
 |
|
|
#1951 |
|
Registered User
Join Date: Apr 2012
Location: Searcy, AR
Posts: 4,203
|
Re: Markeb01 Build Thread
I too really like the shot with the horses and flowering tree, but I also dig the rear shot with your neighbors truck in the background...
 My truck was originally purchased by our local s'cool district (model reference...  ) and one of the maintenance buildings in town will make a great backdrop once I get mine re-assembled... ) and one of the maintenance buildings in town will make a great backdrop once I get mine re-assembled...
__________________
DON Proverbs 27:17  US Air Force Retarded errr Retired My '65 Stepper Build:http://67-72chevytrucks.com/vboard/s...d.php?t=533920 My '60 Rusty Patina Build:http://67-72chevytrucks.com/vboard/s...66#post7402266 My '72 http://67-72chevytrucks.com/vboard/s...59#post7204359 SOLD |
|
|

|
|
|
#1952 |
|
Senior Enthusiast
Join Date: Feb 2007
Location: Spokane Valley, WA
Posts: 8,356
|
Re: Markeb01 Build Thread
Thanks for stopping by guys! I like the maintenance building idea for a backdrop as well. The neighbors truck in the background was originally an Air Force truck, and he actually met one of the guys that worked on it when it was in service. It has a rebuilt small block in it now, but is due up for a big block swap in the near future.
Here's a better shot of it. He's already replaced the hood (this is the old hood) and has fenders and doors for it as well: 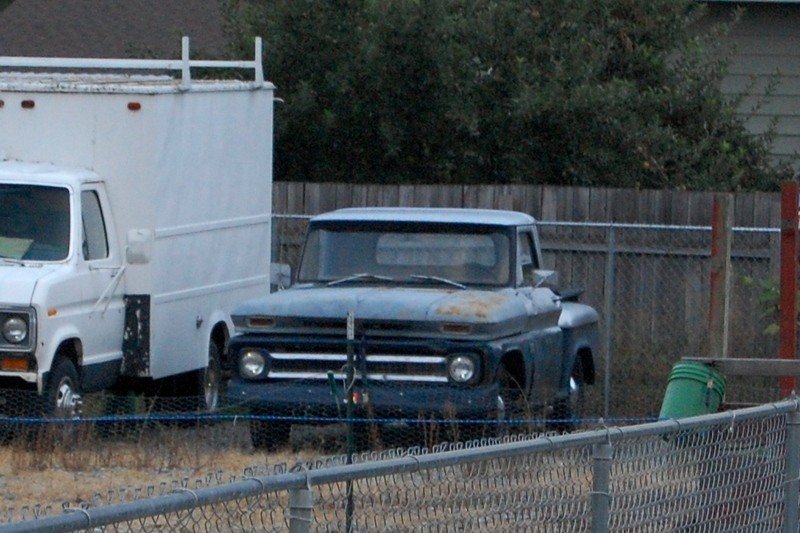
__________________
My Build Thread: http://67-72chevytrucks.com/vboard/s...d.php?t=444502 Last edited by markeb01; 04-28-2015 at 12:12 PM. |
|
|

|
|
|
#1953 |
|
Registered User
Join Date: Apr 2012
Location: Searcy, AR
Posts: 4,203
|
Re: Markeb01 Build Thread
Being retired Air Force, I'd love to find an old AF Truck...
 PM Sent
__________________
DON Proverbs 27:17  US Air Force Retarded errr Retired My '65 Stepper Build:http://67-72chevytrucks.com/vboard/s...d.php?t=533920 My '60 Rusty Patina Build:http://67-72chevytrucks.com/vboard/s...66#post7402266 My '72 http://67-72chevytrucks.com/vboard/s...59#post7204359 SOLD |
|
|

|
|
|
#1954 |
|
Senior Enthusiast
Join Date: Feb 2007
Location: Spokane Valley, WA
Posts: 8,356
|
Re: Markeb01 Build Thread
I suppose it all depends on where the truck lived when it was on duty as to how they look today. The vehicles we had in Yuma were maintained and treated like brand new throughout their "service" life. Vehicles at some other locations got beat senseless.
PM responded to. Thanks for asking.
__________________
My Build Thread: http://67-72chevytrucks.com/vboard/s...d.php?t=444502 |
|
|

|
|
|
#1955 |
|
Senior Enthusiast
Join Date: Feb 2007
Location: Spokane Valley, WA
Posts: 8,356
|
Re: Markeb01 Build Thread
It was a beautiful 75 degree day yesterday, so we spent 4 hours driving around town in the truck having fun while taking care of some tasks. The air conditioner got its first opportunity to show off, and man was it nice. Just enough to make the cab comfortable and not over chilled – on the lowest blower setting.
I’m ready to resume the kitchen overhaul project, but with company coming for Mother’s day, I had to leave things alone and find something else to do. So after achieving very little modeling activity over the last 10 years, I decided it was time to get some things done so I could really progress. In all, I painted five 1/25 scale models today. A 40 Ford convertible for my wife, a Willys gasser, two 57 Ford sedans, and a 52 Chevy fastback. Testor’s De Ja Blue, Mystic Green, and Tamiya’s TS-14 Gloss Black. All of them turned out much nicer than the snapshots indicate: 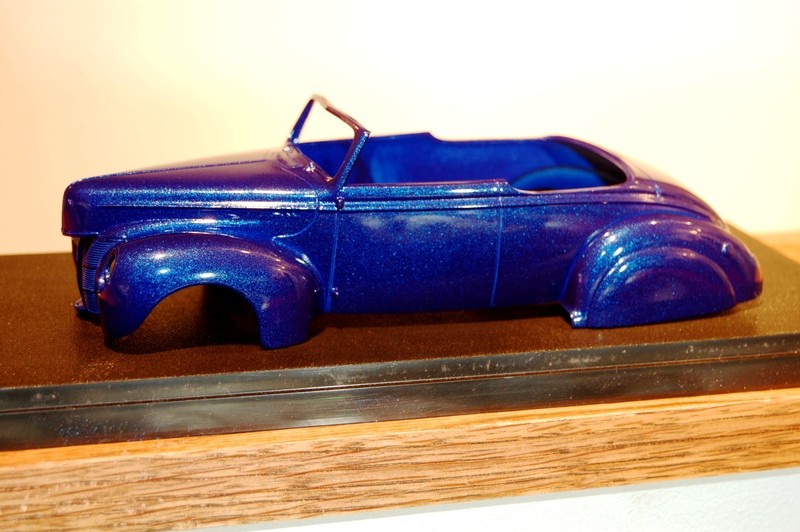 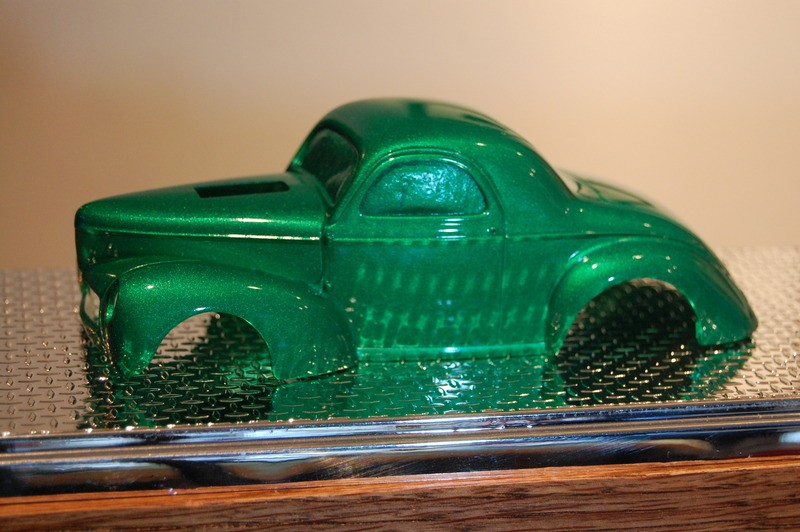 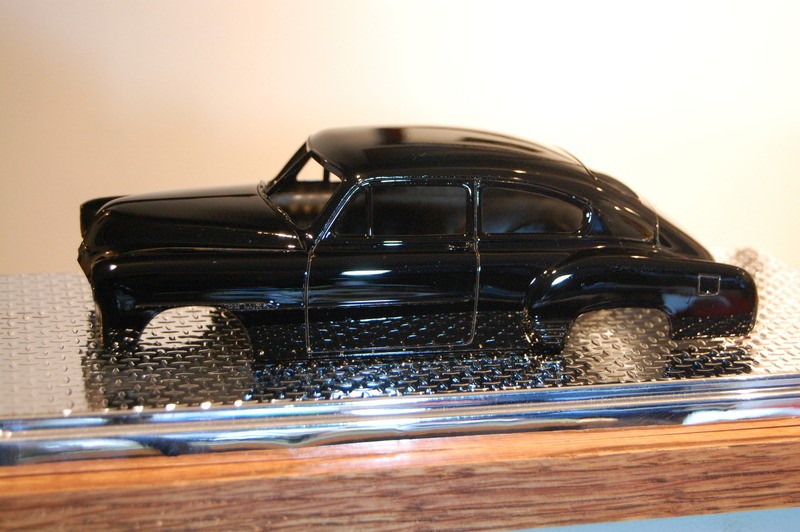  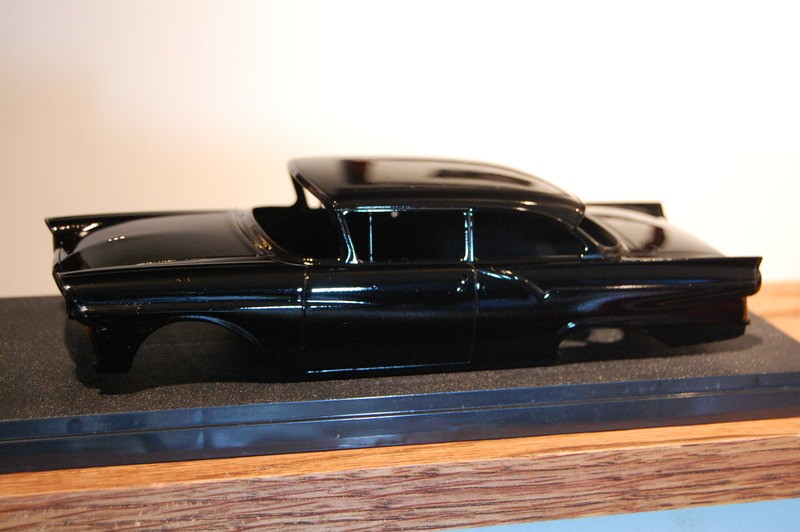 Some of them have been waiting years for paint. I’ve grown to really hate painting models, since it requires nearly as much work as doing an actual car if you want the results to turn out nice. One of the 57's will end up looking something like each of these: 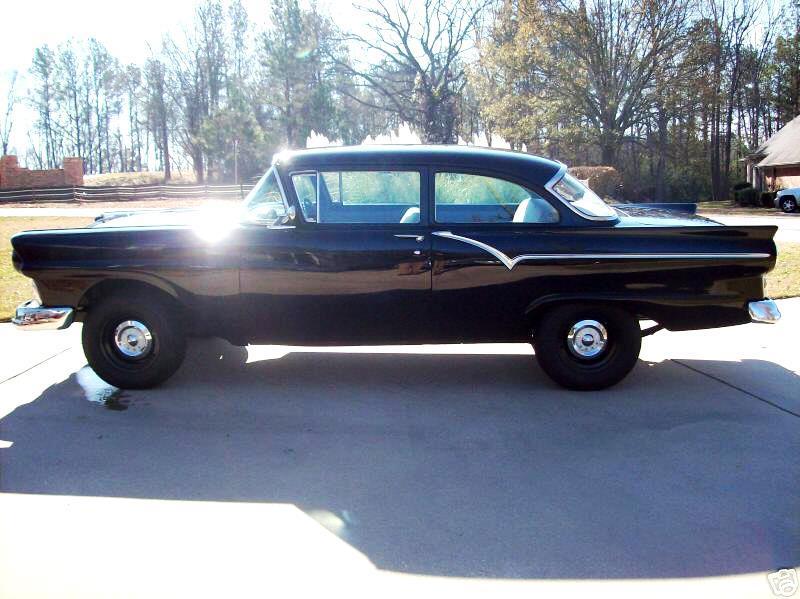 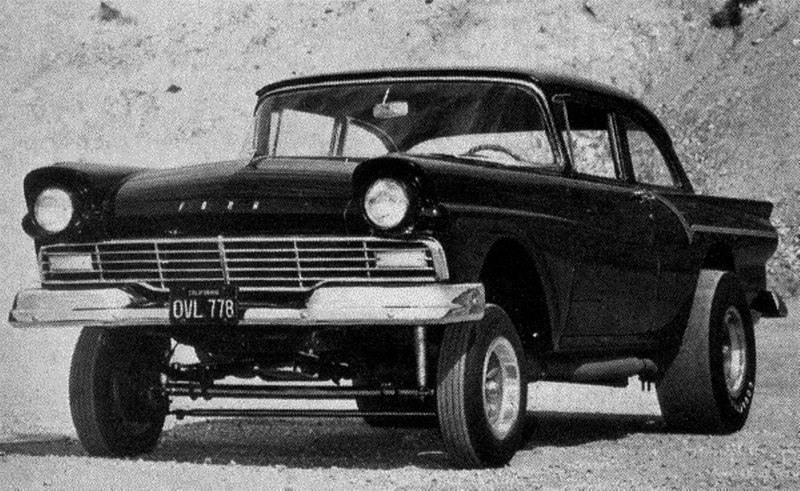
__________________
My Build Thread: http://67-72chevytrucks.com/vboard/s...d.php?t=444502 |
|
|

|
|
|
#1956 |
|
Registered User
Join Date: Apr 2012
Location: Searcy, AR
Posts: 4,203
|
Re: Markeb01 Build Thread
Great work on the models…
 I have a few I need to get back to when I can… probably in the winter... 
__________________
DON Proverbs 27:17  US Air Force Retarded errr Retired My '65 Stepper Build:http://67-72chevytrucks.com/vboard/s...d.php?t=533920 My '60 Rusty Patina Build:http://67-72chevytrucks.com/vboard/s...66#post7402266 My '72 http://67-72chevytrucks.com/vboard/s...59#post7204359 SOLD |
|
|

|
|
|
#1957 |
|
Senior Enthusiast
Join Date: Feb 2007
Location: Spokane Valley, WA
Posts: 8,356
|
Re: Markeb01 Build Thread
I made some significant modeling progress yesterday. I built this 49 Ford long ago, and installed 16” whitewall tires, to closely replicate the earliest photo of this car I ever saw published:
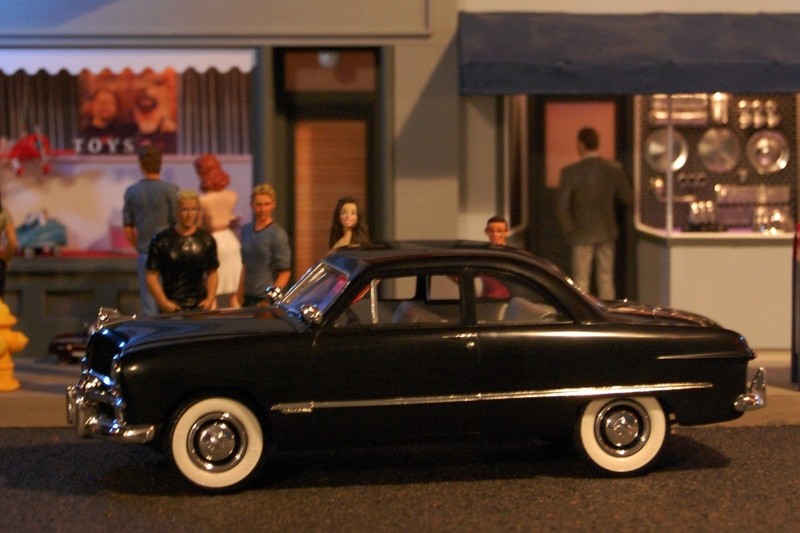 The real car was a fordor and looked kind of goofy with tires this big, but it was what they had available to promote at the time. I’ve grown tired of the model over time, and decided it was in need of an update into the 1960’s so it gained a set of the best 15” scale chrome reversed wheels I’ve ever found (they look much better in real life): 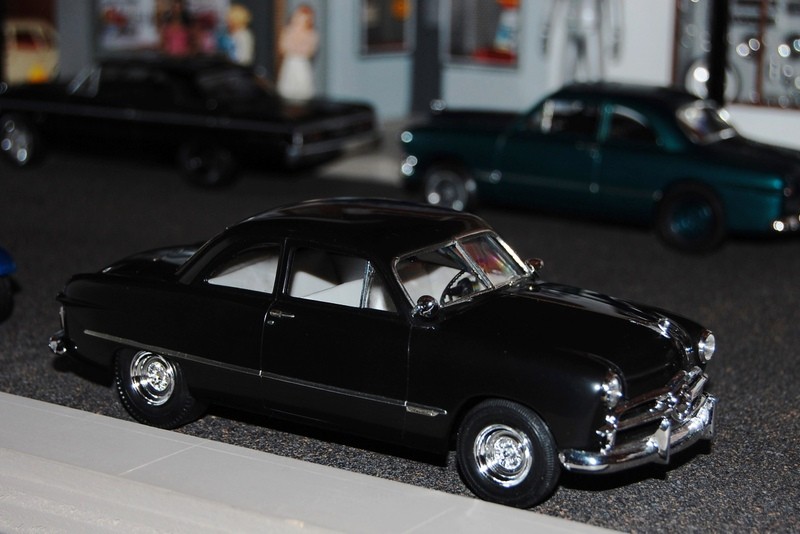 I also slapped the Willys on a chassis, and accomplished some assembly on my wife’s 40 convertible. They will both be left alone for a few months while the paint hardens completely:  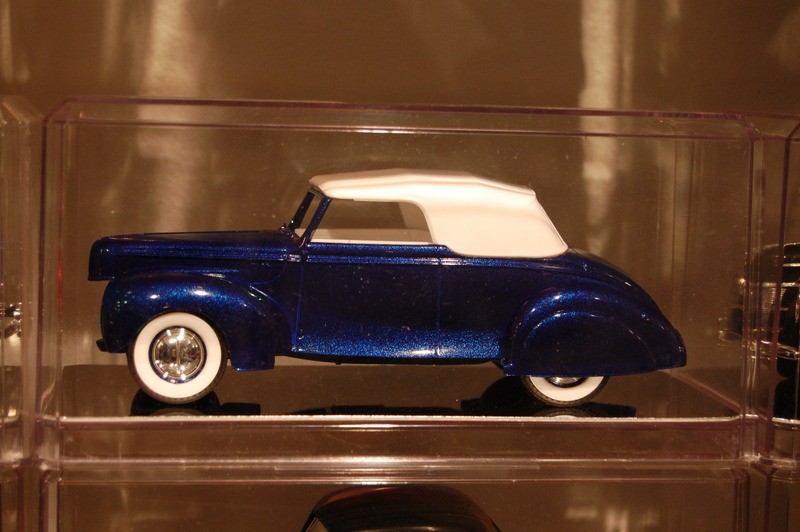 On a real truck topic, perusing Ebay the other day I stumbled on some metalflake motorcycle grips: 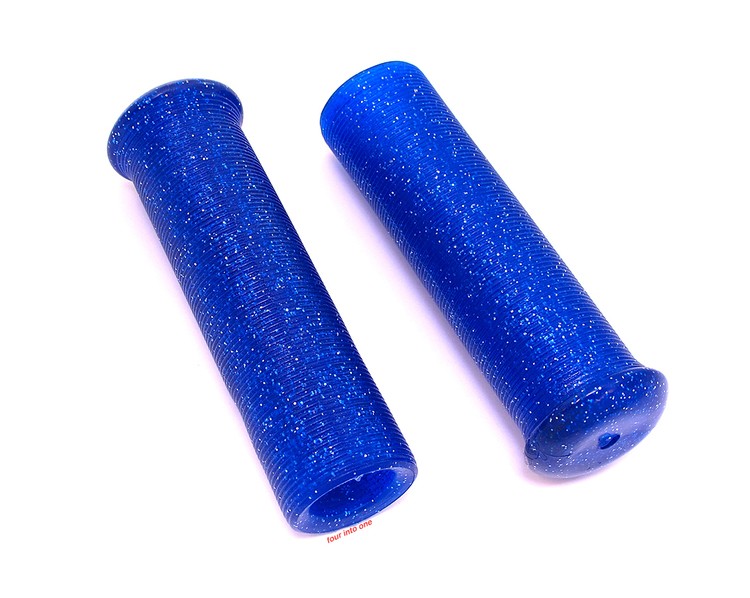 I started thinking they might compliment the steering wheel and add another bit of interest to the interior while making the hand brake even more comfortable to operate. They are sold as a pair, one having an I.D. of 7/8” while the other grip is 1” I.D. to account for the brake hardware. Measuring the adjustable cap on the Orscheln parking brake, I found it to be exactly 7/8” O.D. The grips arrived yesterday and the smaller grip was soon installed. Here’s an earlier shot of the bare handle followed by the metalflake version: 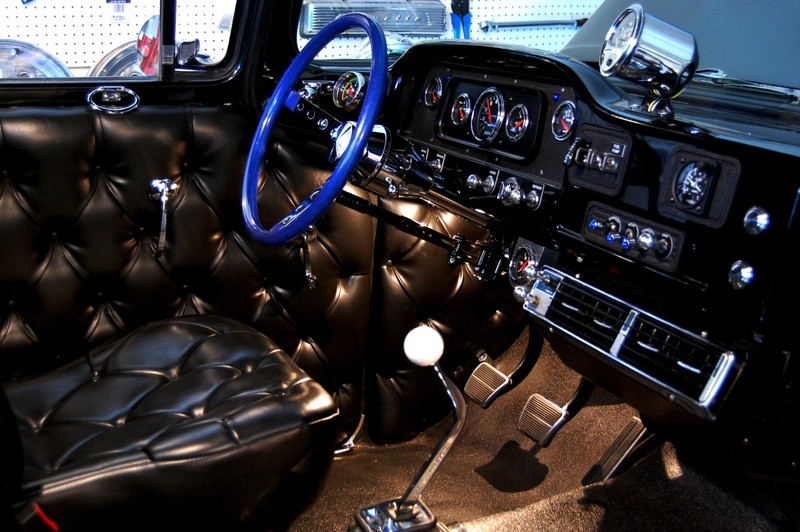 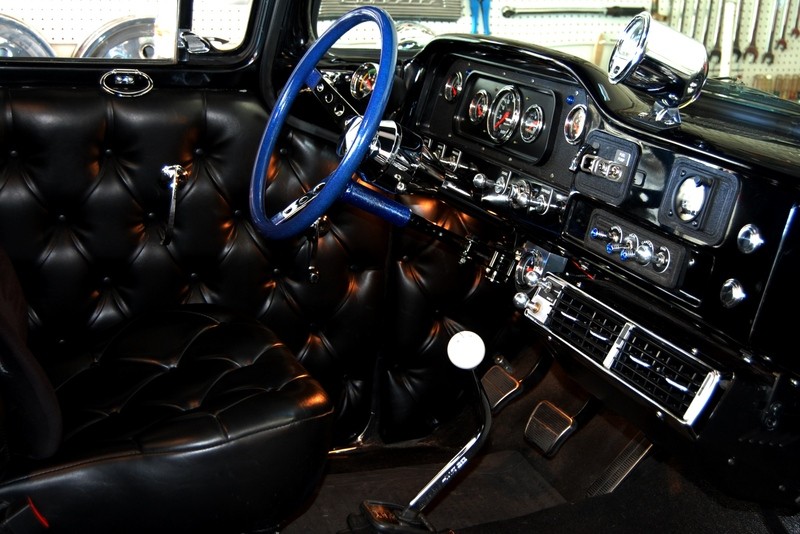 I was considering cutting the grip shorter to match the length of the brake handle cap, but this proved unnecessary as the lower portion of the grip “floats” over the lower handle shaft. I used the old hairspray trick to slip the grip in place. It slid on nice and easy, and once dry sticks like it was installed with contact cement. So I now enjoy a full cushioned hand grip on the brake lever while also drawing attention to the non-stock parking brake mechanism.
__________________
My Build Thread: http://67-72chevytrucks.com/vboard/s...d.php?t=444502 |
|
|

|
|
|
#1958 |
|
Registered User
Join Date: Jun 2012
Location: Selkirk Ontario Canada
Posts: 1,141
|
Re: Markeb01 Build Thread
looks cool mark
__________________
My 63 GMC Panel Slow Build http://67-72chevytrucks.com/vboard/s...=1#post5457281 63 
|
|
|

|
|
|
#1959 |
|
Registered User
Join Date: Apr 2012
Location: Searcy, AR
Posts: 4,203
|
Re: Markeb01 Build Thread
Great move on the grip...
 My pump and filter arrived today, Thanks Again...
__________________
DON Proverbs 27:17  US Air Force Retarded errr Retired My '65 Stepper Build:http://67-72chevytrucks.com/vboard/s...d.php?t=533920 My '60 Rusty Patina Build:http://67-72chevytrucks.com/vboard/s...66#post7402266 My '72 http://67-72chevytrucks.com/vboard/s...59#post7204359 SOLD Last edited by Ta2Don; 05-08-2015 at 04:04 PM. Reason: added comment |
|
|

|
|
|
#1960 | |
|
Senior Enthusiast
Join Date: Feb 2007
Location: Spokane Valley, WA
Posts: 8,356
|
Re: Markeb01 Build Thread
Quote:
Having way too much time on my hands (to say nothing about OCD), I decided the brake handle would look much better without a bicycle streamer hole in the middle. So I sliced the top off the spare grip, and punched a couple of plugs out of it using a hollow punch. Here's the sacrifice piece with a concaved plug stuck in the middle: 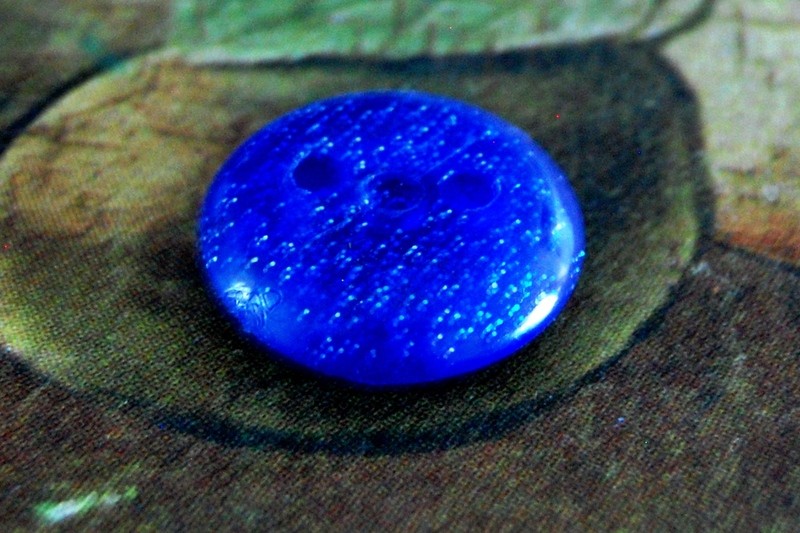 And here's the one in the truck with a convex plug inserted: 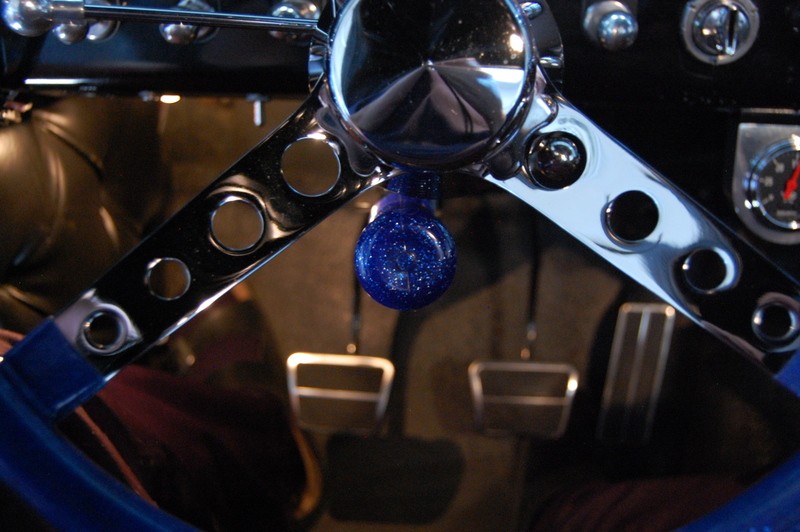 Funny, I just noticed the 4 way flasher ball/knob is perfectly lined up with the inner hole in the right hand steering wheel spoke!
__________________
My Build Thread: http://67-72chevytrucks.com/vboard/s...d.php?t=444502 |
|
|
|

|
|
|
#1961 |
|
Registered User
Join Date: Sep 2012
Location: Leander, TX
Posts: 969
|
Re: Markeb01 Build Thread
Mark love you scale models. Any chance you can take pictures of your whole diorama you have?
Also thought you might like to see my collection that is patiently waiting to be built. I have been collecting since about 1990. Out of all of them I think I have about 5 completed and 20 or 30 started. 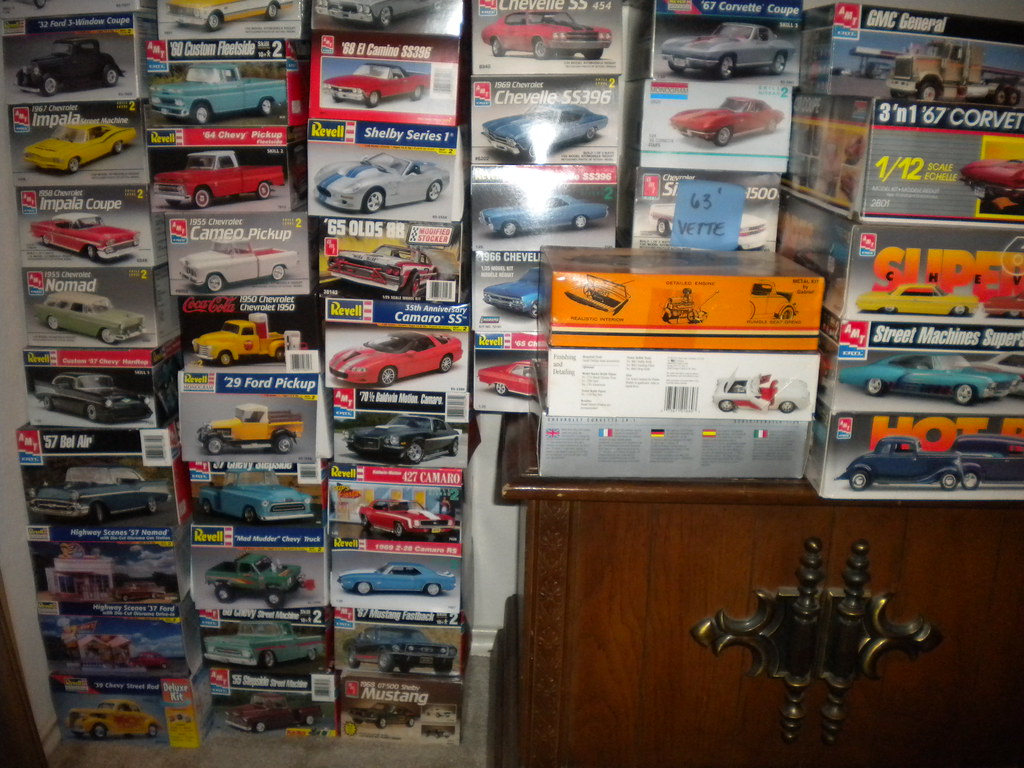 DSCN1906 by bjohnson388, on Flickr DSCN1906 by bjohnson388, on Flickr DSCN1905 by bjohnson388, on Flickr DSCN1905 by bjohnson388, on Flickr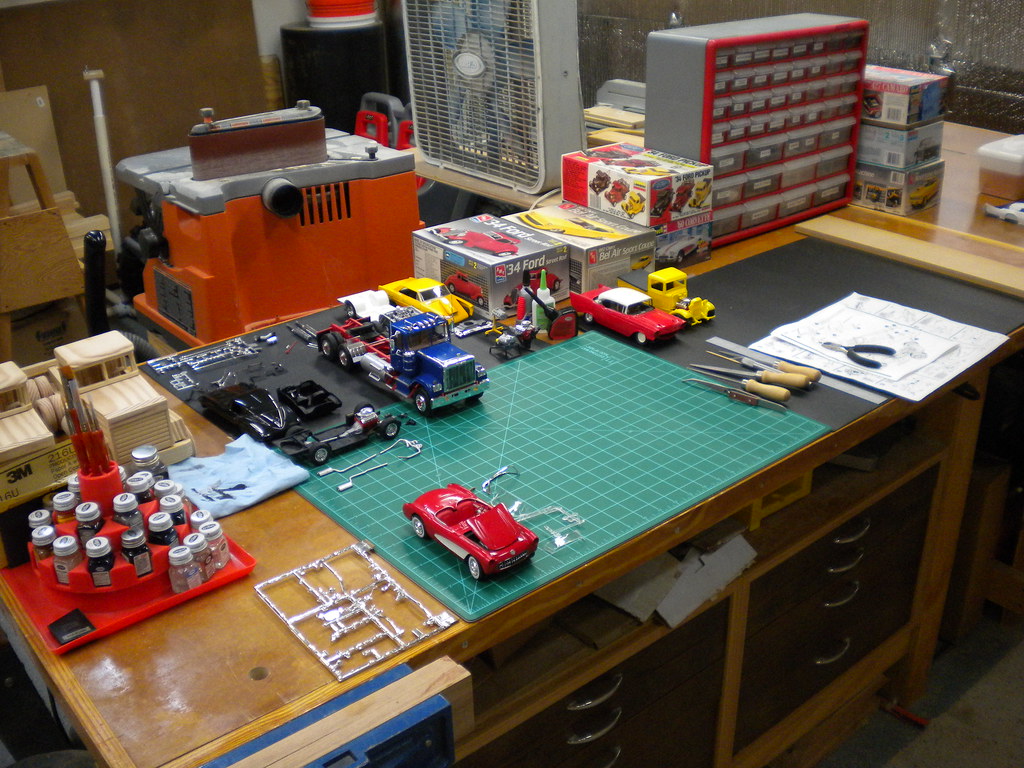 DSCN1893 by bjohnson388, on Flickr DSCN1893 by bjohnson388, on Flickr
__________________
64' Build Thread http://67-72chevytrucks.com/vboard/s...d.php?t=586955 |
|
|

|
|
|
#1962 |
|
Senior Enthusiast
Join Date: Feb 2007
Location: Spokane Valley, WA
Posts: 8,356
|
Re: Markeb01 Build Thread
Nice collection! Over the years I’ve often had more waiting to build than what was finished. My collecting slowed down a bunch about 10 years ago as I finally had most of everything I always liked, and the priority has always been working on the real truck first and models as a lower priority. Now that the truck is essentially finished, I’m migrating back to toys again! So here’s a rather lengthy response to a short question.
I’m a baby boomer and grew up during what I consider the golden age of plastic model building. About 1958-1964 were the absolute best years in my opinion. Before that time very little was available, and afterward Vietnam and other social distractions took center stage taking young guys away from modeling. The first full size model I obtained (1/24–1/25 scale) was in about 1956-57. I have no idea what brand it was, and I don’t think the car represented an actual vehicle but it looked kind of like a 55-56 Chevy. It was black and came with chrome trim for the body sides. All I remember of it was that after the trim was glued to the sides, it looked like a car with chrome tree sprue stuck all over it and I quickly lost interest. Next came the Highway Pioneers by Revell. I bought several of these over the years:  At that time I think they started out around 49 cents and grew to around 69 cents, so if I gave up enough candy I could afford to buy one myself. Car dealerships usually had walls of “promo” models available in every model and paint scheme offered, but I had no connections to obtain any of these. Everything changed in 1958 when AMT released their first 3 in 1 kits. The first one I ever got was the 1959 Chevy convertible. The kit looked like this, but my rendition certainly did not: 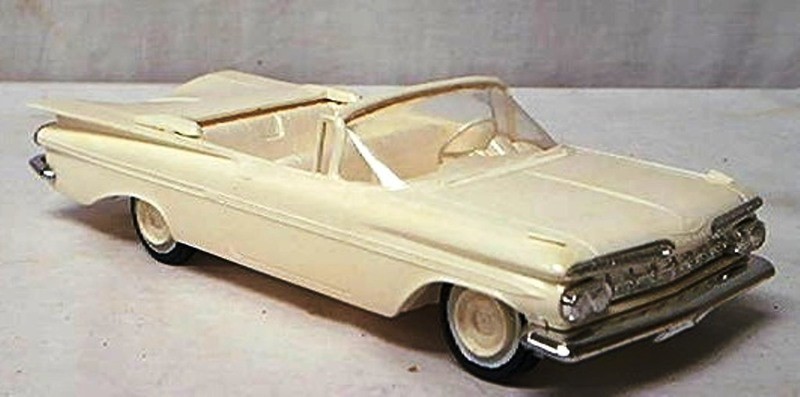 Being 10 or 11 years old with limited car styling and engineering skills under my belt, I smashed the wheels trying to drive them on the heavy splined axles, and put “everything” on the car that came in the kit – skirts, roll bar, racing decals, louvers, scoops, lake pipes, etc. I also used tons of glue to make sure the parts wouldn’t fall off! Talk about a glue bomb. The next big evolutionary step was the Trophy Series kits from AMT. The marketing guys at AMT were smart, they showed stuff on the box art that couldn’t be built without buying more than one type of kit. They also made all of the engines interchange, so you could easily swap in Buick, Olds, Chevy, Chrysler, Lincoln or any other engine they included in a kit. It was brilliant thinking, and hooked a lot of kids in my age bracket into mechanically customizing their models. There were also no trademark infringement issues back then, so engines were identified as what they actually represented. It wasn’t until perhaps the 1980’s that manufacturers threatened the model producers, and made them identify the engine generically as “flathead” or “overhead valve engine” instead of what it actually was. So back to history - the first release of the Trophy Series was the 1932 Ford roadster: 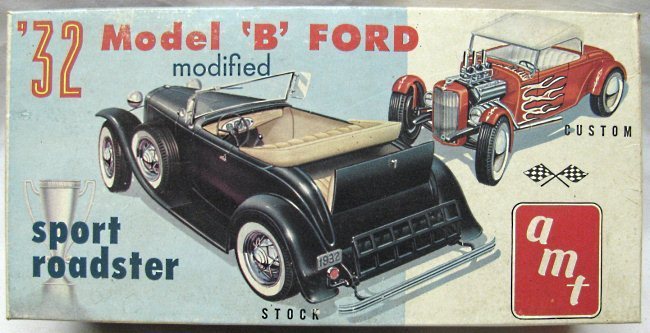 They couldn’t keep up with production and soon released the 1932 Ford 5 window coupe which also sold by the car load:  The 40 Ford coupe (my all-time favorite model) came next: 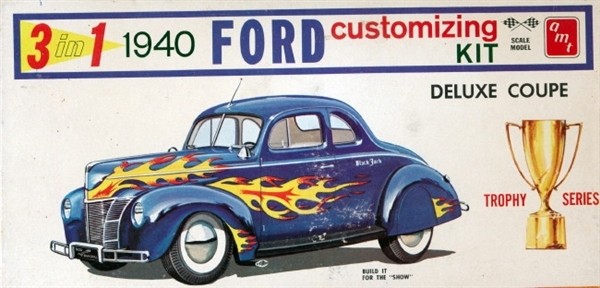 The 39/40 Ford sedan, 49 Ford coupe, 36 Ford chopped coupe/roadster, and Model T double kit followed soon after: 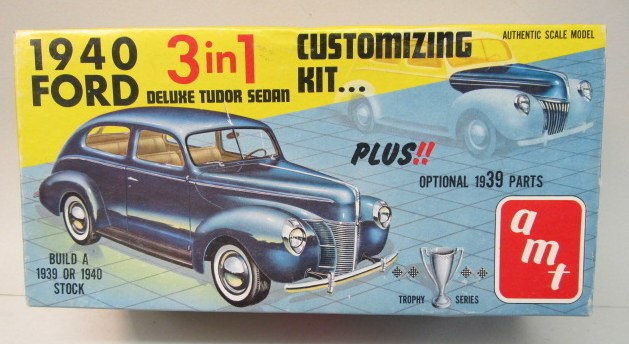 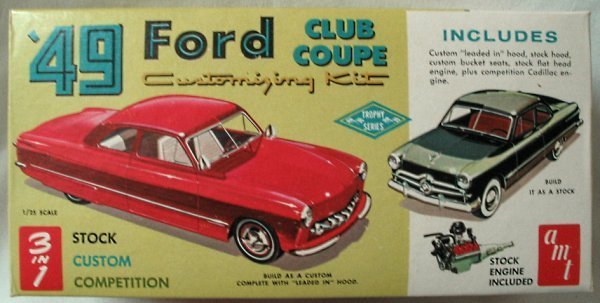  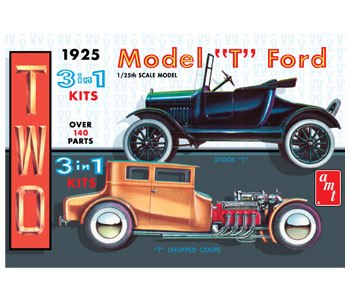 The best part being all of these first production models were molded in black (my favorite color) so paint wasn’t needed. Within a year or so they started molding in gray, blue, or white and I quickly lost interest and spent years searching for the older black kits. Monogram was also around, and made beautiful models (actually much more accurate than AMT). They were molded in whatever colors were depicted on the box. But they could only be made stock and were in what was an oddball scale at the time – 1/24th. The Black Widow was my favorite: 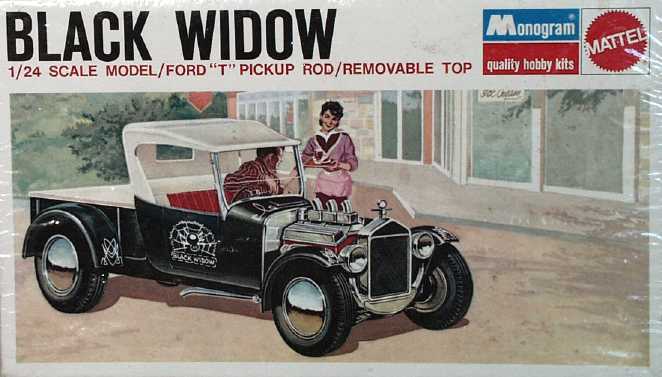
__________________
My Build Thread: http://67-72chevytrucks.com/vboard/s...d.php?t=444502 |
|
|

|
|
|
#1963 |
|
Senior Enthusiast
Join Date: Feb 2007
Location: Spokane Valley, WA
Posts: 8,356
|
Re: Markeb01 Build Thread
Very few parts could be swapped, especially the wheels, so there weren’t a lot of repeat purchases.
Which brings me to now. I never got beyond the favorite models of my youth. I currently have more 40 Fords than anything else. I liked the earlier models as they had decent detail, but were also easy to assemble. Rather than evolving into hysterical levels of detailing, I built my stuff to be viewed in a diorama setting from a few feet away. My first diorama was of the Giant Gila Monster. The movie was released in 1959, and ironically many of the real cars in the movie were produced in 1/25th scale at the time. Here’s a couple of shots from several years ago - The 58 Ford Sheriff’s car started life as a resin 2 door hardtop Fairlane. All of the side trim had to be removed and replaced, and the car converted to a 4 door sedan. It has working headlights, wig wags on the roof, and an accurate depiction of a Siro Drift siren on the roof: 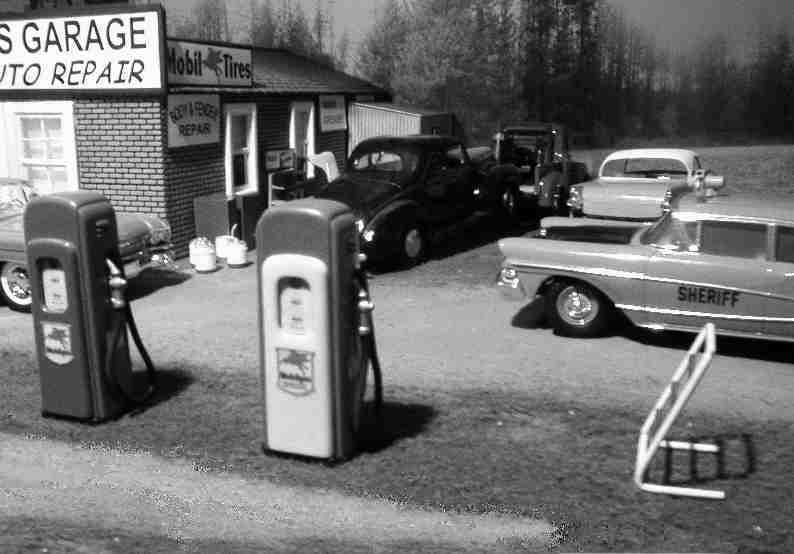 The Gila Monster is a solid chunk of resin that my wife detailed: 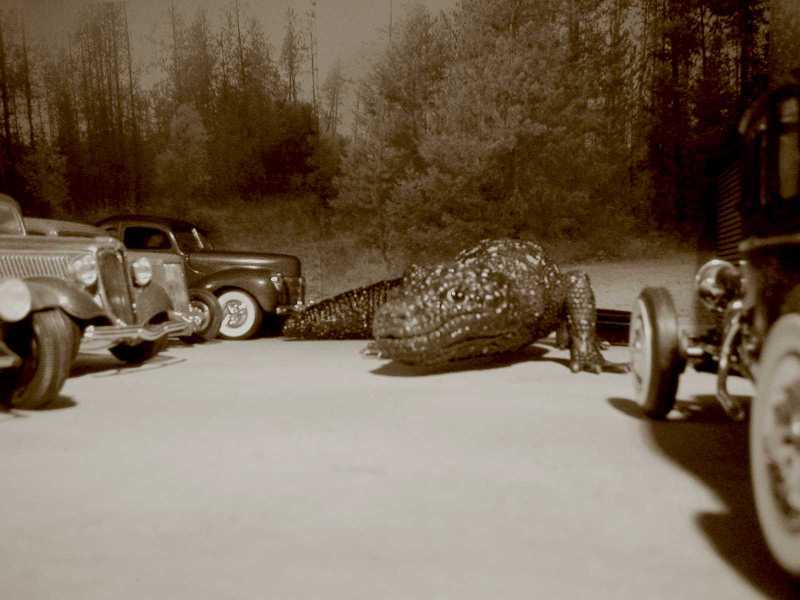 The gas pumps started life as salt and pepper shakers. They originally came with paper stickers on the front for the markings. I peeled the faces off, cut out the hole for the pump face and inserted photo reduced reproductions of real pump faces (these being Martin & Schwartz model 80 “Tall Top” models. The Mobilgas signs are photo reductions of real pieces, the louvers are from old AMT models, the nozzles and hoses are from ugly reproduction toy pumps, and the reset handles (on the other side) are vent window handles from some random model car: 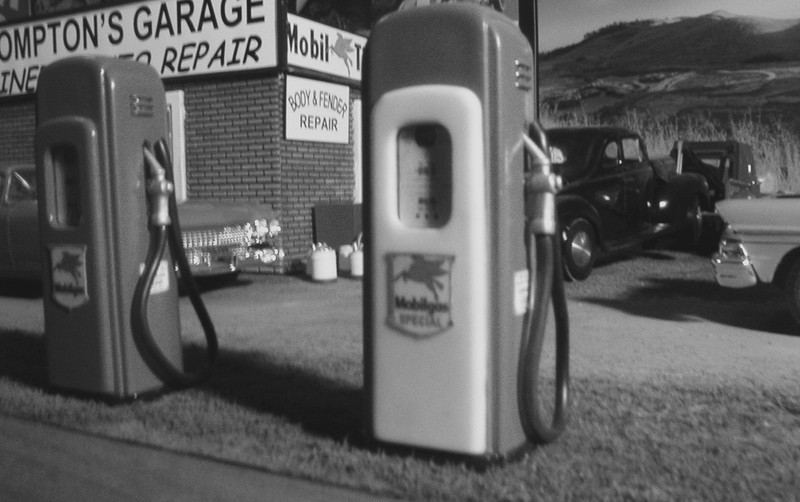 Here’s an overview of the right side of the original diorama. In real life, the cop car used in the movie was actually a former Navy vehicle. They were frequently painted gray with the black hood and trunk lid. The Mobiloil sign in the foreground was an actual sign in real life. I found a photo of one on Ebay, and after removing the bullet holes and rust, printed it up and stuck it to a plastic support. Same thing with the Mobil Tires sign on the roof. I found one of those on Ebay too, but it was up in rafters and the shot was taken at an angle. So after straightening and removal of the 2x4’s in the image, it replicated the one used in the movie.  Over time it just took up too much space, so I chopped it up and kept the essentials in this little display in the garage. Who knows I may build another full size set again in the future: 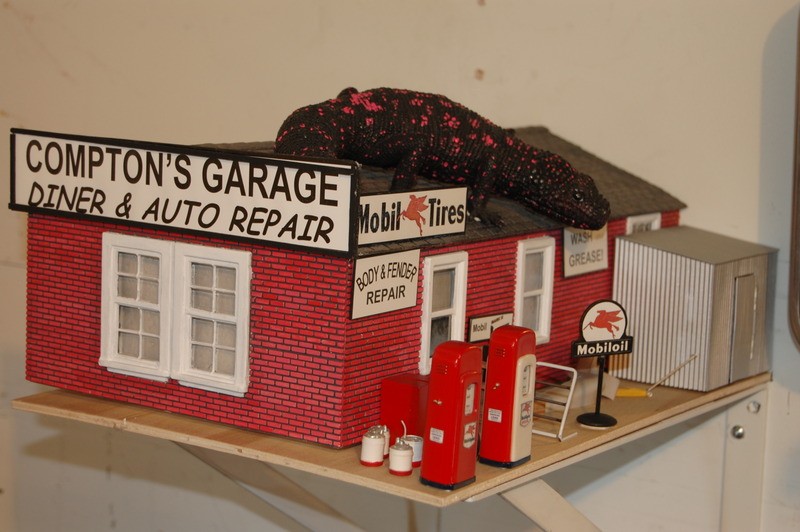 The big replacement for the Giant Gila Monster was the Universal Set. As a kid I started noticing how familiar the place looked, and began to recognize it in more and more films. It was used earlier, but my first memory of it was in It Came from Outer Space. Subsequently it was used in Tarantula, The Monolith Monsters, Earth Versus the Spider, etc. One of the later productions was Back to the Future. It was also used in Peter Gunn, Leave it to Beaver, Adam-12, and many other TV shows. So I thought it would make a nice backdrop to park cars in front of. It took around 2-3 years to get it built as there are no specifications available establishing measurements. The only known dimension was the 16” wheels on the 46 Ford woody used in The Monolith Monsters. Everything was scaled from that, considering distance across the sidewalk and the normal height of doorways and second stories. All of the buildings are made of sheet and strip stock plastic with a couple of machined aluminum pieces thrown in. Here’s what it looks like today: 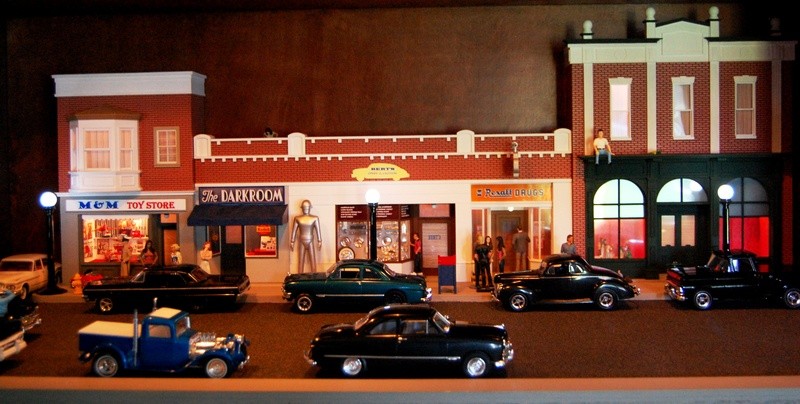 Each building has individual lighting, and the street lights are on their own circuit as well. The camera store in the second store is going to get converted into something else, and I still haven’t decided what to make the building on the far right into. I routinely switch the cars around depending on what mood I’m in: 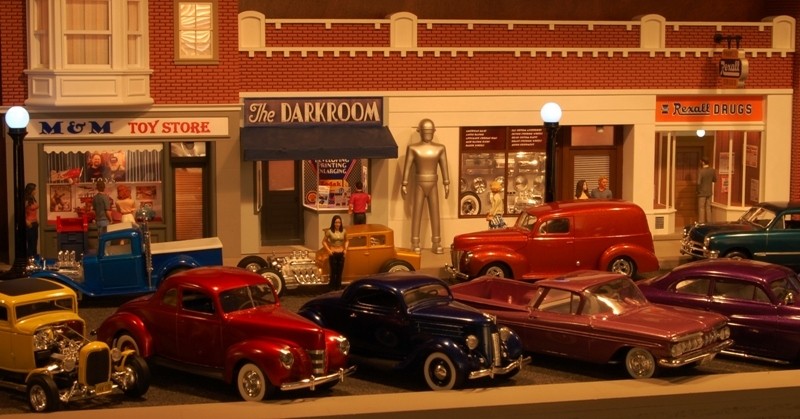 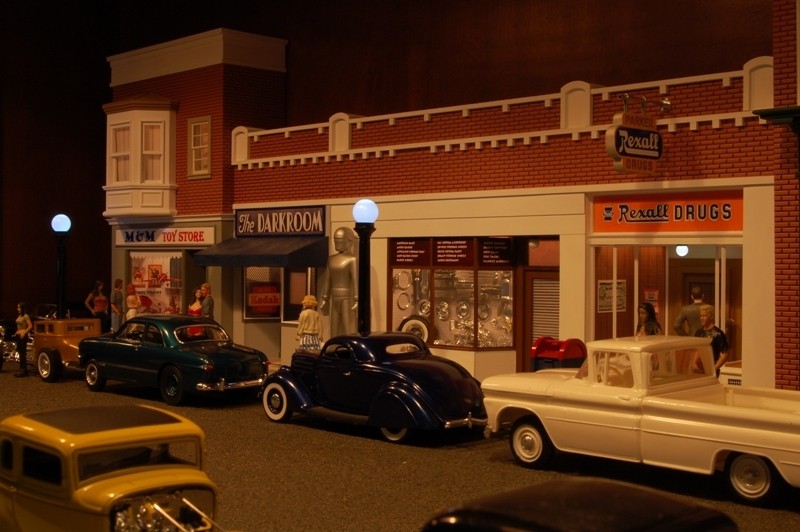 The overflow cars are stored in plastic cases to keep dust off the paint and glass. Here’s what’s on display now. I had to break the photos up into upper and lower or the lighting glares too much: 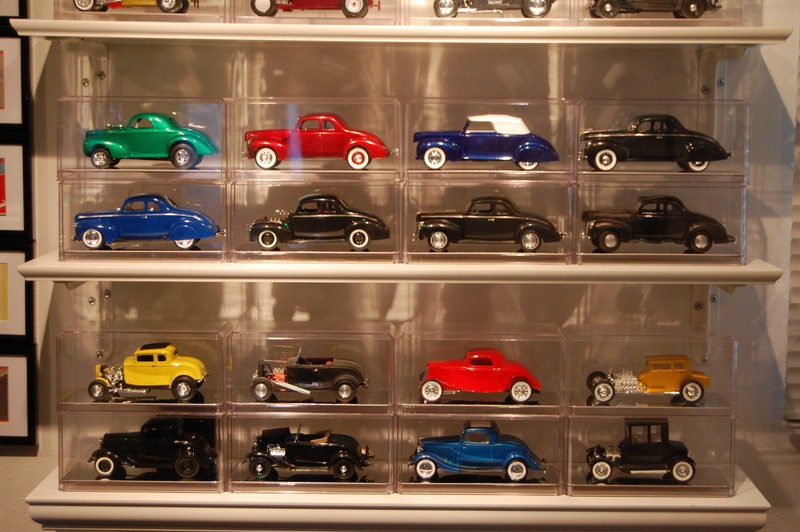 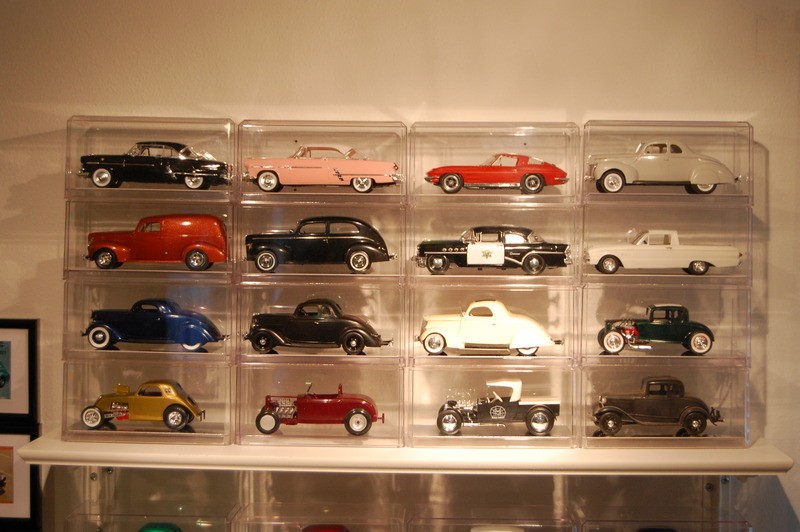
__________________
My Build Thread: http://67-72chevytrucks.com/vboard/s...d.php?t=444502 |
|
|

|
|
|
#1964 |
|
Senior Enthusiast
Join Date: Feb 2007
Location: Spokane Valley, WA
Posts: 8,356
|
Re: Markeb01 Build Thread
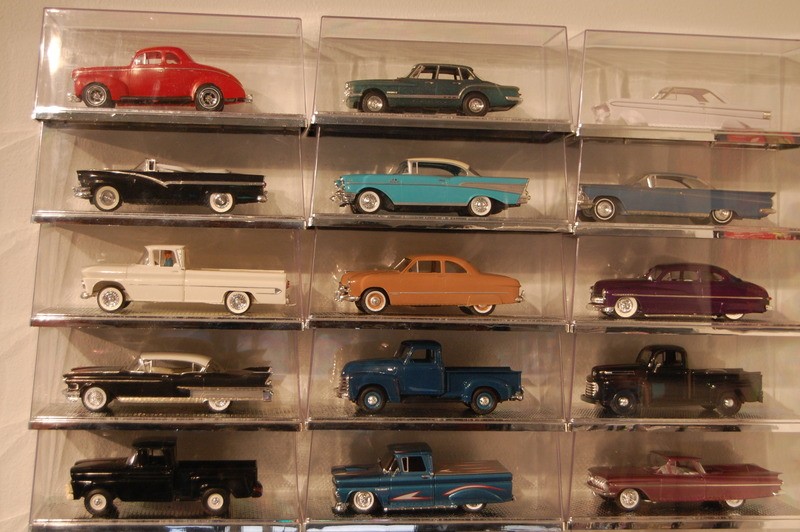 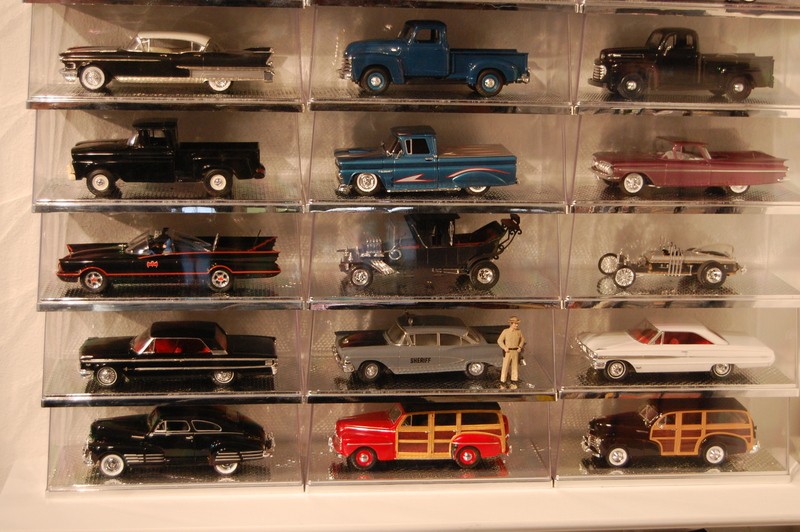 And these are mostly in progress cars. There are also around 50 more in boxes that may become completed models or be sacrificed for parts: 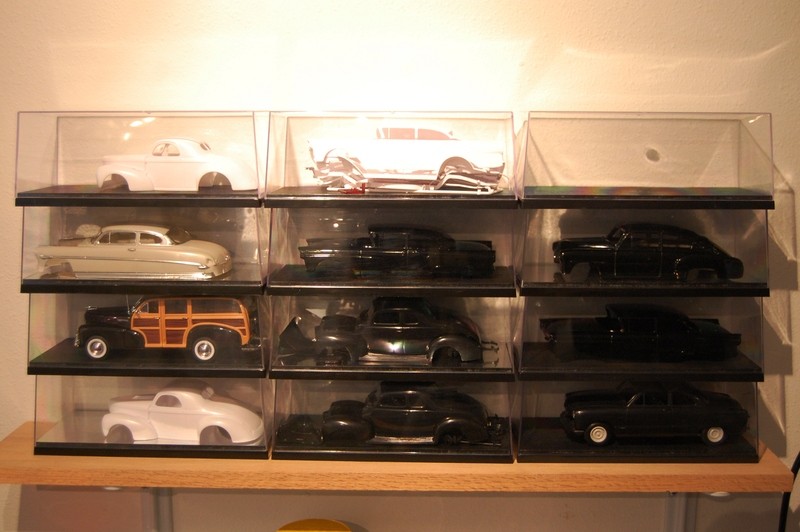 One of the problems with this many models is what to do with them once built. I’ve only got so much room and I don’t want them all over the house, so they pretty much consume the spare bedroom. I almost forgot, here’s the Hot Wheel size stuff; 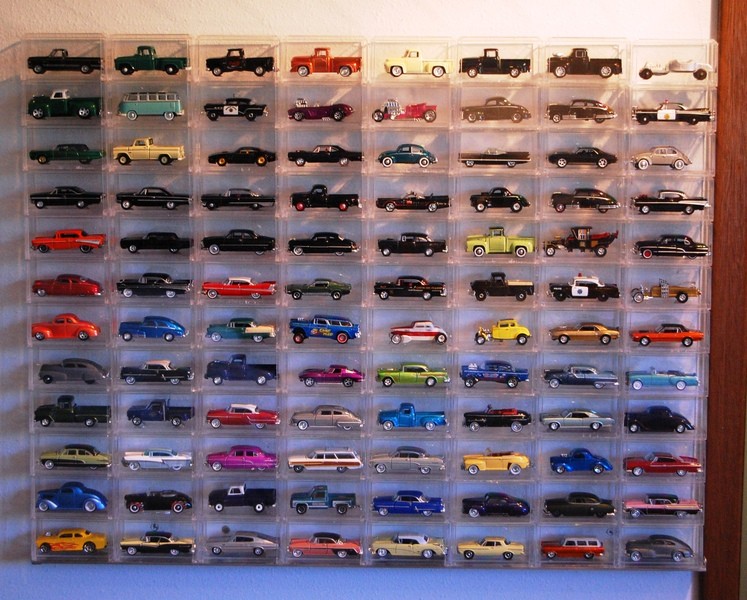 And I finally made a shelf so I have a place to put at least two 1/8th scale models – the Big Deuce and the Big T. I think that’s about it for now! Oh except I also decided to shorten the new grip on the hand brake handle. It looked too much like a bicycle handle grip. So I sliced it off even with the bottom of the adjustable cap, and I like it a lot better: 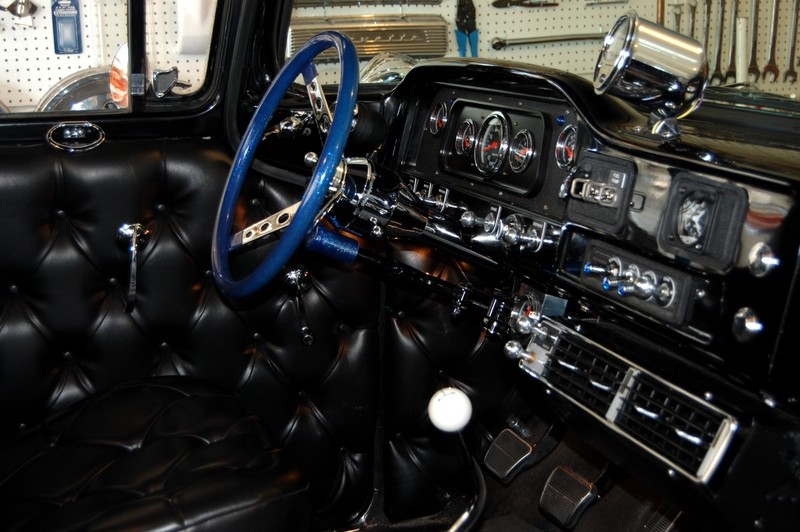
__________________
My Build Thread: http://67-72chevytrucks.com/vboard/s...d.php?t=444502 |
|
|

|
|
|
#1965 |
|
Registered User
Join Date: Sep 2012
Location: Leander, TX
Posts: 969
|
Re: Markeb01 Build Thread
WOW Mark! What fantastic models you have. Maybe someday I will get all mine built and on display. I want to build a diorama as well. I found this one a model club built and I want to replicate it. I built one of the garages already but from wood. If you want to see more pictures of it up close go to my flickr account I uploaded all of them.
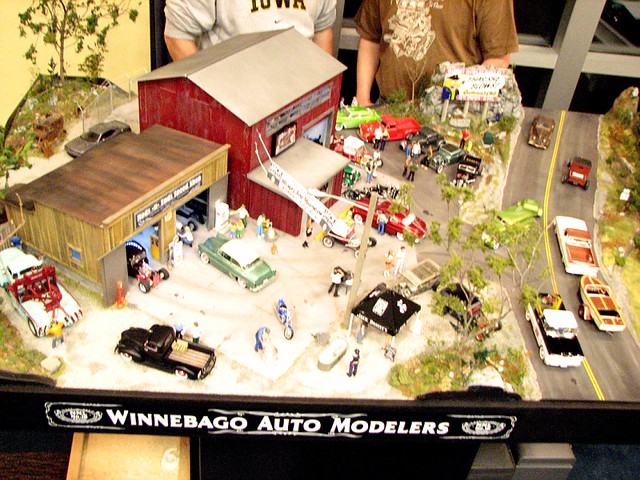 WAM2010ClubBuild054-vi by bjohnson388, on Flickr WAM2010ClubBuild054-vi by bjohnson388, on Flickr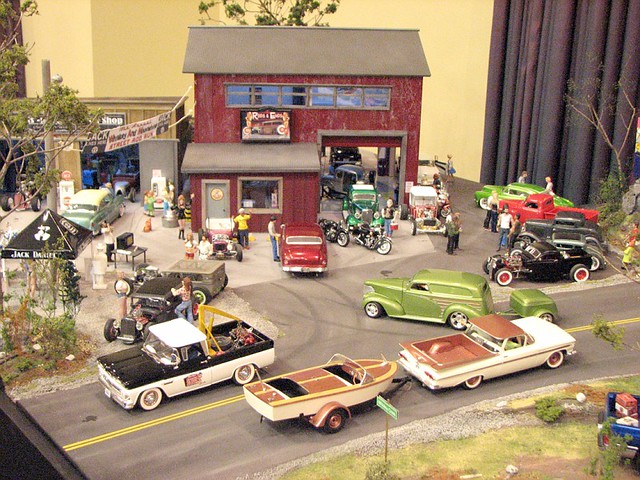 WAM2010ClubBuild053-vi by bjohnson388, on Flickr WAM2010ClubBuild053-vi by bjohnson388, on FlickrHere is the garage I started. 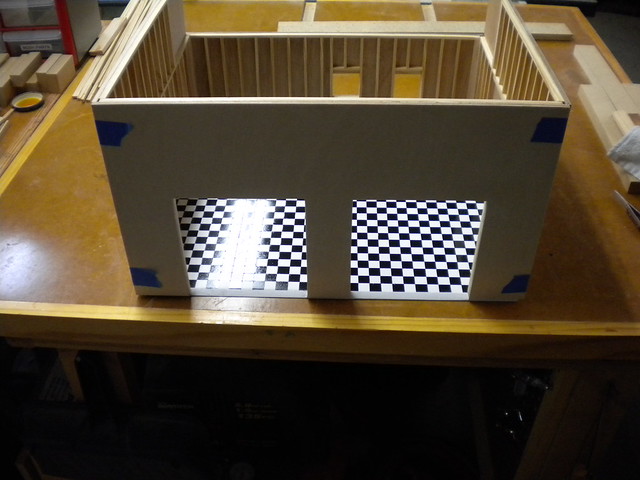 DSCN1947 by bjohnson388, on Flickr DSCN1947 by bjohnson388, on FlickrI know how you feel about the quality of kits. I am obviously later in the game than you but when I was a kid in the early 90's the models from AMT where the ones to get as a lot of them were 3 n 1. Stock, modified or Race. Many had more than one engine and several different tires and wheels. I have 55 and 57 Chevys like this, a 64 Impala with 283 and 409. When I really got into collecting them around 2000 is when they started to drop all the extra pieces and you could only build what was on the box. I too always hated that monogram was a different scale as they produced different cars AMT and Revell didn't. I don't know if you are aware but they have started rereleasing a lot of those kits you have pictures of . I just bought that double T set last year. It has 2 complete models and that is cool. I also have 1/12 scale 57' Chevy that is 3 n 1 and a 67 Corvette 3 n 1. I used the 283 small block from the 57' to make one out of wood to go in the 1/10 scale 32' deuce couple I am building. Thought you might like. 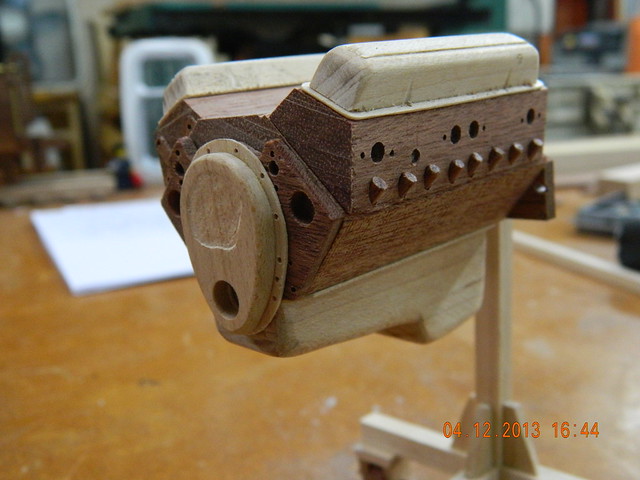 DSCN6525 by bjohnson388, on Flickr DSCN6525 by bjohnson388, on Flickr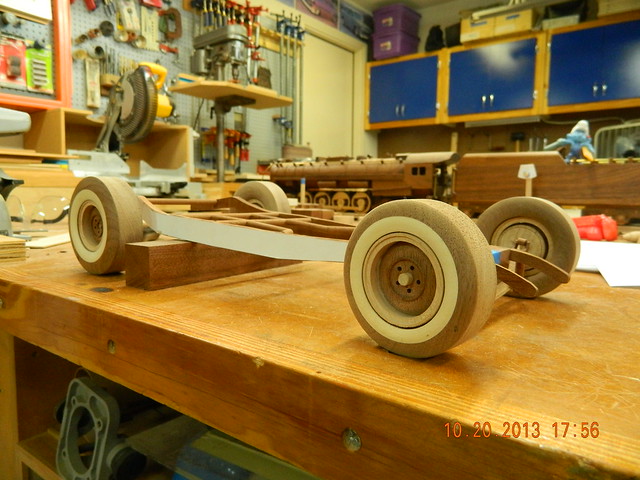 DSCN7466 by bjohnson388, on Flickr DSCN7466 by bjohnson388, on FlickrSorry for the lengthy reply. Its good to know there are other people who obsess over the same hobbies.
__________________
64' Build Thread http://67-72chevytrucks.com/vboard/s...d.php?t=586955 |
|
|

|
|
|
#1966 |
|
Senior Enthusiast
Join Date: Feb 2007
Location: Spokane Valley, WA
Posts: 8,356
|
Re: Markeb01 Build Thread
I appreciate the lengthy reply as I haven’t found many threads or forums that have much similar interest in the things I enjoy most. Your garage is coming along nicely, and they provide a lot of interest when completed as you can change things around indefinitely if desired. That was a lesson I learned on the Gila Monster diorama, once it’s done, not much can be changed or upgraded to keep the interest level up.
I always wanted to make a bigger diorama like the one the modeling club put together, like 4’X8’, but I have limited space in my house as to where something like that would fit. Years ago I had an older friend (since passed on) that built a 40’x15’ shop in his back yard to house his train collection. It had numerous tracks running through a full layout of mountains and small town buildings. There were hundreds of cars and dozens of engines, most of which he scratch built. I really admired what he built, but I bounce all over subjects of interest too often to commit to anything that extensive. When I was a kid, dioramas came in two kinds. The ones at the indoor shows usually represented a car show like this one:  And for a couple of years they did some electric drags in southern California and had clubs bring some cars to fill out their setups:  Your wooden deuce and SBC engine are coming along nicely. It’s amazing what a person can accomplish once their mind is set to it. It looks like you have a wooden train in there as well. That also looks like a lot of time consuming detail. Thanks for sharing and have a great rest of the weekend.
__________________
My Build Thread: http://67-72chevytrucks.com/vboard/s...d.php?t=444502 |
|
|

|
|
|
#1967 |
|
Registered User
Join Date: Apr 2012
Location: Searcy, AR
Posts: 4,203
|
Re: Markeb01 Build Thread
I truly enjoy seeing what folks like you and Bret have accomplished... I am gathering some models and also plan a diorama that I hope will cover a half of a sheet of plywood... I have an office in my house that will be remodeled over the summer and I plan on getting serious about this project... I believe Bret milled his pen lumber to scale, but I will need to purchase, I have notes from previous posts and discussions about yours and have laid out my plan, now to build it... I will start a thread in the Alternate Tinkerings section and will be seeking any advice and or tips that will be useful... Thanx Again for sharing!
Posted via Mobile Device |
|
|

|
|
|
#1968 |
|
Registered User
Join Date: Dec 2012
Location: Rochester, KENT
Posts: 10,565
|
Re: Markeb01 Build Thread
I absolutely love seeing these dioramas.
They allow us to all be creative and to realise dreams we do not have funds to do in real life. I do not know how many of you know much about the Gila Monster.....? However, follow this link http://www.diabetesincontrol.com/contact-us/5139- and see just what it has brought the world. If you look at the date stamp, you will see it is an old article, and today the product is live and well, as are diabetic patients. As mentioned previously, the diversity of the people on this forum is part of what makes me come back all the time. Thanks Bret and Mark for sharing again.
__________________
MY BUILD LINK: http://67-72chevytrucks.com/vboard/s...585901]Redneck Express - 1966 C10 Short Fleetside MY USA ROADTRIPS http://forum.retro-rides.org/thread/...2018-humdinger IF YOU CAN'T FIX IT WITH A HAMMER, YOU'VE GOT AN ELECTRICAL PROBLEM MATE. |
|
|

|
|
|
#1969 |
|
Senior Enthusiast
Join Date: Feb 2007
Location: Spokane Valley, WA
Posts: 8,356
|
Re: Markeb01 Build Thread
Thanks for the comments and compliments guys. Both are always appreciated.
Here’s a minor update having very little to do with anything. Working out in the yard last Saturday I somehow managed to come up with a pretty significant abdominal injury and have been on a self-imposed bed rest/light duty schedule since then. I’m doing the best I can to pretend it away, before I’m compelled to spend thousands of dollars on medical tests, and so far at least it hasn’t gotten any worse. So in the meantime, I started to spray the interior of a resin 46 Ford fordor a few days back (which I had not properly cleaned) and it started blotching up right away so I quit. I scrubbed the outside with Wesley’s tire bleach, but still needed to remove the spray paint from the interior. Needing a tub to soak it in, I remembered I dropped a 64 Valiant in Simple Green a few years ago, so I pulled it out and rinsed it off. It turns out it was 14 years ago that it went into the Simple Green bath! I painted it Testor’s red enamel back in the late 70’s, and it came out dull and uninteresting. Here’s what it looked like in 2001:  I wrapped up the chrome, glass, and chassis and stored them in the original box. Every few months (years?) I’d pull it out of the tub and check the stripping progress. My intent was to strip it back to yellow and sell it on Ebay, as these things have really increased in value. Everything looked look new, except the seats would always retain a tiny bit of red paint in the creases. Pulling it out this time, I was really impressed with how nice it looked. So rather than spending more years in the tank, I sprayed the interior semi-gloss black, and the dash gloss black, followed by reassembly: 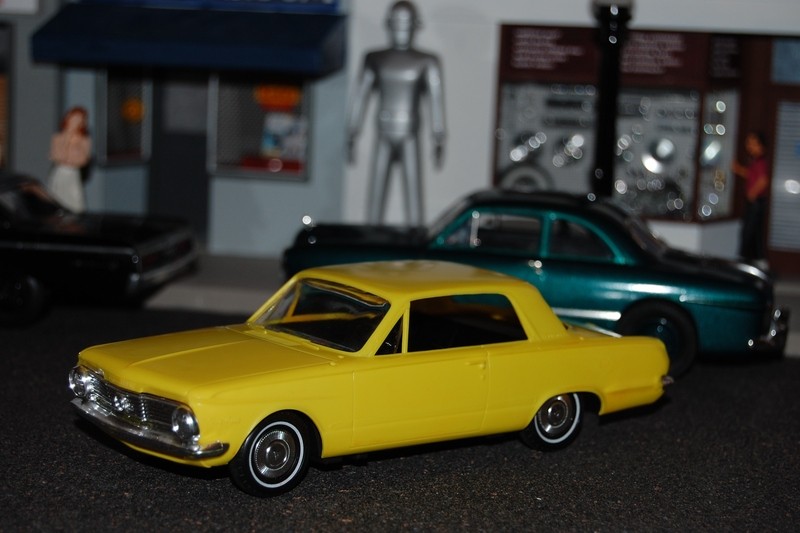 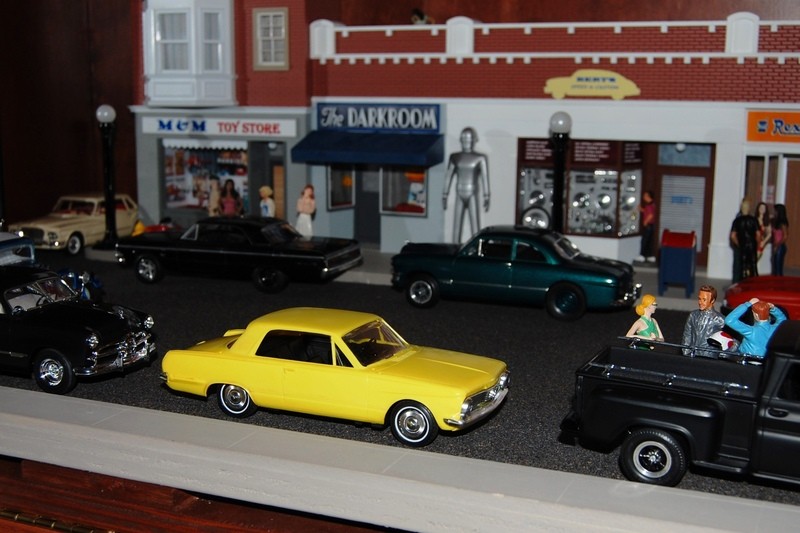 The yellow color really pops and will now remain in the collection. I’m not really sure why I ever painted it red in the first place! It’s just nice to know you can leave styrene models in Simple Green indefinitely and it doesn’t hurt the plastic at all. Also, about 10 years ago I picked up a cheap display box at Michael’s to house some antique/collectible items. Problem was the box was lined with black fuzz which made it difficult to see the contents. So I tore it apart and relined it with blue material my wife offered up. Here’s an old flash photo of how it looked previously: 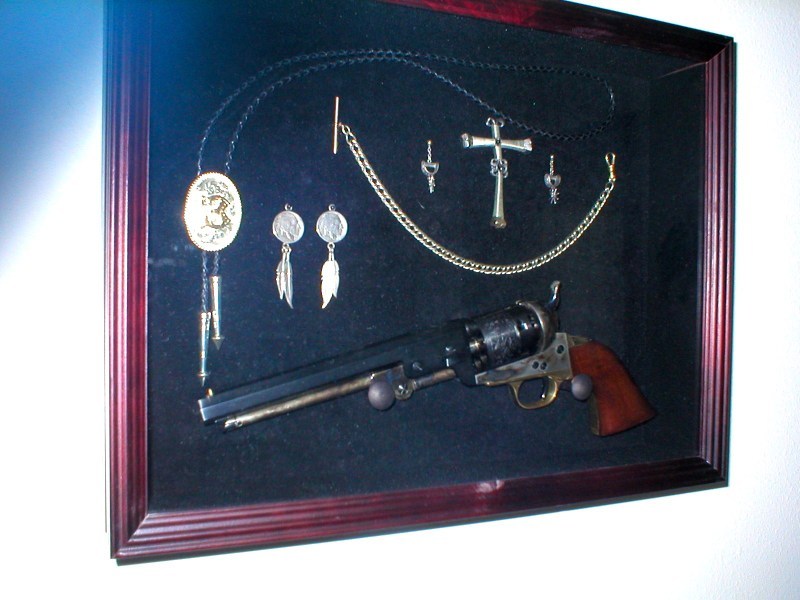 And here’s how it appears today: 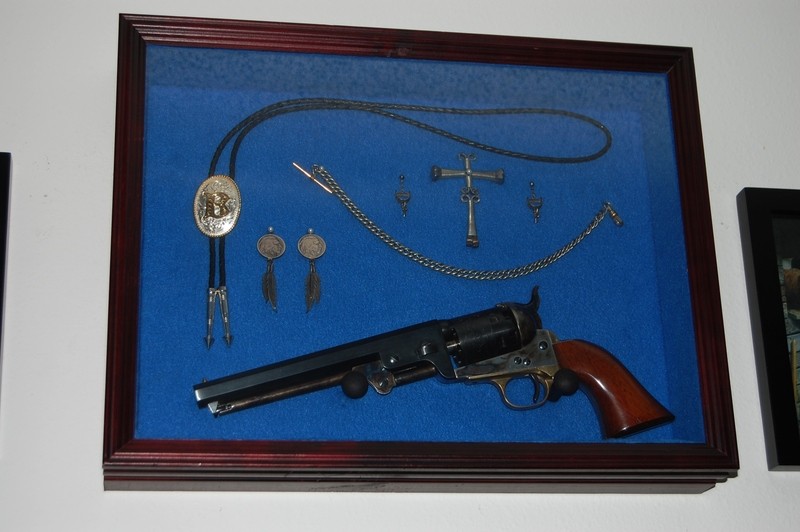 It turned out to be a pretty nice zero cost improvement. And for those interested that's a Uberti replica 1851 Navy. It's accurate and was fun to shoot, the last time being about 15 years ago.
__________________
My Build Thread: http://67-72chevytrucks.com/vboard/s...d.php?t=444502 |
|
|

|
|
|
#1970 |
|
Registered User
Join Date: Sep 2012
Location: Leander, TX
Posts: 969
|
Re: Markeb01 Build Thread
Looks good Mark! In addition to the Simple Green, Purple Power from walmart works great as well. When I had a little bit of a model car rehab back in 2011 I had read about it and tried it on some paint jobs I screwed up as a kid and it worked like a dream.
All of these were stripped of their paint bombs I did when I was younger. A 1988 Chevy LWB, 1990 Chevy 454ss, 64 Impala SS I ruined by too much sanding, and a Pro Street Camaro. I know a lot of guys that buy built paint bomb models off of ebay and rescue them. 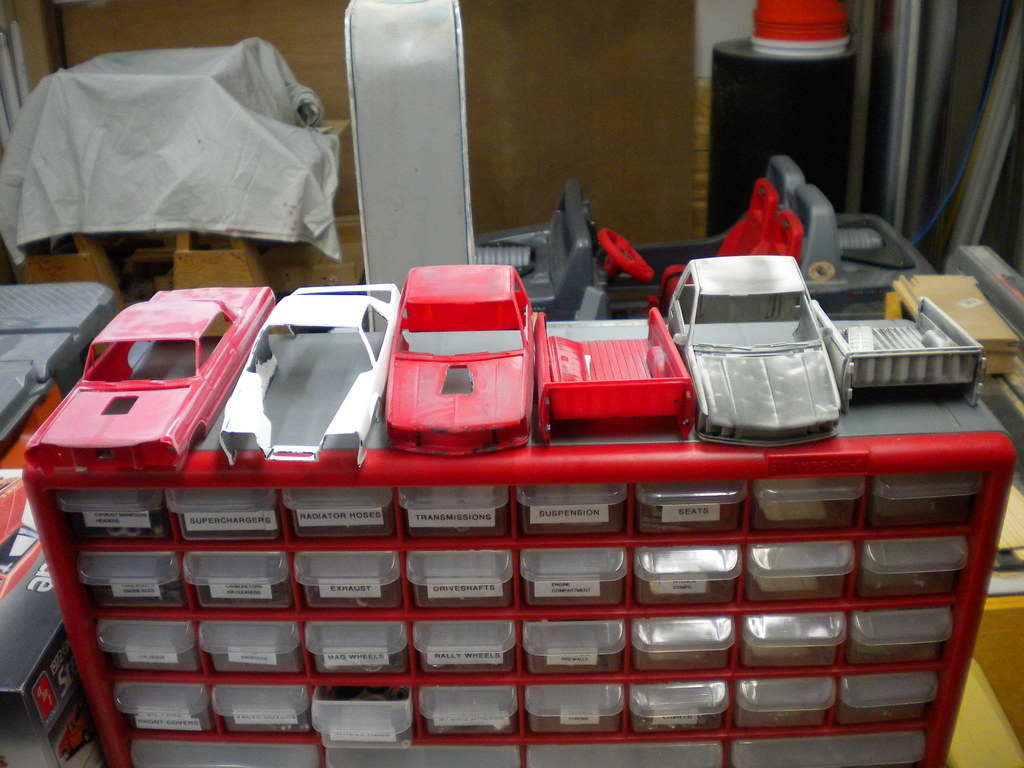 DSCN1929 by bjohnson388, on Flickr DSCN1929 by bjohnson388, on Flickr
__________________
64' Build Thread http://67-72chevytrucks.com/vboard/s...d.php?t=586955 |
|
|

|
|
|
#1971 |
|
Registered User
Join Date: Apr 2012
Location: Searcy, AR
Posts: 4,203
|
Re: Markeb01 Build Thread
Prayers you get over your injury quickly.
These recent posts are the added benefits that I truly enjoy…  I never thought of, or heard of the Simple Green trick...:go: I never thought of, or heard of the Simple Green trick...:go:Now off to ebay...  Great job on the shadow box, and the zero-cost factor... 
__________________
DON Proverbs 27:17  US Air Force Retarded errr Retired My '65 Stepper Build:http://67-72chevytrucks.com/vboard/s...d.php?t=533920 My '60 Rusty Patina Build:http://67-72chevytrucks.com/vboard/s...66#post7402266 My '72 http://67-72chevytrucks.com/vboard/s...59#post7204359 SOLD |
|
|

|
|
|
#1972 |
|
Senior Enthusiast
Join Date: Feb 2007
Location: Spokane Valley, WA
Posts: 8,356
|
Re: Markeb01 Build Thread
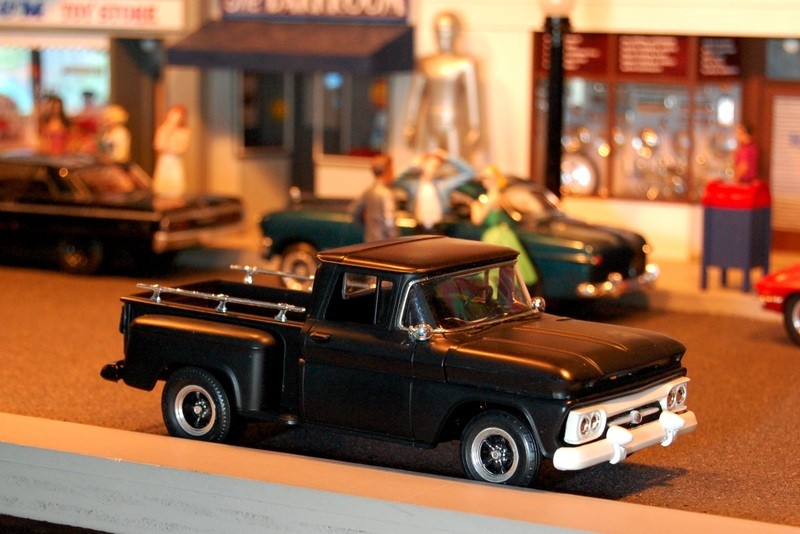
Thanks Don, good thoughts always appreciated. Pain has dropped to a 2-3 level so things are definitely on the mend. In the meantime I took the time to add bumper bullets to the 1/25 real version which turned out reasonably decent:
 Getting very anxious to spending more garage time on the real truck again.
__________________
My Build Thread: http://67-72chevytrucks.com/vboard/s...d.php?t=444502 |
|
|

|
|
|
#1973 |
|
Registered User
Join Date: Sep 2012
Location: Leander, TX
Posts: 969
|
Re: Markeb01 Build Thread
Looks great Mark. Glad to hear your on the mend
Spent all day wiring in my truck. I had read through your rewire of your truck for inspiration. At one point while in the engine bay sitting on the engine I thought to myself Mark would not like this position. Ha.
__________________
64' Build Thread http://67-72chevytrucks.com/vboard/s...d.php?t=586955 |
|
|

|
|
|
#1974 |
|
Registered User
Join Date: Apr 2012
Location: Searcy, AR
Posts: 4,203
|
Re: Markeb01 Build Thread
Amazing how great the die cast version of your truck is...

__________________
DON Proverbs 27:17  US Air Force Retarded errr Retired My '65 Stepper Build:http://67-72chevytrucks.com/vboard/s...d.php?t=533920 My '60 Rusty Patina Build:http://67-72chevytrucks.com/vboard/s...66#post7402266 My '72 http://67-72chevytrucks.com/vboard/s...59#post7204359 SOLD |
|
|

|
|
|
#1975 | |
|
Senior Enthusiast
Join Date: Feb 2007
Location: Spokane Valley, WA
Posts: 8,356
|
Re: Markeb01 Build Thread
Quote:
It was the first time in my life I ever got myself "stuck" somewhere. I had done this drill numerous times throughout my life, but I couldn’t untwist to get back out, and couldn’t untangle my clothes or myself. My first thought was to panic, quickly realizing that wouldn’t help. So I stayed calm and slowly wormed my arms to where I could untangle my legs and clothing until I could get out on my own. It was a learning experience that has never been repeated! Thanks Don, the truth is the only die cast part is the 55 Buick grille, the rest of it is an assortment of plastic parts!
__________________
My Build Thread: http://67-72chevytrucks.com/vboard/s...d.php?t=444502 |
|
|
|

|
 |
| Bookmarks |
|
|