
|
|
|
 02-07-2015, 10:08 PM
|
#1 |
|
Registered User
Join Date: Dec 2010
Location: washington NJ
Posts: 766
|
Re: 46 pickemup in NJ "the Rebuild"
Next up is making the pillar extensions.......
I just cut them out of 18 guage and spent some time bending, hammering, and massaging them to fit the contour of the factory pillar. As mentioned previously the plan is to tuck them behind the pillar and weld along the entire length of the seem and also do some plug welds for additional strength.  [/URL] [/URL]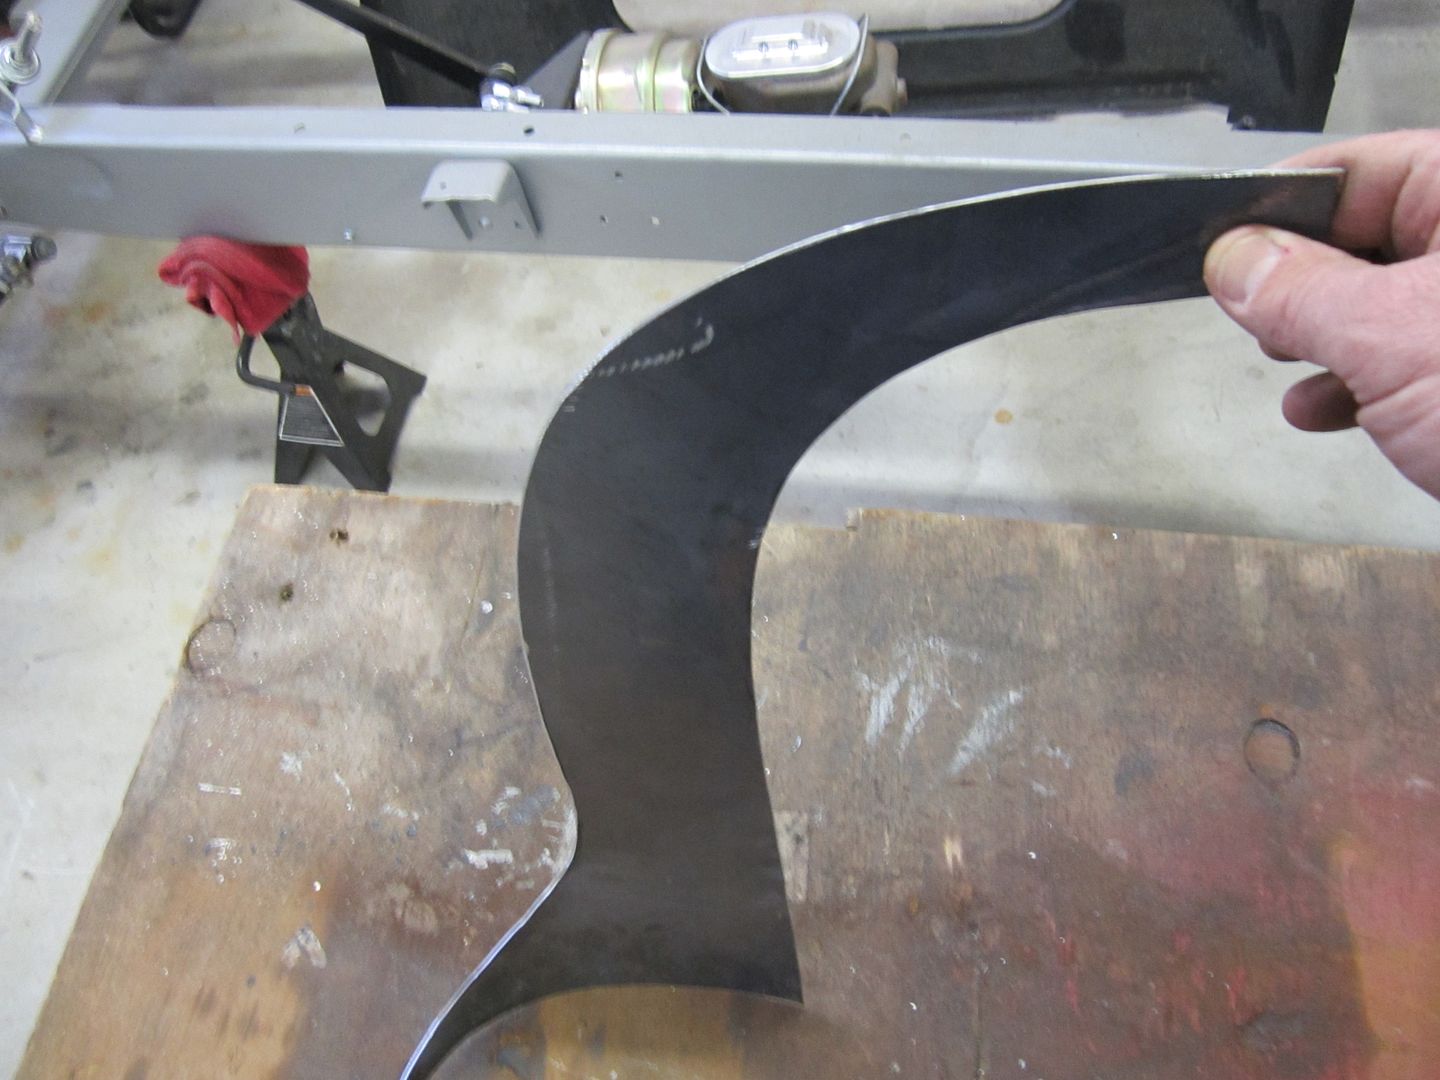 [/URL] [/URL]Once the extensions where made I had to figure out a way to keep them from folding forward in the event of an accident. The only solution I could come up with was to add some structural ribbing on the back side of the pillar welded to the extension at a 90 degrees. The biggest problem would be the lack of space behind the pillar extension as there is barely enough room to get your hand behind , much less the welding gun. So here's what I did. First I did 3 plunge cuts on the inside of the door jam. This would allow me to slide the ribs in from the front side. I made the ribs slightly longer then I needed them this would allow me to get one spot weld on the far back end of the rib to hold in in place. I did the ribbing one at a time so I could keep going back to the truck to make sure I could still get the pillar back in place and not have the ribs move. 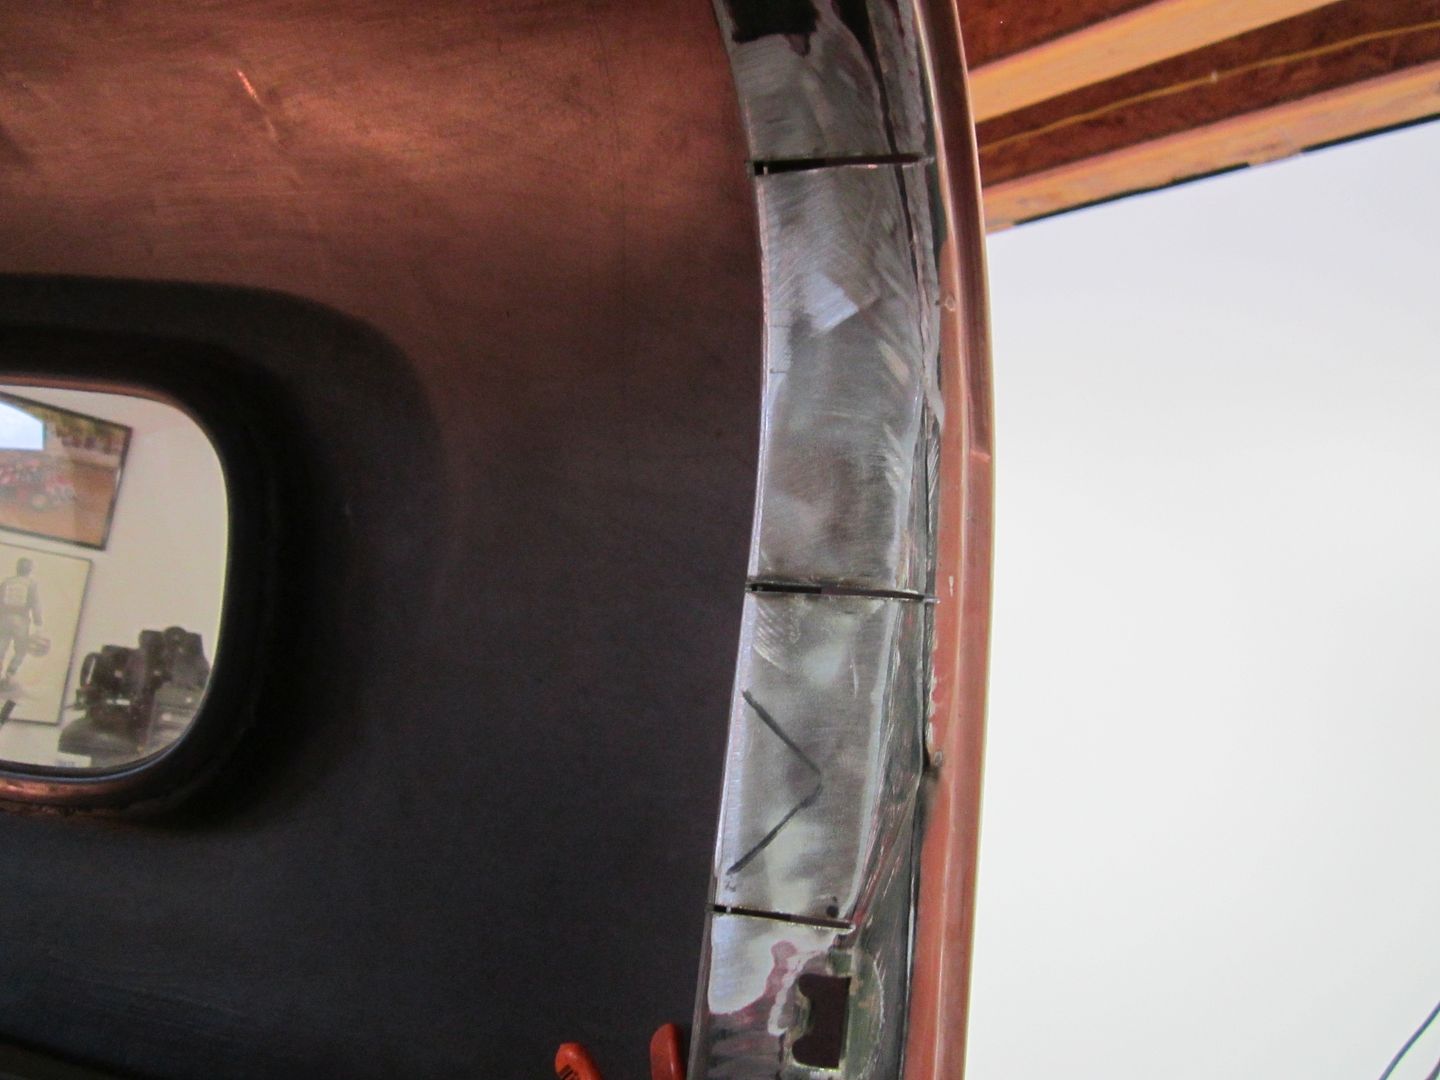 [/URL] [/URL]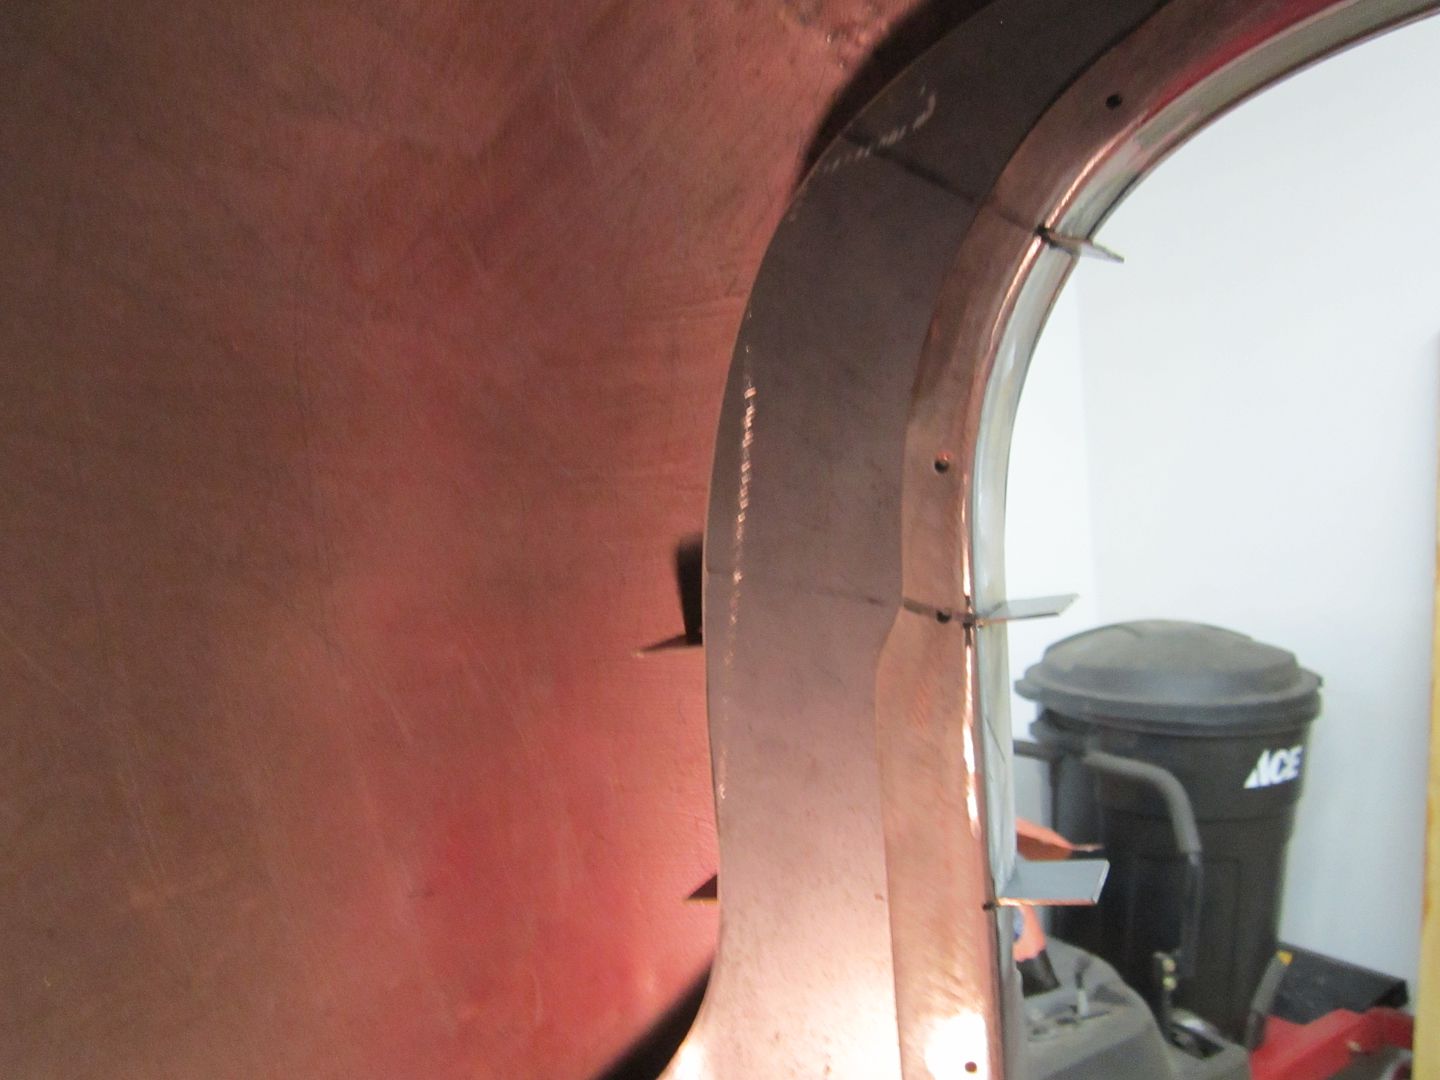 [/URL] [/URL]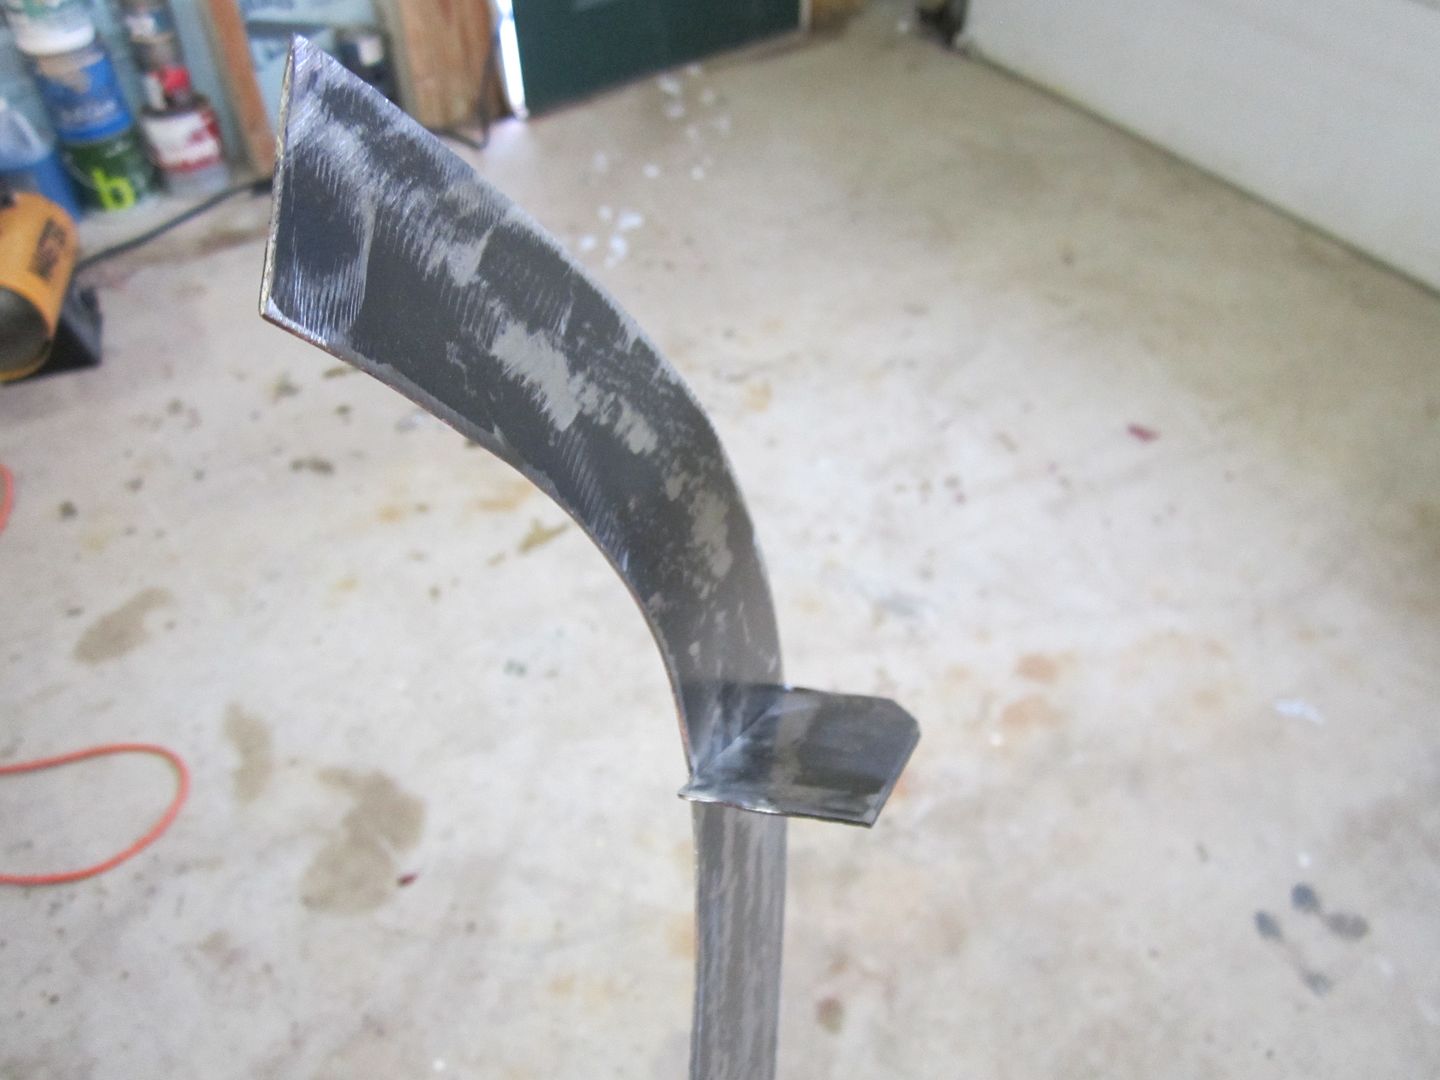 [/URL] [/URL]to further hold the ribbing in place I spot welded through the pillar to the ribbing. This was crucial as I needed all the ribbing to stay in place so that it wouldn't move around when I took the pillar back out for final welding of the ribs  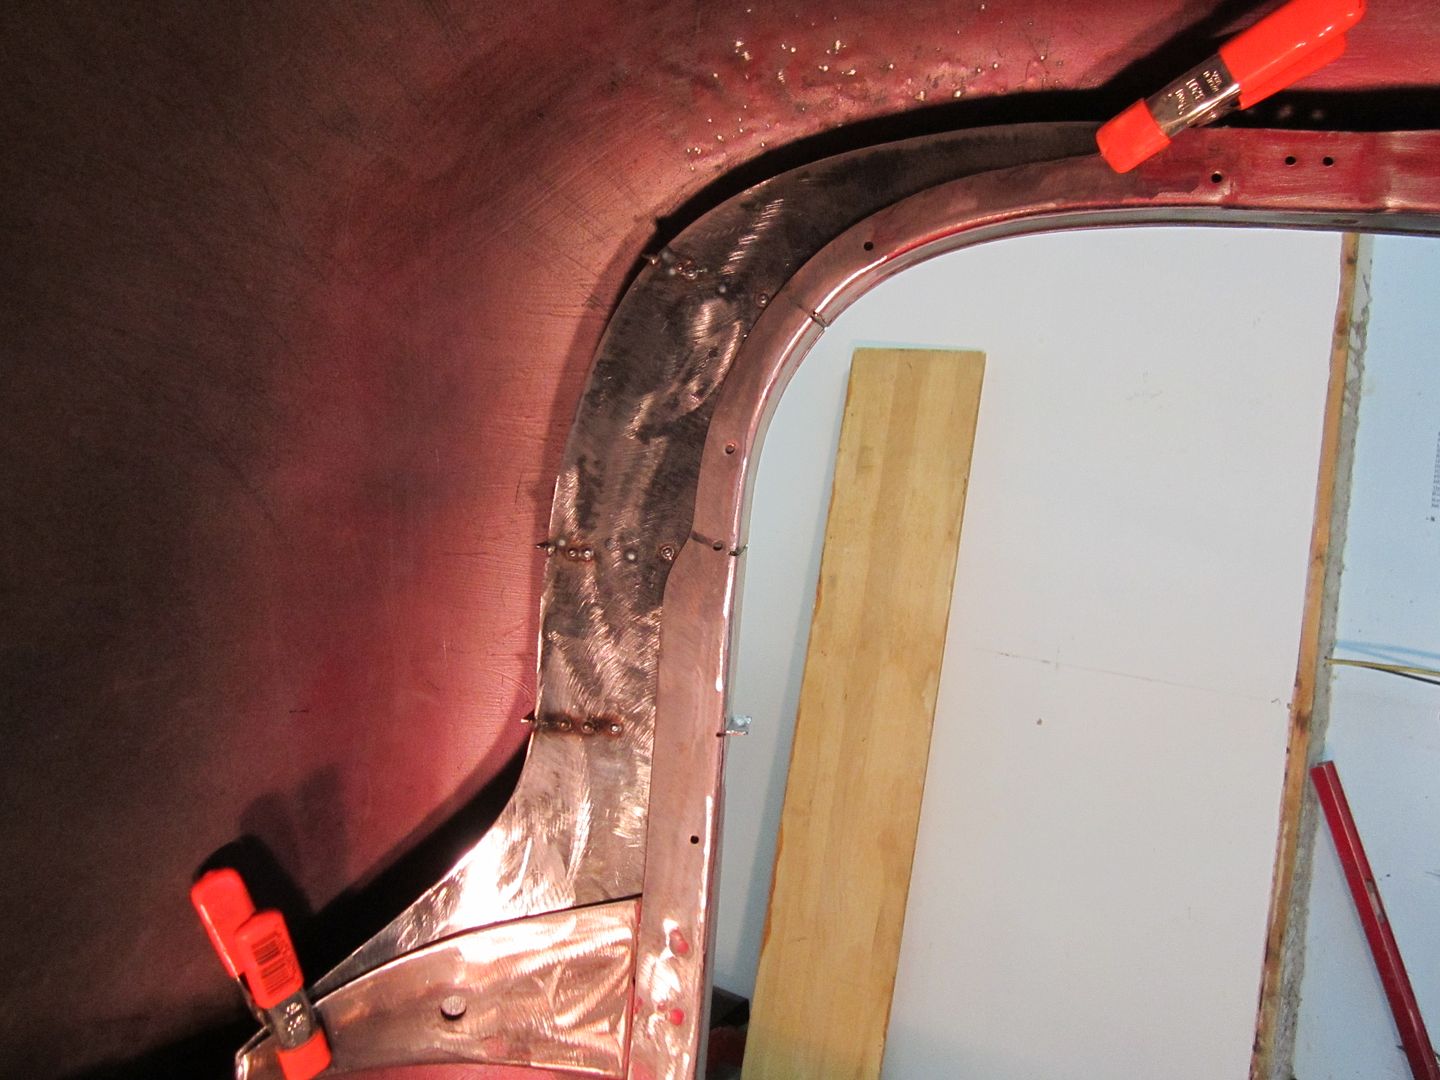 [/URL] [/URL]Once I had the pillar and the ribbing back out I could finish welding the ribs in place on the bench.  [/URL] [/URL]After a looooong day of work, I had 2 matching pillar extensions complete with some support ribbing in hopes of keeping the pillar from folding forward. 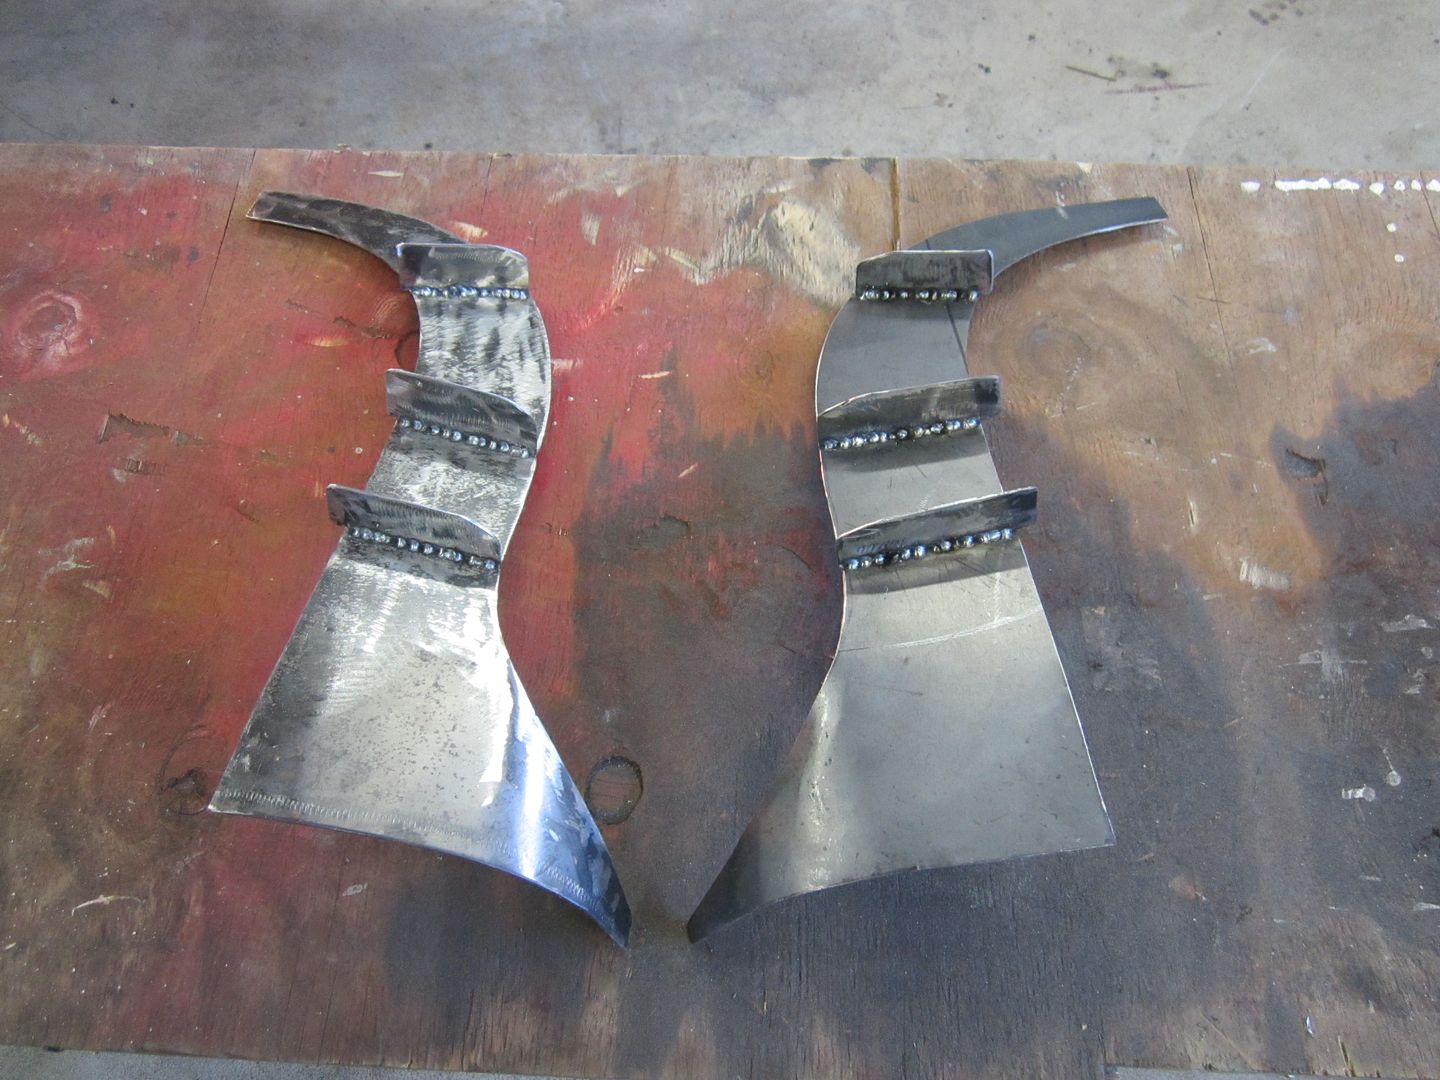 [/URL] [/URL]After the ribbing was complete I trimmed the front side of the ribbing off keeping only about a 1/4" protruding through the inside front of the door jam. This will give me enough material to weld the ribbing fast to the inside of the jam when I close up the access holes, thus (hopefully) giving me added strength to the webbing. 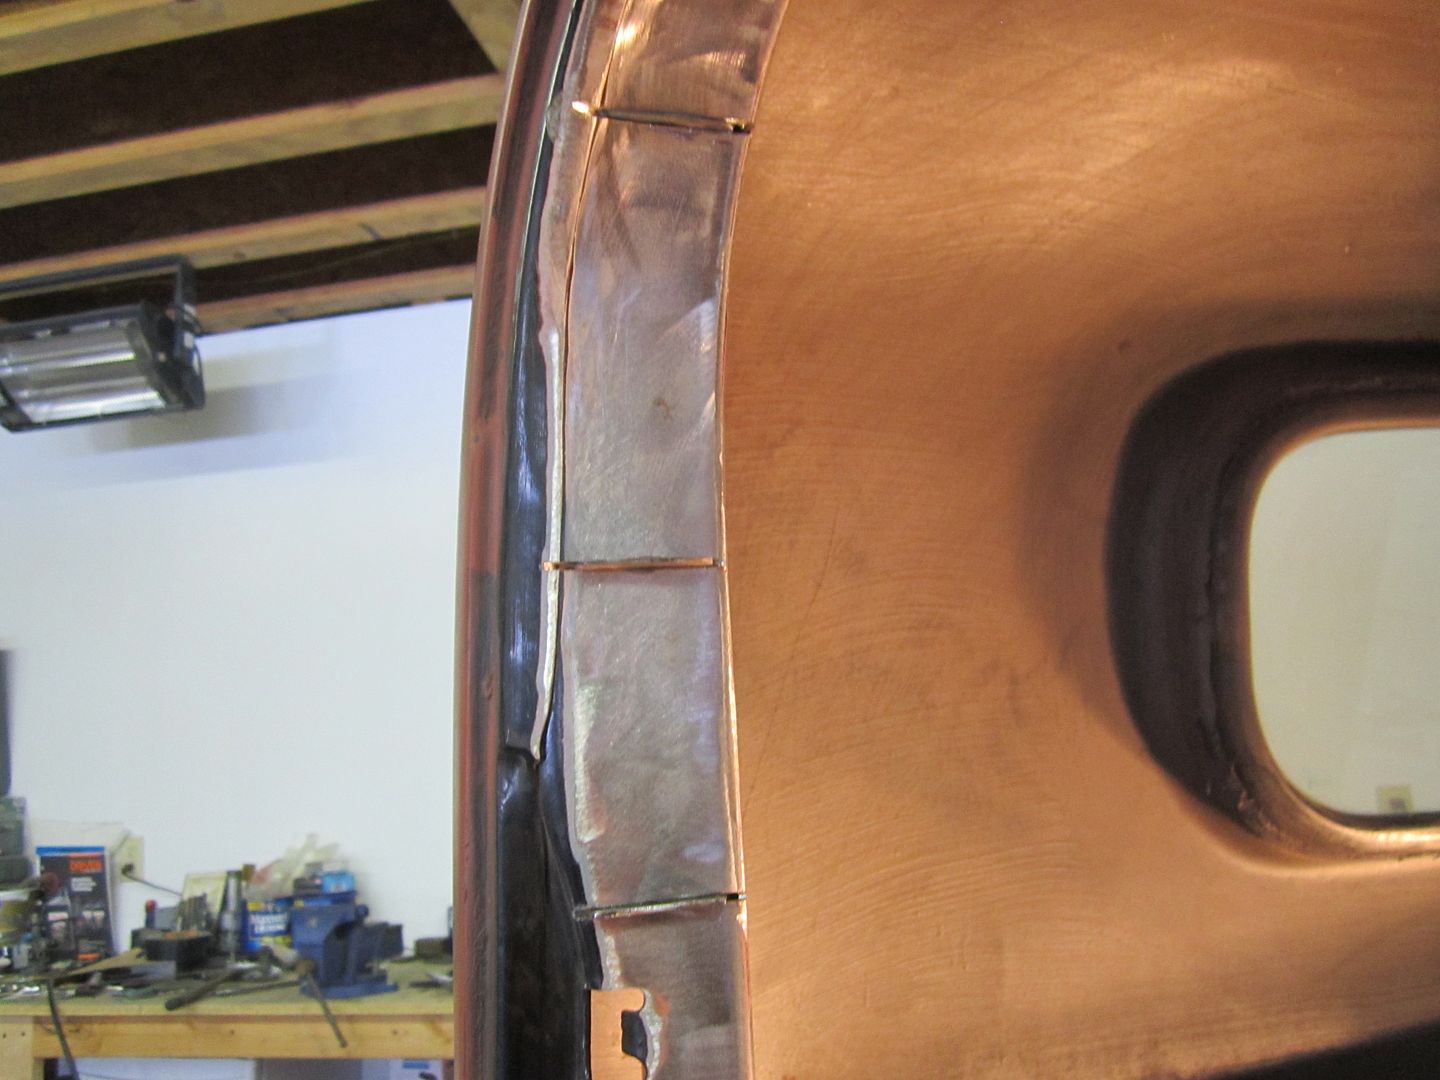 [/URL] [/URL]
|

|

|
|
02-07-2015, 10:31 PM
|
#2 |
|
Registered User
Join Date: Dec 2010
Location: washington NJ
Posts: 766
|
Re: 46 pickemup in NJ "the Rebuild"
Next up was the actual bracket that would be the mounting point for the belt. Again I would use this for additional structural support of the pillar extensions. So I cut another access hole through the inside of the door jam right above the center rib this would let the bracket sit directly on top of the rib and get welded to it as well.. This would again allow me to slide the bracket in from the front side and also give me a welding point to fasten it to the jam.
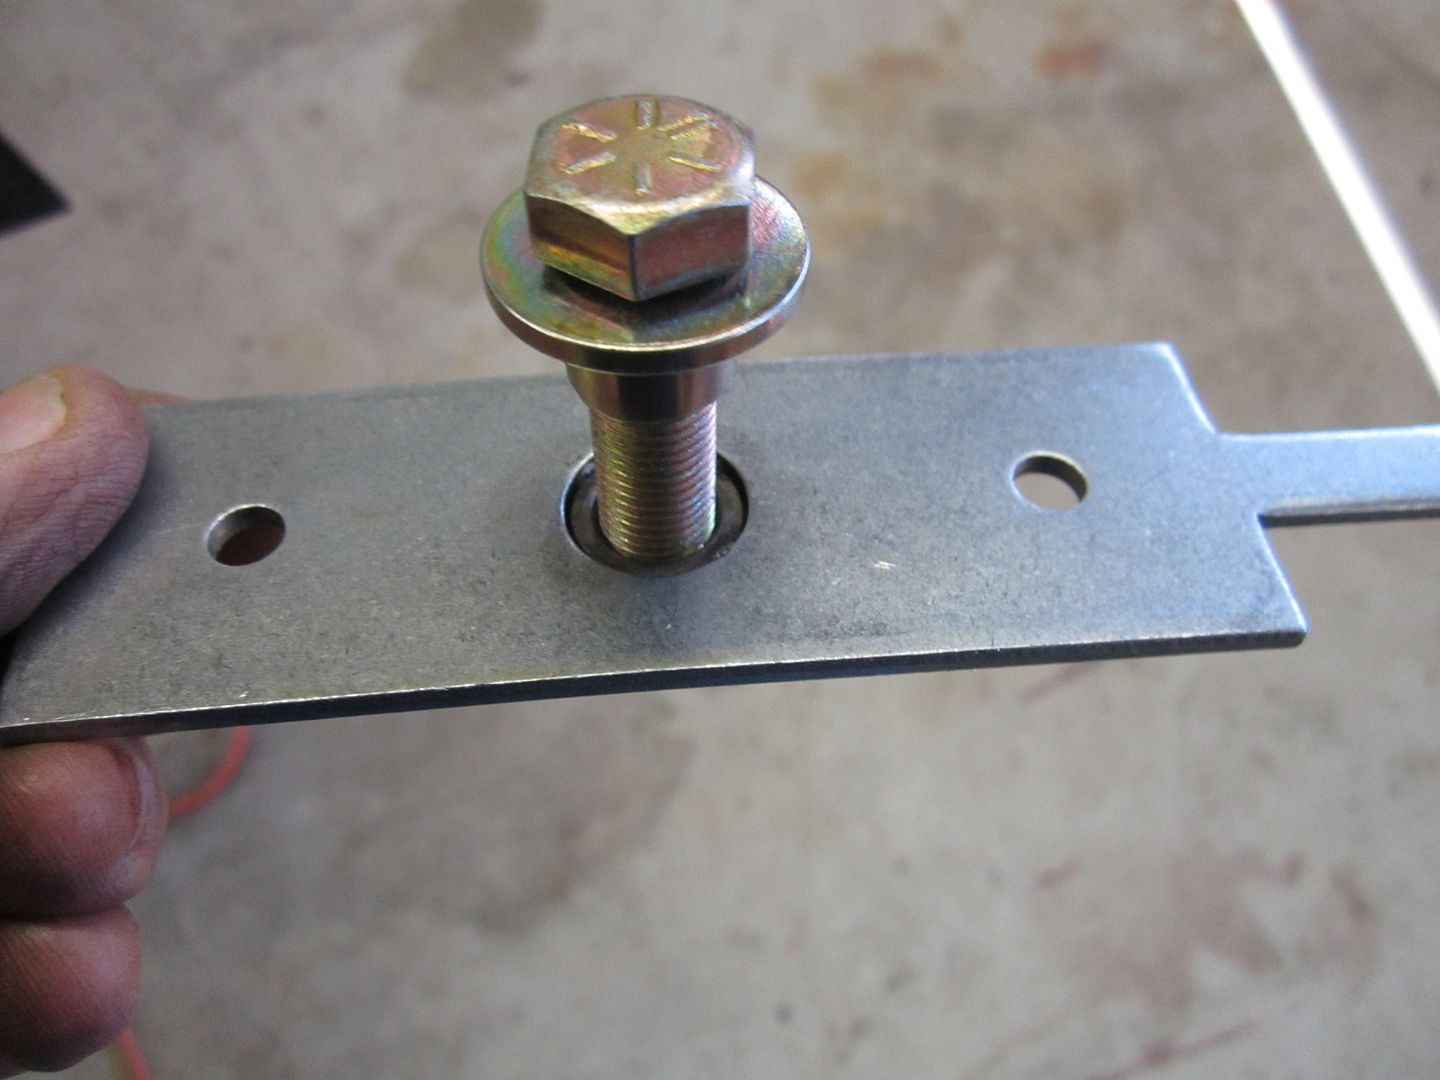 [/URL] [/URL]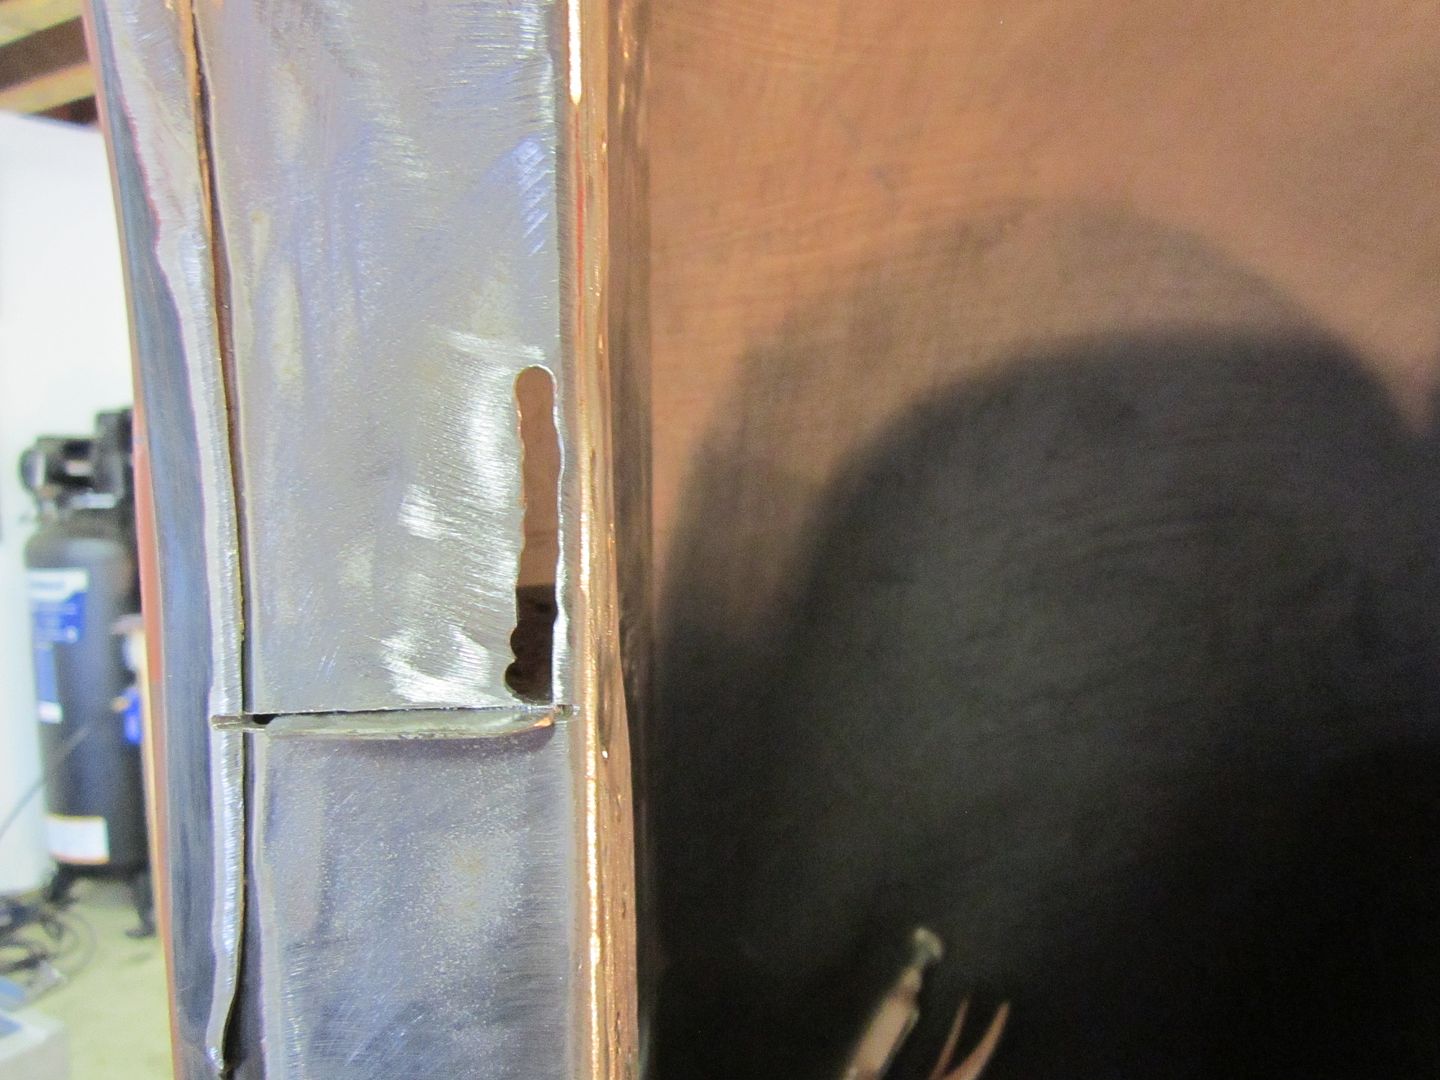 [/URL] [/URL]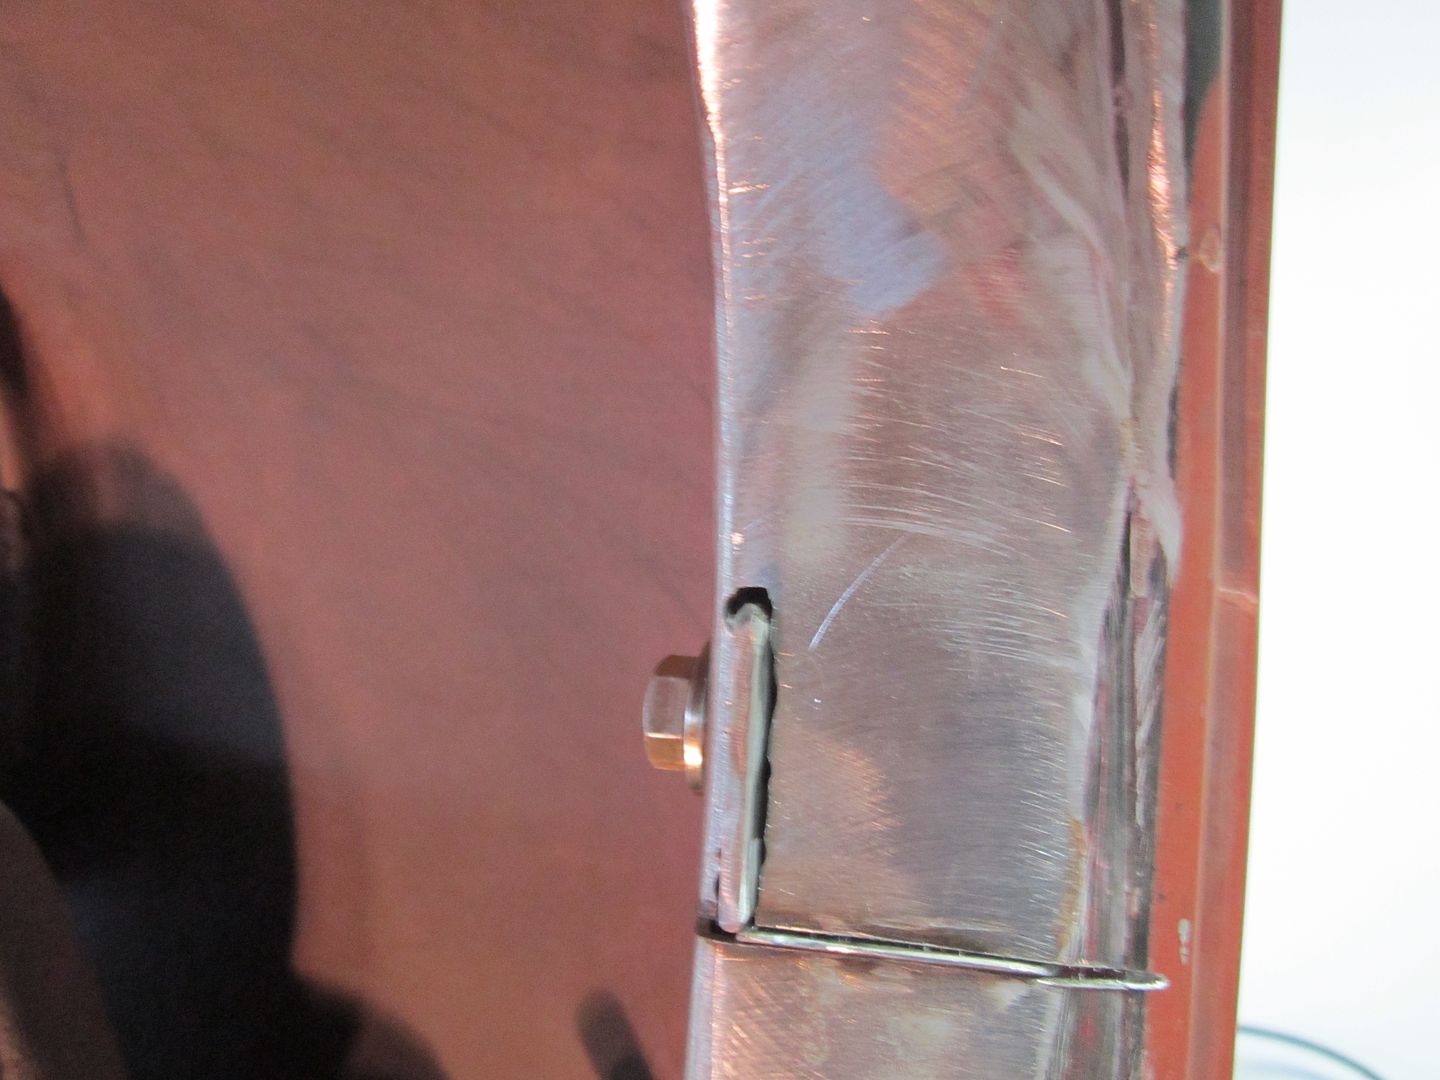 [/URL] [/URL]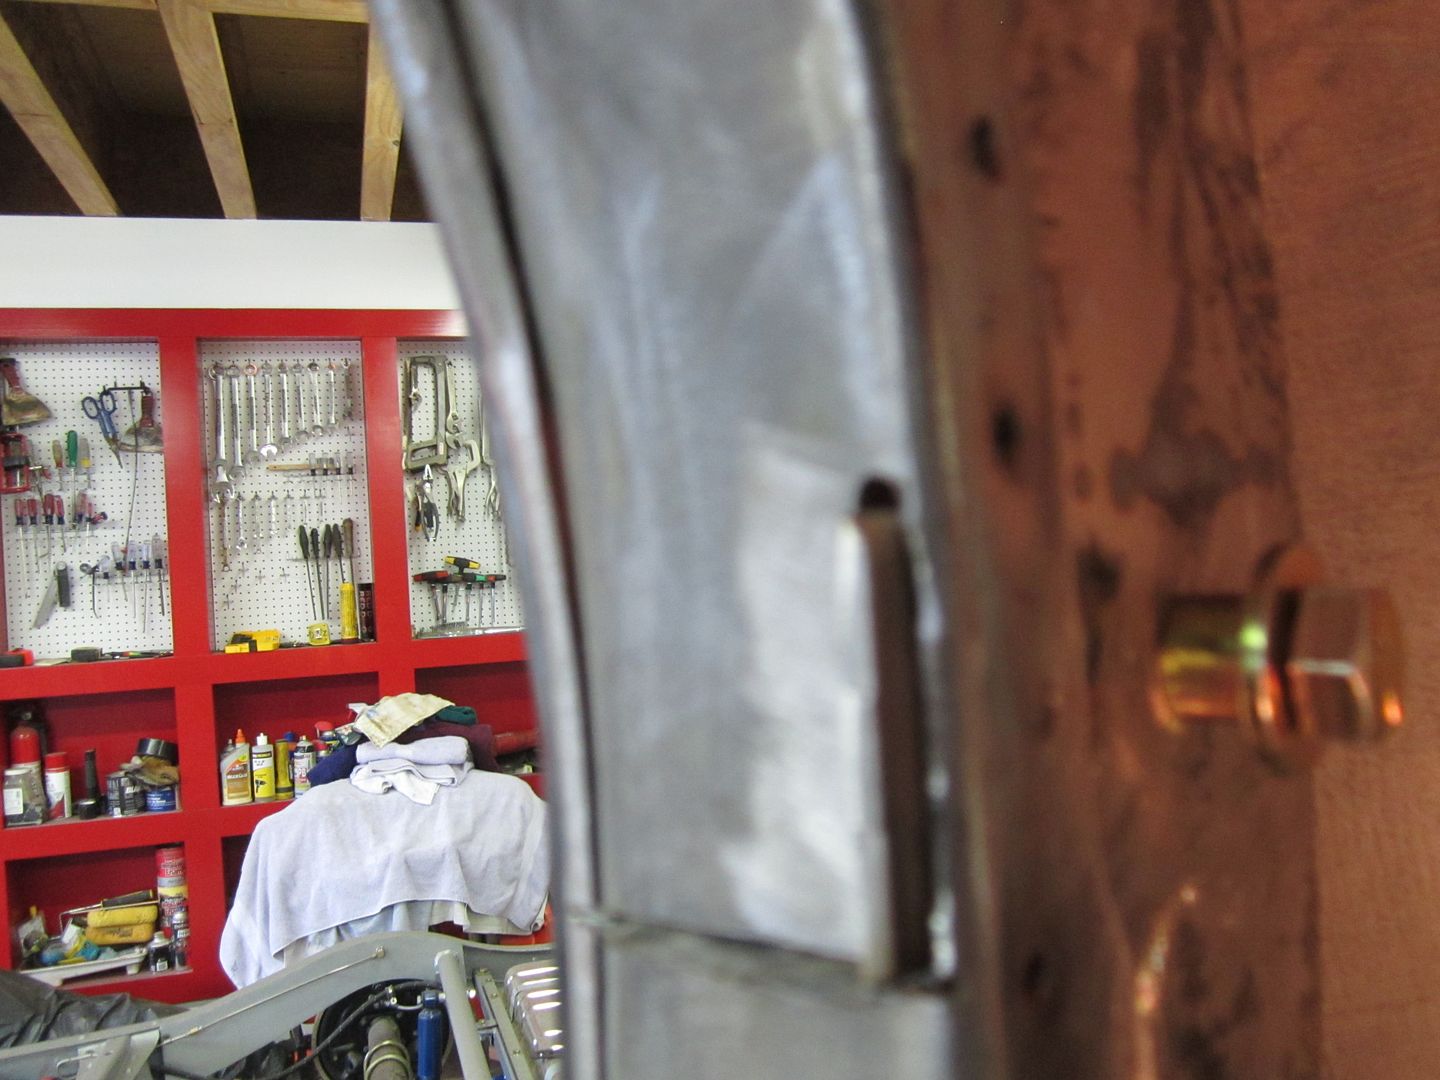 [/URL] [/URL]Once I had the bracket in the hole I could tack it in place take it out and do the final welding of it. 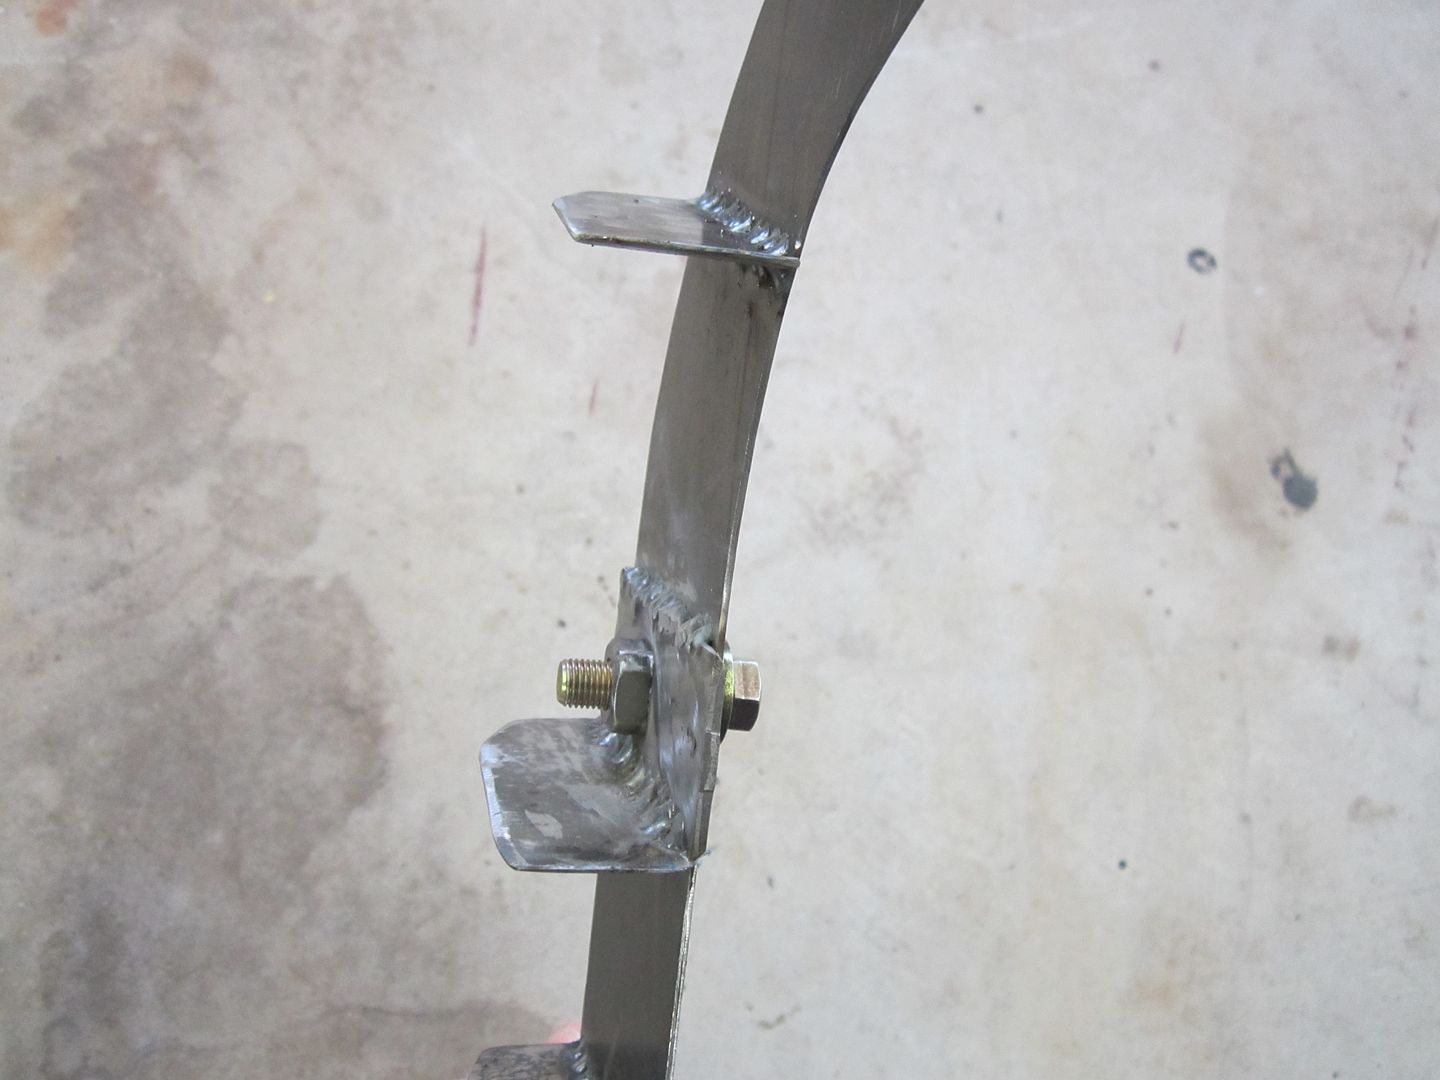 [/URL] [/URL]So the last thing I got done today was drilling all the holes for the plug welds. 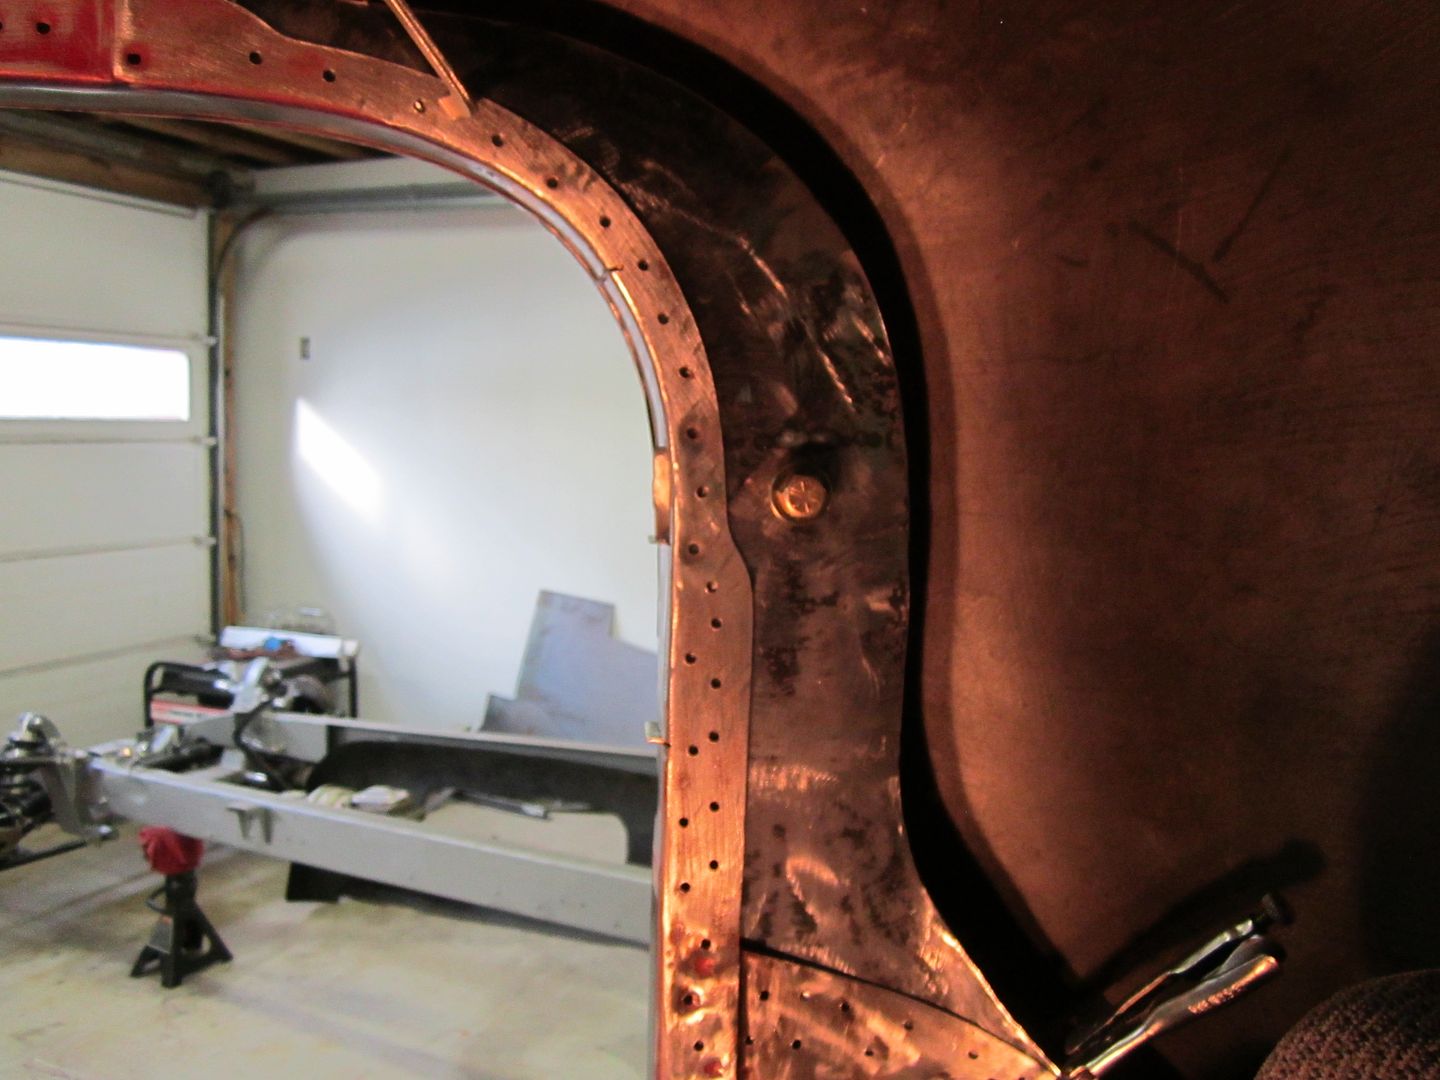 [/URL] [/URL]So to re-cap.....the pillar extension will get welded the full length along the seam of the factory pillar. Then it will get plug welded through all the holes I made in the factory pillar. Then I will weld all the ribbing and the bracket to the inside of the door jam. Overkill perhaps, but I don't think it will fold forward as easy. I guess in the event of an accident I will probably only be a vegetable instead of pushing up daisies! 
|
|
|
|
|
06-05-2015, 05:30 PM
|
#3 |
|
Registered User
Join Date: Feb 2010
Location: Cruzeville
Posts: 219
|
Re: 46 pickemup in NJ "the Rebuild"
anybody know if there is 1 piece windshields for the 39-47 like there are for the advanced design trucks?
|
|
|
|
|
06-05-2015, 06:06 PM
|
#4 | |
|
Registered User
Join Date: Dec 2002
Location: Cactus Patch So. Az
Posts: 4,749
|
Re: 46 pickemup in NJ "the Rebuild"
Quote:
__________________
53 TuTone Extended Cab 350 4-Spd 3:08 (SOLD) 53 Chevy Moldy pearl green ZZ-4 4L60E 9" 3:25 55 GMC 1st Black Mll (ZZ4) ZZ6 TKO 600 5 sp 3:73 62 Solidaxle Corvette Roman Red (327 340hp 4spd 3:36) C4 & C5 suspension tube chassis LS 3 4L70E 65 Corvette Coupe 327 350hp 4spd 4:11 78 Black Silverado SWB (350/350) 5.3 & 4L60E 3:42 2000 S-Type 3.0 (wife cruiser) 2003 GMC SCSB 5.3 4L60E 3:42 |
|
|
|
|
|
05-28-2016, 05:54 PM
|
#5 |
|
Registered User
Join Date: Jun 2010
Location: Encinitas, CA
Posts: 508
|
Re: 46 pickemup in NJ "the Rebuild"
Where did the trans cross member and master cylinder kits come from?
Great pics and very nice work
__________________
1954 GMC on 93 Silverado chassis http://67-72chevytrucks.com/vboard/s...d.php?t=408344 1942 Chevy 1/2 ton Pickup http://67-72chevytrucks.com/vboard/s...d.php?t=429494 R.I.P. TOM SEFFRON 68 FOUR DOOR http://67-72chevytrucks.com/vboard/s...d.php?t=495438 1942 Chevy that ate my brain 70 Chassis https://67-72chevytrucks.com/vboard/...d.php?t=835250 |
|
|
|
|
06-09-2016, 07:11 PM
|
#6 |
|
Registered User
Join Date: Dec 2010
Location: washington NJ
Posts: 766
|
Re: 46 pickemup in NJ "the Rebuild"
Well, the NJ weather finally took a turn for the better and we got a few warm days to finish painting the dash. As soon as it was dry enough I got the damn thing back in and out of the way in the garage.
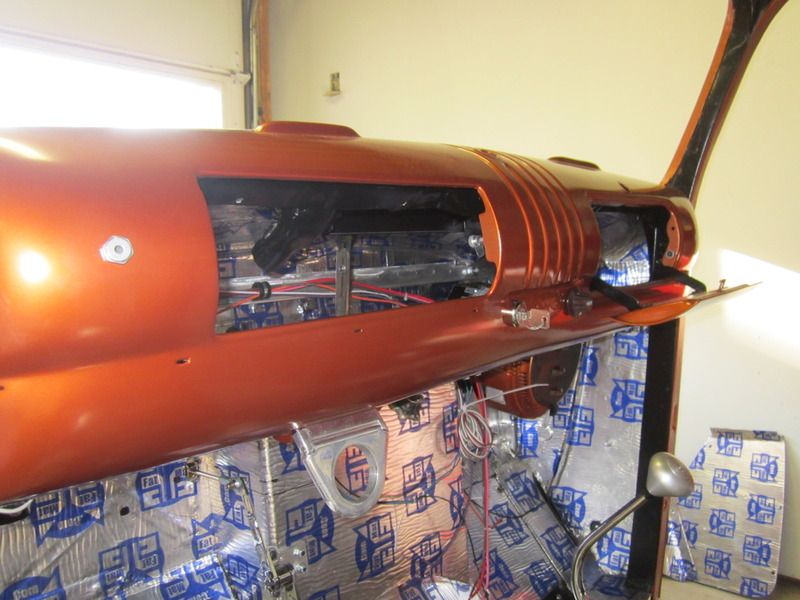 [/URL] [/URL]I had to make a bracket to firm up the the dash behind the steering column as the old one was thrown out with the half assed swing arm brake pedal assembly. You can kind of see it through the dash cluster opening. I also started putting in some of the switches so I can plan my wire routing. This is going to take some time as my OCD tends to make me contemplate things for hours on end. LOL! 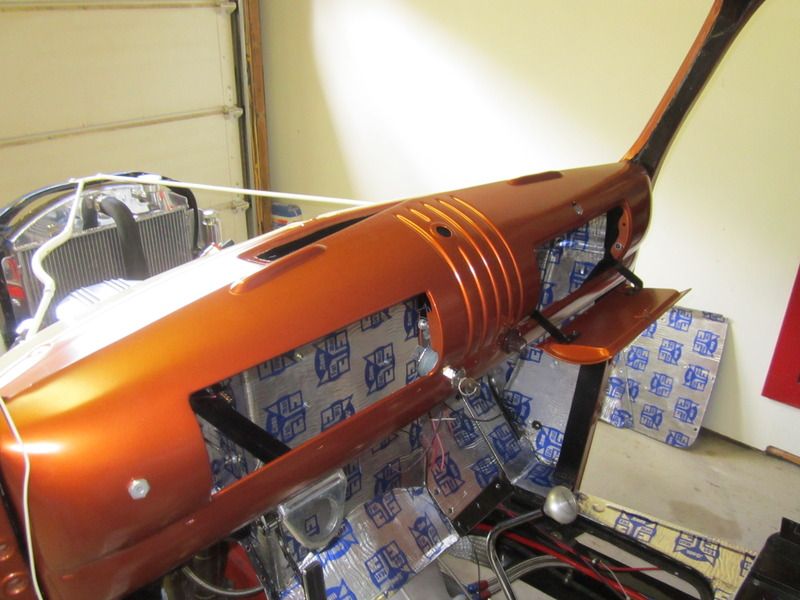 [/URL] [/URL]Got the heater back in with a new core and new 12 volt motor. I don't want to re-hash everything I had to do to save this heater, but lets just say it was a pain in the butt. Looking back I probably should have just nixed a heater altogether but we get some nice days here in the fall and winter, their just a little cold. Unfortunately it was my only option as I could not find a heater that would fit in the space I had (9 1/4"). 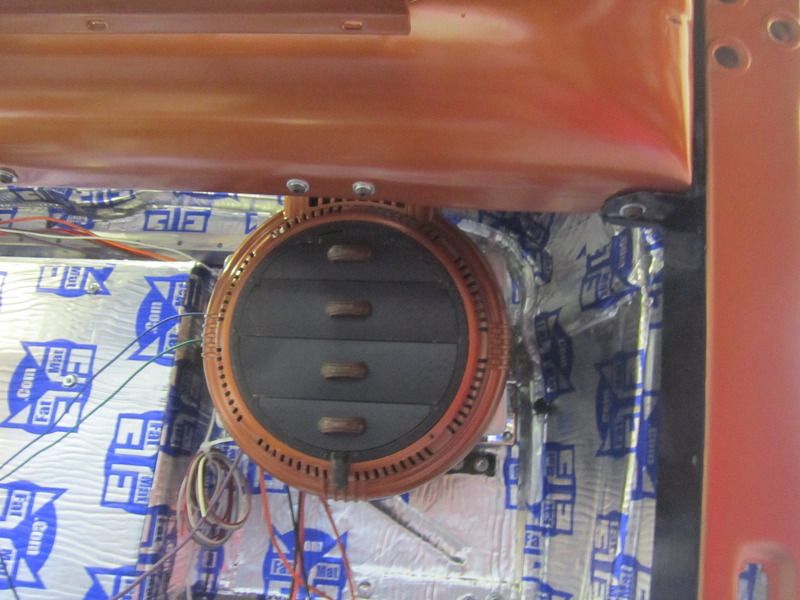 [/URL] [/URL]Also got the last piece of the puzzle for the dash so I can start making my wire connections. I was going to go with Dakota digital but I cheaped out and went with Autometer. Just waiting on a wiper switch and grounding blocks that are on order. Then I can really jump into it! 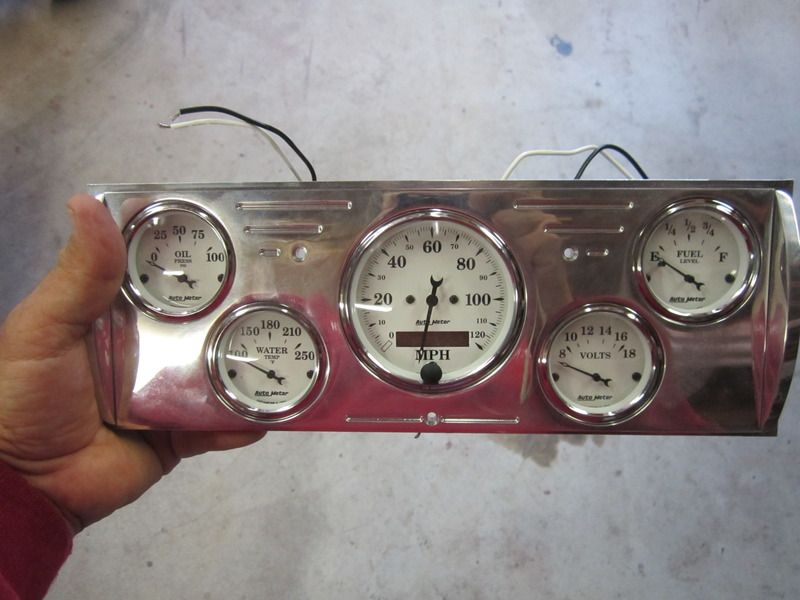 [/URL] [/URL]
|
|
|
|
|
02-08-2015, 08:47 AM
|
#7 |
|
Registered User
Join Date: May 2013
Location: Centerville,Ma.
Posts: 1,223
|
Re: 46 pickemup in NJ "the Rebuild"
That looks good ,but the only thing I would do different is to do half inc stitch welds with half in gaps between the welds. I think it will actually be stronger as the welds will hold it in place and the unwelded areas will be stronger. When you weld sheet metal the weld is strong but it actually makes the metal next to the weld the weak point. The only place you will find a continuous weld in factory construction in a boxed frame section.
|
|
|
|
|
02-08-2015, 09:22 AM
|
#8 | |
|
Registered User
Join Date: Dec 2010
Location: washington NJ
Posts: 766
|
Re: 46 pickemup in NJ "the Rebuild"
Quote:
|
|
|
|
|
|
02-08-2015, 09:45 AM
|
#9 |
|
Registered User
Join Date: Dec 2002
Location: Cactus Patch So. Az
Posts: 4,749
|
Re: 46 pickemup in NJ "the Rebuild"
Excellent idea for the upper anchor for the belts.
As we found out after we had the seat installed in the 46 and siting behind the wheel, the upper belt was hitting my chin when seated in a driving position. So the fix was to remove the window panel and re locate the upper anchor down a bit and more towards the rear window. The position of the belt is now in a better feeling spot across my shoulder. I love doing things twice!!!
__________________
53 TuTone Extended Cab 350 4-Spd 3:08 (SOLD) 53 Chevy Moldy pearl green ZZ-4 4L60E 9" 3:25 55 GMC 1st Black Mll (ZZ4) ZZ6 TKO 600 5 sp 3:73 62 Solidaxle Corvette Roman Red (327 340hp 4spd 3:36) C4 & C5 suspension tube chassis LS 3 4L70E 65 Corvette Coupe 327 350hp 4spd 4:11 78 Black Silverado SWB (350/350) 5.3 & 4L60E 3:42 2000 S-Type 3.0 (wife cruiser) 2003 GMC SCSB 5.3 4L60E 3:42 |
|
|
|
|
04-08-2015, 01:20 PM
|
#10 |
|
Registered User
Join Date: May 2013
Location: Centerville,Ma.
Posts: 1,223
|
Re: 46 pickemup in NJ "the Rebuild"
If the steering doesn't return you need to add more caster to the front end.It will also cause the truck to try to wander instead of running straight. If you had moved the upper ball joint to the rear with either adjustment or tilting the front clip to the rear it would correct it. I think replacing the pacer clip is a good idea if for no other reason I would worry about availability of parts for that old rack. It doesn't look like the p.o spent a lot of time making it look like it belonged there.
|
|
|
|
|
04-08-2015, 02:30 PM
|
#11 | |
|
Registered User
Join Date: Dec 2002
Location: Cactus Patch So. Az
Posts: 4,749
|
Re: 46 pickemup in NJ "the Rebuild"
Quote:
__________________
53 TuTone Extended Cab 350 4-Spd 3:08 (SOLD) 53 Chevy Moldy pearl green ZZ-4 4L60E 9" 3:25 55 GMC 1st Black Mll (ZZ4) ZZ6 TKO 600 5 sp 3:73 62 Solidaxle Corvette Roman Red (327 340hp 4spd 3:36) C4 & C5 suspension tube chassis LS 3 4L70E 65 Corvette Coupe 327 350hp 4spd 4:11 78 Black Silverado SWB (350/350) 5.3 & 4L60E 3:42 2000 S-Type 3.0 (wife cruiser) 2003 GMC SCSB 5.3 4L60E 3:42 |
|
|
|
|
|
06-05-2015, 05:00 PM
|
#12 |
|
Registered User
Join Date: Dec 2010
Location: washington NJ
Posts: 766
|
Re: 46 pickemup in NJ "the Rebuild"
Wow been a lounge time since i updated! I kind of got help up back in February. We had so much snow piled up (from the 14 times we got our driveway plowed this winter), that every day the snow would melt, run under the side door to the garage, and then freeze over night. I had a 2 inch thick slab of ice covering the entire garage floor. In fact it was so bad, the dolley that my cab is on was frozen fast to the floor so I couldn't move it.
The only good thing that come about from the terrible winter was that I could spend some much needed time on my other hobby (see post 77). I tell ya if you ever have the desire to spend money chasing gremlins and hot rods just ain't doing it for you.....buy a salt water reef tank, UGH! Anyways I digress, When I last posted I was working on the seat belts. Well I got that all squared away and I have to say turned out better then expected. Next up, now that the weather is better here in Nj was the bottom of the cab. I decided to get the old girl down off the dolley and give the bottom a good scraping and undercoating. After about 6 hours of scraping, wire brushing, sanding, cleaning, and of course drinking.....I had the bottom ready to go. Of course as you can see somebody has worked on the underside previous to me. 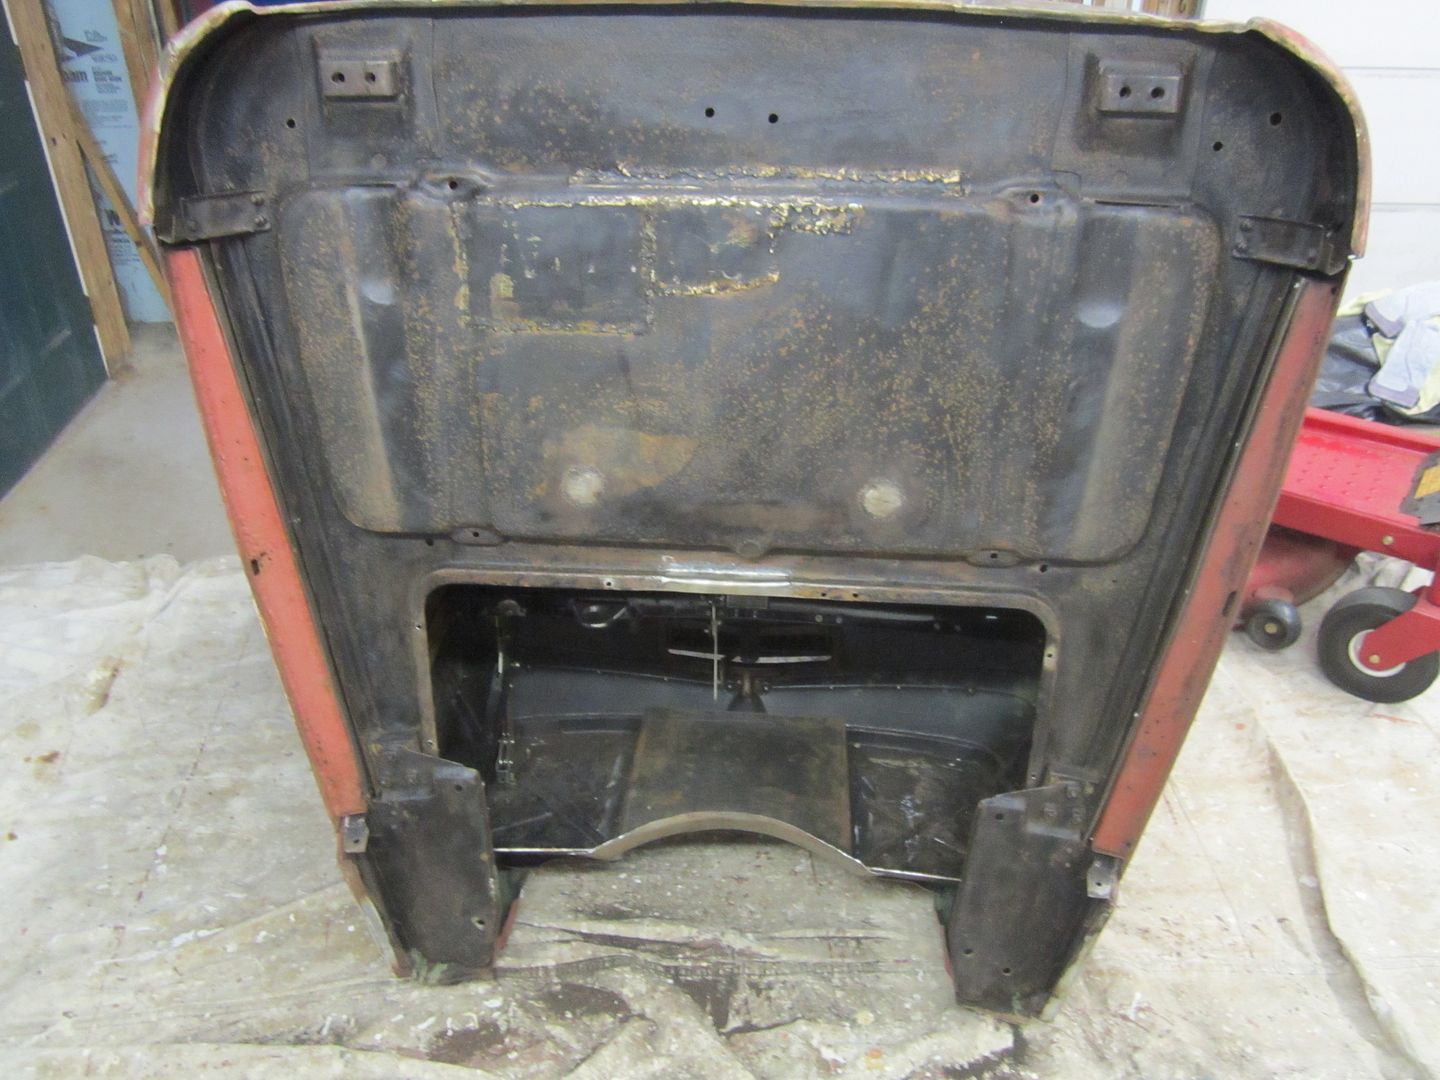 [/URL] [/URL]I gave the ole girl 2 good coats of this stuff along with the inside of the rocker panels 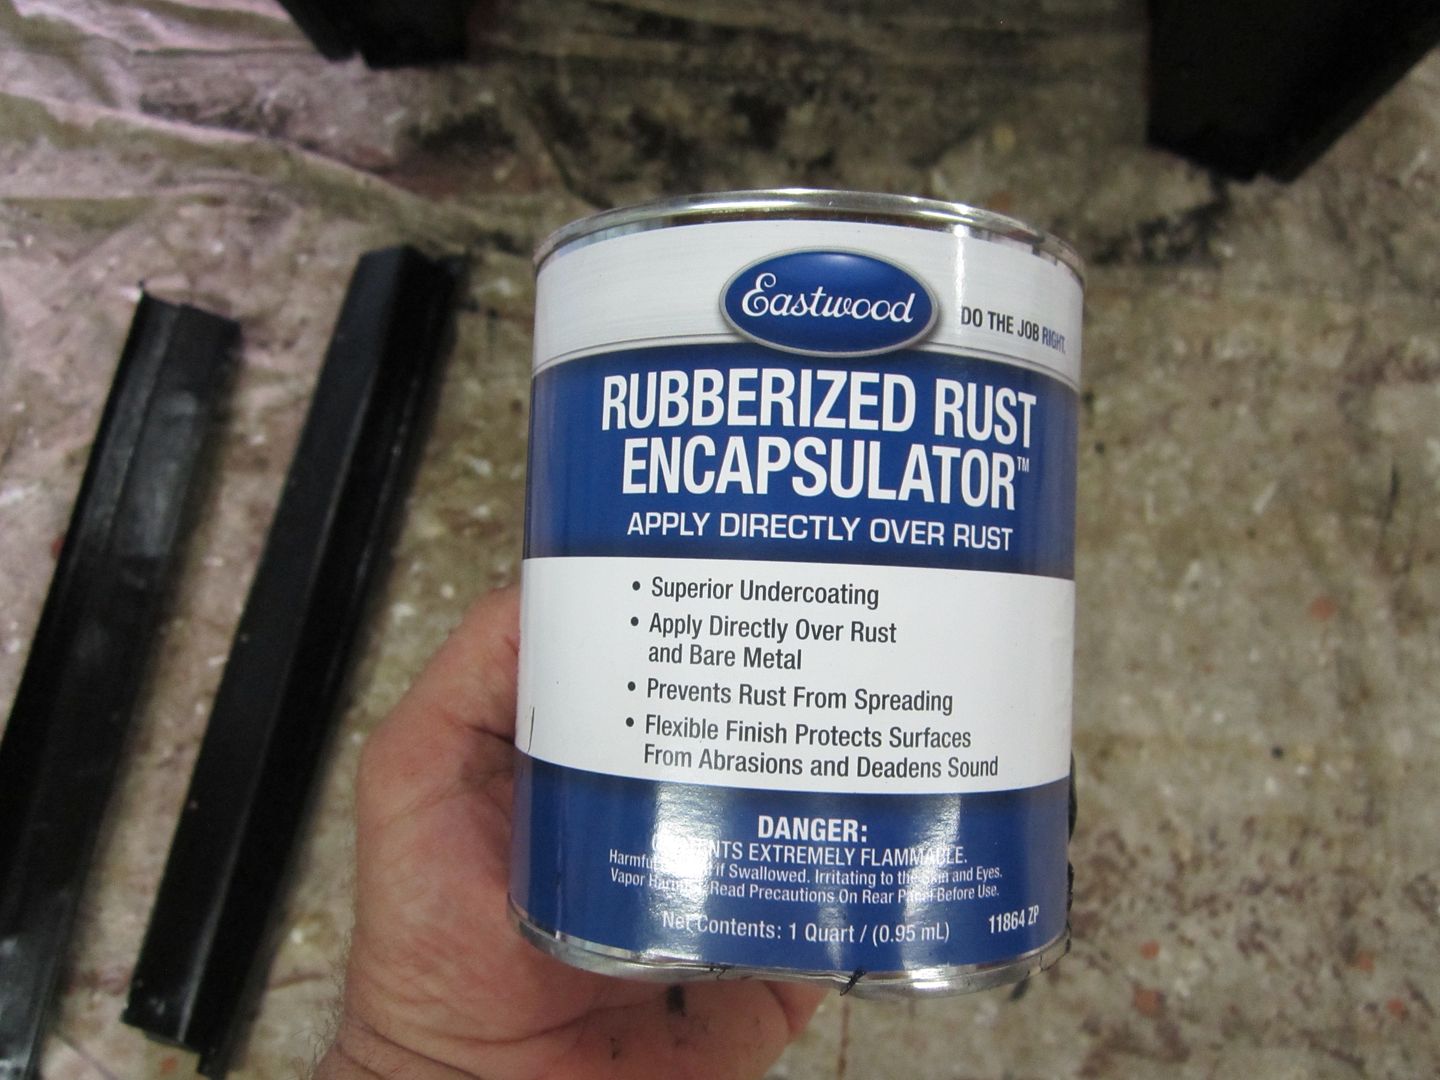 [/URL] [/URL]Looks pretty good or at least better then it did...... 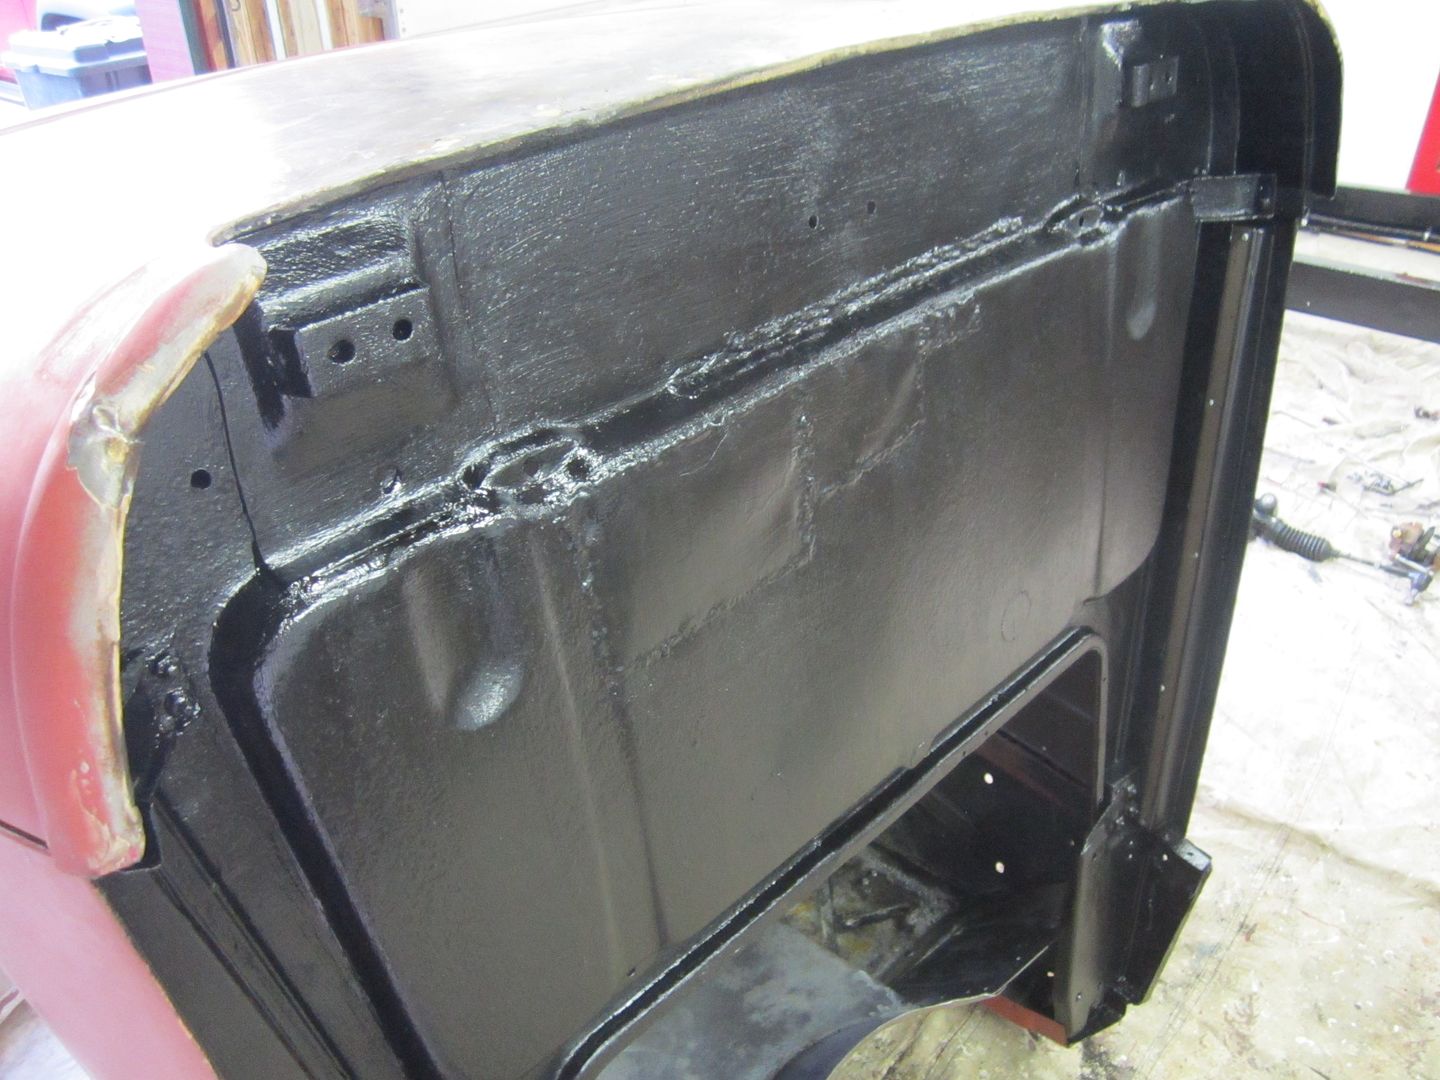 [/URL] [/URL]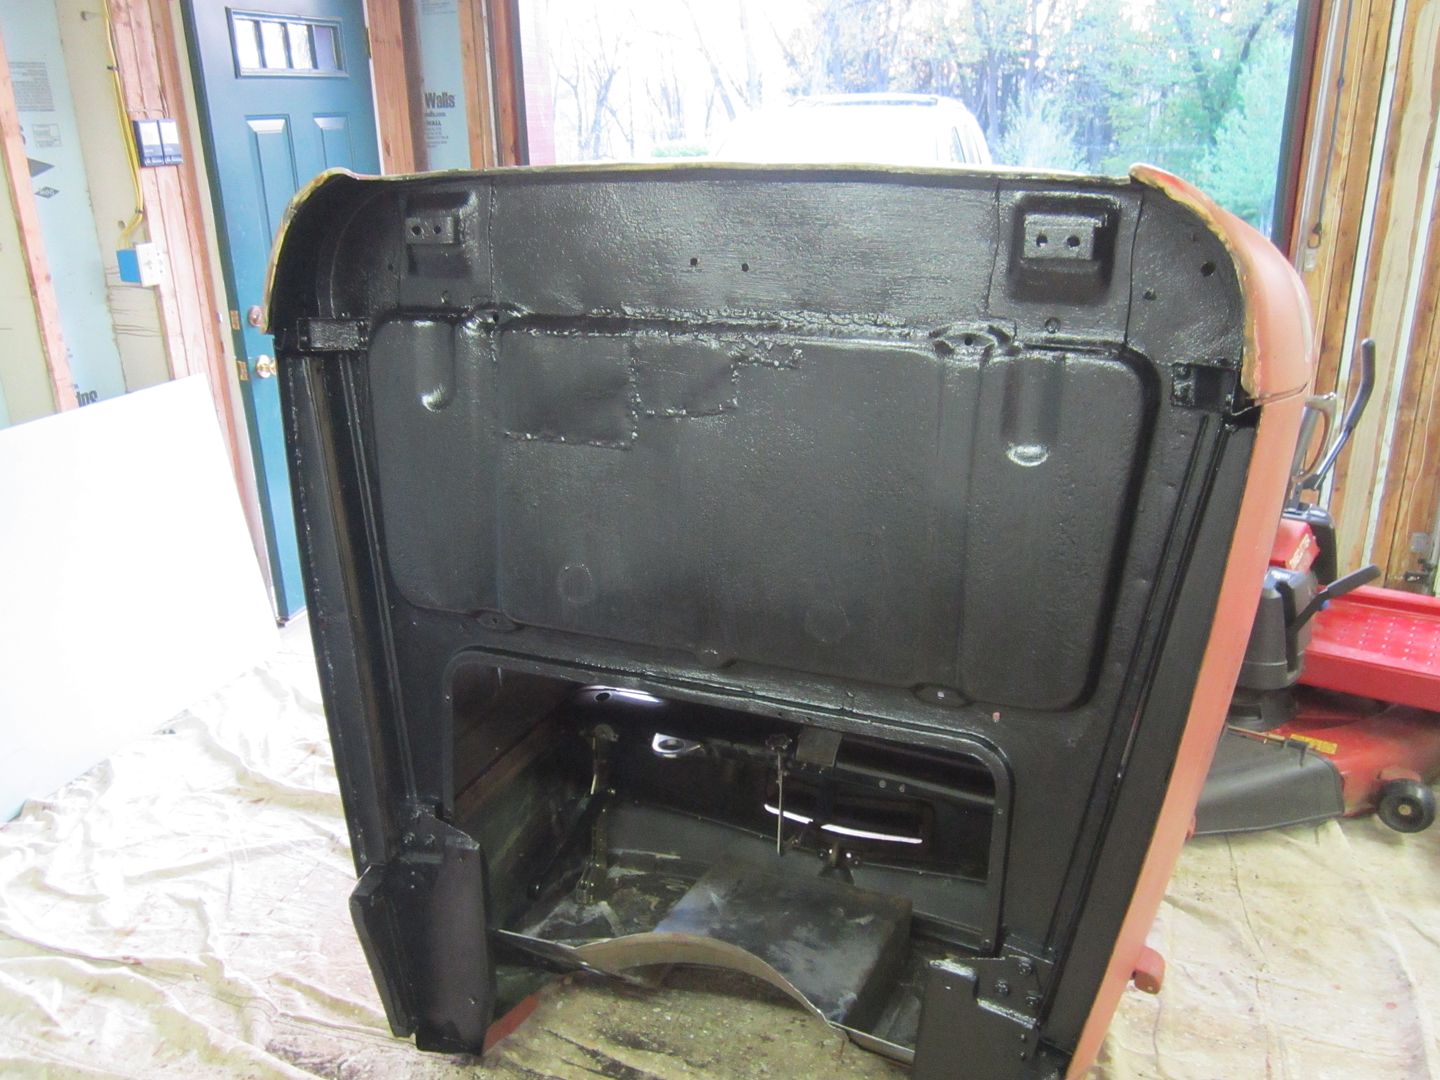 [/URL] [/URL] [/URL] [/URL]
|
|
|
|
|
06-05-2015, 05:16 PM
|
#13 |
|
Registered User
Join Date: Dec 2010
Location: washington NJ
Posts: 766
|
Re: 46 pickemup in NJ "the Rebuild"
So now at this point I figured it was getting close to a time when I would have to decide if I was going to repaint the truck or not. My options were.........
1. Just hit the repaired portion of the back of the cab with red oxide and throw it back together as is and look past all the other problems it has. 2. Just scuff the whole truck and repaint entirely with another coat of red oxide primer. 3. Address the issues that all the previous owners neglected to do, strip, prime, and paint. So seeing as how I am starting to get really burned out messing with this truck, (remember I only bought it hoping to have something to tinker with on the weekends), I decided to just scuff the whole truck and give it another shot of primer and call it done. However, that was until my good buddy came over and started to poke around a little more and started to find some stuff that just couldn't be left un-repaired. Soooooooo 2 weeks and about $500 later here is where I am at. I must have removed about 75 Lbs. of body filler. In some spots were it was needed it was about 1" deep  . In the spots were it wasn't needed it was only 1/2" deep . In the spots were it wasn't needed it was only 1/2" deep
|
|
|
|
|
06-05-2015, 05:34 PM
|
#14 |
|
Registered User
Join Date: Dec 2010
Location: washington NJ
Posts: 766
|
Re: 46 pickemup in NJ "the Rebuild"
So after removing the 75 Lbs. of $&%# from all the other hacks, my buddy and I addressed the issues as best we could and proceeded to put only about 10 Lbs. of putty back on.
This is a pic of the back of the cab after we did the re-inforcing of the back panel. who ever did the original body work completely puttied in the style line across the back so we ground it back out. 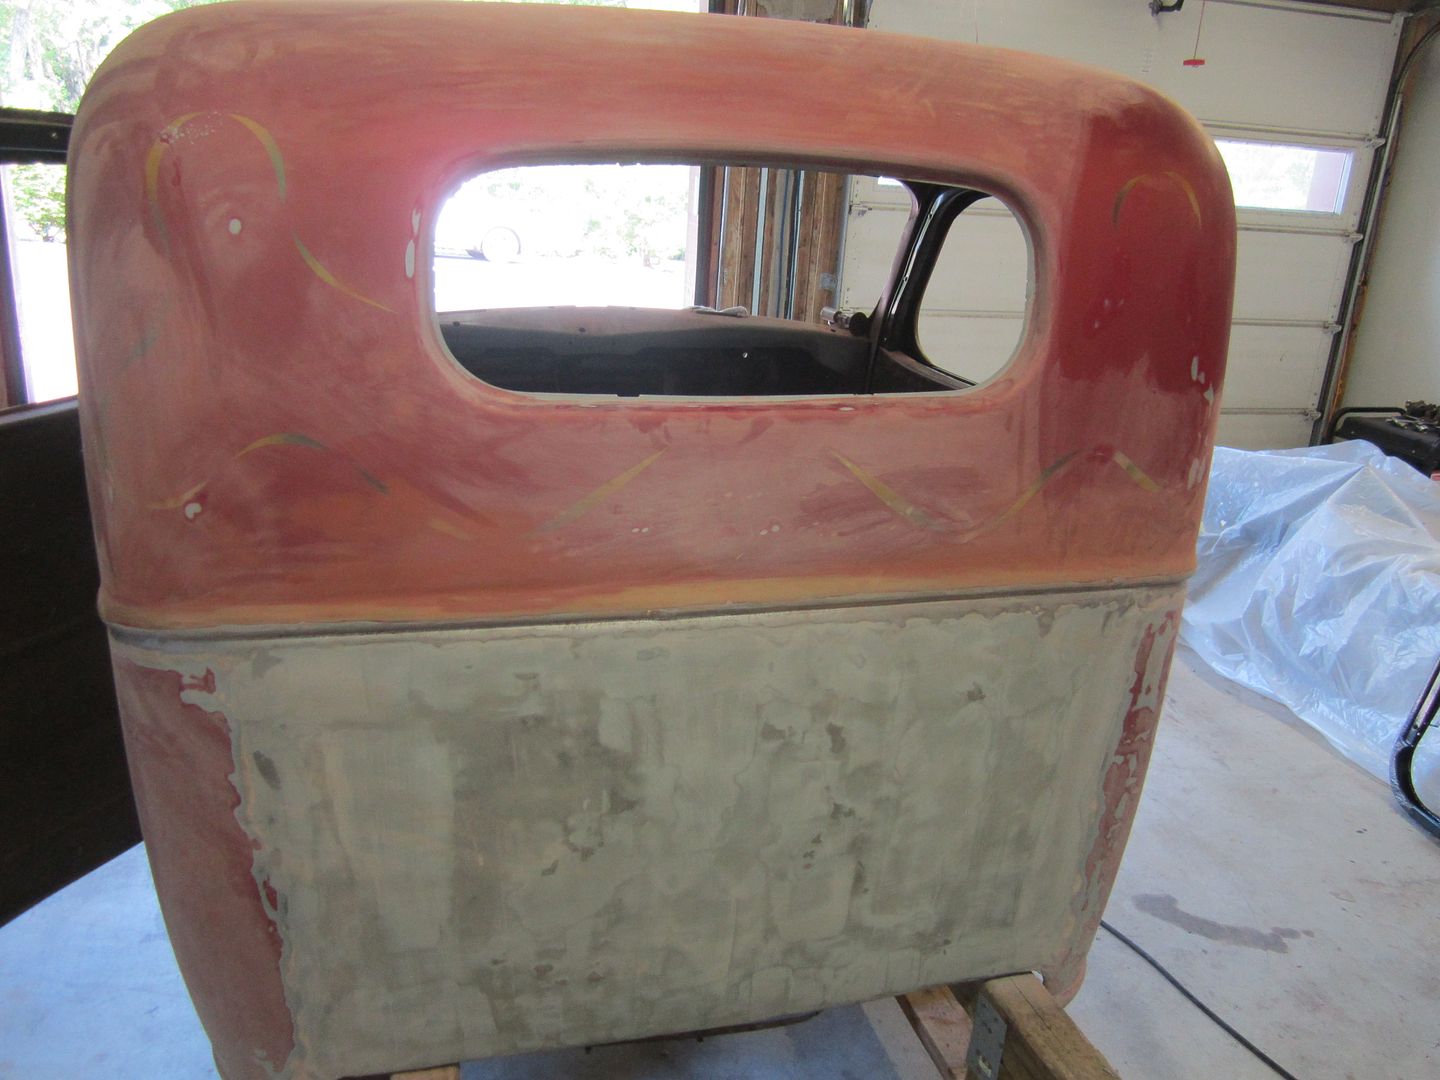 [/URL] [/URL]Upon closer review, we discovered what we thought was the paint bubbling up on the top of the cab, so we started to grind away only to find surface rust under the original coat of filler. Ground off the top of the cab and cleaned off all the rust. 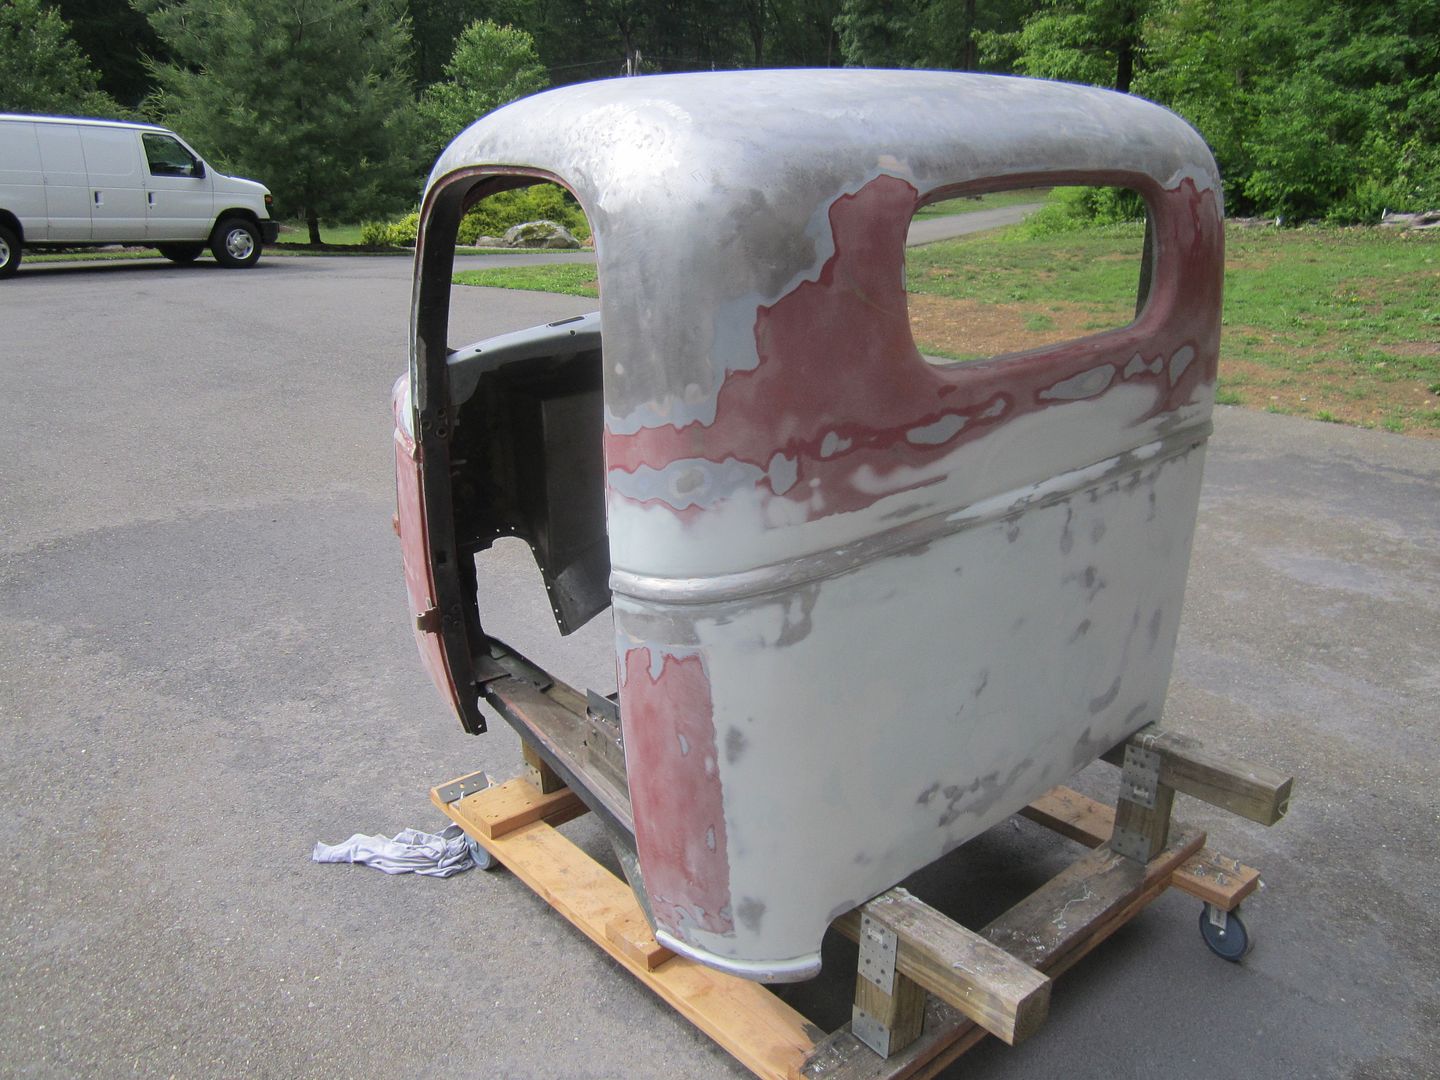 [/URL] [/URL]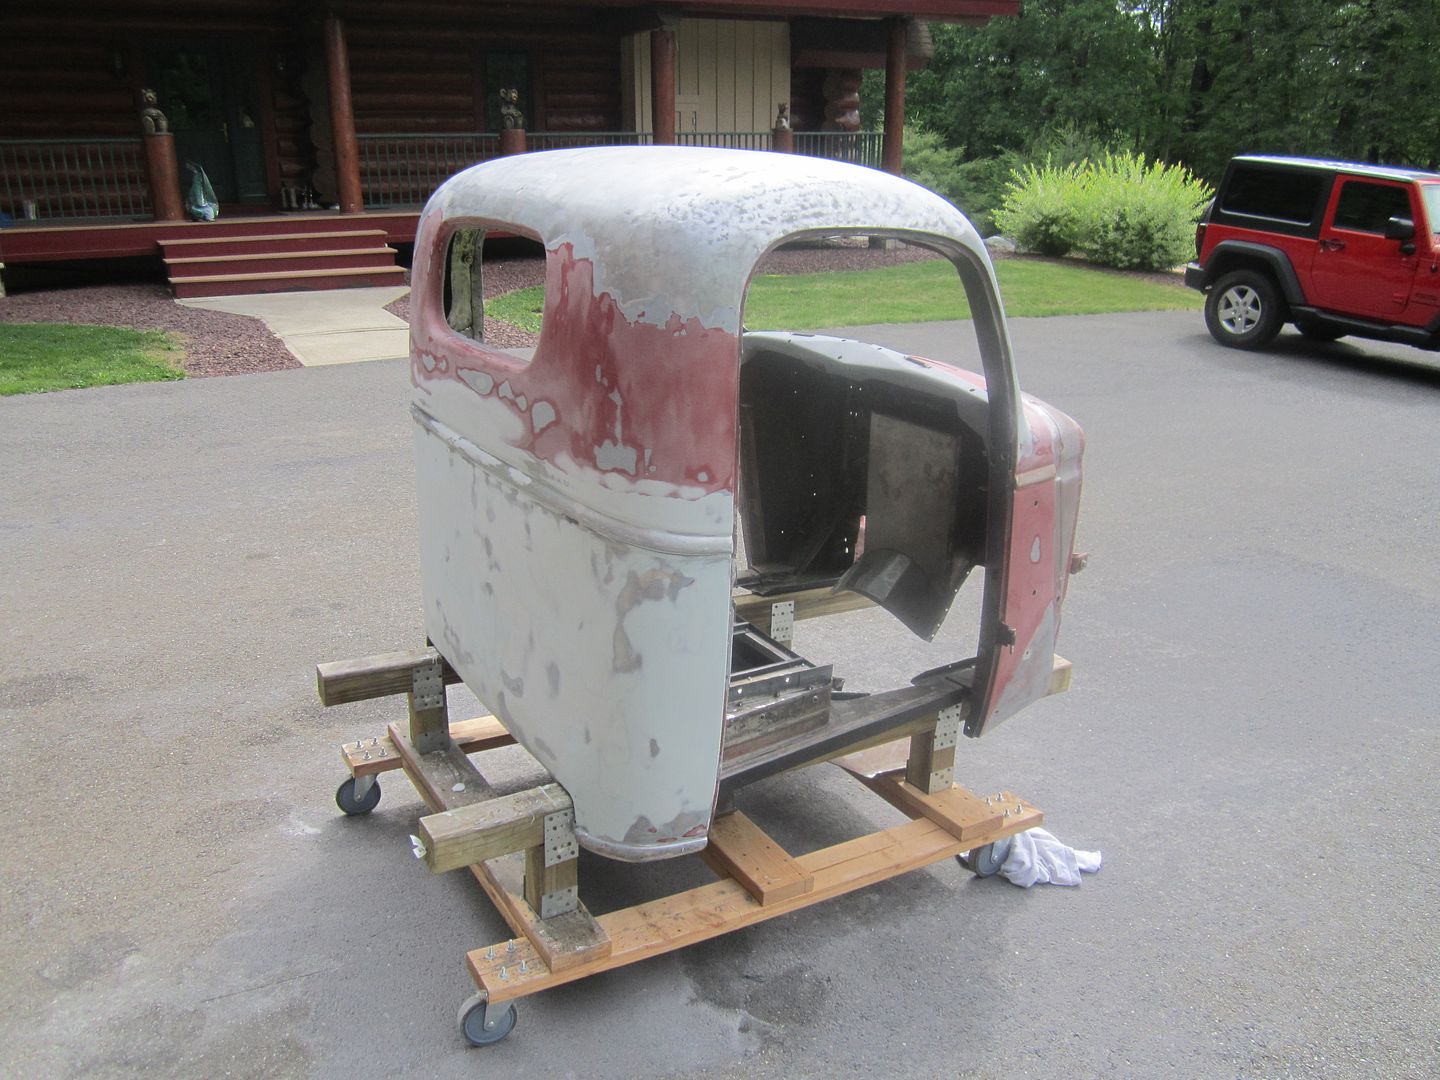 [/URL] [/URL]Re-worked the doors, I won't even begin to tell you what kind of a mess we found under the filler on these. 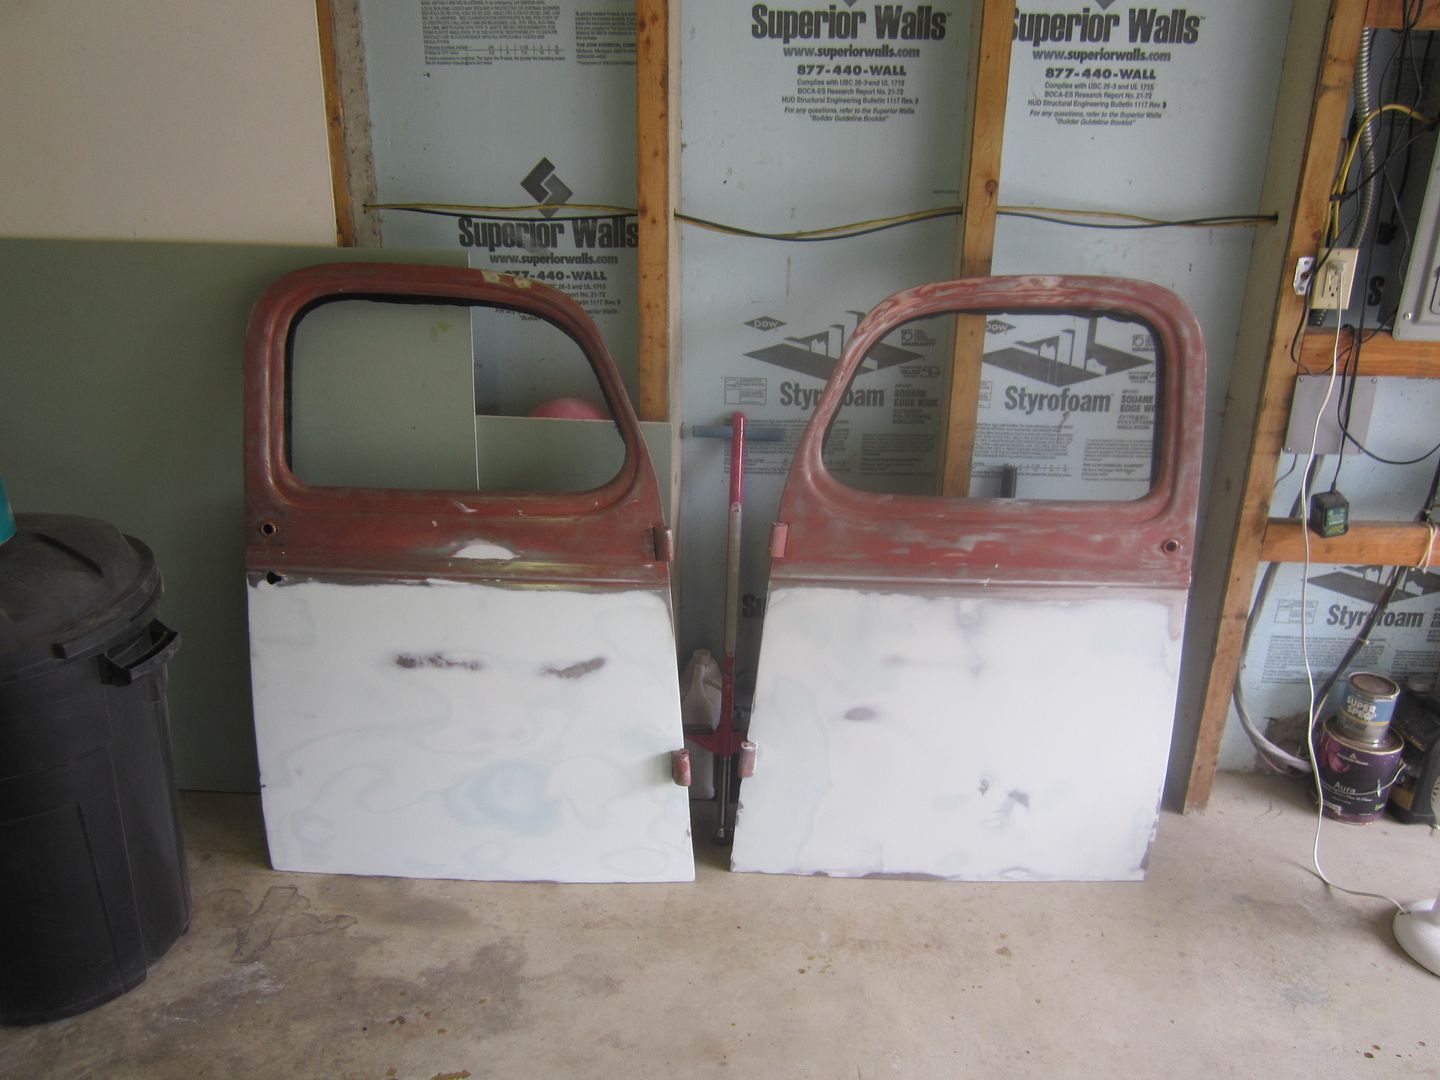 [/URL] [/URL]Sanded and sanded and sanded until me, the wife, my 2 daughters, and Mr. Magoo had dust in places we didn't know we had 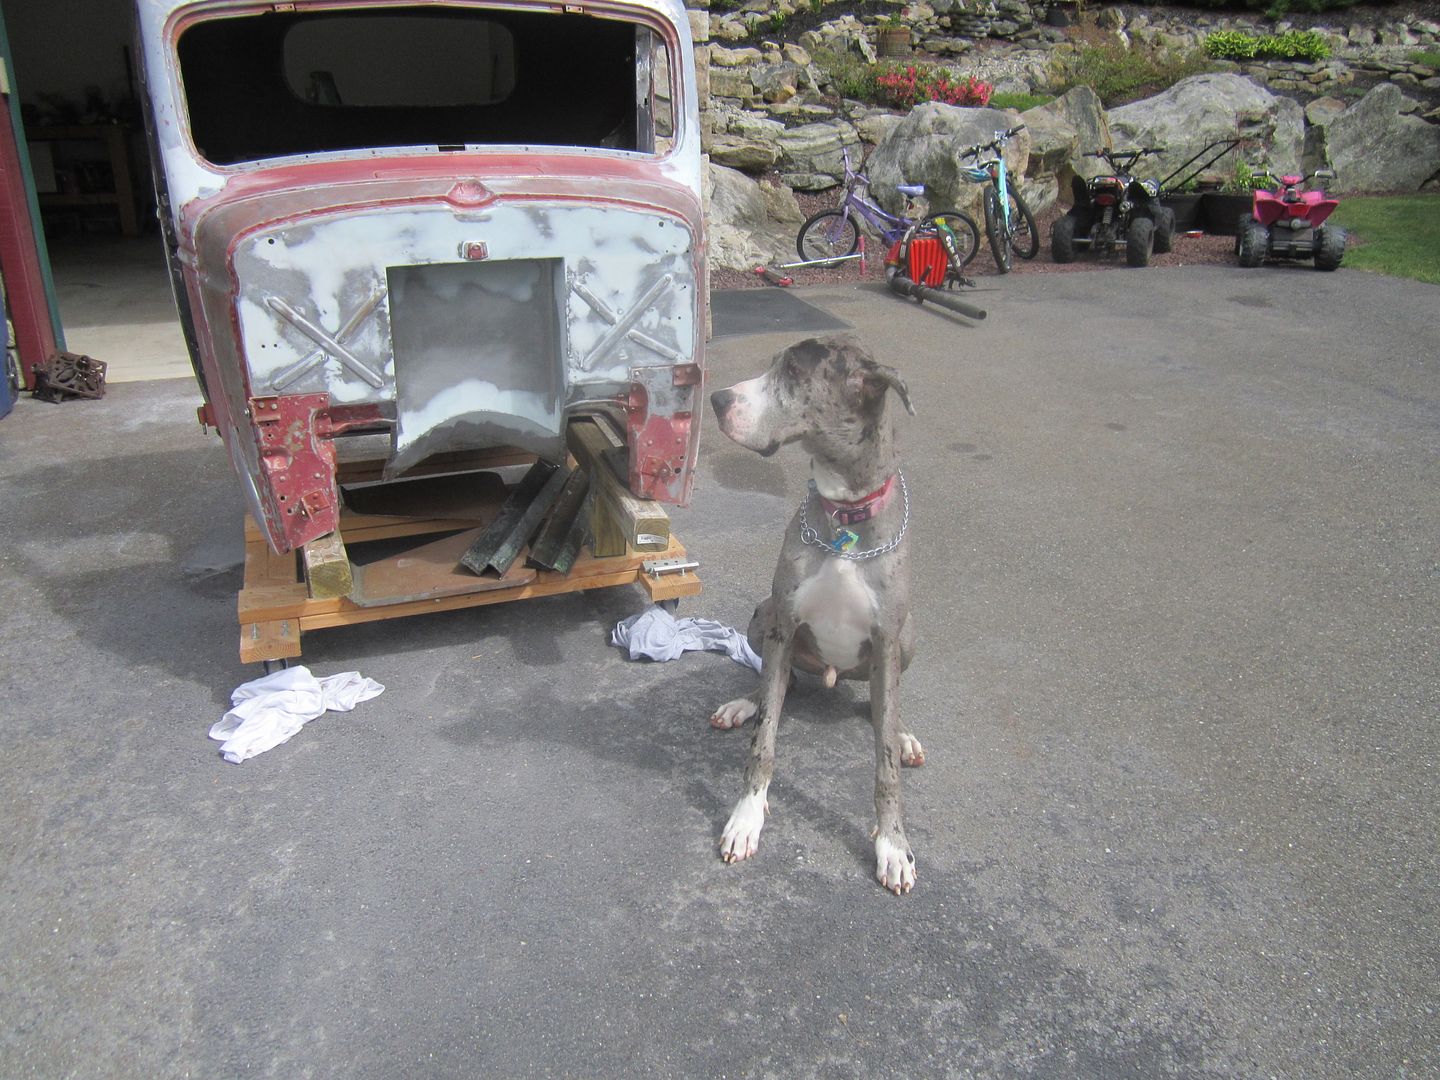 [/URL] [/URL] [/URL] [/URL]I have another day or so of sanding and cleaning up the cab and then it will be ready for primer. In the meantime, I am going to hop on my 4 wheeler and go on a beer run for me and Goo Be Doo  [/URL] [/URL]
|
|
|
|
|
06-05-2015, 06:08 PM
|
#15 |
|
Registered User
Join Date: Nov 2011
Location: Winnipeg, Manitoba
Posts: 164
|
Re: 46 pickemup in NJ "the Rebuild"
I have seen the one piece windshields on ebay for 1939-46 trucks before so I know that they exist. I was going to get one for my truck but I waited too long and they sold them out. I wish I could remember what the name of the company was.
|
|
|
|
|
06-06-2015, 05:22 PM
|
#16 | |
|
Registered User
Join Date: Dec 2010
Location: washington NJ
Posts: 766
|
Re: 46 pickemup in NJ "the Rebuild"
Quote:
|
|
|
|
|
|
06-06-2015, 05:22 PM
|
#17 | |
|
Registered User
Join Date: Dec 2010
Location: washington NJ
Posts: 766
|
Re: 46 pickemup in NJ "the Rebuild"
Quote:
http://www.belairautoparts.com/newdesign/33-48parts.htm
|
|
|
|
|
|
06-06-2015, 05:37 PM
|
#18 |
|
Registered User
Join Date: Nov 2011
Location: Winnipeg, Manitoba
Posts: 164
|
Re: 46 pickemup in NJ "the Rebuild"
Yeah, they aren't cheap! I thinks that's why I waited too long!! Gave me an excuse not to buy one

|
|
|
|
|
06-11-2015, 08:21 PM
|
#19 |
|
Registered User
Join Date: Dec 2010
Location: washington NJ
Posts: 766
|
Re: 46 pickemup in NJ "the Rebuild"
pretty self explanatory here......2k primer........
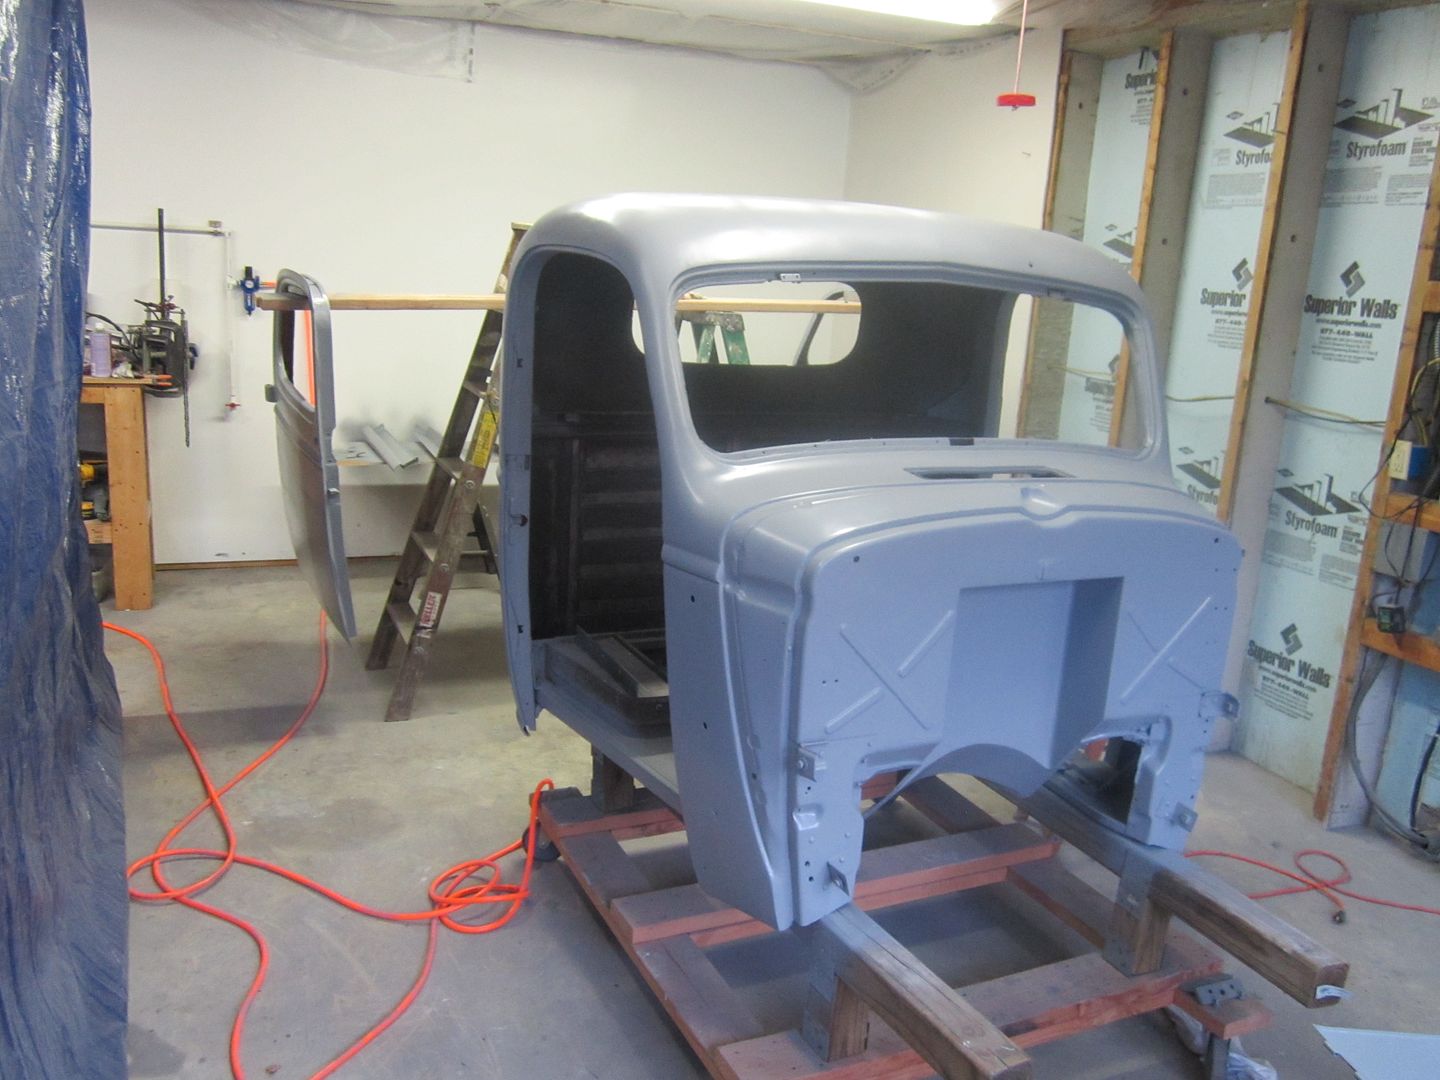 [/URL] [/URL]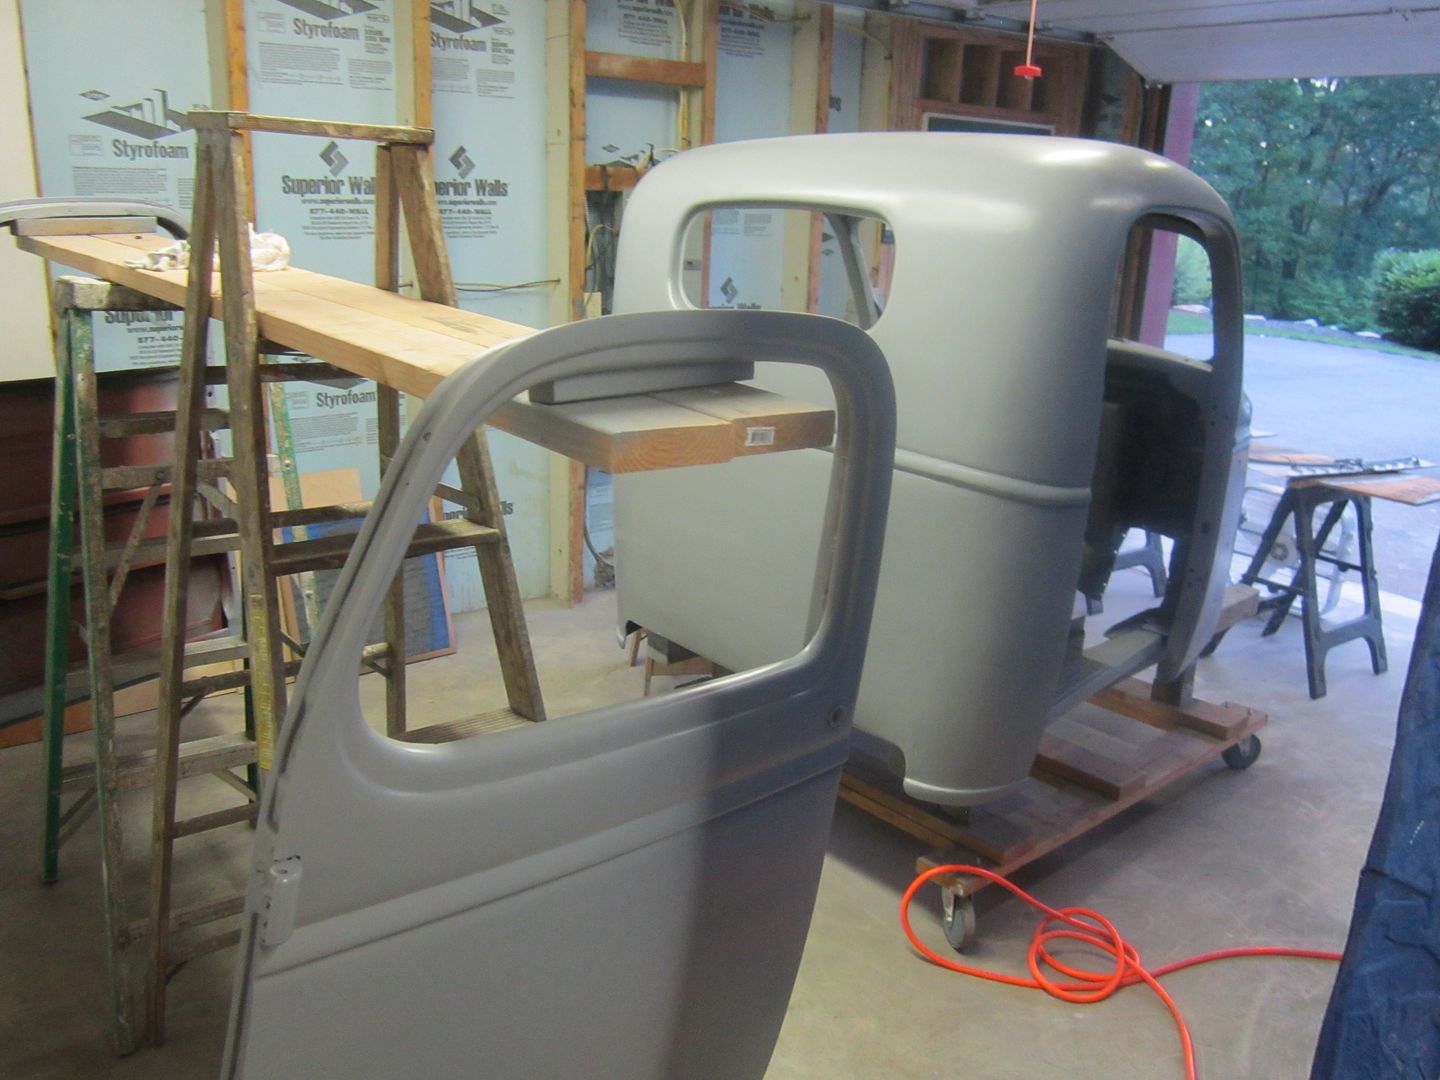 [/URL] [/URL] [/URL] [/URL]I think it turned out 1000% better then expected. Not perfect but far better then that 1/2 azzed band aid I had n the back of the cab. 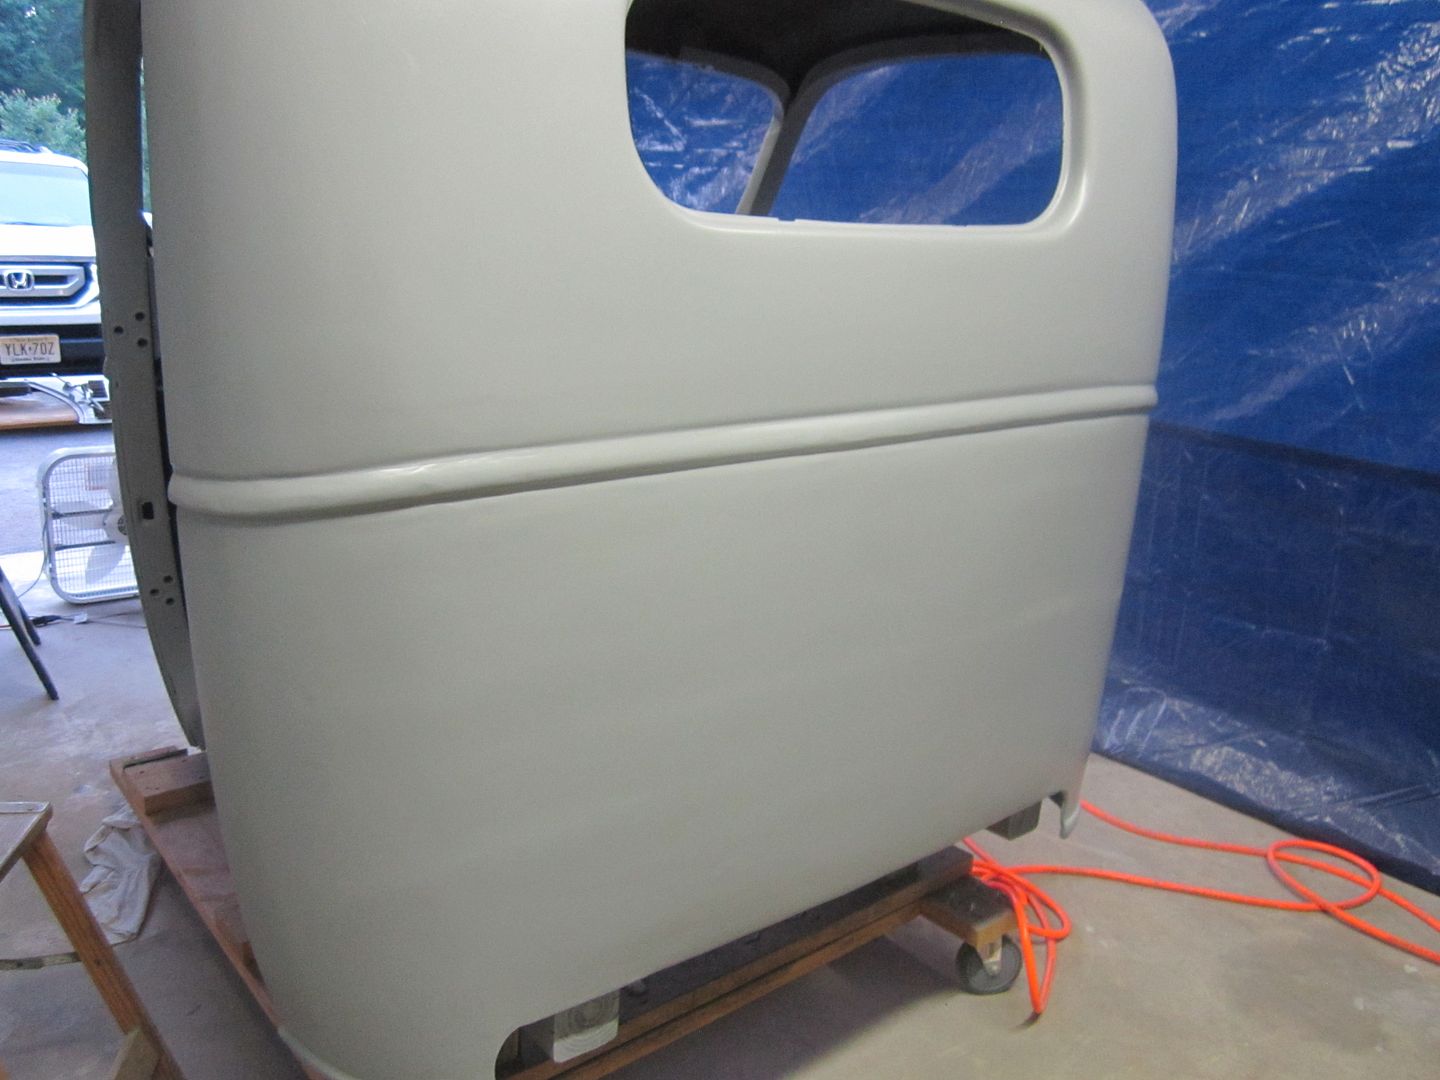 [/URL] [/URL]
|
|
|
|
|
06-11-2015, 09:24 PM
|
#20 |
|
Registered User
Join Date: May 2013
Location: Centerville,Ma.
Posts: 1,223
|
Re: 46 pickemup in NJ "the Rebuild"
Looks great ,nice work. Now what color are we going for?
|
|
|
|
|
06-12-2015, 12:49 AM
|
#21 |
|
SAVING ONE TRUCK AT A TIME
 Join Date: Feb 2010
Location: sherwood oregon
Posts: 1,141
|
Re: 46 pickemup in NJ "the Rebuild"
Looking good. Any colors picked yet?
__________________
53-suburban (99% done) 40-pick up (99.9% done) 12-cc lb dually D-max (dd) 61-crew cab D-max "PAY LESS FOR WHAT YOU NEED PAY MORE FOR WHAT YOU WANT" 53 BURBAN BARN FIND:http://67-72chevytrucks.com/vboard/s...d.php?t=404091 1940 PROJECT MOON SHINE:http://67-72chevytrucks.com/vboard/s...d.php?t=551088 1961 CREW MAX: http://67-72chevytrucks.com/vboard/s....php?p=6957999 |
|
|
|
|
06-12-2015, 05:34 PM
|
#22 | |
|
Registered User
Join Date: Dec 2010
Location: washington NJ
Posts: 766
|
Re: 46 pickemup in NJ "the Rebuild"
Quote:
|
|
|
|
|
|
06-12-2015, 05:38 PM
|
#23 |
|
Registered User
Join Date: Dec 2010
Location: washington NJ
Posts: 766
|
Re: 46 pickemup in NJ "the Rebuild"
this is what I am shooting
 [/URL] [/URL]
|
|
|
|
|
06-12-2015, 05:42 PM
|
#24 |
|
Registered User
Join Date: Feb 2012
Location: Warrington, PA
Posts: 26
|
That will look awesome.
Posted via Mobile Device |
|
|
|
|
06-12-2015, 05:43 PM
|
#25 | |
|
Registered User
Join Date: Feb 2012
Location: Warrington, PA
Posts: 26
|
Quote:
Posted via Mobile Device |
|
|
|
|
 |
| Bookmarks |
|
|


 Hybrid Mode
