
 |
|
|
#176 |
|
Registered User
Join Date: Feb 2010
Location: Lebanon, Ohio
Posts: 1,359
|
Re: Bob's Retirement Build - My '55 TF
Special thanks to Orrie G for providing the following two pics:
This gave me a great start toward solving my problem. I now know that the bracket in my picture doesn't go with my truck, and that I have a motor that is close to correct, if not exact. (I bought the motor from a friend of mine, and I think it was from a '56.) I compounded my problem by cutting out most of what Orrie identifies as the "factory support". I did that to make room for my center channel speakers. When I did that I thought the brace was just there for dash support, so I cut most of it out. I thought the captive nuts in it were to support the radio (which I am mounting in the headliner area). I didn't think about the wiper motor because the other two brackets were there, as shown in my picture. I mean, how many brackets do you need to mount a stinkin' motor? (Apparently one more than I have...) When I cut the support out I did leave one captive nut, so I can see where the motor needs to be located, left to right. Unfortunately, if I install the motor in its original position the arms will hit my speakers. I'll have to drop the motor down a little over inch, but that shouldn't be the end of the world. At worst I'll have to lengthen the arms a little bit. Thanks again, Orrie G!
__________________
Bob "It won't take long and it won't cost much." '55 3100 (383/700R4)--'55 Belair Sedan (350/4-speed)--'64 'Vette Conv. (327/4-speed)--'68 GTO Conv. (462/4-speed)--'69 Cutlass Conv. (350/TH350)--'06 'Vette Conv. (LS2/6-speed) Bob's Retirement Build - My 55 TF Bob's 700R4 Build (how-to) |
|
|

|
|
|
#177 |
|
Registered User
 Join Date: Jul 2012
Location: Baton Rouge, LA
Posts: 385
|
Re: Bob's Retirement Build - My '55 TF
Nice Work!!!
__________________
Ryan... 1972 C10 Stepside With 2014 Camaro 6.2L/6l80e drivetrain http://67-72chevytrucks.com/vboard/s...11#post5532411 |
|
|

|
|
|
#178 |
|
Registered User
Join Date: Feb 2010
Location: Lebanon, Ohio
Posts: 1,359
|
Re: Bob's Retirement Build - My '55 TF
Here are the details on the fix. Here's the riser, mounted to the wiper motor (or should I call it the "lowerer"?). Note that it has a through hole and a pin.
The riser bolts into the one factory threaded hole that remains, and the pin goes into the locating hole to keep the assembly from spinning. I tried to take pictures similar to Orrie G's, so here they are: When running, the passenger arm is closest to hitting, and misses the speaker by an 1/8". Now, back to the body work...
__________________
Bob "It won't take long and it won't cost much." '55 3100 (383/700R4)--'55 Belair Sedan (350/4-speed)--'64 'Vette Conv. (327/4-speed)--'68 GTO Conv. (462/4-speed)--'69 Cutlass Conv. (350/TH350)--'06 'Vette Conv. (LS2/6-speed) Bob's Retirement Build - My 55 TF Bob's 700R4 Build (how-to) |
|
|

|
|
|
#179 |
|
Registered User
Join Date: Dec 2013
Location: Purmerend, Netherlands
Posts: 1,657
|
Re: Bob's Retirement Build - My '55 TF
Nice fix!
__________________
Cheers!! Kees. 1959 Chevy Fleetside Longbed My build: http://67-72chevytrucks.com/vboard/s...d.php?t=643426 Kool Guyz CC Instagram: _King_Kustom_ |
|
|

|
|
|
#180 |
|
Registered User
Join Date: Aug 2007
Location: Corona, California
Posts: 7,998
|
Re: Bob's Retirement Build - My '55 TF
Came out nice.
Kim |
|
|

|
|
|
#181 |
|
Registered User
Join Date: Feb 2010
Location: Lebanon, Ohio
Posts: 1,359
|
Re: Bob's Retirement Build - My '55 TF
Thanks Kim & Rockin!
It's supposed to rain here this afternoon, so I can't clear the finished cars out of the garage to do bodywork on the truck. Dust storms lead to major cleanups. So off I go on another goat trail... For weeks (and maybe a few too many adult beverages) I've been thinking about how to fab the headliner and upper back panel. I've looked at commercial panels, polyfoam, lauan plywood -- the works. But being as cheap as I am, here's what I came up with. I decided I could smooth the underside of the roof with drywall mud to make a mold, then pour a fiberglass panel. First, I taped off all openings so that someday I'll be able to get the drywall mud back out: Then I put in a layer of 1-mil plastic film to keep the mud from sticking to the cab: As I was smearing the mud around, the plastic wanted to slide, but by holding it here and there I was able to get a fairly smooth first coat in the large center area with a 6" putty knife. I then used a 1" putty knife to get a start on smoothing outside of the center area: I've got the temperature up to 72 degrees, and hope to come out here tomorrow (or 2 weeks from now?) to find this dry and stable so I can put the next coat on. The good news is, the mud can be "sanded" with a wet cloth. Once the mold is dry and smooth I'll cover it with another layer of 1-mil plastic, then apply fiberglass cloth and resin. The guy at U.S. Composites said that two layers of 'glass should do it. Do any of you fiberglass gurus know if 1-mil plastic under the 'glass is enough to allow it to release from the mold? Before you ask: NO, I won't make one of these for anyone else. Also, I wish that every time I had the thought, "I sure am glad I'm not trying to make a living at this", I would run the other way!
__________________
Bob "It won't take long and it won't cost much." '55 3100 (383/700R4)--'55 Belair Sedan (350/4-speed)--'64 'Vette Conv. (327/4-speed)--'68 GTO Conv. (462/4-speed)--'69 Cutlass Conv. (350/TH350)--'06 'Vette Conv. (LS2/6-speed) Bob's Retirement Build - My 55 TF Bob's 700R4 Build (how-to) Last edited by DransportGarage; 04-09-2016 at 01:49 PM. |
|
|

|
|
|
#182 |
|
Registered User
Join Date: Dec 2013
Location: Purmerend, Netherlands
Posts: 1,657
|
Re: Bob's Retirement Build - My '55 TF
This is a nice idea!!
Looking forward to what you make of it  I've decided to go the cheap way with the headliner...
__________________
Cheers!! Kees. 1959 Chevy Fleetside Longbed My build: http://67-72chevytrucks.com/vboard/s...d.php?t=643426 Kool Guyz CC Instagram: _King_Kustom_ |
|
|

|
|
|
#183 | |
|
Registered User
Join Date: Jan 2012
Location: Motown
Posts: 7,680
|
Re: Bob's Retirement Build - My '55 TF
Quote:
most of my glass was done in place over cardboard with tape and paste wax or free form using a space frame and cloth the plastic may pucker (look at 3rd pic down) and/or dissolve when the resin is applied the easiest way is to cover everything with masking tape, smooth the tape as well as you can then use pva mold release (expensive and only available in specialty stores) or do and ogre and just use paste wax, use a couple coats of wax and the pattern should release if you can get an edge to come up, shoot some compressed air under the pattern to finish the job you'll need 4 or 5 layers of 3/4oz mat to keep an area that large from warping or breaking i used many rolls of waxed tape on truk when doing the glass 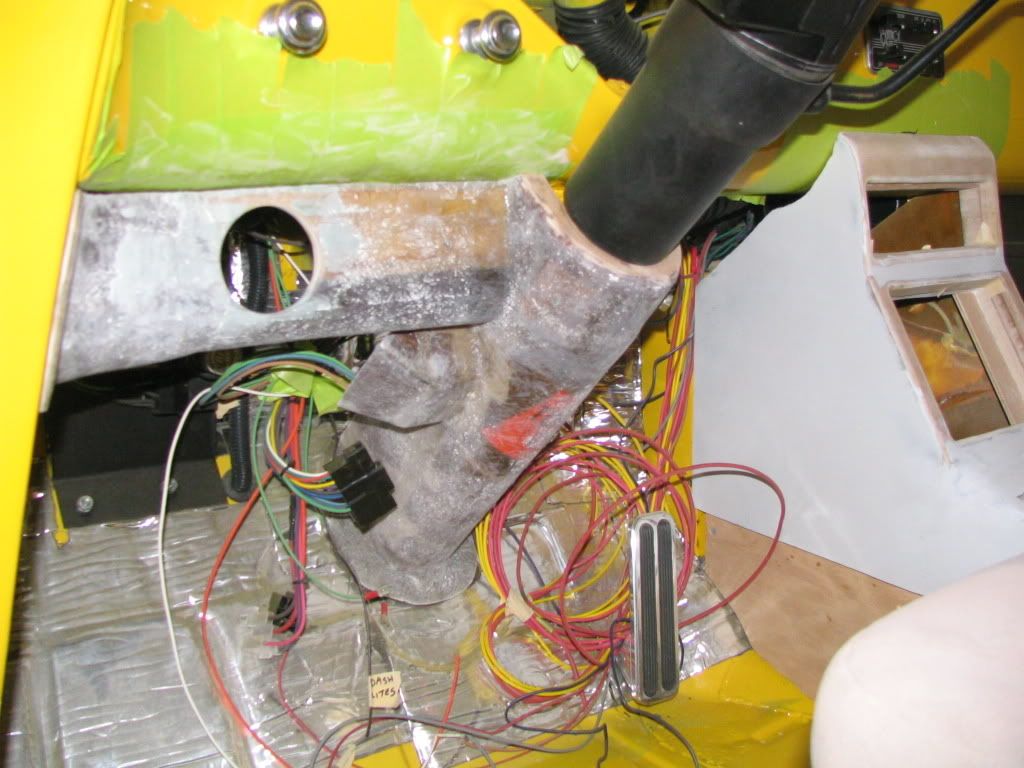 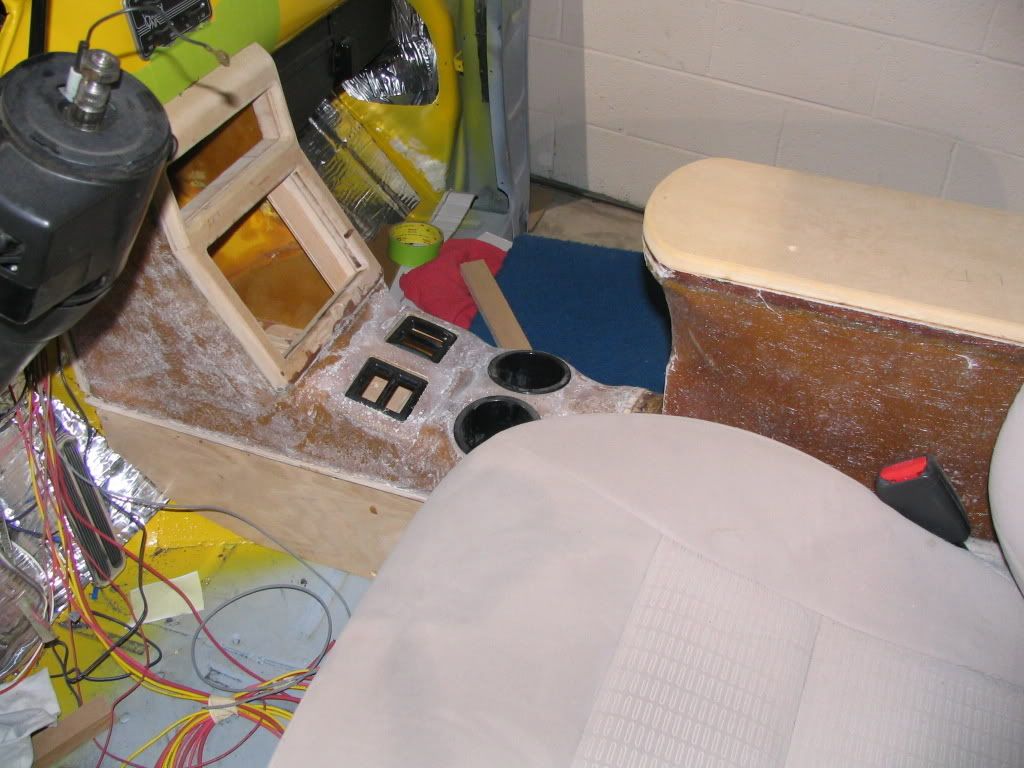 when i made the tonneau cover i tried taping waxed foil to a wooden form this is what i ended up with, it took a lot to make it paint ready 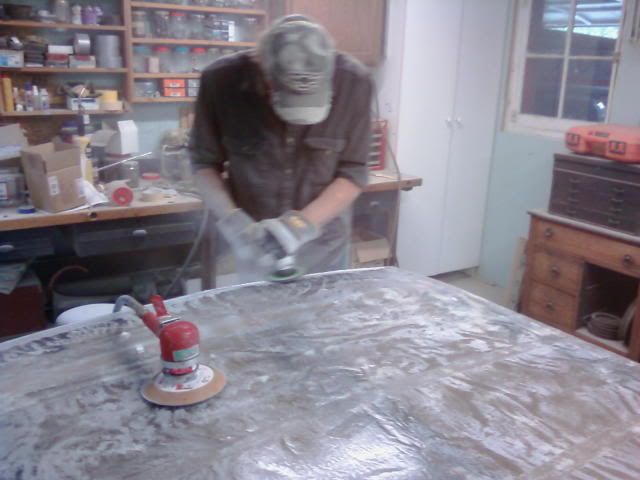 here's the cardboard and waxed tape buck i made for the radiator cover 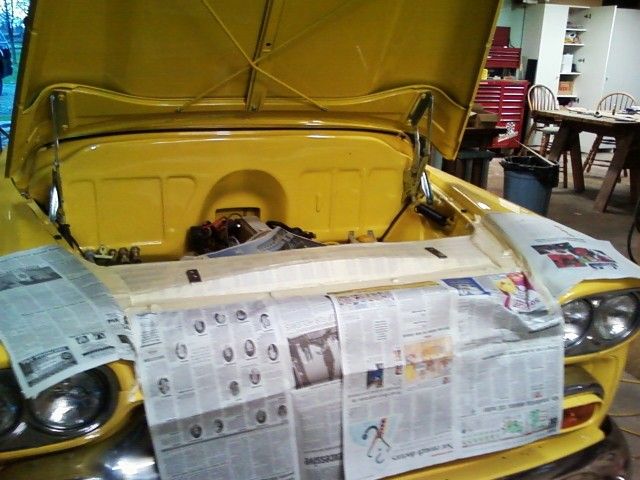
__________________
cool, an ogre smiley  Ogre's 58 Truk build Ogre's 58 Truk buildhow to put your truck year and build thread into your signature shop air compressor timer |
|
|
|

|
|
|
#184 | ||||
|
Registered User
Join Date: Feb 2010
Location: Lebanon, Ohio
Posts: 1,359
|
Re: Bob's Retirement Build - My '55 TF
Thanks much for the response, Ogre.
Quote:
Quote:
Quote:
Quote:
I've used your free-form technique to make my console and dash skirts. Sure do miss the Fiberglass Forum that went belly-up a couple of years ago, but you filled me in very nicely!
__________________
Bob "It won't take long and it won't cost much." '55 3100 (383/700R4)--'55 Belair Sedan (350/4-speed)--'64 'Vette Conv. (327/4-speed)--'68 GTO Conv. (462/4-speed)--'69 Cutlass Conv. (350/TH350)--'06 'Vette Conv. (LS2/6-speed) Bob's Retirement Build - My 55 TF Bob's 700R4 Build (how-to) Last edited by DransportGarage; 04-10-2016 at 04:09 AM. |
||||
|
|

|
|
|
#185 |
|
Registered User
Join Date: Jan 2012
Location: Motown
Posts: 7,680
|
Re: Bob's Retirement Build - My '55 TF
with the convex shape of the roof don't try big sheets of cloth/mat or you'll get wrinkles
i used 6''x6'' pieces for the tonneau cover, down to 2''x2'' pieces for some of the console parts 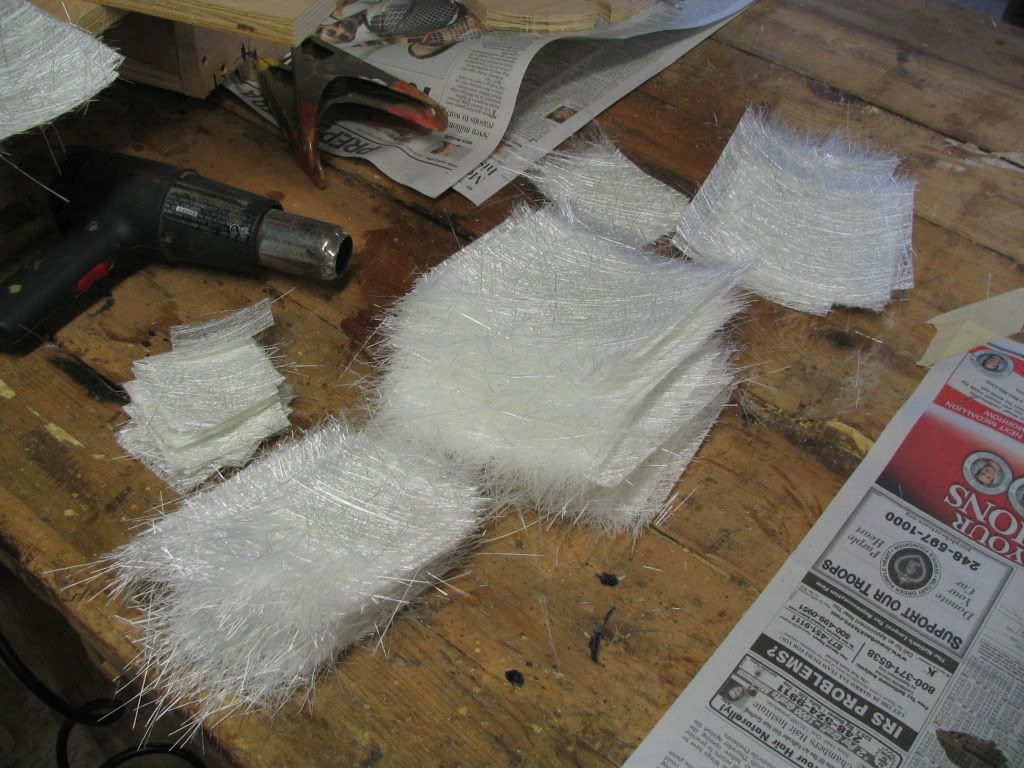
__________________
cool, an ogre smiley  Ogre's 58 Truk build Ogre's 58 Truk buildhow to put your truck year and build thread into your signature shop air compressor timer |
|
|

|
|
|
#186 |
|
Registered User
Join Date: Jan 2012
Location: Motown
Posts: 7,680
|
Re: Bob's Retirement Build - My '55 TF
if you get tired of counting hardener drops...
i typically made resin batches in 4 to 8 oz batches, i bought mixing cups on ebay and this $6 scale was used to weigh the resin to add hardener at 1% to 2% by weight for 300 grams of resin i'd add 3 grams of hardener, instead of counting out 60 drops  i'd adjust the ratio based on how fast it kicked or the temp in my shop that day 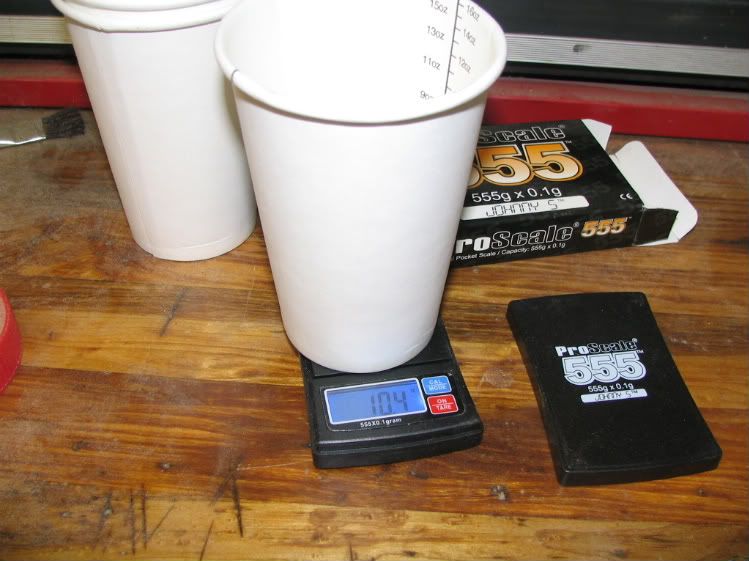
__________________
cool, an ogre smiley  Ogre's 58 Truk build Ogre's 58 Truk buildhow to put your truck year and build thread into your signature shop air compressor timer |
|
|

|
|
|
#187 |
|
Registered User
Join Date: Feb 2010
Location: Lebanon, Ohio
Posts: 1,359
|
Re: Bob's Retirement Build - My '55 TF
Ogre, Thanks for the tip on doing the corners. At a minimum I'll slit the cloth a time or two. If it doesn't lay down when dry I'll try the cut & paste. As you know, the serrated roller doesn't go into the corners well either.
...and on quick-mixing the MEK & resin, I have a scale exactly like that -- and, I didn't think of it on my own.
__________________
Bob "It won't take long and it won't cost much." '55 3100 (383/700R4)--'55 Belair Sedan (350/4-speed)--'64 'Vette Conv. (327/4-speed)--'68 GTO Conv. (462/4-speed)--'69 Cutlass Conv. (350/TH350)--'06 'Vette Conv. (LS2/6-speed) Bob's Retirement Build - My 55 TF Bob's 700R4 Build (how-to) |
|
|

|
|
|
#188 |
|
Registered User
Join Date: Feb 2010
Location: Lebanon, Ohio
Posts: 1,359
|
Re: Bob's Retirement Build - My '55 TF
And now for the day's activities: By the time I got back from the swap meet (which sucked, BTW) the garage had been at 72 degrees for 24 hours and the drywall mud did NOT come anywhere near drying. I believe that, when used on drywall, the gypsum board sucks the moisture out of the joint compound. In my case, the plastic held the moisture in (and a bare roof would have done the same thing). I tried a high-powered hair dryer and although it seemed to help a little bit, this was going to take days.
Using the 1-mil plastic was a fail in general -- although I would have made it work -- It slid around too much and would have caused cracking of the mud at the edges. Take 2: I ripped out what I had done, re-cleaned the roof underside, then covered the inside of the roof with duct tape: The reason I used the duct tape is that I bought 3 large rolls at the swap meet for $5 (like $1.66 each). I know it'll be fine under the mud, but I'll be doing a test tomorrow to see how happy it is with resin poured on it. I may have to switch to masking tape. (Have you had any experience whith duct tape Ogre?) What I've learned since yesterday is that there's this mud called "setting-type joint compound" that has as one of its ingredients plaster of Paris. It dries chemically rather than by air drying. Tomorrow I'll smear some of that schmutz around and see if I can complete the mold. My Lowes has 3 drying speeds: 20, 45 and 90 minute. I was lucky enough to run into a drywaller at the store and he claims that it's a lot faster than that, so I got the 90 minute. Tomorrow should be interesting...
__________________
Bob "It won't take long and it won't cost much." '55 3100 (383/700R4)--'55 Belair Sedan (350/4-speed)--'64 'Vette Conv. (327/4-speed)--'68 GTO Conv. (462/4-speed)--'69 Cutlass Conv. (350/TH350)--'06 'Vette Conv. (LS2/6-speed) Bob's Retirement Build - My 55 TF Bob's 700R4 Build (how-to) |
|
|

|
|
|
#189 | |
|
Registered User
Join Date: Jan 2012
Location: Motown
Posts: 7,680
|
Re: Bob's Retirement Build - My '55 TF
i'm still not sure what your trying to accomplish with the drywall/plaster
if you do get the plaster poured and pull the plug; what then? if you fiberglass over the plaster plug the fiberglass will be too big to fit in the roof i have used plaster of paris to make a mold, yes it does dry fast and works well it is very brittle, even on small pieces it helps to embed some reinforcement in the plaster some wire mesh and a few handles will allow you to pull the plaster off using duct tape vs masking: masking tape comes off easier sometimes even with proper waxing the tape comes off with the glass you will probably destroy the glass before pulling the duct tape off Quote:
that was enough it took me longer to clean than the job, plus it pulled up the glass i buy 2'' chip brushes from harbor fright, i cut half the bristle length off and stipple with these
__________________
cool, an ogre smiley  Ogre's 58 Truk build Ogre's 58 Truk buildhow to put your truck year and build thread into your signature shop air compressor timer |
|
|
|

|
|
|
#190 | ||||
|
Registered User
Join Date: Feb 2010
Location: Lebanon, Ohio
Posts: 1,359
|
Re: Bob's Retirement Build - My '55 TF
Quote:
1) tape over the mold. 2) apply 'glass and build to thickness. 3) take 'glass panel out, then rip out the plaster and the rest of the tape. You're right that there will be a gap between the inside of the roof and the new panel. I plan to install little "top hats" (standoffs) to the roof after the plaster is removed, and hold the new panel to them using velcro. I may use j-mold on the outside of the new panel, or not, depending on how well the velcro works. Of course, the new panel will be held in bu the sunvisor brackets and dome light to prevent catastrophic failure during the driving experience! The use of the standoffs will position the top at exactly the same location in which it was formed (he said). Here's a picture of the progress. I'm in the process of erasing the black guide coat. It took about 5 minutes to sand the white portion shown in the pic. Note the piece of garden hose. It's kind of tricky block sanding a concave panel, so I'm using the piece of hose and 220 grit wet-or-dry. For rough sanding I'm using an 80-grit drywall "sponge. No dust! It appears to have worked. I've just applied the final (3rd) coat and will wet sand it in about 2 hours. I'll let it dry overnight, then tape it and 'glass it tomorrow. Quote:
Quote:
Quote:
I will use the HF chip brush, especially in/near the corners. Cutting it off to stiffen it is a great idea! Thanks again for all the help, Ogre! Your tips have contributed a lot to how I did other 'glass parts on the truck.
__________________
Bob "It won't take long and it won't cost much." '55 3100 (383/700R4)--'55 Belair Sedan (350/4-speed)--'64 'Vette Conv. (327/4-speed)--'68 GTO Conv. (462/4-speed)--'69 Cutlass Conv. (350/TH350)--'06 'Vette Conv. (LS2/6-speed) Bob's Retirement Build - My 55 TF Bob's 700R4 Build (how-to) Last edited by DransportGarage; 04-12-2016 at 04:38 PM. |
||||
|
|

|
|
|
#191 |
|
Registered User
Join Date: Jan 2012
Location: Motown
Posts: 7,680
|
Re: Bob's Retirement Build - My '55 TF
now it makes sense :doh: i was lost on the plaster/filler piece
the reinforcement would not have worked in your application, you want it to come out in pieces i'm interested in seeing the results (now that i know what your doing)  one comment on the velcro: it's quite thick and wiggles side to side a bit maybe 2 sided tape would work better, install once and permanent i use velcro to hold the battery cover on behind the drivers seat, it is marginal but better than nothing  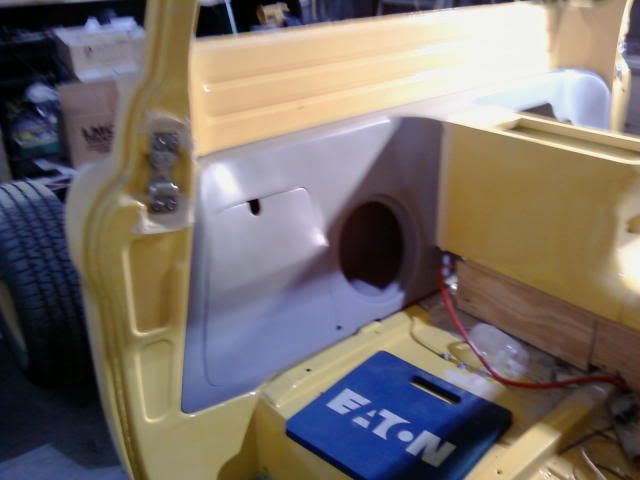
__________________
cool, an ogre smiley  Ogre's 58 Truk build Ogre's 58 Truk buildhow to put your truck year and build thread into your signature shop air compressor timer |
|
|

|
|
|
#192 | |
|
Registered User
Join Date: Feb 2010
Location: Lebanon, Ohio
Posts: 1,359
|
Re: Bob's Retirement Build - My '55 TF
At least one of us knows what I'm doing.
 Quote:
The mold is complete, but not without a few problems. The setting joint compound was ready to wet sand with 220 grit paper and an 80-grit sponge block after about two hours. It cut much quicker than body filler but not as quickly as regular joint compound. One good thing is that it doesn't "melt" when you wipe it off with a wet rag like regular joint compound does. On the downside, it doesn't feather well at the edge either, but who cares? It took three coats to get it to the desired form, a lot like working with body filler. I let it sit overnight at 72 degrees. When I came out in the morning the edges and thin areas were a lighter color than the thicker parts -- the mud had absorbed water. After about 20 minutes with the heat gun all areas were the lighter color -- but the tape wouldn't stick AT ALL. DESPAIR. Then I got the idea of using a flat latex paint over the mud. I painted a test patch and let it sit for four hours. The tape would sort of stick, but when pulled off it took the paint with it. I decided that it stuck well enough, and that it would work if I didn't lift the tape. I "dry-brushed" a very light coat of the flat paint over the entire area and let it sit overnight. The thinner coat and additional drying time helped a lot. Here's a picture with a little over half of the tape applied: I have a couple of small areas (2" x 2") where the paint has lifted, but I don't think it will be a problem. The weight of the resin will hold it down. When I put the tape down near the back edge I used a putty knife to press the tape into the seam between the sheet metal parts: This will give me a natural cut line when I trim the panel. I also cut two full-size pieces of 'glass cloth (not mat) tonight, and slit the corners. Tomorrow I'll put paste wax on the tape and apply 'glass and cloth. If you listen closely you'll hear the cursing... That's it for today
__________________
Bob "It won't take long and it won't cost much." '55 3100 (383/700R4)--'55 Belair Sedan (350/4-speed)--'64 'Vette Conv. (327/4-speed)--'68 GTO Conv. (462/4-speed)--'69 Cutlass Conv. (350/TH350)--'06 'Vette Conv. (LS2/6-speed) Bob's Retirement Build - My 55 TF Bob's 700R4 Build (how-to) Last edited by DransportGarage; 04-14-2016 at 11:45 PM. |
|
|
|

|
|
|
#193 |
|
Registered User
Join Date: Jan 2012
Location: Motown
Posts: 7,680
|
Re: Bob's Retirement Build - My '55 TF
did you get a spare roof or is your cab upside down?
__________________
cool, an ogre smiley  Ogre's 58 Truk build Ogre's 58 Truk buildhow to put your truck year and build thread into your signature shop air compressor timer |
|
|

|
|
|
#194 |
|
Registered User
Join Date: Feb 2010
Location: Lebanon, Ohio
Posts: 1,359
|
Re: Bob's Retirement Build - My '55 TF
My cab is upside down -- on the rotisserie.
Today was an OK day, I suppose. I placed three layers of 10-ounce glass cloth, making the headliner. I don't recommend using duct tape because the tape reacts with the resin, resulting in a "crinkle finish": The good news is, the crinkle is underneath the resin for the most part. The bad news is, those 2" x 2" patches where the paint lifted, and some other areas, resulted in high spots in the finished surface. I ground them reasonably flat between the 2nd and 3rd layers... ...so I have a manageable final product: some refinishing required. I don't have a picture with the third layer applied, but it looks like the first picture in this post, only flatter. The whole mess is taking its time drying, but I hope to trim it tomorrow, then remove it and figure out what to do next. I'll be doing a little glass work on the side toward the roof just to be sure there are no weak spots, then doing a little body work on the "business side that will accept the Ultraleather.
__________________
Bob "It won't take long and it won't cost much." '55 3100 (383/700R4)--'55 Belair Sedan (350/4-speed)--'64 'Vette Conv. (327/4-speed)--'68 GTO Conv. (462/4-speed)--'69 Cutlass Conv. (350/TH350)--'06 'Vette Conv. (LS2/6-speed) Bob's Retirement Build - My 55 TF Bob's 700R4 Build (how-to) Last edited by DransportGarage; 04-15-2016 at 07:25 PM. |
|
|

|
|
|
#195 |
|
Registered User
Join Date: Jan 2012
Location: Motown
Posts: 7,680
|
Re: Bob's Retirement Build - My '55 TF
once the plug is pulled you can use the gap in between the roof skins to add some reinforcing ribs
i've seen rope hot glued down with some fiberglass over it, it will add a lot of strength to the panel i did something similar with plywood on my tonneau cover i laid the wood over the panel and fiberglassed over it 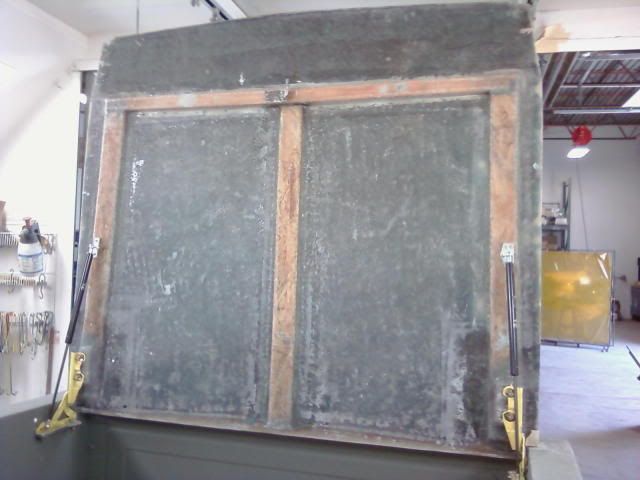
__________________
cool, an ogre smiley  Ogre's 58 Truk build Ogre's 58 Truk buildhow to put your truck year and build thread into your signature shop air compressor timer |
|
|

|
|
|
#196 |
|
Registered User
Join Date: Feb 2010
Location: Lebanon, Ohio
Posts: 1,359
|
Re: Bob's Retirement Build - My '55 TF
I'm hoping that, with appropriately-placed velcro, I won't need reinforcement. The domed shape, and the use of three layers of 10-oz. cloth really makes this thing rigid. That said, I do have a little room between the roof and the panel, so I could use the "rope trick" right where the inner roof used to accept the rubber gasket if need be. I really am surprised, though, at how little room there is between the roof and the panel.
__________________
Bob "It won't take long and it won't cost much." '55 3100 (383/700R4)--'55 Belair Sedan (350/4-speed)--'64 'Vette Conv. (327/4-speed)--'68 GTO Conv. (462/4-speed)--'69 Cutlass Conv. (350/TH350)--'06 'Vette Conv. (LS2/6-speed) Bob's Retirement Build - My 55 TF Bob's 700R4 Build (how-to) |
|
|

|
|
|
#197 |
|
Registered User
Join Date: Feb 2010
Location: Lebanon, Ohio
Posts: 1,359
|
Re: Bob's Retirement Build - My '55 TF
Here's the molded product:
...the mess underneath: ...and the panel in place after some rough trimming: The panel released nicely and the mess wasn't nearly as bad as it looks. However, DON'T USE DUCT TAPE. Use masking tape. The duct tape leaves a gooey residue after it reacts with the resin. Notice also that my "roof console" that holds my radio, equalizer and DVD player is now welded in place, and the headliner panel is now notched to accommodate it. ...and here's an "Indian trick" for those working with fiberglass: In order to grind the edge of the panel flush with the door opening I layed 2 layers of masking tape next to the panel, one on top of the other. Then I ground the edge down until the 36-grit 3" sanding disc just barely removed the top layer of tape. (As you look at the picture below, realize that the cab is upside down, and that you are looking down at the top of the door opening and the edge of the panel): If you've never done this you will be amazed at how accurately this will allow you to cut the edge of the glass without hurting the adjacent area (in this case, the door opening). This trick also comes in handy when you are making a fiberglass repair. Just surround the area to be repaired with tape, then put a second layer of tape directly over the first. Mix up the resin, then add 'glass (mat or cloth) and resin to the area. Let dry. Then grind down the repair until you just tick the top layer of tape, as in the picture above. Remove the tape, block sand the last 5 thousandths of the repair and feather. You'll be ready for high-solids primer. So, I had my edge even with the door opening, but I really want to be 3/8" below the edge (or, because this is a roof, above the edge). I made this little fixture to draw a cut line that will help me take off the additional 3/8". I just rested the dowel against the edge of the panel and ran it around the perimeter, allowing the Sharpie to draw the cut line.: Once the panel is upholstered this will give me about a 1/4" reveal of paint around the headliner. Next I'll be adding a skim coat of filler to flatten the panel and get ready for upholstery.
__________________
Bob "It won't take long and it won't cost much." '55 3100 (383/700R4)--'55 Belair Sedan (350/4-speed)--'64 'Vette Conv. (327/4-speed)--'68 GTO Conv. (462/4-speed)--'69 Cutlass Conv. (350/TH350)--'06 'Vette Conv. (LS2/6-speed) Bob's Retirement Build - My 55 TF Bob's 700R4 Build (how-to) Last edited by DransportGarage; 04-16-2016 at 10:07 PM. |
|
|

|
|
|
#198 |
|
Registered User
Join Date: Jan 2012
Location: Motown
Posts: 7,680
|
Re: Bob's Retirement Build - My '55 TF
looks good
 masking tape will leave a little residue and it comes off easily
__________________
cool, an ogre smiley  Ogre's 58 Truk build Ogre's 58 Truk buildhow to put your truck year and build thread into your signature shop air compressor timer |
|
|

|
|
|
#199 | |
|
Registered User
Join Date: Feb 2010
Location: Lebanon, Ohio
Posts: 1,359
|
Re: Bob's Retirement Build - My '55 TF
Quote:
The skim coat is on the panel. I'll be taking it to my upholstery guy for inspection, to be sure it's thick enough and flat enough to suit him, maybe Thursday. Today, however, is honey-do. Tomorrow I volunteer at EnterTRAINment Junction to play with trains (Google it!), and my hi-power rifle league convenes in the evening. Retirement is highly underrated!
__________________
Bob "It won't take long and it won't cost much." '55 3100 (383/700R4)--'55 Belair Sedan (350/4-speed)--'64 'Vette Conv. (327/4-speed)--'68 GTO Conv. (462/4-speed)--'69 Cutlass Conv. (350/TH350)--'06 'Vette Conv. (LS2/6-speed) Bob's Retirement Build - My 55 TF Bob's 700R4 Build (how-to) |
|
|
|

|
|
|
#200 |
|
Registered User
Join Date: Feb 2010
Location: Lebanon, Ohio
Posts: 1,359
|
Re: Bob's Retirement Build - My '55 TF
The rough bodywork on the firewall - and essentially the entire cab - is complete. With that done I was able to pull the cab off of the rotisserie and roll it onto its back.
Today I poured the headliner rear panel. Here it is with just the tape on the inside of the cab (cab on its back): ...and here's the 'glass & resin: This was a lot easier than the headliner itself since (unlike the headliner) the net shape of the rear panel exactly matched the rear of the truck. I did 4 layers of 10 oz. cloth. I'll let this sit overnight, then pull it in the morning and trim it.
__________________
Bob "It won't take long and it won't cost much." '55 3100 (383/700R4)--'55 Belair Sedan (350/4-speed)--'64 'Vette Conv. (327/4-speed)--'68 GTO Conv. (462/4-speed)--'69 Cutlass Conv. (350/TH350)--'06 'Vette Conv. (LS2/6-speed) Bob's Retirement Build - My 55 TF Bob's 700R4 Build (how-to) |
|
|

|
 |
| Bookmarks |
|
|