
 |
|
|
#176 | |
|
Registered User
Join Date: Aug 2012
Location: Salem Mo
Posts: 652
|
Re: 1957 Chevy truck re-rebuild
Quote:
 One place I can not block sand is where the gills are. Thinking back, I had to weld in a filler piece for where the old turn signals were. Now I not only have to smooth the weld of the turn signal fill but also the gill welds. This is mainly done by feel since no block can fit into this area. A little extra time is involved, but they've blended in nicely. Just joking, but, for some reason the first picture looks like a fish laying on it's side. lol Last edited by Stepside Jim; 04-17-2013 at 09:47 AM. |
|
|
|

|
|
|
#177 |
|
Registered User
Join Date: Aug 2007
Location: Corona, California
Posts: 7,998
|
Re: 1957 Chevy truck re-rebuild
Looking good.
You may try a hobby shop for some small blocks. I have one from when I was messing with RC planes. Kim |
|
|

|
|
|
#178 | |
|
Registered User
Join Date: Aug 2012
Location: Salem Mo
Posts: 652
|
Re: 1957 Chevy truck re-rebuild
Quote:
 Usually in a small tight area such as the gills I will fold the paper over about 4 layers, this will usually keep the paper strong enough as to not drop into the low spots. Thanks Kim. Usually in a small tight area such as the gills I will fold the paper over about 4 layers, this will usually keep the paper strong enough as to not drop into the low spots. Thanks Kim.  I've dealt with the long, enduring process of block sandig all the panels before. There are times when you need something to keep you motivated. So far I've taken a couple hundred pictures of this project. It's good to sit down and go through them to remind myself how far I've gotten so far. In my last set of pictures I lifted the sheet off the engine and took a picture to remind myself as to where I'm heading. Yup, ok, my mind is back on track again. 
|
|
|
|

|
|
|
#179 |
|
Registered User
Join Date: Aug 2007
Location: Corona, California
Posts: 7,998
|
Re: 1957 Chevy truck re-rebuild
Nice looking engine.
Kim |
|
|

|
|
|
#180 |
|
Registered User
Join Date: Dec 2011
Location: Mobile, Alabama
Posts: 996
|
Re: 1957 Chevy truck re-rebuild
Thanks for taking the time to explain what you are doing on the paint. It really helps. Great project. dug
__________________
My Build - http://67-72chevytrucks.com/vboard/s...d.php?t=515876 |
|
|

|
|
|
#181 | |
|
Registered User
Join Date: Aug 2012
Location: Salem Mo
Posts: 652
|
Re: 1957 Chevy truck re-rebuild
Quote:
Speaking of posting pictures, I just spent 3 hours downloading a new browser so I can get back to using Photobucket. This is a test run, so here goes. Still working on the block sanding, I've got 180 grit wrapped around 3 paint sticks taped together. Got a sponge to keep the area wet, and the dog supervising. The idea is to follow the contour of the fender trying to knock down any high spots. 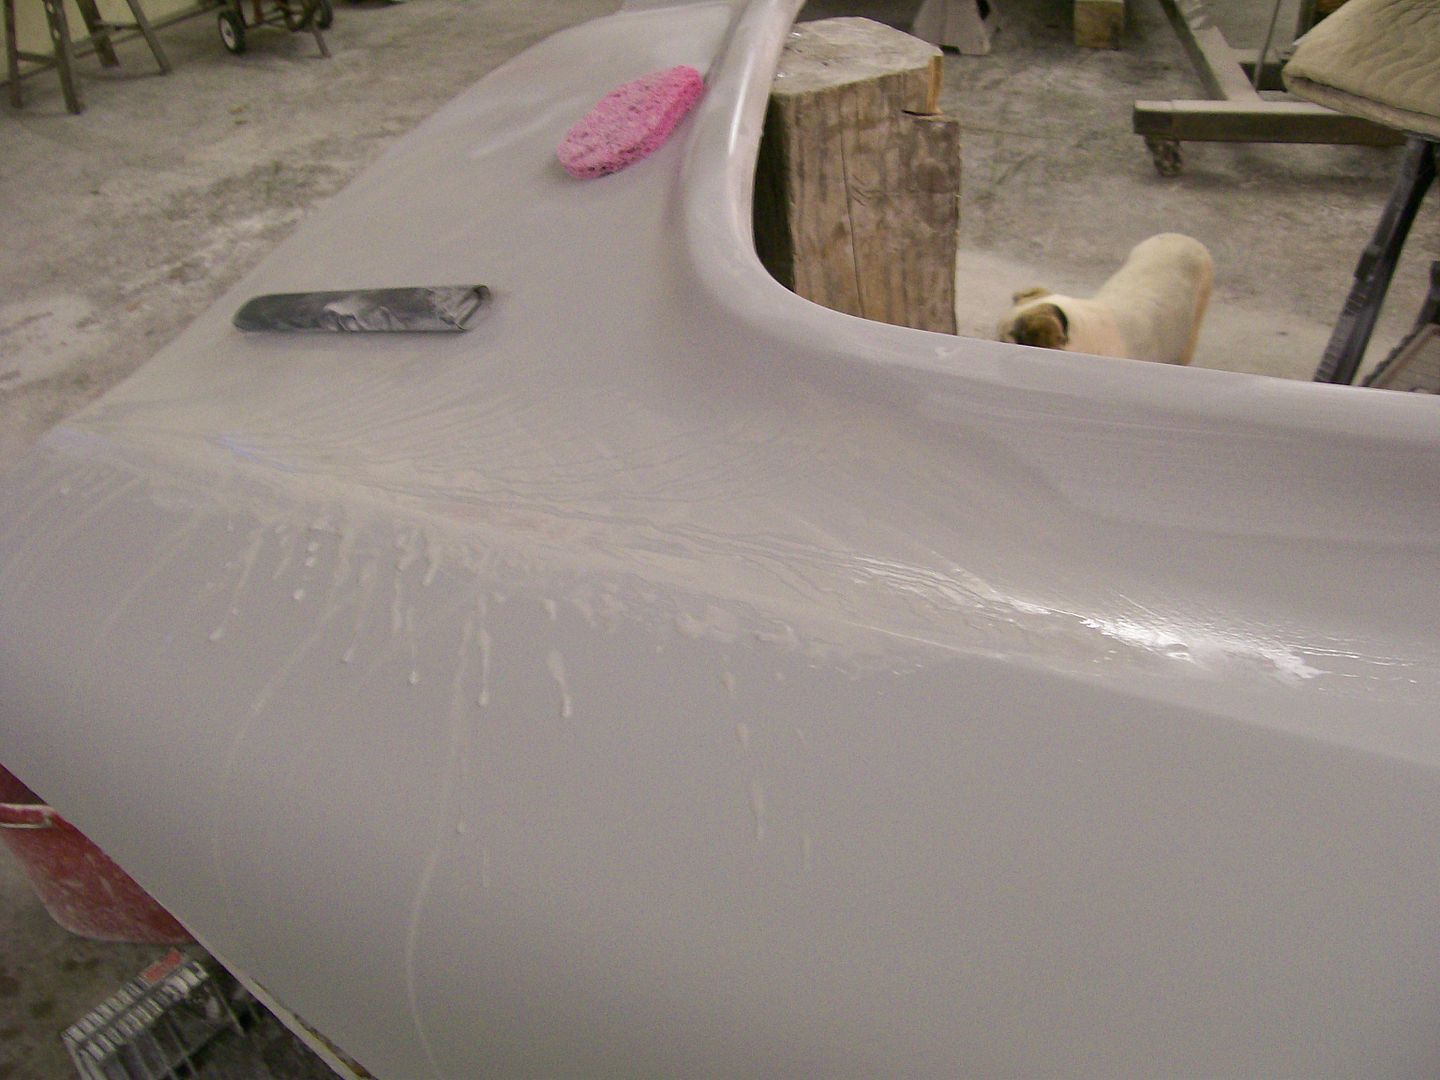
|
|
|
|

|
|
|
#182 |
|
Registered User
Join Date: Aug 2012
Location: Salem Mo
Posts: 652
|
Re: 1957 Chevy truck re-rebuild
|
|
|

|
|
|
#183 |
|
Registered User
 Join Date: Mar 2011
Location: Sydney AUS
Posts: 160
|
Re: 1957 Chevy truck re-rebuild
Looking really nice. Im just about to attach this on my truck, not looking forward to it but it sure does clean the door jams up alot.
__________________
Blake. Sydney Aus 56 Chev 3100 build - http://67-72chevytrucks.com/vboard/s...d.php?t=480363 LOW n LOUD 
|
|
|

|
|
|
#184 |
|
56 - autocross
Join Date: Apr 2010
Location: Camarillo, Ca
Posts: 1,121
|
Re: 1957 Chevy truck re-rebuild
How did you do this? Filler, grinding, welding? Can you let us know in detail if possible?
|
|
|

|
|
|
#185 | |
|
Registered User
Join Date: Aug 2012
Location: Salem Mo
Posts: 652
|
Re: 1957 Chevy truck re-rebuild
Quote:
I haven't had any problems doing this before and looks nice when done. If anyone has had issues in the past please let us know. Does require alot of finger sanding, sounds strange but Walmart strong strip bandaids on my finger tips really help. Gotta remember, I've finger sanded every runner on the foot steps and every ridge on the firewall also. Thanks for checking in. Jim |
|
|
|

|
|
|
#186 | |
|
Registered User
Join Date: Aug 2012
Location: Salem Mo
Posts: 652
|
Re: 1957 Chevy truck re-rebuild
Quote:
 Thanks for checking too. Jim |
|
|
|

|
|
|
#187 |
|
Registered User
Join Date: Aug 2007
Location: Corona, California
Posts: 7,998
|
Re: 1957 Chevy truck re-rebuild
That sure is a nice looking jam.
Kim |
|
|

|
|
|
#188 |
|
Registered User
Join Date: Aug 2012
Location: Salem Mo
Posts: 652
|
Re: 1957 Chevy truck re-rebuild
Auuurgh, still block sanding..... prime, block, prime, block.......
 But why, why prime, block, prime, block? Pictures tell the story, here we go. The high build primer is sprayed and dried. Then block sanded with 180 grit. Problem is, it's dull. The real problem is, when done and cleared, anything missed here will show later. We need to get a clear/shiney finish now. Dull finish after sanding. 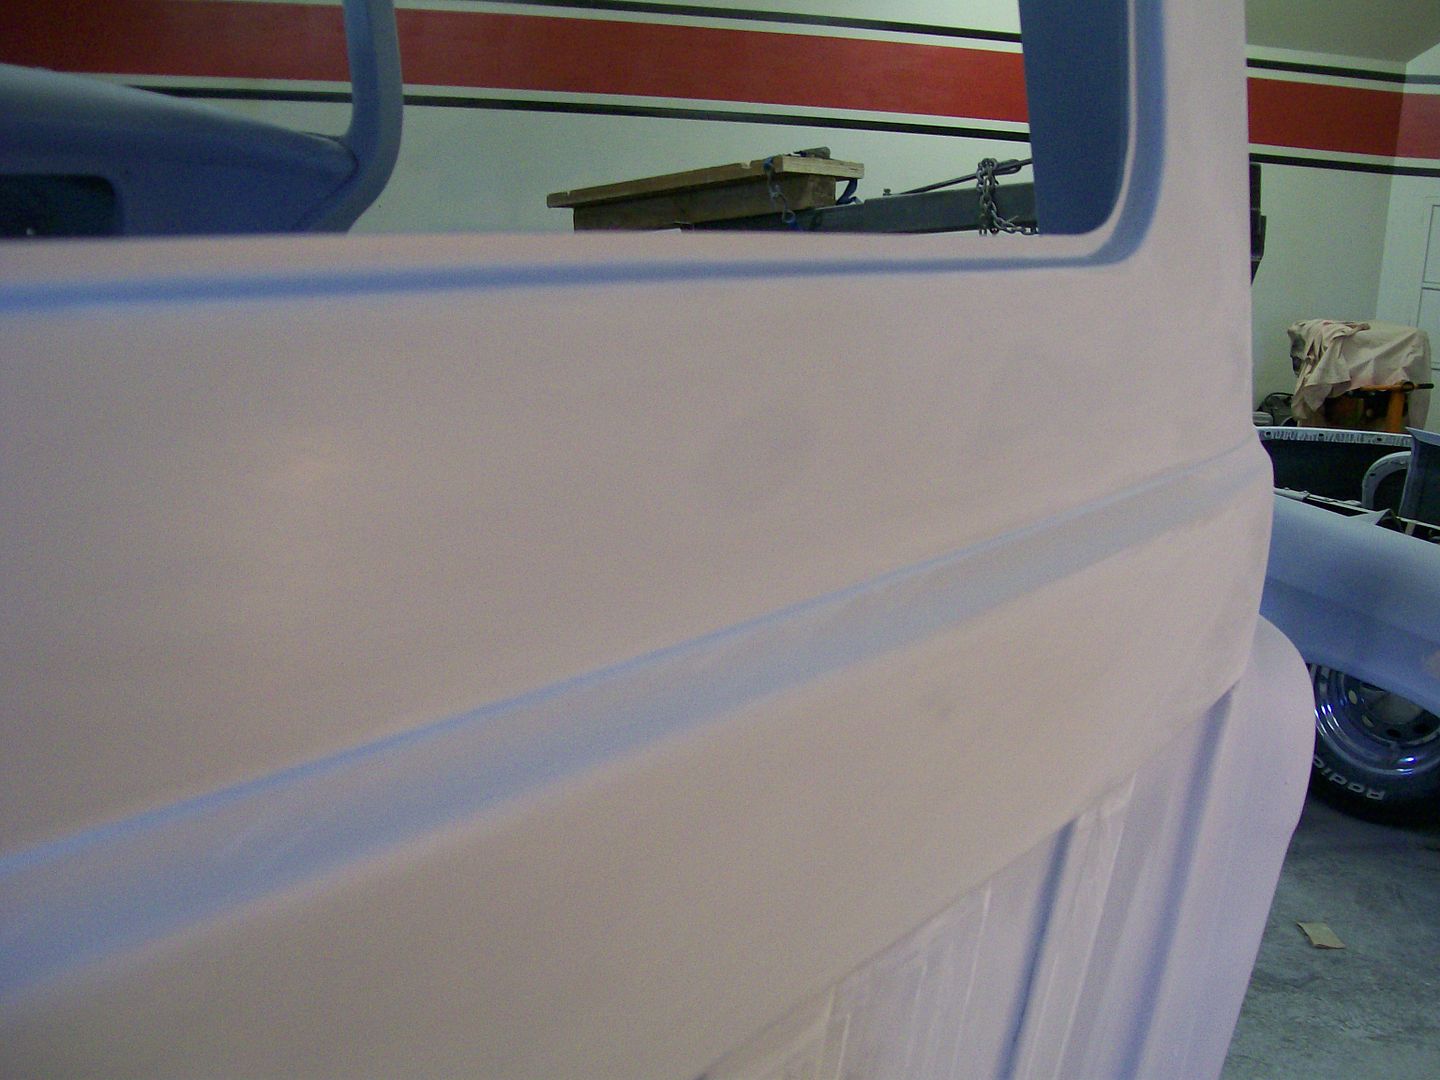 Here I've wet the surface with a pre cleaner, sometimes I'll just take water and wet the surface. 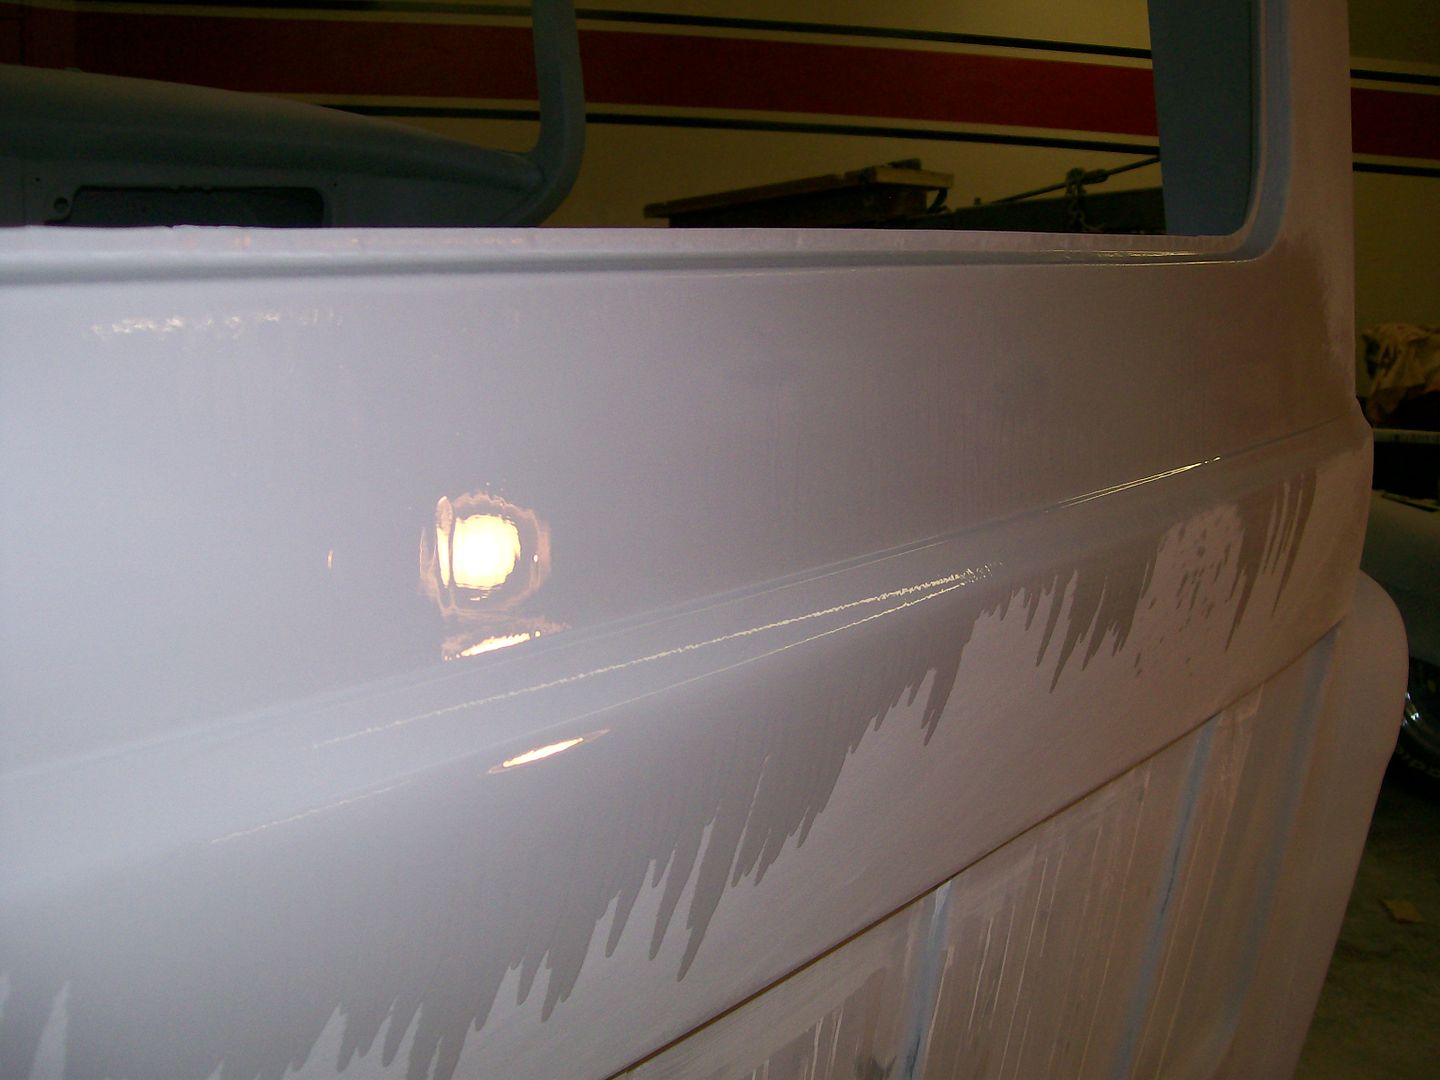 With a dull finish I couldn't see in detail to find the low spots. By running my hand over the finish I could hardly feel the low spot. It wasn't till I used the reflection of the shop stripe on the wall to see this deflection of the width of the stripe to see the problem area. This low spot would definetly show after the final painting. 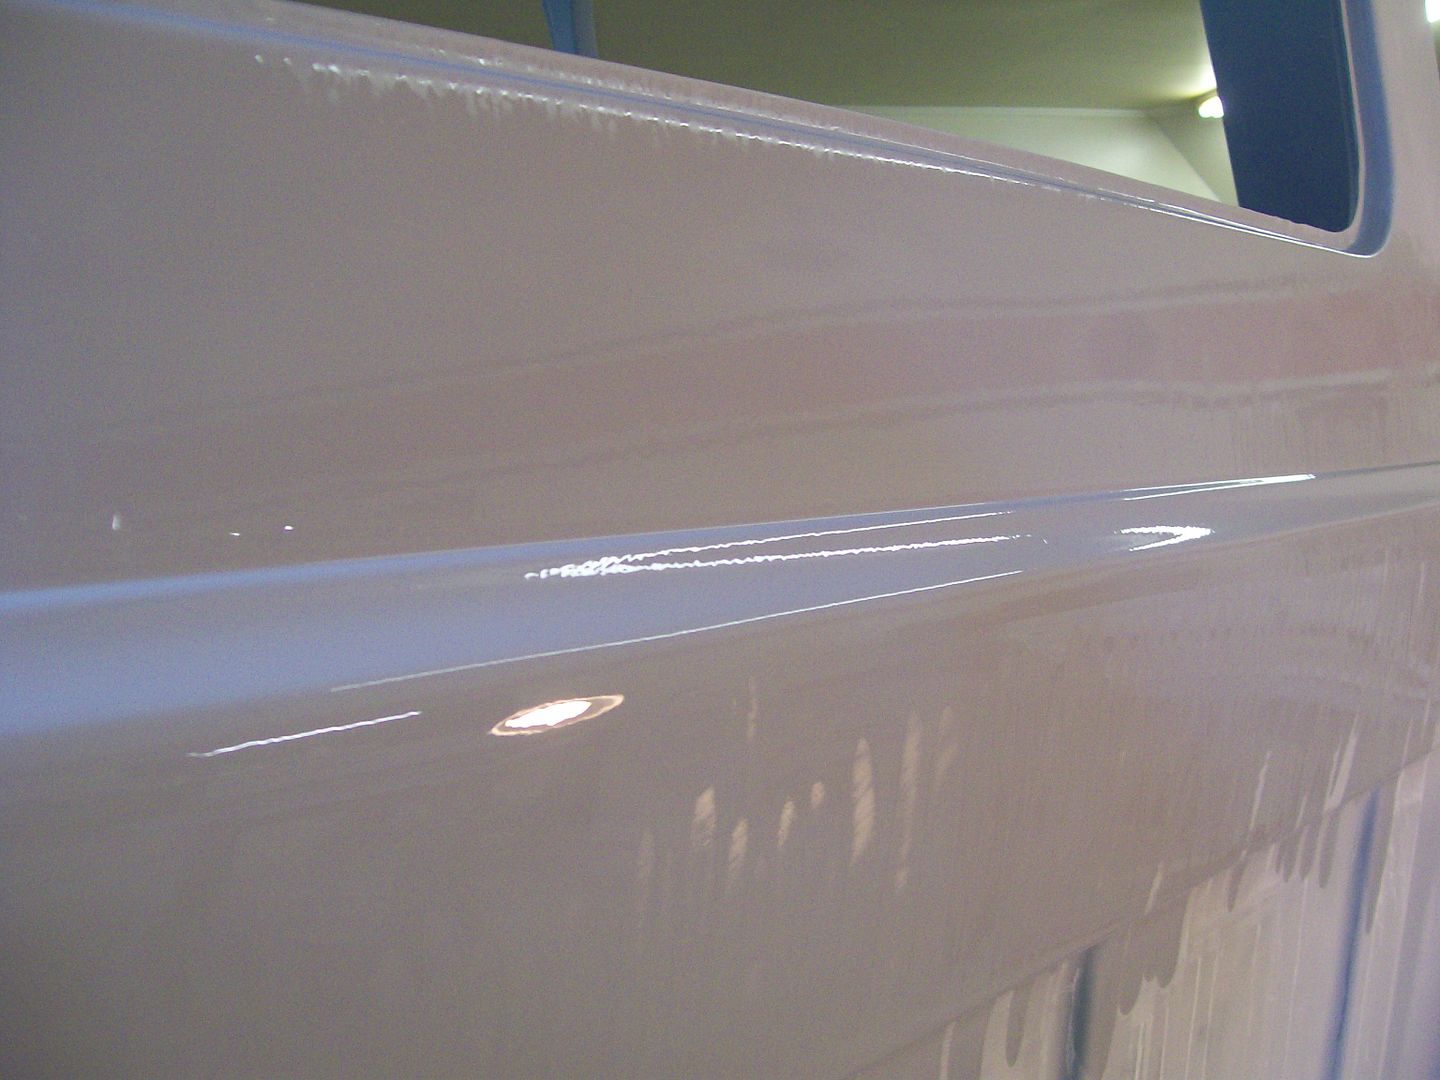 I can either spray and sand, or I can directly focus on this low spot. My choice is glazing putty, then block sand the glazing putty. After the block sanding of the glazing putty, then a coat of high build primer. 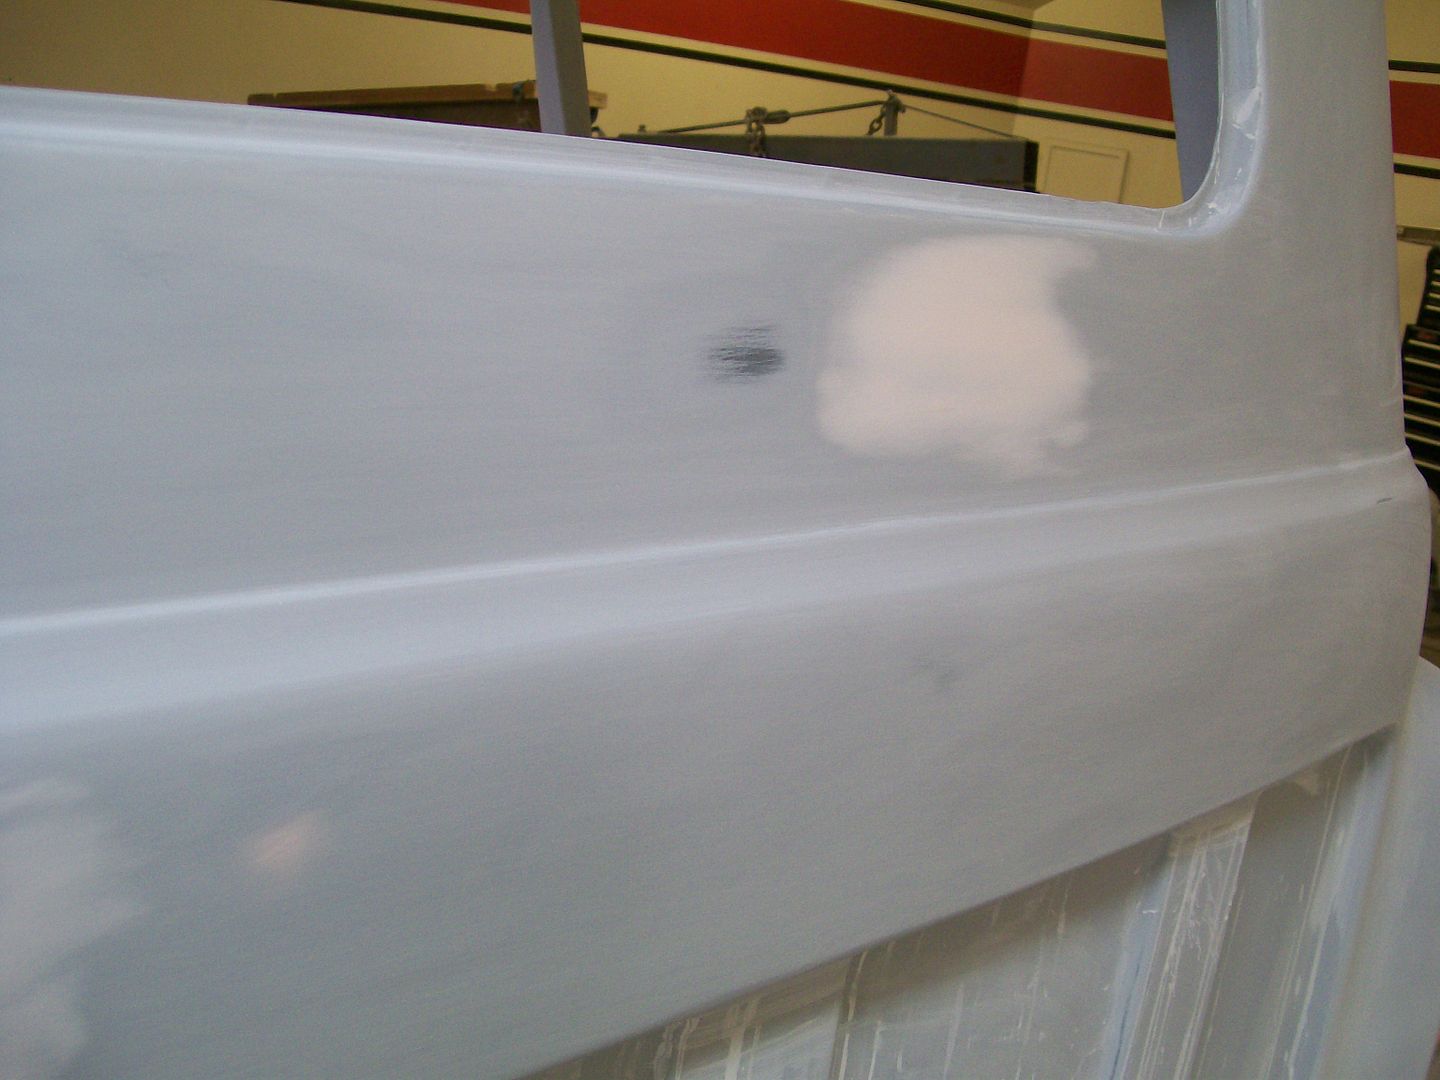 Now after the primer blocking. The stripe reflection now stays consistant all the way across. 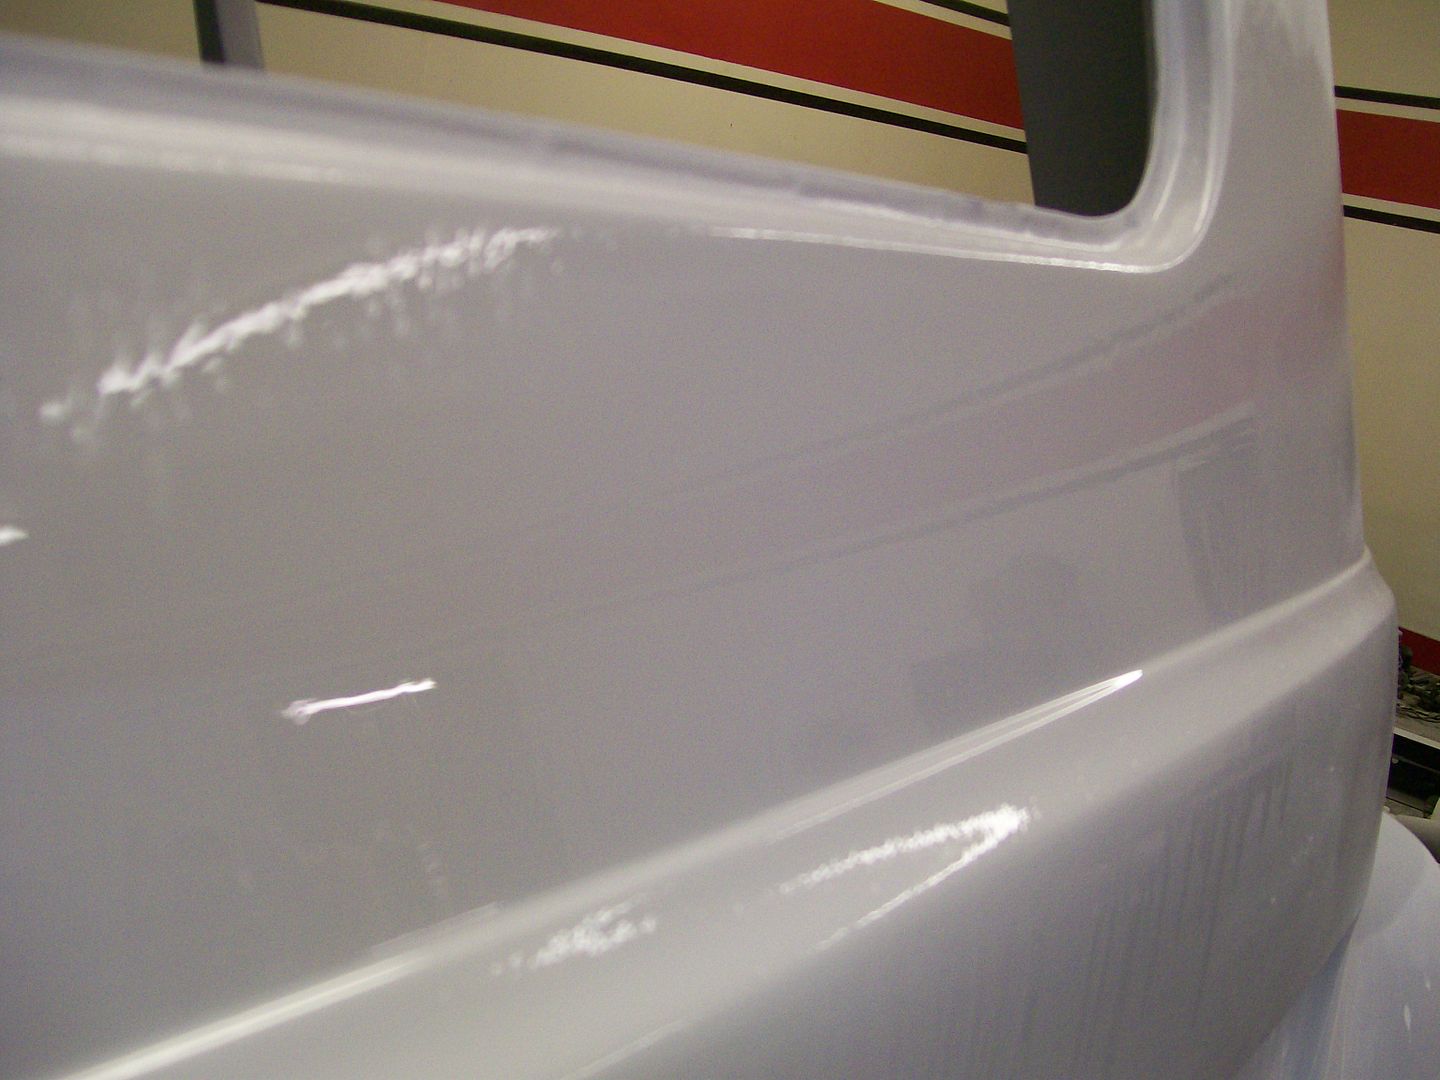 Sometimes the issue isn't fixing the low spots, it's finding them in the first place. Moving the light back and forth didn't show this spot, it took a long flat reflection to expose it. Ok, back to sanding.... Jim 
|
|
|

|
|
|
#189 |
|
Registered User
Join Date: Aug 2007
Location: Corona, California
Posts: 7,998
|
Re: 1957 Chevy truck re-rebuild
That came out nice.
Kim |
|
|

|
|
|
#190 |
|
Registered User
Join Date: Aug 2012
Location: Salem Mo
Posts: 652
|
Re: 1957 Chevy truck re-rebuild
|
|
|

|
|
|
#191 |
|
Registered User
Join Date: Aug 2007
Location: Corona, California
Posts: 7,998
|
Re: 1957 Chevy truck re-rebuild
Looks nice.
I'll be doing mine also. Kim |
|
|

|
|
|
#192 | |
|
Registered User
Join Date: Jan 2012
Location: Motown
Posts: 7,680
|
Re: 1957 Chevy truck re-rebuild
Quote:
 i didn't do them and wished i had, i see them every day i was just so tired of your quoted text  i was unable to see or feel minor in's and out's when doing my body work i could fix it when flaws were pointed out, just could find them luckily i had lots of people to show me, too many people...
__________________
cool, an ogre smiley  Ogre's 58 Truk build Ogre's 58 Truk buildhow to put your truck year and build thread into your signature shop air compressor timer |
|
|
|

|
|
|
#193 |
|
Registered User
Join Date: May 2010
Location: Lawrenceville, Ga
Posts: 2,646
|
Re: 1957 Chevy truck re-rebuild
It looks much better when the seams are smoothed. Those seams are the sloppiest part of a TF. I know these were work trucks but I've always been a little surprised that they allowed them to leave the plant looking as sloppy as they usually do.
|
|
|

|
|
|
#194 |
|
Registered User
Join Date: Aug 2012
Location: Salem Mo
Posts: 652
|
Re: 1957 Chevy truck re-rebuild
Thanks all, the worst part is sanding a convex panel such as the inside of the cab. It does look nice when done though.
 _Ogre, oh the block sanding, it goes on and on and on. Finding the problem areas can be tough, there two things I find that help. One, after block sanding, wet the panel as if there is a clear coat on the primer, then start looking for reflection imperfections. Second is a mind set. Instead of looking how good the panel looks, look for how bad the panel looks. It's about the only time I recommend a cup half full view. Russell Ashley, how cool is it that they probably had no idea of what their "work trucks" are going to look like 40 or 50 years later.  Next up is the tail gate. My original is in pretty good shape, but it did get about 20 years of farm usage. Talking about sanding the inside of the cab is one thing, it's gonna take hours and hours to get the tailgate looking good enough to match the rest of the truck. I took the easy way out, new tailgate..... I got it from Classic parts. There was a choice of the American or over seas unit. I went with the American, I must say, very nice unit. Fits perfect, nice and square, the whole thing is just a nice piece. I do however have to cut away the chain brackets, drill the holes for the hidden hinges and make some cuts for the hidden linkage. 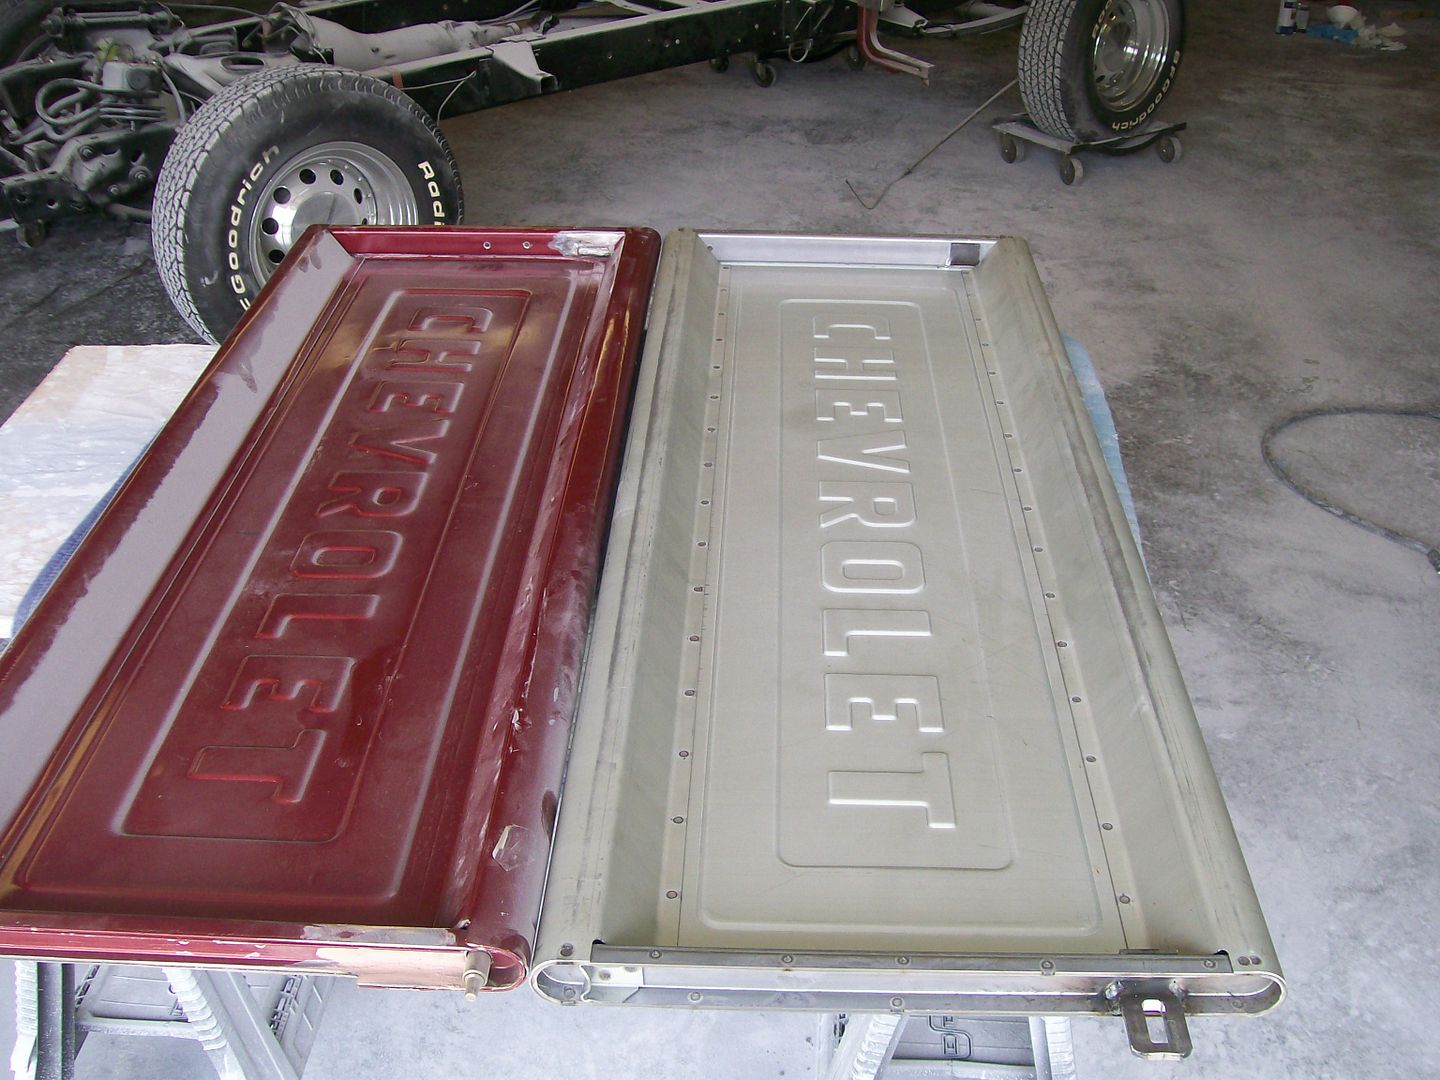 Just look at all the small dimples and dings I've saved time not having to deal with with the old one. 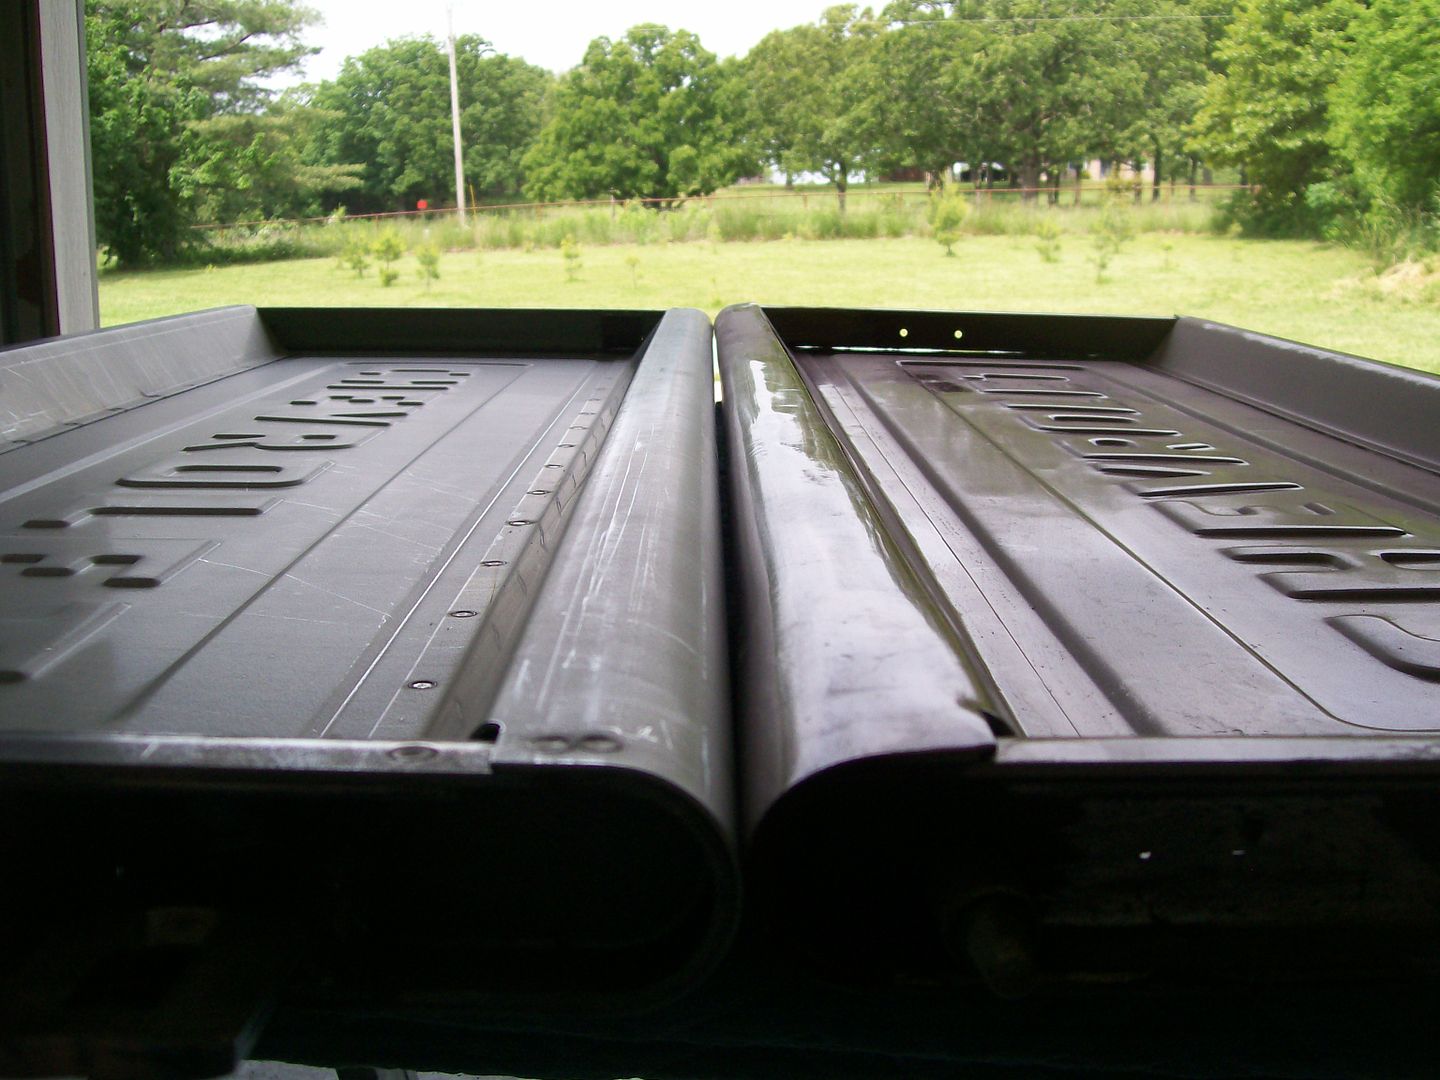
|
|
|

|
|
|
#195 |
|
Registered User
Join Date: Aug 2012
Location: Salem Mo
Posts: 652
|
Re: 1957 Chevy truck re-rebuild
I've been putting in alot of hours on the truck, problem is...... it's the work that doesn't visually show progress, but it's all about refining. One thing I really focus on at this stage of a project is checking and rechecking how everything fits together. I don't want fitment problems after the paint is on.
One part of the project I've struggled with is the front grill. Dad perefered the 55 - 56 grill, it is a nice looking grill. I struggle with the idea that it is a 57, single year for this grill. Brothers had a sale on the 57 grill, not a big savings but it prompted me to order one. Once it got here I put the cab back on the frame and assembled the front of the truck. I don't know if the original truck parts have been distorted from the past or the new grill is slightly off but I had to spend a couple of hours getting a near perfect fit. After all the work, it's in and I fitted it so there is some adjustment when final assembly happens. 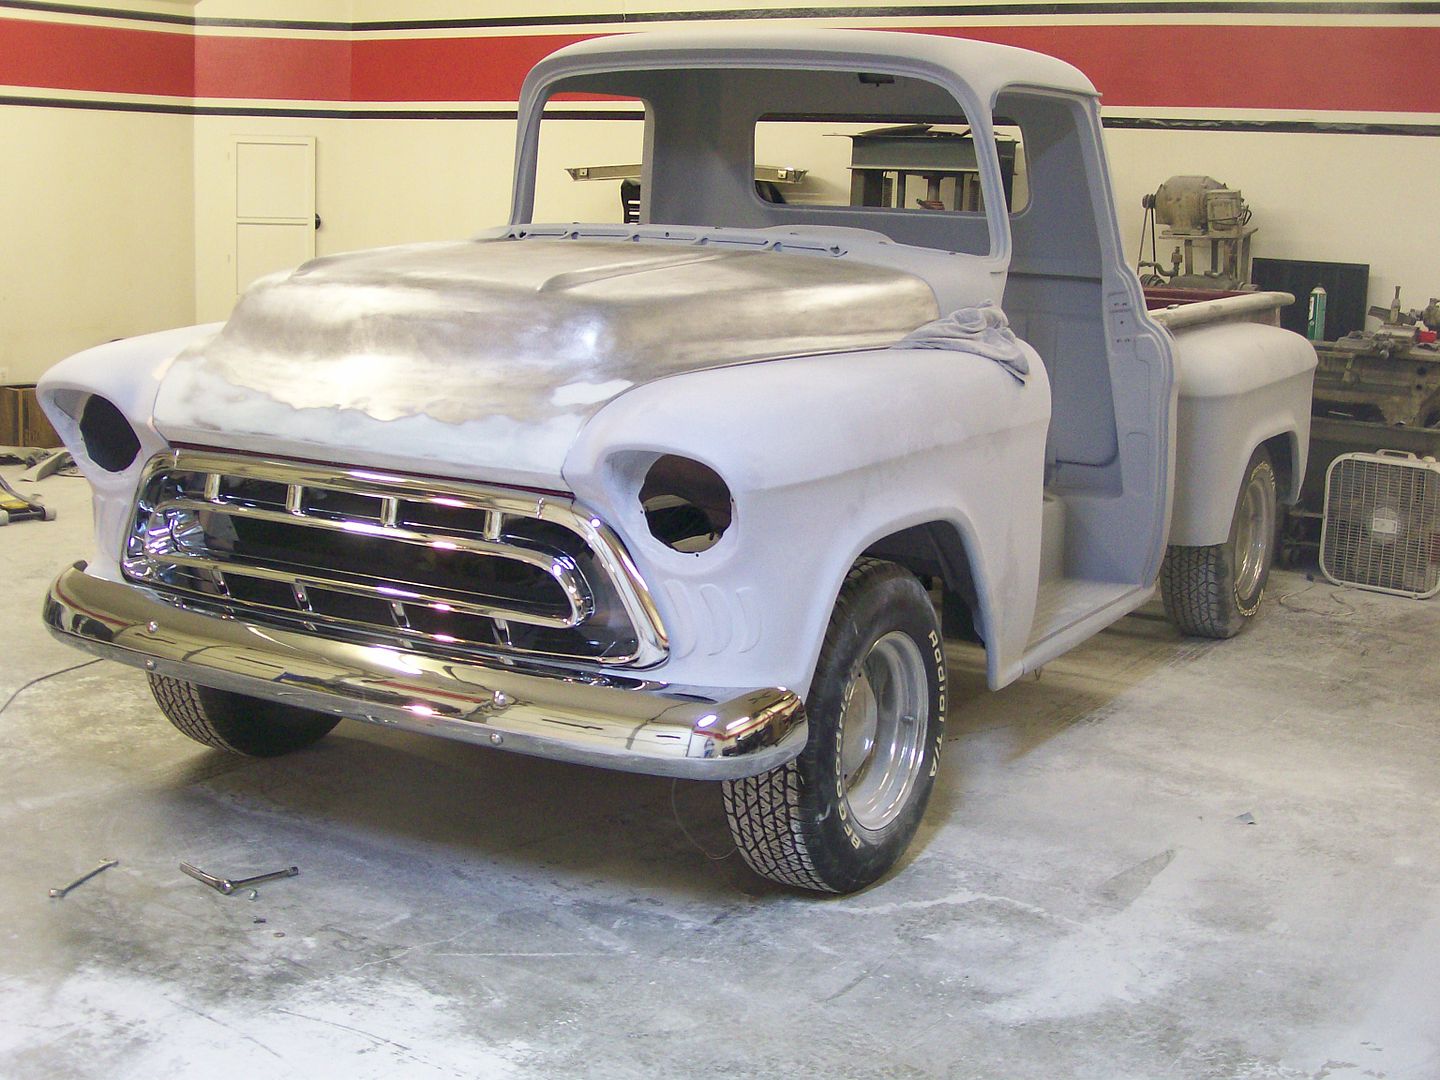
|
|
|

|
|
|
#196 |
|
Registered User
Join Date: Aug 2007
Location: Corona, California
Posts: 7,998
|
Re: 1957 Chevy truck re-rebuild
Looks real sharp.
My original 57 grill fits real tight in its opening. Kim |
|
|

|
|
|
#197 |
|
Registered User
Join Date: Dec 2011
Location: Southern Oklahoma
Posts: 181
|
Re: 1957 Chevy truck re-rebuild
A guide coat over the gray primer will help you find the problem areas. Just lightly spray a black or red oxide mist coat over each panel. Don't try to completely cover the gray with it. You will find this works great. I won't block anything without it. Just remember you only need a very light (thinned down quite a bit) dusting of another color of primer over the gray primer. Hope this helps
|
|
|

|
|
|
#198 |
|
A320 Pilot/USAF Retired
Join Date: Mar 2009
Location: Charleston, SC
Posts: 2,629
|
Re: 1957 Chevy truck re-rebuild
Very nice! Gotta love the 57 grill!!
__________________
JJ My 1957 build: http://67-72chevytrucks.com/vboard/s...d.php?t=334552 http://www.trifive.com/forums/showthread.php?t=22037 Instagram - Chuckdriver57 |
|
|

|
|
|
#199 |
|
Registered User
Join Date: Aug 2012
Location: Salem Mo
Posts: 652
|
Re: 1957 Chevy truck re-rebuild
Kim, that tight fit situation was what I was trying to stay away from. It seems that no matter wow careful I am on final assembly I'm gonna scratch or bump an edge, grrrrr. Anymore when possible I try to find a way to create a very small gap where I can to remove as many chances of chippage.
papastrk, thanks for checking in. I've been down the guide coat sanding procedure many a time, and it works well. My showing of the wetting the primer and watching the reflection was a small confined area that was easy to show in a picture. The wetting of the primer then watching the reflection really helps on large panels. Sometimes the panel will show good with the guide coat, but if the wave in the panel is spanning a large area the sandpaper will follow the wave and remove the guide coat giving the impression of a true flat surface. This wet and reflect concept is the next step after the guide coat procedure. While I've got the Photobucket site opened up I'll take advantage. (Remember, I'm on dial-up here)  Still trying to smooth alot of the rough edges I'm moving to the firewall. I was able to straighten most of the seam but even with the straightening I needed to smooth the edge. 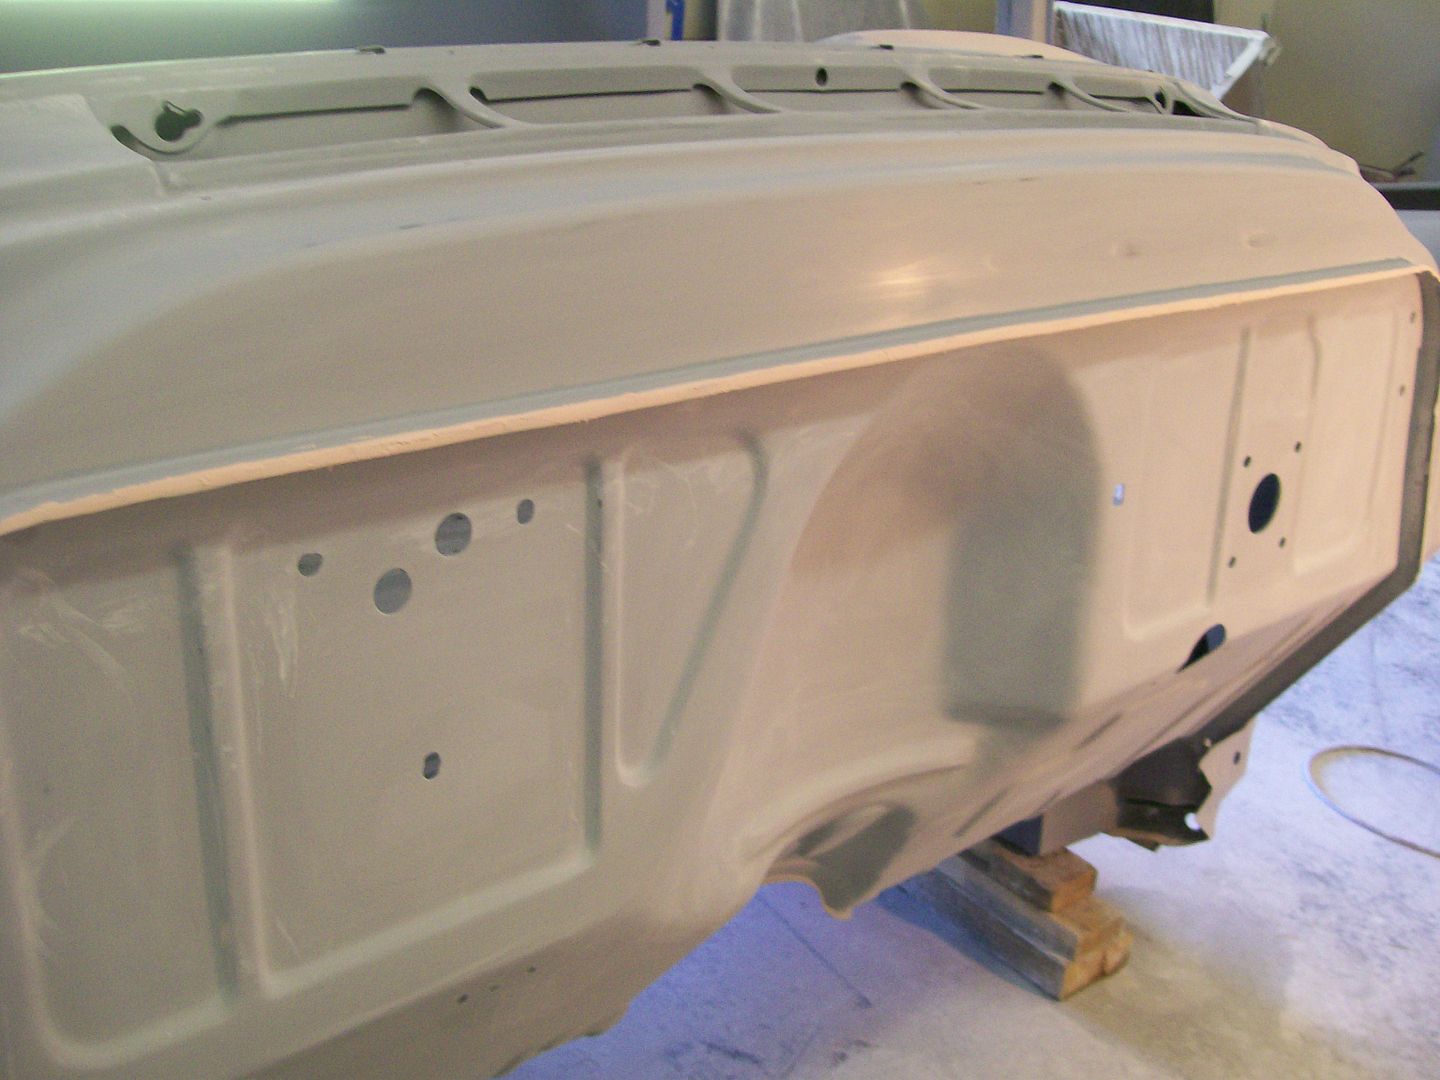 There wasn't much filler left after the sanding, but I guess that's the idea. Now a nice clean edge. 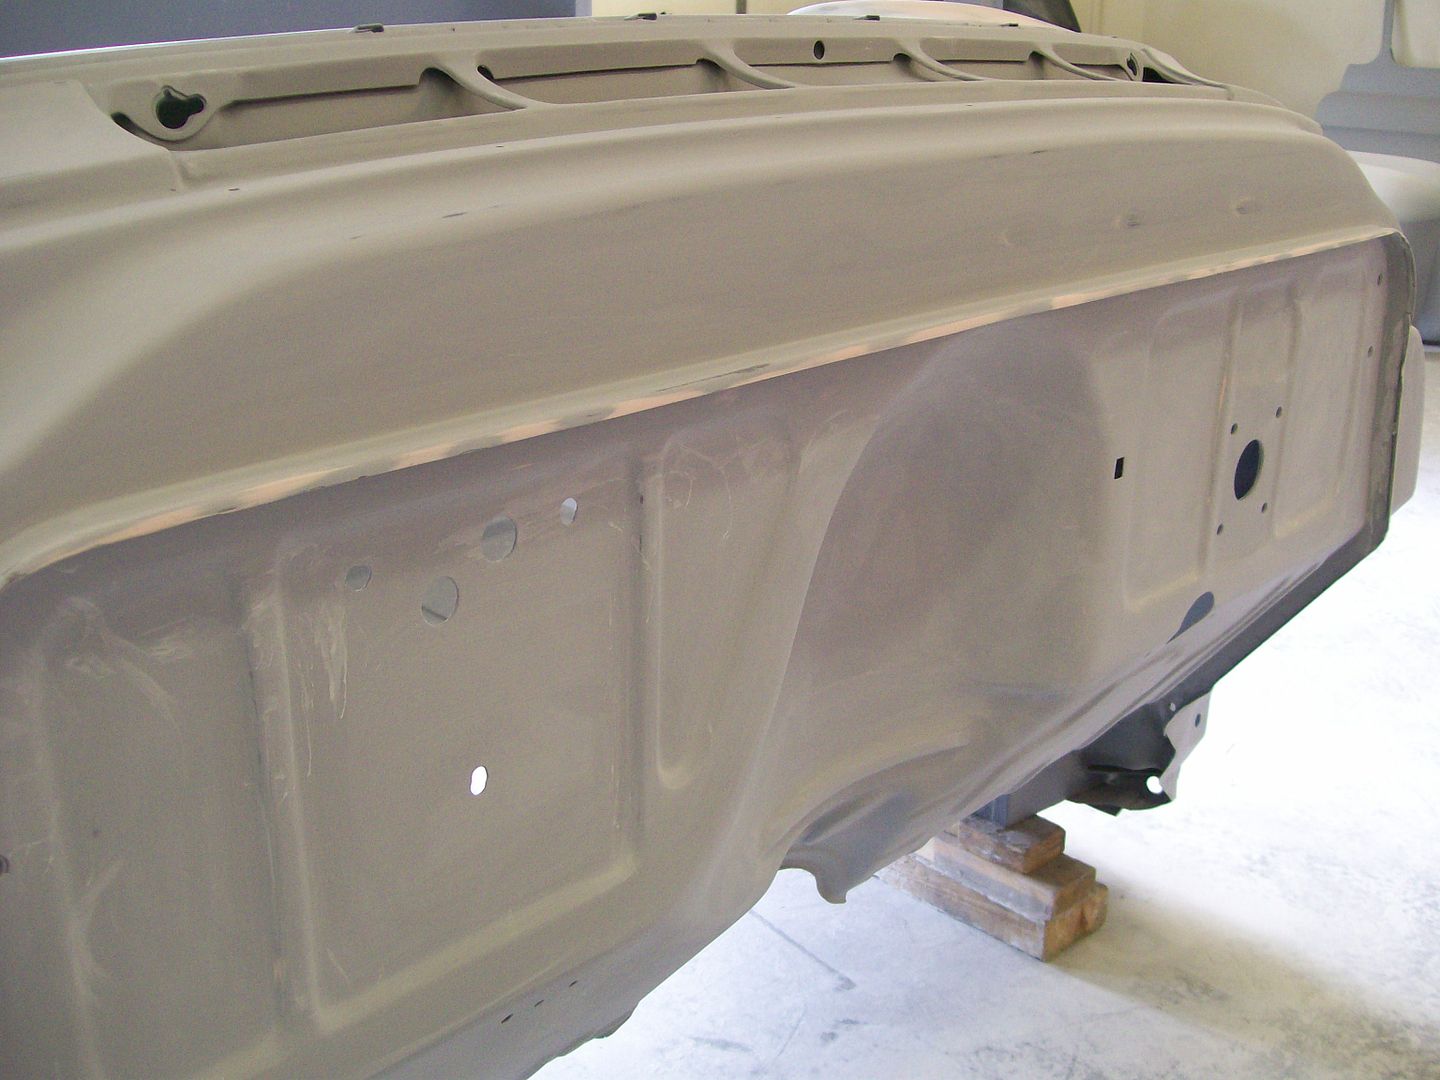 I know many have removed this seam, I really have no problem with the seam as long as it's straight. 
|
|
|

|
|
|
#200 |
|
Registered User
Join Date: May 2010
Location: Lawrenceville, Ga
Posts: 2,646
|
Re: 1957 Chevy truck re-rebuild
You are doing some super fine work on that truck.
We might be in the minority on this forum, but I also think the firewall seam looks OK. |
|
|

|
 |
| Bookmarks |
|
|