
 |
|
|
#176 |
|
Registered User
Join Date: Apr 2003
Location: Indep, MO
Posts: 5,893
|
Re: The Hillbilly Deluxe dually build
Glad to see some movin on this. You're a better man than I. I dig the stepper!
You can get the polishing rouge and wheels to fit a 4 1/2" grinder. Zoro Tools has them. If you're coming from already polished, heat and pressure are your friend. They should clean up good. Glad to hear from you! Where can you get some "Bud" and "Sissy" Texas plates for the slider?
__________________
Boppa's Old Yeller Truck Build, Old Yeller's New Heart! Project Buzz Bomb Flyin' Low! |
|
|

|
|
|
#177 |
|
Registered User
Join Date: Mar 2013
Location: Netherlands
Posts: 116
|
Re: The Hillbilly Deluxe dually build
Hi. Very cool build man. You are doing a very nice job. I love the DIY powedercoating. What tools are you using for this? I mean what kind of gun, oven, etc?
About the wheels, you can really make them shining again. These are my alu wheels which were pretty ugly when I got them. Some alu polish and a polishing bal on adrill and a few hours later it was just like chrome. Before: 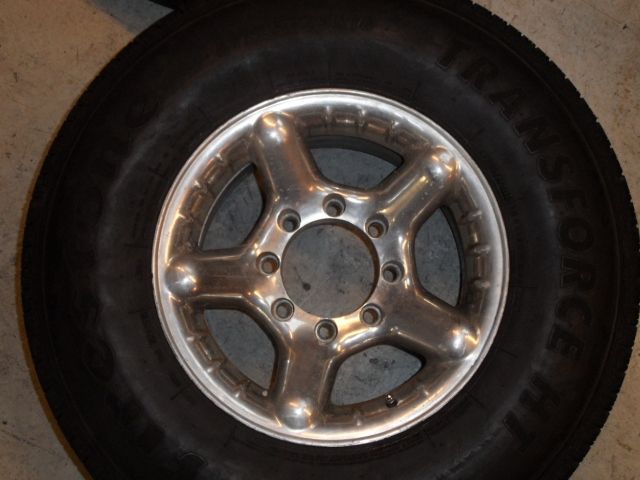 After: 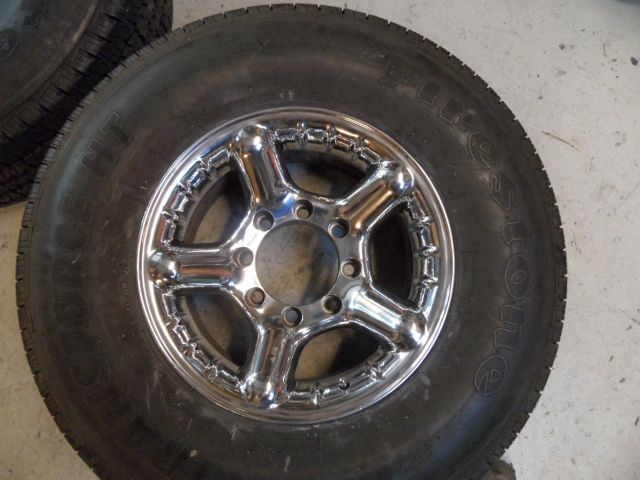
|
|
|

|
|
|
#178 |
|
Farm Truck
 Join Date: Aug 2006
Location: Jersey Village, Texas
Posts: 547
|
Re: The Hillbilly Deluxe dually build
Go to Wally-world and get this...It will do wonders.
http://cached.tptools.com/RS/SR/prod...L_18425a4f.jpg
__________________
1969 CST/10 1984 K5 Blazer 4x4 2016 Dodge Ram 2500 4x4 Mike Jersey Village, Tx |
|
|

|
|
|
#179 |
|
Senior Member
 Join Date: Jun 2010
Location: Illinois
Posts: 2,957
|
Re: The Hillbilly Deluxe dually build
I have been searching for a set of Alcoas just like that for my K30. They look like they might clean up pretty good.
__________________
Roy 85 Short Bed Silverado- Work in progress. http://67-72chevytrucks.com/vboard/s...d.php?t=564818 1987 R10 shortie |
|
|

|
|
|
#180 |
|
Registered User
Join Date: Nov 2009
Location: Edmonton Alberta
Posts: 286
|
Re: The Hillbilly Deluxe dually build
TX,
Do you have any experience with that aluminum acid stuff? If you don't, be VERY VERY careful with it. I use it on occasion and its VERY easy to "Bleach" the aluminum. Frankly, I avoid using it at all costs but it does work if you know what your doing
__________________
1989 3+3 2wd Dually. 454 BB. Factory loaded for the day, including Alcoa rims. |
|
|

|
|
|
#181 |
|
I know the pieces fit
Join Date: Nov 2007
Location: MONTGOMERY, AL
Posts: 5,523
|
Re: The Hillbilly Deluxe dually build
Do you think the slave cylinder bracket will be sturdy enough with just the two mounting tabs? It looks interesting but I wonder if it will flex. It seems like a lot of force to hold not to be triangulated.
|
|
|

|
|
|
#182 |
|
Senior Member
 Join Date: Jun 2010
Location: Illinois
Posts: 2,957
|
Re: The Hillbilly Deluxe dually build
In a process the truck fleetwashers use called two-stepping. Where you spray with an acid on the rim let set a few seconds then spray an alkaline cleaner over that to neutralize then pressure wash all that off. Especially on polished you can actually burn the finish if you let an acid set on it.
__________________
Roy 85 Short Bed Silverado- Work in progress. http://67-72chevytrucks.com/vboard/s...d.php?t=564818 1987 R10 shortie |
|
|

|
|
|
#183 |
|
Watch out for your cornhole !
 Join Date: Jun 2003
Location: Azle, Texas
Posts: 14,162
|
Re: The Hillbilly Deluxe dually build
I'm not too wrapped up in the polishing. I do a lot of aluminum stuff in my motorcycle restorations. Some of it is so bad I have to start out with bead blasting as the first step. I'll get them slicked up to some comfortable level one way or the other.
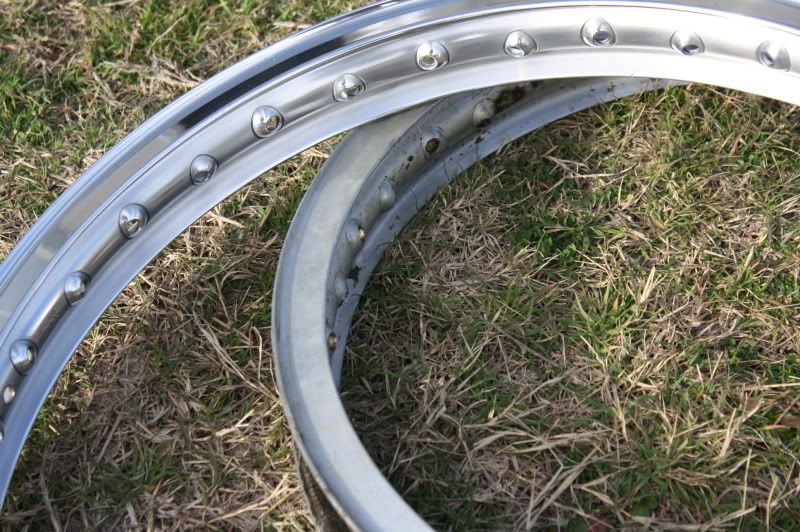 I'm kind of looking forward to the dually wheels. I've done a pile of motorcycle rims and polishing around those spoke dimples is a beating. The Alcoas should allow me to at least use power tools in all areas without any difficulty. I didn't bring any of the wheels to work with me today though. I forgot to load them in my car last night and didnt want to be banging around in the garage this morning at 4am since my wife was asleep. All I did productive to the truck today was order new valve stems for the Alcoas. They use a real weird 9.7mm truck type of valve stem. I never knew there were metric valve stems before this. My local O Reilly will have them in a day or two. Like 2 bucks each. |
|
|

|
|
|
#184 |
|
Watch out for your cornhole !
 Join Date: Jun 2003
Location: Azle, Texas
Posts: 14,162
|
Re: The Hillbilly Deluxe dually build
And to add, I appreciate everyone's encouragement and guidance. I always read every post several times to make sure I'm grasping the information y'all are offering me whether I specifically mention it or not.
|
|
|

|
|
|
#185 |
|
Watch out for your cornhole !
 Join Date: Jun 2003
Location: Azle, Texas
Posts: 14,162
|
Re: The Hillbilly Deluxe dually build
I think it will be fine. Its 1/4 inch plate. Just stupid substantial material. The picture isn't right to see it, but there is a 1 inch solid rod, fully circumferentially welded between the two plates.
|
|
|

|
|
|
#186 |
|
Senior Member
Join Date: Apr 2004
Location: sw colorado
Posts: 2,720
|
Re: The Hillbilly Deluxe dually build
i have that bracket on my jeep with the AA adapter BH for the NV4500. it doesnt flex that i know of. ive had it on there for 4 years now and never had a clutch issue.
|
|
|

|
|
|
#187 |
|
I know the pieces fit
Join Date: Nov 2007
Location: MONTGOMERY, AL
Posts: 5,523
|
Re: The Hillbilly Deluxe dually build
Cool. I know they've been around as long as I can remember and make good stuff, it just seems odd at first glance.
|
|
|

|
|
|
#188 |
|
Watch out for your cornhole !
 Join Date: Jun 2003
Location: Azle, Texas
Posts: 14,162
|
Re: The Hillbilly Deluxe dually build
If I remember when I get to the shop today I'll snap some better pictures of the AA bracket. Its built hell for stout.
|
|
|

|
|
|
#189 |
|
Watch out for your cornhole !
 Join Date: Jun 2003
Location: Azle, Texas
Posts: 14,162
|
Re: The Hillbilly Deluxe dually build
As is my habit of geeking out with pictures over tech minutiae, here is another installment.
The valve stems for the Alcoa wheels are like nothing I've ever seen. They are 9.7mm metric valve stems. The wheels have little tiny valve stem holes, way smaller than the usual .463 ones. Fortunately I found a part number (TR543) that my local O Reilly could order for me. Still waiting on them but I'm confident since they were in the system and on the shelf at another somewhat local store. 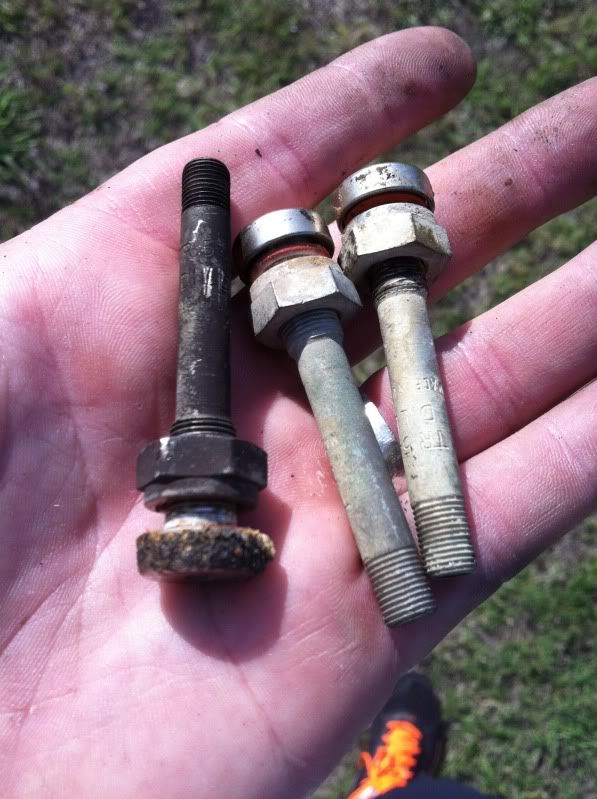 The wheels are very nasty. One of the front ones particularly so. I assume I'm seeing Fix-A-Flat remnants here. 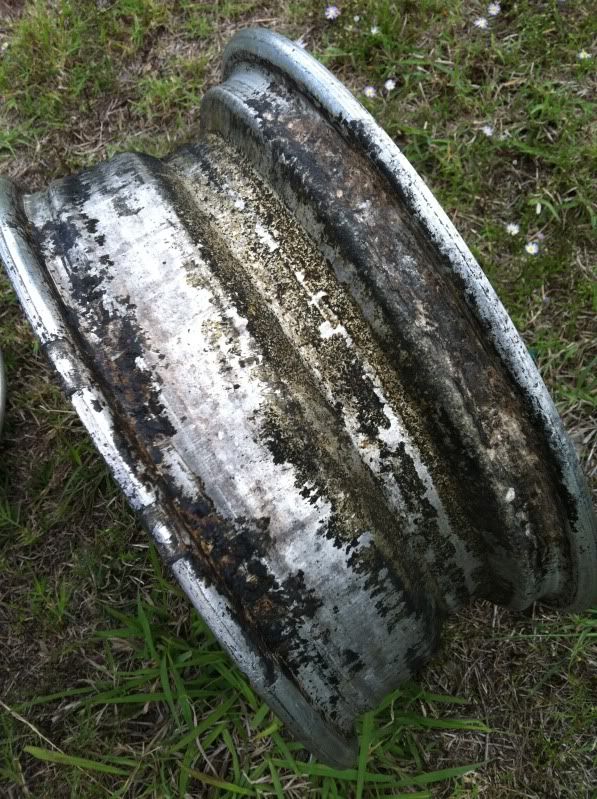 Also, the back sides of the two front wheels were nasty from brake dust and suspension grease. Easy to see which two I'm talking about. 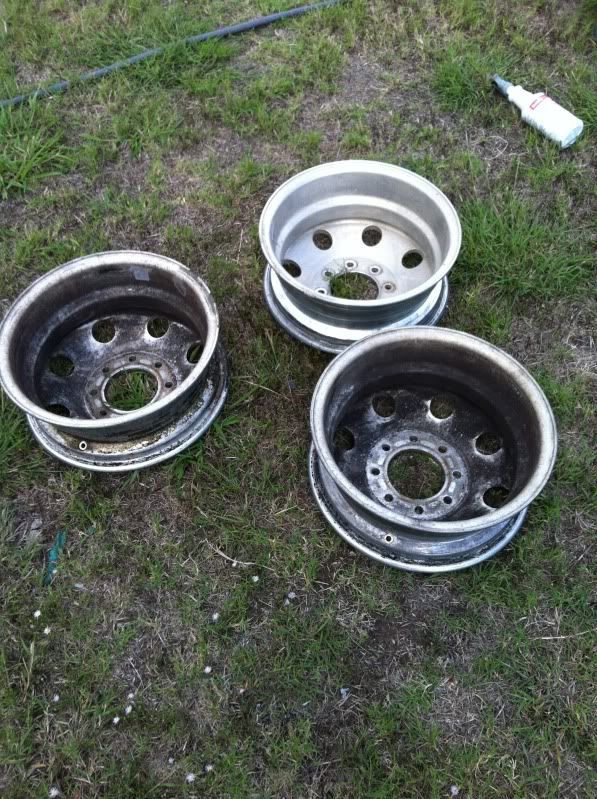 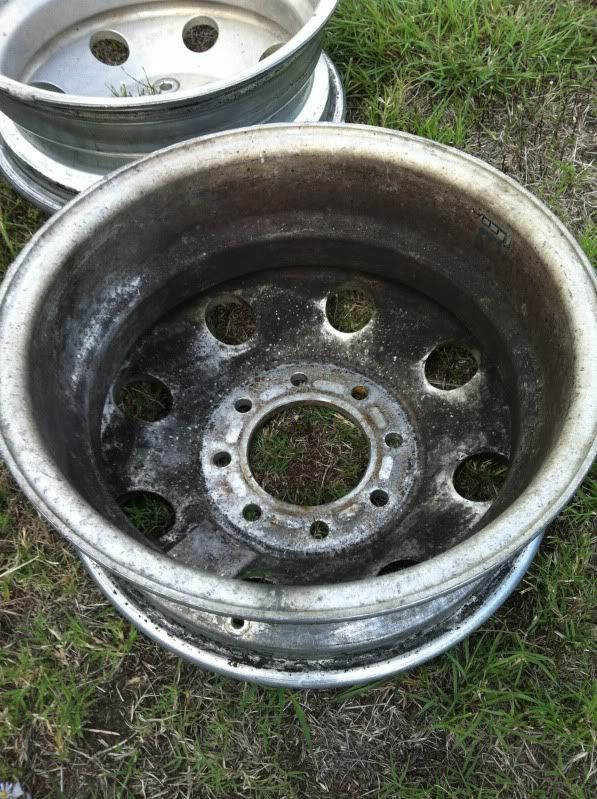 Whereas the back sides of the rear wheels were pretty decent.  So, despite stern warnings, I mixed a 50/50 acid water mix and acid washed them. Lesson learned today, acid dissolves Scotchbrite pads ASAP. Some improvement but not near enough. Again, I'm trying to get these clean and de-funkified so I can begin making them pretty. I have to get all of the brake dust, grease, tar, and rust off of them before I break out the polishing wheels. 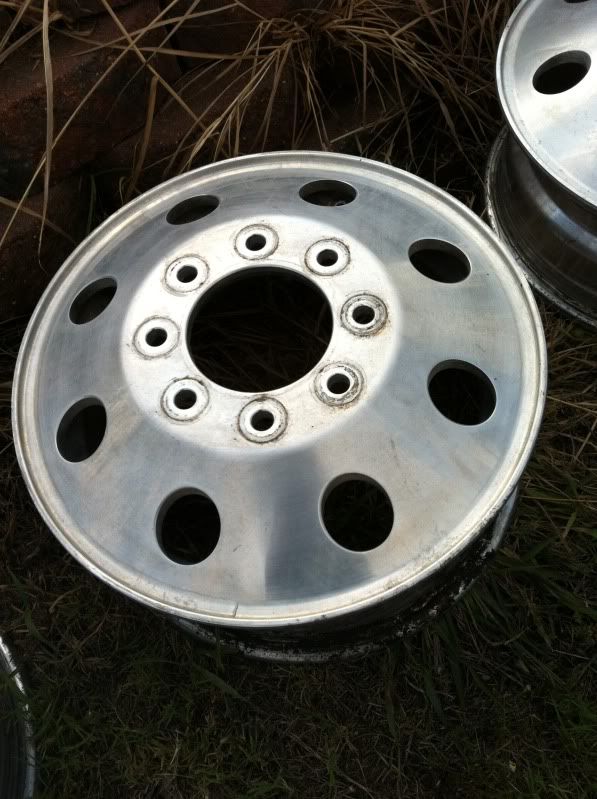 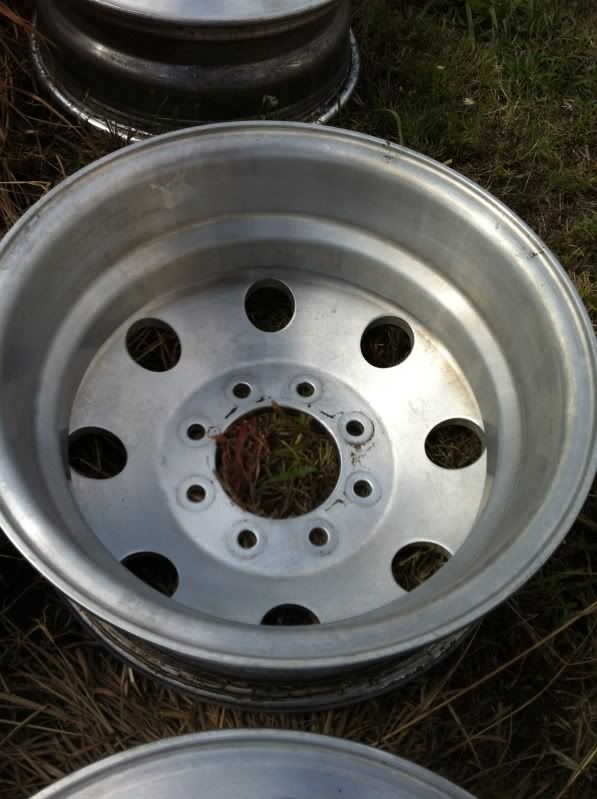 FedEx showed up just now with more goodies. I love those blue and yellow Moog Problem Solver boxes. Do it once, do it right. 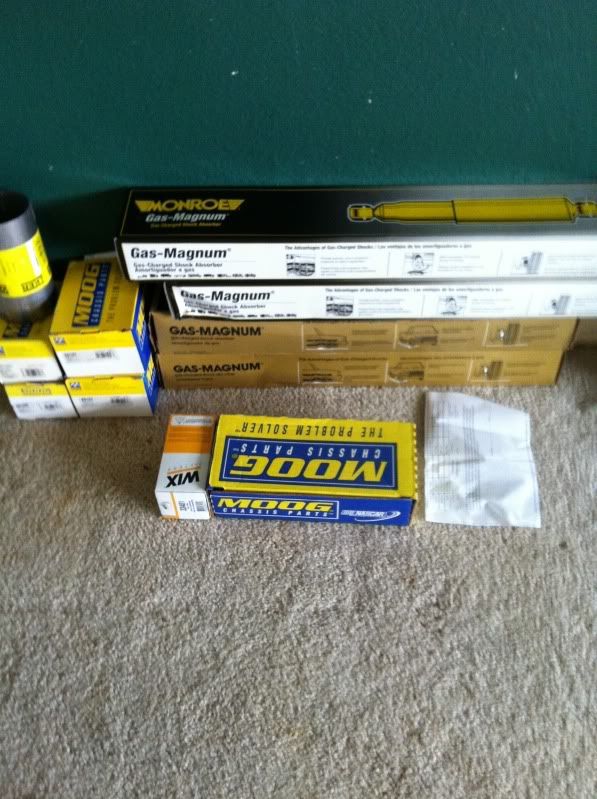 Rockauto kills on prices. I saved over 200 dollars just on that little pile of parts by using them over local stores. Same exact part numbers, same brands, everything. All it takes is patience in waiting on delivery. I have more time than money so that's the route I take. Today when I run to get my daughters from school, I'm gonna stop and buy a decent selection of DA sand papers. I'm going to have to start kind of aggressive on the faces of these wheels near the lugnut area. I'll work my way down to fine grits then dig into polishing. If I were a truck building rock star, I'd just buy new wheels. But I'm a stubborn bull headed do-it-yourselfer so I'm taking the wheel refurbishment head on in a hand to hand battle. |
|
|

|
|
|
#190 |
|
Registered User
Join Date: Sep 2011
Location: Rockwall, Texas
Posts: 113
|
Re: The Hillbilly Deluxe dually build
Hey TX, now that I see your stepside, I realize I saw you at that last swap meet in Decatur. I walked up to it and checked it out. It sounded good when you fired it up to move it. Next time I'll look for ya. That's a neat little truck. I dig The Hillbilly Deluxe too.
__________________
1990 K5 Blazer (sold) 1983 SWB C-10 to K-20 Conversion |
|
|

|
|
|
#191 |
|
Registered User
Join Date: Sep 2009
Location: Weare,NH
Posts: 1,592
|
Re: The Hillbilly Deluxe dually build
There is nothing like original wheels. There is always someone who will go crazy over your truck like "aww man, that amazing, the wheels look like new!"
I'm also pretty cheap and would rather spend elbow grease than dollars. |
|
|

|
|
|
#192 | ||
|
Watch out for your cornhole !
 Join Date: Jun 2003
Location: Azle, Texas
Posts: 14,162
|
Re: The Hillbilly Deluxe dually build
Quote:
Quote:
I started with 80 grit sandpaper on the entire wheel and have been working finer all day. I should have good pics in a few hours. I have no fingerprints left. |
||
|
|

|
|
|
#193 |
|
Registered User
Join Date: Sep 2009
Location: Beaverton, OR from WA State
Posts: 1,515
|
Re: The Hillbilly Deluxe dually build
Awesome looking dually, congrats on finding those Alcoas! Your patience has served you well. I am enjoying watching this truck come together.
For heavy oxidation I use 3M™ Marine Aluminum Restorer and Polish 09020 applied with 0000 steel wool. Yes, it leaves fine scratches, but they come out with the usual steps. After that I use the same polish with a regular applicator. Then I bust out whatever power tool is adequate for the job and the Adam's Metal Polish #1 & #2. Oh, come to think of it I have an example...this is a set of wheels on my friend's truck that we did, factory PY0 alloys made by Alcoa. We stripped the clear coat off of them so they were raw, then the 3M, and Adam's. We did not need to use any steel wool save on the nasty spots behind wheel weights. After: 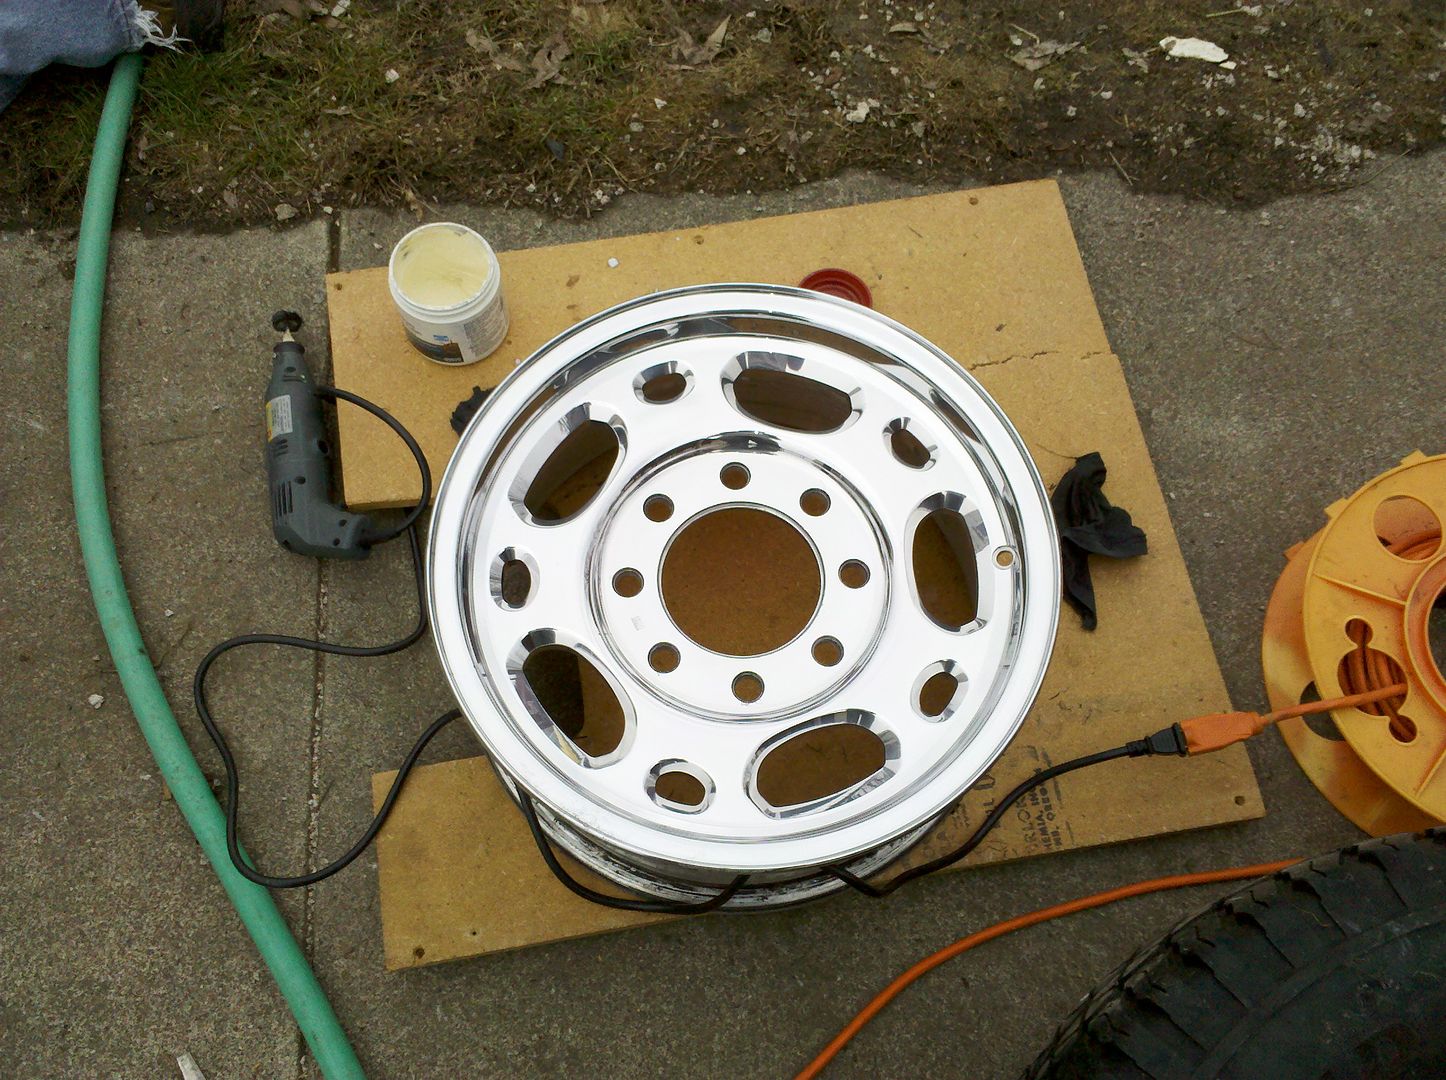 After: 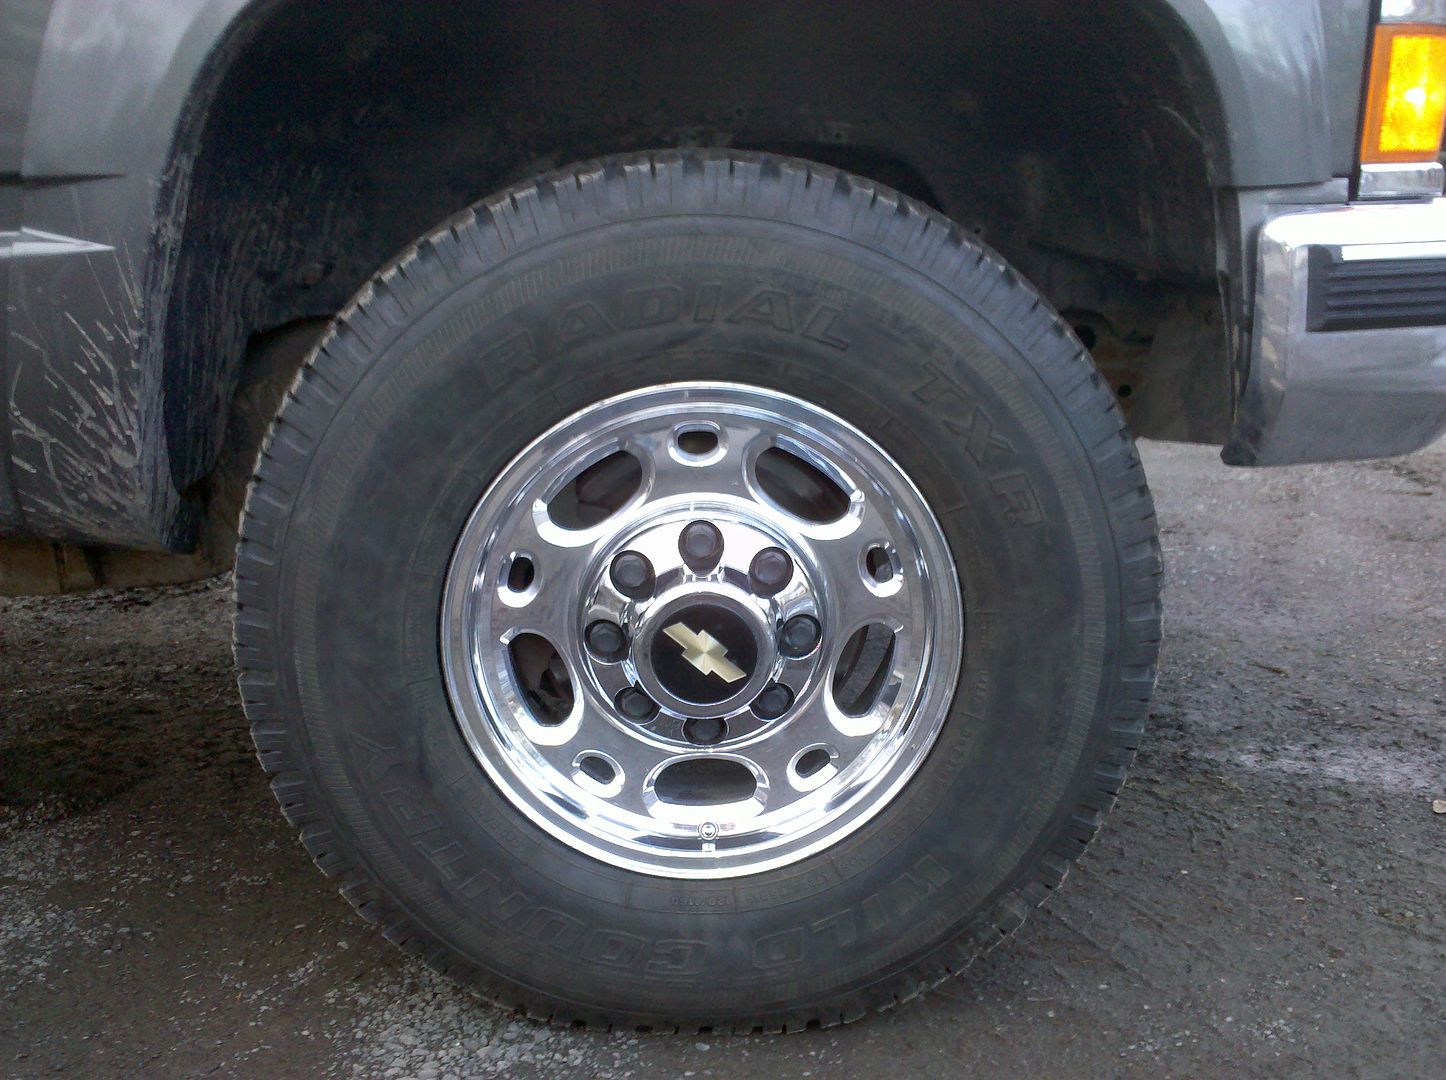
__________________
Devin 1983 GMC High Sierra 2500, 4x4, RC/LB, 400 S.B., SM-465, NP-208, Corporate 10 bolt & 9.5" 14 bolt 1996 GMC Sierra SLE 3500 DRW, 4x4, EC/LB, Vortec 454, NV-4500, BW-4401, AAM 925 & AAM 1050 1997 GMC Sierra SLT 1500 4x4, Z71/F44, EC/SB, Vortec 350 My Introduction with my '83s History New Daily, the '96 |
|
|

|
|
|
#194 | |
|
Watch out for your cornhole !
 Join Date: Jun 2003
Location: Azle, Texas
Posts: 14,162
|
Re: The Hillbilly Deluxe dually build
Quote:
Damn. Polishing school is in session and teacher Devin is at the blackboard schooling us. That is some fine work you do. I'm kind of hesitant to post my efforts now. Y'all be nice. I'm pretty fair as a powdercoater, but not real versed in polishing. As a reminder, here is a close up of the finish on the wheels when I got them. 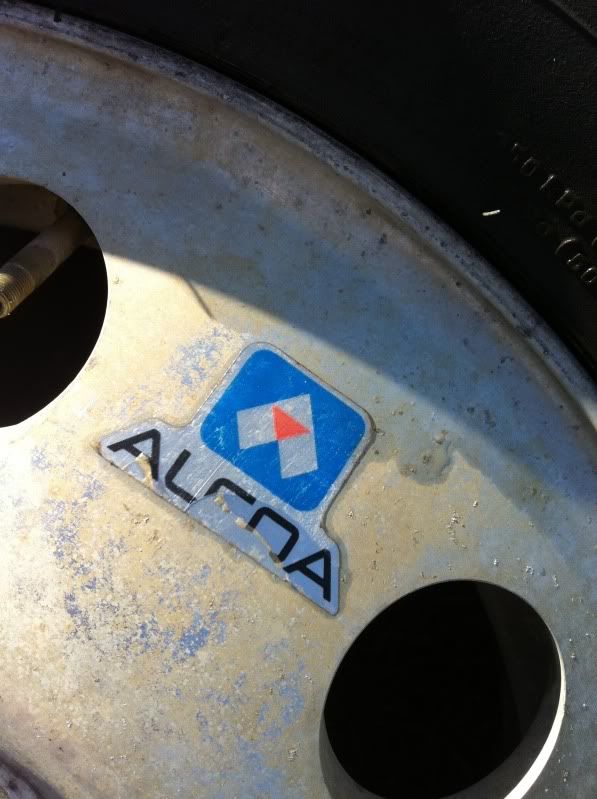 This was a beating to remove. I suspect its old Fix-A-Flat skank. I wound up using a wire brush on a drill on the bead seats and center barrels.  I had to start at 80 grit with a DA sander. Then 180, 220, 320. Then I switched to wet sanding with 600, 1000, and 1500. Then hand polish from there. 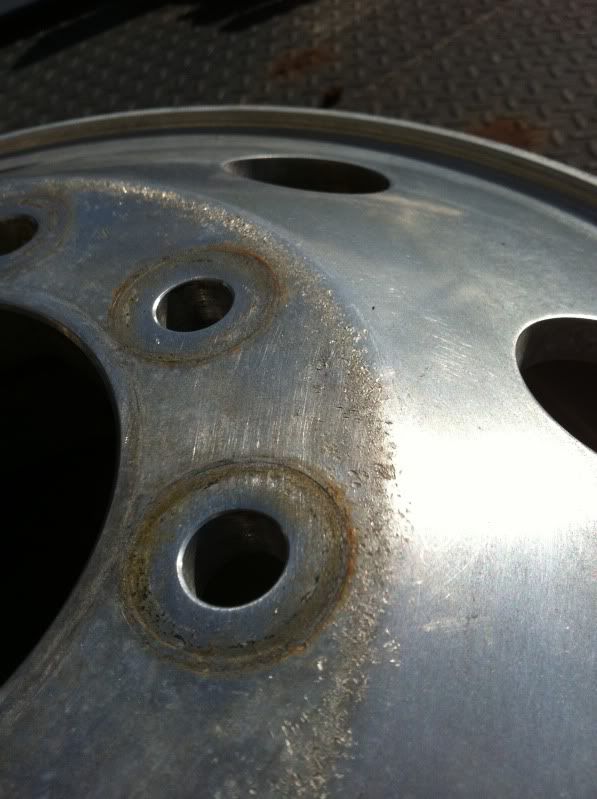 Machine sanded through 320 grit.... 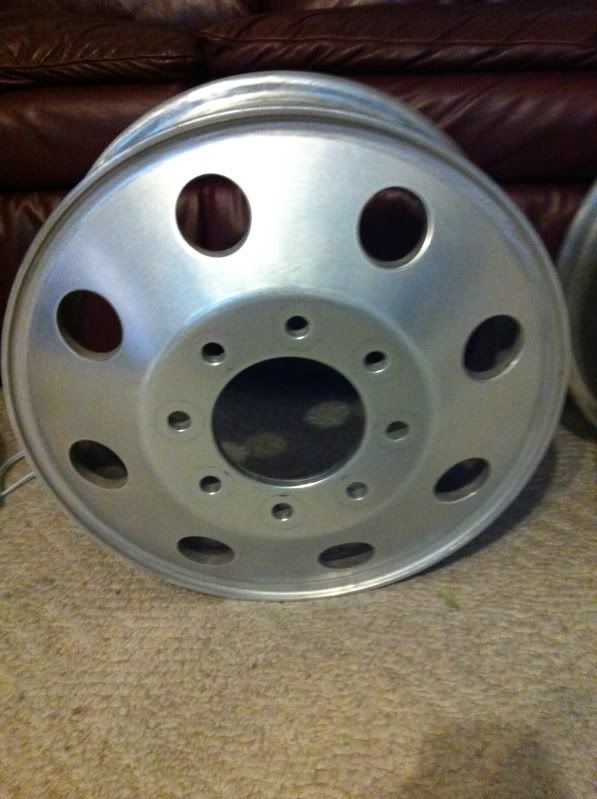 Then wet sanded on out and polished... 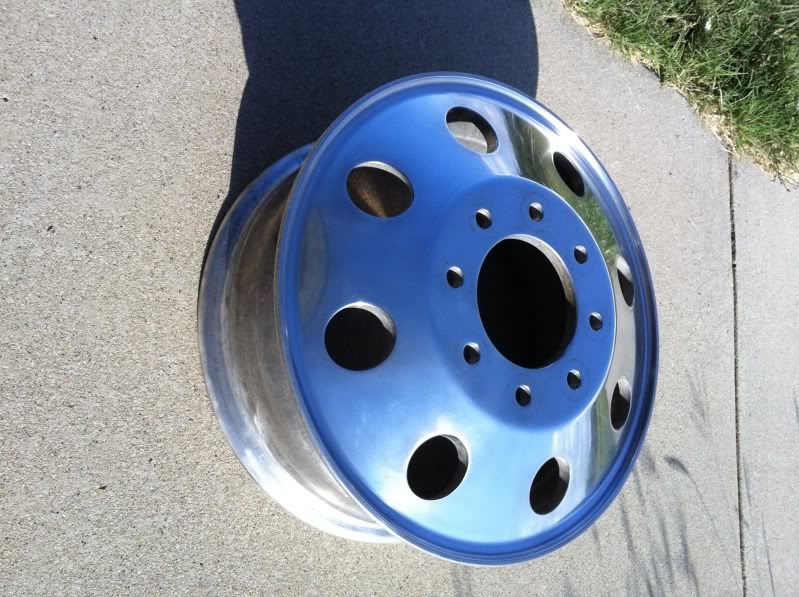 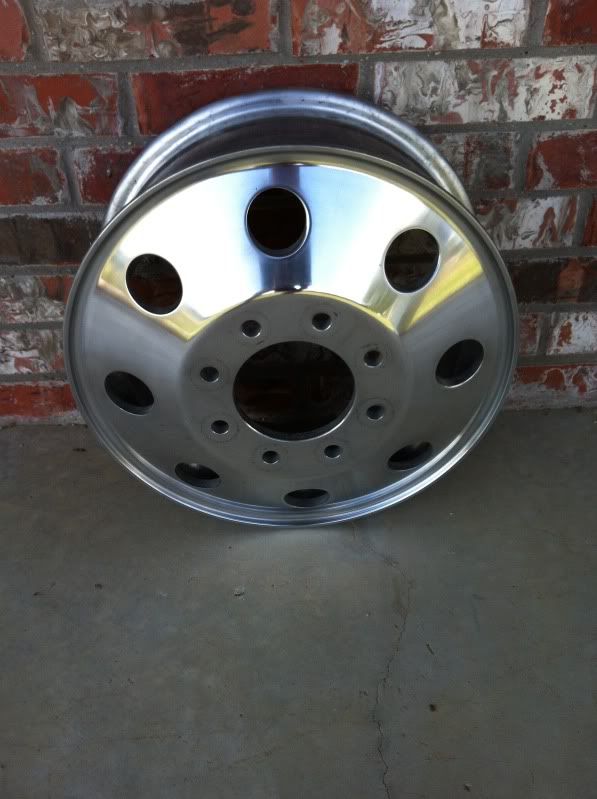 I think it needs another round or three of fine polish work but its getting better. I have only done the two fronts so far. My wife graciously spread an old blanket on the living room floor and tolerated me sitting there polishing. |
|
|
|

|
|
|
#195 | |
|
Senior Member
Join Date: Apr 2004
Location: sw colorado
Posts: 2,720
|
Re: The Hillbilly Deluxe dually build
Quote:
|
|
|
|

|
|
|
#196 | |
|
I know the pieces fit
Join Date: Nov 2007
Location: MONTGOMERY, AL
Posts: 5,523
|
Re: The Hillbilly Deluxe dually build
Quote:

|
|
|
|

|
|
|
#197 |
|
Watch out for your cornhole !
 Join Date: Jun 2003
Location: Azle, Texas
Posts: 14,162
|
Re: The Hillbilly Deluxe dually build
In my case, I just wet sanded with the 1500 grit pretty thoroughly then polished them twice with this stuff.
Its just a tube of white polish I've had on my shelf for years. |
|
|

|
|
|
#198 |
|
Registered User
Join Date: Sep 2009
Location: Beaverton, OR from WA State
Posts: 1,515
|
Re: The Hillbilly Deluxe dually build
You, Sir, could teach me a thing or two...
 patience included. Those look fantastic! I have always been leery of sanding, I've created hot spots and low spots before... :/ patience included. Those look fantastic! I have always been leery of sanding, I've created hot spots and low spots before... :/
__________________
Devin 1983 GMC High Sierra 2500, 4x4, RC/LB, 400 S.B., SM-465, NP-208, Corporate 10 bolt & 9.5" 14 bolt 1996 GMC Sierra SLE 3500 DRW, 4x4, EC/LB, Vortec 454, NV-4500, BW-4401, AAM 925 & AAM 1050 1997 GMC Sierra SLT 1500 4x4, Z71/F44, EC/SB, Vortec 350 My Introduction with my '83s History New Daily, the '96 |
|
|

|
|
|
#199 |
|
Registered User
Join Date: Oct 2009
Location: canton ga
Posts: 12,724
|
Re: The Hillbilly Deluxe dually build
Tex ,you always amaze me with your builds and how to do lessons ,thanks for being here and sharing with us.
|
|
|

|
|
|
#200 |
|
Watch out for your cornhole !
 Join Date: Jun 2003
Location: Azle, Texas
Posts: 14,162
|
Re: The Hillbilly Deluxe dually build
Thank you. That's quite a compliment. I think good build threads help to hype people up and get them motivated to work on their own stuff when they might be feeling burnt out or depressed about lack of progress on their own projects.
|
|
|

|
 |
| Bookmarks |
|
|