
 |
|
|
#201 |
|
Registered User
Join Date: Aug 2007
Location: Corona, California
Posts: 7,998
|
Re: 1957 Chevy truck re-rebuild
The seam came out nice.
Kim |
|
|

|
|
|
#202 |
|
A320 Pilot/USAF Retired
Join Date: Mar 2009
Location: Charleston, SC
Posts: 2,629
|
Re: 1957 Chevy truck re-rebuild
Looks much better with the seam!!
__________________
JJ My 1957 build: http://67-72chevytrucks.com/vboard/s...d.php?t=334552 http://www.trifive.com/forums/showthread.php?t=22037 Instagram - Chuckdriver57 |
|
|

|
|
|
#203 |
|
Registered User
Join Date: Aug 2012
Location: Salem Mo
Posts: 652
|
Re: 1957 Chevy truck re-rebuild
Ahhh, some seam likers just like me. I understand the idea of smoothing lots of stuff on these old trucks, but for me, it's the '50's, body lines, bumps and bulges, were a big part of the character of these old vehicles.
Although I'm taking care of many of he odds and ends, I've still been taking pictures and since I've got pictures, I'll keep posting them. The hood is gonna be clear coat black top and bottom, I wanted to find a way to paint it all at one time. The very front edge will have a touch of silver but otherwise glossy black. It would be huge plus if I can paint all at one time, no extra taping, no overspray, ect. In this case I attached to the front hood latch then a spacer between the chain and hood so can prime between the hood and chain. I plan on making a hanging bracket for paint day. Hood after sandblasting and cleaning. 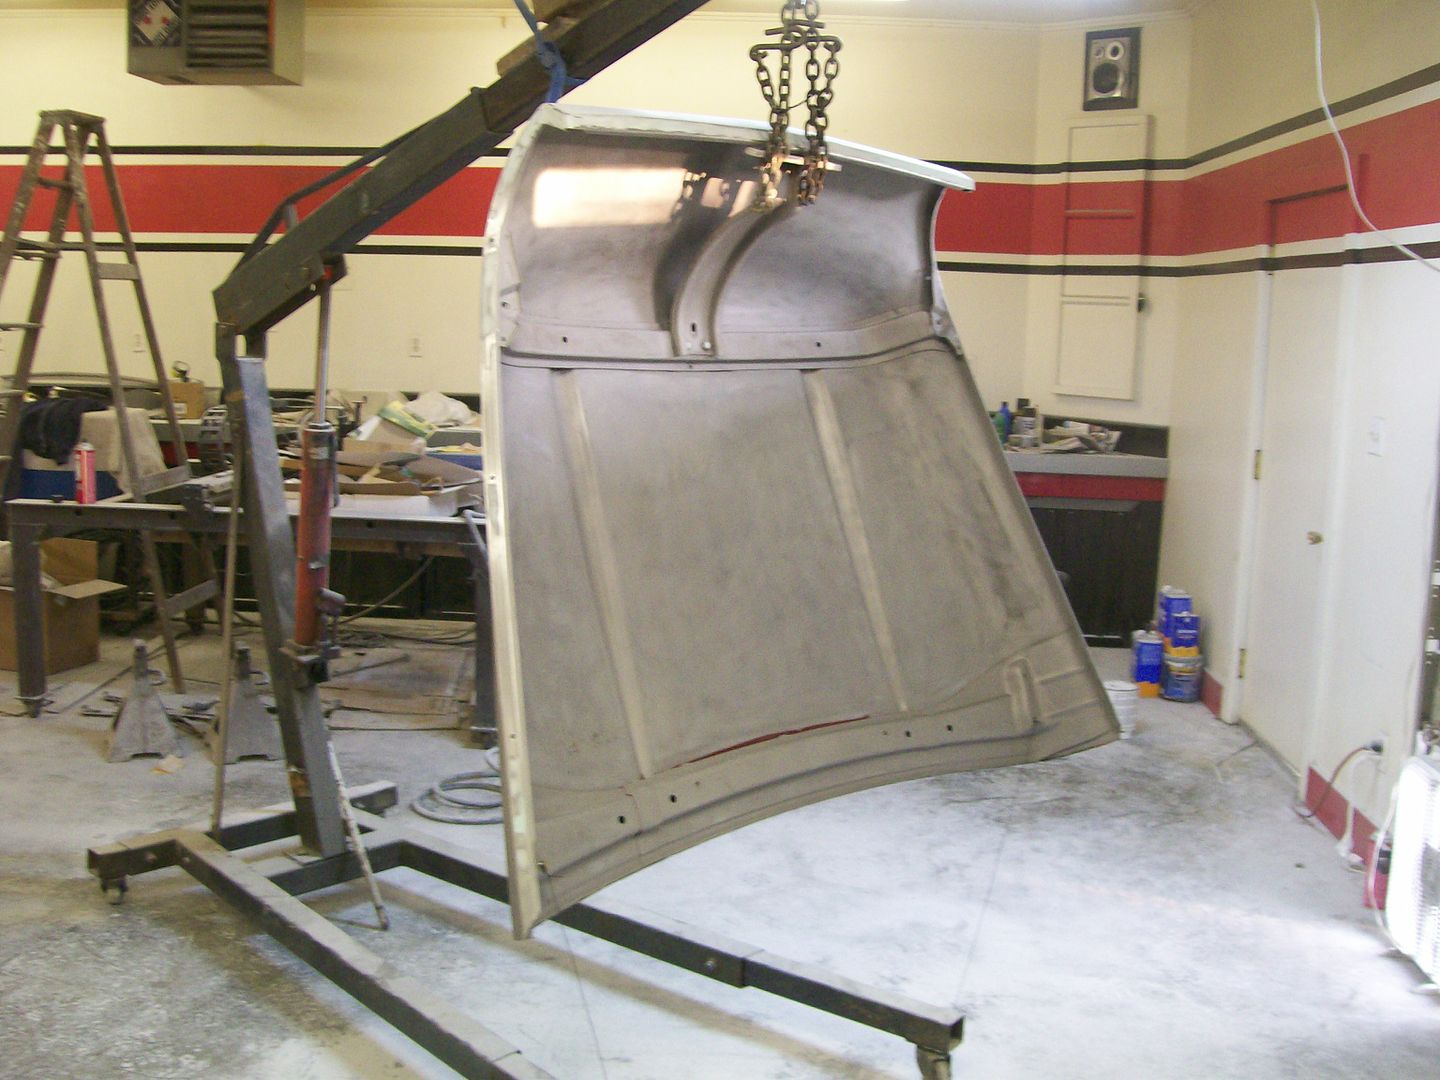 I understand the troubles of warping sheet metal such as this hood. It does such a great job plus, the last paint job was also stripped to metal. Problem was, they used no metal etching primer, they used lacquer based primer, it comes off very easy. This makes the sandblasting process go real fast, by going fast, I can eliminate most of the heat caused by blasting. Now with one good coat of epoxy primer. After this primer dries about an hour I got 2 coats feather fill applied. All done in one evening, great. 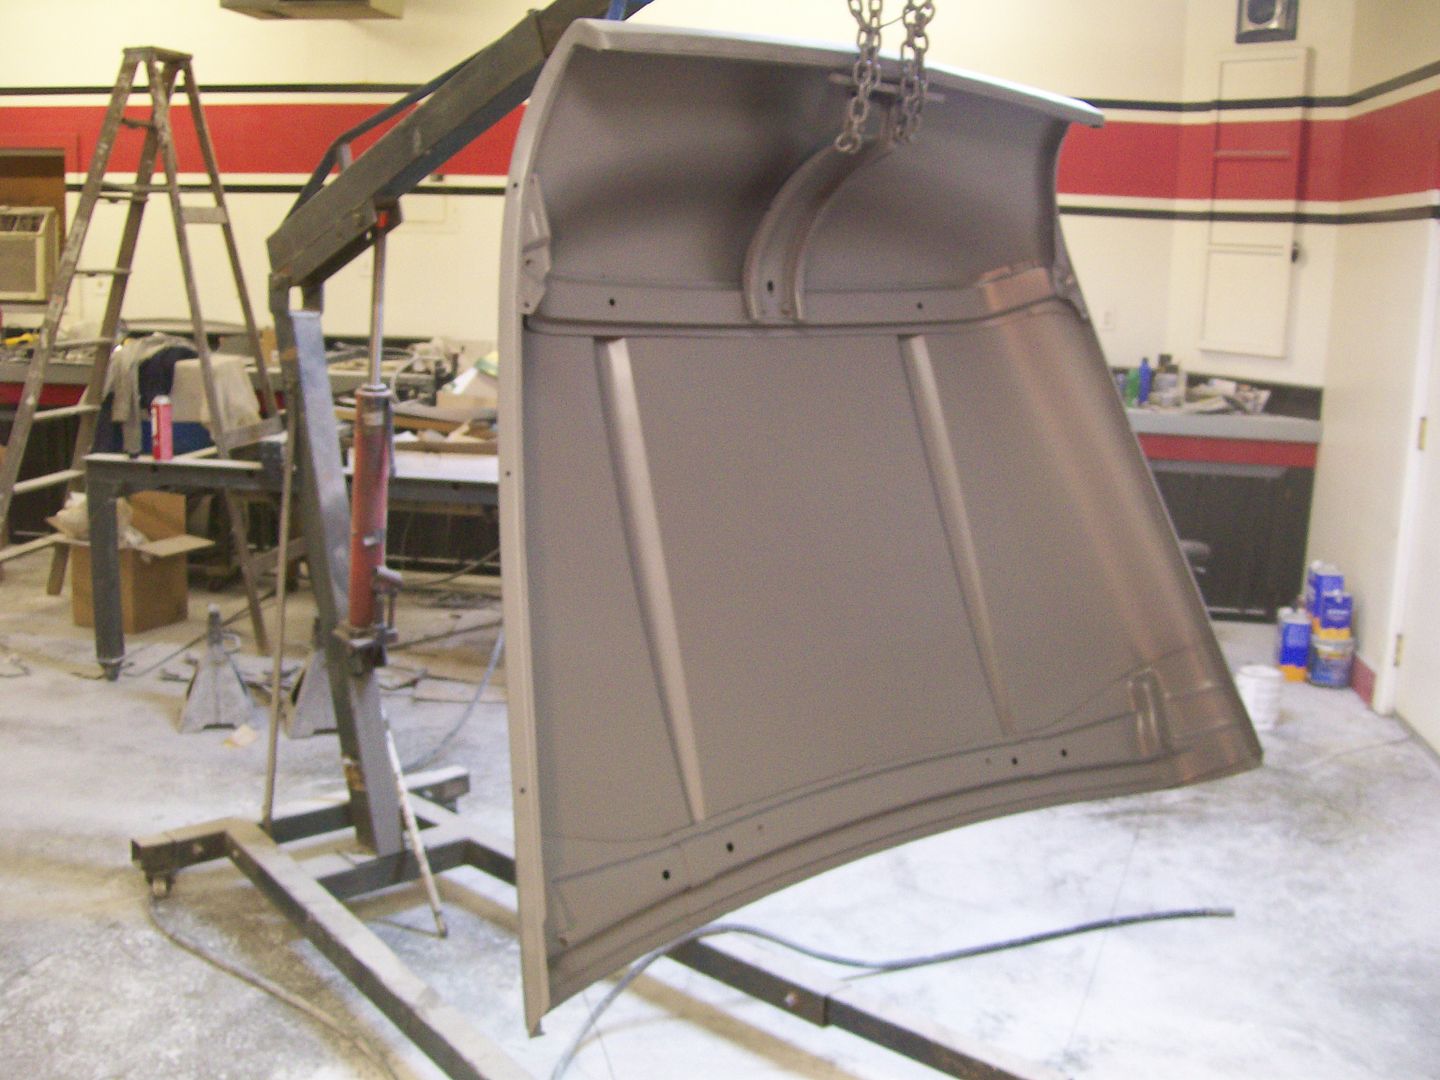 To help stabilize the hood I also ran fine wire from the lower edges of the hood to the legs of the engine hoist. |
|
|

|
|
|
#204 |
|
Registered User
Join Date: May 2009
Location: Under a bad sign
Posts: 498
|
Re: 1957 Chevy truck re-rebuild
Looking good.
And one more use for the cherry picker 
|
|
|

|
|
|
#205 |
|
Registered User
Join Date: Feb 2013
Location: Lakeside Ariz
Posts: 445
|
Re: 1957 Chevy truck re-rebuild
I just had to replace my hood due to sandblasting. I did find a good 57 hood for $100 . I thought was a good buy. I like the 57 hood better than the 55 anyway.
Rich |
|
|

|
|
|
#206 |
|
Registered User
Join Date: Aug 2007
Location: Corona, California
Posts: 7,998
|
Re: 1957 Chevy truck re-rebuild
That came out nice.
Kim |
|
|

|
|
|
#207 |
|
Registered User
Join Date: Jan 2012
Location: Motown
Posts: 7,680
|
Re: 1957 Chevy truck re-rebuild
i'm always amazed with your shop, one of my favorite shops
we paint a lot of stuff big and small on both sides by hanging everything with paint hooks they are made of spring steel and very strong, we have 1000s around the shop of assorted sizes you can hang a hood with 2 hooks going into bolt holes  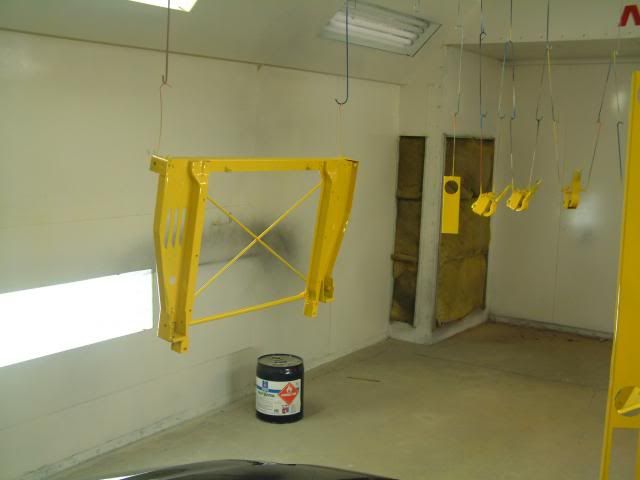 in back of the bed you can see all the bed strips hanging from the ceiling 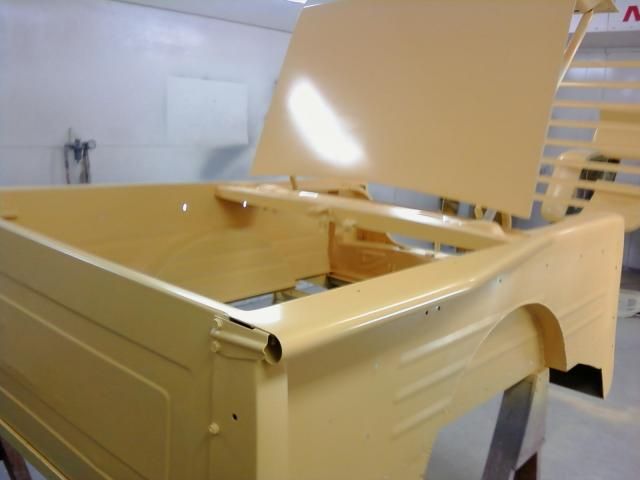 you'd probably have to buy 1000 at a time, but this site has free samples  ebay has 50- six inch hooks for $10
__________________
cool, an ogre smiley  Ogre's 58 Truk build Ogre's 58 Truk buildhow to put your truck year and build thread into your signature shop air compressor timer |
|
|

|
|
|
#208 |
|
Registered User
Join Date: Aug 2012
Location: Salem Mo
Posts: 652
|
Re: 1957 Chevy truck re-rebuild
_Ogre, ahhhhh, I like those hooks. Gladyou like the shop, I don't remember letting it get this messy, I've been creating so much dust I refuse to clean it til I'm passed the heavy dust stage of the build.
Baldeagle SR, it's a learning curve, good thing you found another hood at a good price. I destroyed my first hood, it was for a Chevy Nova, that was back in the early 80's.  More pics tonight... Sometime back in the early 80's this truck and a front clip installed. I've been told it was from an el-camino, I'd like to find numbers or something to identify it. It looks like it's not the first one they've done, I like how they blended the frames together, and when my dad took it in for an alignment, it checked out ok and the shims in the alignment are only the midlle of adjustment. My only issue is a cosmetic look to a couple areas, there's no time like the present to get at it. My first area is to get rid of the 90 degree look at the end of the front frame. 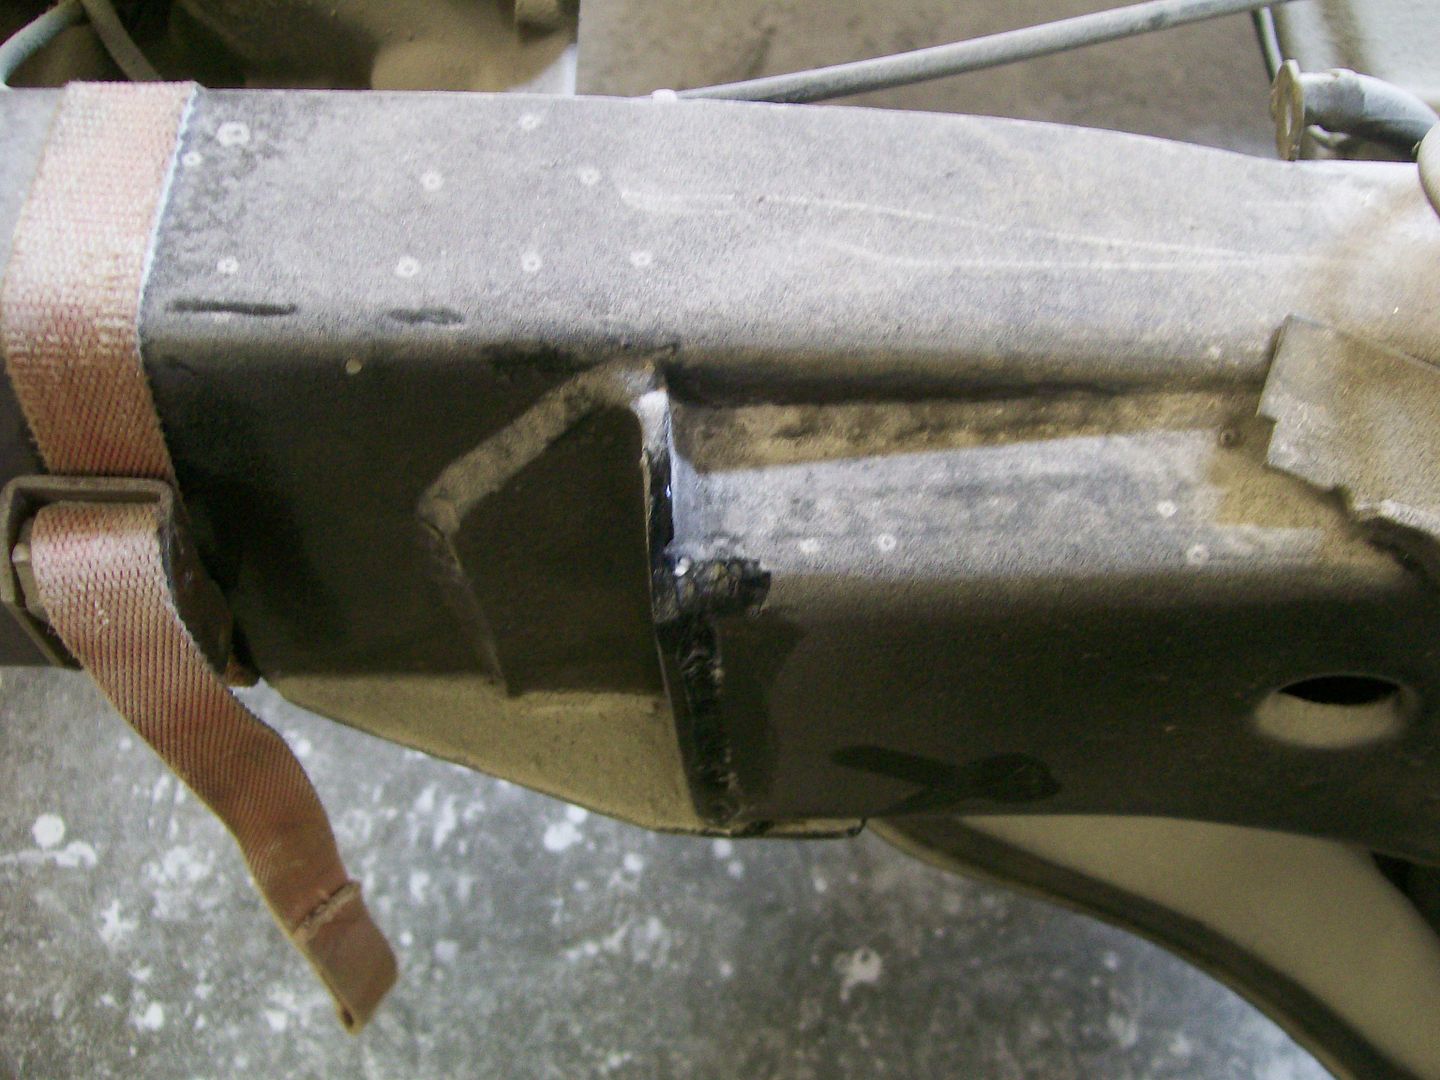 Gotta love the sandblaster. I first cut the weld that attached the 90 to the front frame. The 90 came out about 3/16" beyond the frame and made a good weld zone. I want to get the 90 degree lower than the front frame and create a 1/8" gap. The gap is going to give me a great way to get deep penetration on the reweld. 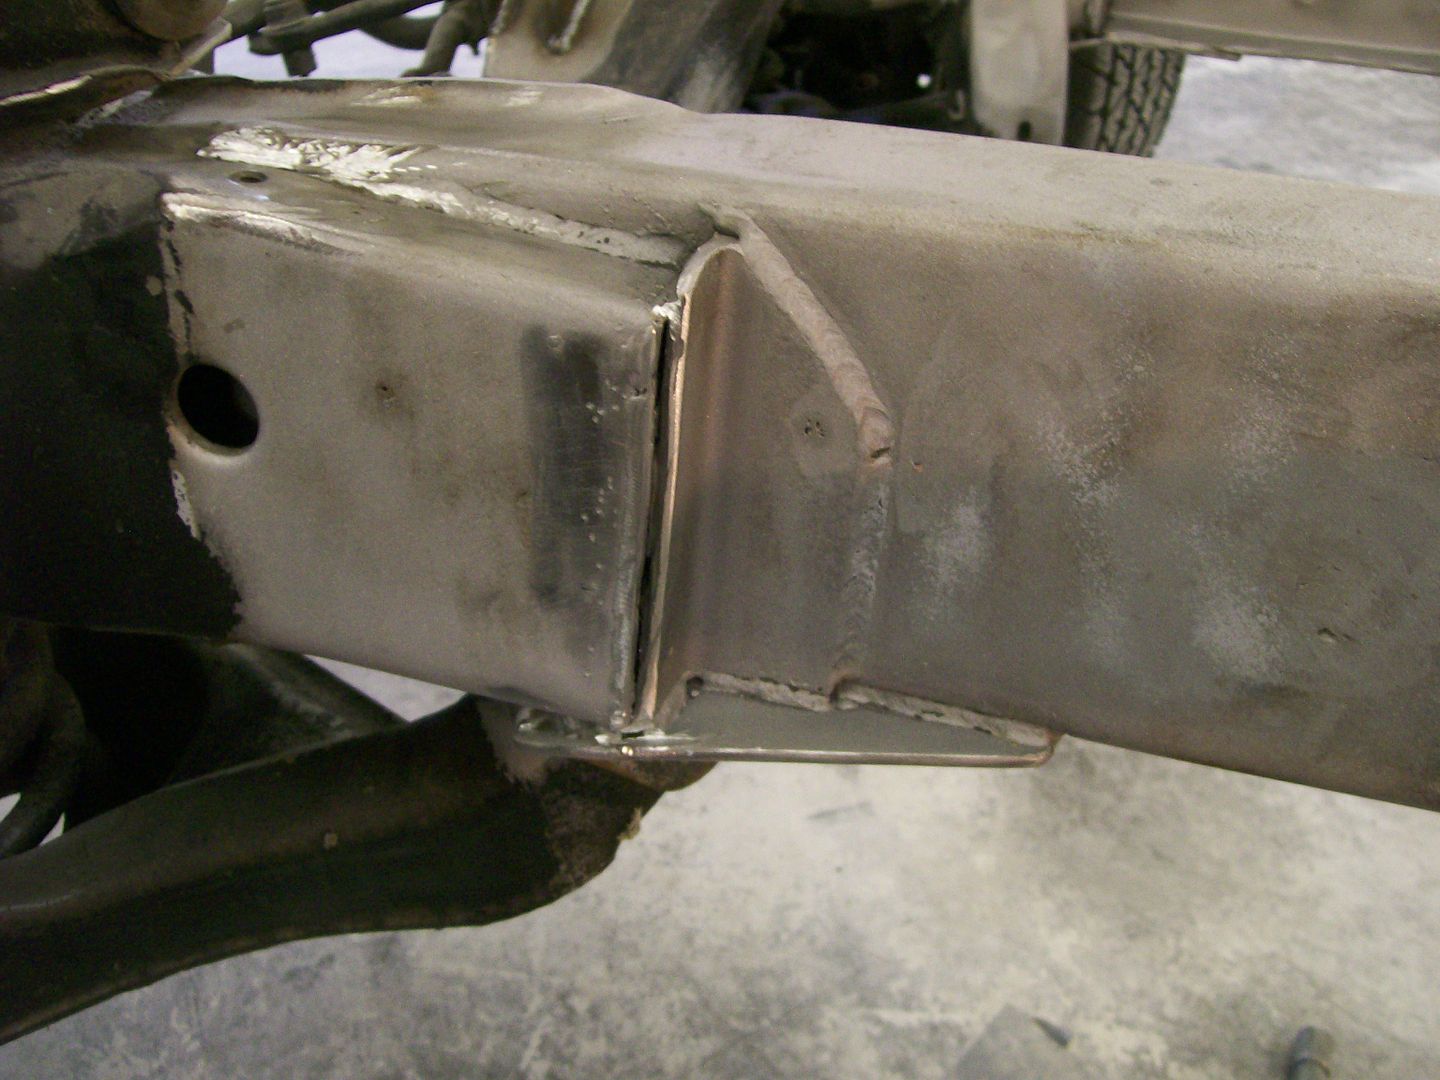 More to follow. |
|
|

|
|
|
#209 |
|
Registered User
Join Date: Aug 2012
Location: Salem Mo
Posts: 652
|
Re: 1957 Chevy truck re-rebuild
Moving forward on the frame upgrade.... I got all the pieces cut and shaped how I wanted them. I allowed gaps to help weld get deep penetration also.
Here's the pieces. Since I allowed the gaps, I had to use a magnet to hold the top piece, otherwise it wanted to fall into the cavity below it. 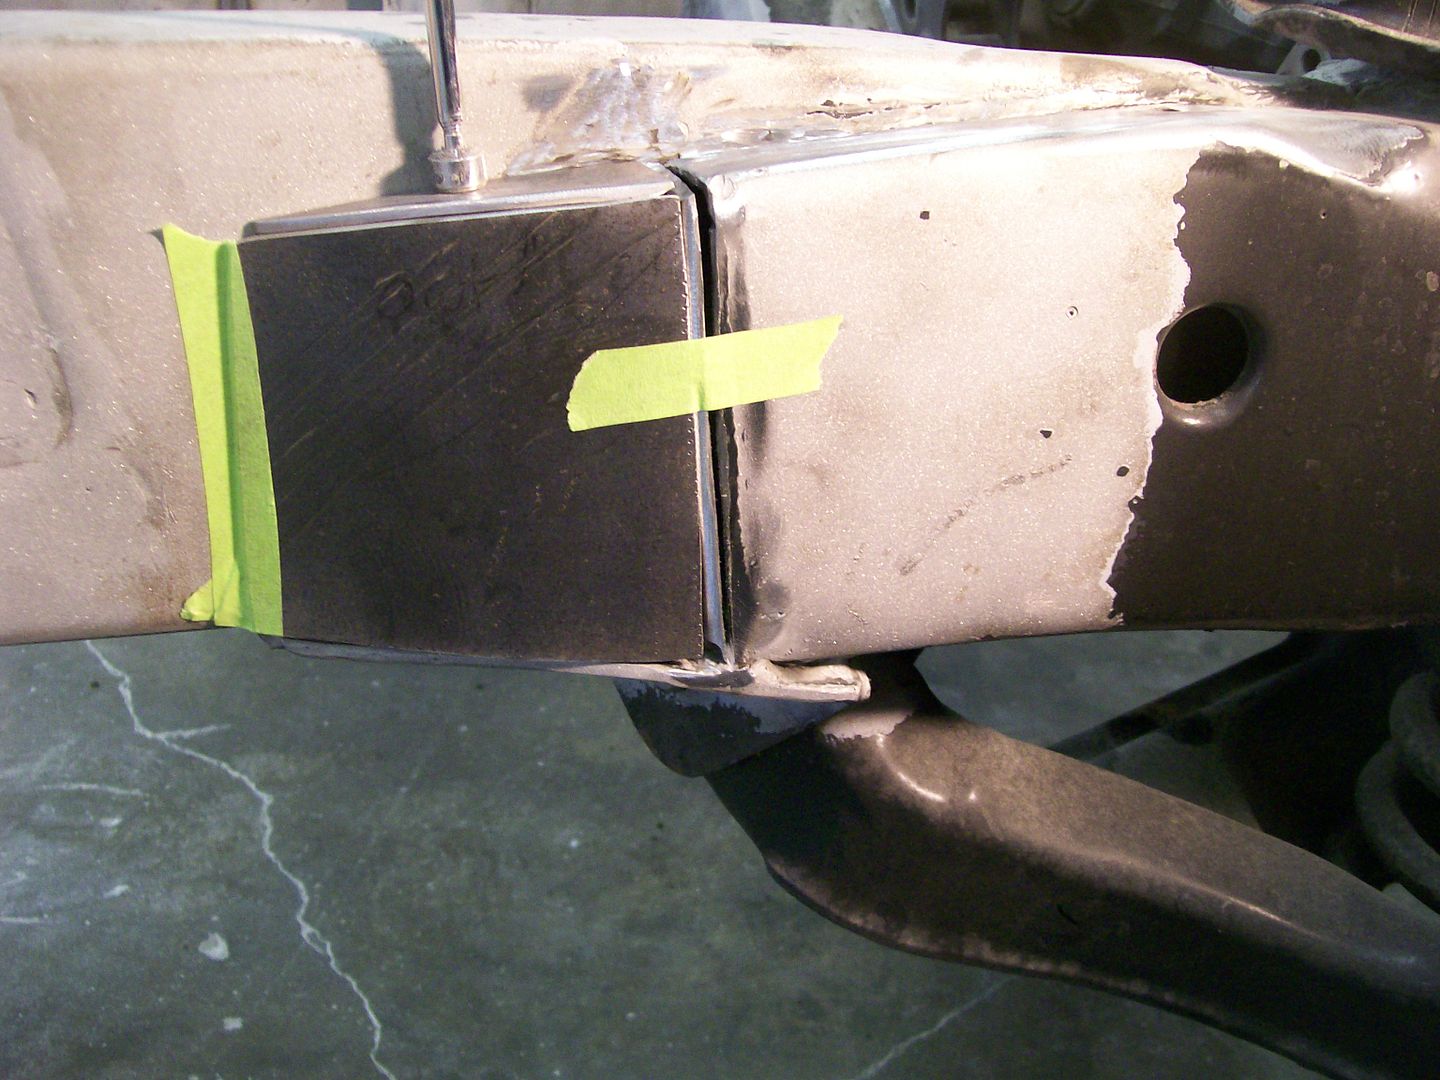 Then came the welding. Where I showed the 90 degree piece and the gap that I cut into, I welded that gap first. Then went back over with another weld that covered the new tapered piece, then covered the gap weld, then to the frame. This attached all the pieces together when done. 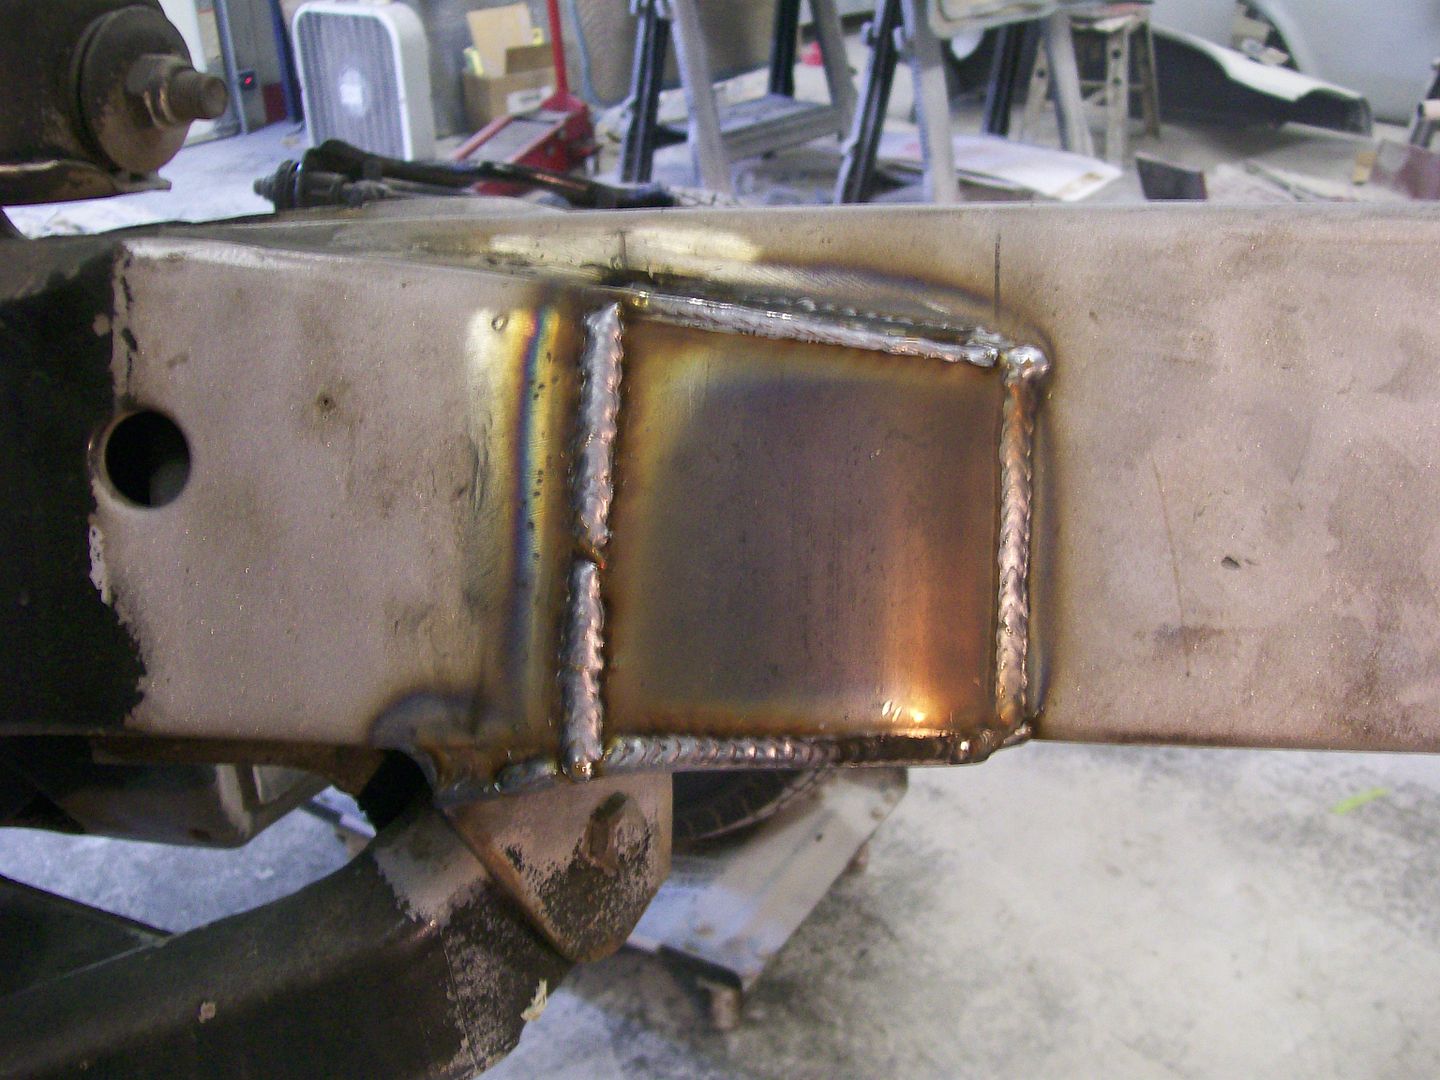 Now the final clean up. I got the look I wanted. I wanted to get the new and old frame to at least blend together and not look so obvious that there had been work done. 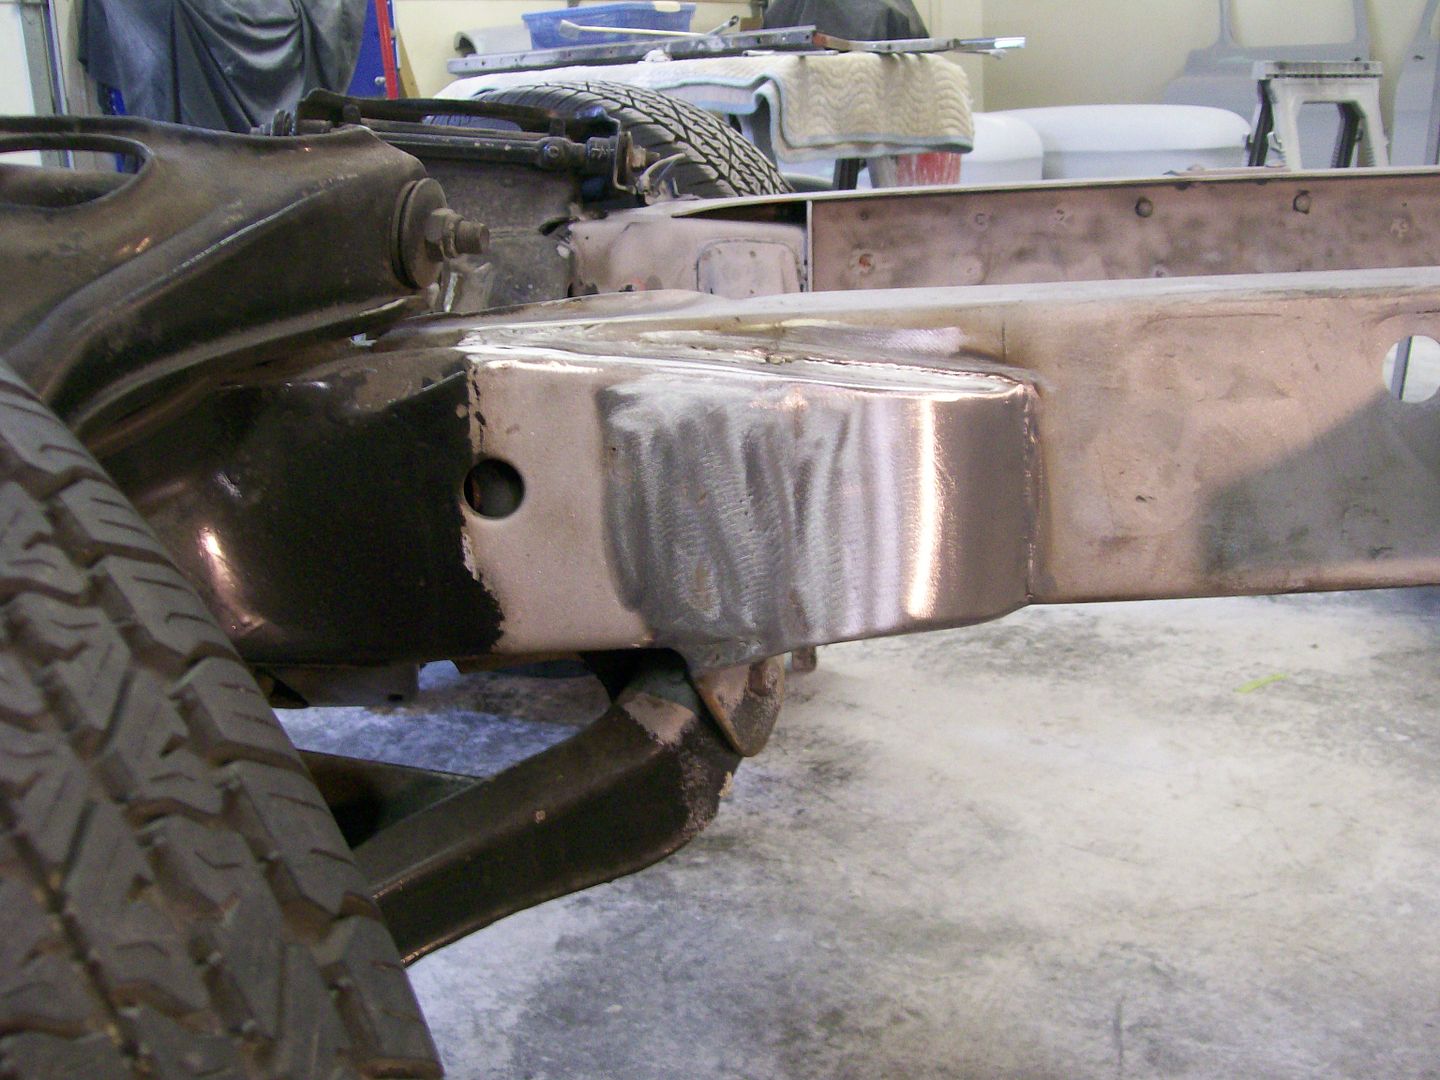 Aaurgh, look at that rolled up edge from the original frame. I suspect that's where the original steering column passed by the top of the frame. That's the next thing to change. |
|
|

|
|
|
#210 |
|
Registered User
Join Date: Aug 2007
Location: Corona, California
Posts: 7,998
|
Re: 1957 Chevy truck re-rebuild
Looks good.
Kim |
|
|

|
|
|
#211 |
|
Registered User
Join Date: Aug 2012
Location: Salem Mo
Posts: 652
|
Re: 1957 Chevy truck re-rebuild
This is my first post with high speed internet. WOW, before I waited about 8 minutes to up load a picture, now..... about 20 seconds, this is great.
I mentioned the small flared section of the frame last post. Here's a close up. 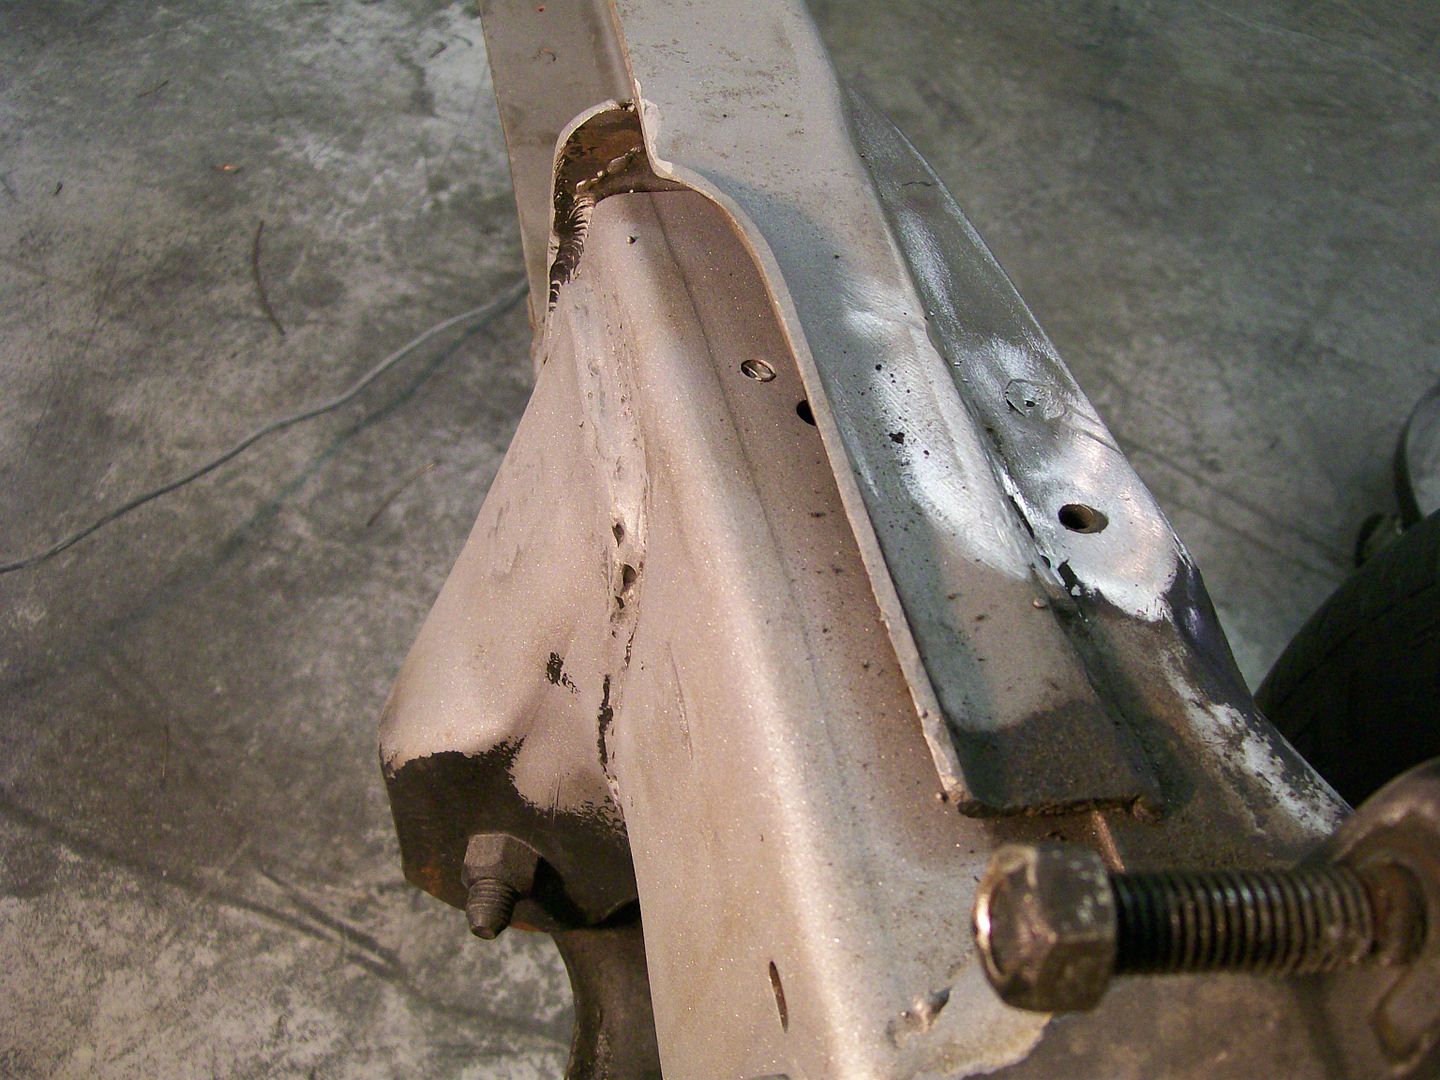 I cut off the flare then beveled the edge, than made a matching piece. 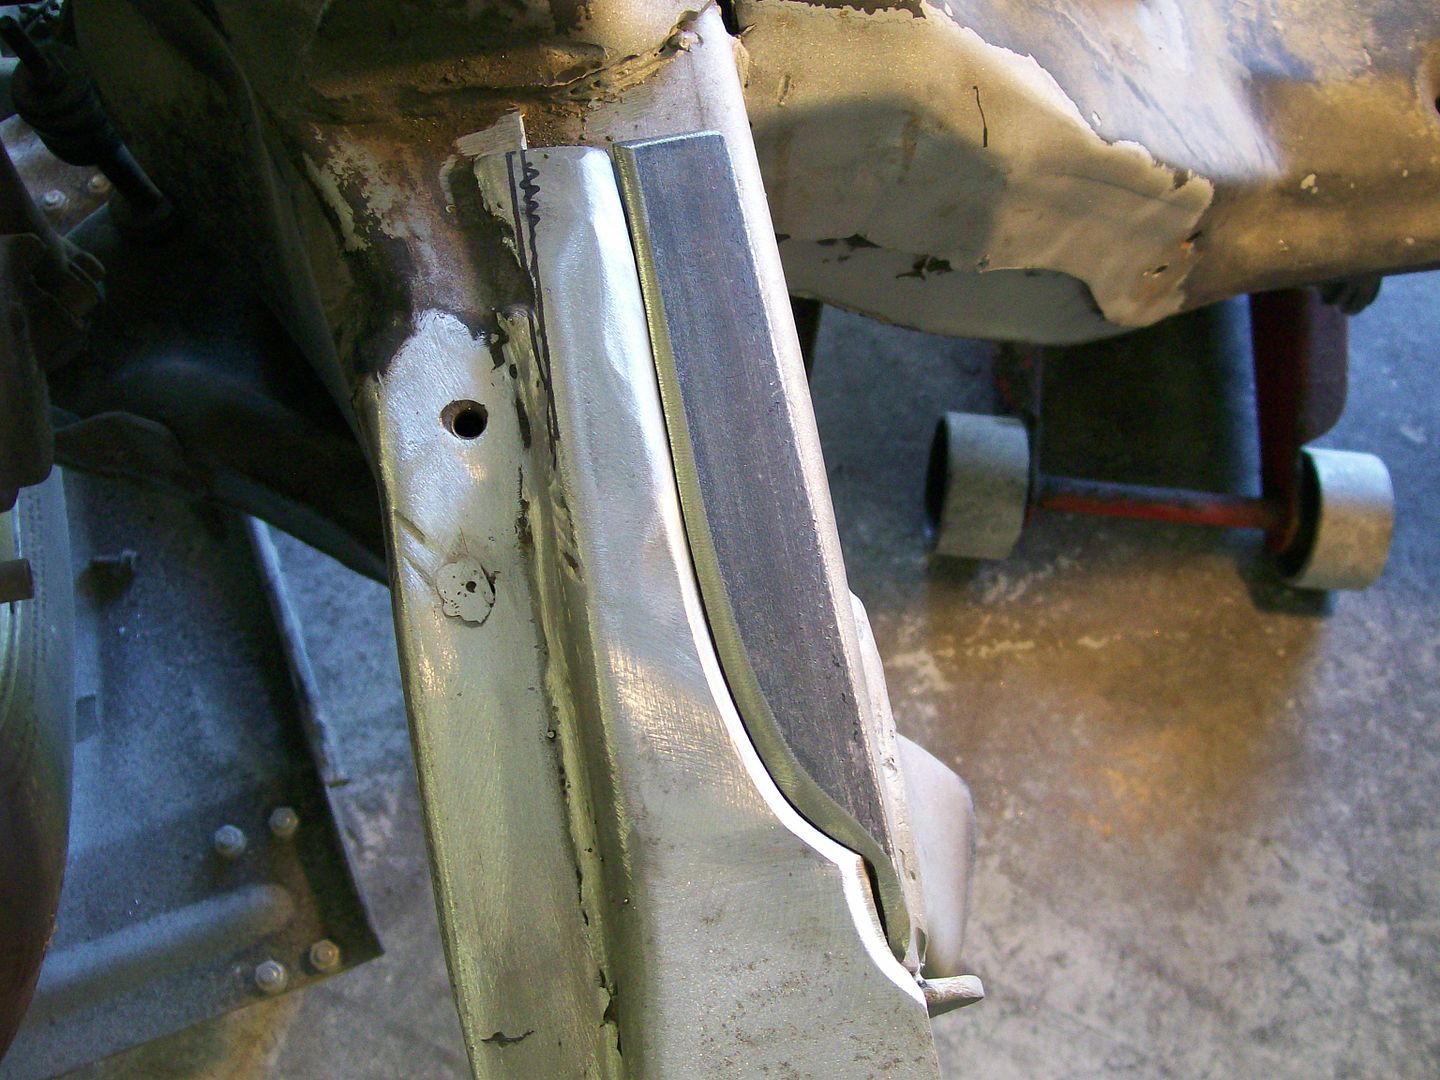 Then the welding. 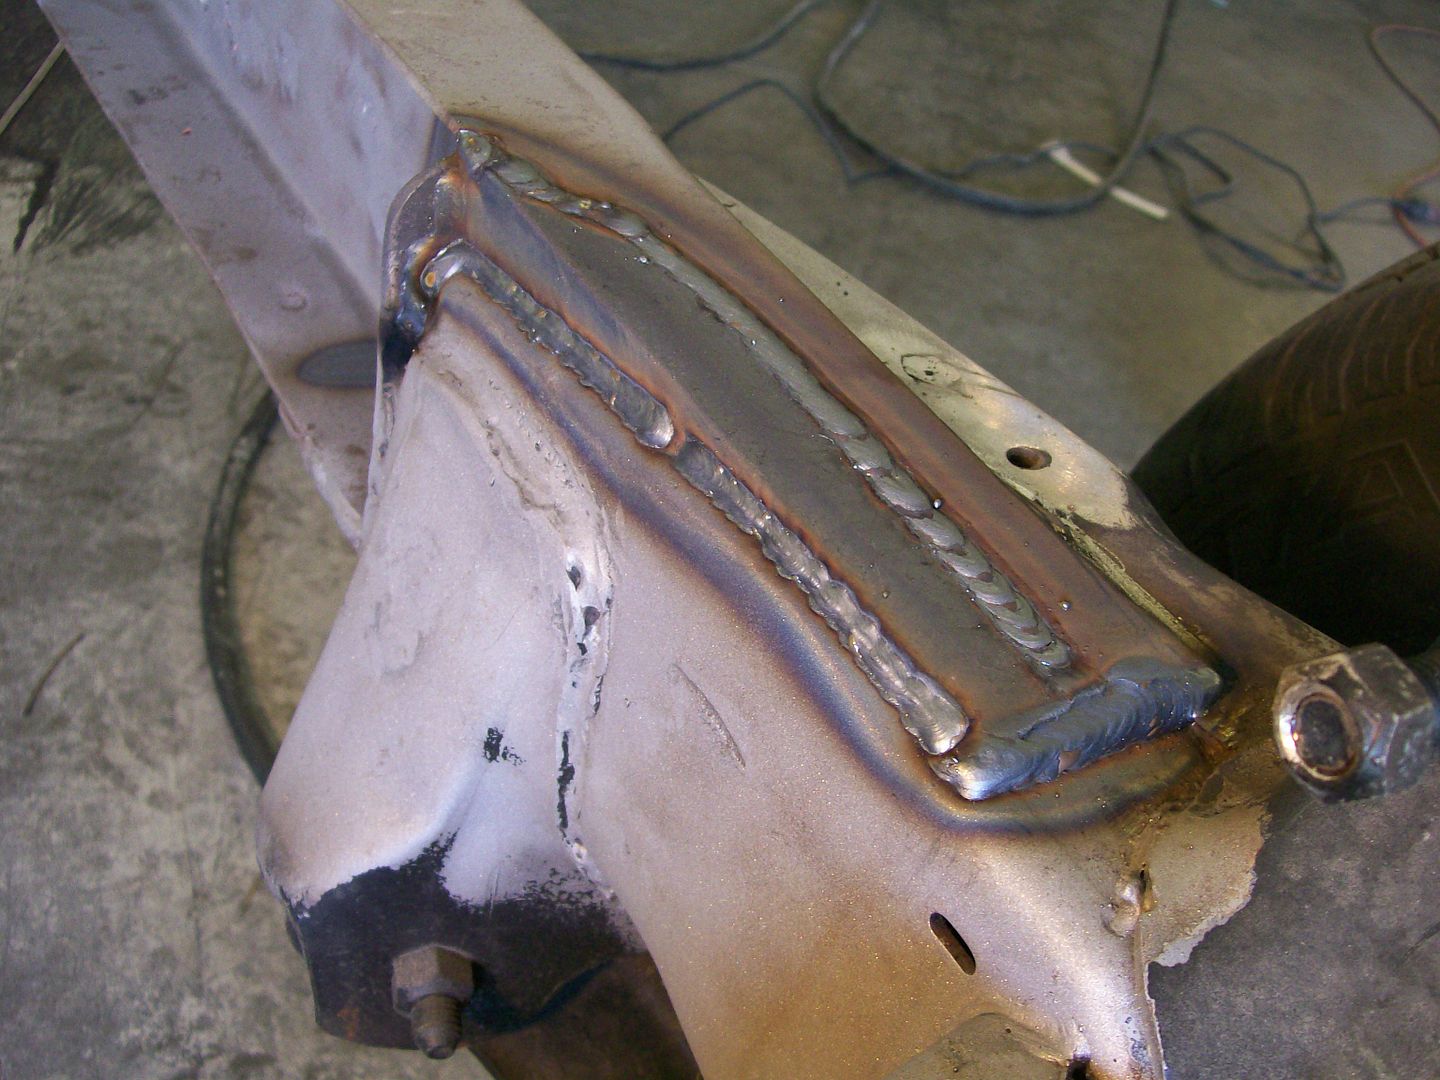 Looks much better and should be stronger also.  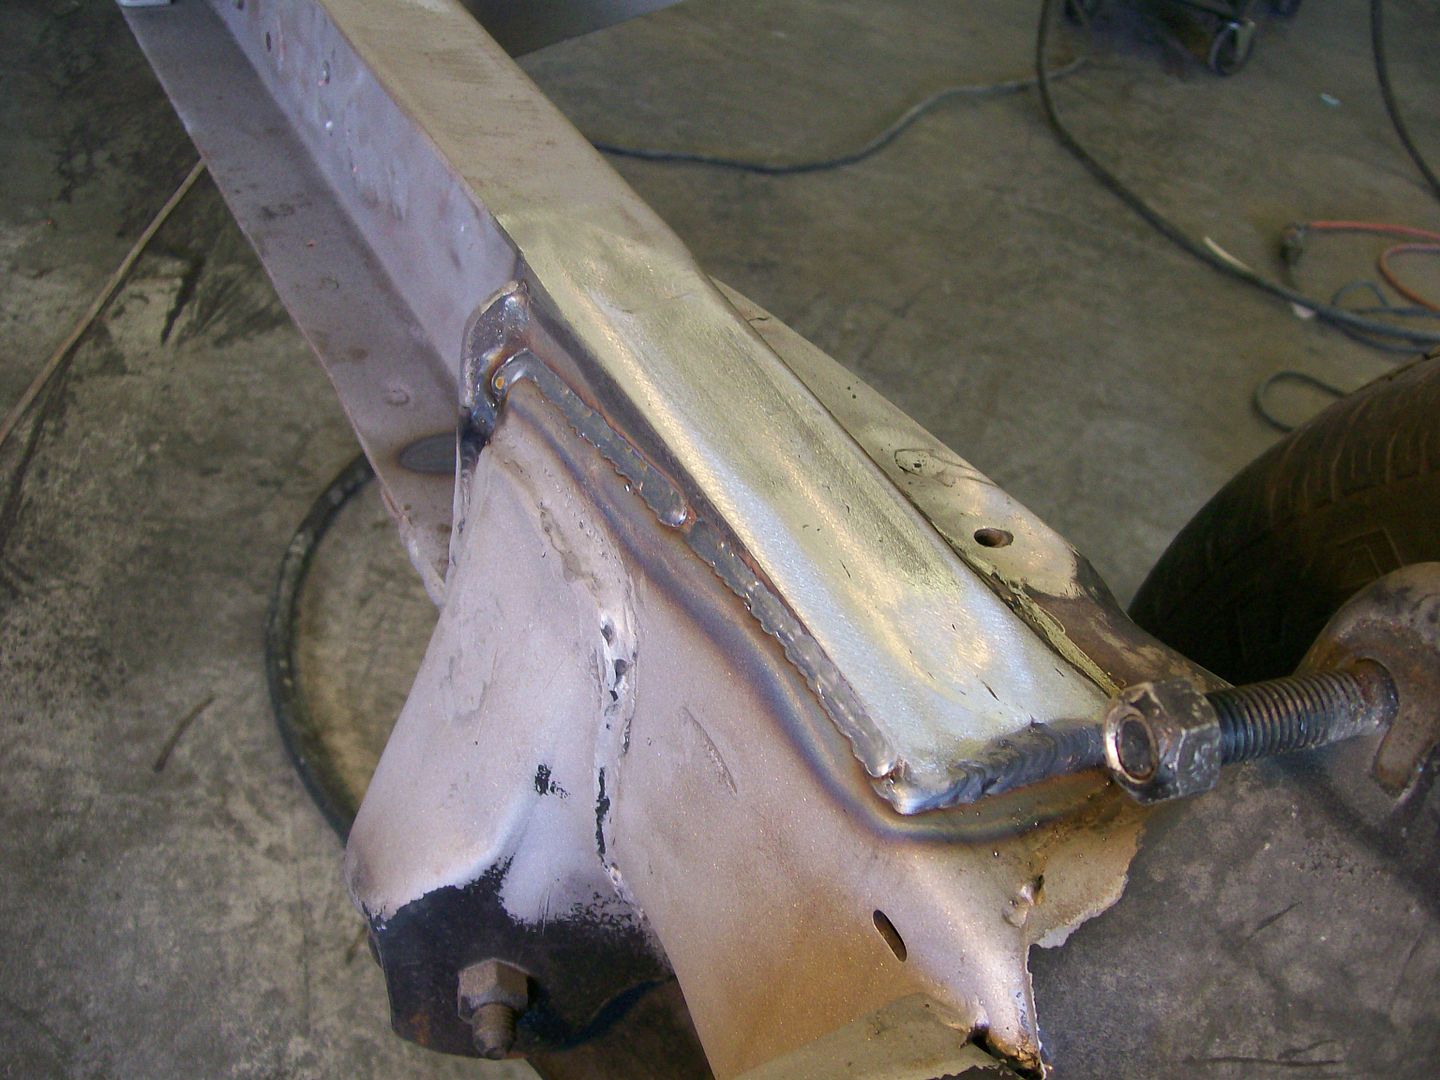
|
|
|

|
|
|
#212 |
|
Registered User
Join Date: Aug 2007
Location: Corona, California
Posts: 7,998
|
Re: 1957 Chevy truck re-rebuild
Nice mod.
Kim |
|
|

|
|
|
#213 |
|
Registered User
Join Date: Jan 2012
Location: Motown
Posts: 7,680
|
Re: 1957 Chevy truck re-rebuild
welcome to the 21st century stepside

__________________
cool, an ogre smiley  Ogre's 58 Truk build Ogre's 58 Truk buildhow to put your truck year and build thread into your signature shop air compressor timer |
|
|

|
|
|
#214 |
|
Registered User
Join Date: Aug 2012
Location: Salem Mo
Posts: 652
|
Re: 1957 Chevy truck re-rebuild
Oh, this is great, I merely think about doing something, and it's done. I was talked into Verizon, of which we don't get Verizon cell phone service down here, the Verizon jet pack. It's nothing more than a device about the size of your mouse. It creates a WIFI hot spot where ever it is. They said it gets, or has a different technology to obtain a signal. It works great, very pleased.
I just up-loaded this pic, 10 seconds, wow. This means I'll have to move out of the Flintstone age and not use my feet to stop my truck now. Go Fred.....  It's a long story, but somehow the old bed took some bad turns along it's life time. Somethings I could see, somethings I decided to not see. Problem was, by not seeing (or ignoring), I wasn't facing reality to know this bed was not ever going to look as good as the rest of the truck. So I turned to Mar-K products, through Classic parts company. New front panel, new sides, new rear cross sill and I already had the tailgate. Once again, near perfect parts from Mar-K. The front panel was not Mar-K, it is nice but not quite the quality of Mar-K. 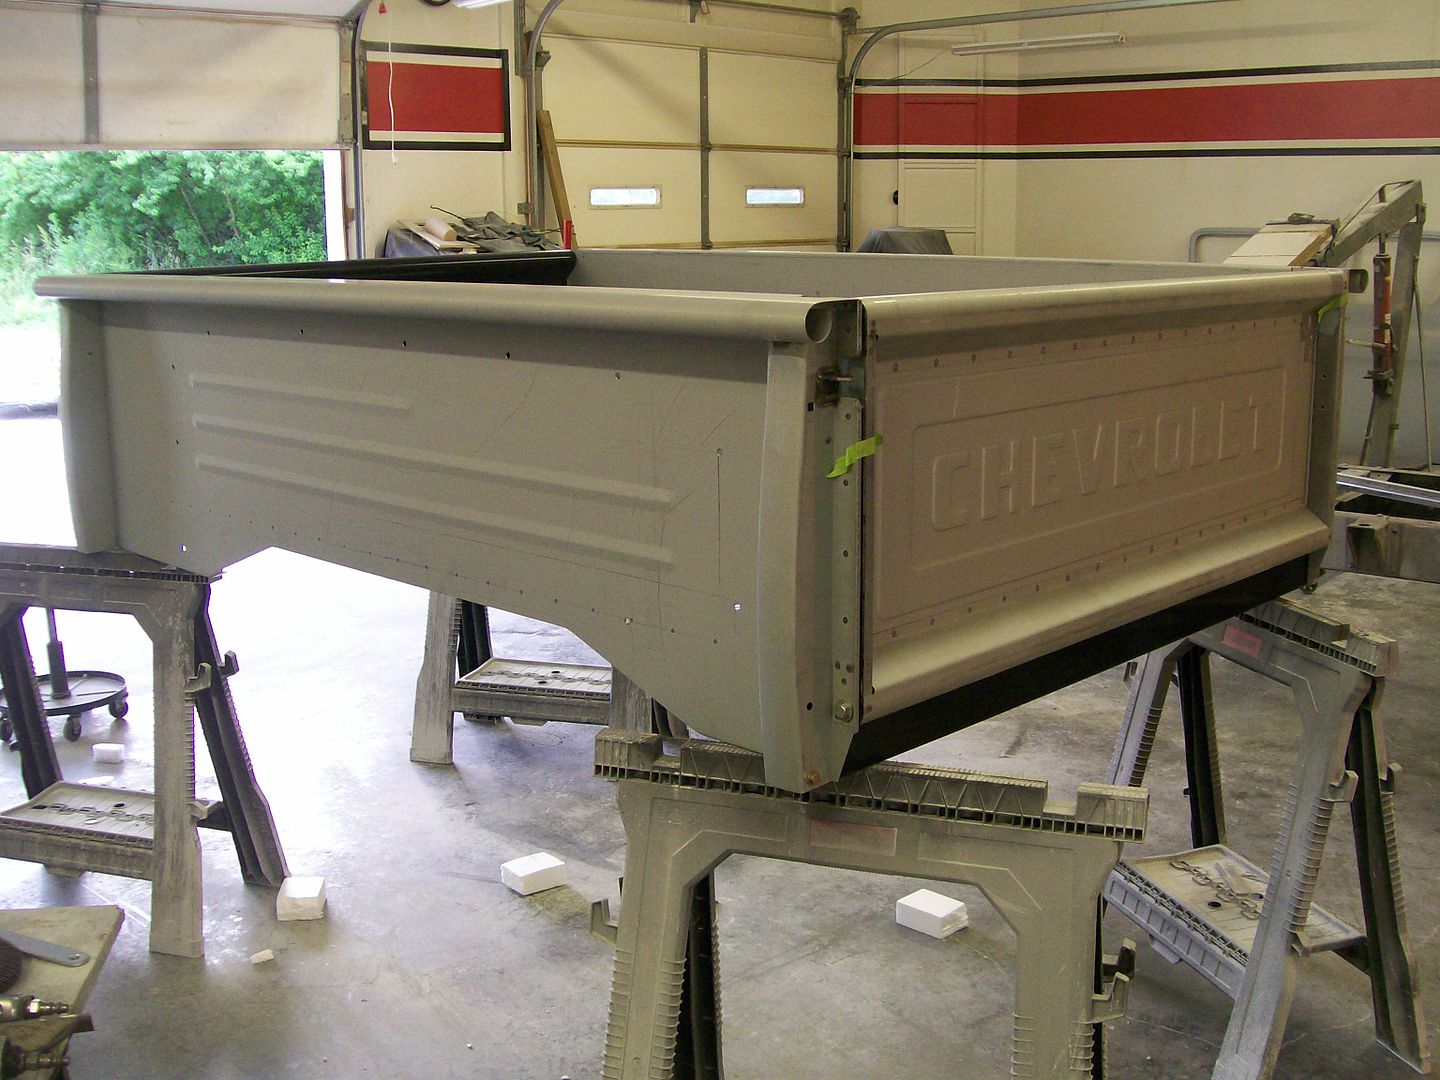
|
|
|

|
|
|
#215 |
|
Registered User
Join Date: Aug 2007
Location: Corona, California
Posts: 7,998
|
Re: 1957 Chevy truck re-rebuild
Nice looking bed.
Kim |
|
|

|
|
|
#216 |
|
Registered User
Join Date: Aug 2012
Location: Salem Mo
Posts: 652
|
Re: 1957 Chevy truck re-rebuild
Thanks Kim, this new bed will save me alot of time and give me a better finished project.
The tough decision was saying good by to the some of the work I already did to the old bed. I went a slightly different route on the end cap design. I also had to cut off the chain hooks off the new bed. 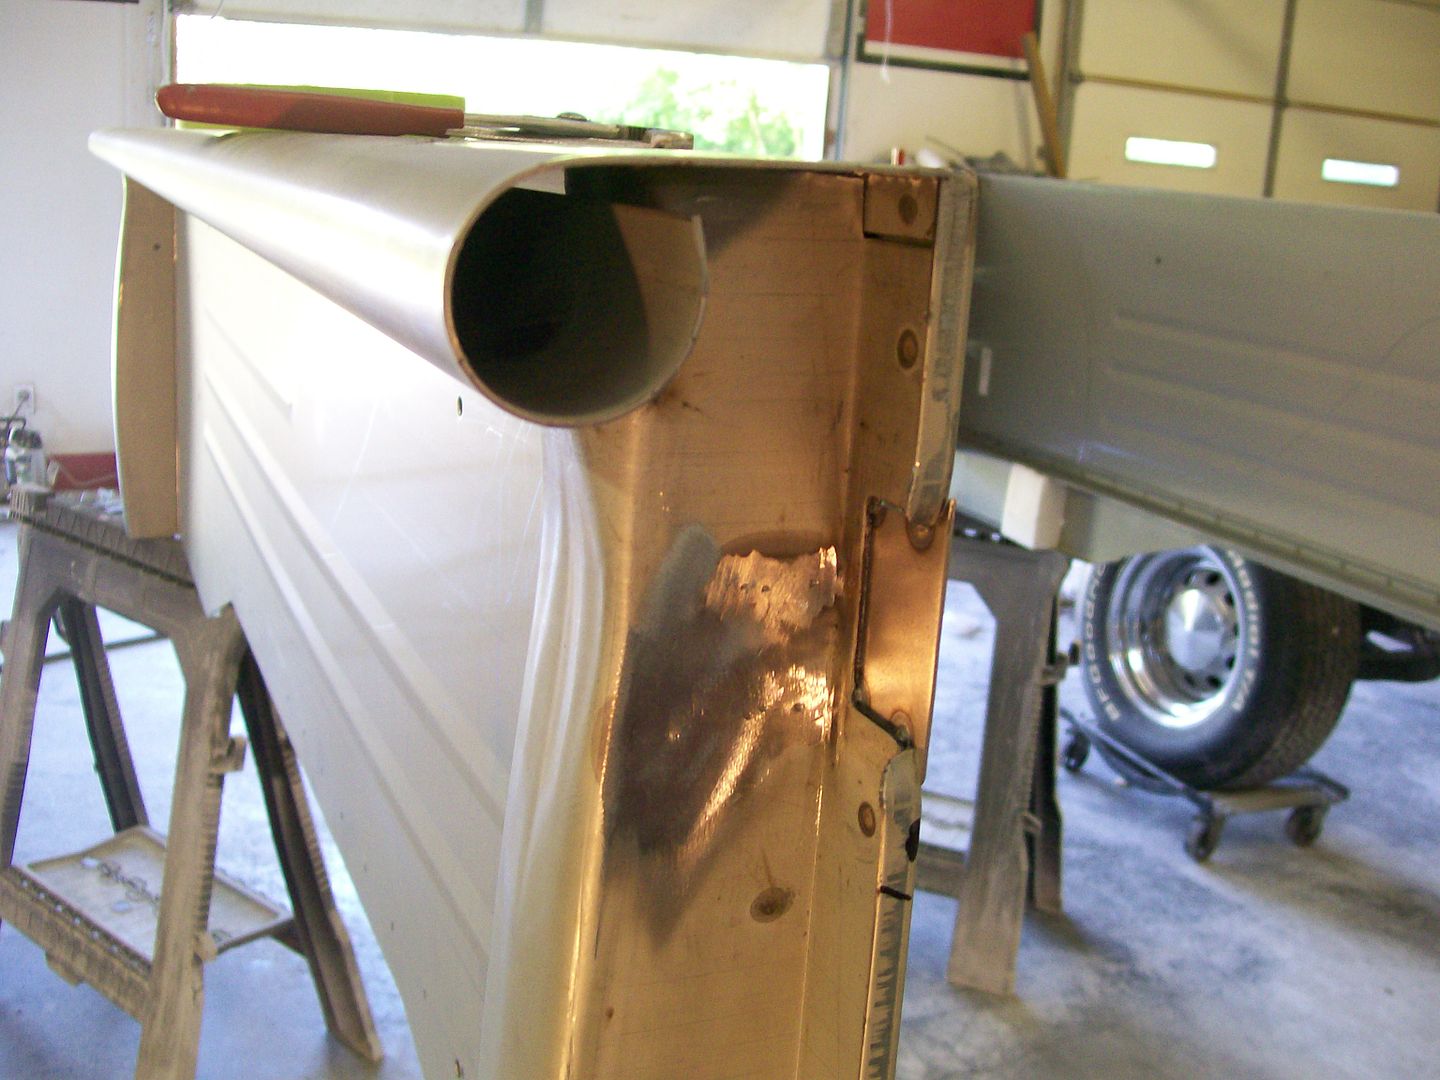 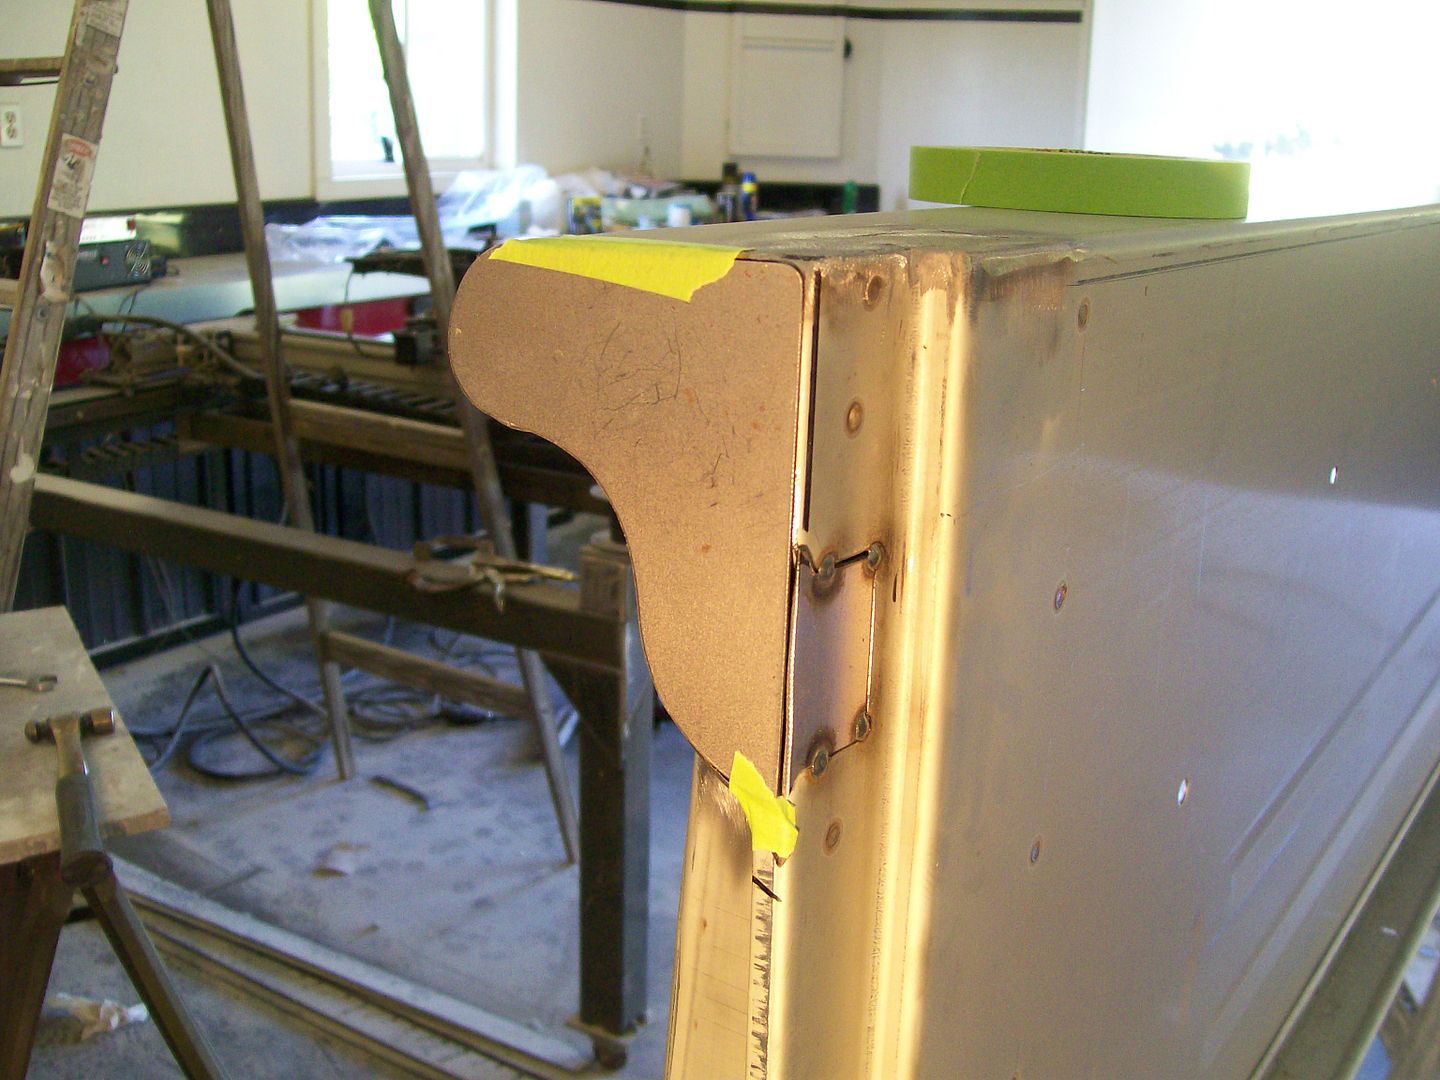 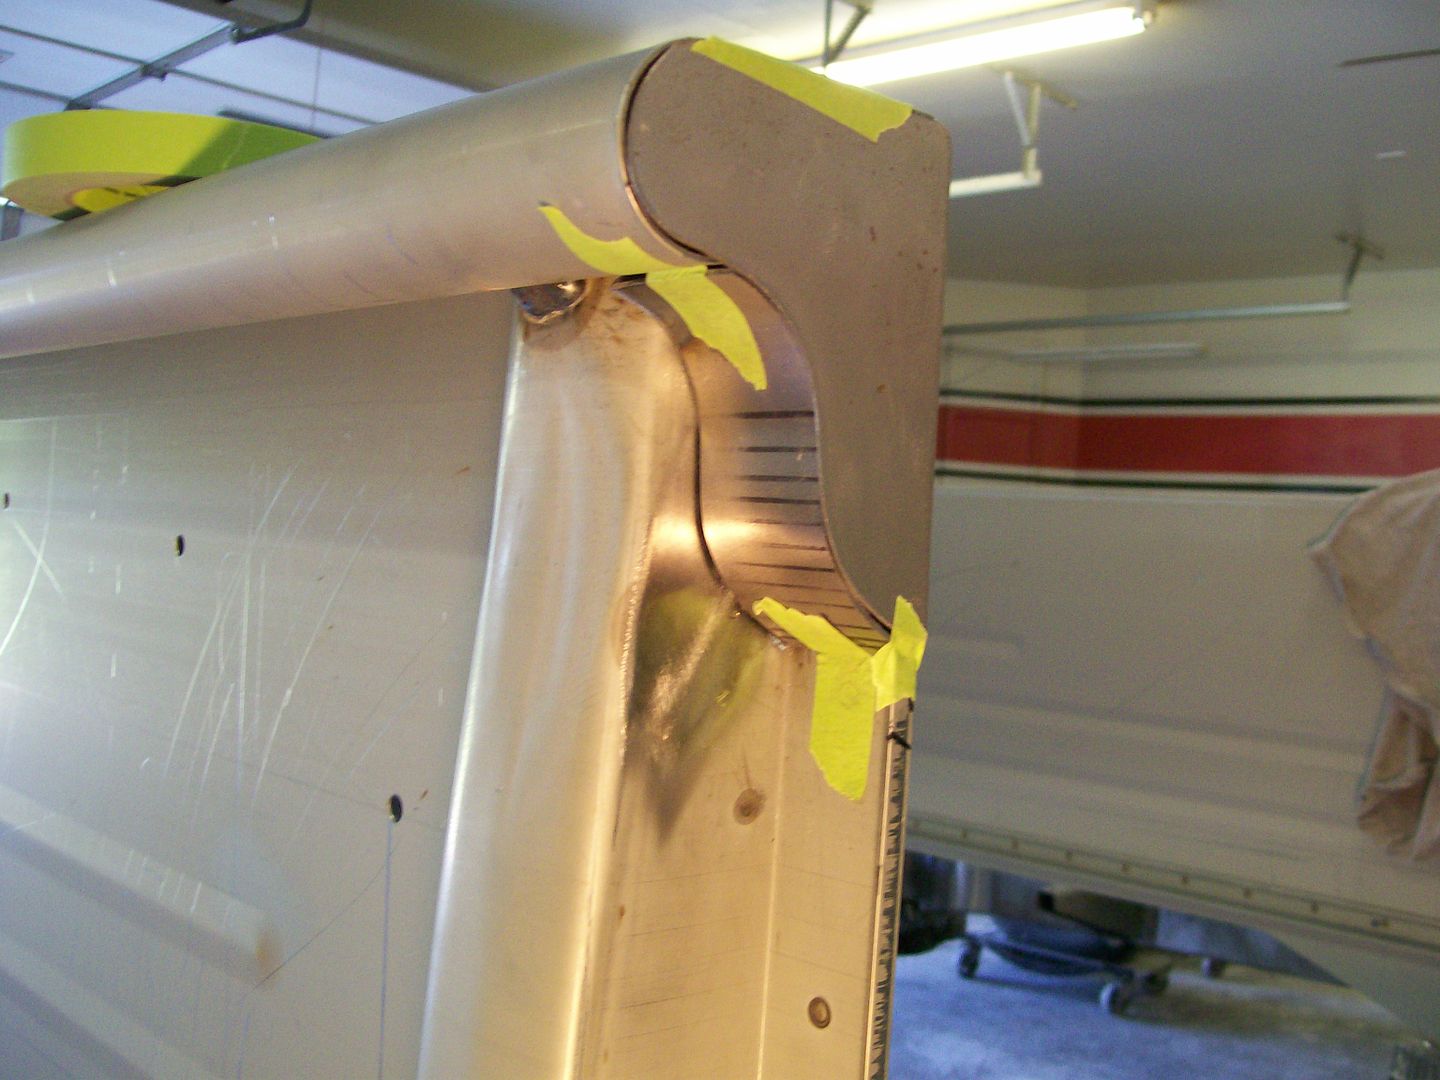 Before I welded it shut I gave it a protective coating of weldable primer. I was concerned about it holding water also. So I put a small drain hole to drain any moisture. 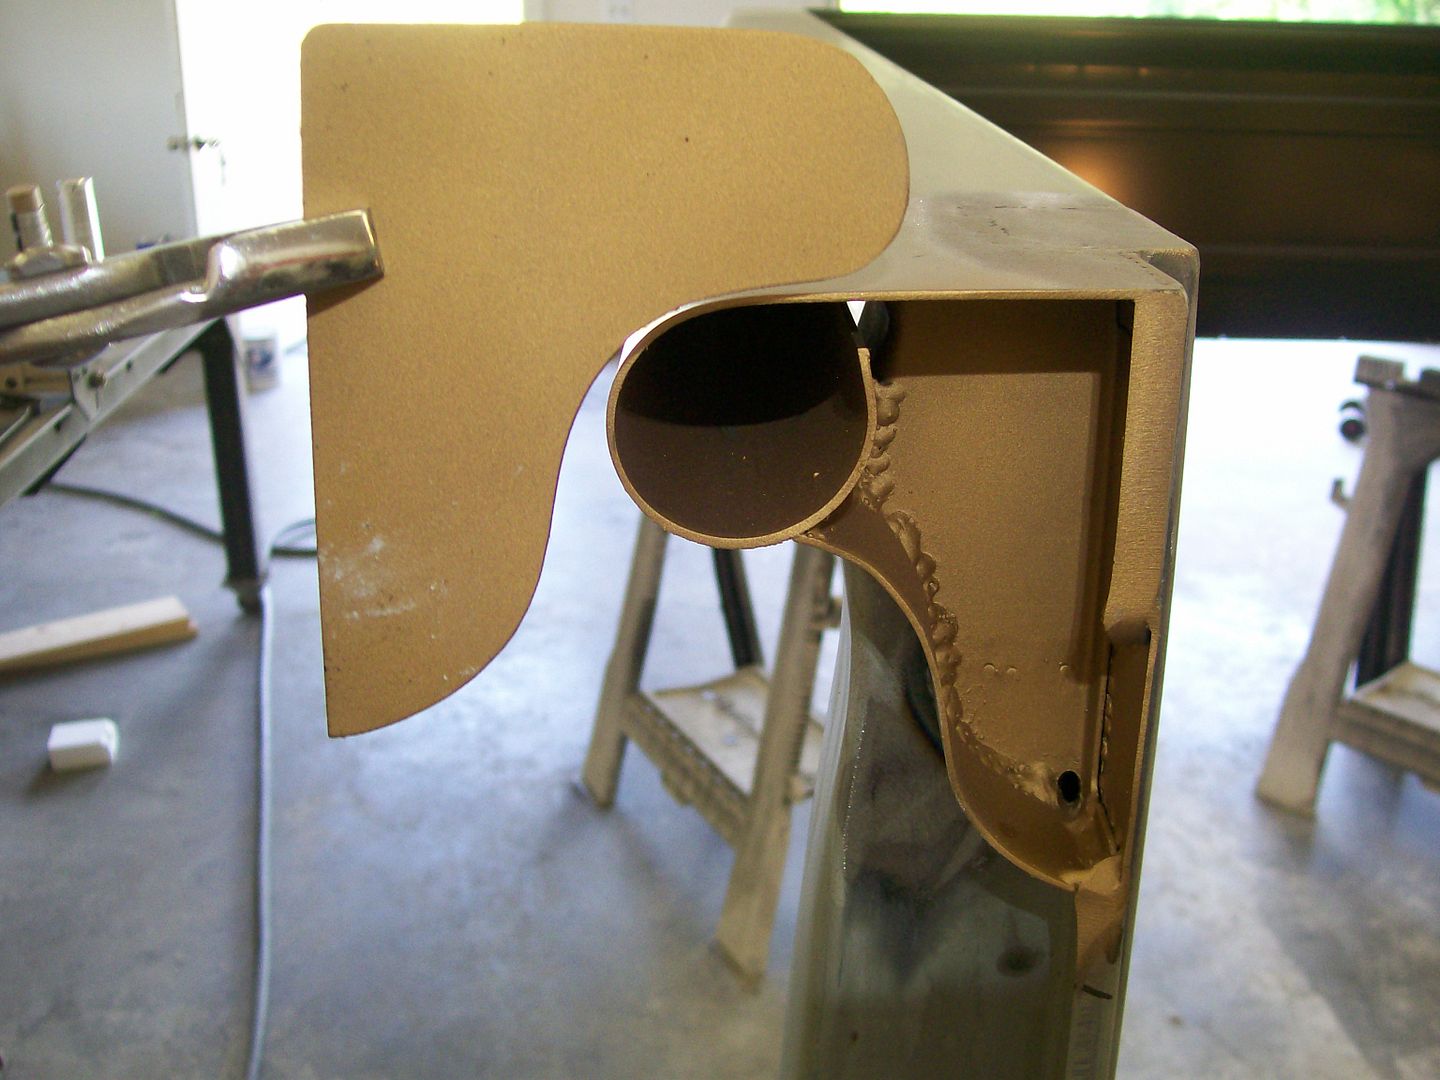
|
|
|

|
|
|
#217 |
|
Registered User
Join Date: Jan 2012
Location: Motown
Posts: 7,680
|
Re: 1957 Chevy truck re-rebuild
bed mods look good stepside
are you using hidden latches and folding tailgate supports?
__________________
cool, an ogre smiley  Ogre's 58 Truk build Ogre's 58 Truk buildhow to put your truck year and build thread into your signature shop air compressor timer |
|
|

|
|
|
#218 | |
|
Registered User
Join Date: Aug 2012
Location: Salem Mo
Posts: 652
|
Re: 1957 Chevy truck re-rebuild
Quote:
I got these about 3 years ago, they are nice and they are stainless steel. However, I do see the ones advertised that when you open, or pull back the mechanism to open the tailgate, they can stay in the open position, those would be nice. In my case with these, you have to commit both hands every time to open or close. Both latches have to be operated at the same time. What the latch looks like. 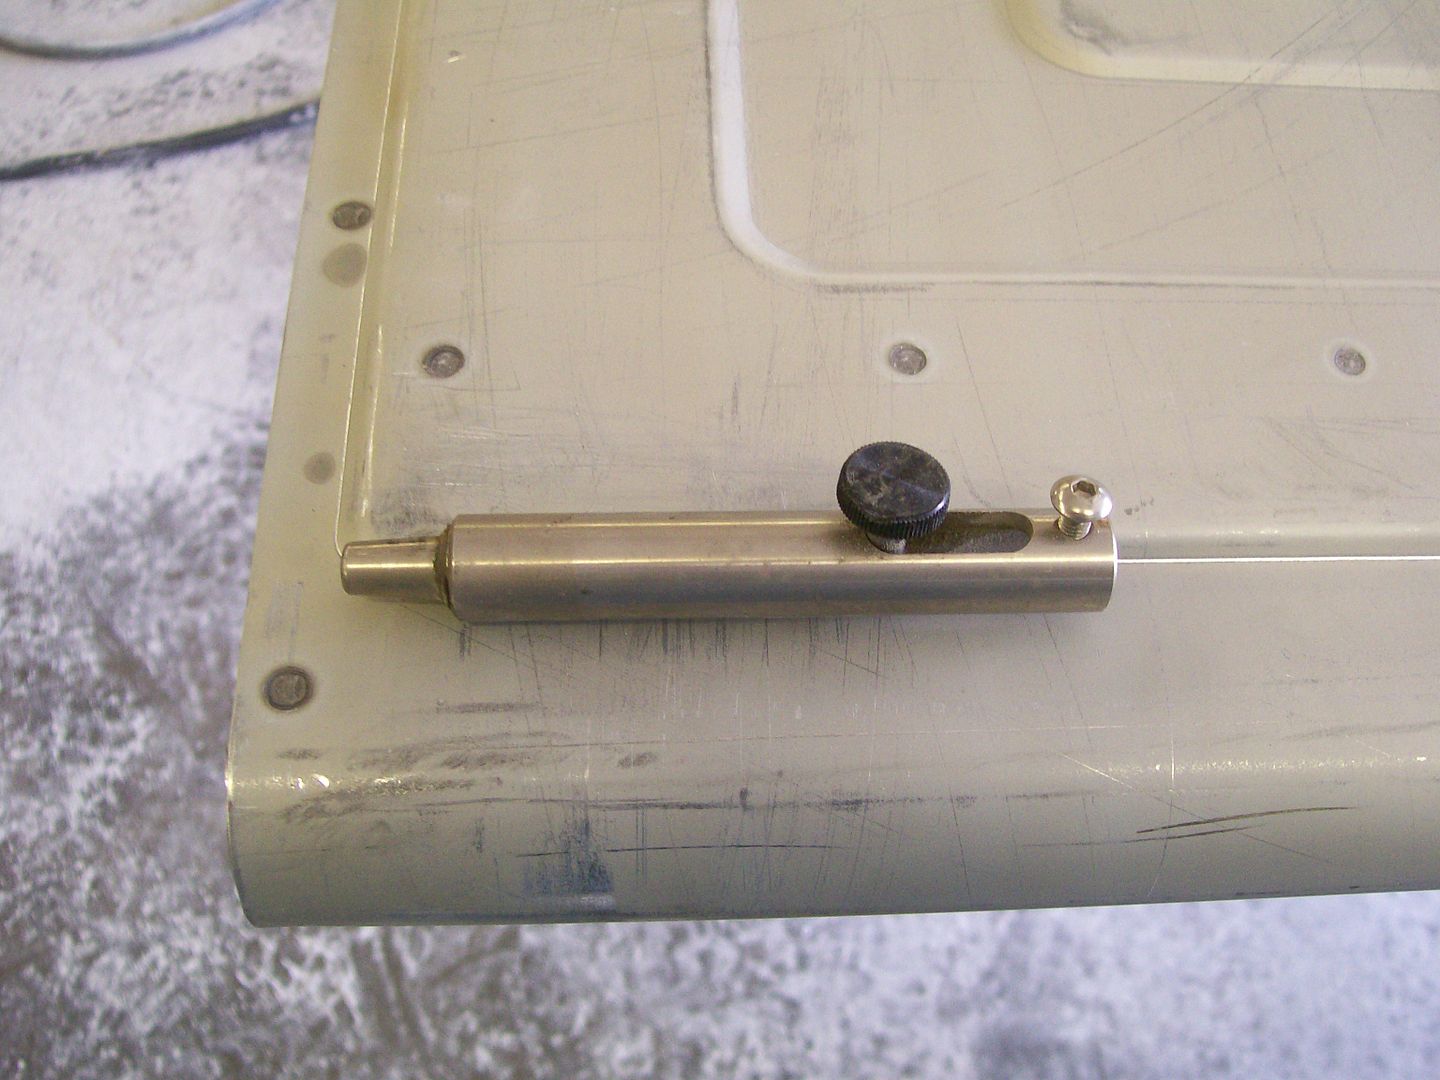 Once it's installed into the tail gate. 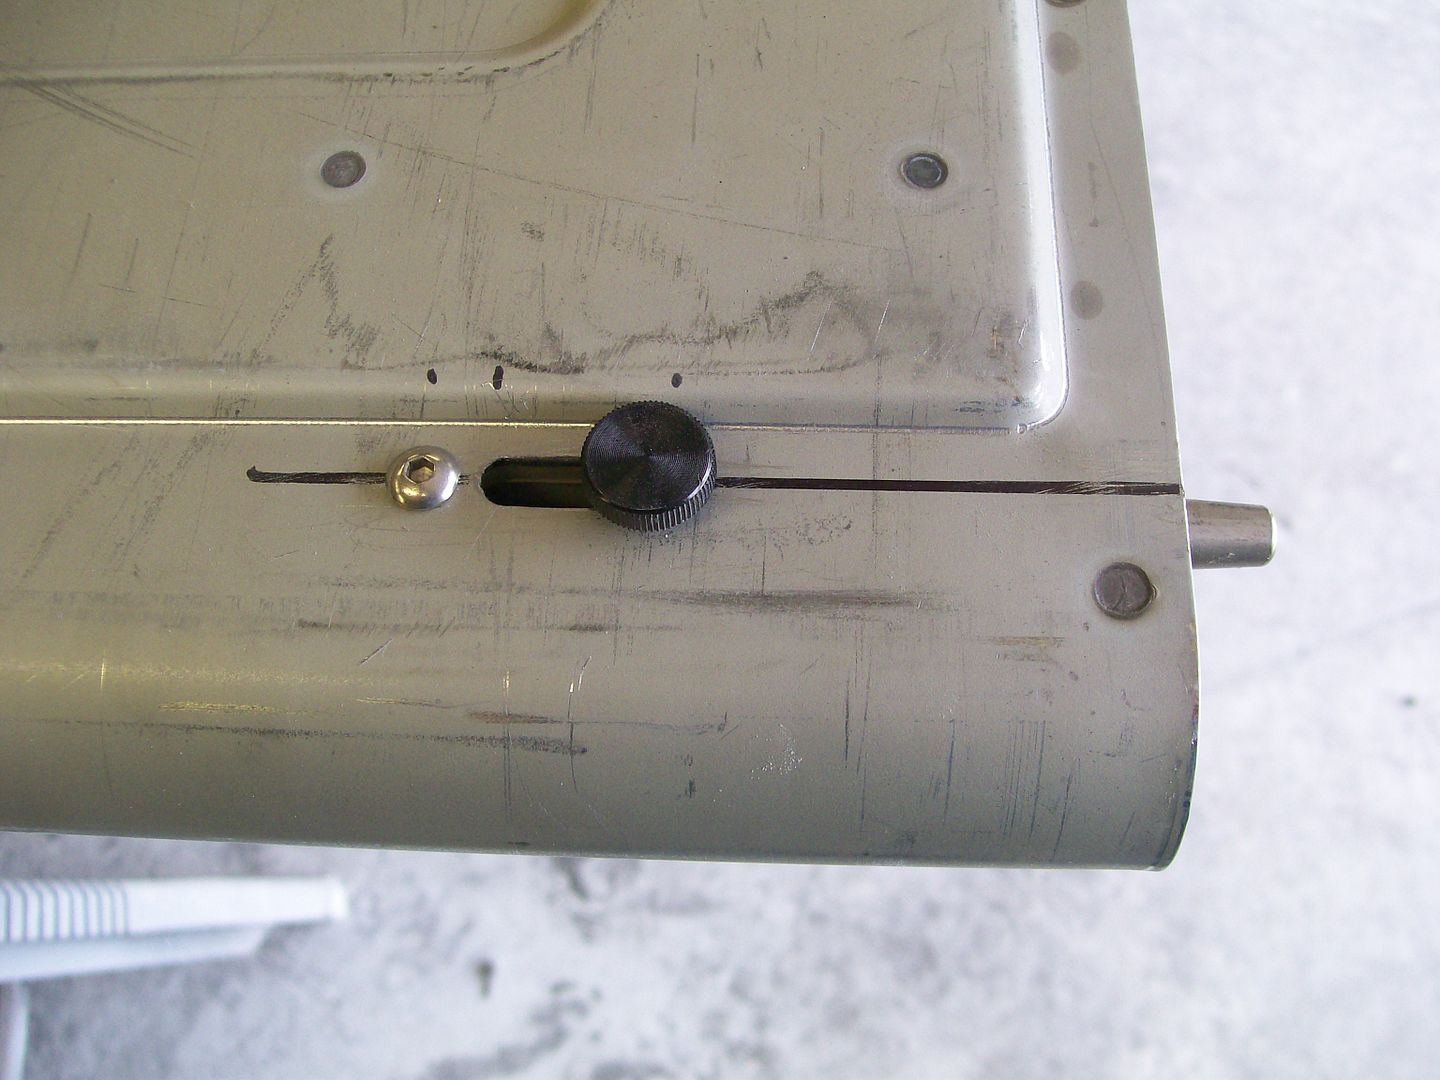
|
|
|
|

|
|
|
#219 |
|
Registered User
Join Date: Aug 2012
Location: Salem Mo
Posts: 652
|
Re: 1957 Chevy truck re-rebuild
|
|
|

|
|
|
#220 |
|
Registered User
Join Date: May 2010
Location: Lawrenceville, Ga
Posts: 2,646
|
Re: 1957 Chevy truck re-rebuild
You had some lovely tail light mods on the other bed. Are you going to duplicate that on this new bed?
|
|
|

|
|
|
#221 |
|
Registered User
Join Date: Aug 2007
Location: Corona, California
Posts: 7,998
|
Re: 1957 Chevy truck re-rebuild
Looking good.
Kim |
|
|

|
|
|
#222 | |
|
Registered User
Join Date: Aug 2012
Location: Salem Mo
Posts: 652
|
Re: 1957 Chevy truck re-rebuild
Quote:
Marked and cut the opening for the tail light. 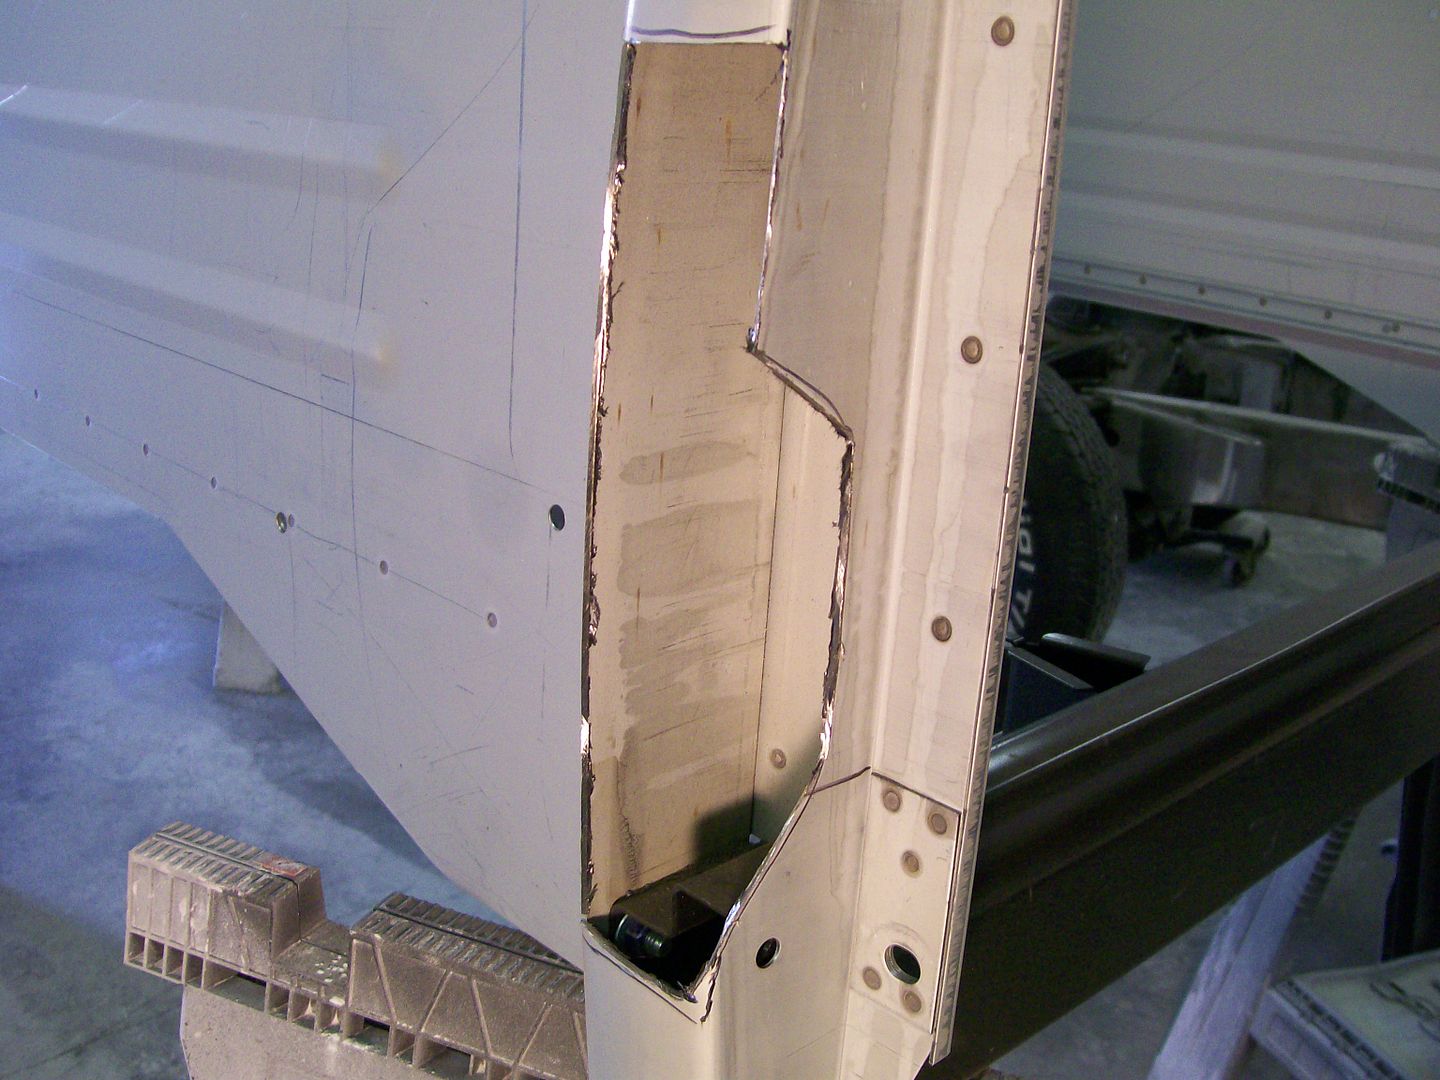 Trim and fitting for the change over. 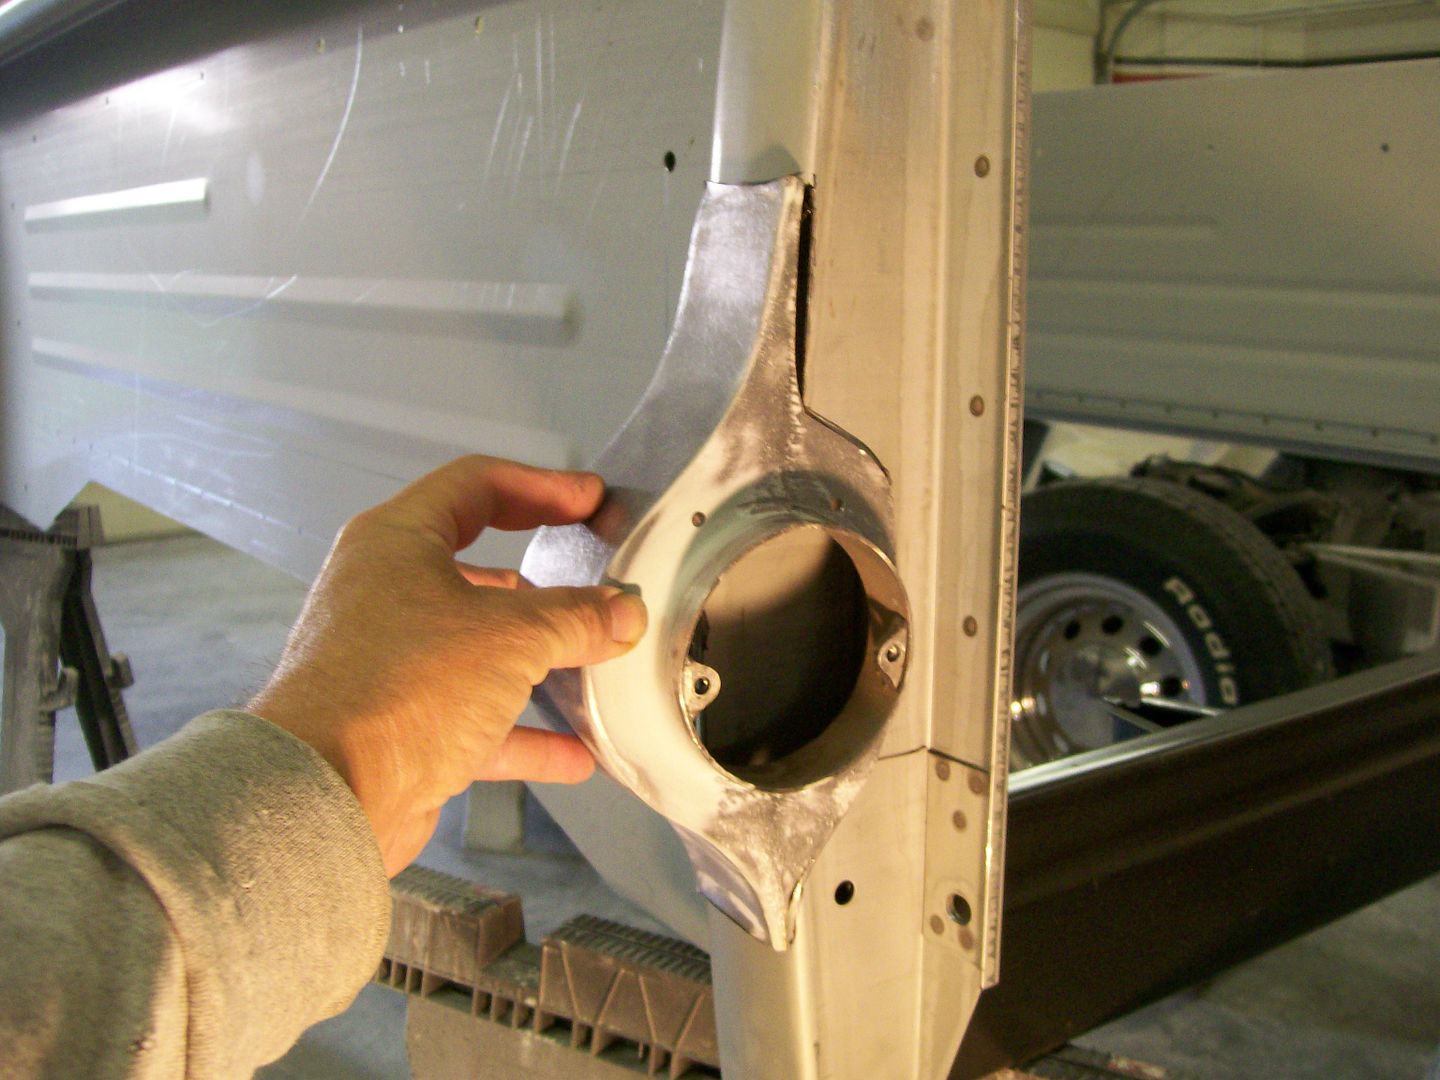 Finishing up the second side. 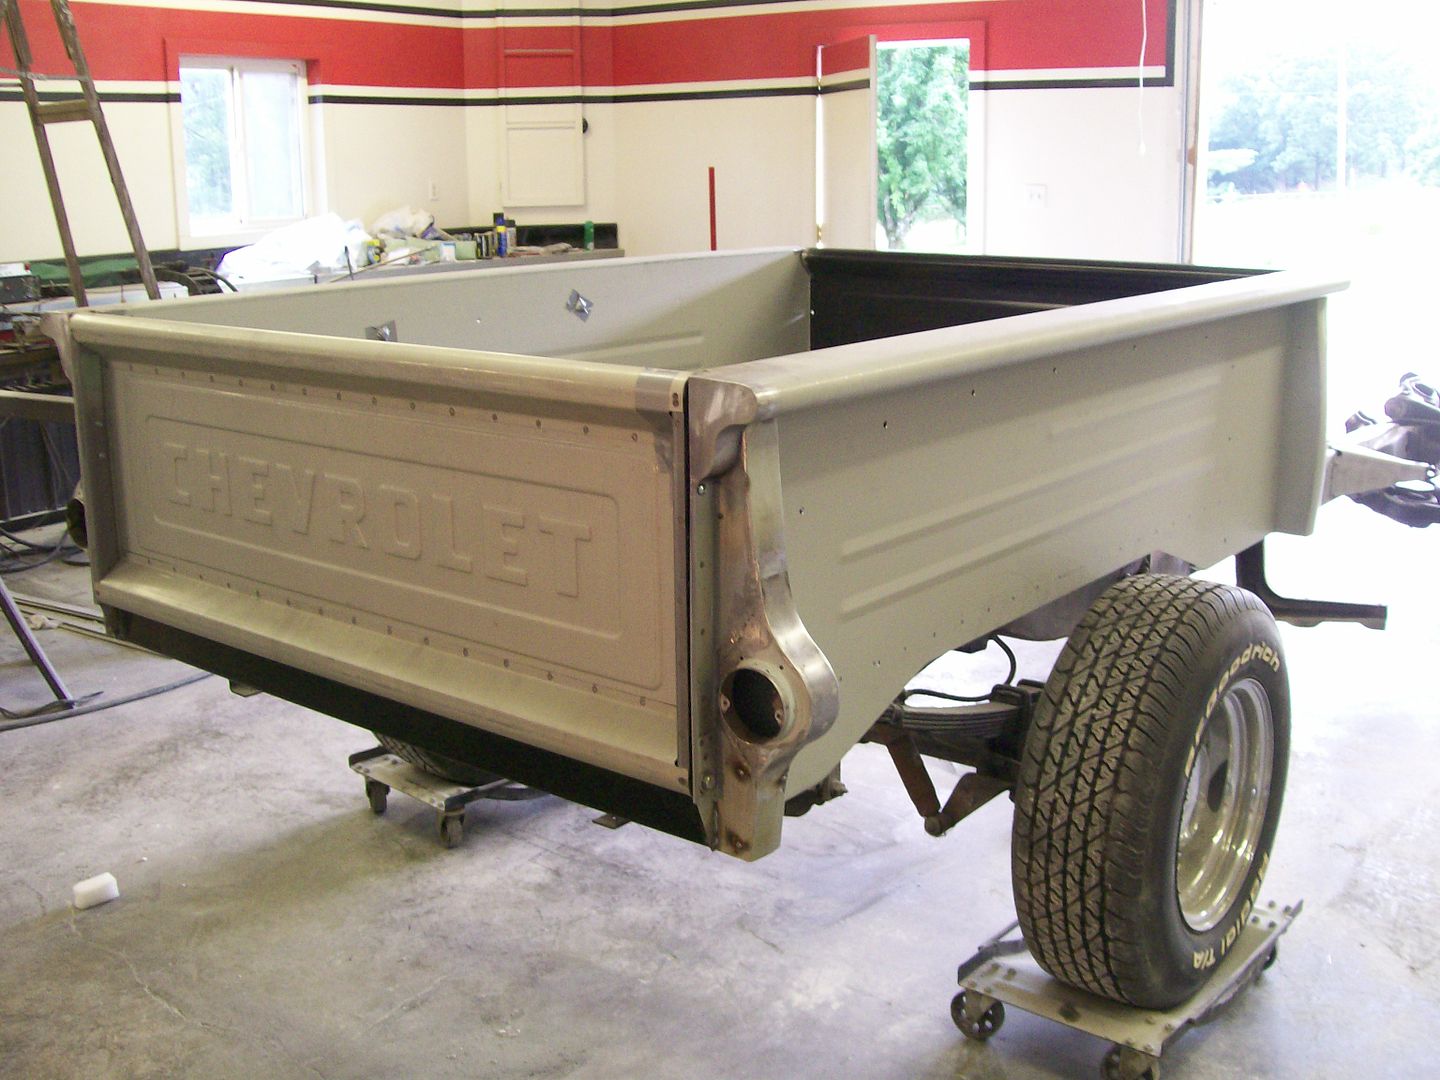 All welded up. 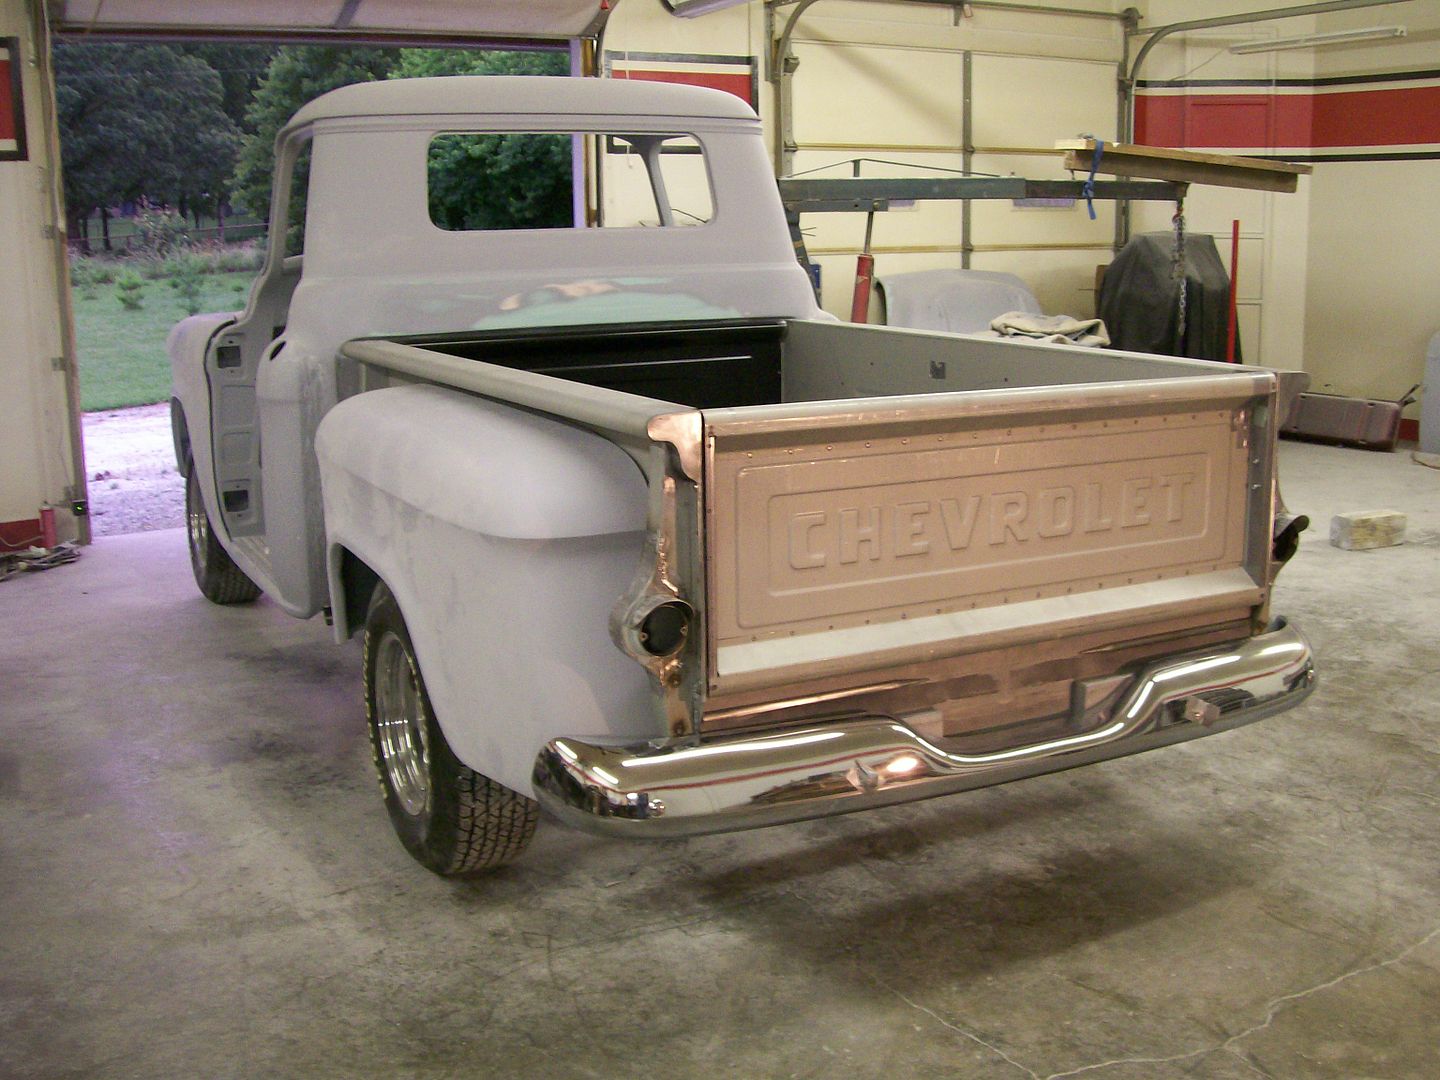 Sure it took some time to do the change over, but in the long run I'd still be messing with the old bed trying to straighten out some of the rough areas. |
|
|
|

|
|
|
#223 |
|
Registered User
Join Date: Aug 2007
Location: Corona, California
Posts: 7,998
|
Re: 1957 Chevy truck re-rebuild
It came out real nice.
Kim |
|
|

|
|
|
#224 |
|
Registered User
Join Date: Aug 2012
Location: Salem Mo
Posts: 652
|
Re: 1957 Chevy truck re-rebuild
Thanks Kim, you're very kind.
With so many different ways to direct a build on these trucks I decided to go for more of an aggressive/racy overall approach. This means getting rid of the bench seat for some bucket seats. I wanted some that fit snug around my body without any extra seat. I opted for some from the Jegs catalog. 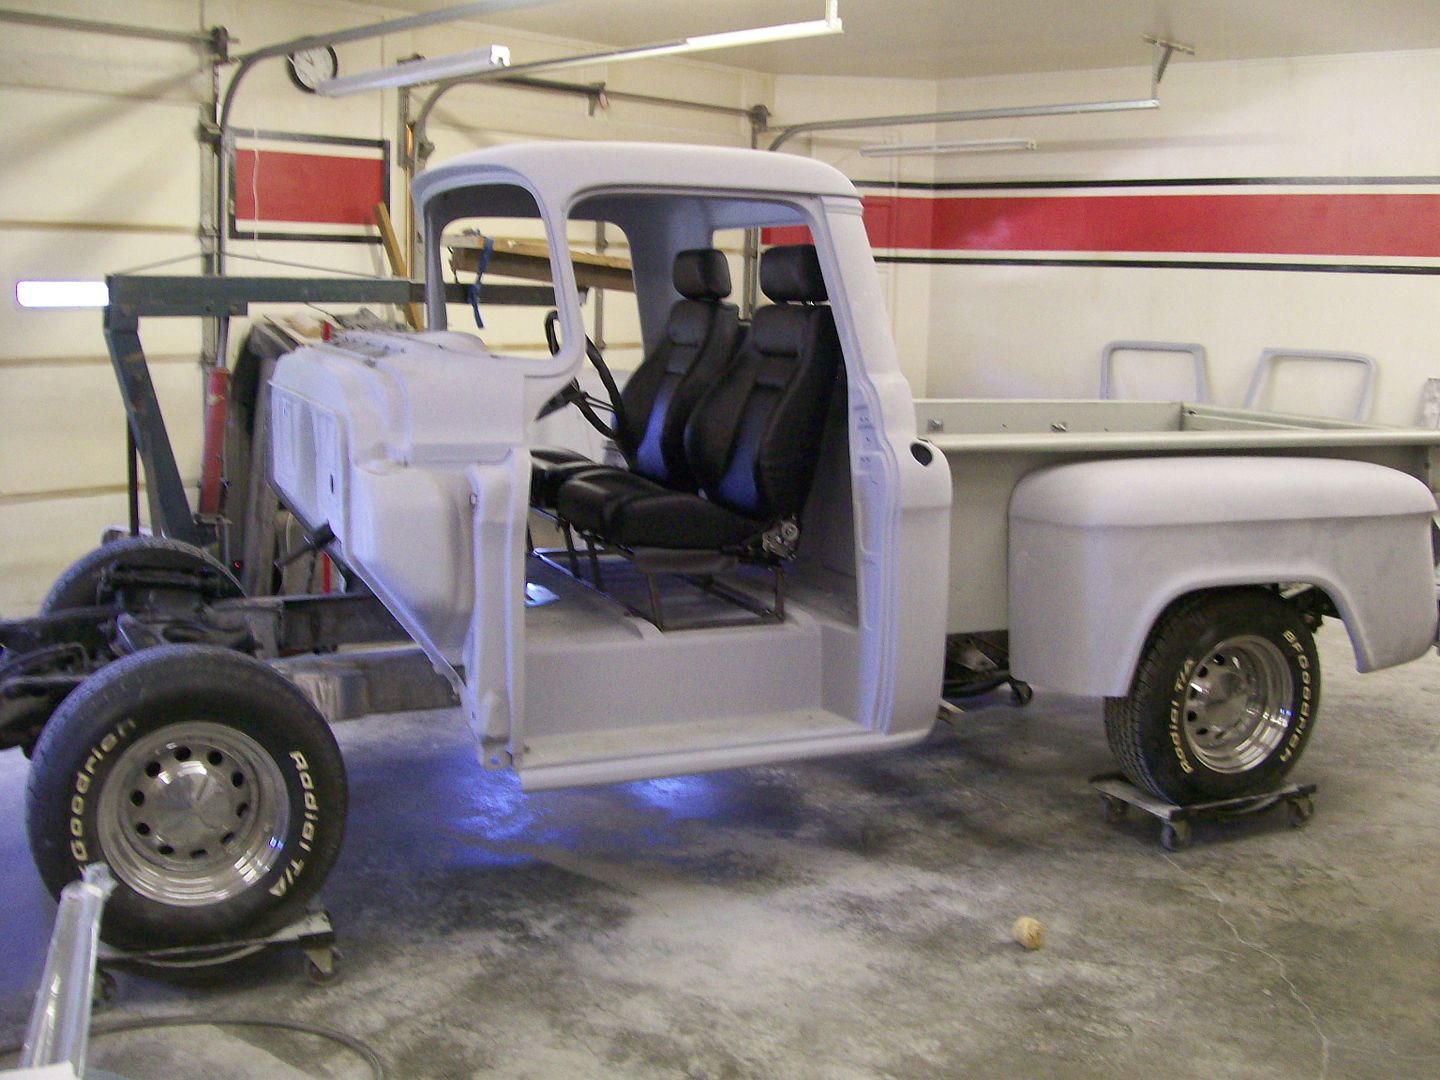 The toughest part was getting the height set right. This pic is close but I think I dropped them down just a bit after this picture was taken. What I did want was to use the original seat mounting holes. I already welded shut all the extra holes from previous installations before I got the truck. 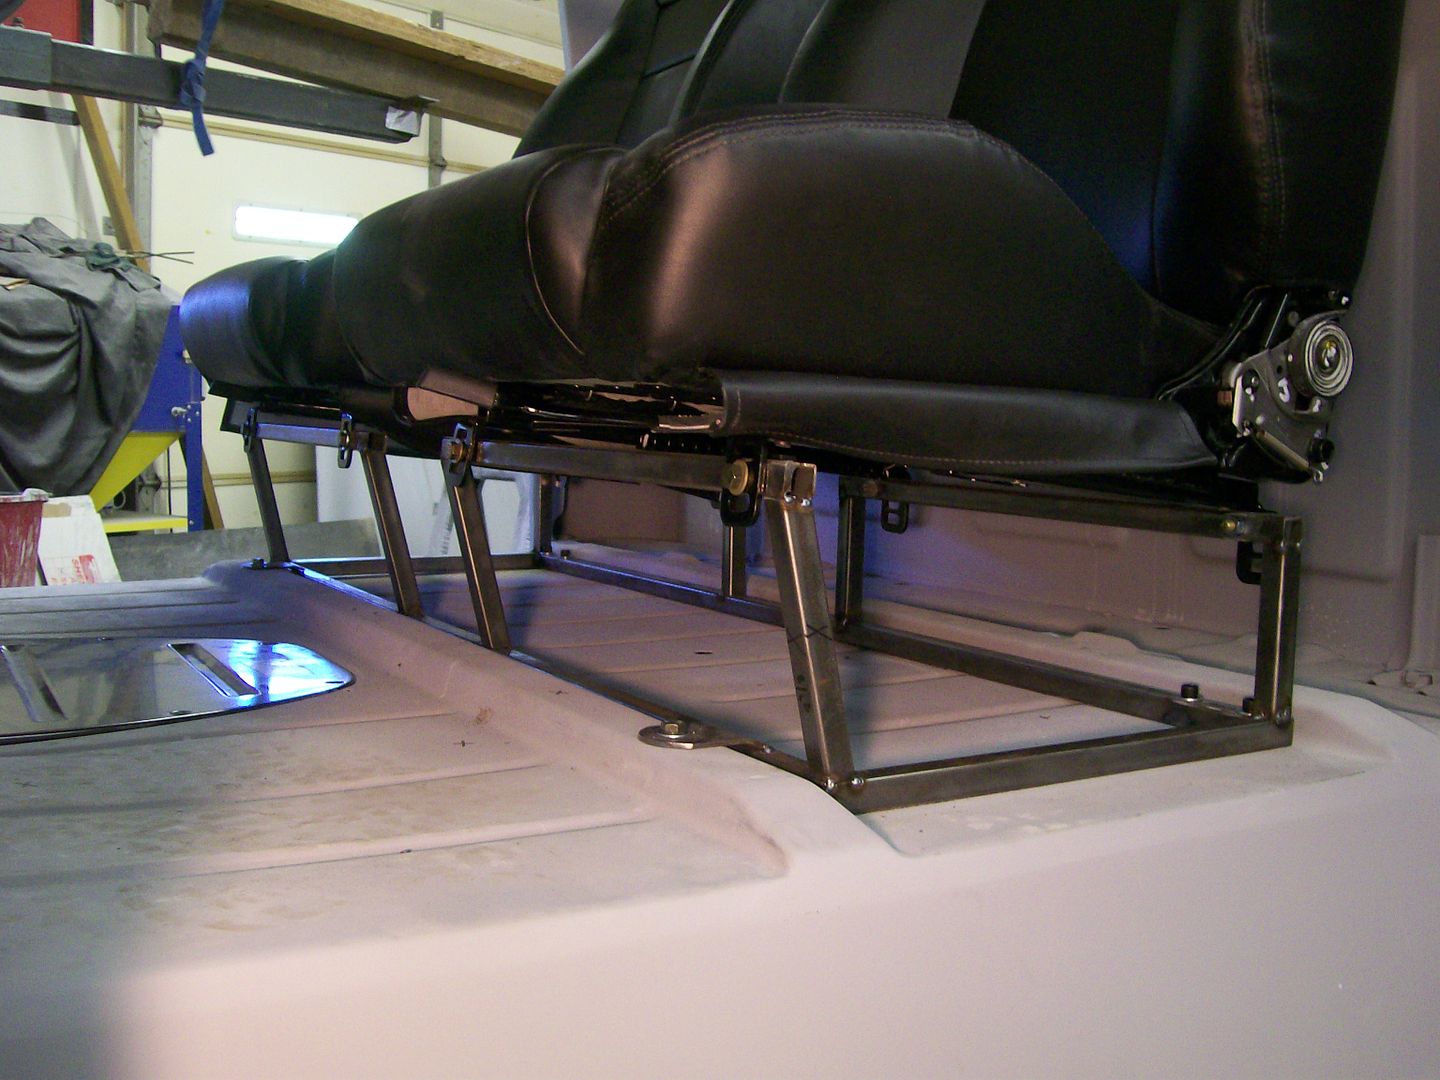
|
|
|

|
|
|
#225 |
|
Registered User
Join Date: Dec 2011
Location: Southern Oklahoma
Posts: 181
|
Re: 1957 Chevy truck re-rebuild
I like the one piece base for the two bucket seats. Make the mounting look cleaner to me. Very nice! Are you going to box any of the frame rail behind the rear lower control arm bracket?
|
|
|

|
 |
| Bookmarks |
|
|