
 |
|
|
|
|
#1 | |
|
Registered User
Join Date: Mar 2013
Location: Edmonton, AB
Posts: 298
|
Re: Rust-Eh (1953 Chevrolet 3100)
Quote:
 Untitled by Spencer Wiedeman, on Flickr Untitled by Spencer Wiedeman, on Flickr Untitled by Spencer Wiedeman, on Flickr Untitled by Spencer Wiedeman, on Flickr
|
|
|
|

|
|
|
#2 |
|
Registered User
Join Date: Mar 2013
Location: Edmonton, AB
Posts: 298
|
Re: Project: Patina (1949 Chevrolet 1434)
Here's a little bit of an update!
My fabricator finished designing the front frame horns. I think they are super clean looking. he also tucked my front bumper in significantly. 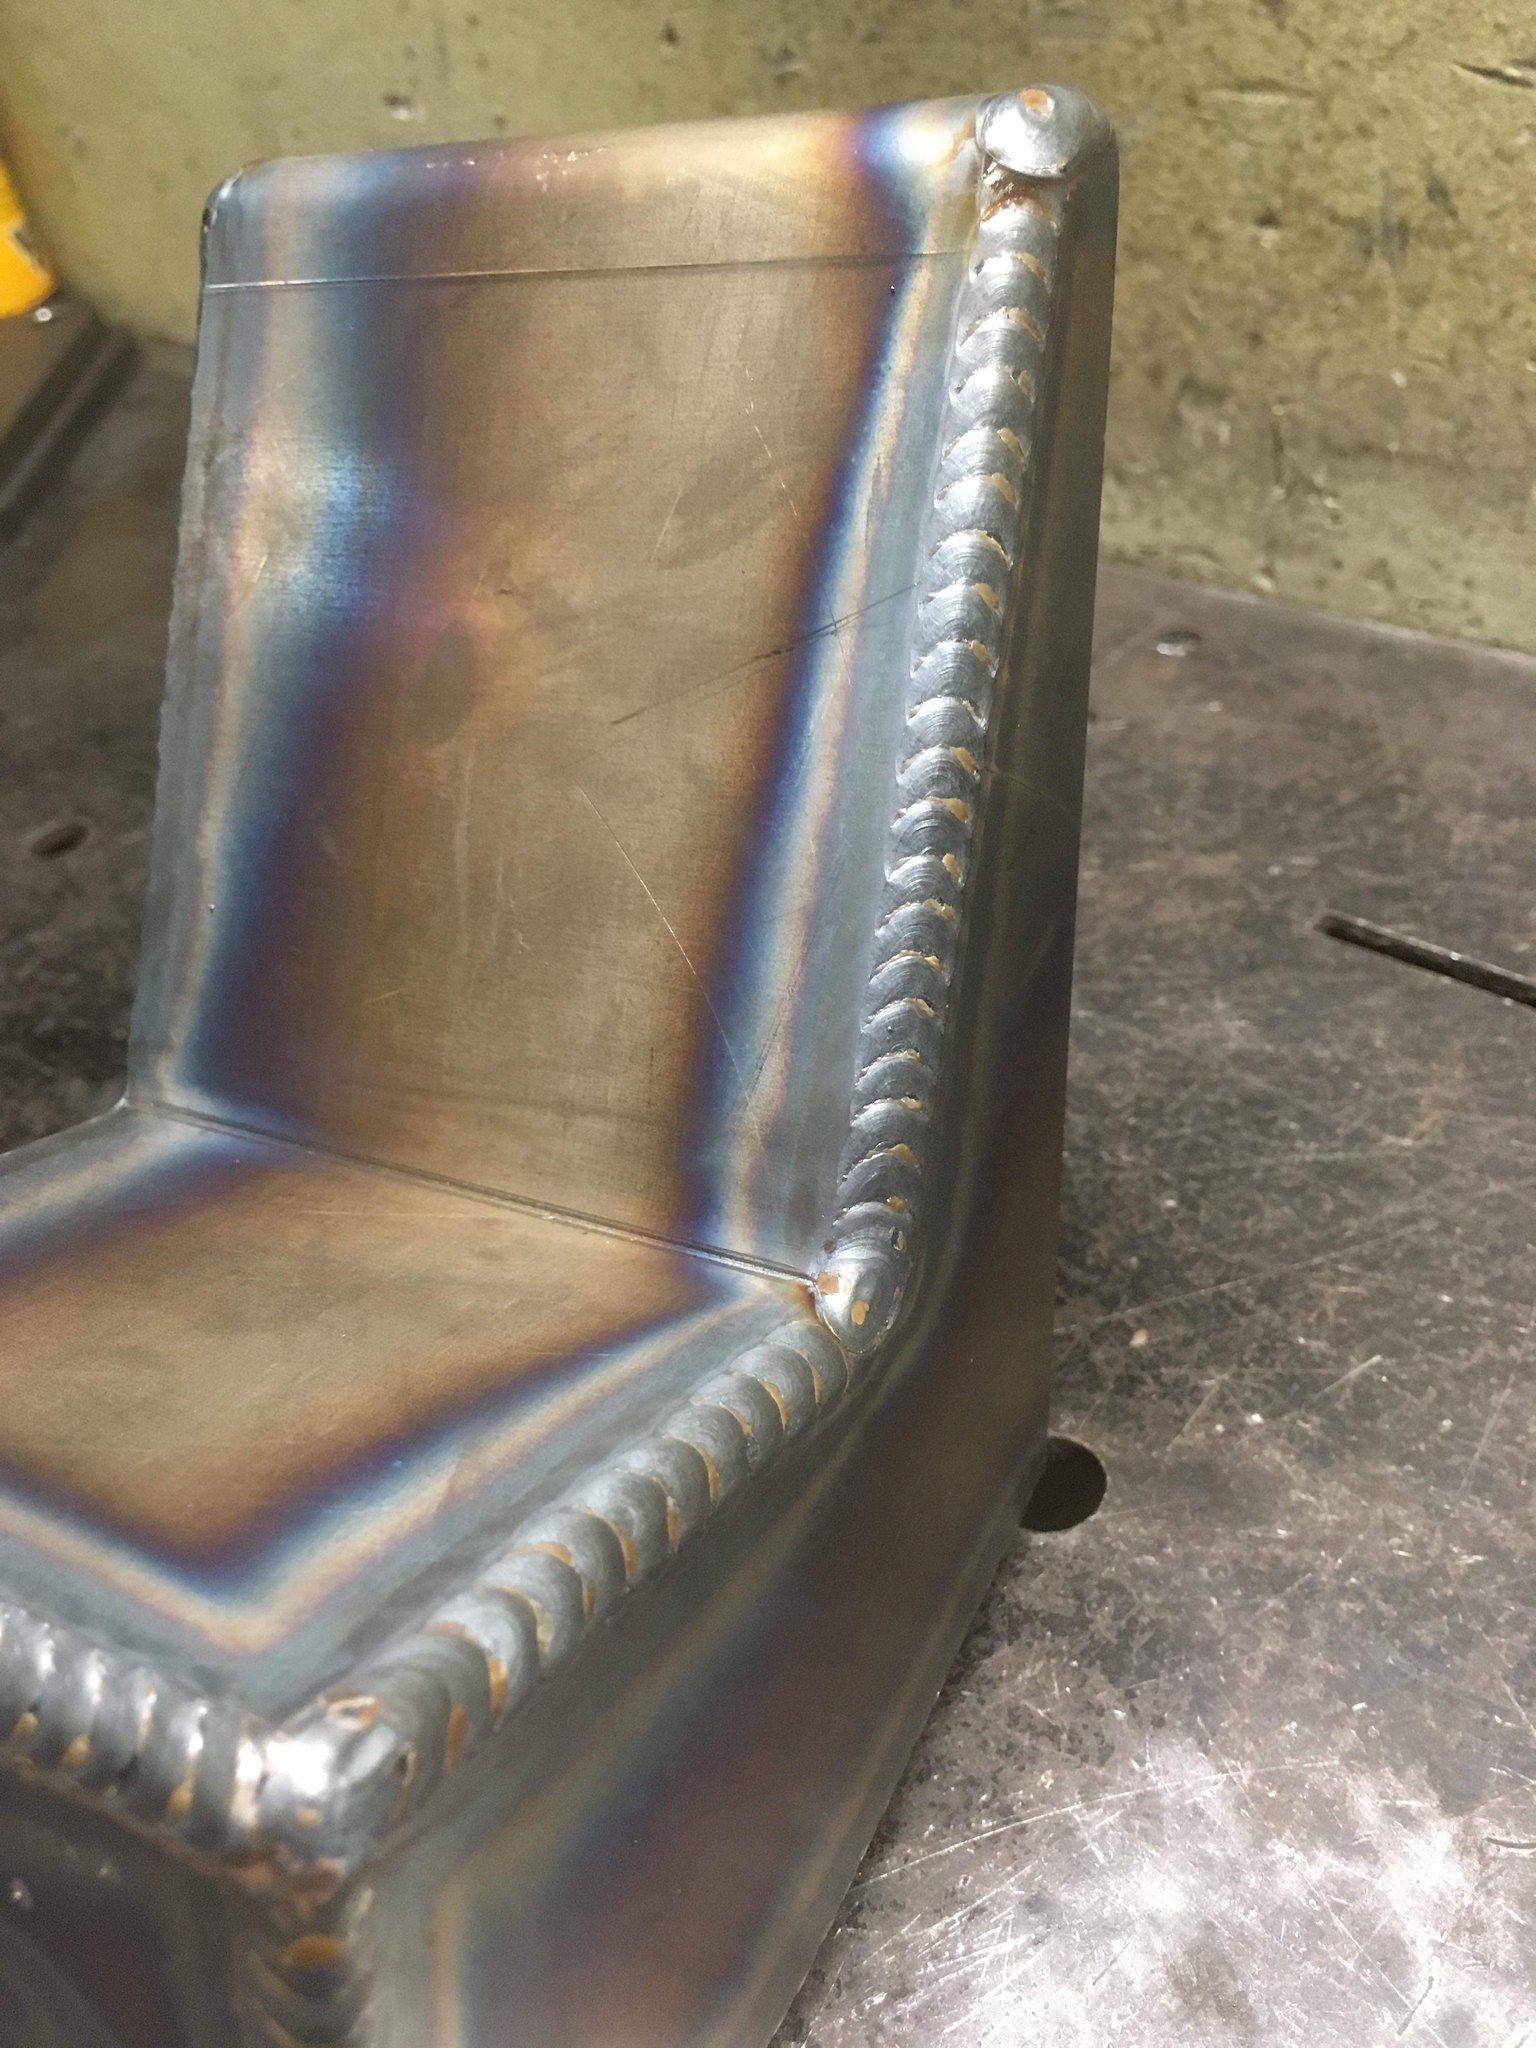 Untitled by Spencer Wiedeman, on Flickr Untitled by Spencer Wiedeman, on Flickr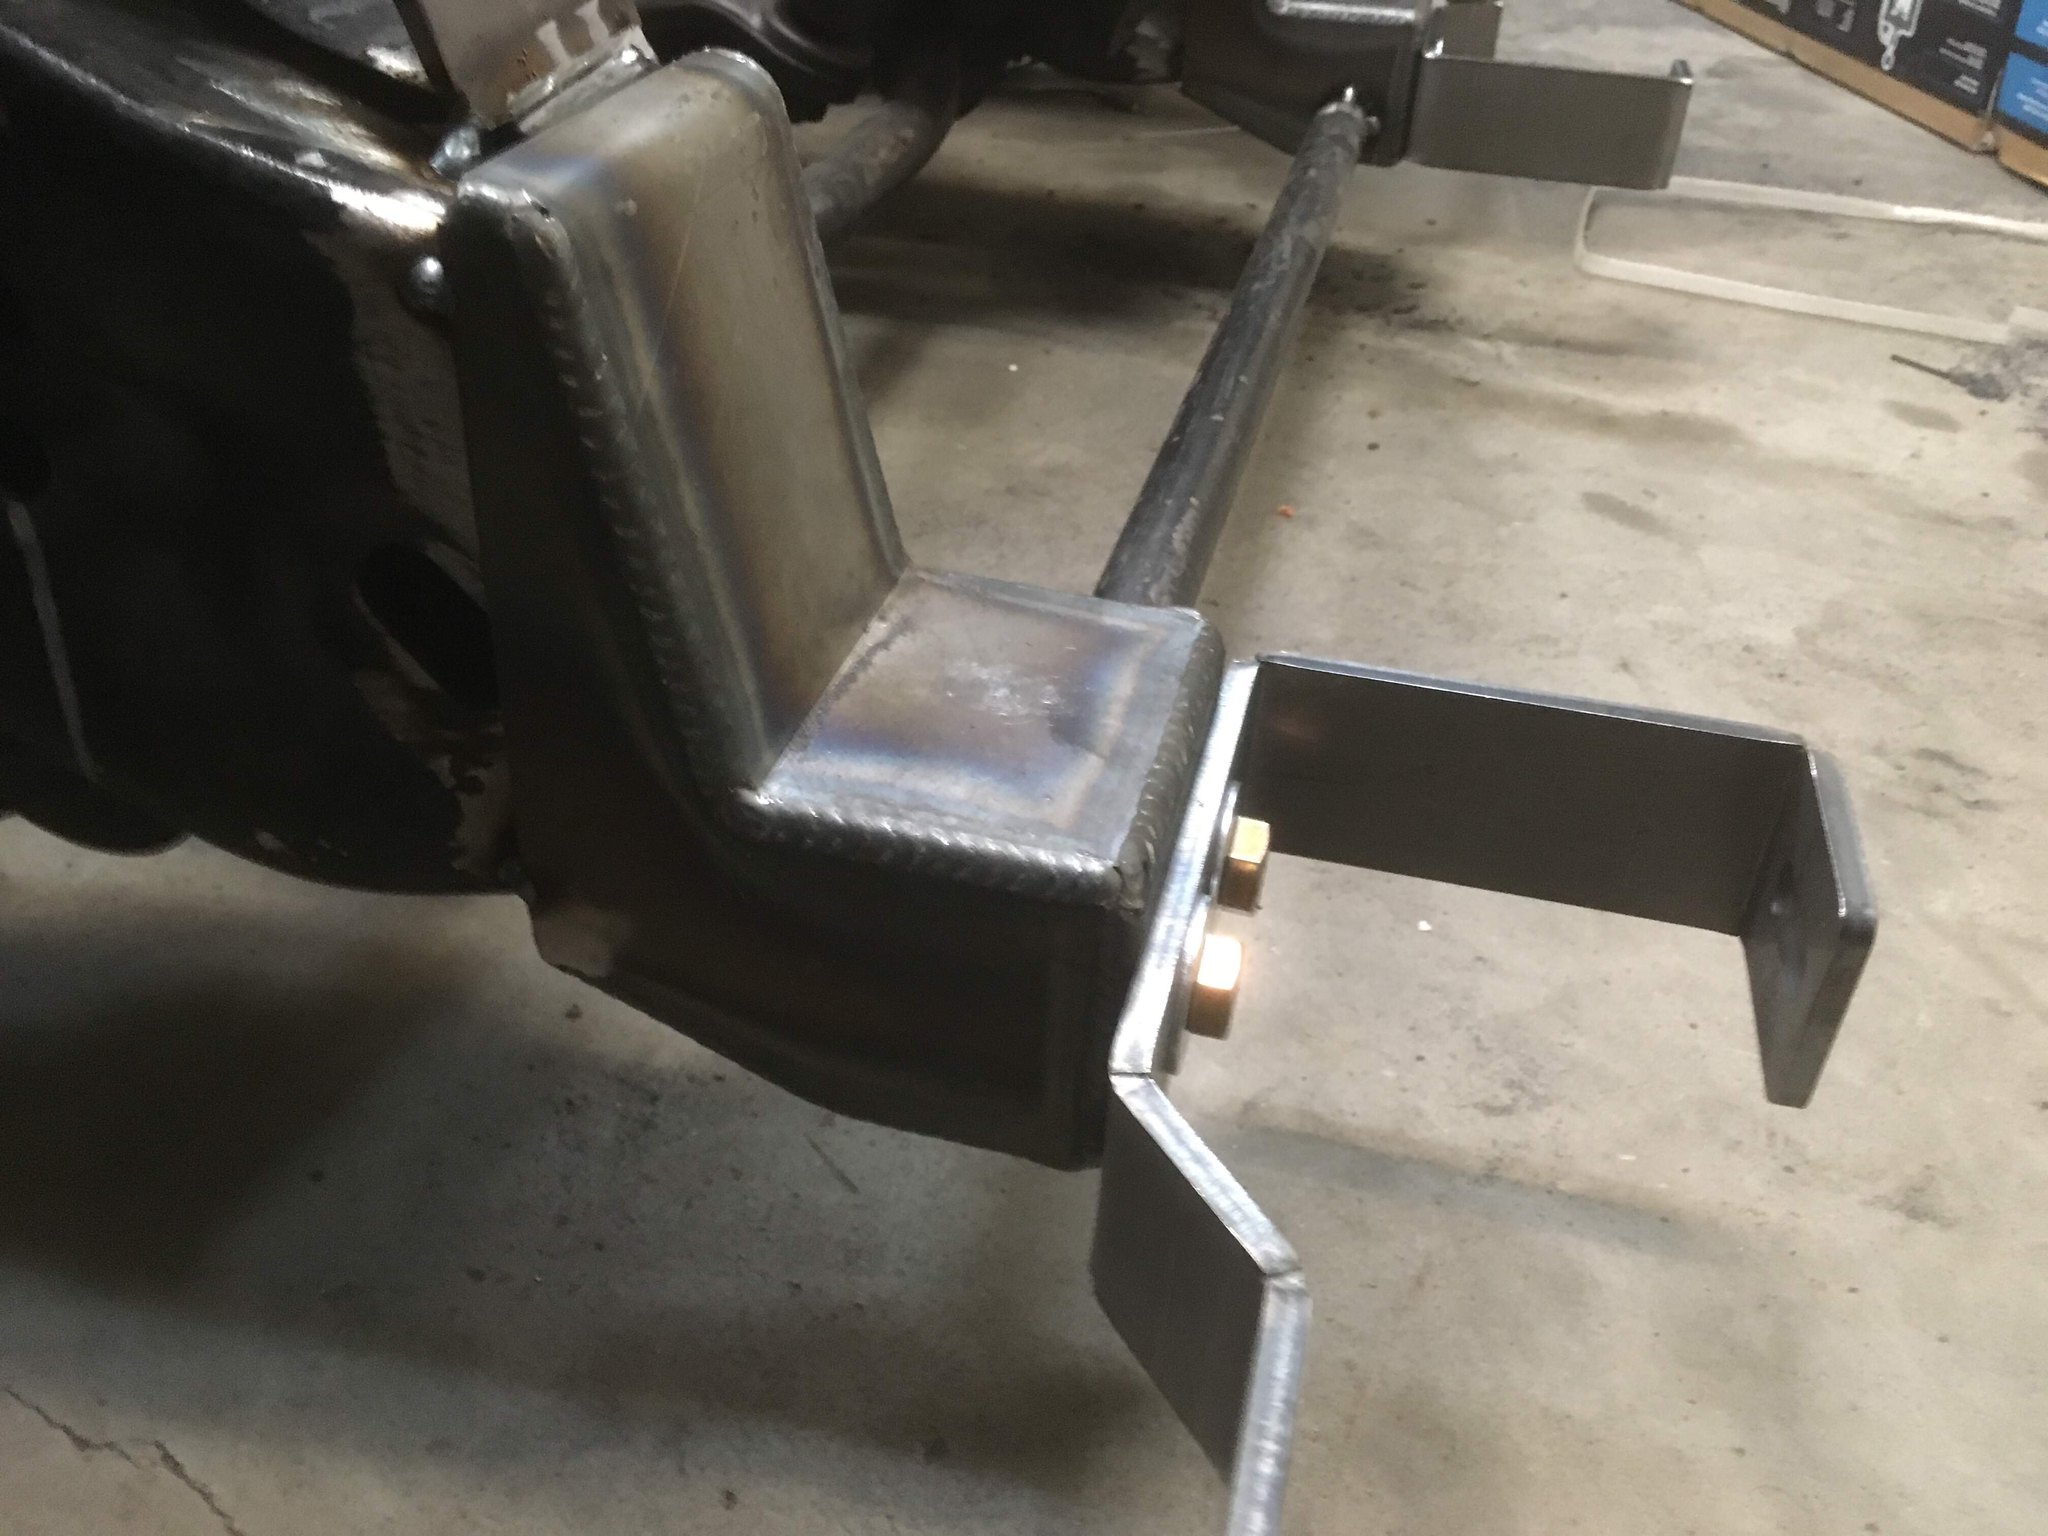 Untitled by Spencer Wiedeman, on Flickr Untitled by Spencer Wiedeman, on Flickr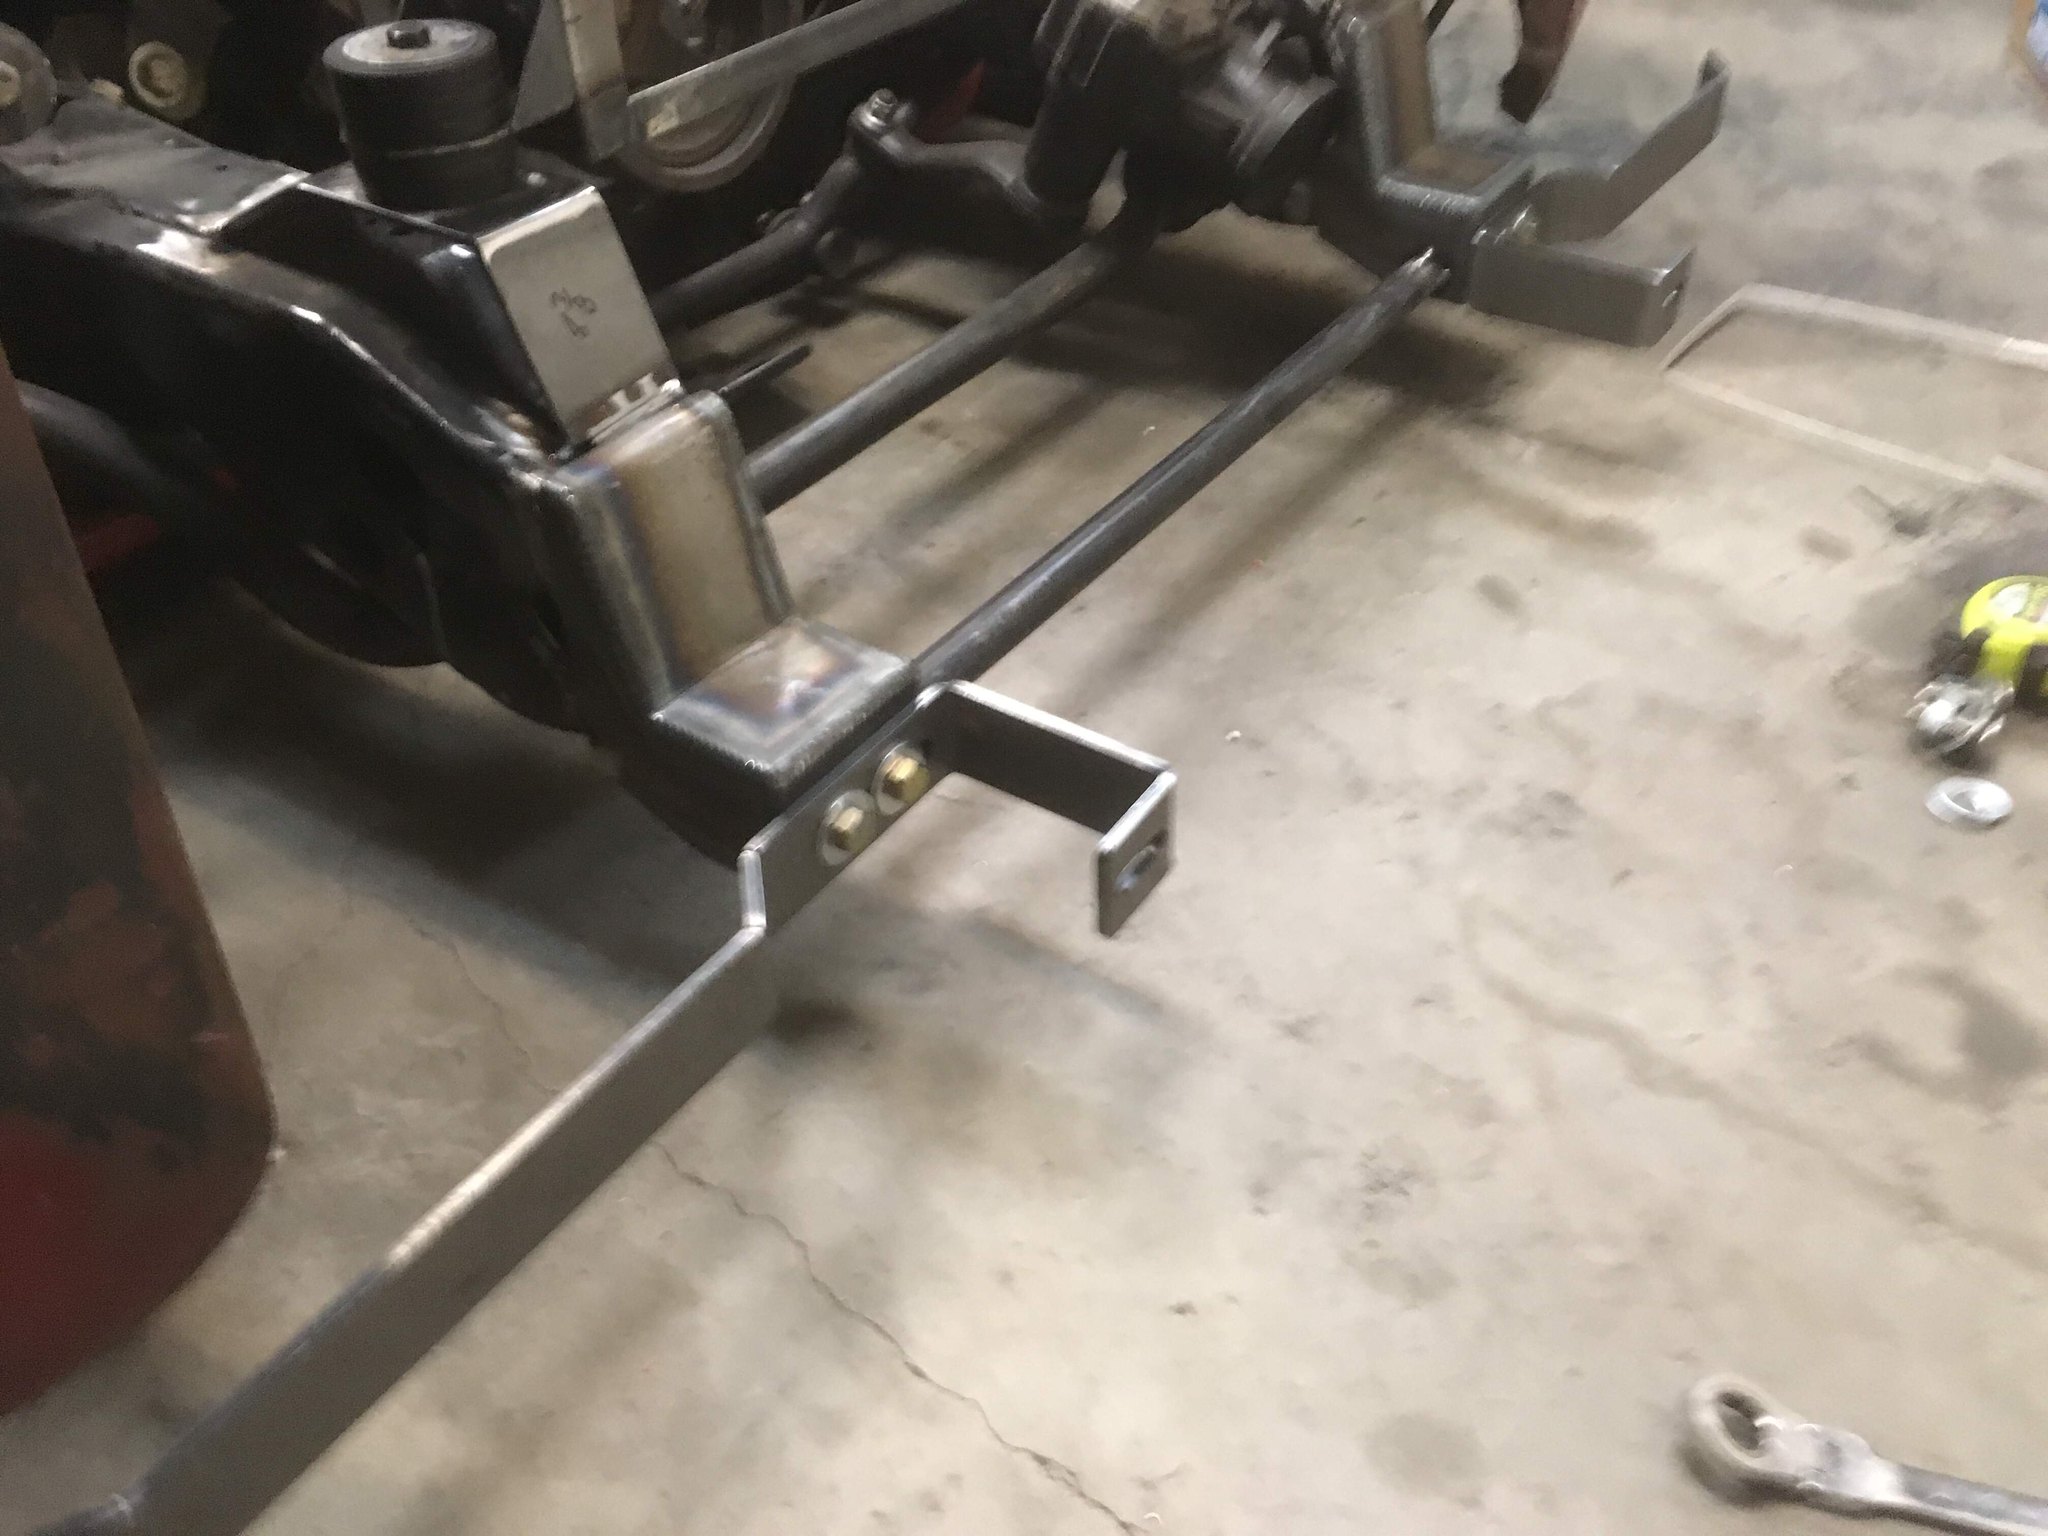 Untitled by Spencer Wiedeman, on Flickr Untitled by Spencer Wiedeman, on Flickr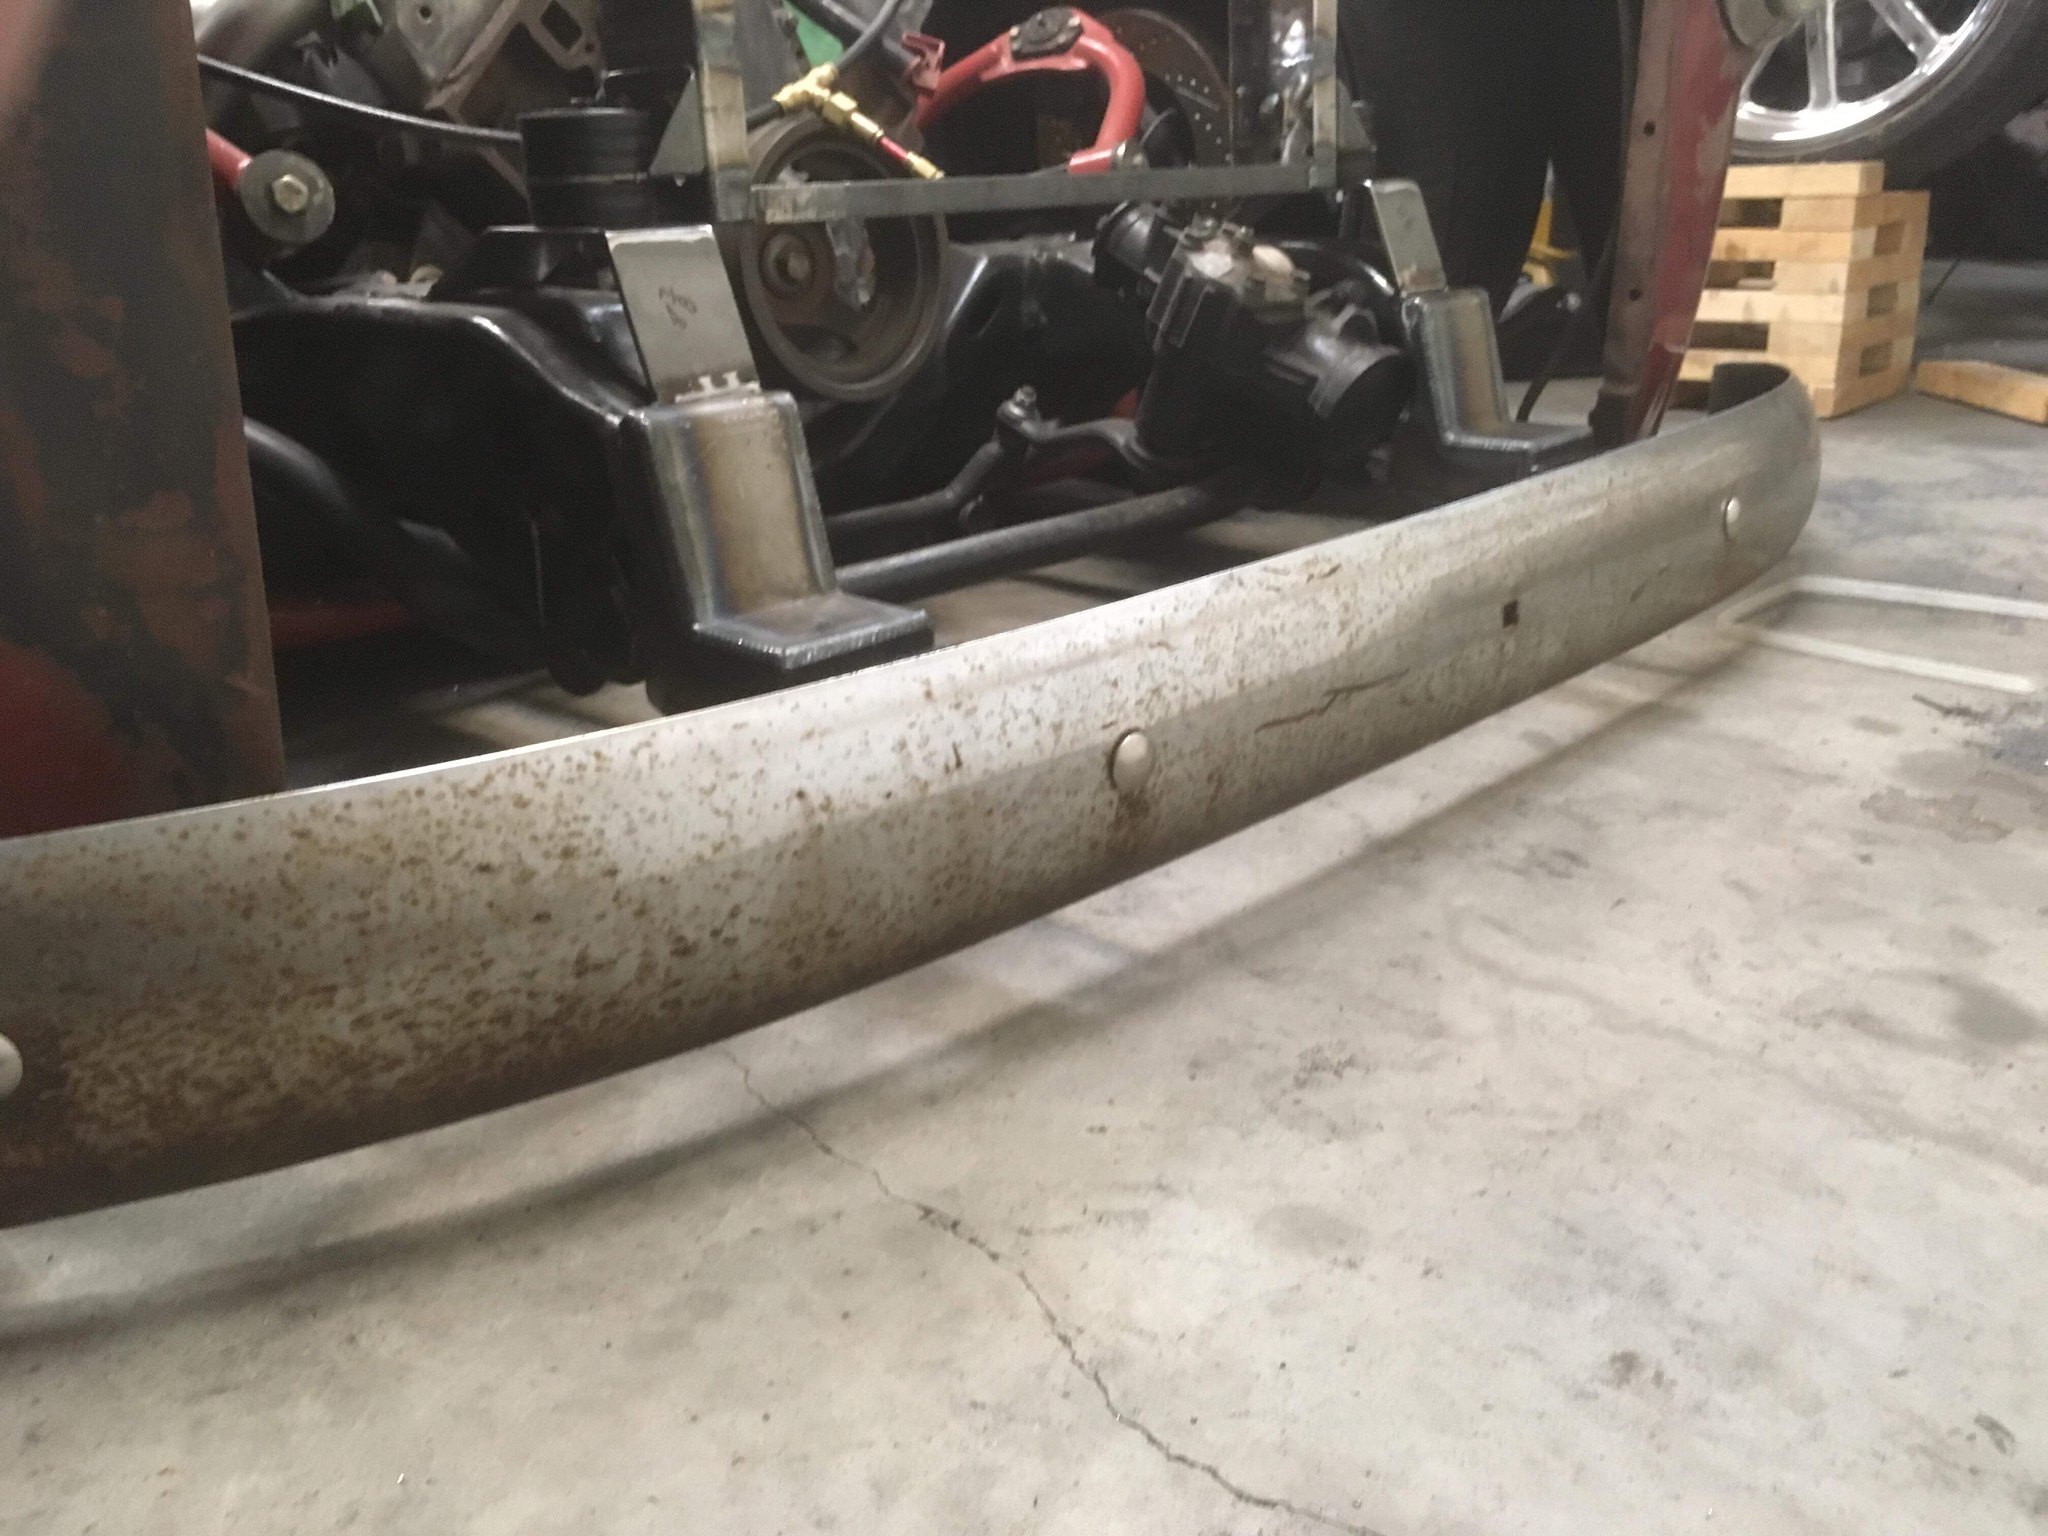 Untitled by Spencer Wiedeman, on Flickr Untitled by Spencer Wiedeman, on Flickr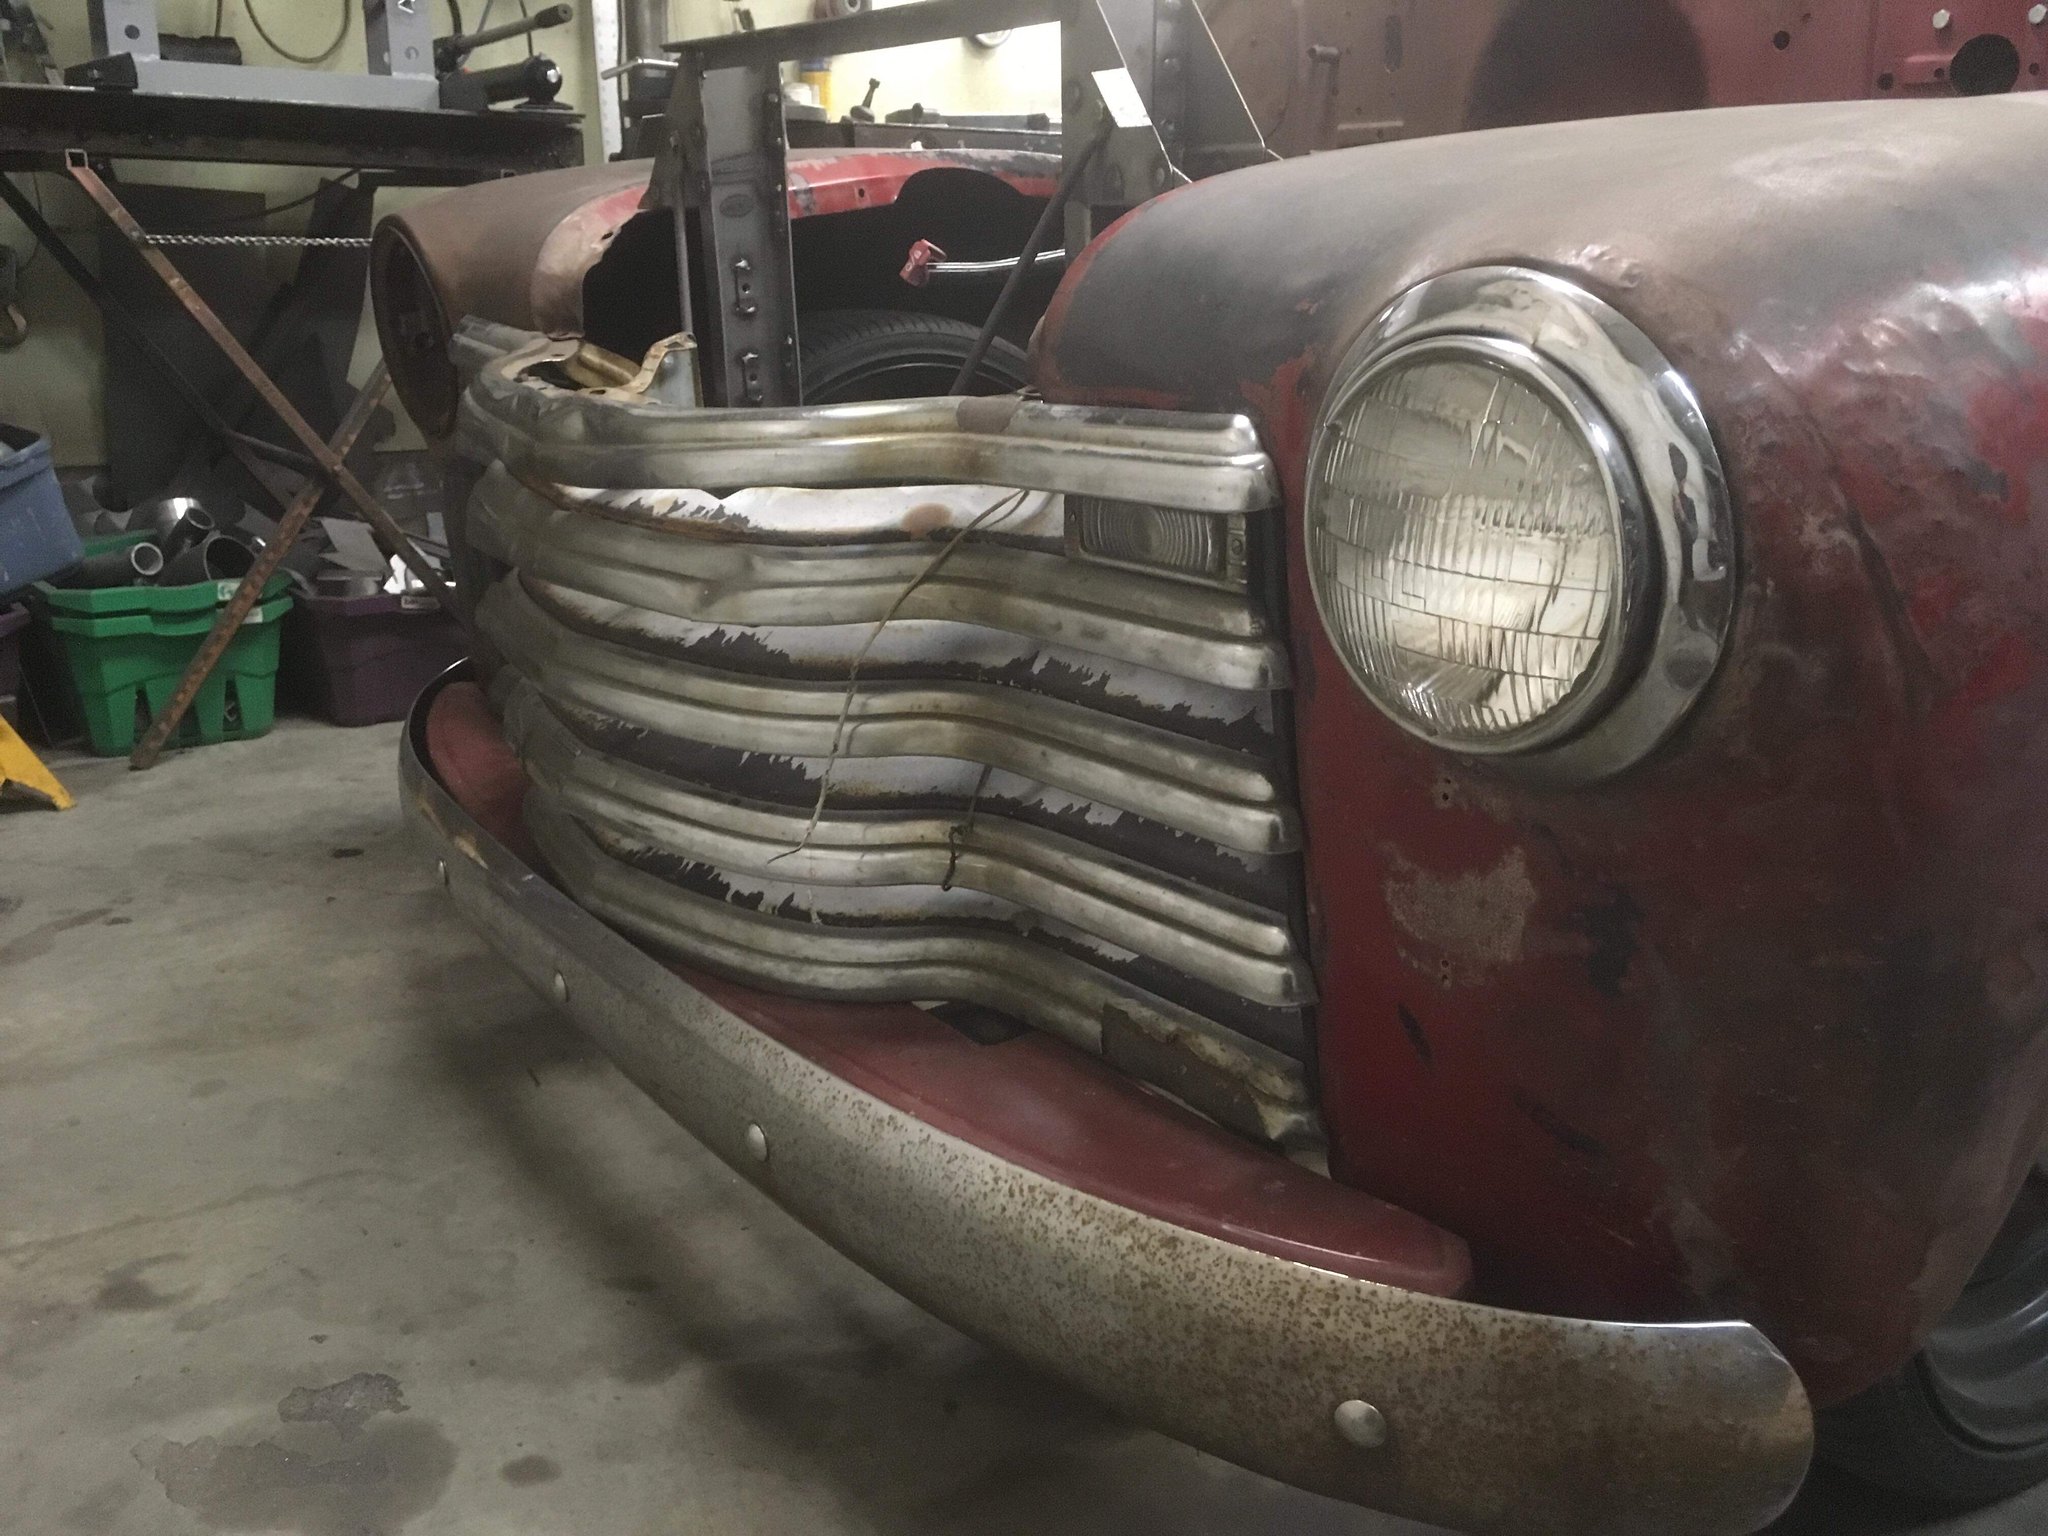 Untitled by Spencer Wiedeman, on Flickr Untitled by Spencer Wiedeman, on FlickrThe holes in the splash apron will be filled 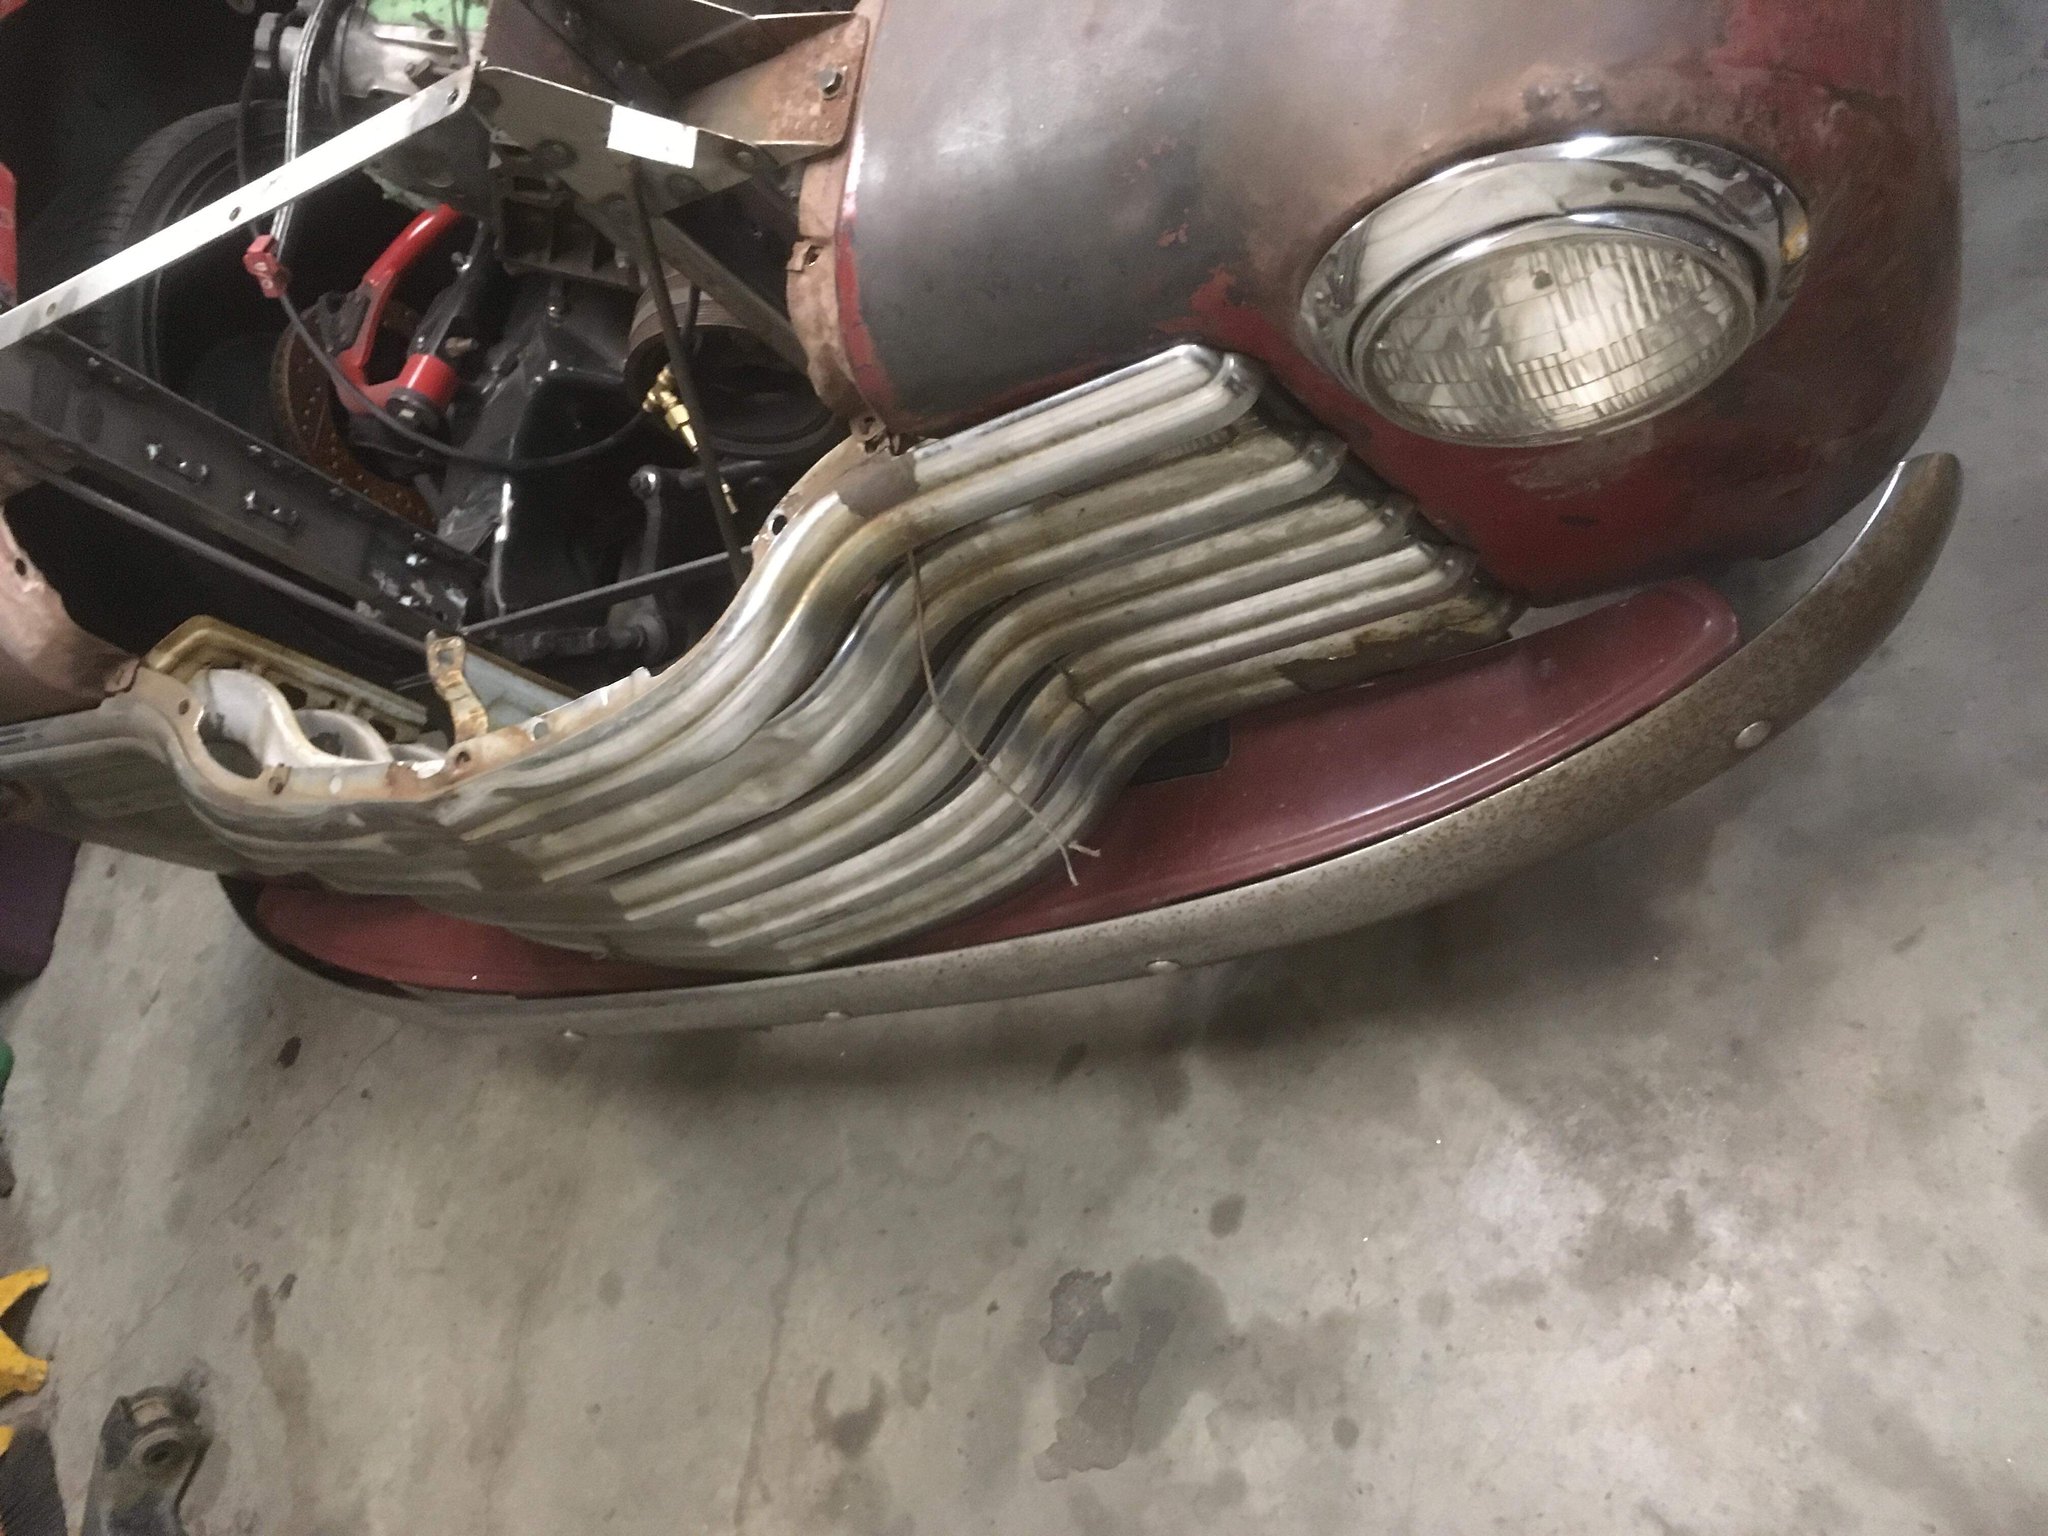 Untitled by Spencer Wiedeman, on Flickr Untitled by Spencer Wiedeman, on FlickrHe also got my exhaust all welded together over the past few days 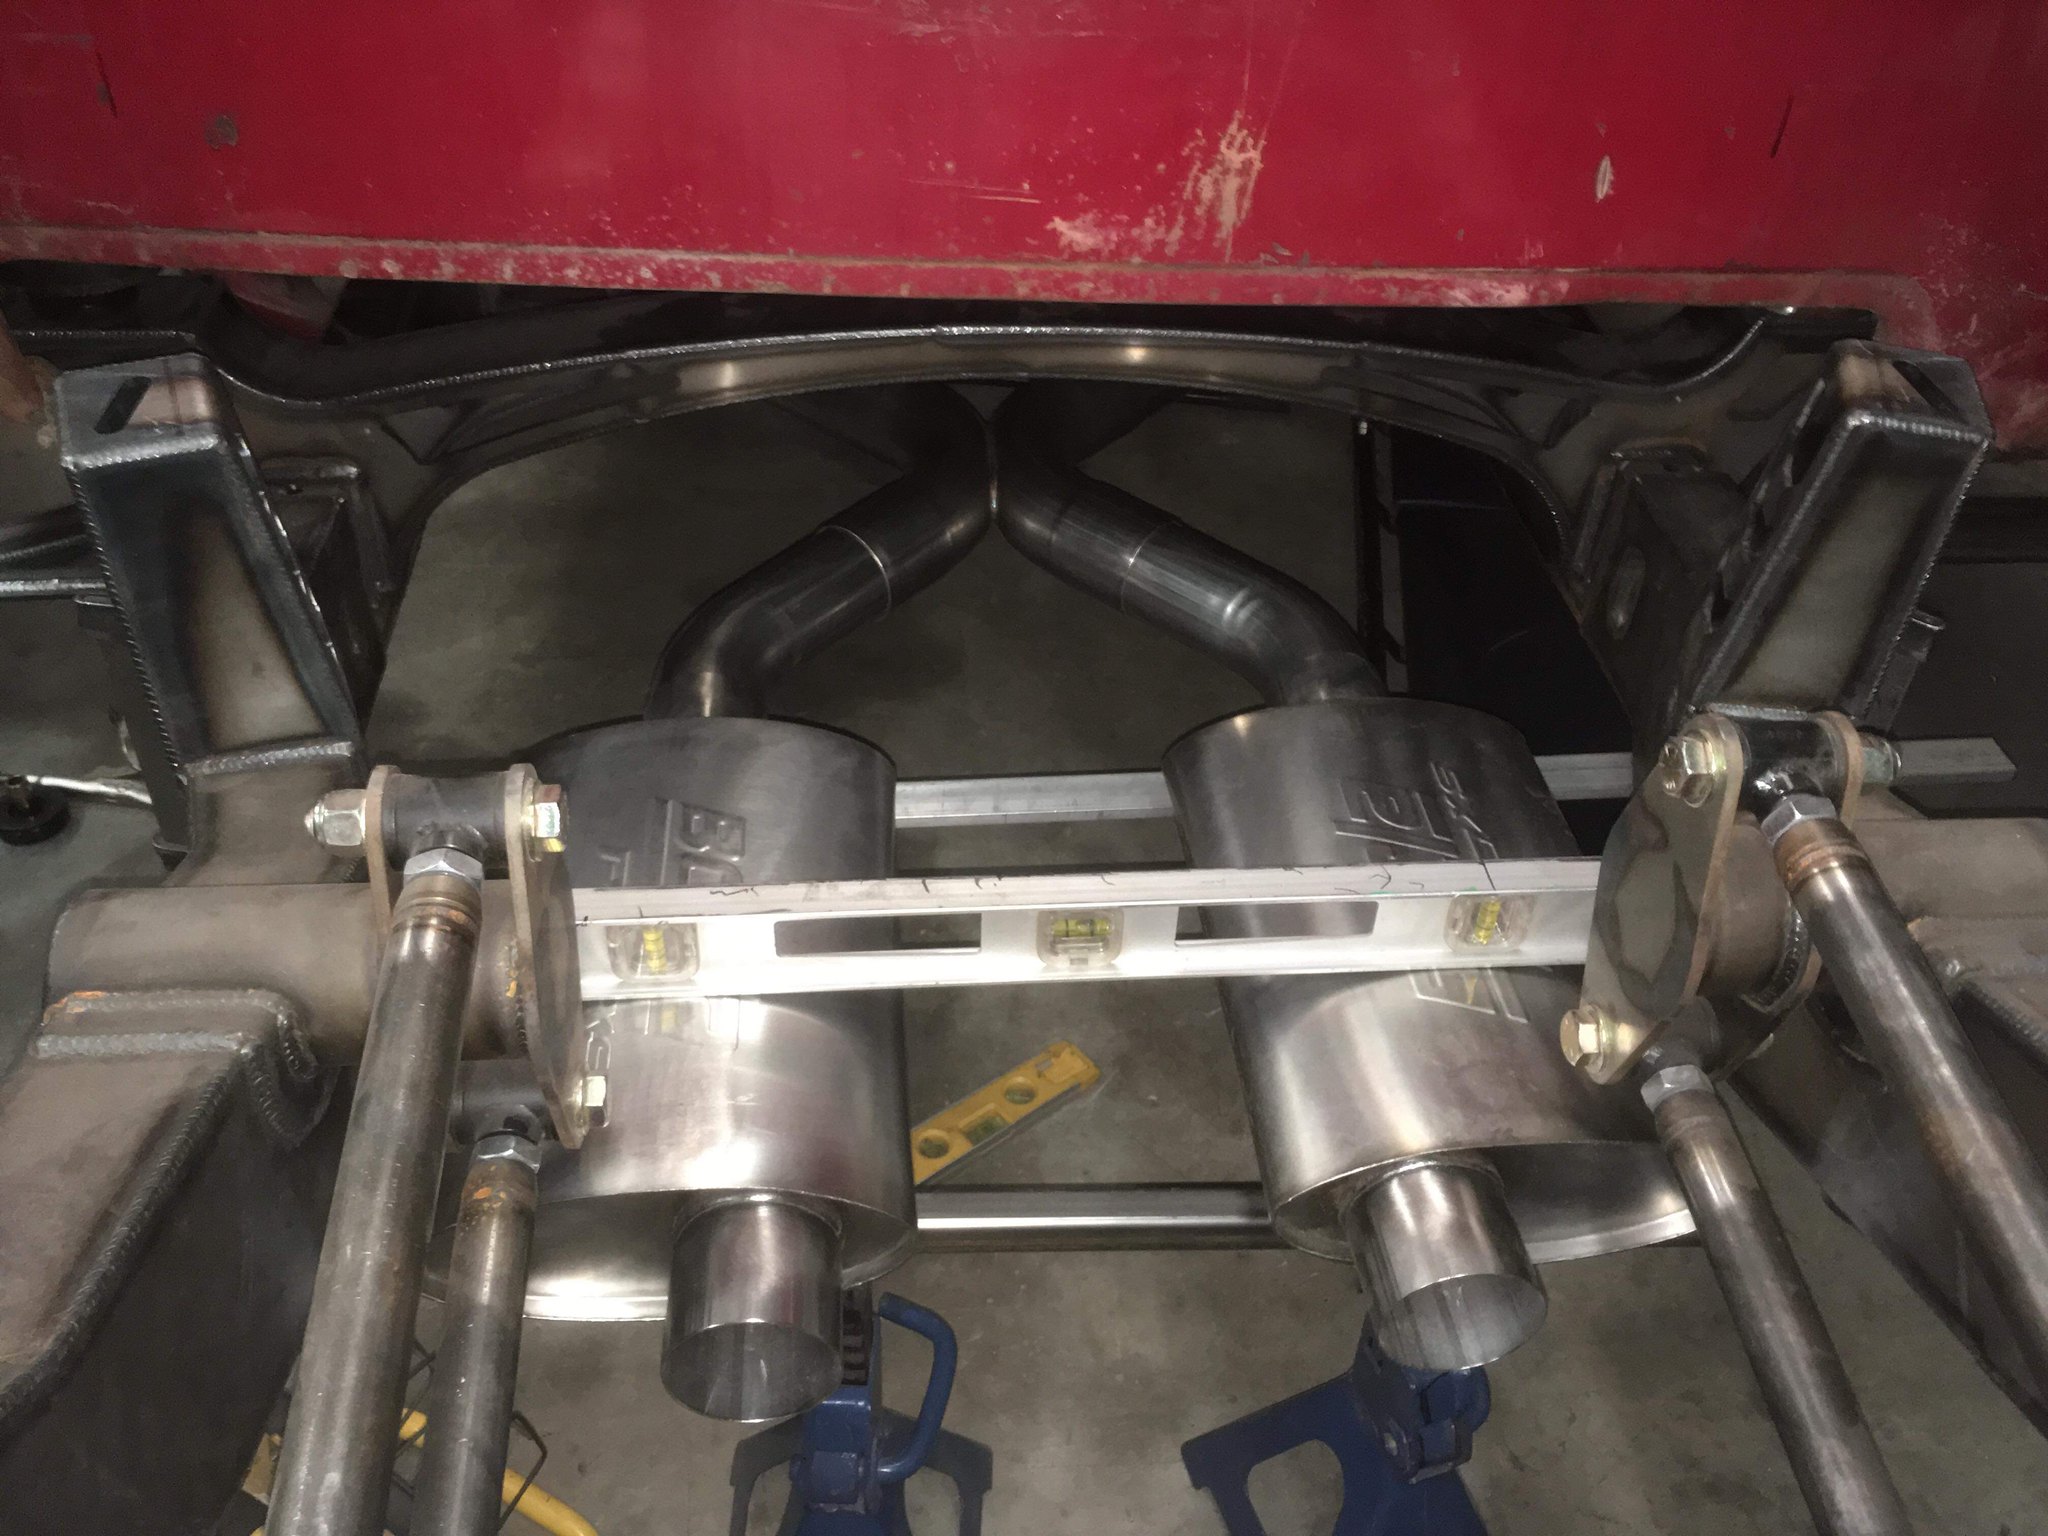 Untitled by Spencer Wiedeman, on Flickr Untitled by Spencer Wiedeman, on Flickr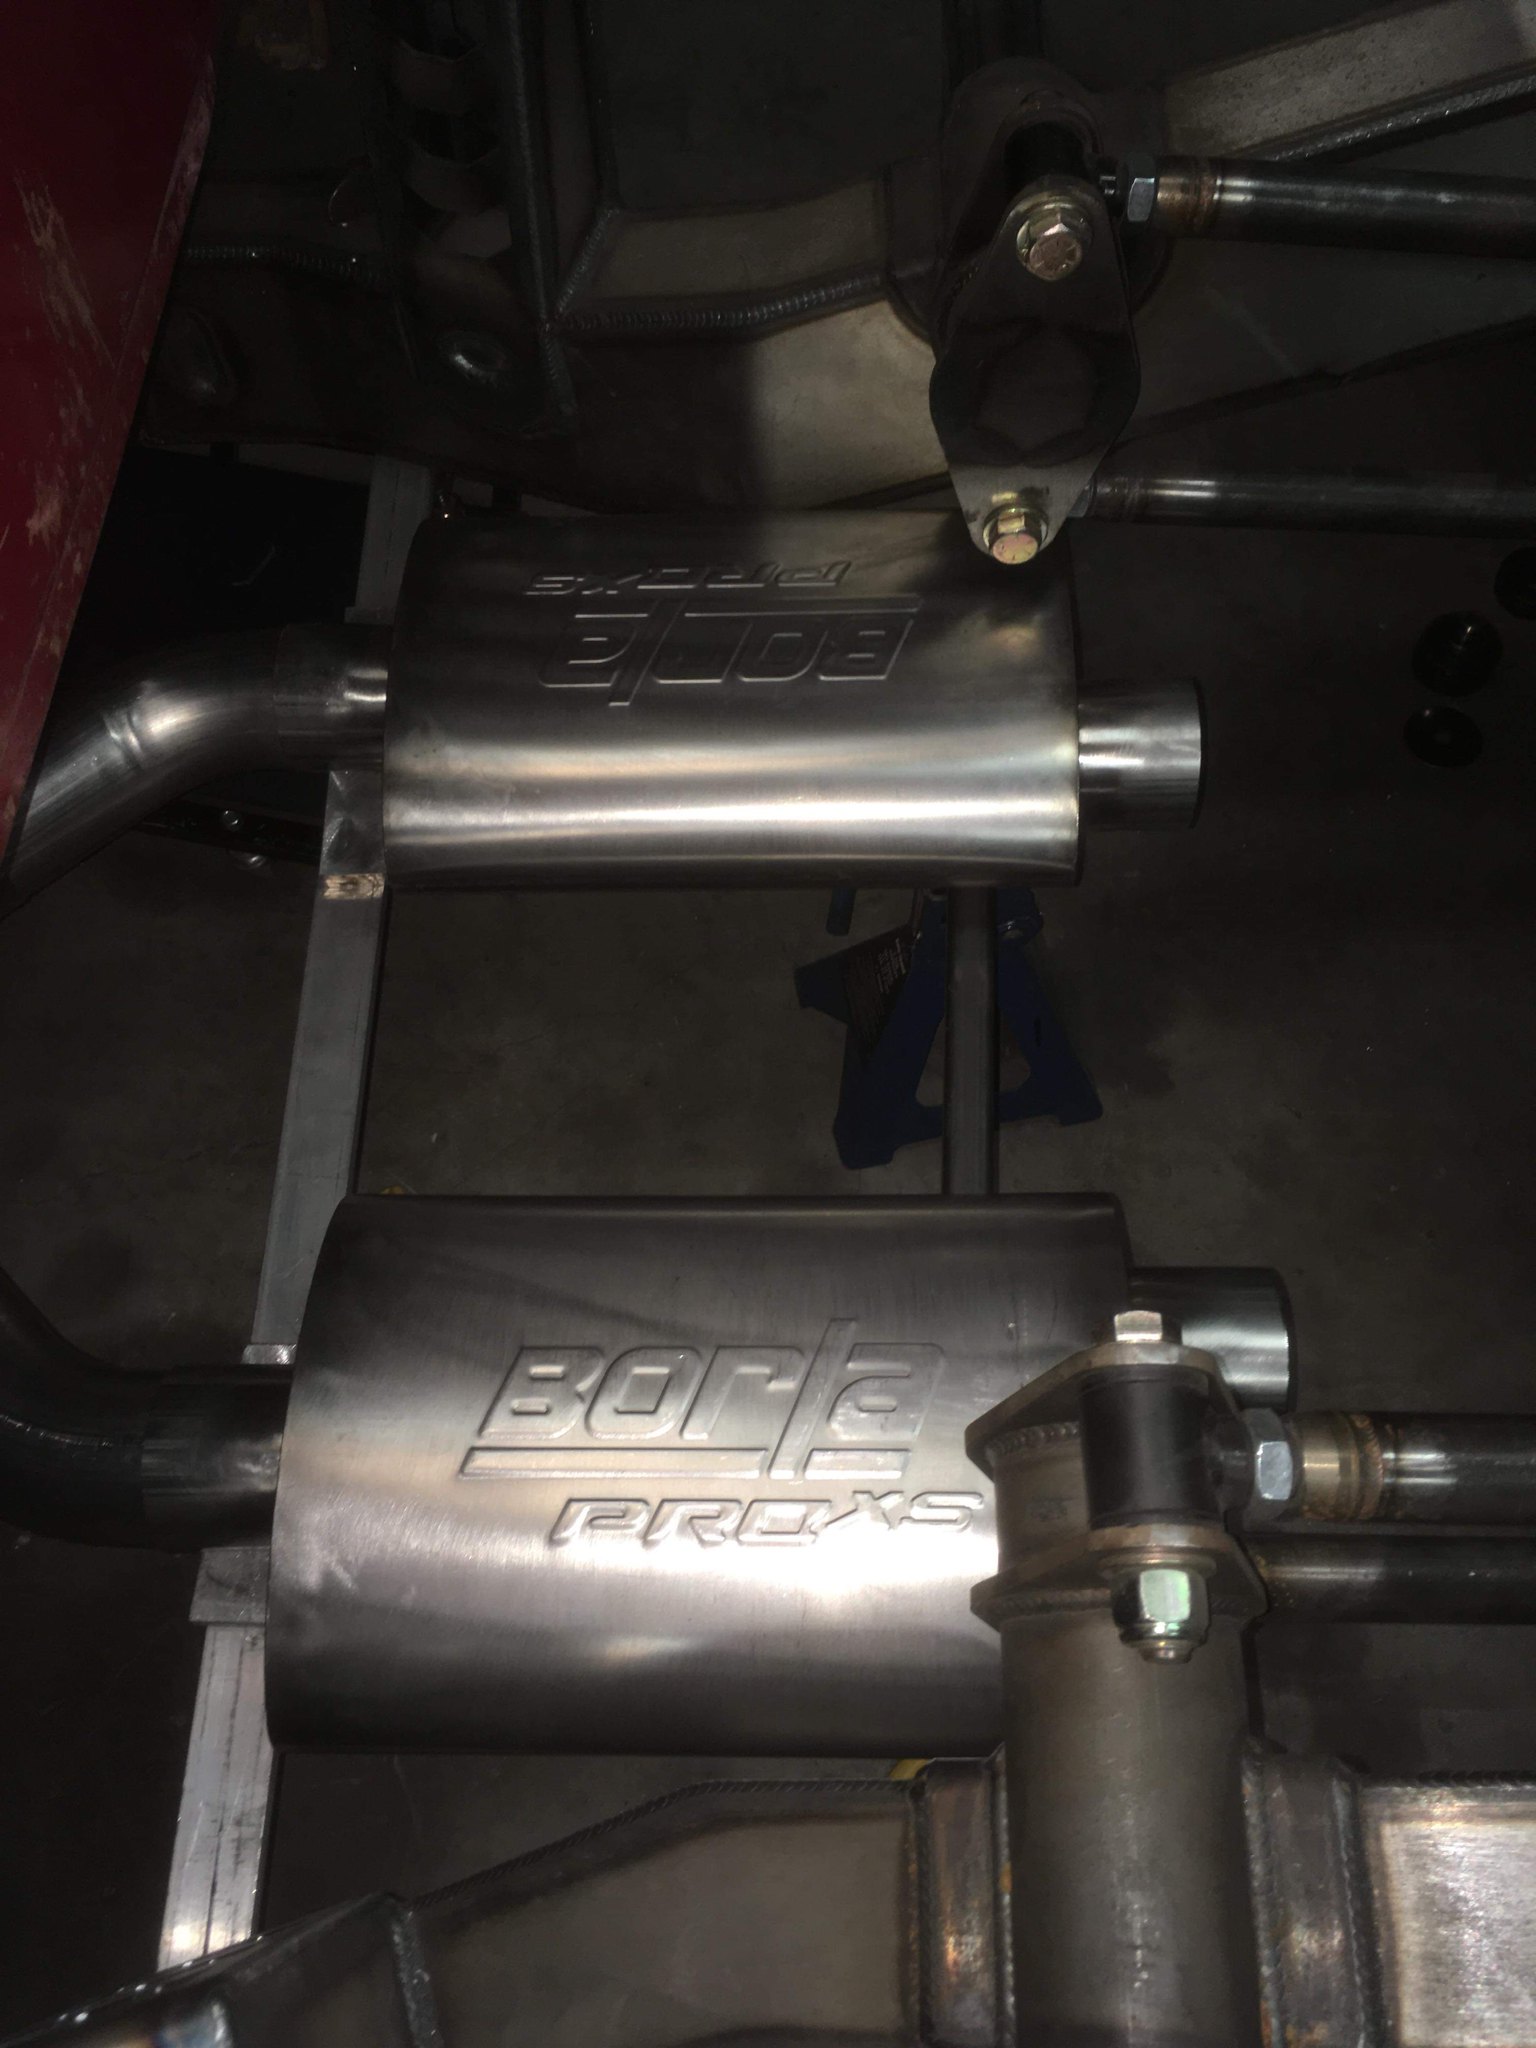 Untitled by Spencer Wiedeman, on Flickr Untitled by Spencer Wiedeman, on Flickr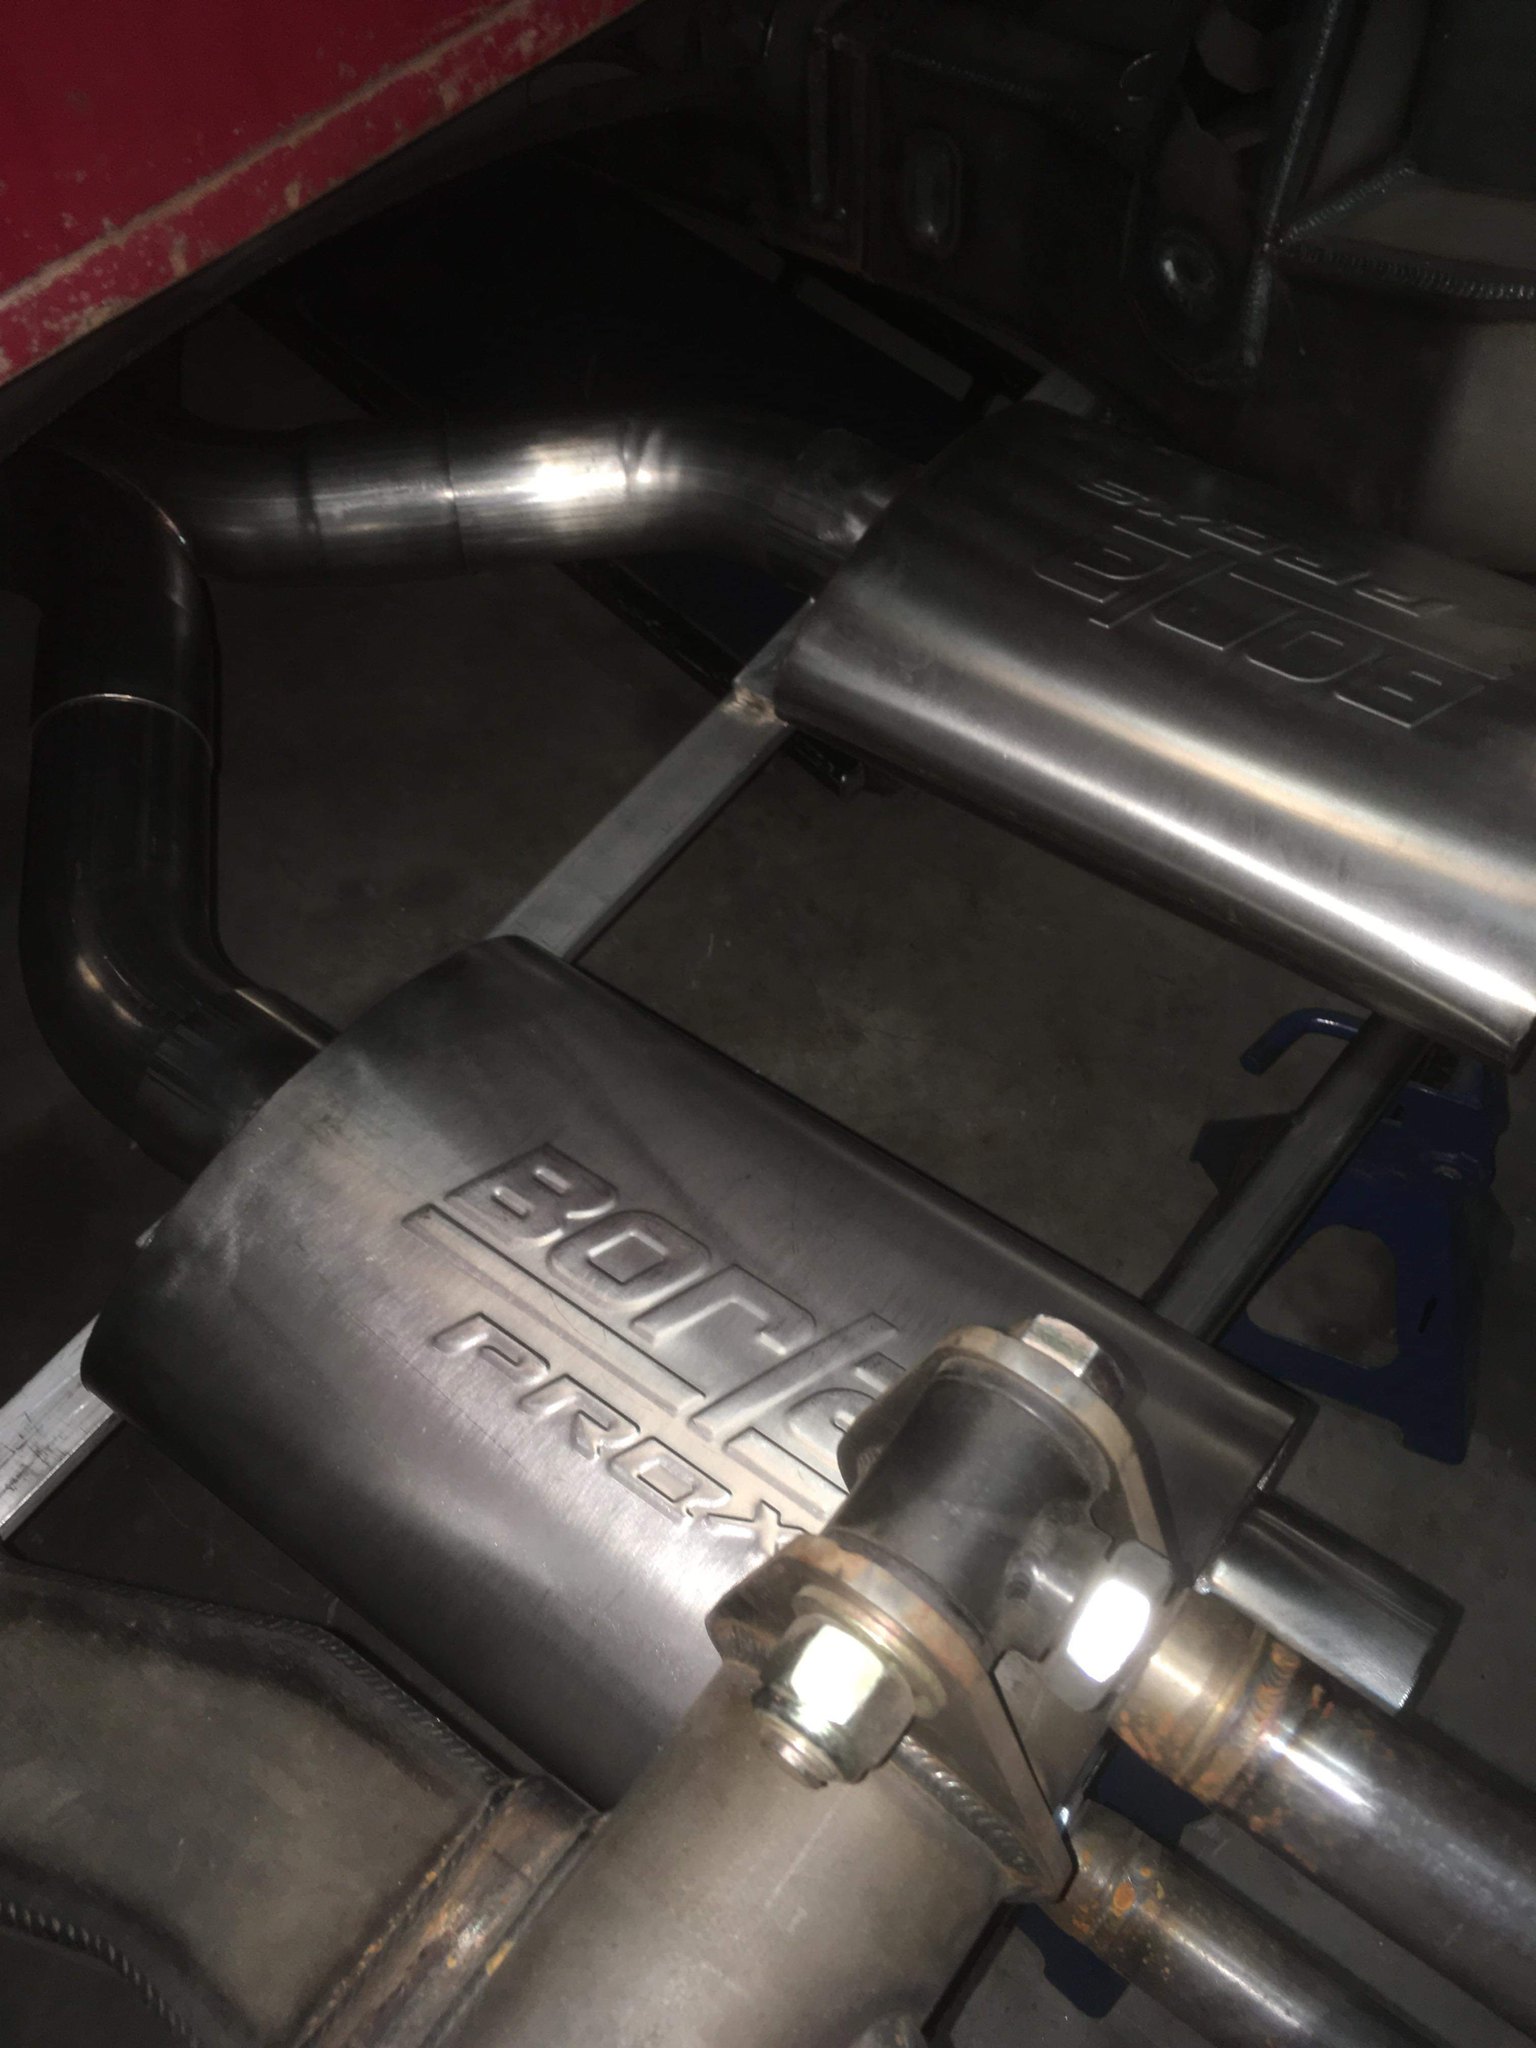 Untitled by Spencer Wiedeman, on Flickr Untitled by Spencer Wiedeman, on Flickr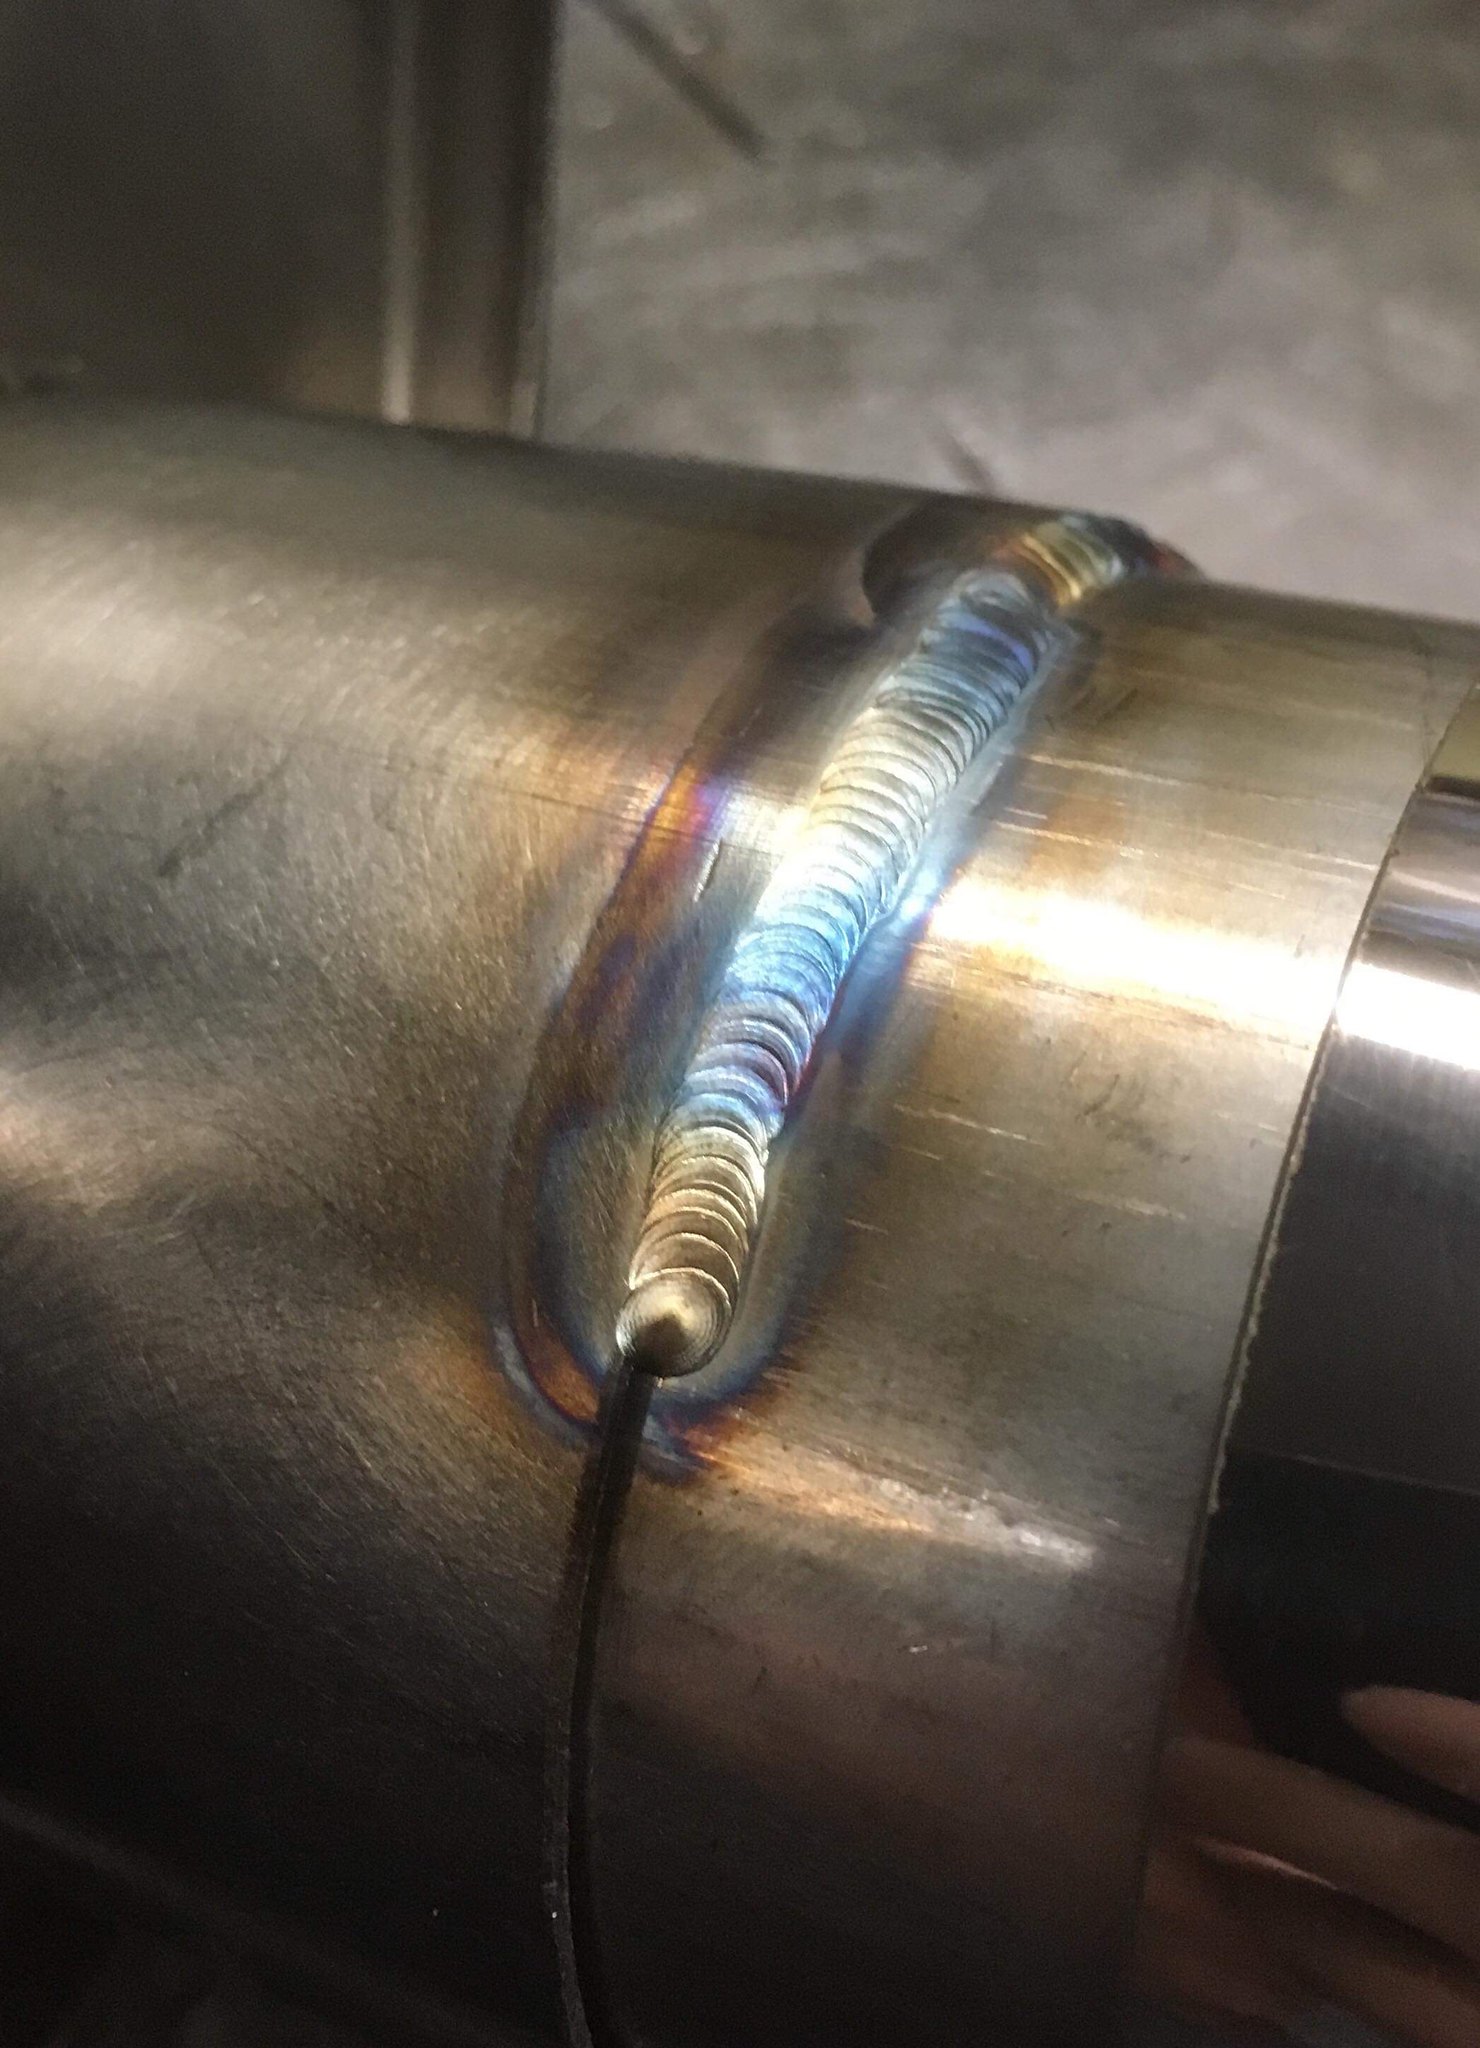 Untitled by Spencer Wiedeman, on Flickr Untitled by Spencer Wiedeman, on Flickr Untitled by Spencer Wiedeman, on Flickr Untitled by Spencer Wiedeman, on Flickr
|
|
|

|
|
|
#3 |
|
Registered User
Join Date: Mar 2013
Location: Edmonton, AB
Posts: 298
|
Re: Project: Patina (1949 Chevrolet 1434)
I will be dressing my LQ4 6.0L with Delmo's DeLS3 kit. Locally I found a guy selling a 3 bolt Delmo TB set up and jumped all over it. It saved me time, money, and the hassle of shipping parts across the border.
In order to get my old factory TB up to par with the new parts I took it to a local company called Sublime Resurfacing. They specialize in dry ice blasting and their results are amazing. Here are some before and after photos of my TB: 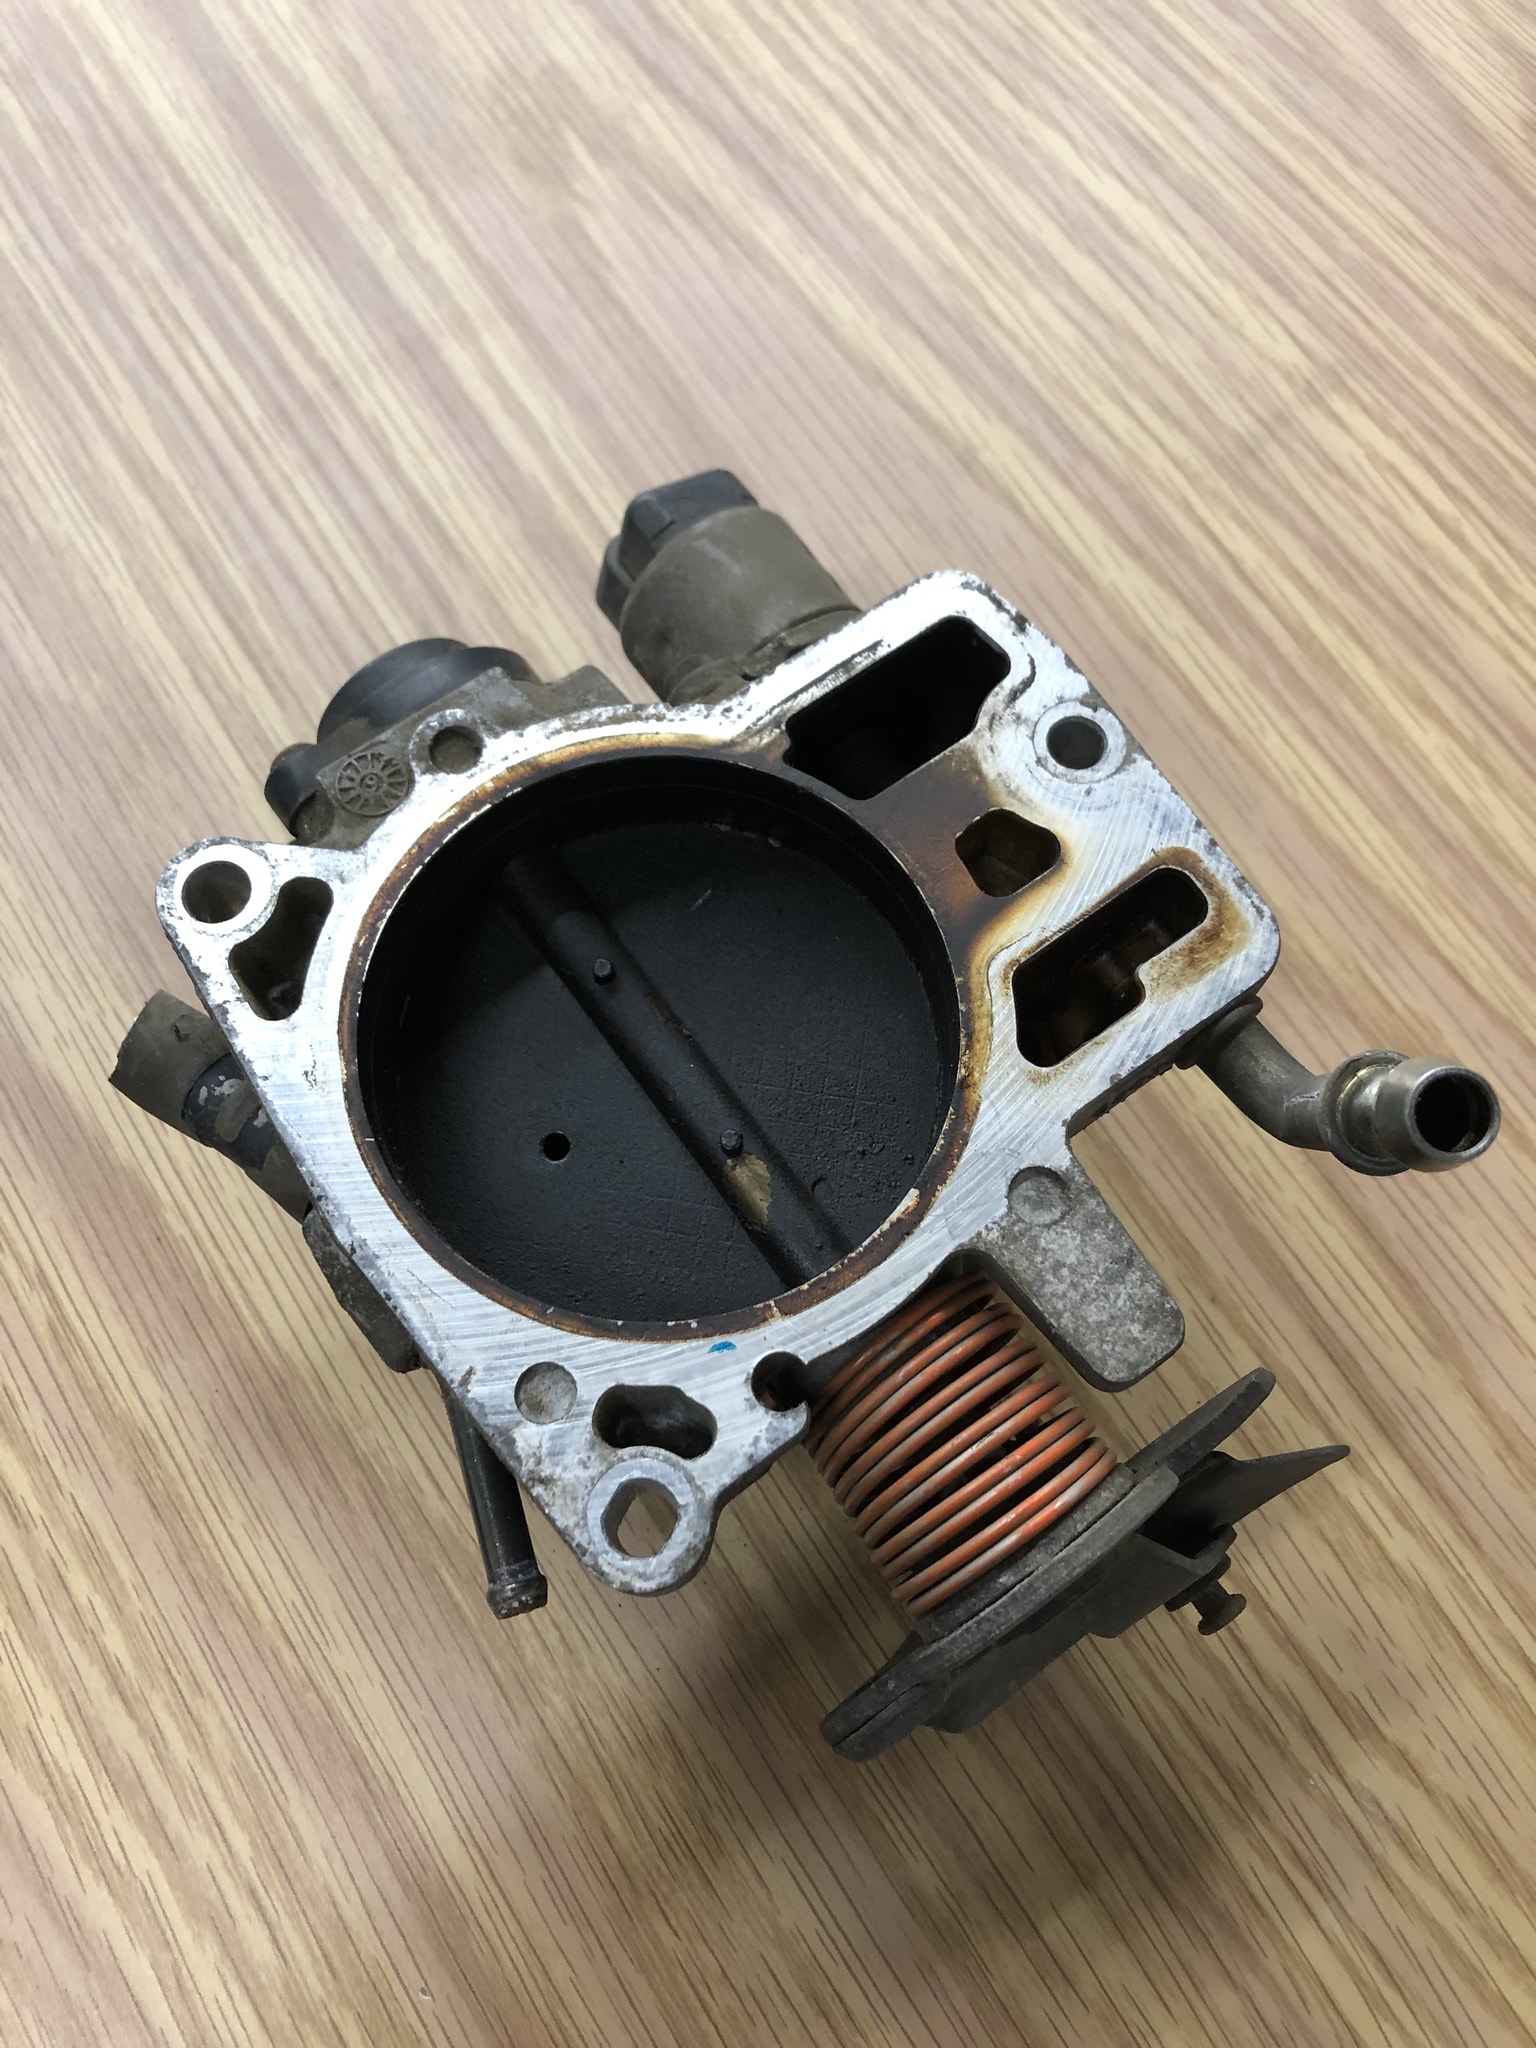 Untitled by Spencer Wiedeman, on Flickr Untitled by Spencer Wiedeman, on Flickr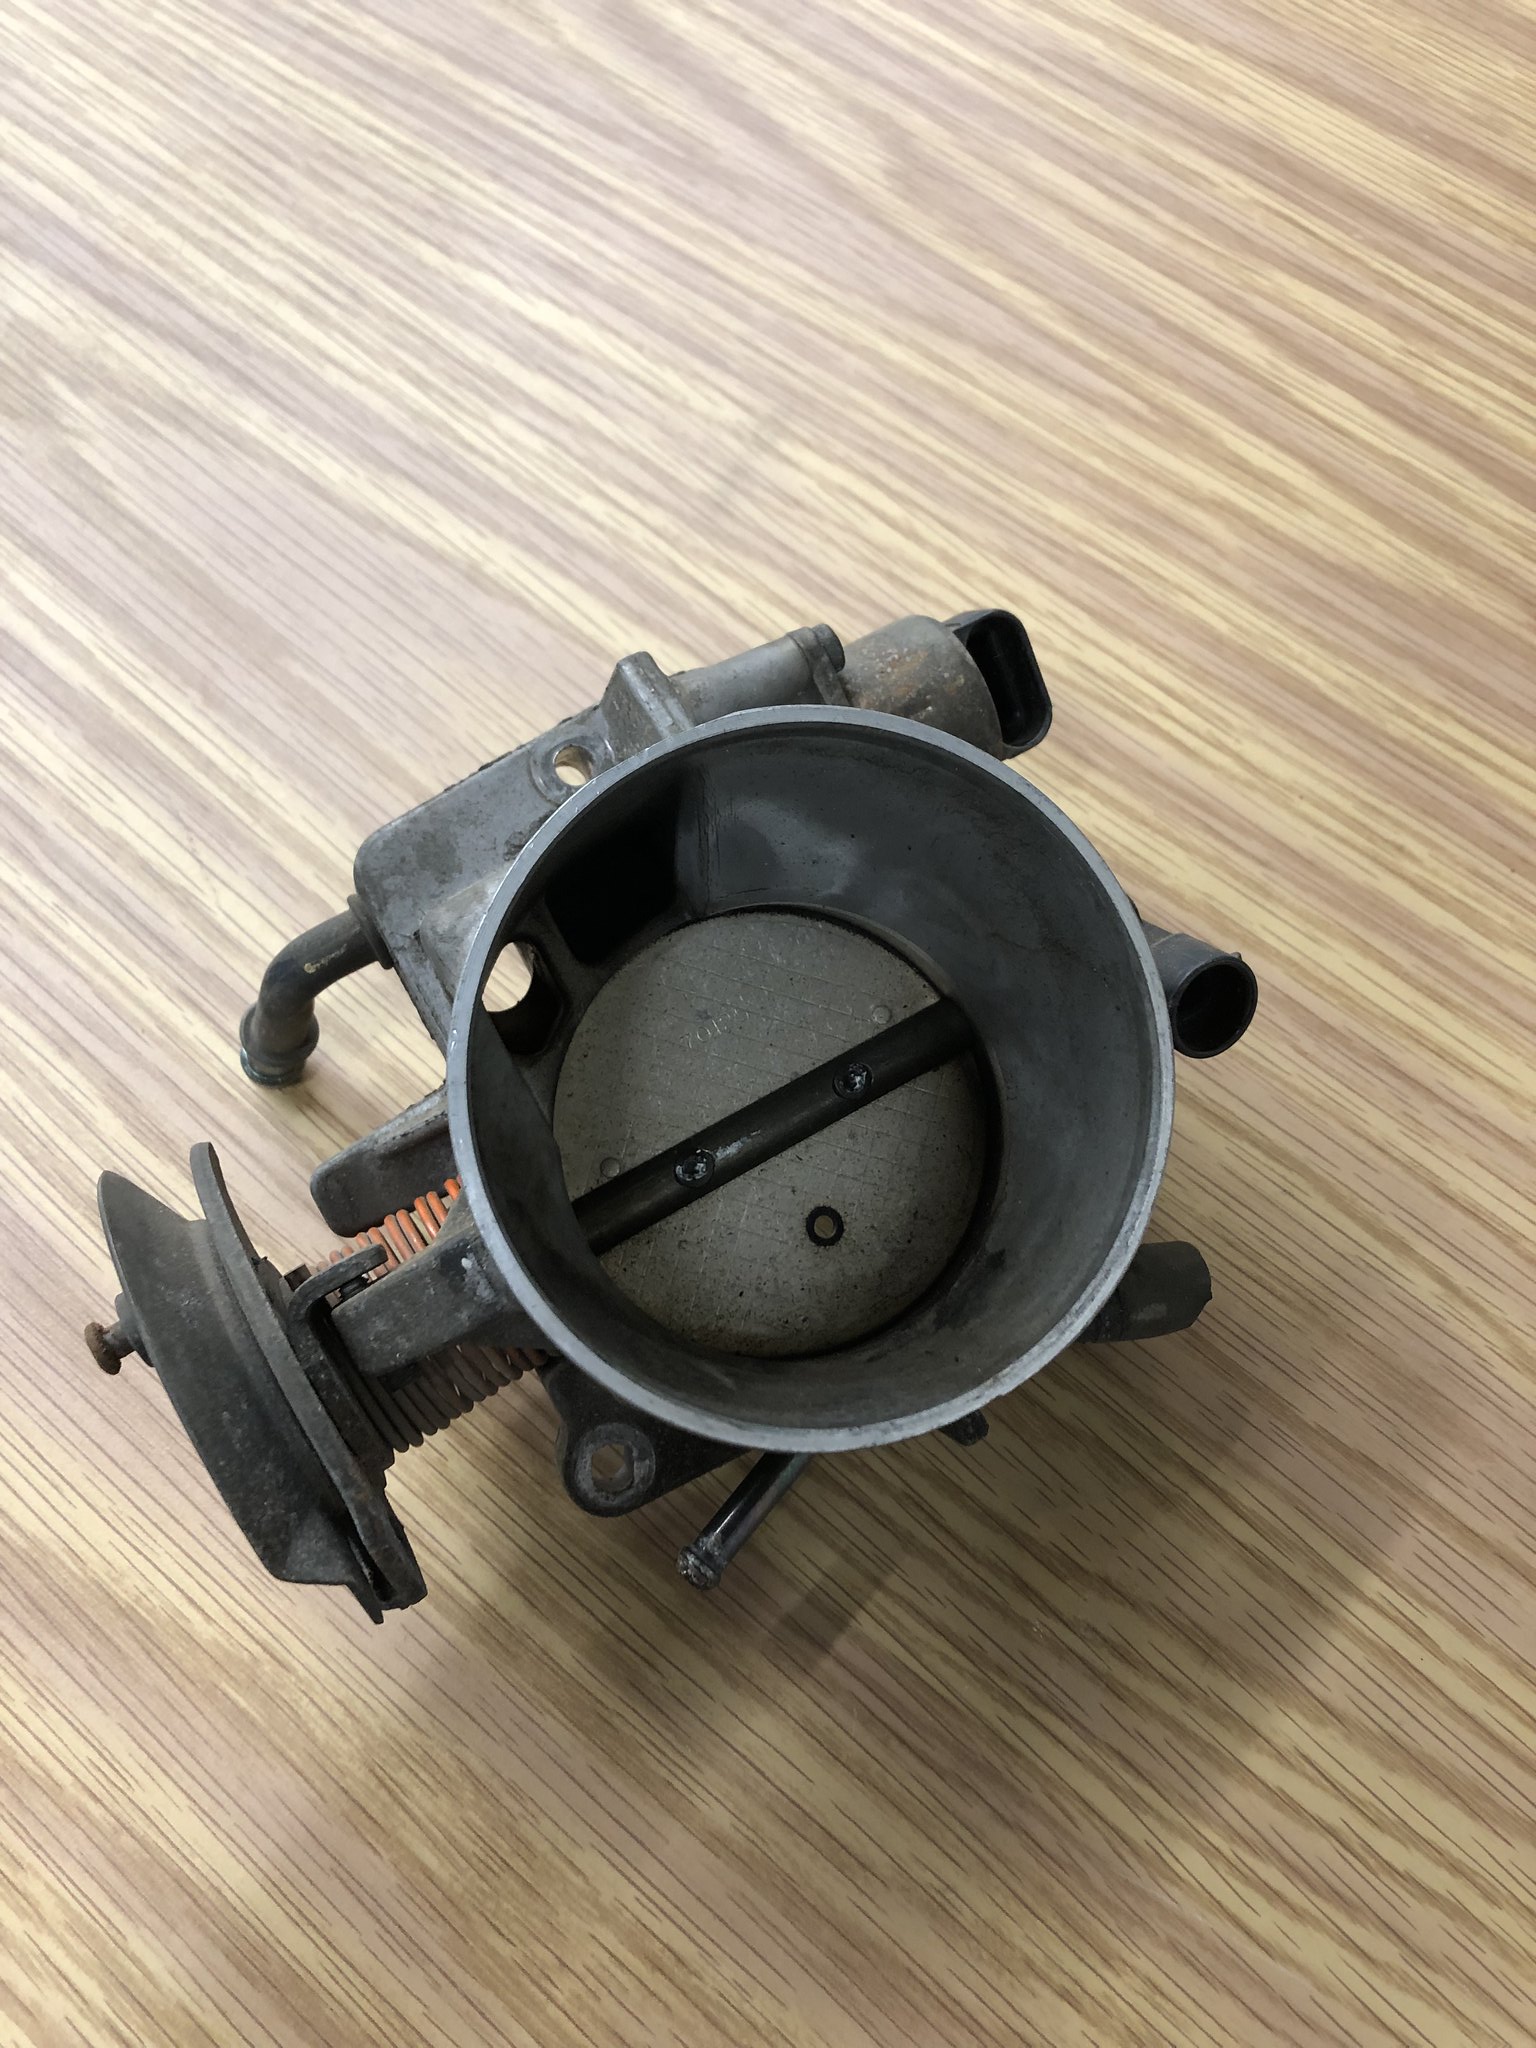 Untitled by Spencer Wiedeman, on Flickr Untitled by Spencer Wiedeman, on Flickr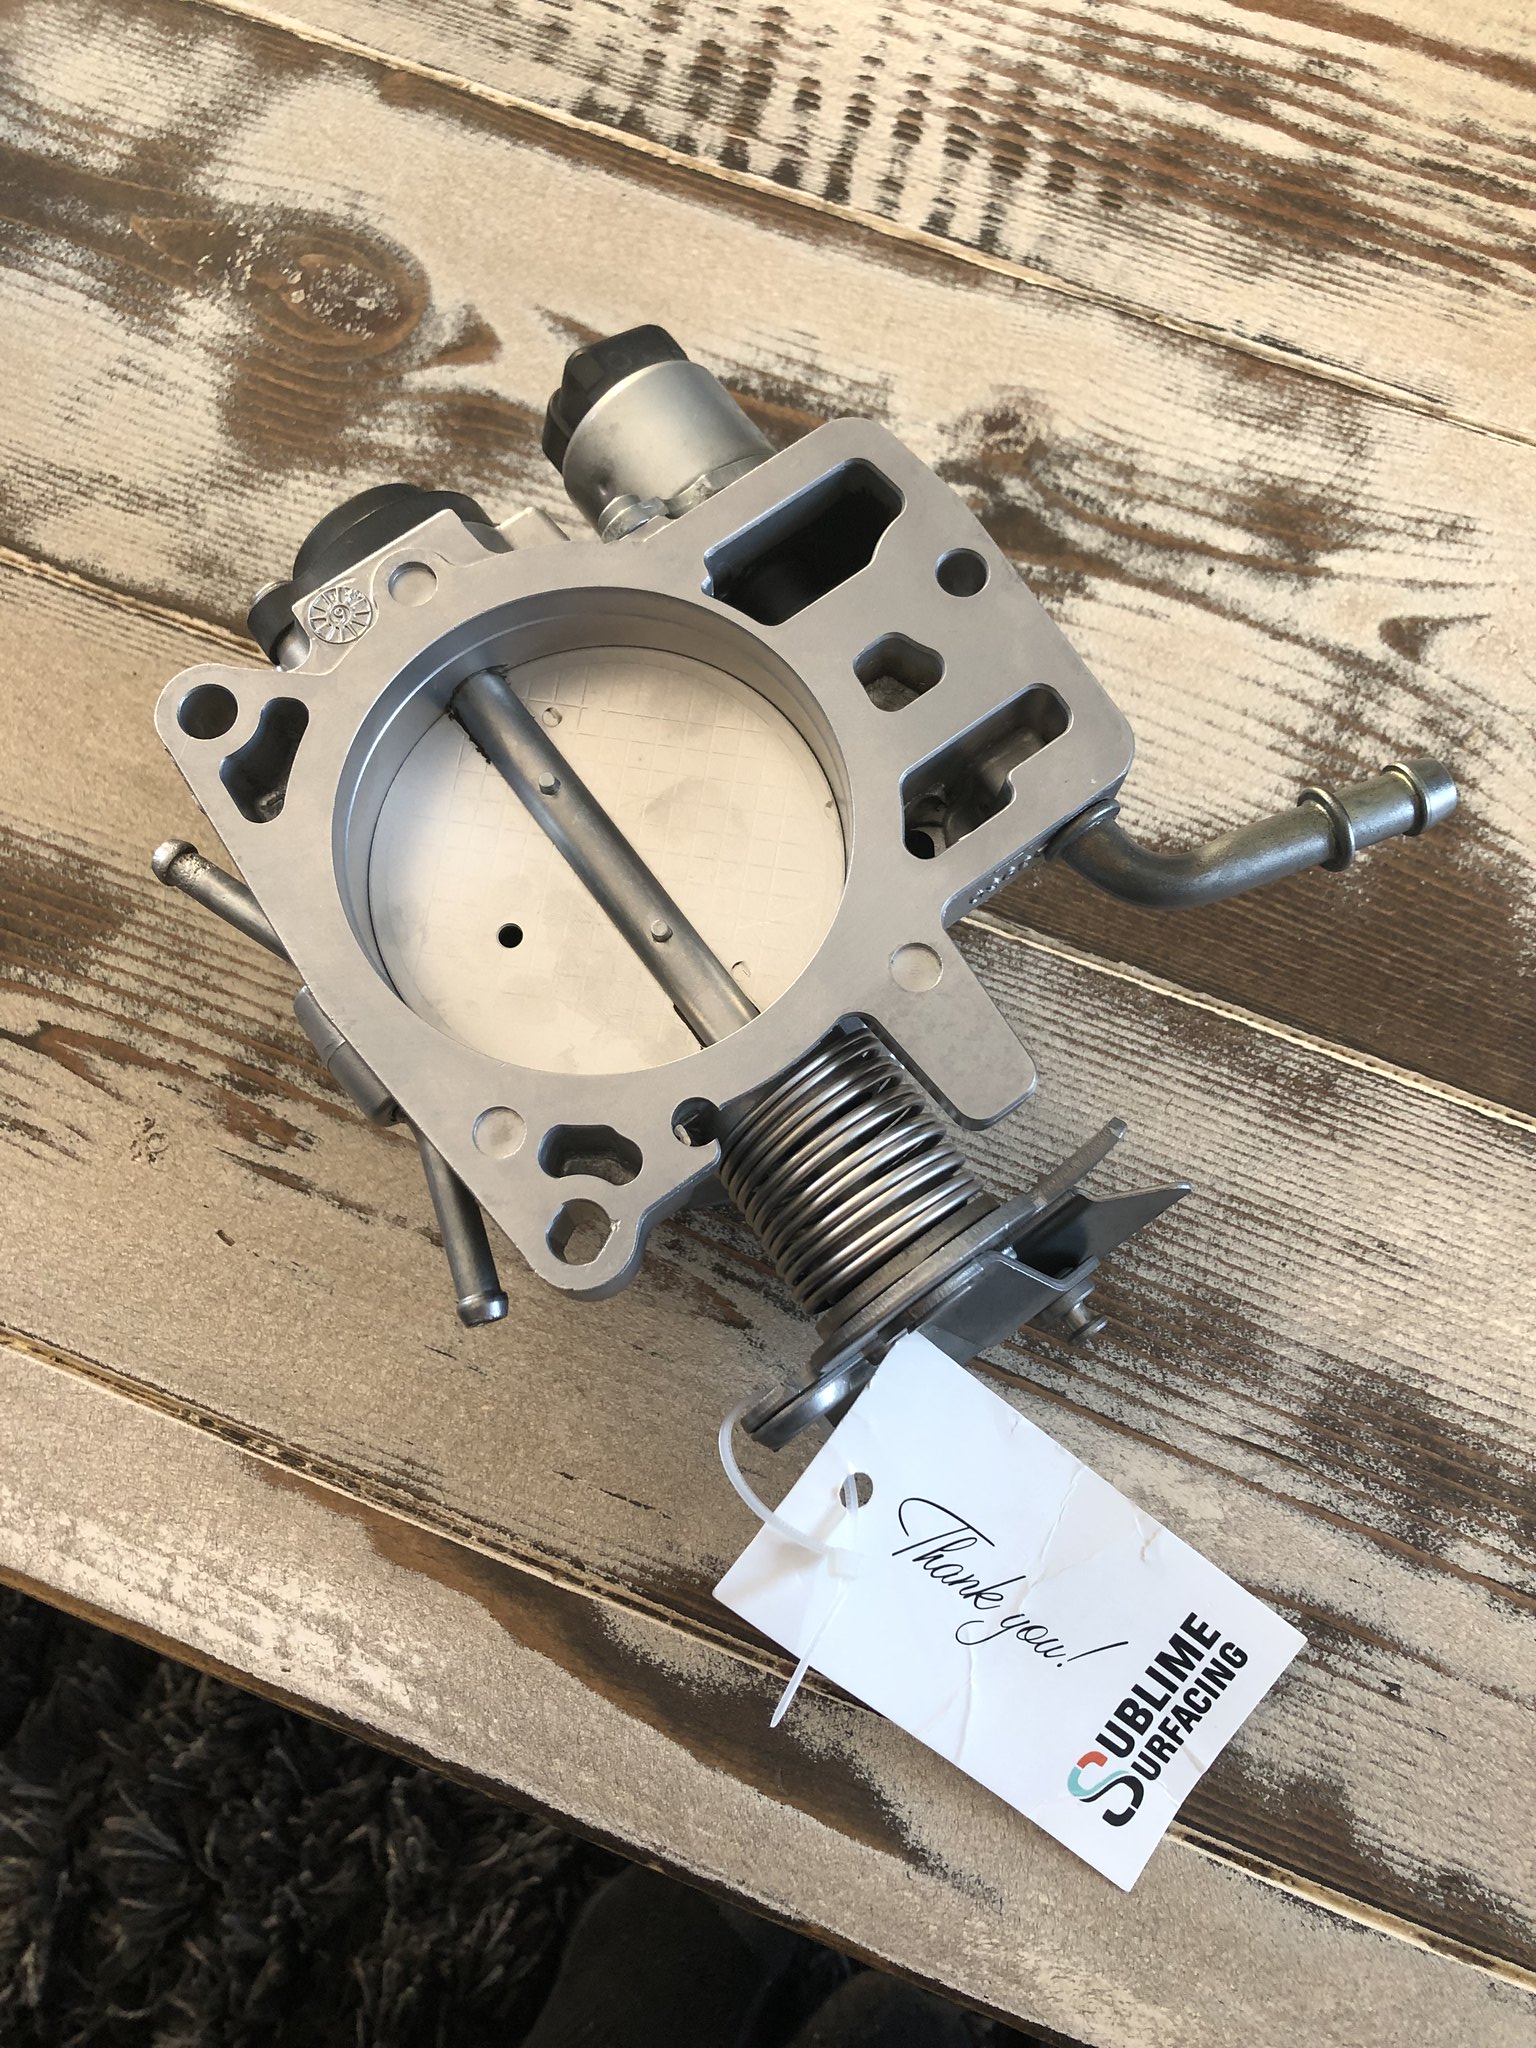 Untitled by Spencer Wiedeman, on Flickr Untitled by Spencer Wiedeman, on Flickr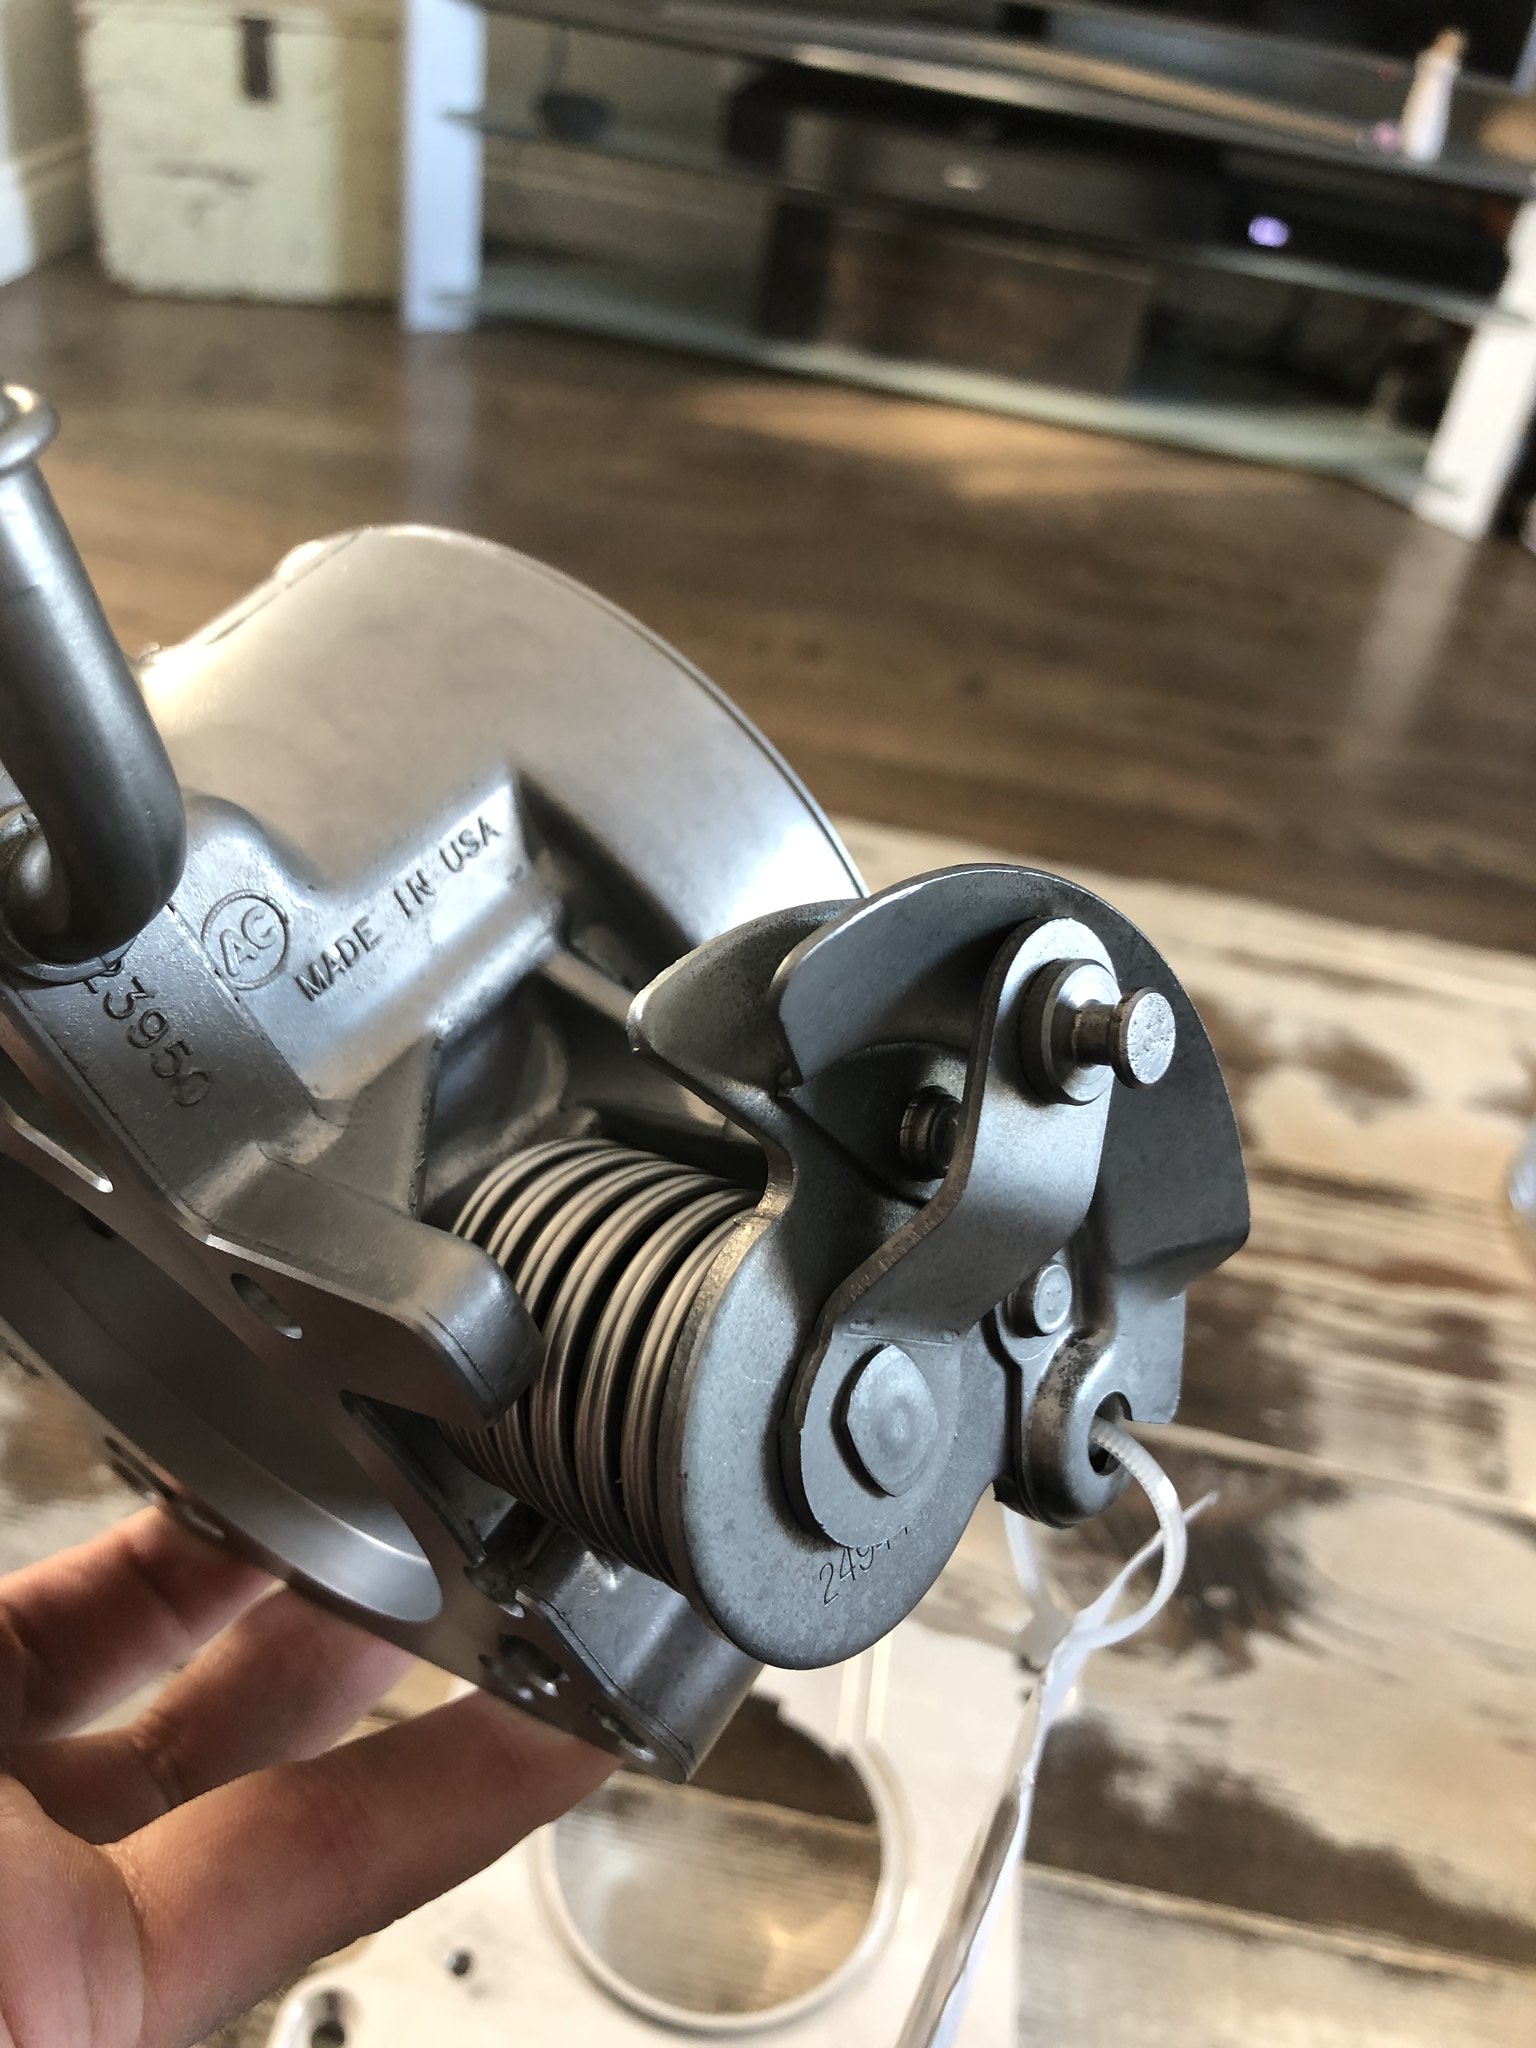 Untitled by Spencer Wiedeman, on Flickr Untitled by Spencer Wiedeman, on FlickrThe Delmo TB adaptor and mounting plate 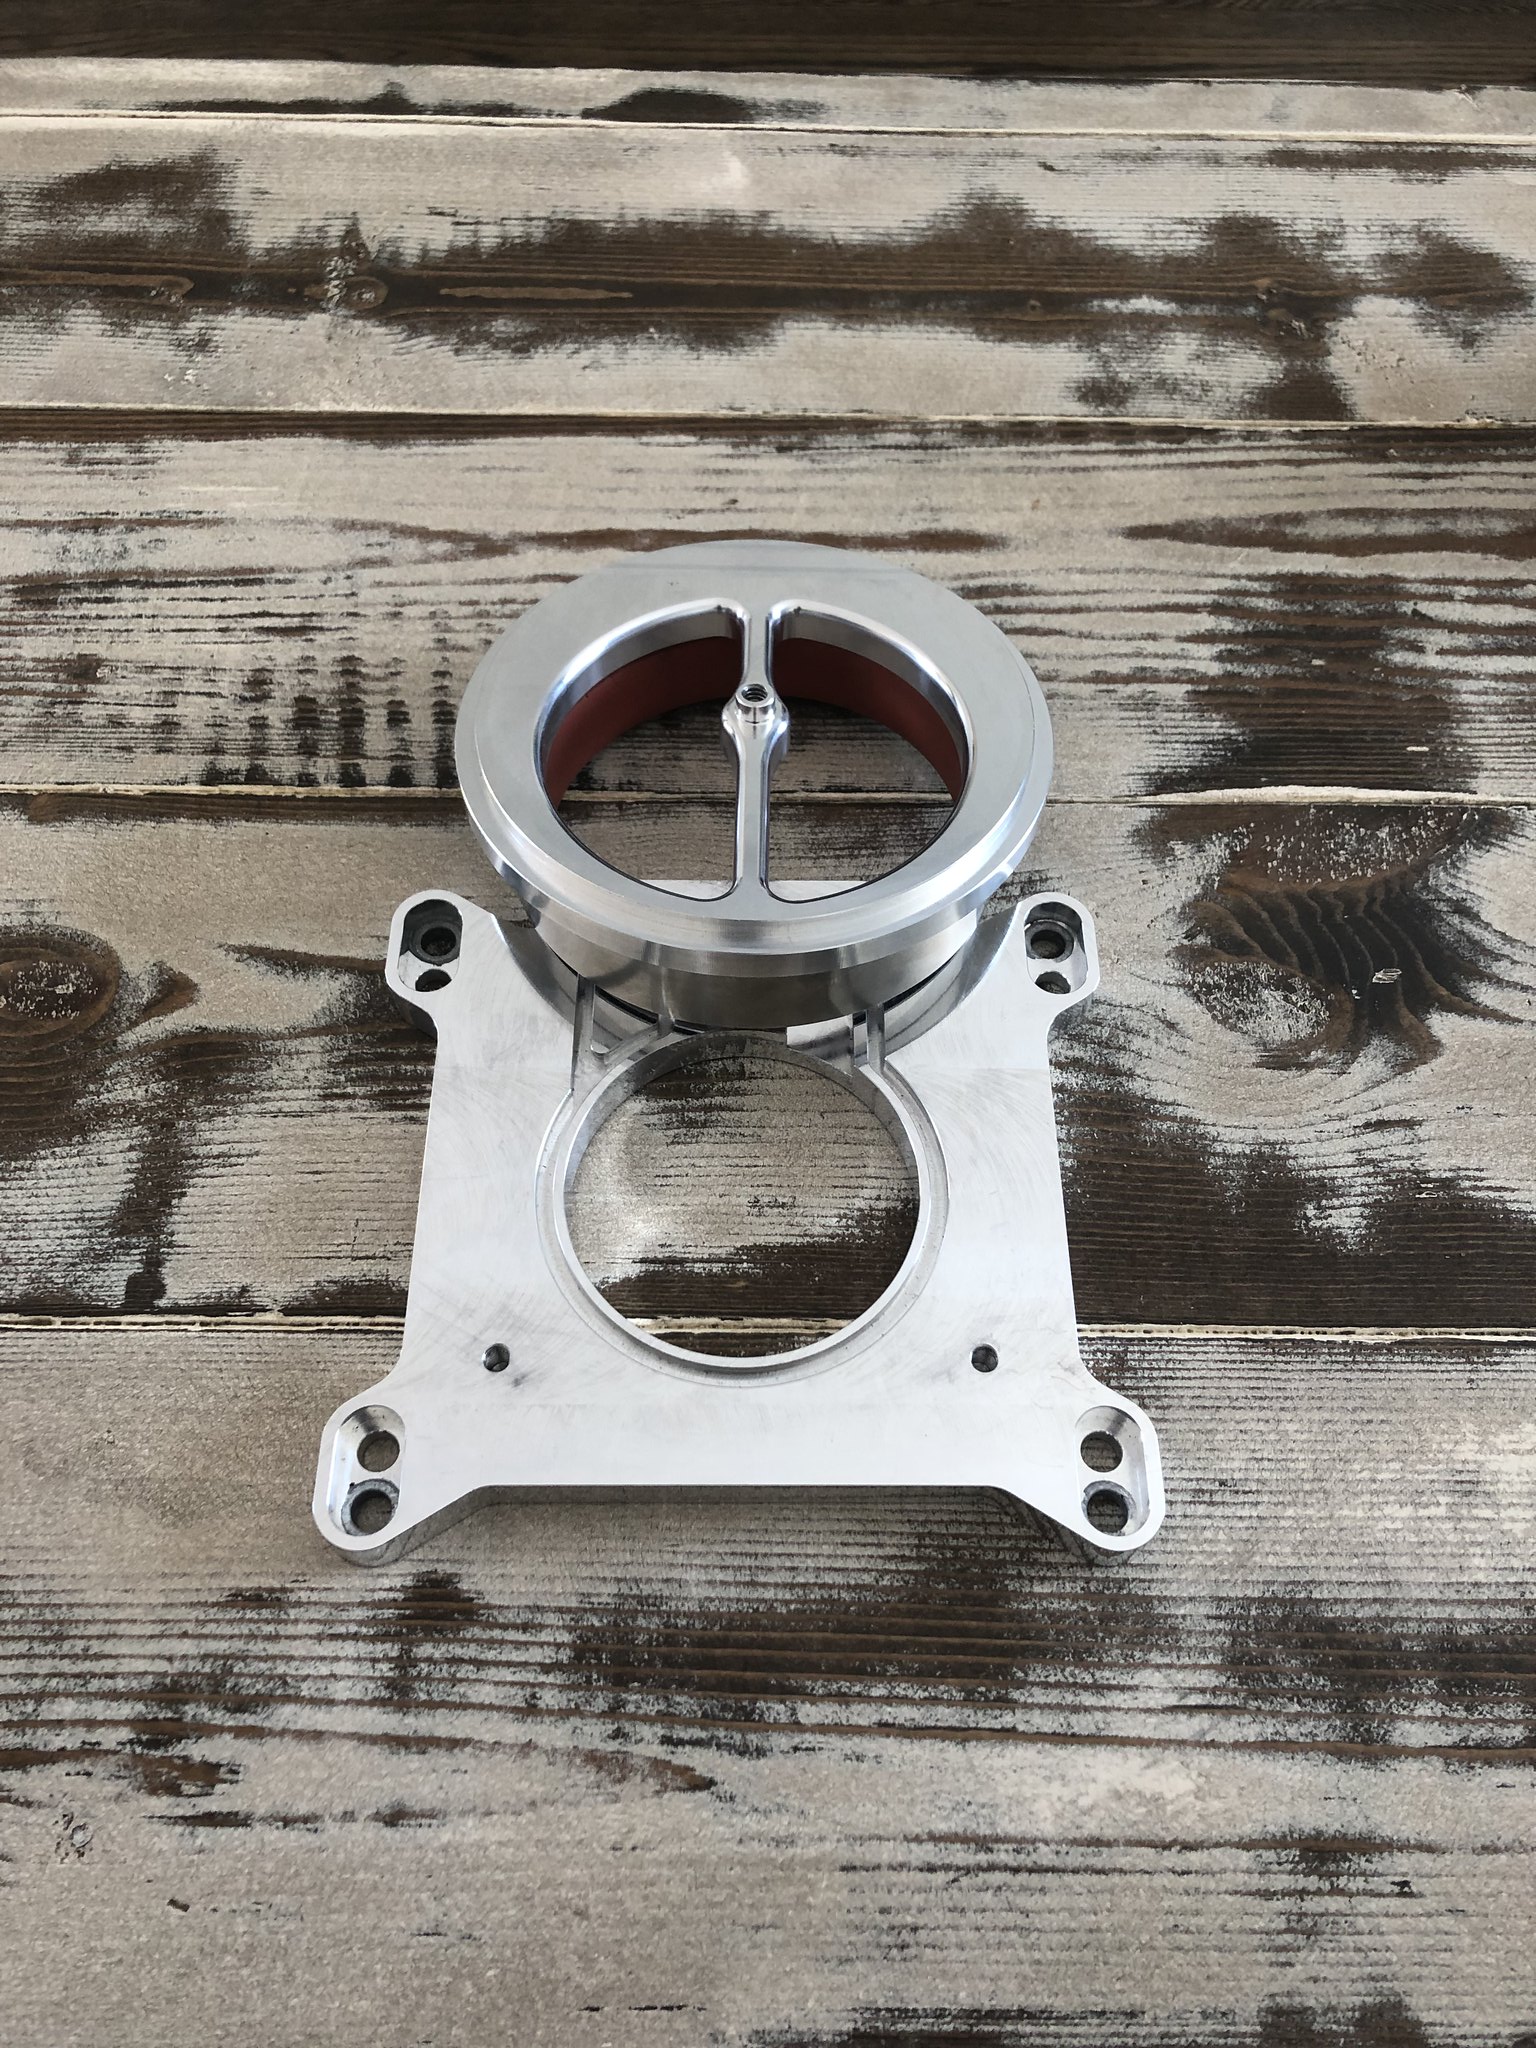 Untitled by Spencer Wiedeman, on Flickr Untitled by Spencer Wiedeman, on Flickr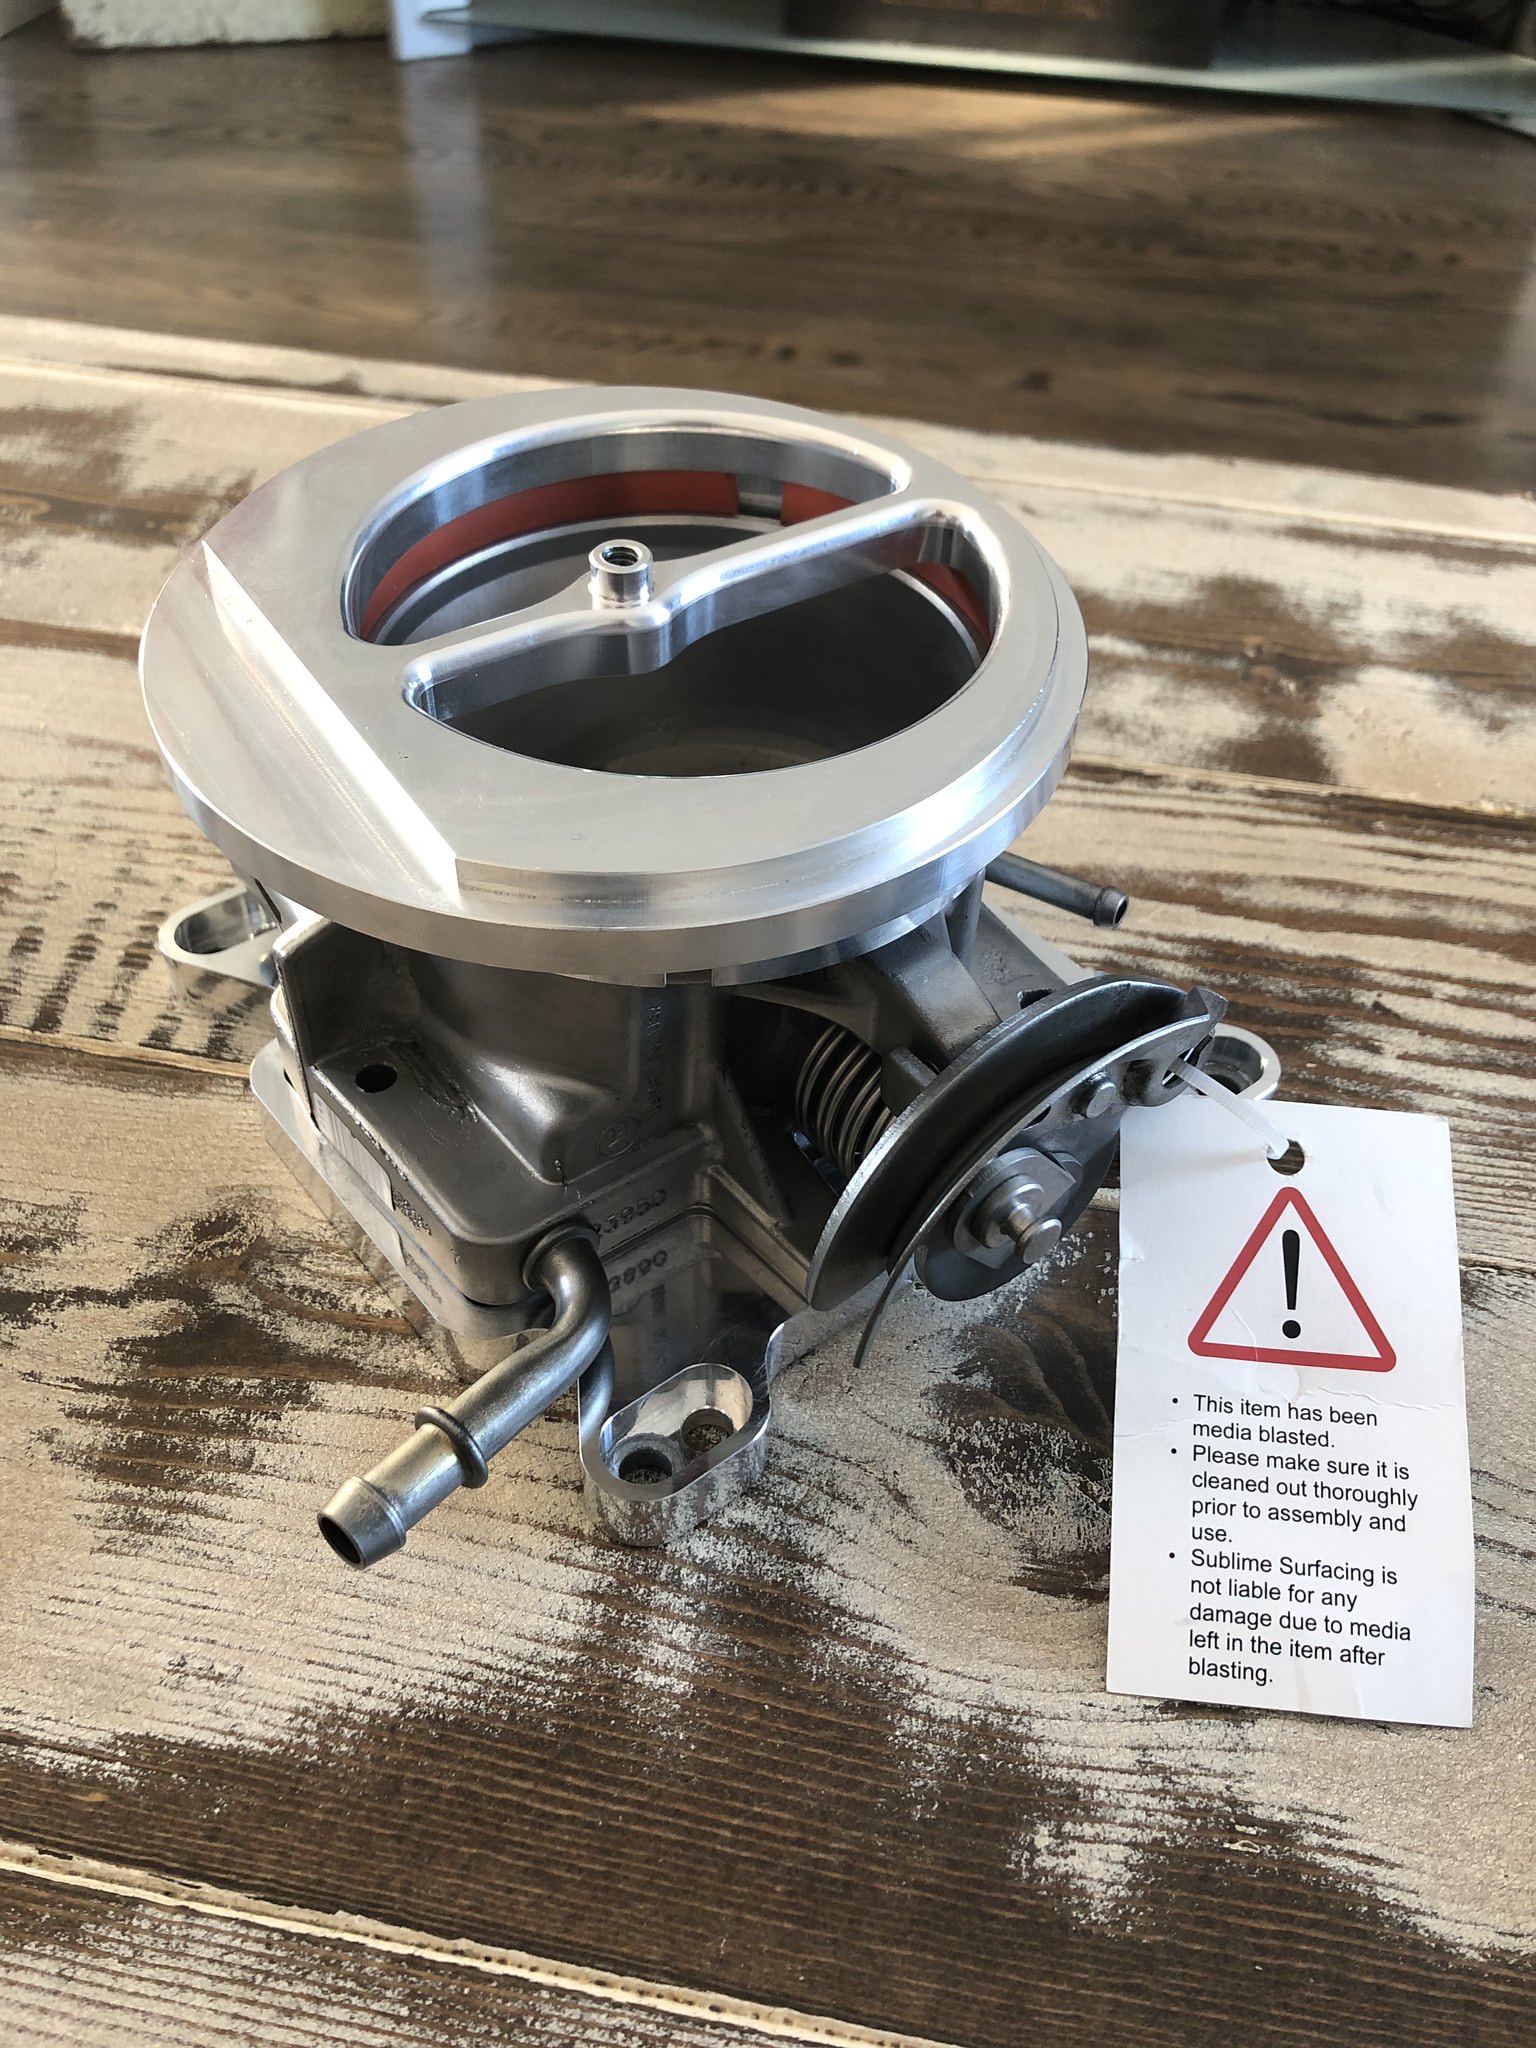 Untitled by Spencer Wiedeman, on Flickr Untitled by Spencer Wiedeman, on Flickr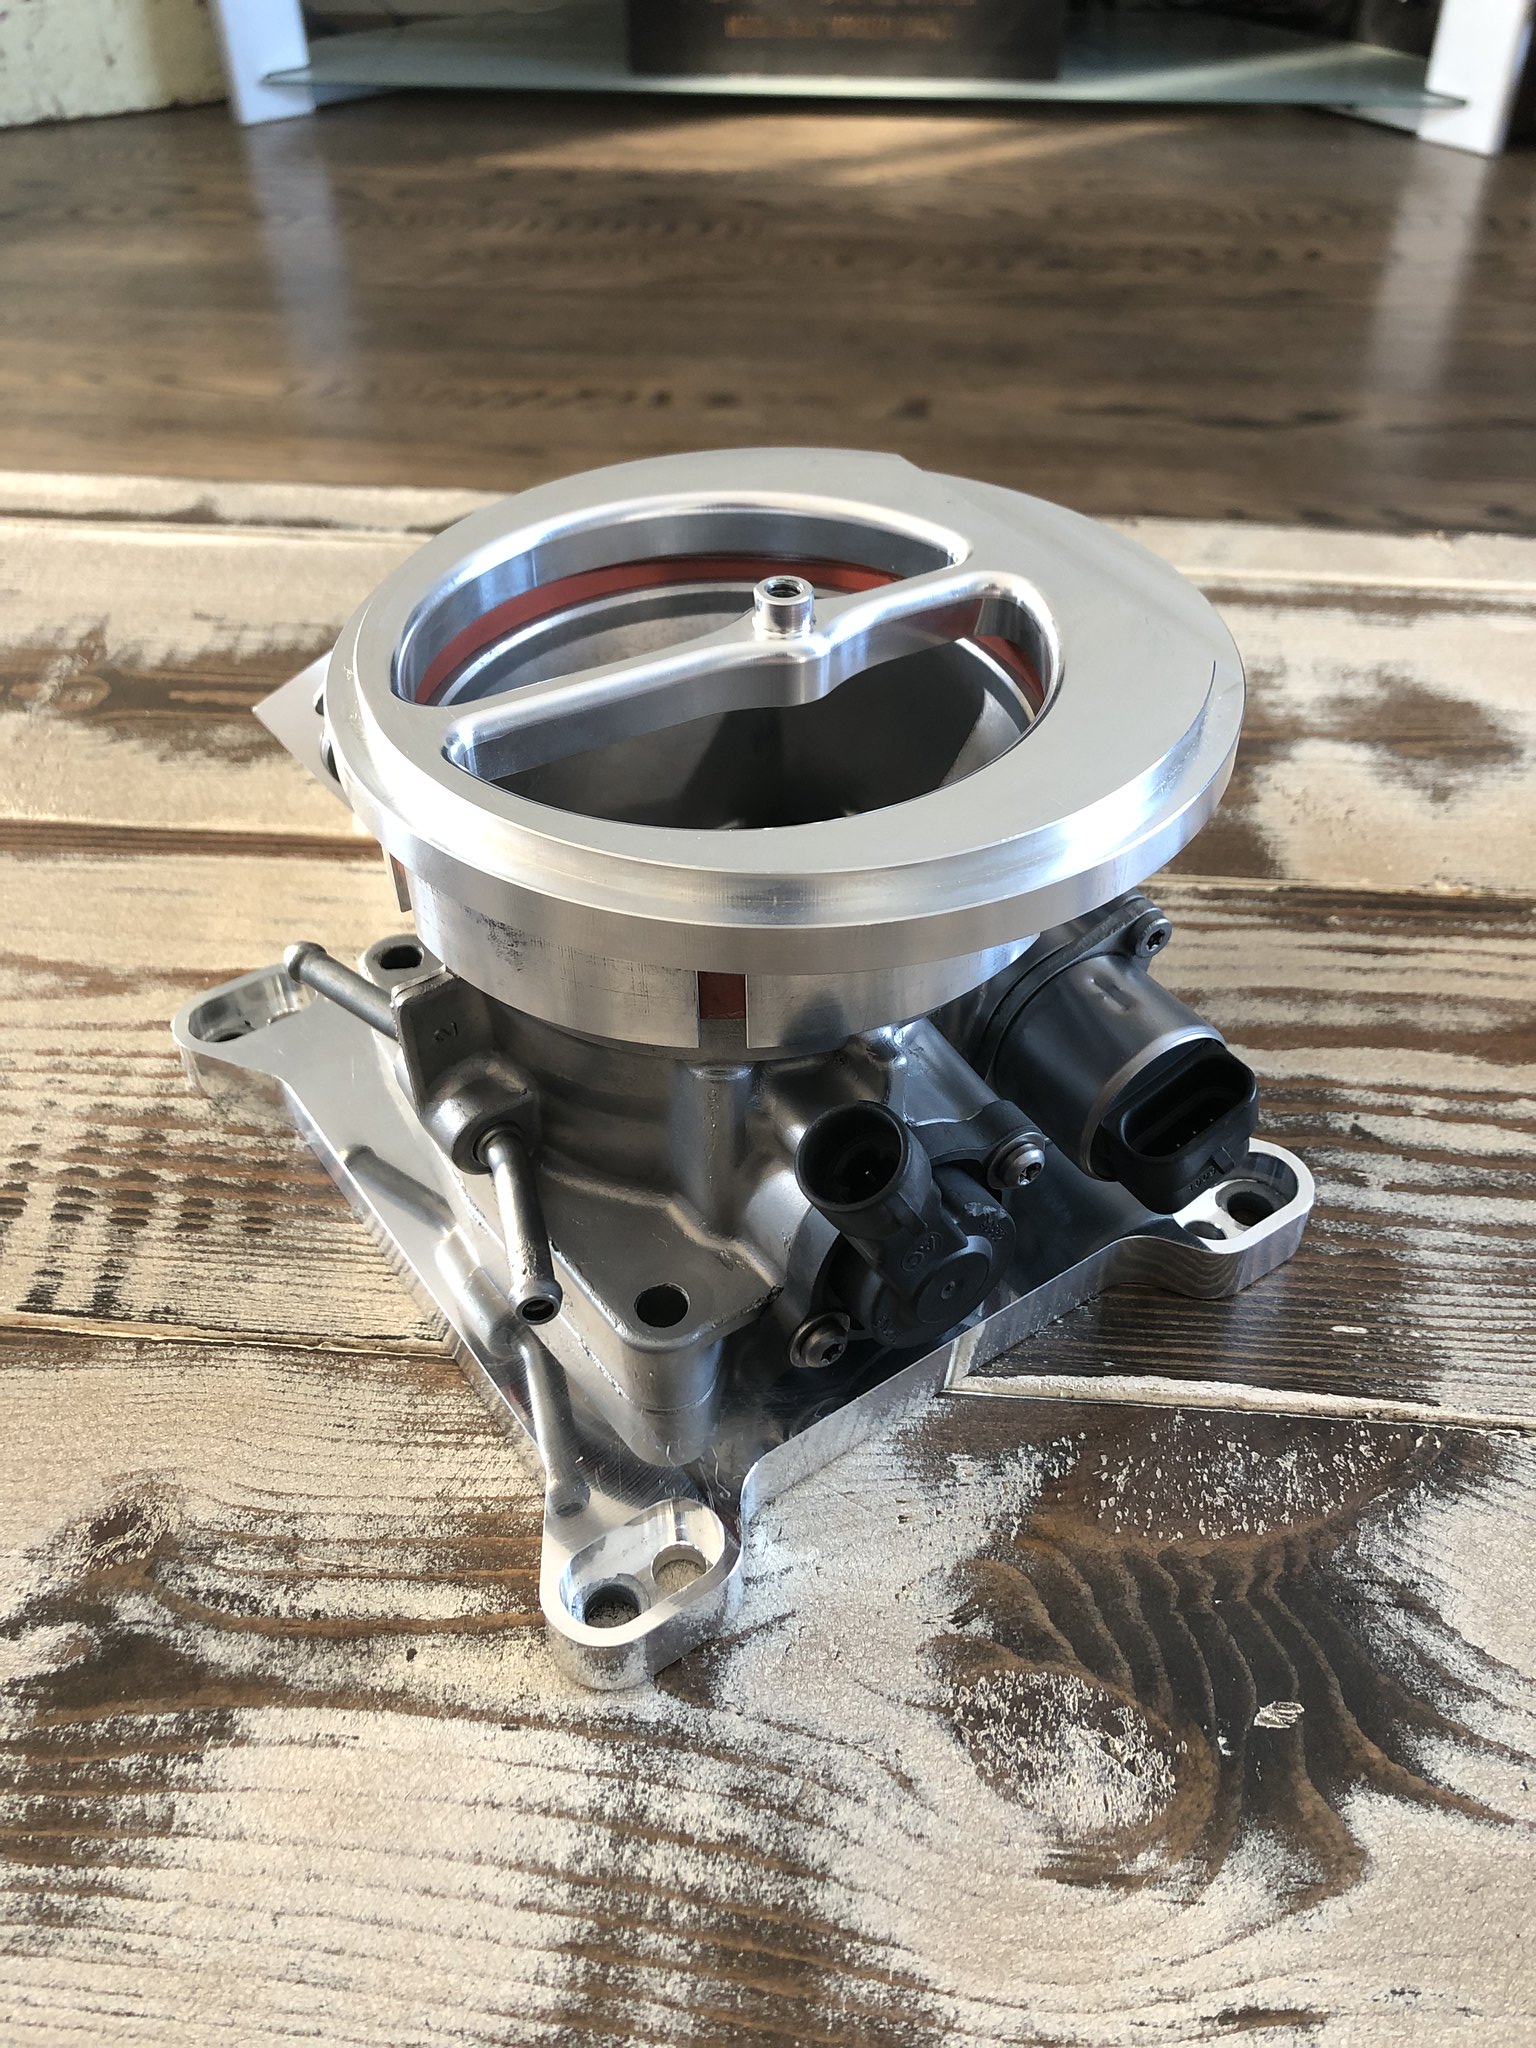 Untitled by Spencer Wiedeman, on Flickr Untitled by Spencer Wiedeman, on FlickrI also ordered this valley cover since I will be running SBC valve covers without an oil fill provision 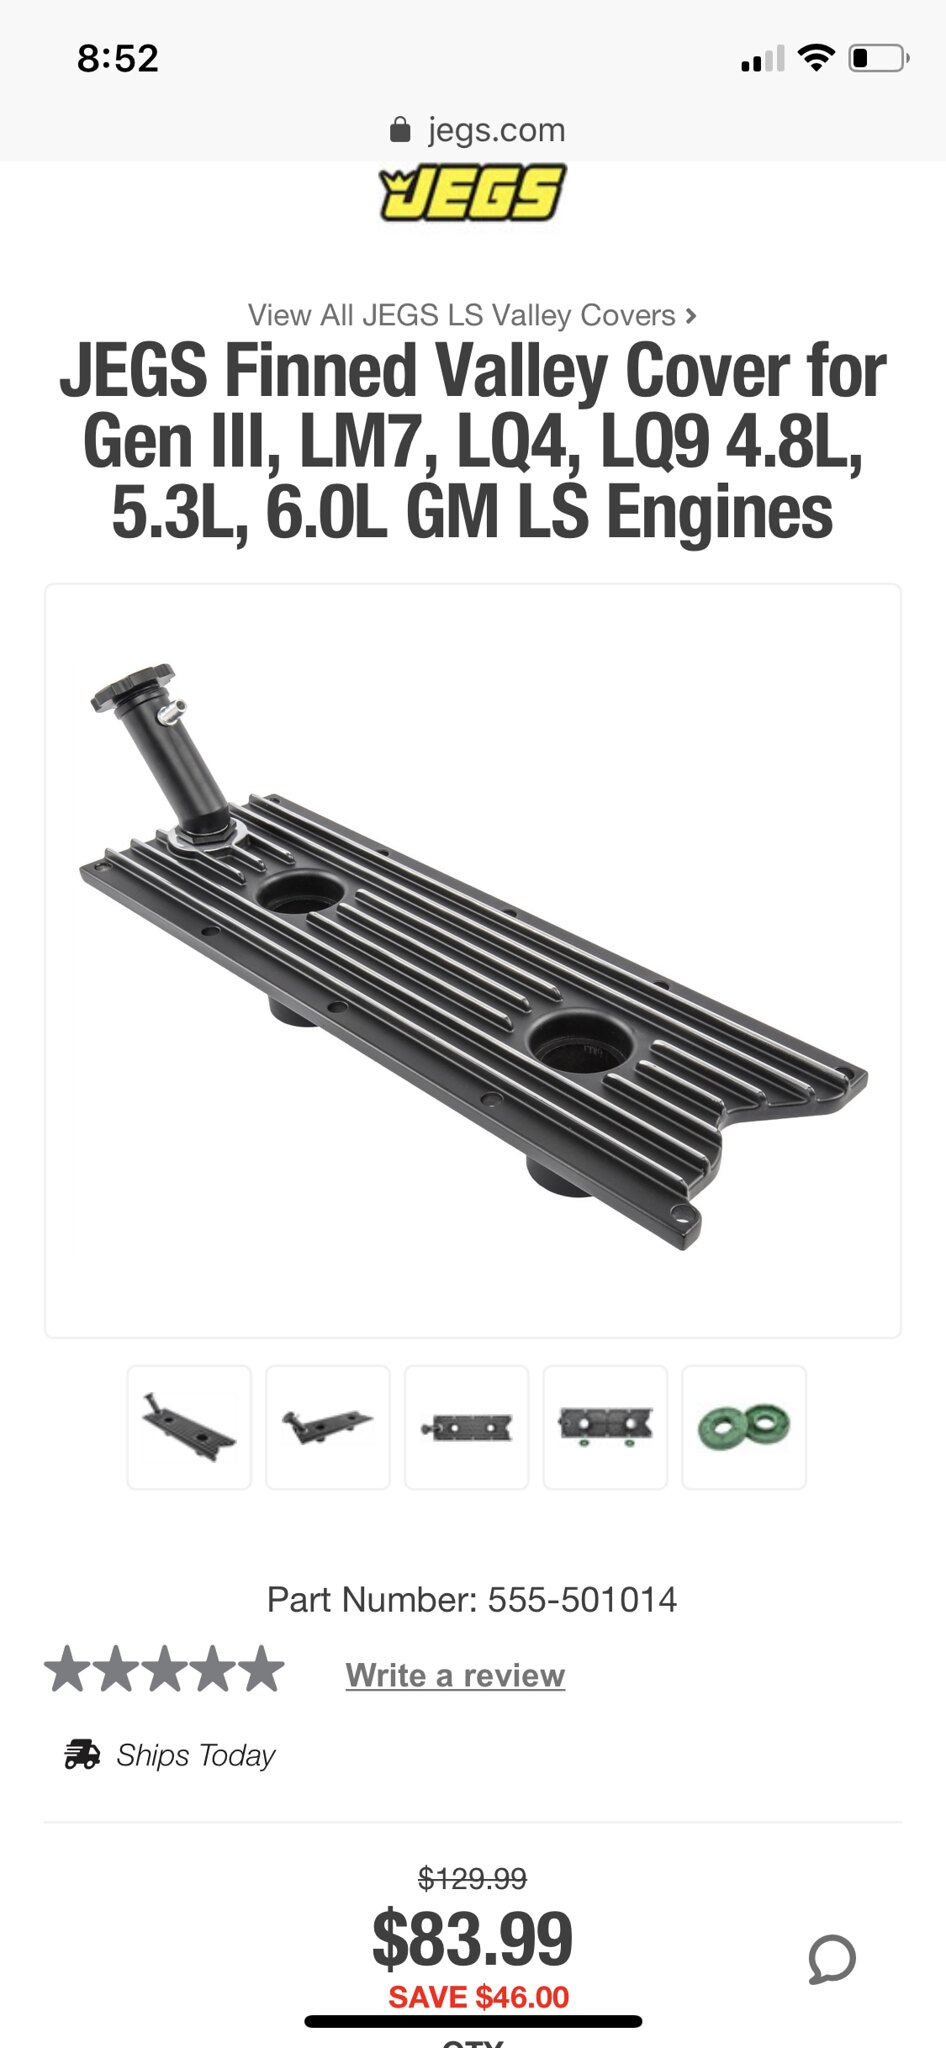 Untitled by Spencer Wiedeman, on Flickr Untitled by Spencer Wiedeman, on FlickrThe engine should look very similar to this when I'm done. I will be running a different air cleaner but it gives you an idea. My engine will be painted matte red with a set of black drive junky accessories and black 60s Nova air cleaner. 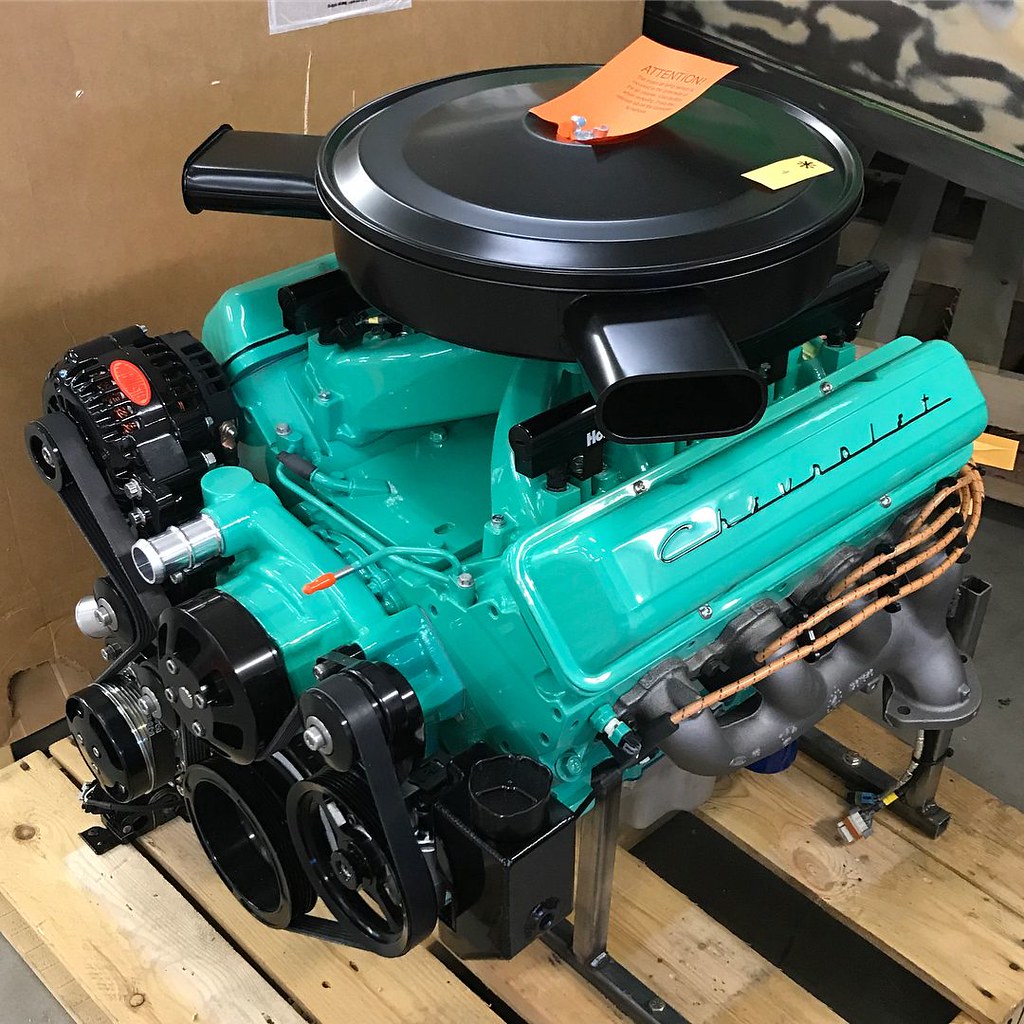 Untitled by Spencer Wiedeman, on Flickr Untitled by Spencer Wiedeman, on Flickr
|
|
|

|
|
|
#4 |
|
Registered User
Join Date: Nov 2013
Location: Los Angeles
Posts: 236
|
Re: Project: Patina (1949 Chevrolet 1434)
I know it's a silly thing to get excited about, but those welds are f'in beautiful!
__________________
http://67-72chevytrucks.com/vboard/s...s10+frame+swap |
|
|

|
|
|
#5 |
|
Registered User
Join Date: Mar 2013
Location: Edmonton, AB
Posts: 298
|
Re: Project: Patina (1949 Chevrolet 1434)
I know! He's super talented!!
|
|
|

|
|
|
#6 |
|
Registered User
Join Date: Nov 2016
Location: Beaumont, Alberta
Posts: 468
|
Re: Project: Patina (1949 Chevrolet 1434)
Amazing work. Cant wait to hopefully see this truck on the road this summer.
|
|
|

|
|
|
#7 |
|
Registered User
Join Date: Mar 2013
Location: Edmonton, AB
Posts: 298
|
Re: Project: Patina (1949 Chevrolet 1434)
LOL, it will not be on the road anytime soon. I'm another $30K plus from having this ol thing running/ driving. I'll have it in Lethbridge for the Street Wheelers weekend/ Battle at the bridge.
|
|
|

|
|
|
#8 |
|
Registered User
Join Date: Aug 2012
Location: Northeast KS
Posts: 1,783
|
Re: Project: Patina (1949 Chevrolet 1434)
I'm running a similar type SBC look on my setup. Using a Cadillac/Olds batwing air cleaner. That valley cover is cool, I'm running the LS6 on mine.
__________________
1999 GMC Suburban K2500 SLT, 454/4L80E 1991 Z/28, 6.0L/T56 1949 GMC 250, S10 Frame, 6.0L/4L80E Instagram @aceshighspeedshop |
|
|

|
|
|
#9 |
|
Registered User
Join Date: Mar 2013
Location: Edmonton, AB
Posts: 298
|
Re: Project: Patina (1949 Chevrolet 1434)
Awesome! I'll likely get a new oil fill cap machined that looks like the factory SBC breather/ fill cap. Cant wait to see it all come together!
|
|
|

|
|
|
#10 |
|
Registered User
Join Date: Mar 2013
Location: Edmonton, AB
Posts: 298
|
Re: Project: Patina (1949 Chevrolet 1434)
After seeing the results of the dry ice blasting on my TB I decided to take my old SBC script covers to Sublime Surfacing. Here are the results:
 Untitled by Spencer Wiedeman, on Flickr Untitled by Spencer Wiedeman, on Flickr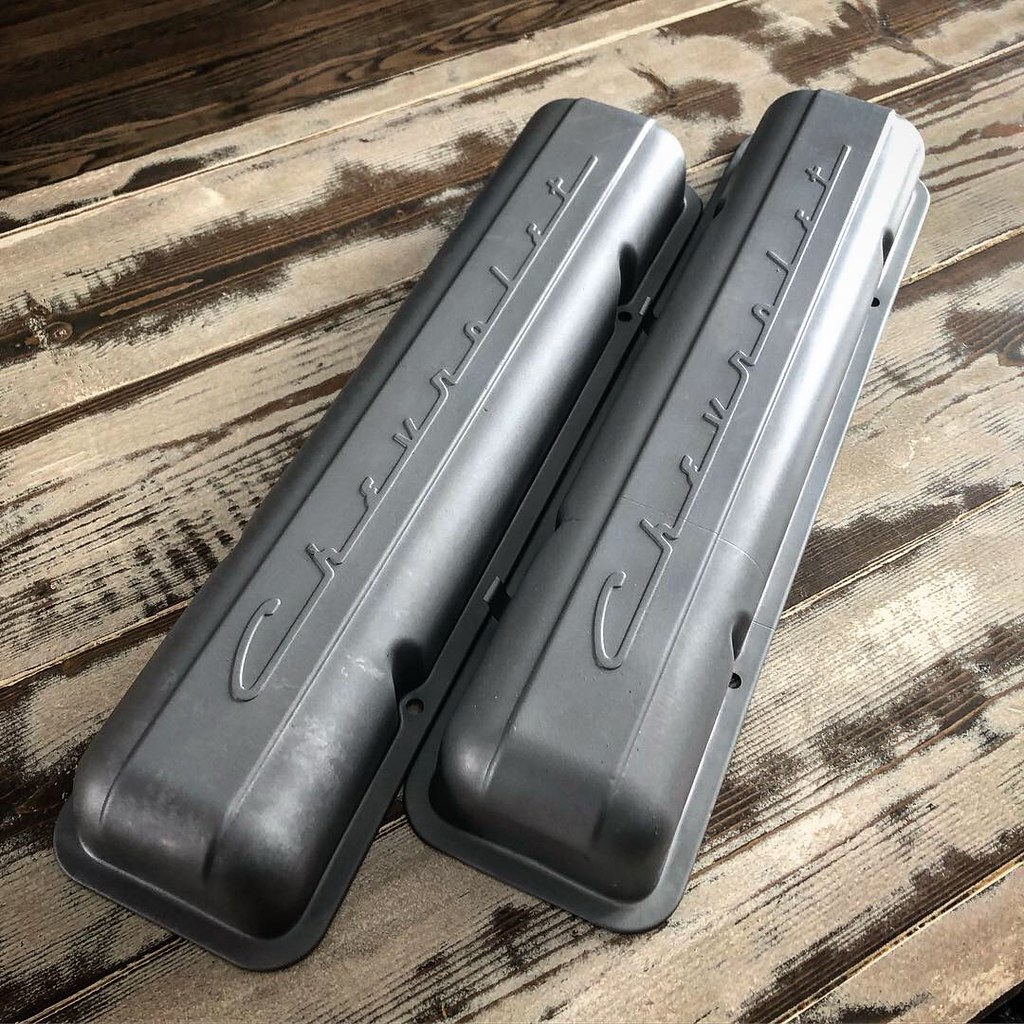 Untitled by Spencer Wiedeman, on Flickr Untitled by Spencer Wiedeman, on FlickrI also have a local guy designing up a couple different coil mounts so I can relocate them to the back of the engine like a distributor. This is the initial design but needs to be refined to allow rom for the coil plugs. 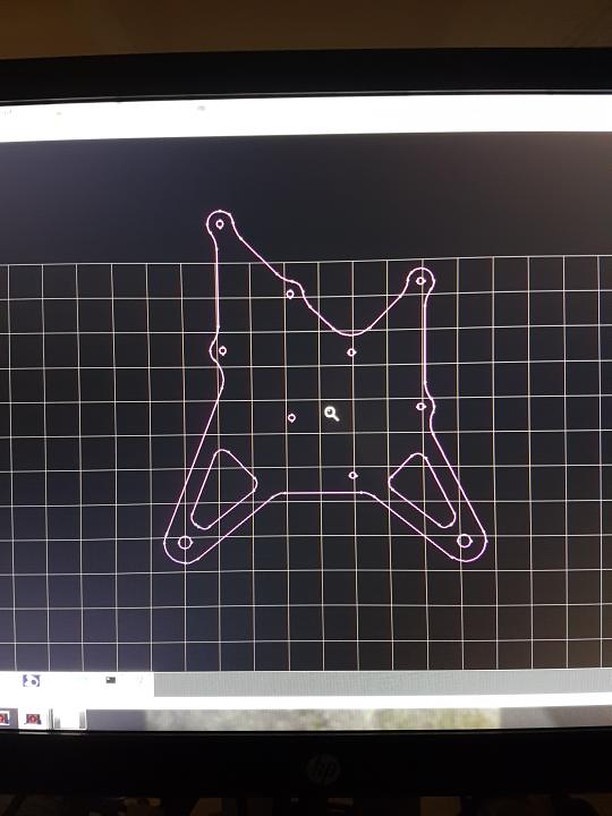 Untitled by Spencer Wiedeman, on Flickr Untitled by Spencer Wiedeman, on Flickr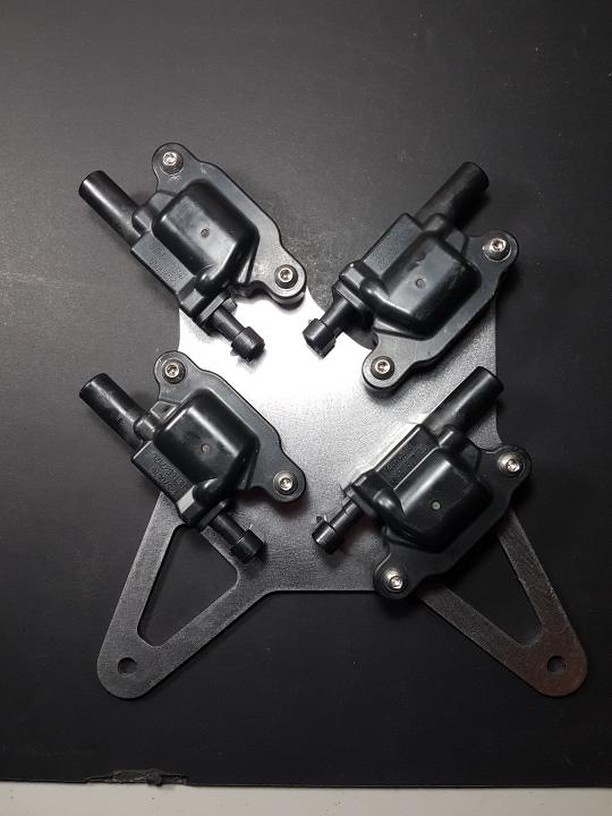 Untitled by Spencer Wiedeman, on Flickr Untitled by Spencer Wiedeman, on FlickrStay tuned for more! |
|
|

|
|
|
#11 |
|
Registered User
Join Date: Jan 2010
Location: Titusville, PA
Posts: 3,585
|
Re: Project: Patina (1949 Chevrolet 1434)
very nice stuff. I too mount the bumpers in a little.
__________________
51' 99toLife finished 2011,355 sbc,5speed, patina, redoing whole truck, inter, bags, etc http://67-72chevytrucks.com/vboard/s...d.php?t=382481 49Hardtimes s/10 susp- bagged, vortec sbc, 5 speed, patina, sold http://67-72chevytrucks.com/vboard/s...d.php?t=594874 VIDEOS https://youtu.be/E8zHhjgS_lA https://youtu.be/E8zHhjgS_lA Geronimo 54' LS engine, static drop IFS, Client build, just about done http://67-72chevytrucks.com/vboard/s...62#post7399162 52' 3100 Slowly in progress, will be painted two toned, have 235 with a t-5, lowered OG frame Other projects, 49' farmuse 3100, killer Patina, will be slammed, LS engine, full done interior up next! www.coffeeandcustoms.com |
|
|

|
|
|
#12 |
|
Registered User
Join Date: Mar 2013
Location: Edmonton, AB
Posts: 298
|
Re: Project: Patina (1949 Chevrolet 1434)
Awesome. I think I'll build out the factory splash apron to match the contour of the fenders and fill in the open space. As it is it's been trimmed from the factory shape.
|
|
|

|
|
|
#13 |
|
Registered User
Join Date: Jul 2015
Location: Mississauga
Posts: 90
|
Re: Project: Patina (1949 Chevrolet 1434)
I have want to tuck my bumper in too, is the splash apron a simple trim off the backside?
|
|
|

|
|
|
#14 |
|
Registered User
Join Date: Mar 2013
Location: Edmonton, AB
Posts: 298
|
Re: Project: Patina (1949 Chevrolet 1434)
Yup, just trim to fit!
|
|
|

|
|
|
#15 |
|
Senior Member
 Join Date: May 2007
Location: Doodah Kansas
Posts: 7,774
|
Re: Project: Patina (1949 Chevrolet 1434)
super pretty!
__________________
the mass of men live lives of quiet desperation if there is a problem, I can have it. new project WAYNE http://67-72chevytrucks.com/vboard/s...d.php?t=844393 |
|
|

|
|
|
#16 |
|
Registered User
Join Date: Mar 2013
Location: Edmonton, AB
Posts: 298
|
Re: Project: Patina (1949 Chevrolet 1434)
I headed out to my buddies shop and got a bunch of parts mocked up. I got the bed, rear fenders, and new front clip on.
There is a ton to get done yet but I'll keep plugging away at it. I'm going to be picking up a KMS tools rotisserie to throw my cab on while I do the rust repair. 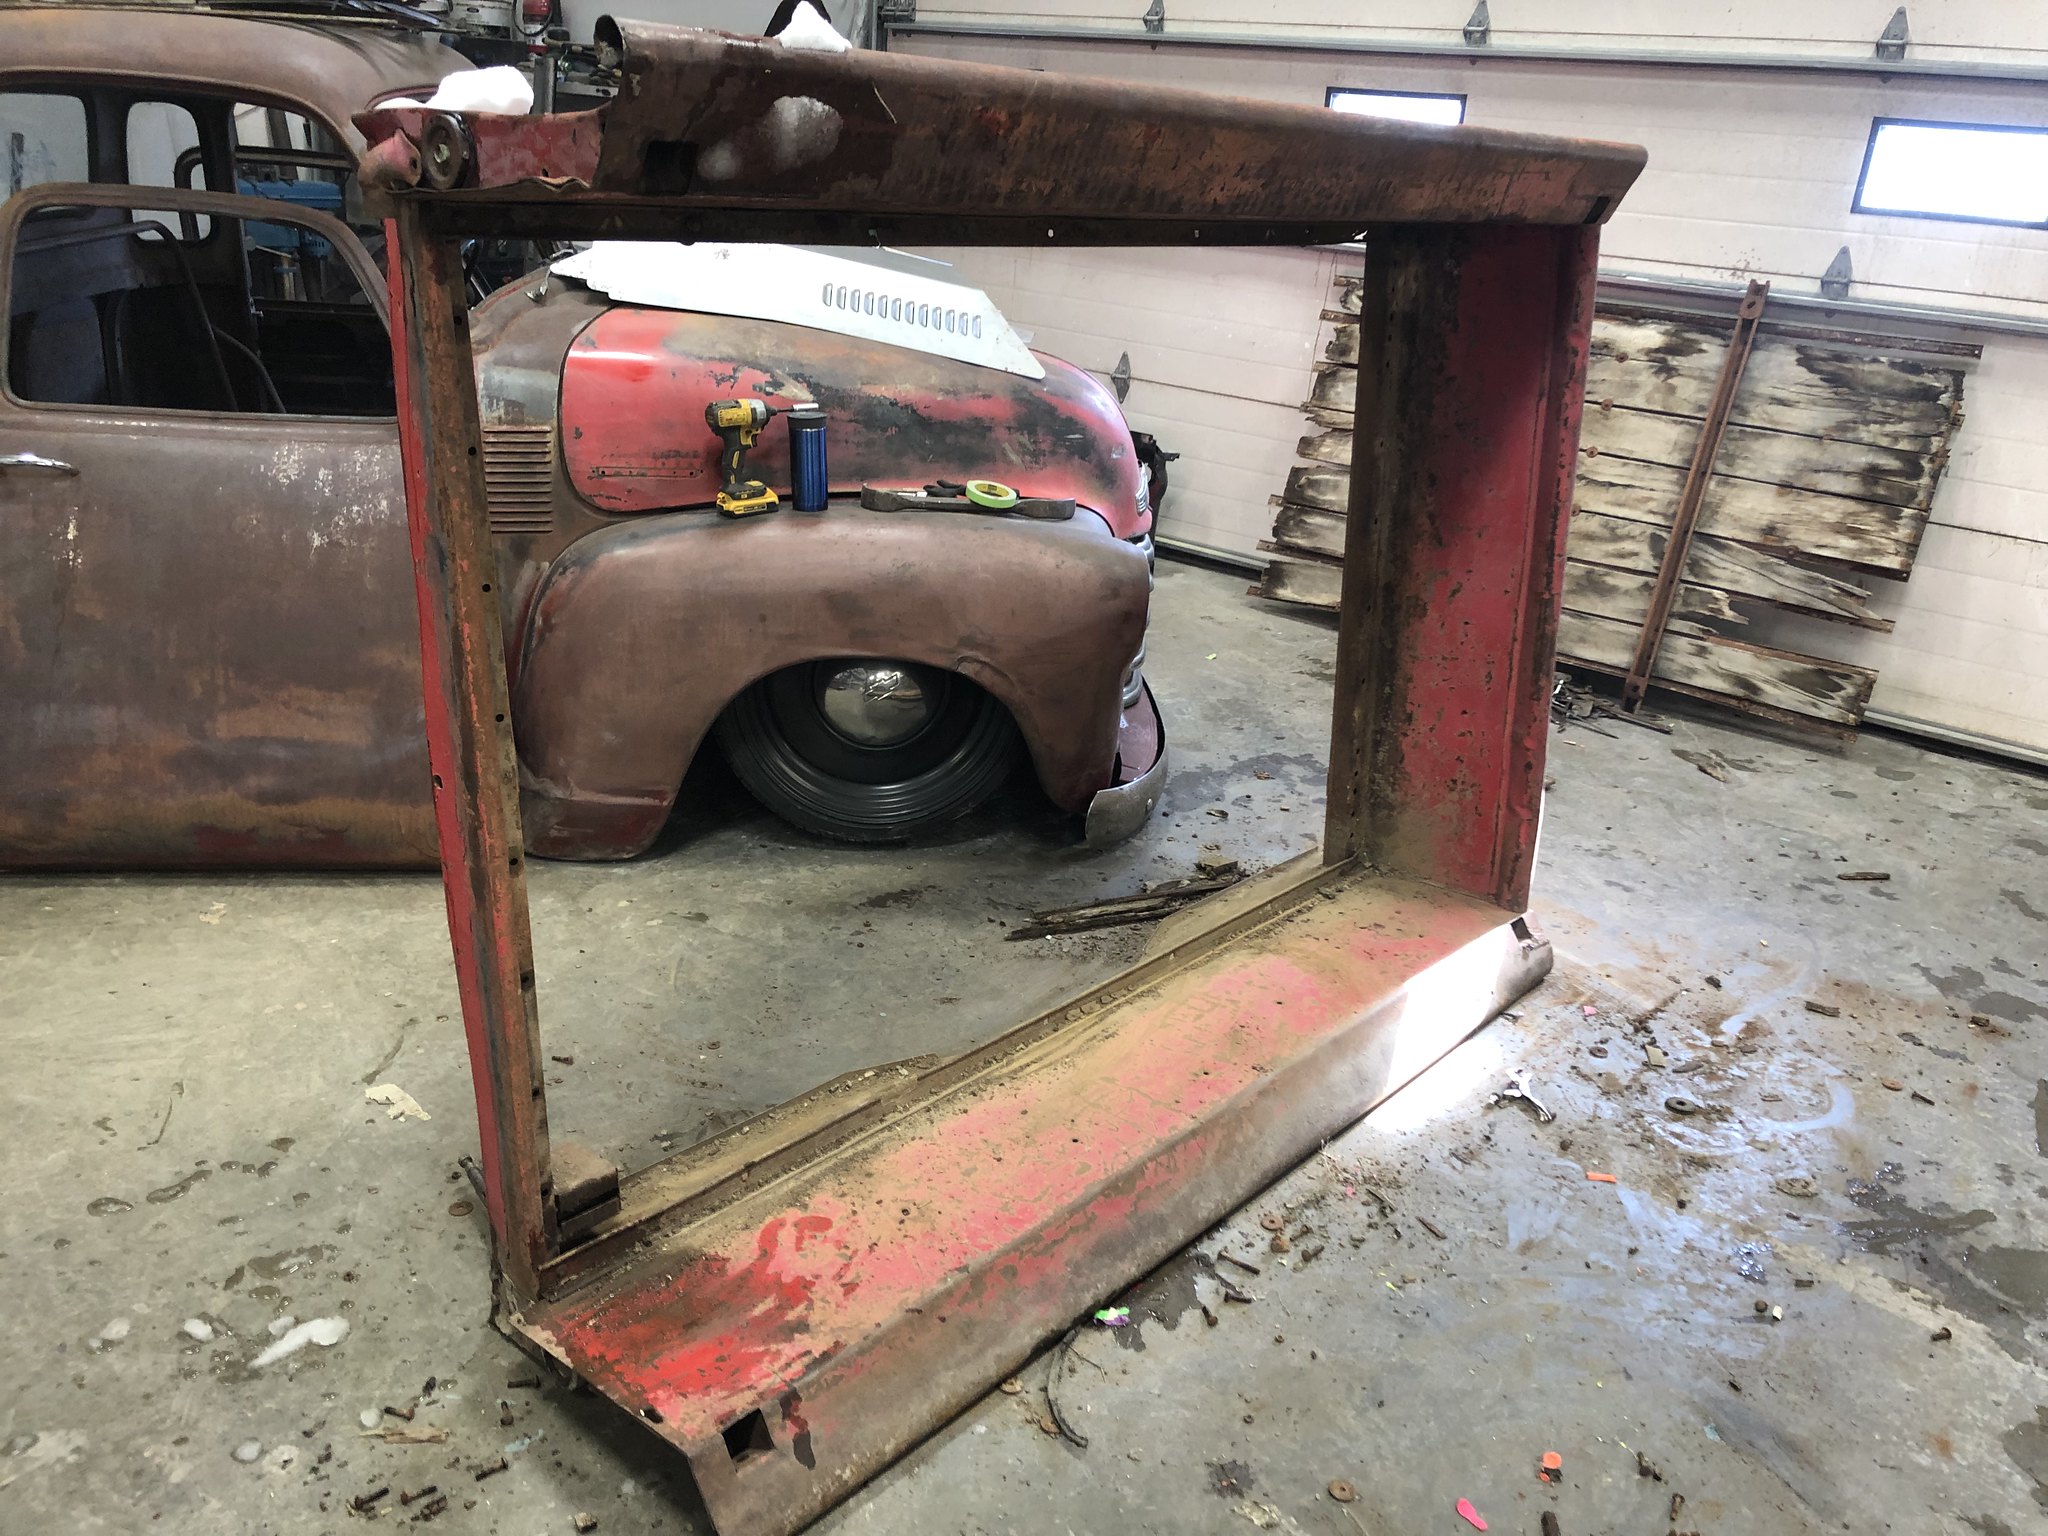 Untitled by Spencer Wiedeman, on Flickr Untitled by Spencer Wiedeman, on Flickr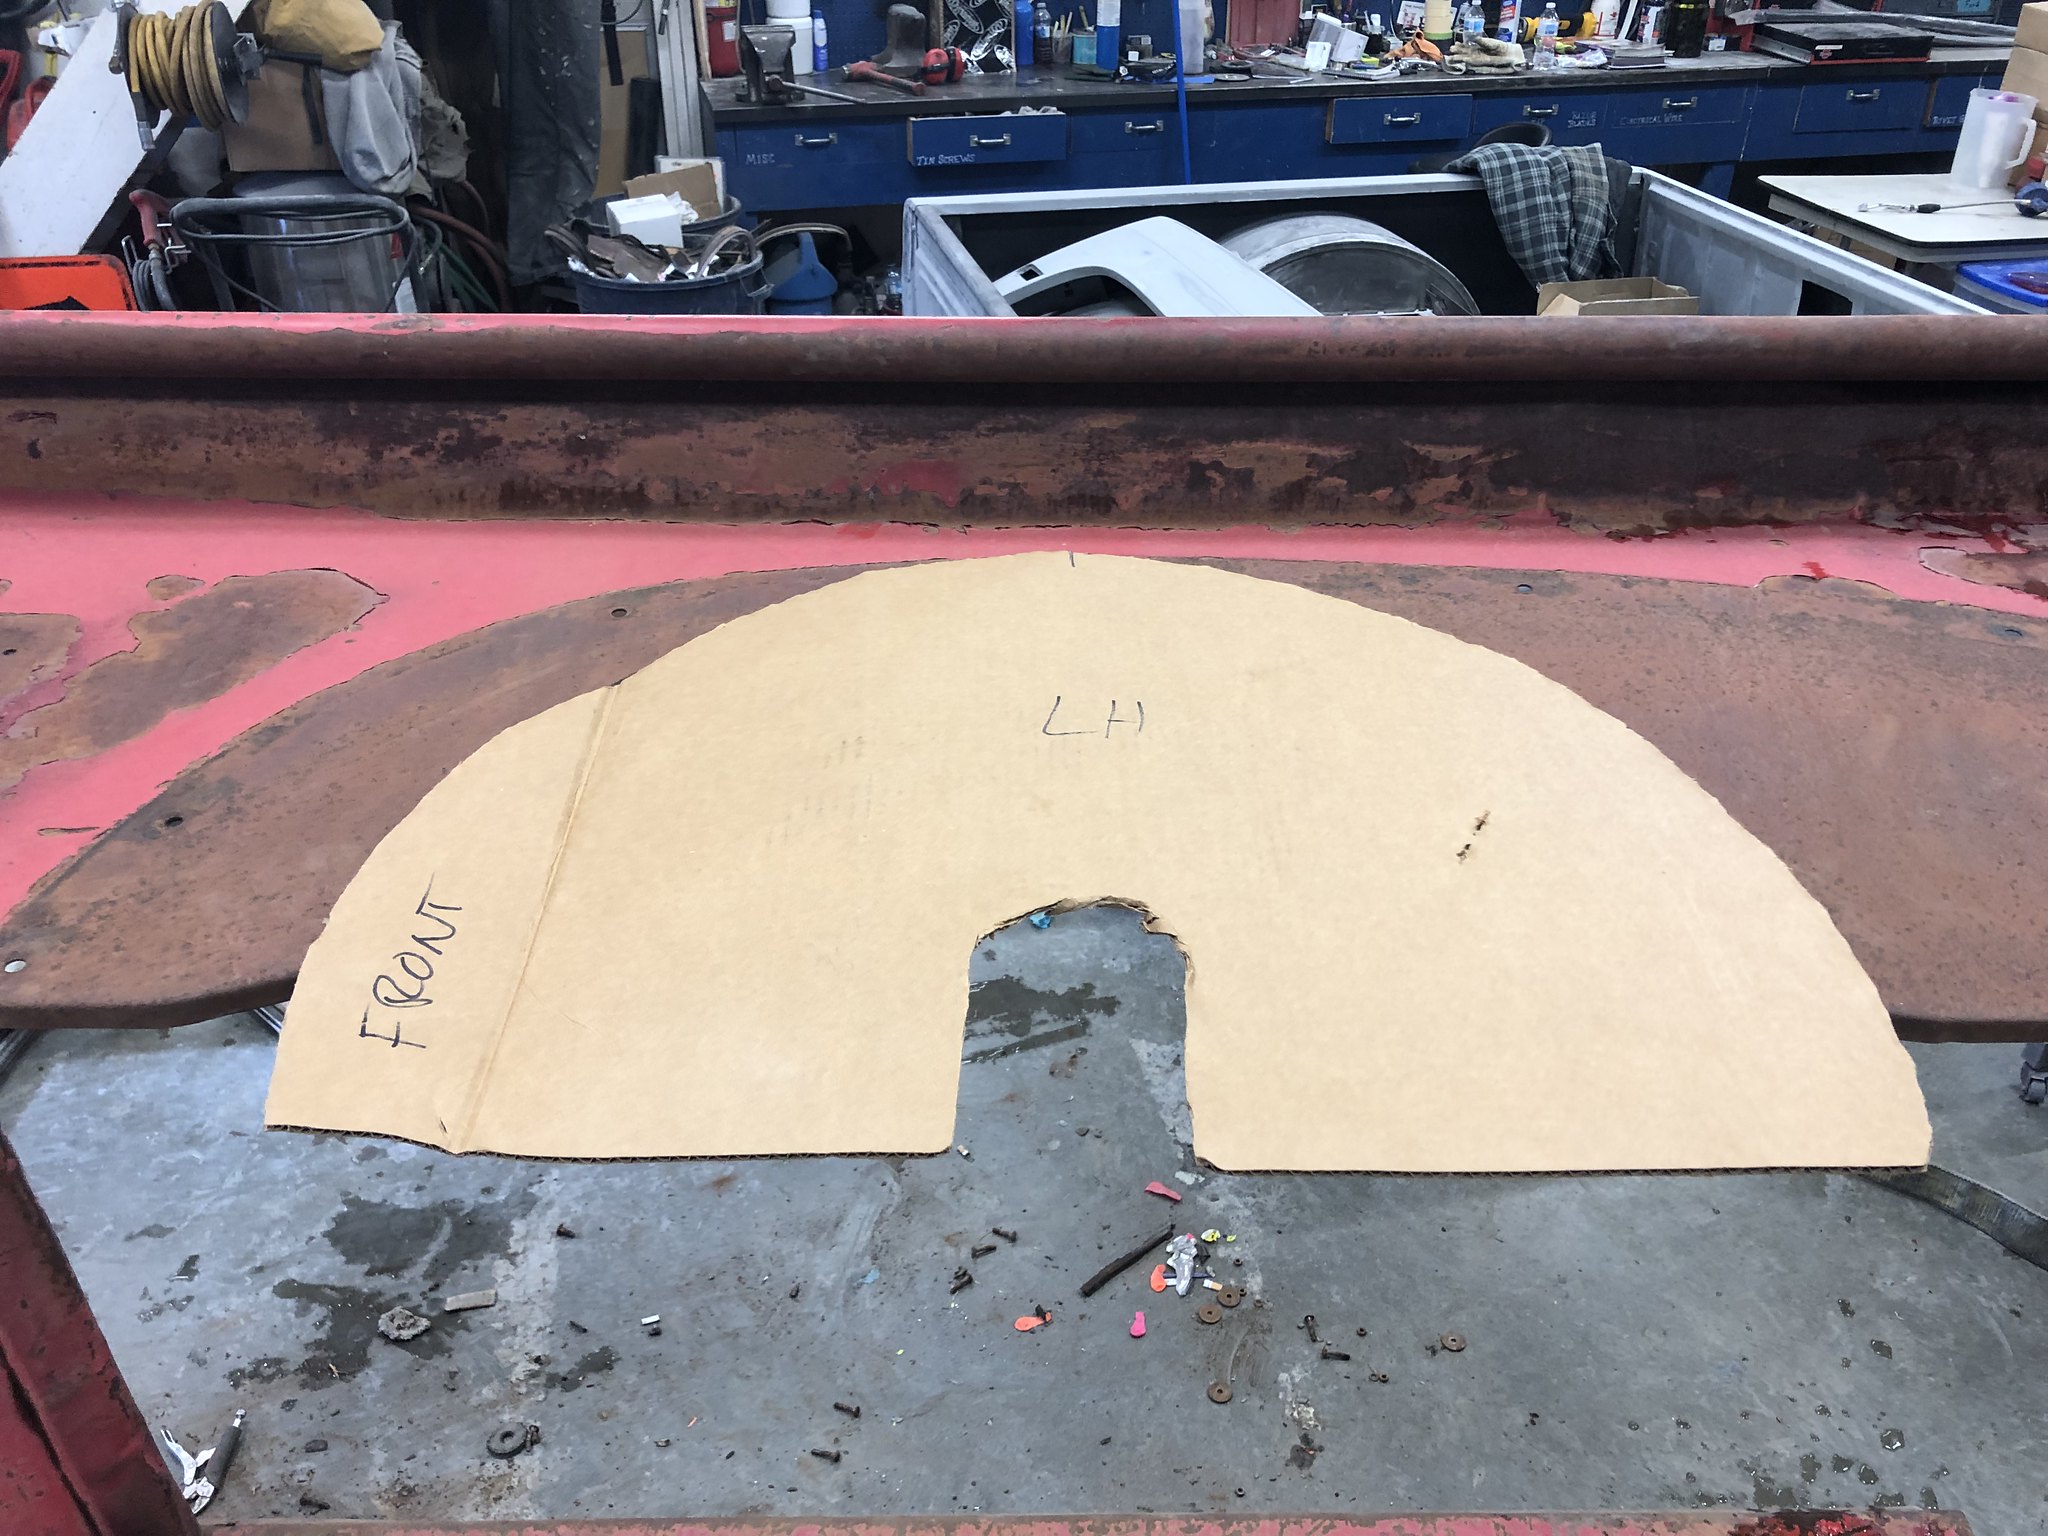 Untitled by Spencer Wiedeman, on Flickr Untitled by Spencer Wiedeman, on FlickrAfter test fitting I came to the conclusion that I needed to trim more to allow room for the big 22x12s wit 335.25R22 tires 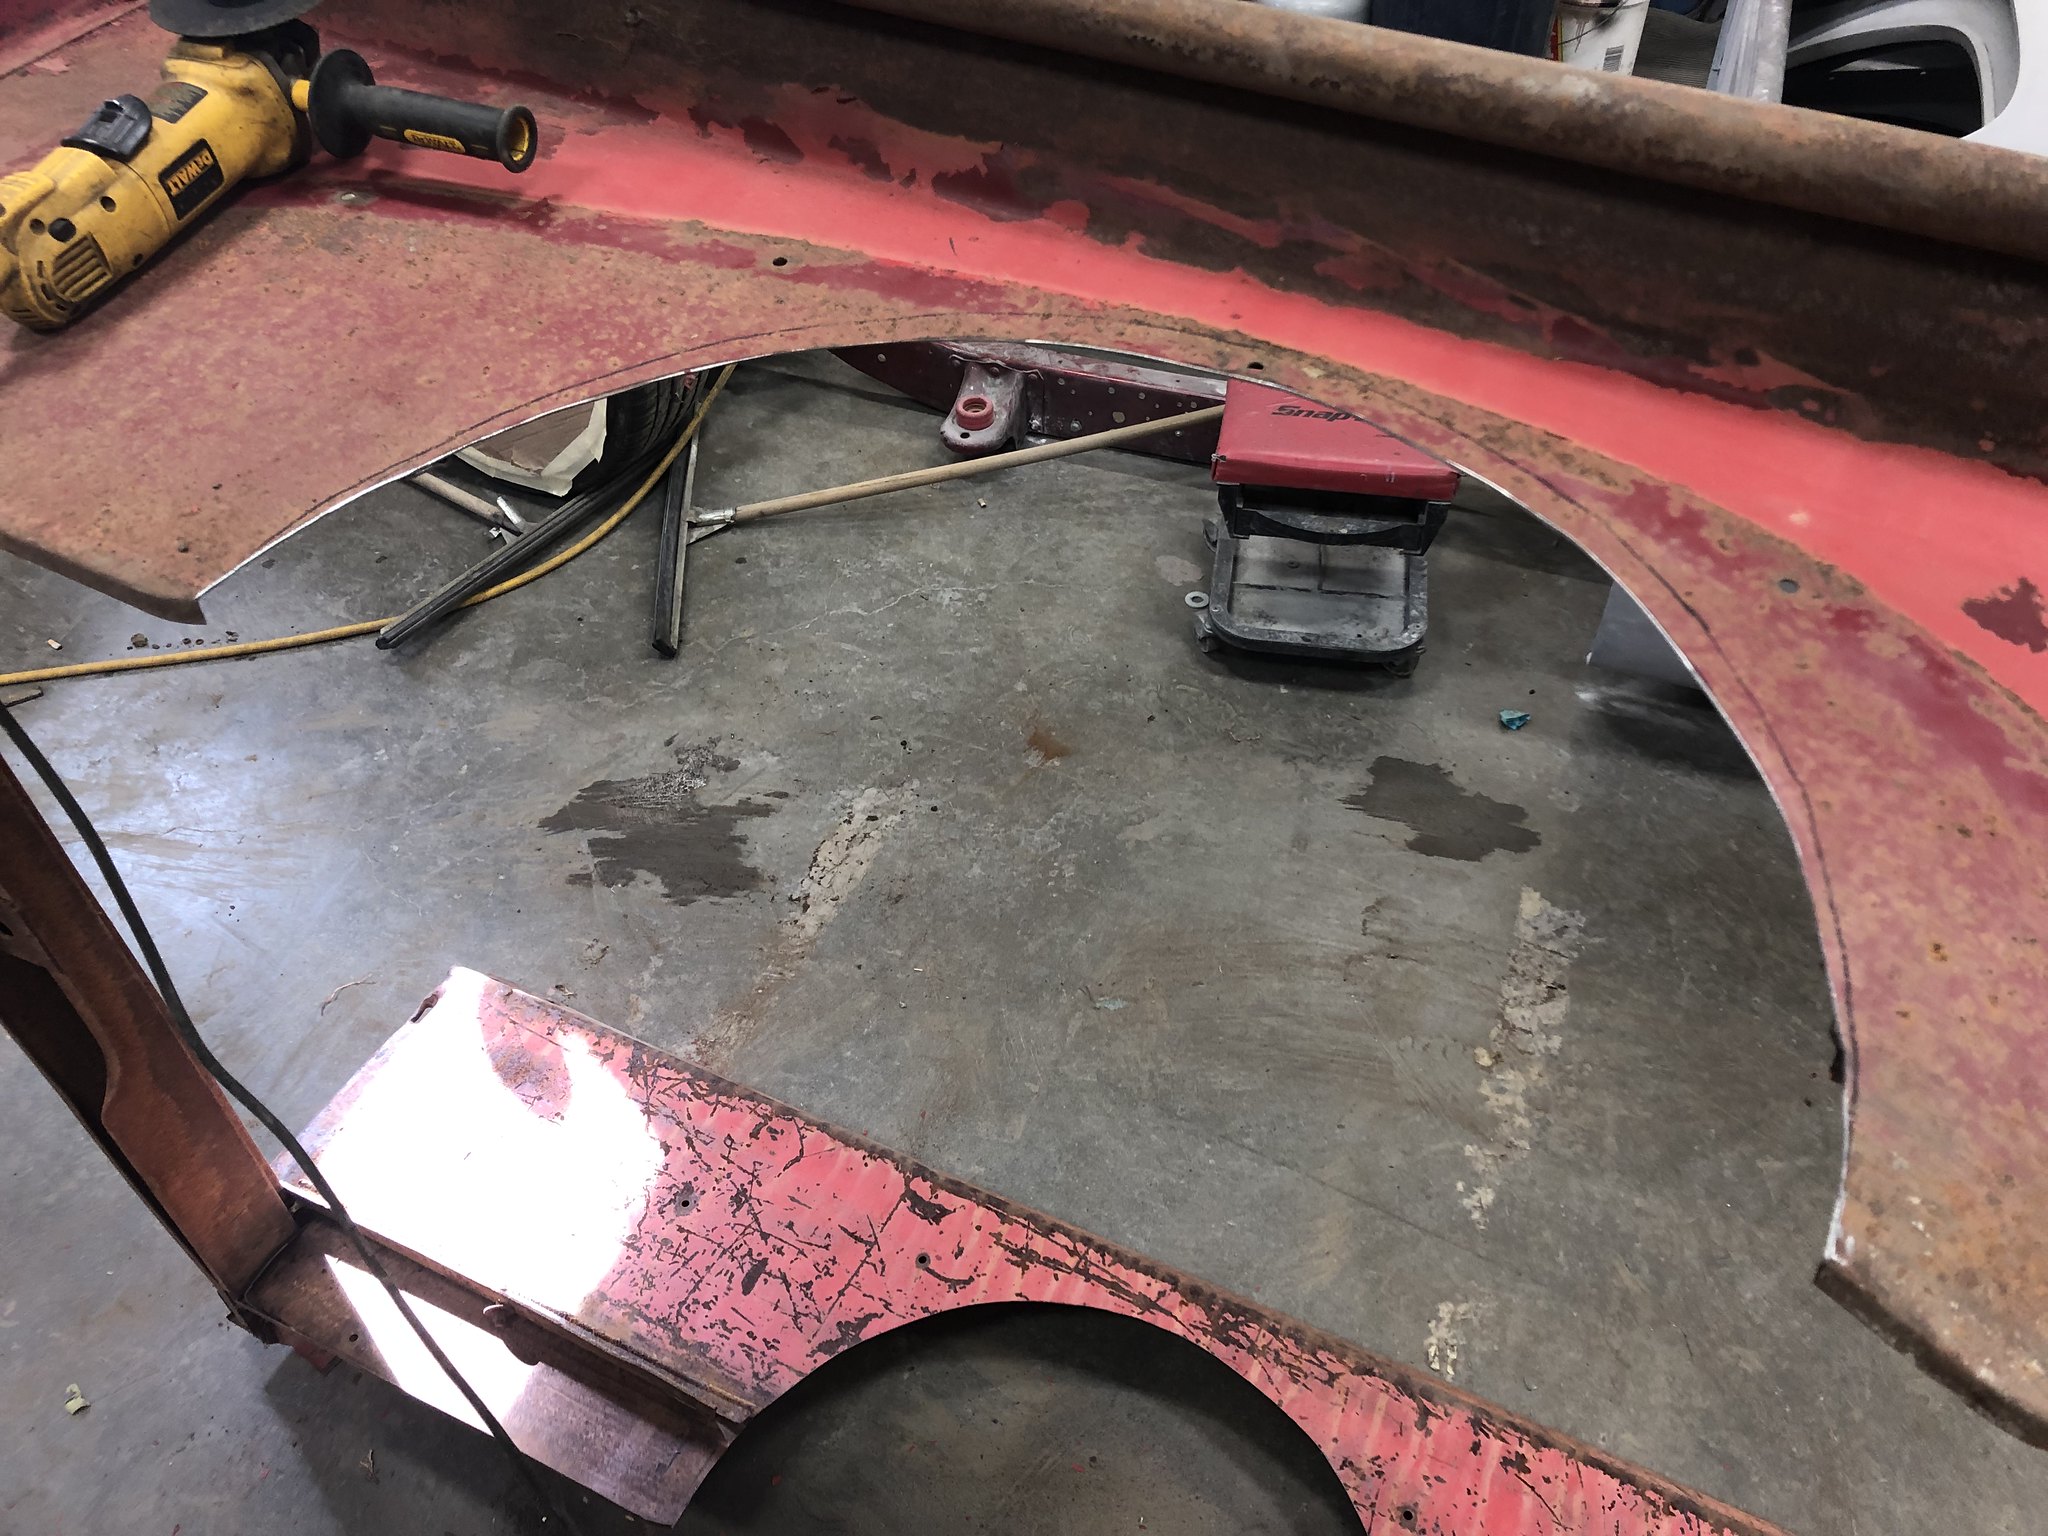 Untitled by Spencer Wiedeman, on Flickr Untitled by Spencer Wiedeman, on Flickr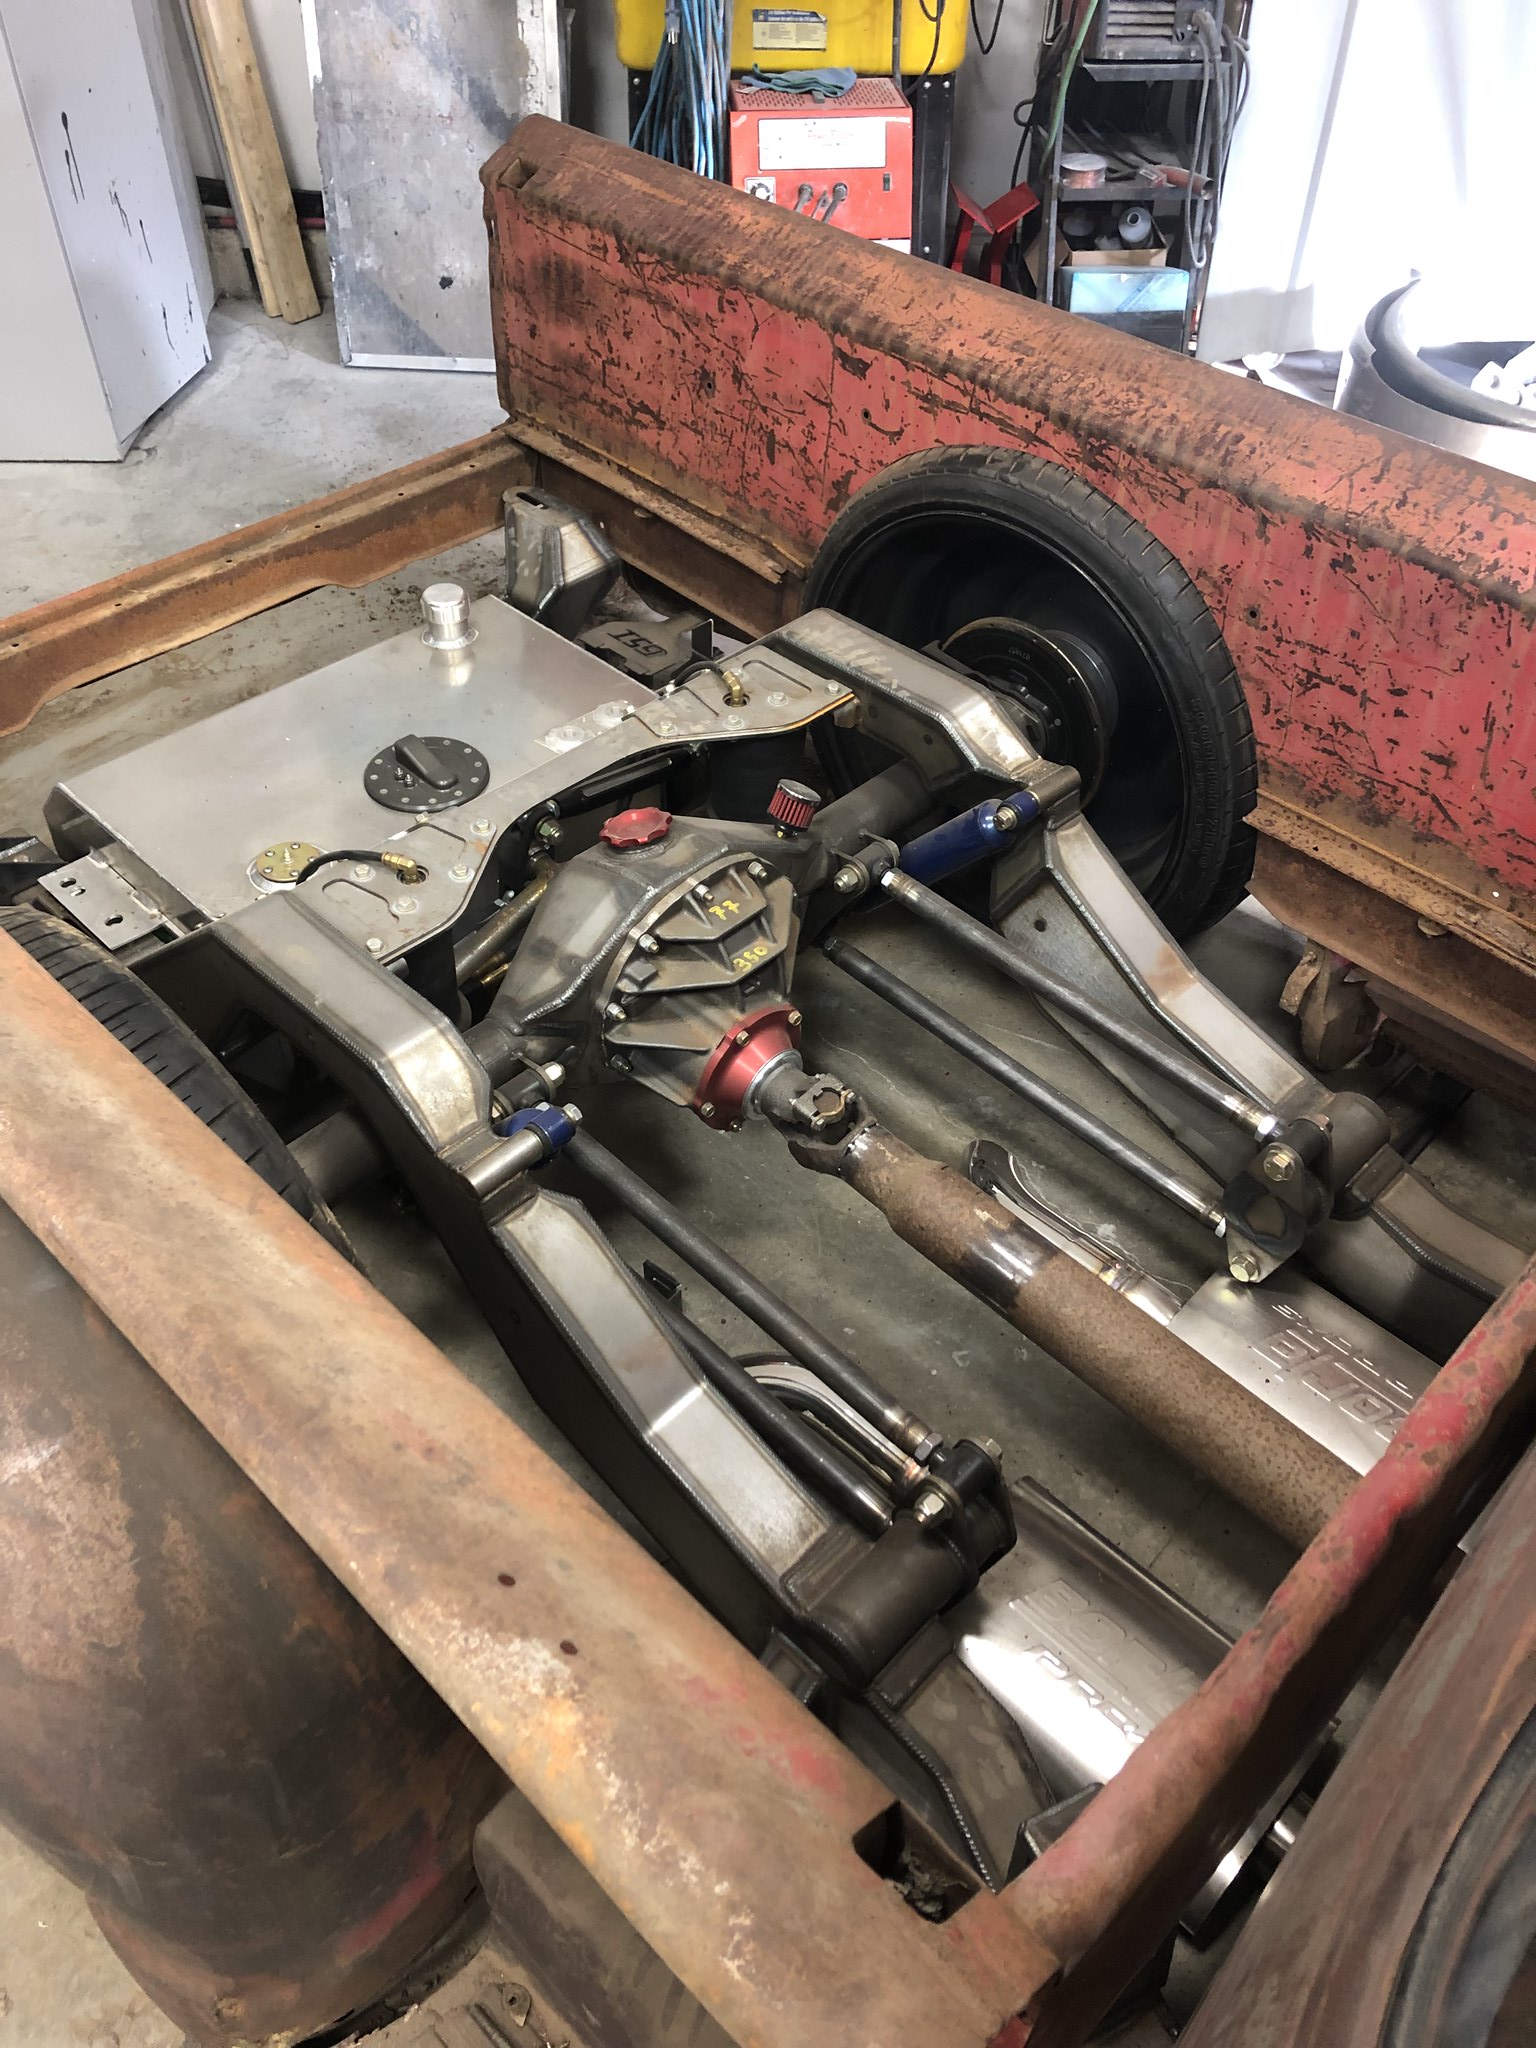 Untitled by Spencer Wiedeman, on Flickr Untitled by Spencer Wiedeman, on FlickrIt looks like I can repurpose the bed cross sills as new bed mounts 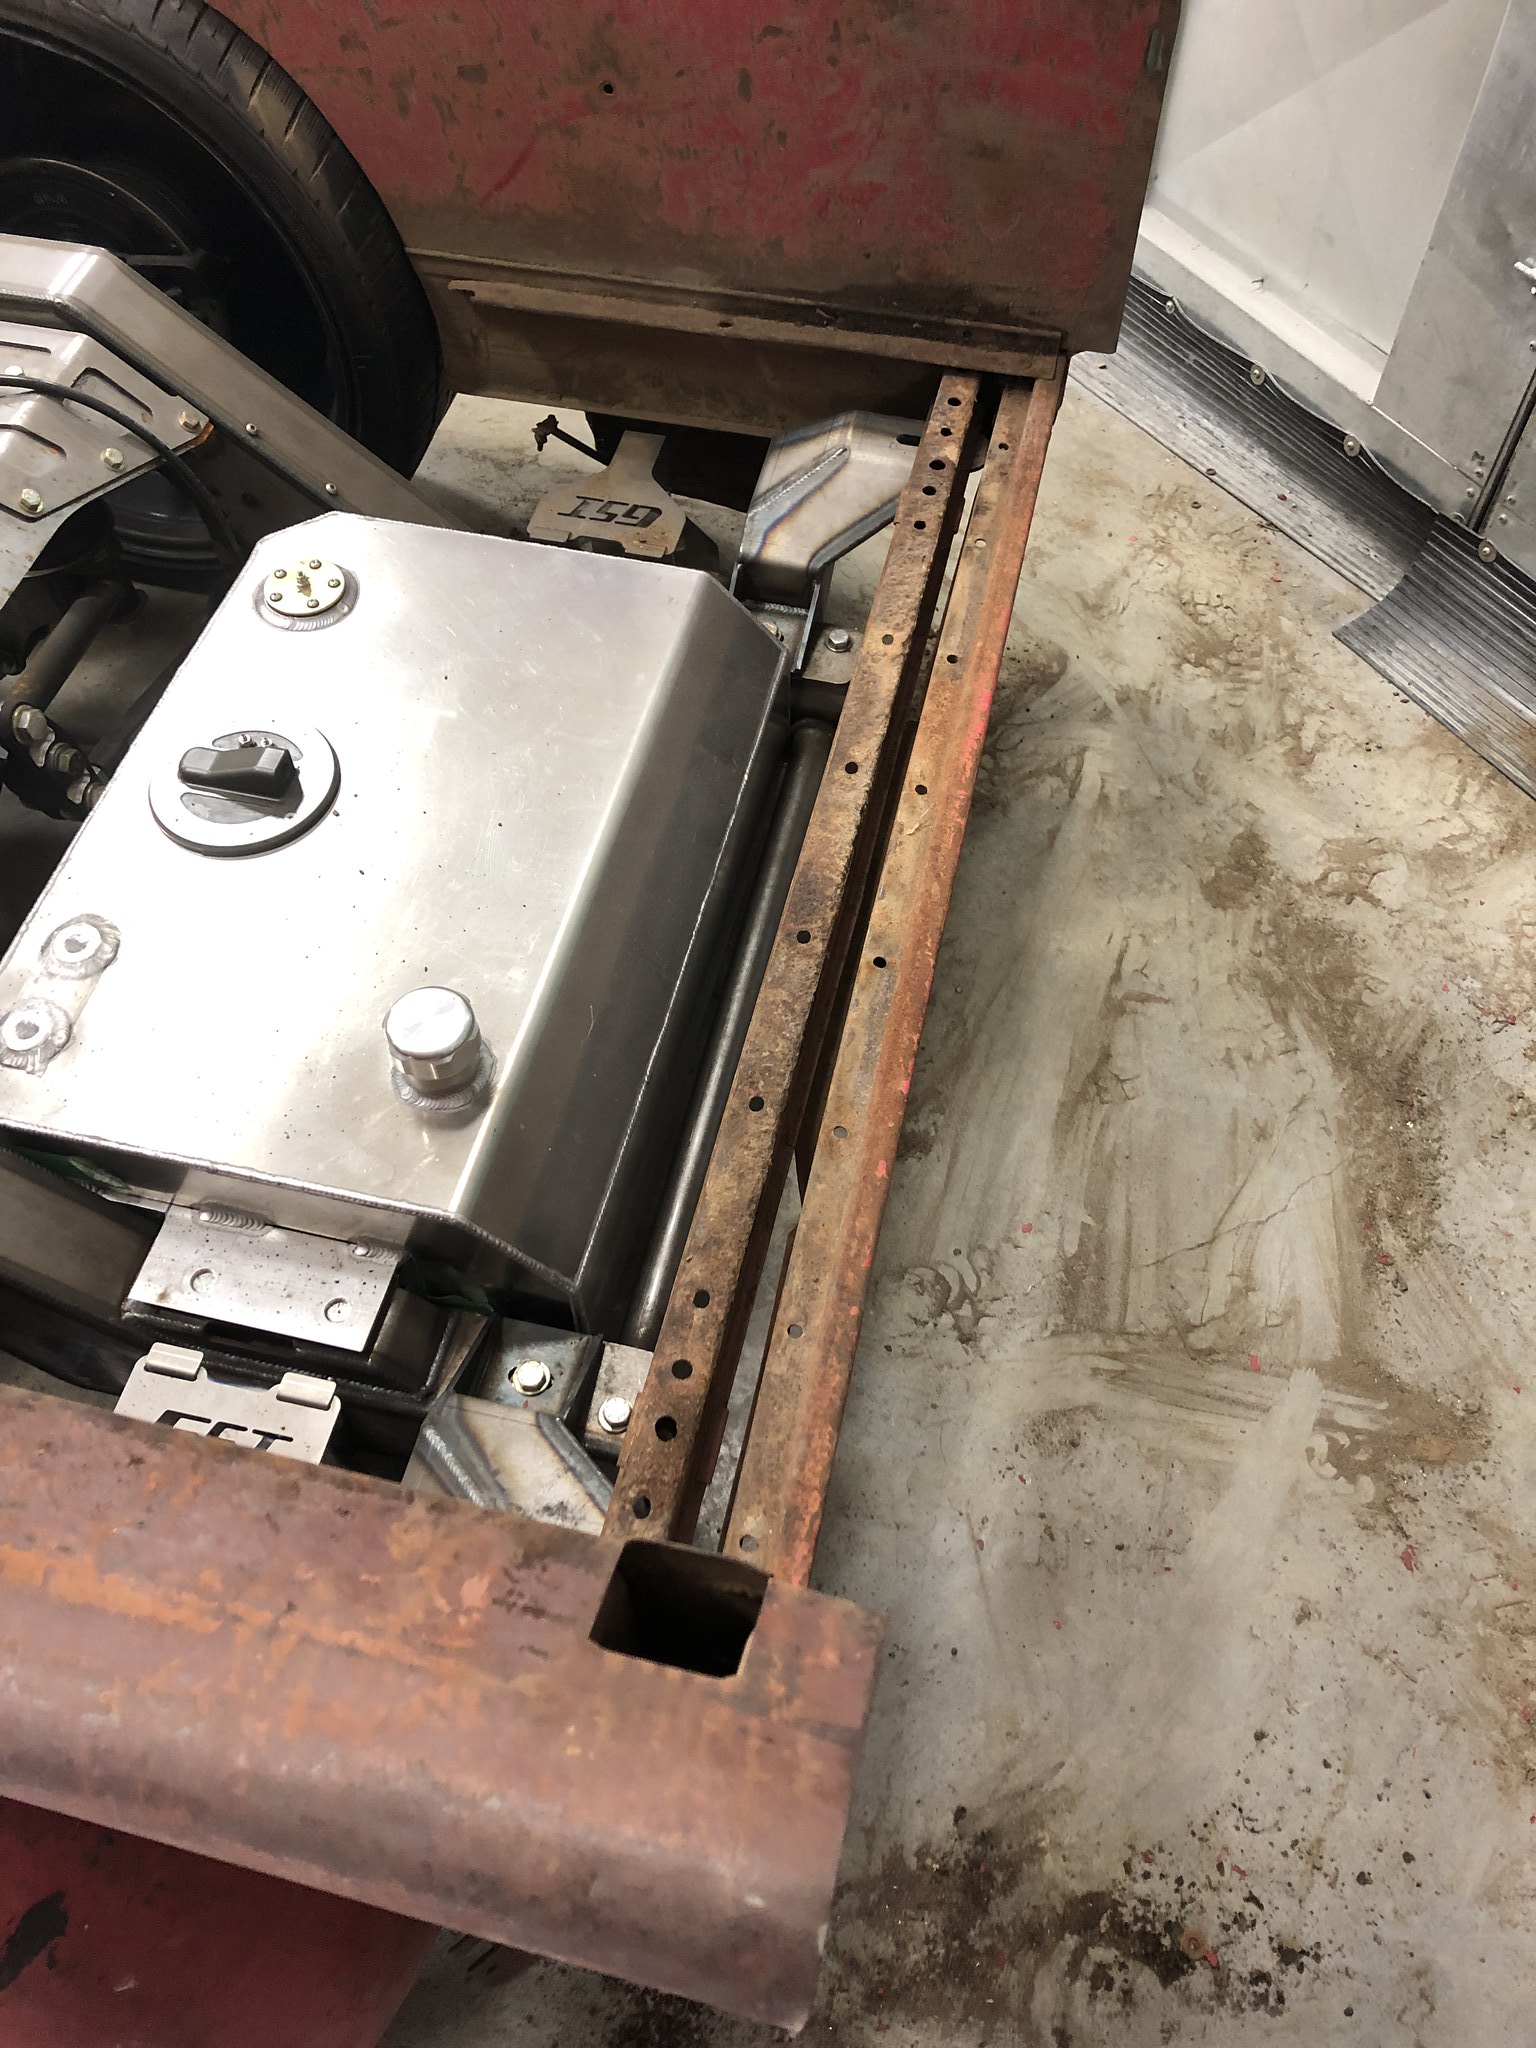 Untitled by Spencer Wiedeman, on Flickr Untitled by Spencer Wiedeman, on FlickrAfter cutting I was left with this as a final product... I will have to mount the bed about 1-2' higher than factory to accommodate the big wheels 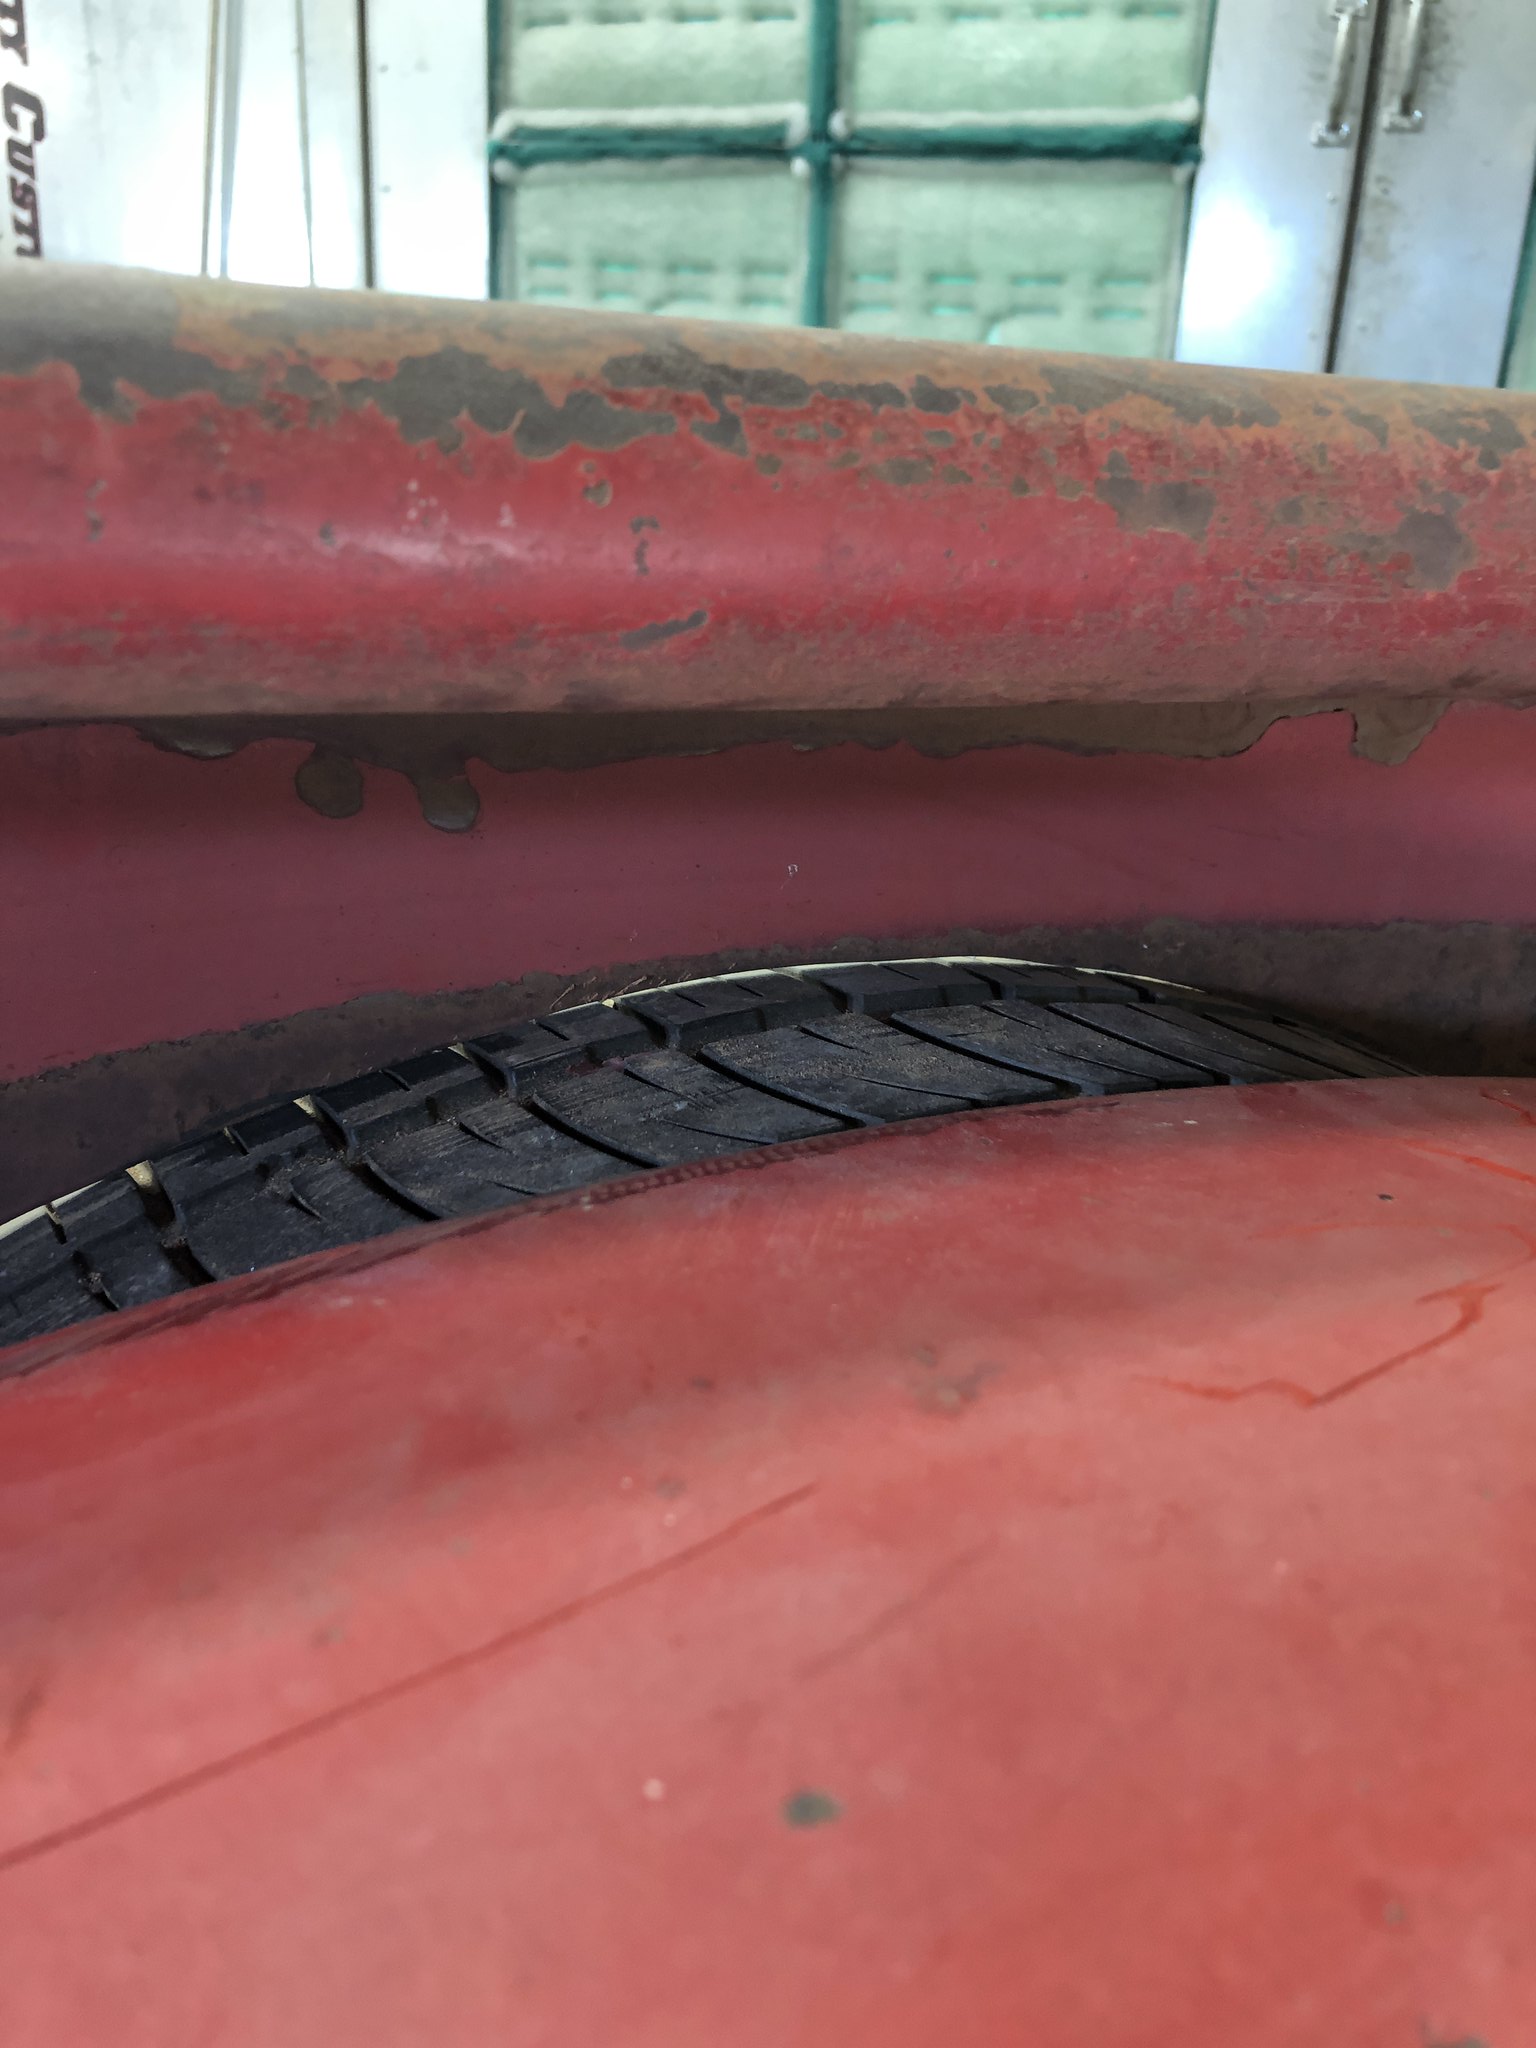 Untitled by Spencer Wiedeman, on Flickr Untitled by Spencer Wiedeman, on Flickr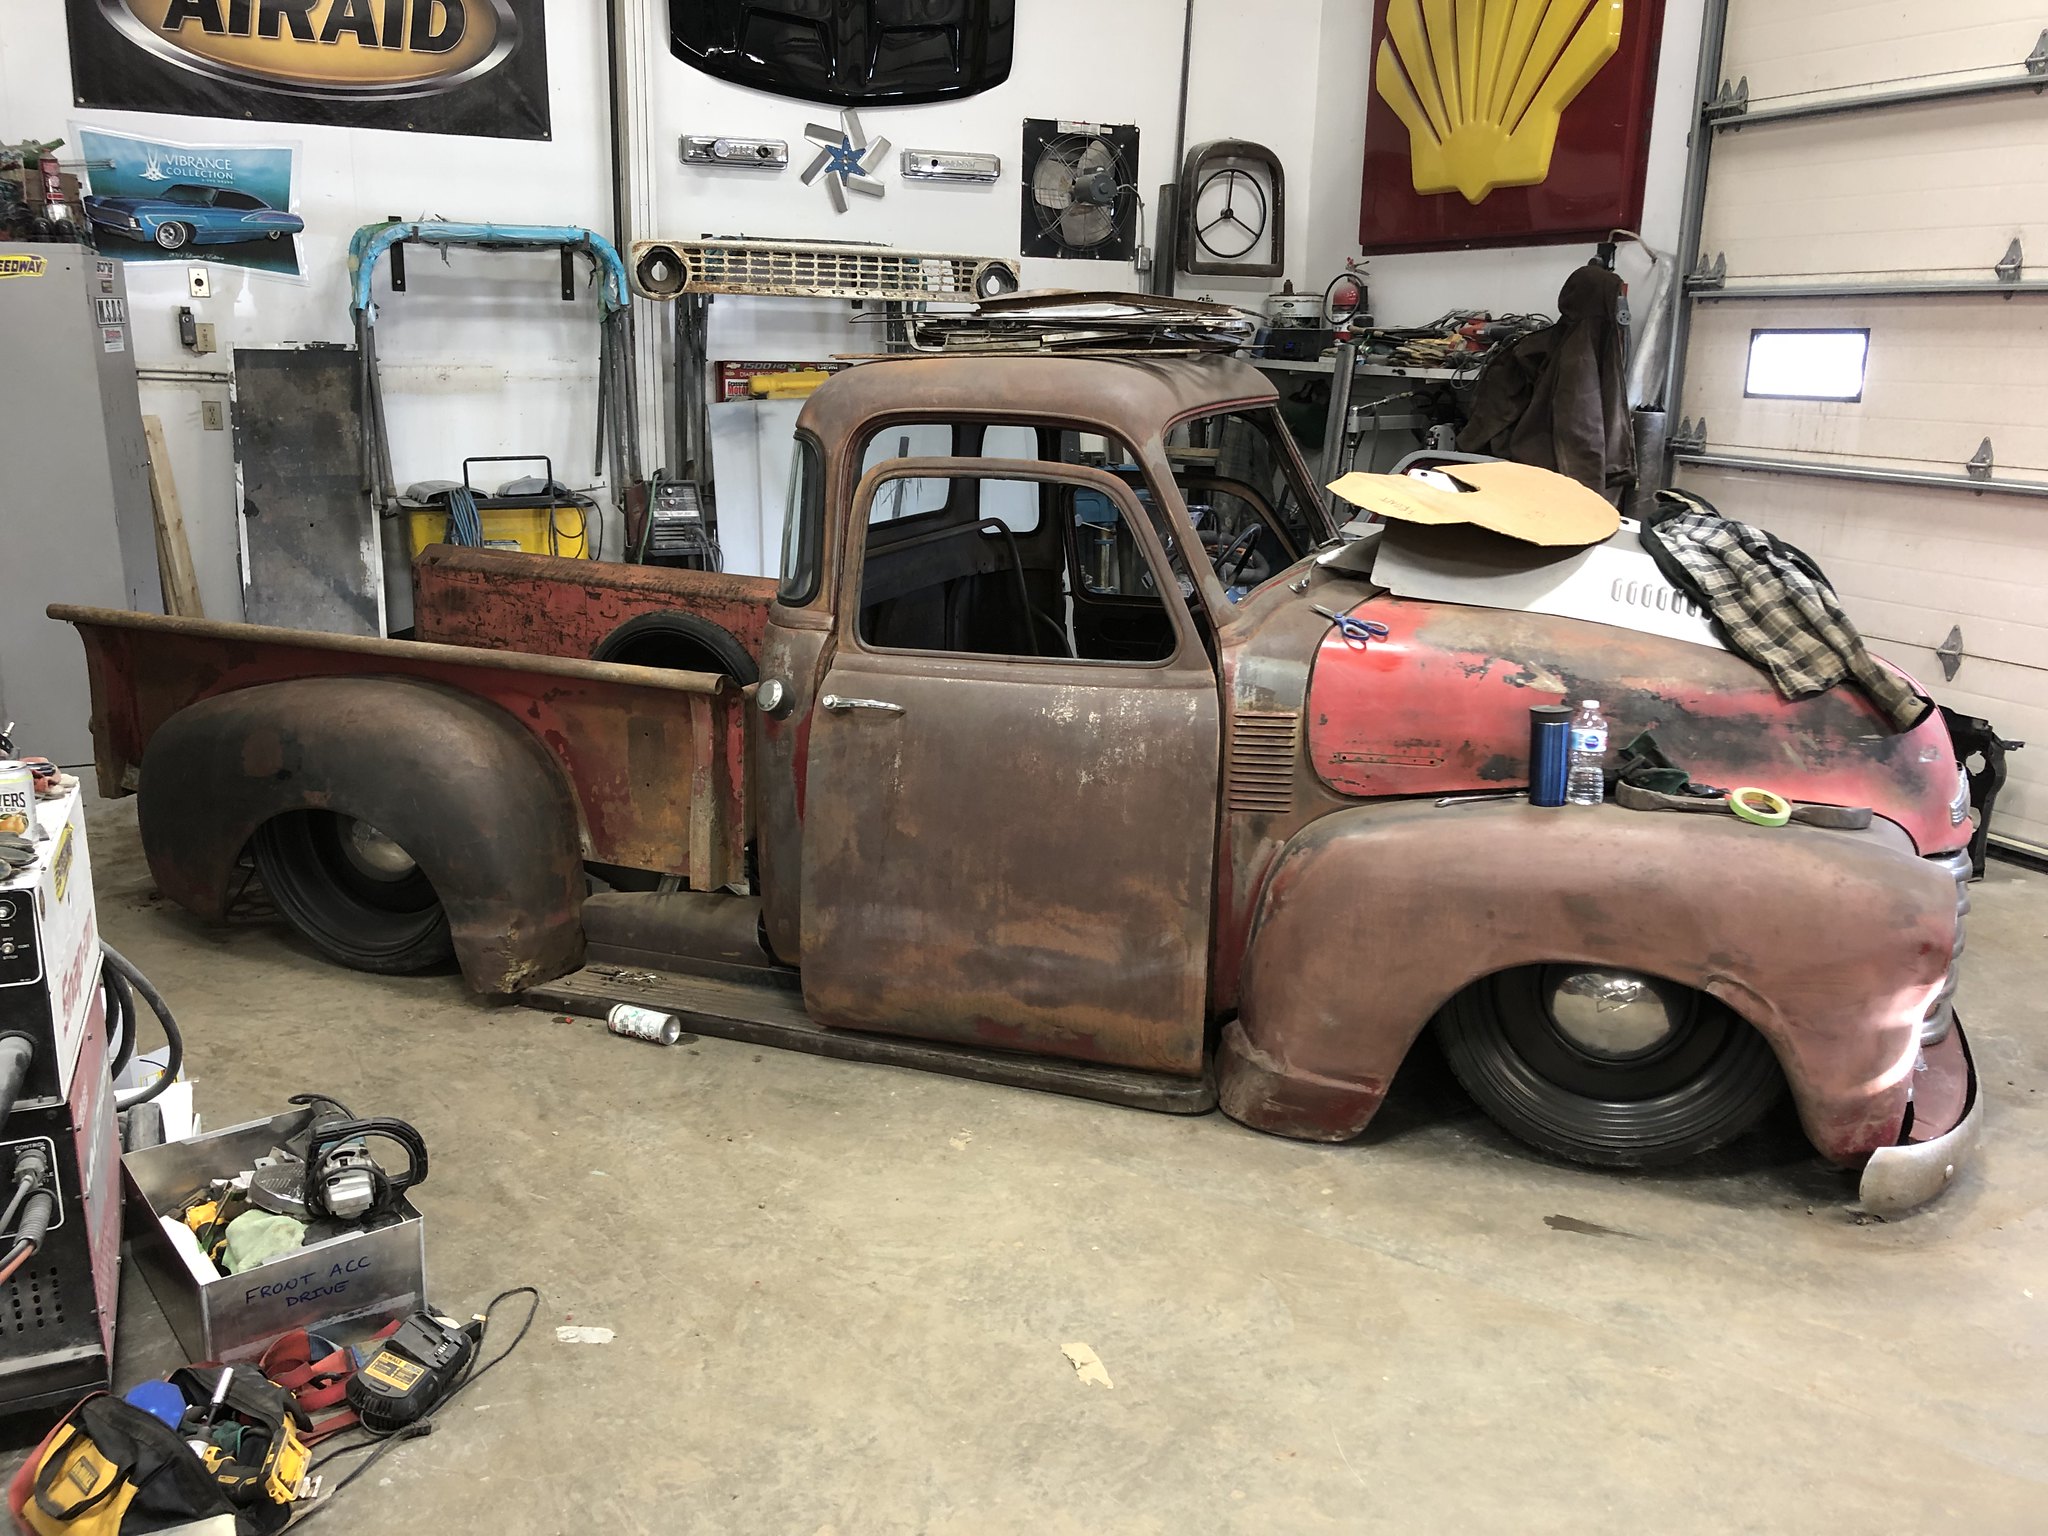 Untitled by Spencer Wiedeman, on Flickr Untitled by Spencer Wiedeman, on Flickr
|
|
|

|
|
|
#17 |
|
Registered User
Join Date: Nov 2016
Location: Beaumont, Alberta
Posts: 468
|
Re: Project: Patina (1949 Chevrolet 1434)
Wicked update. Love the truck.
    
|
|
|

|
|
|
#18 |
|
Registered User
Join Date: Mar 2013
Location: Edmonton, AB
Posts: 298
|
Re: Project: Patina (1949 Chevrolet 1434)
|
|
|

|
|
|
#19 |
|
Registered User
Join Date: Mar 2013
Location: Edmonton, AB
Posts: 298
|
Re: Project: Patina (1949 Chevrolet 1434)
Next I tackled the front end. I bought an abandoned project with a bunch of good panels. It has the same colour code as my truck however it was repainted at some point during its life. The paint underneath is the same red that is on my cab. when it comes time to paint march my cab corners and whatnot I think ill dust the over the paint on the cab to make it all flow together.
This is after I quickly sanded the panels with 240 and hit it with some 3M Machine Polish  Untitled by Spencer Wiedeman, on Flickr Untitled by Spencer Wiedeman, on FlickrIt still needs a lot more buffing 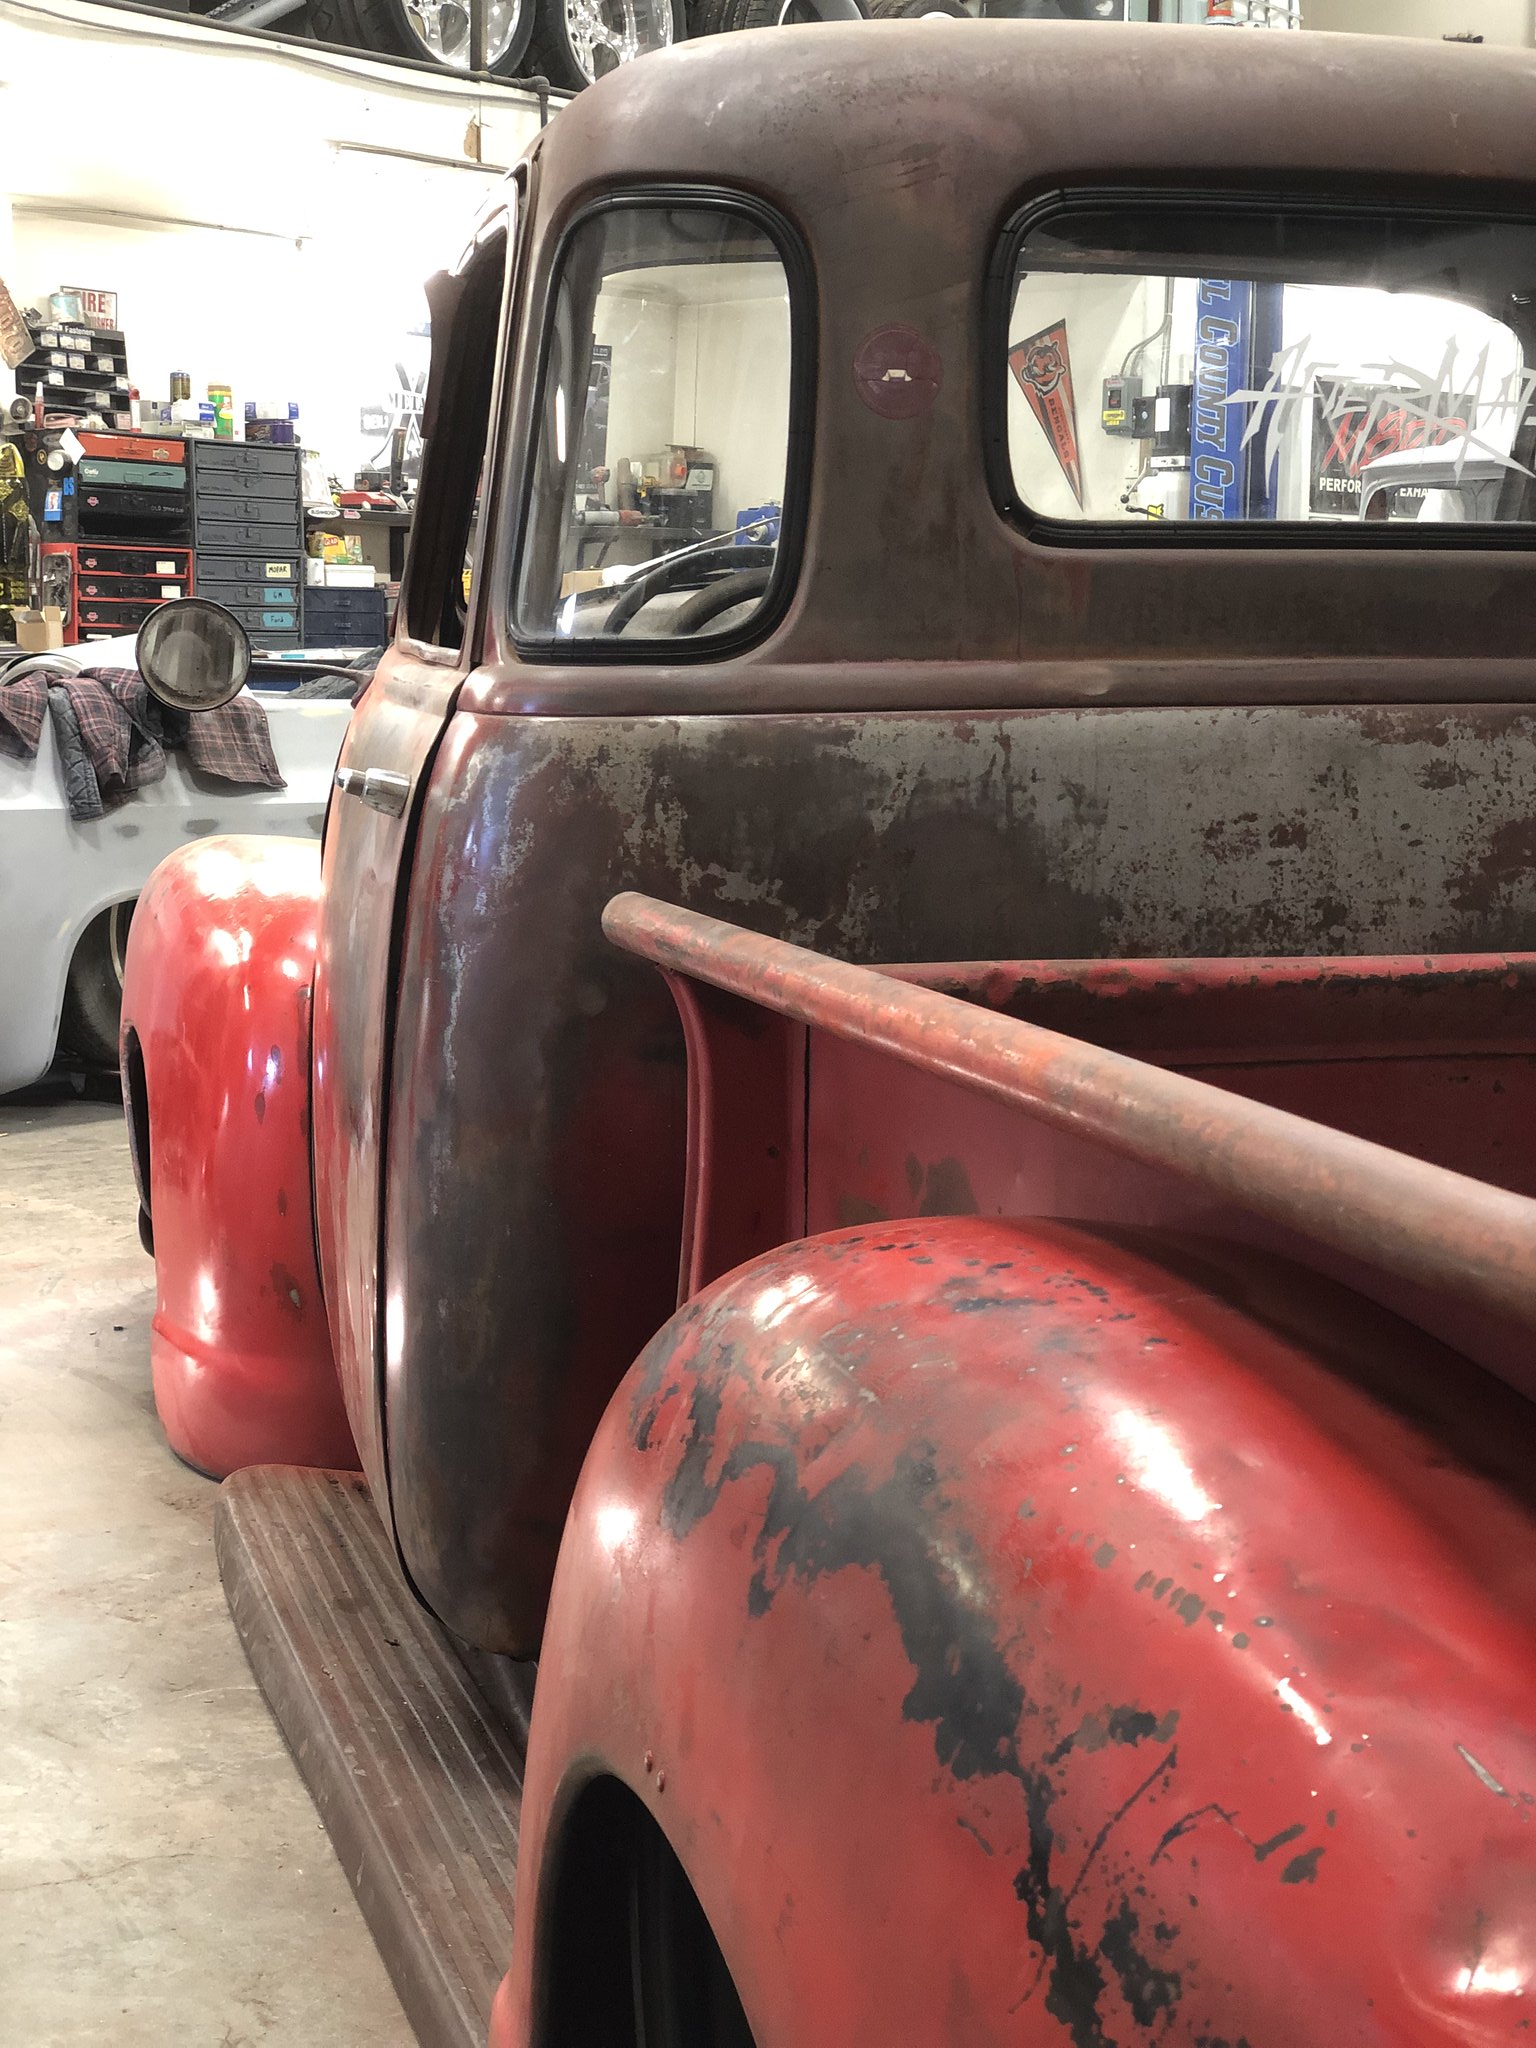 Untitled by Spencer Wiedeman, on Flickr Untitled by Spencer Wiedeman, on Flickr Untitled by Spencer Wiedeman, on Flickr Untitled by Spencer Wiedeman, on Flickr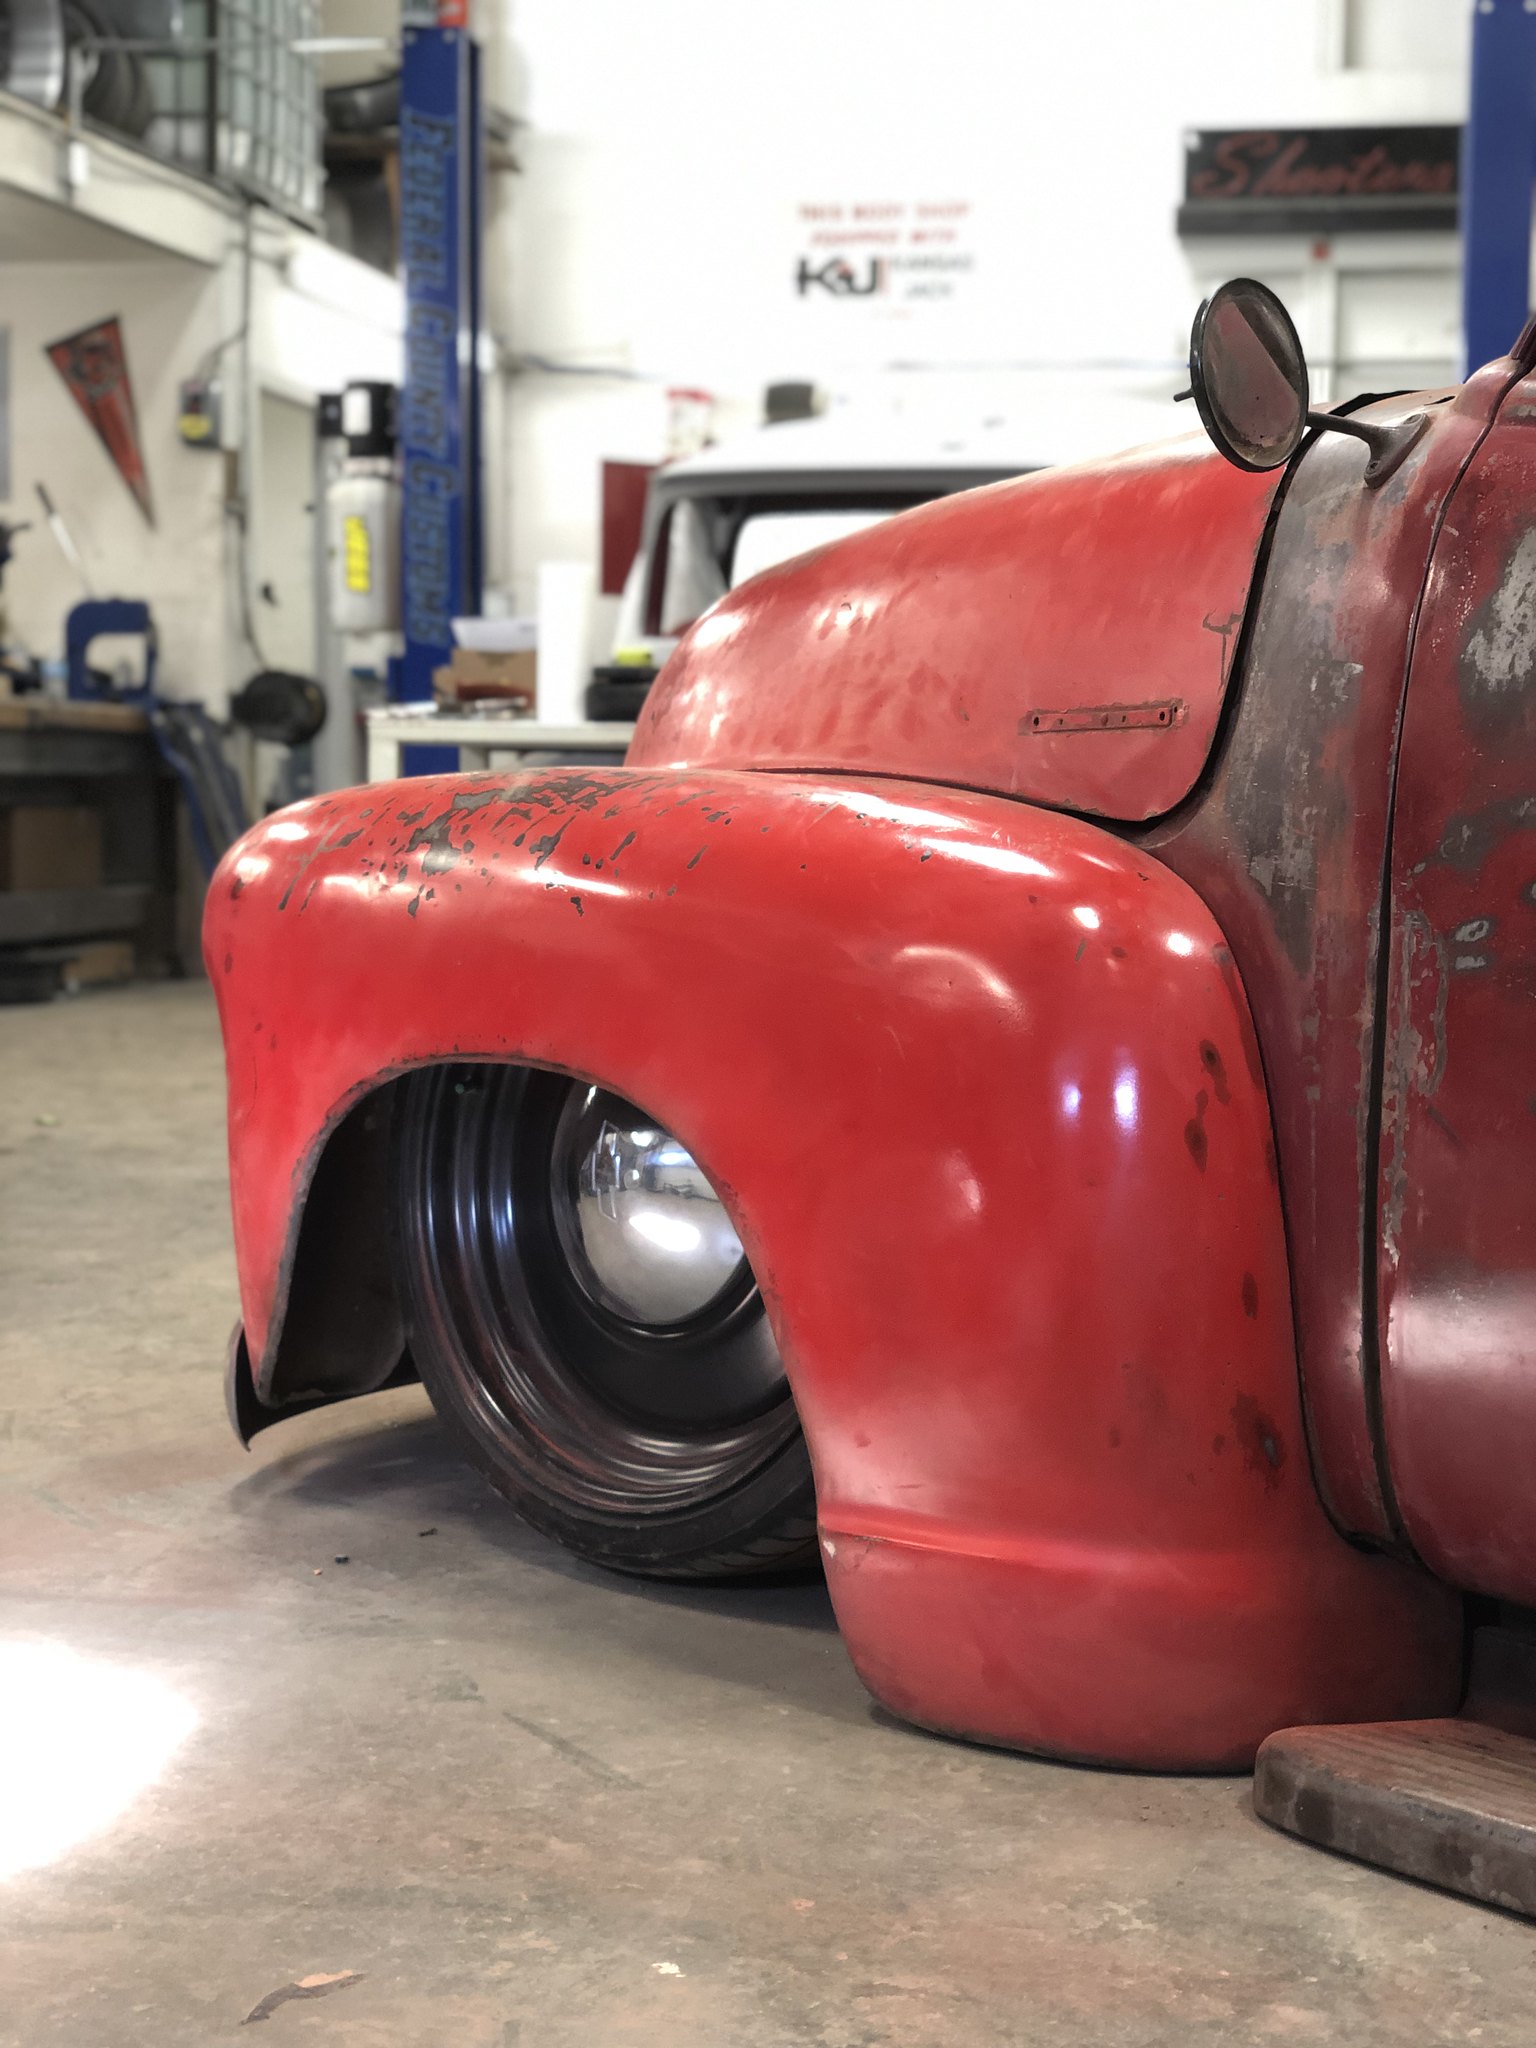 Untitled by Spencer Wiedeman, on Flickr Untitled by Spencer Wiedeman, on Flickr Untitled by Spencer Wiedeman, on Flickr Untitled by Spencer Wiedeman, on Flickr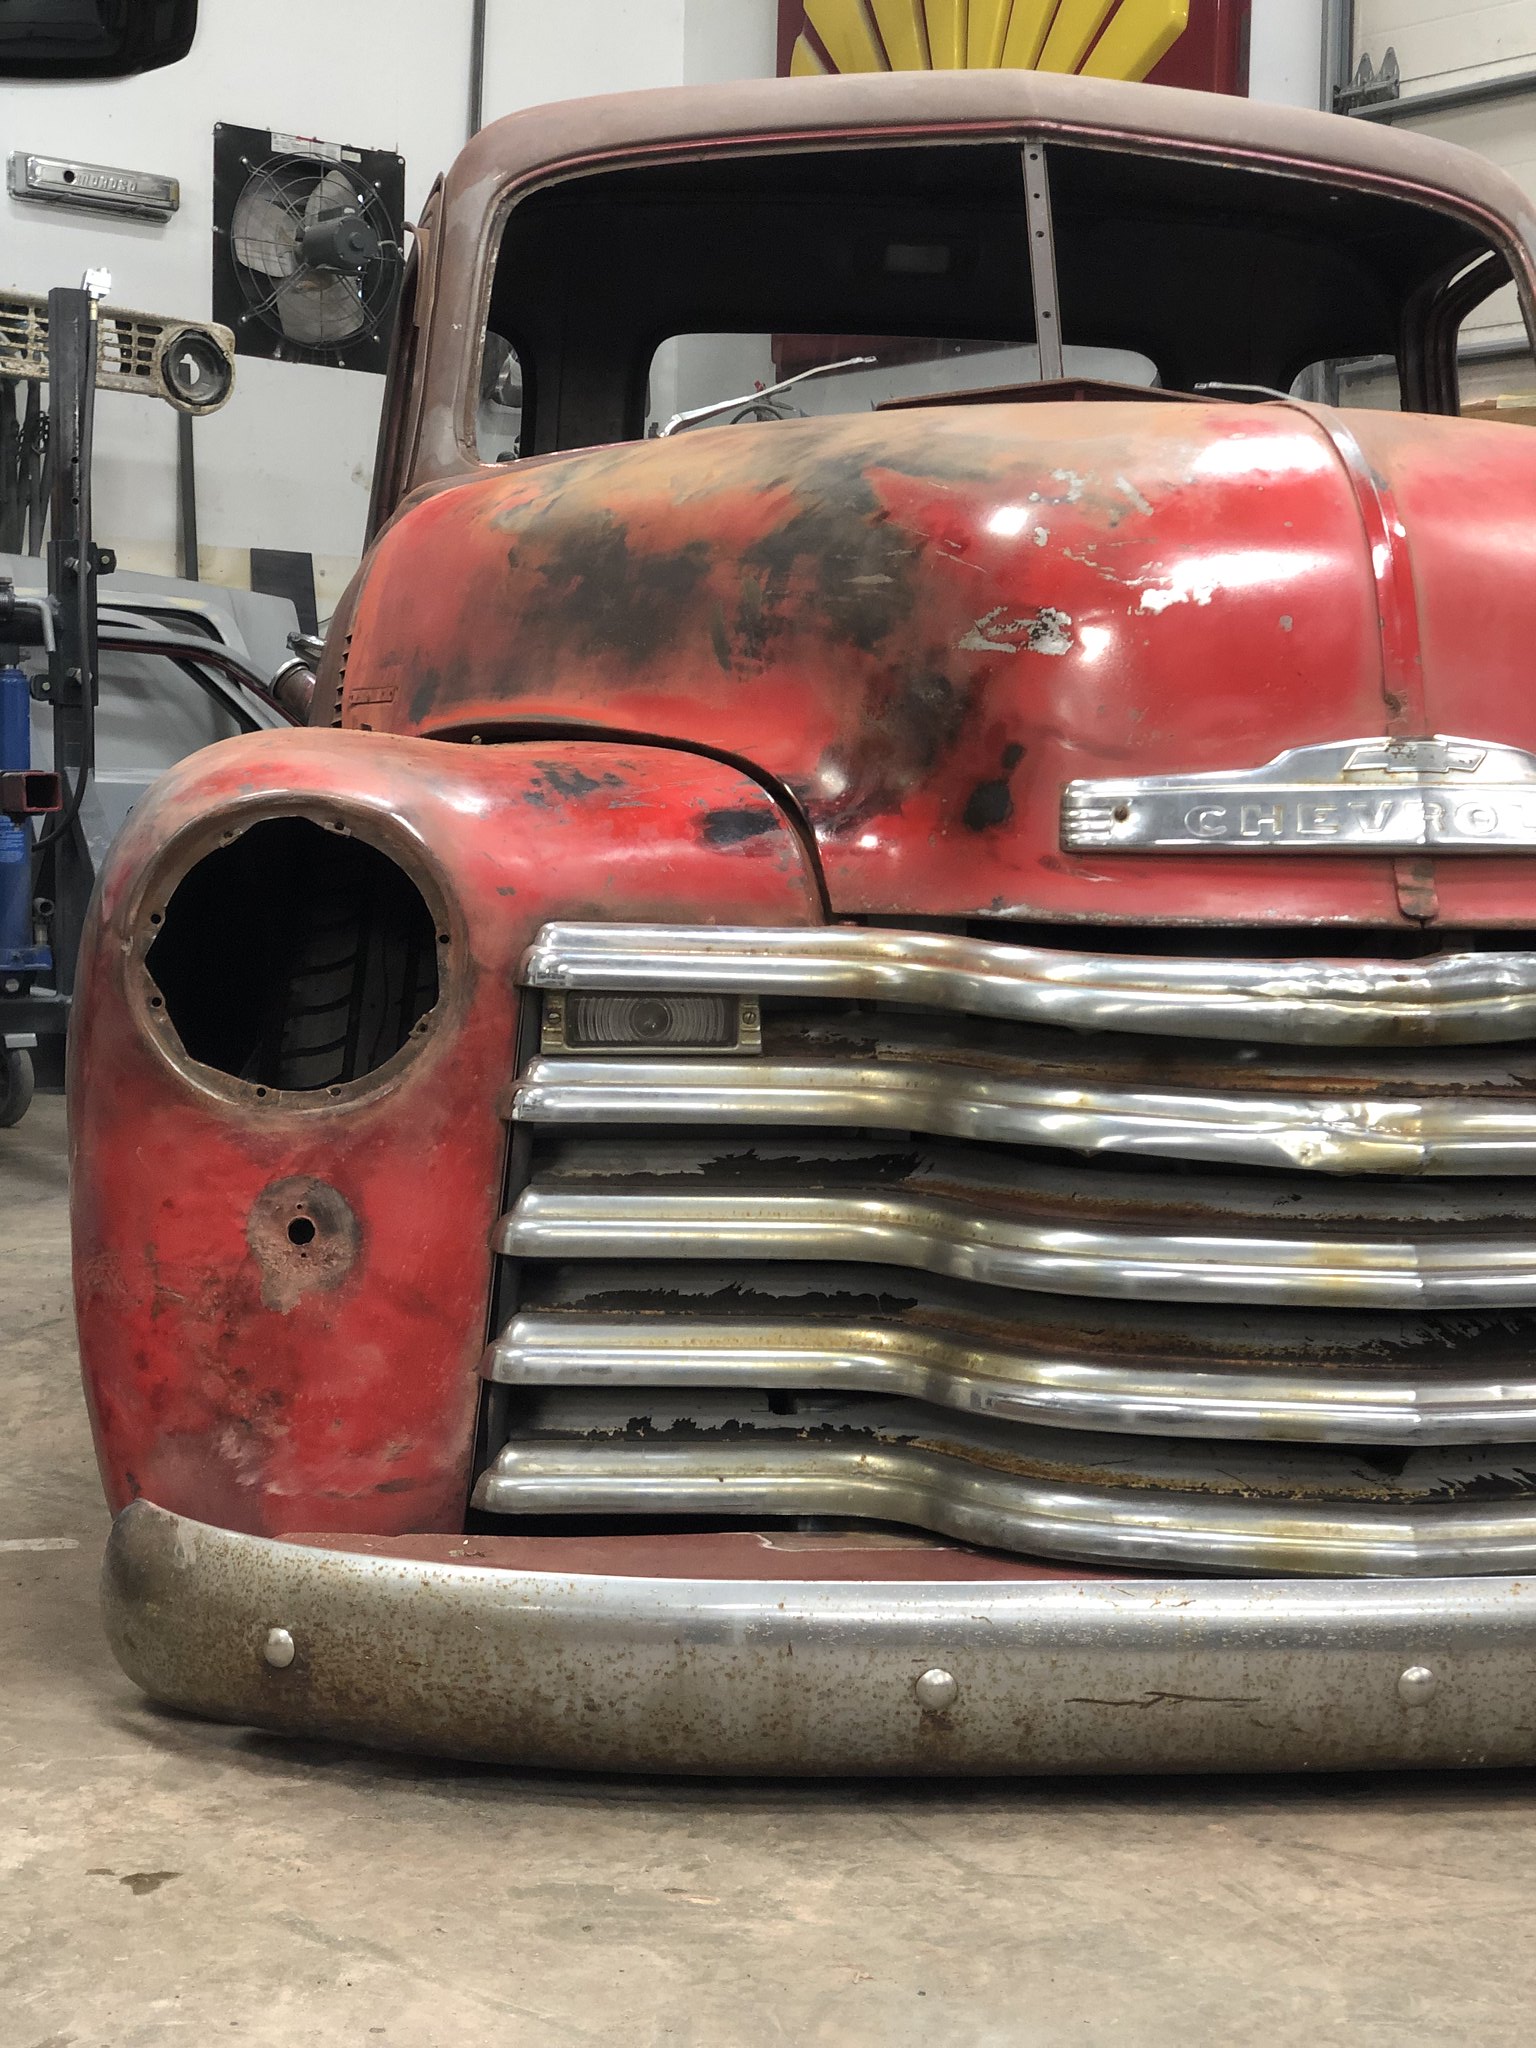 Untitled by Spencer Wiedeman, on Flickr Untitled by Spencer Wiedeman, on FlickrHere is a photo of how the feders used to look 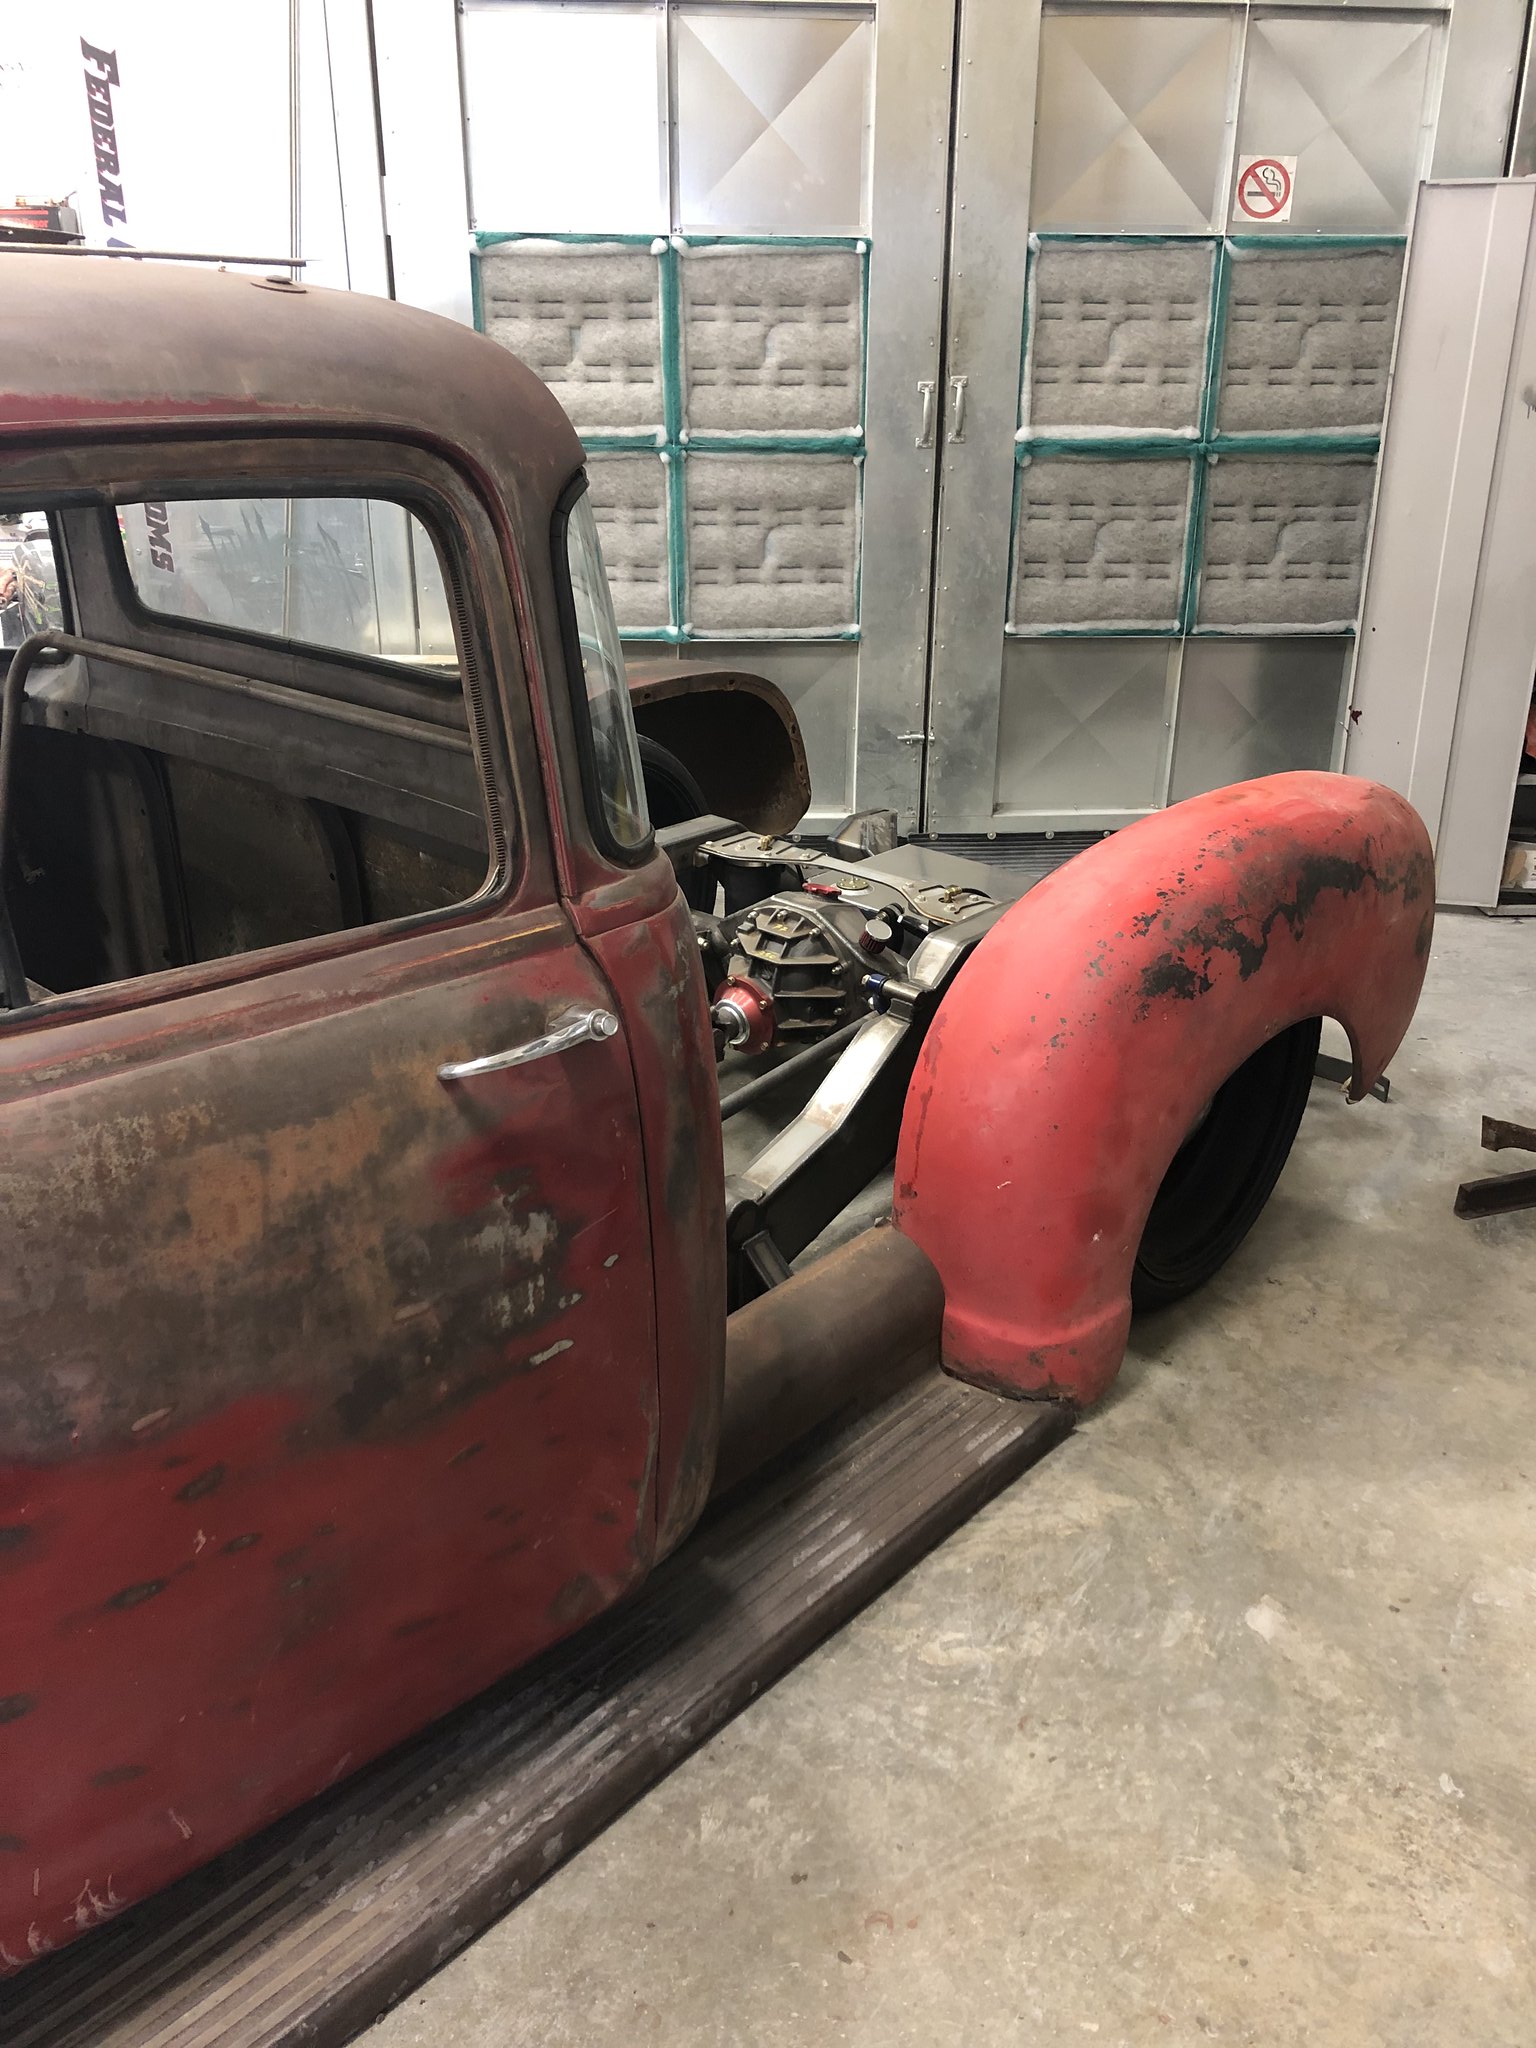 Untitled by Spencer Wiedeman, on Flickr Untitled by Spencer Wiedeman, on Flickr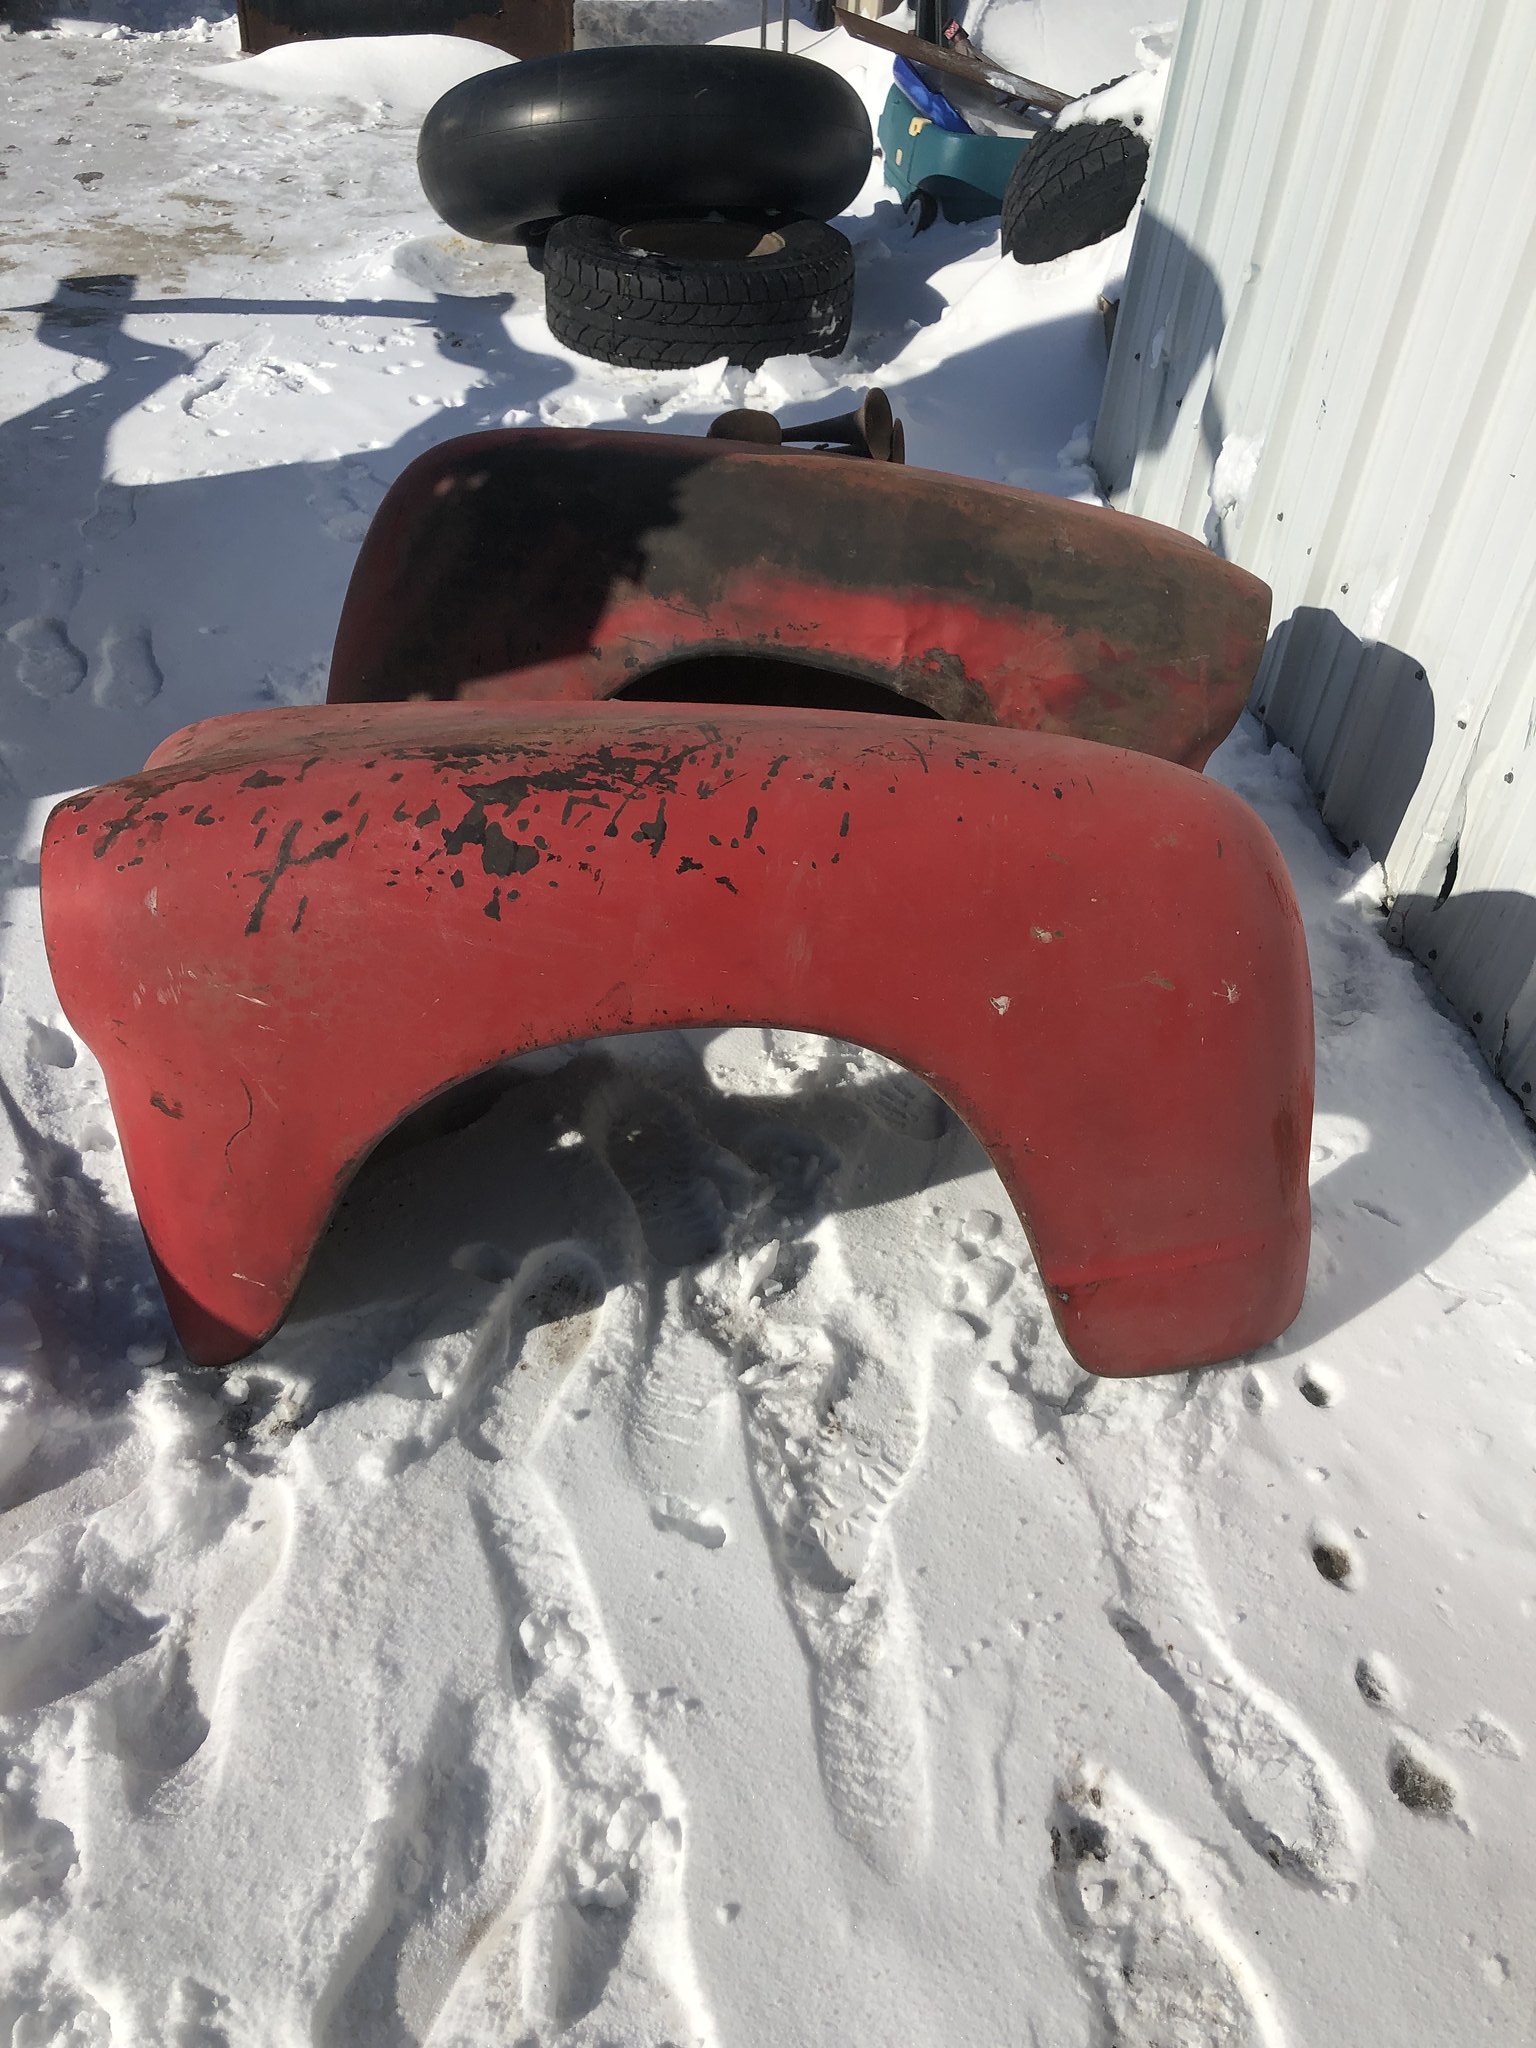 Untitled by Spencer Wiedeman, on Flickr Untitled by Spencer Wiedeman, on Flickr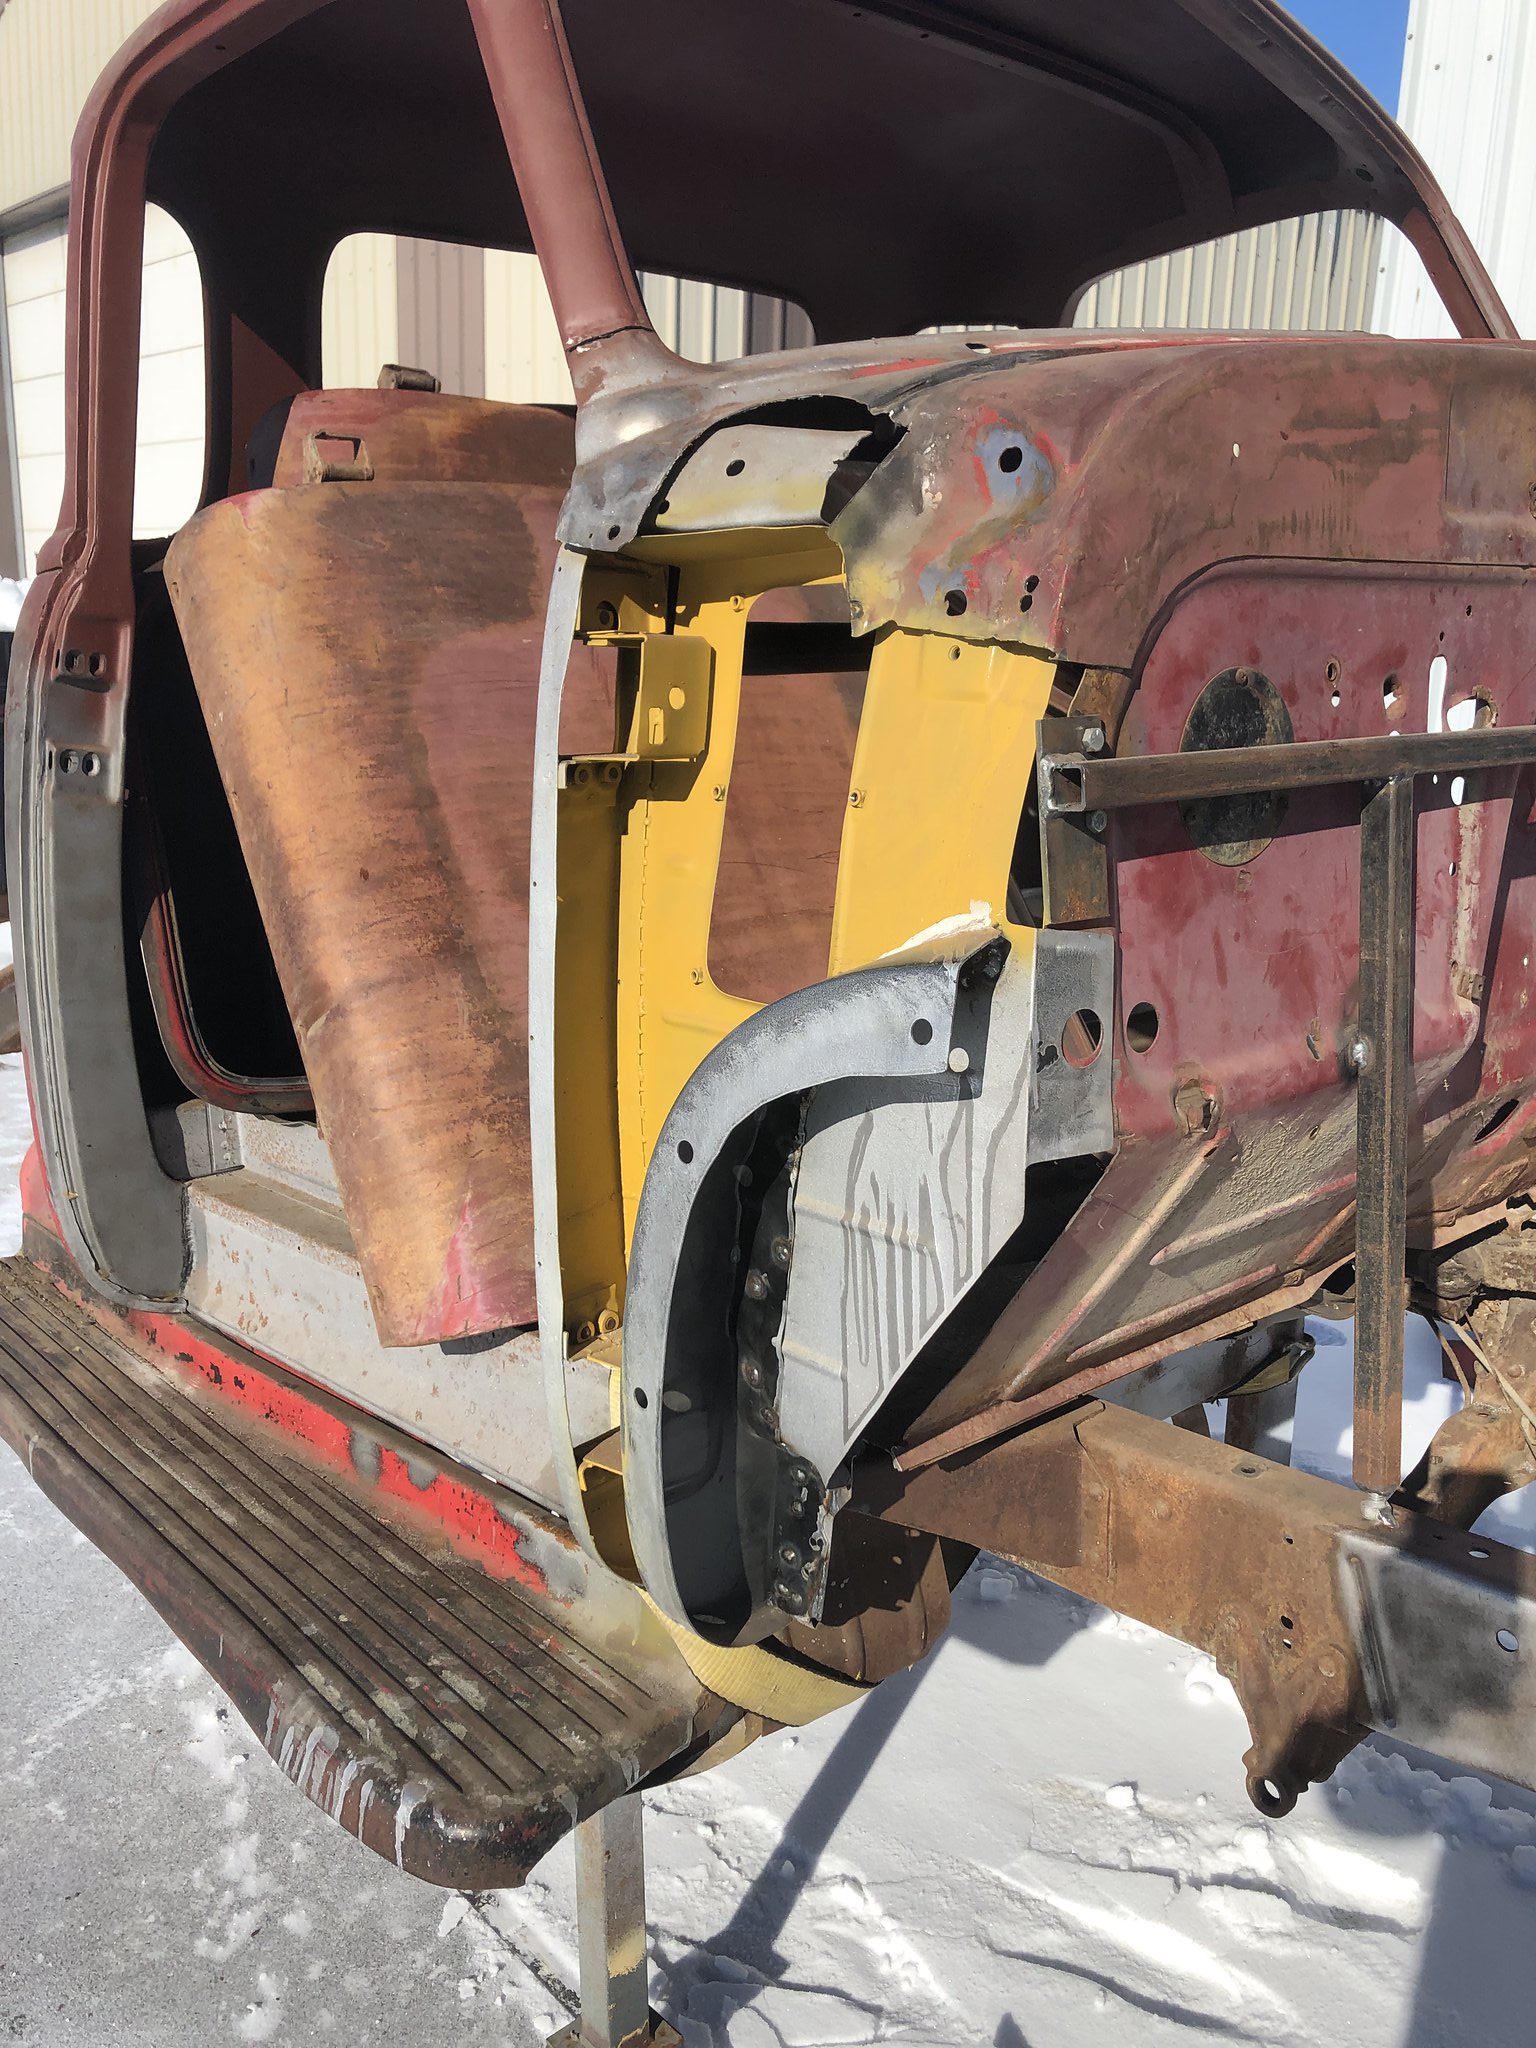 Untitled by Spencer Wiedeman, on Flickr Untitled by Spencer Wiedeman, on Flickr
|
|
|

|
|
|
#20 |
|
Registered User
Join Date: Mar 2013
Location: Edmonton, AB
Posts: 298
|
Re: Project: Patina (1949 Chevrolet 1434)
I then started installing my Altman bear claw latches and SBC valve cover adapters.
The Altman latches were a breeze to install 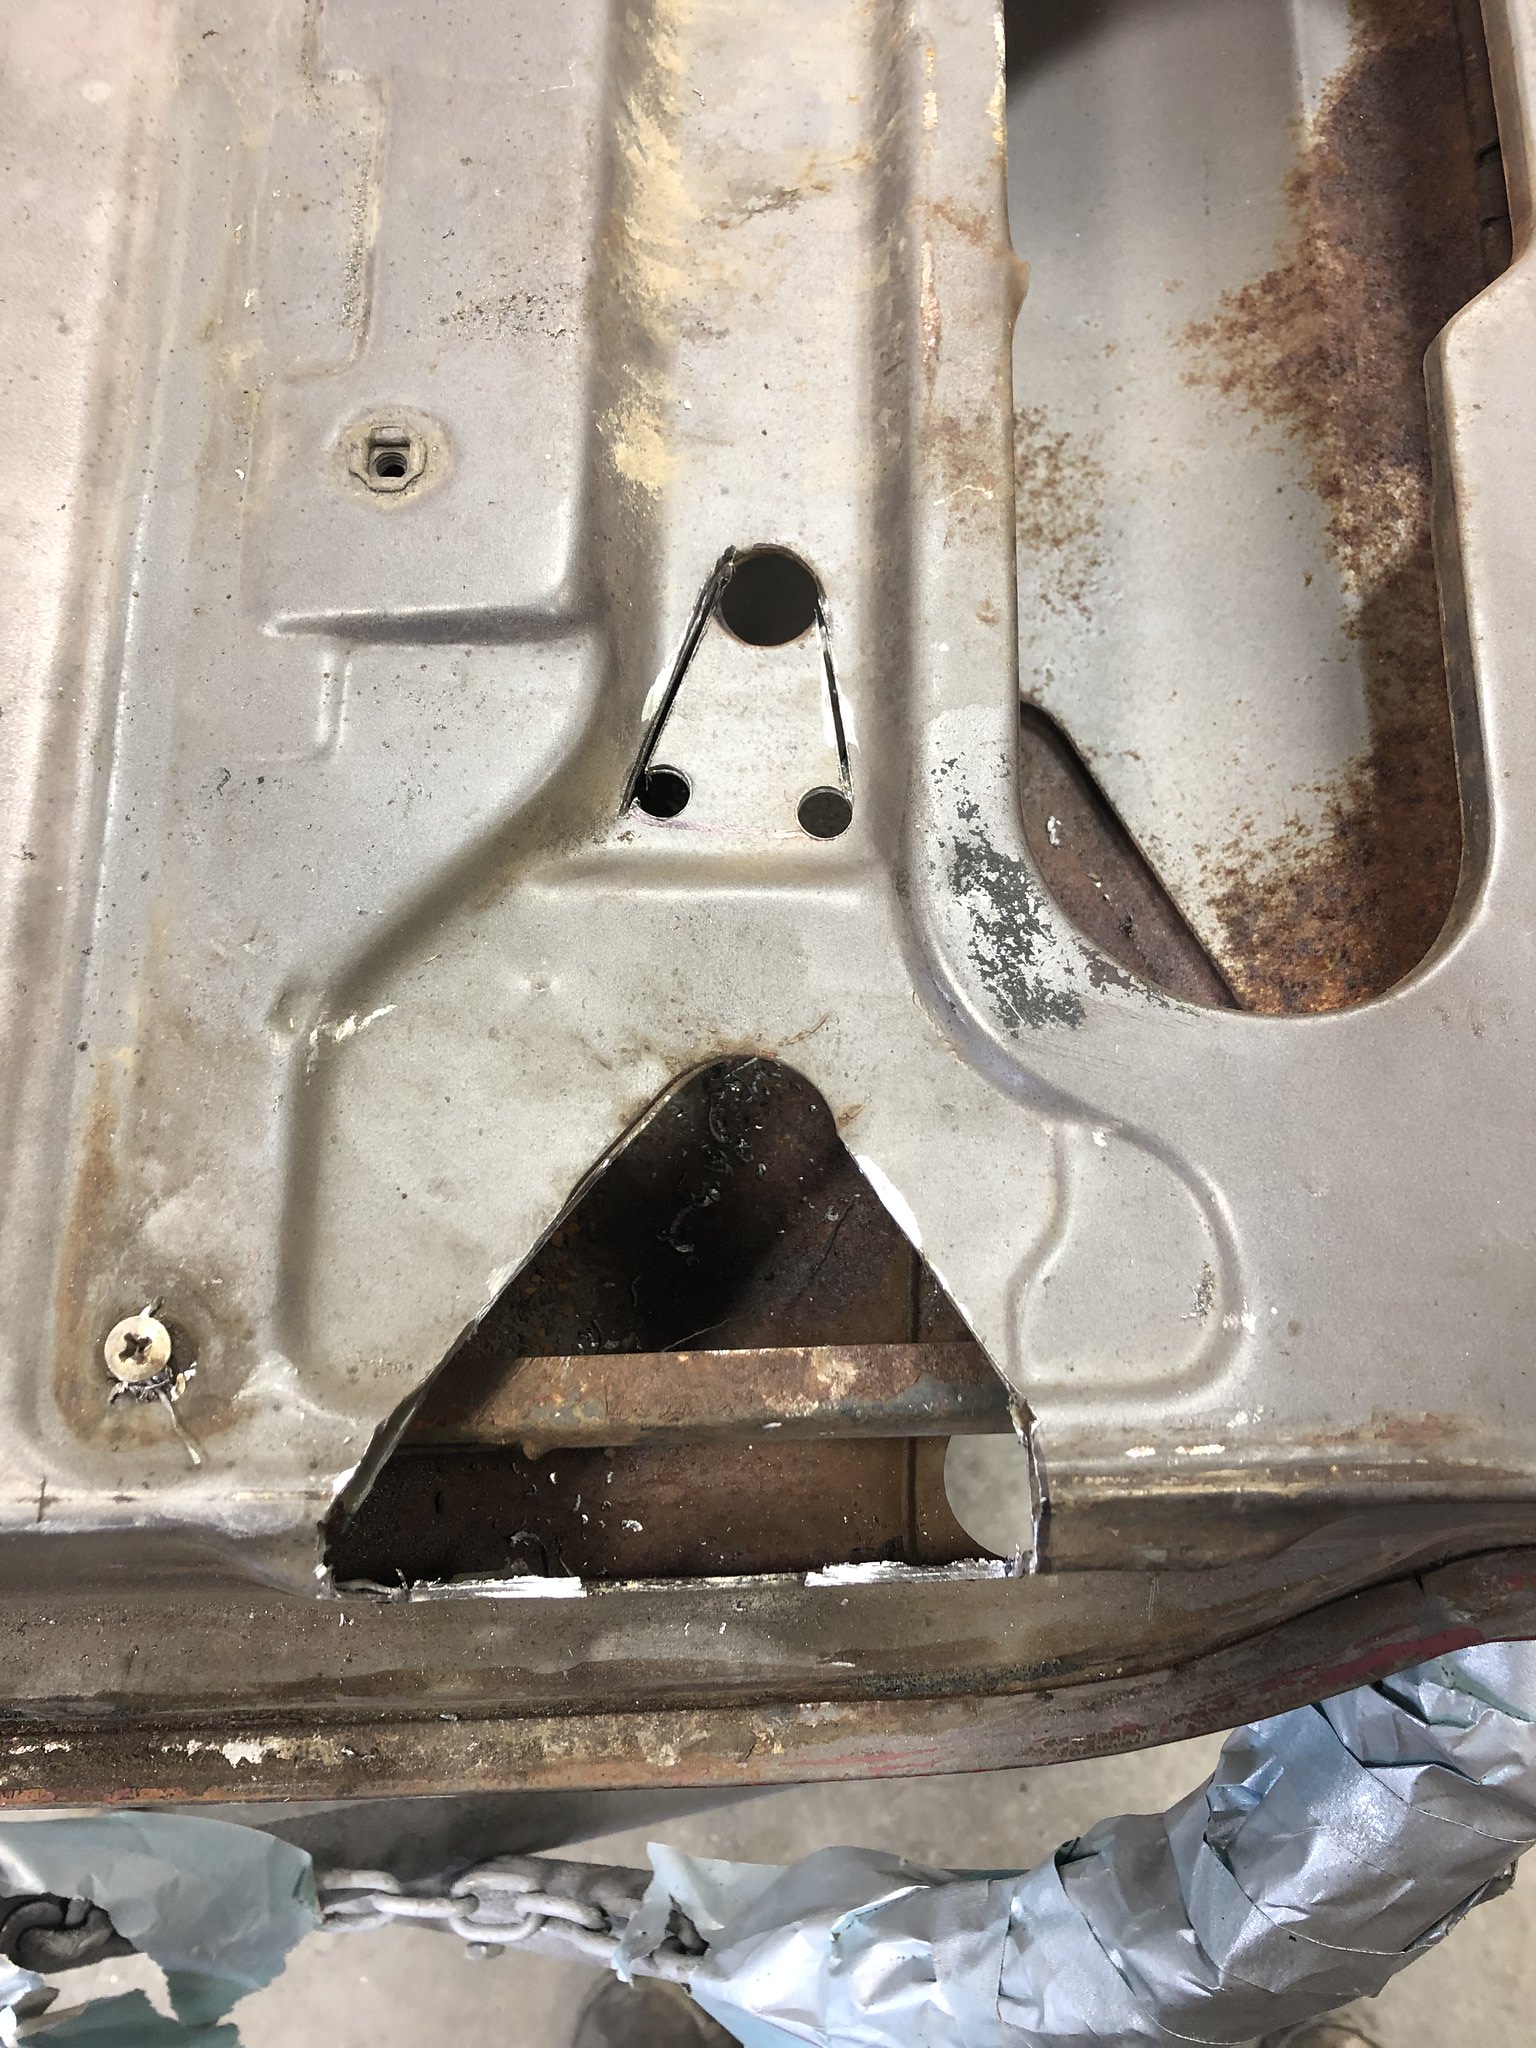 Untitled by Spencer Wiedeman, on Flickr Untitled by Spencer Wiedeman, on Flickr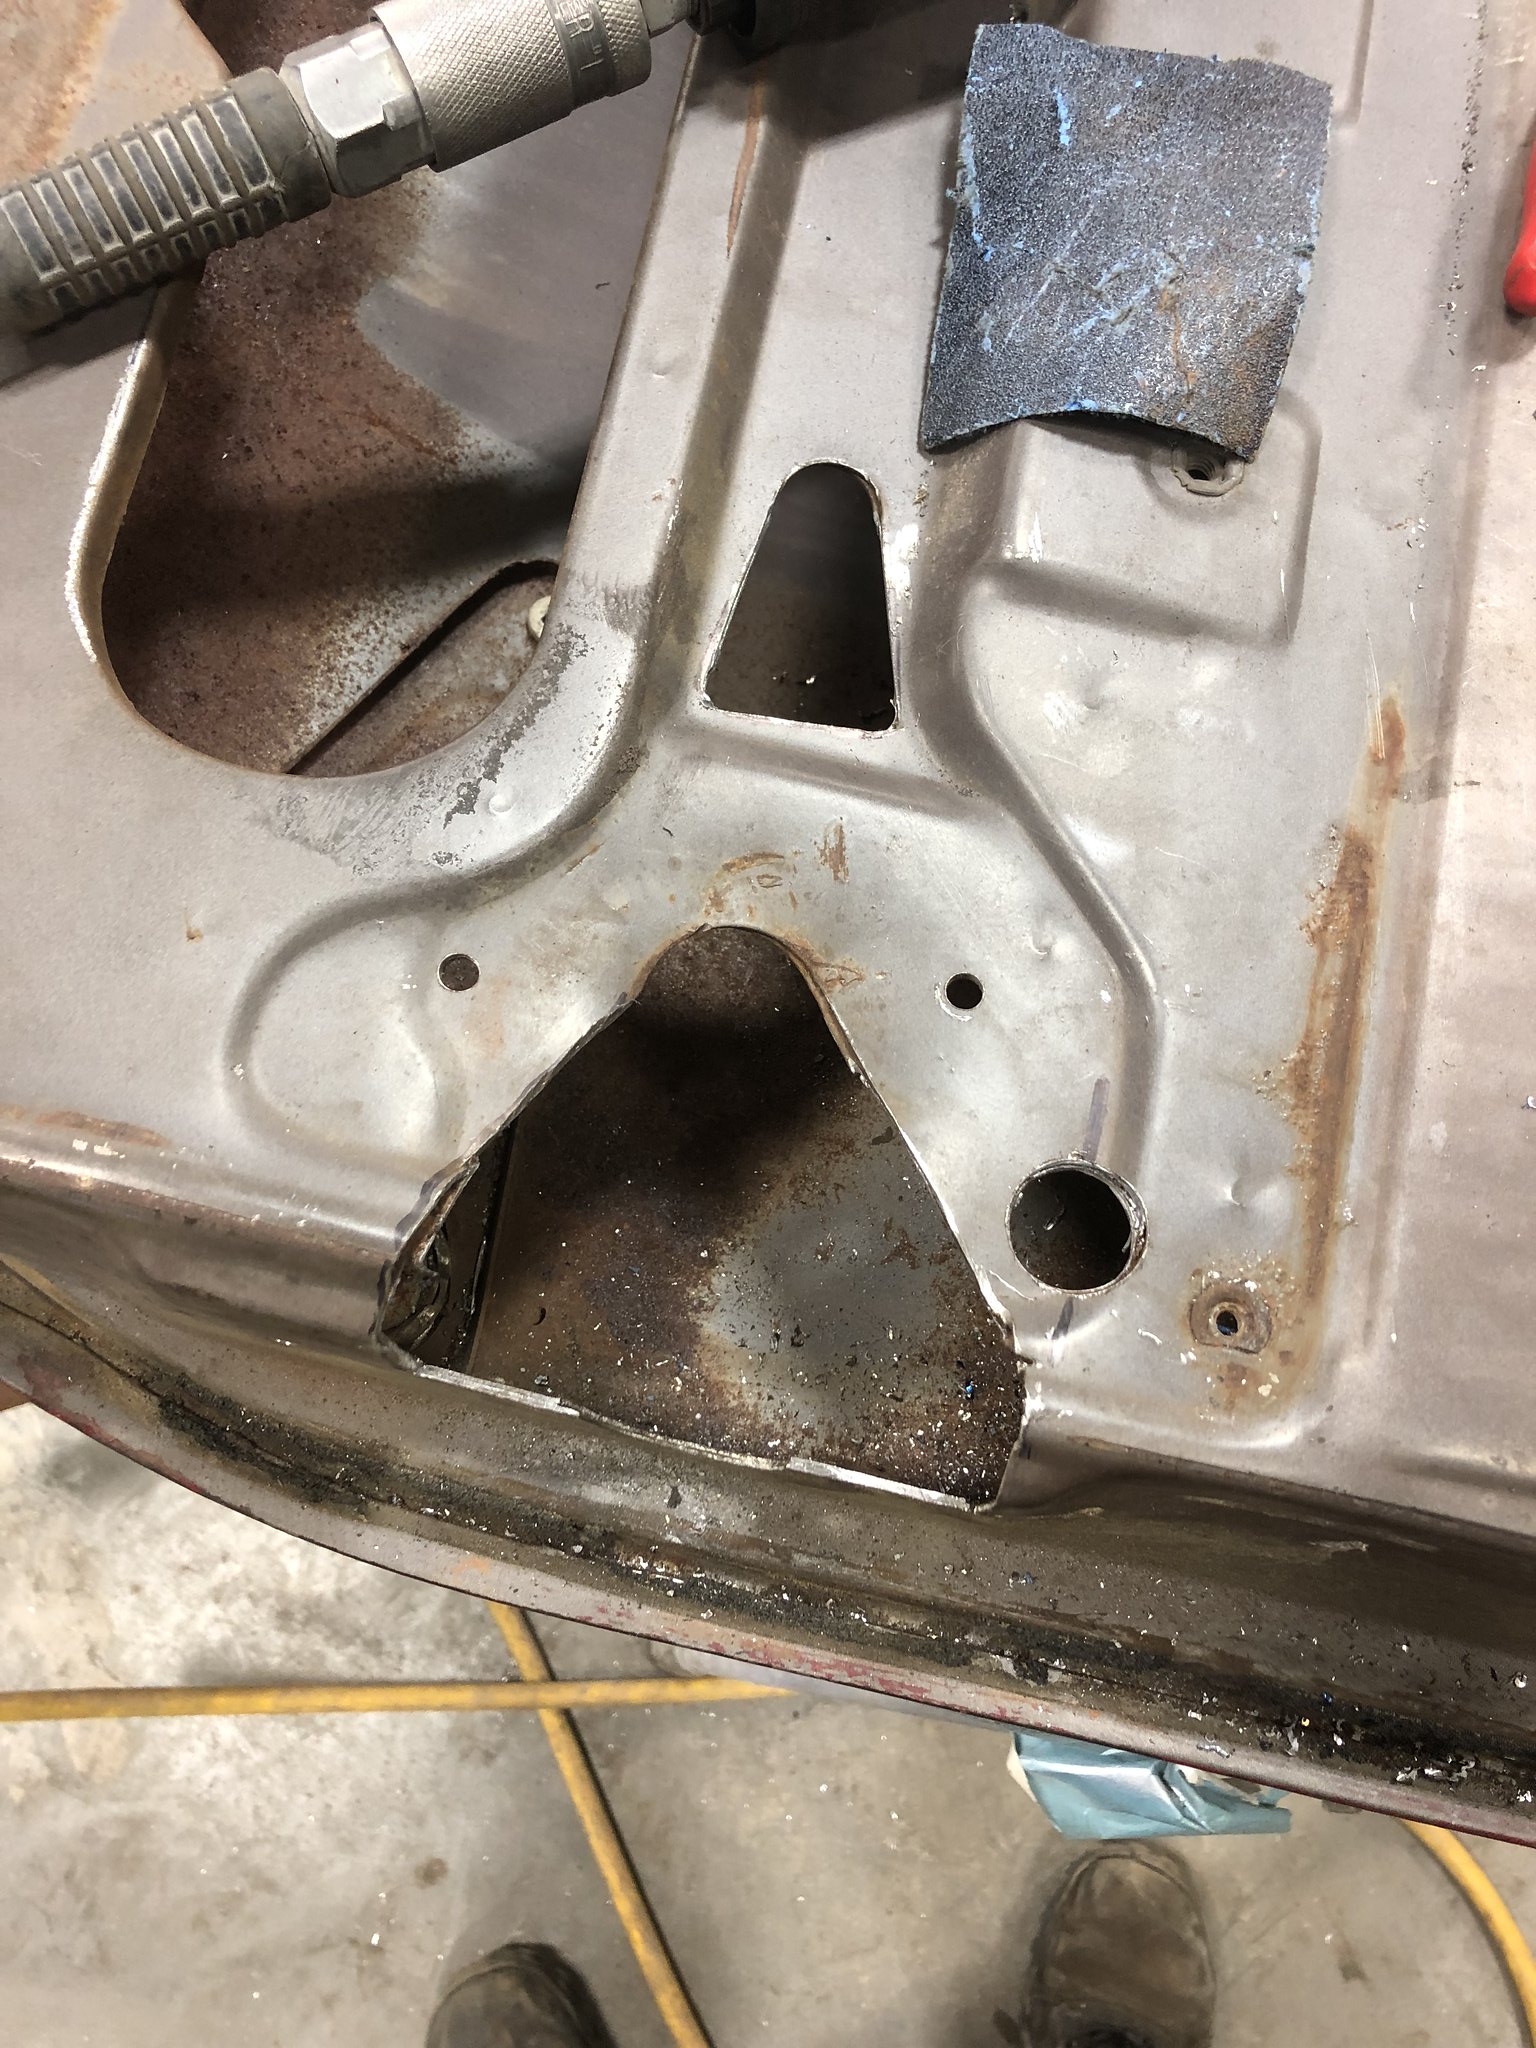 Untitled by Spencer Wiedeman, on Flickr Untitled by Spencer Wiedeman, on Flickr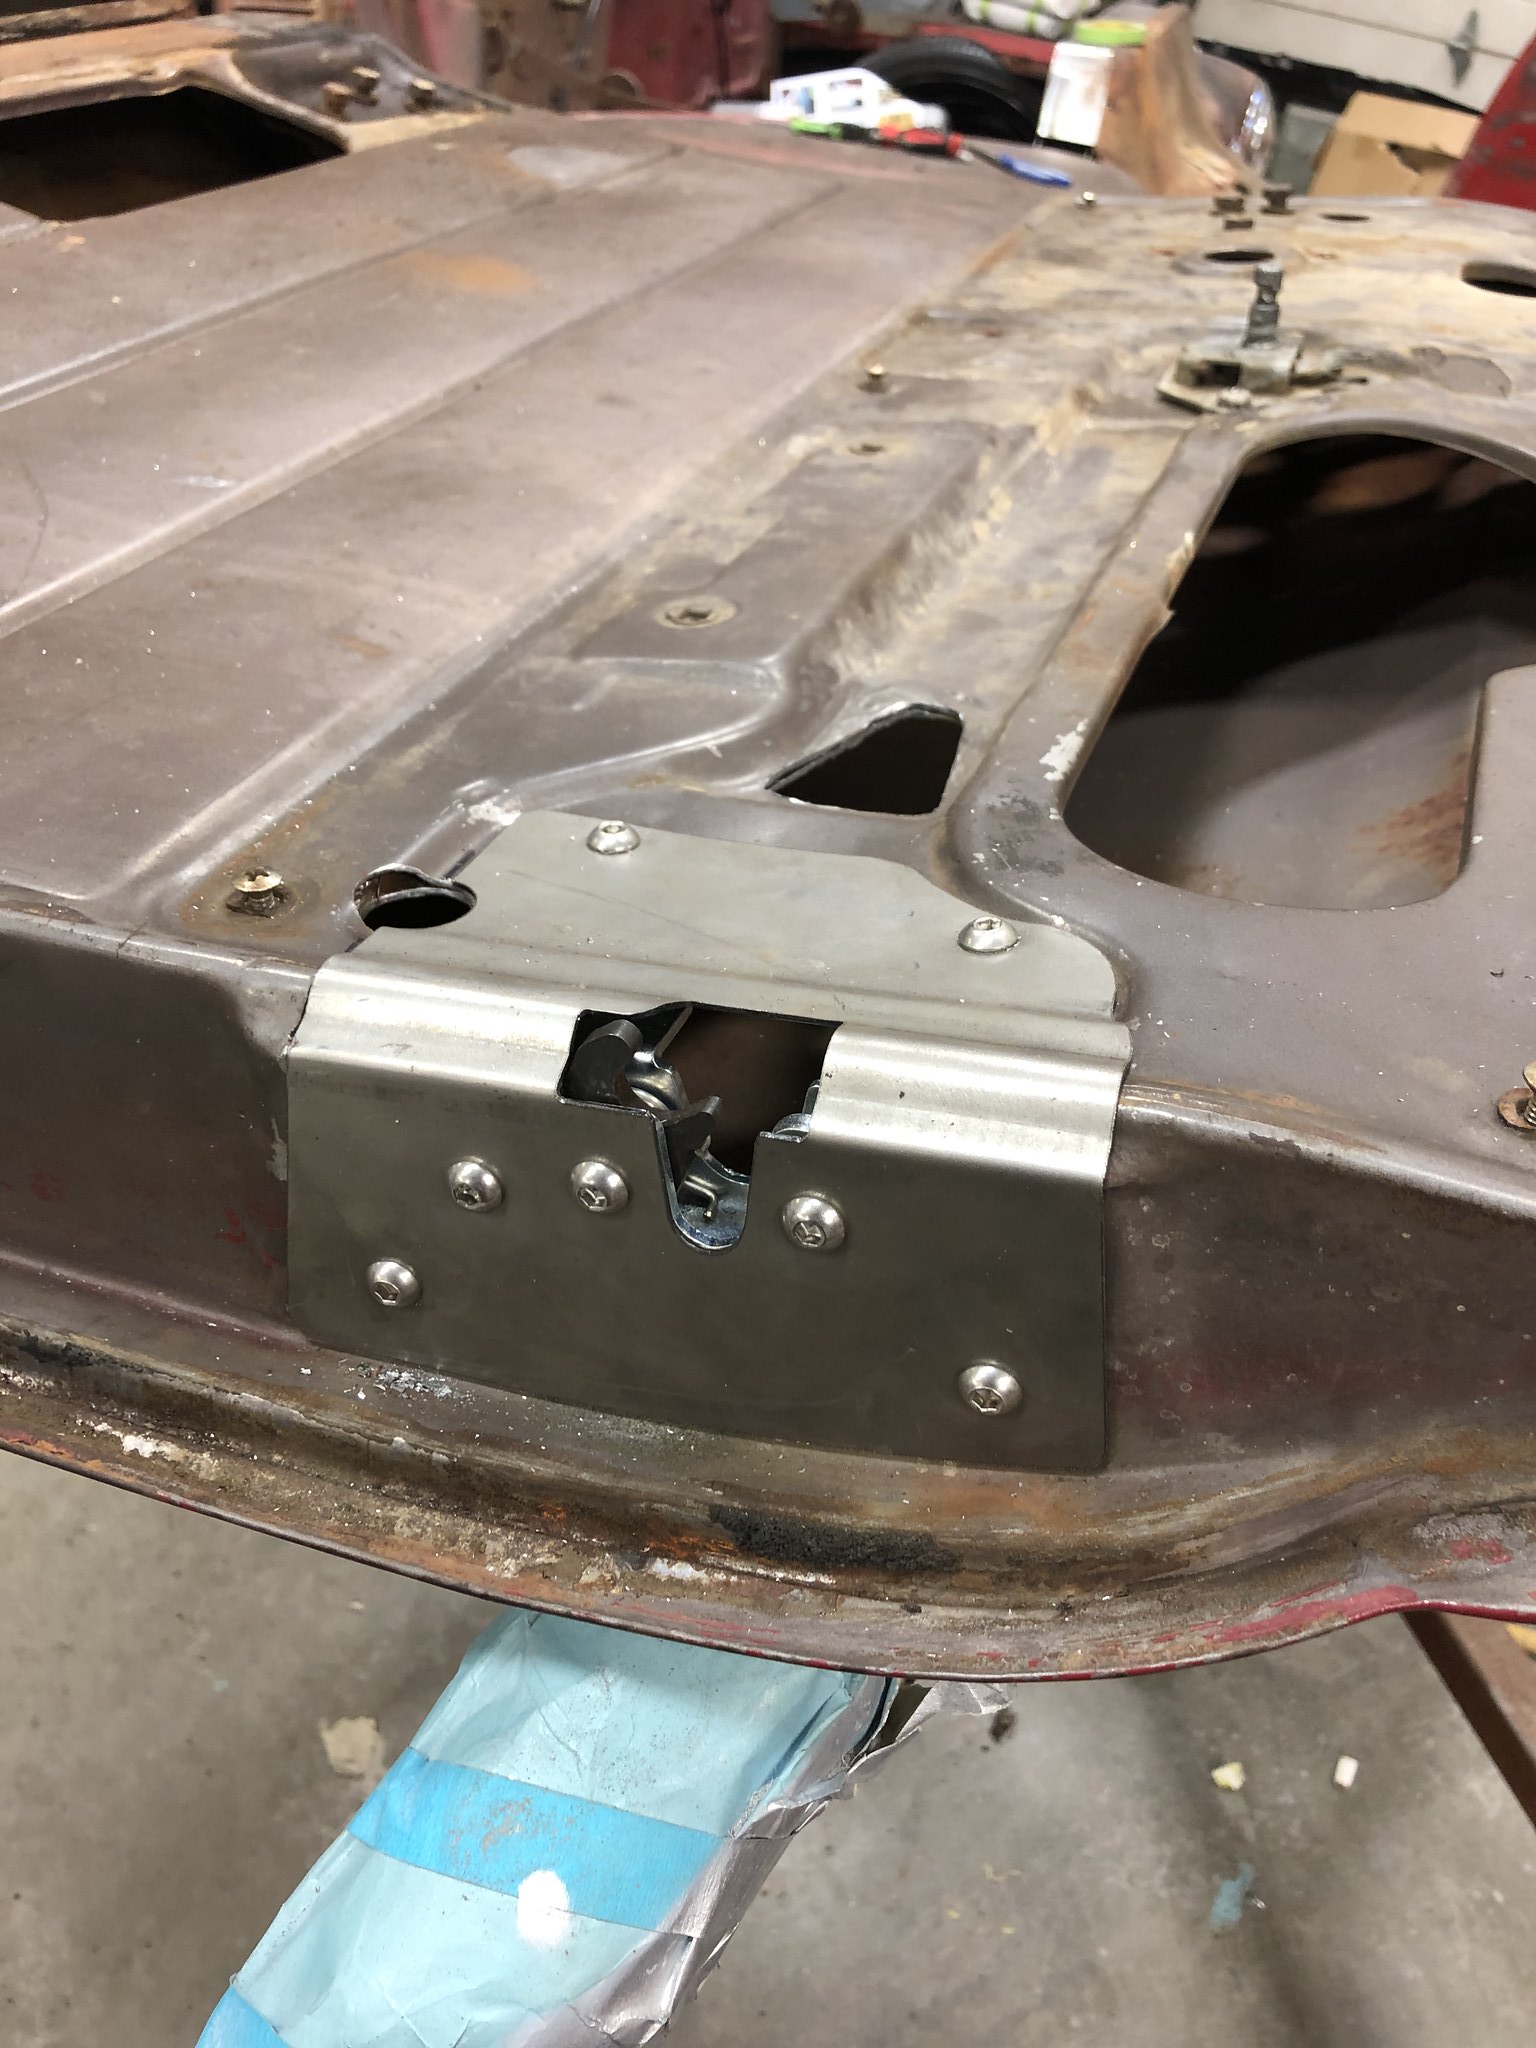 Untitled by Spencer Wiedeman, on Flickr Untitled by Spencer Wiedeman, on FlickrI've heard some guys flip the door relays from side to side and run a modified arm in the factory door groove from the relay to the latch. As is is right now the arm contacts the door through its stroke. I plan to do the same once my new relays arrive. 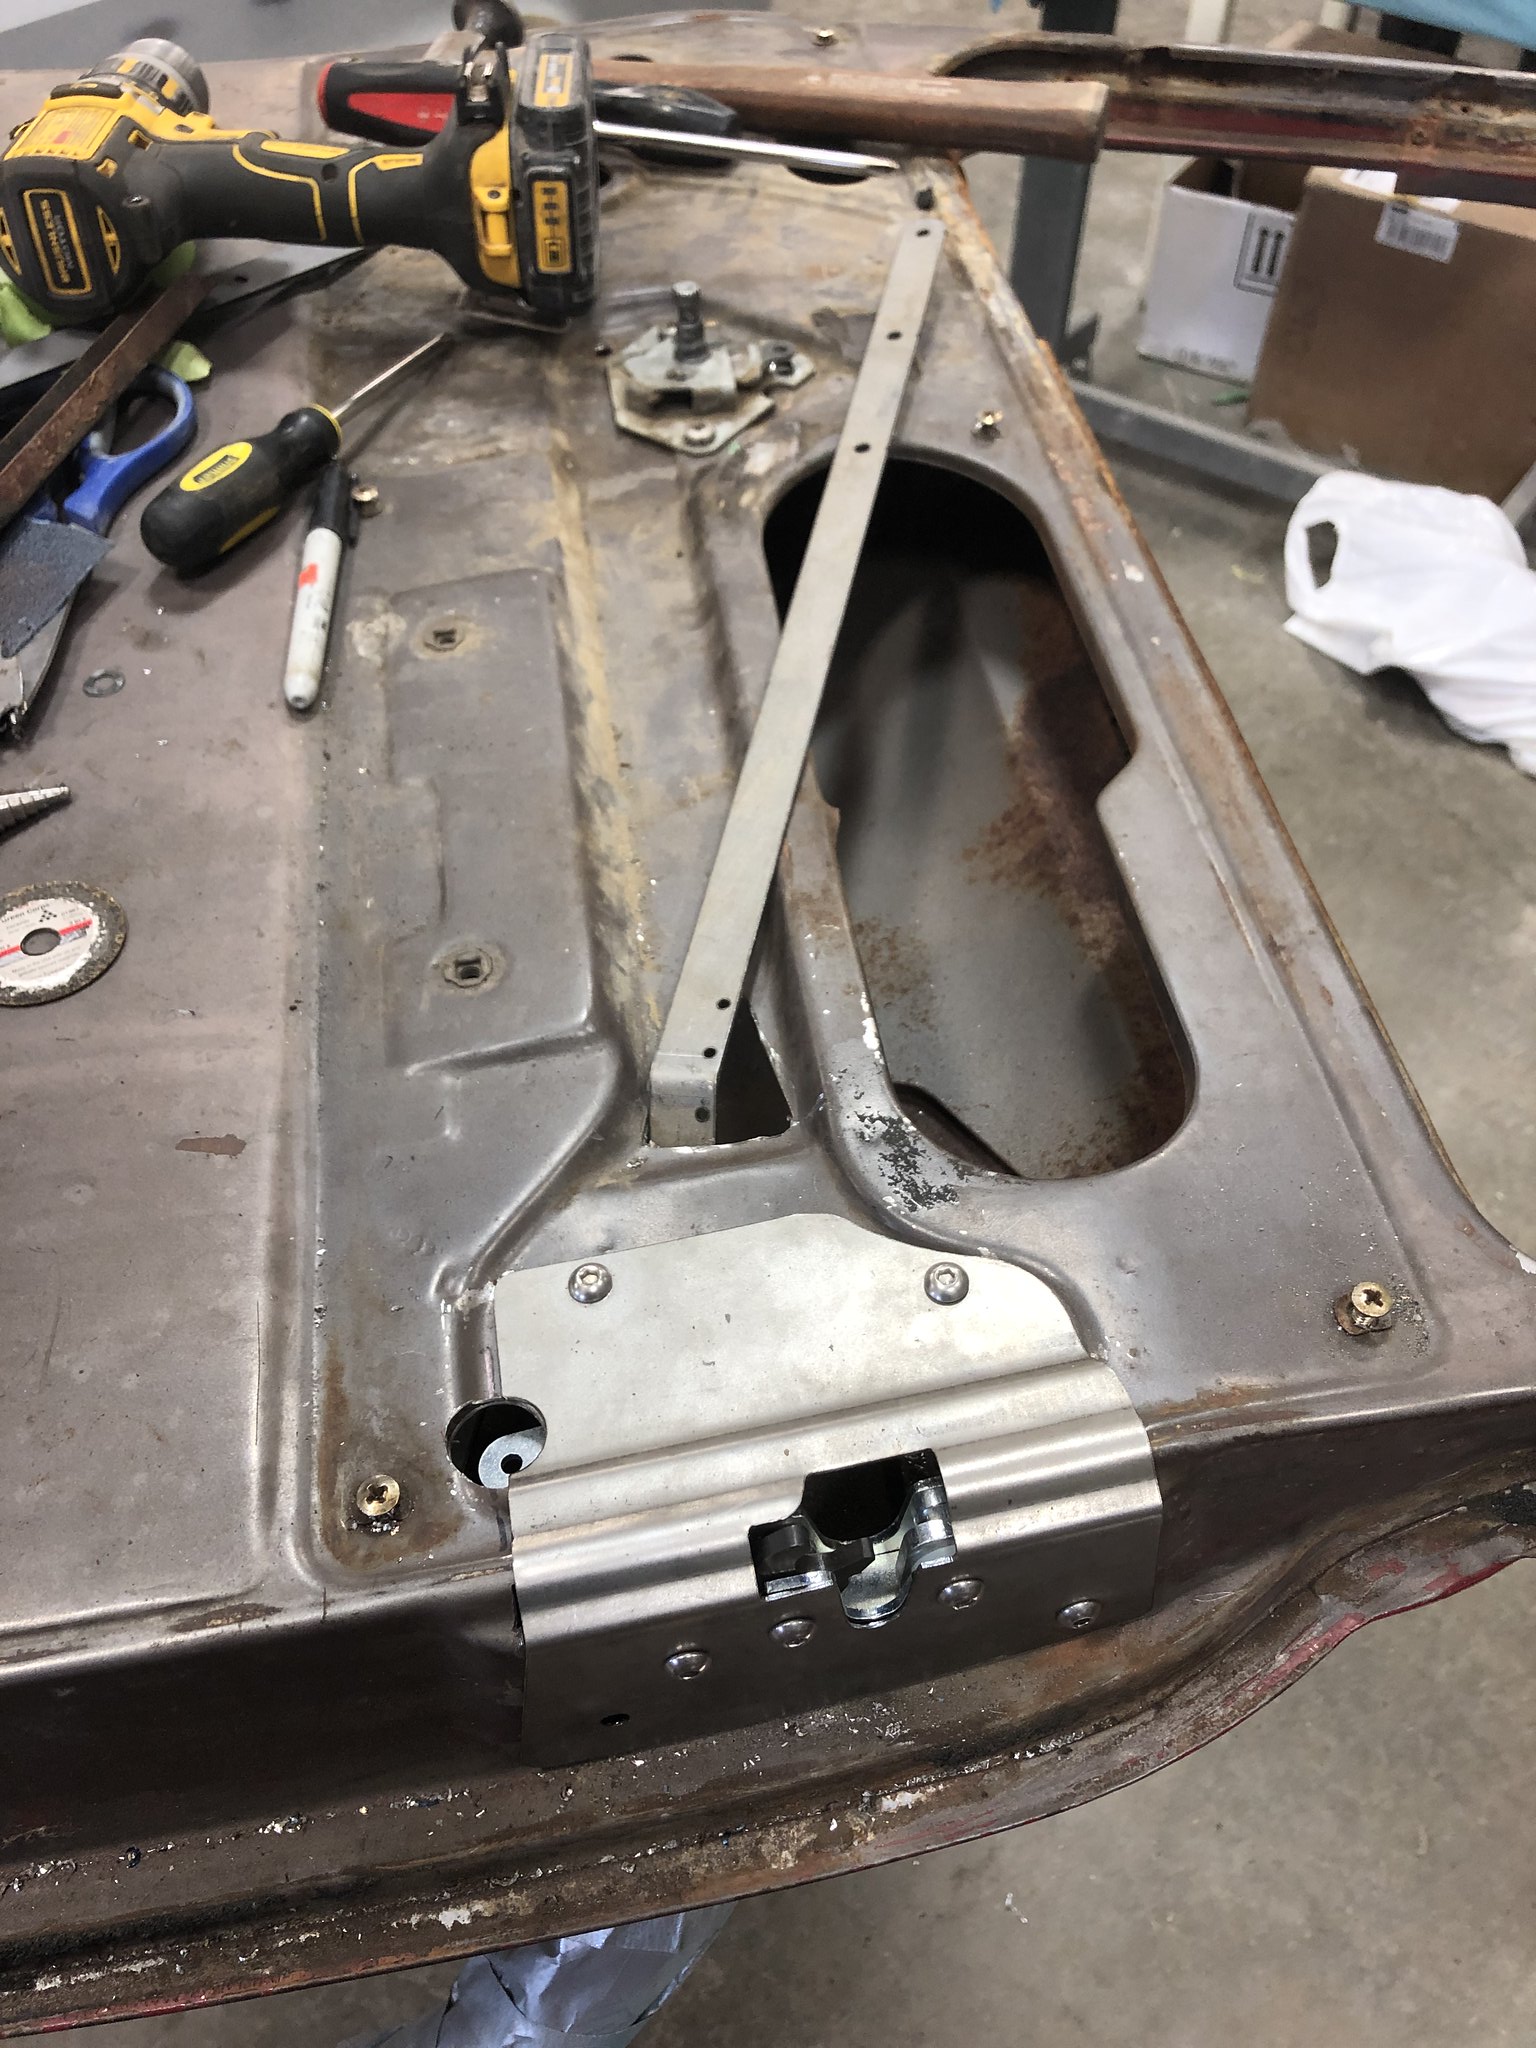 Untitled by Spencer Wiedeman, on Flickr Untitled by Spencer Wiedeman, on FlickrMy valve cover adapters are from GSI Machine and Fabrication. They are a beautifully crafted piece and would recommend them to anyone. The adapter uses the factory LS valve cover gasket on the bottom and a factory gasket for the SBC covers on top 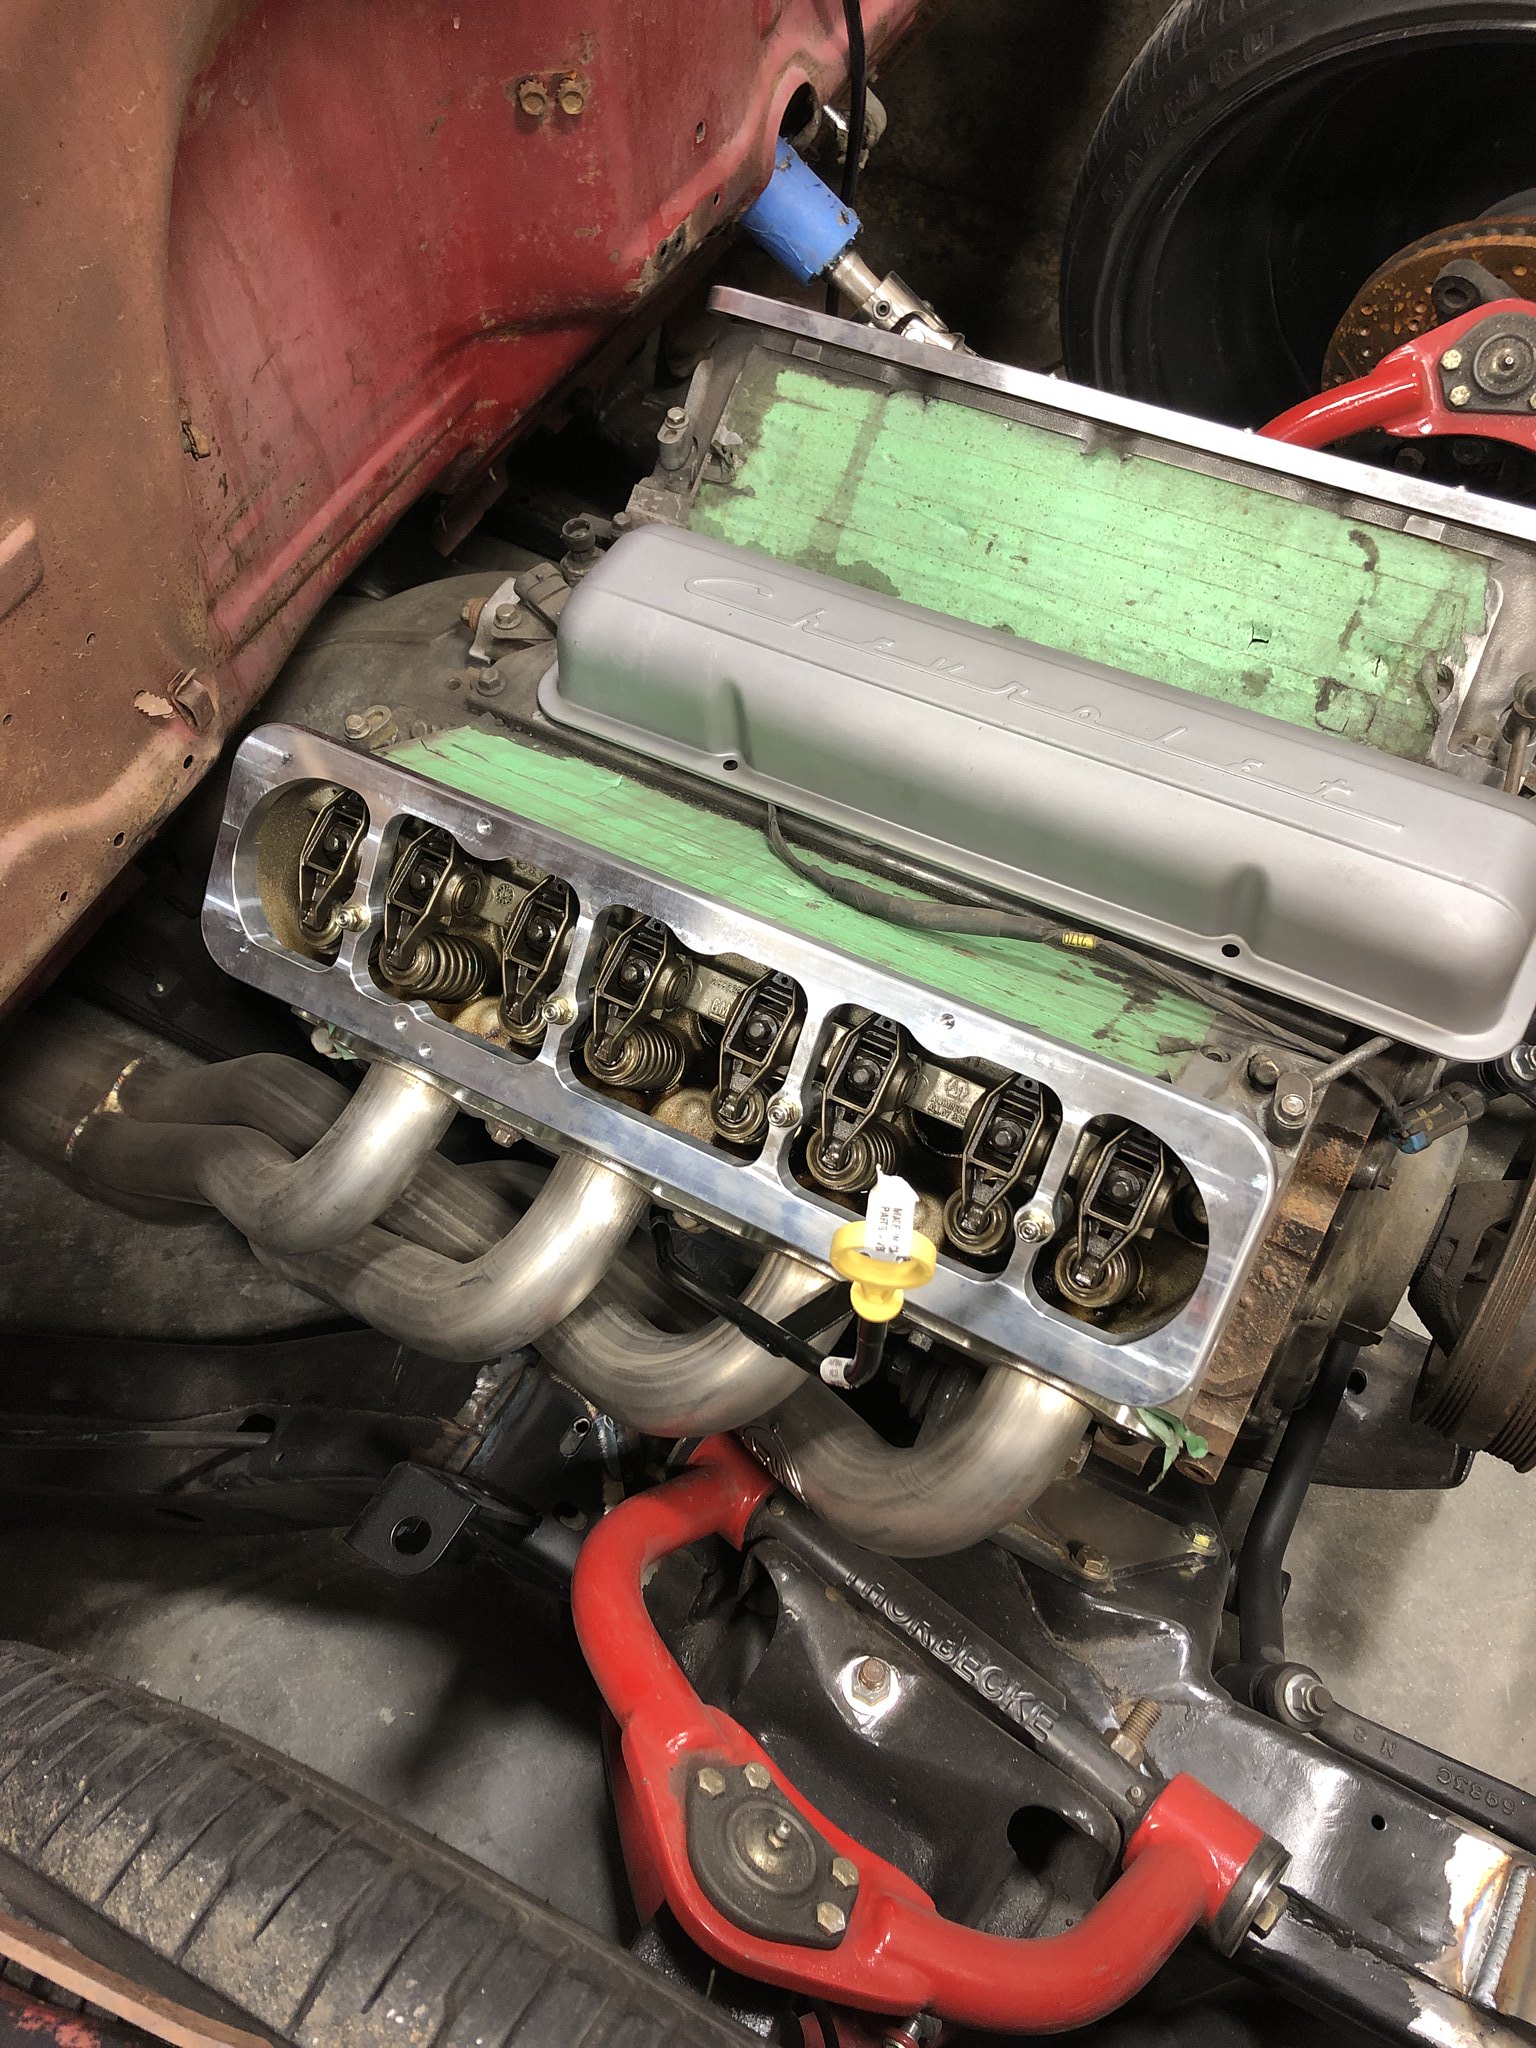 Untitled by Spencer Wiedeman, on Flickr Untitled by Spencer Wiedeman, on Flickr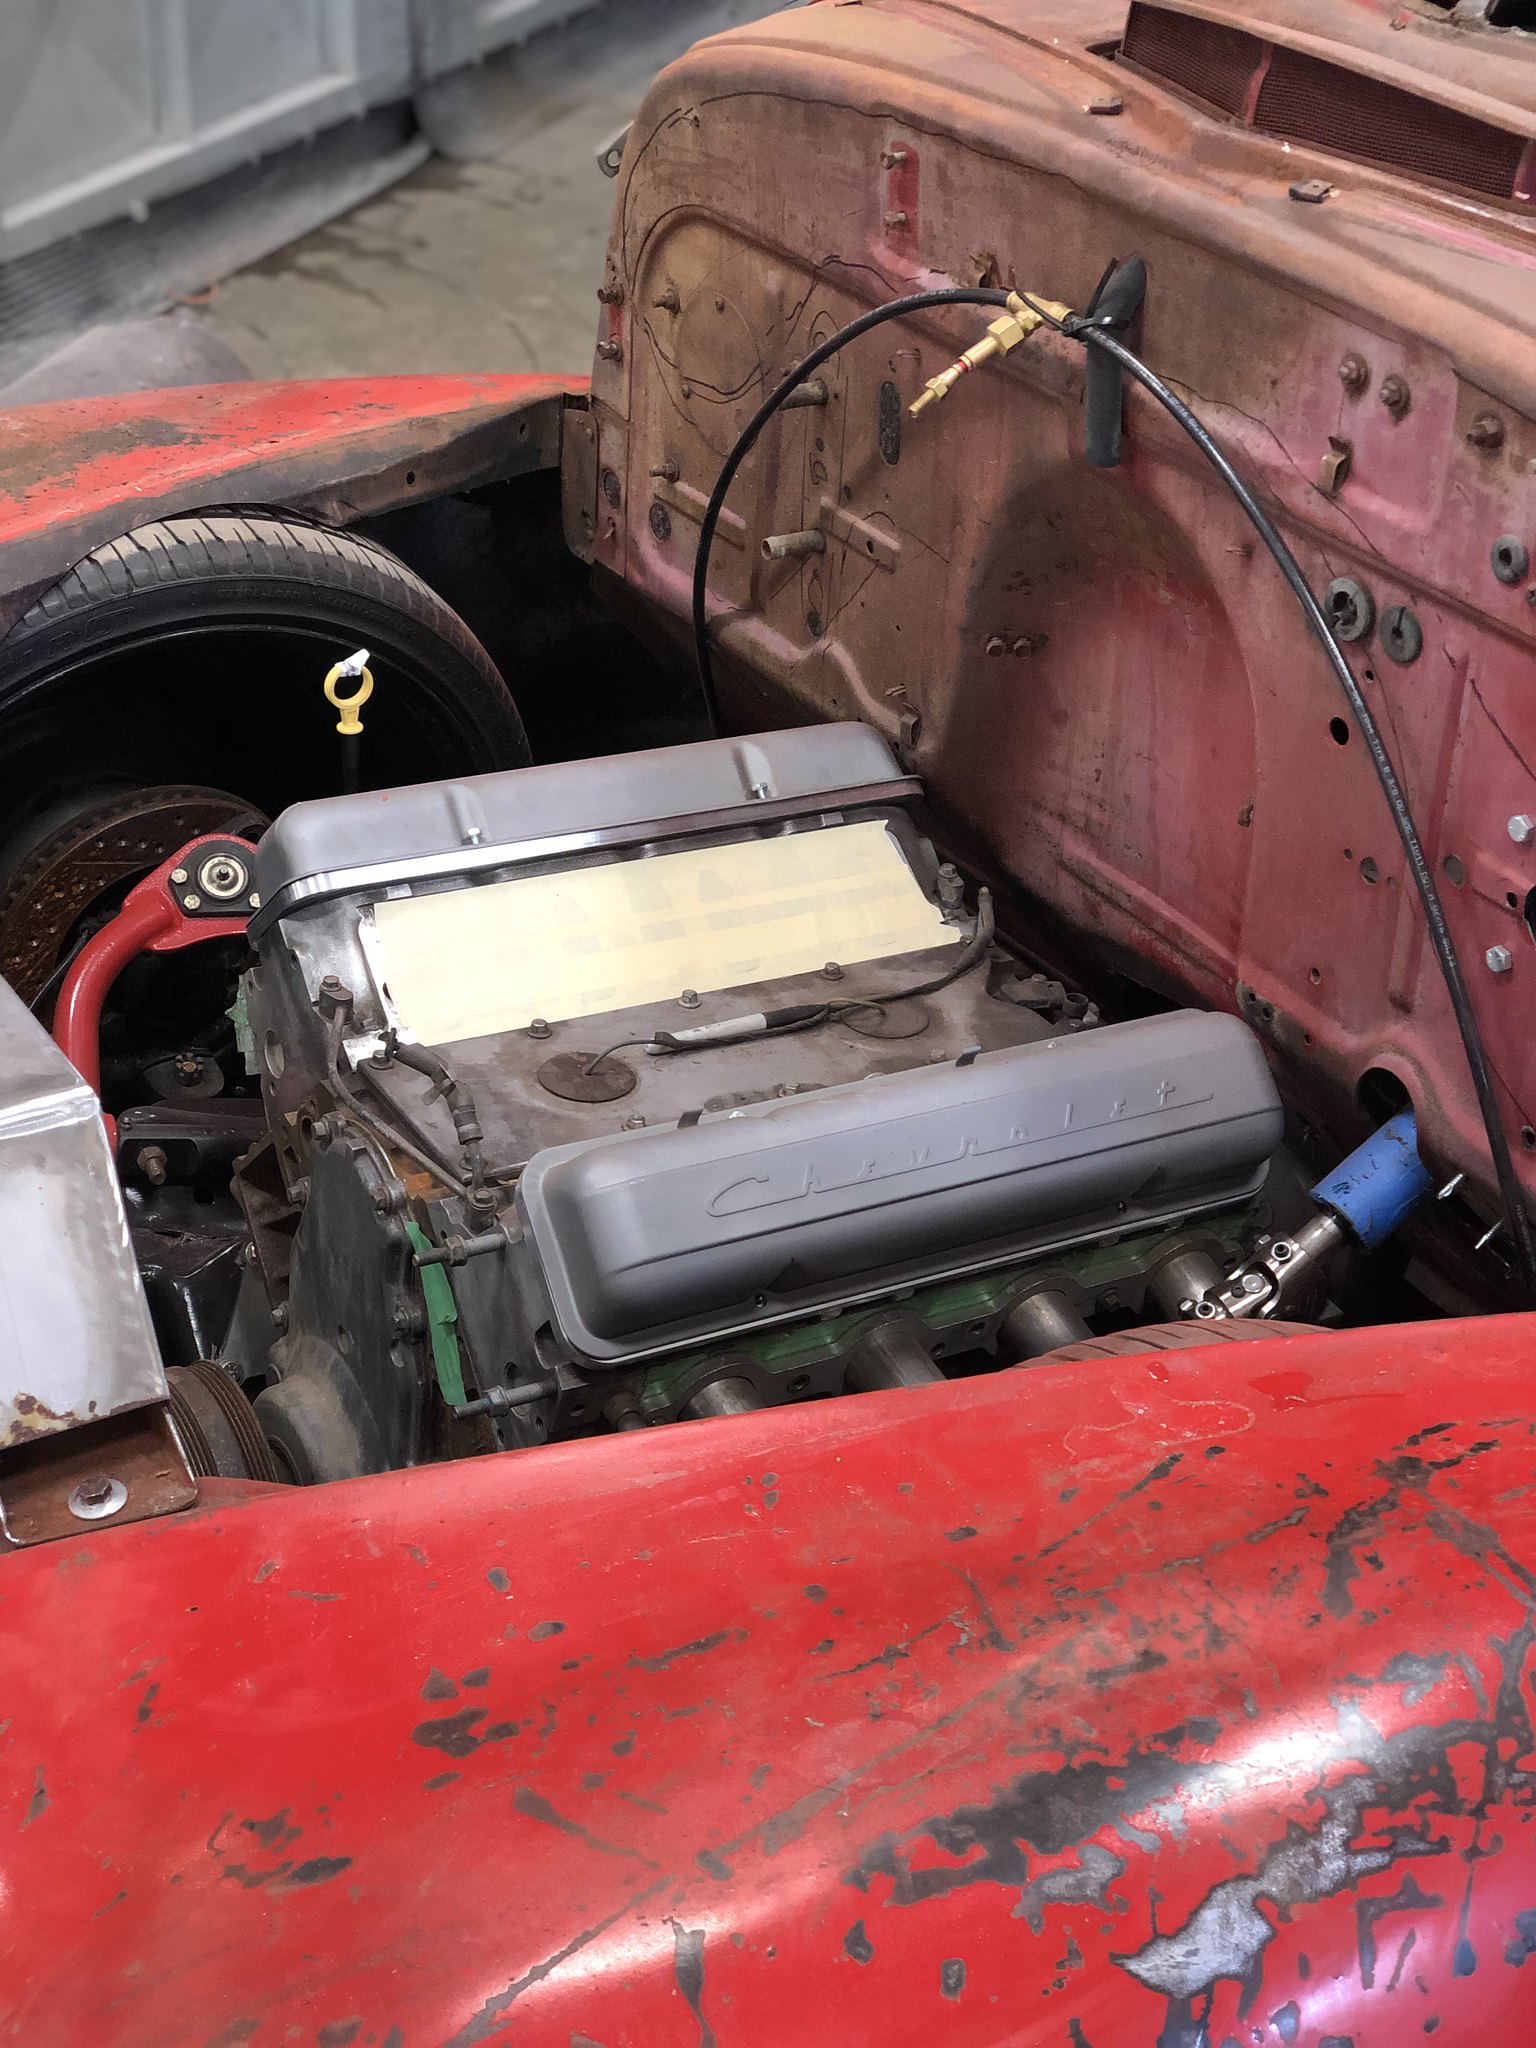 Untitled by Spencer Wiedeman, on Flickr Untitled by Spencer Wiedeman, on FlickrI didn't have any SBC gaskets so the valve covers are just sitting on there with a couple bolts 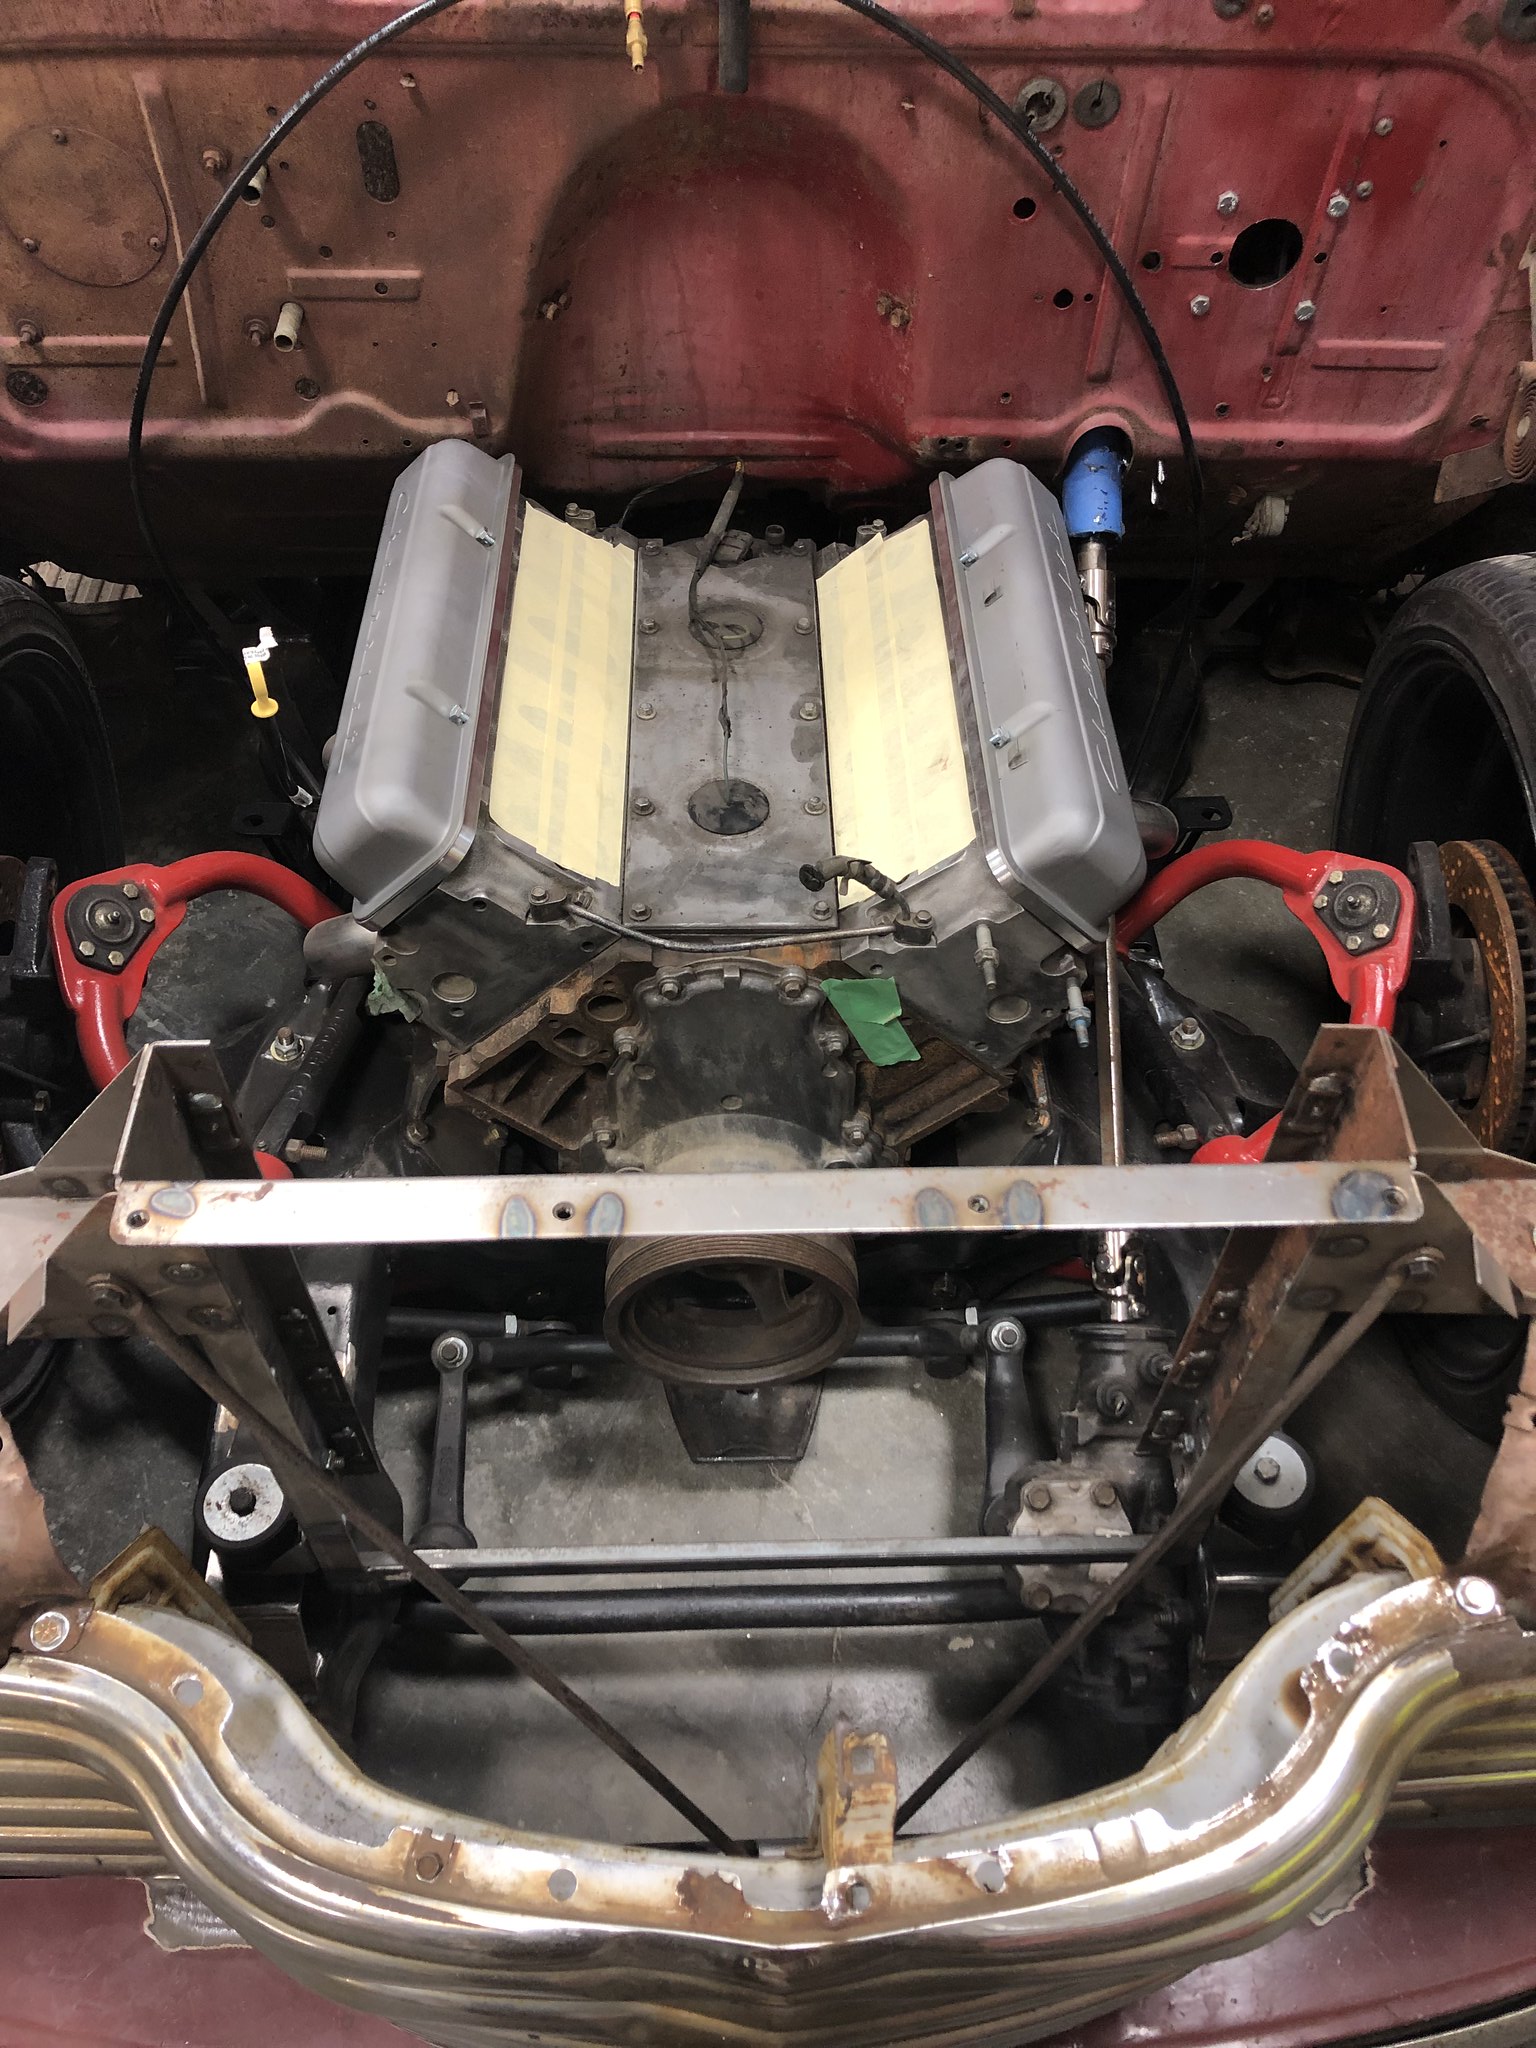 Untitled by Spencer Wiedeman, on Flickr Untitled by Spencer Wiedeman, on Flickr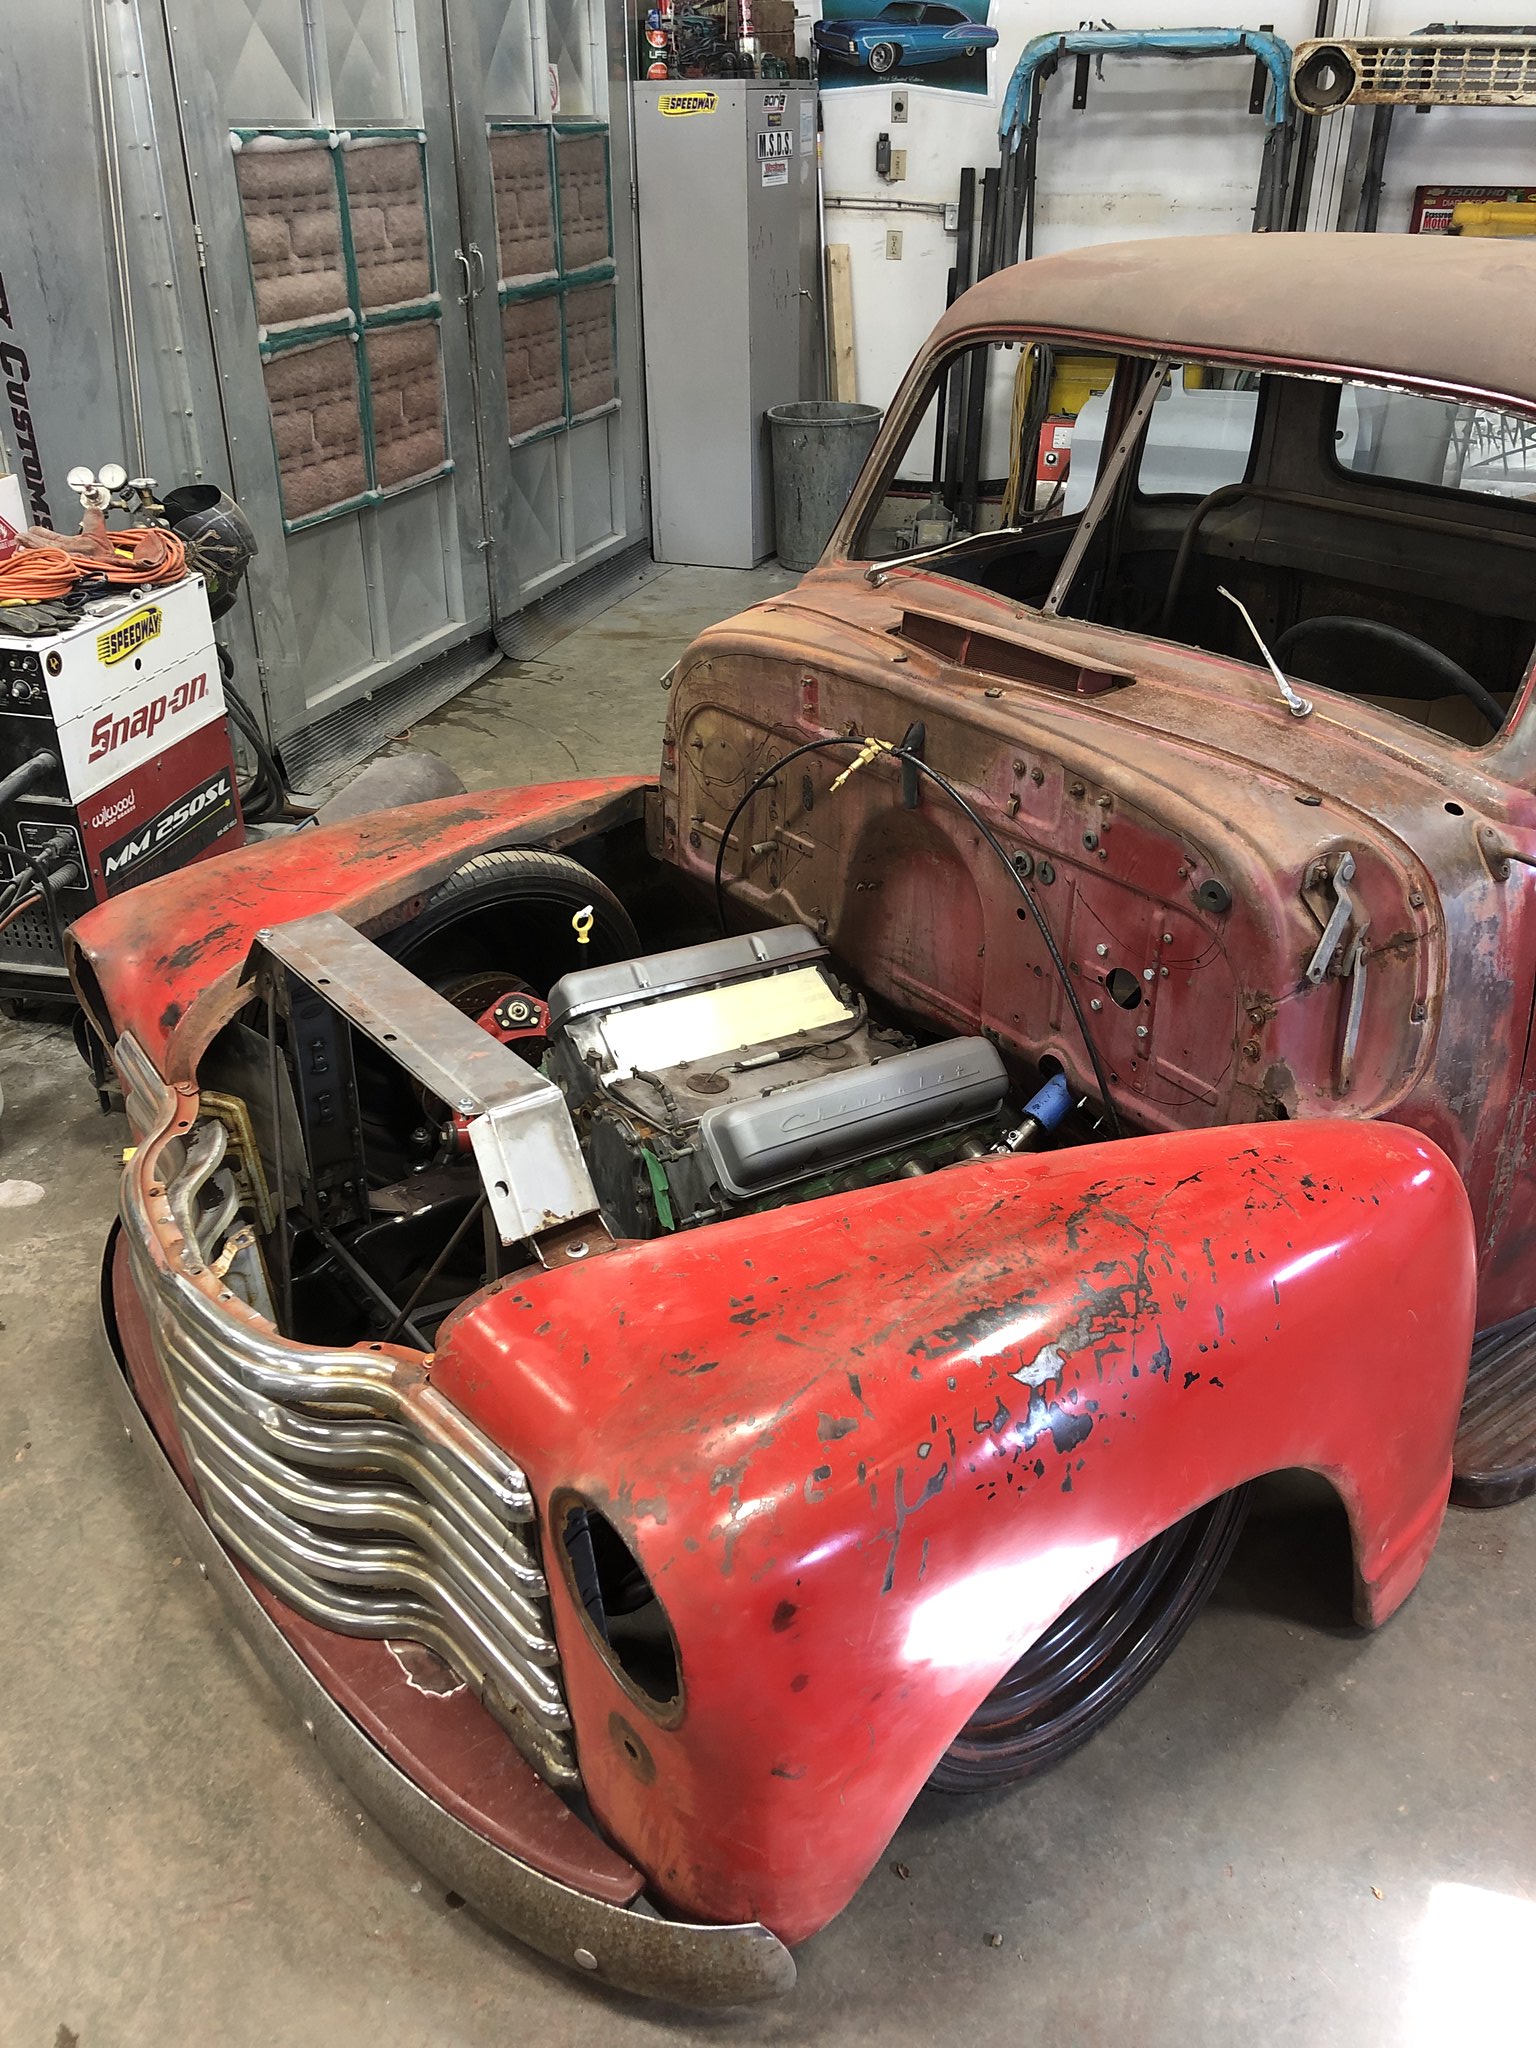 Untitled by Spencer Wiedeman, on Flickr Untitled by Spencer Wiedeman, on Flickr
|
|
|

|
|
|
#21 |
|
Registered User
Join Date: Mar 2013
Location: Edmonton, AB
Posts: 298
|
Re: Project: Patina (1949 Chevrolet 1434)
The only issue I've run into this far is fitting my radiator. I bought a Champion 4 core rad with shroud and fan. With my current set up it's way too tall and contacts my steering box. I really want to hide the rad beneath this sheetmetal panel from *****in sheetmetal to keep the engine bay looking clean.
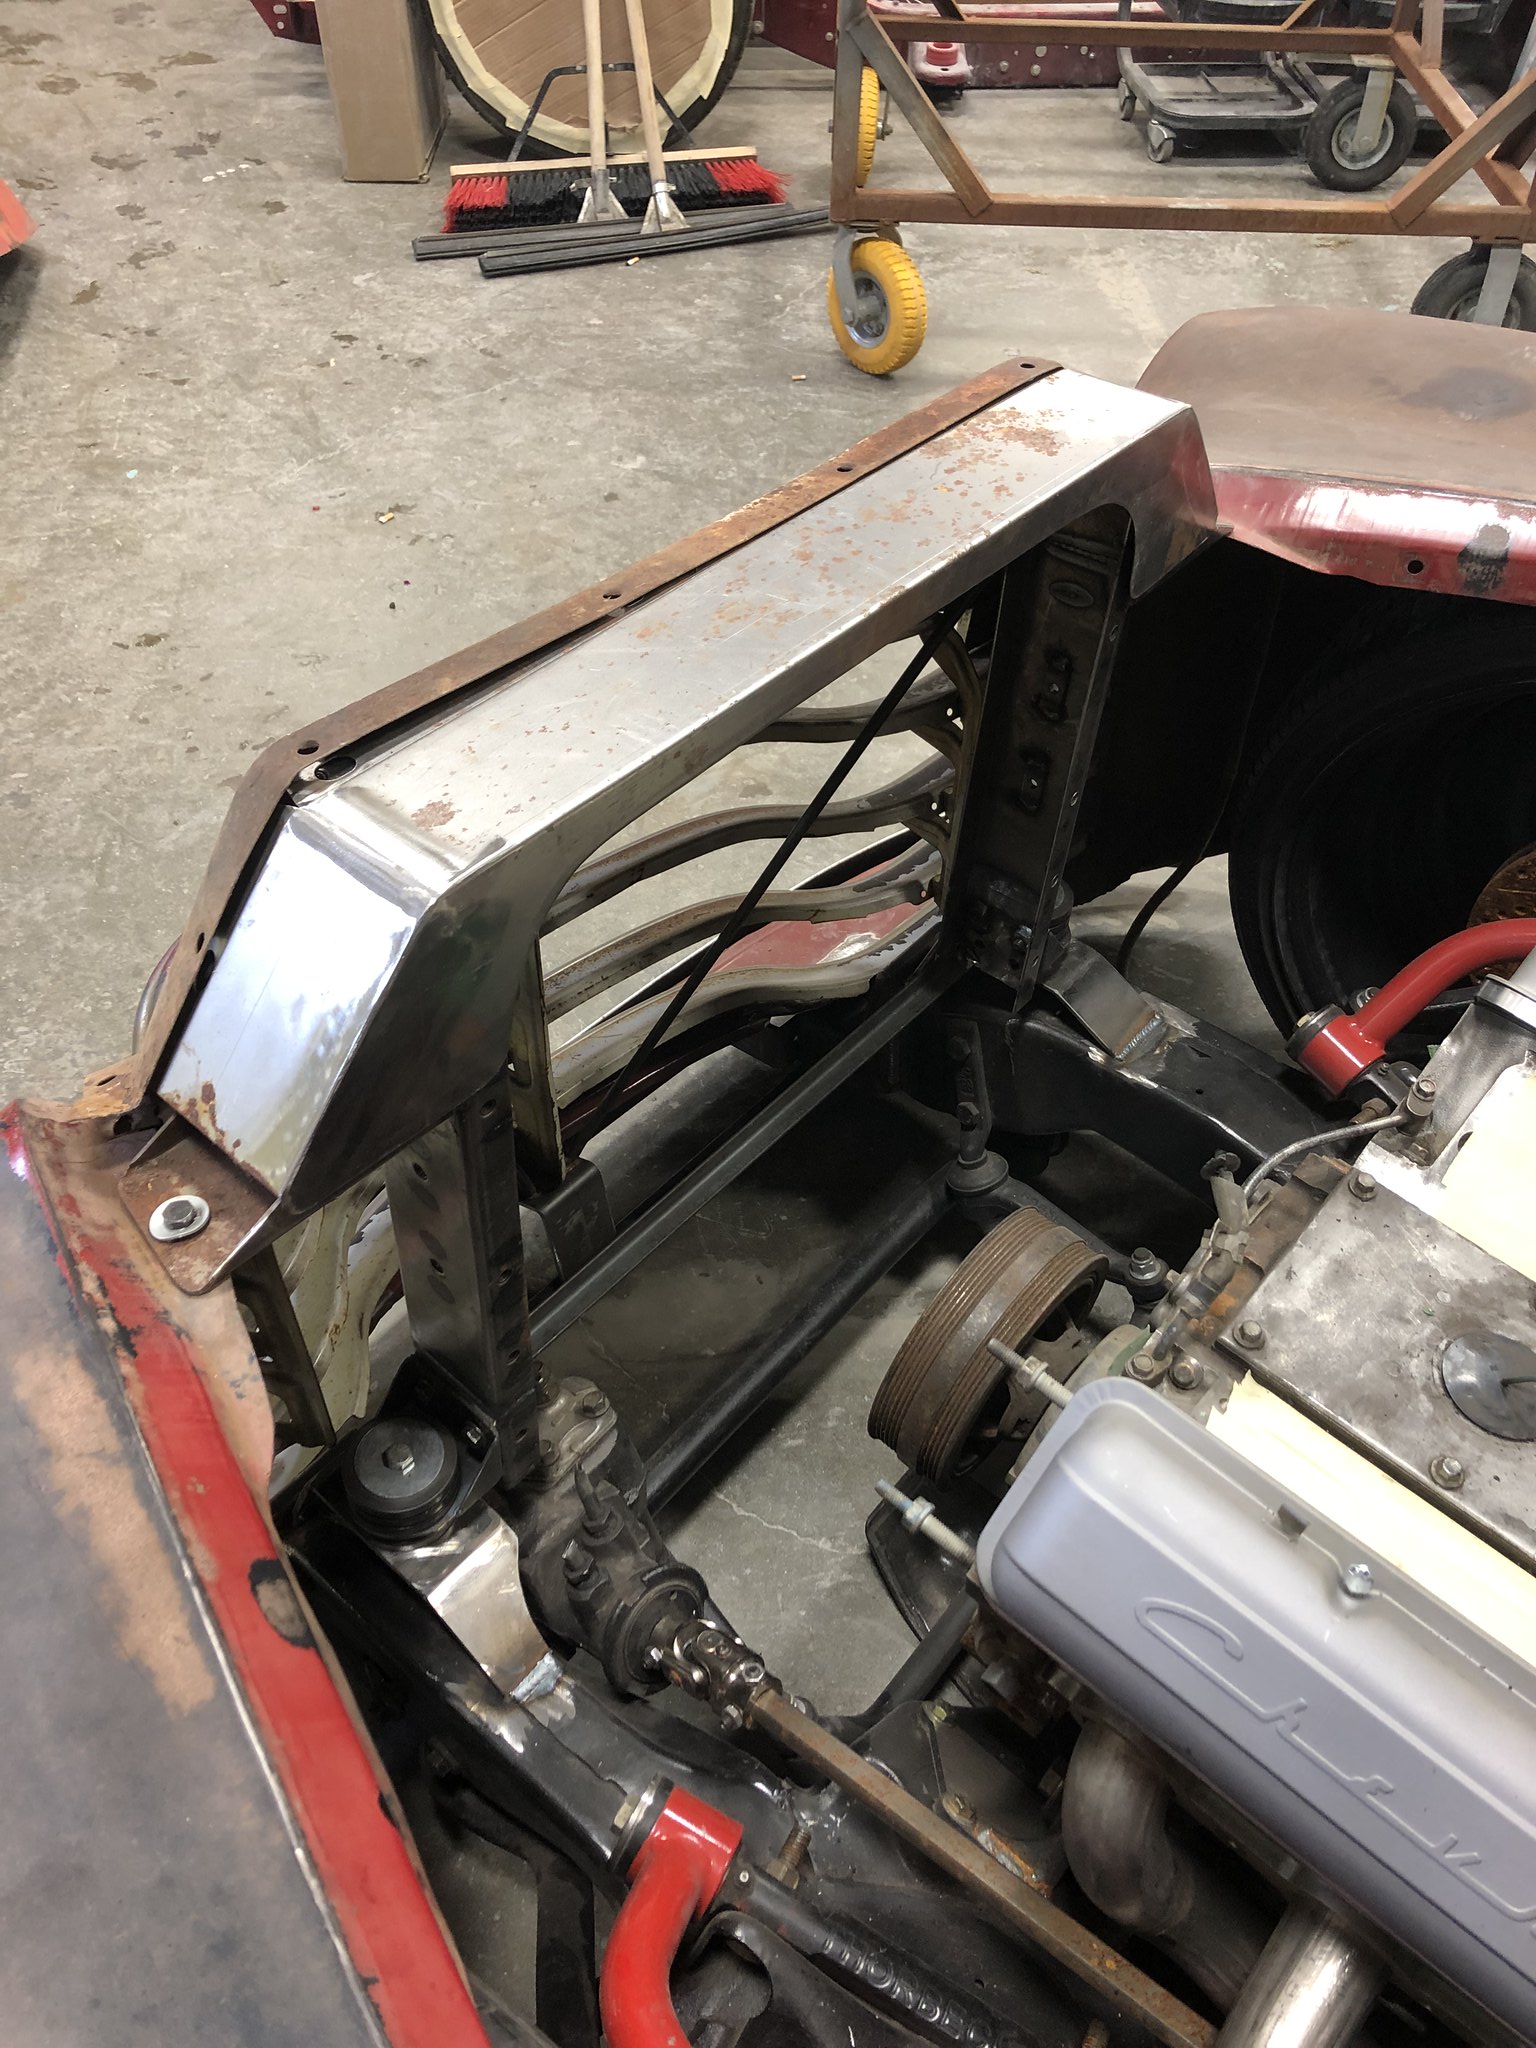 Untitled by Spencer Wiedeman, on Flickr Untitled by Spencer Wiedeman, on FlickrAs you can see theres not much room unless I cut the bottom out of the core support and severely angle it towards the bumper to gain clearance. 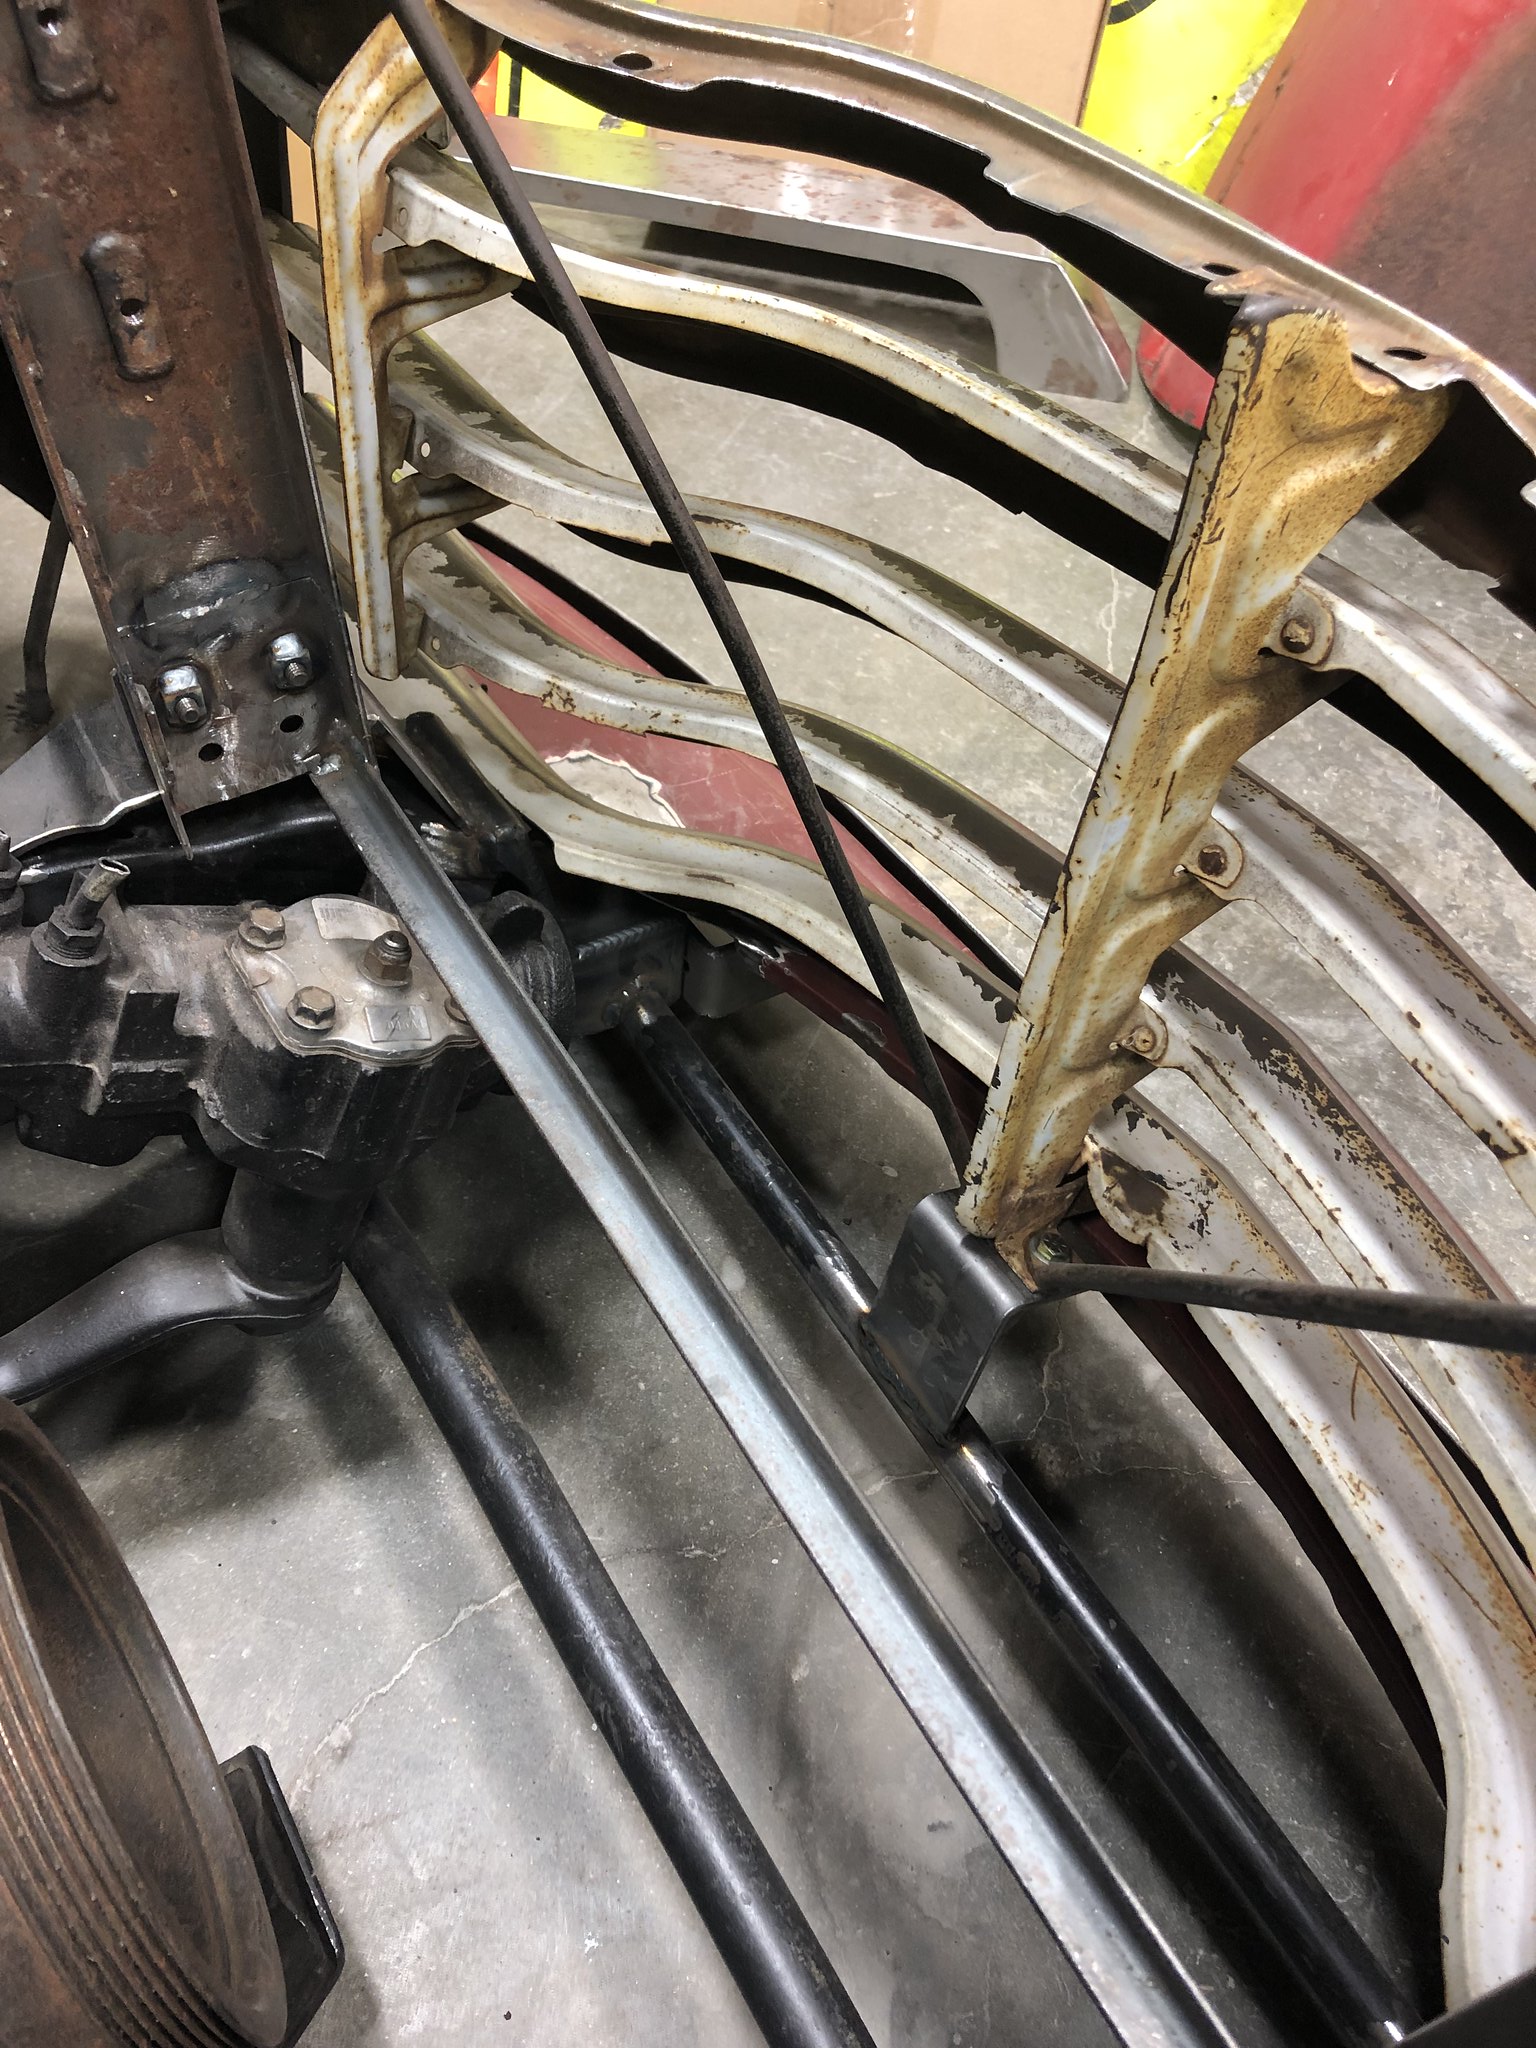 Untitled by Spencer Wiedeman, on Flickr Untitled by Spencer Wiedeman, on FlickrHere are a bunch of random photos to give you all a better look  Untitled by Spencer Wiedeman, on Flickr Untitled by Spencer Wiedeman, on FlickrThe cab will be getting these new floor and toe boards shortly 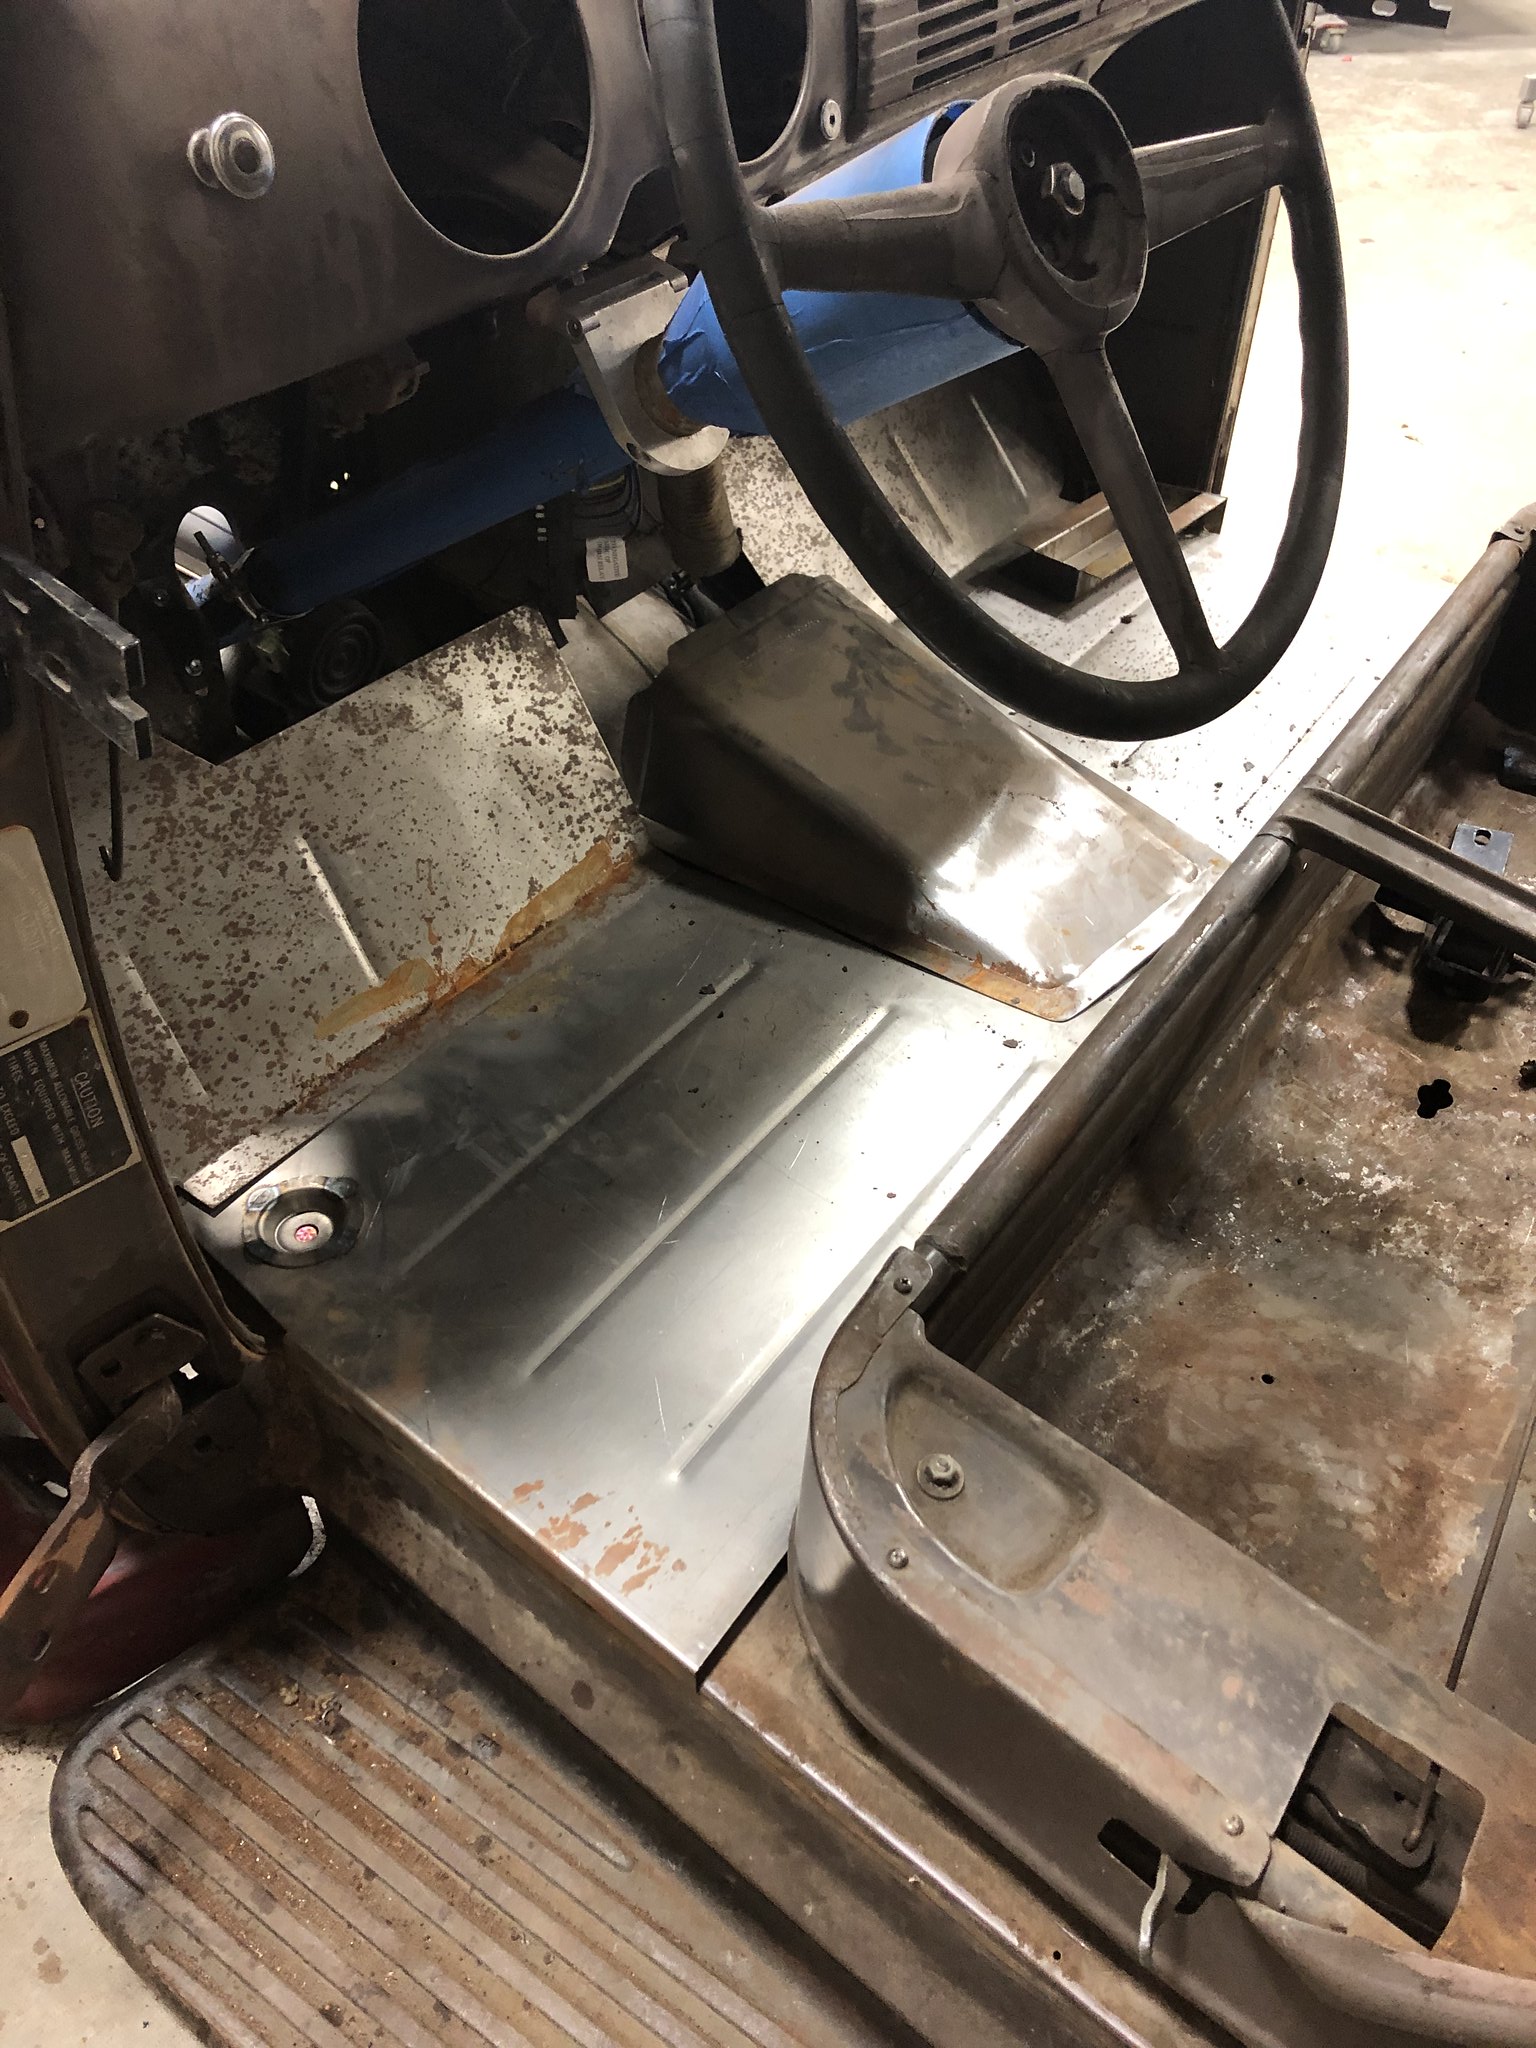 Untitled by Spencer Wiedeman, on Flickr Untitled by Spencer Wiedeman, on FlickrFrame pics 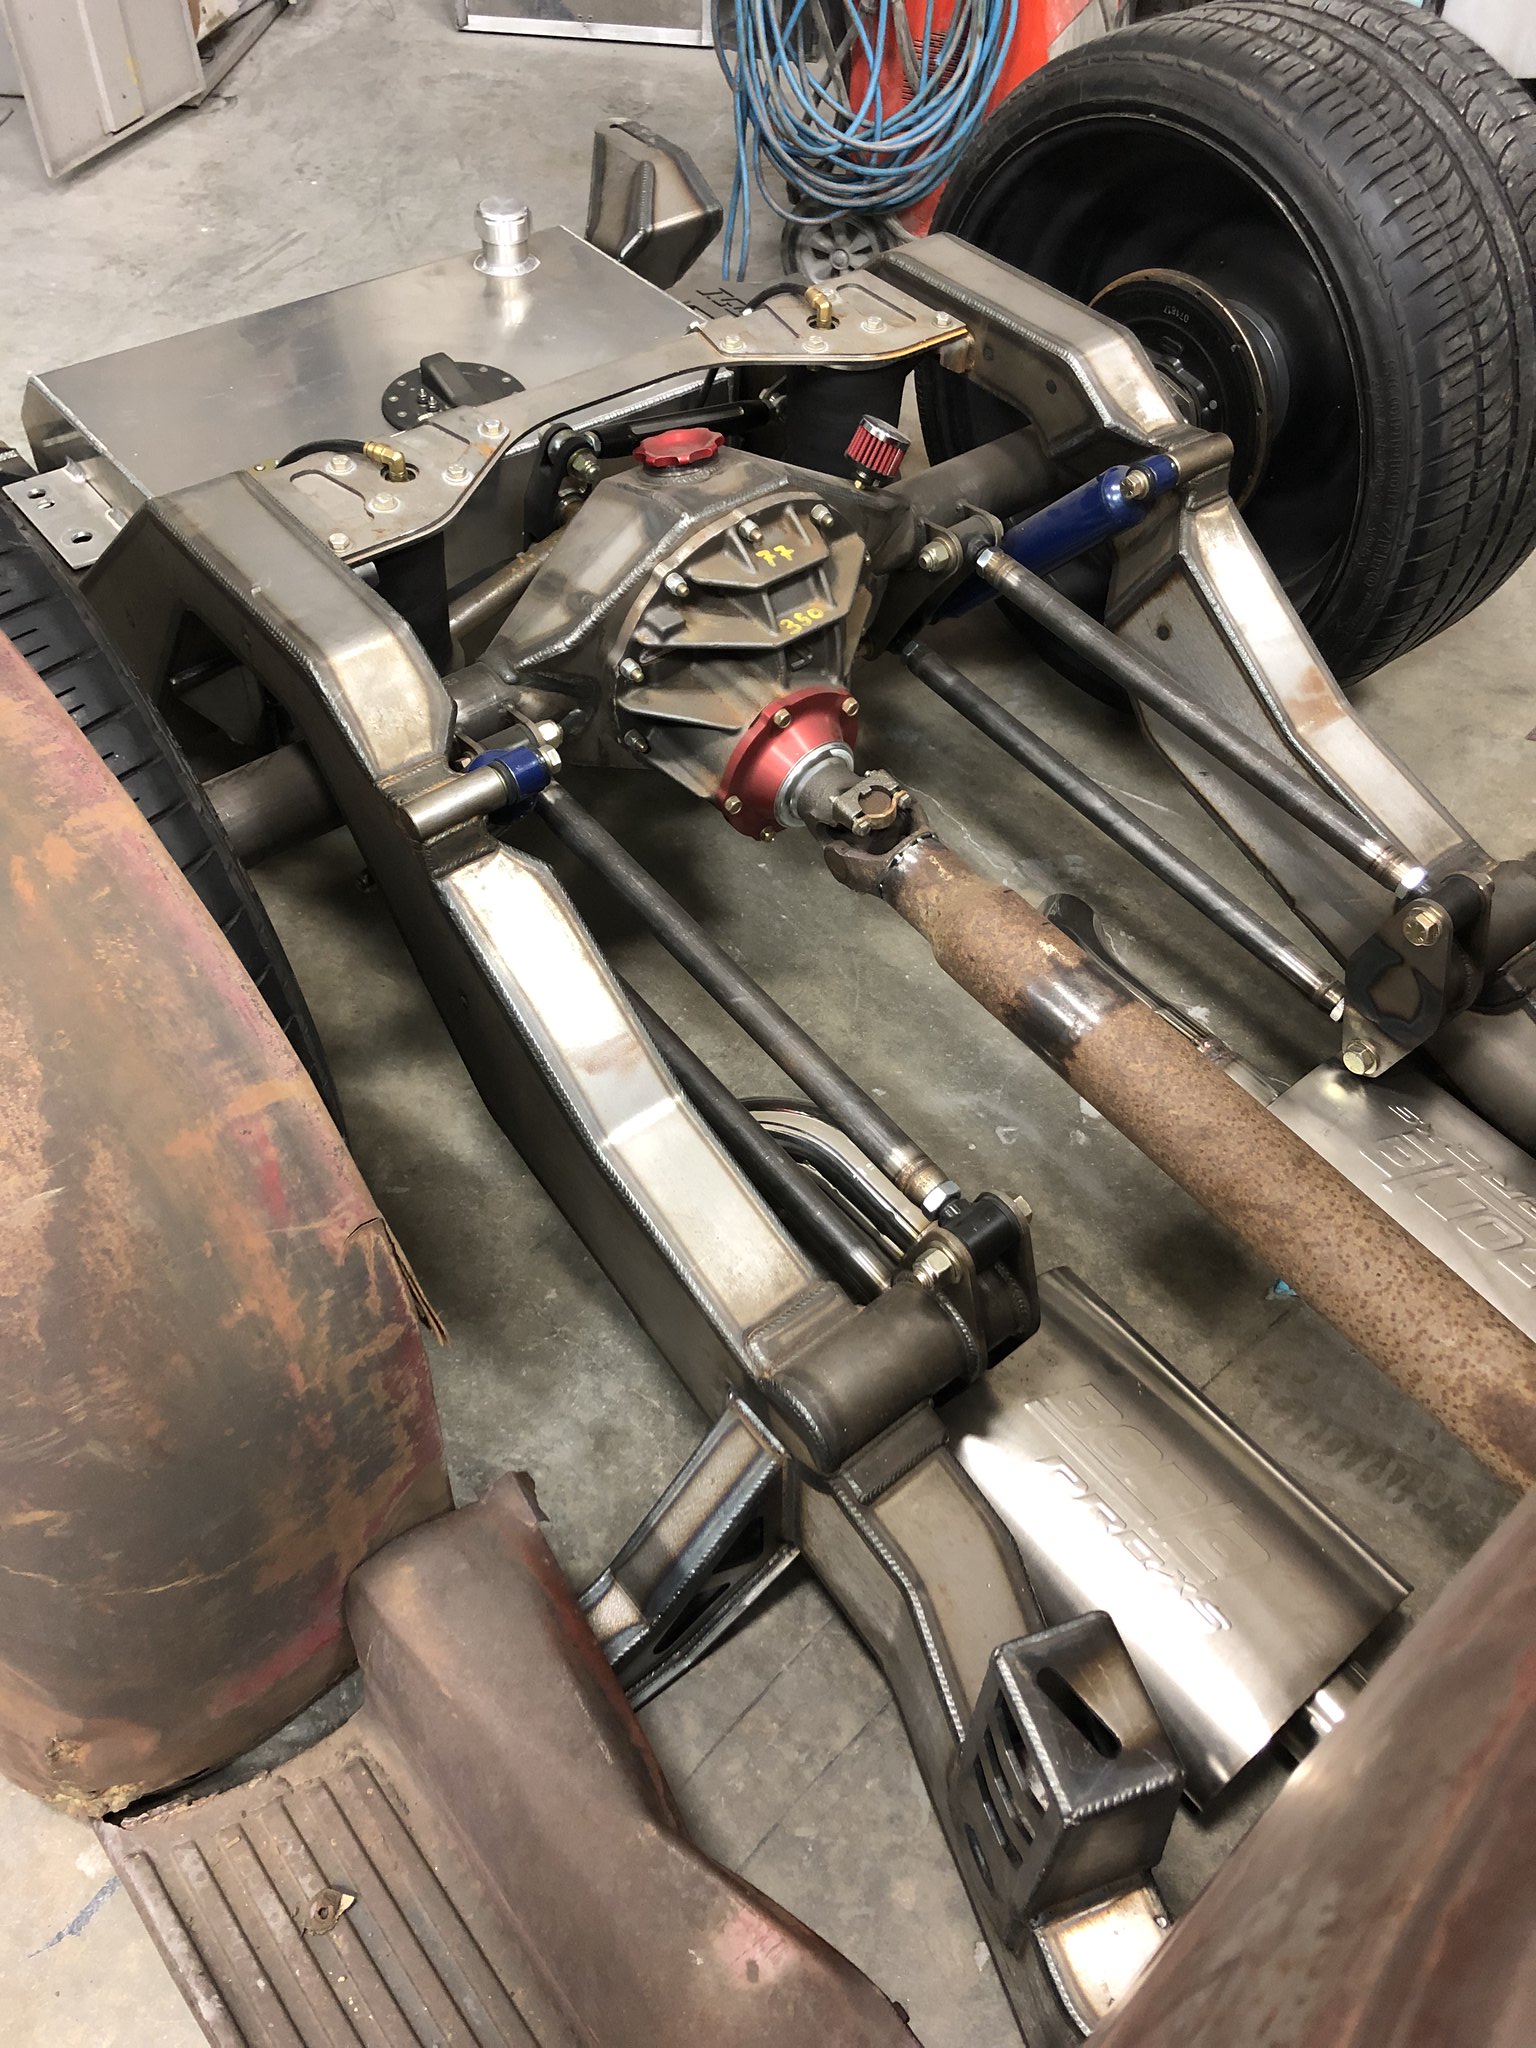 Untitled by Spencer Wiedeman, on Flickr Untitled by Spencer Wiedeman, on Flickr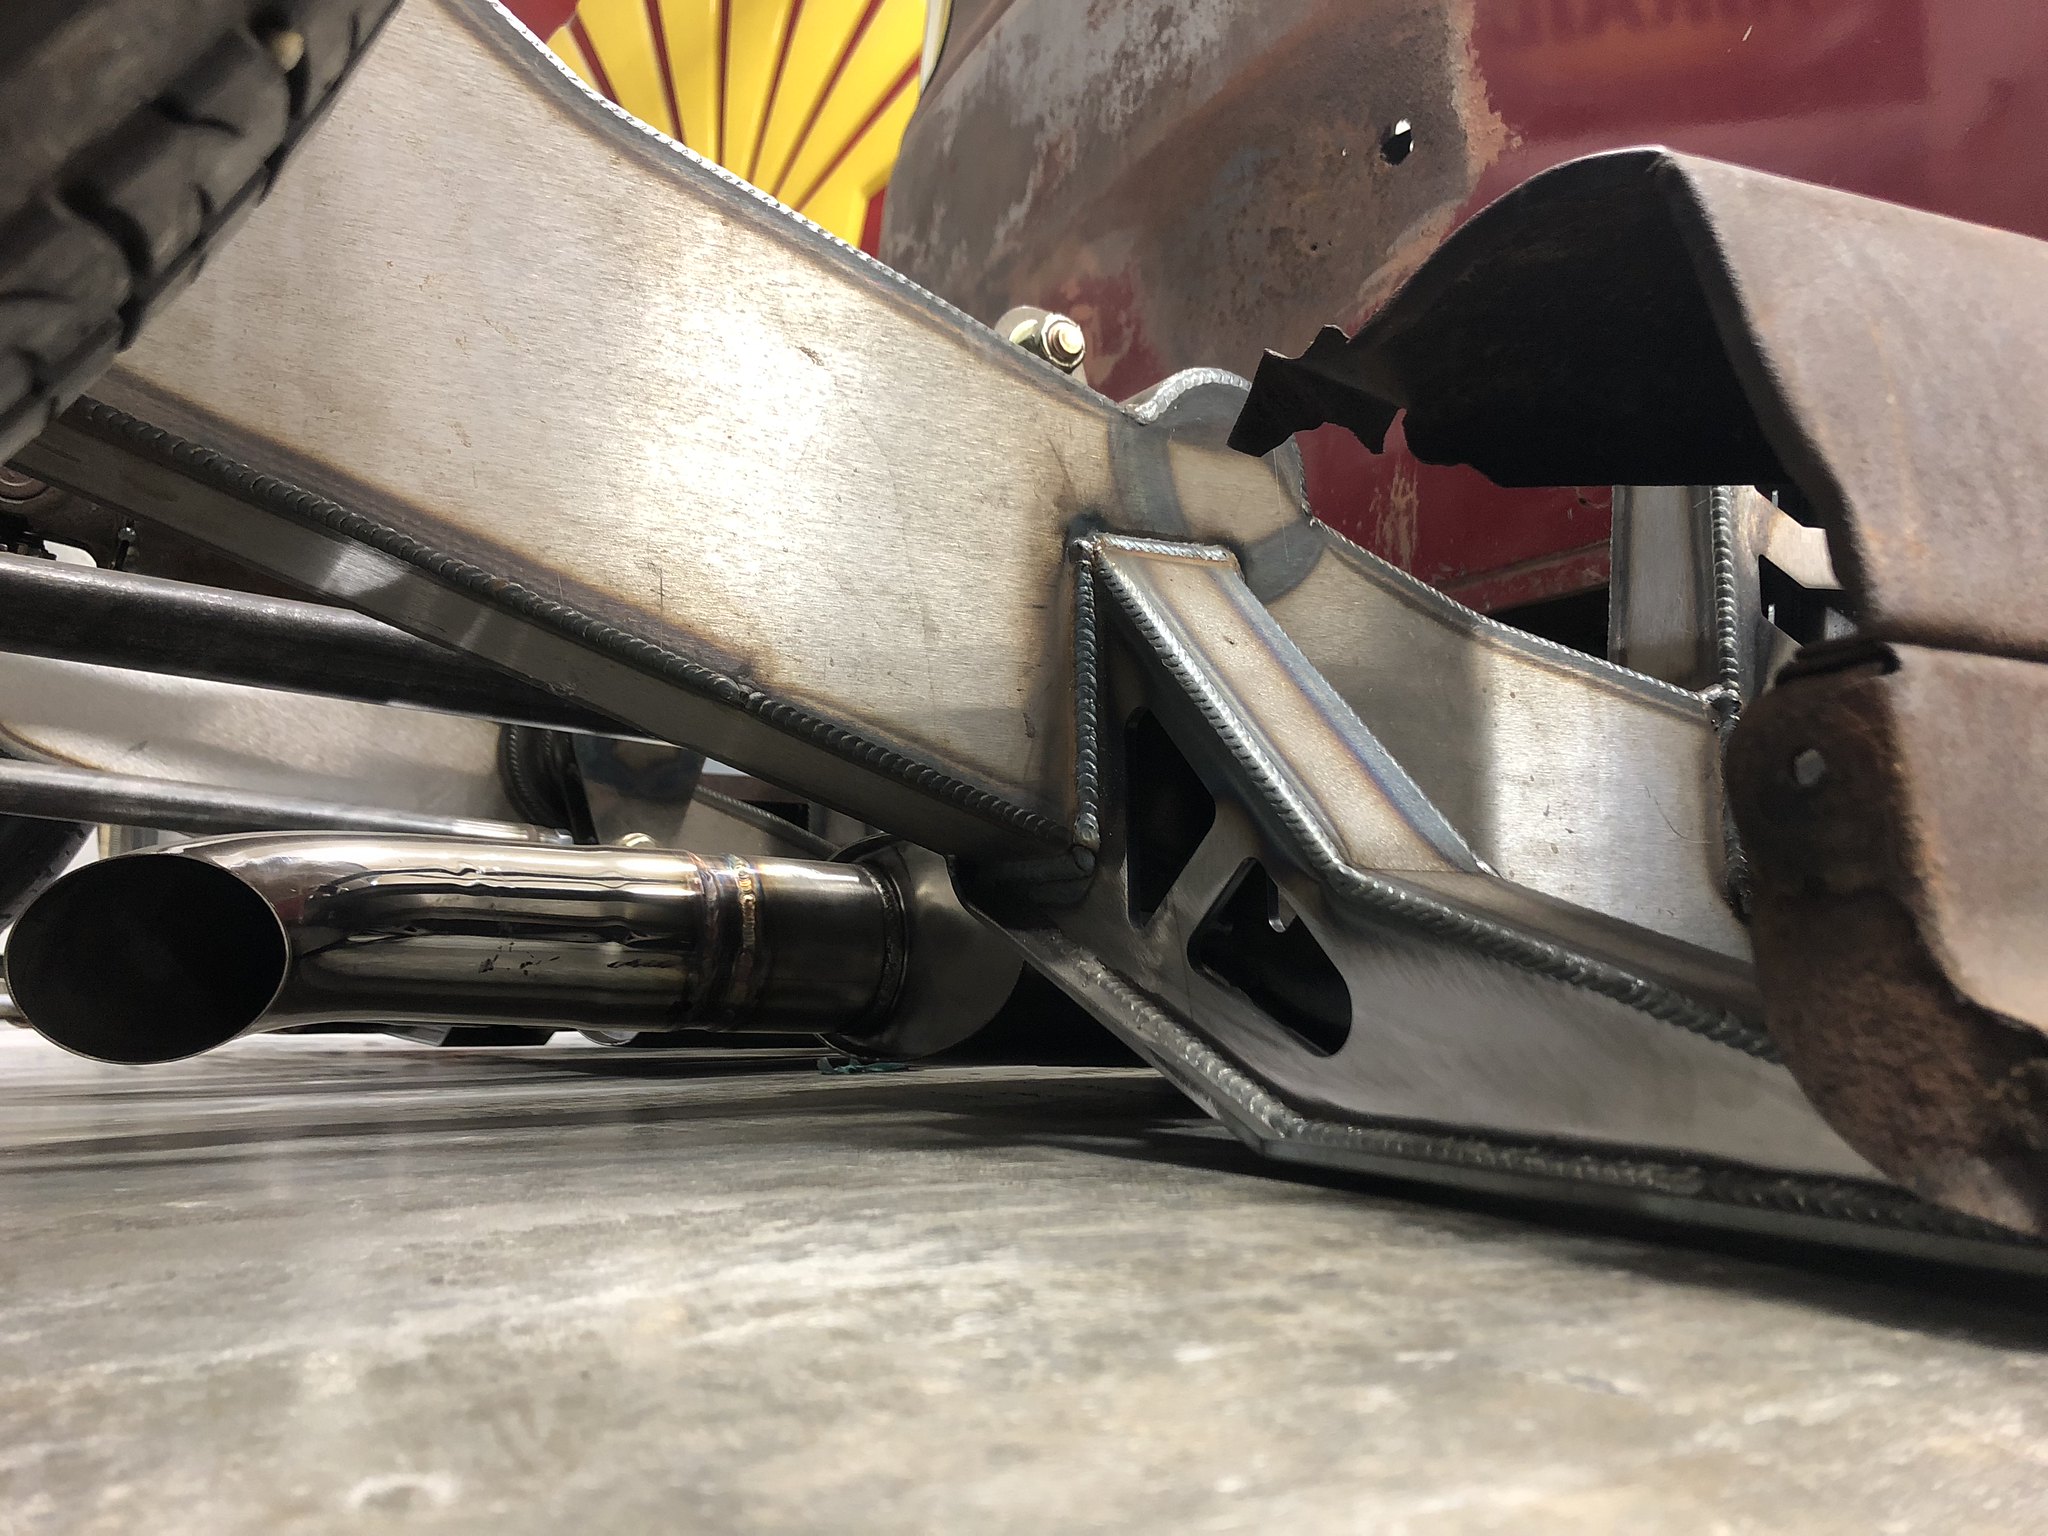 Untitled by Spencer Wiedeman, on Flickr Untitled by Spencer Wiedeman, on FlickrNew valley pan from JEGS to compliment the Holley intake and fuel rails I've ordered 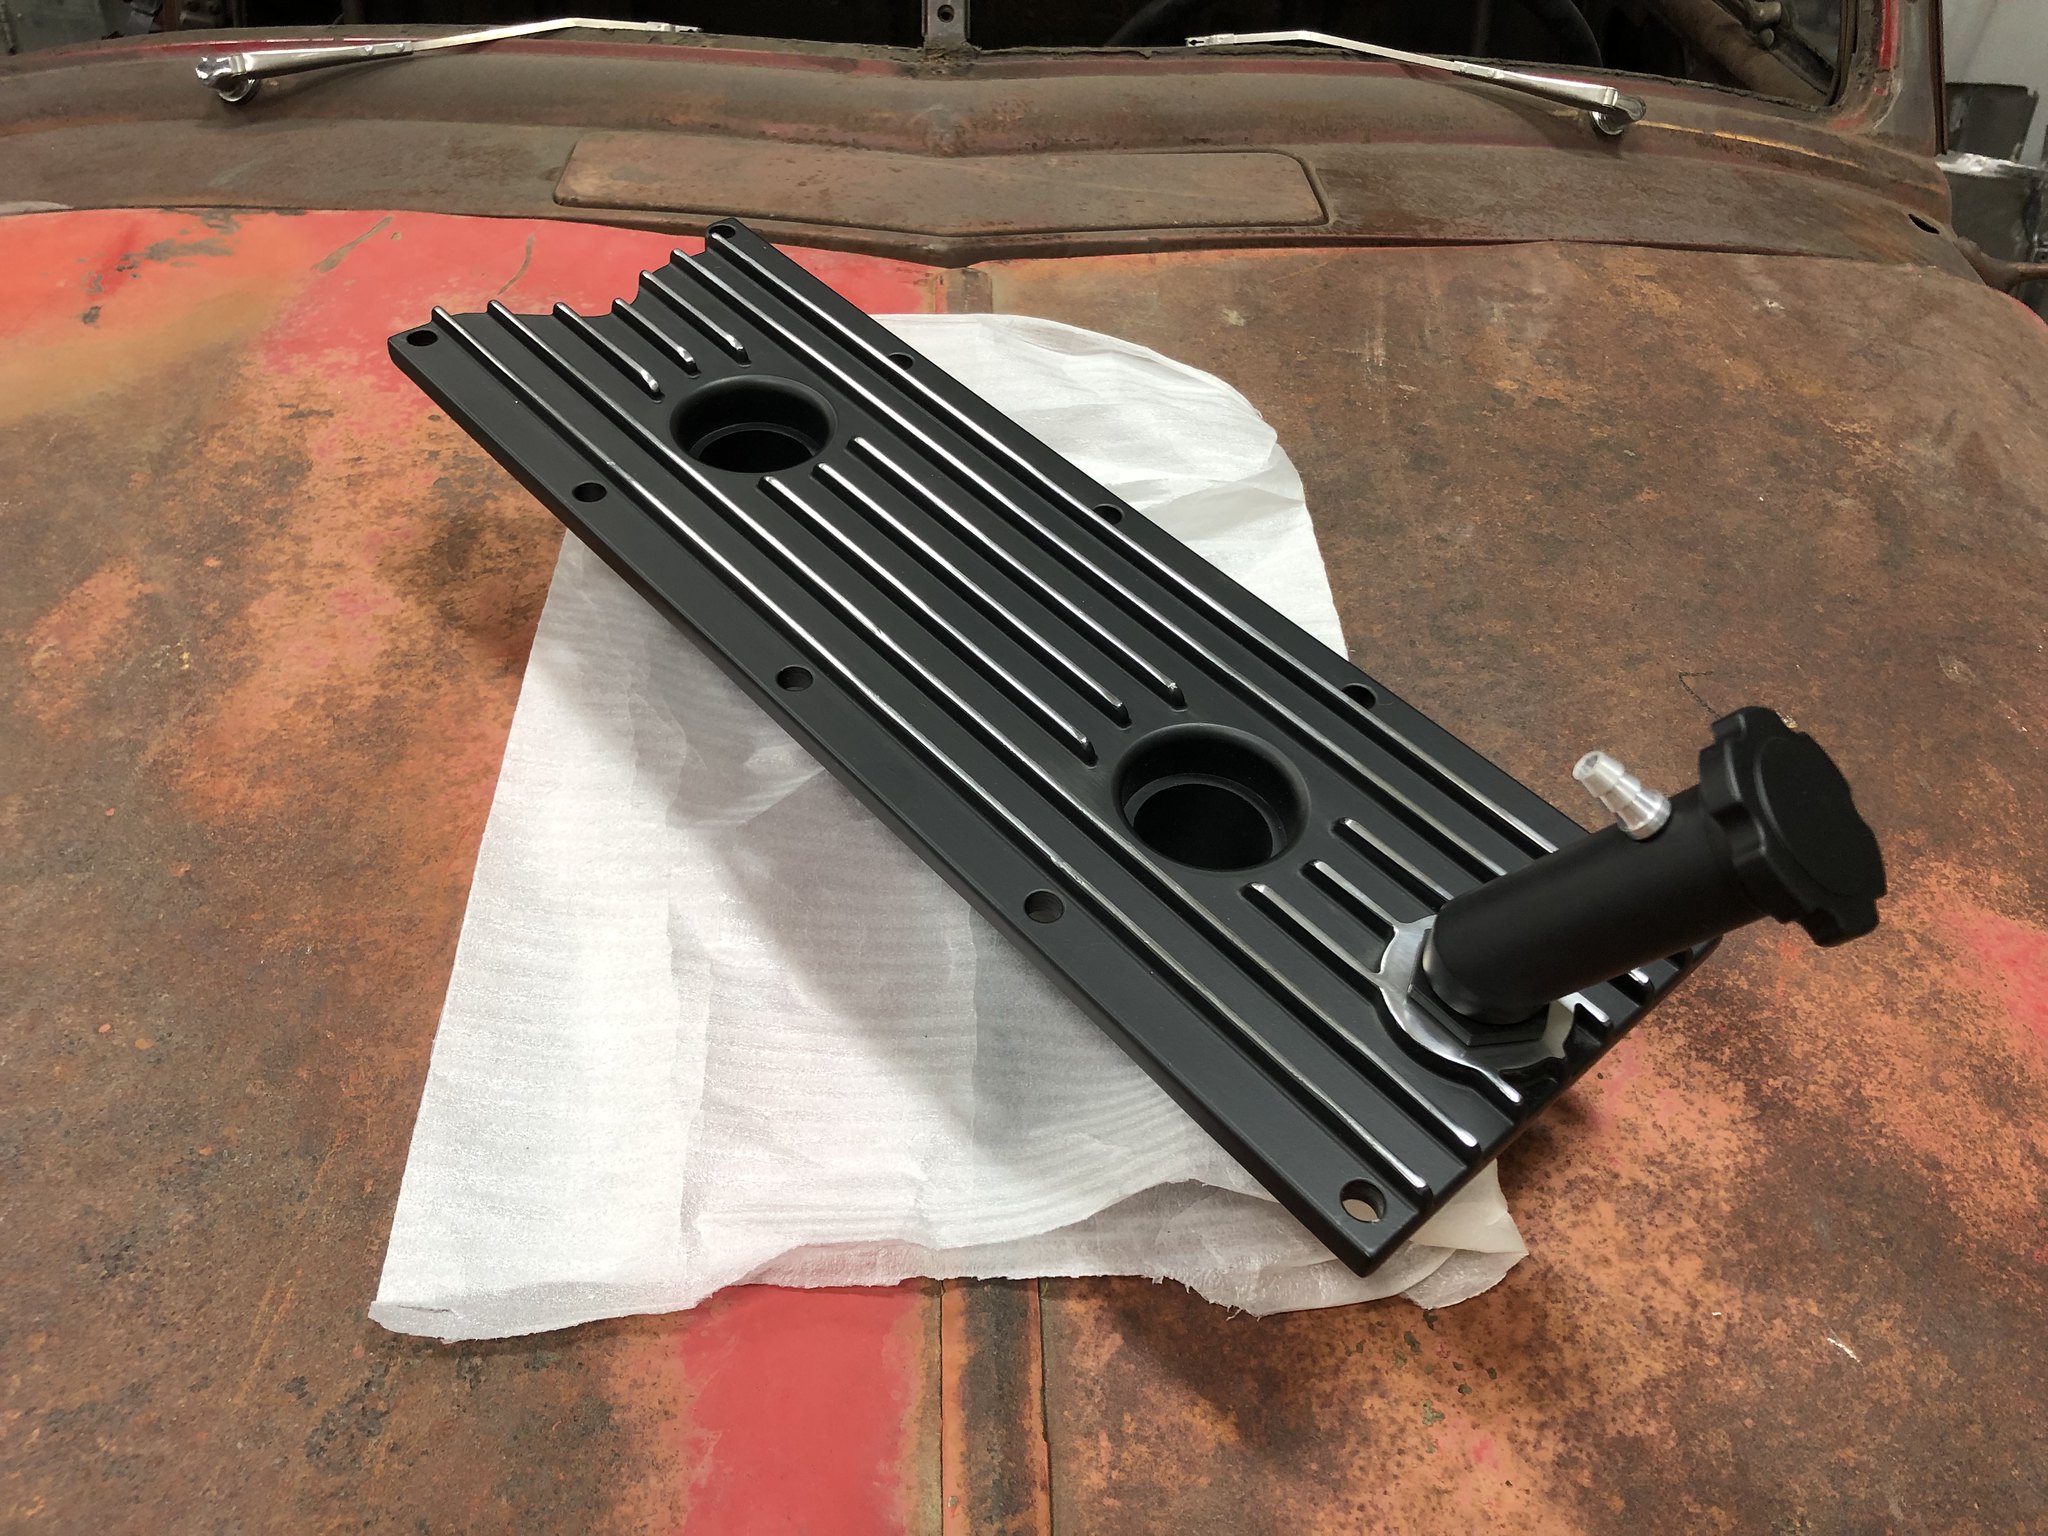 Untitled by Spencer Wiedeman, on Flickr Untitled by Spencer Wiedeman, on Flickr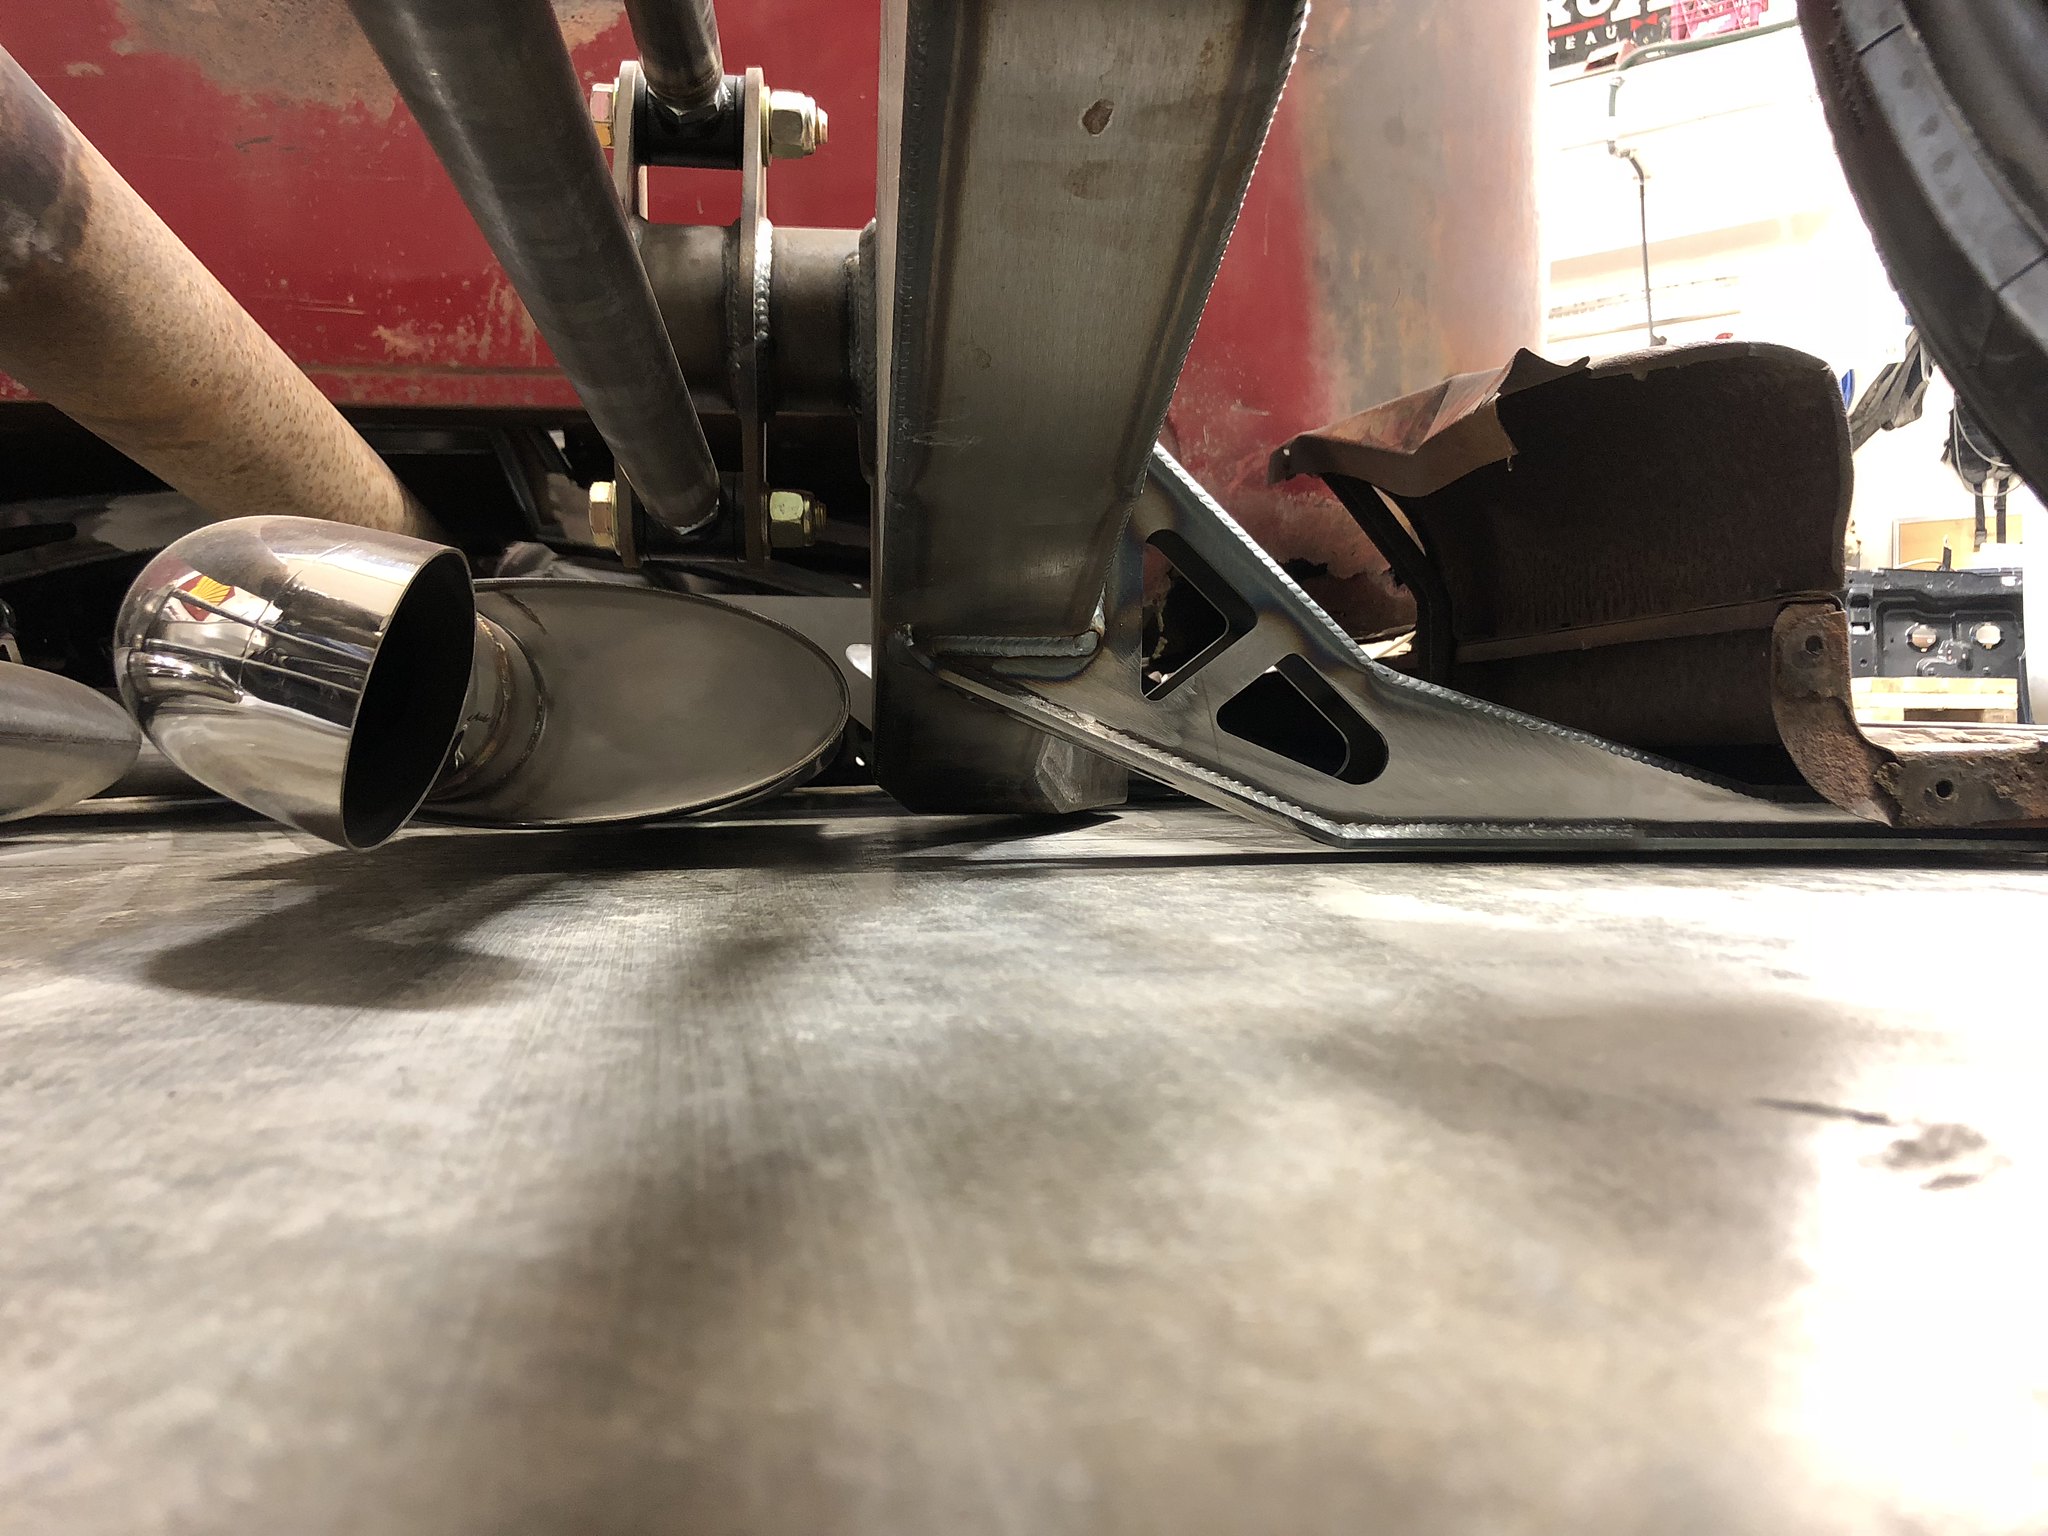 Untitled by Spencer Wiedeman, on Flickr Untitled by Spencer Wiedeman, on Flickr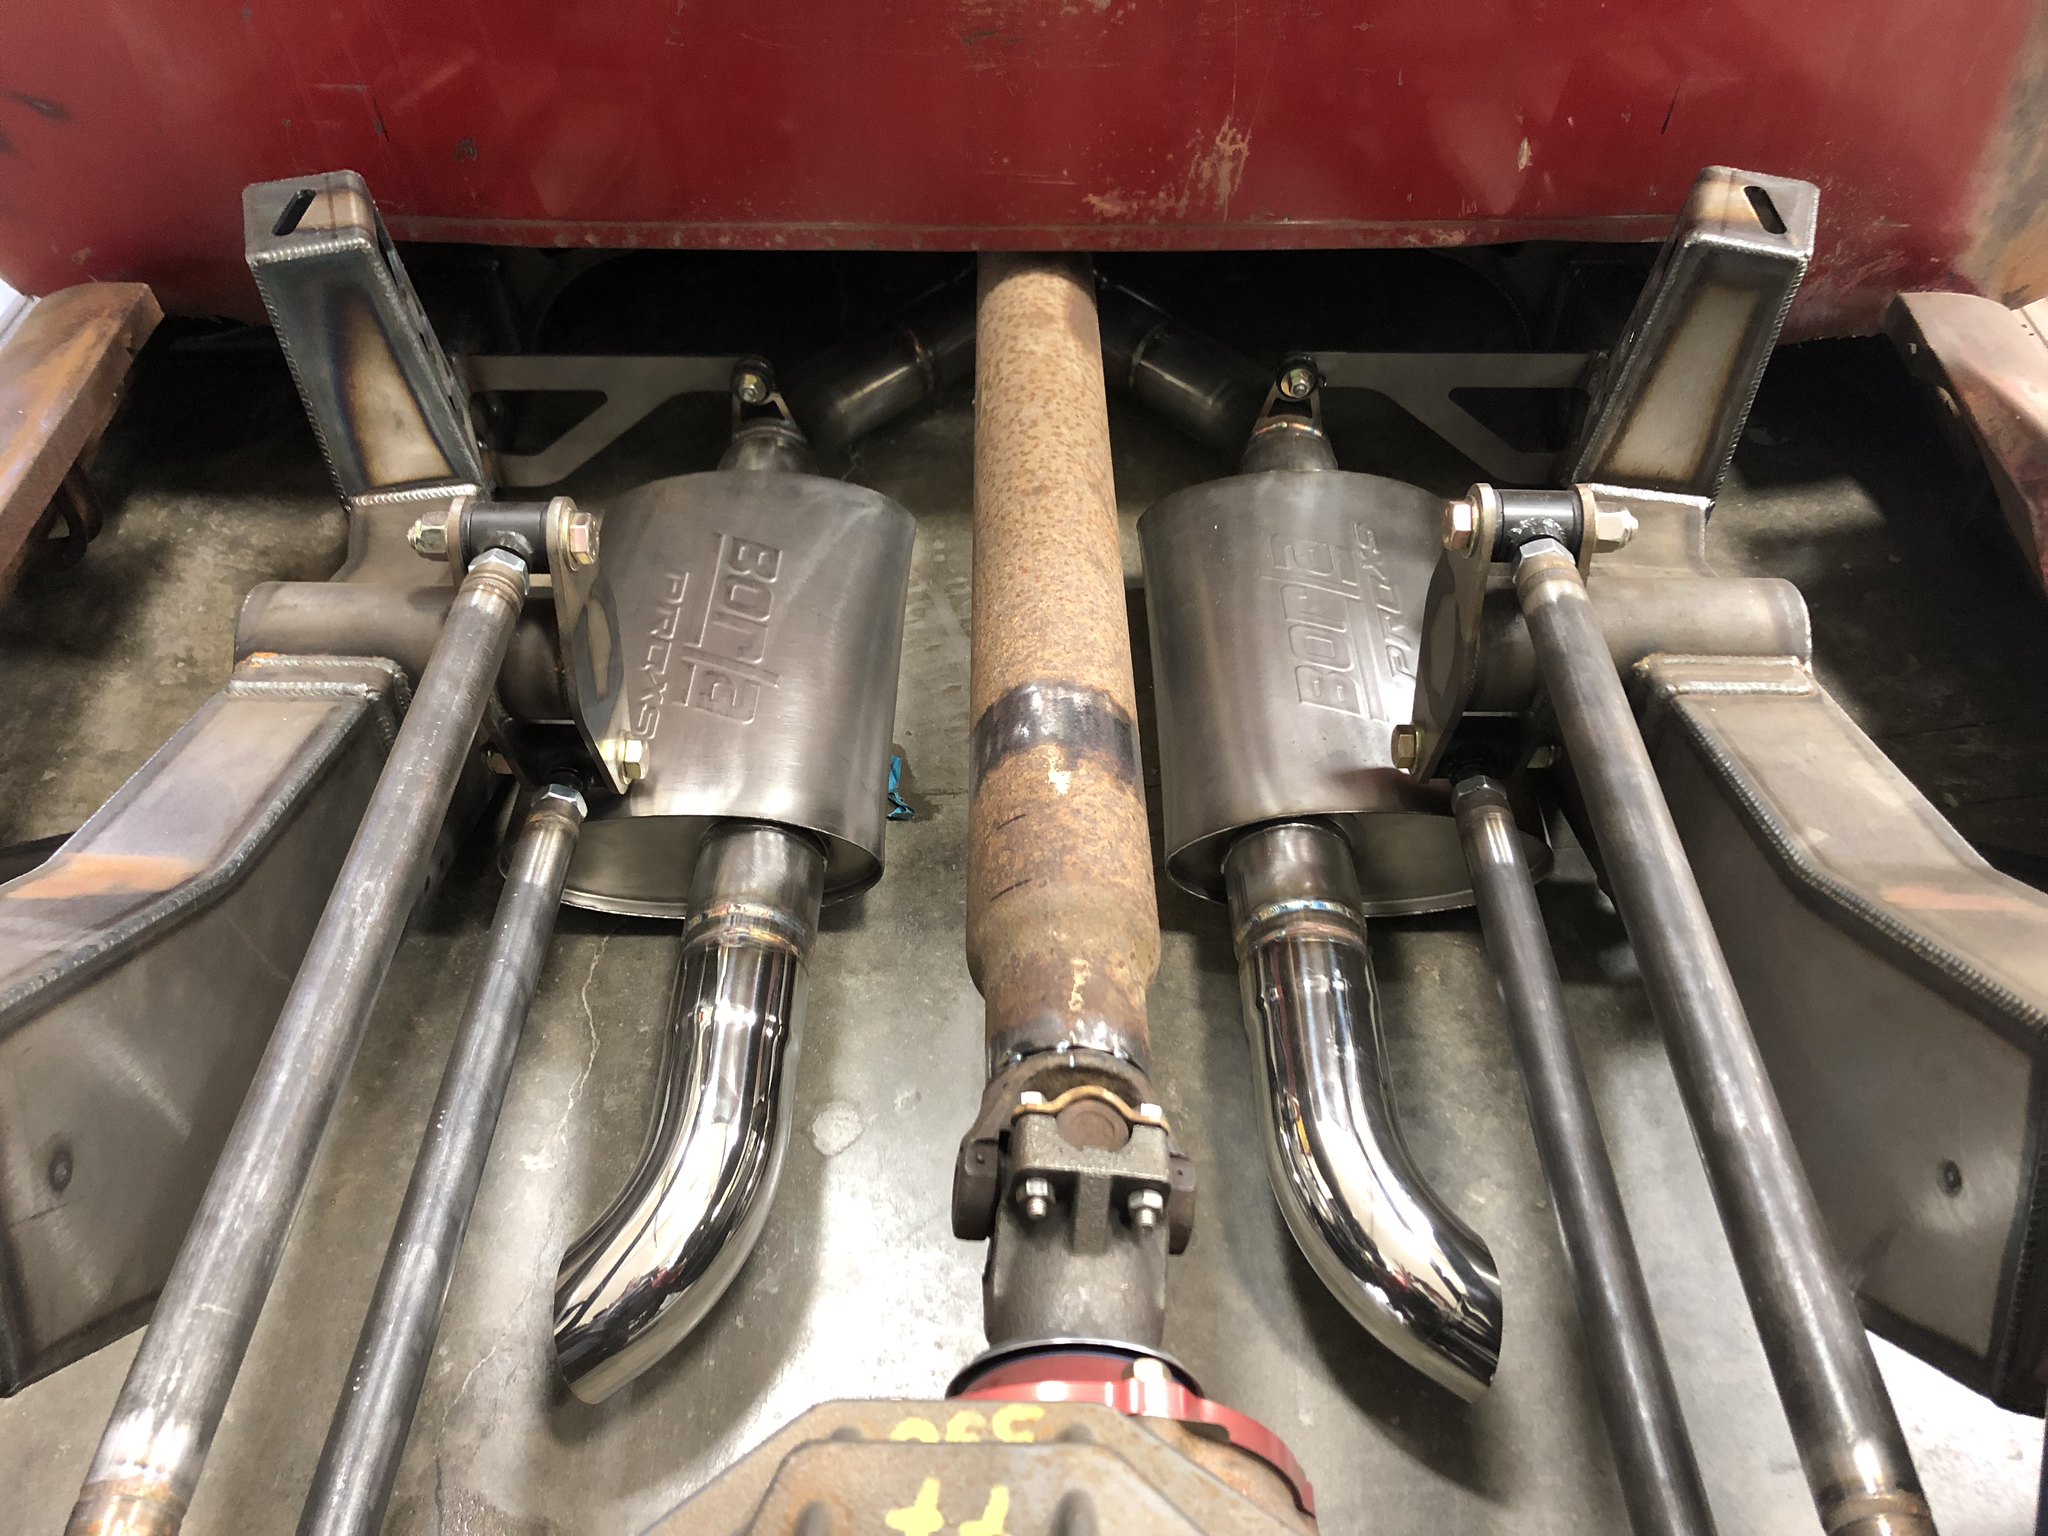 Untitled by Spencer Wiedeman, on Flickr Untitled by Spencer Wiedeman, on Flickr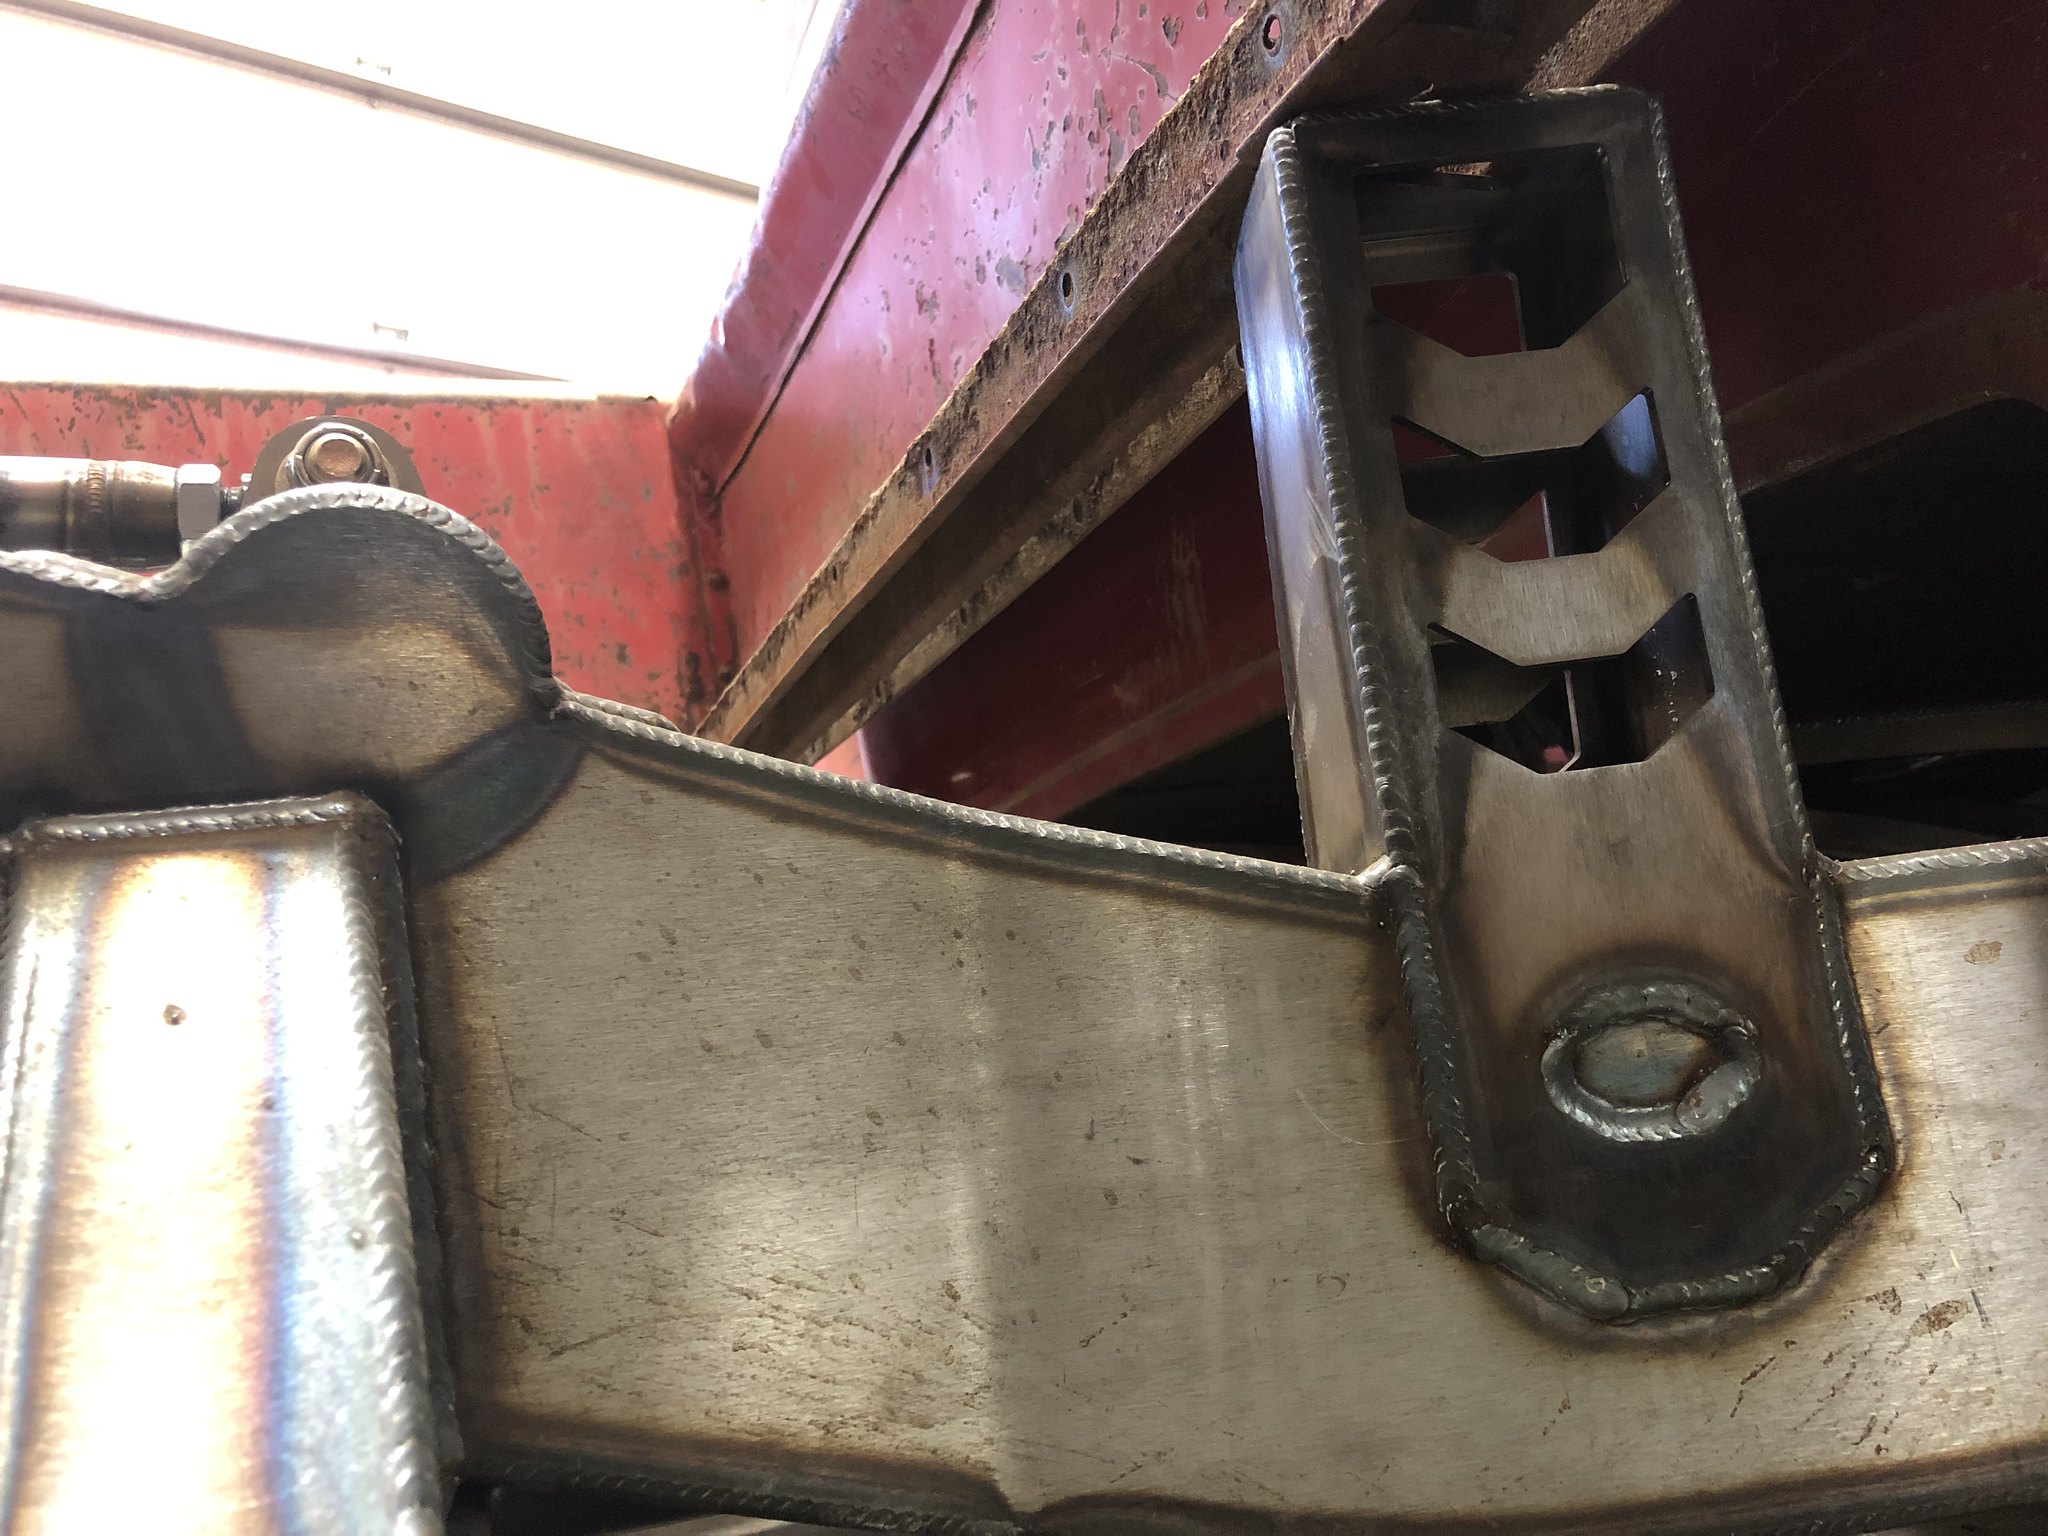 Untitled by Spencer Wiedeman, on Flickr Untitled by Spencer Wiedeman, on Flickr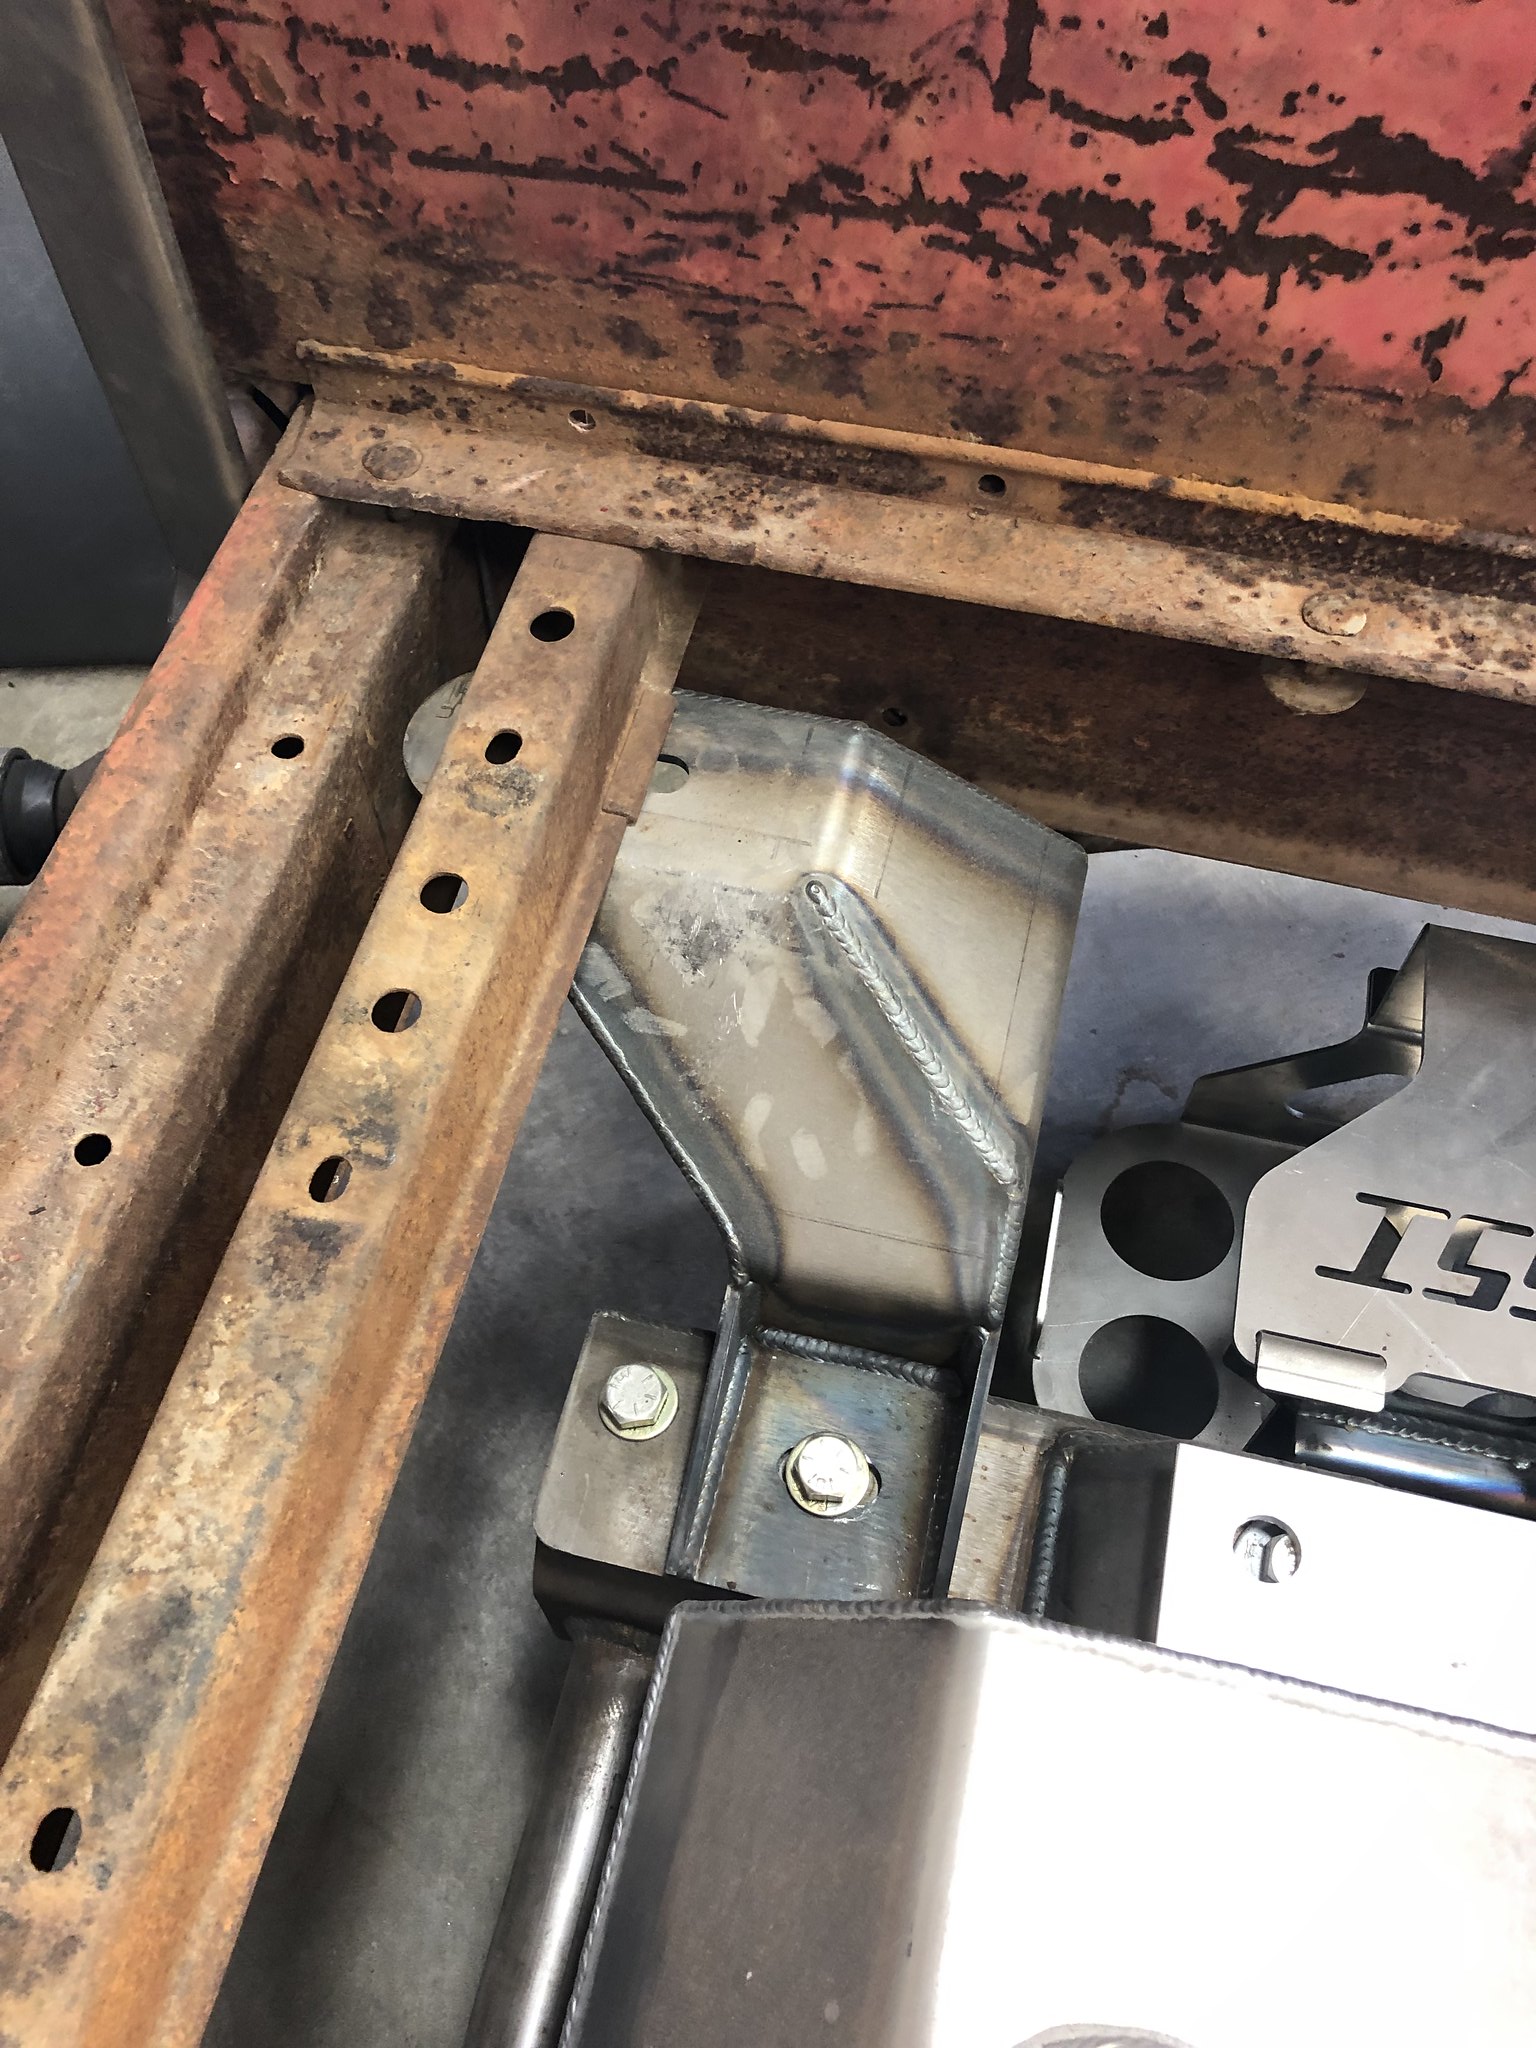 Untitled by Spencer Wiedeman, on Flickr Untitled by Spencer Wiedeman, on Flickr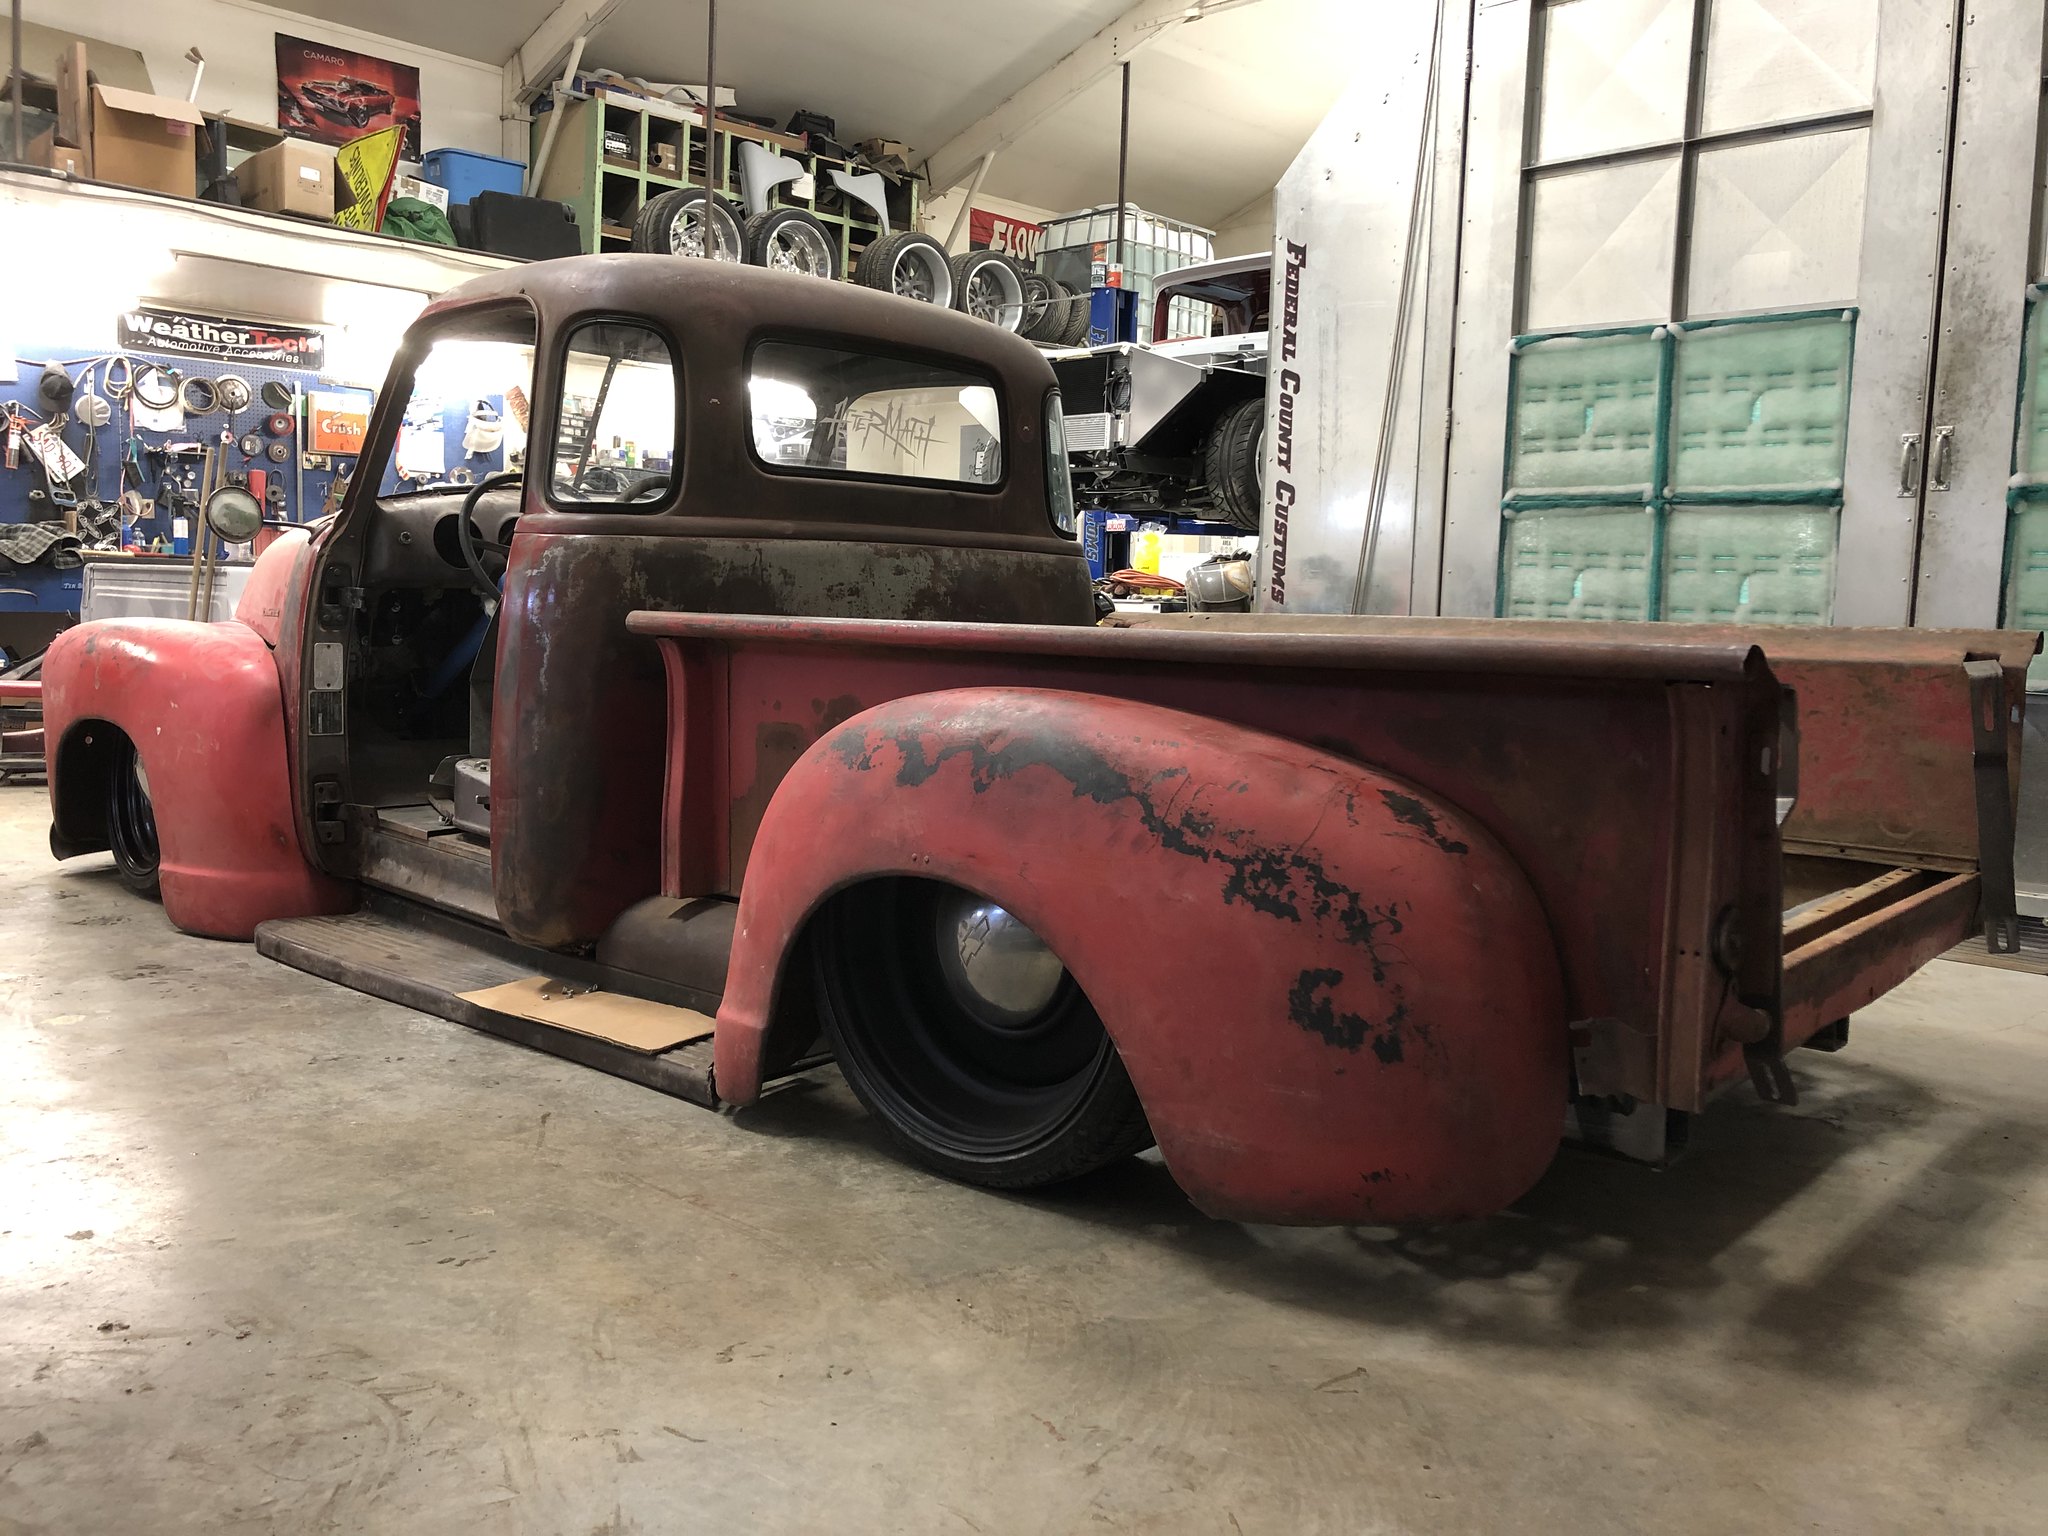 Untitled by Spencer Wiedeman, on Flickr Untitled by Spencer Wiedeman, on Flickr Untitled by Spencer Wiedeman, on Flickr Untitled by Spencer Wiedeman, on FlickrHere you can see the factory colour under the new front fenders 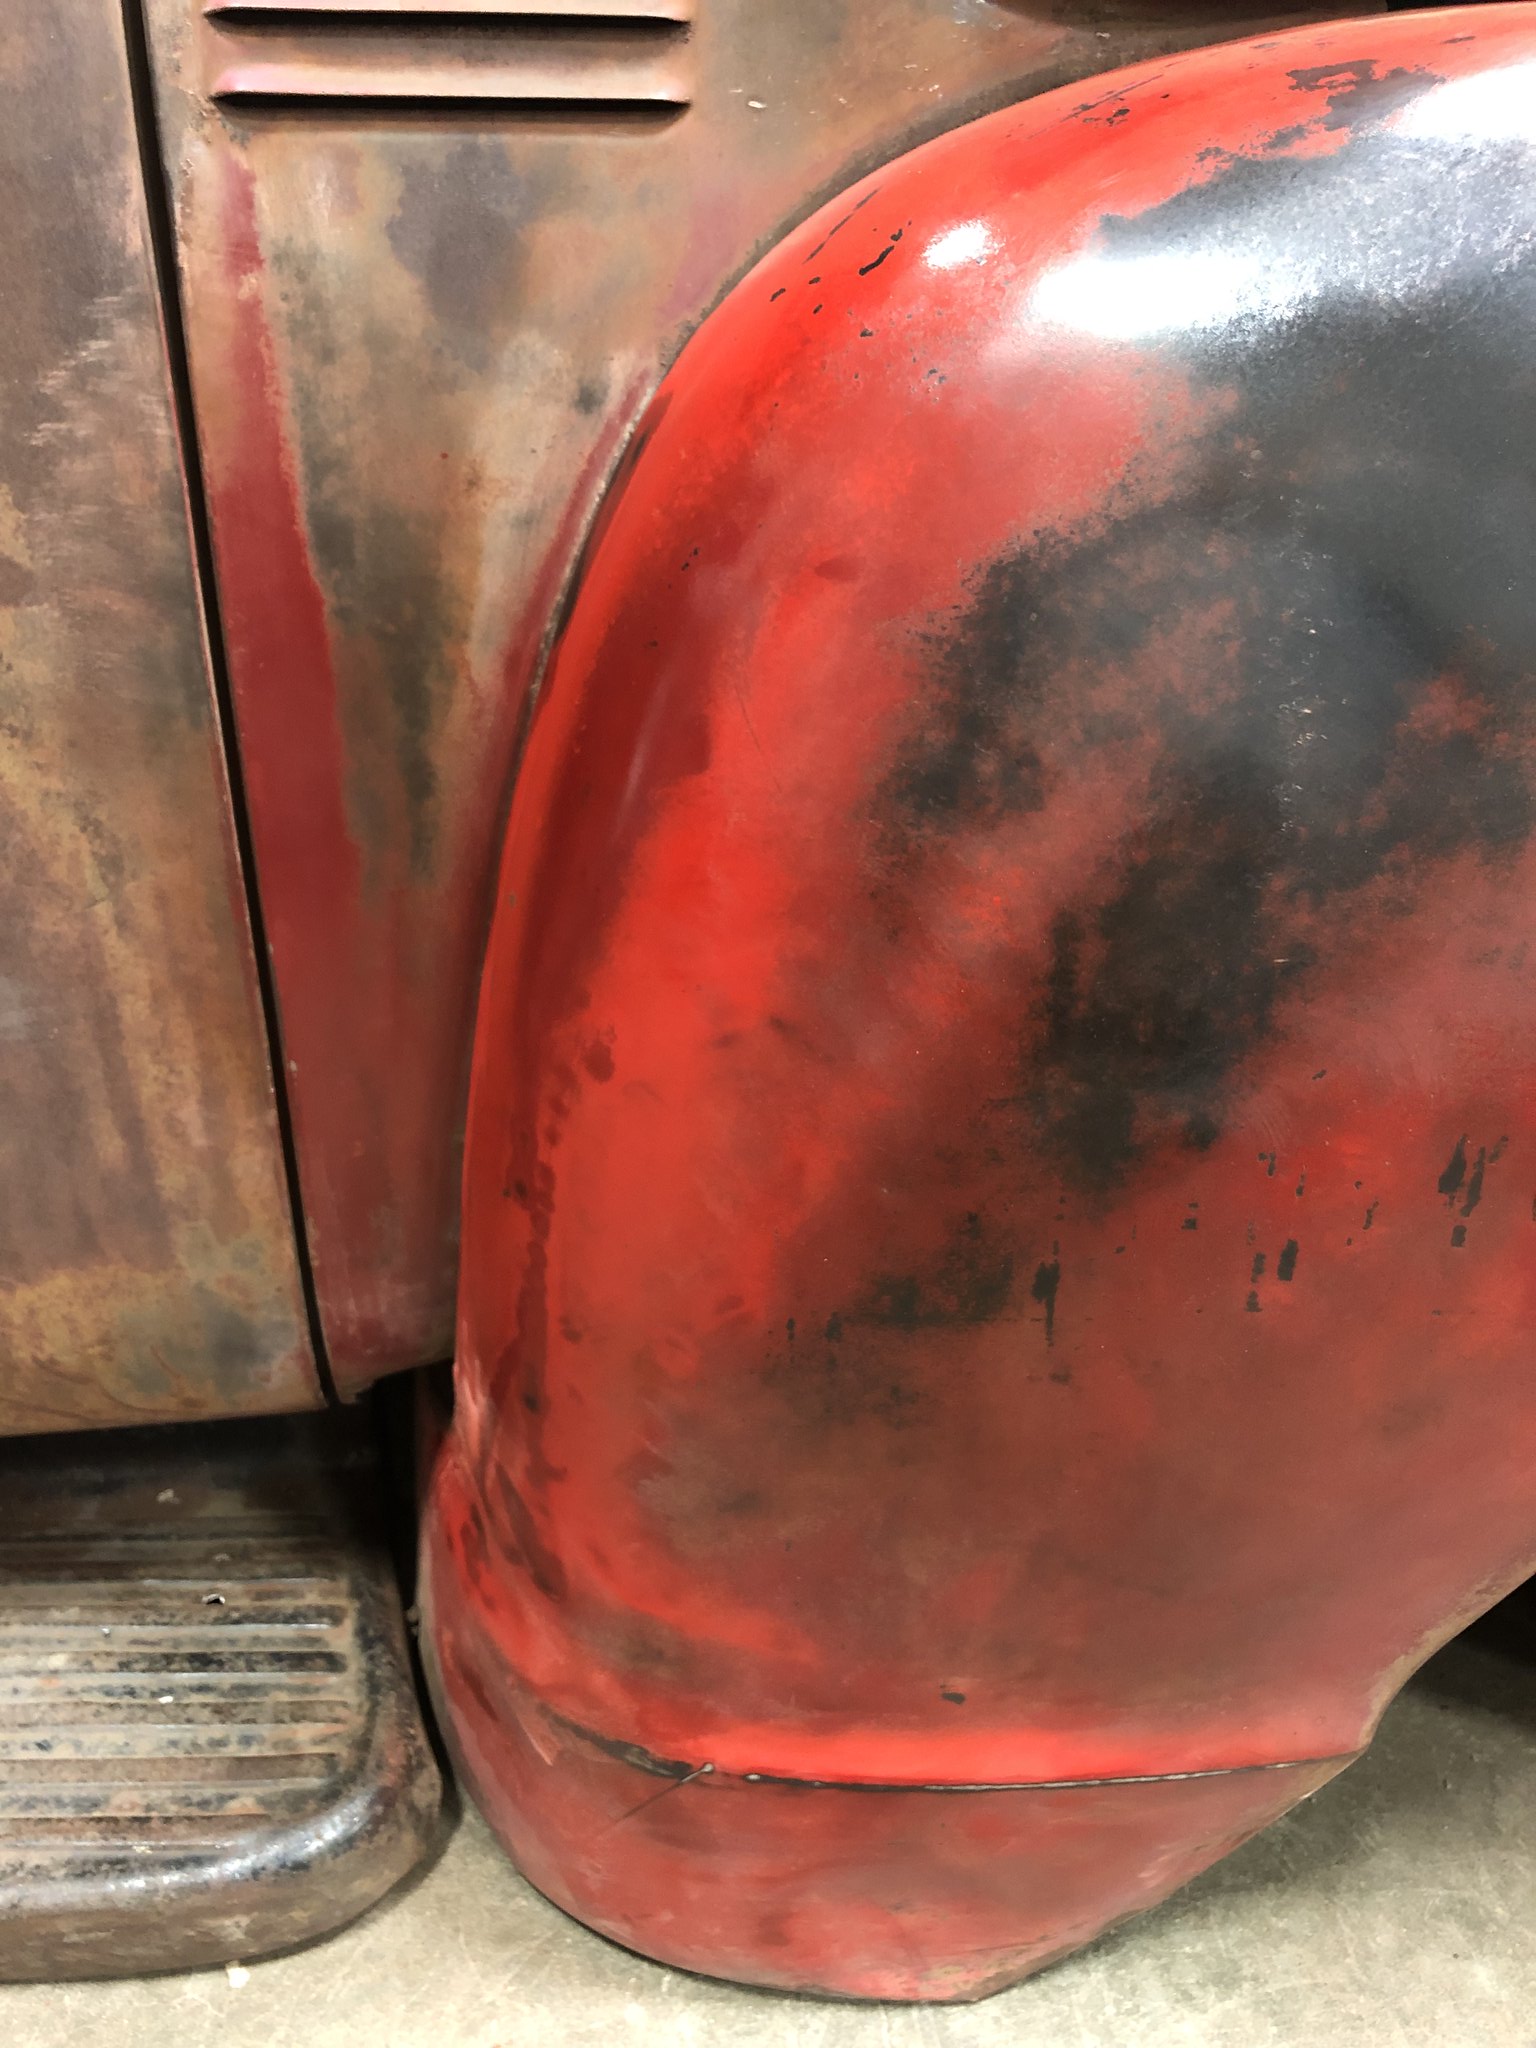 Untitled by Spencer Wiedeman, on Flickr Untitled by Spencer Wiedeman, on FlickrI hammered out a ton of dents in the running boards and other panels while I was at it 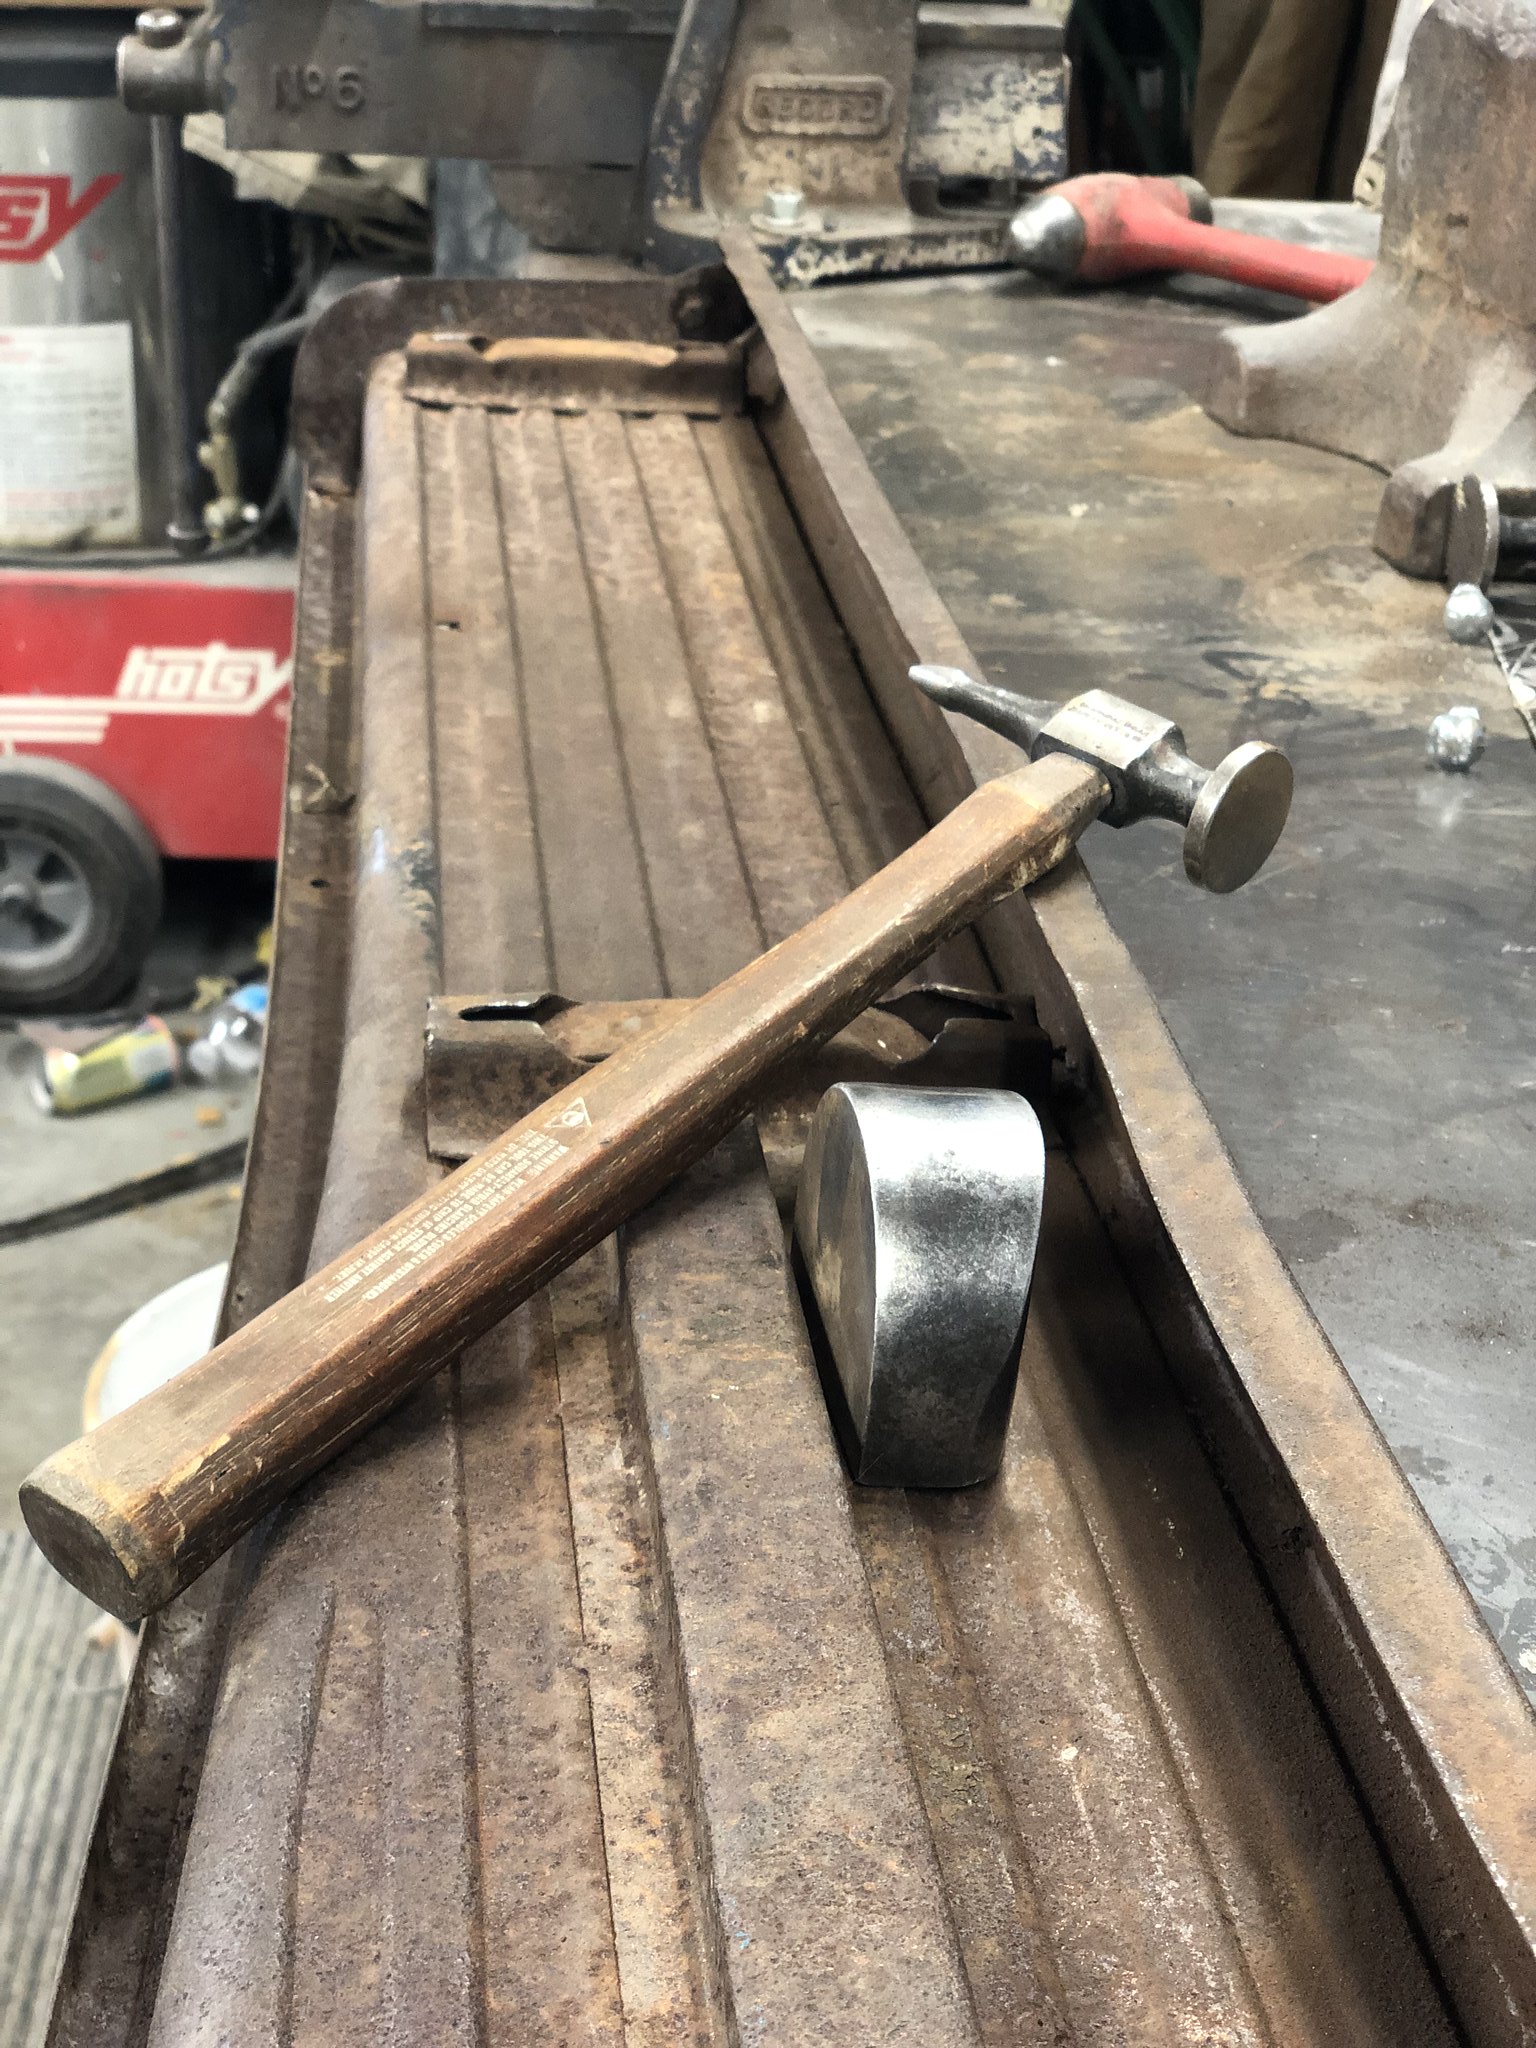 Untitled by Spencer Wiedeman, on Flickr Untitled by Spencer Wiedeman, on FlickrUnfortunately the running board brackets wer welded on 1' too far towards the rear for everything to line up. So I'm moving and rebuilding the factory mounts to get them all lined up. 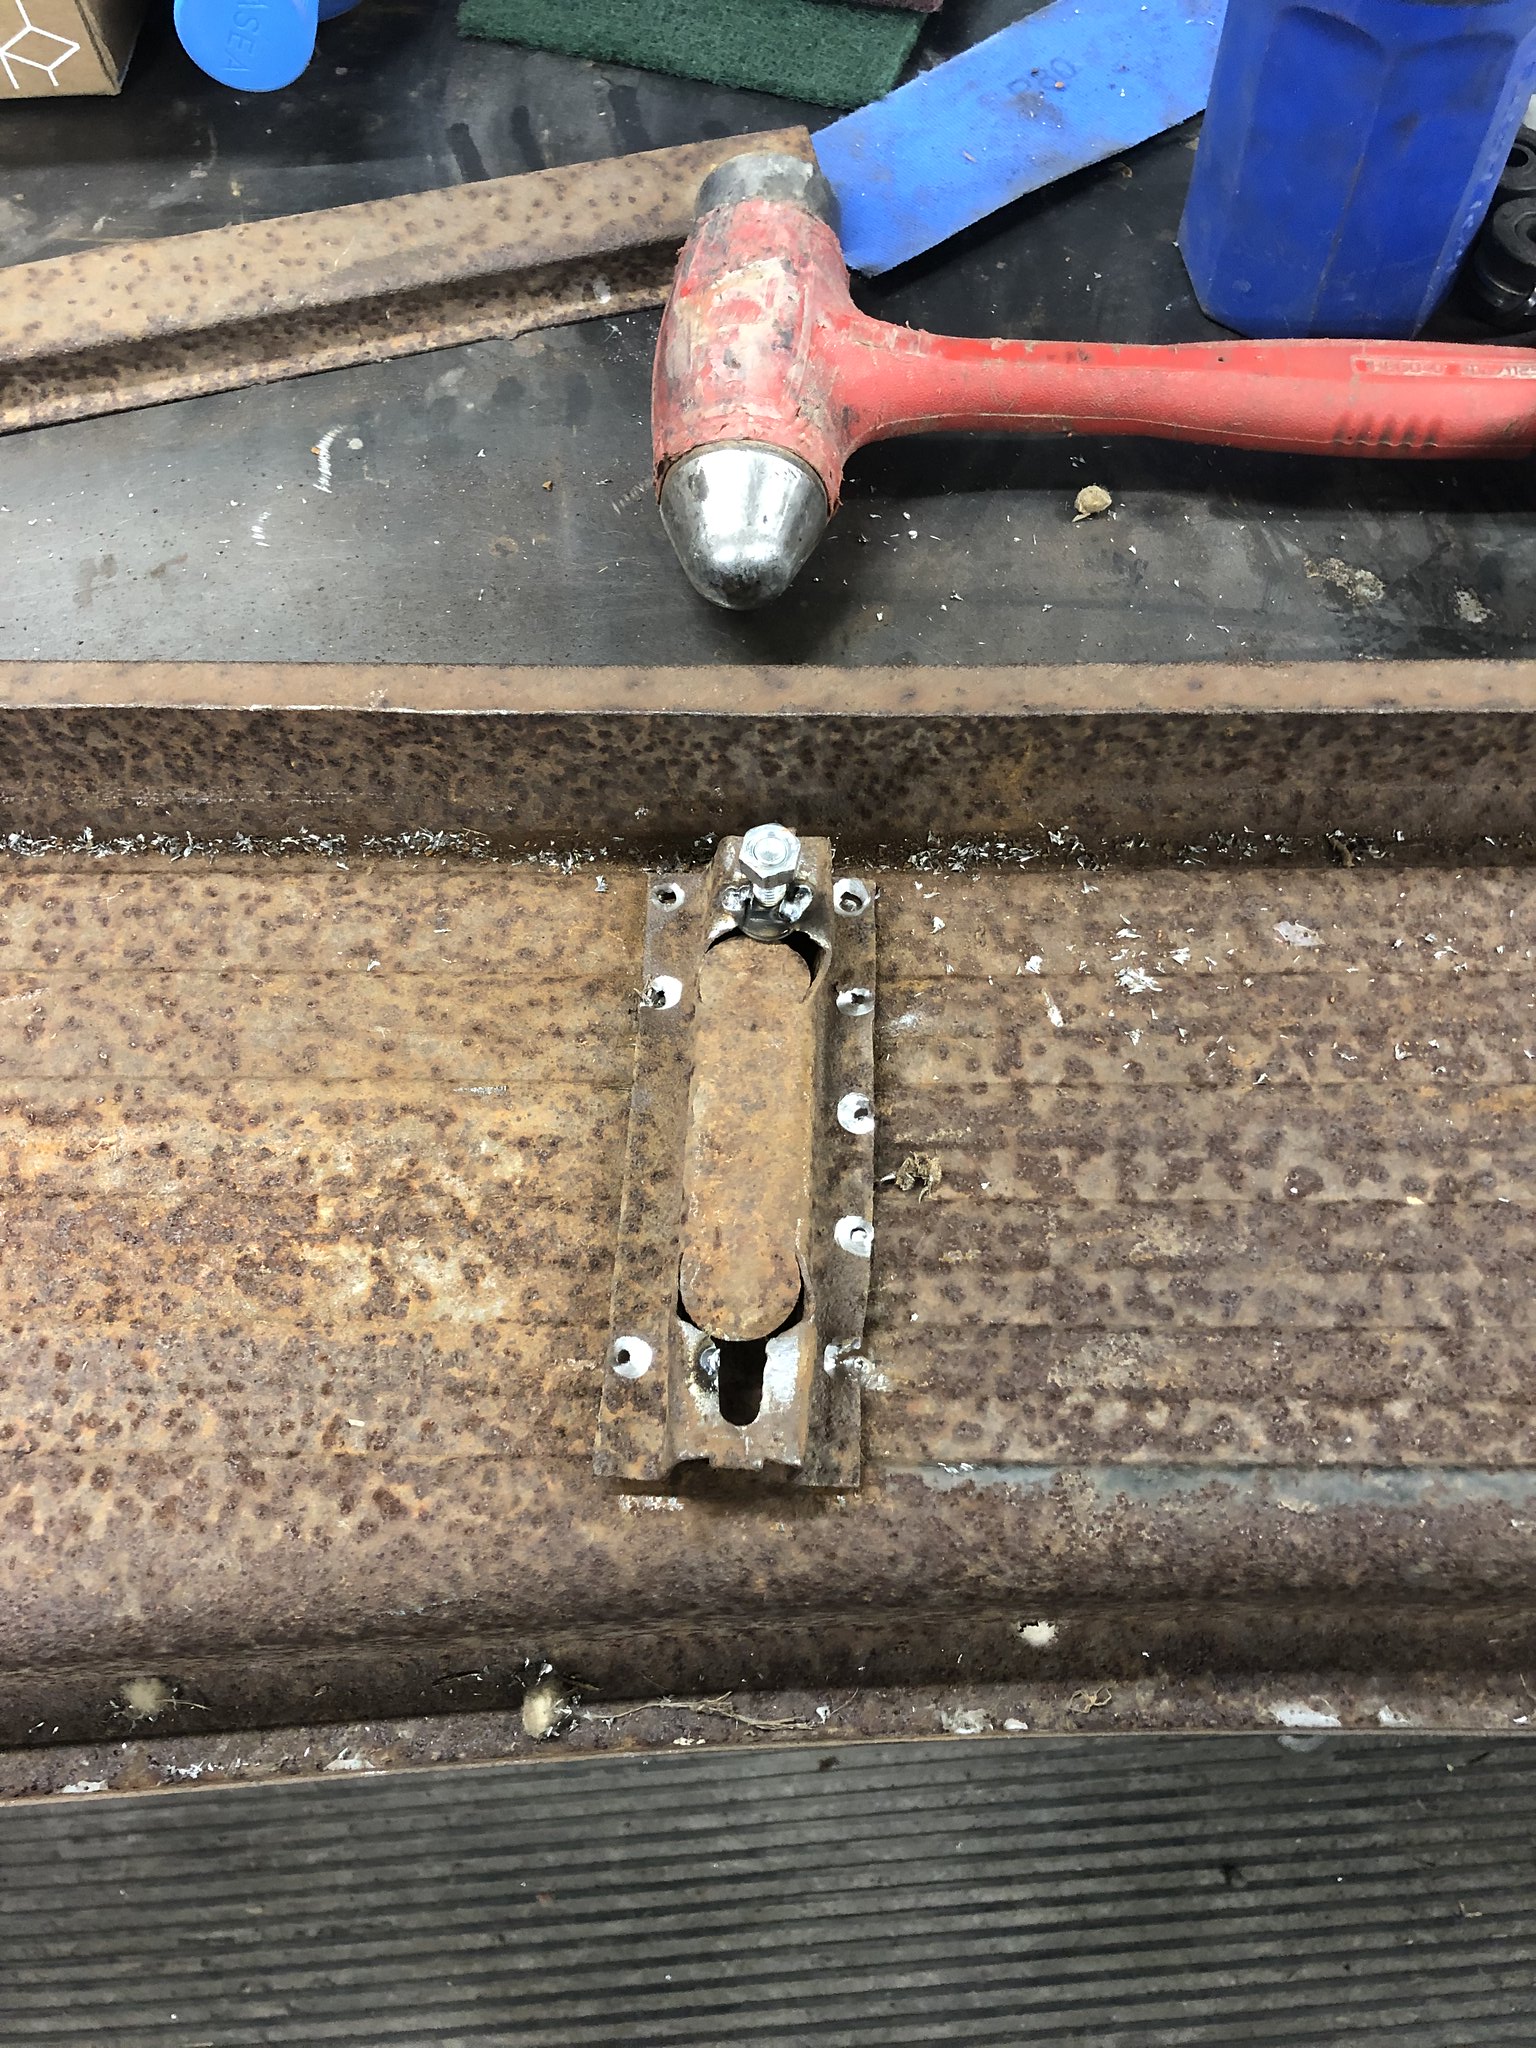 Untitled by Spencer Wiedeman, on Flickr Untitled by Spencer Wiedeman, on Flickr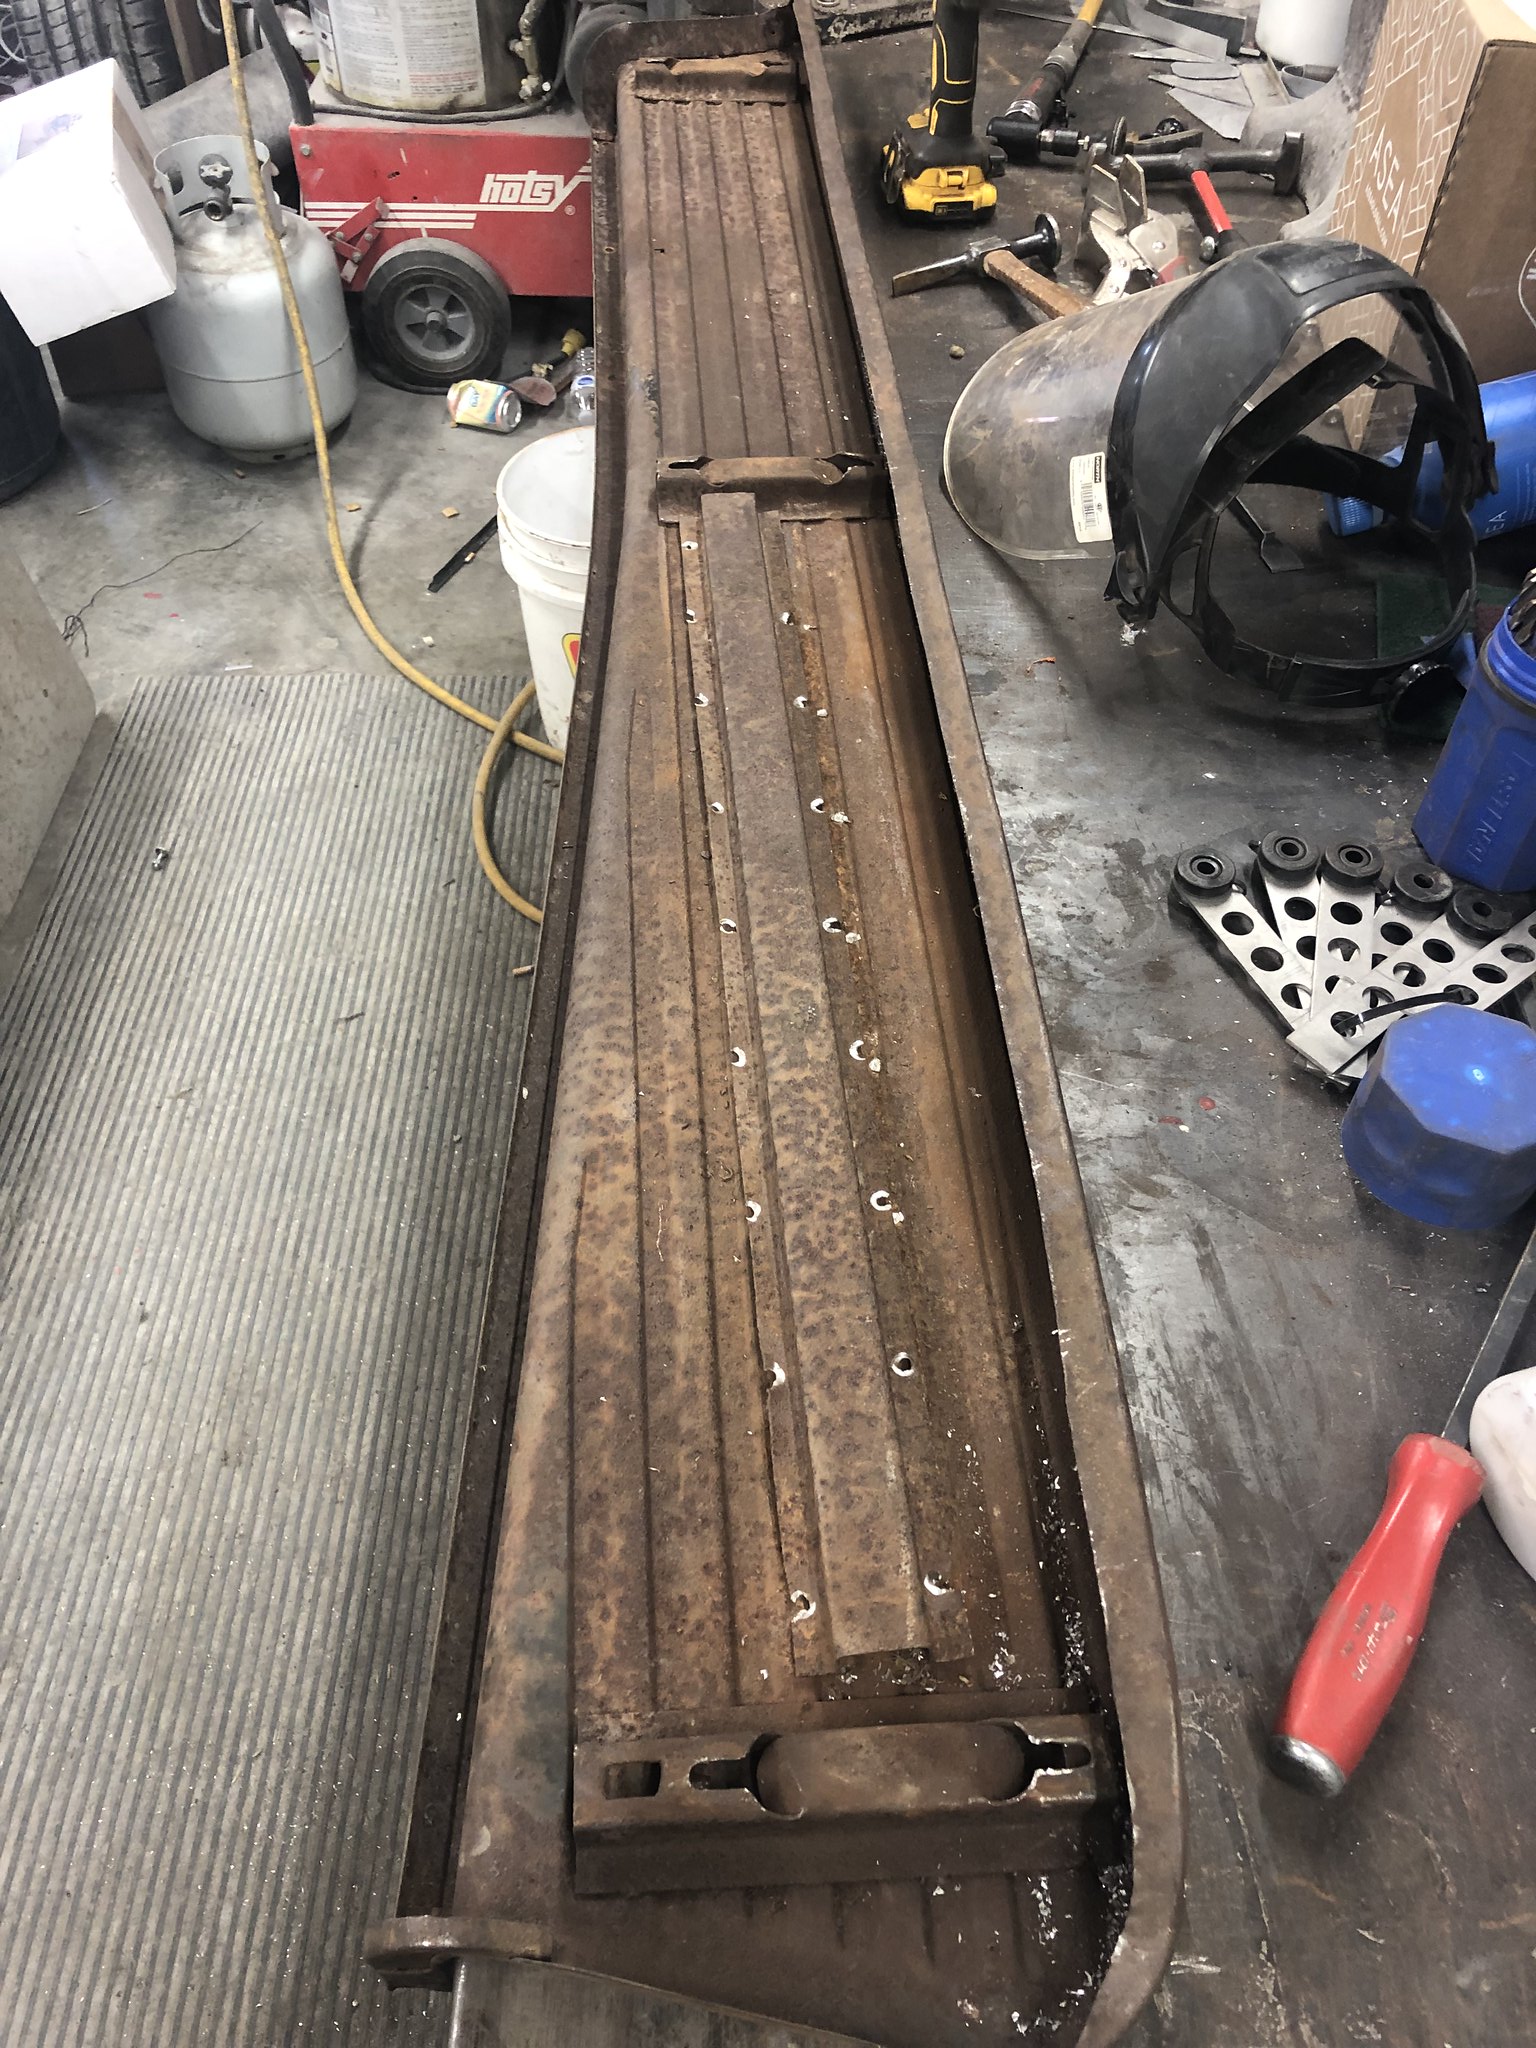 Untitled by Spencer Wiedeman, on Flickr Untitled by Spencer Wiedeman, on Flickr
|
|
|

|
|
|
#22 |
|
Senior Member
  Join Date: Nov 2008
Location: Glendora, CA
Posts: 6,339
|
Re: Project: Patina (1949 Chevrolet 1434)
I know you're doing the patina thing but will you blast and prime or bed coat the undersides of those running boards? They look like they have a fairly aggressive coat of rust already.
Just found your thread. I used Delmo valve cover adapters and Moon Equipment finned valve covers so I am very interested in that Jegs valley cover you posted. Thanks, hadn't sen that yet. I moved my coils down to the top of the frame rails on both sides. One of the shop's guys wanted to put them in a sort of "box" behind the throttle body ala the mechanical fuel injection box that was on early Vettes. I vetoed that idea. Didn't think it would fool ANYone and would look dorky. Your idea looks better. Will you have two of those machined plates and will you put them together sort of "stacked" horizontally or vertically somehow?
__________________
'55 Big Window Shortbed, Drive-It-&-Work-On-It slid down the "slippery slope" to a Frame-Off Rodstoration! LQ4/4l85e/C4 IFS/Mustang 8.8 rearend w/3.73's Dan's '55 Big Window "Build" - Well, Kinda! |
|
|

|
|
|
#23 | |
|
Registered User
Join Date: Mar 2013
Location: Edmonton, AB
Posts: 298
|
Re: Project: Patina (1949 Chevrolet 1434)
Quote:
The coil bracket will allow me to stack the coils on top of each other or mount a set of coils on either side of the plate. My guy is going to cut out two different designs for me to trial. Once I receive the kit I will post more photos to give you a better idea. The JEGs valley cover was $50 off so I bought it. I think I got it for $89. I woudn't pay any more for it than that. It's just a cast part and isn't the best of quality. |
|
|
|

|
|
|
#24 |
|
Registered User
Join Date: Jan 2010
Location: Titusville, PA
Posts: 3,585
|
Re: Project: Patina (1949 Chevrolet 1434)
great updates. top notch stuff for sure. truck has great character too.
__________________
51' 99toLife finished 2011,355 sbc,5speed, patina, redoing whole truck, inter, bags, etc http://67-72chevytrucks.com/vboard/s...d.php?t=382481 49Hardtimes s/10 susp- bagged, vortec sbc, 5 speed, patina, sold http://67-72chevytrucks.com/vboard/s...d.php?t=594874 VIDEOS https://youtu.be/E8zHhjgS_lA https://youtu.be/E8zHhjgS_lA Geronimo 54' LS engine, static drop IFS, Client build, just about done http://67-72chevytrucks.com/vboard/s...62#post7399162 52' 3100 Slowly in progress, will be painted two toned, have 235 with a t-5, lowered OG frame Other projects, 49' farmuse 3100, killer Patina, will be slammed, LS engine, full done interior up next! www.coffeeandcustoms.com |
|
|

|
|
|
#25 |
|
Registered User
Join Date: Mar 2013
Location: Edmonton, AB
Posts: 298
|
Re: Project: Patina (1949 Chevrolet 1434)
Hey guys,
Sorry its been a little quiet around here. I'm just uploading another batch of photos to my Flickr account. Once they've uploaded I'll toss them on the thread. There isn't much new but I finally got the truck on the hoist so I have some photos of the underside. I also got the running boards fixed and they are in epoxy primer for the time being. The truck is currently waiting its turn for a custom firewall and toe boards and some other rust repair. I expect it will get done within the next year or so. Once that's done it will be time to plumb and wire the truck. It's a slow process but it will get there. Here are a couple photos from a photo shoot I had done this summer:  Trucks by Spencer Wiedeman, on Flickr Trucks by Spencer Wiedeman, on Flickr Trucks by Spencer Wiedeman, on Flickr Trucks by Spencer Wiedeman, on Flickr
|
|
|

|
 |
| Bookmarks |
|
|