
 |
|
|
#201 |
|
Senior Member
 Join Date: Mar 2011
Location: Tucson, Arizona
Posts: 2,084
|
Re: Markeb01 Build Thread
Thanks Mark. I think they look very period correct for the truck. I was considering some mid 60s car buckets but they are getting just too expensive for what you get. I'm glad to hear they work for you since it sounds like we're afflicted with much the same back ailments. I'll have to check them out.

|
|
|

|
|
|
#202 |
|
Registered User
Join Date: Sep 2011
Location: Tacoma, WA
Posts: 2,425
|
Re: Markeb01 Build Thread
I am afraid I missed it, but where did your floor sills come from?
I am obviously not a purist in regards to my build ..... 
__________________
Michael McMurphy My 66 Stepside My 64 Tow Truck My 66 Tempest Table Of Contents Added to Page1 |
|
|

|
|
|
#203 |
|
Senior Enthusiast
Join Date: Feb 2007
Location: Spokane Valley, WA
Posts: 8,356
|
Re: Markeb01 Build Thread
I got them from Chevy Duty (ClassicParts). I should have taken a comparison picture showing both the old and new in the same photo, but I was in too big a hurry to get them installed!
http://www.classicparts.com/1960-66-...tinfo/03-065S/ American Classic also sells them, but charges more. They also have the best photo of the item: 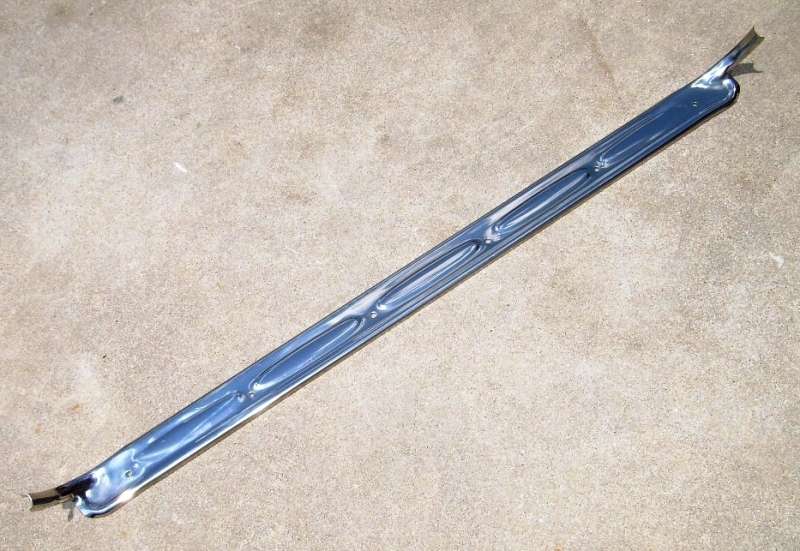 It's the next to the last item on the following link: http://www.americanclassic.com/asp/d...ype=to&exyear=
__________________
My Build Thread: http://67-72chevytrucks.com/vboard/s...d.php?t=444502 |
|
|

|
|
|
#204 |
|
The 60-66 GMC/Pontiac guy....
Join Date: Oct 2010
Location: Apache Junction, Arizona
Posts: 1,306
|
Re: Markeb01 Build Thread
WOOPS! wrong thread... sorry..
__________________
 Building Genuine Pontiac Firepowered cars and trucks for several decades.  Why Pontiac?? That's just me daring to be different.  Projects.. 63 C10 Short Wheel Base fleetside (The Pro-Street) currently under reconstruction. 440CID 2X4 Pontiac 
Last edited by 66-PMD-GMC; 05-28-2012 at 09:13 PM. Reason: wrong thread |
|
|

|
|
|
#205 | |
|
Senior Enthusiast
Join Date: Feb 2007
Location: Spokane Valley, WA
Posts: 8,356
|
Re: Markeb01 Build Thread
Quote:
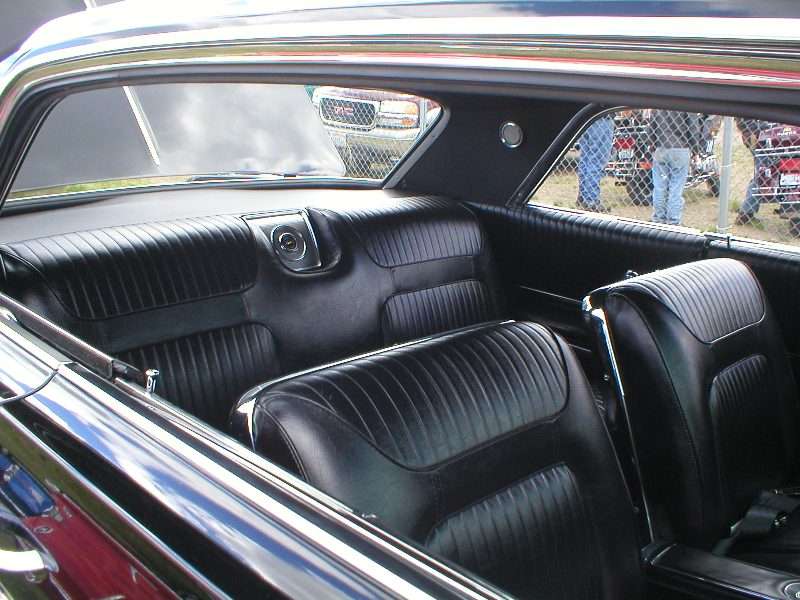 Problem being the parts add up to well over $1,000 today, and when you're done the backs still arenít adjustable.
__________________
My Build Thread: http://67-72chevytrucks.com/vboard/s...d.php?t=444502 |
|
|
|

|
|
|
#206 | |
|
Registered User
Join Date: Sep 2011
Location: Tacoma, WA
Posts: 2,425
|
Re: Markeb01 Build Thread
Quote:
I am guessing they sell by the each and are not side specific?
__________________
Michael McMurphy My 66 Stepside My 64 Tow Truck My 66 Tempest Table Of Contents Added to Page1 Last edited by McMurphy; 05-29-2012 at 09:04 AM. Reason: missing bracket |
|
|
|

|
|
|
#207 |
|
Senior Enthusiast
Join Date: Feb 2007
Location: Spokane Valley, WA
Posts: 8,356
|
Re: Markeb01 Build Thread
That is correct. 2 each required and they fit either side, there is no front or back, left or right.
__________________
My Build Thread: http://67-72chevytrucks.com/vboard/s...d.php?t=444502 |
|
|

|
|
|
#208 |
|
Senior Enthusiast
Join Date: Feb 2007
Location: Spokane Valley, WA
Posts: 8,356
|
Re: Markeb01 Build Thread
Weíve decided to try a few local road trips up to a couple hours from the house and see if my back can tolerate it. So I thought it might be a good idea to carry a spare tire and jack again. I stuck a new valve stem in a stock 15x6 powder coated wheel I had laying around, and mounted the best left over Firestone 195x15 tire off my wifeís Toyota. I previously ran this size on the front, so it should be sufficient for a spare without taking up too much room in the bed. I never removed the Camaro spare tire bracket from the bed floor, and kept all the hold down hardware in one place so it was pretty easy to remount the spare. The jack went in the passenger side junk bag and the crank handle was conveniently tethered with the handle/straps on top for rattle free convenience.
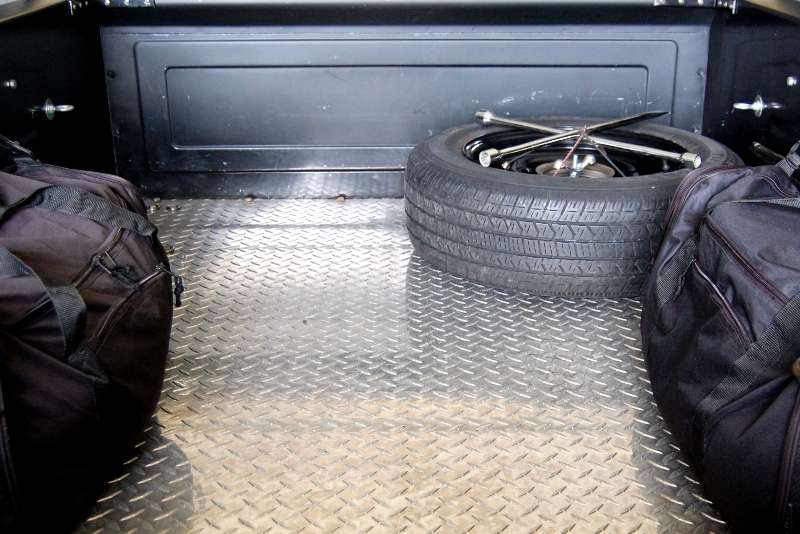 I also replaced #6 & 8 spark plugs which need to be cleaned up about once a year. And the new wide windshield trim is scheduled to arrive Friday. Hopefully I can restart that project next week.
__________________
My Build Thread: http://67-72chevytrucks.com/vboard/s...d.php?t=444502 |
|
|

|
|
|
#209 |
|
Senior Enthusiast
Join Date: Feb 2007
Location: Spokane Valley, WA
Posts: 8,356
|
Re: Markeb01 Build Thread
A few years ago a careless helper dropped the tailgate before the chains were connected, chunking a nice deep matching pair of gouges in the powder coated rear bumper. Since I forgot to take any before pictures, hereís a couple of older images highlighting the damaged areas:
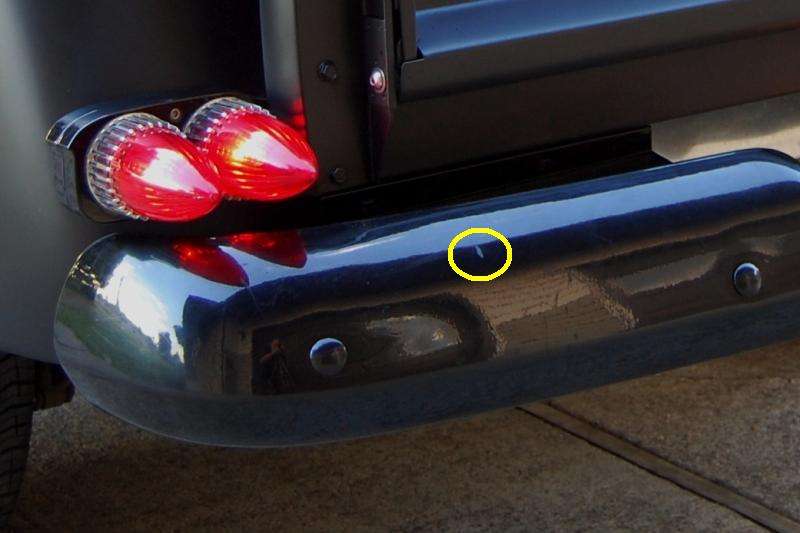 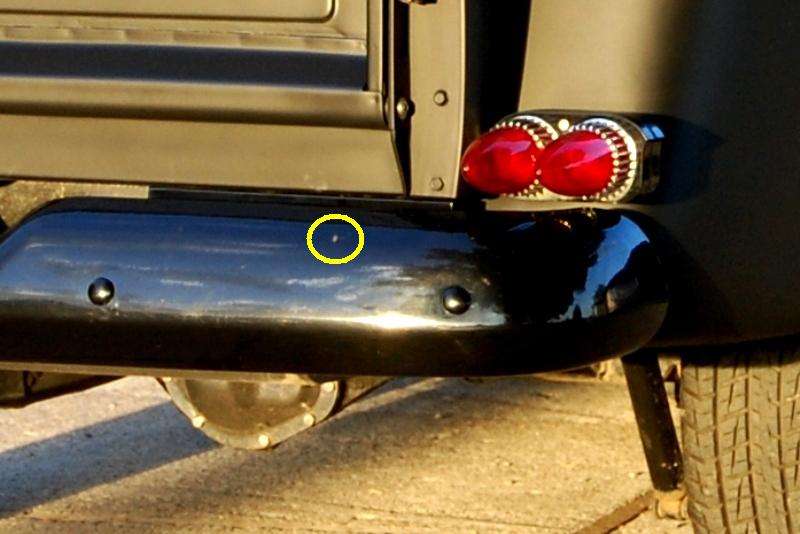 Fortunately the powder coat is really thick, so I was able to sand out most of the damage starting with 320 wet up through 1500 grit, after which I hit it with the body buffer. The first pass was done with a wool pad and 3M Perfect It rubbing compound, followed by 3M foam pad polishing glaze. For not having put more than an hourís effort into it, the bumper turned out looking pretty darn good. At least the gouges are gone and it looks shiny again. Hereís a lousy picture taken late at night. 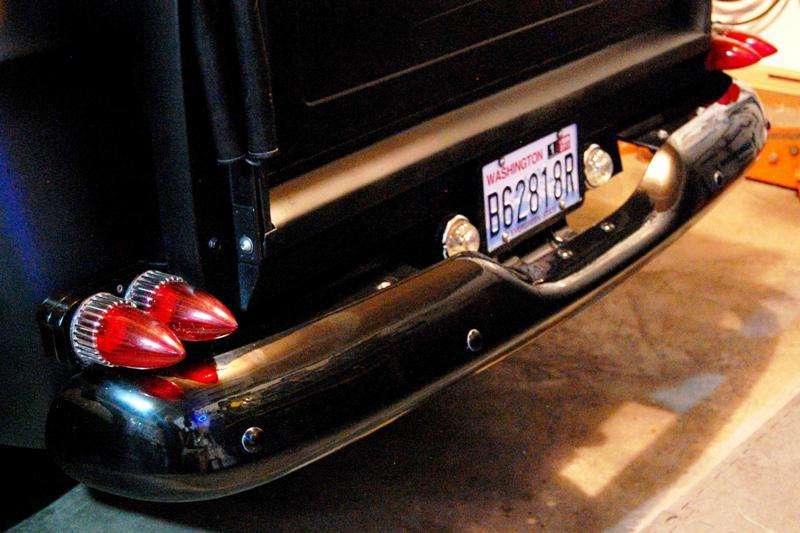
__________________
My Build Thread: http://67-72chevytrucks.com/vboard/s...d.php?t=444502 |
|
|

|
|
|
#210 |
|
Senior Member
 Join Date: Oct 2009
Location: Fayetteville, Arkansas
Posts: 1,923
|
Re: Markeb01 Build Thread
Quote:
with my big belly and long legs the seat has to go all the way back so i don't need the seat backs adjustable, just set it up to fit the driver. and your right... it will scald your arm, but looks cool. nice job with the buffer... Last edited by clemdaddy; 05-31-2012 at 01:45 PM. Reason: spelling |
|
|

|
|
|
#211 |
|
Senior Enthusiast
Join Date: Feb 2007
Location: Spokane Valley, WA
Posts: 8,356
|
Re: Markeb01 Build Thread
That sounds like an excellent idea, essentially creating a home built version of buddy buckets, with richer looking seats. Iíd suggest take a look at the buddy bucket frame shown on post 5366 of the following thread, for ideas on what modifications your stock bench frame may need to accommodate twin seats:
http://67-72chevytrucks.com/vboard/s...seats&page=215
__________________
My Build Thread: http://67-72chevytrucks.com/vboard/s...d.php?t=444502 |
|
|

|
|
|
#212 |
|
Senior Enthusiast
Join Date: Feb 2007
Location: Spokane Valley, WA
Posts: 8,356
|
Re: Markeb01 Build Thread
I started out washing the truck for a car show this weekend, when I heard the unmistakable sound of a heavy with 4 radial aircraft engines. I grabbed the camera and snapped a couple of shots of B17 Aluminum Overcast heading in to land at Felts Field. Here are a couple of shots showing with the gear up, and gear down:
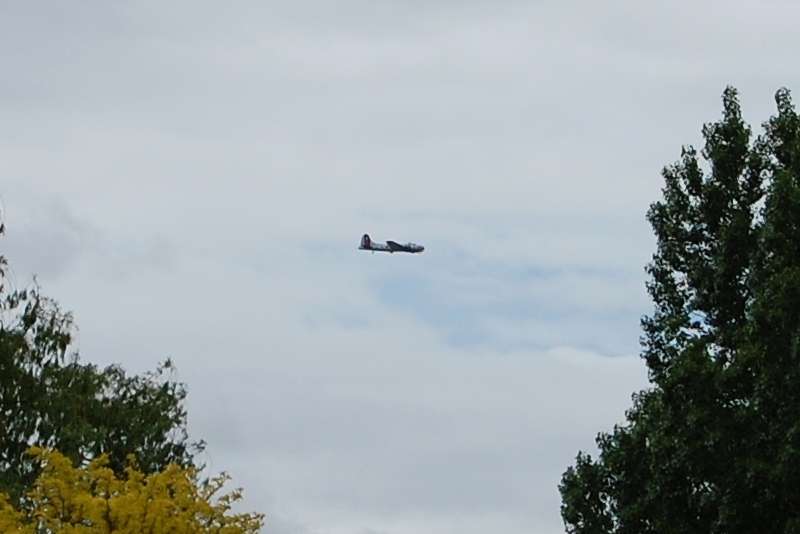 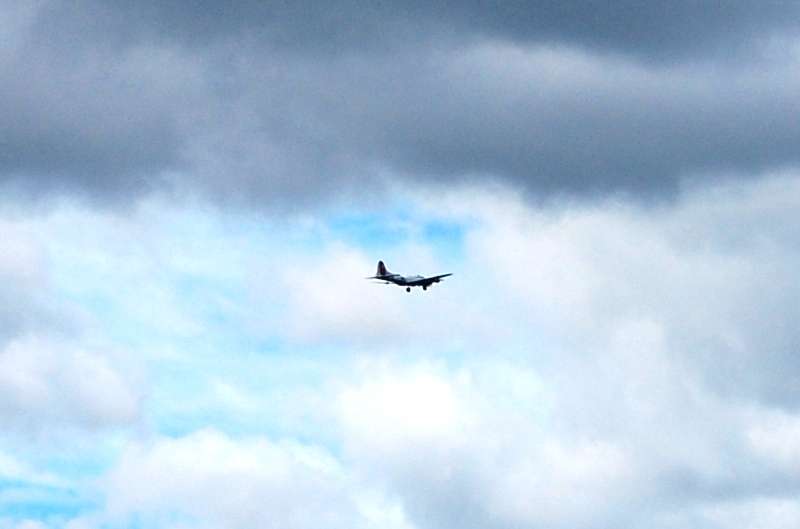 The crappy weather made it a little disappointing. When these vintage bombers appear once or twice a year, they general fly an unusual route that takes them within a few hundred feet of my backyard at low level. I had one fly directly over me at about 500 feet a few years back, but didn’t have access to a camera that day. As I was drying the truck, the brown truck showed up with my “wide” windshield trim. It arrived exactly as advertised, in excellent condition and well packaged. The upper two pieces are perfect, needing only polishing. The passenger lower has two tiny dings, and the driver lower piece has one dent and 5 or six pinpoint size dings. There are also some wiper scratches, but no real damage. The beauty of this trim is virtually the entire back side of the trim is accessible due to the design of the trim, which will make it very relatively easy to restore compared to the thin trim. Here are a few pics showing how much nicer the wide trim looks compared to the skinny trim: The two in front are the new wide lower pieces. The tiny one in the back is the lower driver side from the other set: 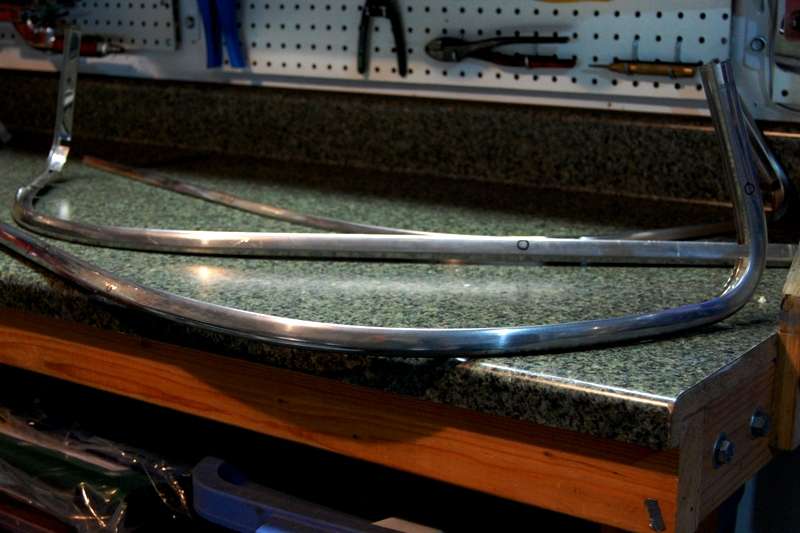 This is a shot of the upper driver side piece. This stuff is just beautiful if this type of detail matters like it does to me: 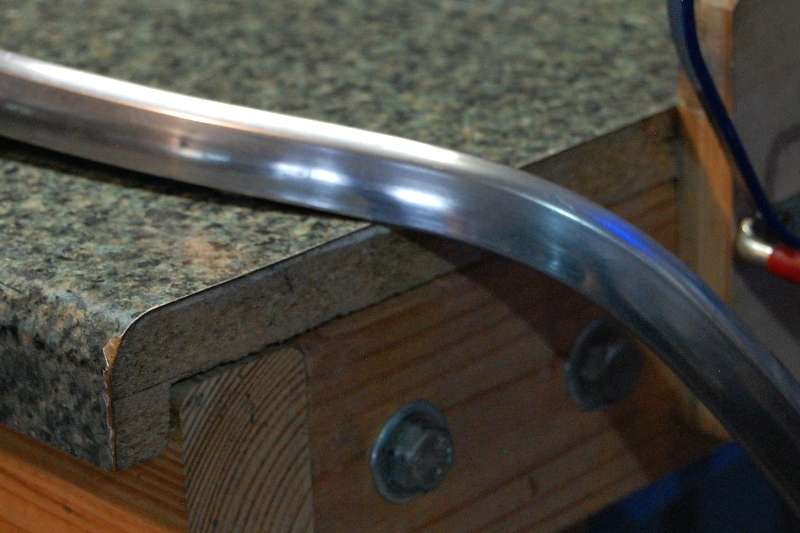 Here’s a shot showing the driver side lower corner of the thin trim compared to the “molding” of the wide trim. The wide trim retains its shape around the bend, while the thin piece actually flattens out:  And these joint caps are probably the most graphic depiction of how much different the two styles of trim are from each other: 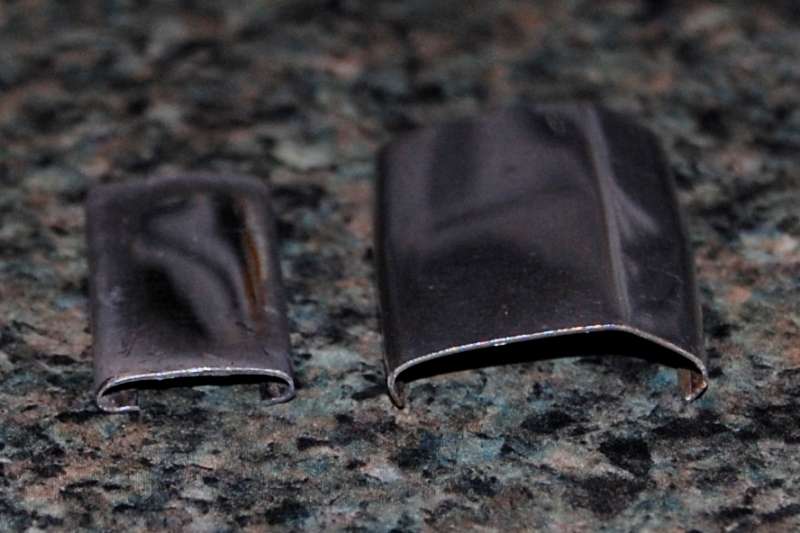 This is the only actual dent in the entire set. Even though it’s on the character line, it’s completely open in the back over this spot, and will be relatively easy to correct: 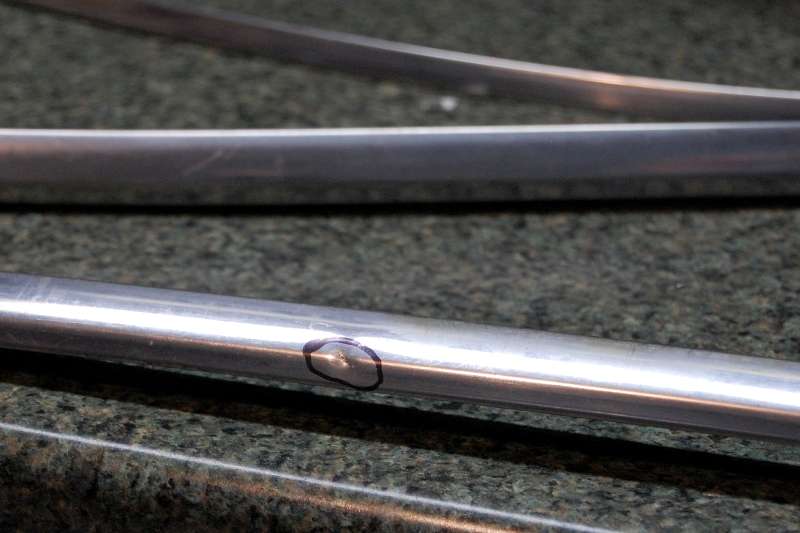 It looks like I’m going to be busy for the next few days, as I also received confirmation the full floor vinyl mat is scheduled to arrive next week.
__________________
My Build Thread: http://67-72chevytrucks.com/vboard/s...d.php?t=444502 Last edited by markeb01; 06-02-2012 at 02:30 AM. |
|
|

|
|
|
#213 |
|
Rollin' Old Skool
Join Date: Jun 2007
Location: Hattiesburg, MS
Posts: 5,371
|
Re: Markeb01 Build Thread
i've been wanting to take pics of the planes flying in & out of the Air Force base here...last year i got a bit of a show as the Thunderbirds were practicing for the local air show...they would come zooming by, & like a little kid i would get up and run to the window (or outside) to look everytime, lol....and those big C-17 cargo planes come in & go out not far above the treetops/rooftops, & i'm always staring in amazement...i also saw an Osprey flying by last year...one direction it went by with the propellers upward like a copter, and it came back by a few minutes later flying with them like a plane....my wife laughs at me for looking, or she scolds me because i get distracted by them when driving
 ...not sure what it is about planes that captures my interest so much ...not sure what it is about planes that captures my interest so muchbtw, the new trim looks much better...can't wait to see it polished & installed!
__________________
_____________________________________________ Phillip My Build threads: 1966 Chevy C-10 "Black Betty" shortbed, fleetside, BBW, 327 V8/ Powerglide (under construction) http://67-72chevytrucks.com/vboard/s...ighlight=betty 1997 Chevy Tahoe, 2dr/2wd, mild custom (Daily driver) http://67-72chevytrucks.com/vboard/s...d.php?t=601142 Pics: '66 C-10 https://flic.kr/s/aHsjHWD4h9 '97 Tahoe https://flic.kr/s/aHsjGZ7wKP '93 C-1500 https://flic.kr/s/aHskxdpdnQ '88 S-10 Blazer https://flic.kr/s/aHsjYGx4Md Previous Rides: 1993 Chevy S-10 ext. cab, 4.3L, 4/5 drop (Sold) 1993 Chevy C-1500 short/step Retro-Rod (Sold) 1988 S-10 Blazer 2dr/2wd mild custom (Sold) |
|
|

|
|
|
#214 |
|
Registered User
Join Date: Sep 2011
Location: Tacoma, WA
Posts: 2,425
|
Re: Markeb01 Build Thread
Heh.... 7 years of my life as a gunner on a Air Defense weapon system taught me one thing. If it is flying, identify it.
Cant help it. Even after all these years I still look at anything in the sky. Cool pics Mark! Too awesome. Cannot wait to see that trim on, with comparative pics.
__________________
Michael McMurphy My 66 Stepside My 64 Tow Truck My 66 Tempest Table Of Contents Added to Page1 |
|
|

|
|
|
#215 | ||
|
Senior Enthusiast
Join Date: Feb 2007
Location: Spokane Valley, WA
Posts: 8,356
|
Re: Markeb01 Build Thread
Quote:
The best example I can offer that weíre not alone in this behavior happened back in the mid 1980ís when I was driving north on Highway 17 near the San Jose airport. It was the height of the afternoon commute when a B17 and a B24 bomber appeared in the sky off to my left. The B17 was in front with the B24 trailing. The B17 was close enough I could make out the tail markings, and it was impossible to not recognize that tail fin. Since this was the first time I had ever seen flying WWII vintage bombers I slowed down a bit to get a better look. I was very careful to watch the traffic and glance at the planes when I could, and each time I slowed down a little more. Nobody was pushing behind me, and it turned out the traffic in front of me was slowing down too. By the time I reached the runway all of the traffic going both directions had stopped, and I got to watch the B24 land. It only lasted a few seconds and the traffic started moving again. Beyond the cool factor of actually seeing the planes, I was amazed that every car on the freeway had stopped to watch, and not a single person honked their horn. The second time I experienced a complete traffic stoppage due to airplanes was sitting on an overpass near Moffett Field. The Thunderbirds were warming up for an air show, and the Highway Patrol stopped traffic for about 15 minutes to keep drivers from wrecking while they rubbernecked. Apparently A10 Warthogs were also part of the show, because a flight of them approached the overpass we were parked on. We first picked them up about a quarter mile away in a shallow descent from an altitude of about 1500 feet. By the time they were within 50 feet of the car they were at the same height as the overpass. We were looking directly into the cockpit and could see the markings on the lead pilotís helmet! A friend of my older son in the back seat panicked and tried to get out of the car. The rest of us just calmly sat and watched, knowing this was a once in a lifetime opportunity, and it would all be over in seconds (either way)! Of course they pulled up at the last second and cleared the cars by about 20 feet, providing a magnificent view of the bottom of an A10. Iím sure anybody that was there that day will never forget the event. Iím equally sure the pilots were probably having a great time scaring the crap out of half the spectators! Quote:
Itís kind of hysterical watching old Sci-Fi movies from the 50ís, because they inserted whatever footage they had with the plane pointing in the right direction. And if it wasn't pointing the right way, they just flipped the film over and the markings are all backwards! A guy takes off in an F80, which turns into an F86, F101 Voodoo, F84 Thunderjet, F102 Delta Dagger, F104 Starfighter, etc, and theyíre all suppose to be the same guy in the same plane! What surprises me (and my wife) is that I actually know what they are. I mean Ė who cares?!!  Interestingly we took a drive out past Fairchild Air Force Base a couple of days ago, and they had some really big cargo plane flying around I didnít recognize. I looked up C17 and believe that was it. About all I could determine at the time was it had four engines and a T tail with the horizontal stabilizer up near the top of the vertical stabilizer. I thought maybe he was practicing tough and go landings, but after making several wide circles, about a dozen guys were seen behind the plane floating down in their parachutes. That was something neither of us had ever witnessed before, and created a memorable event. Anyhow itís all good. Thanks for the comments guys, they are always thought provoking.
__________________
My Build Thread: http://67-72chevytrucks.com/vboard/s...d.php?t=444502 |
||
|
|

|
|
|
#216 |
|
Registered User
Join Date: Sep 2011
Location: Tacoma, WA
Posts: 2,425
|
Re: Markeb01 Build Thread
I have been that guy jumping out of the air plane too....
C-130 and C-141 are the 2 main favorites for airborne operations, until you start getting into helicopters of course. Cool memories, thanks for sharing them. I know that area of south bay well, also. We lived down there when I was a kid, then again I spent 4 years at Fort Ord, down in Monterrey. HWY 17 is awesome to drive at 0300 or 0400 on a Sunday night/Monday morning at 60 to 85 mph and you have both lanes to yourself..... Not that I would be so reckless.... well ...... not with passengers anyways.... LoL
__________________
Michael McMurphy My 66 Stepside My 64 Tow Truck My 66 Tempest Table Of Contents Added to Page1 |
|
|

|
|
|
#217 |
|
Senior Enthusiast
Join Date: Feb 2007
Location: Spokane Valley, WA
Posts: 8,356
|
Re: Markeb01 Build Thread
Today we participated in the 20th annual Reardan Mule Days car show. Unfortunately it rained hard all morning right up until the parade started, which deterred a lot of people from bringing their cars out. The total entrants added up to 3 trucks (including ours) and 5 cars.
One of the trucks was an early 50ís Chevy that was both chopped and sectioned. The other was a 1967 (I think) that was really clean. 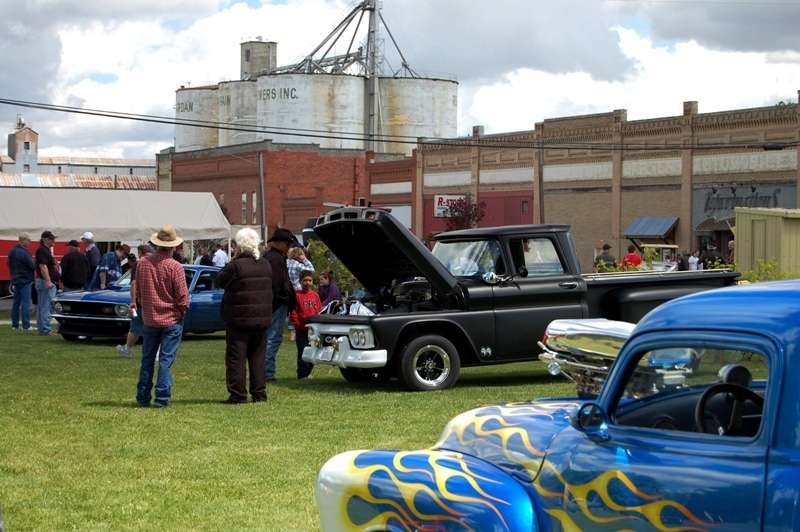 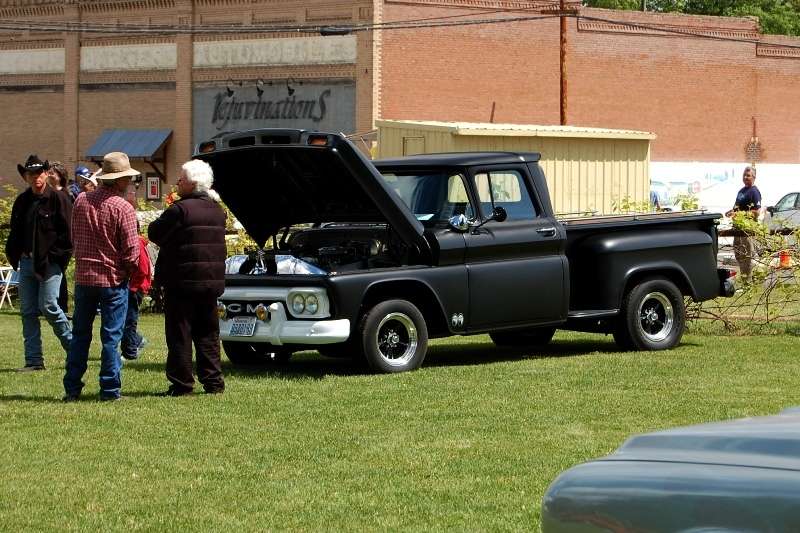 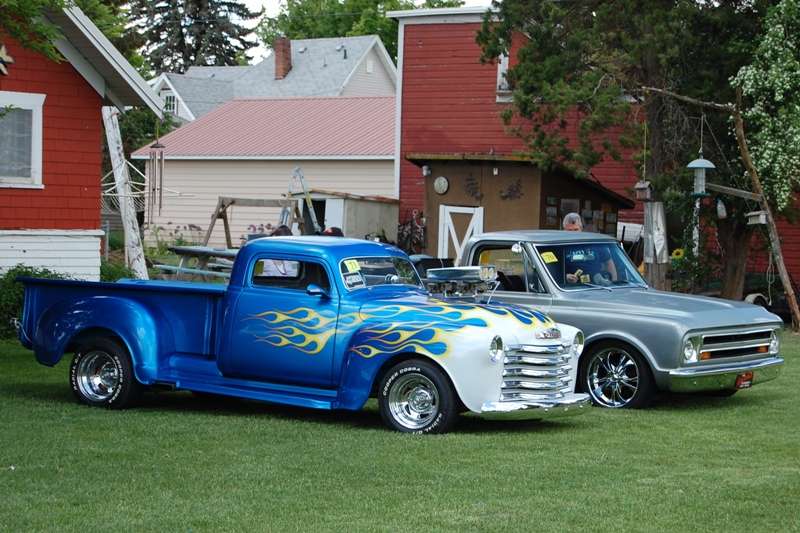 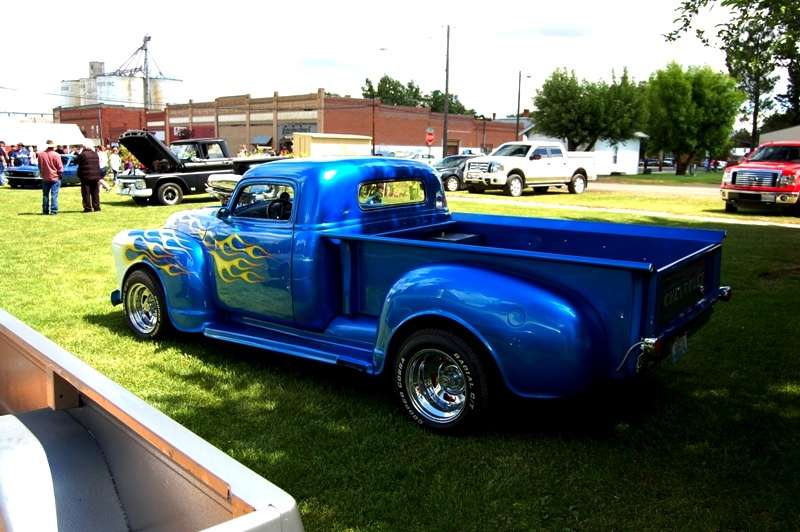  Several of the locals mentioned the park is normally filled to overflowing, and this was the lowest turn out they had ever seen. It didnít slow down the spectators however, as there was a lot of interest and discussions with owners. In spite of the low attendance we had a great time. The rain departed, the sun came out, and there were multiple events being held simultaneously, keeping things interesting. We only stayed a couple of hours since my wife works nights and needed some sleep, but it was enough to have fun and enjoy the trip. And another highlight of the trip Ė there was a 63 Chevy short stepside sitting right on the edge of town in clear view of the highway. We pulled over and snapped a couple of pics. It looks to be in decent shape. At first I thought the front fender had the typical extensive rust behind the tire, but with a closer look it appears a fence post it in the way of the fender and appearing as damage. This is what it looks like from the highway with the naked eye: 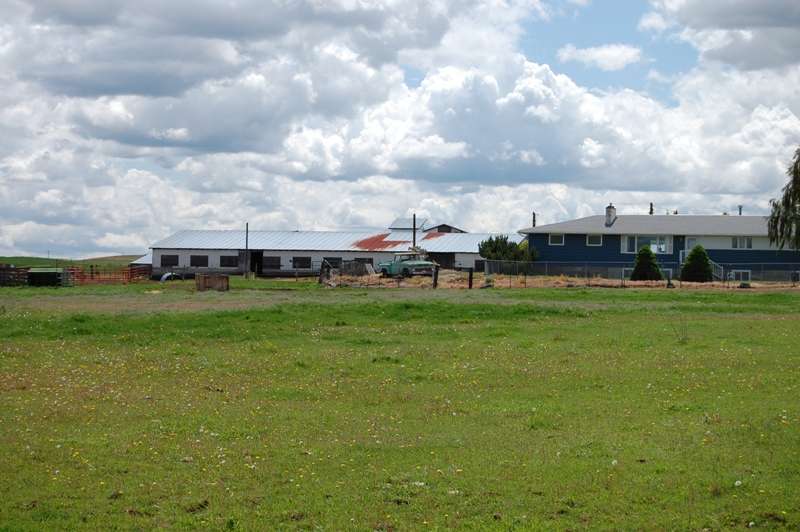 And here it is zoomed up a bit: 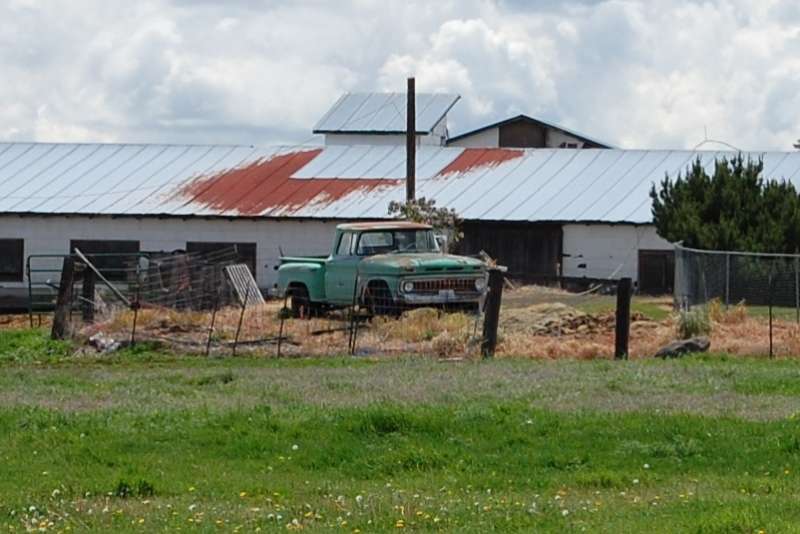 This was also my first opportunity to take photos with the new UV and Polarized lens filters. They certainly did make a difference, but I need to play with the Polarizing filter more to maximize its effectiveness. I think it may also work better without my Polarized sun glasses. Iíll try that next time.
__________________
My Build Thread: http://67-72chevytrucks.com/vboard/s...d.php?t=444502 |
|
|

|
|
|
#218 |
|
But Found Her 25yrs Later!
Join Date: Oct 2010
Location: Oregon City, Oregon
Posts: 10,530
|
Re: Markeb01 Build Thread
Nice pics.
__________________
I lost my 65 - Found it 25 years later: http://67-72chevytrucks.com/vboard/s...d.php?t=426650 66 C20 Service Truck: http://67-72chevytrucks.com/vboard/s...d.php?t=428035 |
|
|

|
|
|
#219 |
|
Senior Enthusiast
Join Date: Feb 2007
Location: Spokane Valley, WA
Posts: 8,356
|
Re: Markeb01 Build Thread
The vinyl full floor mat showed up this morning from Auto Custom Carpets (ACC). It certainly does look attractive in a deep rich black color. The OEM style rubber floor mat it is replacing looked terrible from the day it arrived, the entire surface being covered with crazing and cracks, which can easily be seen here:
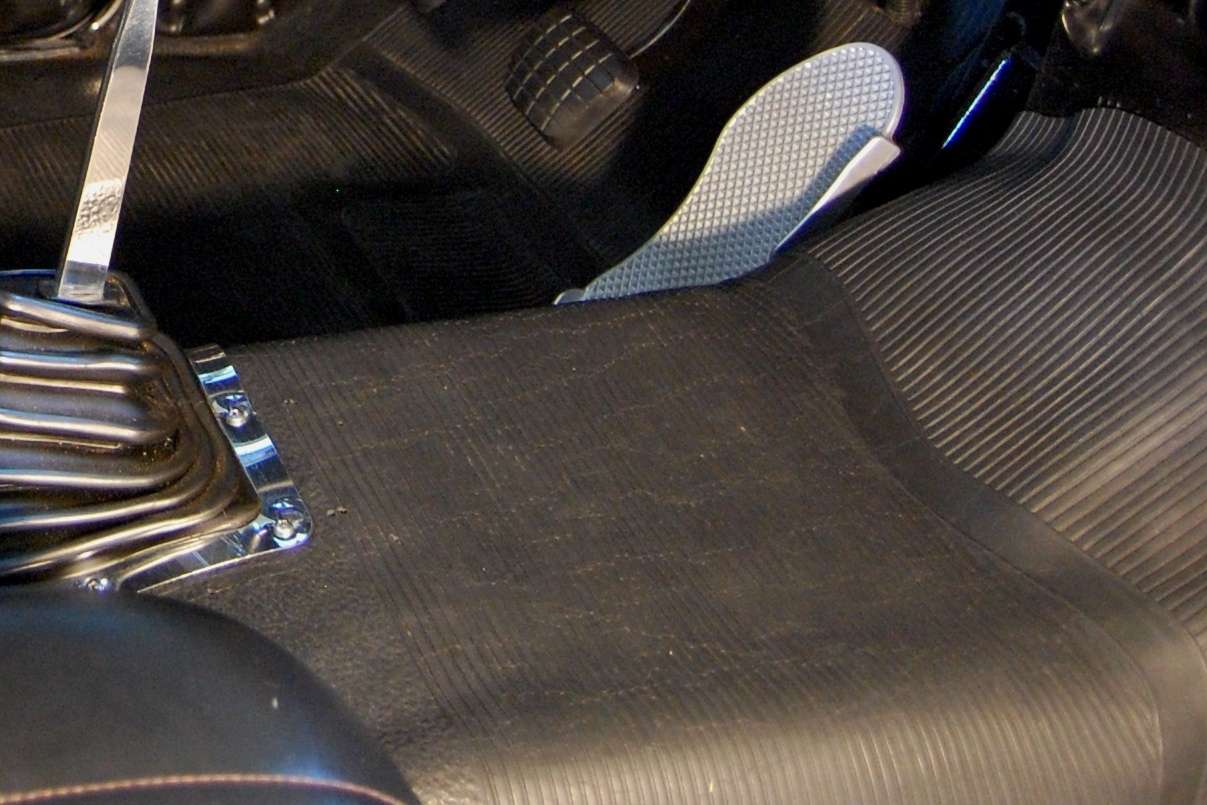 Iím thinking either the rubber material wasnít mixed correctly or was molded before the fixture came up to operating temperature. As noted in the tag stapled to the mat, it has to sit for 48 hours to relax the wrinkles from shipping. Hopefully that will be enough time to allow the pinched nerve in my neck to let go so I can get out in the garage and pull the seats, shifter, seat belts, sills, etc. Hereís a shot showing the overall size and gloss, along with a couple of close ups highlighting the pebble grain finish. After it has warmed up for a day or two, I'll try pressing some additional form into it and remove a few more wrinkles: 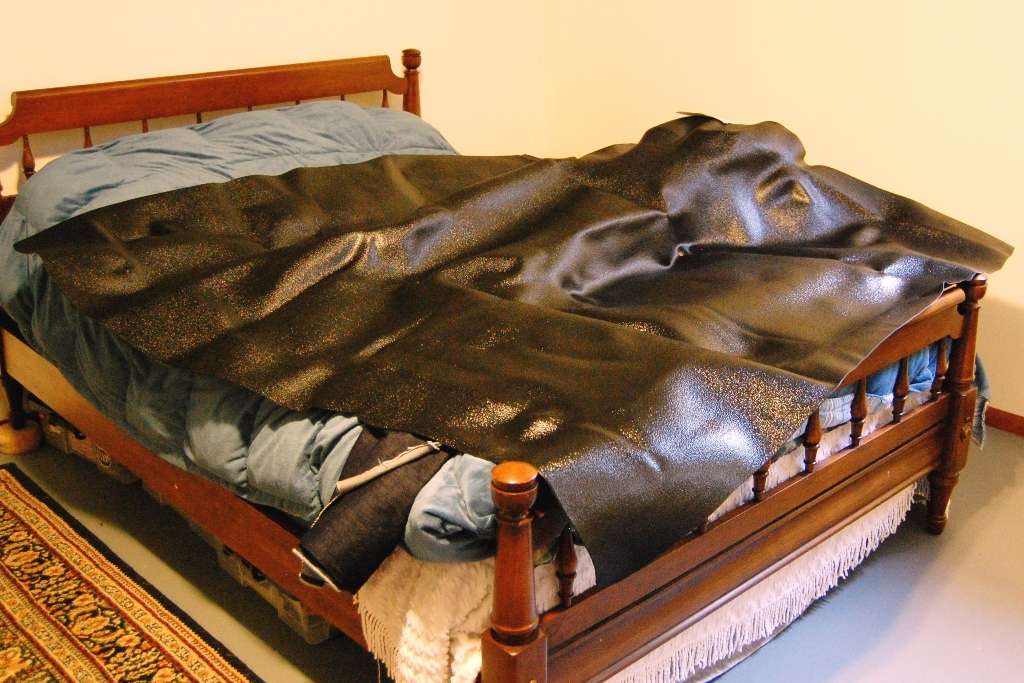   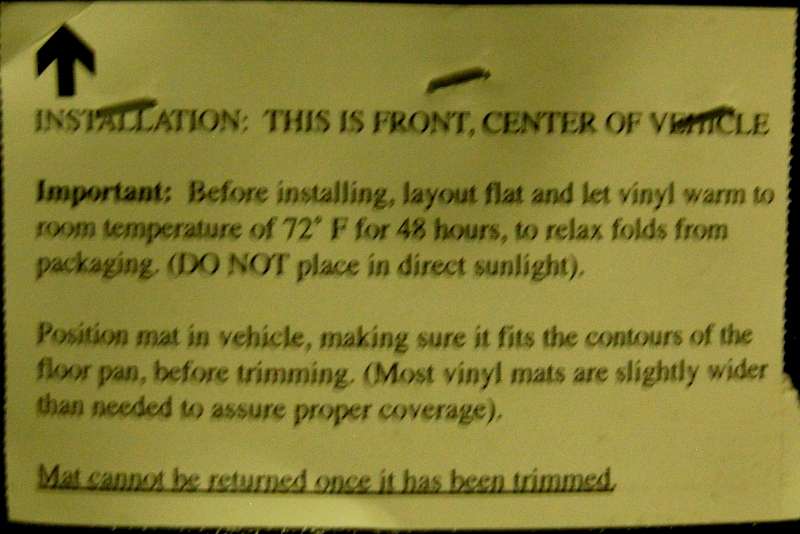
__________________
My Build Thread: http://67-72chevytrucks.com/vboard/s...d.php?t=444502 |
|
|

|
|
|
#220 |
|
Registered User
Join Date: Apr 2012
Location: Cambridge, Ontario, Canada
Posts: 1,771
|
Re: Markeb01 Build Thread
Hey Mark, I was at a cruise night here in Cambridge tonight, and there was a nice, very original 63 GMC, thought you might like to see a pic or 2.
__________________
Craigerrr My build thread, CRGRS 66 Winter Build: http://67-72chevytrucks.com/vboard/s...09#post5638709 |
|
|

|
|
|
#221 |
|
Senior Enthusiast
Join Date: Feb 2007
Location: Spokane Valley, WA
Posts: 8,356
|
Re: Markeb01 Build Thread
Wow, that really is a beauty, thanks for sharing. Ironically that’s actually what I was looking for when we found our truck. I wanted a 1963, either GMC or Chevy. I specifically didn’t want the any 60-62 because of the torsion bar suspension, and preferred the wrap around windshield.
Had my truck started life with an inline six, it would still be in there. I always wanted to build one with a 4 barrel and headers, but mine came with the 850 pound 305 which I was not crazy about at all.
__________________
My Build Thread: http://67-72chevytrucks.com/vboard/s...d.php?t=444502 |
|
|

|
|
|
#222 |
|
Registered User
Join Date: Sep 2011
Location: Tacoma, WA
Posts: 2,425
|
Re: Markeb01 Build Thread
Think of the polarizer as a venitian blinds.
If you put two of them together, one north south and the second east west you could blot out the line of sight. They really only cut down on oblique glare, like from glass off to the left or right if your polarized lens is oriented up and down. Your skies in the photos are showing more blue sky than stark white washed. Reardan is such a wheat town... LOL Picturesque too. Surprised you didnt get some with some of the old buildings in town, or the main drag. Even been out to Tekoa? It is out in the Palouse about half way to Pullman and spring time is fantastic as the rolling hills are turning green with the fresh wheat growing and you can see thunder storms a hundred miles away.... Just a tiny little farming town, but lots of photogenic spots there. Best friend and I went golfing out there one morning, I should never forget it.
__________________
Michael McMurphy My 66 Stepside My 64 Tow Truck My 66 Tempest Table Of Contents Added to Page1 |
|
|

|
|
|
#223 | |
|
Senior Enthusiast
Join Date: Feb 2007
Location: Spokane Valley, WA
Posts: 8,356
|
Re: Markeb01 Build Thread
Quote:
 But we were long gone by the time those were handed out. But we were long gone by the time those were handed out.Havenít been to Tekoa Ė yet. Thanks for the suggestion that may well be our next destination. I havenít traveled more than an hour from home in over 10 years because of degenerative back problems, but now that weíre on the recovery side of the heart attack weíre planning some 1-2 hour day trips to see how much can be tolerated. We both really love and miss traveling and seeing new things, and I'm not finding the photo opportunities I'm looking for locally.
__________________
My Build Thread: http://67-72chevytrucks.com/vboard/s...d.php?t=444502 |
|
|
|

|
|
|
#224 |
|
Registered User
Join Date: Sep 2011
Location: Tacoma, WA
Posts: 2,425
|
Re: Markeb01 Build Thread
Probably high on the list of why I think Spokane is just the best place in the world to live.
No matter what you like, you can find or get it in Spokane. Nowhere I have ever been in this world had the diversity in geography, outdoor activities, all the creature comforts of a major city but still have a small town feel to it.... Not to wax Norman Rockwellian on you all, but you truely have to see this city, and the diversity in an hours drive in any direction, to truely appreciate it. I grew up out at the end of Long Lake, so Reardan was in my "neighborhood" so to speak....
__________________
Michael McMurphy My 66 Stepside My 64 Tow Truck My 66 Tempest Table Of Contents Added to Page1 |
|
|

|
|
|
#225 |
|
Senior Enthusiast
Join Date: Feb 2007
Location: Spokane Valley, WA
Posts: 8,356
|
Re: Markeb01 Build Thread
The last couple of weeks havenít been very productive trying to cope with increasingly limiting pinched nerves in my back and neck. Chiropractic adjustments, massage therapy, pain pills, and anti-inflammatories failed to produce any noticeable improvement.
So I decided this morning it was time for some alternate therapy. With my new floor mat burning a hole in my pocket, I decided a few hours disassembling the interior would provide some vigorous physical activity which would either make things better (or worse) and improve my crappy attitude at the same time. 2 days in a closed bedroom with a space heater set on 80 degrees eliminated virtually all of the packaging wrinkles on the new mat. This is how it looks today without anything underneath to support the shape:  The vinyl material is certainly unlike anything Iíve ever had on the floor of a truck. At 80 degrees itís as flexible as very fresh piece of licorice. At 72 degrees itís more like a very stale piece of licorice. At 55 degrees itís more like a 3/16Ē sheet of ABS plastic, except it can be bent without breaking. Out in the truck, the first thing to go was the shifter handle because it was easy to remove sitting in the driverís seat. My neck wonít bend too well so I wasnít enthusiastic about getting under the truck to hold on to any fasteners. As it turned out I didnít have to and everything was removed from above. I just used a pry bar to apply upward pressure on the seat mounting brackets and outer seat belt bolts. These show the front floor mat, and the older floor mat that was chopped up to fill in between the seats. 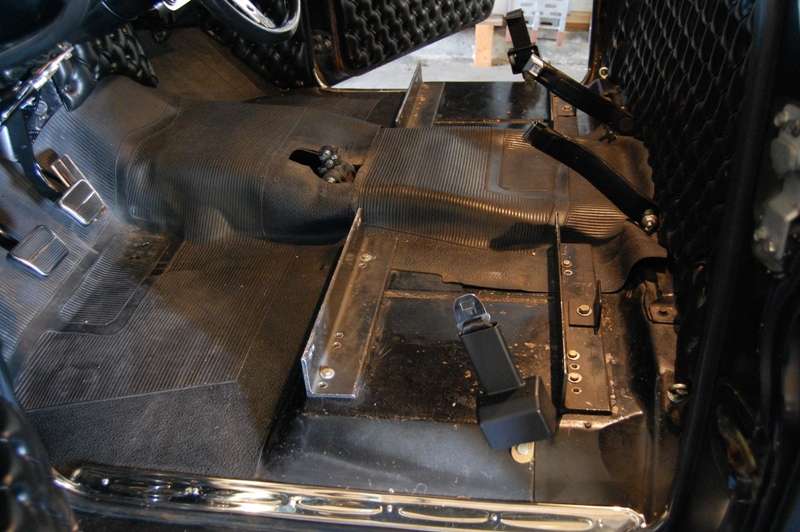 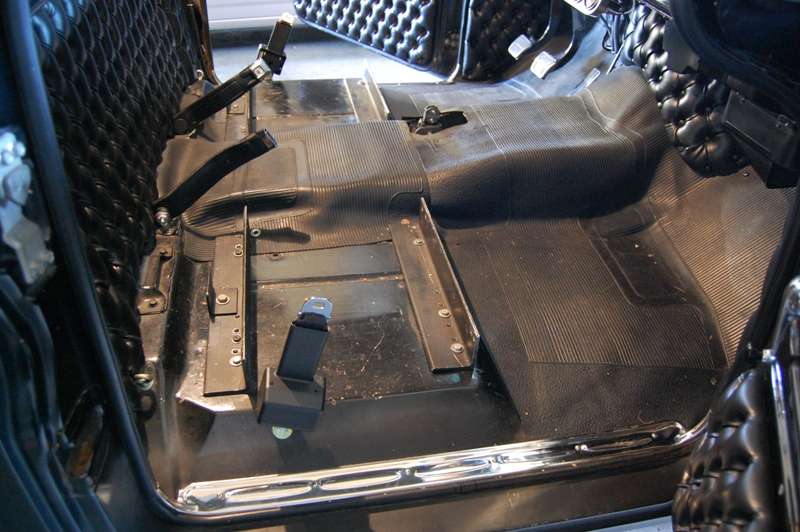 And here it is about 3 hours later. The seat brackets, and belts have been removed, but the old eye bolts for the racing belts still remain, because they have to be removed from underneath. The firewall and rear panel upholstery has also been removed. Iím going to try leaving the upholstered kick panels in place and tuck the mat underneath, but they may also have to be removed: 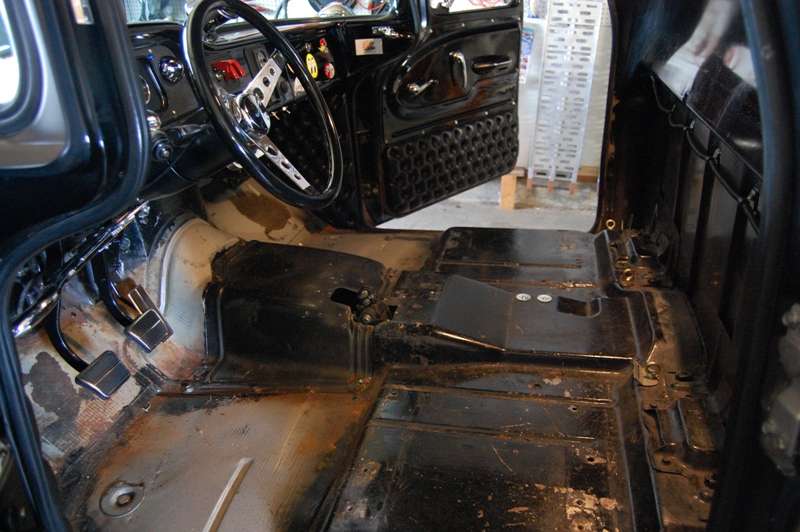 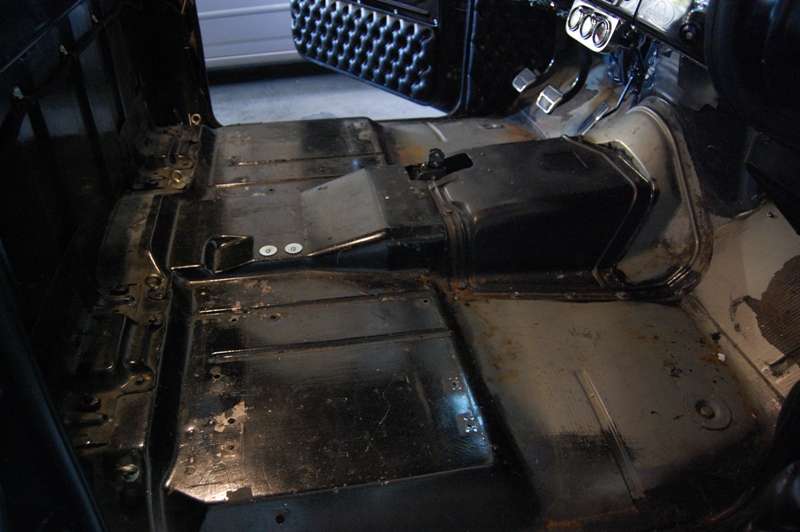 If everything goes well in the morning, Iíll have my wife help pull the eye bolts along with the gas pedal. . A good vacuuming and wipe down should finalize the prep. The mat was delivered with a jute pad, but I havenít stretched it out yet to see how much it covers. If my patience holds out, Iíd like to lay out the new mat in the cab, set the space heater in place at 80 degrees and leave it for a couple of days until it is perfectly molded to the floor before doing any trimming. Weíll see. Iíve wanted one of these full floor mats for a long time, so Iím enthusiastic to see how it turns out.
__________________
My Build Thread: http://67-72chevytrucks.com/vboard/s...d.php?t=444502 |
|
|

|
 |
| Bookmarks |
|
|