
|
Register or Log In To remove these advertisements. |
|
|
|
|||||||
 |
|
|
Thread Tools | Display Modes |
|
|
 09-08-2017, 09:21 AM
|
#1 |
|
Senior Member
 Join Date: May 2007
Location: Doodah Kansas
Posts: 7,748
|
Re: Kell's Two Cents - 1946 build
the vent in the dash isnt a vent, its open like that for a map light that goes in the bracket you are describing, there was a switch under the dash to turn it on. it was for illuminating the choke and throttle bowden cables as well as the ash tray, or just for reading a map.
I wired a dash light in mine that turns on with the rest of the gauge lights so its on all the time with the headlights, but dimmer than it would have been originally, because I put my HVAC controls there and they arent backlit. the bracket you are missing is just a light box that keeps the light from scattering anywhere but straight down, I think I have one out of a dash already and if I do I will snap a picture, I didnt use it on mine because its a dim little dash bulb. the zip tied wiring looks great, very clean. look up how to do aircraft lacing on youtube, you will save money and time if you ever do it again with the nylon string, I used to do it as an aircraft tech a million years ago. very very clean work!
__________________
the mass of men live lives of quiet desperation if there is a problem, I can have it. new project WAYNE http://67-72chevytrucks.com/vboard/s...d.php?t=844393 |

|

|
|
09-08-2017, 12:33 PM
|
#2 |
|
Registered User
Join Date: Nov 2014
Location: Oakland, CA
Posts: 114
|
Re: Kell's Two Cents - 1946 build
thanks dude yeah the bracket that is imaged is mine, I have that part. We tacked it onto the dash when I had some dash work done, but I have been looking around for a little self grounding socket and haven't found a part number. I figure I can find some generic one to work, I just haven't begun looking down that path yet so I have nothing figured out so far
|
|
|
|
|
09-09-2017, 06:14 PM
|
#3 | |
|
Senior Member
Join Date: May 2007
Location: Doodah Kansas
Posts: 7,748
|
Re: Kell's Two Cents - 1946 build
Quote:
I think this is it http://www.ebay.com/itm/OLD-DASH-PAN...T/142454929907
__________________
the mass of men live lives of quiet desperation if there is a problem, I can have it. new project WAYNE http://67-72chevytrucks.com/vboard/s...d.php?t=844393 |
|
|
|
|
|
09-09-2017, 09:11 PM
|
#4 | |
|
Registered User
Join Date: Nov 2014
Location: Oakland, CA
Posts: 114
|
Re: Kell's Two Cents - 1946 build
Quote:
I swear I over complicate things so much, after that link you sent a quick search for "single contact socket" brings up part numbers from both summit and American Autowire. I really appreciate that attentiveness Joe thanks for the help |
|
|
|
|
|
09-11-2017, 01:23 AM
|
#5 |
|
Registered User
Join Date: Nov 2014
Location: Oakland, CA
Posts: 114
|
Re: Kell's Two Cents - 1946 build
alright so I got a full day on the truck like I was hoping and made all the progress I was hoping to make. I want to step back real quick and update on the brakes and how they were giving me so much trouble. Now that I have experience in this area I feel I could go back in time and knock out everything I needed to do to get them bled and done in a day. I think it took all the time that it did because I wasn't even aware how to approach the situation with a thorough, systematic way in order to get them done right the first time. I think it's made all so worse just cause you're dealing with brake fluid and getting that dripping all over the place
Anyways, here we go Right off the bat I needed to change the location of the remote reservoir fill. I always find myself trying to be slick, thinking I'm being smart then finding that it's really more of a headache. I mounted it on the back wall of the under seat area, where with the seat on I couldn't even get a funnel to it. I went ahead and moved it near the front on the side and got it so I could fill it quite easily. Progressive Automotive offers to make you a brake linkage, all you gotta do is call in with your dimensions and they'll send one out to you. My booster is placed so far back that when I saw the dinky thing they sent me I went ahead a cut a new one out of solid 3/4" stock and went with that instead. So at this point I was ready for day one of bleeding the brakes. We went old school with it and had a buddy over pumping the brakes for like an hour straight and us not getting anything out. I was starting with the farthest wheel, so I'm in the rear and just not getting anything... I go ahead and send him off. The fronts seemed to at least be getting fluid in the lines, though those didn't seem to be bleeding either. Even with no pressure on the line I found a leak on the front left line coming off of the front distribution block. Now this is another situation where I thought I was being slick and tucked the distribution block all funky in the frame... It made it a b**ch to get to and now I know that especially on brake lines, or any type of plumbing for that matter, try to keep the connections in easily accessible locations... Being as that my cheapo flare tool was probably the suspect, I went down to the autoparts store and picked up a pre-flared line that happened to be the perfect size and got it switched out. So now day 2 I realized I should really try more aggressive means, and I went and picked up a harbor freight vacuum bleeder. With this I was getting somewhere. The fronts seemed to be getting fluid through but I was getting absolutely nothing but air out the backs. I sat doing it for an extended time just thinking it was coming slowly but surely, however it never did... I began having concerns about my rear brake cylinders, as I had changed the bleeders on them but not the actual cylinders. They were old and original, so if something were wrong I figured that could be a cause of a bunch of air getting through. Not sure if they were ever actually an issue, but as a precautionary measure I went ahead and switched those. On the third day I added teflon tape to the bleeders as to try to cut down on the air getting pulled in through the threads. This seemed to help ALOT and by now I was finally getting some pedal inside the cab. Around this time however I began realizing that I had been skipping the steps of double checking the gap between the booster and cylinder and also bench bleeding the cylinder. I figured these were adding to my soft pedal woes. I pulled the cylinder, realized my huge gap, closed it up and bench bled the cylinder. Put it all back together and was finally actually getting decent pedal. 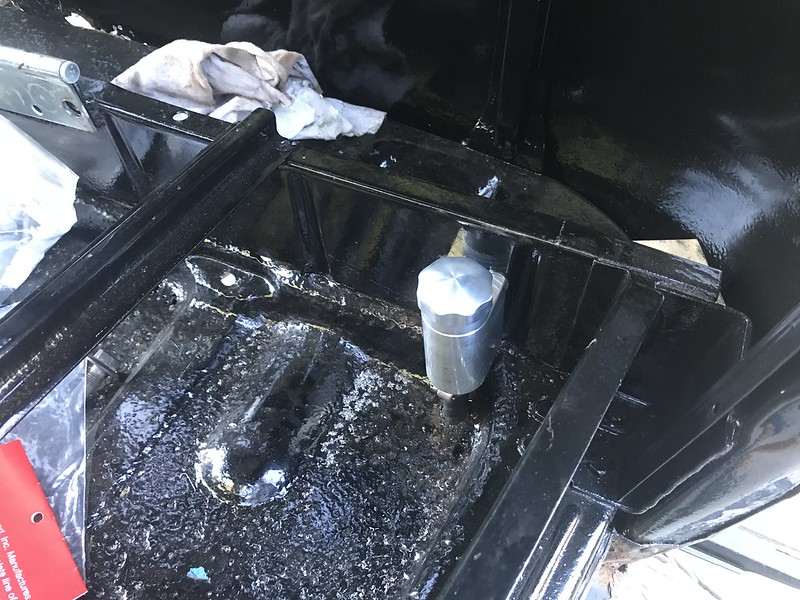 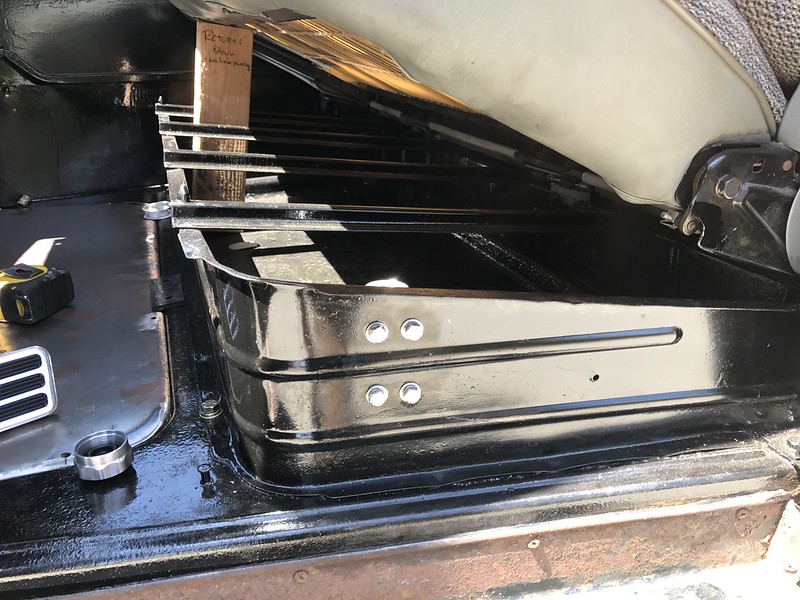 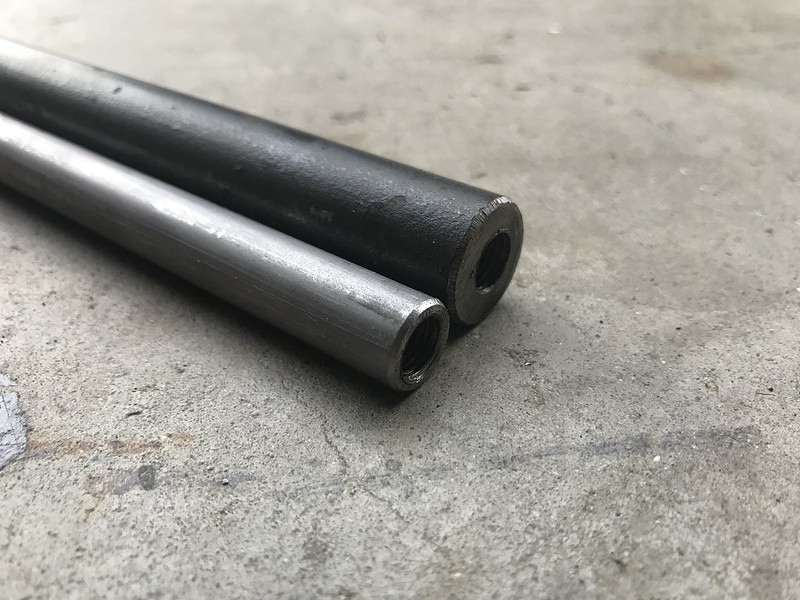 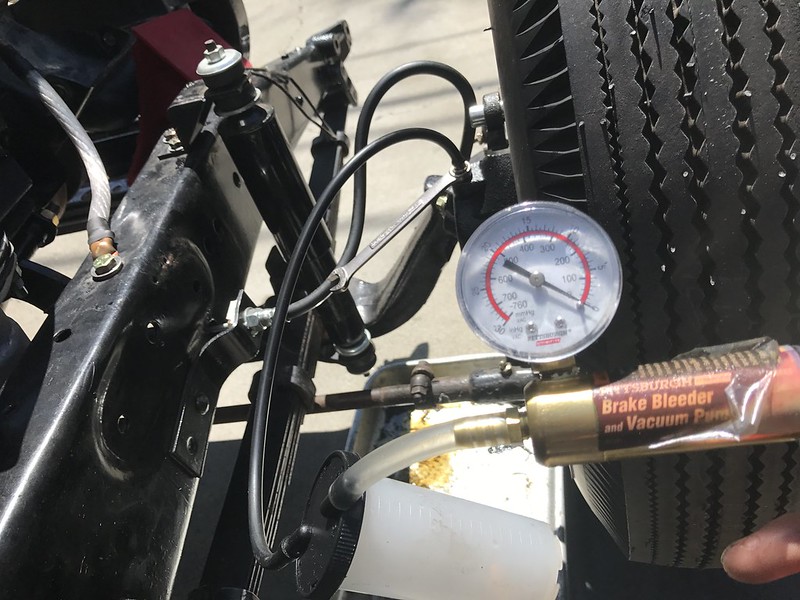 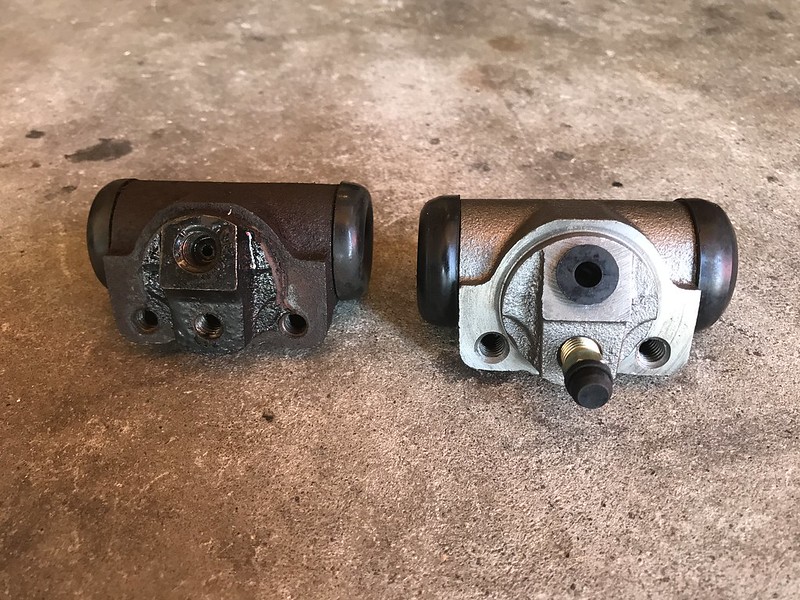 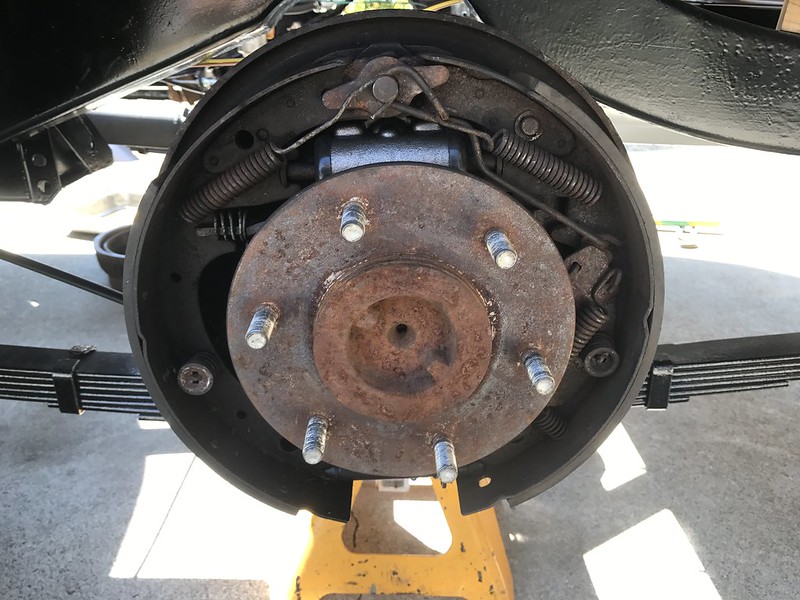
Last edited by gokellurself; 09-11-2017 at 12:31 PM. |
|
|
|
|
09-11-2017, 01:32 AM
|
#6 |
|
Registered User
Join Date: Nov 2014
Location: Oakland, CA
Posts: 114
|
Re: Kell's Two Cents - 1946 build
I had set the gap at about a 1/4", but later found something call the spec for .020" So today I pulled everything again to reset the gap. Got some photos this time, bench bled the cylinder again and got it all back together. Vacuum bled everything and was getting solid streams of fluid out of each bleeder. Brake pedal was feeling really good so I went on and moved to the other things I had going on to get the truck up and on the street
To answer Paintman's question, looks like a 1" cylinder. I had to extend the bolt an 1 1/16" beyond the face of the booster to close up the gap. With the truck running this evening the brakes seem somewhat non responsive for the first 1/4 of the pedal, then they proceed to be very strong beyond that. Idk if that sounds similar to Paintman's issue but with them working so well I'm gonna let them be for the moment 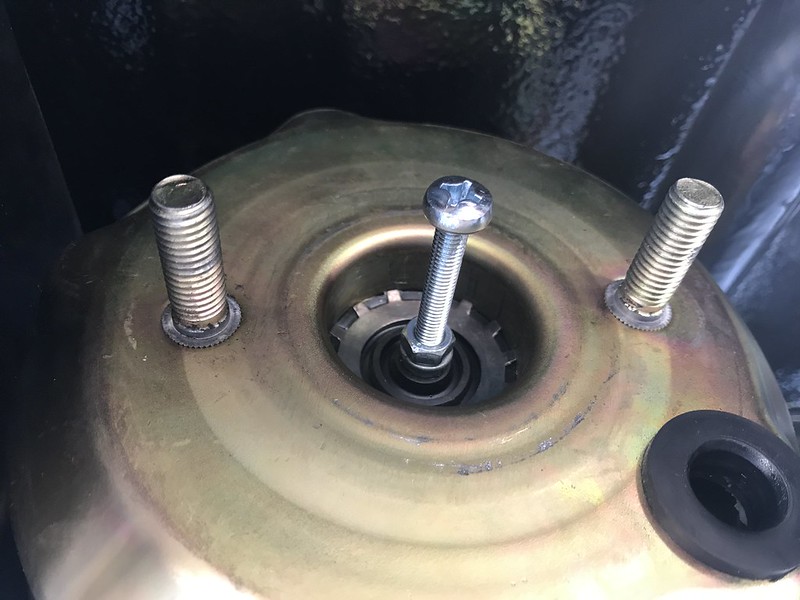 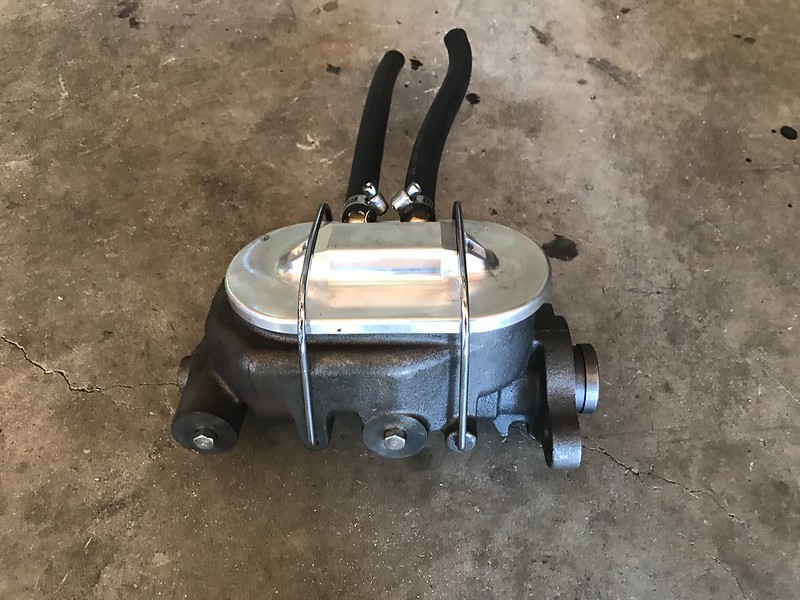 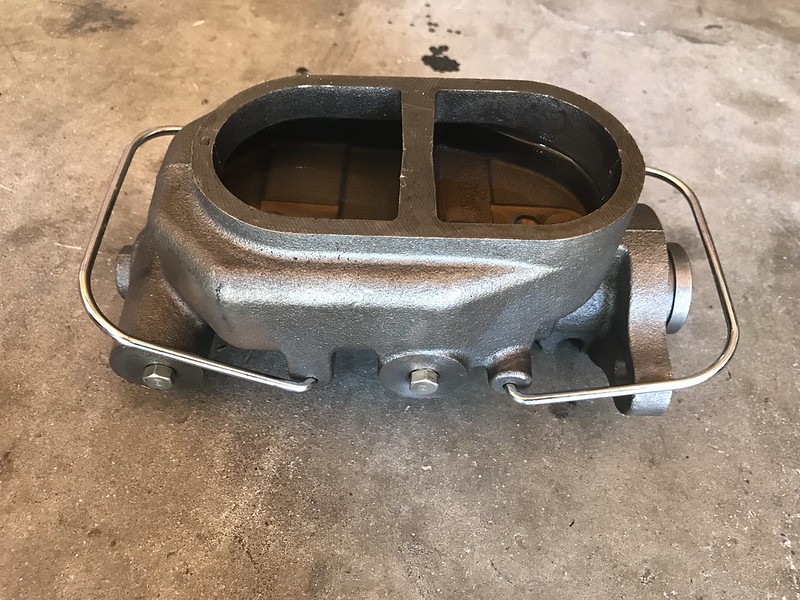 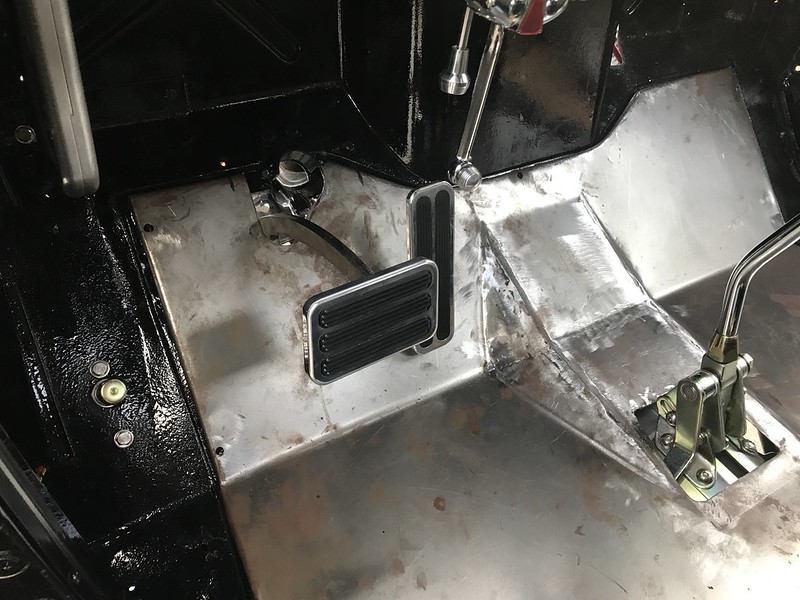
Last edited by gokellurself; 09-11-2017 at 01:46 AM. |
|
|
|
|
09-08-2017, 11:13 PM
|
#7 |
|
Registered User
Join Date: Jan 2010
Location: Titusville, PA
Posts: 3,585
|
Re: Kell's Two Cents - 1946 build
wiring looks great. much easier to keep things clean with small amount of circuits. I usually opt for 21 circuits bc its nice to have the options for down the road. but... so much more to handle. Wiring is labor intensive, even though it doesn't seem like it would be.
I use 0/2 welding wire and press the ends on in a vise. not sure if its cheaper than what you got or not. NEVER heard of electrical tape on wires bf loom. One word of advise I learned, on bullet style connectors even if you use heat shrink on them, they can get corrosion if they are exposed to elements. I now opt for weather packs. Its a bit more tricky to crimp them right and costs go up a a bit, but its much nicer to just unhook a 4 wire weatherpack and you know it will never leak.
__________________
51' 99toLife finished 2011,355 sbc,5speed, patina, redoing whole truck, inter, bags, etc http://67-72chevytrucks.com/vboard/s...d.php?t=382481 49Hardtimes s/10 susp- bagged, vortec sbc, 5 speed, patina, sold http://67-72chevytrucks.com/vboard/s...d.php?t=594874 VIDEOS https://youtu.be/E8zHhjgS_lA https://youtu.be/E8zHhjgS_lA Geronimo 54' LS engine, static drop IFS, Client build, just about done http://67-72chevytrucks.com/vboard/s...62#post7399162 52' 3100 Slowly in progress, will be painted two toned, have 235 with a t-5, lowered OG frame Other projects, 49' farmuse 3100, killer Patina, will be slammed, LS engine, full done interior up next! www.coffeeandcustoms.com |
|
|
|
|
09-11-2017, 08:51 AM
|
#8 |
|
Registered User
Join Date: Jan 2010
Location: Titusville, PA
Posts: 3,585
|
Re: Kell's Two Cents - 1946 build
Everything fighting you is kinda the ropes alot of times. It can be daunting but it makes you truly understand things. I had problems with no fluid to rear cylinders on my first build, the MC needed bench bled again. I had problems with my clutch, pedal was bottoming out on floor. I spent countless hours on each, but figured them out.
Truck looks great, can't wait to see some video.
__________________
51' 99toLife finished 2011,355 sbc,5speed, patina, redoing whole truck, inter, bags, etc http://67-72chevytrucks.com/vboard/s...d.php?t=382481 49Hardtimes s/10 susp- bagged, vortec sbc, 5 speed, patina, sold http://67-72chevytrucks.com/vboard/s...d.php?t=594874 VIDEOS https://youtu.be/E8zHhjgS_lA https://youtu.be/E8zHhjgS_lA Geronimo 54' LS engine, static drop IFS, Client build, just about done http://67-72chevytrucks.com/vboard/s...62#post7399162 52' 3100 Slowly in progress, will be painted two toned, have 235 with a t-5, lowered OG frame Other projects, 49' farmuse 3100, killer Patina, will be slammed, LS engine, full done interior up next! www.coffeeandcustoms.com |
|
|
|
|
09-11-2017, 09:04 AM
|
#9 |
|
Registered User
Join Date: Dec 2002
Location: Cactus Patch So. Az
Posts: 4,749
|
Re: Kell's Two Cents - 1946 build
Do you have a master cylinder for a power brake booster?
__________________
53 TuTone Extended Cab 350 4-Spd 3:08 (SOLD) 53 Chevy Moldy pearl green ZZ-4 4L60E 9" 3:25 55 GMC 1st Black Mll (ZZ4) ZZ6 TKO 600 5 sp 3:73 62 Solidaxle Corvette Roman Red (327 340hp 4spd 3:36) C4 & C5 suspension tube chassis LS 3 4L70E 65 Corvette Coupe 327 350hp 4spd 4:11 78 Black Silverado SWB (350/350) 5.3 & 4L60E 3:42 2000 S-Type 3.0 (wife cruiser) 2003 GMC SCSB 5.3 4L60E 3:42 |
|
|
|
|
09-11-2017, 12:30 PM
|
#10 | |
|
Registered User
Join Date: Nov 2014
Location: Oakland, CA
Posts: 114
|
Re: Kell's Two Cents - 1946 build
Yeah I kinda figure as much that nows the time I'll really be getting to work all the kinks out. Guys like you and Joe are so good and so quick because you've already done it so many times and have learned
Quote:
Last edited by gokellurself; 09-11-2017 at 12:48 PM. |
|
|
|
|
|
09-11-2017, 12:48 PM
|
#11 |
|
Registered User
Join Date: Nov 2014
Location: Oakland, CA
Posts: 114
|
Re: Kell's Two Cents - 1946 build
Hey any of you guys running tanks under the beds in your truck, how/where are you running the breather vent?
|
|
|
|
|
09-11-2017, 06:13 PM
|
#12 | |
|
Registered User
Join Date: Dec 2010
Location: washington NJ
Posts: 766
|
Re: Kell's Two Cents - 1946 build
Quote:
 It's amazing how many people have issues with the gap between the booster and the MC You would think they would set the proper gap at the factory when it is assembled. I still have the same problem as you. I have zero pedal for the first 1-2" then I get a good pedal. It may be because I have a small leak at the rear residual valve. When I address that issue I think I am going to try an 1-1/4 MC. |
|
|
|
|
|
09-18-2017, 02:33 AM
|
#13 | |
|
Registered User
Join Date: Nov 2014
Location: Oakland, CA
Posts: 114
|
Re: Kell's Two Cents - 1946 build
Quote:

|
|
|
|
|
|
09-18-2017, 06:28 PM
|
#14 |
|
Senior Member
Join Date: May 2007
Location: Doodah Kansas
Posts: 7,748
|
Re: Kell's Two Cents - 1946 build
man I shoot myself in the foot so much its a wonder I can walk. I am sending you a 1700 mile shoulder pat brother
__________________
the mass of men live lives of quiet desperation if there is a problem, I can have it. new project WAYNE http://67-72chevytrucks.com/vboard/s...d.php?t=844393 |
|
|
|
|
09-19-2017, 01:05 PM
|
#15 | |
|
Registered User
Join Date: Nov 2014
Location: Oakland, CA
Posts: 114
|
Re: Kell's Two Cents - 1946 build
Quote:
|
|
|
|
|
|
09-19-2017, 01:43 PM
|
#16 |
|
Registered User
Join Date: Nov 2014
Location: Oakland, CA
Posts: 114
|
Re: Kell's Two Cents - 1946 build
well I could wait no longer... I literally tore the truck down as soon as I got it so even I have been curious how it was going to look once it came back together. I just kinda pieced it together at the moment, still needs miscellaneous adjusting and finalizing but here it is.
I'm hoping my metal guy can roll out some of the body work on the lower front and clean it up, I have the valence, and the rear fenders need to be dropped down and finalized. I have been hesitant to do much of anything to the patina but I'm starting to think it's probably about time for a thorough sponge bath and see how it comes out Last edited by gokellurself; 09-19-2017 at 02:53 PM. |
|
|
|
|
09-19-2017, 03:51 PM
|
#17 |
|
Registered User
Join Date: Dec 2010
Location: washington NJ
Posts: 766
|
Re: Kell's Two Cents - 1946 build
Looks great! I think the only thing it needs is a front bumper. And a windshield
|
|
|
|
|
09-19-2017, 09:42 PM
|
#18 |
|
Registered User
Join Date: Jan 2010
Location: Titusville, PA
Posts: 3,585
|
Re: Kell's Two Cents - 1946 build
that is a patina from the patina gods. engine doing ok? def don't want to rush stuff like that. it takes alot of time cleaning the block and threads. Just food for thought, any engine I get or build I typically do a compression test. Just helps to know what each cylinder is doing. You could also do a leakdown test on your cooling system just to make sure there is no cracks in the head or block. I doubt there is, but its good to rule things out.
__________________
51' 99toLife finished 2011,355 sbc,5speed, patina, redoing whole truck, inter, bags, etc http://67-72chevytrucks.com/vboard/s...d.php?t=382481 49Hardtimes s/10 susp- bagged, vortec sbc, 5 speed, patina, sold http://67-72chevytrucks.com/vboard/s...d.php?t=594874 VIDEOS https://youtu.be/E8zHhjgS_lA https://youtu.be/E8zHhjgS_lA Geronimo 54' LS engine, static drop IFS, Client build, just about done http://67-72chevytrucks.com/vboard/s...62#post7399162 52' 3100 Slowly in progress, will be painted two toned, have 235 with a t-5, lowered OG frame Other projects, 49' farmuse 3100, killer Patina, will be slammed, LS engine, full done interior up next! www.coffeeandcustoms.com |
|
|
|
|
10-02-2017, 02:03 AM
|
#19 | ||
|
Registered User
Join Date: Nov 2014
Location: Oakland, CA
Posts: 114
|
Re: Kell's Two Cents - 1946 build
Quote:
Quote:
Good call on the engine testing, I can't believe I hadn't jumped on that for curiosities sake. I haven't gotten to the leak down yet, but I ran the compression test one evening and I think my numbers are looking pretty good. I let the gauge jump up 4 times, and typically did 2 tests per cylinder, sometimes 3 to make sure I was getting a good reading. Each cylinder came in between 110 + 120 psi, so if I'm not mistaken I think that means I'm doing alright |
||
|
|
|
|
10-02-2017, 02:54 AM
|
#20 |
|
Registered User
Join Date: Nov 2014
Location: Oakland, CA
Posts: 114
|
Re: Kell's Two Cents - 1946 build
So what else I've been up to...
I had a real scare starting up the truck one day and had a gnarly metal on metal clank. I tried it again and it started right up. The very next day pulled it out the garage and had that crazy sounding clank again... and then again... My online research had me ready for anything from a bent rod, to hydrolock, to loose flex plate bolts, loose torque converter bolts, bad starter,etc, etc... So the next day I started a troubleshooting sequence and sure enough the first thing I found was that one of the bolts had come loose on the starter somehow, and when trying to engage would make all kinds of raucous. Tightened it up but I'll be keeping an eye on it, I'm just glad it wasn't something worse Speaking of keeping an eye, I knew I had a bit of a clearance issue with one of my crossmember and had been debating whether to actually fix it or to run a pretty heavy bump stop. I decided I was gonna go ahead and fix it... This is on the cross member that goes across where the front spring perches are for the rear leaf springs. I put it up as far as it would go while staying under the bed. I figured I might as well over do it because as of now I have next to no money into my rear suspension setup, aside from 4" blocks. As the truck gets up and going here I am open to considering some options for a more permanent setup, so we'll see Beyond this crossmember, a less dire yet similar situation is apparent in the crossmember right below the rear of the cab. I checked it out and looks like if I move it forward a couple inches there is area under the cab that I can kick the tubing up and gain probably 3 inches of clearance which should be plenty enough for now. I've yet to do it as it seems like a PITA working under the cab like that right now, but I'll for sure be getting to it As I was finalizing my running boards I had this crazy gap along the bottom of the cab and running board. I measured my rear body mount and it was almost 2 inches in height. This seemed too big but since I had purchased the whole cab mounting block kit together I never paid it much mind. I put a call in to Chev's of the 40's and the guy found the dimensions that he had on file coming in more like 1 1/16". I went ahead and pulled the bushings and cut them down to size and now my body line is looking right about where it should be  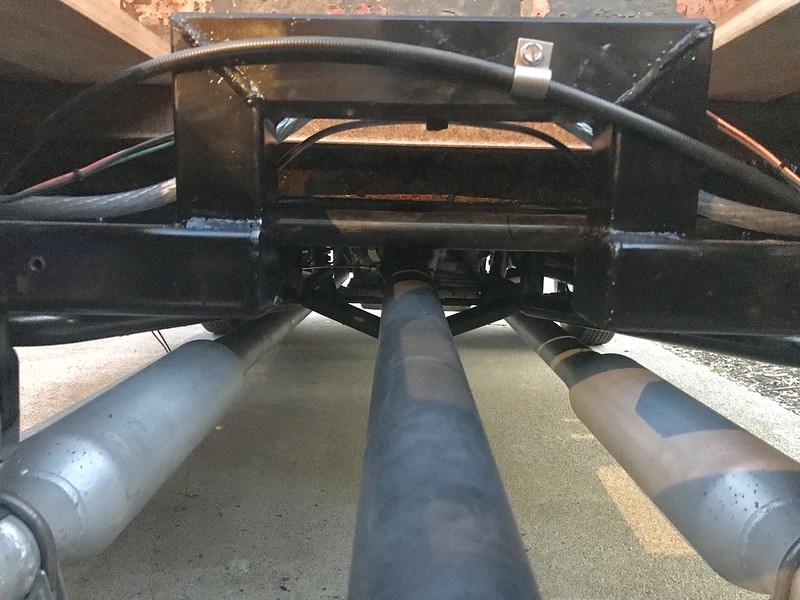 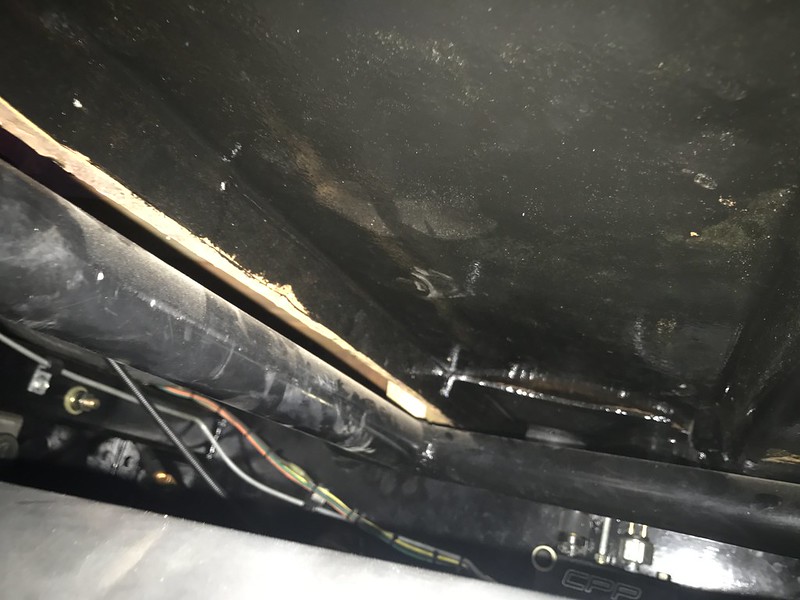 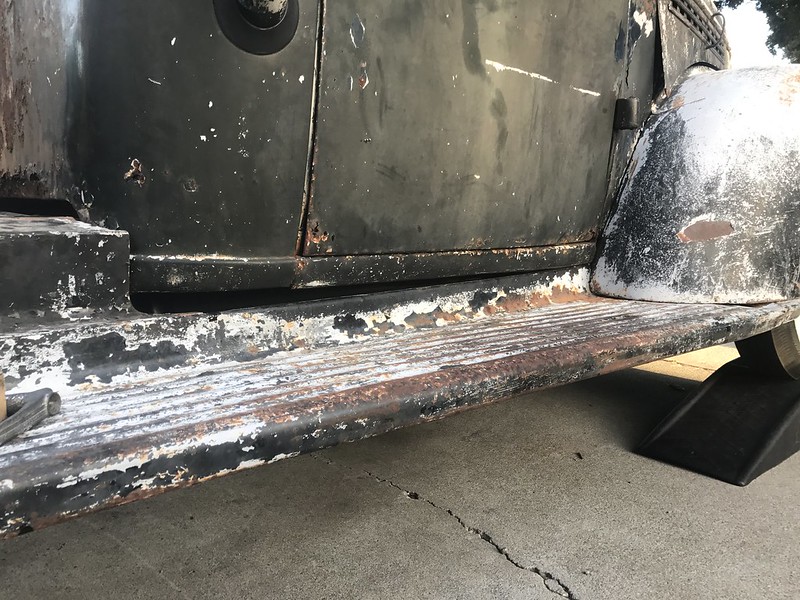 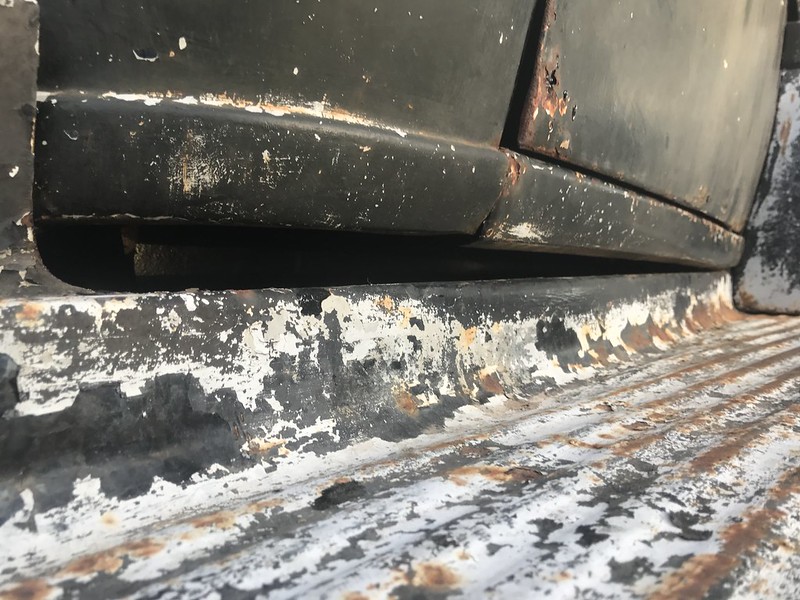  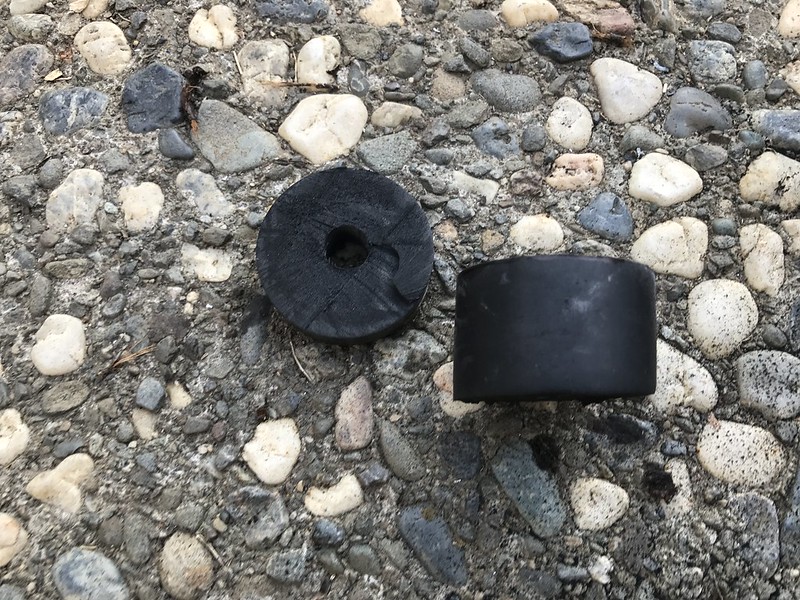 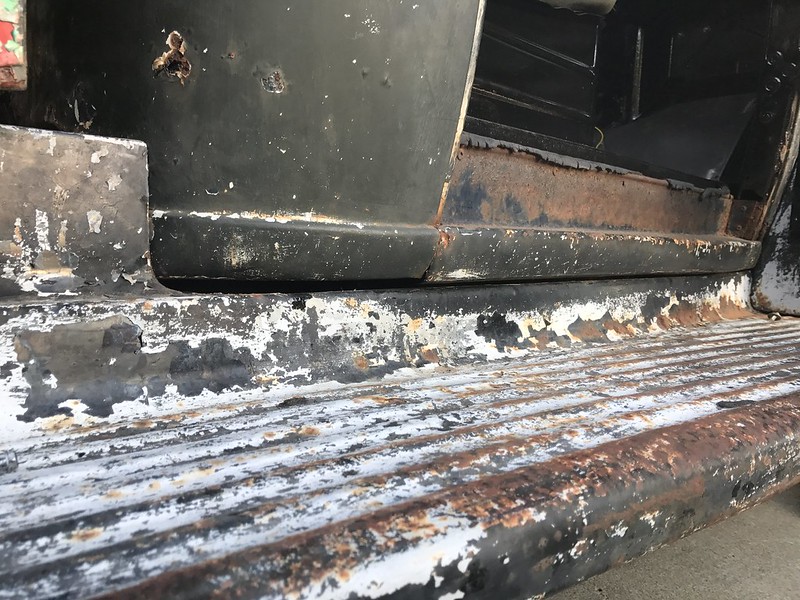
|
|
|
|
|
10-02-2017, 03:36 AM
|
#21 |
|
Registered User
Join Date: Nov 2014
Location: Oakland, CA
Posts: 114
|
Re: Kell's Two Cents - 1946 build
I've got about 50 miles on the truck by now, just around town and though my paperwork and insurance is legit, and even though the breeze feels damn good cruising around with no windshield, I gotta try to focus on what's going to get it road worthy
I took it down to the parts store last week to have my alternator checked out as it was simply the one that came with the engine, if I needed a new one I'd just pick one up. There was an electrical clip on the side of it but I just figured it was for the computer and I ignored it. Obviously I didn't realize how alternators actually gauged charge or what a voltage regulator did, but I do now. After some research I found all the 2 wire alternator to CS alternator conversion info and found this nice connector made by AC delco. I cut the extra plug off then the red wire goes to the positive battery (I used the post on the alternator) and the yellow wire, with resistor included, goes to ignition power. Now my alternator tests good! It's taken me about 2.5 years to figure out/decide how I was going to run my taillights. I even ordered the original reproduction brackets, but decided I wasn't crazy about them. I had these little brackets that I turned sideways and somewhat got the taillights to mount on them and I think I'm gonna keep em For the windshield frame I followed the Trucks! fauxtina how to and used 220 to cut through the heavy paint I had applied, then switched to 320 as I was getting close and putting in the final work. I tried to keep in mind the pattern of the paint that remained on the body around the windshield and sanded accordingly. Not mind-blowing or anything but I think it does it's job rather well. I got the rubber on, the brackets on, and now have a functioning windshield! I had initially painted the inside of the window frame black but in the end decided to sand it all off and clear coat the bare metal instead. I had done the same thing on my firewall and I think I would incorporate more bare metal into the truck if I had the chance to do it all over again, I really like the look. I pulled my side windows and sealed them with urethane sealant as well, as previously I had installed them with setting tape all the way around. At this same time I sanded the front valance that I had picked up a while ago. I was thinking that the red was just a top layer, and it proved to be the case. I think I could add some white on it to make it really blend in but really my goal was just to get the red off to make it more subtle. My front needs a little bit of work to get it all coming together right but I think this will do I swear I was getting all glares + stares when I first began this build, but now when people drive by I get all kinds of thumbs ups and waves. I wish I could be tucked away in a shop somewhere building this thing, but no, everybody gets to see the progress. I had one of the neighbors I had never met before stop by with his 51 Ford today though. Seems you end up meeting a bunch of good guys owning a truck like this 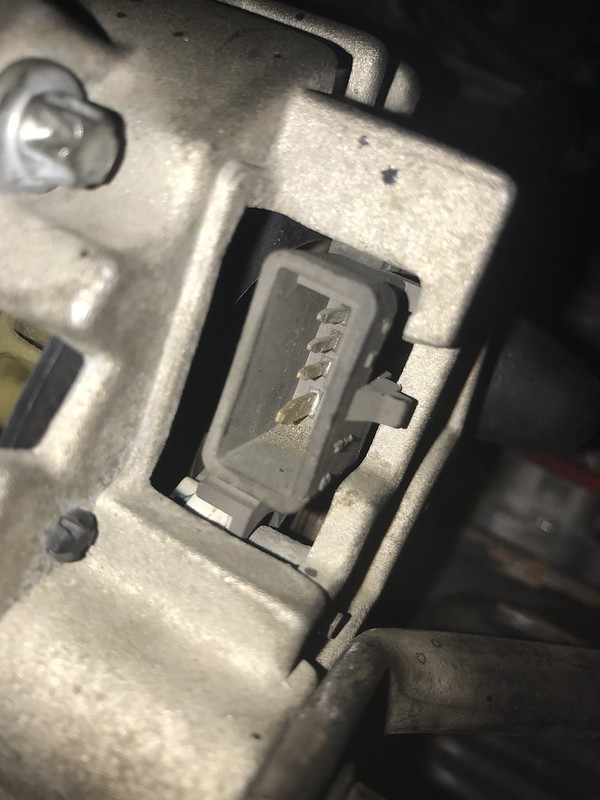 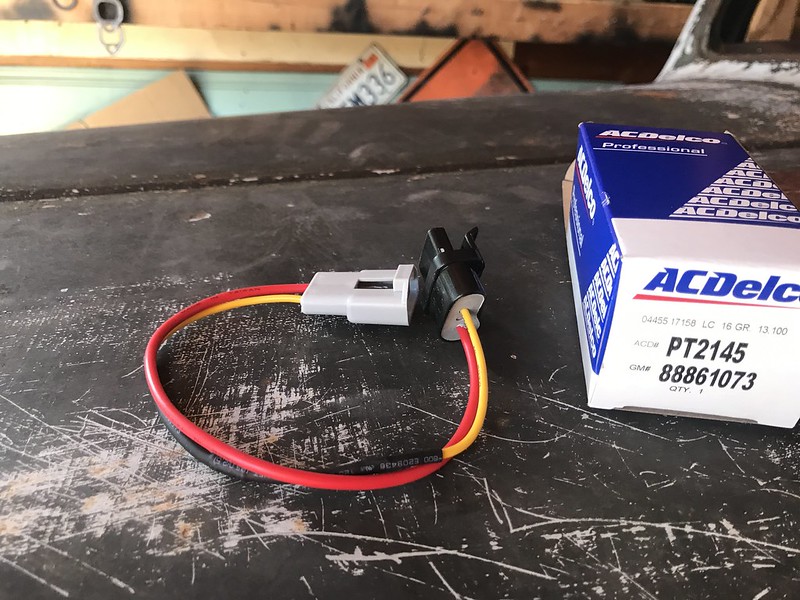 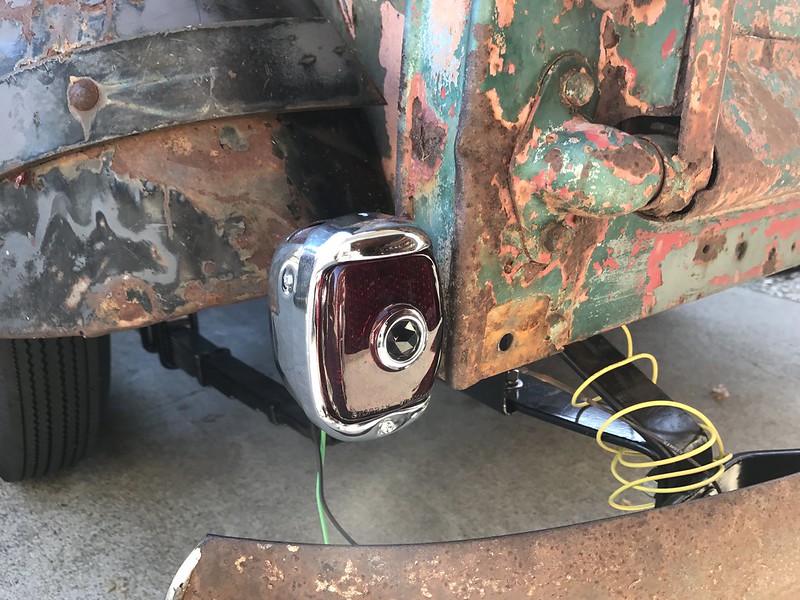 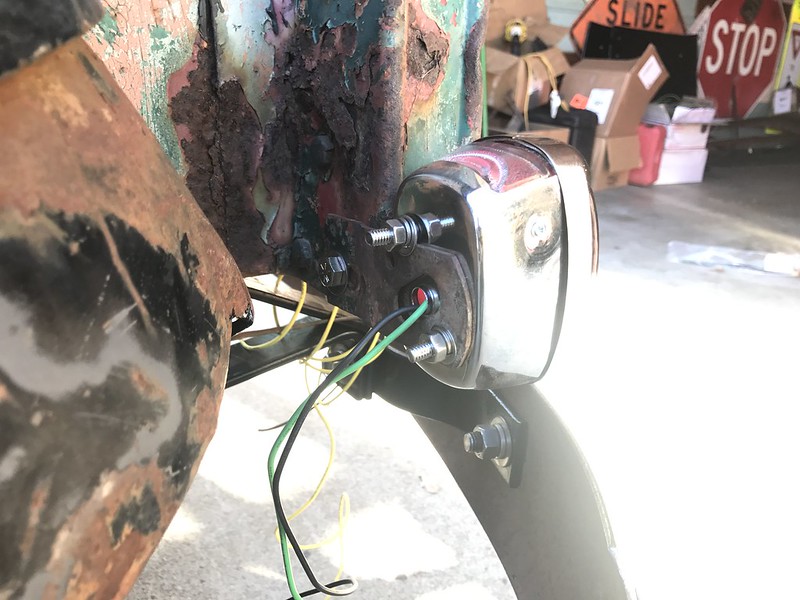   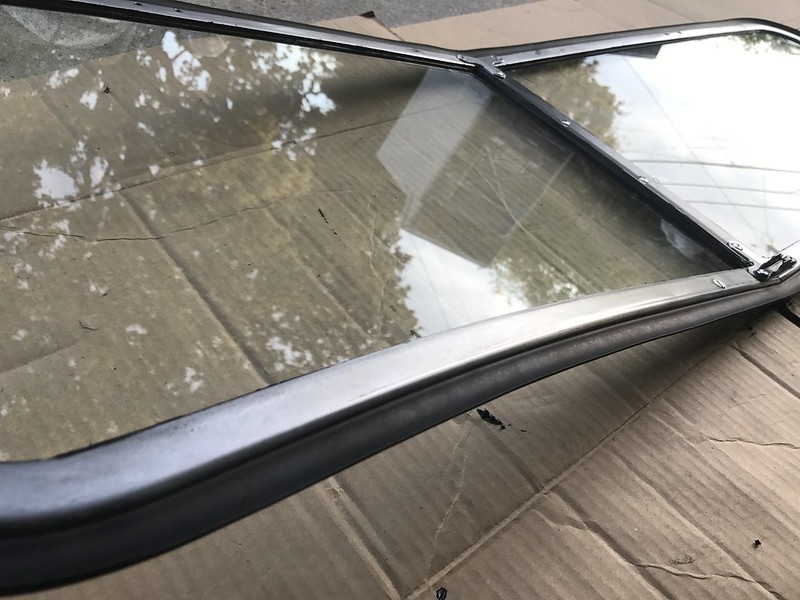 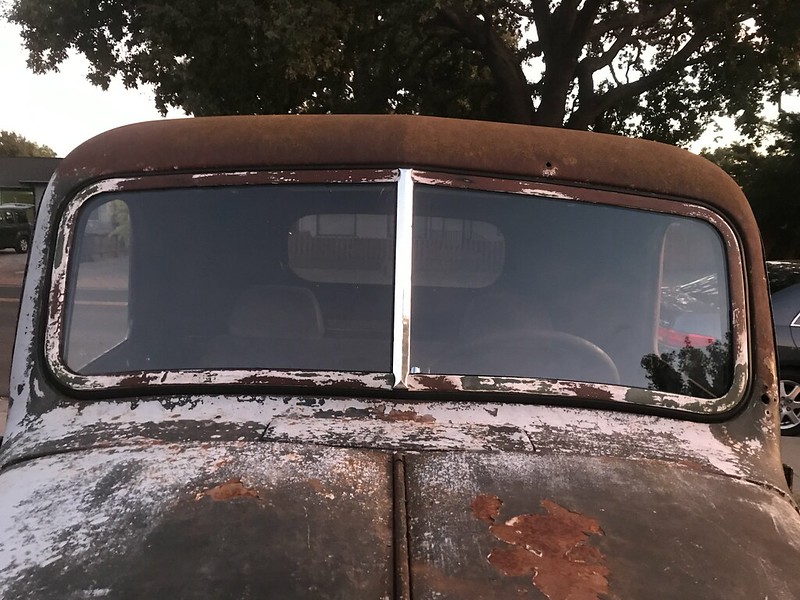 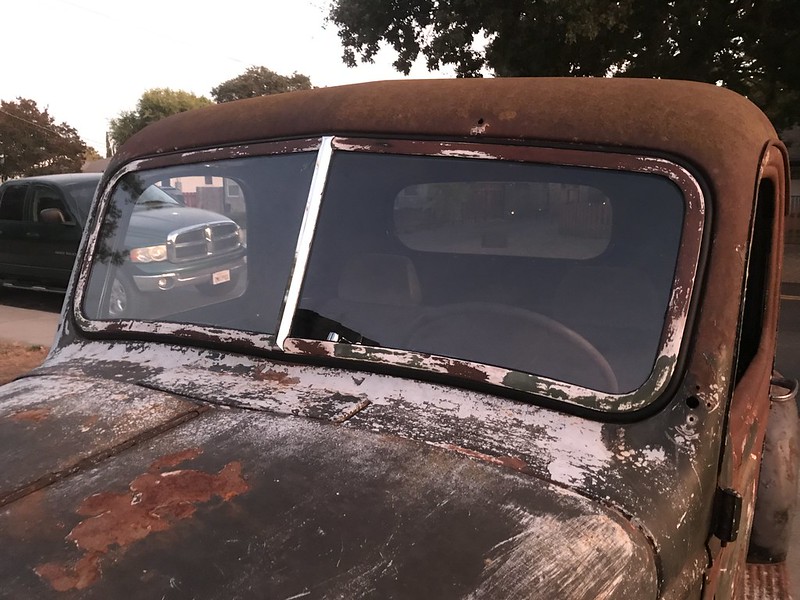 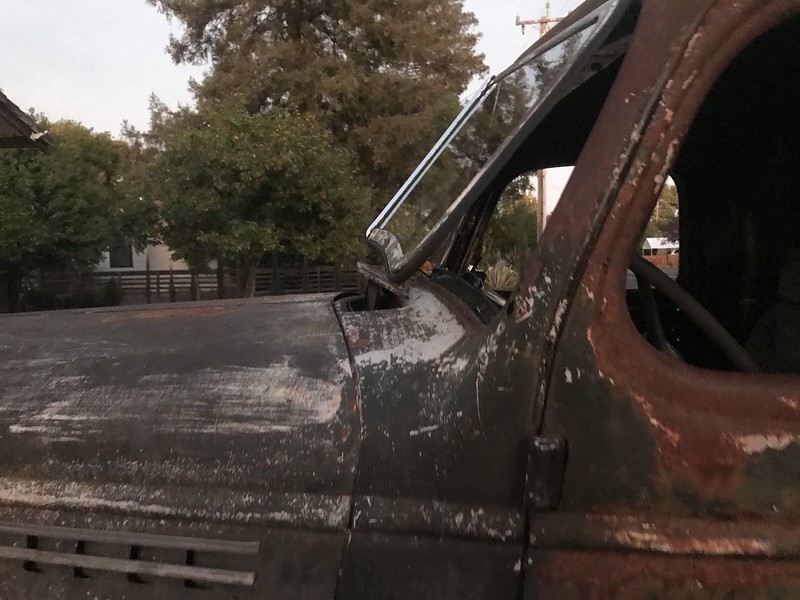 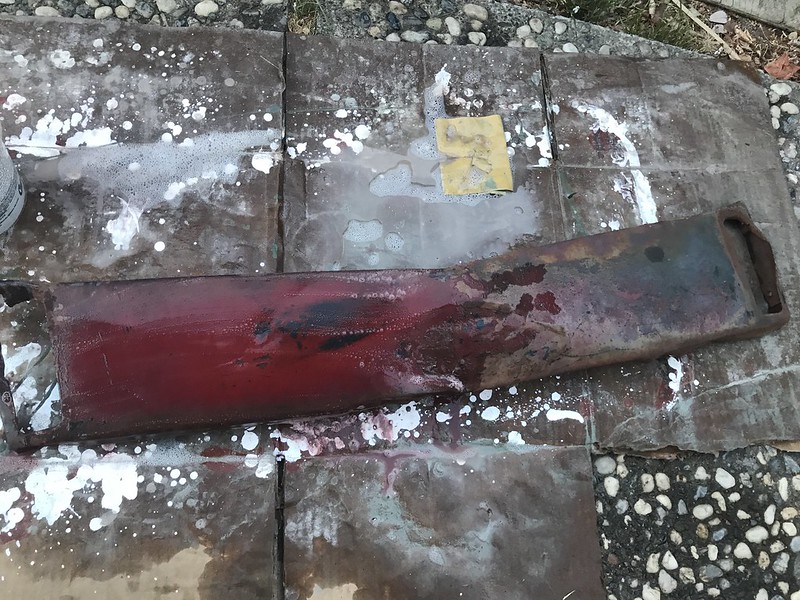  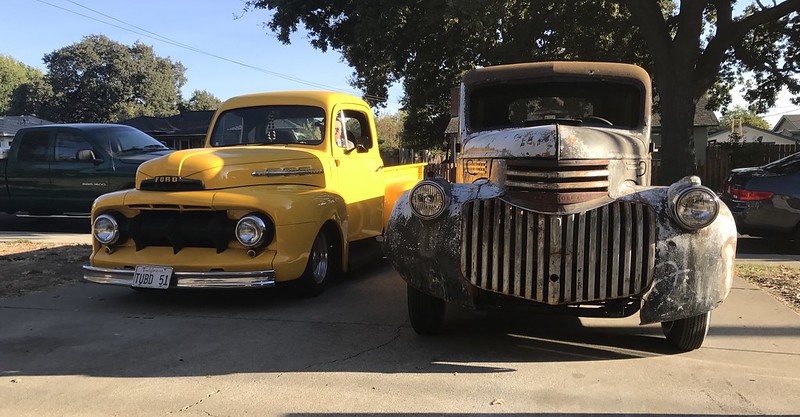
Last edited by gokellurself; 10-03-2017 at 01:19 AM. |
|
|
|
|
| Bookmarks |
|
|


 Hybrid Mode
