
|
 11-22-2023, 10:07 AM
|
#426 |
|
Registered User
Join Date: May 2011
Location: Syracuse, Utah
Posts: 1,892
|
Re: 67 Camaro Build
The car is off the blocks and after spending some extra time on the stinger hood its ready to be moved back to the other shop. This round of blocking is done!

__________________
Brett  67 Camaro SS Build:http://67-72chevytrucks.com/vboard/s...d.php?t=751594 72 Cheyenne/10 Super 115" Fleetside (Waiting it's turn.) 72 Cheyenne/K30 Super 133" DRW SOLD Build:http://67-72chevytrucks.com/vboard/s...d.php?t=645614 YouTube: https://www.youtube.com/@6dee7-7dee2 |

|

|
|
11-22-2023, 01:02 PM
|
#427 |
|
Active Member
 Join Date: Mar 2022
Location: Twin Cites, MN
Posts: 161
|
Re: 67 Camaro Build
I vote 1970 Corvette Daytona Yellow. There's already too many black and red Camaro's...
 
|
|
|
|
|
11-26-2023, 09:33 AM
|
#428 |
|
Registered User
Join Date: May 2011
Location: Syracuse, Utah
Posts: 1,892
|
Re: 67 Camaro Build
I hadnt considered yellow but that does bring a couple of 69 Camaros to mind. A friend of mine used to own this Daytona Yellow car with a black vinyl top and yellow houndstooth interior, very nice! Its a big block, 4-speed car that was sporting Keystones and Goodyear Polys. Very Day 2 with slapper bars, 10k Sun tach, SW green line gauges, and a wood wheel.
The second is an internet build that I ran into researching the orange headers. Also, a very cool yella car! https://www.yenko.net/forum/showthread.php?t=161639 At this point in time I was truly waffling on the color, but in the end ultimately decided our Day 2, Grumpys Toy, Motion mash-up car would be Ermine White. 
__________________
Brett 67 Camaro SS Build:http://67-72chevytrucks.com/vboard/s...d.php?t=751594 72 Cheyenne/10 Super 115" Fleetside (Waiting it's turn.) 72 Cheyenne/K30 Super 133" DRW SOLD Build:http://67-72chevytrucks.com/vboard/s...d.php?t=645614 YouTube: https://www.youtube.com/@6dee7-7dee2 |
|
|
|
|
11-27-2023, 07:57 PM
|
#429 |
|
Senior Member
  Join Date: Apr 2022
Location: Hillsboro, Oregon
Posts: 411
|
Re: 67 Camaro Build
I vote for Tahoe Turquiose myself. I love that one year only color on 67s. Plus it works great with a stinger hood and you dont see it very often.
Deepwater Blue or Nantucket blue looked good as well in 67. Tripoli Turquoise in 68 look neat as well.
__________________
The Twins: 1968 C10 SWB - Blue 327/5 Speed 1968 Camaro SS/RS - Blue 327/4speed C10 Build Thread: http://67-72chevytrucks.com/vboard/s...d.php?t=833278 The "Others" 1933 Ford Pickup (Camaro in disguise) 2017 Camaro SS Life long Chevy guy |

|
|
|
11-27-2023, 07:59 PM
|
#430 | |
|
Senior Member
Join Date: Apr 2022
Location: Hillsboro, Oregon
Posts: 411
|
Re: 67 Camaro Build
Quote:
__________________
The Twins: 1968 C10 SWB - Blue 327/5 Speed 1968 Camaro SS/RS - Blue 327/4speed C10 Build Thread: http://67-72chevytrucks.com/vboard/s...d.php?t=833278 The "Others" 1933 Ford Pickup (Camaro in disguise) 2017 Camaro SS Life long Chevy guy |
|
|
|
|
|
11-27-2023, 10:06 PM
|
#431 |
|
Active Member
Join Date: Mar 2022
Location: Twin Cites, MN
Posts: 161
|
Re: 67 Camaro Build
I'm a member on the Yenko website and watched Graeme build the Yellow Z28.
Yep, white is a clean canvas and you can do wrap for temporary lettering too. Have you seen the Rat's Nest thread ? Jim's car is spectacular and the lettering looks like real paint. This is his COPO that was restored and painted the original LeMans Blue. All the other colors are wrap. |
|
|
|
|
11-29-2023, 10:44 AM
|
#432 |
|
Registered User
Join Date: May 2011
Location: Syracuse, Utah
Posts: 1,892
|
Re: 67 Camaro Build
So many great colors, I must admit its been hard to stick to the original vision for the car. It mightve made it easier if almost all our daily drivers werent also white. I agree that it's an excellent canvas for lettering or a wrap, that's a very cool idea. You know if I do that though Chris might just track me down and give me a swift kick to the ol bean bag!
 Thank you, I found the Rats Nest thread and am looking forward to reading it. After removing the old upholstery earlier and fitting these rear armrests to the mini tubs. Its go time to remove as much cotton, glue, and surface rust as possible. Ha, it certainly did make a mess, cotton crap went everywhere with the help of my little disc sander.  Ive got some new covers ready to go but no foam yet. Ive got some new covers ready to go but no foam yet.
__________________
Brett 67 Camaro SS Build:http://67-72chevytrucks.com/vboard/s...d.php?t=751594 72 Cheyenne/10 Super 115" Fleetside (Waiting it's turn.) 72 Cheyenne/K30 Super 133" DRW SOLD Build:http://67-72chevytrucks.com/vboard/s...d.php?t=645614 YouTube: https://www.youtube.com/@6dee7-7dee2 |
|
|
|
|
12-03-2023, 09:42 AM
|
#433 |
|
Registered User
Join Date: May 2011
Location: Syracuse, Utah
Posts: 1,892
|
Re: 67 Camaro Build
With an SS big block template kit and the actual emblems, Chris started drilling the holes for our Camaro badging. I imagine this was tough after all the work done to turn around and then drill holes.
 Day 2 cars would have all the badging so thats what is happening. Day 2 cars would have all the badging so thats what is happening.
__________________
Brett 67 Camaro SS Build:http://67-72chevytrucks.com/vboard/s...d.php?t=751594 72 Cheyenne/10 Super 115" Fleetside (Waiting it's turn.) 72 Cheyenne/K30 Super 133" DRW SOLD Build:http://67-72chevytrucks.com/vboard/s...d.php?t=645614 YouTube: https://www.youtube.com/@6dee7-7dee2 |
|
|
|
|
12-06-2023, 10:09 AM
|
#434 |
|
Registered User
Join Date: May 2011
Location: Syracuse, Utah
Posts: 1,892
|
Re: 67 Camaro Build
Using a stencil kit the Bumble Bee nose stripe is being laid out in conjunction with the SS emblems. Thanks to Chris for taking these pics for us.
__________________
Brett 67 Camaro SS Build:http://67-72chevytrucks.com/vboard/s...d.php?t=751594 72 Cheyenne/10 Super 115" Fleetside (Waiting it's turn.) 72 Cheyenne/K30 Super 133" DRW SOLD Build:http://67-72chevytrucks.com/vboard/s...d.php?t=645614 YouTube: https://www.youtube.com/@6dee7-7dee2 |
|
|
|
|
12-10-2023, 09:47 AM
|
#435 |
|
Registered User
Join Date: May 2011
Location: Syracuse, Utah
Posts: 1,892
|
Re: 67 Camaro Build
A few days before these pics, the car underwent a POR-15 treatment for the main and trunk floor. Plenty of seam sealer was applied afterward. Hot dang, we are now entering the final coatings phase.

__________________
Brett 67 Camaro SS Build:http://67-72chevytrucks.com/vboard/s...d.php?t=751594 72 Cheyenne/10 Super 115" Fleetside (Waiting it's turn.) 72 Cheyenne/K30 Super 133" DRW SOLD Build:http://67-72chevytrucks.com/vboard/s...d.php?t=645614 YouTube: https://www.youtube.com/@6dee7-7dee2 |
|
|
|
|
12-13-2023, 09:56 AM
|
#436 |
|
Registered User
Join Date: May 2011
Location: Syracuse, Utah
Posts: 1,892
|
Re: 67 Camaro Build
Scuffing the trunk area for its final top coat, also noticed some exterior sealer for the deck filler panel went on as well.
__________________
Brett 67 Camaro SS Build:http://67-72chevytrucks.com/vboard/s...d.php?t=751594 72 Cheyenne/10 Super 115" Fleetside (Waiting it's turn.) 72 Cheyenne/K30 Super 133" DRW SOLD Build:http://67-72chevytrucks.com/vboard/s...d.php?t=645614 YouTube: https://www.youtube.com/@6dee7-7dee2 |
|
|
|
|
12-13-2023, 12:29 PM
|
#437 |
|
Registered User
Join Date: Oct 2017
Location: Hudson Valley, New York
Posts: 612
|
Re: 67 Camaro Build
Looking good, still following along, eagerly awaiting to see paint on this thing
__________________
'68 C20 Utility 396 4sp (BuildThread: http://67-72chevytrucks.com/vboard/s...d.php?t=806904 ) '68 C10 50th |
|
|
|
|
12-14-2023, 07:39 AM
|
#438 |
|
Registered User
Join Date: Sep 2008
Location: Newport, North Carolina
Posts: 616
|
Re: 67 Camaro Build
Same here...looking for the paint update!
|
|
|
|
|
12-15-2023, 10:11 AM
|
#439 |
|
Active Member
Join Date: Mar 2022
Location: Twin Cites, MN
Posts: 161
|
Re: 67 Camaro Build
Wondering why is he laying out the stripe on the primer ??? Shouldn't that be after final color application and under the clear ? Making a lot of work for himself to mask that off for color.
|
|
|
|
|
12-15-2023, 10:45 AM
|
#440 | |
|
Registered User
Join Date: Oct 2017
Location: Hudson Valley, New York
Posts: 612
|
Re: 67 Camaro Build
Quote:
__________________
'68 C20 Utility 396 4sp (BuildThread: http://67-72chevytrucks.com/vboard/s...d.php?t=806904 ) '68 C10 50th |
|
|
|
|
|
12-17-2023, 09:35 AM
|
#441 | ||||
|
Registered User
Join Date: May 2011
Location: Syracuse, Utah
Posts: 1,892
|
Re: 67 Camaro Build
Quote:
Quote:
http://67-72chevytrucks.com/vboard/s...postcount=1218 Quote:
Quote:
Thanks for following along you guys its a good time documenting the car coming together. This is a little story I'm calling "My original plan was." I intended to bring the car home, install the rollbar, drill the emblem holes, weld the firewall and seat pans, and place the shell back on the rotisserie. Excellent plan, wasn't it? Only issue: Chris and Kelly weren't too fond of my one-person, four-post lift method that involved grabbing the roof and quarters with ratchet straps to attach it to the rotisserie.  Also, as previously posted, Chris wanted another round of blocking with the car altogether. Once this was done it was a good time to lay out the bumblebee stripe with the SS fender emblems simultaneously. Not to mention (but I will), because I'm slow and the body shop is very busy it did take slightly over six months to get the car back into process the last time, I brought it home. So, to save time and possibly hours of body rework it was agreed earlier that the car would stay. Id come in and assist in placing the shell back on my rotisserie when the time came, using their 2-post lift. That is exactly what happened next, the front clip was removed and the body shell went back onto the rotisserie. Went fairly smoothly in my opinion, just a few hours one morning. The good news is that the car is another step closer to paint. In hindsight doing it this way probably cost a little more but, with the time savings (?) and Chris and Kellys skills Ive got no complaints! The End. A few days later I stopped back by and found theyd repaired the trunk floor (hanger holes created by the exhaust shop earlier, see link). Im fairly sure Chris will take advantage of the rotisserie angles to block some more on the roof as well. https://67-72chevytrucks.com/vboard/...&postcount=288
__________________
Brett 67 Camaro SS Build:http://67-72chevytrucks.com/vboard/s...d.php?t=751594 72 Cheyenne/10 Super 115" Fleetside (Waiting it's turn.) 72 Cheyenne/K30 Super 133" DRW SOLD Build:http://67-72chevytrucks.com/vboard/s...d.php?t=645614 YouTube: https://www.youtube.com/@6dee7-7dee2 |
||||
|
|
|
|
12-20-2023, 10:33 AM
|
#442 |
|
Registered User
Join Date: May 2011
Location: Syracuse, Utah
Posts: 1,892
|
Re: 67 Camaro Build
Ive been waiting for this! With the body on the rotisserie, its time to rebuild the worn-out front steering/suspension, finish some other subframe repairs, add a fast steering and disc brake upgrade, as well as prep and paint the diff. Just in time, I was starting to run out of Camaro stuff to mess with.

__________________
Brett 67 Camaro SS Build:http://67-72chevytrucks.com/vboard/s...d.php?t=751594 72 Cheyenne/10 Super 115" Fleetside (Waiting it's turn.) 72 Cheyenne/K30 Super 133" DRW SOLD Build:http://67-72chevytrucks.com/vboard/s...d.php?t=645614 YouTube: https://www.youtube.com/@6dee7-7dee2 |
|
|
|
|
12-21-2023, 09:21 AM
|
#443 |
|
Active Member
Join Date: Mar 2022
Location: Twin Cites, MN
Posts: 161
|
Re: 67 Camaro Build
When you remove the control arms, just sell the uppers and the entire brake system and buy Global West tubular upper control arms and their disc brake set up as a package. The original lowers are fine, but when replacing the rubber bushings, install their bushings in that too. Better handling geometry built into the tubular arms.
The rear axle has been highly modified from original too. It appears the frame rails have been modified for the 4 link, coil over modification, but if the channels with all the holes on the frame are for the shocks to mount to, I hope there is another bar connecting them together and mounting to the floor pan for strength. Mine with the GW uppers and disc conversion. Sorry about the huge pic, don't know how to downsize that. 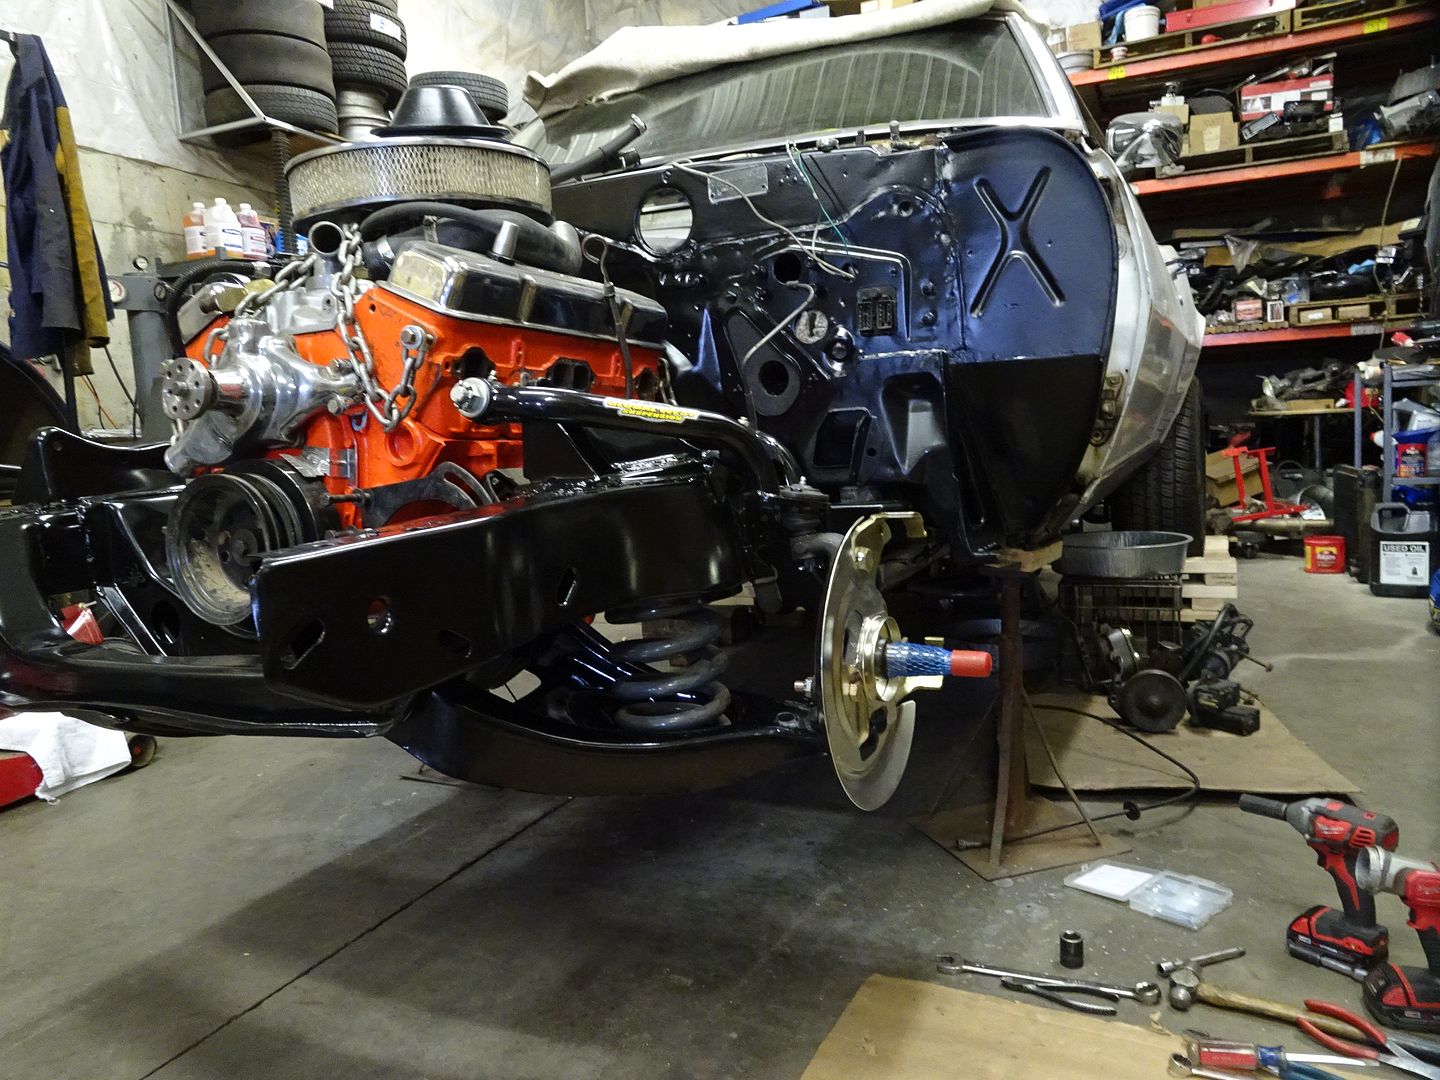
|
|
|
|
|
12-21-2023, 09:35 AM
|
#444 |
|
Active Member
Join Date: Mar 2022
Location: Twin Cites, MN
Posts: 161
|
Re: 67 Camaro Build
1 other item, I hope you are eliminating the throttle rod to the carb and going to a cable. I have a Lokar pedal in black to match the other pedals without the bling looking out of place. It is the Midnight series.
But what I found when I added this same pedal to my Chevelle is, the added stress of that set up cracked the firewall where it mounts and the Camaro was already cracked there. I made a reinforcement plate from 1/8" steel for the Camaro and welded it on. 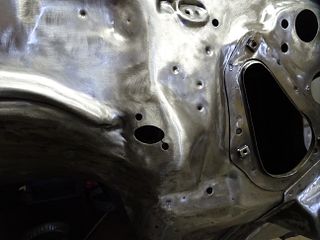 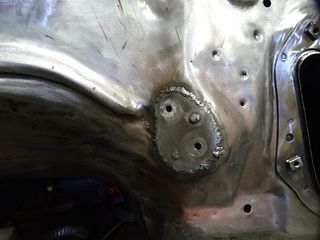 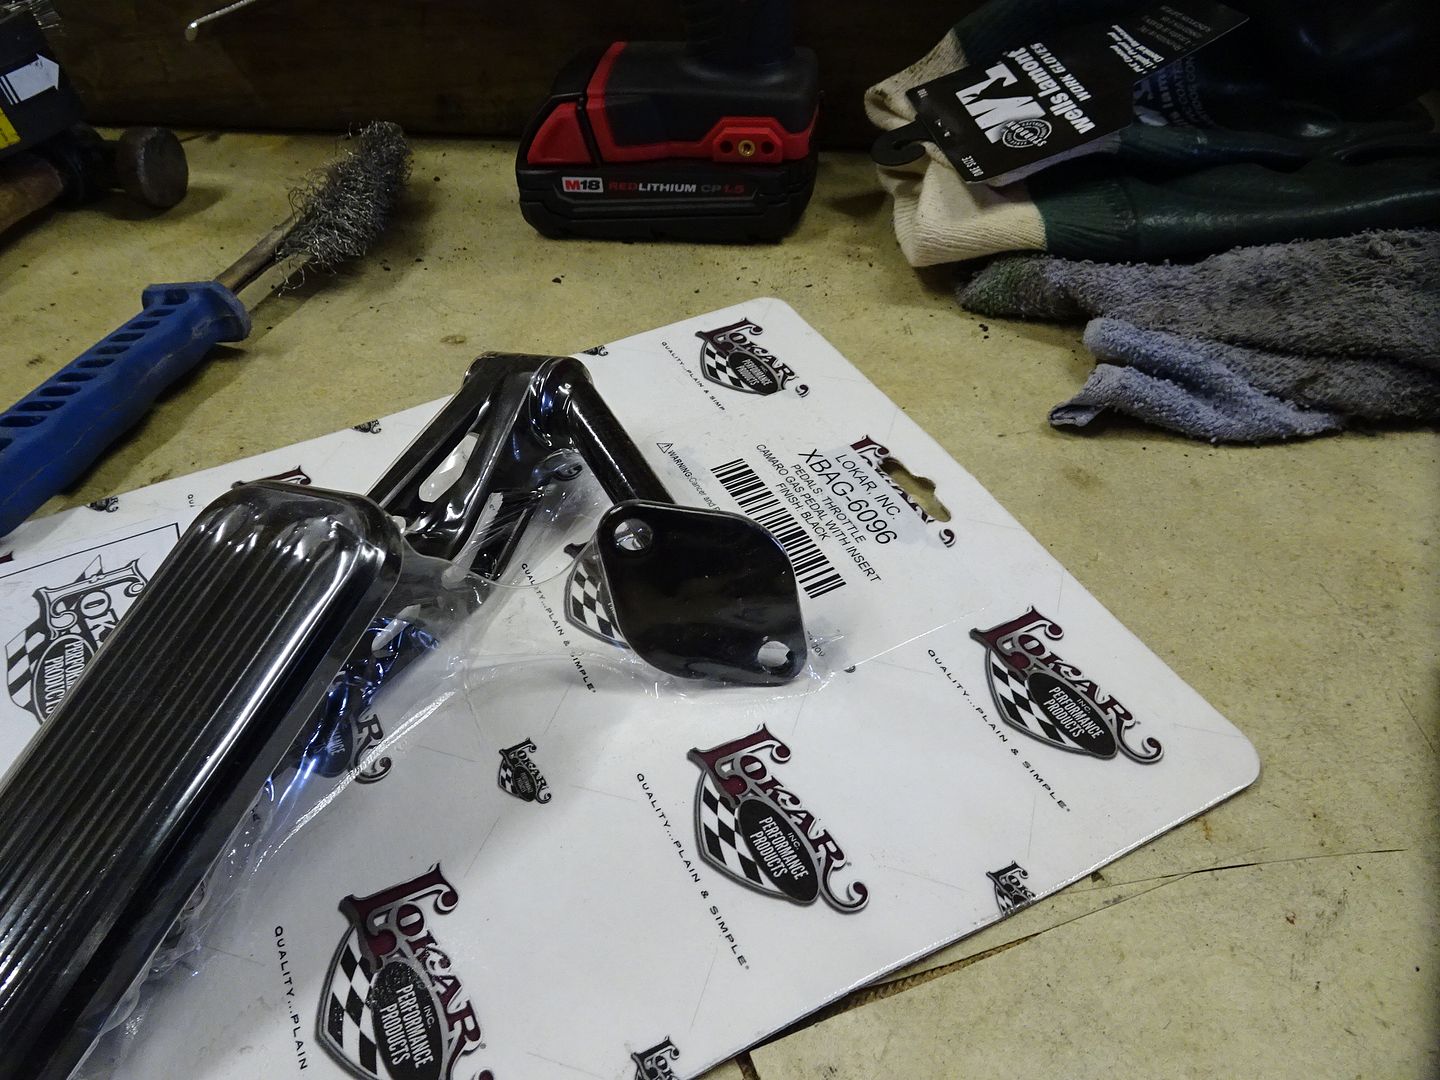
|
|
|
|
|
12-22-2023, 05:38 PM
|
#445 |
|
BlahBlahBlah
Join Date: Feb 2002
Location: Monroe, Wa.
Posts: 19,782
|
Re: 67 Camaro Build
Found another Grumpy pic. Looks like they are running four abreast!
I haven't kept up much on the board lately ... I hope you're going with white. Maybe its already been decided?
__________________
... Monroe Swap meet May 18-19. Mike has the same spots for the NW guys he's had forever. Lunch time BBQ at the spaces. If you have stuff to sell bring it along. If you have a question PM stllookn (Mike) here via the board. https://67-72chevytrucks.com/vboard/...d.php?t=851291 |
|
|
|
|
12-24-2023, 09:56 AM
|
#446 | |||
|
Registered User
Join Date: May 2011
Location: Syracuse, Utah
Posts: 1,892
|
Re: 67 Camaro Build
Quote:
Quote:
Nice upgrades and build btw, I am aware of the poor steering geometry and considered updated control arms or perhaps the Dick Guldstrand modifications. Heres an interesting read. https://pozziracing.com/first_gen_suspension_geome.htm All of the used takeoff parts were part of the deal with Kelly (Perks shop manager) when he purchased our original body. If I dont use it, it goes to him to use or dispose of. Youre correct on the rear suspension, that was a tough decision for me one thing led to another (link). https://67-72chevytrucks.com/vboard/...&postcount=136 And yes, the lateral bar is removable and out for floor access at this point. Im focused on trying to hide the newer technology thats finding its way into our car. It's more of a D2Restomod, heavy on the D2Resto part. Besides, Im running skinnies up front. Quote:
My workbench has been an absolute drop zone lately, or is that all the time? First up, start pulling cotter pins and giving all the fasteners a good shot of WD40.
__________________
Brett 67 Camaro SS Build:http://67-72chevytrucks.com/vboard/s...d.php?t=751594 72 Cheyenne/10 Super 115" Fleetside (Waiting it's turn.) 72 Cheyenne/K30 Super 133" DRW SOLD Build:http://67-72chevytrucks.com/vboard/s...d.php?t=645614 YouTube: https://www.youtube.com/@6dee7-7dee2 |
|||
|
|
|
|
12-26-2023, 09:42 AM
|
#447 |
|
Active Member
Join Date: Mar 2022
Location: Twin Cites, MN
Posts: 161
|
Re: 67 Camaro Build
Once aftermarket control arms came around with the Guldstrand mod built in, that modification faded away quickly. I'm surprised you came up with the Pozzi article, I haven't seen that come up in a search in many years, nice digging...
Just do the tubulars, much easier than cutting and welding on the sub frame. With the rear already heavily modified, matching that on the front will be expected. My resto-mod has turned more that way too, as time passes, but hey, you'll have a better car as a result. If you're set on cutting, consider getting a different frame. Yours is a very early one and would bring a nice income from a 100% original restorer looking for it, just don't tell Kelly about the swap... 
|
|
|
|
|
12-26-2023, 09:46 AM
|
#448 |
|
Active Member
Join Date: Mar 2022
Location: Twin Cites, MN
Posts: 161
|
Re: 67 Camaro Build
Just dawned on me, are you familiar with the threaded rod compression for disassembling that suspension without it turning into a bomb ? Yes, people use the finger style compressors, but they aren't as safe, or easy to use.
|
|
|
|
|
12-27-2023, 10:47 AM
|
#449 | ||
|
Registered User
Join Date: May 2011
Location: Syracuse, Utah
Posts: 1,892
|
Re: 67 Camaro Build
Quote:
Dick Guldstrand aka Mr. Corvette is a big deal in early Corvette history. I first became aware of him in the mid to late 80s and again while enjoying the NCRS community. https://www.chevyhardcore.com/news/d...way-at-age-87/ No worries, already put some work into this subframe repairing a rotten body mount (additional links below), and I think that its early LOS uniqueness is cool. Its in great shape and Im only restoring/repairing and keeping modifications to a minimum. http://67-72chevytrucks.com/vboard/s...0&postcount=31 http://67-72chevytrucks.com/vboard/s...9&postcount=32 http://67-72chevytrucks.com/vboard/s...0&postcount=33 The next guy to own this car after me has the option to do just that. They could add additional handling components to complement the rear 4-link in that way or go further and swap out the subframe. This car has the potential to go in a lot of different future directions if so desired, lowered ride height, autocross, fuel injection, etc. For my purposes, good old straight line, carbureted goodness is the plan. Quote:
 Decided to take a lot of reference pics (surprise, surprise ), brake line routing, steering, etc. Thinking I might just want to reference them later which I did a couple of times when it was going back together. Dropped the shocks and continued pulling all the cotter pins as well as another round of penetrant.
__________________
Brett 67 Camaro SS Build:http://67-72chevytrucks.com/vboard/s...d.php?t=751594 72 Cheyenne/10 Super 115" Fleetside (Waiting it's turn.) 72 Cheyenne/K30 Super 133" DRW SOLD Build:http://67-72chevytrucks.com/vboard/s...d.php?t=645614 YouTube: https://www.youtube.com/@6dee7-7dee2 |
||
|
|
|
|
12-28-2023, 06:16 PM
|
#450 |
|
Senior Member
Join Date: Apr 2022
Location: Hillsboro, Oregon
Posts: 411
|
Re: 67 Camaro Build
Ah the Guldstrand mod, about the best thing you can do if you dont want the look of the tubular a arms and gonna have some corner fun. I thought about it on my 68, but the car is too original, low mileage to really mess with outside of just replacing bushings. Which is something I need to do at some point as the entire car still has all of it original ball joints and bushings. So Ill be following along with the subframe tear down to take notes, lol.
__________________
The Twins: 1968 C10 SWB - Blue 327/5 Speed 1968 Camaro SS/RS - Blue 327/4speed C10 Build Thread: http://67-72chevytrucks.com/vboard/s...d.php?t=833278 The "Others" 1933 Ford Pickup (Camaro in disguise) 2017 Camaro SS Life long Chevy guy |
|
|
|
 |
| Bookmarks |
|
|


 Linear Mode

