
|
Register or Log In To remove these advertisements. |
|
|
|
|||||||
 |
|
|
Thread Tools | Display Modes |
|
|
 12-04-2016, 07:01 AM
|
#1 |
|
Senior Member
 Join Date: Jun 2009
Location: Belews Creek , NC
Posts: 4,220
|
Re: '72 Super Project: Updates!
Real nice work
 Good to see you are back at it Good to see you are back at it 
__________________
Larry It is easily overlooked that what is now called vintage was once brand new. "Project 68" paypal.me/ldgrant |

|

|
|
11-26-2016, 11:50 PM
|
#2 |
|
Senior Member
Join Date: Aug 2011
Location: Reno, Nv.
Posts: 1,424
|
Re: '72 Super Project: Updates!
Nice work, looking good.
__________________
1927 Willy's Knight 24,000 original miles, 1958 Impala 283/Powerglide, 1964 C-30 383/4 speed, 1971 Monte Carlo 350/350, 1972 GMC K2500 350/350, 1976 Chev. K10 350/350, 2006 GMC Sierra 2500HD LBZ Duramax/Allison, 2006 Chev. Silverado K3500 LBZ Duramax/Allison |
|
|
|
|
11-27-2016, 08:47 AM
|
#3 |
|
Registered User
Join Date: Aug 2013
Location: Atlanta, GA
Posts: 702
|
Re: '72 Super Project: Updates!
Looks awesome. Love what you are doing.
__________________
1968 C10 292/3 spd - sold 1969 K10 350/3 spd/205 - sold 1971 K5 350/4 spd/ 205 - sold 1970 K20 350/350/205 - sold 1969 K20 396/400/205 - work in process |
|
|
|
|
11-27-2016, 09:45 AM
|
#4 |
|
Registered User
Join Date: Oct 2006
Location: Orland Park Il
Posts: 2,041
|
Re: '72 Super Project: Updates!
Looking good, sweet shop too! Where did you get the rear brake hardware kit from?
__________________
68 GMC C3500 Longhorn DRW 67 Chevy C10 LWB 90 Mustang Gt 90 Mustang Notchback |
|
|
|
|
11-27-2016, 12:16 PM
|
#5 |
|
Registered User
Join Date: Feb 2006
Location: ND
Posts: 208
|
Re: '72 Super Project: Updates!
Thanks for the comments. I pieced all of the parts for the rear brakes rather than purchasing a kit.
This is what I purchased for my '72 Leaf spring rear converted to coil sprung. I don't think there is a difference between the two. But I don't know for sure, so there is my disclaimer. I was slightly disappointed upon receiving most of the Delco parts as most of it was manufactured overseas. They seem to be of decent quality, but AC Delco used to be synonymous with "Keeping your GM truck GM." The joys of a global market. Wheel Cylinders RH ACDELCO 18E1123 LH ACDELCO 18E1124 Spring/Hardware Kit - Does both sides ACDELCO 18K1597 Self Adjuster Kits RH RAYBESTOS H2509 LH RAYBESTOS H2508 Parking Brake Cables x2 ACDELCO 18P2299 Drum Shoes Raybestos 280PG
__________________
1972 Chevy C-10 Cheyenne Super - Buckets, A/C, "The 17 Year Revival Project" |
|
|
|
|
11-27-2016, 02:21 PM
|
#6 |
|
Registered User
Join Date: Oct 2006
Location: Orland Park Il
Posts: 2,041
|
Re: '72 Super Project: Updates!
Thanks for the #'s!
__________________
68 GMC C3500 Longhorn DRW 67 Chevy C10 LWB 90 Mustang Gt 90 Mustang Notchback |
|
|
|
|
12-22-2016, 05:56 AM
|
#7 |
|
Registered User
Join Date: Aug 2010
Location: Grande Prairie Alberta
Posts: 105
|
Re: '72 Super Project: Updates!
Subscribed
|
|
|
|
|
12-31-2016, 11:45 PM
|
#8 |
|
Registered User
Join Date: Feb 2006
Location: ND
Posts: 208
|
Re: '72 Super Project: Updates!
Well, I'm at my end of the year update. Not much in the way of progress, due to being sick for three weeks following Thanksgiving and receiving 40+ inches of snow in December, between cleaning snow and trying to stay healthy, truck time took a bit of a hit. I did order some sheet metal though and should be back on track again. I ordered a new cab floor, rockers, cab corners, front fenders, inner fenders, front/rear bumpers along with brackets, LH door shell and a RH door skin.
 It was advised that I test fit that door shell, before I started cutting any of the factory floor or rockers apart, due to known fitment issues. So today I mounted the drivers side shell. I'm not a body man at all, so this truck is going to be my learning curve. However out of the box, I had it bolted up and after twenty minutes or so of adjustments, I think I have it sitting relatively decent. The hinges were still bolted to the cab in the same position the factory doors were hung, so any adjustments were done on the door to hinge location. My hinges definitely need to be rebuilt though, and I know that will require more adjusting, but I think it fits decent for the most part. The only major issue I had was the top hoop hitting part of the drip rail in the dead center, but the drip rail itself was sagging in that spot, once that was clearanced, the door was able to shut fully without hitting anything else and resting on the little rubber bumpstops. The rear door to cab gap is about 1/4", I think I could slide it back a hair more, however I looked at my '69 GMC with stock doors and it had about the same gap, so maybe it's acceptable? All of my door pics can be seen HERE. The repro door discussion can be found here. 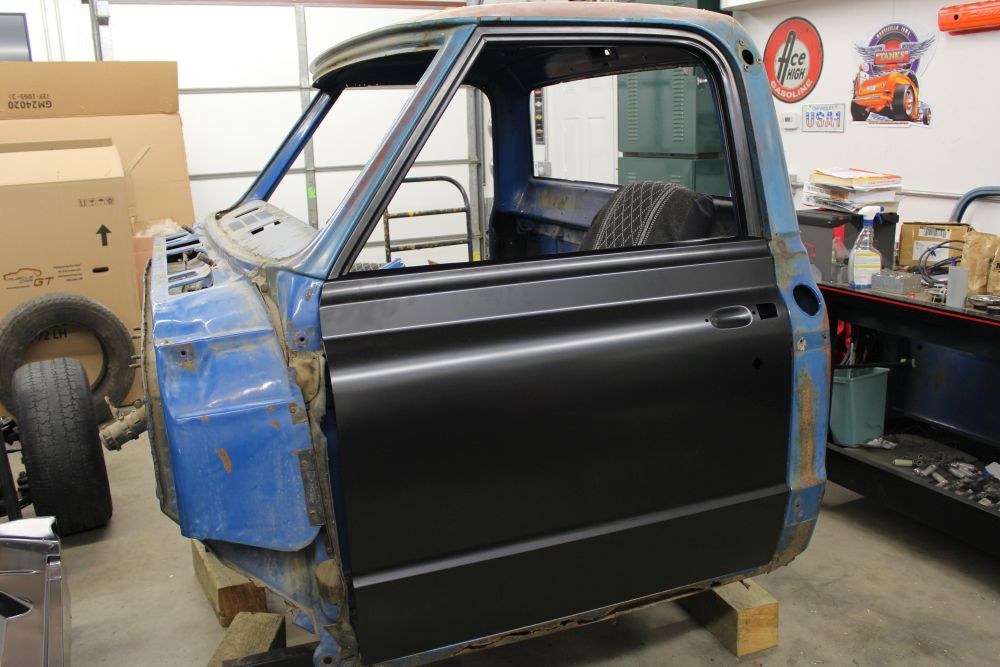  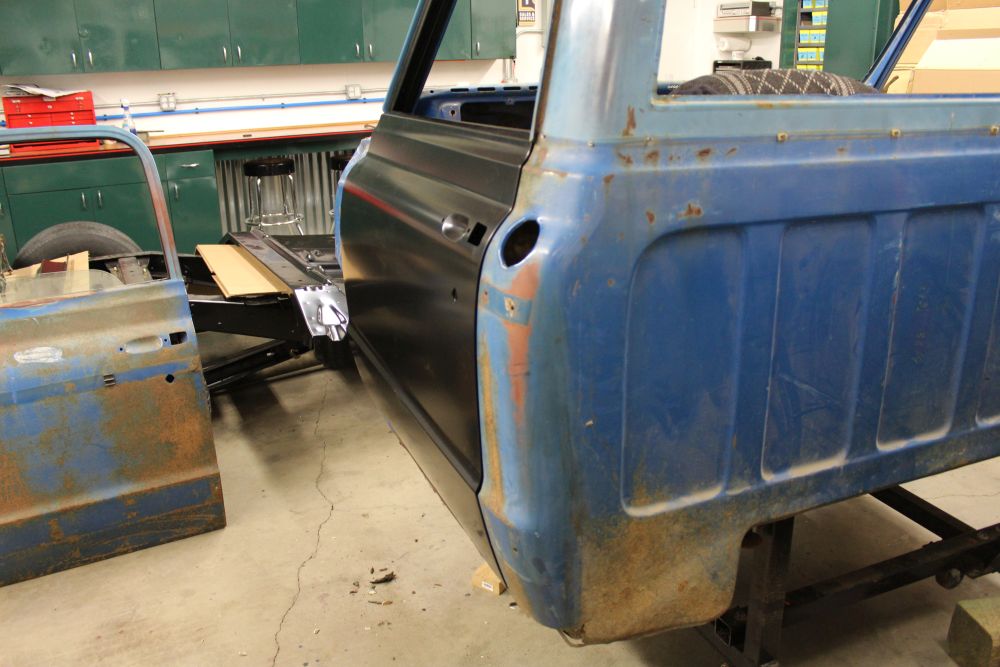 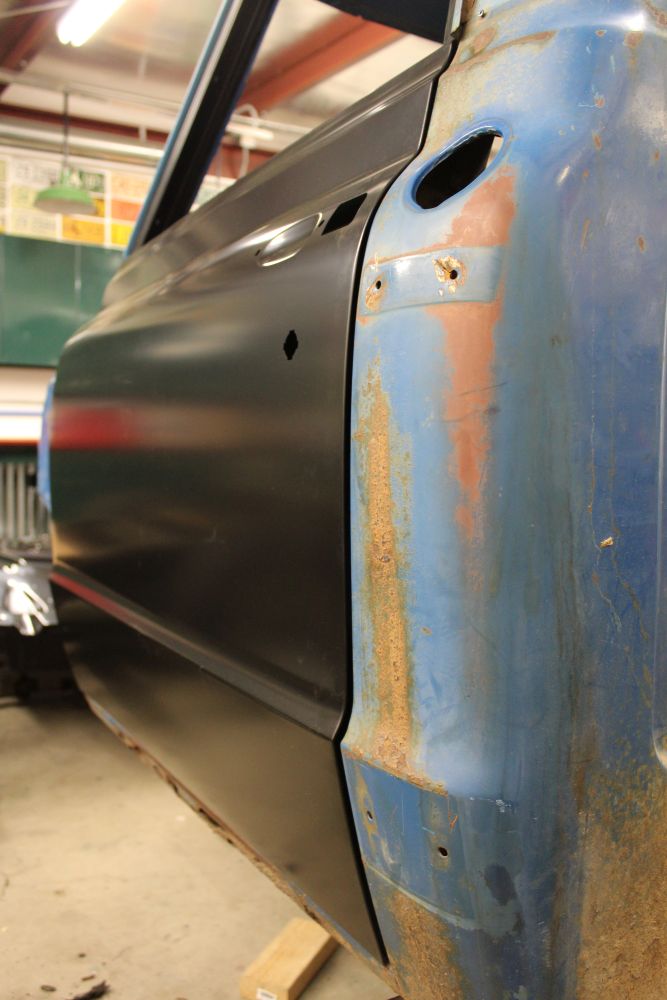 The following is the main reason I decided to go with a door shell. First and foremost is finding good original sheet metal in my region is really hard, if not impossible. The patch panels to repair this door would cost nearly two thirds what a new shell costs. Third, and probably the most important reason is, I really lack the body working skills to attempt such an endeavor. I am going to try to reskin my passenger side door, any pointers in that department would be appreciated. 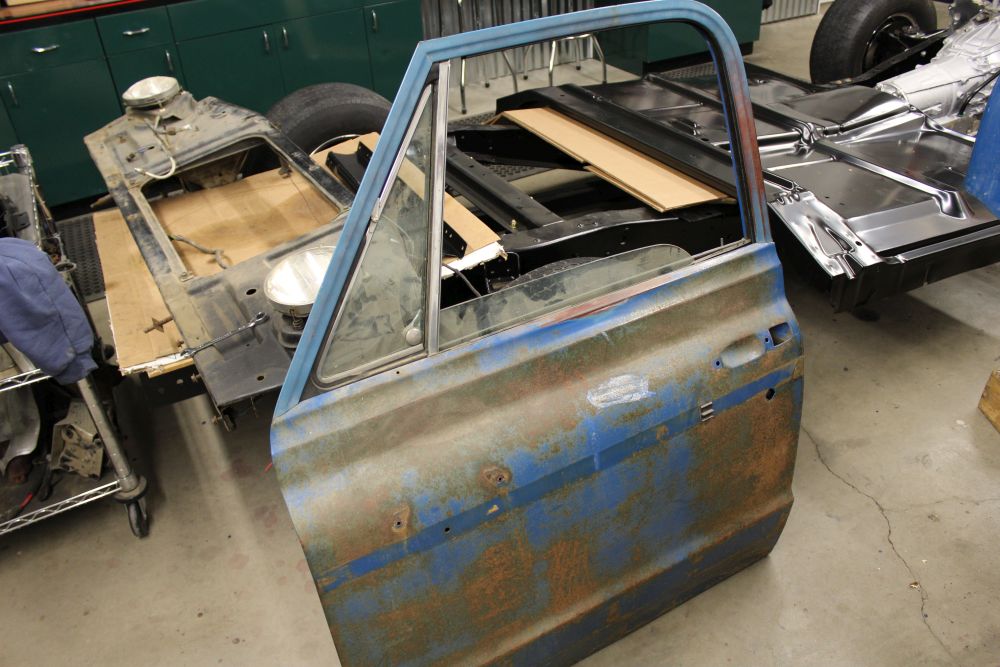 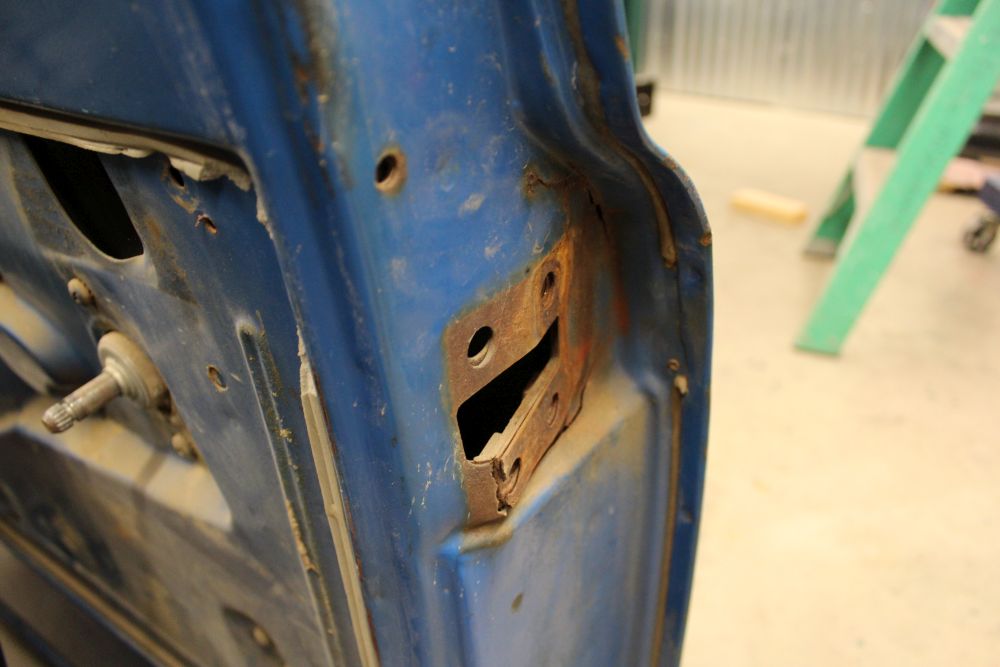 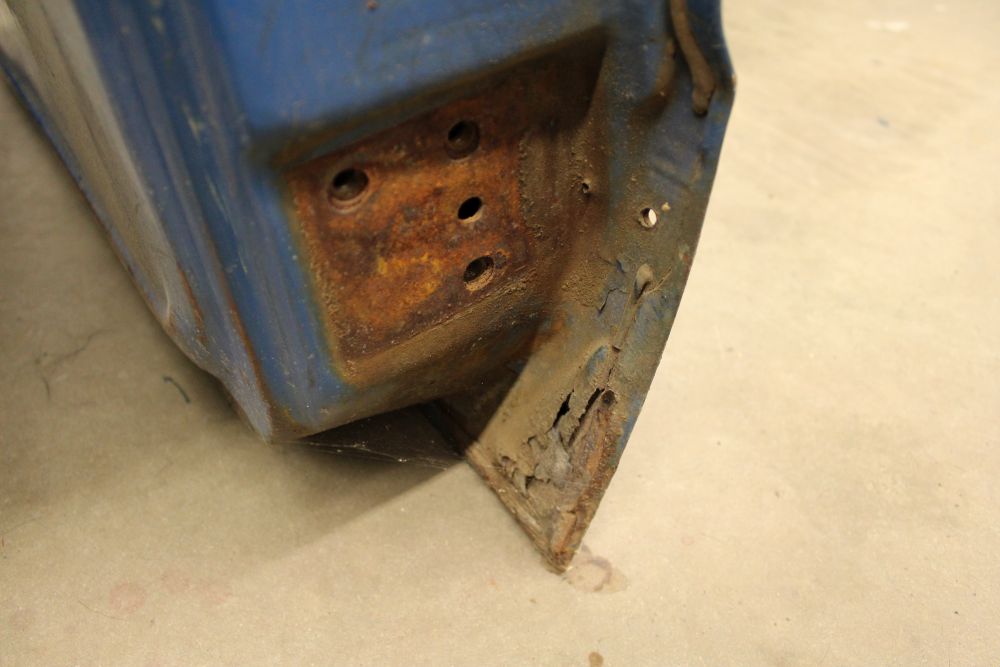 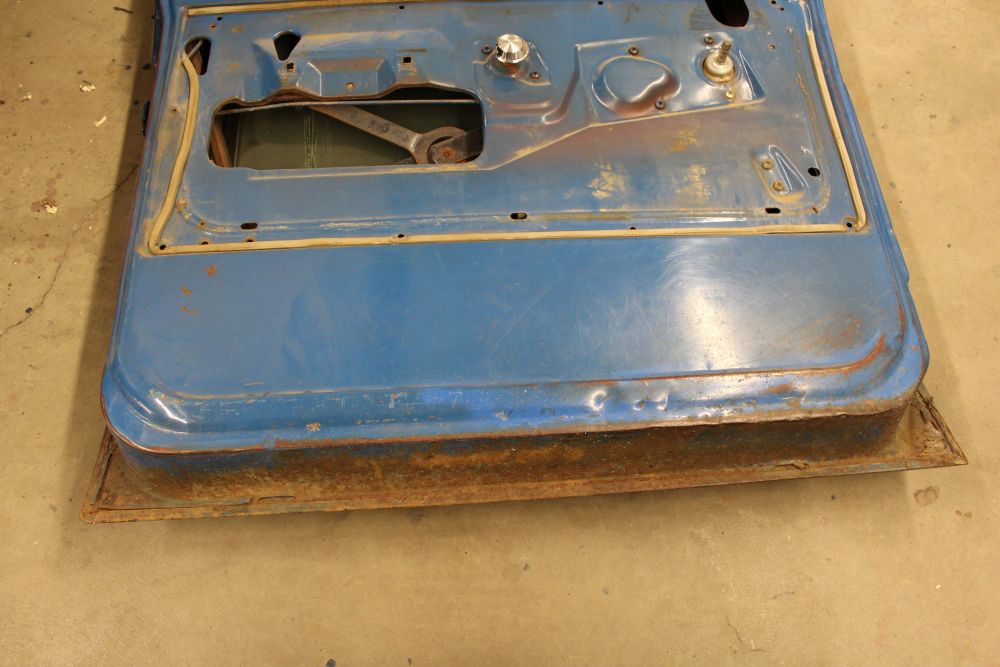 Obligatory shot of my helper. The last lab I had when I was in high school was about the same age as this pup (3 yo) when I first ripped this truck apart, so although I've never driven it since I've owned it, there is some sentiment attached to it. 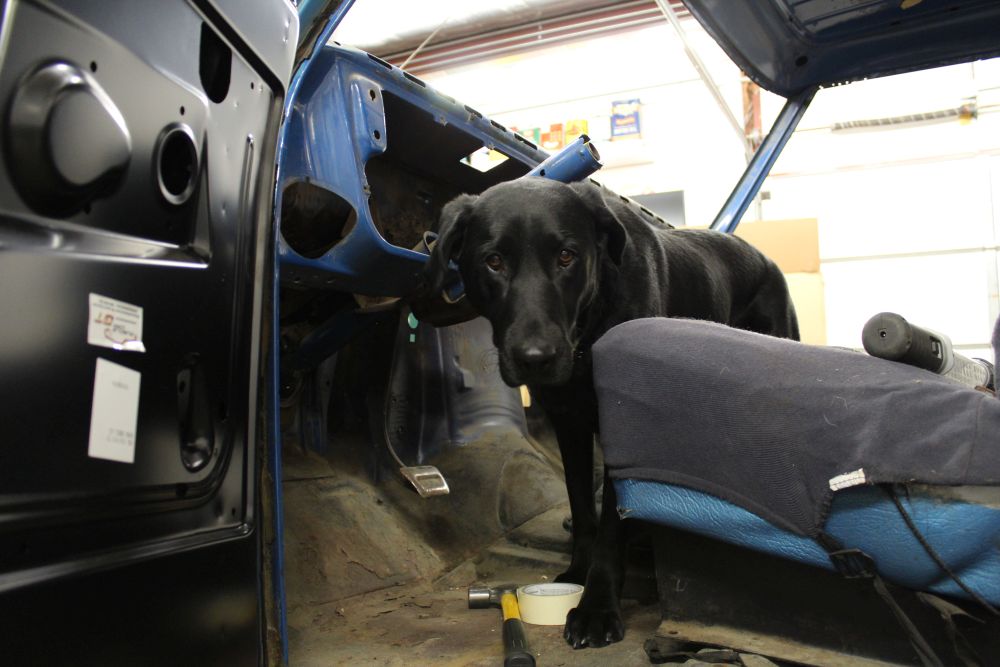 New cab floor, the high hump floors weren't in stock any time soon, so I'll be cutting this one out for my high hump cover. 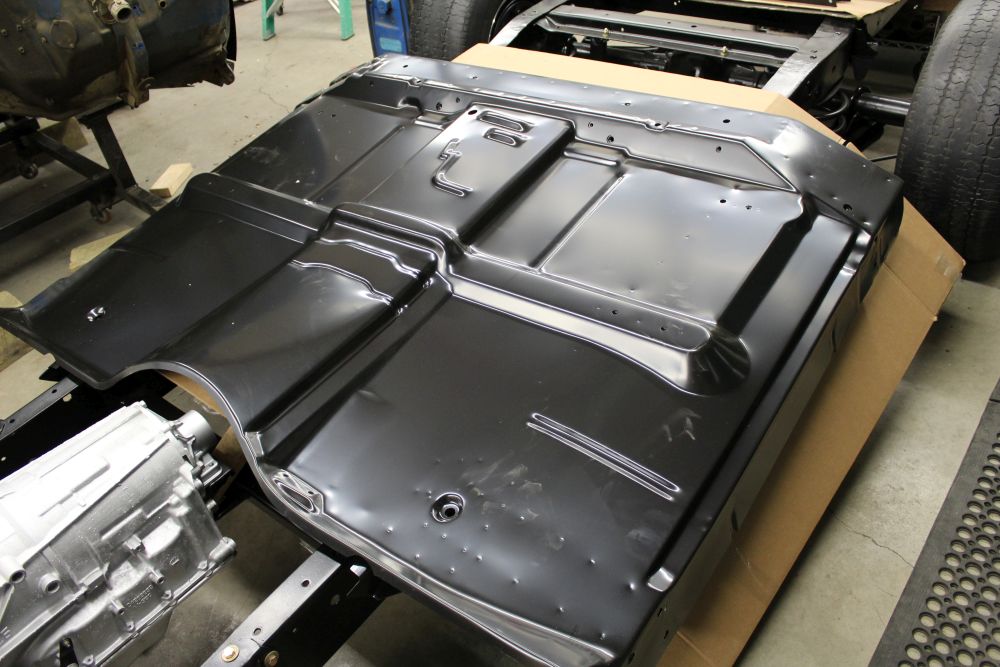 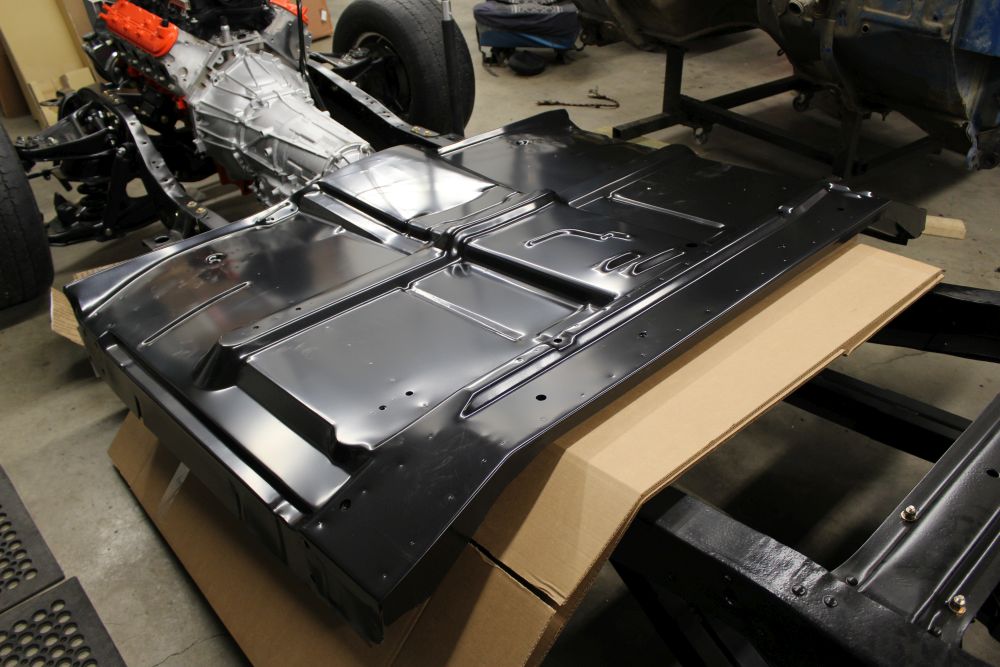 I took a few pics of my trouble spots on my cab. I know worse has been fixed before, but I'll get through this. You folks with the California cabs are not aware of how good you have it. Not only is it rusted out, it was an old farm truck, so it's had antennas mounted on it, been hit by various things, had some shoddy cab marker lights added on at some point, been out in a few hail storms, etc. I guess that's why its called a project truck. 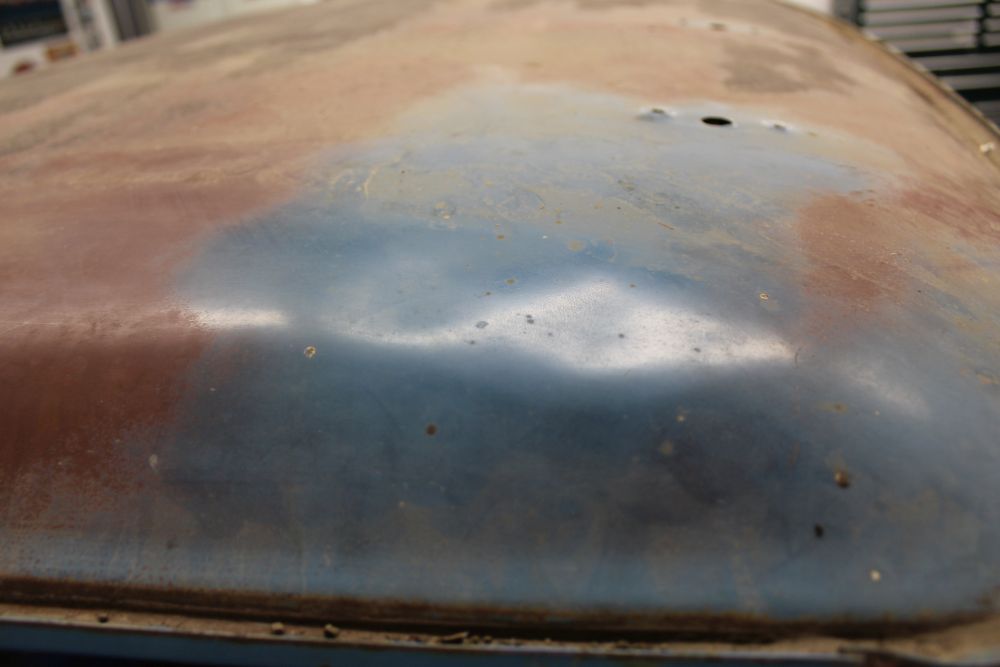 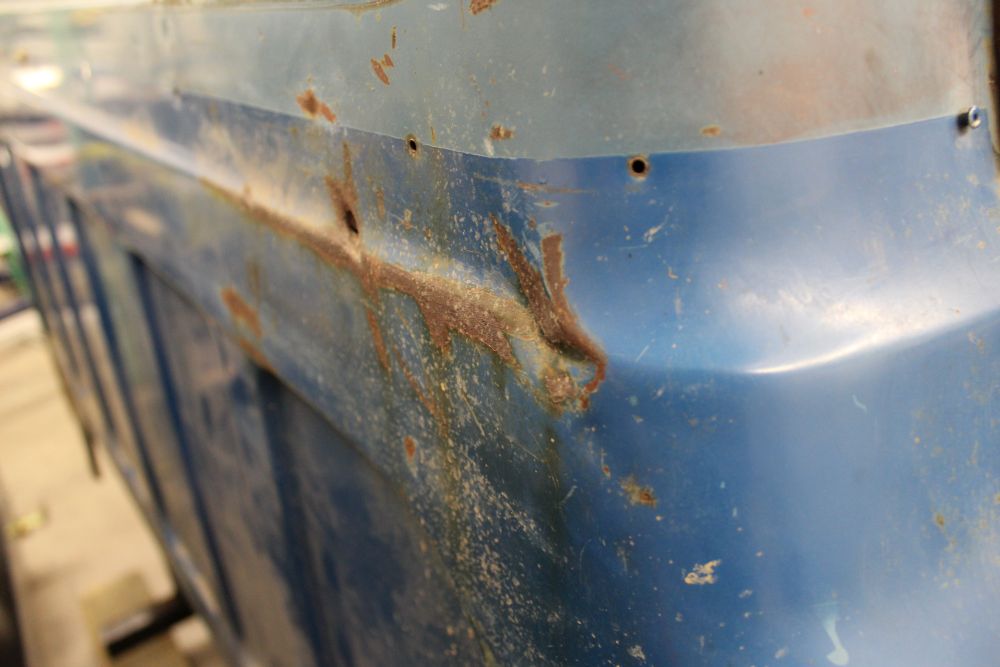 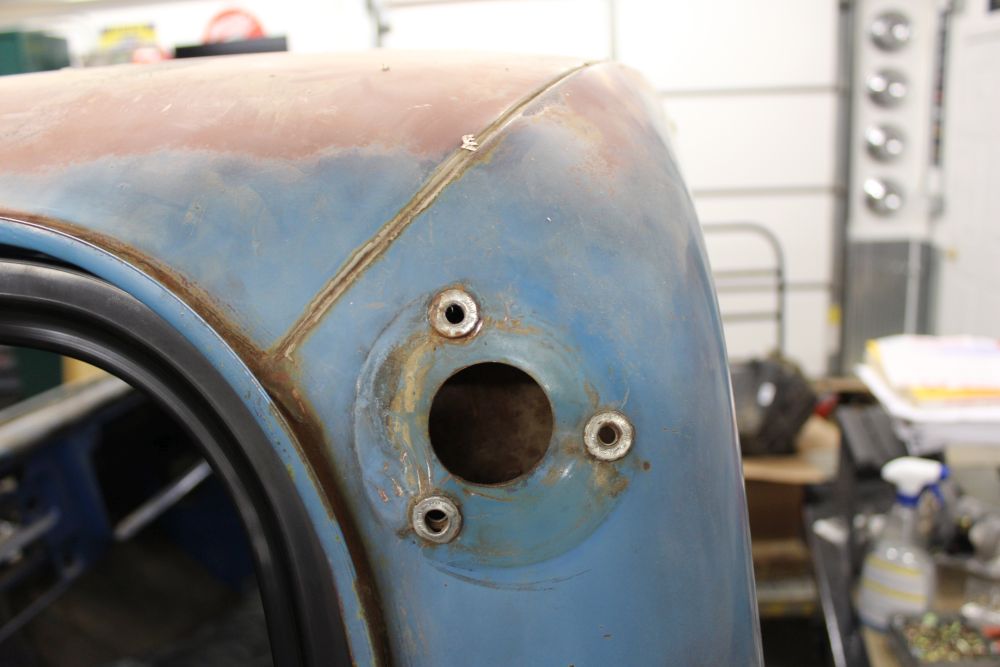 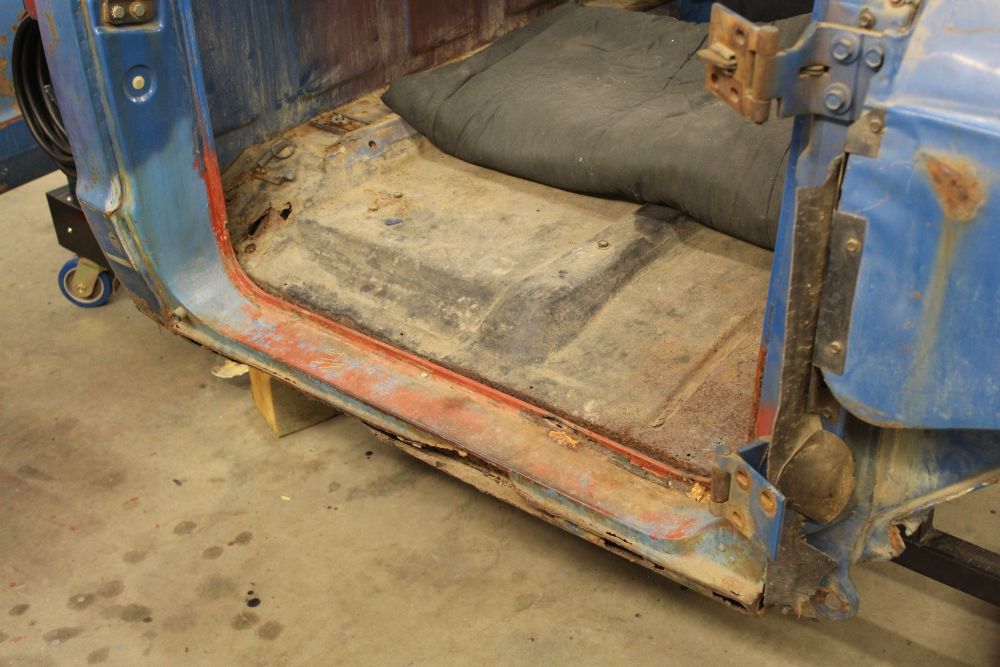 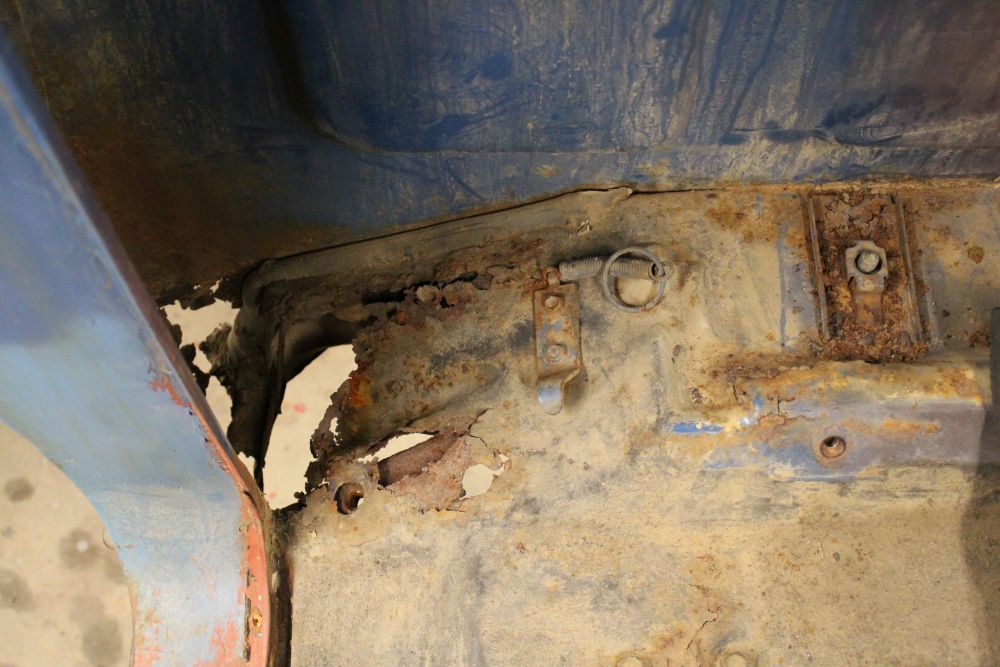 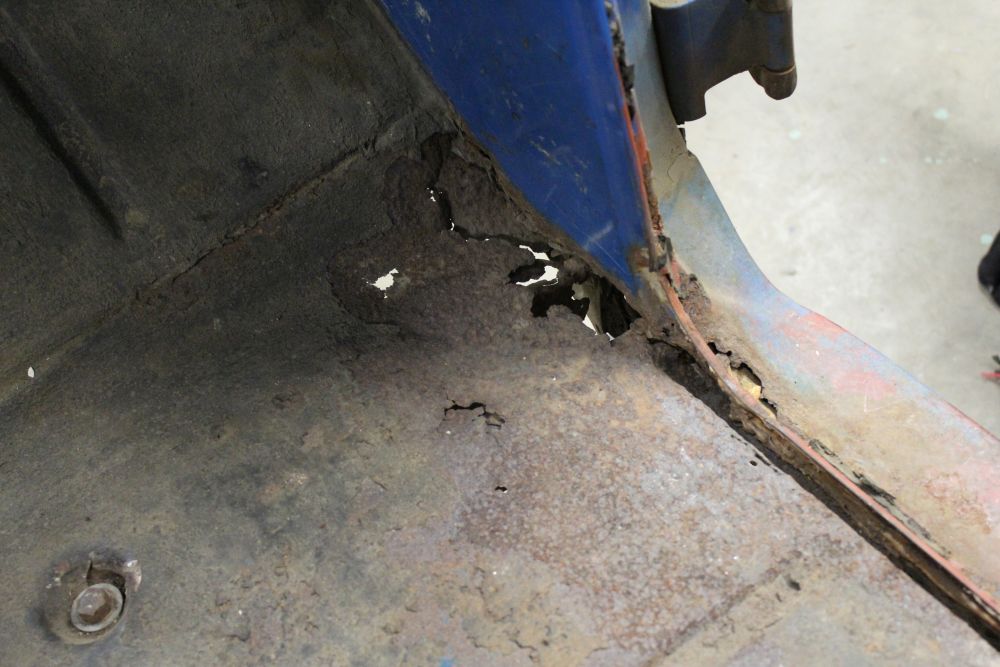 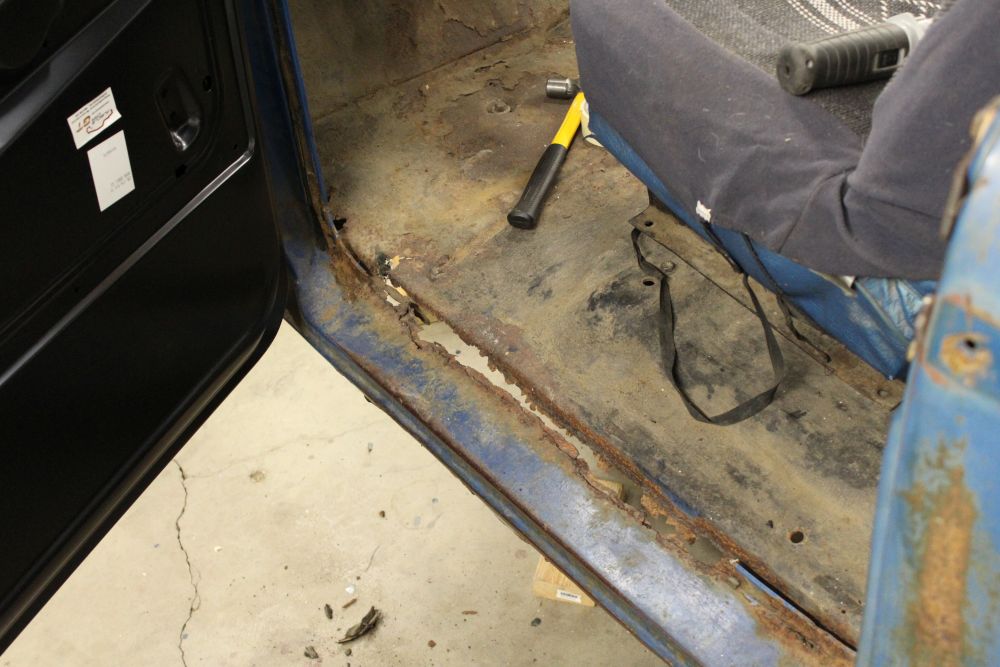 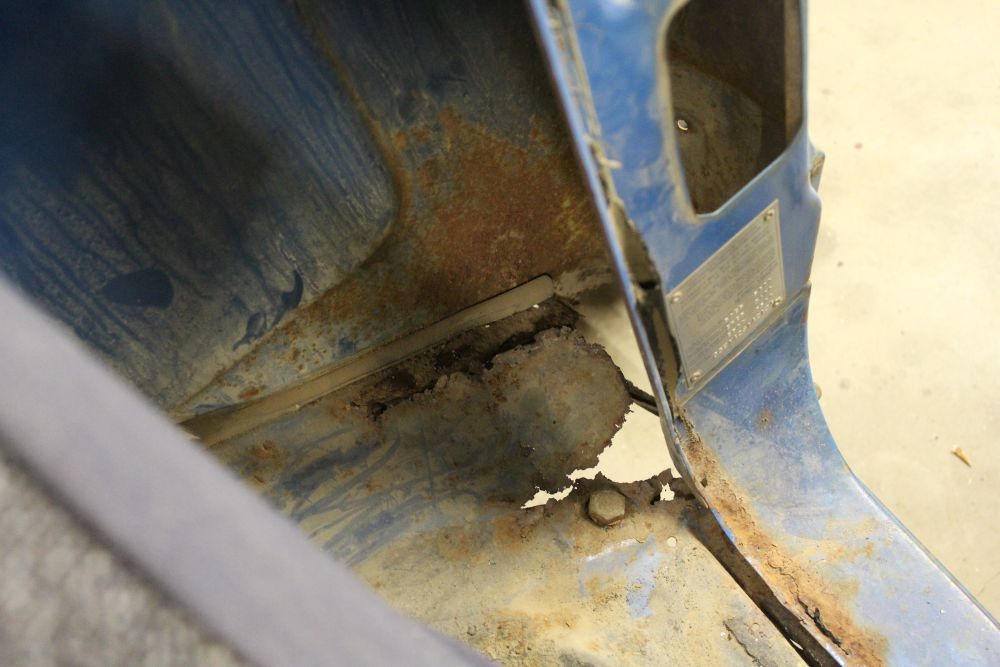
__________________
1972 Chevy C-10 Cheyenne Super - Buckets, A/C, "The 17 Year Revival Project" |
|
|
|
|
01-01-2017, 12:22 AM
|
#9 |
|
Account Suspended
 Join Date: Jul 2016
Location: Tacoma, WA
Posts: 6,873
|
Re: '72 Super Project: Updates!
Hi,
Thanks for the update on the repro doors, the pic showed me what I was wondering. The door fit looks great so maybe the newer doors have obviously been updated as they have the triangle raised portion in the front lower inside and your fit is nice. Good job and I do think it was wise to fit it up now before the floor work. I was wondering who would need a full floor....now I know...I take it for granted the trucks in WA state just need the inner and outer rocker and maybe a bit of the kick panel...Thanks again, now I have to read the first part of your long build! |
|
|
|
|
01-01-2017, 12:56 AM
|
#10 |
|
Registered User
Join Date: Feb 2006
Location: ND
Posts: 208
|
Re: '72 Super Project: Updates!
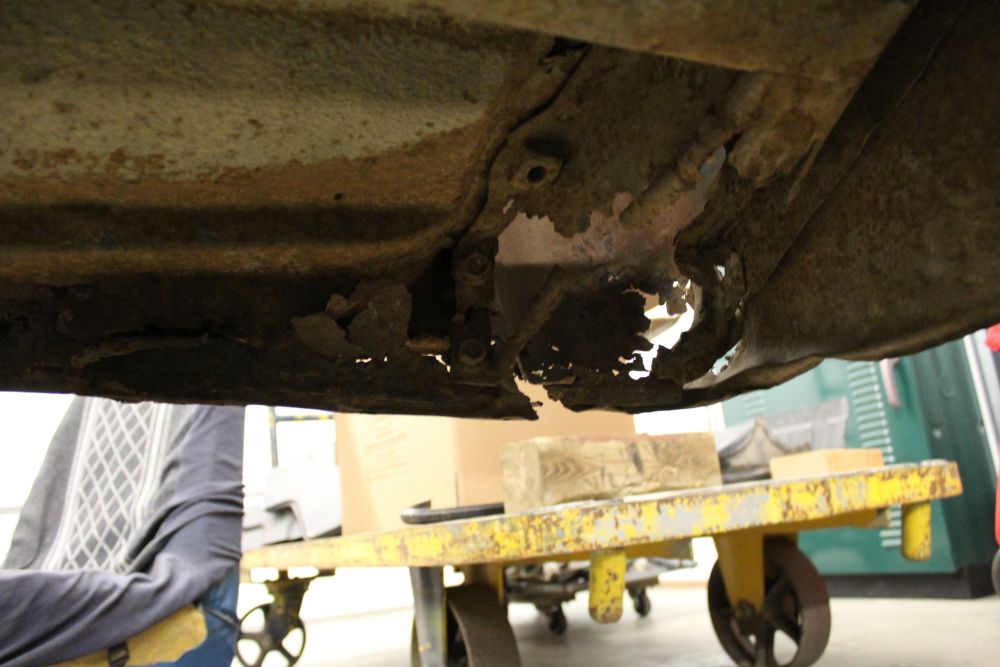
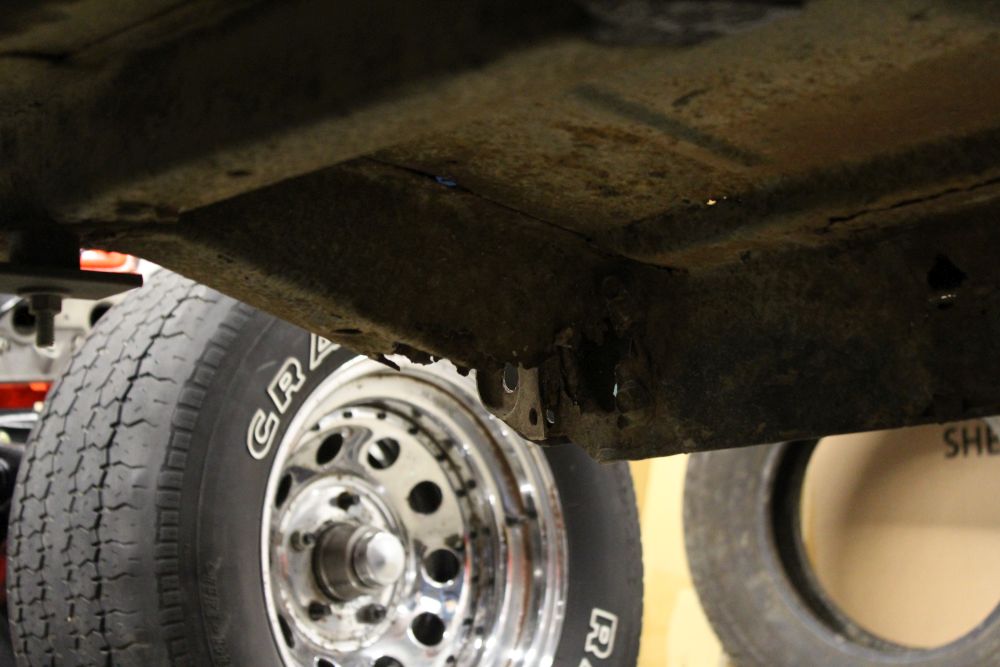
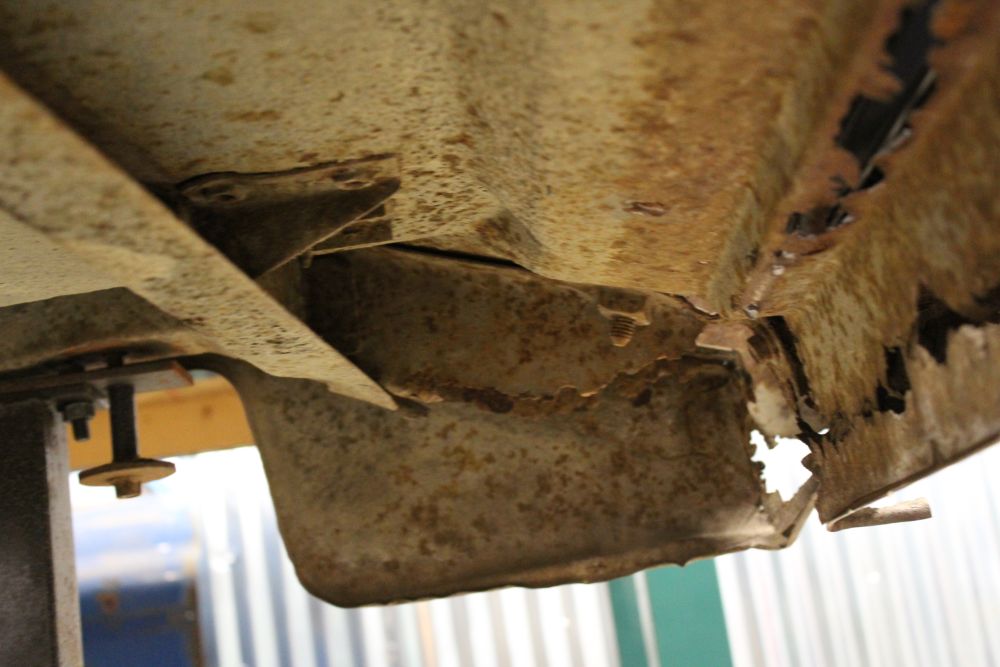
Hey, thanks for the kind words. I forgot to take pictures of the bottom of the floor. That was the main reason for replacing the floor instead of a few patches of the floor pan. All of the cab support braces are rusted through.
__________________
1972 Chevy C-10 Cheyenne Super - Buckets, A/C, "The 17 Year Revival Project" |
|
|
|
|
02-08-2024, 09:55 PM
|
#11 |
|
Registered User
Join Date: Feb 2006
Location: ND
Posts: 208
|
Re: '72 Super Project: Updates!
Here we are again 8 years later. I've been under the weather the last few days, so I thought I'd get this thing up to speed. Life flies by and funds limit progress like a lot of things in life, but I got back on track a few years ago. A few photo links apparently are in-op, so a few quick cliff notes are going to have to do. You can start here or go back and re-read the beginning if you want.
2007 Long story short, I bought this truck from my brothers in high school with the intention of doing a frame off restoration. College, money, life all prevented that. It sure was easy to rip apart into a million pieces though. Last picture is a 5.7 Vortec that I was going to put into this, it now resides in a '62 Impala.   P1010466 P1010466   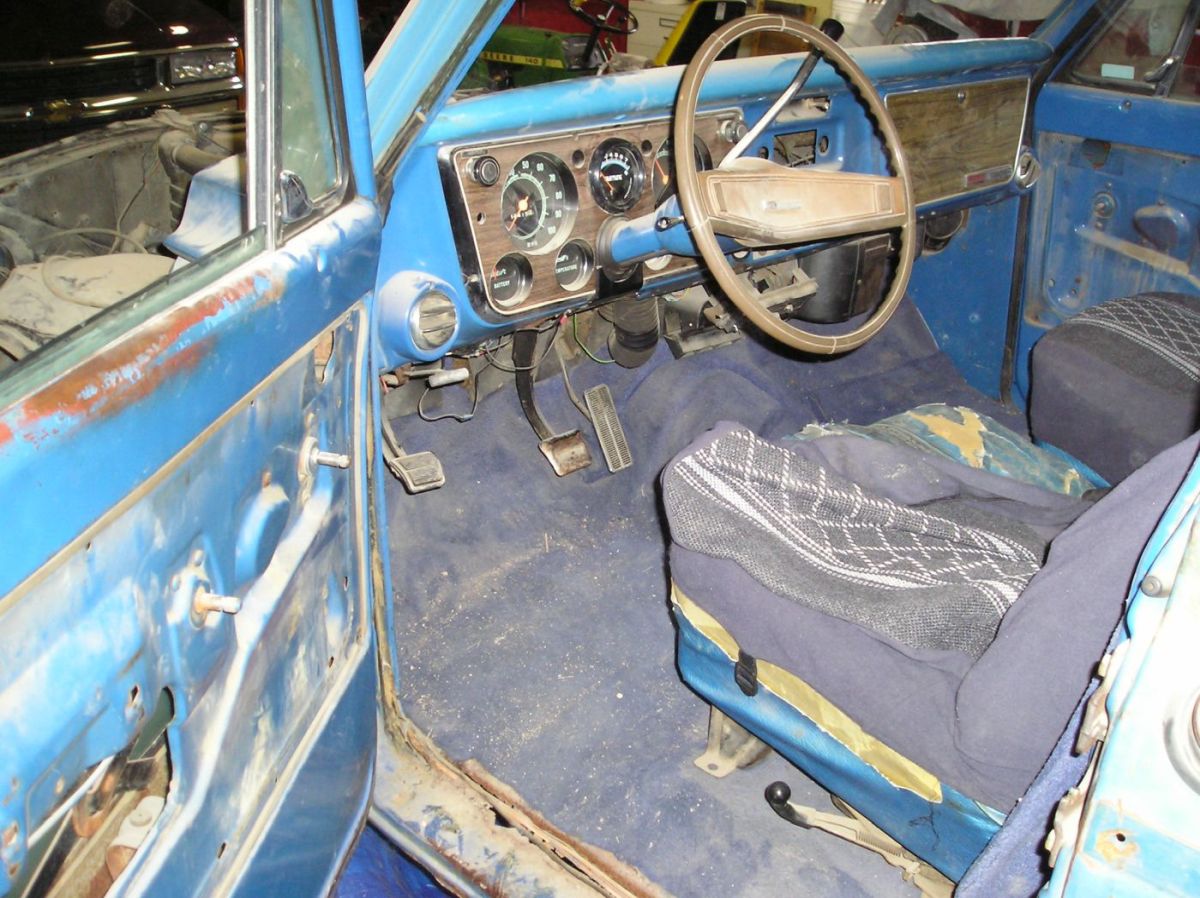       
__________________
1972 Chevy C-10 Cheyenne Super - Buckets, A/C, "The 17 Year Revival Project" Last edited by 1972CheyenneSuper; 02-09-2024 at 02:11 PM. |
|
|
|
|
02-08-2024, 10:07 PM
|
#12 |
|
Registered User
Join Date: Feb 2006
Location: ND
Posts: 208
|
Re: '72 Super Project: Updates!
2016
Procured a trailing arm frame to create a swb frame. (I still have the intact original leaf spring frame) Cleaned up a 5.3 engine, this engine would eventually be shelved and replaced with the 6.0 that will be seen in a few posts. Suspension parts are from the now nonexistent Early Classic Enterprises who closed up shop in their prime imo.             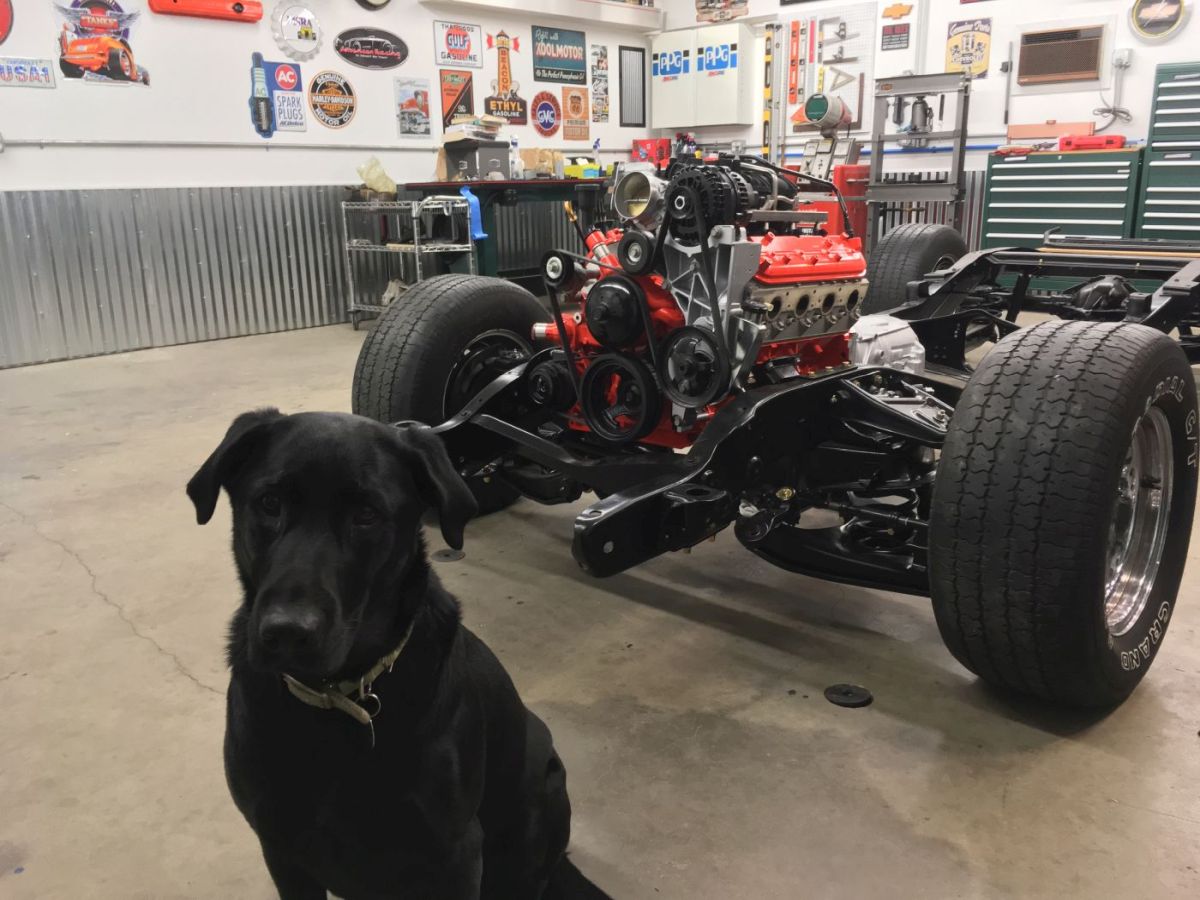 
__________________
1972 Chevy C-10 Cheyenne Super - Buckets, A/C, "The 17 Year Revival Project" Last edited by 1972CheyenneSuper; 02-09-2024 at 02:19 PM. |
|
|
|
|
02-08-2024, 10:23 PM
|
#13 |
|
Registered User
Join Date: Feb 2006
Location: ND
Posts: 208
|
Re: '72 Super Project: Updates!
2017
Come springtime '17 I started on the cab. Elected to go with a full floor due to the rot in all of the supports and floor pans.          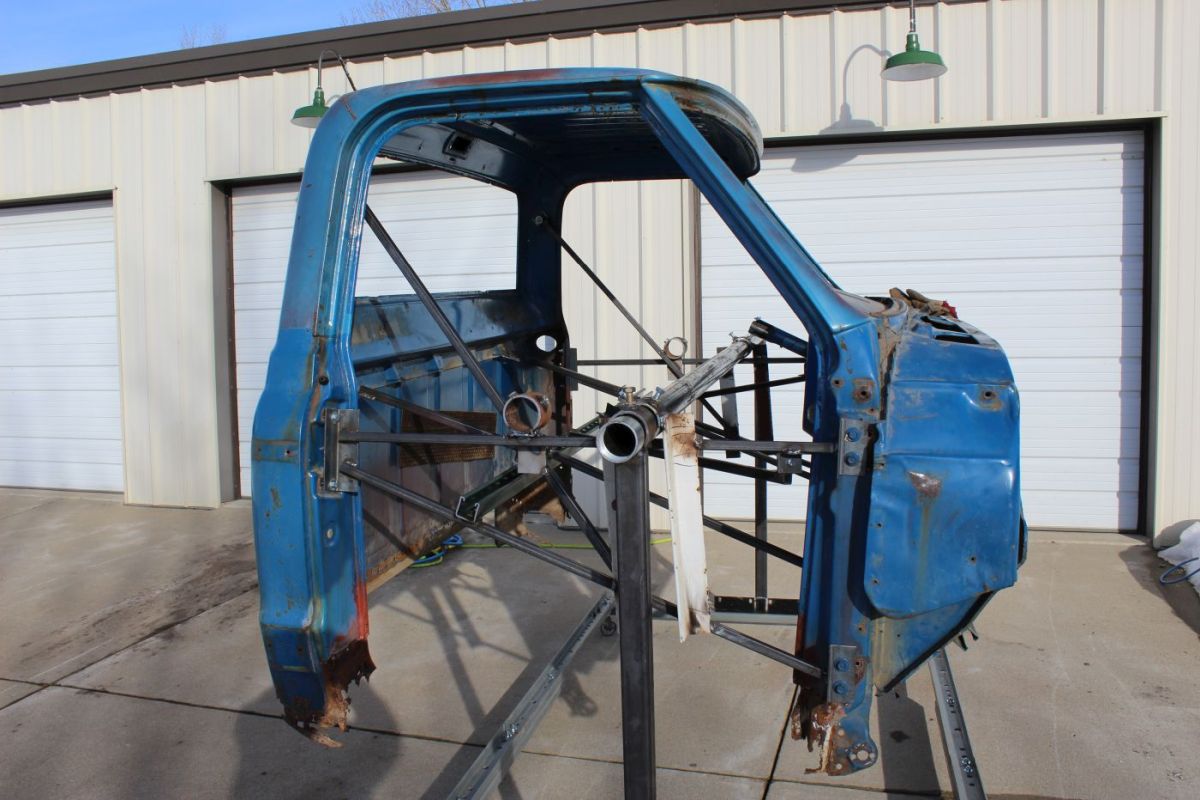    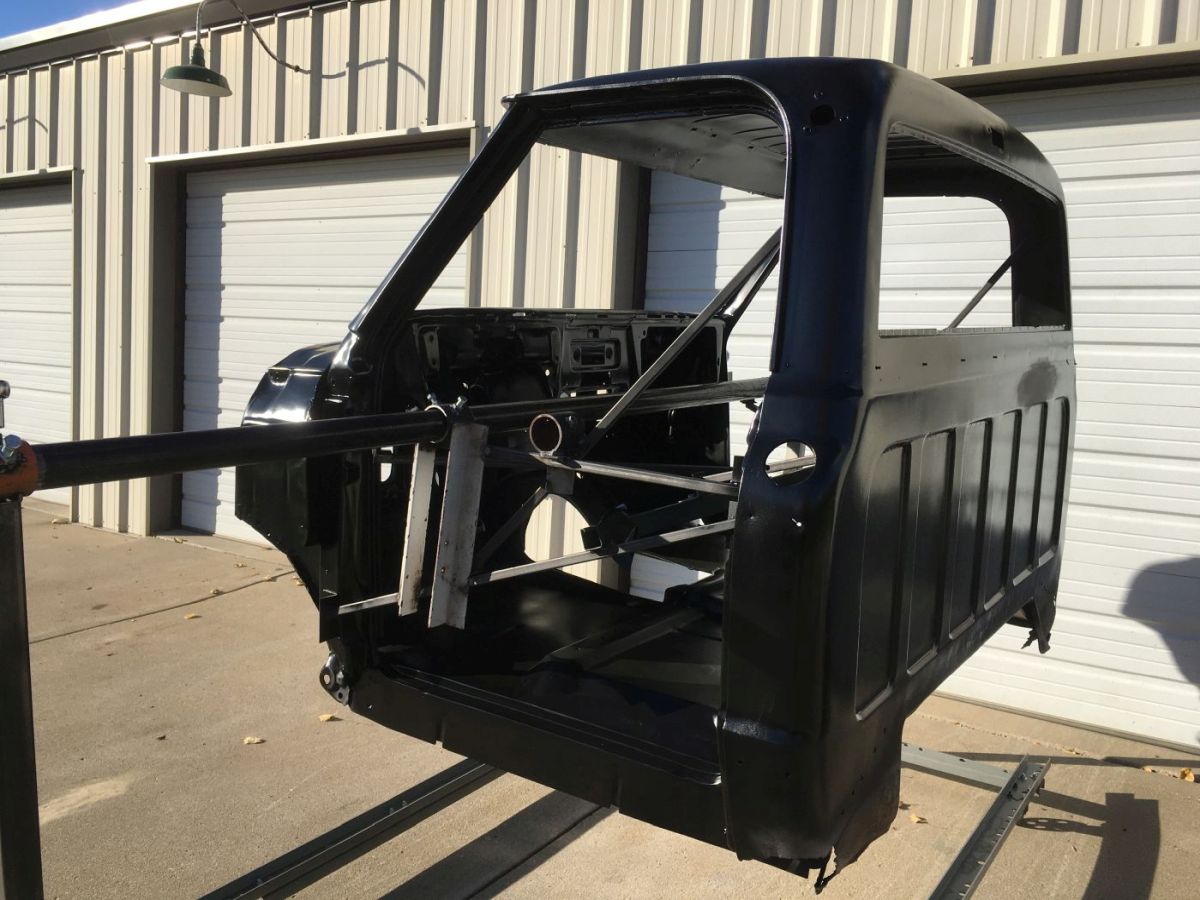
__________________
1972 Chevy C-10 Cheyenne Super - Buckets, A/C, "The 17 Year Revival Project" Last edited by 1972CheyenneSuper; 02-09-2024 at 02:25 PM. |
|
|
|
|
02-08-2024, 10:28 PM
|
#14 |
|
Registered User
Join Date: Feb 2006
Location: ND
Posts: 208
|
Re: '72 Super Project: Updates!
2018-2021
This time period was a bit of a recession, busy with a new job, and just a lot of life happening. Bought some parts, but really stalled out after getting the new floor in, just didn't quite know how to tackle the a and b pillars, rockers and cab corners, and the rest of the body work.   
__________________
1972 Chevy C-10 Cheyenne Super - Buckets, A/C, "The 17 Year Revival Project" Last edited by 1972CheyenneSuper; 02-09-2024 at 02:29 PM. |
|
|
|
|
02-08-2024, 10:46 PM
|
#15 |
|
Registered User
Join Date: Feb 2006
Location: ND
Posts: 208
|
Re: '72 Super Project: Updates!
2022
Summer of '22 is when I really started to dig back into this thing. I started with a few small instant gratification projects to boost a little confidence, before tackling the big picture stuff. 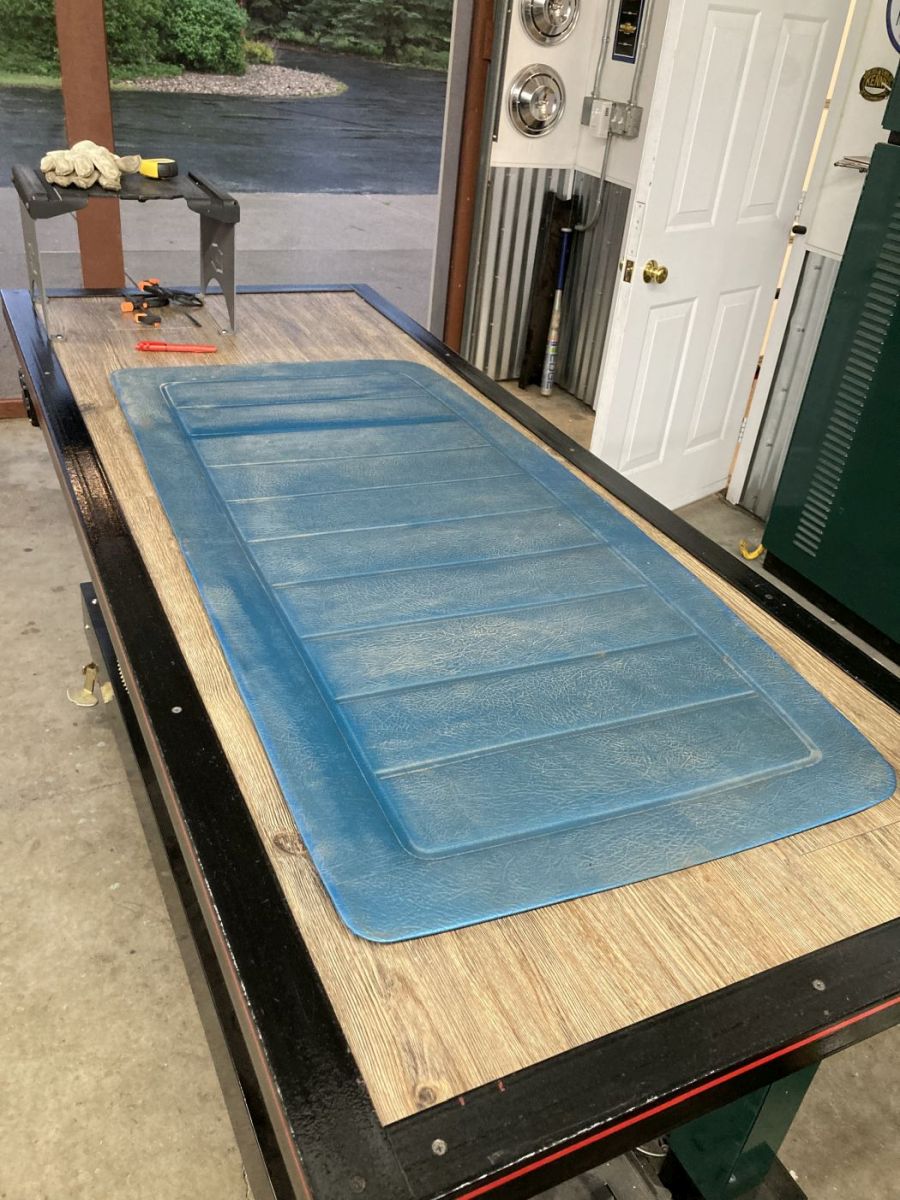 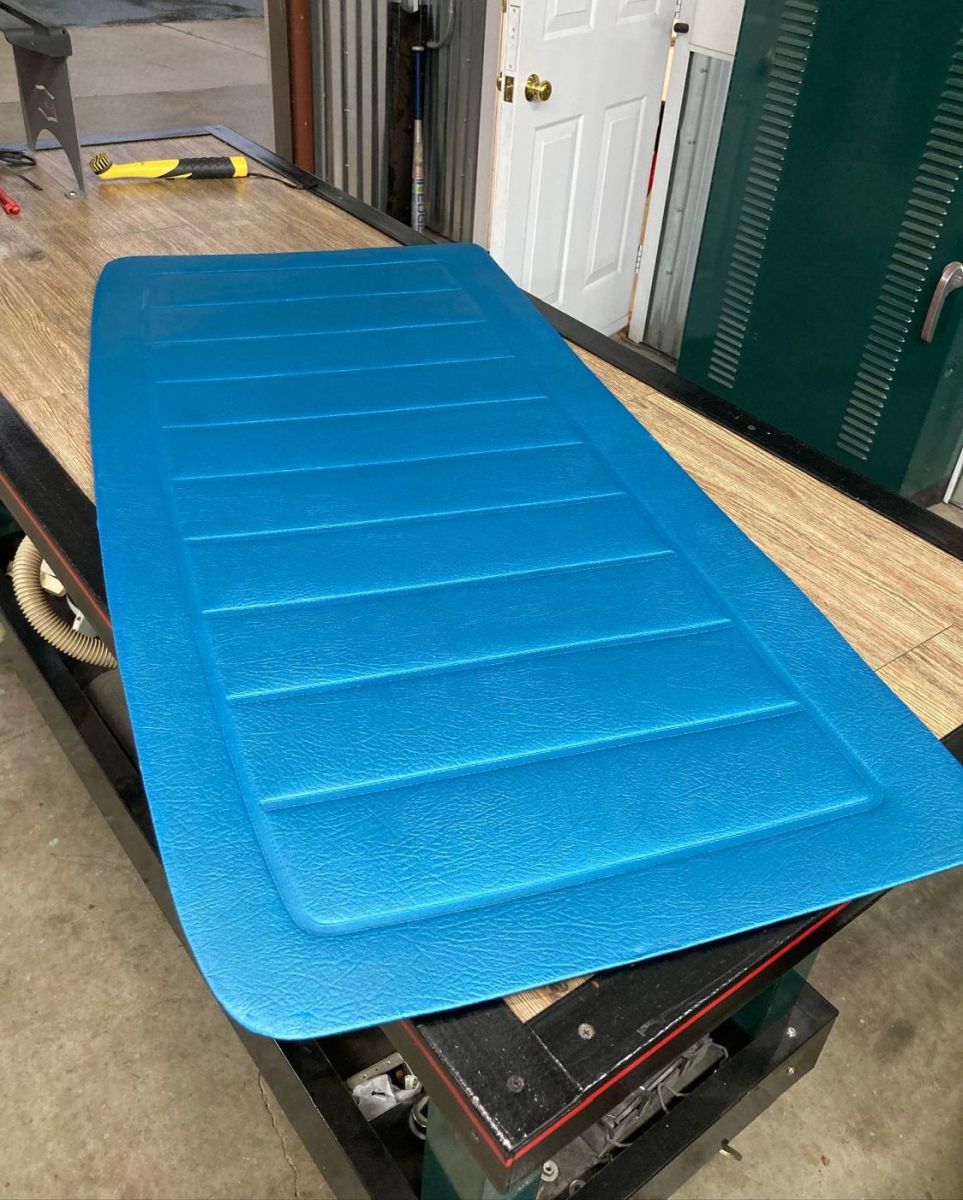         Next, I worked on the bed fill. I used a fuel door from an OBS, trying to use GM parts where possible for the custom stuff. 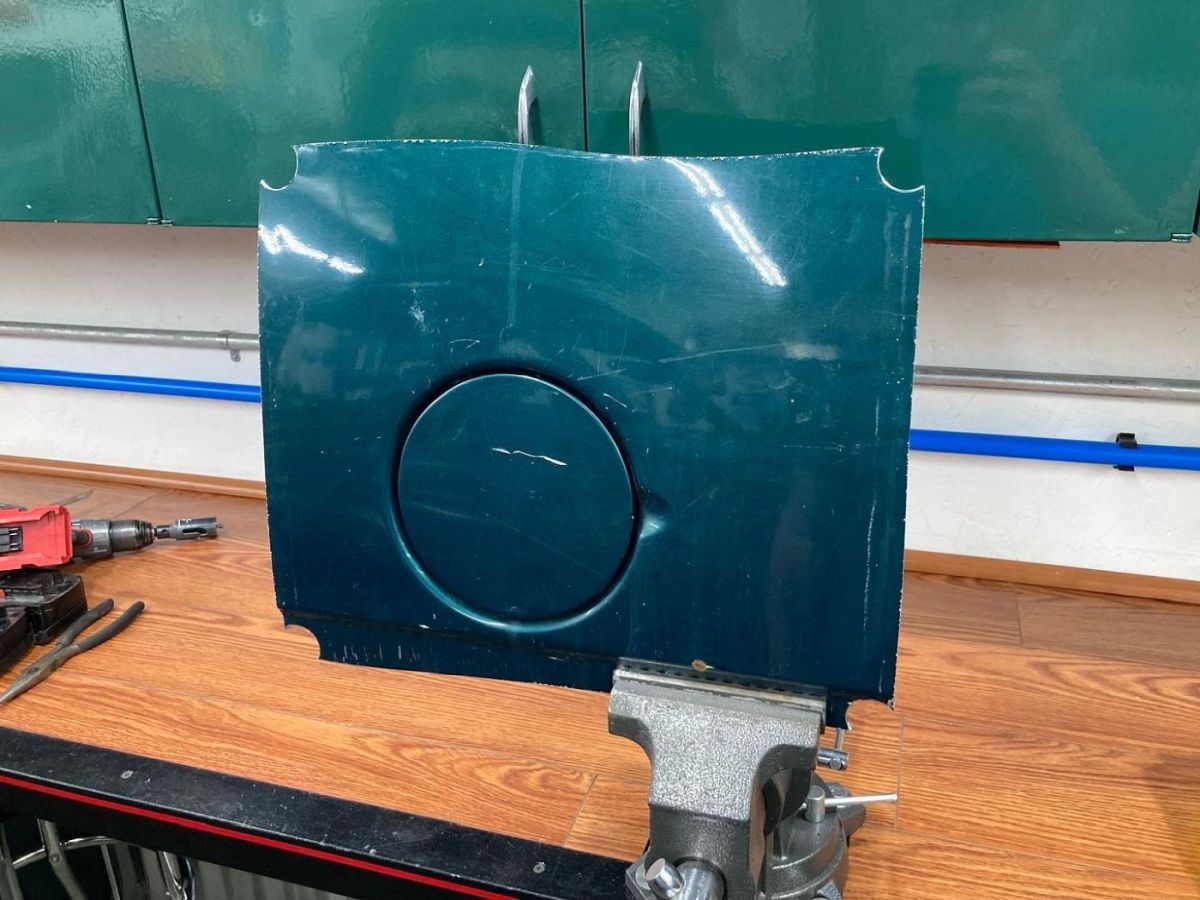      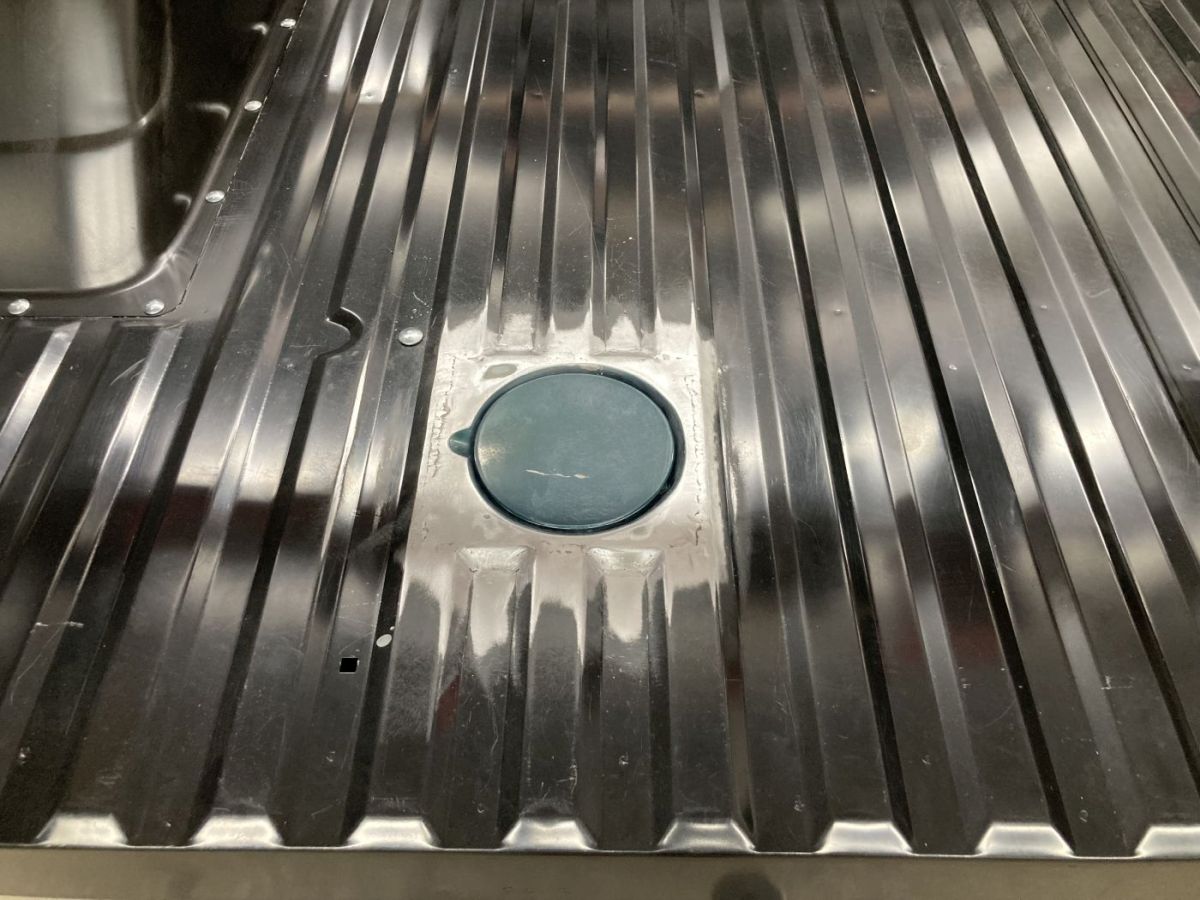   Starting to look like something. 
__________________
1972 Chevy C-10 Cheyenne Super - Buckets, A/C, "The 17 Year Revival Project" Last edited by 1972CheyenneSuper; 02-09-2024 at 02:39 PM. |
|
|
|
|
02-08-2024, 10:49 PM
|
#16 |
|
Born Psycho
Join Date: Feb 2001
Location: brentwood,cal,usa
Posts: 4,755
|
 looks really good, that was a ton of work, you should be proud of yourself looks really good, that was a ton of work, you should be proud of yourself
__________________
jerry moss 72 cheyenne super K20- tilt,tach,vacuum,speedwarning,buckets,shoulder belts,am/fm,tow hooks,bumper guards,toolbox,aux. fuel tank,posi front and rear,plus other goodies!!! SOLD 69 suburban K20-tilt,tach,vacuum,speedwarning,buckets,shoulder belts,am/fm,4 inch all spring lift,4 speed, 14 bolt full floater, dana 44 HD,warn winch,posi front and rear,tow hooks,plus other goodies. 73/80 chevy/gmc K20 SB400,turbo 400,205,tilt,a-c,gas hog. 77 K/5 cheyenne blazer-daily driver/beater. SON HAS IT NOW BRENTWOOD,CALIFORNIA |

|
|
|
02-09-2024, 07:50 PM
|
#17 |
|
Registered User
Join Date: Sep 2013
Location: SPOKANE VALLEY Wa
Posts: 47
|
Re: '72 Super Project: Updates!
velcro is a great idea for the headliner! I used a bunch of magnets for mine. I was worried the first bump it was going to fall on my head. But so far so good!

__________________
-------------- 1970 C/10 LWB build thread: https://67-72chevytrucks.com/vboard/...d.php?t=847860 IG- Tip70 |
|
|
|
|
02-09-2024, 08:49 PM
|
#18 | |
|
Registered User
Join Date: Feb 2006
Location: ND
Posts: 208
|
Re: '72 Super Project: Updates!
Quote:

__________________
1972 Chevy C-10 Cheyenne Super - Buckets, A/C, "The 17 Year Revival Project" |
|
|
|
|
|
02-09-2024, 09:47 PM
|
#19 |
|
Registered User
Join Date: Feb 2006
Location: ND
Posts: 208
|
Re: '72 Super Project: Updates!
Alright, this post will get us pretty much up to speed as the truck sits. Last weekend, I started the install of the Gen 5 Vintage Air unit. I was faced with the dilemma of rebuilding the factory system or going aftermarket. I decided to go with the newer unit which is a bit more straightforward (I think) than the older system with all of the vacuum operated diaphragms and cables. With the new Gen 5, Vintage Air doesn't supply the cable conversion kit to use with the stock A/C controls. Maintaining that stock look is fairly important to me, as I like the look of the factory controls more than any other available pieces. They supply their own control panel with the Gen 5 as they have said they have clearance issues with the converted controls. I could've have tried to find a nos Gen 4 system that supposedly is more friendly with the converted controls, but I like a good challenge. They were able to substitute the cable converters in lieu of the VA control panel. More to come on the controls later, still a work in progress.
Everyone by now is familiar with the flat panels that come with aftermarket A/C units, that help "clean up" the firewall and facilitate the hose routing, whether they've done it to their own truck or have seen them at car shows. I'm going to be attempting something a little different, that I've only seen on a few other builds. I want to retain the original "suitcase" housing, if for no other reason than to maintain a little originality. I really do like the trucks with nice shaved firewalls and the foresight to fill all the unused firewall opens and unused screw holes. I however did not have the time to do so with the timeline I was working with last fall. To add to that, that was never my plan anyways. The idea will be to at first glance appear to a factory appearing system, but in reality, it will be a hollow hose chase and a place for the VA heater valve. Being in the middle of winter here, it is also basically impossible to tool up to prime, base coat, and clear coat one part. I started by lining up the factory holes that both pieces did share and drilled the remainder from the factory box through the VA plate, I trimmed any outlying material from the plate to match the factory box shape. Once that was done, I siliconed the back of the plate as directed by VA as if it was being installed per instructions and bolted it to the truck overnight along with the factory box to help clamp it into place. The next day I was able to remove the factory box and continue working on the system. Some new sealing foam on the factory suitcase and a new blower motor seal and I was able to finalize the left portion of the box that you see here. A few rivnuts here and there are required as well. The VA wiring grommet luckily ends up between the evaporator core and the blower motor compartment and was easy to feed wires through. Since the right half of the suitcase just bolts together, it will be able to act as an easy access to the hose connections and heater valve. I still have to make some sort of plug to block the air passage from the cowl into the suitcase. A dummy blower motor will be installed as well.        
__________________
1972 Chevy C-10 Cheyenne Super - Buckets, A/C, "The 17 Year Revival Project" |
|
|
|
|
02-19-2024, 09:41 PM
|
#20 |
|
Registered User
Join Date: Feb 2006
Location: ND
Posts: 208
|
Re: '72 Super Project: Updates!
Well, not the most productive week, just finally recovering from this sick bug. Worked on the bucket seats most of last week at night in the house. Discovered that one of the seats had two upper covers on it, kinda odd. The covers are from Cars Inc. I had ordered them a couple of winters ago, but with the wait time, they came in the middle of summer, so they were shelved with the intention of being a winter project. I added a layer of 3/4" foam to the bottoms, maybe needed more in a few spots, but they were a little difficult to work with, having the extra rods and clips in the middle to "shape" the indented portions. I didn't realize these were in there until I started disassembling. I ended up fishing pieces of thermostat wire through to pull the clips onto the rods, which worked good. A little time in the sun this summer and I'll think they'll work the wrinkles out. A little trickier than the large bench seats I've done before. Also got my speaker grills painted and a couple of other interior pieces since we had a little warmer weather.
I will be stuffing a small piece from the old seat covers into the small area where the seat back meets the seat bottom, for some reason, there just wasn't quite enough material in that area.      
__________________
1972 Chevy C-10 Cheyenne Super - Buckets, A/C, "The 17 Year Revival Project" |
|
|
|
|
02-20-2024, 10:50 AM
|
#21 |
|
Active Member
Join Date: Oct 2012
Location: Phx, AZ
Posts: 143
|
Re: '72 Super Project: Updates!
Awesome job and I'm impressed you've stuck with it over all the years!
__________________
Scott 1970 C10 LWB-->SWB Under Construction https://67-72chevytrucks.com/vboard/...d.php?t=847605 2014 2500HD DirtyMax|Daily Driver|Stock 2003 Tahoe Stock 1985 K5 5.3LS/4L60E|8Lug 4:56|3/4 Ton Front|14BFF Rear|Roll Cage|Dove-tailed & Bobbed |
|
|
|
|
02-20-2024, 04:16 PM
|
#22 |
|
Registered User
Join Date: Jun 2014
Location: Beaverton, Oregon
Posts: 196
|
Re: '72 Super Project: Updates!
Great pictures on the steering column assembly. I already forgot how to put mine back together!
__________________
My 1970 C10 ChassisFab LWB to SWB Build Thread |
|
|
|
|
02-20-2024, 11:59 PM
|
#23 | ||
|
Registered User
Join Date: Feb 2006
Location: ND
Posts: 208
|
Re: '72 Super Project: Updates!
Quote:
Quote:
__________________
1972 Chevy C-10 Cheyenne Super - Buckets, A/C, "The 17 Year Revival Project" |
||
|
|
|
|
03-12-2024, 12:15 AM
|
#24 |
|
Registered User
Join Date: Feb 2006
Location: ND
Posts: 208
|
Re: '72 Super Project: Updates!
Been busy the last couple of weeks. Finally decided on what to do for accessory brackets and decided on the ICT brackets with a lower alternator to try to keep the bulky look down some. The Holley mid-mount setup is nice, but pricey. A little epoxy and they blend in pretty good I think. I've spent hours researching coolant sensors for LS swaps and weighed all of the options and have decided I'm most likely going to run factory gauges. I came across these, which I hadn't seen before. Not sure what the temperature, ohm range is, but it'll make the gauge work, and I won't have to switch to a 3 wire F-body sender and reroute any wiring. Temp Sender - Ebay
I'll have the Terminator handheld to view the most correct temperature anyways.    I tried using the velcro to attach the gas tank carpet to the mdf board, but that didn't work too well, ended up using spray adhesive. I did use the hook portion on the top painted portion though where the factory screw holes are located. I wasn't aware that the new repo stuff wasn't intended to mount that high, but rather clip on the gas tank. So I seam ripped the plastic clips off, and stuck the top portion to the velcro and it seemed to work really good.  I ordered up some black belts, just to get something in and establish the holes before the seats and console went in. Might convert to three points in the future, but just wanted to keep things moving, rather than waiting for color swatches and going back and forth. The carpet does have a little flub that I couldn't work all the way out where it is supposed to curve back around the in cab tank, but with it being behind the seat, it's really not too evident. A flat piece of carpet with just a nice hemmed top seam would've worked nearly perfect.  I also did velcro, down the sides of the door pillars and it worked real great, just rolling the excess carpet in nicely. It makes it easy to re-access and with the speaker hole I can reach the molding hardware and door stuff easy enough.  I ended up figuring out where to put my bluetooth amp and it ended up being in a pretty easy to reach location, but hidden. I simply took the 5/16" nut off some sort of column bolt, which I don't remember what it is for, but replaced it with a coupling nut and made a little bracket with some riv-nuts for the ground and the cluster ground when the time comes. I was going to try to mount it closer to the dash and use one of those larger holes on the bottom edge with a deluxe knob like the wiper or radio would have, but this is super easy to reach under and turn on or off.   And finally, Saturday I was able to hang the first piece of metal back on. Alot of yellow tape and nerves. 1/8" alignment holes saved the day, definitely would've banged something up without them. I dissassembled my two original doors to start taking an assessment of what were going to need. I want to get them fully loaded, before I think about hanging fenders, just in case I have to compensate for the weight a little bit, although my rebuilt hinges are pretty solid. I'm going to focus on the doors, then more engine compartment stuff before we bring more shiny stuff onto the chassis. That's all for this go around.  
__________________
1972 Chevy C-10 Cheyenne Super - Buckets, A/C, "The 17 Year Revival Project" |
|
|
|
|
03-17-2024, 09:59 PM
|
#25 |
|
Registered User
Join Date: Feb 2006
Location: ND
Posts: 208
|
Re: '72 Super Project: Updates!
Another weekend gone by with a decent amount of progress. Hung the driver side door, installed trim handle, got the latch plate set. As on the other side, I left the bucket seat out to aid the trim and latch install in the b pillar area of the cab through the speaker hole. After that was complete, I was able to seal up this side of the gas tank carpet and install the driver side bucket. Finished up the glovebox install, with a modified latch arm. You can see this thread to see the interference in fitment in conjunction with the Vintage Air system and the ducting. Got a lot of parts showing up in the next couple of weeks. All of the parts to load the doors, alot of engine stuff, etc.
     
__________________
1972 Chevy C-10 Cheyenne Super - Buckets, A/C, "The 17 Year Revival Project" |
|
|
|
|
| Bookmarks |
|
|


 Hybrid Mode
