
|
|
|
 02-27-2017, 05:40 PM
|
#1 |
|
Registered User
Join Date: Mar 2013
Location: Hubbard TX
Posts: 73
|
Re: My K5 Blazer Story.
I may have missed it, but did you guys clearance the frame rails for the truck manifolds? I saw where you had to clearance the block for the xmember and I'm just gonna nip that one in the bud JIC. Could be different for a suburban, but not wanting to find out after the fact!
BTW, Like many, I've been following Larry's builds from expeditionportal and here. Beautiful workmanship and attention to detail. |

|

|
|
03-01-2017, 04:20 PM
|
#2 | |
|
Windy Corner of a Dirty Street
Join Date: Jun 2003
Location: Pueblo West, Colorado
Posts: 2,926
|
Re: My K5 Blazer Story.
Quote:
 These old frames are flimsy enough as it is. Cutting frames for late model engine swaps to make room for A/C compressors or exhaust manifolds is strictly against my religion. Nothing irks me more than seeing that hack work documented in other peoples build threads. These old frames are flimsy enough as it is. Cutting frames for late model engine swaps to make room for A/C compressors or exhaust manifolds is strictly against my religion. Nothing irks me more than seeing that hack work documented in other peoples build threads.  Actually, on Robs K5 the manifolds cleared the frame just fine with room to spare for when the exhaust shop made the exhaust pipes. I really had my doubts but Rob picked the right manifolds to make it all work without cutting anything. This was my first Gen III "LS" swap as everything else I have done have always been big blocks (mainly 454's and 8.1L's). Thanks for the kind words! 
__________________
Current vehicle collection: 1978 Chevrolet K10, 8.1L, NV4500, NP205 1989 Chevrolet Suburban, 8.1L, NV4500, NP241 1993 Chevrolet C1500 Sportside, TBI 7.4L, 4L60E 2001 Chevrolet K2500HD, Ext Cab, SWB, 8.1L, ZF 6 speed 2014 Chevrolet Impala LTZ 3.6L Vortec 8.1L because life is too short to tolerate underpowered vehicles
|
|
|
|
|
|
03-04-2017, 12:41 PM
|
#3 |
|
K5Camper
 Join Date: Mar 2004
Location: Pueblo, CO
Posts: 1,513
|
Re: My K5 Blazer Story.
Yep, no cutting for us. Actually I had 2 pairs of 6.0 manifolds from a H2 that we used. With the dirty dingo slider engine mounts pushed back to keep the trans in the stock position there was plenty of room. The manifolds clear well.
If you push the engine forward from. The stock location you would have trouble clearing the frame with the manifolds. I don't think the H2 manifolds are any different than the standard truck manifolds. Truck versions work. Hell if you want the extra pair I'll let them go for $50 plus the ride. PM me with your info if you want them.
__________________
Rob Z. 1975 K5 350/465/205/D44/12b 4" lift on 35's- RIP 1991 K5 8.1L/NV4500/241/D44/14b FWC Camper |
|
|
|
|
04-29-2017, 01:05 AM
|
#4 |
|
K5Camper
Join Date: Mar 2004
Location: Pueblo, CO
Posts: 1,513
|
Re: My K5 Blazer Story.
After seeing Mikey and Gary's progress in their Father and son build I realized I've been lacking in the update department on my own thread. Since the dual battery setup went in I've added the beginnings of my onboard air system. 2.5 Gallon tank is mounted. Compressor is mounted and it's been plumbed up with hoses.
Onward to pics... This is the smittybuilt air tank I picked up, which also came with all the lines and fittings to build an onboard air setup. I did have to pick up a pressure switch and check valve to complete it, but it's a decent start.  Looking up from underneath. This is directly behind the winch/bumper combo. I've moved the blowoff valve to a different port so it's not low hanging fruit off road.  My Jeep buddy John got me this for my birthday this year. It's a nice creature comfort item that is really nice to add to the truck.  Didn't take much to setup, but not having the interior paneling of a uplevel truck made it a little challenging to hide the wiring. I ended up stuffing it behind the gasket for the windshield.  Mounting point for the compressor. Fabbed up some brackets and mounted them to the core support with some rubber isolators for the compressor to the brackets.  Plumbed up. Unfortunately after getting this running I was fixing some minor leaks at fittings, I powered up the compressor and it stopped running when it hit 55psi. Earlier it had ran up to 115psi without an issue. It never worked again. Got to get a bigger one..  Oh yeah I finally got my electric speedo working. Long story short, having 12v on the ground to the DRAC module tends to keep the setup from working. Re-ran the ground and it started working again. Plus with the mods done to the DRAC with what I found online got the speedo dialed in dead nuts on accurate. Speedo is right in line with GPS readings from my phone.  Biggest addition is changing out the shocks. My right rear started leaking. Plus the rear shock mounts need to be cut off and replaced with ones in at a better angle. After much research one common thread came through. "Buy the best shocks can afford." I had my parts guy do some digging on the part numbers from Bilsteins website for K5's I found and he scored big time. Got all 4 for under $350. Fronts are in. Very happy with the results. Need time in Larry's garage to cut the axle mounts off the rear and weld on some new ones from Ruffstuff. Then I can pop in the rear Bilsteins.  Tried out the front shocks on a little sunday drive up to Cripple Creek last weekend. Amazing difference.  The road follows Four Mile Creek most of the way up. Sometimes it's close like this, other times it's a 100ft or better below. Probably where they got the name for the road. It's known as Shelf road for a reason thats for sure.  After looking for a place to eat in Cripple Creek we bailed for Victor which is on the other side of the states largest working pit gold mine. Had a great lunch and headed back on Phantom Canyon road. The road follows the old grade for the Florence and Cripple creek railroad that ran from 1894 to 1915. It has many wood lined bridges and two tunnels along the way. I like this photo as it really represents Three centuries in one shot. 1800's for when the tunnel was cut, 1900's when the K5 was originally produced and 2000's for when I took the shot. 
__________________
Rob Z. 1975 K5 350/465/205/D44/12b 4" lift on 35's- RIP 1991 K5 8.1L/NV4500/241/D44/14b FWC Camper |
|
|
|
|
04-29-2017, 11:48 AM
|
#5 |
|
Registered User
Join Date: Dec 2009
Location: Fairbanks, AK
Posts: 1,830
|
Re: My K5 Blazer Story.
Excellent work on the additions. My old K10 with those shocks and ez ride springs was very comfortable on and off road. Bummer about the compressor.
__________________
-Marcus 1991 V3500 L29 454 4L80E NP205 D60/14 Bolt 4.56's 1984 K30 292 TH400 NP205 D60/14 Bolt 4.56's flat bed 7'6" Meyer Plow 2022 Silverado 3500 L8T Project Daily Driver Project Heavy Hauler Project Plow Truck |
|
|
|
|
04-29-2017, 07:25 PM
|
#6 | |
|
K5Camper
Join Date: Mar 2004
Location: Pueblo, CO
Posts: 1,513
|
Re: My K5 Blazer Story.
Quote:
The main problem with it was that the CFM rating was low for what I had repurposed it for. It just wasn't up to the task. I'll get a larger unit and should be able to mount it up pretty quickly.
__________________
Rob Z. 1975 K5 350/465/205/D44/12b 4" lift on 35's- RIP 1991 K5 8.1L/NV4500/241/D44/14b FWC Camper |
|
|
|
|
|
09-11-2017, 11:39 PM
|
#7 |
|
K5Camper
Join Date: Mar 2004
Location: Pueblo, CO
Posts: 1,513
|
Re: My K5 Blazer Story.
I've been a little slack in updating the build over here Lost most of the photo links with Photobucket's ransom. I don't have the patience to go back and rebuild the links with a new photo hosting site.
Since I last updated, lots have happened. Main one, Larry's desert trip. Trip report coming, but I got to finish writing it first. Next, exhaust routing sucks. Sounds great but over heats the fuel system on long runs. It's going to be completely reconfigured. last thing, I got something I've been looking for a very long time. I finally found a Four Wheel Camper for my Blazer. So here starts the saga of the camper and its refurbishing. Like I said, I've been looking for one for a very long time. Camping with Larry out of his camper is a game changer. No fiddling with tents, sleeping on the ground or other fun normal to "roughing it". Park, level it out, pop the top and crack a cold one. I witnessed this for a week in Utah and knew I had to get one. Ironically, one came up for sale in Grand Junction while we were out in Utah. One night we still had cell coverage and while hunkered down in my tent in the dark hiding from the wind I found it. Timing couldn't have been more off as I was pouring cash into the fuel tank on the trip and couldn't go for it. So a month later in July I'm running my normal search in Craigslist and come across one for sale out of Denver for $300. No joke. The guy is willing to split the camper from the Blazer which is almost unheard of. I burn up my phone trying to get a hold of the guy and make arrangements to check it out that next weekend. Here's what I find.. 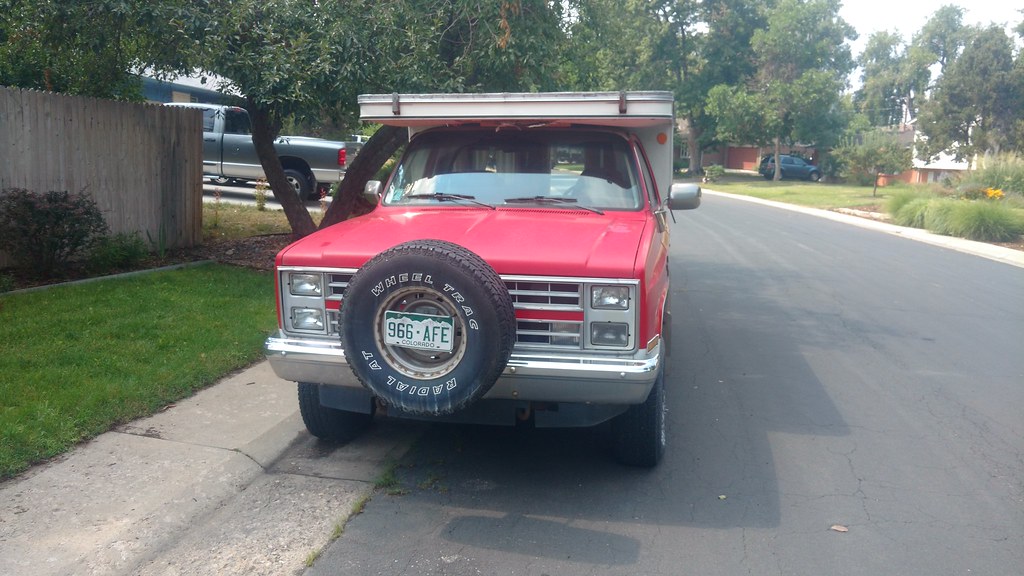 IMG_20170806_112458422 by Rob Zulian, on Flickr IMG_20170806_112458422 by Rob Zulian, on FlickrIt's rough around the edges, but complete.  IMG_20170806_112654253 by Rob Zulian, on Flickr IMG_20170806_112654253 by Rob Zulian, on FlickrBiggest issue is rot. FWC used 1" particle board in the front cab wall and cab over floor. 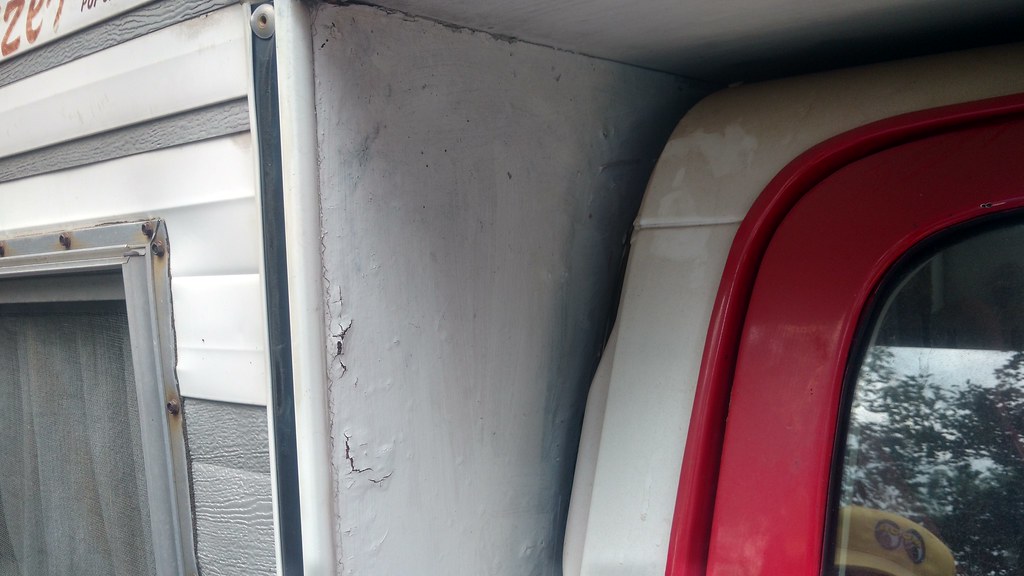 IMG_20170806_112848660_HDR by Rob Zulian, on Flickr IMG_20170806_112848660_HDR by Rob Zulian, on FlickrRotten.. 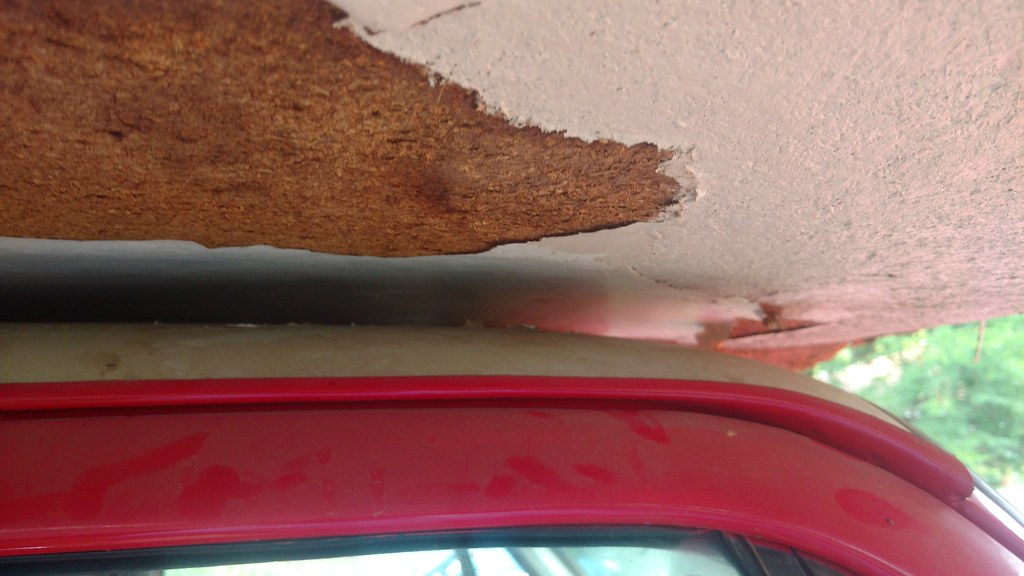 IMG_20170806_112856241 by Rob Zulian, on Flickr IMG_20170806_112856241 by Rob Zulian, on FlickrOh yeah, heres the reason for the rot. Roof needs resealed and a new vent installed.  IMG_20170806_113813081 by Rob Zulian, on Flickr IMG_20170806_113813081 by Rob Zulian, on FlickrVintage 1982 goodness. 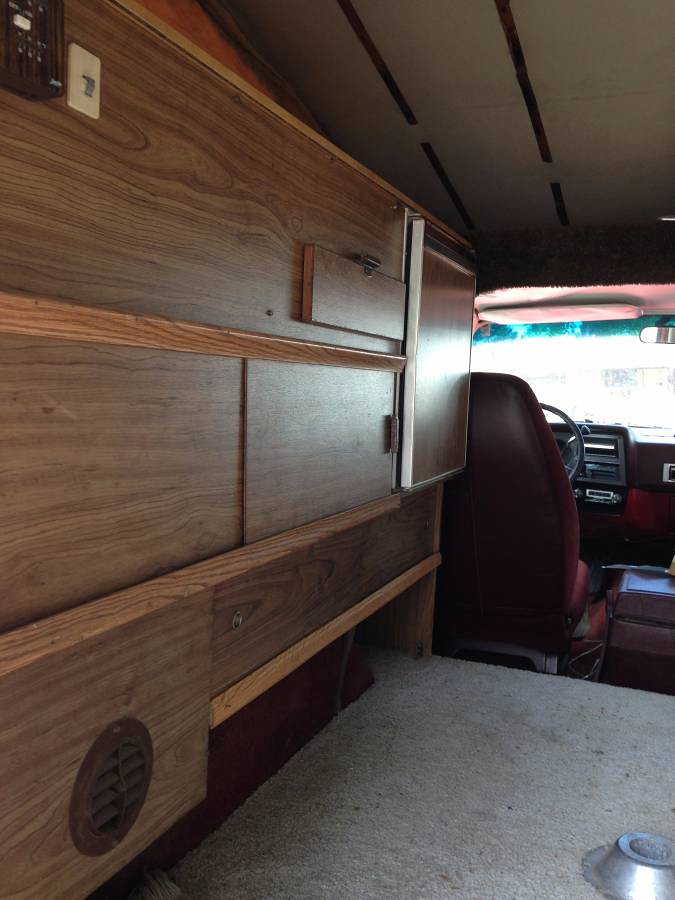 00S0S_hdTDFugAbdI_1200x900 by Rob Zulian, on Flickr 00S0S_hdTDFugAbdI_1200x900 by Rob Zulian, on FlickrOverall it's got good bones. I'm not out much if it is a turkey. 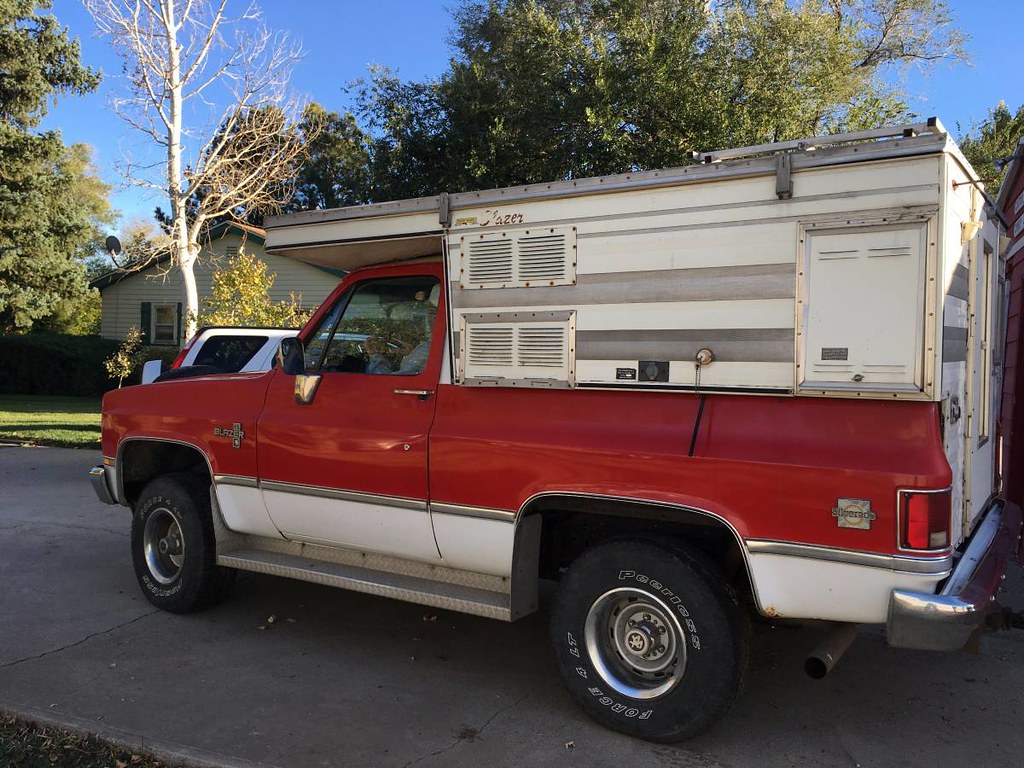 00k0k_euqpFcVK5Aj_1200x900 by Rob Zulian, on Flickr 00k0k_euqpFcVK5Aj_1200x900 by Rob Zulian, on FlickrSo I give the guy $150 and tell him I'll be back next week to pick it up with the rest of the money. The K5.3 is waiting in the wings for it's new house. 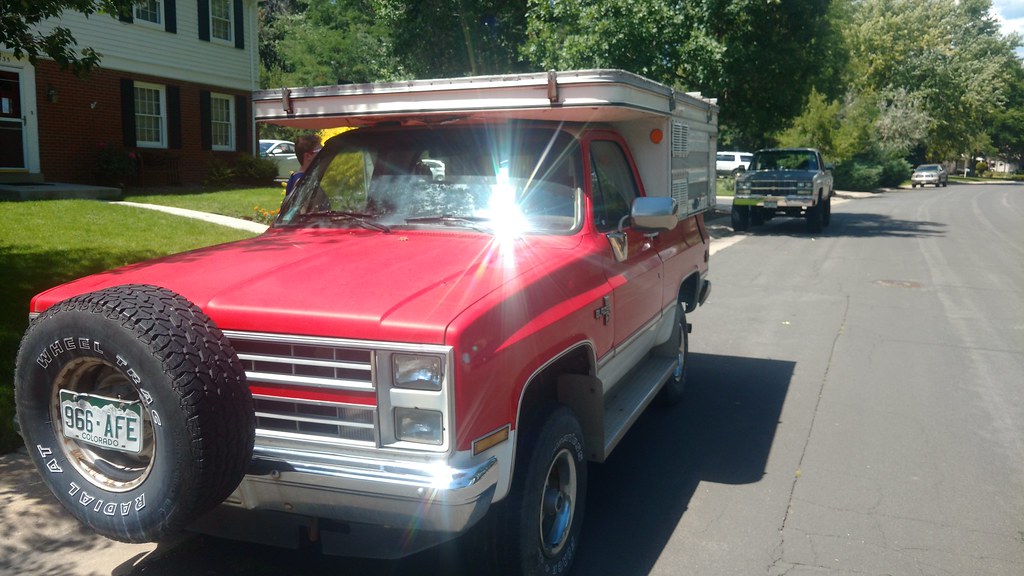 IMG_20170813_130235603 by Rob Zulian, on Flickr IMG_20170813_130235603 by Rob Zulian, on FlickrFunny thing was, the camper was actually located about 10 miles from my parents house. I had left the K5.3 up there the week before to take a car home to work on. So My buddy John followed me up with his trailer so we could take off the factory top, load it on the trailer and put the camper on the K5 for the ride home. Why didn't we put the camper on the trailer? Because these are not true "slide in" campers. They actually bolt down like a factory top and the floor is separate to the camper itself. So the camper is open to the bottom. There really isn't anything to set it on that would hold steady. Smartest thing we could do is bolt it to the back of the Blazer.  IMG_20170813_122005971 by Rob Zulian, on Flickr IMG_20170813_122005971 by Rob Zulian, on FlickrThe chief inspector checking out what I just got into. (my Dad) 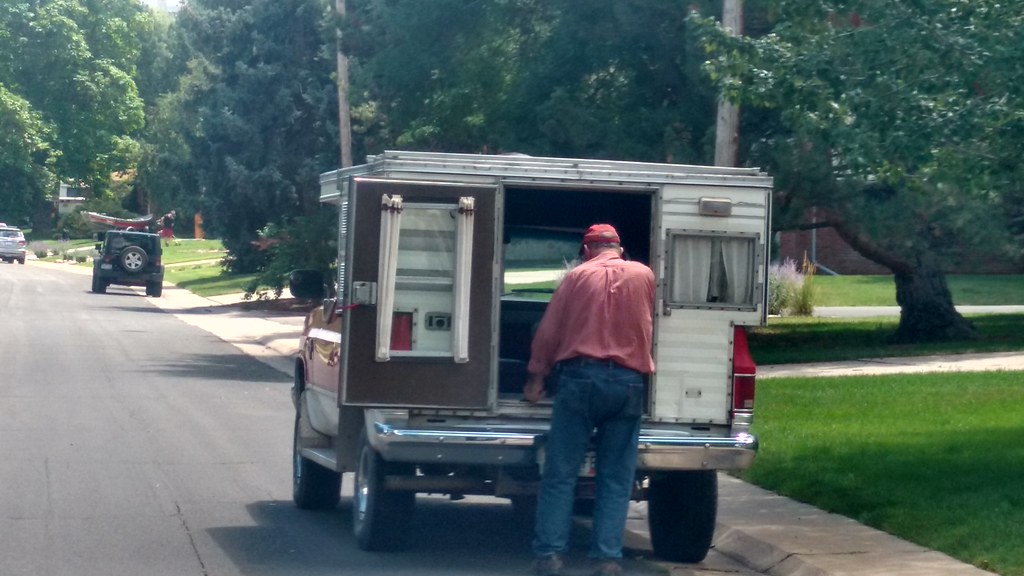 IMG_20170813_131141147_HDR by Rob Zulian, on Flickr IMG_20170813_131141147_HDR by Rob Zulian, on FlickrI got lucky some more and had a guy offer up some like new camper jacks for cheap just before going after the camper. Couldn't do this without them. 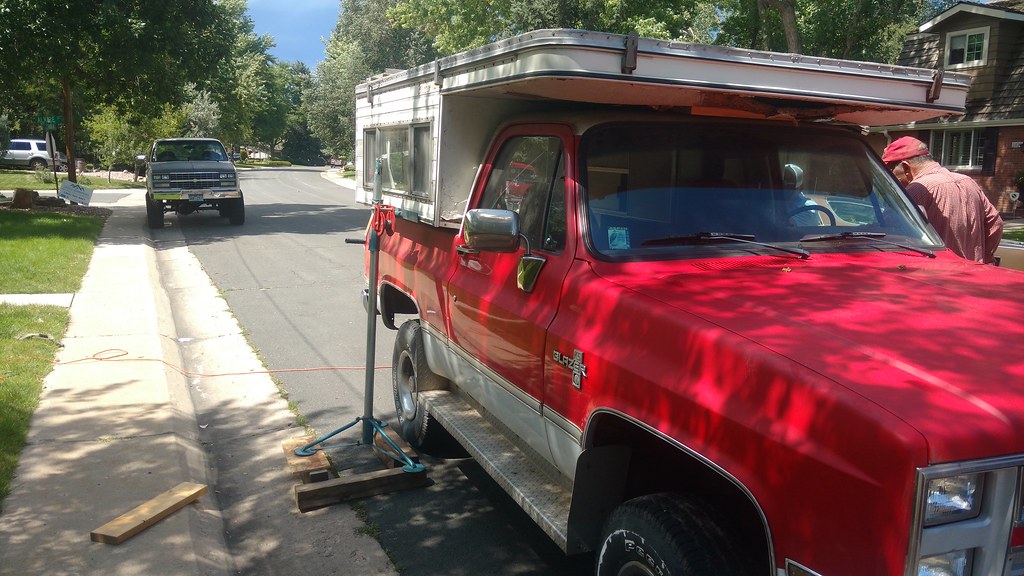 IMG_20170813_142008963 by Rob Zulian, on Flickr IMG_20170813_142008963 by Rob Zulian, on FlickrIt's off. Sketchy as hell but it's off. We had to take the jacks as high as they could go as the difference in height between the stock K5 and mine was large.  IMG_20170813_142906896 by Rob Zulian, on Flickr IMG_20170813_142906896 by Rob Zulian, on FlickrIt's back on. 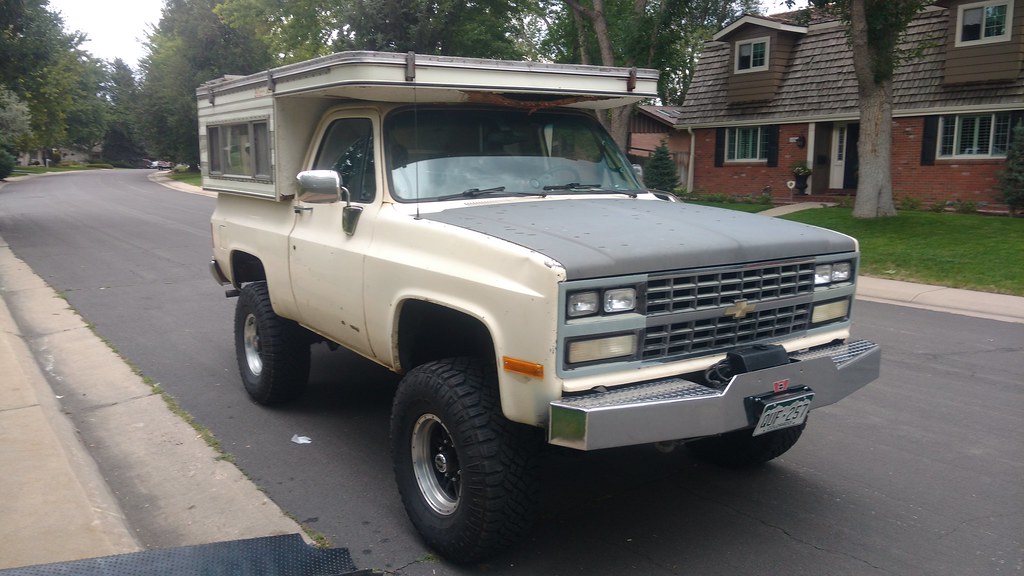 IMG_20170813_150719087 by Rob Zulian, on Flickr IMG_20170813_150719087 by Rob Zulian, on FlickrGot the top popped at John's house. He offered up a place to unload it at and his brother is an excellent carpenter to help fix it. 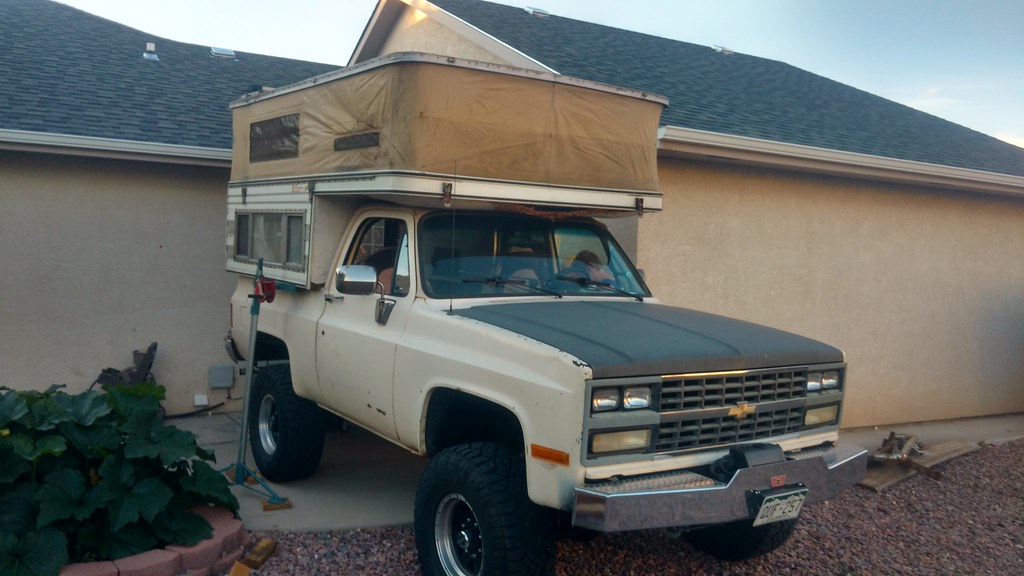 IMG_20170813_192341476_HDR by Rob Zulian, on Flickr IMG_20170813_192341476_HDR by Rob Zulian, on FlickrYou can see the extent of the damage with the daylight coming through the front.  IMG_20170813_192906968 by Rob Zulian, on Flickr IMG_20170813_192906968 by Rob Zulian, on FlickrDeconstruction begins. 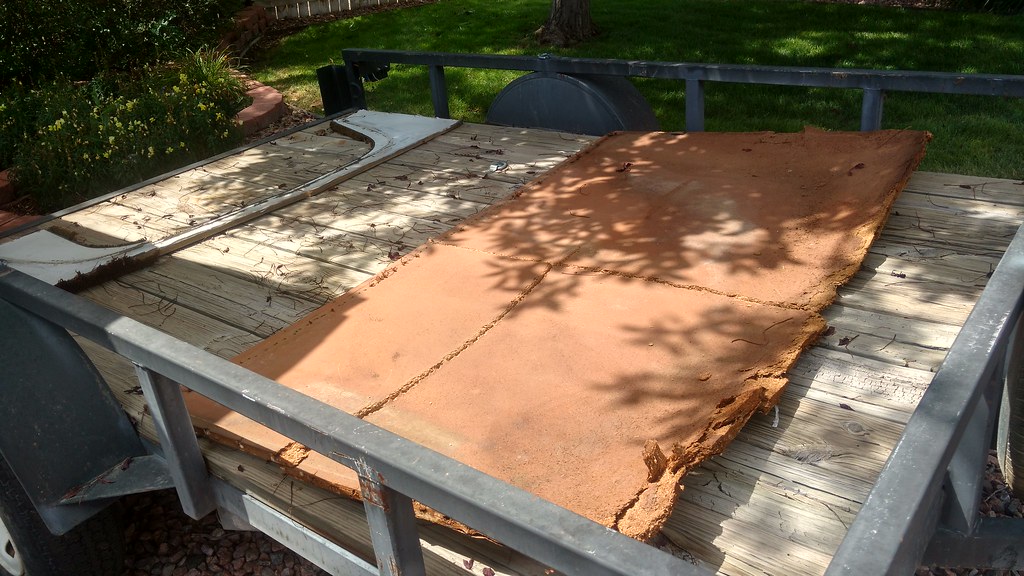 IMG_20170826_135322625_HDR by Rob Zulian, on Flickr IMG_20170826_135322625_HDR by Rob Zulian, on FlickrWide open.. 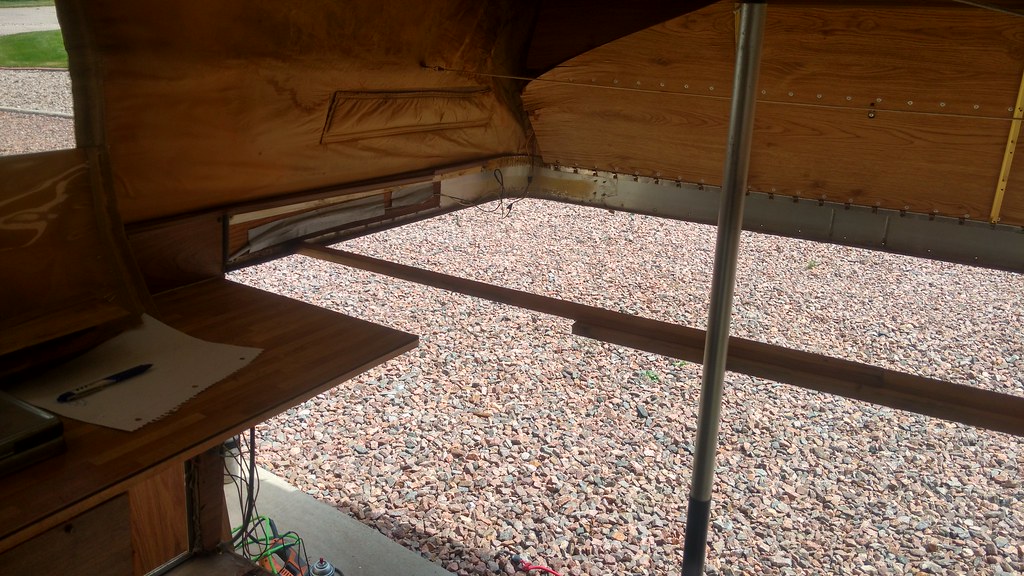 IMG_20170826_135353249_HDR by Rob Zulian, on Flickr IMG_20170826_135353249_HDR by Rob Zulian, on FlickrHere's where the snowball started rolling right down hill. After discussing with John and Shane about what I want, we found the cabinet in the stock form was all wrong. I don't want to cook inside this small space. Water storage is less than 5 gallons and uses a little hand pump for the sink. Not to mention you have to winterize this stuff when it gets cold. I carry water when camping and plan on Scepter can storage on my rear bumper setup. The 3 way fridge does a bad job at keeping stuff cold on any source except 110v power. It's from 1982 remember? So it went bye-bye too. I plan on a 12v chest fridge that is much better with a low current draw. The cabinet got gutted as a result. 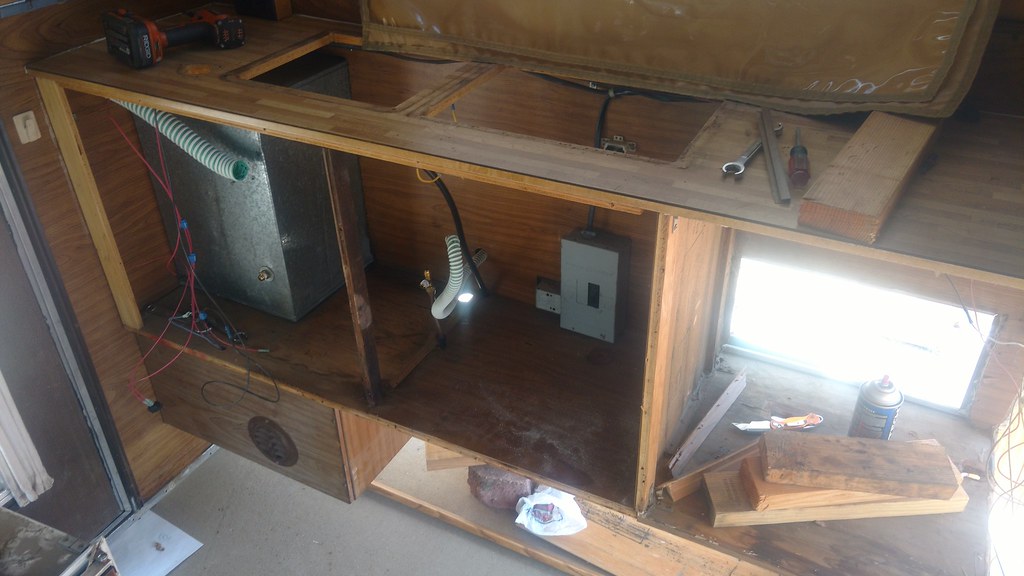 IMG_20170827_122533857 by Rob Zulian, on Flickr IMG_20170827_122533857 by Rob Zulian, on FlickrThe end result. 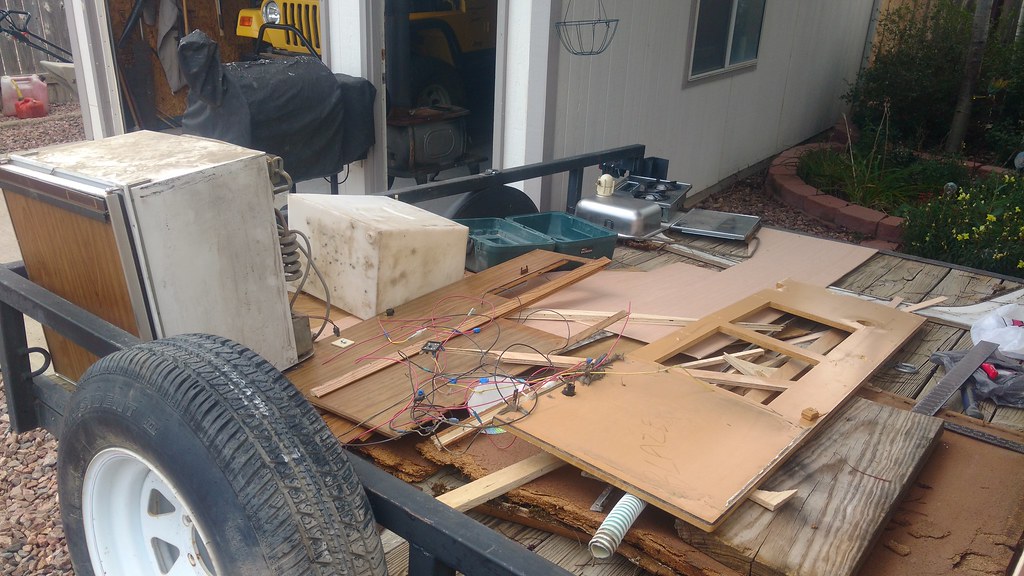 IMG_20170827_153854990 by Rob Zulian, on Flickr IMG_20170827_153854990 by Rob Zulian, on FlickrCab floor replaced. We doubled up here. 5/8" and 1/2" plywood glued together and screwed together. It's 1/16th of an inch thicker than the crappy particle board. Very strong. 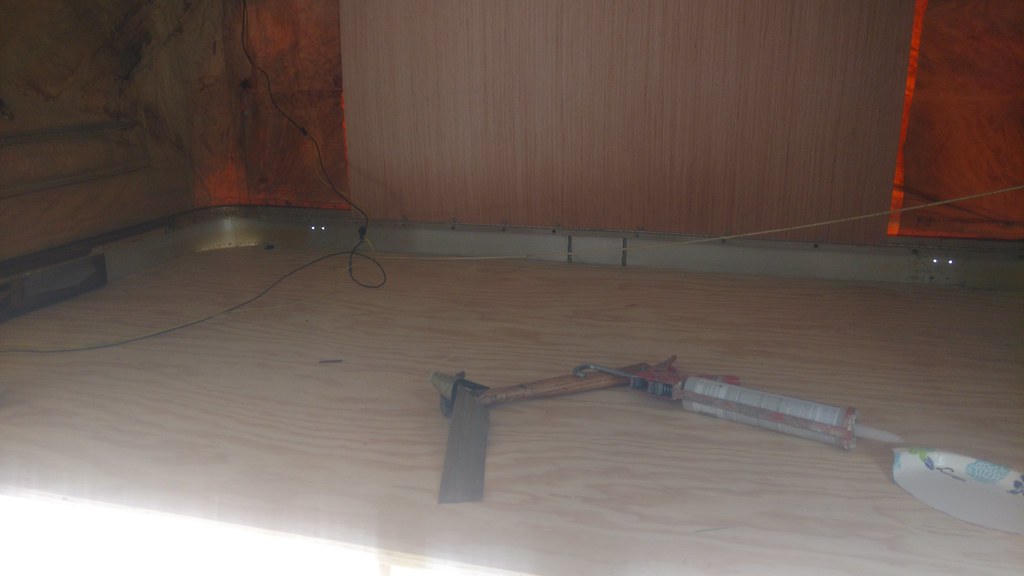 IMG_20170827_122542713 by Rob Zulian, on Flickr IMG_20170827_122542713 by Rob Zulian, on FlickrBlank slate. 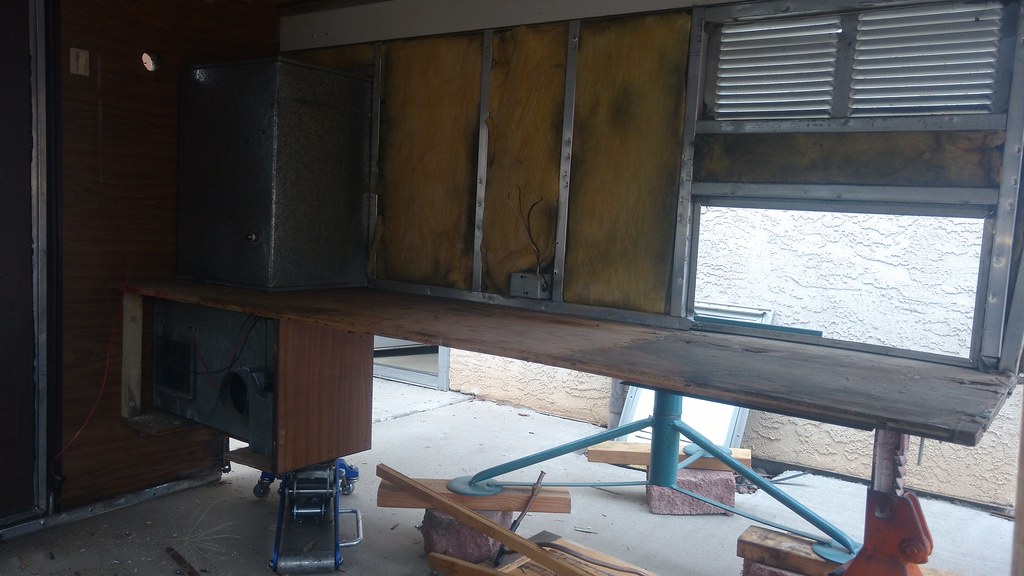 IMG_20170827_154441244 by Rob Zulian, on Flickr IMG_20170827_154441244 by Rob Zulian, on FlickrPassenger side replaced. 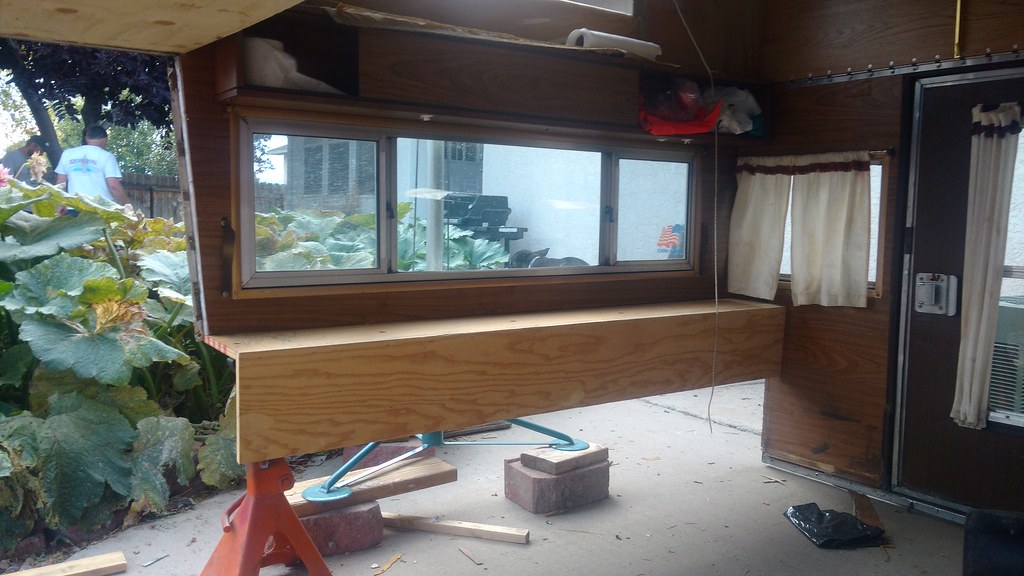 IMG_20170909_172350175 by Rob Zulian, on Flickr IMG_20170909_172350175 by Rob Zulian, on FlickrWe doubled up this side. 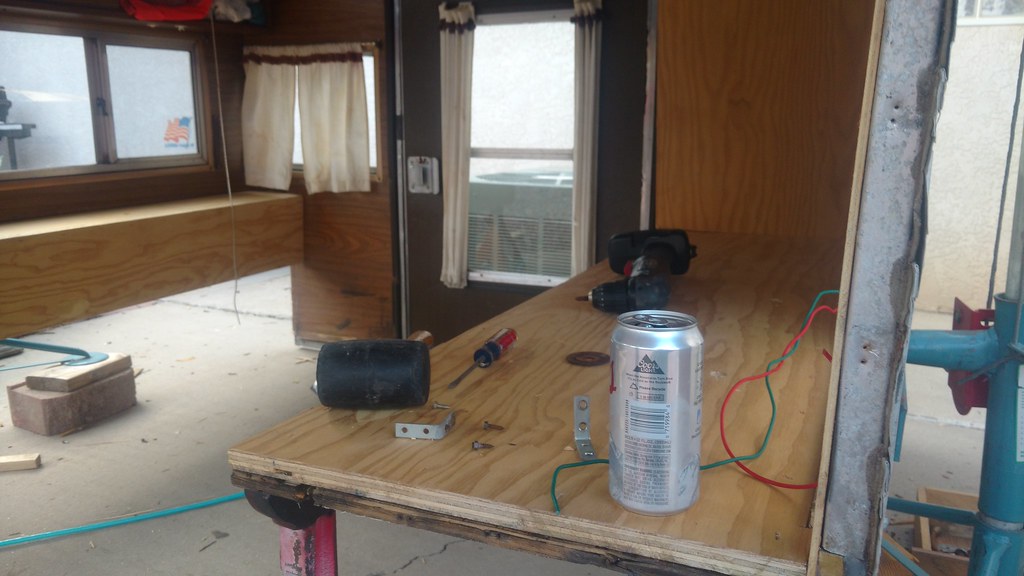 IMG_20170909_172354905 by Rob Zulian, on Flickr IMG_20170909_172354905 by Rob Zulian, on FlickrFront cab wall is in place. Added gusset block of oak to support the cab-over floor to the front wall joint. 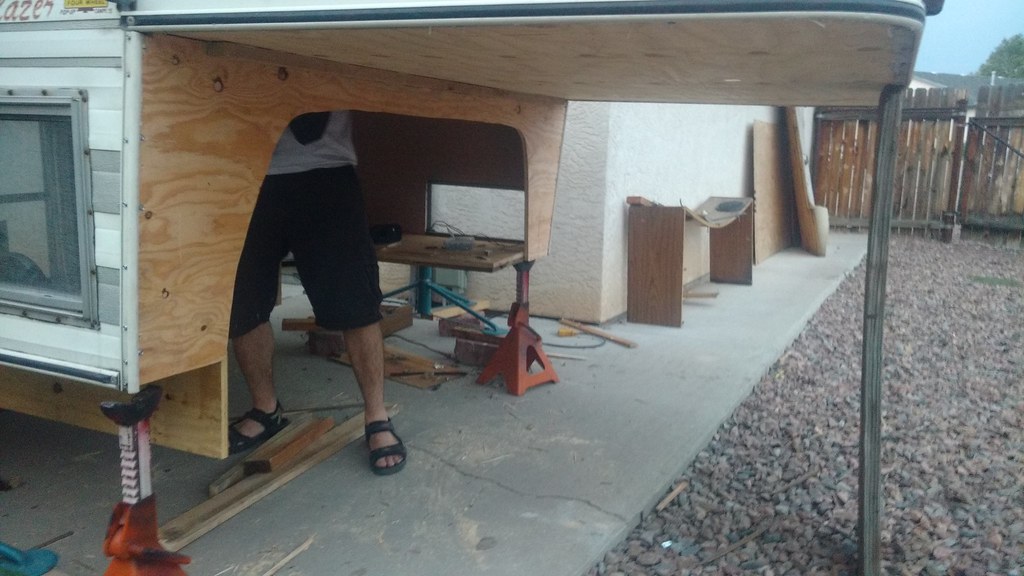 IMG_20170909_191516905 by Rob Zulian, on Flickr IMG_20170909_191516905 by Rob Zulian, on FlickrInside.  IMG_20170909_191559917 by Rob Zulian, on Flickr IMG_20170909_191559917 by Rob Zulian, on FlickrWhat you see in the work on the camper has taken place over 3 different weekends. Still have to seal the roof. Stain the wood and seal it. The outside of the cab wall and cab-over will be faced with aluminum. The goal here is to have it ready to ride for the 18 desert trip.
__________________
Rob Z. 1975 K5 350/465/205/D44/12b 4" lift on 35's- RIP 1991 K5 8.1L/NV4500/241/D44/14b FWC Camper |
|
|
|
|
09-12-2017, 03:35 AM
|
#8 |
|
Registered User
Join Date: Dec 2009
Location: Fairbanks, AK
Posts: 1,830
|
Re: My K5 Blazer Story.
YES!!! That is awesome. Spare tire will go on a rear swing out? Compressor fridge is the only way to go. I ran mine constantly unplugged from shore power in my driveway for a week and batteries still showed full charge. Granted that was during our 20 hours of daylight time of year, but still... 100w solar panel and two 6v house batteries. Can't wait to see the finished product and write up on the Desert Trip.
__________________
-Marcus 1991 V3500 L29 454 4L80E NP205 D60/14 Bolt 4.56's 1984 K30 292 TH400 NP205 D60/14 Bolt 4.56's flat bed 7'6" Meyer Plow 2022 Silverado 3500 L8T Project Daily Driver Project Heavy Hauler Project Plow Truck |
|
|
|
|
09-12-2017, 09:22 AM
|
#9 |
|
Registered User
Join Date: Sep 2011
Location: Rockwall, Texas
Posts: 113
|
Re: My K5 Blazer Story.
That's really cool!
__________________
1990 K5 Blazer (sold) 1983 SWB C-10 to K-20 Conversion |
|
|
|
|
09-12-2017, 10:44 AM
|
#10 |
|
K5Camper
Join Date: Mar 2004
Location: Pueblo, CO
Posts: 1,513
|
Re: My K5 Blazer Story.
The rear bumper plans are to look similar to Larry's rear bumper but reversed. I want the tire on the left and the can carrier on the right. Rear vision is different with the camper, but with a window in the passenger side rear corner I don't want to block what little vision I have.
__________________
Rob Z. 1975 K5 350/465/205/D44/12b 4" lift on 35's- RIP 1991 K5 8.1L/NV4500/241/D44/14b FWC Camper |
|
|
|
|
09-12-2017, 11:23 AM
|
#11 |
|
Registered User
Join Date: Dec 2009
Location: Fairbanks, AK
Posts: 1,830
|
Re: My K5 Blazer Story.
Food for thought, but while you have it all apart it would be easy to install and wire a backup camera. PO on my camper did it, and I'm going to get a little stand alone monitor that auctions to the wing window for about $80 for full time rearward vision.
__________________
-Marcus 1991 V3500 L29 454 4L80E NP205 D60/14 Bolt 4.56's 1984 K30 292 TH400 NP205 D60/14 Bolt 4.56's flat bed 7'6" Meyer Plow 2022 Silverado 3500 L8T Project Daily Driver Project Heavy Hauler Project Plow Truck |
|
|
|
|
09-13-2017, 12:28 AM
|
#12 | |
|
K5Camper
Join Date: Mar 2004
Location: Pueblo, CO
Posts: 1,513
|
Re: My K5 Blazer Story.
Quote:
__________________
Rob Z. 1975 K5 350/465/205/D44/12b 4" lift on 35's- RIP 1991 K5 8.1L/NV4500/241/D44/14b FWC Camper |
|
|
|
|
|
09-28-2017, 06:44 PM
|
#13 |
|
Registered User
Join Date: Oct 2014
Location: Scottsdale, AZ
Posts: 465
|
Re: My K5 Blazer Story.
This is a cool thread. Thanks for posting and keeping it up to date!
|
|
|
|
|
02-01-2018, 01:58 AM
|
#14 |
|
Registered User
Join Date: Jul 2011
Location: back 40, bc
Posts: 3,805
|
Re: My K5 Blazer Story.
Fantastic score Rob! 'specially for the price
your re-construction is looking good emergency hatch on my Travel-Mate got ripped off in a storm and soaked the overhead...not as bad as yours though, just the roof paneling and 1 board by the hatch to replace and who cares if it's a '82 (mine's a '89) waaaay better than dicking around with tent poles (usually in the dark....) tarps and getting soaked when ya roll into the wall.. camper, like ya say, level up, set up lawnchairs, crack beer..... |
|
|
|
|
02-01-2018, 02:13 AM
|
#15 |
|
Registered User
Join Date: Jul 2011
Location: back 40, bc
Posts: 3,805
|
Re: My K5 Blazer Story.
notice you say your going to re-seal the roof. I get tired of climbing up on mine every yr or so to re-caulk, going hi-tec and permanently this yr
Alsans RS use this at work, it is incredible stuff, lightweight, practically indestructable once hardened, and will last over 50 yrs. It's not cheap, the can pictured is around $300, but they come in smaller gallon sizes. It's a 2 stage that has to be mixed, and you most certainly want to be wearing gloves and old clothes.....it will take weeks to get off your skin...ask me how i know... and if your roof is any kind of metal (mine's alum) you will also need this primer all in about $100-150 to do, more than caulking, but that's far outweighed by the fact you will never worry about it again-ever. piece of mind.... |
|
|
|
|
02-01-2018, 01:11 PM
|
#16 |
|
Registered User
Join Date: Dec 2009
Location: Fairbanks, AK
Posts: 1,830
|
Re: My K5 Blazer Story.
Interesting.... I have to condition my rubber roof in the spring. Not looking forward to that annual bit of maintenance.
__________________
-Marcus 1991 V3500 L29 454 4L80E NP205 D60/14 Bolt 4.56's 1984 K30 292 TH400 NP205 D60/14 Bolt 4.56's flat bed 7'6" Meyer Plow 2022 Silverado 3500 L8T Project Daily Driver Project Heavy Hauler Project Plow Truck |
|
|
|
|
02-02-2018, 01:00 AM
|
#17 |
|
K5Camper
Join Date: Mar 2004
Location: Pueblo, CO
Posts: 1,513
|
Re: My K5 Blazer Story.
I've been a little lax in updating. Not as much on the truck done, but camper work has been happening. So here's an update from a few more weekends worth of work completed. Without further delay, here goes...
The roof needed resealed and all the screws replaced. The old vent was wasted and got a fresh one from one of my tech's tearing apart another RV. 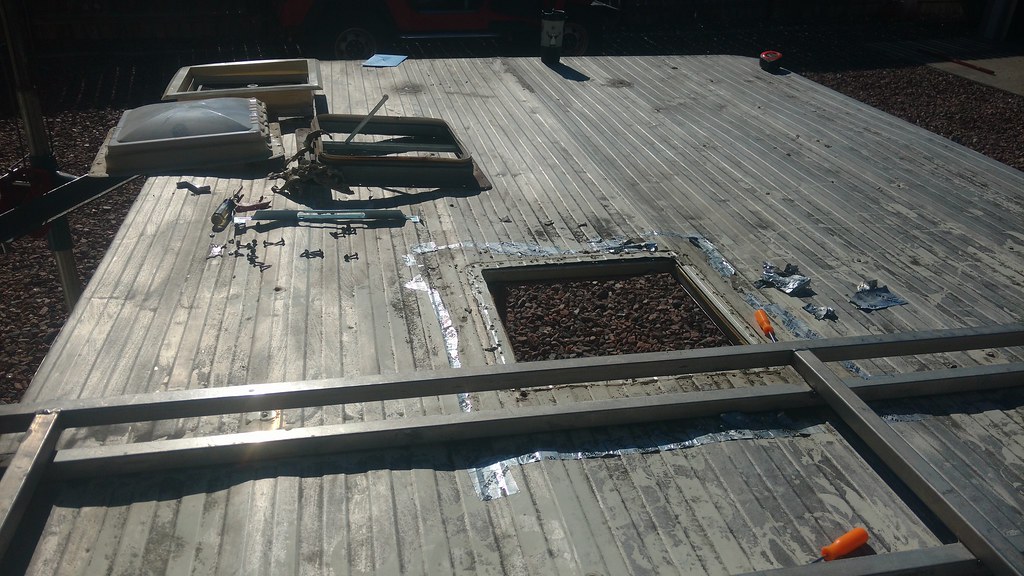 Work on the roof by Rob Zulian, on Flickr Work on the roof by Rob Zulian, on FlickrThe rack got pulled for better access and the entire roof cleaned of old garbage with a wire wheel, scrubbed and dried. Then coated. Work on the roof by Rob Zulian, on Flickr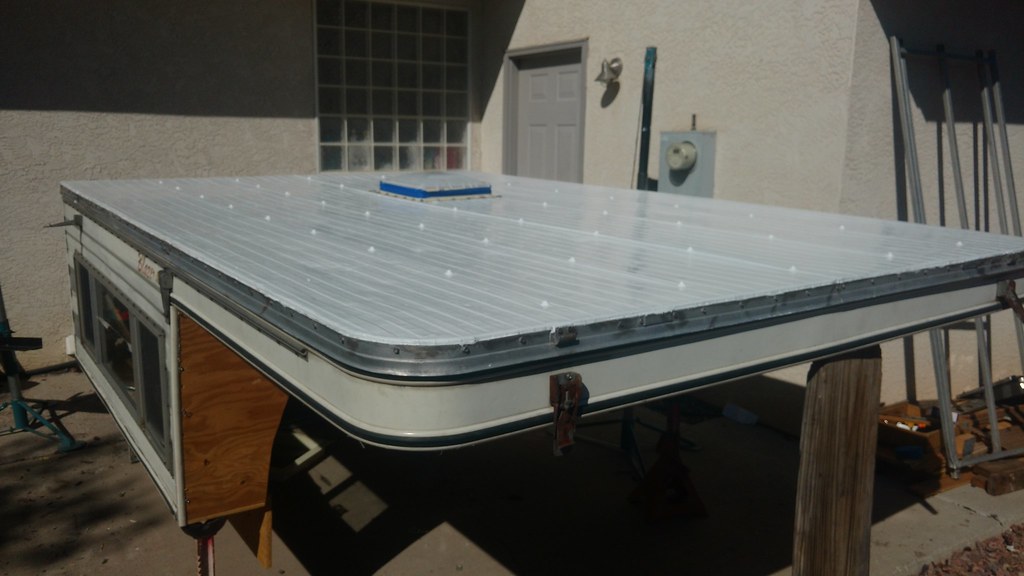 Work on the roof by Rob Zulian, on Flickr Work on the roof by Rob Zulian, on FlickrAfter seeing the piss poor setup for sealing the camper to the truck when we first loaded it (all they use is foam camper tape) I knew it had to be done in a better way. So we had to get the truck back under the camper to get solid measurements for an idea I had. 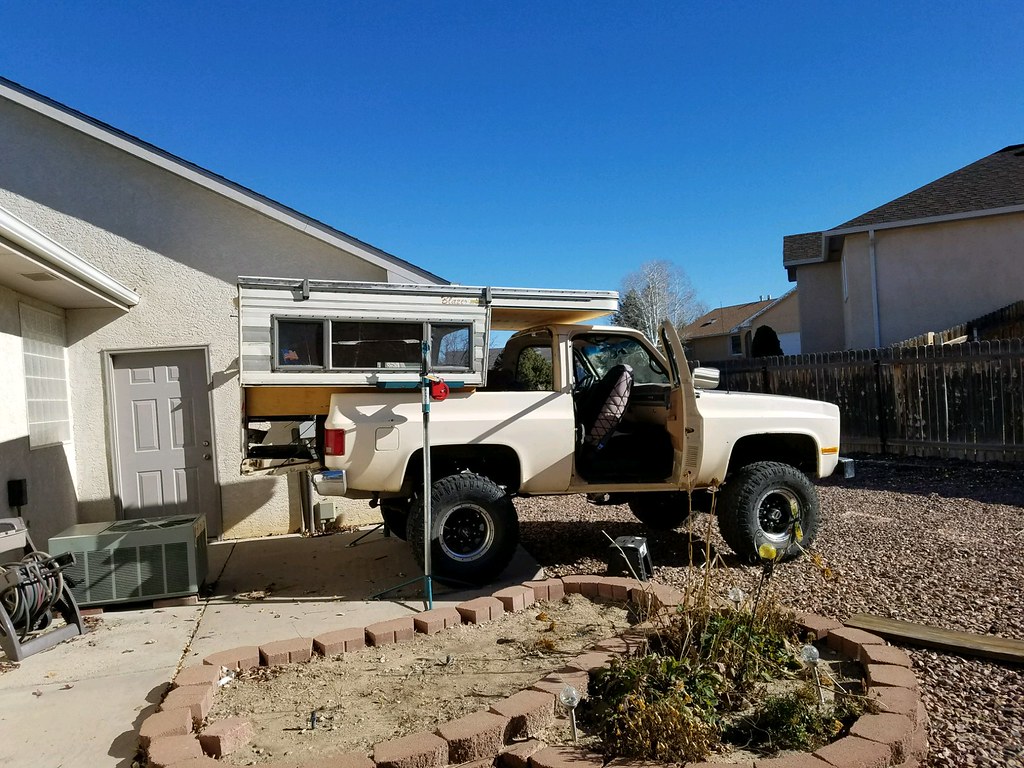 21902 by Rob Zulian, on Flickr 21902 by Rob Zulian, on FlickrYou can see the problem here. The cab has a natural channel built in for the stock seals to go to for the top. Without the fiberglass top in place the channel is a natural path for the drainage to go right to the bedrail and then inside. 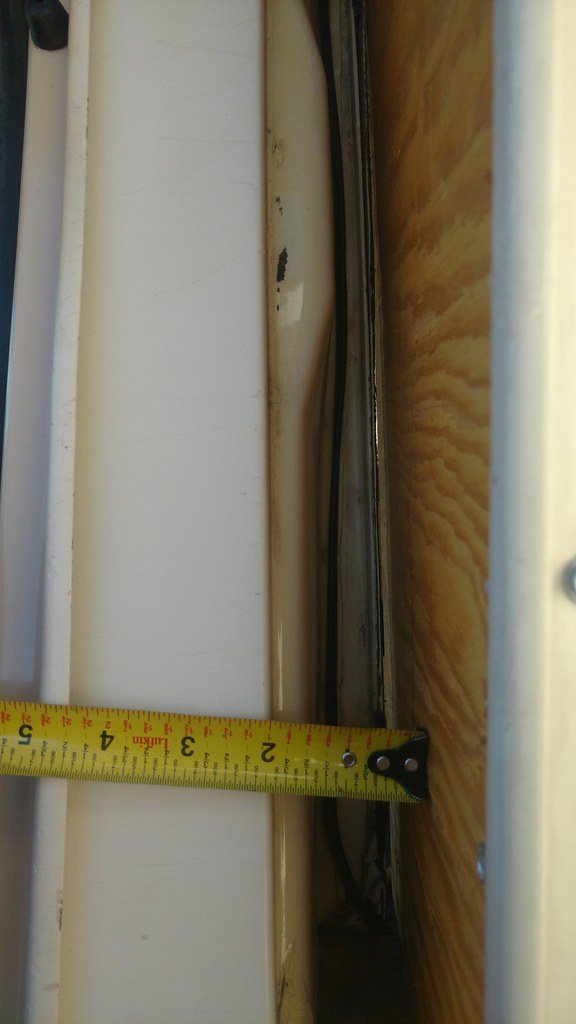 IMG_20171210_120141109 by Rob Zulian, on Flickr IMG_20171210_120141109 by Rob Zulian, on FlickrI sourced another K5 top with help from a member on CK5.com who chopped it down to the first few inches for me. After getting the measurements needed with the camper and K5 together we screwed down a section of landscape edging for a straight edge. 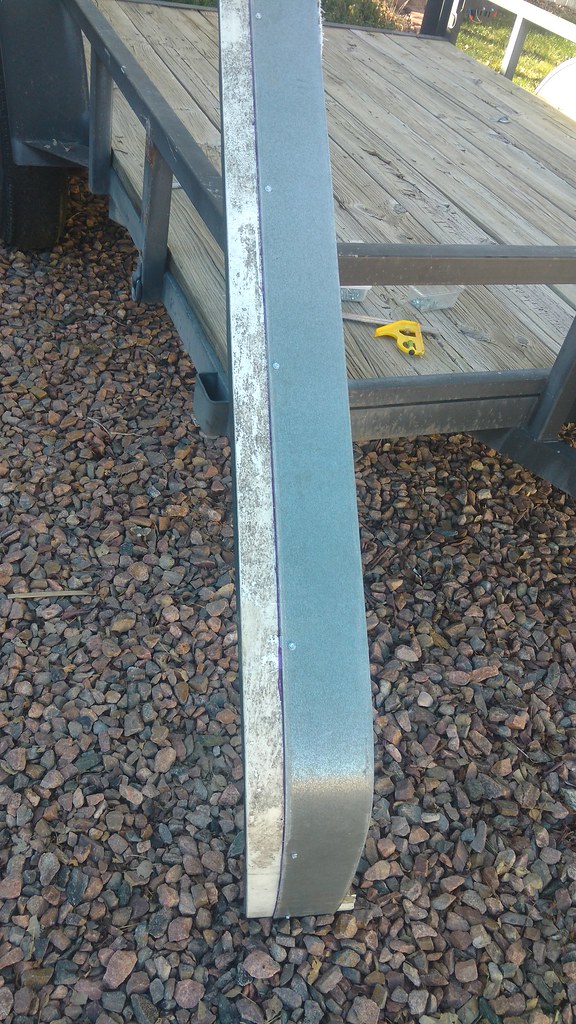 IMG_20171210_124559809 by Rob Zulian, on Flickr IMG_20171210_124559809 by Rob Zulian, on FlickrLet the cutting commence..Measure twice cut once right? 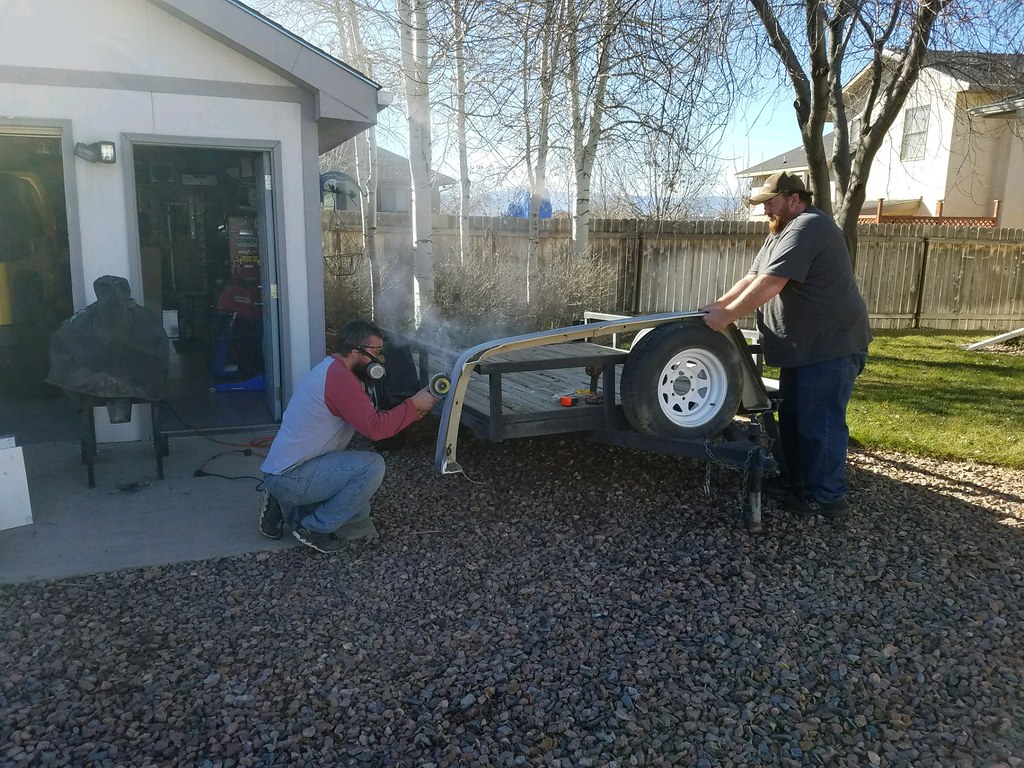 21905 by Rob Zulian, on Flickr 21905 by Rob Zulian, on FlickrThis is Shane, Johns brother doing the inside surgery with the wheel of death. 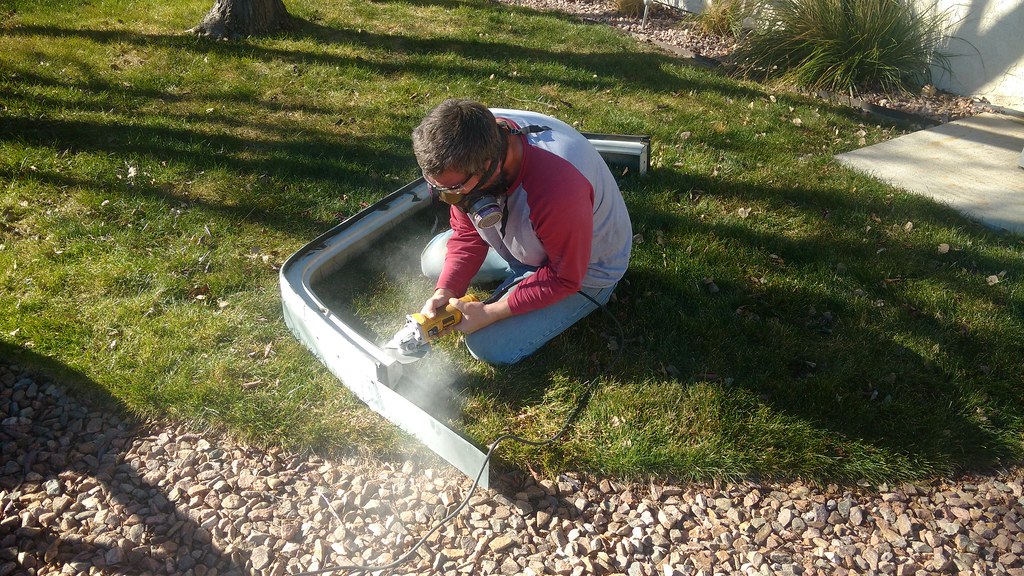 IMG_20171210_125935445 by Rob Zulian, on Flickr IMG_20171210_125935445 by Rob Zulian, on FlickrThe final product. Just enough to fill the gap. 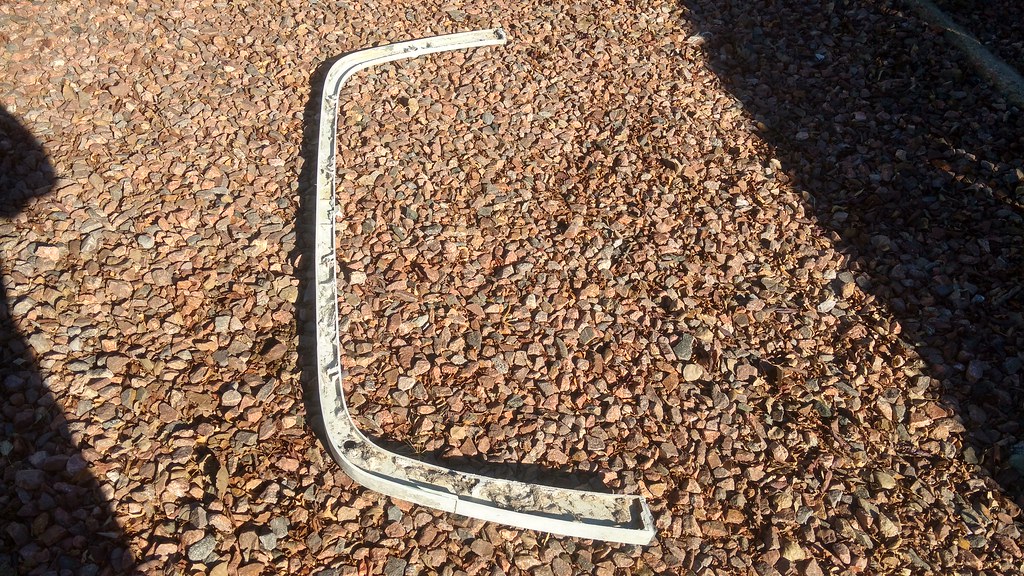 IMG_20171210_131000050_HDR by Rob Zulian, on Flickr IMG_20171210_131000050_HDR by Rob Zulian, on FlickrHere's the part mocked in place. Fit like a glove. 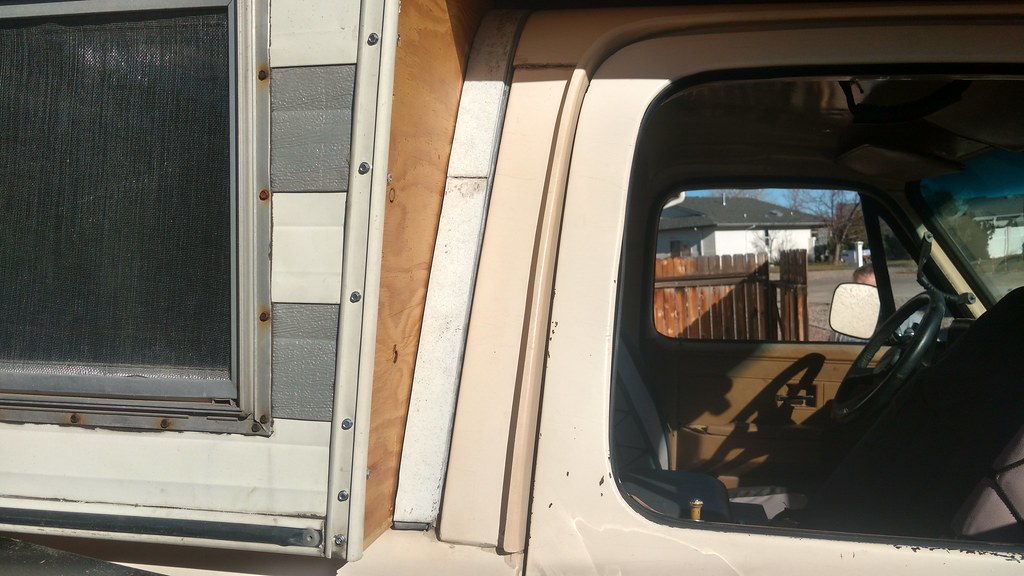 IMG_20171210_131820652_HDR by Rob Zulian, on Flickr IMG_20171210_131820652_HDR by Rob Zulian, on Flickr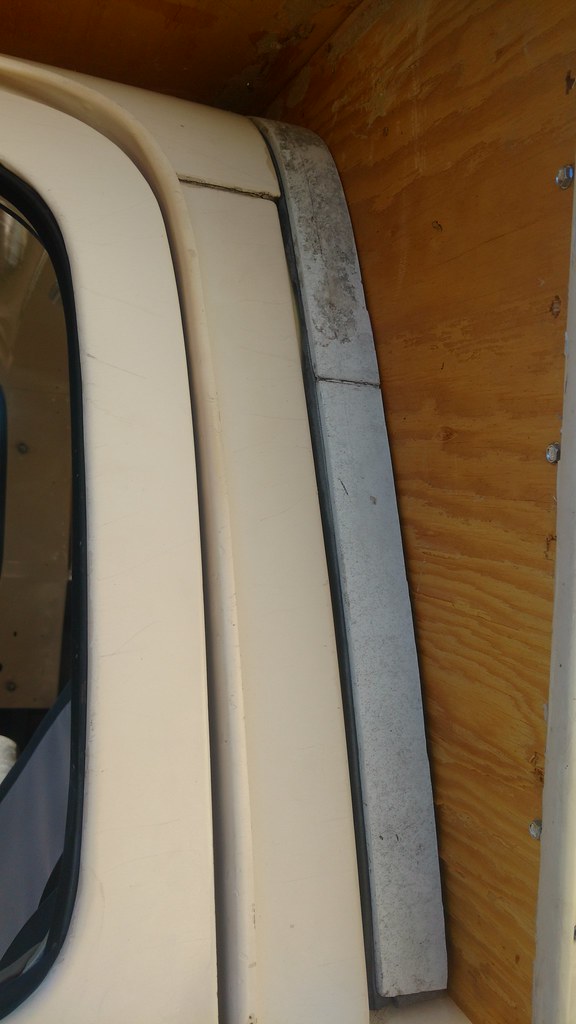 IMG_20171210_131800746 by Rob Zulian, on Flickr IMG_20171210_131800746 by Rob Zulian, on FlickrWith the top section in place, holes were added from the stock top holes back through the front wall of the cab for 6 additional points to bolt the camper to the cab. We still need to skin the outside exposed wood with some sheet aluminum one of my co-workers had stashed away. 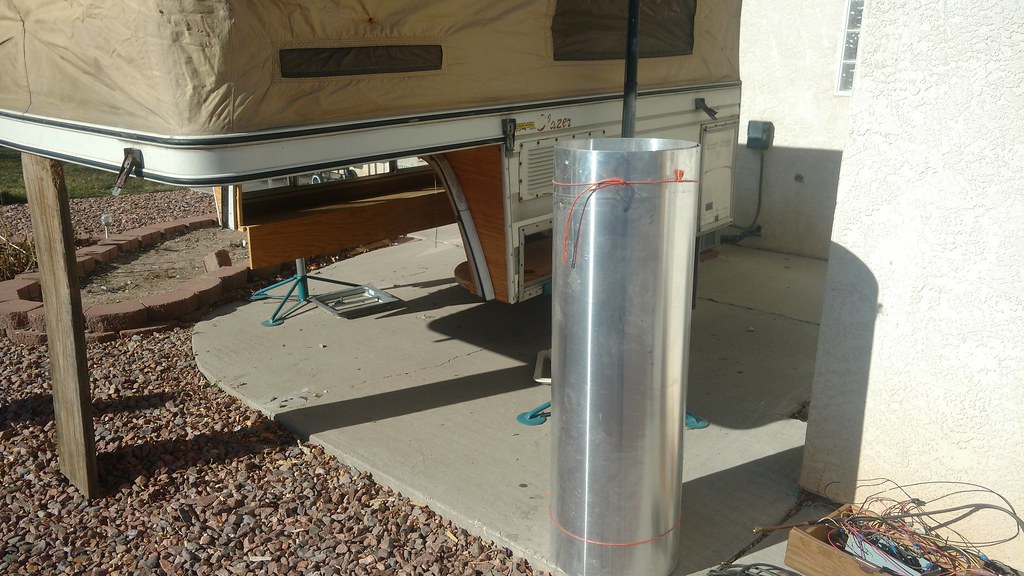 Work day on the camper. by Rob Zulian, on Flickr Work day on the camper. by Rob Zulian, on FlickrCab floor section glued and screwed in place. 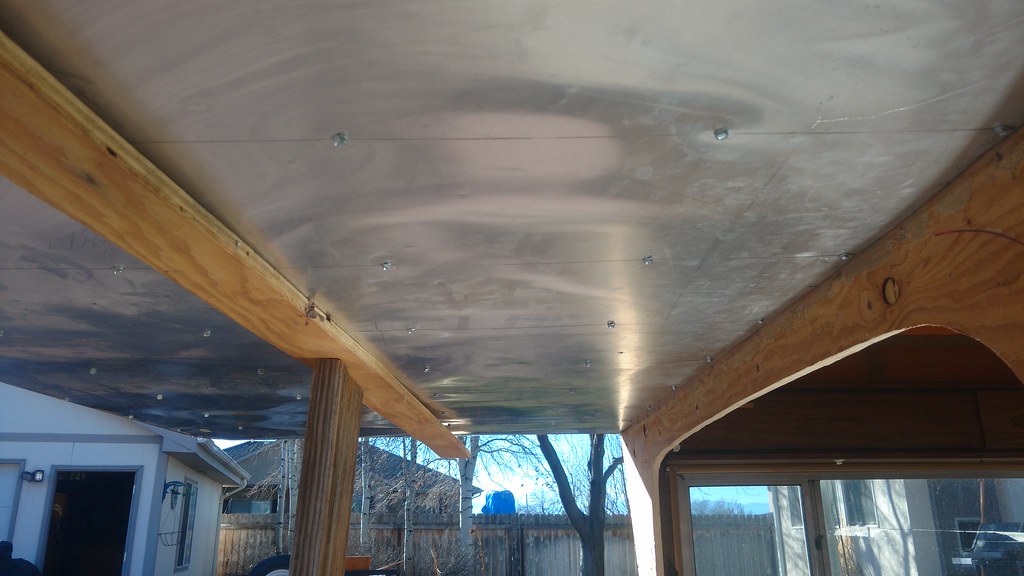 Work day on the camper. by Rob Zulian, on Flickr Work day on the camper. by Rob Zulian, on FlickrCab wall trimmed out with the fiberglass bolted in place. 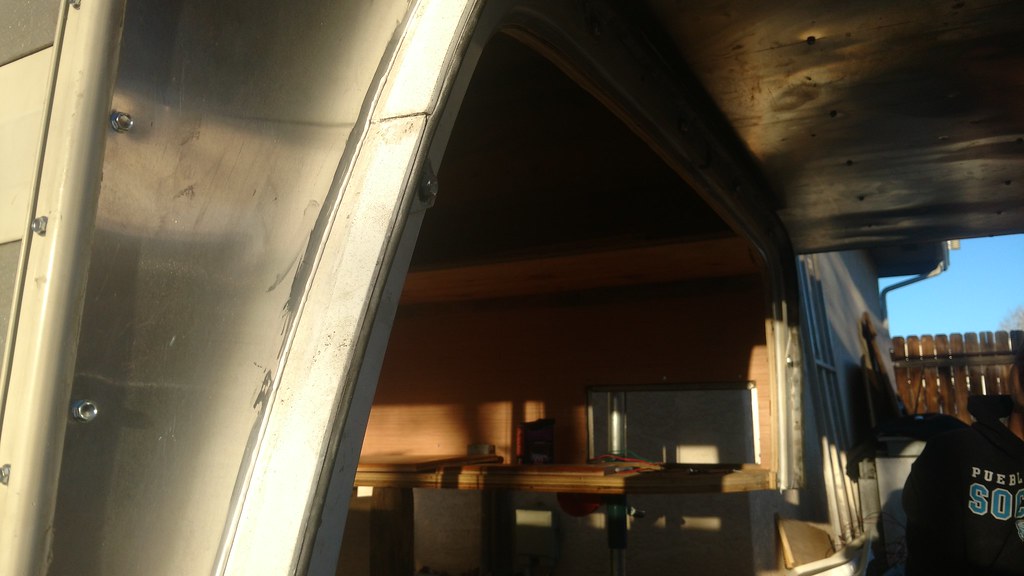 Work day on the camper. by Rob Zulian, on Flickr Work day on the camper. by Rob Zulian, on FlickrCabinet rebuilding started. 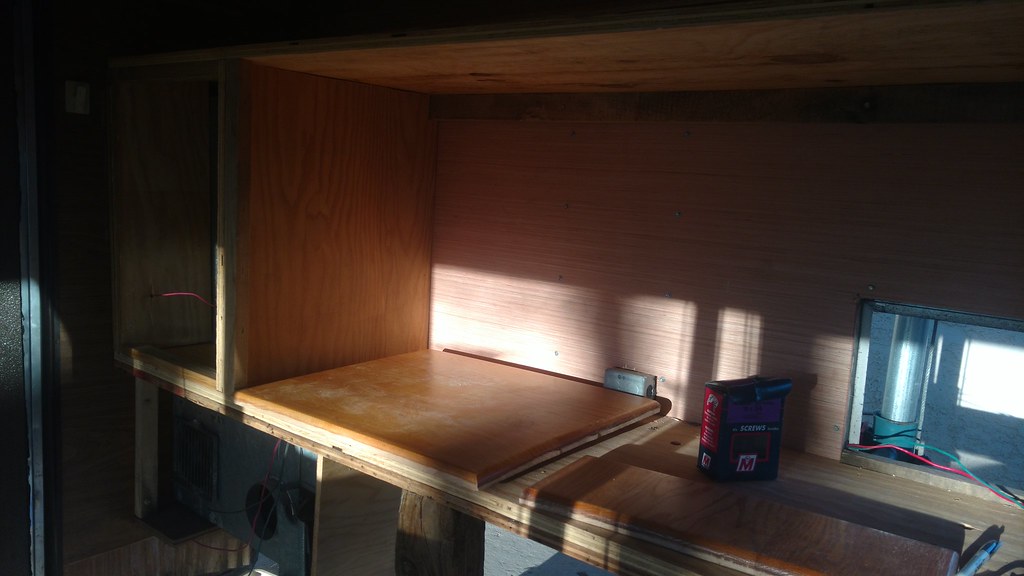 Work day on the camper. by Rob Zulian, on Flickr Work day on the camper. by Rob Zulian, on FlickrJohn had some oak paneled doors from other cabinet he salvaged and didn't have any use for them we could repurpose them for this project. 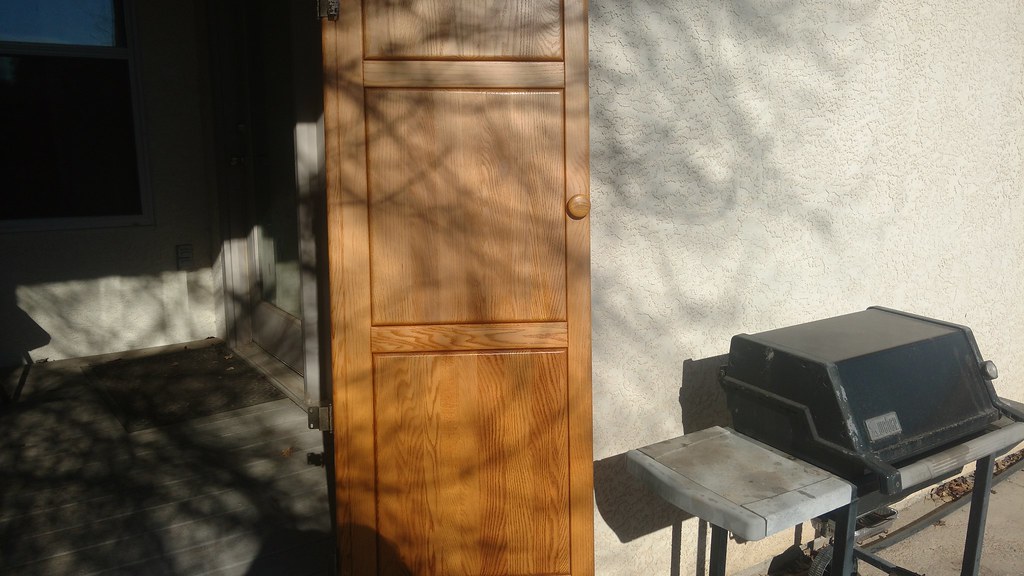 Work day on the camper. by Rob Zulian, on Flickr Work day on the camper. by Rob Zulian, on Flickr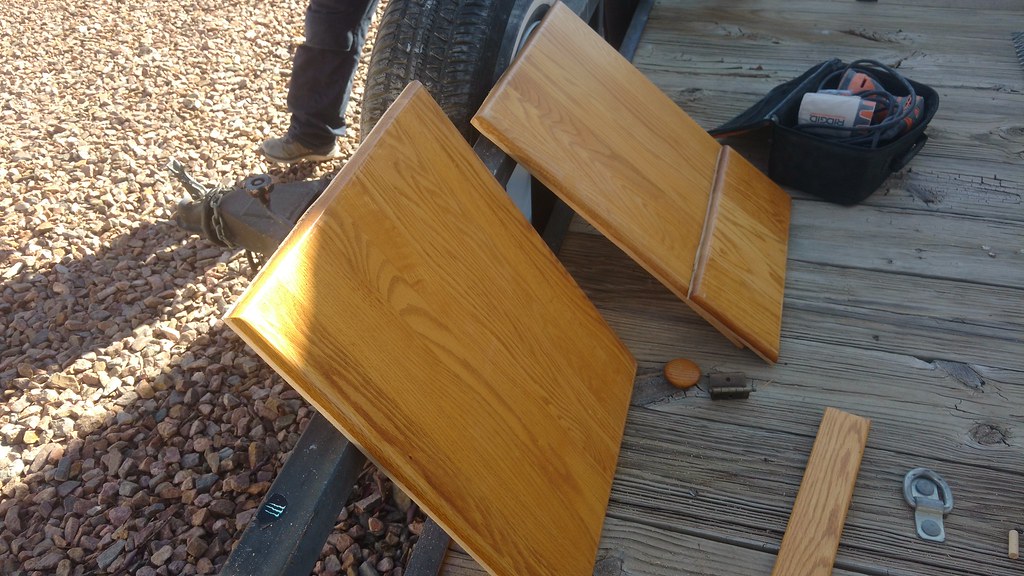 Work day on the camper. by Rob Zulian, on Flickr Work day on the camper. by Rob Zulian, on Flickr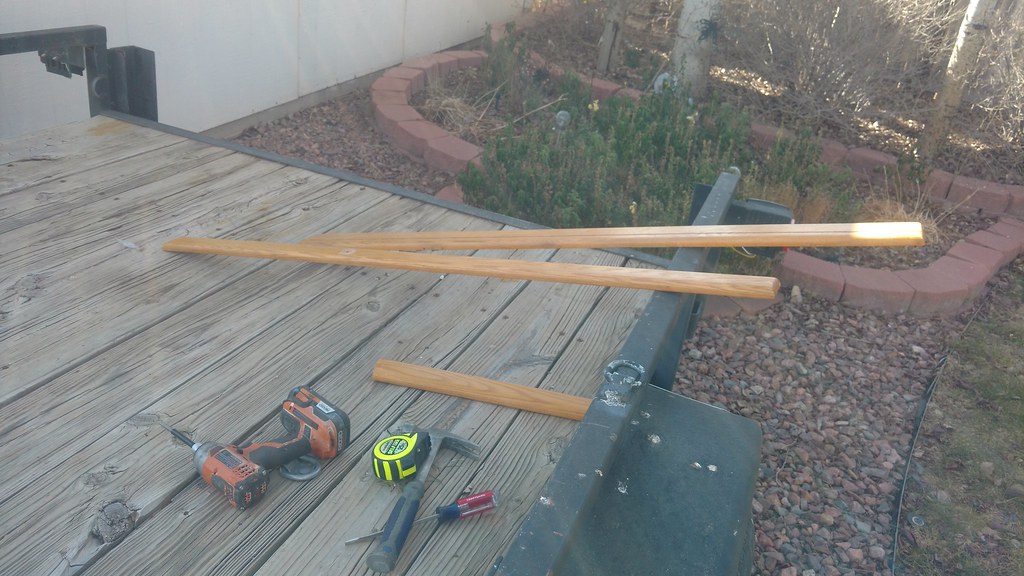 Work day on the camper. by Rob Zulian, on Flickr Work day on the camper. by Rob Zulian, on FlickrFramework completed. 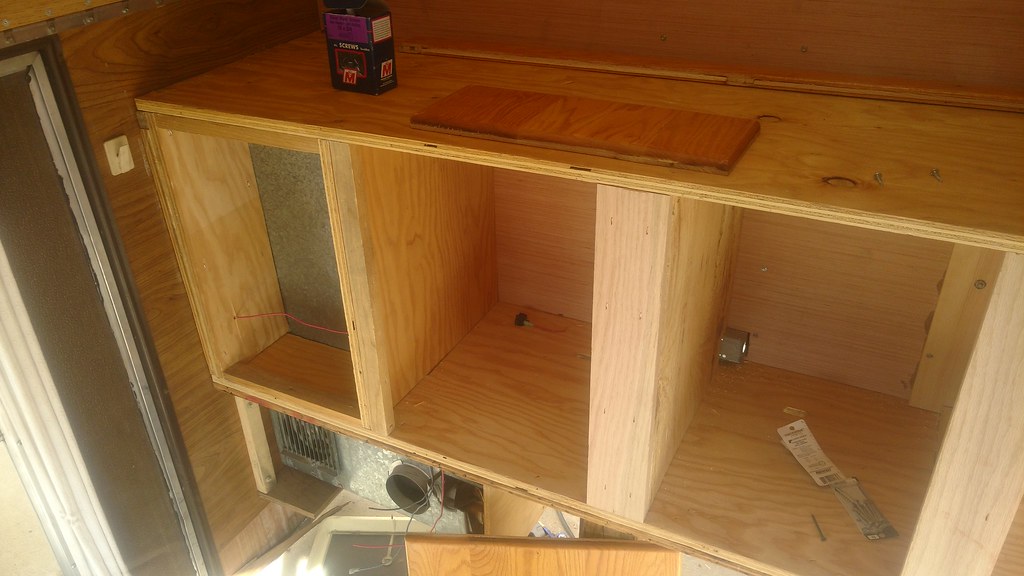 More work by Rob Zulian, on Flickr More work by Rob Zulian, on FlickrFront corner was cut back to allow for clearance to my drivers seat. You'll notice the cab wall opening is cut open larger than the original version. Again this was done due to interference with the front seat not allowing it to move all the way back and have the seat back in a position I find comfy. 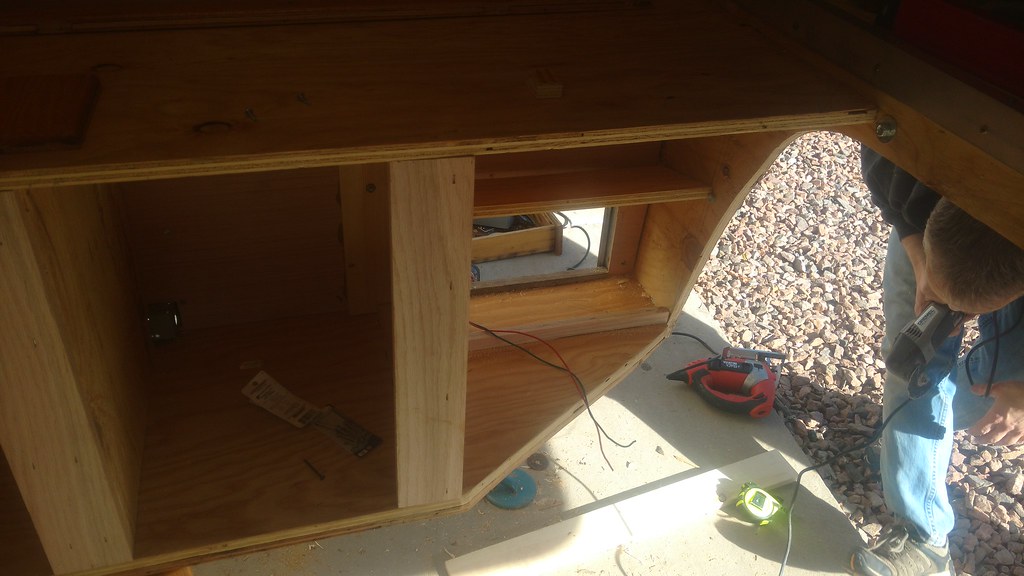 More work by Rob Zulian, on Flickr More work by Rob Zulian, on FlickrThis area will be very usefull. Lower cubby will contain the fuse panel and be the wiring hub for the camper. The middle vertical panel will be where the solar control panel, battery monitor panel, usb charge ports and switches will reside. The upper cubby will be for storage of small items. 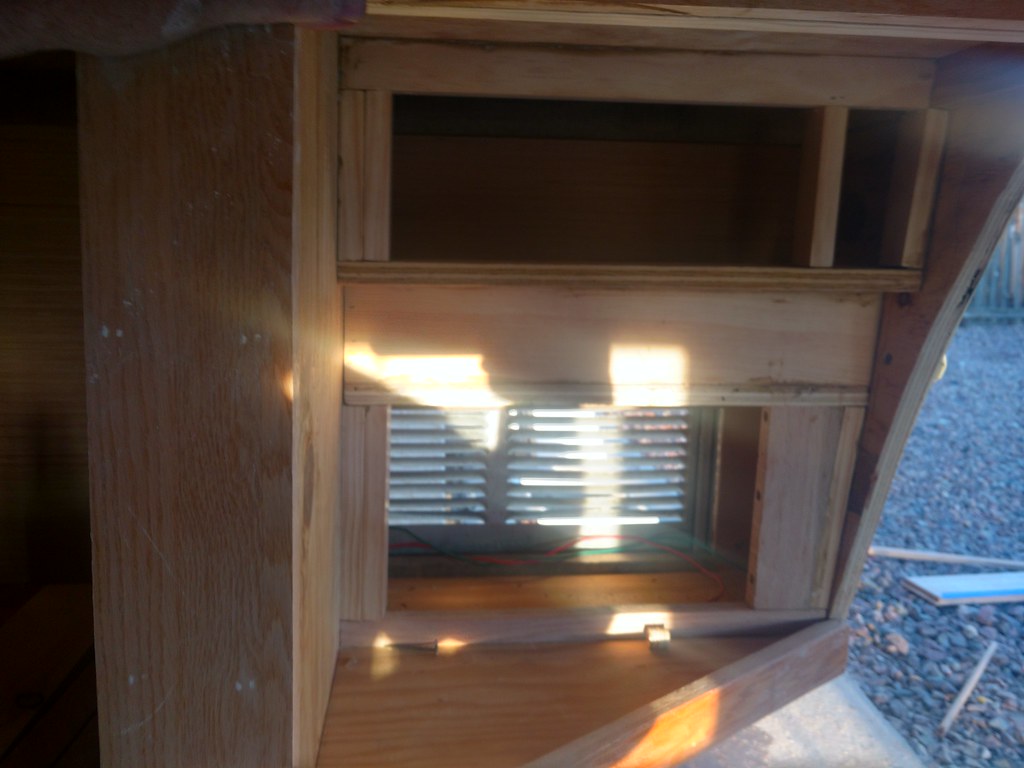 Cabinet work. by Rob Zulian, on Flickr Cabinet work. by Rob Zulian, on FlickrCabinet framed out with the oak trim. Still need to hang the doors. 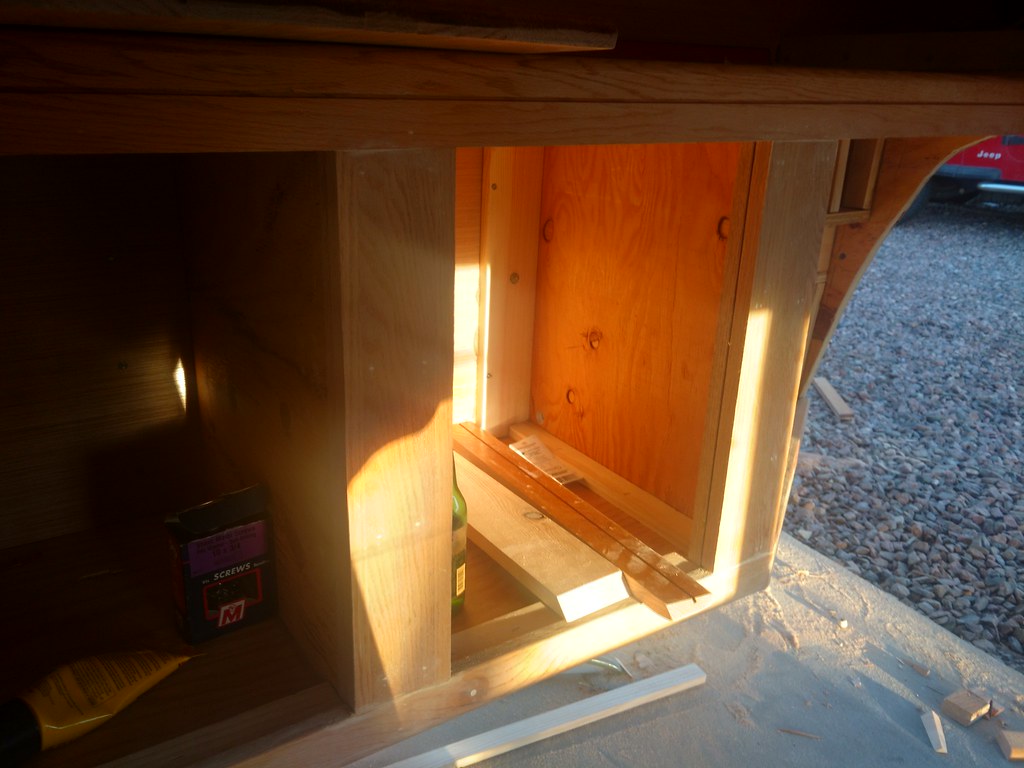 Cabinet work. by Rob Zulian, on Flickr Cabinet work. by Rob Zulian, on Flickr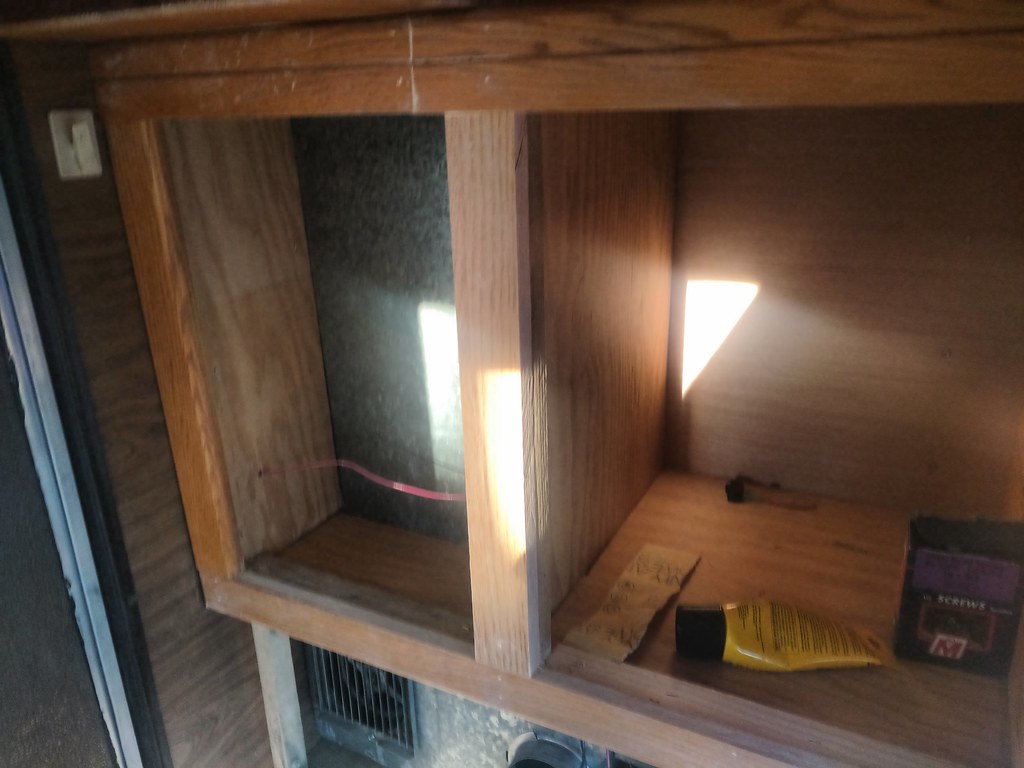 Cabinet work. by Rob Zulian, on Flickr Cabinet work. by Rob Zulian, on FlickrThe countertop will be cut out of stainless steel and inset on the top. 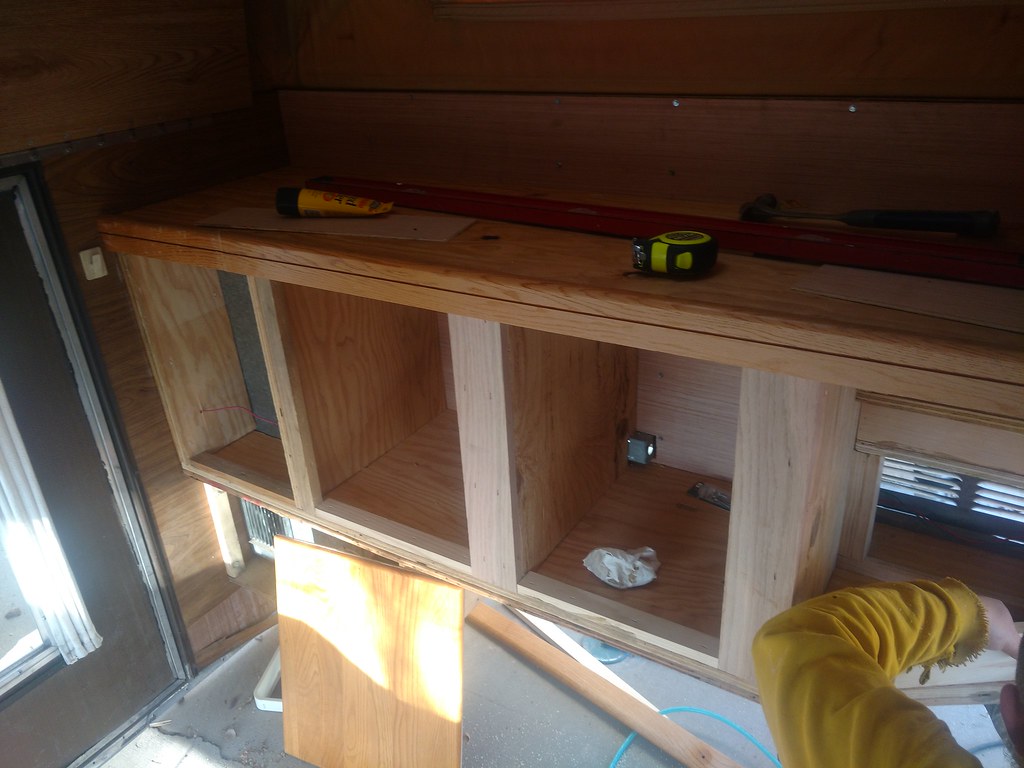 Cabinet work. by Rob Zulian, on Flickr Cabinet work. by Rob Zulian, on FlickrThe cabinet is a large hurdle to get completed. All that is left to it is hang the doors, sand, stain/poly. Next phase is the inside of the roof. The stock headliner was water damaged and falling apart. So it's getting pulled along with the fiberglass batting insulation. Higher density foil backed insulation will be going back in, wiring run for the solar panel, lights and vent fan. The headliner going back in will be a plain white shower wall board. The wallboard is fairly thin/light and the white will brighten up the interior even with the lights off. Plus side is it's water resistant. We will probably reconstruct the lift panels in round metal electrical conduit and make a stronger setup than the plywood panels that are warped to hell. From there, the camper needs the lower bench redone and the floor stripped of carpet and recovered in a vinyl flooring of some type. Then it's time to drop the camper on again.
__________________
Rob Z. 1975 K5 350/465/205/D44/12b 4" lift on 35's- RIP 1991 K5 8.1L/NV4500/241/D44/14b FWC Camper |
|
|
|
|
02-02-2018, 02:52 AM
|
#18 |
|
Registered User
Join Date: Dec 2009
Location: Fairbanks, AK
Posts: 1,830
|
Re: My K5 Blazer Story.
Great progress. That seal looks solid.
__________________
-Marcus 1991 V3500 L29 454 4L80E NP205 D60/14 Bolt 4.56's 1984 K30 292 TH400 NP205 D60/14 Bolt 4.56's flat bed 7'6" Meyer Plow 2022 Silverado 3500 L8T Project Daily Driver Project Heavy Hauler Project Plow Truck |
|
|
|
|
02-03-2018, 12:37 AM
|
#19 | |
|
Registered User
Join Date: Jul 2011
Location: back 40, bc
Posts: 3,805
|
Re: My K5 Blazer Story.
Quote:
you got some very handy friends.. 
|
|
|
|
|
|
02-03-2018, 10:57 PM
|
#20 | |
|
K5Camper
Join Date: Mar 2004
Location: Pueblo, CO
Posts: 1,513
|
Re: My K5 Blazer Story.
Quote:
Yep, those two guys have been a major blessing in this project. Without them I'd be using a sawzall to get stuff done. We trade help as they both have Jeeps that need work too. We put a complete lift on Shane's old YJ wrangler last summer. Plus they are a riot to go camping with. Lots of fun for sure.
__________________
Rob Z. 1975 K5 350/465/205/D44/12b 4" lift on 35's- RIP 1991 K5 8.1L/NV4500/241/D44/14b FWC Camper |
|
|
|
|
|
02-11-2018, 12:28 AM
|
#21 |
|
K5Camper
Join Date: Mar 2004
Location: Pueblo, CO
Posts: 1,513
|
Re: My K5 Blazer Story.
We had a rare storm coming our way today and I had it off too. So my buddy Bill and I wanted head west and see what trouble we could get into. I loaded my dog, some drinks and snacks and we took off.
 Heading out of town, the snow hadn't got too aggressive yet. Just cold. Like 17° cold.  Heading up hardscrabble with a fresh layer of frost on the trees. 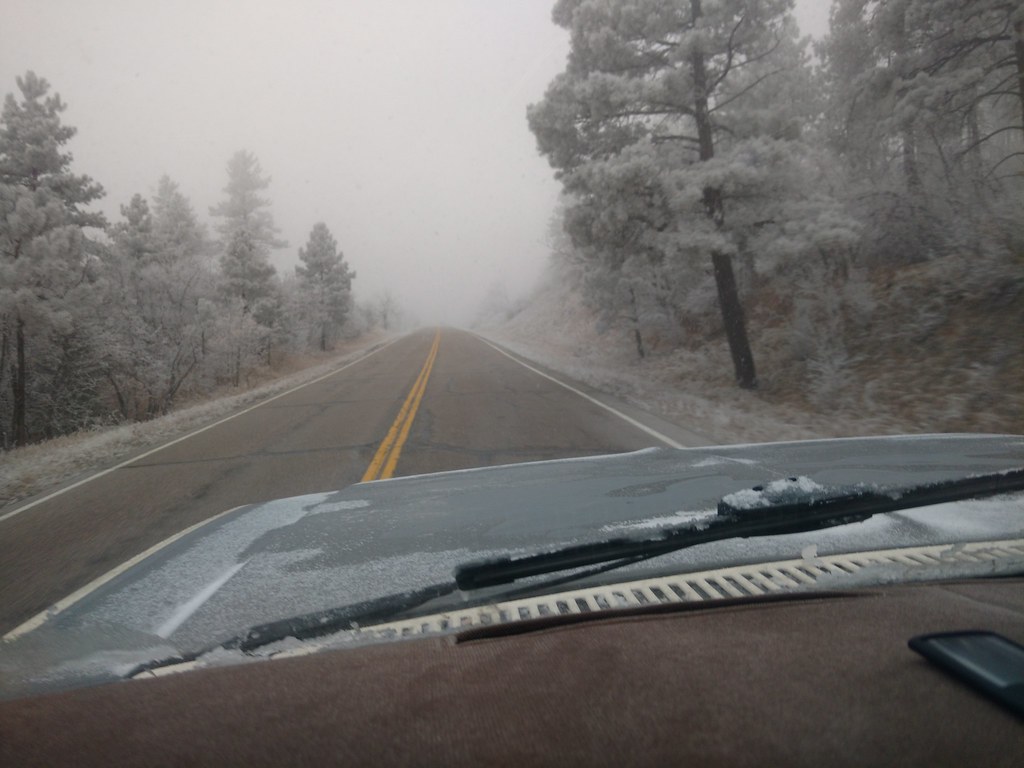 On the trail. Not sure how the aspen trees got to look like this. But not much snow to play on. 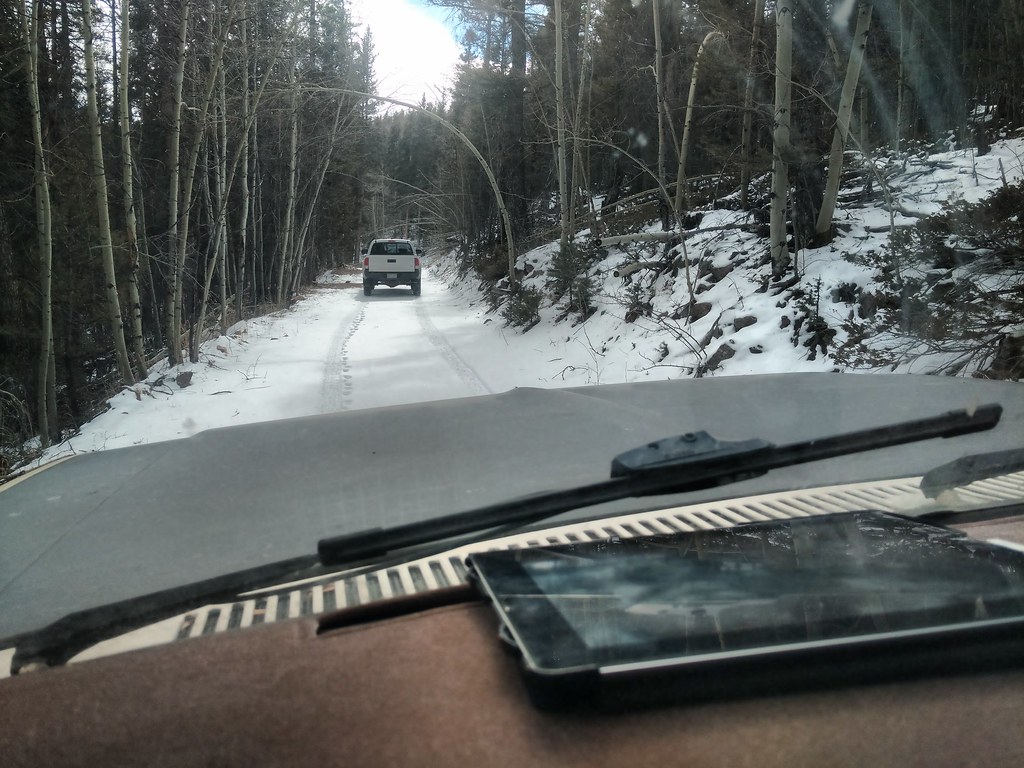 At the top. 11,450ft of elevation. Doggo needed to stretch her legs.  We are higher than the storm below. The normal view here is a wide valley that reaches to the mountain range on the other side.  Poser shot.. 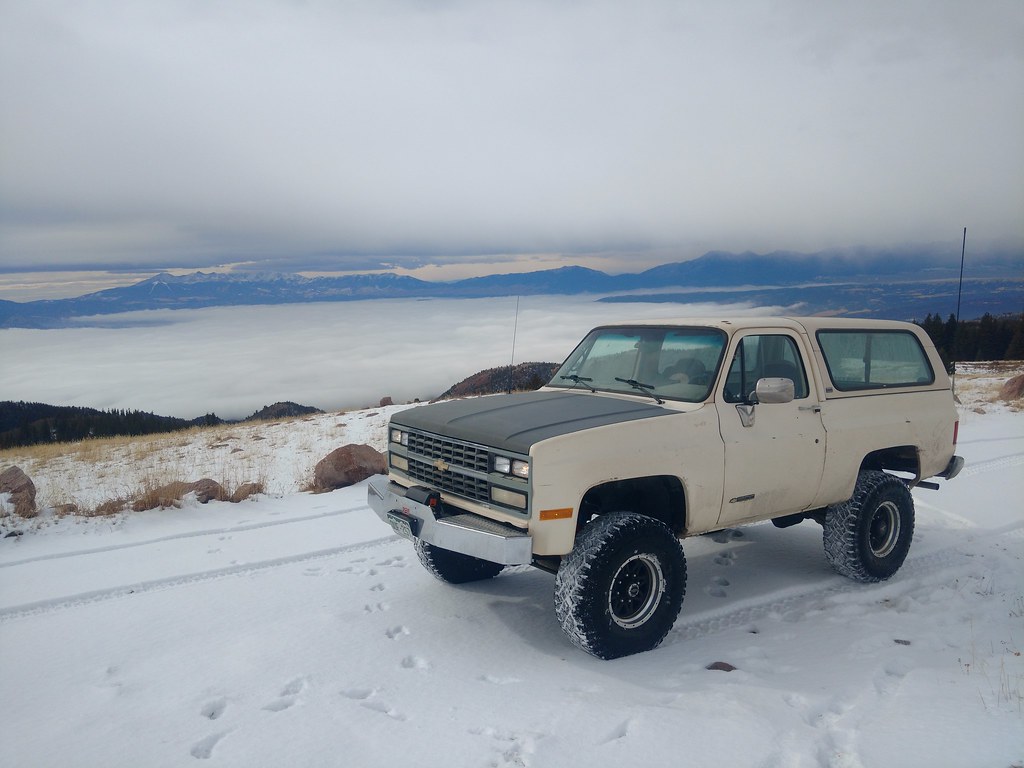 Coming down. At about 9,400ft just above the cloud.  Coming off the trail had is closer to Walsenburg so we ended up driving that way and rolling back up I-25 in the heart of the storm. No pics as all it was white. Not much visibility and doubled the normal time for the drive.
__________________
Rob Z. 1975 K5 350/465/205/D44/12b 4" lift on 35's- RIP 1991 K5 8.1L/NV4500/241/D44/14b FWC Camper |
|
|
|
|
02-13-2018, 10:48 PM
|
#22 |
|
Senior Member
Join Date: Jan 2003
Location: Grand Junction, Colorado
Posts: 611
|
Re: My K5 Blazer Story.
Just a note on the top. I doubt you will run into this as your cut down fiberglass shell mounting method will eliminate what i ran into.
Before i mounted the camper on my 79 i removed the rare cucv artic kit cover that was on my 79. That being said i put the screws back in their empty nut zerts to prevent leaks. That was a whoopsie as said screw held up the front part of the camper a wee bit which caused an air and water leak issue. That was a unique problem that i am sure no one but me will run into in the next 1000 years. Lol. However i'd make sure those screws will not rub holes in the roof of the K5. DW
__________________
Doug Wright aka K5NUTT over @coloradok5.com Owner of http://groups.yahoo.com/group/ChevyK5BlazerChalets Certified K5 Nut |
|
|
|
|
02-14-2018, 12:34 AM
|
#23 | |
|
K5Camper
Join Date: Mar 2004
Location: Pueblo, CO
Posts: 1,513
|
Re: My K5 Blazer Story.
Quote:
__________________
Rob Z. 1975 K5 350/465/205/D44/12b 4" lift on 35's- RIP 1991 K5 8.1L/NV4500/241/D44/14b FWC Camper |
|
|
|
|
|
02-14-2018, 07:34 AM
|
#24 |
|
Senior Member
Join Date: Jan 2003
Location: Grand Junction, Colorado
Posts: 611
|
Re: My K5 Blazer Story.
I am guessing the original design relied heavily on the weight of the camper bed area to seal the cab since it did not use the forward fiberglass top bolts to in essence pull the camper forward to seat it on the seals.
__________________
Doug Wright aka K5NUTT over @coloradok5.com Owner of http://groups.yahoo.com/group/ChevyK5BlazerChalets Certified K5 Nut |
|
|
|
|
02-15-2018, 12:30 AM
|
#25 | |
|
K5Camper
Join Date: Mar 2004
Location: Pueblo, CO
Posts: 1,513
|
Re: My K5 Blazer Story.
Quote:
__________________
Rob Z. 1975 K5 350/465/205/D44/12b 4" lift on 35's- RIP 1991 K5 8.1L/NV4500/241/D44/14b FWC Camper |
|
|
|
|
 |
| Bookmarks |
|
|


 Hybrid Mode
