
|
Register or Log In To remove these advertisements. |
|
|
|
|||||||
 |
|
|
Thread Tools | Display Modes |
|
|
 06-28-2020, 10:57 PM
|
#1 |
|
Registered User
Join Date: May 2016
Location: Willow, Alaska
Posts: 846
|
Re: 1978 Chevy K20 longbed with nearly 500,000 miles! LS Swap begins!
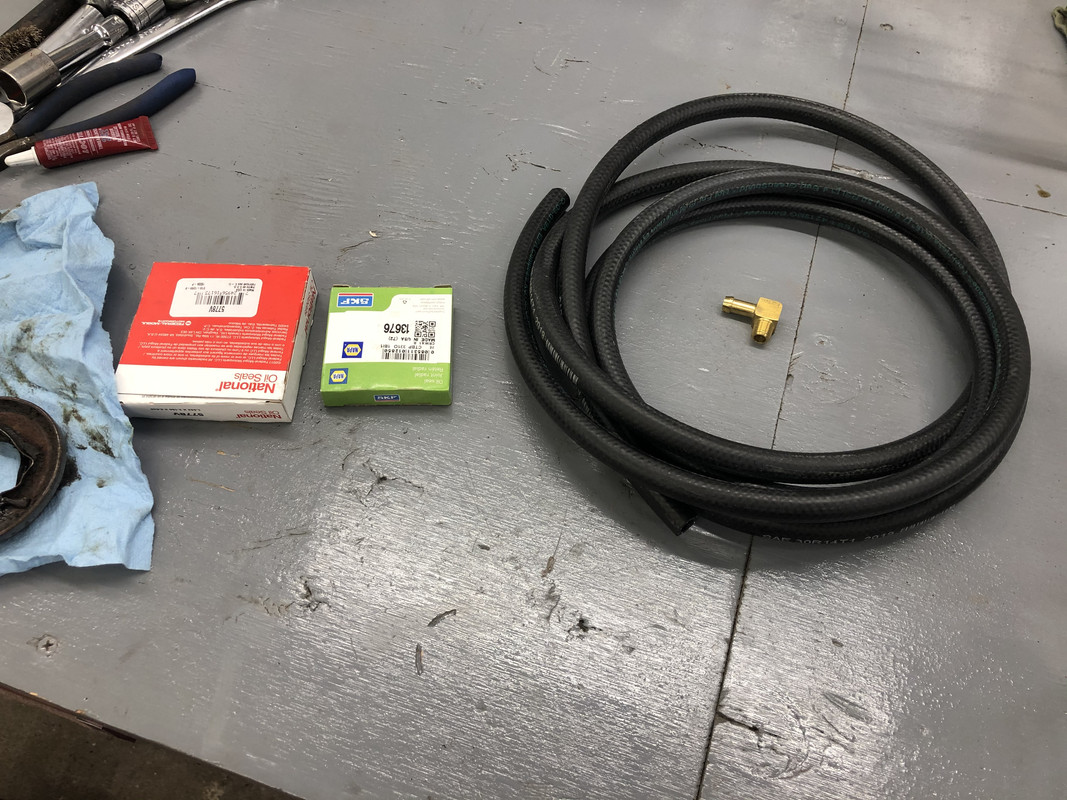
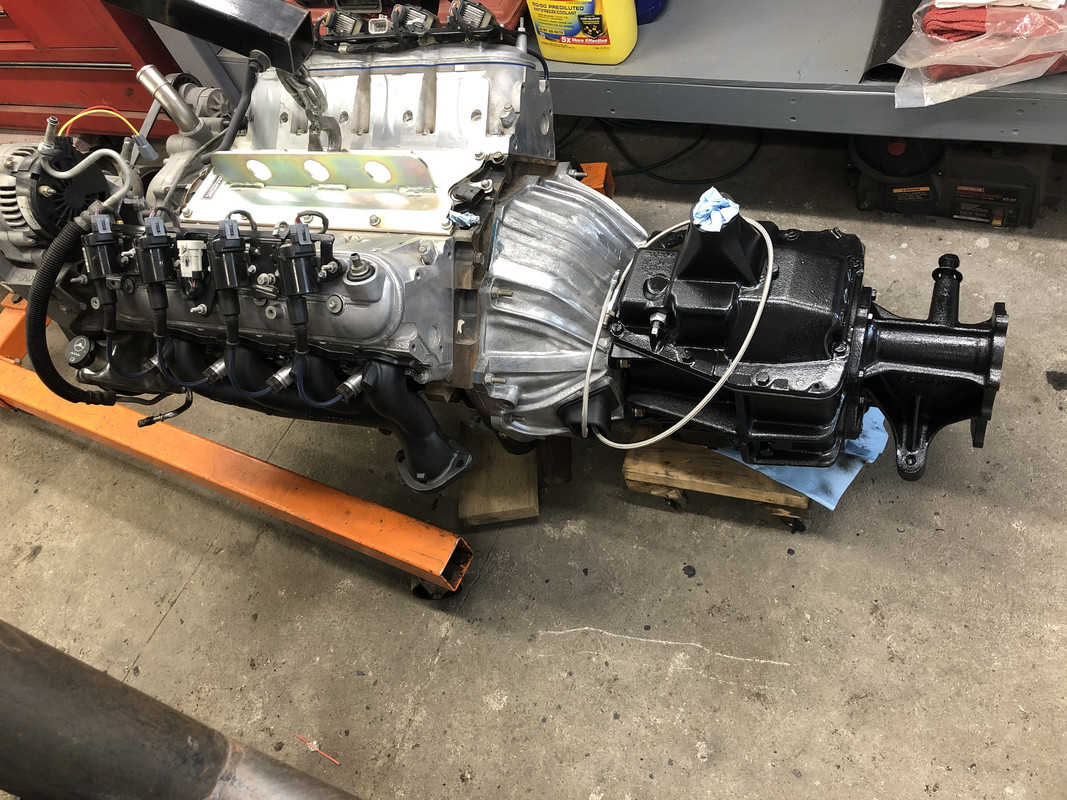
The transmission adapter seal wasn't included in either the transmission or transfer case kits, go figure! I swung by the parts store and picked one up, as well as a pinion seal and some vent line.
 The new seal is installed! 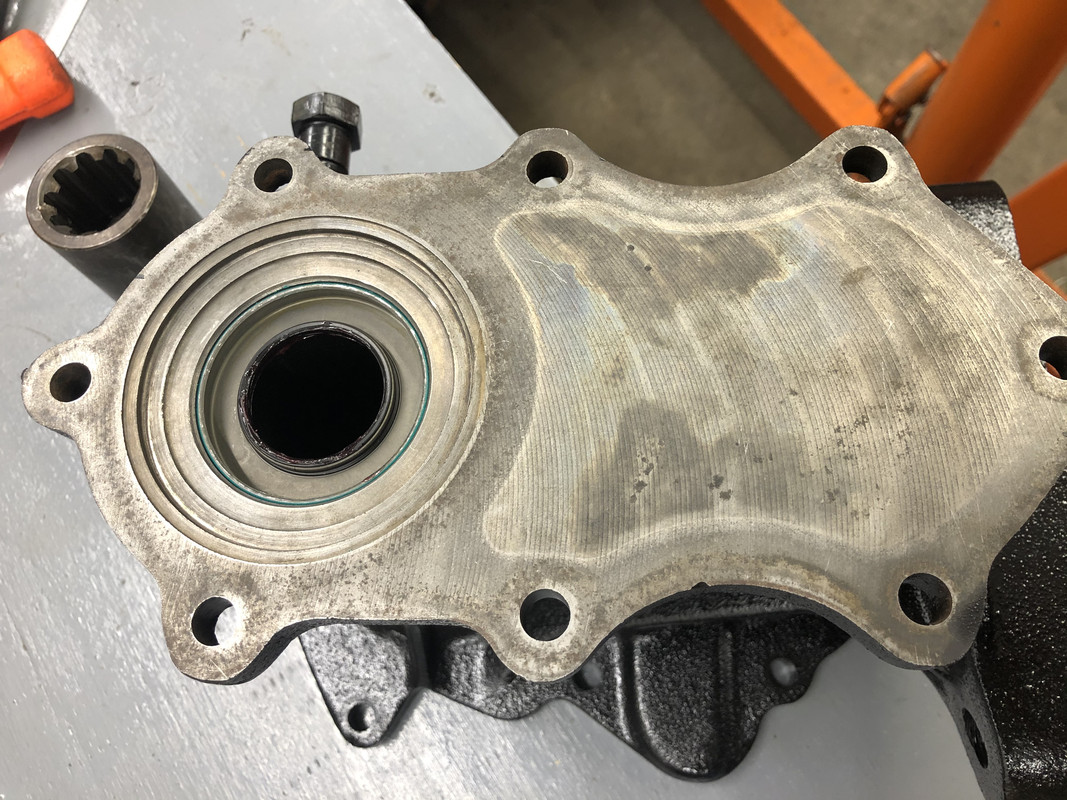 Coupler sleeve installed! 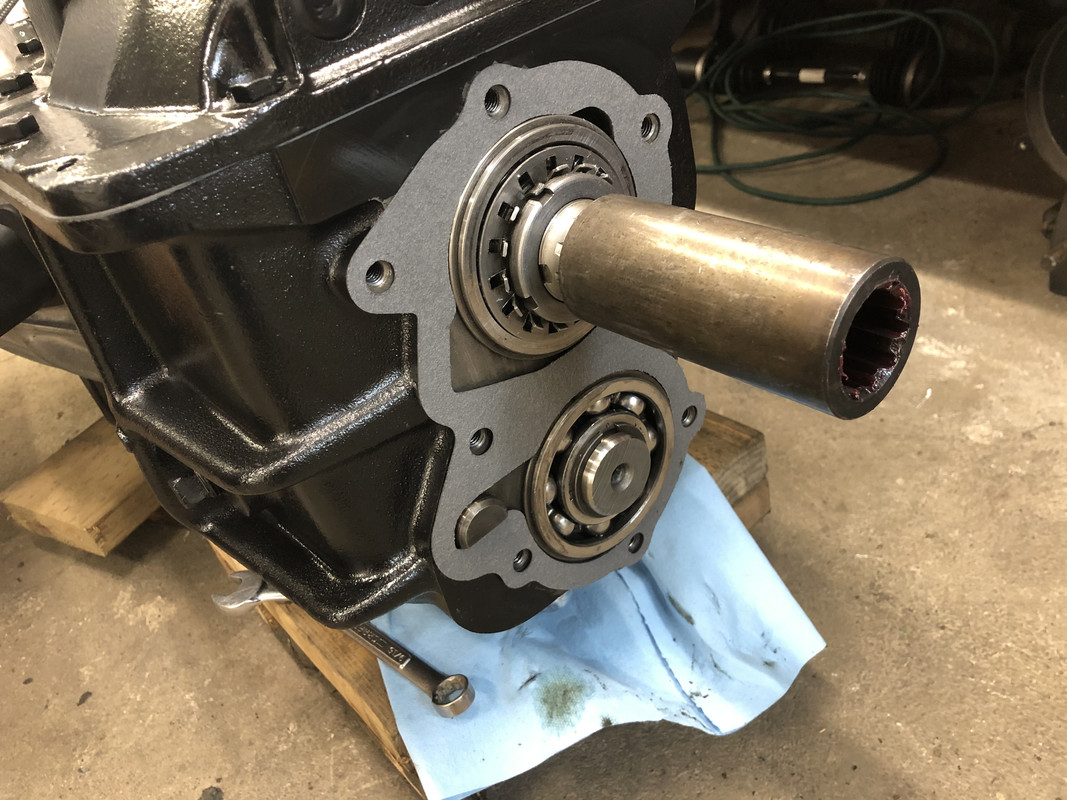 Mated to the transmission. 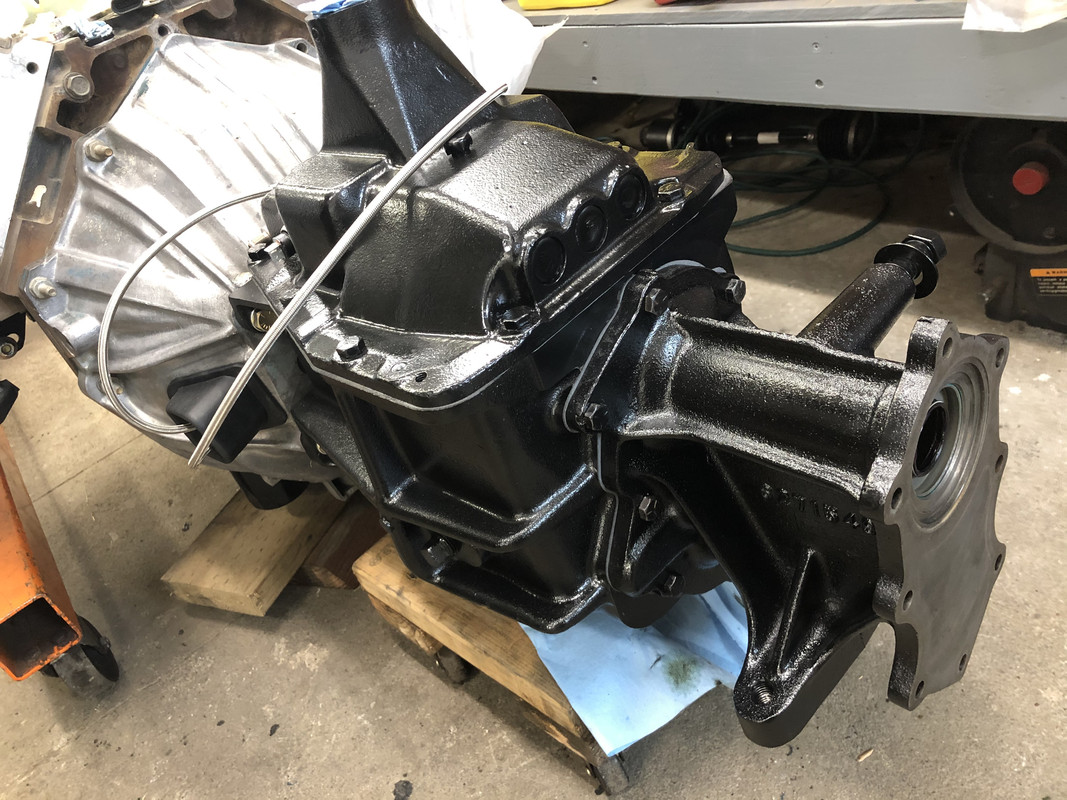 Before going any further with the engine and transmission, I wanted to address this pinion seal leak on the front axle. Eventually, the outer seals and U-joints will be replaced as they are worn out also, but for now I wanted to knock out this one, as it'll be much easier without the engine in the way. Here's a trick I use to hold the yoke from spinning while removing the nut. You can also see that I've written how many turns the nut took to remove, in order to set the nut back in the correct place and not affect the pinion crush sleeve. 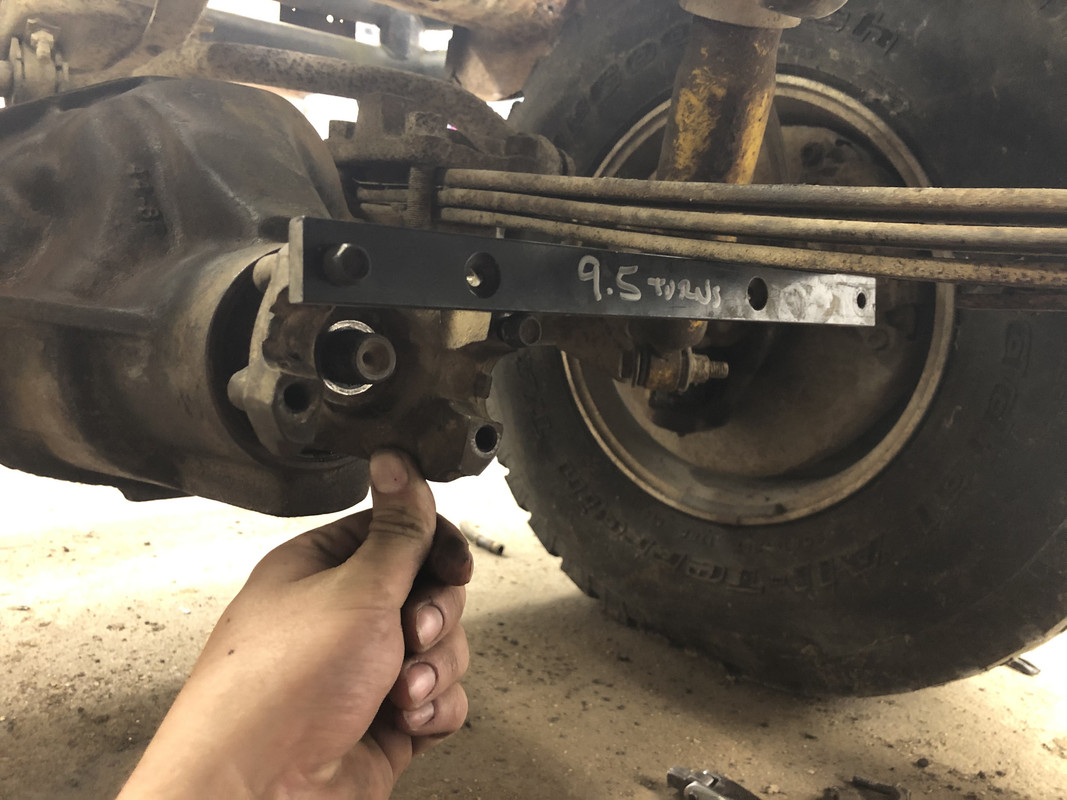 Removing the yoke. 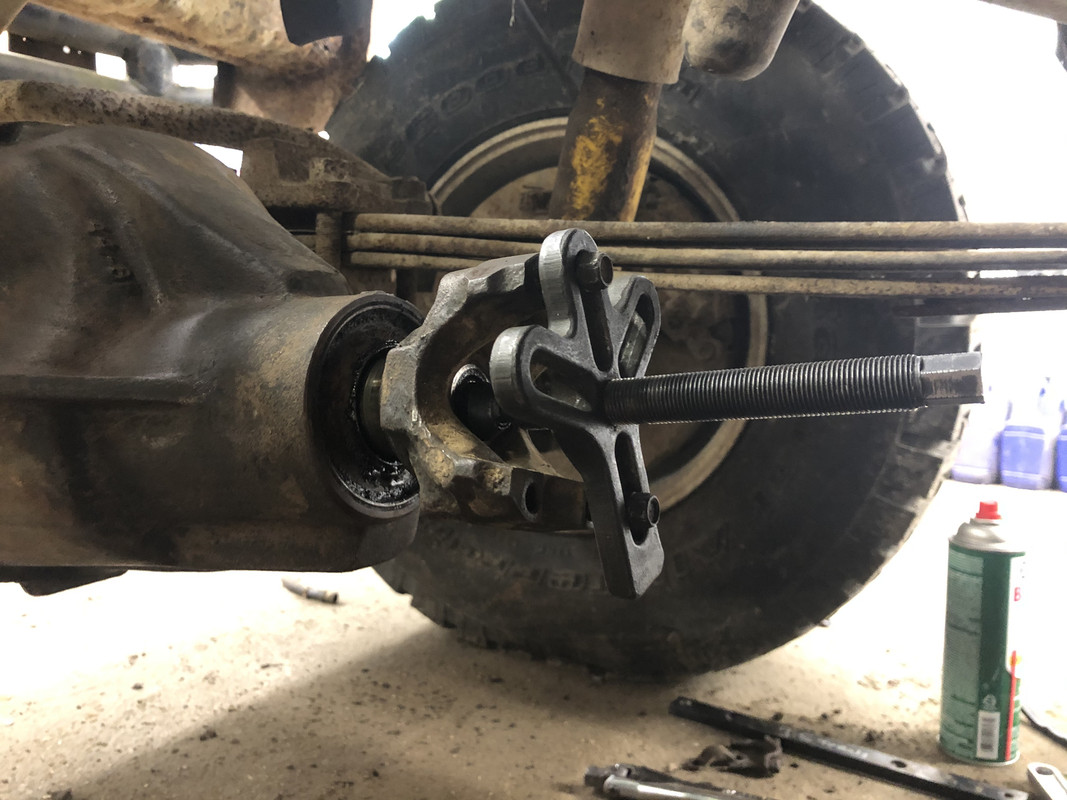 New seal installed! 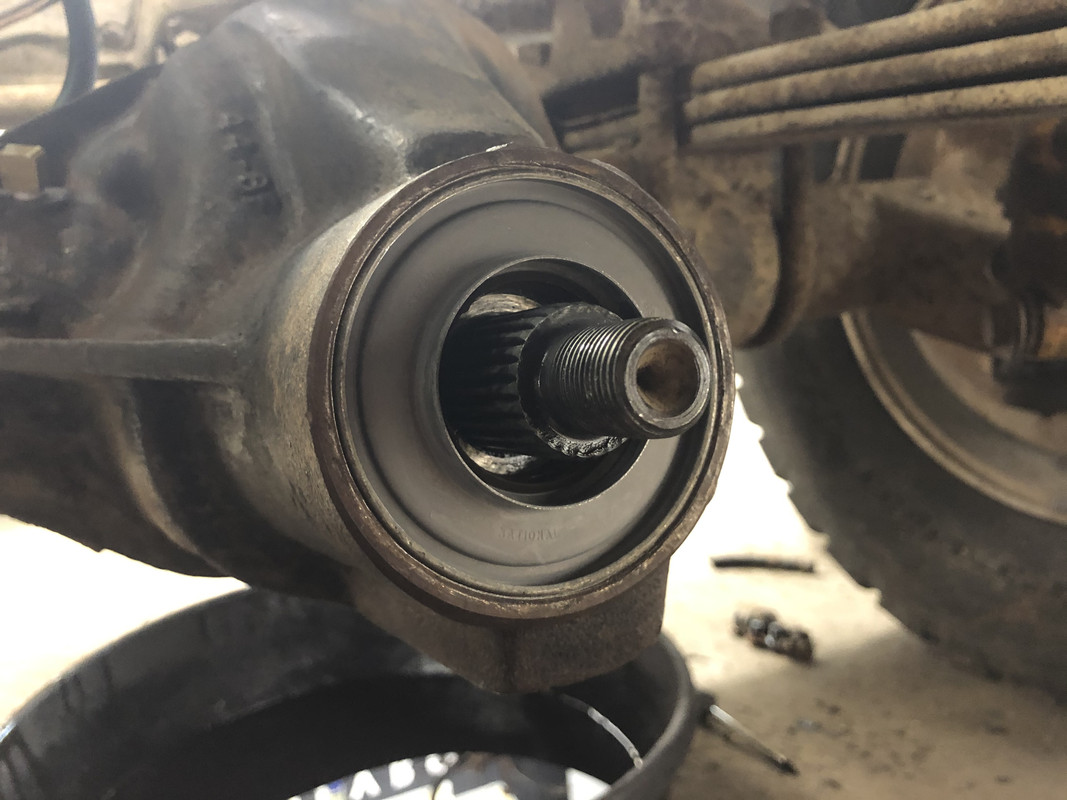 Yoke back in place and nut tightened back to it's original position. 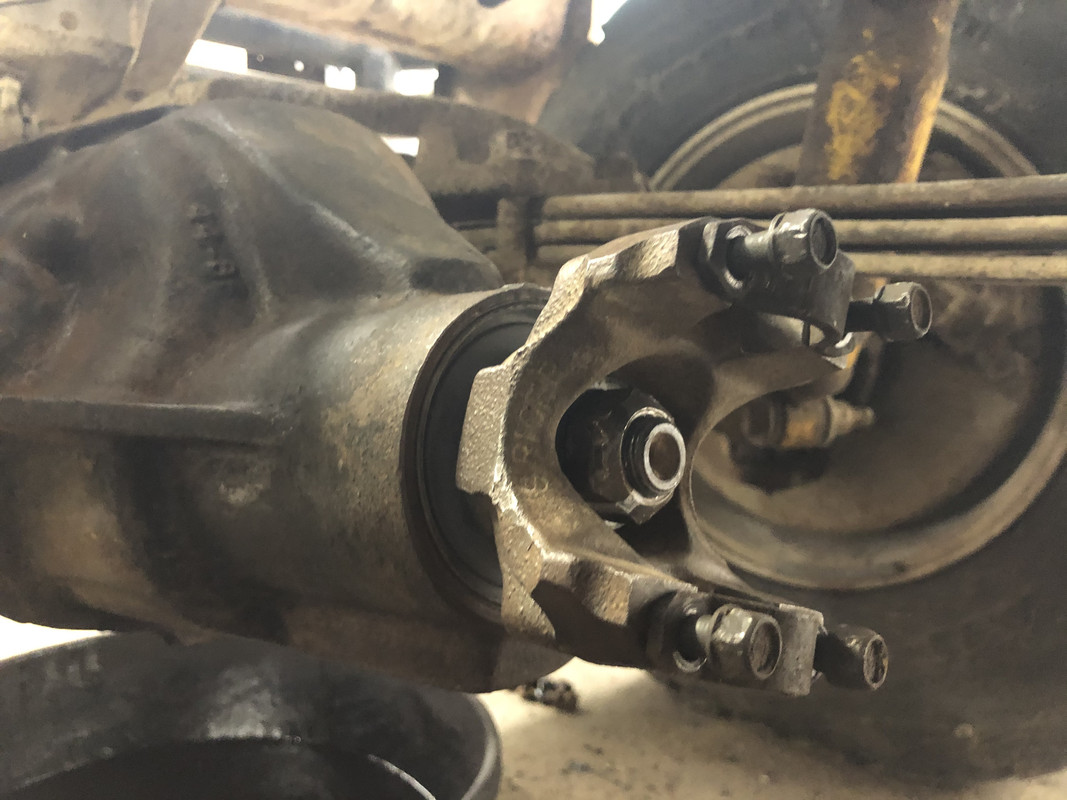 Part of the reason these seals are all bad is because of the vent system. The hose was cut and packed full of dirt, and the nipple was half broken off. 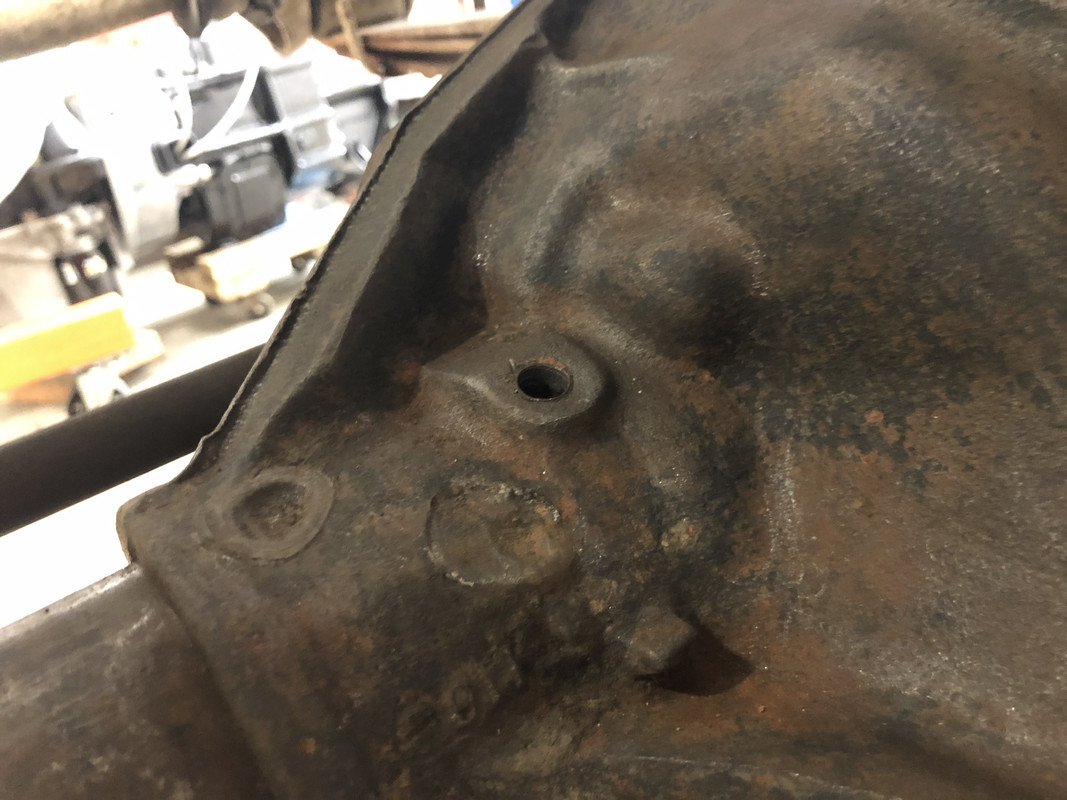 Tapping the hole for 1/8" NPT. 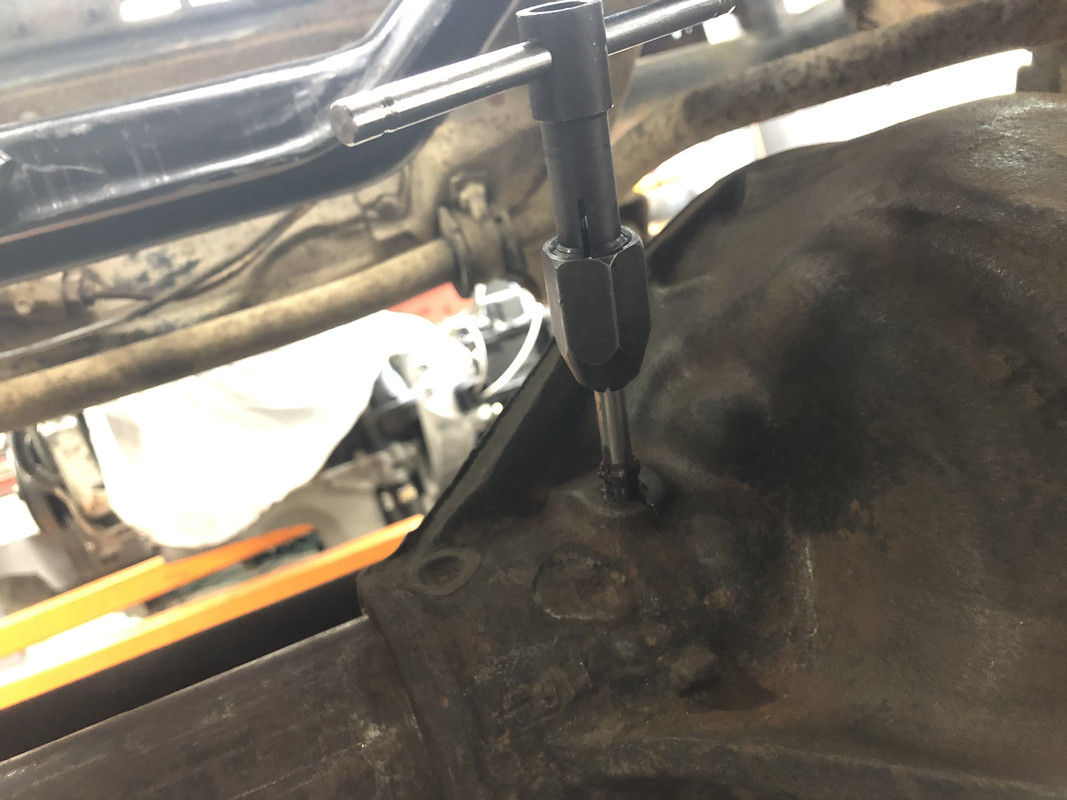 New, better fitting installed.  I ran new vent line for the front axle. 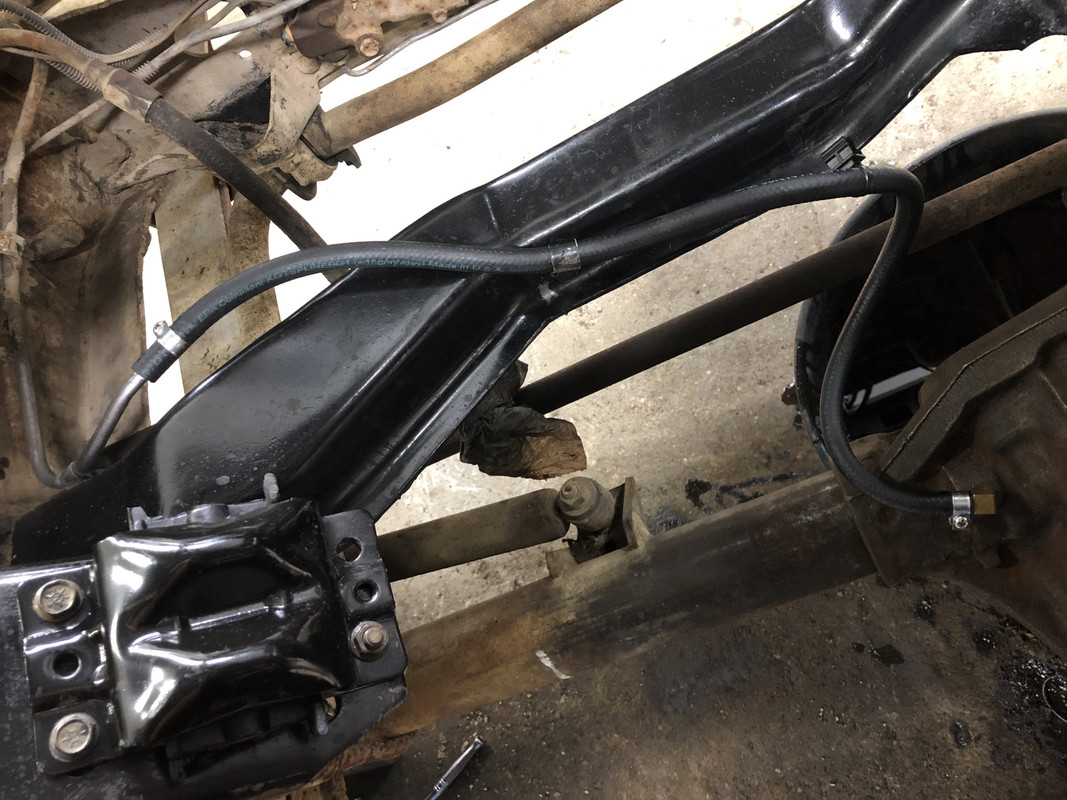 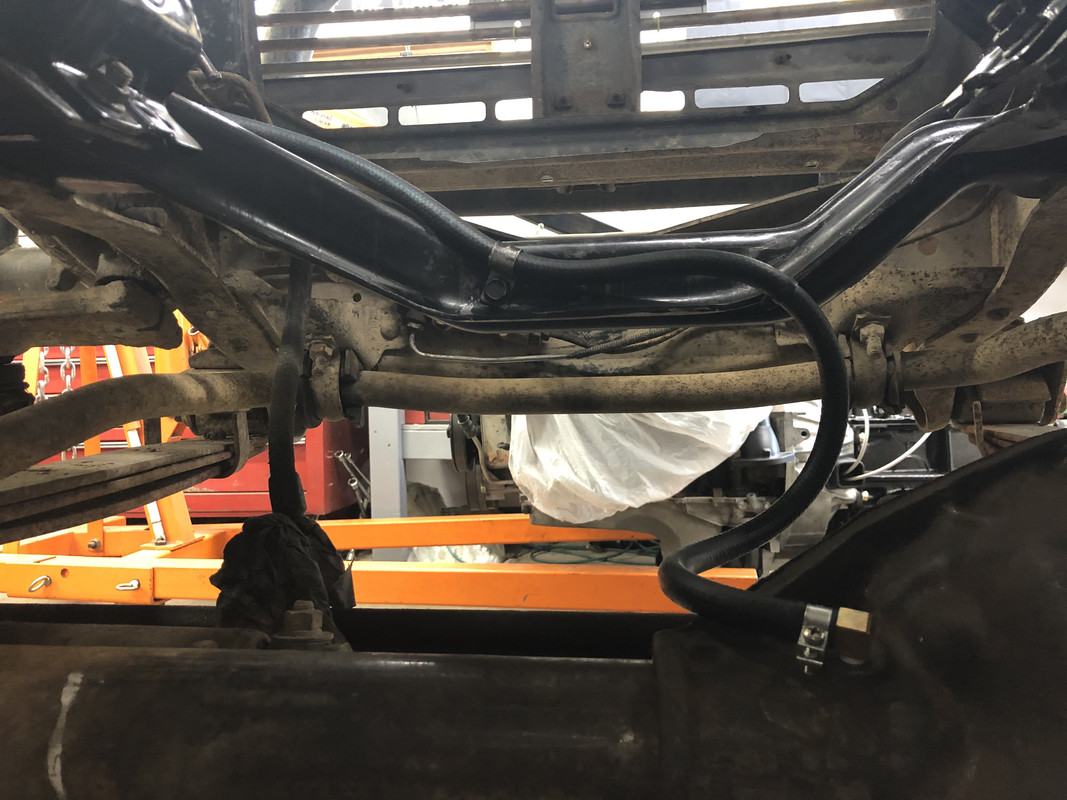 Replaced the upper line as well. 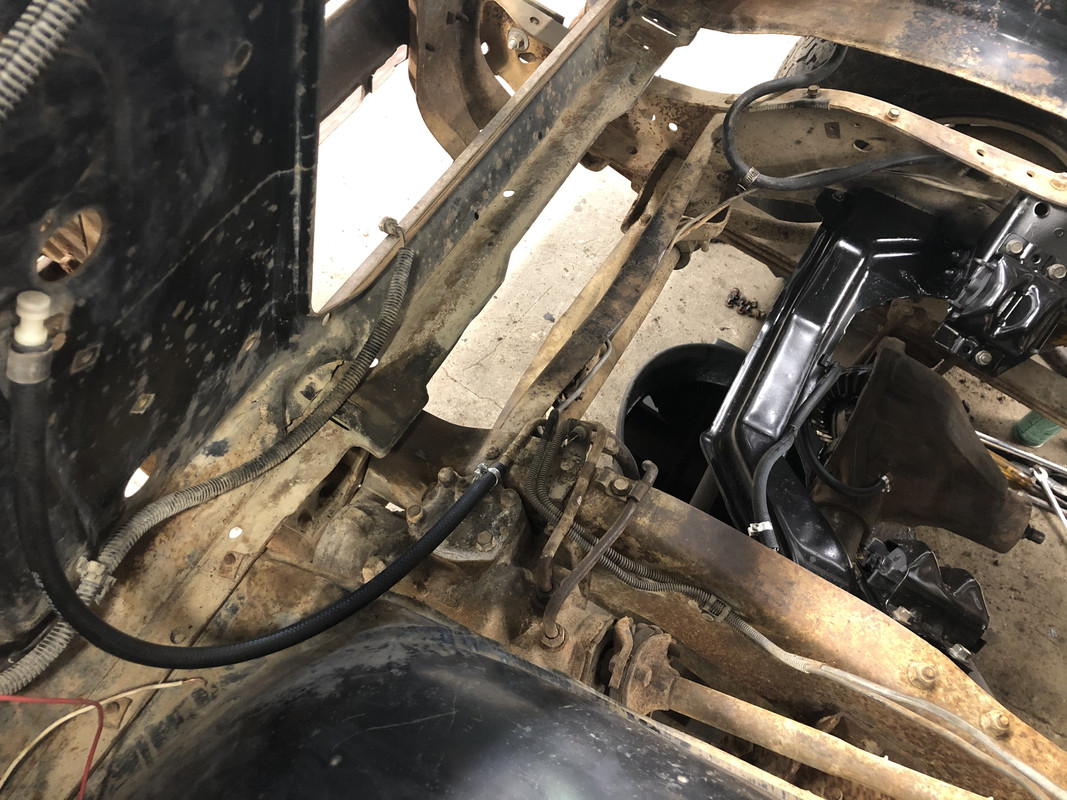
|

|

|
|
06-28-2020, 11:14 PM
|
#2 |
|
Registered User
Join Date: May 2016
Location: Willow, Alaska
Posts: 846
|
Re: 1978 Chevy K20 longbed with nearly 500,000 miles! LS Swap begins!
Now we're finally ready to go in!
 I had to remove the hood for this one. I didn't think I'd ever have a chance of wrestling that SM465 back up from underneath, so it goes in from the top! 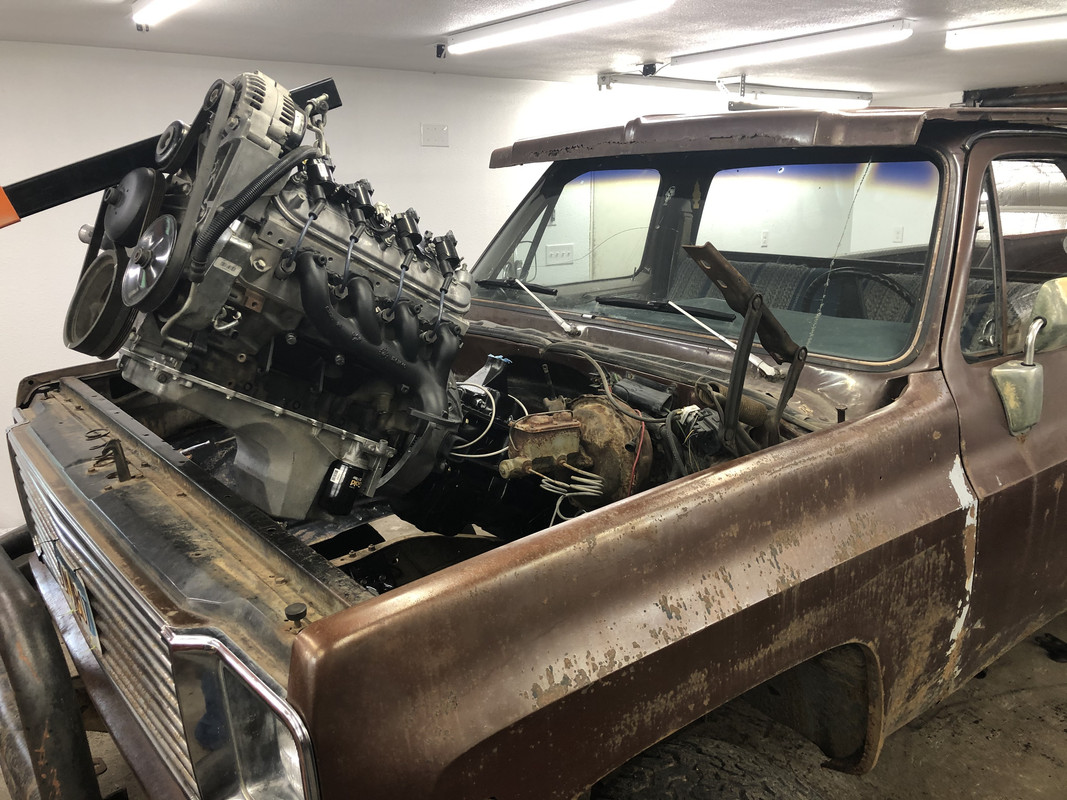 Since I'm using the Dirty Dingo Sliders, I started at the transmission mounts, since the crossmember and transmission mounts are fixed, and that will determine the engine setback. 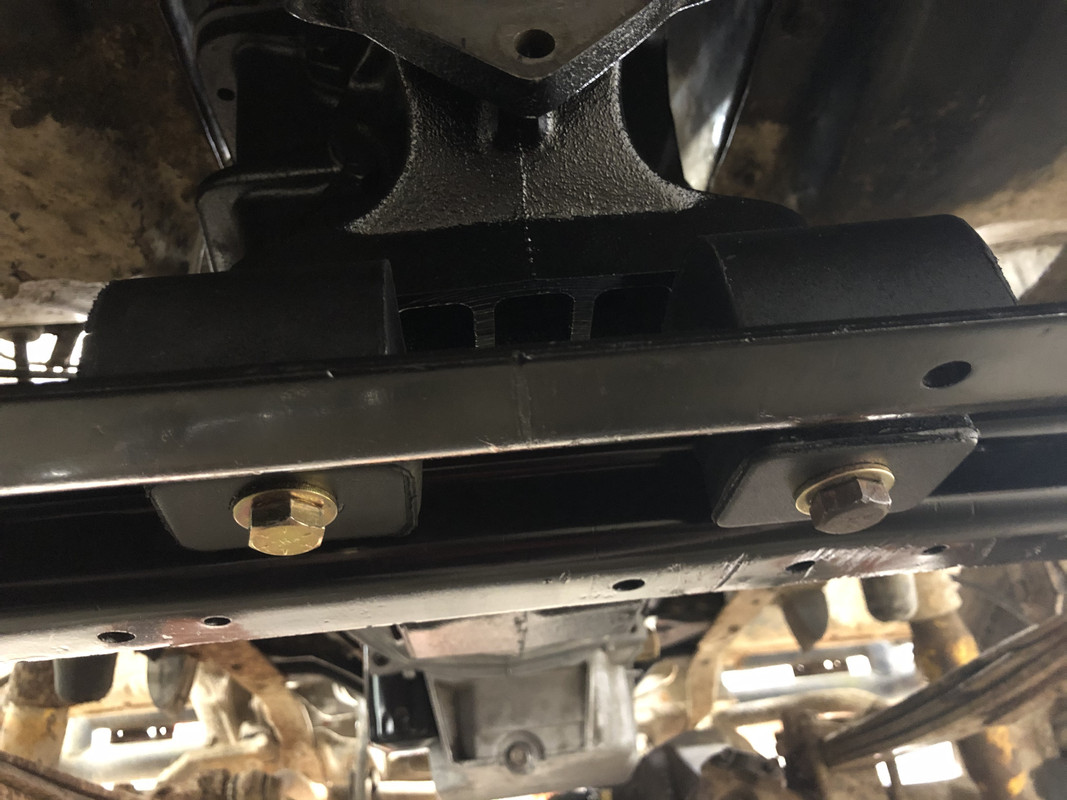 There is tons of clearance all the way around the stock truck pan!  Here are some pictures of the 2010+ Camaro exhaust manifold clearance to the frame. Sorry for the fingers in a few pictures, the LED shop lights are almost blinding! Passenger side:  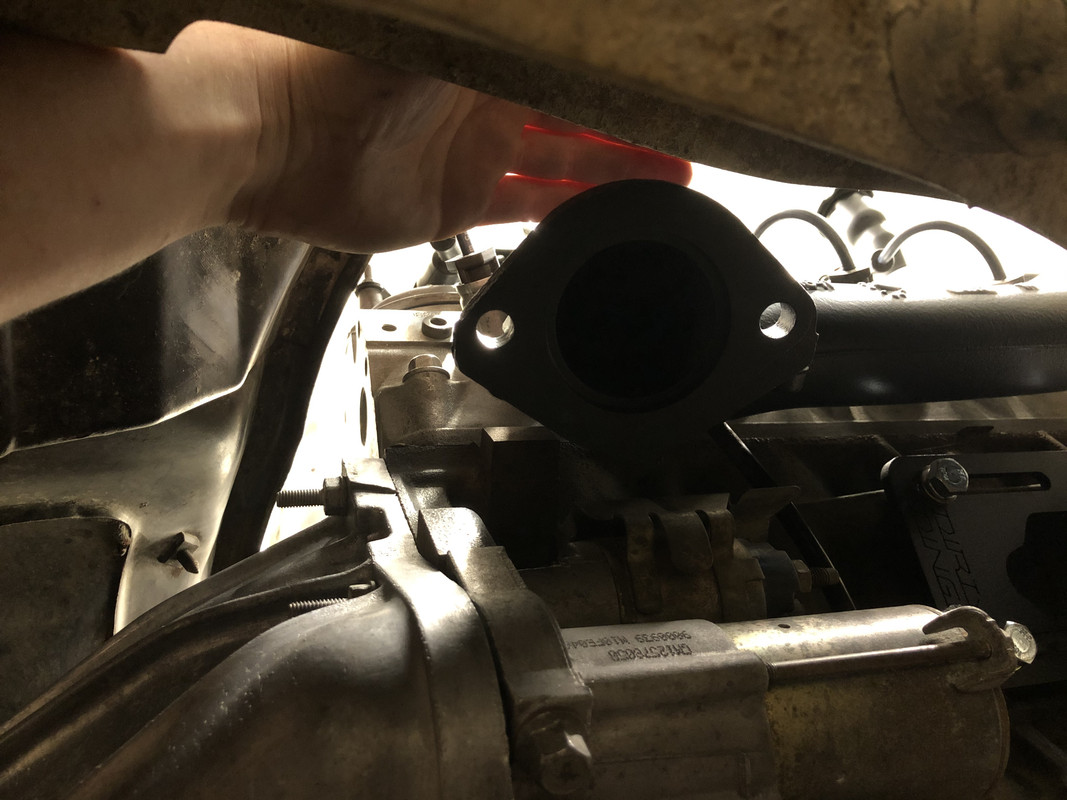 Driver side: 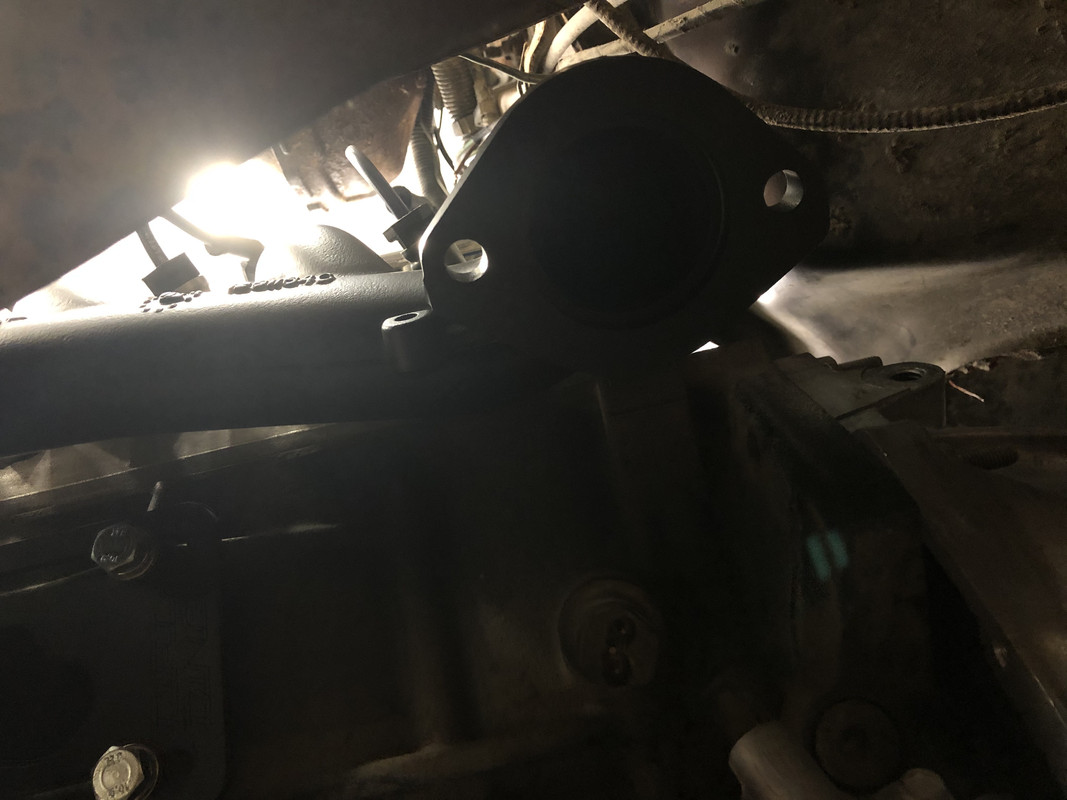 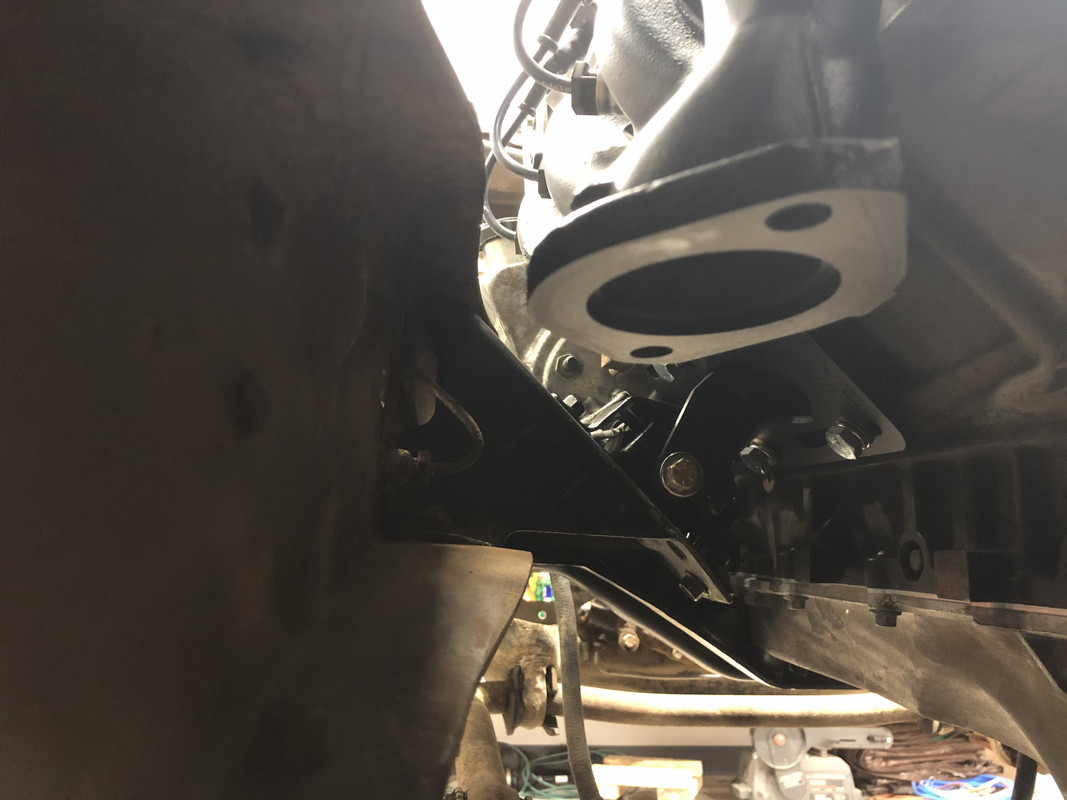 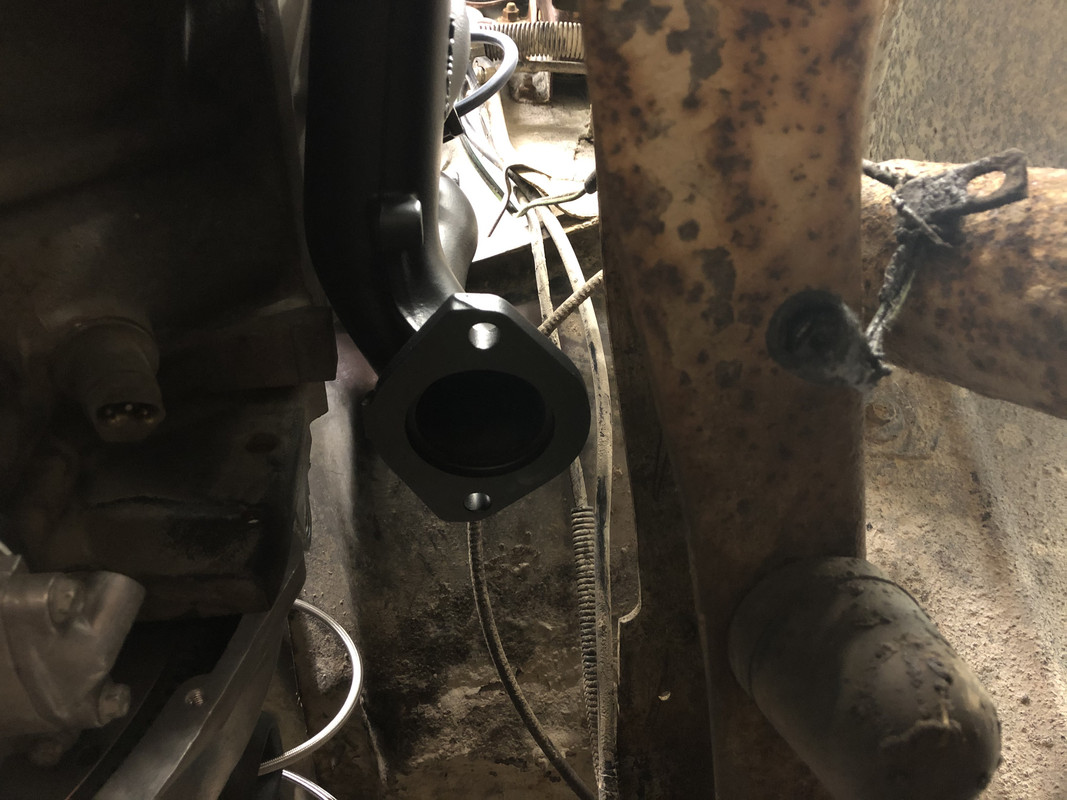 The engine and transmission are completely bolted in! The return line on the power steering pump required a very slight bend away from the frame, but otherwise, it's a perfect fit. 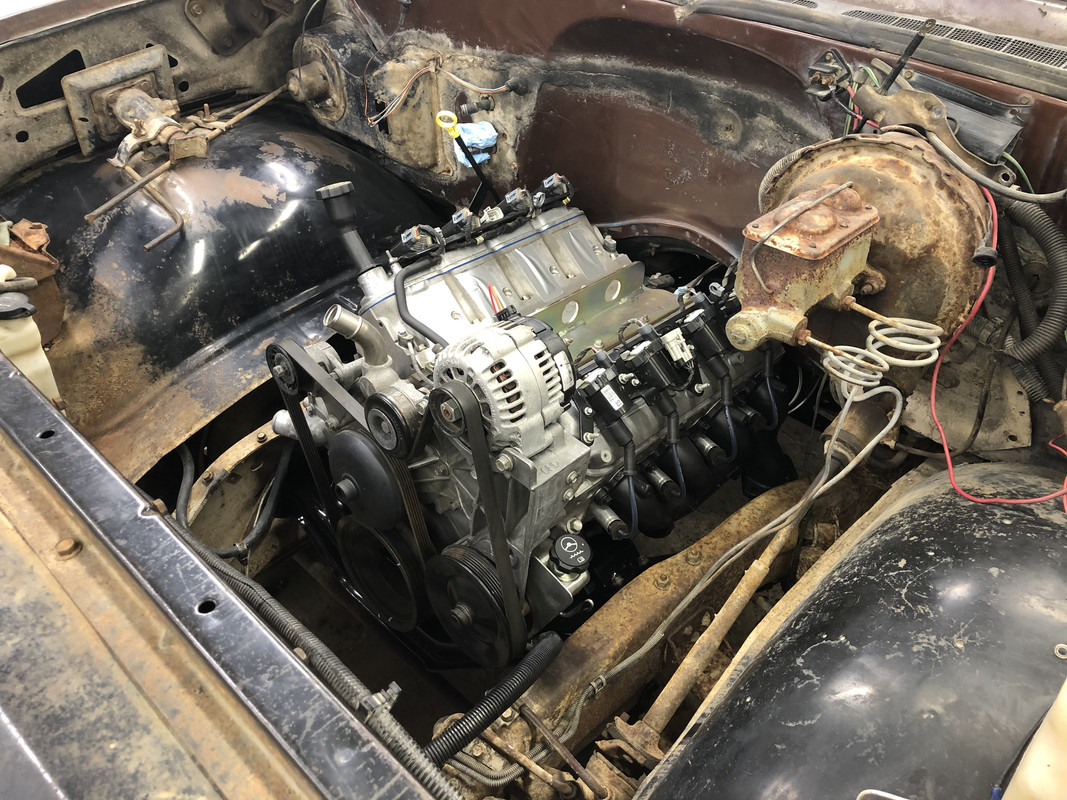 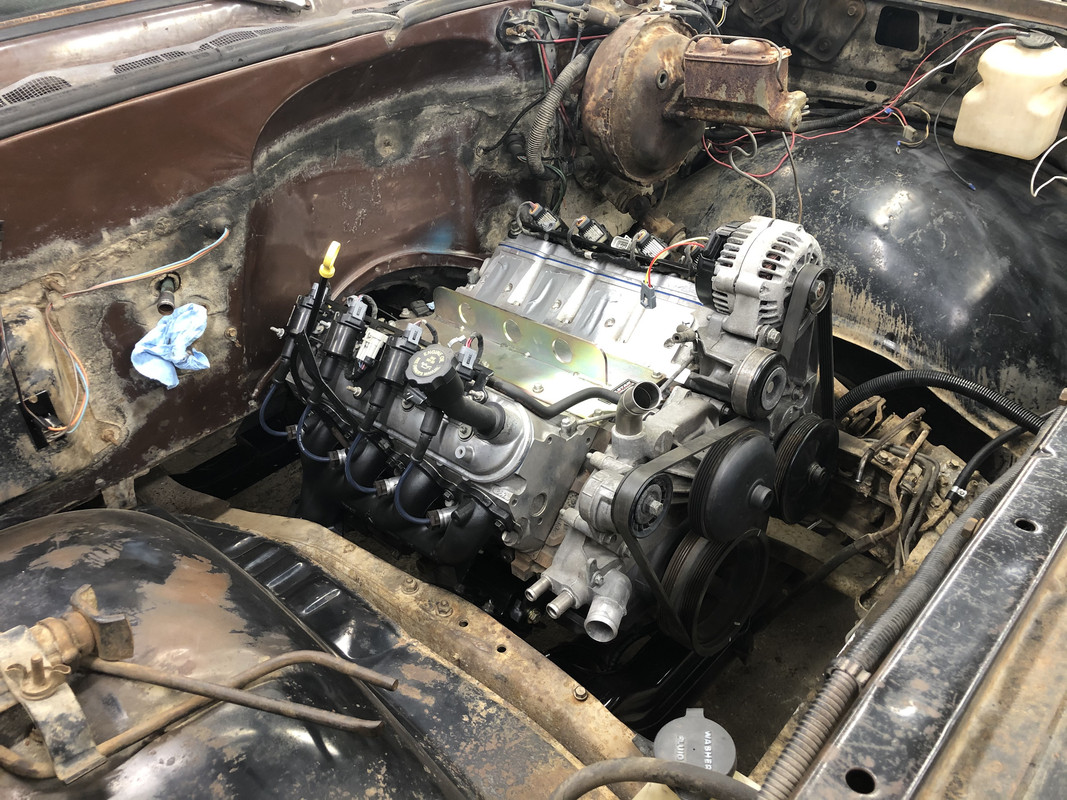 Removed the hoist plate to install the valley cover. 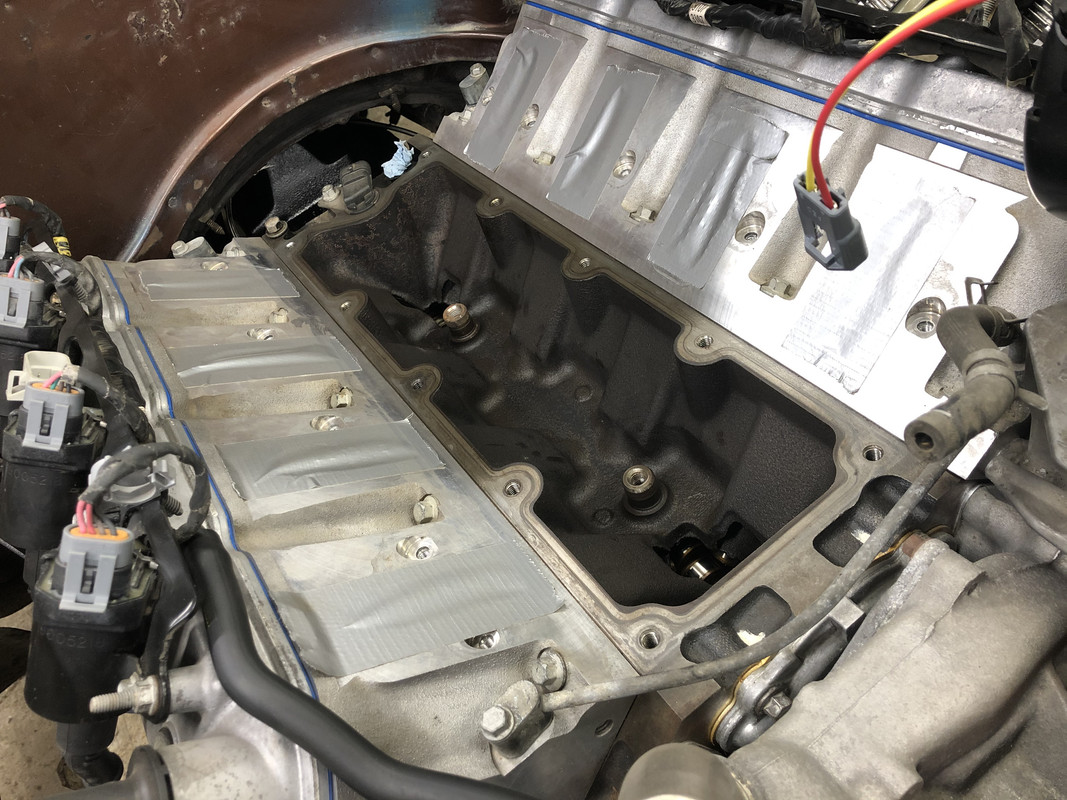 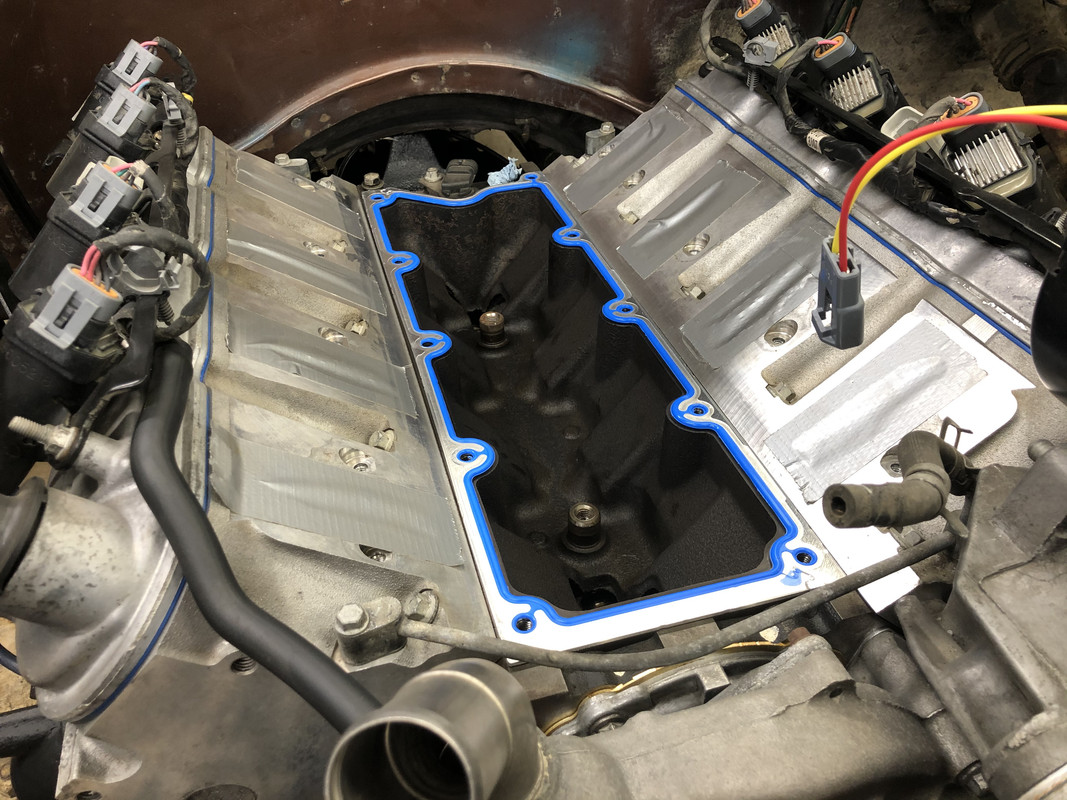 And the cover installed! 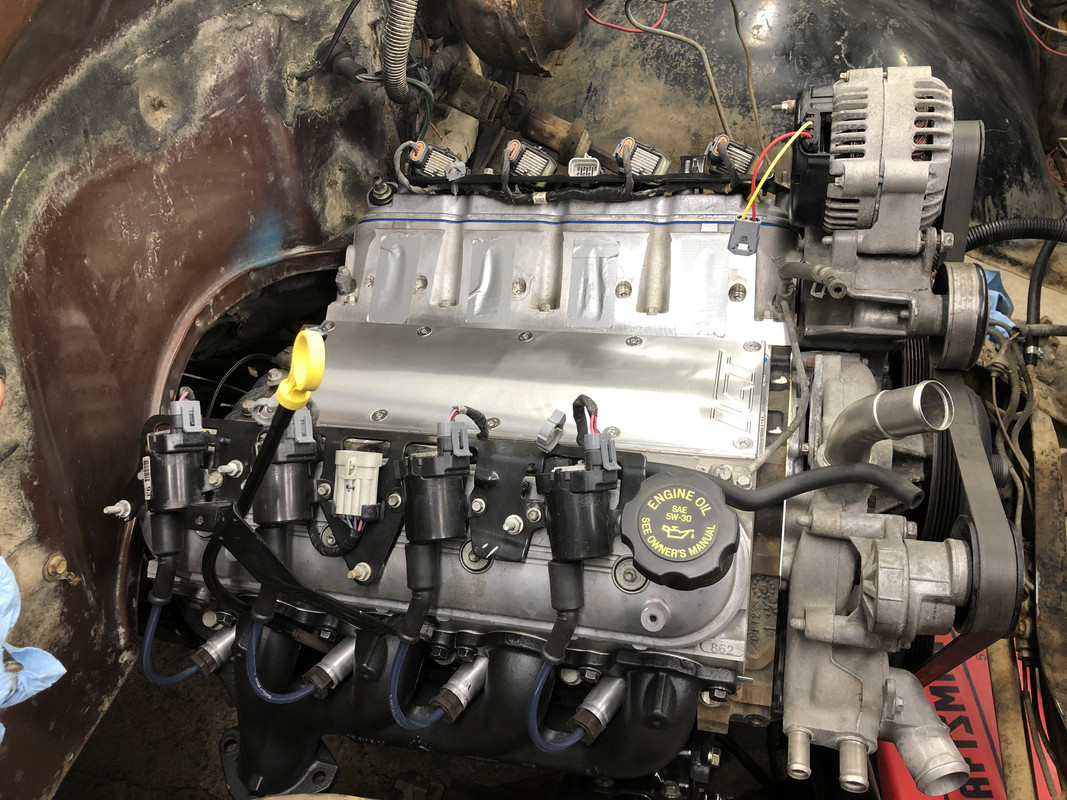
|
|
|
|
|
07-08-2020, 11:32 AM
|
#3 |
|
Registered User
Join Date: Nov 2014
Location: Norfolk,NE
Posts: 136
|
Re: 1978 Chevy K20 longbed with nearly 500,000 miles! LS Swap begins!
Really like this build and great progress so far. Reminds me of my build, get everything mechanically in shape and make it pretty later.
__________________
1982 Sierra Classic K15 RC/LB 6.2L Diesel 700R4 1988 GTA Trans AM 305 TPI 700R4 1993 Formula Firebird LT1 T56 1995 GMC K2500 ECLB 6.5L 4L80E 1996 GMC K3500 CCLB LB7 6L90 |

|
|
|
07-10-2020, 03:45 PM
|
#4 |
|
Registered User
Join Date: May 2016
Location: Willow, Alaska
Posts: 846
|
Re: 1978 Chevy K20 longbed with nearly 500,000 miles! LS Swap begins!
Thank you!
My small Summit box showed up today, with new intake gaskets and the power steering return line. 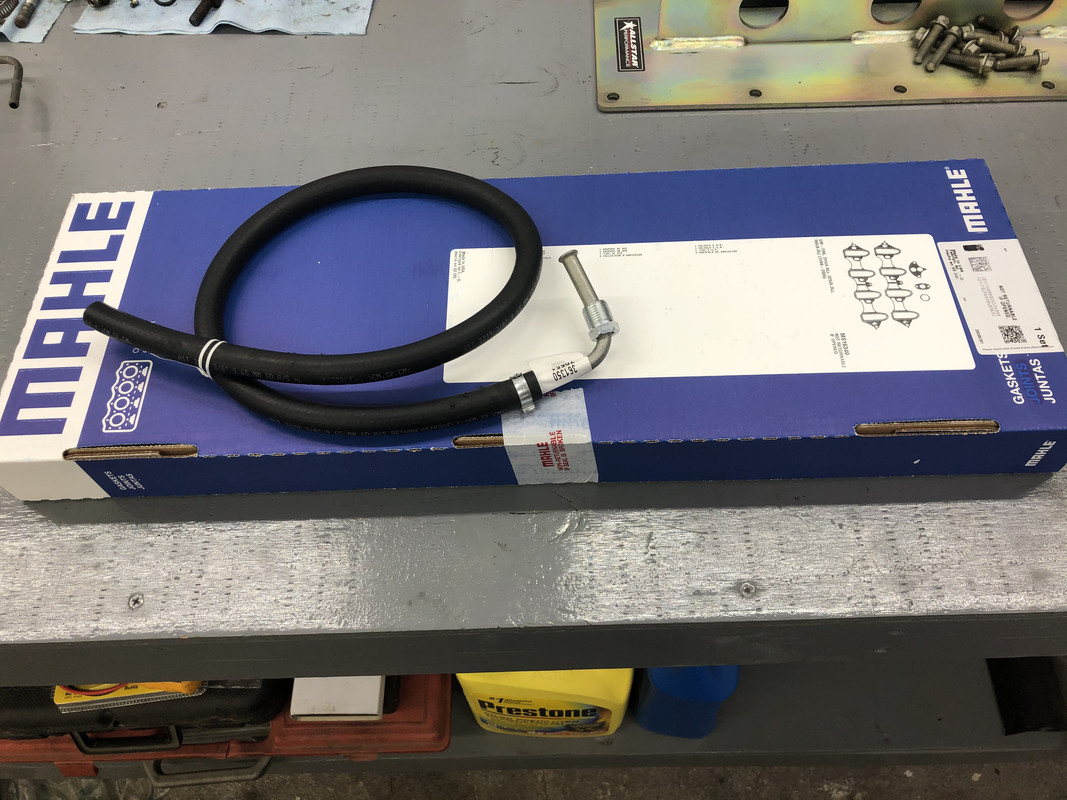 It's a cut-to-fit piece, so now it should hopefully fit!  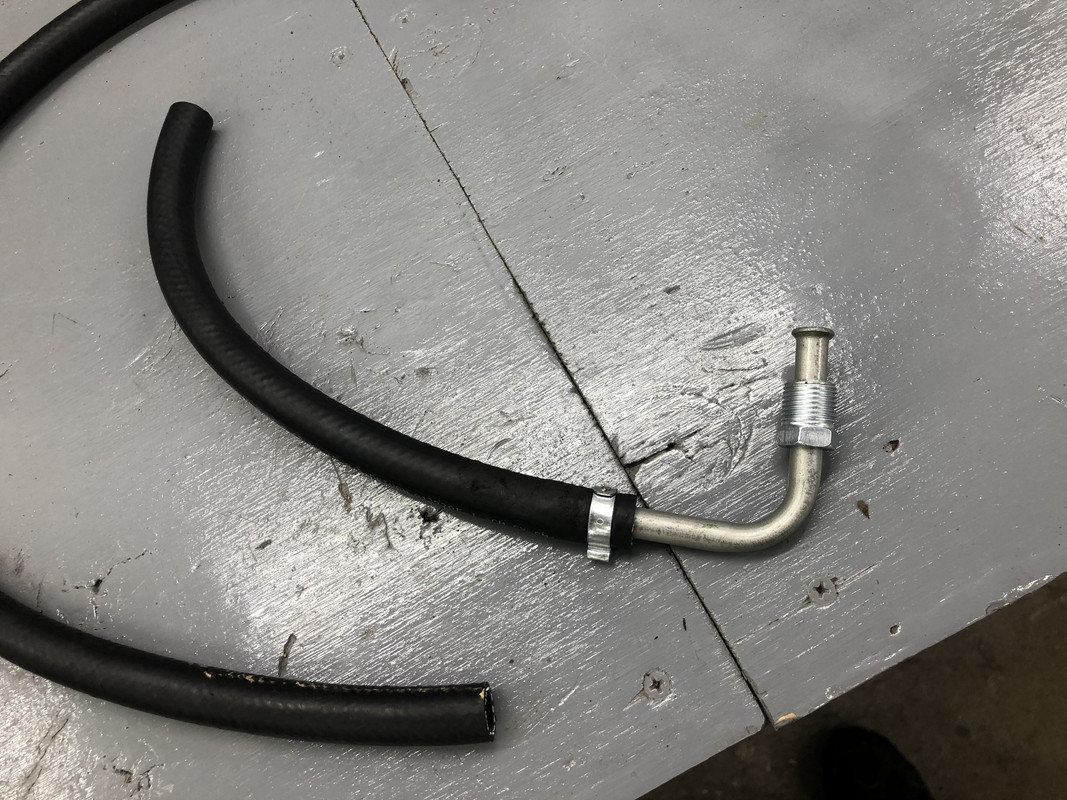 Perfect length, I left just a little extra in the bend to compensate for any engine movement. 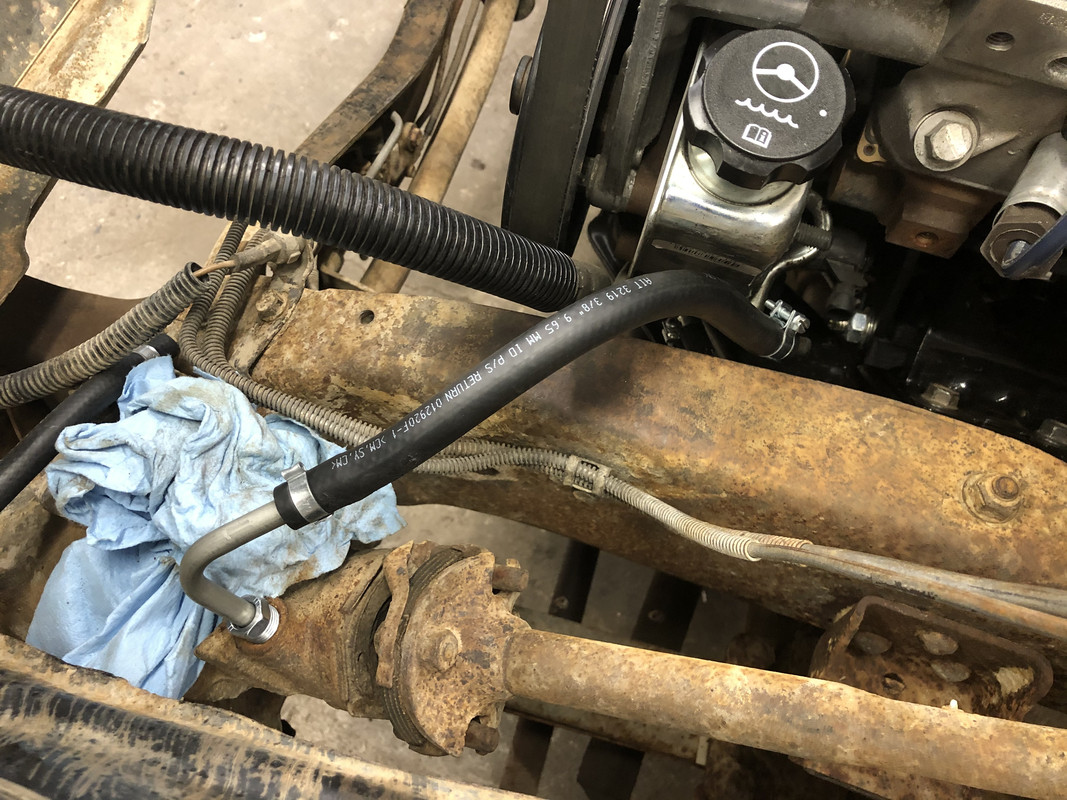
|
|
|
|
|
06-29-2020, 05:58 AM
|
#5 |
|
Registered User
Join Date: Oct 2015
Location: PNW
Posts: 3,527
|
Re: 1978 Chevy K20 longbed with nearly 500,000 miles! LS Swap begins!
You seem to be matter of fact about fixing things along the way that others, including myself, would be frustrated by. This is going to be a very solid rig when you are finished putting it together your way.
|
|
|
|
|
06-29-2020, 10:52 AM
|
#6 |
|
Registered User
Join Date: May 2016
Location: Willow, Alaska
Posts: 846
|
Re: 1978 Chevy K20 longbed with nearly 500,000 miles! LS Swap begins!
Thanks! This is definitely far from my first swap, and I have two more in line once this one is done! I worked as a professional technician for years at some pretty fast paced shops, and it forces you pick up the ability to think up solutions on the spot for the weirdest problems. I also work 4 10’s and get a 3 day weekend, so work evenings are pretty much spent doing HOURS of research on what I want to use and to plan ahead to make sure I have all the parts needed to knock out a good chunk over the weekend. Which still doesn’t work as I spend half the weekend running to the parts stores for THAT little part I missed
|
|
|
|
|
07-05-2020, 10:51 PM
|
#7 |
|
Senior Member
 Join Date: Mar 2013
Location: Ann Arbor, MI
Posts: 1,022
|
Re: 1978 Chevy K20 longbed with nearly 500,000 miles! LS Swap begins!
Nice write up on an LS swap! Great history on the truck and looking forward to seeing it up and running again.
|
|
|
|
|
07-06-2020, 11:22 PM
|
#8 |
|
Registered User
Join Date: May 2016
Location: Willow, Alaska
Posts: 846
|
Re: 1978 Chevy K20 longbed with nearly 500,000 miles! LS Swap begins!
Thank you!
Nothing too exciting happened this weekend, I got busy with 4th of July plans and the holiday also pushed back some parts I was expecting in. I did get the fuel tanks and filler necks pulled, and the tank brackets sent off to powder coat though! 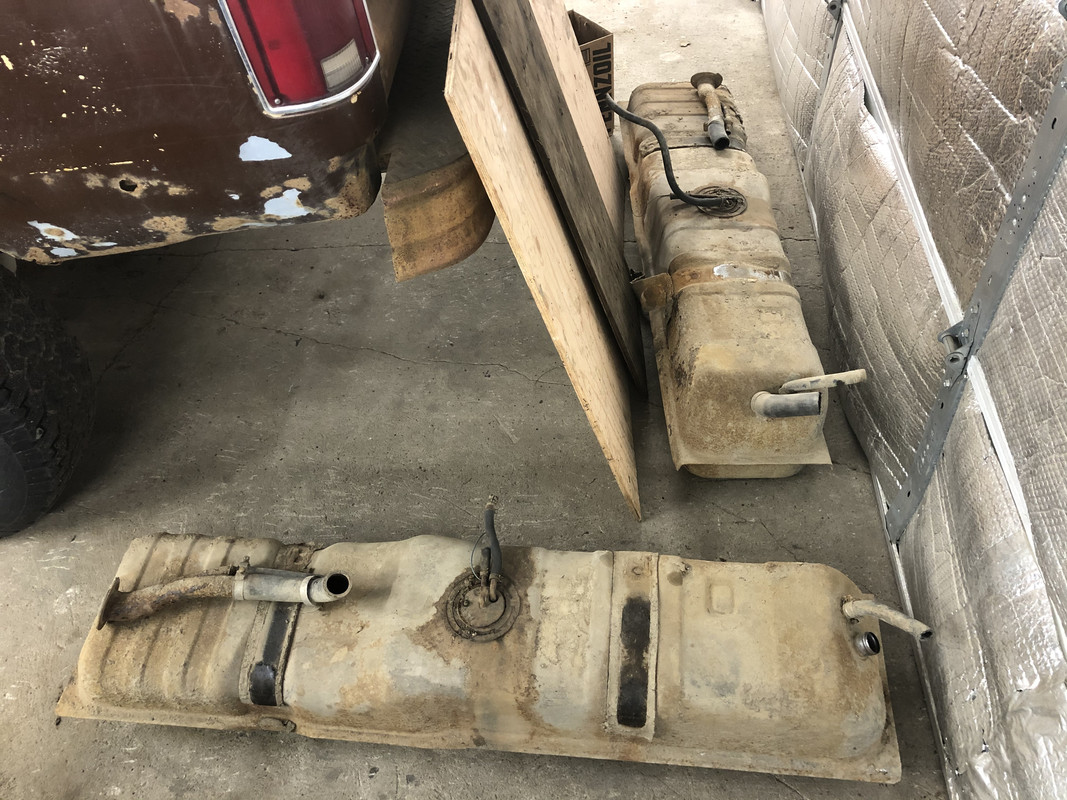
|
|
|
|
|
07-13-2020, 10:44 PM
|
#9 |
|
Registered User
Join Date: May 2016
Location: Willow, Alaska
Posts: 846
|
Re: 1978 Chevy K20 longbed with nearly 500,000 miles! LS Swap begins!
Being single and having 3 day weekends every week certainly helps!
I have a pretty good system going, work on it all 3 days and get what I can done, and figure out what I need for the following weekend, and order it before I leave back for work. That way, when the next weekend comes, I’m loaded back up with parts and things to do!
|
|
|
|
|
07-14-2020, 10:58 PM
|
#10 |
|
Registered User
Join Date: Feb 2012
Location: CA
Posts: 846
|
Re: 1978 Chevy K20 longbed with nearly 500,000 miles! LS Swap begins!
The truck is looking great. Even though you won’t see the dash once it is buttoned up, there is a great feeling knowing it is clean and organized under there. Nice wiring job also!
__________________
"Dixie" - 1988 Chevrolet V30 CC DRW "3+3" | 7.4L 454 (L19) | TH400 | 4" lift | 35"s "Lucille" - 1949 Chevrolet 3100 (on hold) |
|
|
|
|
07-19-2020, 07:56 PM
|
#11 |
|
Registered User
Join Date: May 2016
Location: Willow, Alaska
Posts: 846
|
Re: 1978 Chevy K20 longbed with nearly 500,000 miles! LS Swap begins!
Thank you, I agree. It's nice knowing everything is in good shape under there, even if it's not seen.
So, EXCELLENT start to the weekend! The Holley Terminator X arrived! I'm stoked to try this out, the reviews have been great so far. It's essentially supposed to be a replacement for the junkyard ECU/swap harnesses with much more tuning capability. I also got two sensors, one for oil pressure and one to read fuel pressure, as well as a quick connect to 3/8" hose adapter. 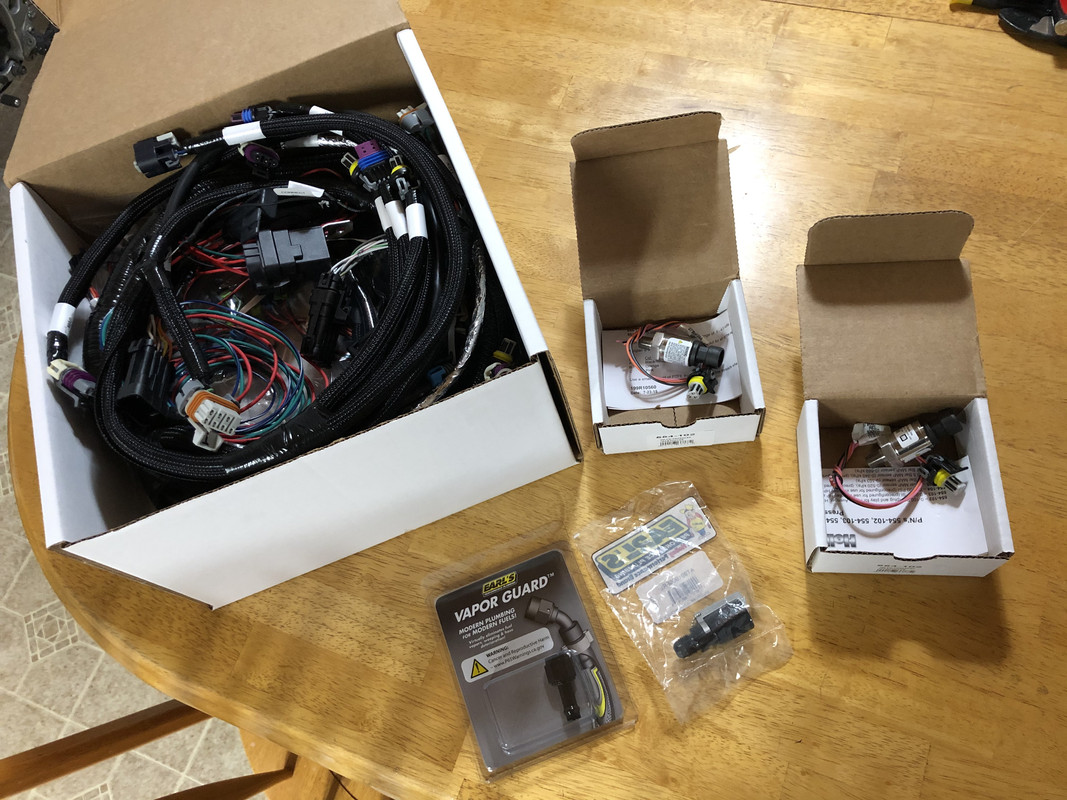 My lower battery tray support showed up. The last piece to move the battery over to the driver's side. 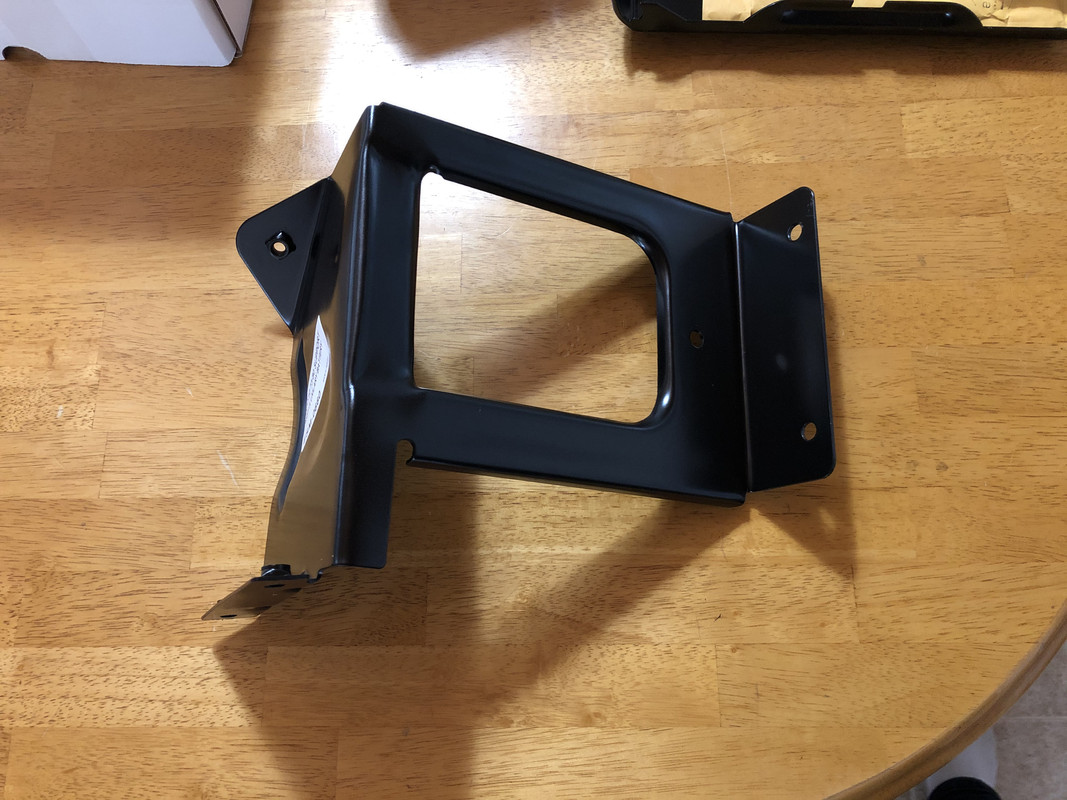 The shift boot trim ring also came in for the transmission shifter. 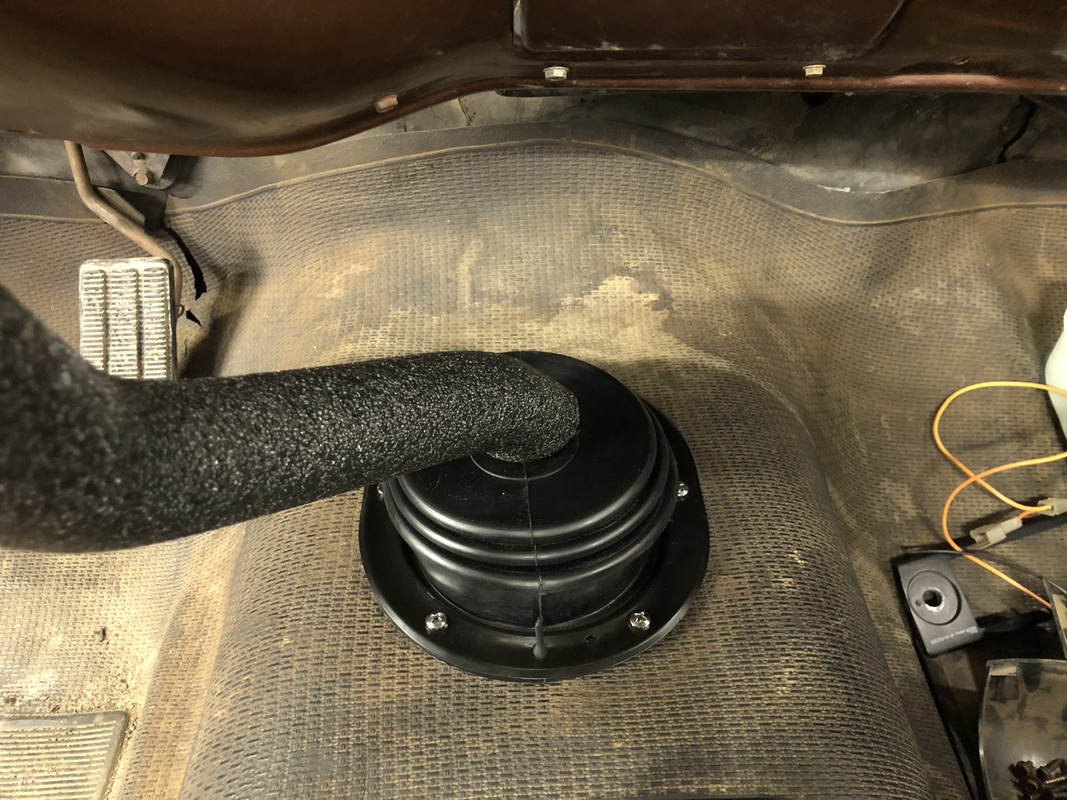 The CPP steering box flare-to-oring adapters arrived too. 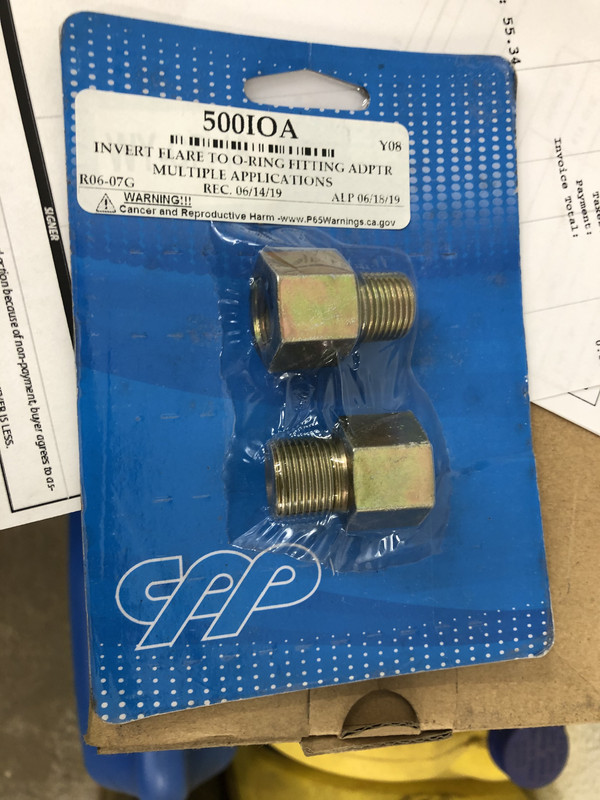 I did some junkyard scouting and scored this hydroboost manual pedal! I didn't really plan on this conversion, but for $10...that's hard to say no to! 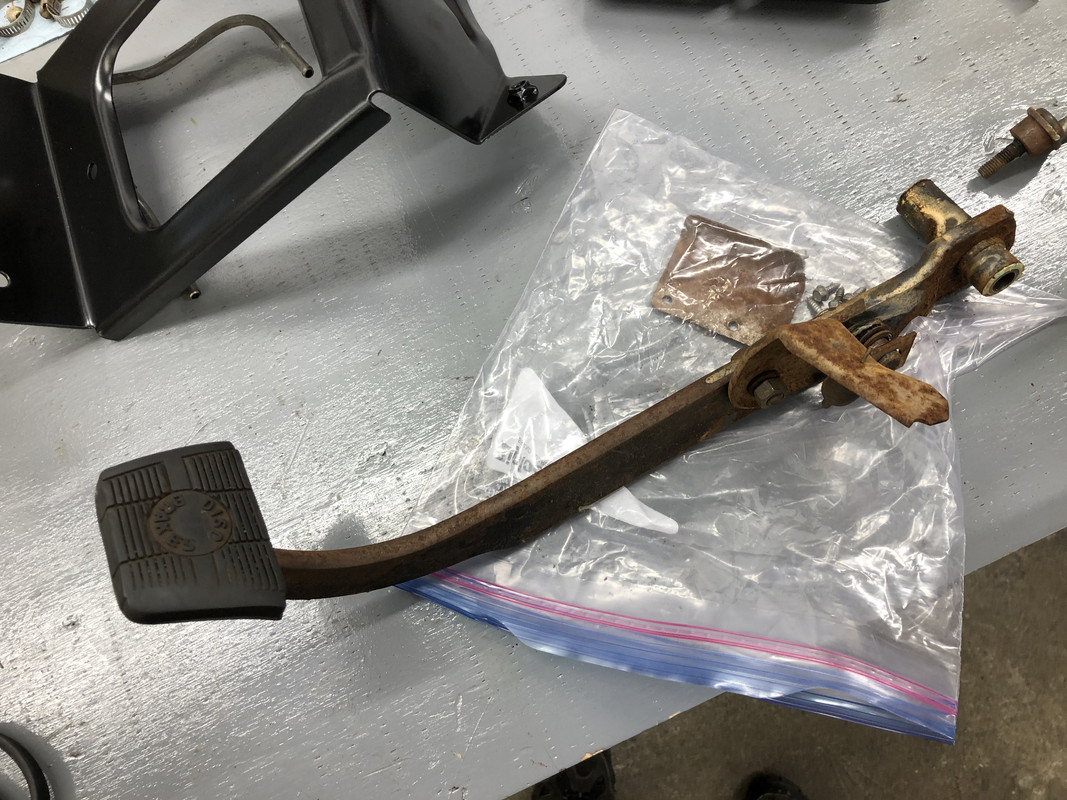 I also came across an uncut set of battery cables for a 99-02 Chevy, these should work perfectly with the driver's side battery!  Back to the truck, I decided the harness still wasn't complete, so I tied the grounds together and added a single termination point for the frame, and also ran it to the front to connect to a forward ground point. Shouldn't have any ground issues with this setup! 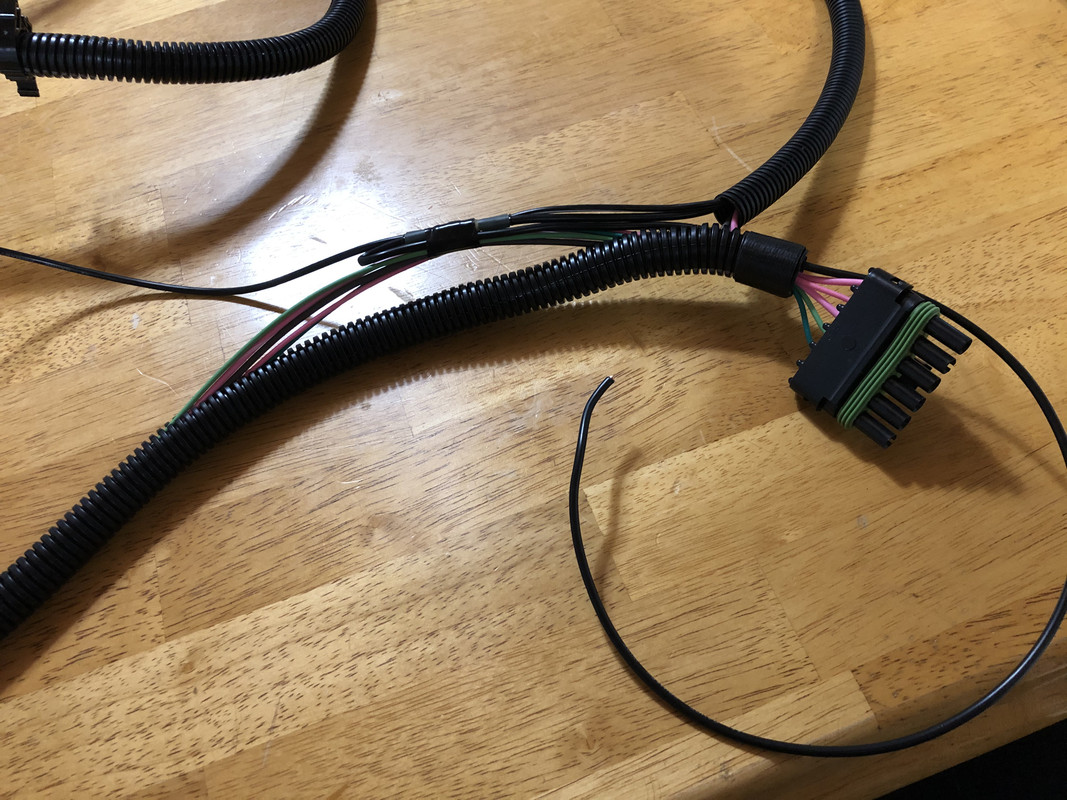 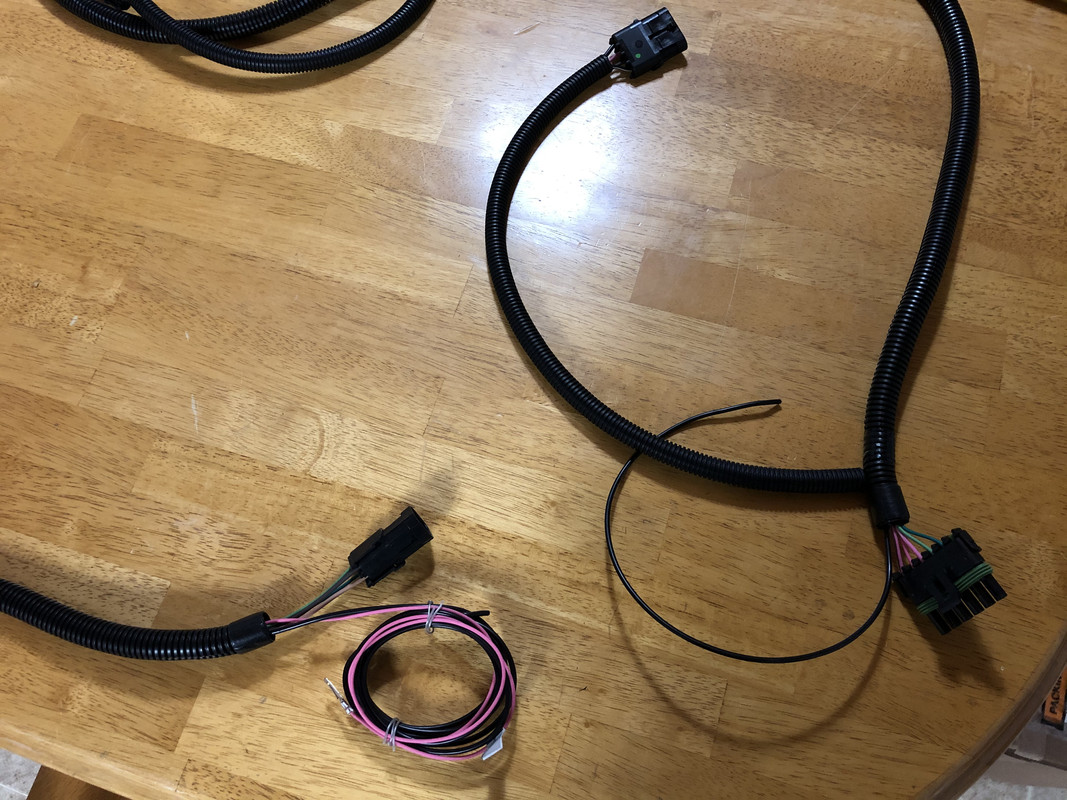 Next up, I started on transferring the hole for the clutch master cylinder. I took a thin piece of cardboard, scissors, and pen to the junkyard and traced out the area out using the harness hole as a guide. 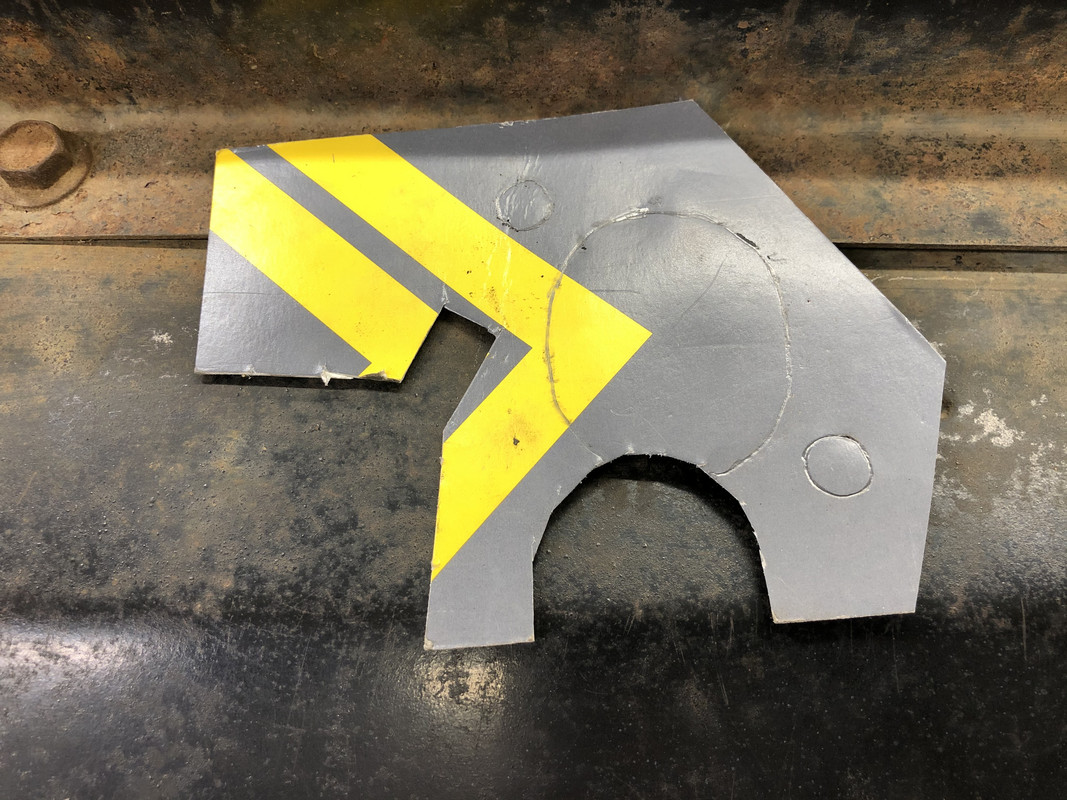 Cut out.  Not too bad of a fit! 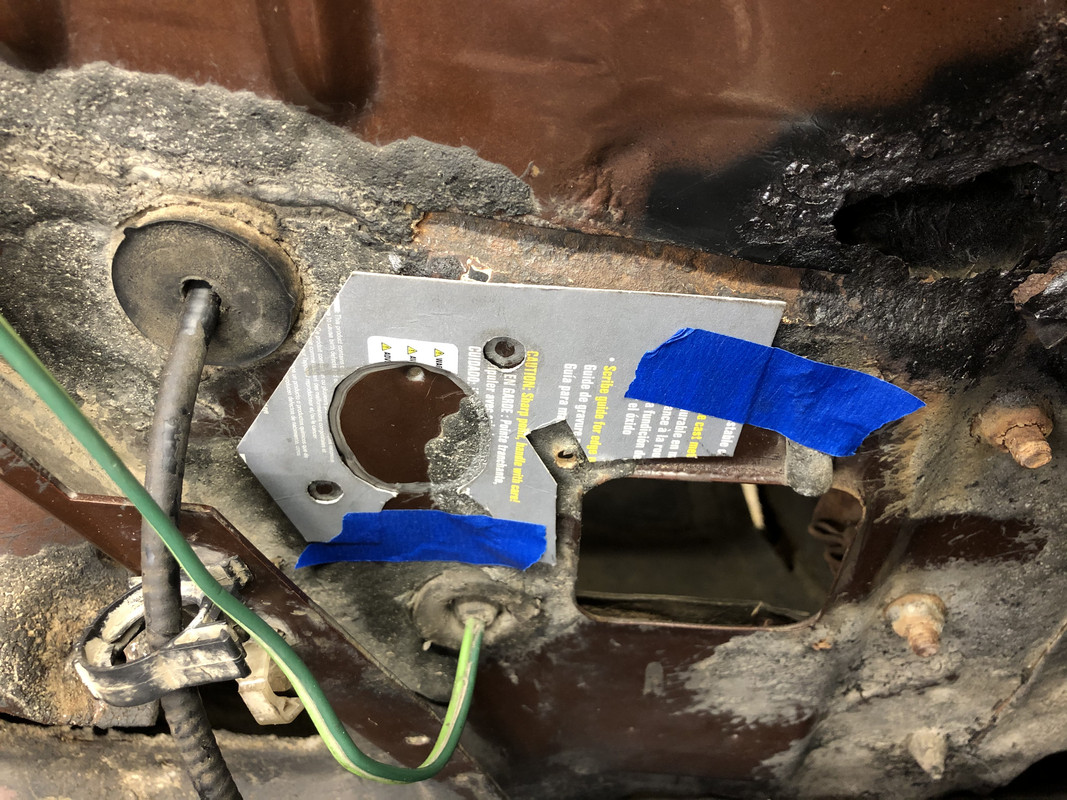 Outline traced out, and verified against the online template measurements. I had to adjust my template slightly to the right, but otherwise it was pretty spot on! 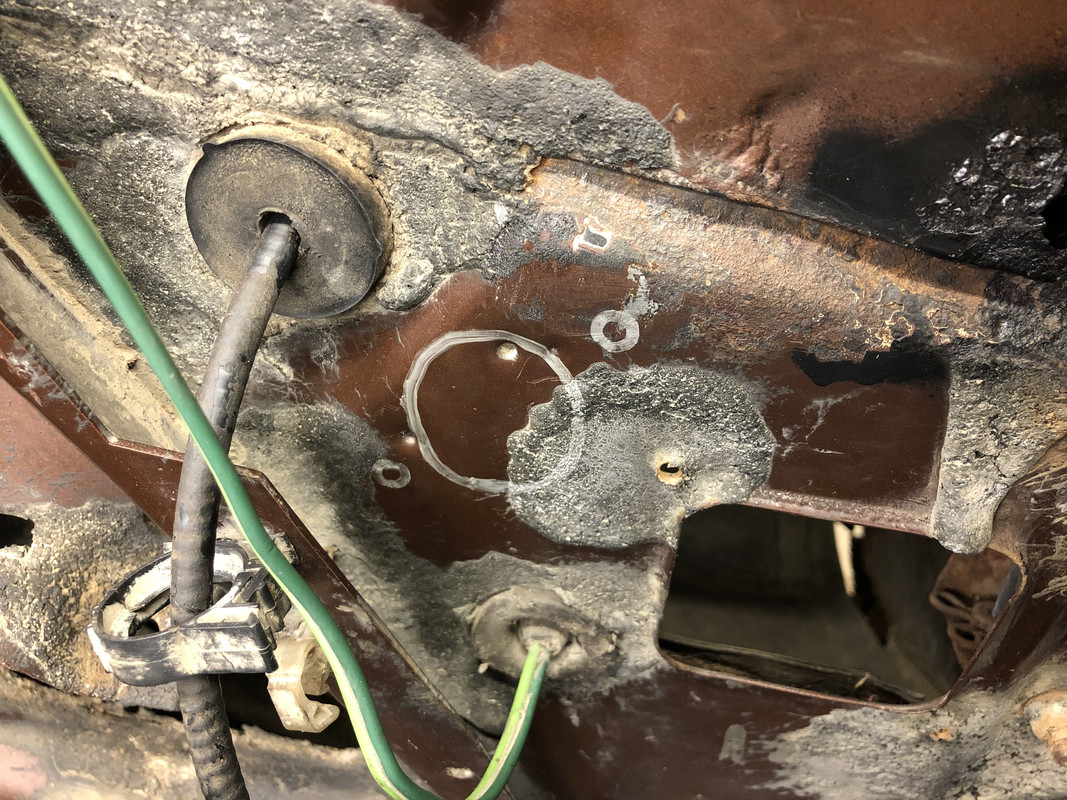 Cut out the holes, I believe this was 1.25" that needed to be ovalled.  The clutch pedal itself had a deep groove worn into the pin where the clutch slave rode. 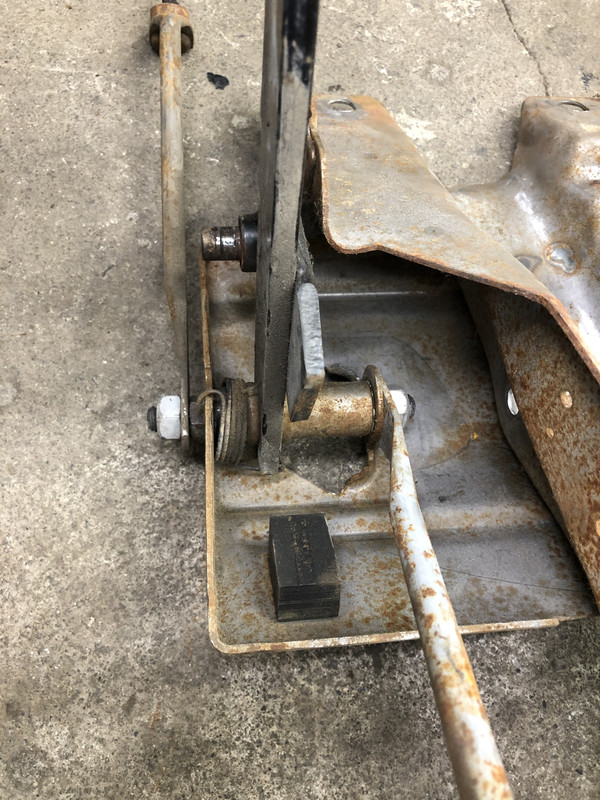 I removed the pedal and built some weld up along the worn groove. The weld is harder than the material, and should prevent the spot from wearing back out as quickly. 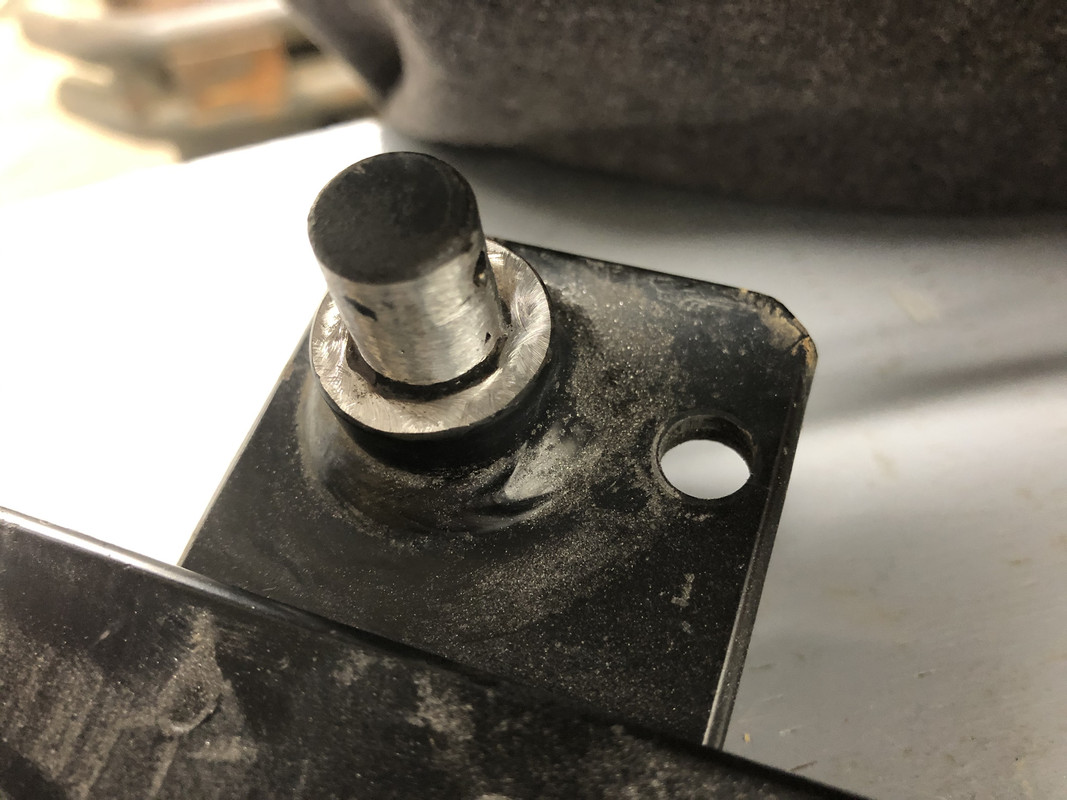 Perfect fit!  Oh yeah, I picked up a new clutch master cylinder to test fit this! 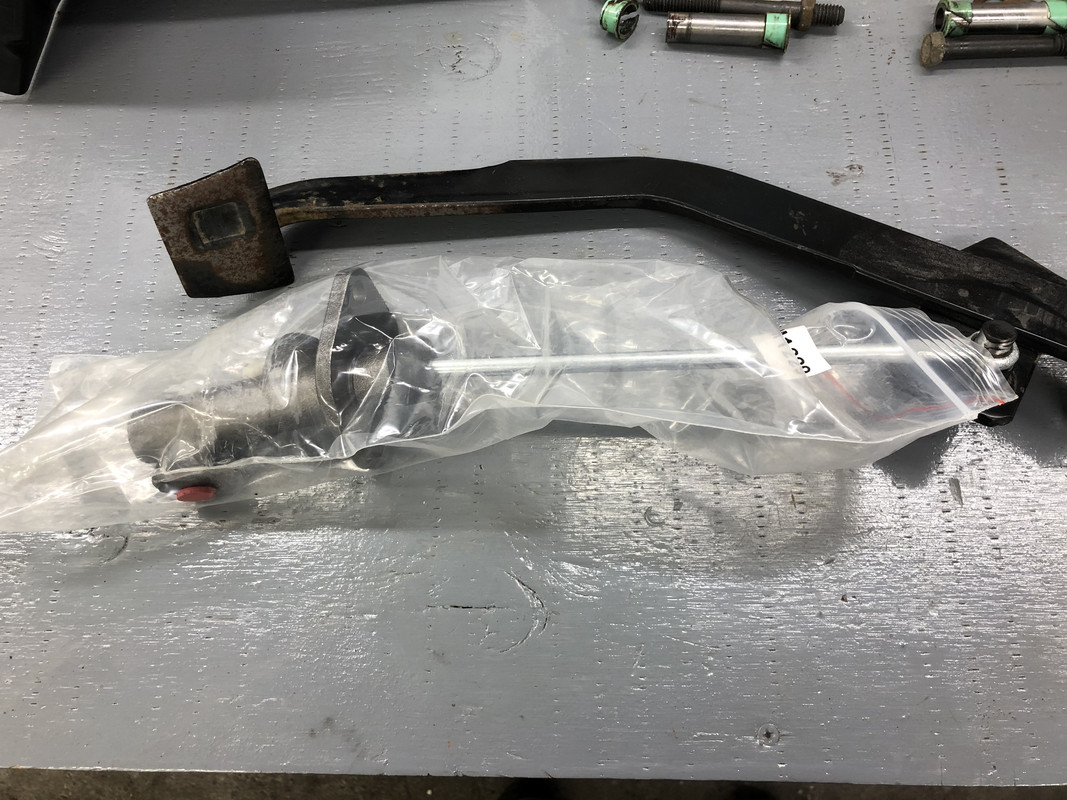 I started painting the pedal box, pedals, and all related parts. 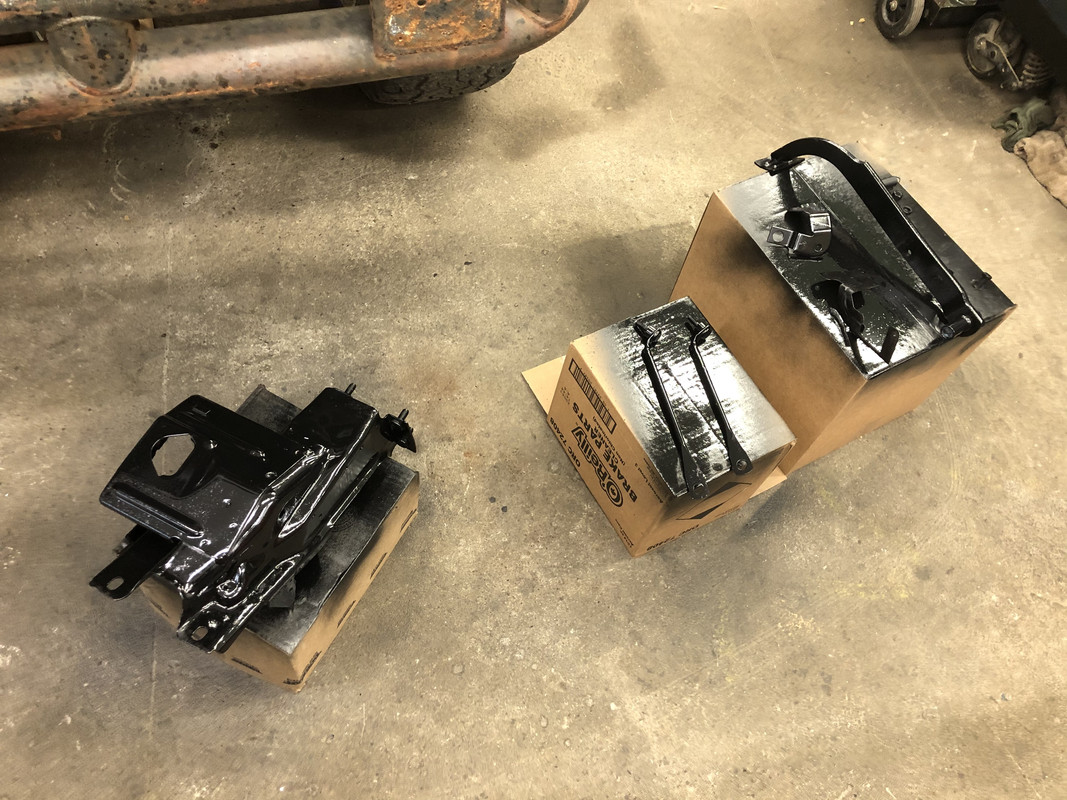 Getting ready to install the new bushings and pedal pads. 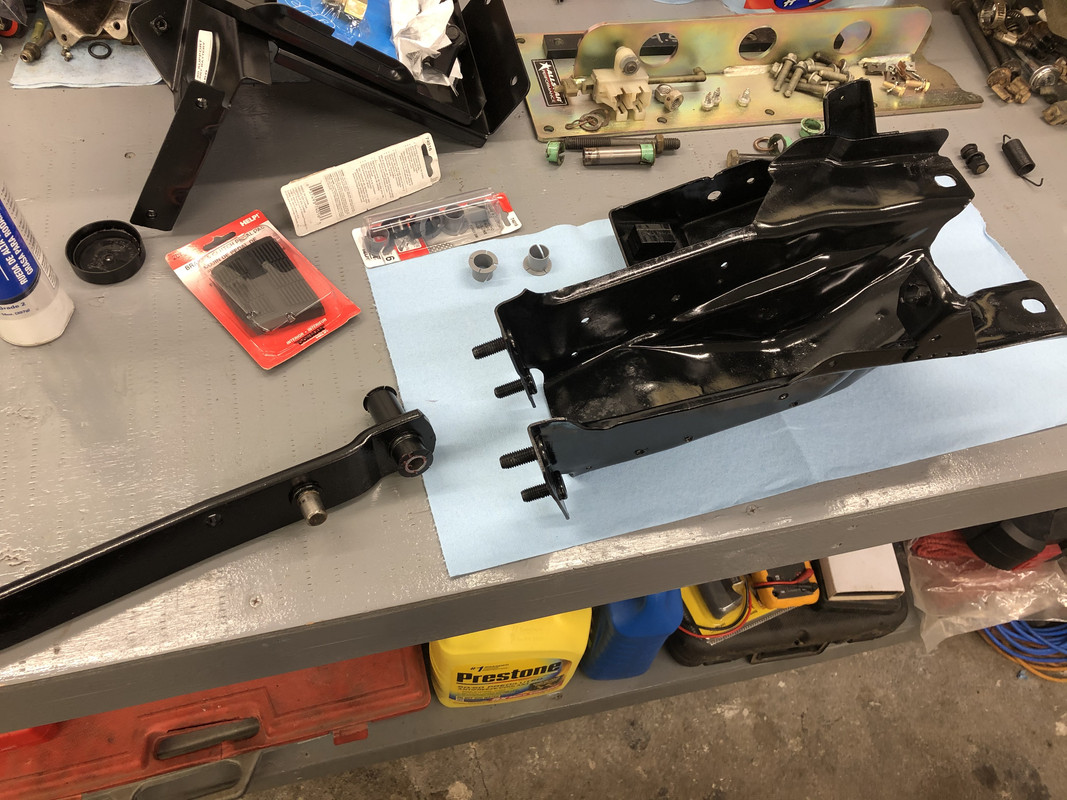 Fresh bushings and grease....mmmm! 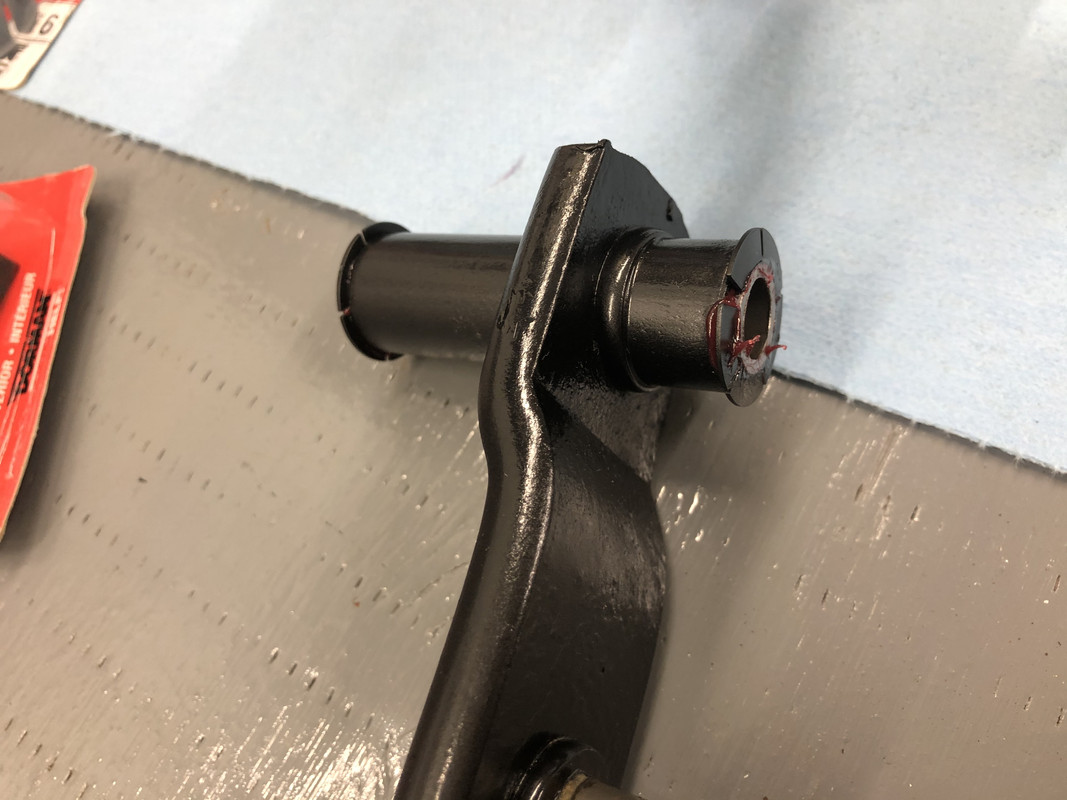 Pedal box reassembled! 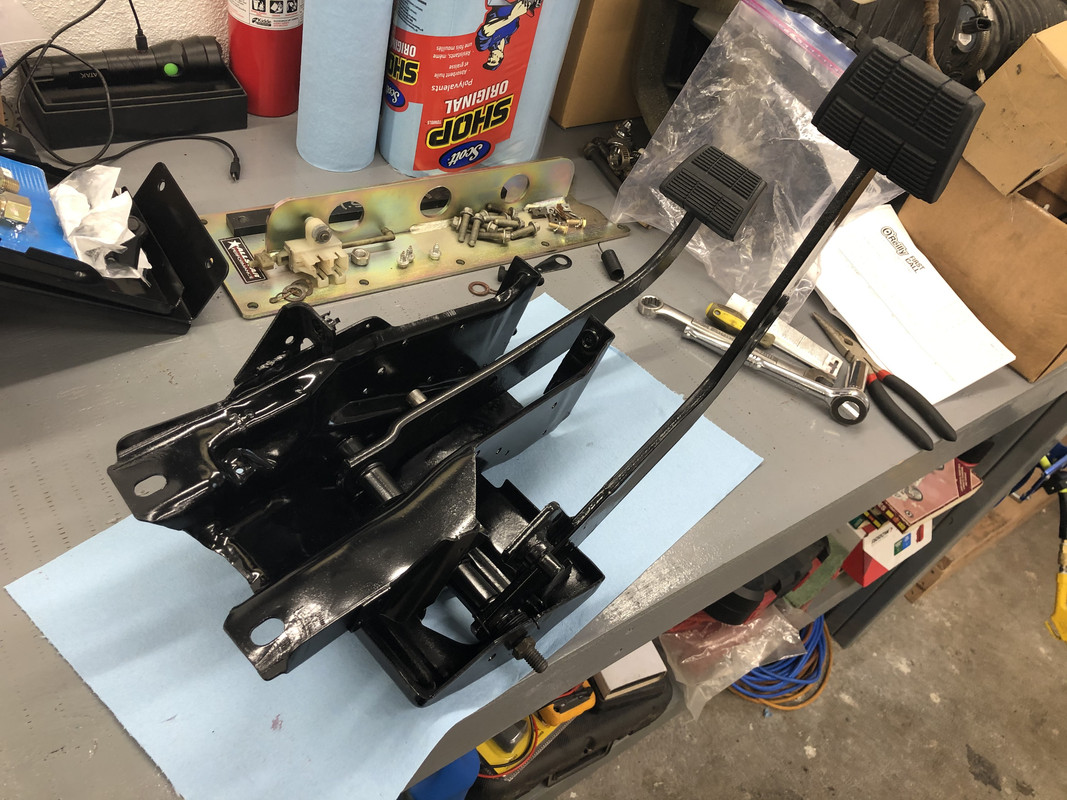 I removed the gas pedal for the same treatment, and drilled and tapped the housing as a place to mount the fuel pump relay block up and out of the way. 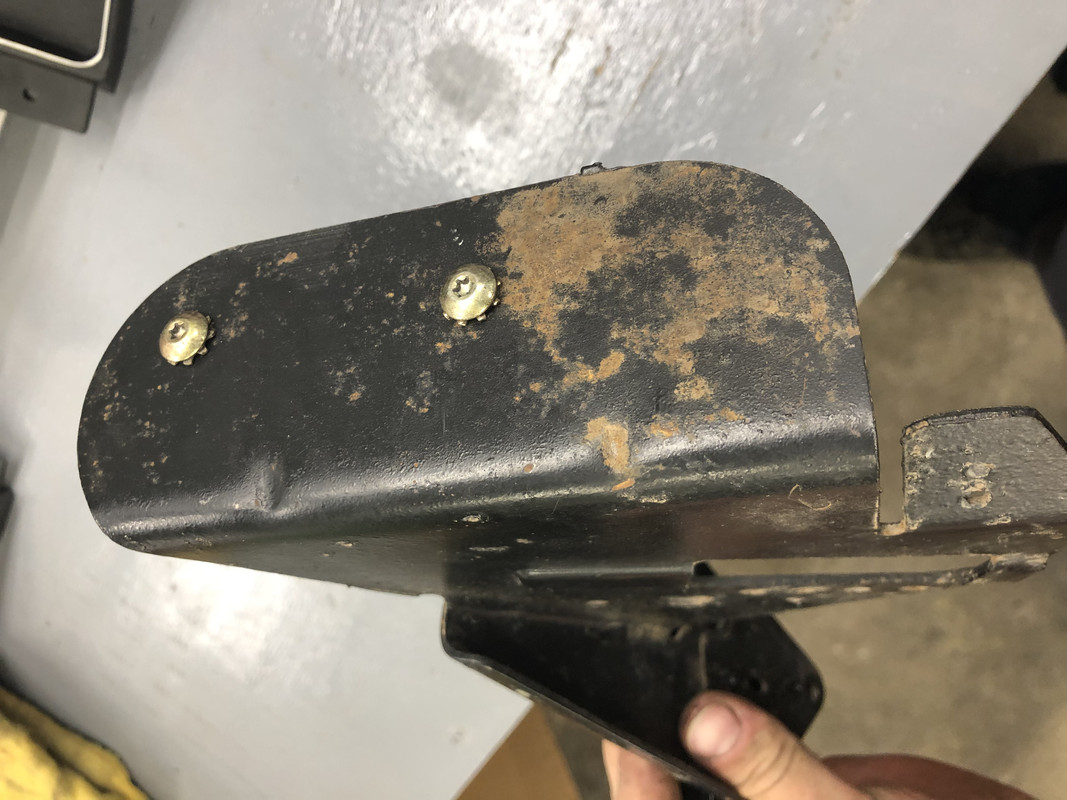
|
|
|
|
|
07-19-2020, 08:34 PM
|
#12 |
|
Registered User
Join Date: May 2016
Location: Willow, Alaska
Posts: 846
|
Re: 1978 Chevy K20 longbed with nearly 500,000 miles! LS Swap begins!
Gas pedal cleaned and painted. This was a chore to scrape and wipe out every single little groove on this thing!
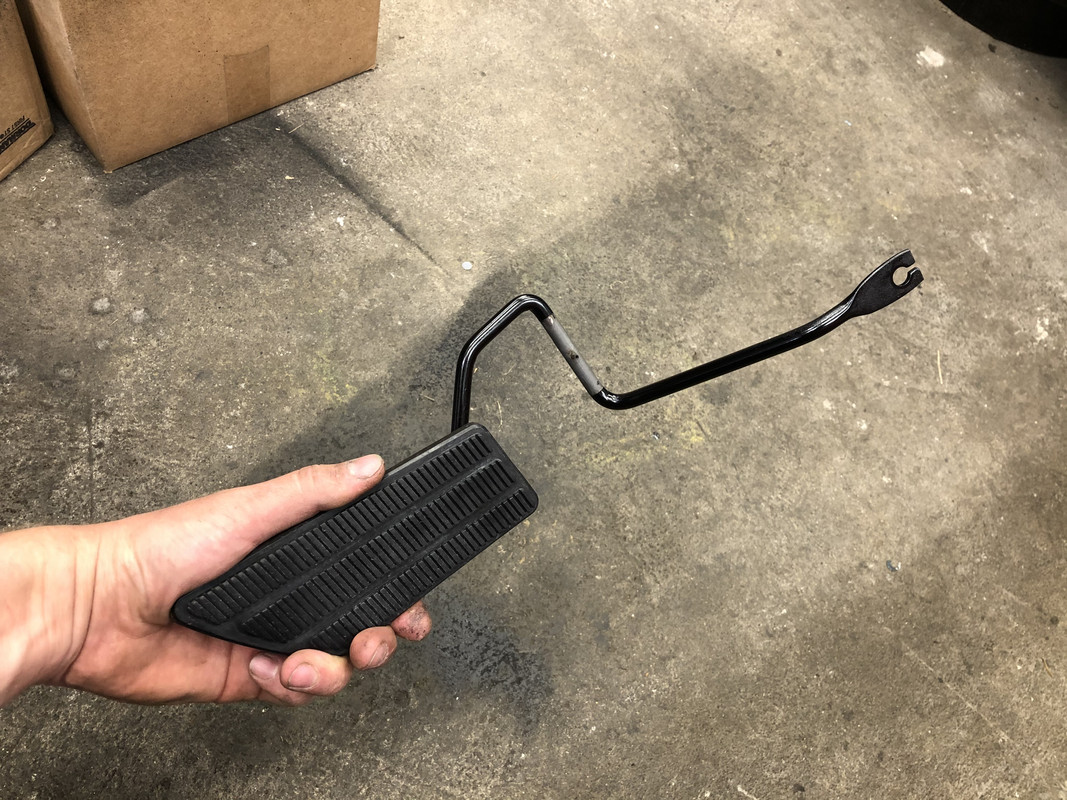 All pedals finally mounted in place! 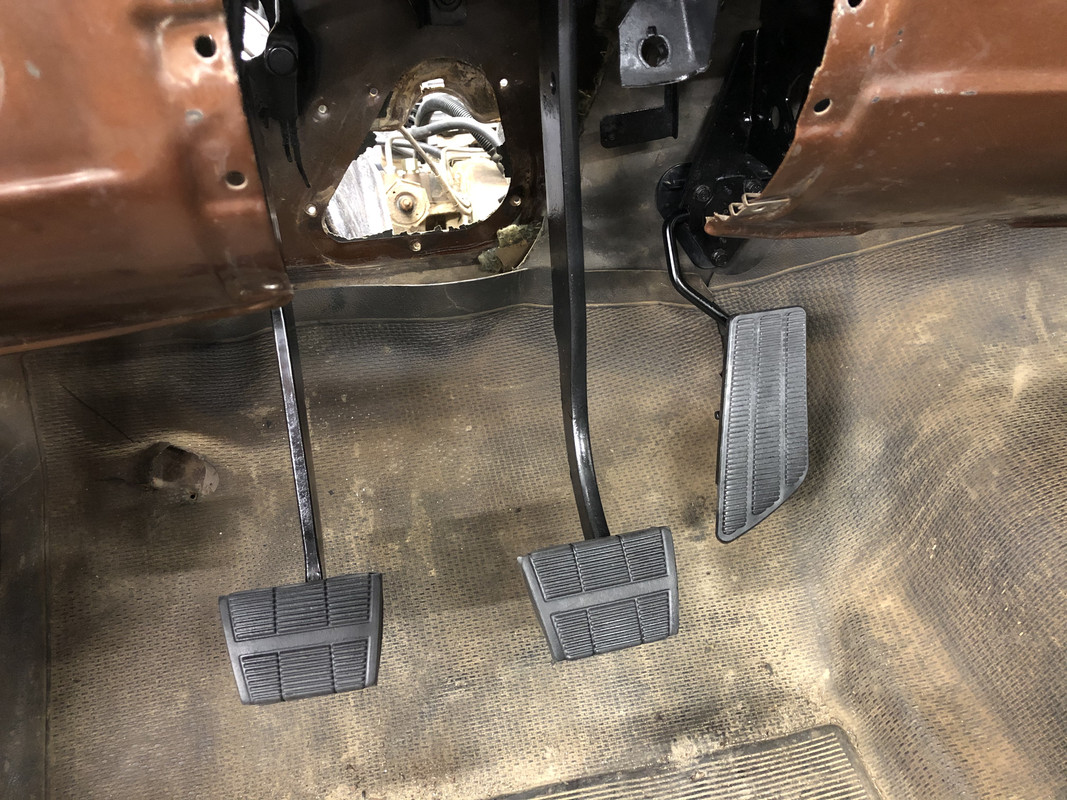 Started mounting the fuel tank relays and harness. 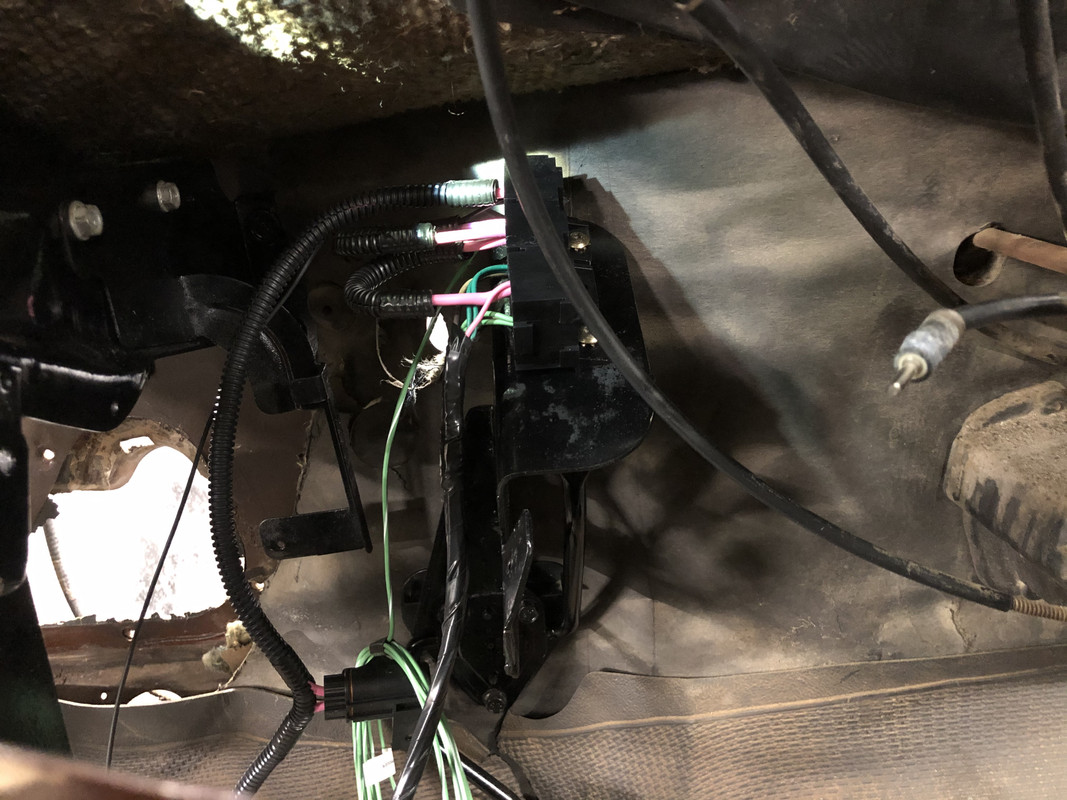 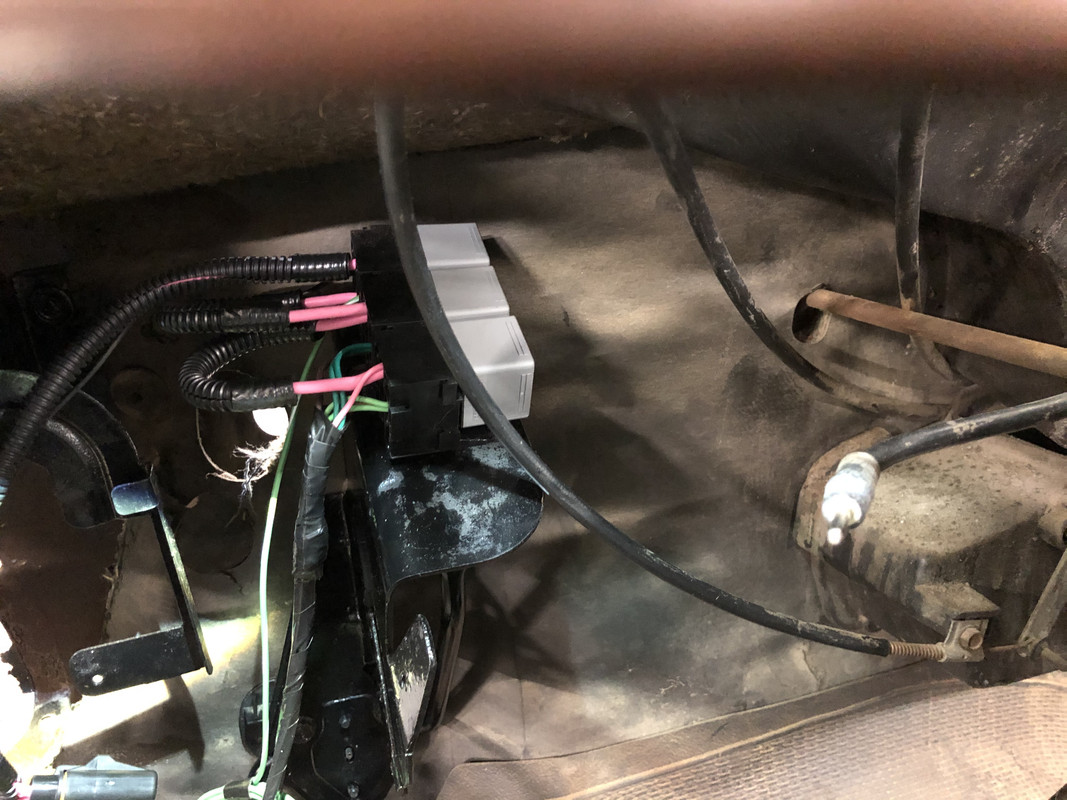 I decided that since I'm going to go with a hydroboost setup, I should add a cooler to the system, since my 2002 1500HD utilizes one. I happened to have a spare one and modified it a bit. I cut off the lines and flared them for 3/8" line. 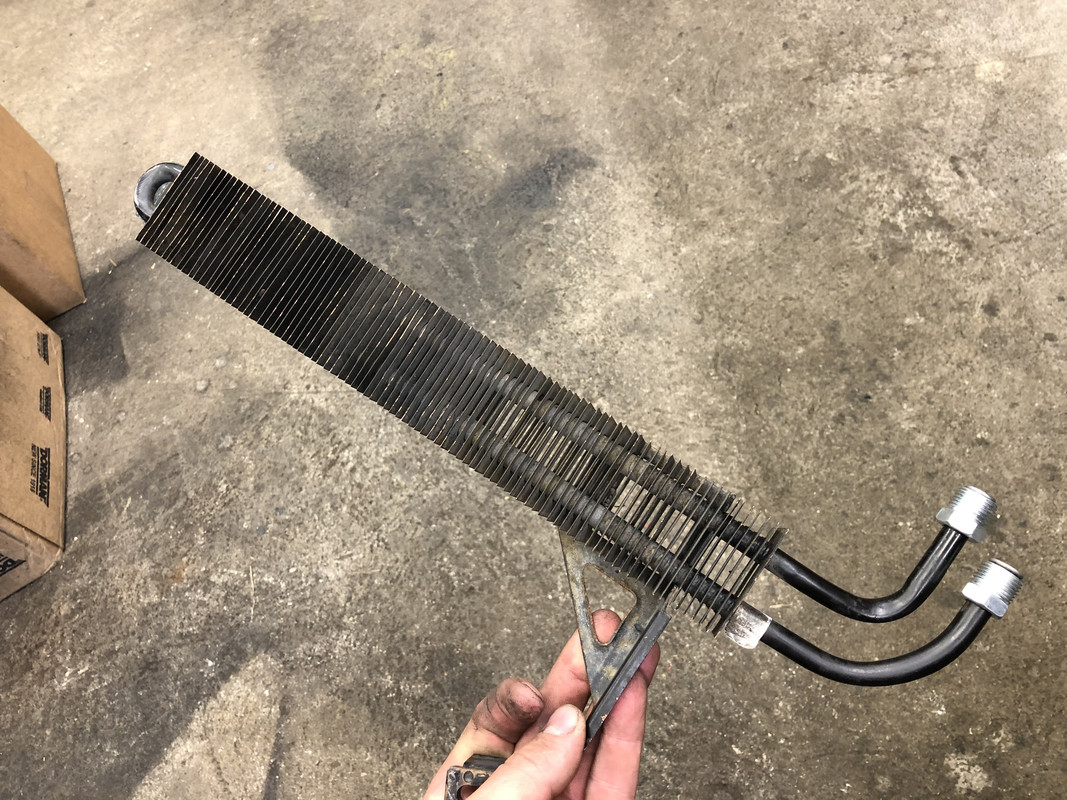 Rear standoff: 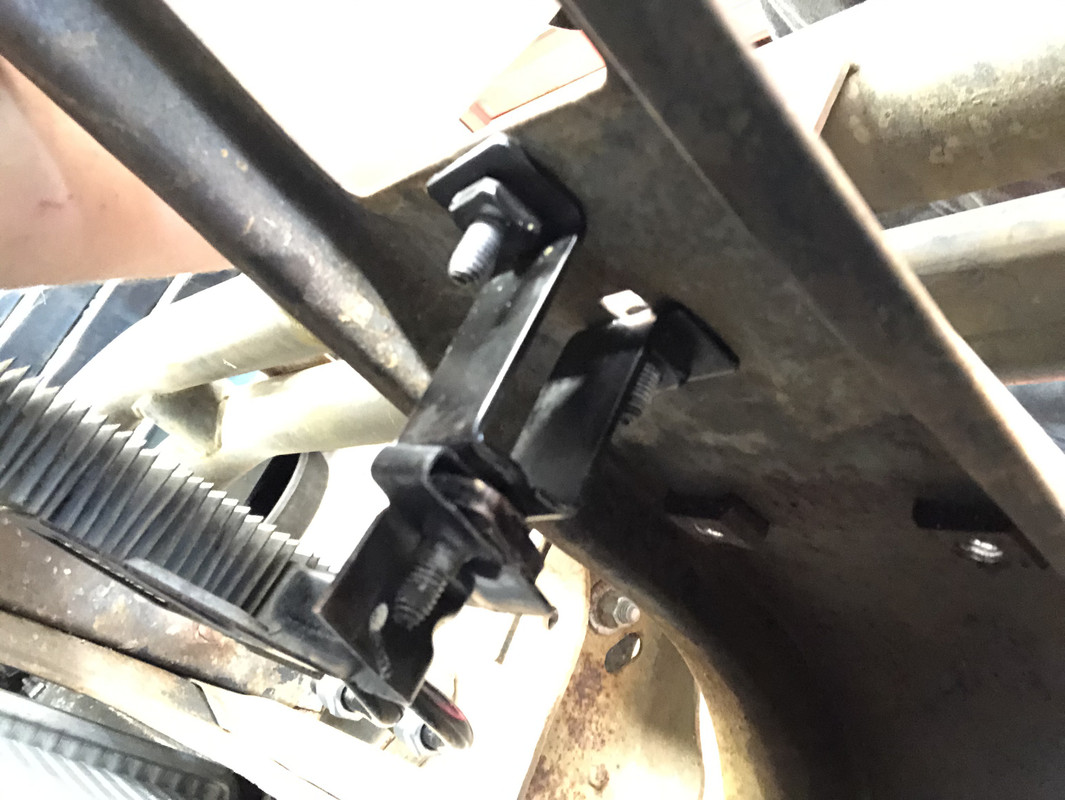 Mounted in all it's glory! 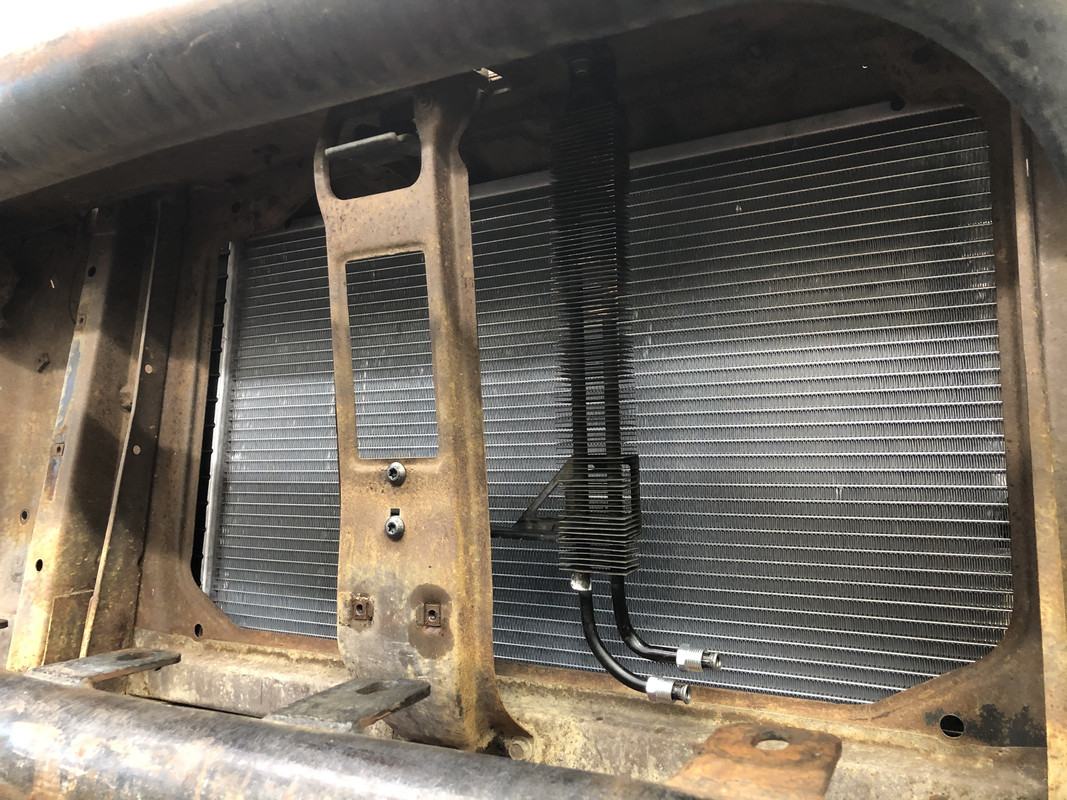 Next up, the fuel system. I capped off the return ports on the Pollak valve as they won't be used with the Holley returnless system. 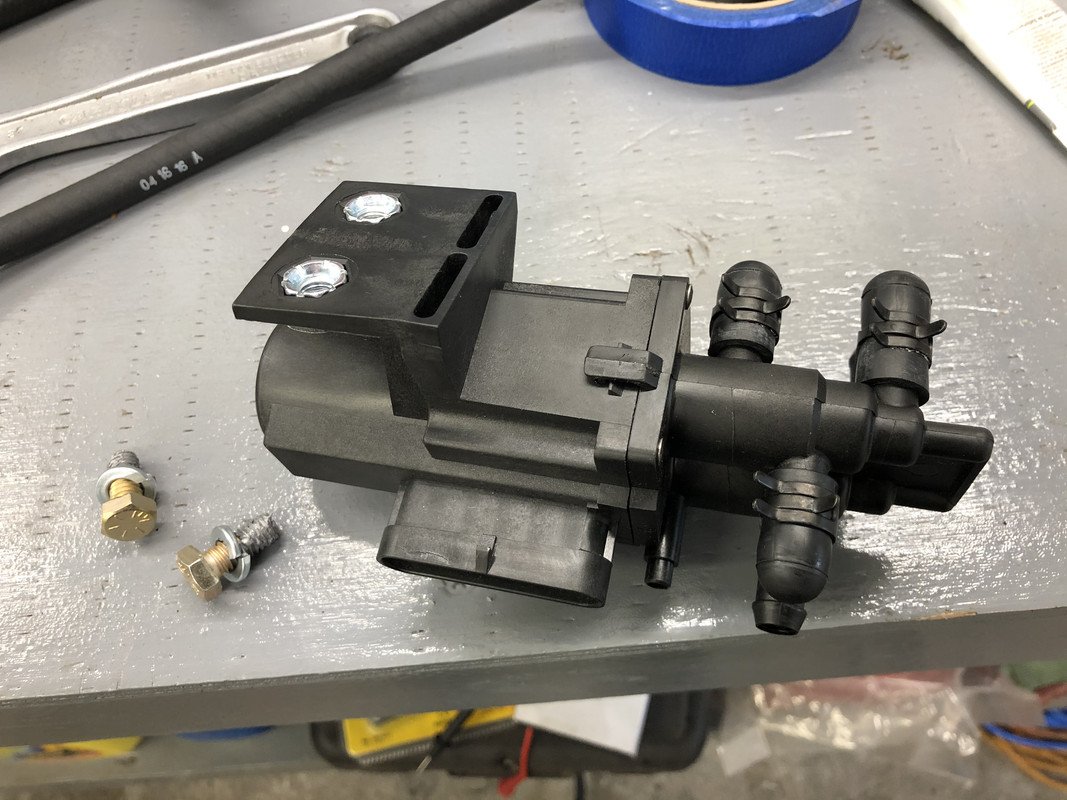 The main harness ran from the firewall: 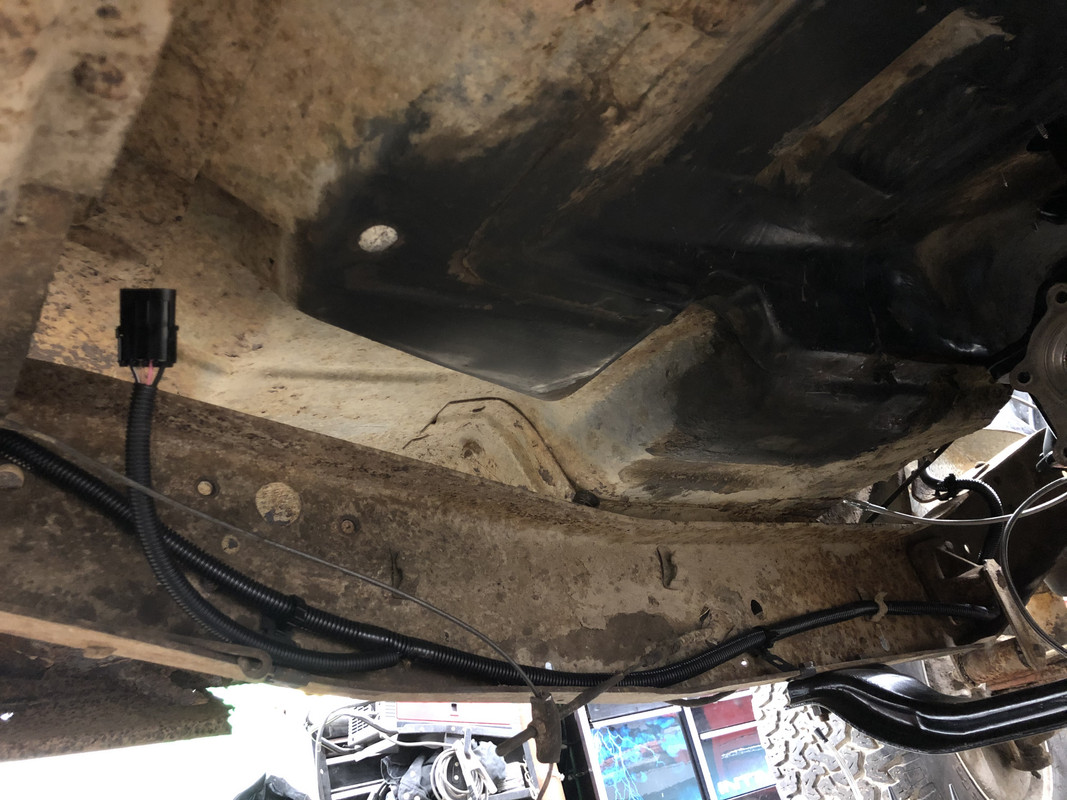 And around to the passenger side. Tank switching valve also mounted! 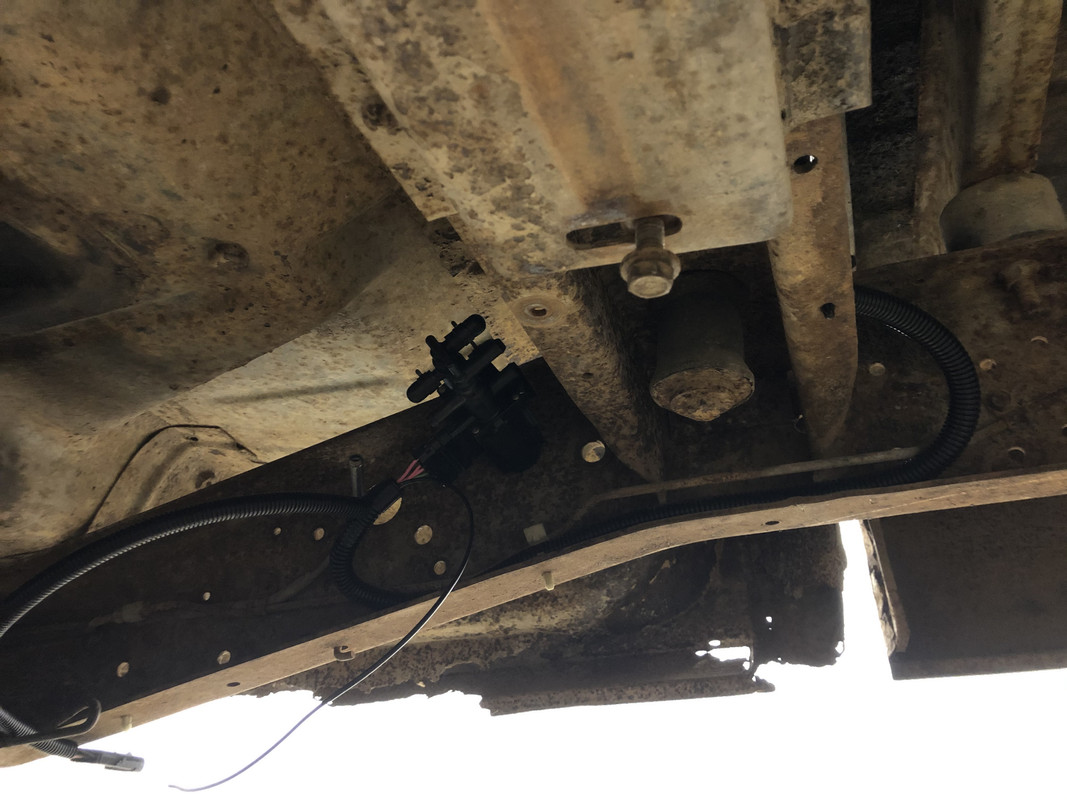 Inner fuel lines and wires ran on the passenger side: 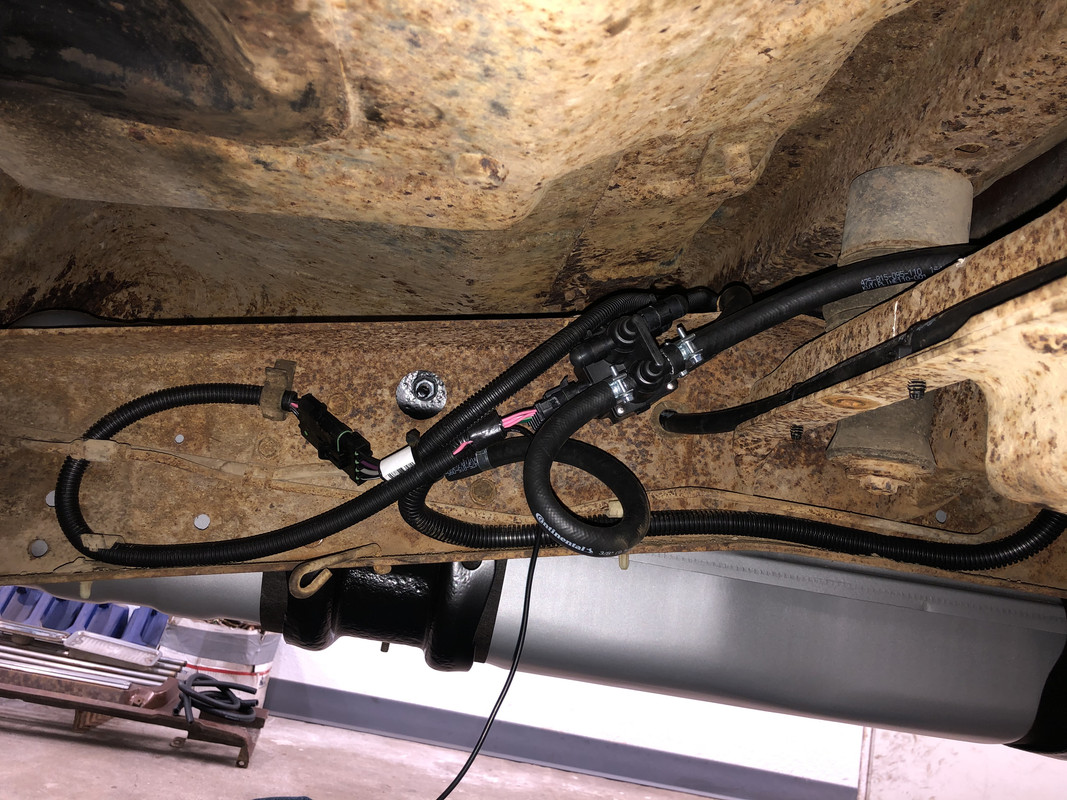 Passenger side tank completely mounted! 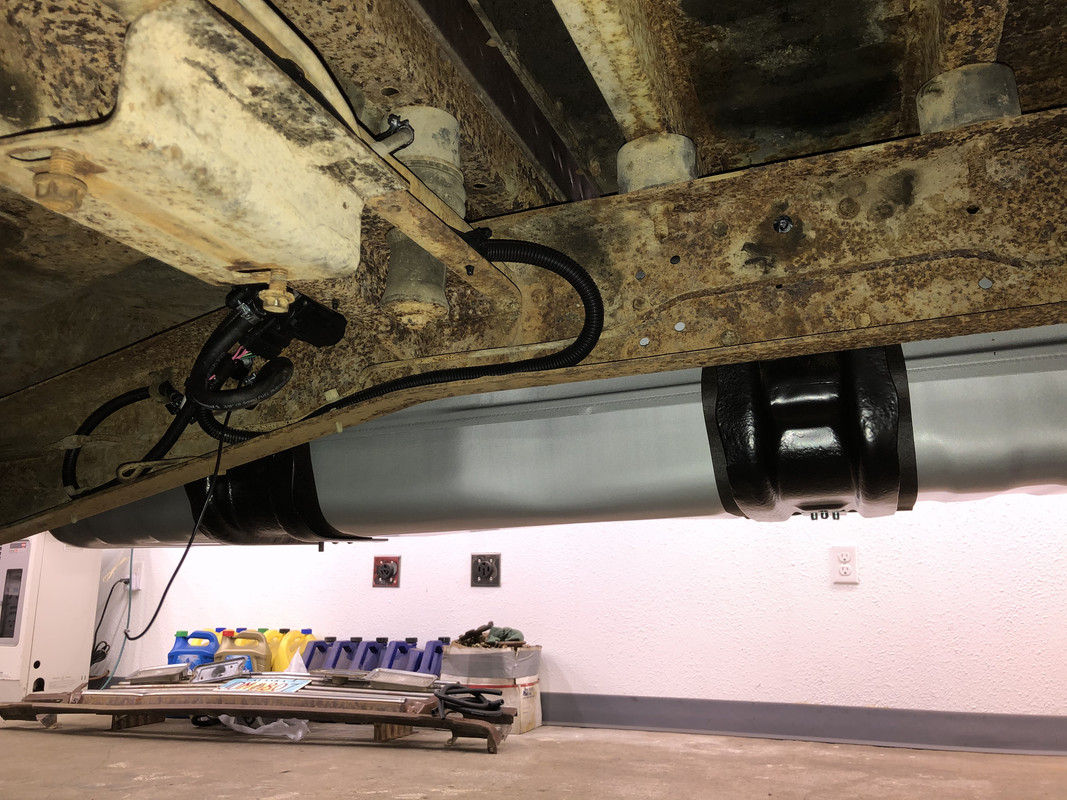 I reused the grommet that originally would house the sending unit wires on the stock tanks for running the vent lines through the frame and tying them together. I will have to pick up more line, but it will run towards the back and terminate at about the same height as the rear axle vent line. 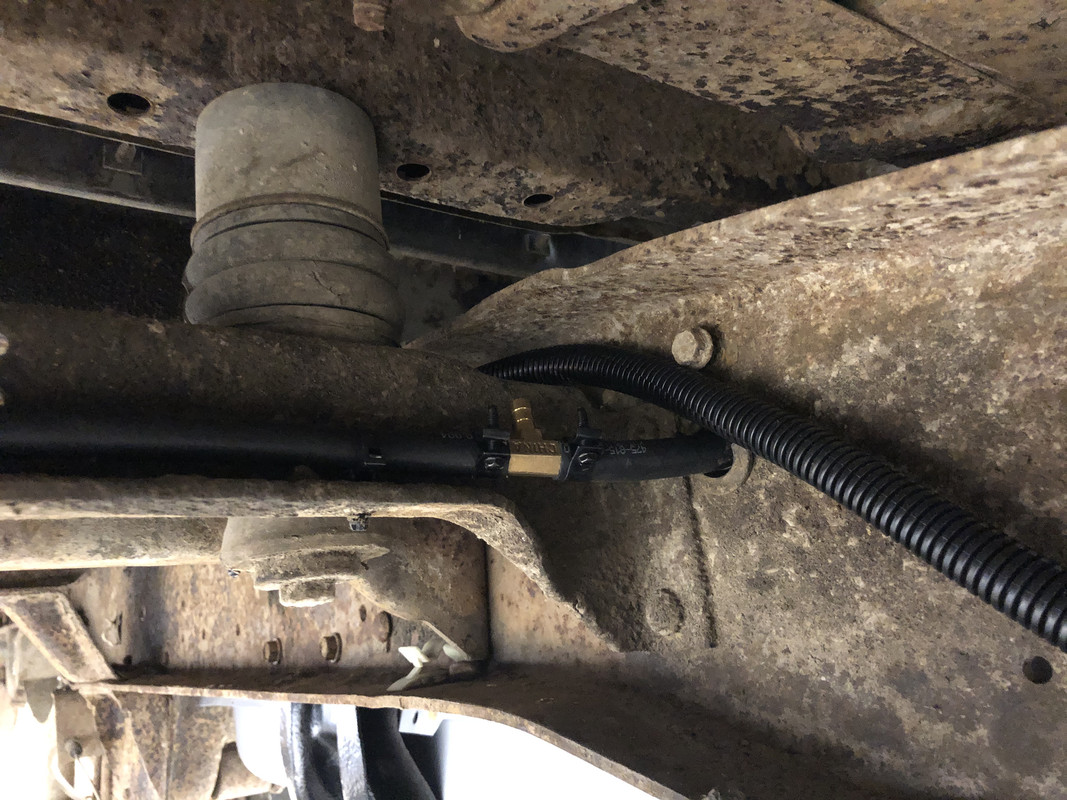 Driver's side fuel tank is mounted and wiring ran:  Both tanks fully installed, wired, and plumbed! I still need to pick up a new terminal for the ground wire near the switching valve. 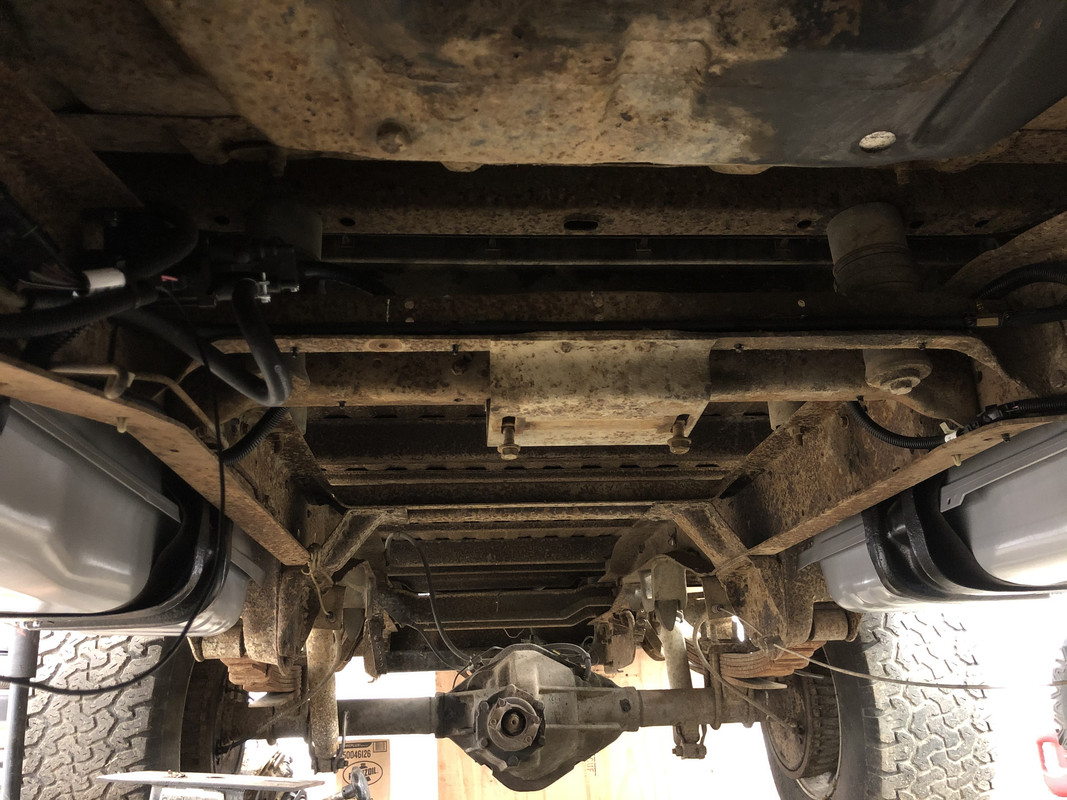 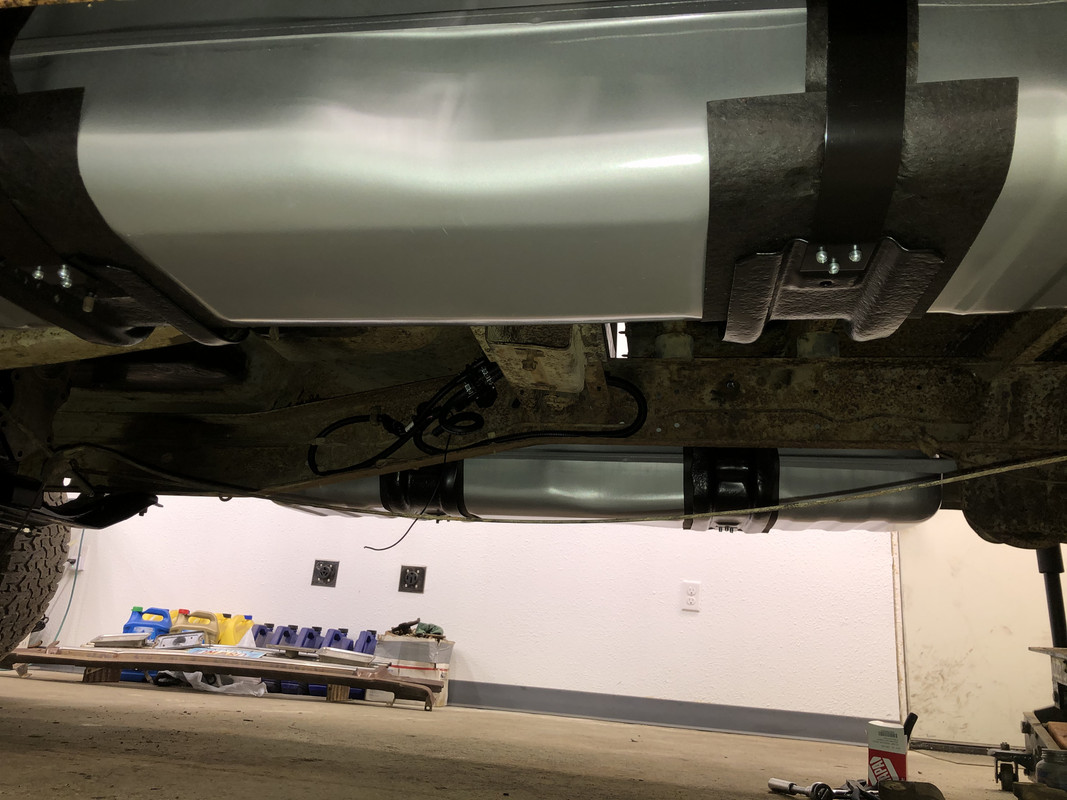 Shiny new filler necks! This definitely won't match the rest of the truck 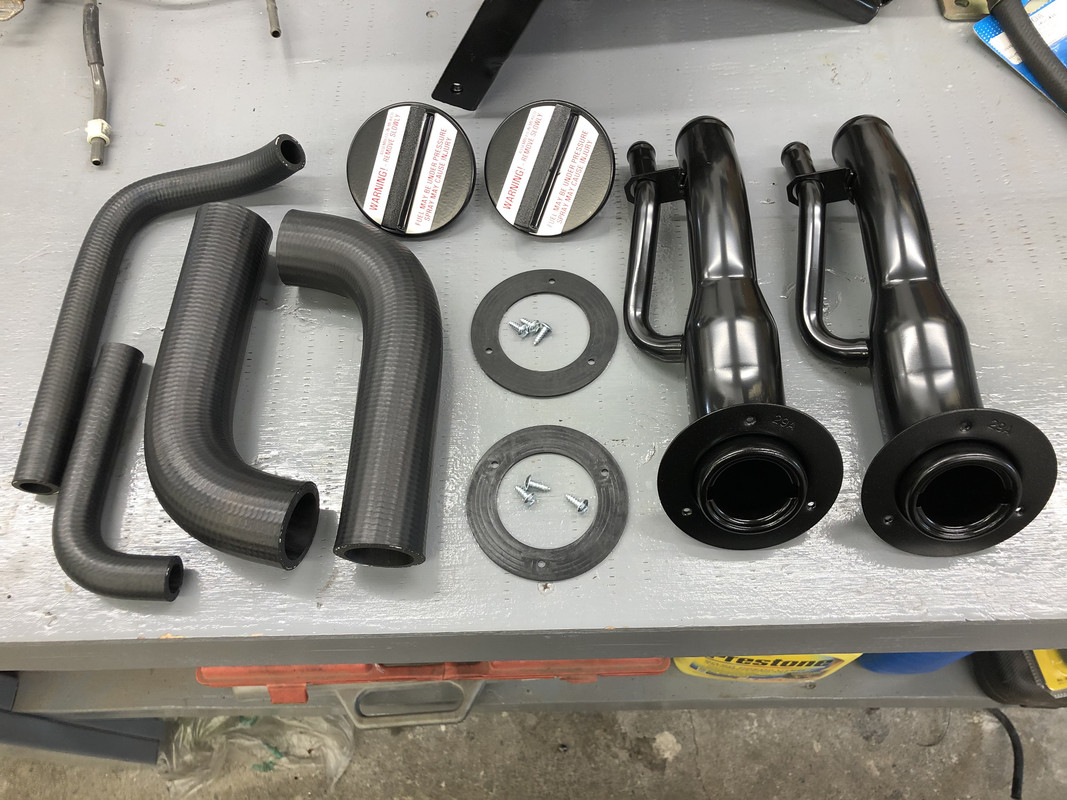 Passenger side:  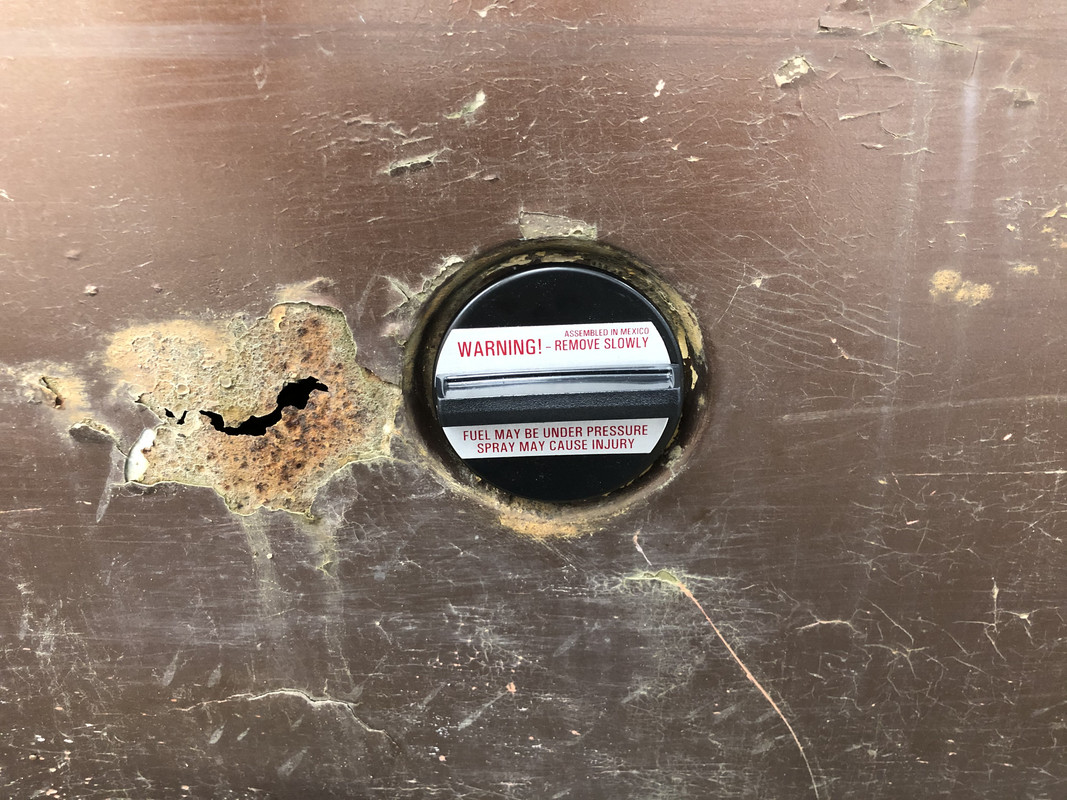 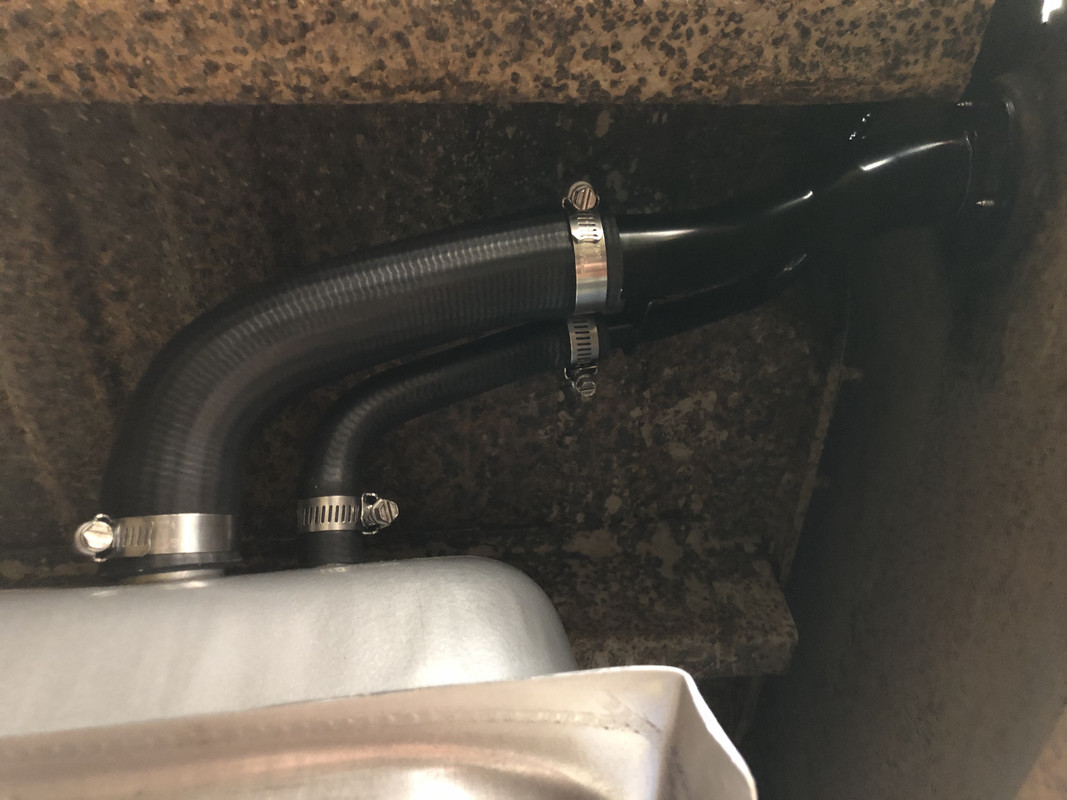 Driver side: 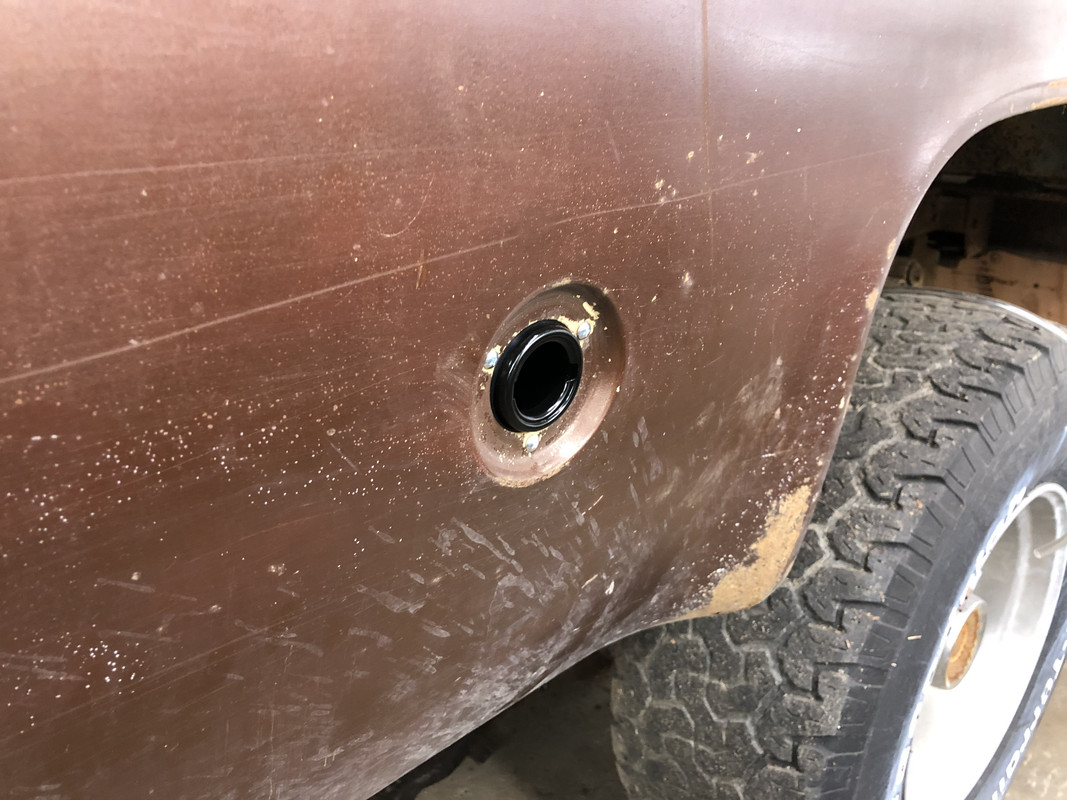 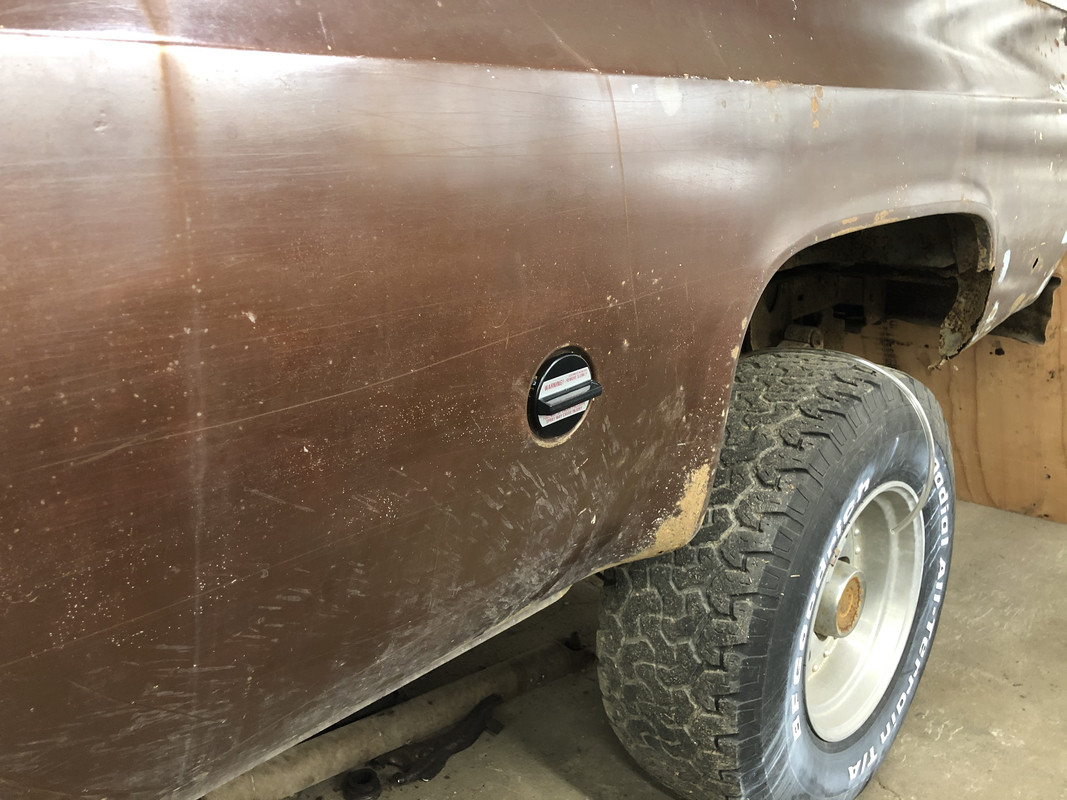 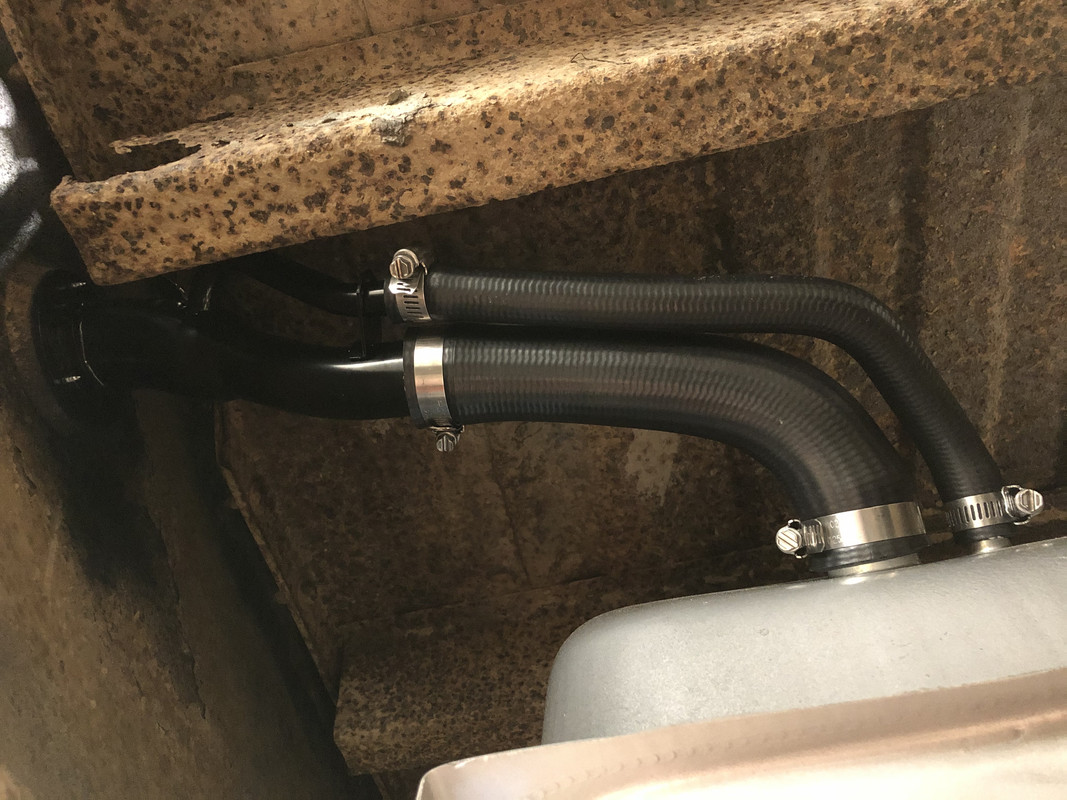
|
|
|
|
|
07-26-2020, 11:03 PM
|
#13 |
|
Registered User
Join Date: May 2016
Location: Willow, Alaska
Posts: 846
|
Re: 1978 Chevy K20 longbed with nearly 500,000 miles! LS Swap begins!
Another slightly sporadic update, I kicked through another handful of small things this weekend.
The PTO cover plates were still leaking on the transmission, even with new gaskets. I decided to ditch those and picked up some nice machined aluminum ones which should also benefit by cooling the oil a little more. I picked up a hydroboost rebuild kit for when I come across a rebuildable unit. The power steering cooler fittings came in, along with a Y-block for the fuel sensor, and some wiring connectors for later on in the game.  My oil pressure sending unit adapter came in from Ebay. I believe this is off a late 80's/early 90's corvette. It has a dual outlet for both the stock and Holley sensors. 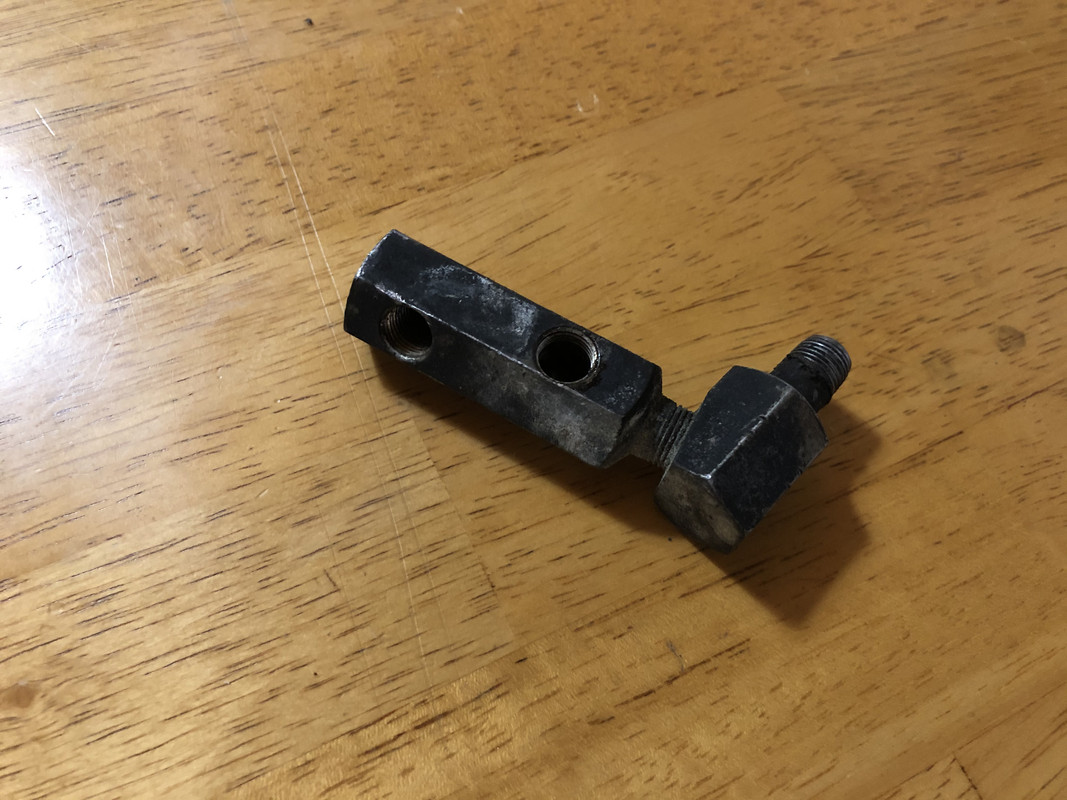 I also picked up a new brake light switch, oil pressure switch, and a bottle of brake fluid for the clutch cylinder. A few things also came in from Summit, a couple fuel fittings, fuel hose fire liner, and the firewall grommet for the Holley harness. 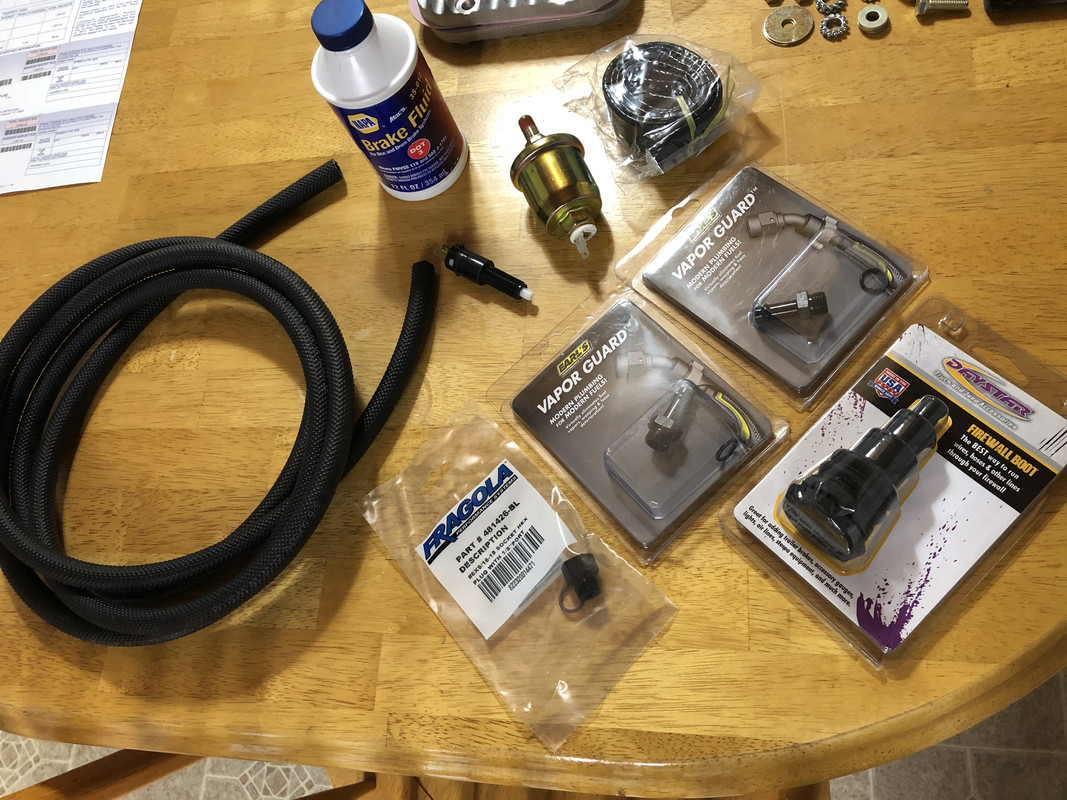 Assembled the fuel Y-block.  This is how it will mount with the sensor. 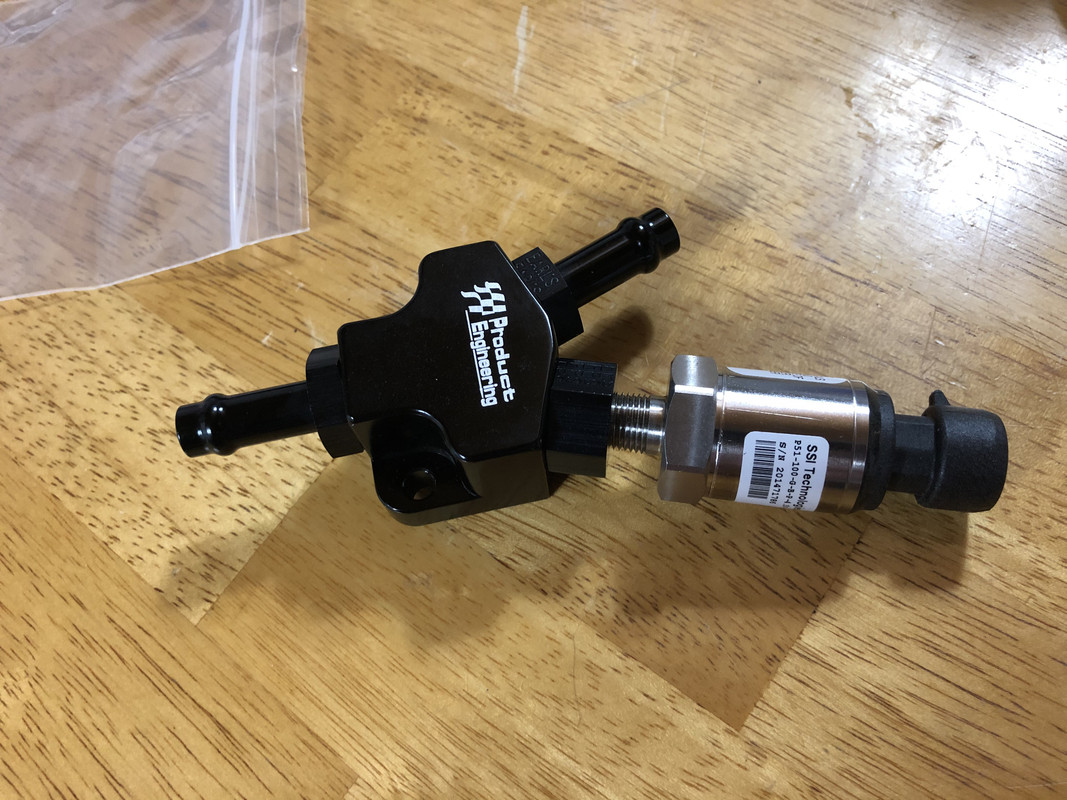 I trimmed the grommet up to the 1" mark and ran it under hot water for a couple of minutes to soften it up more. This was still a TIGHT squeeze! 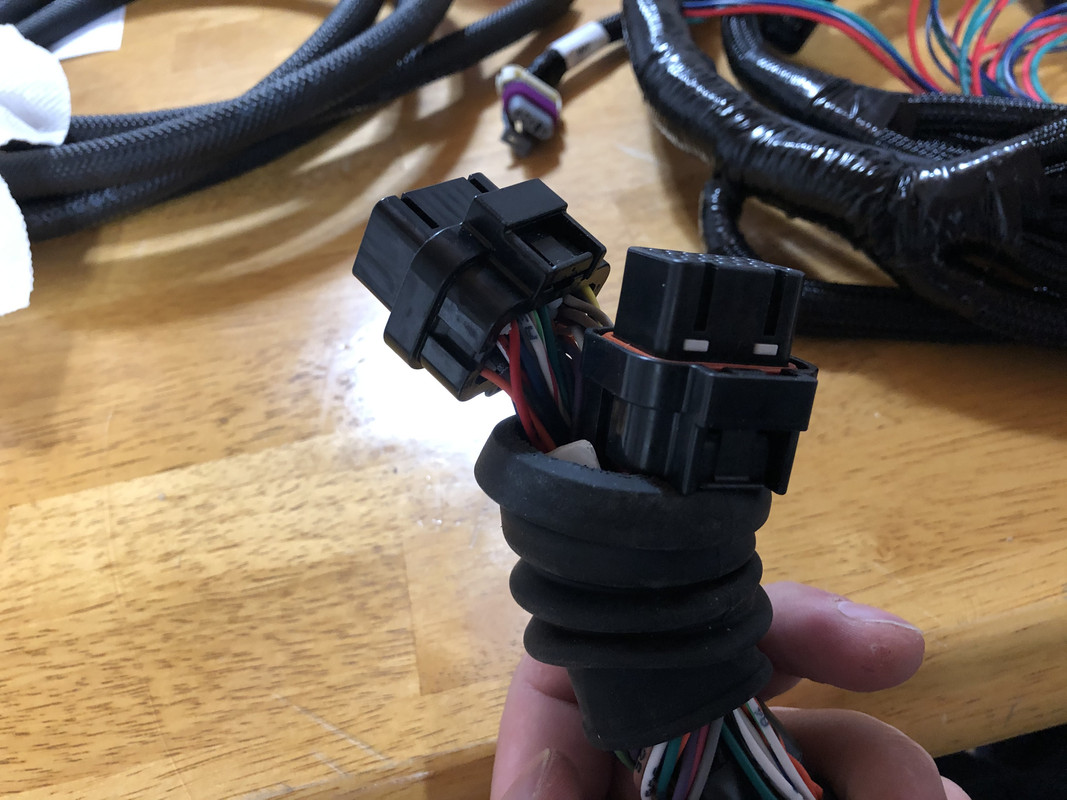 But now it's on, and looks great! I ran the USB cable inside it as well, and will wait until I go to lay the harness out before I secure it in place. 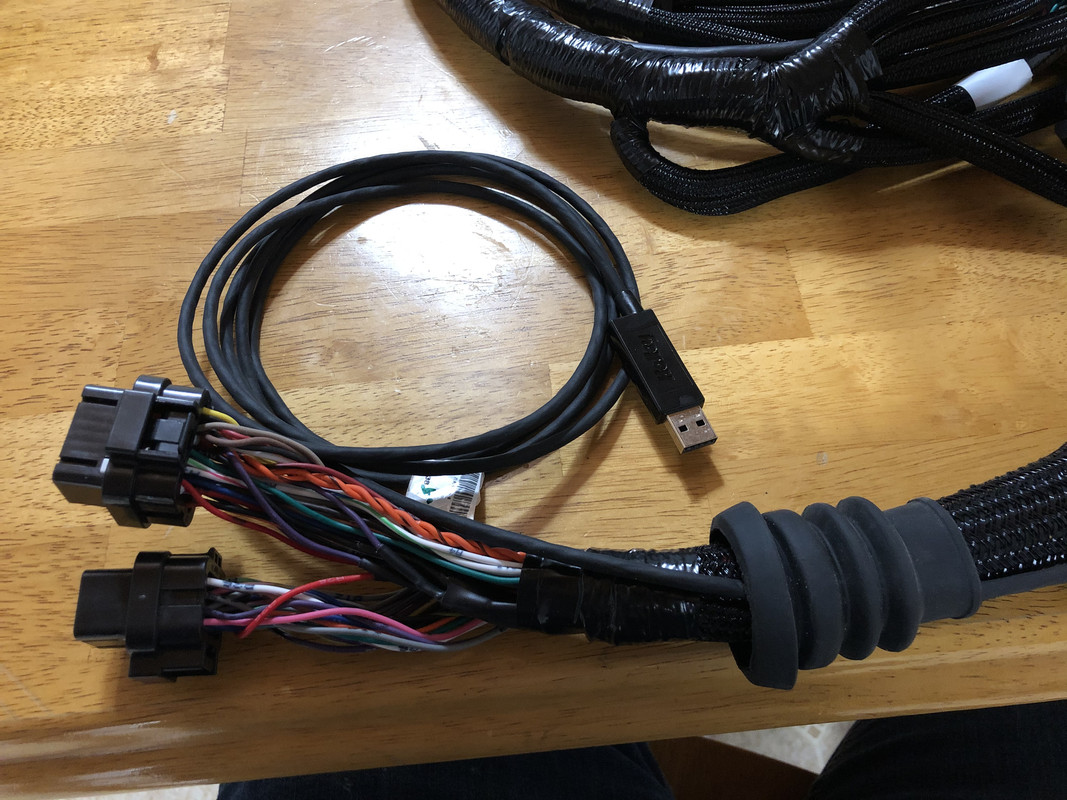 Installed the fittings on the power steering cooler. 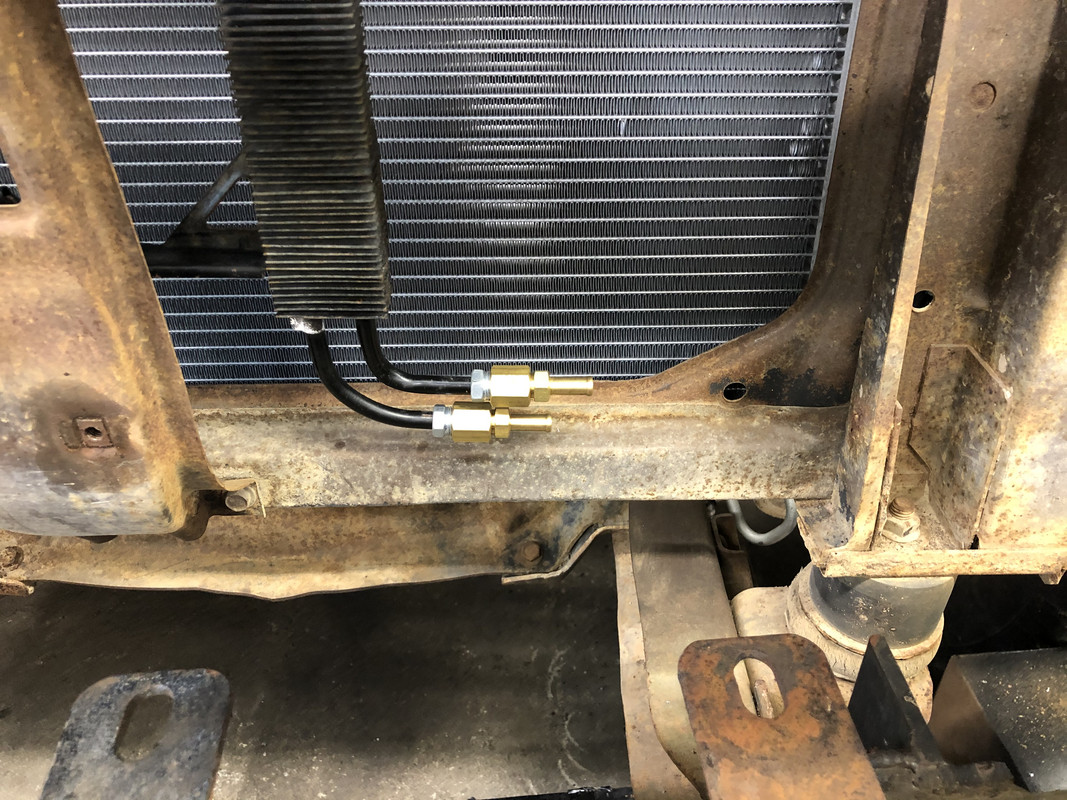 Next, I drilled the holes for the nutserts required for mounting the battery tray to the driver's side fender. 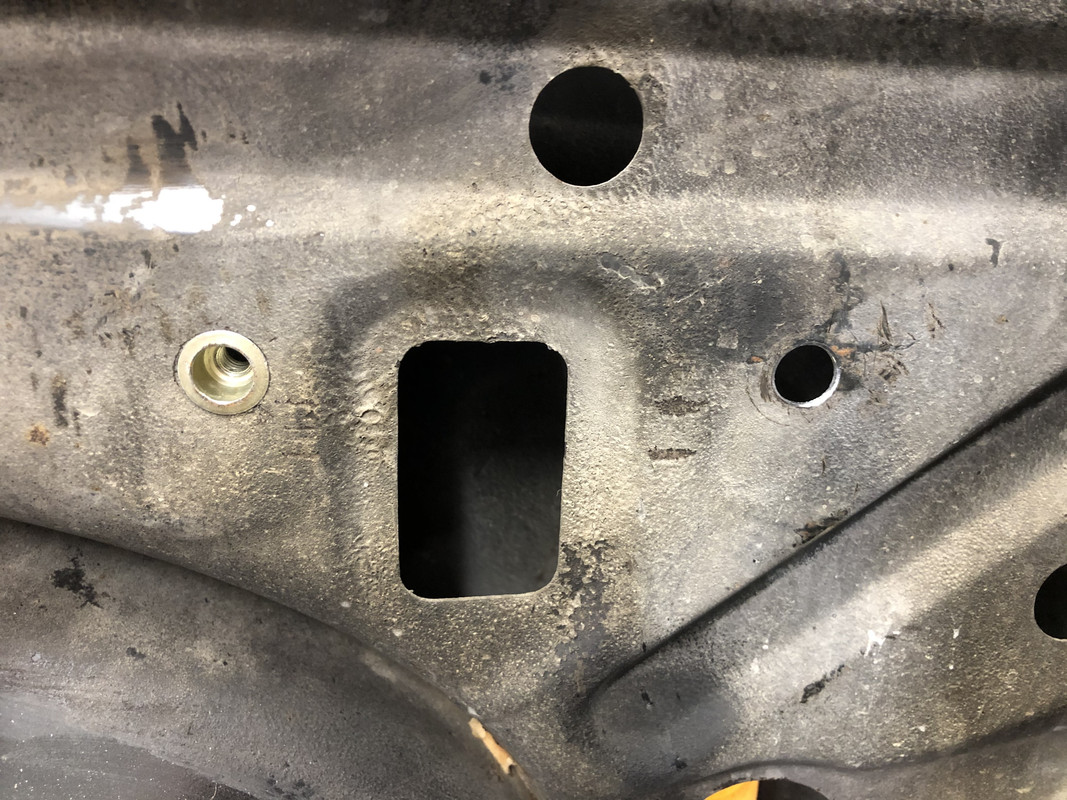 These were an absolute PITA to install. I had to use a two foot extension on the setting tool!  Test fitting the lower bracket and drilling the dimpled holes in the core support and inner fender for mounting. 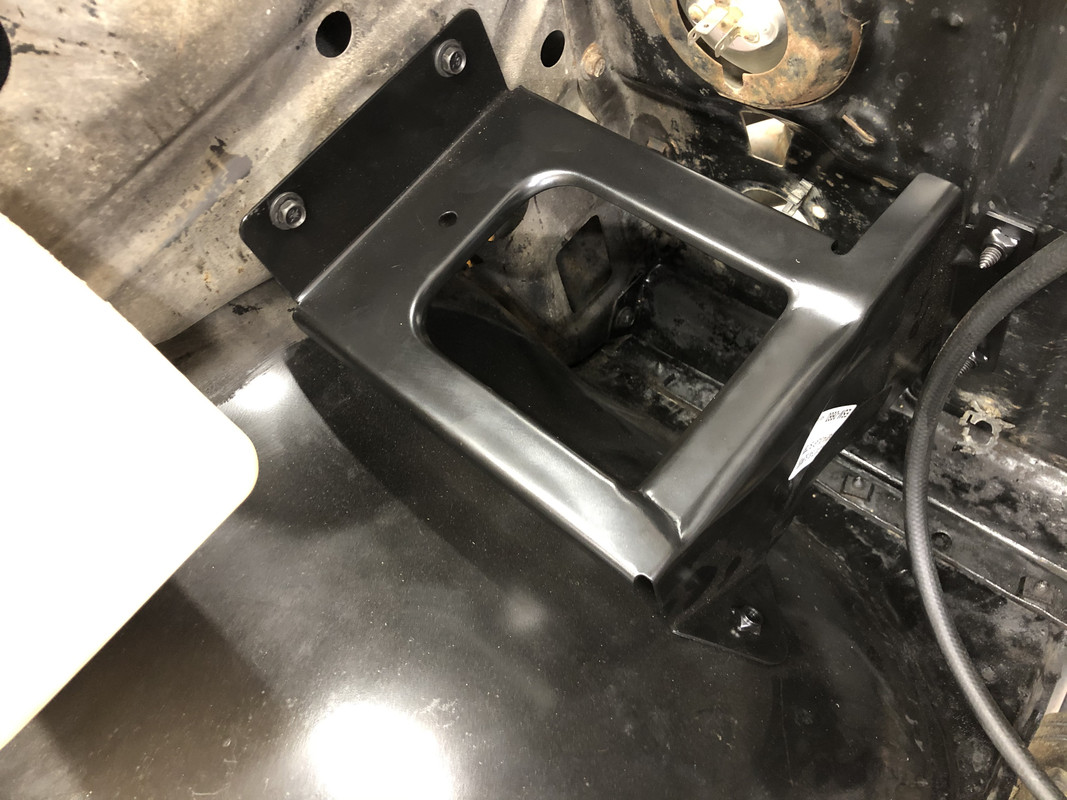 Why they sell the battery tray and battery try mount as two separate pieces is beyond me...seems like one of those parts that should come pre-assembled. Oh well, at least I can fix that! I marked the area for the holes to be drilled. 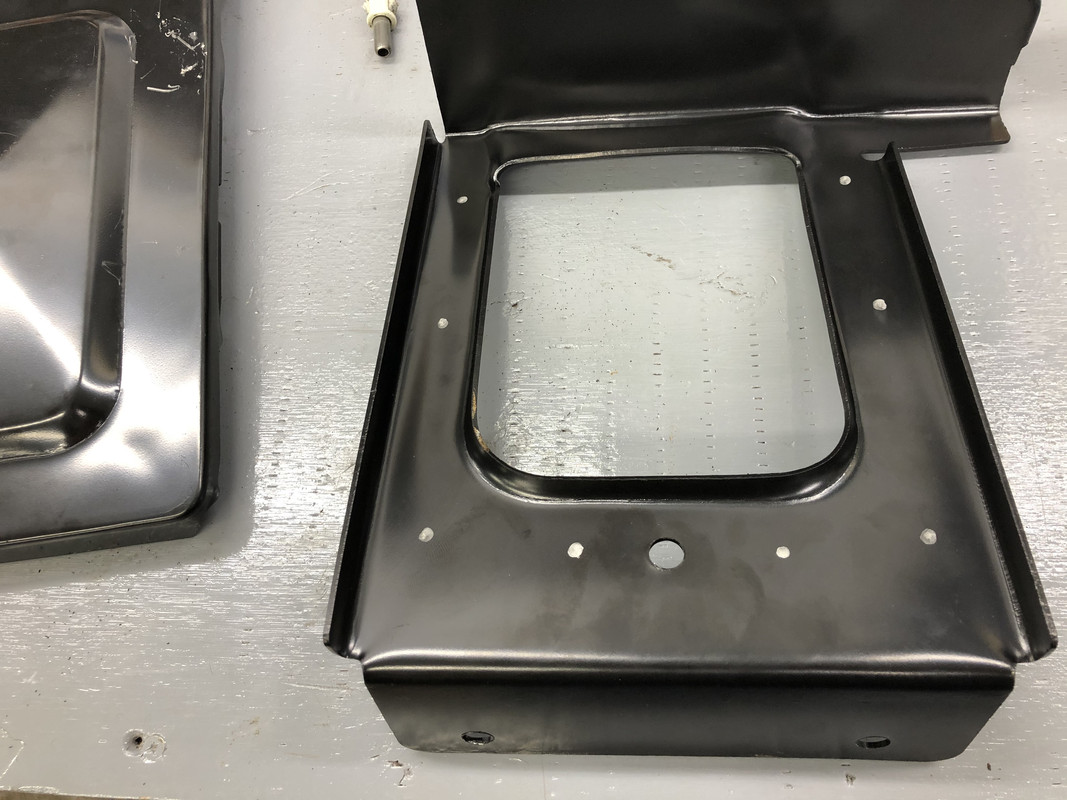 Transferred the holes to the tray, and cleaned the areas to bare metal. 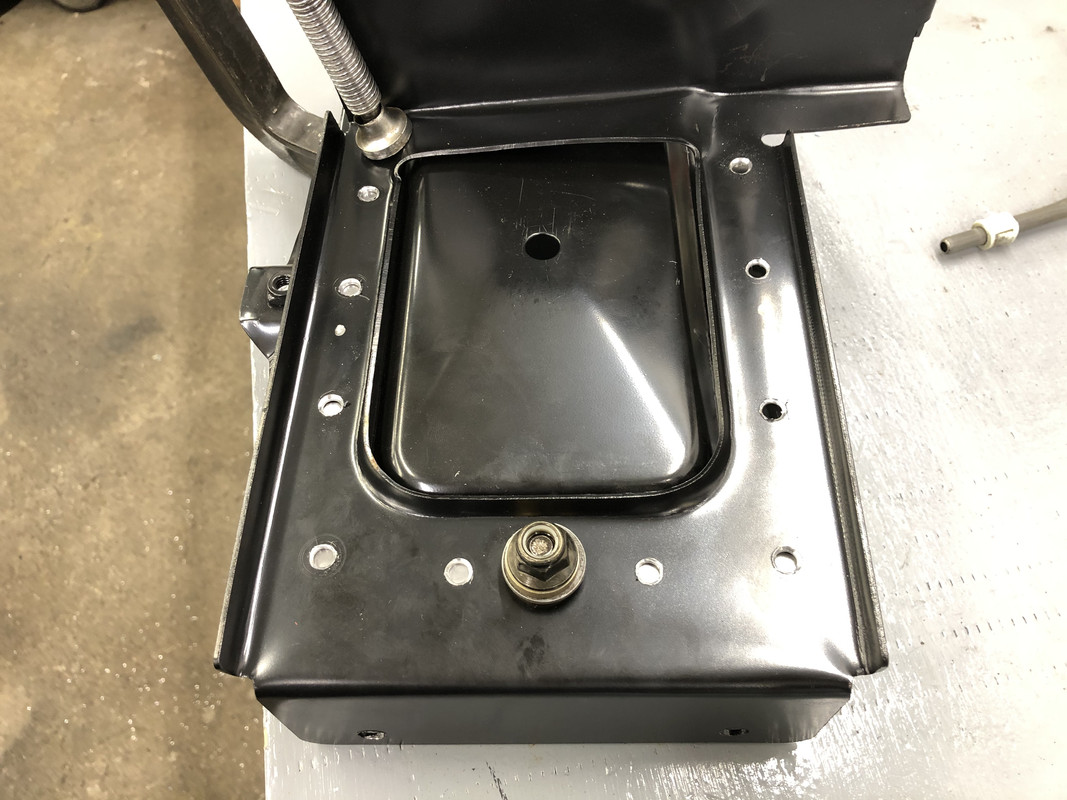 Started plug welding on one side. The tray was slightly tweaked, so I had to transfer the clamp halfway through the job.  Finished, top side!  And on the bottom side. 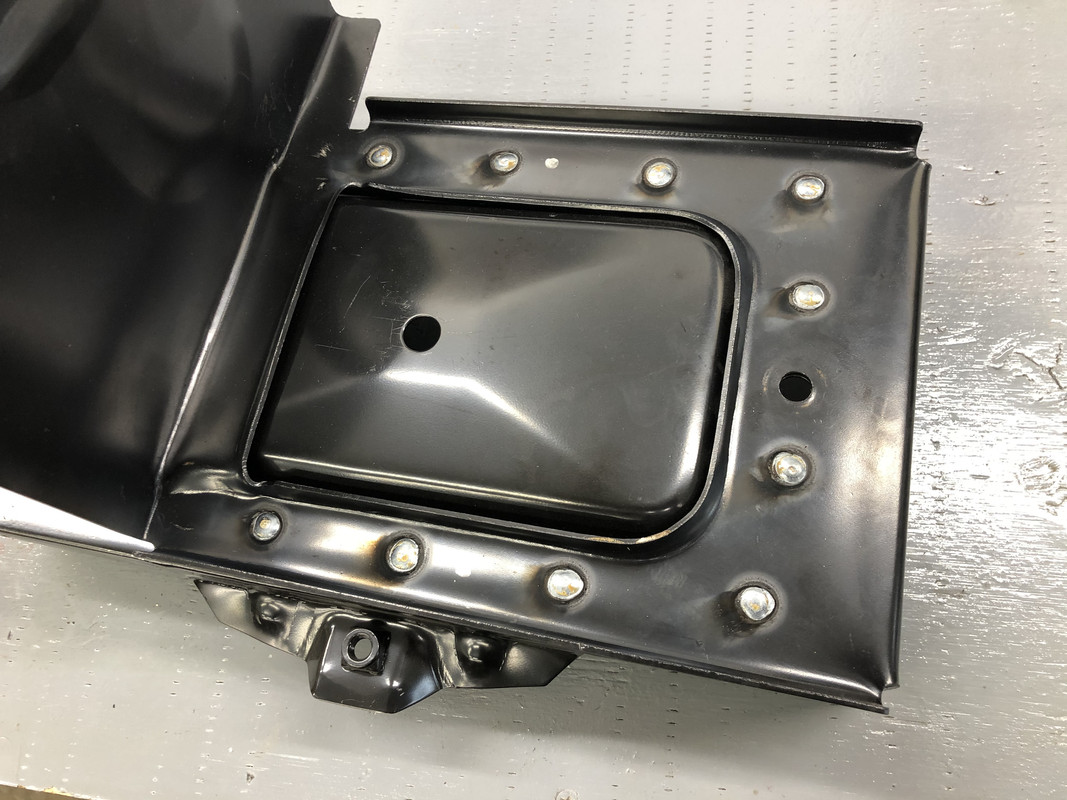 Cleaned up the welds and shot it with a coat of paint, it actually looks factory! 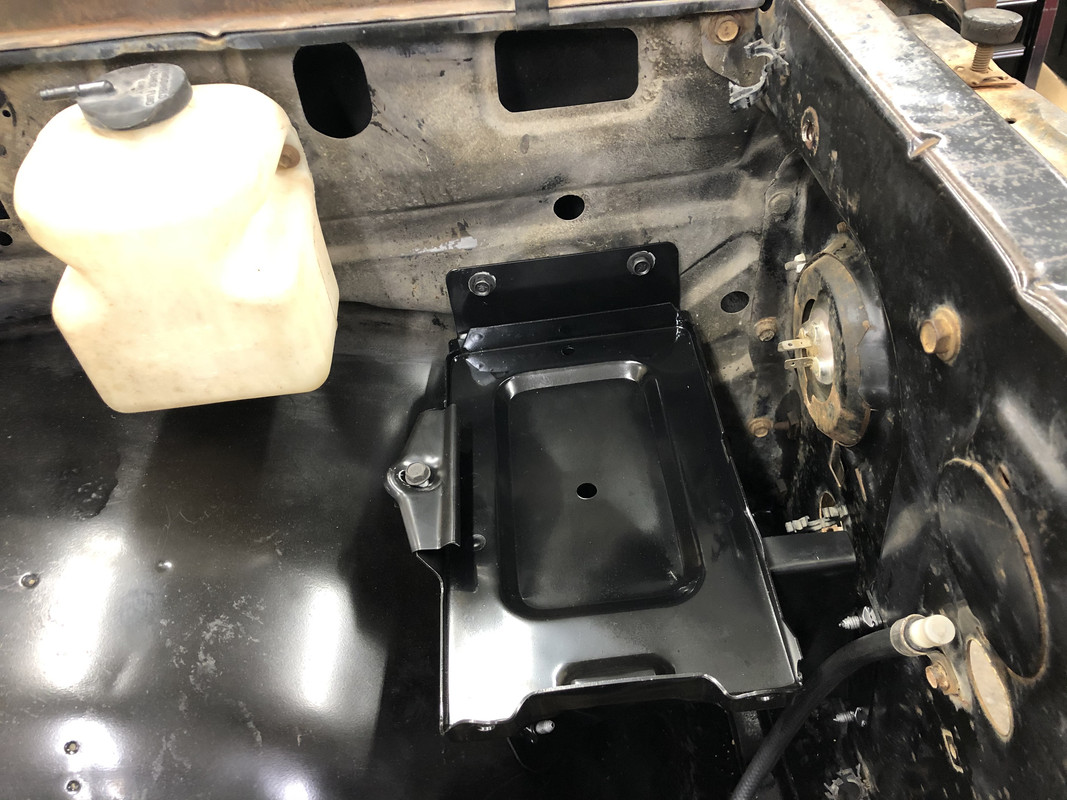 Next up, I bench bled the clutch master cylinder and installed it, and bled out the whole system. Seems to work well, the pedal feels soft for a short bit of travel, but I think that is just taking up the air gap on the throwout bearing, as it does engage the pressure plate fully. The hood hinge hits the reservoir in the closed position though, so I'll have to modify that mounting bracket to provide clearance.  Also cleaned up the fuel tank guards and installed them. Some slight trimming on the "lip" on the sides, but other than that, they fit the aftermarket tanks very well. 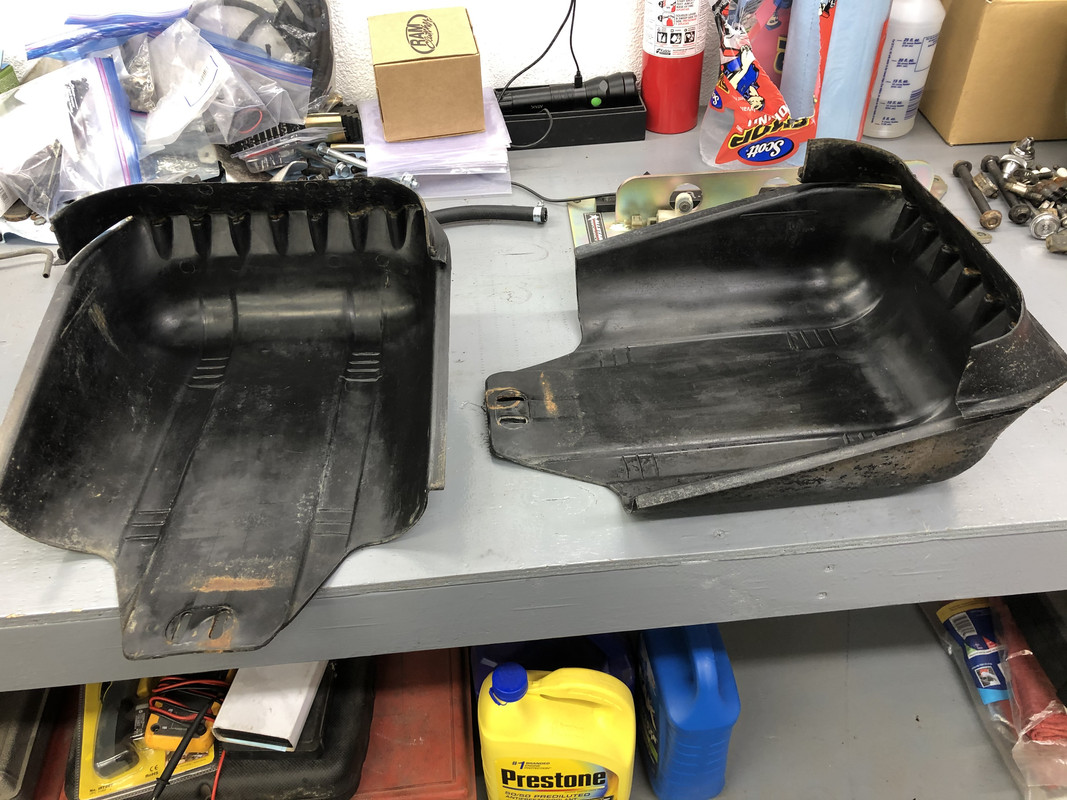 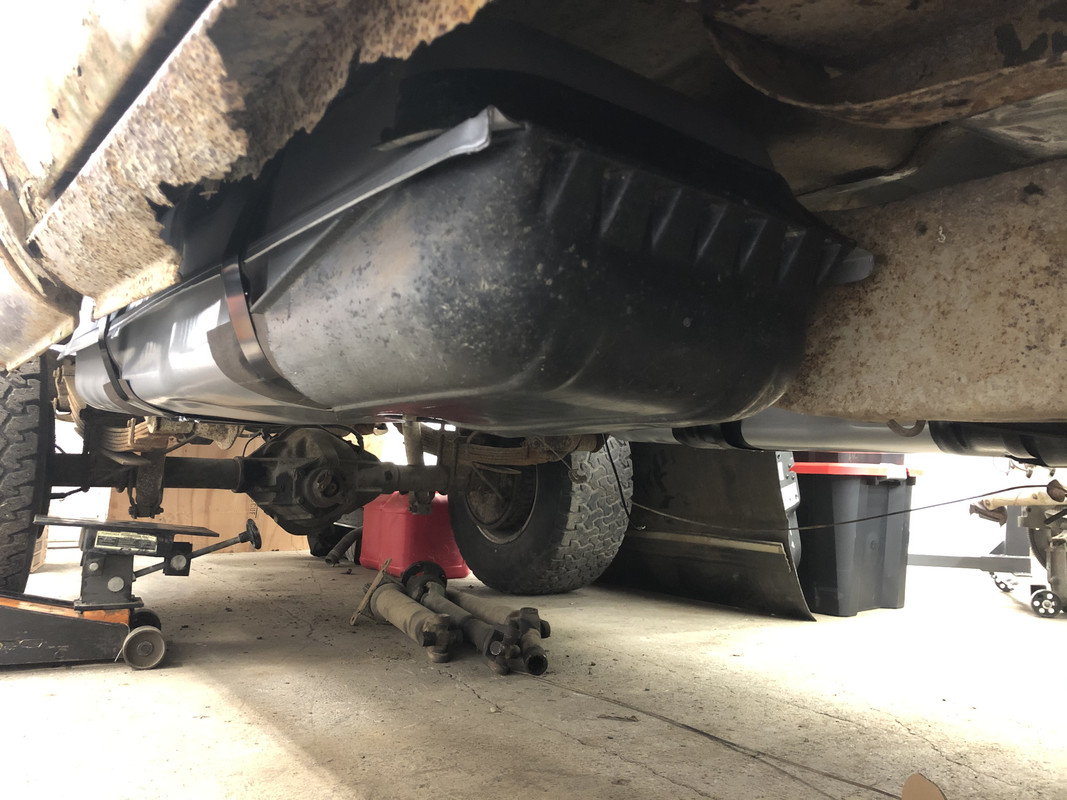 I installed the Ebay Corvette adapter and installed the two oil pressure sending units. 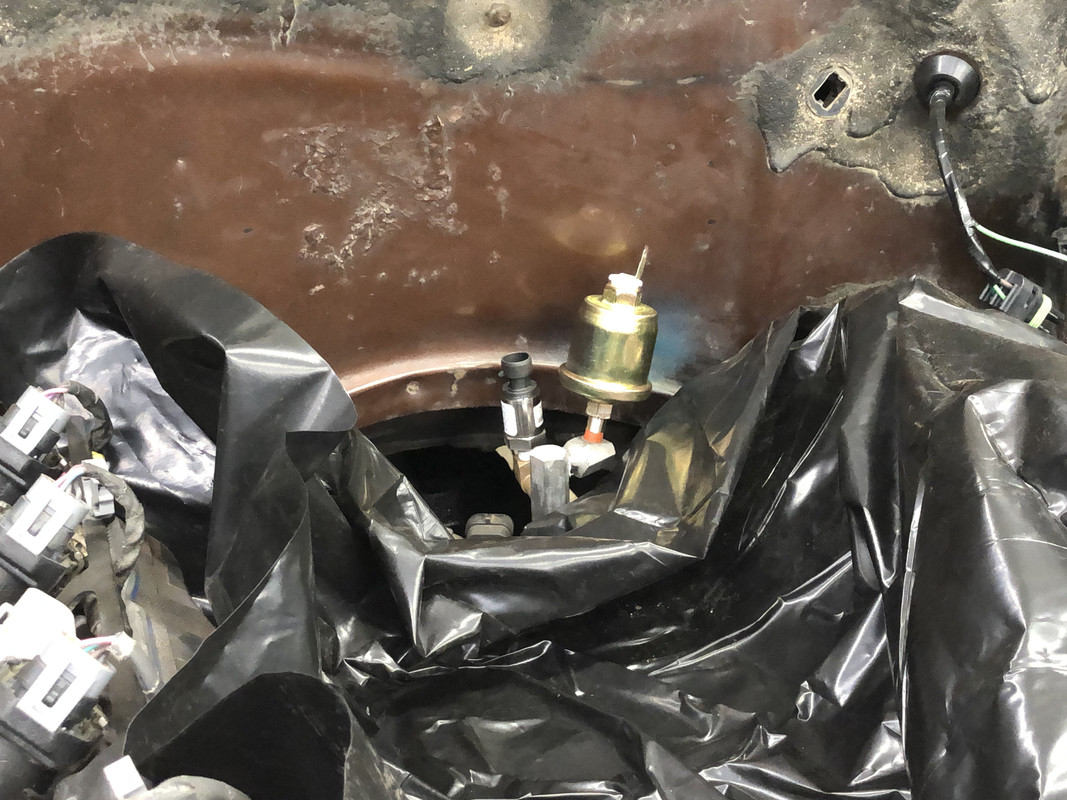 And finally, installed and routed the positive battery cable. I'll be fine tuning the fitment once the new power steering pump and lines are installed, this old one has a sensor and different style of line taking up real estate behind the pump. 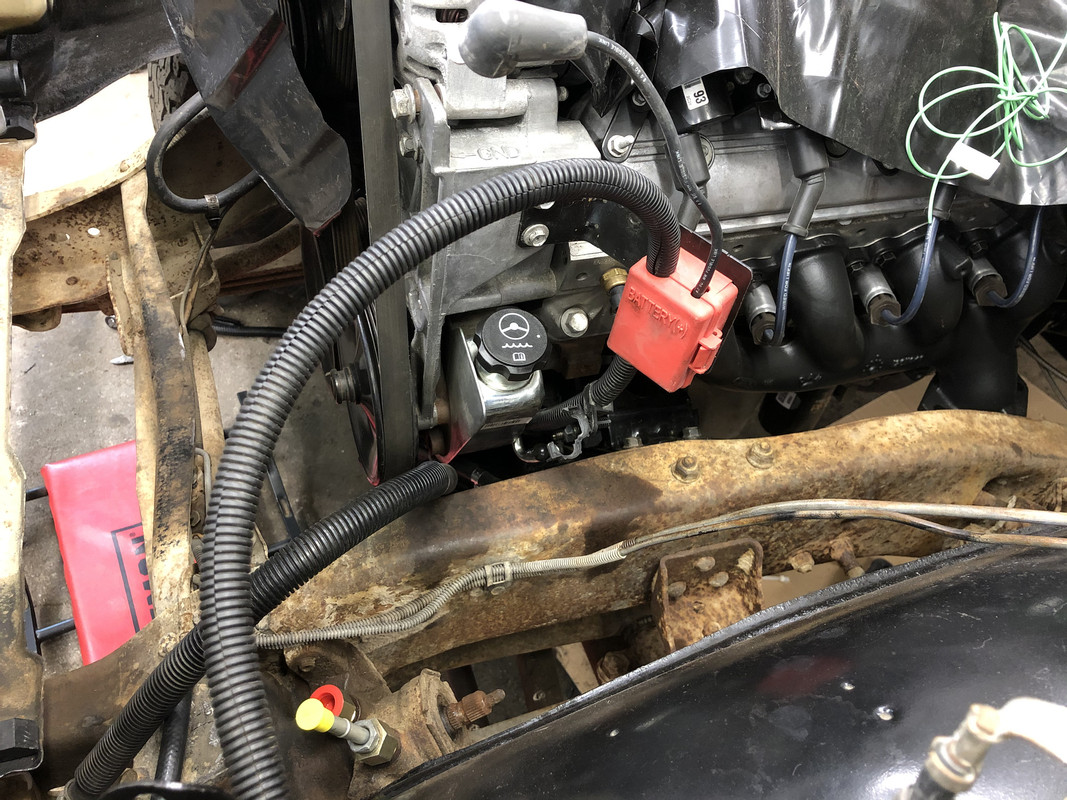
|
|
|
|
|
08-01-2020, 02:21 AM
|
#14 |
|
Registered User
Join Date: May 2016
Location: Willow, Alaska
Posts: 846
|
Re: 1978 Chevy K20 longbed with nearly 500,000 miles! LS Swap begins!
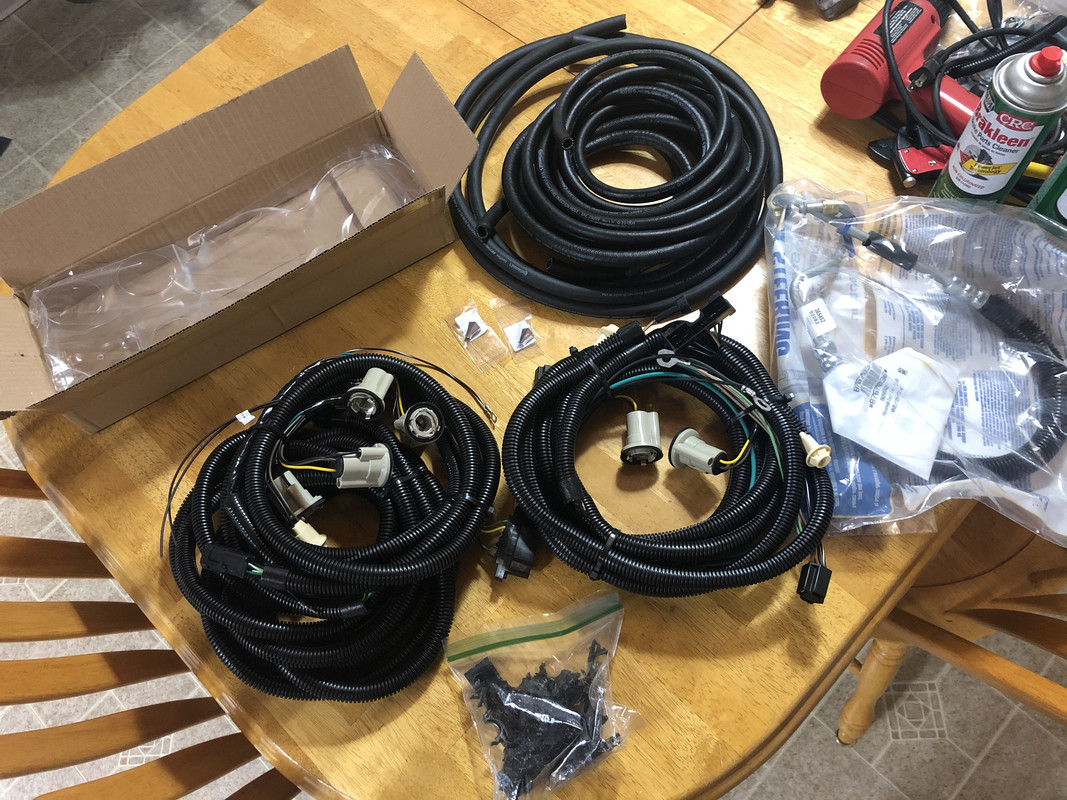
It's the weekend, so more goodies! The headlight harness and taillight harness showed up from Harnessworx. I picked up some more fuel line to do both the fuel tank vents and the engine lines when the time comes. I also picked up a length of power steering hose to route to the cooler. New heater slider knobs and a gauge cluster lens as well!
 The hydroboost specific power steering pump and lines came in today from Napa. All that's left is finding a hydroboost unit!  I picked up the correct bolts for the PPE PTO covers for the transmission. 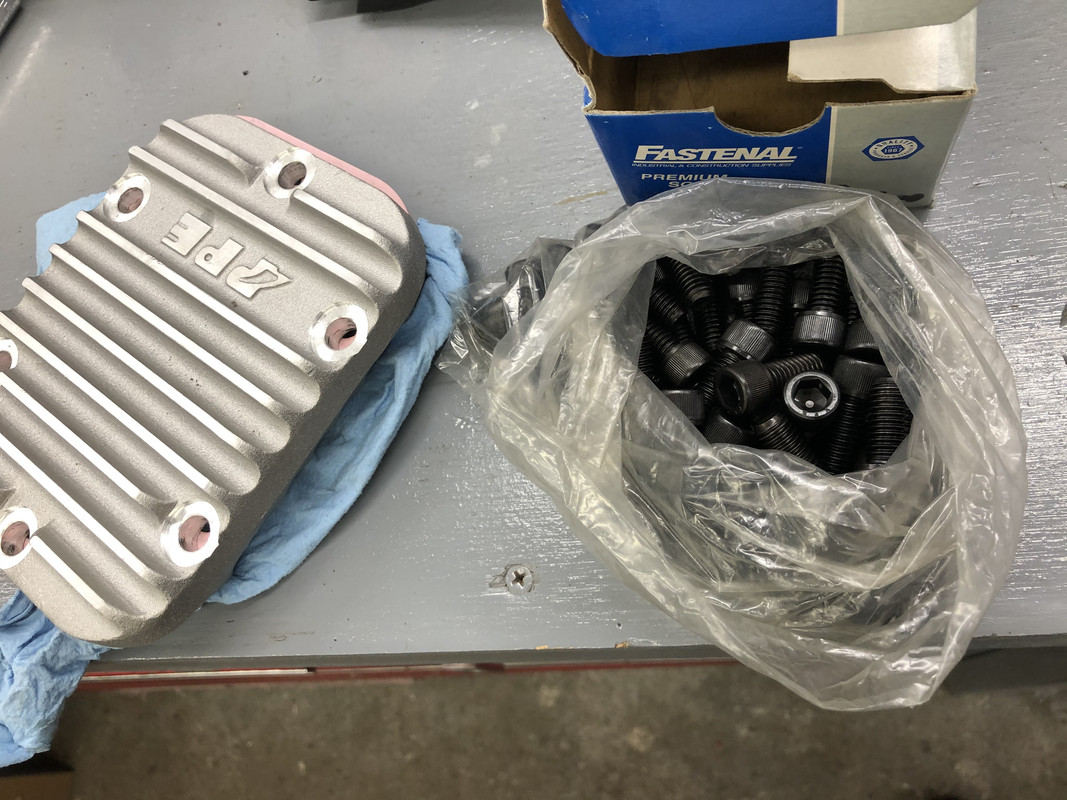 One installed! I'll finish the other up tomorrow 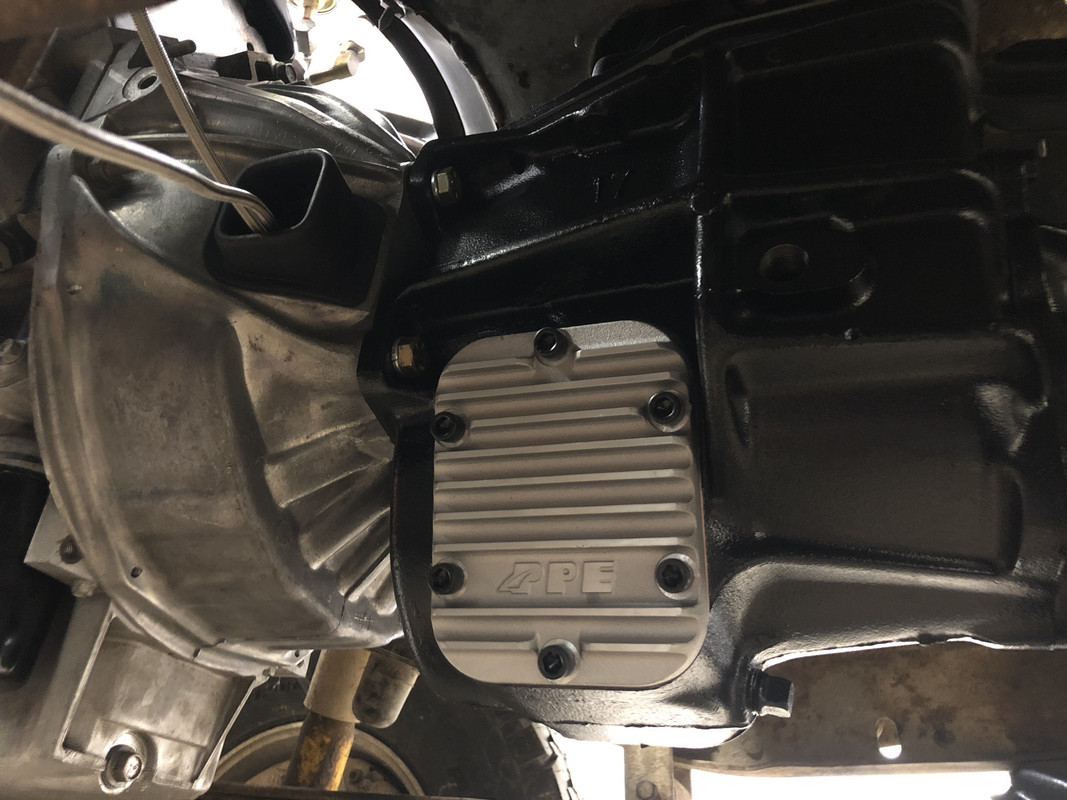
|
|
|
|
|
08-02-2020, 08:09 PM
|
#15 |
|
Registered User
Join Date: Oct 2015
Location: PNW
Posts: 3,527
|
Re: 1978 Chevy K20 longbed with nearly 500,000 miles! LS Swap begins!
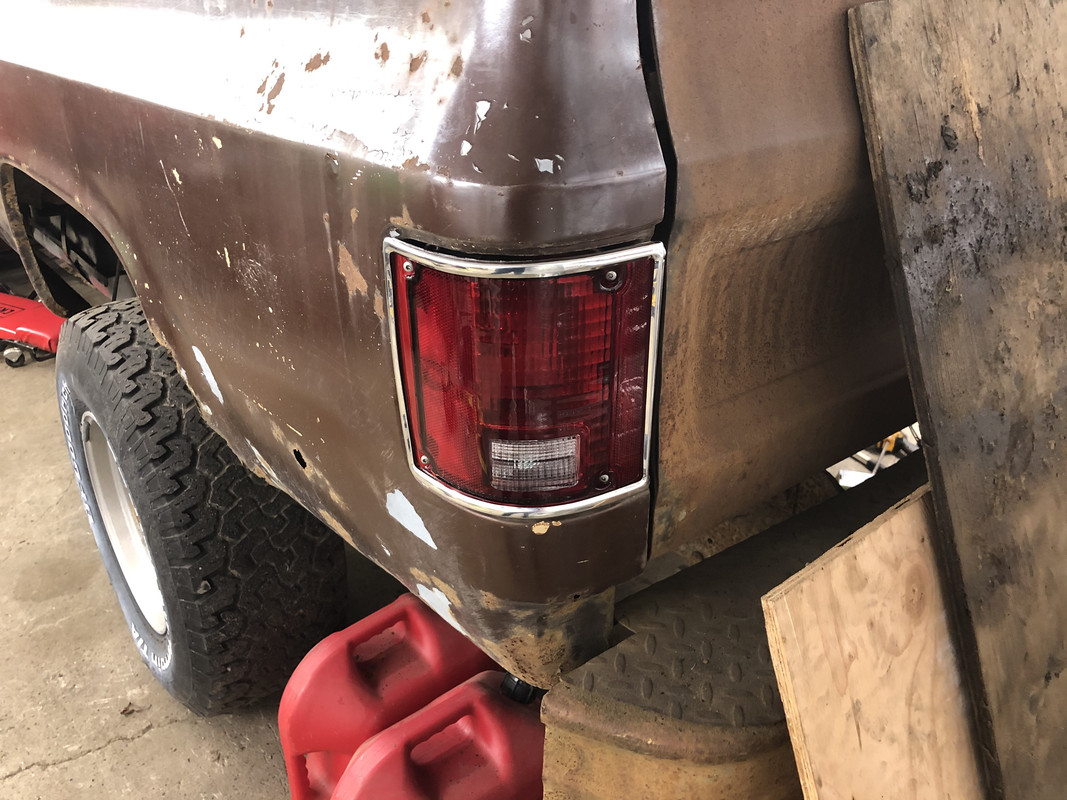
This picture kind of captures it all for me. Warning! No, just kidding, what strikes me about this build and what I try to keep in mind on my own is the idea of taking it in stages. Making it a good running truck, cleaning it up, addressing cosmetics, etc. That you could be single-minded and install brand new parts right next to a rust hole shows dedication. I've had builds where I thought I had to fix everything at once and consequently the build stalled and I got discouraged. Hopefully this makes sense. Maybe I'll just summarize by saying good job!
|
|
|
|
|
08-02-2020, 10:39 PM
|
#16 |
|
Registered User
Join Date: May 2016
Location: Willow, Alaska
Posts: 846
|
Re: 1978 Chevy K20 longbed with nearly 500,000 miles! LS Swap begins!
I get exactly what you mean. I've owned well over 100 cars, and half of them were classic vehicles. It's easy to dive into something and have an amazing vision for it, only to be caught up in "project creep", where too much gets torn down at once because hey, while you're in there, you might as well take care of this as well! I used to do just that, and still do to some extent, but it's much easier now to step back and realize exactly what does and doesn't need to be done to simply maximize the time spent enjoying your ride in the best way possible - driving it! David Freiburger a while back had a quote that stuck with me, "Don't get it right, just get it running". Life is short and most of us that enjoy building cars like myself, invest a lot of time into them trying to make them perfect, my view now is that it doesn't need to be perfect to enjoy it. This is the way I try to tackle each of my builds:
1. Clean everything! I don't care how rough, how much rust, dirt, or grime is present, everything gets washed! It provides easy progress and lets you enjoy working on a car that already looks better from when you first got it, plus makes it much nicer to work on and may even let you spot potential problems that may have been hidden by the dirt. 2. Get it running! Sure, it's hard to hold back from tearing into a brand new project to just work on everything right away! But getting it running lets you: A. Determine the working condition of the drivetrain, B. Allows the car to be mobile so it doesn't become a source of frustration by being in the way, and C. Hey! Now you can drive it! 3. Make it safe! Even bringing back the most hopeless of engines is worthless if the car can't be driven safely. Steering, suspension, brakes, seat belts, and lights are all pretty easy fixes and ensure that no unwanted surprises can happen. Stick with rebuilding or replacing stock parts for the time being and perform large upgrades later on (disc or big brake kits, suspension kits, etc), as you can still drive it while saving up money or accumulating all the pieces. 4. Everything else! Once the car is running, driving, and safely operational, anything else you need to do is just a weekend project. Do one thing, or area, at a time. Try not to keep the car down for long periods, as this becomes discouraging if you aren't driving the car regularly. I've been asked with many project cars before, that are mechanically pristine, but tend to be imperfect on the outside, "When are you going to paint it?! I can't believe you would drive it without finishing it!" My reply is simply, "It has paint on it, and the fact that it is worn or mismatched doesn't stop it from being driven. I may or may not ever get to it, but at least I'm out enjoying my car! Where is yours?" It does take a lot of self control to get there, but I feel that it allows you more time to enjoy these the way they were meant to be! Alright, more parts have arrived! The hydroboost specific power steering pump showed up, along with the remaining hoses. 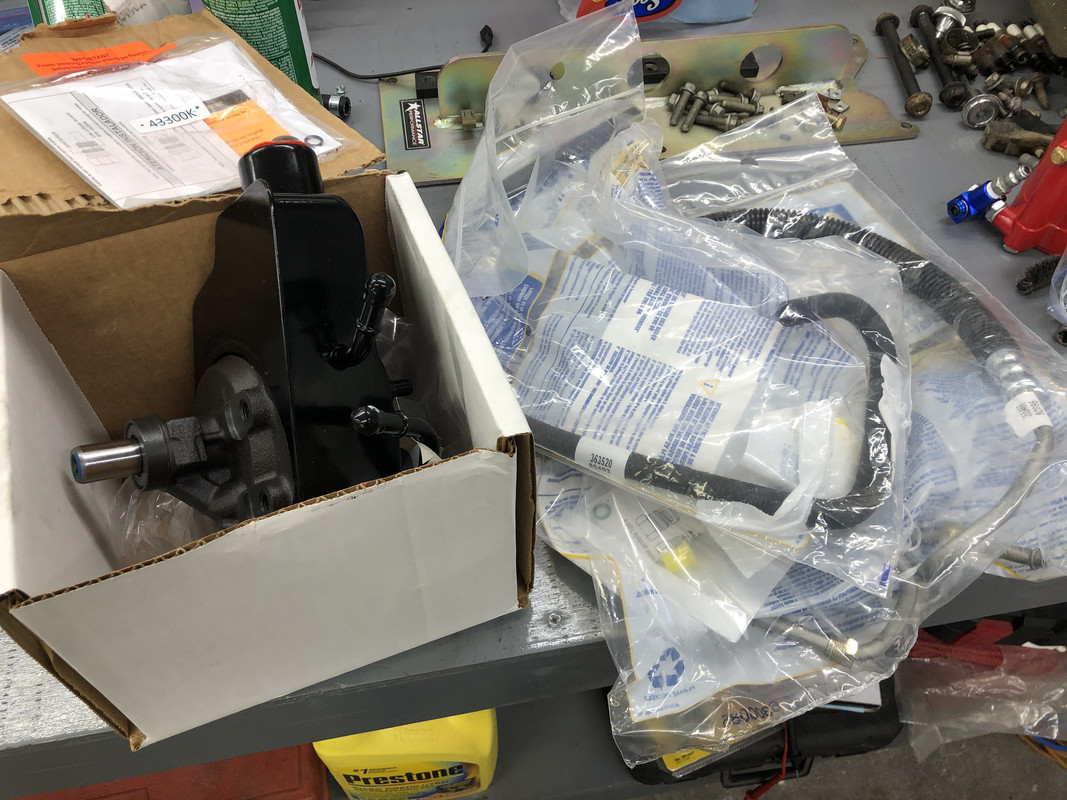 My Nick Williams 92mm cable driven throttle body also showed up, along with the throttle cable bracket! Quite a nice piece! I also picked up LED bulbs for all the exterior lights, and a new pair of taillight lenses (one showed up late). 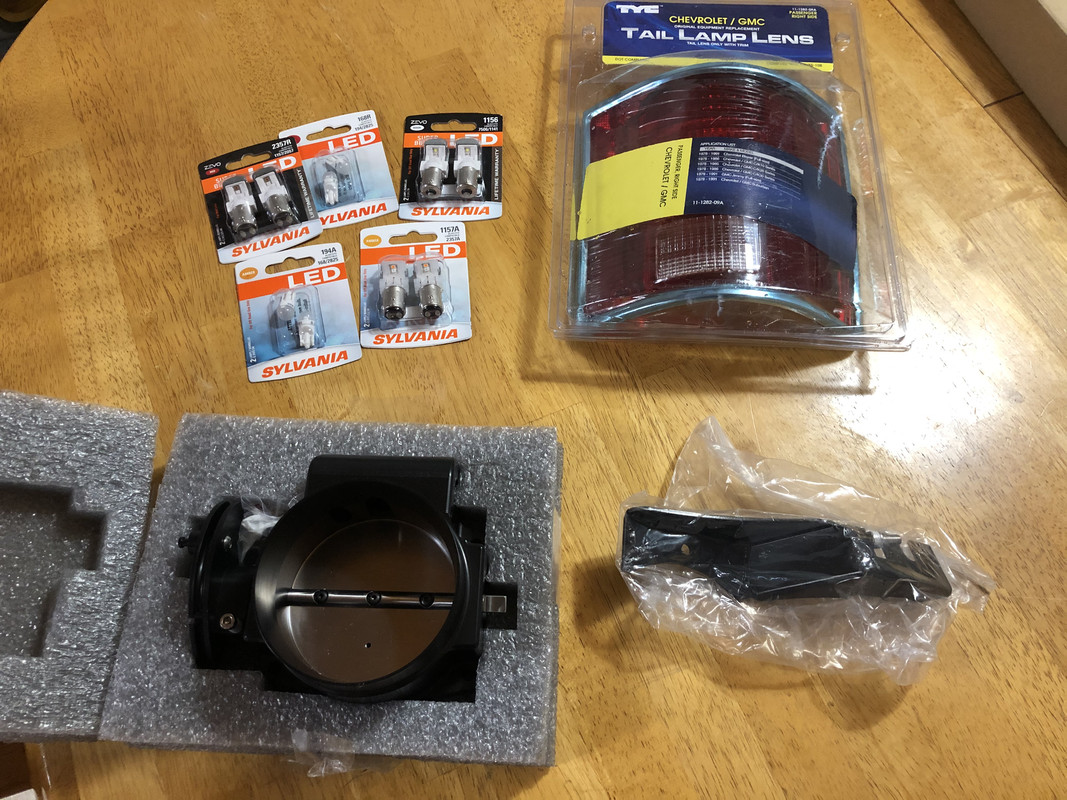 Now that I finished up mounting the oil pressure sensors, time to get started on the intake! Stripped and sprayed on some cleaner. 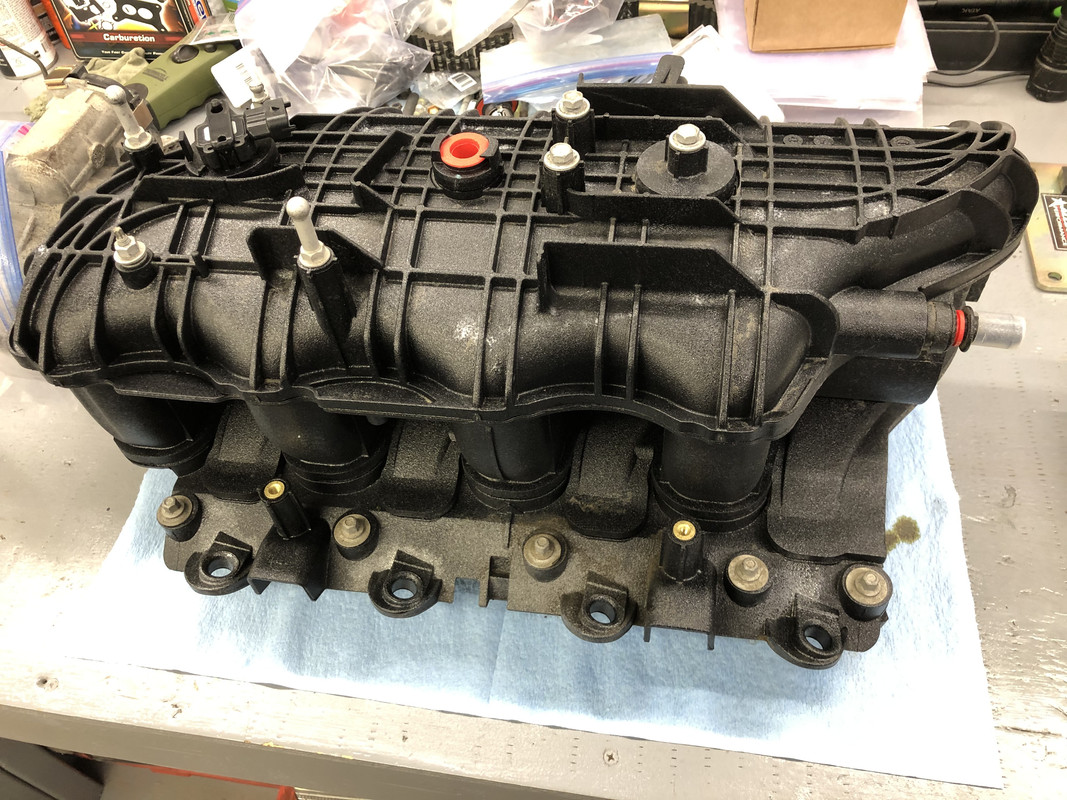 All wiped down and detailed! There was quite a bit of oil on the inside I had to clean too. 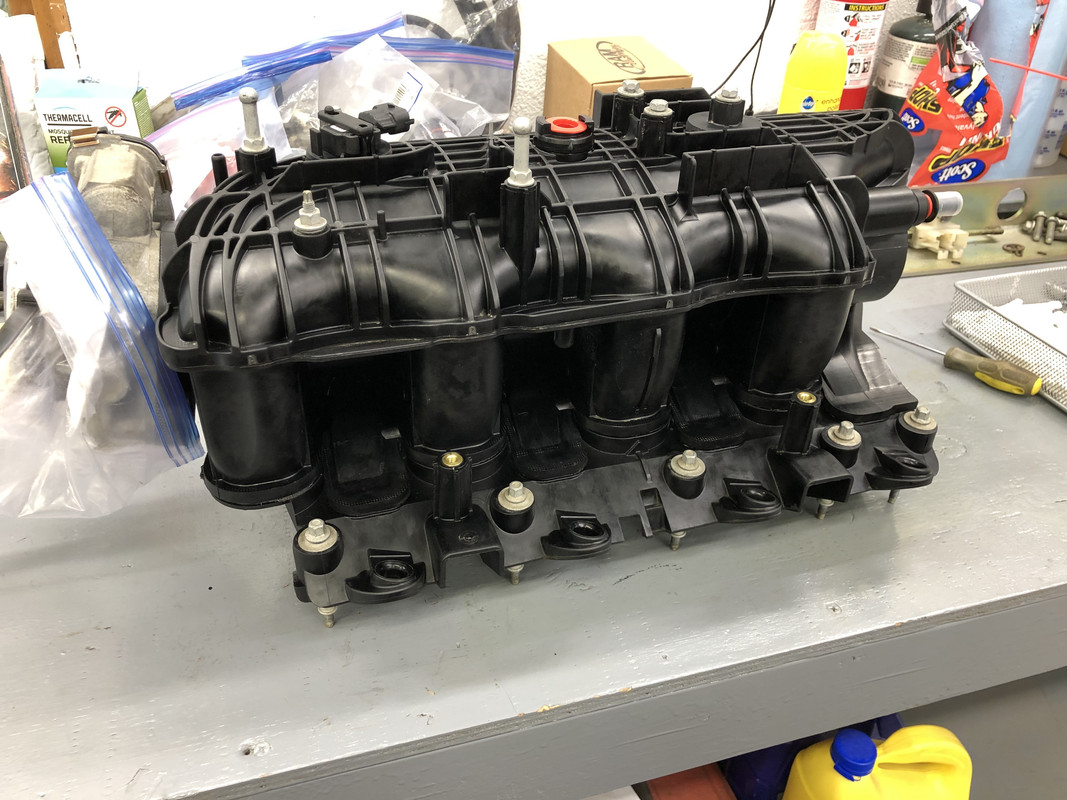 New OEM intake gaskets! 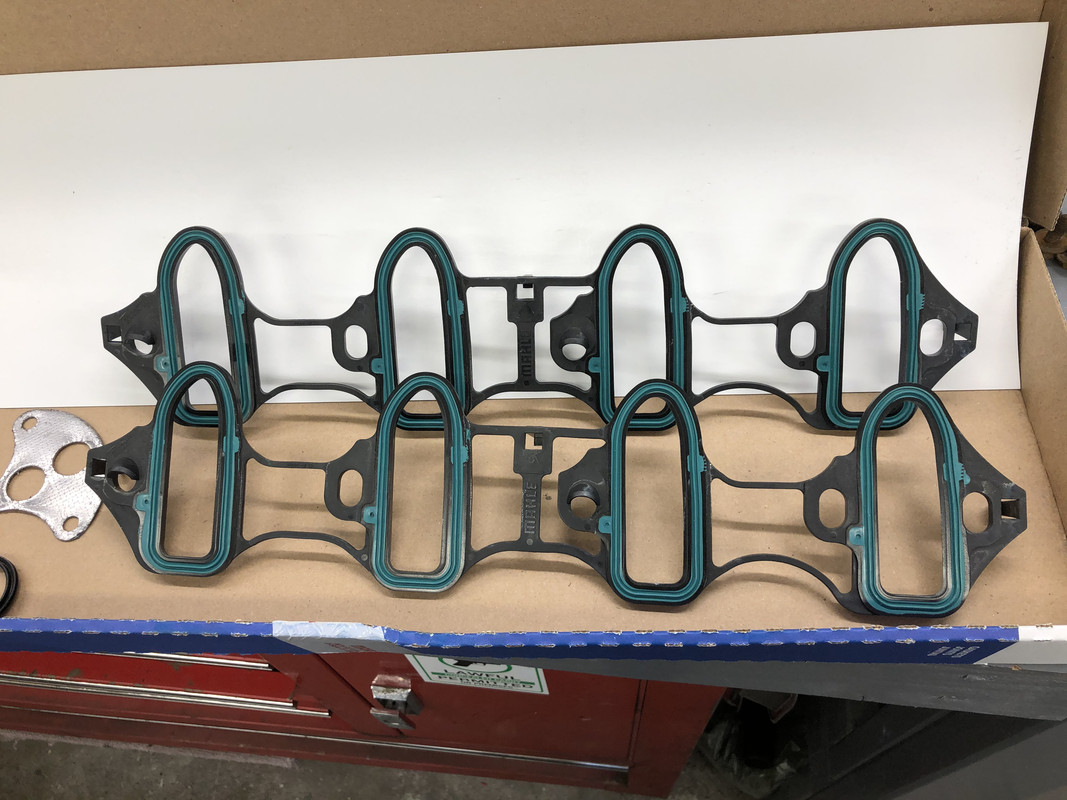 I went to mount the throttle body...and was met with this surprise! The cable bracket hits on the nipple on the intake manifold! I wasn't very happy about this, as the bracket alone was close to $50! This is supposed to be about as top of the line as you can get for throttle bodies. 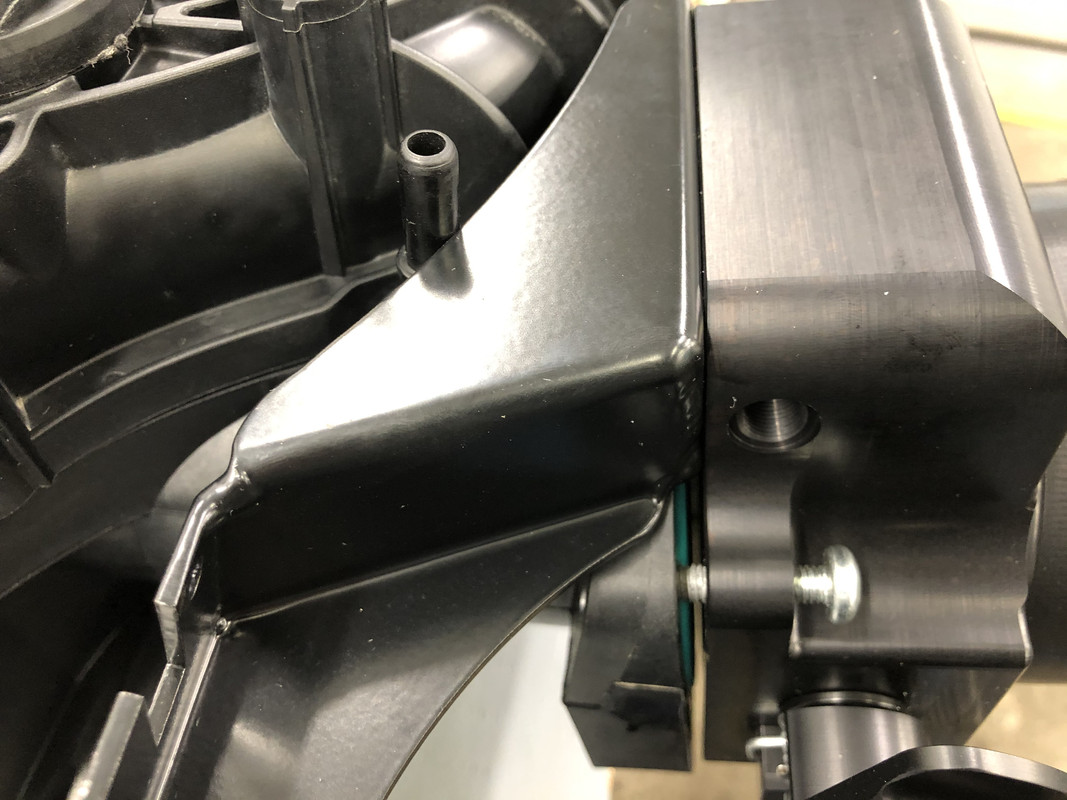 So I sucked it up and trimmed out a nice radius with the dremel and repainted the bracket... 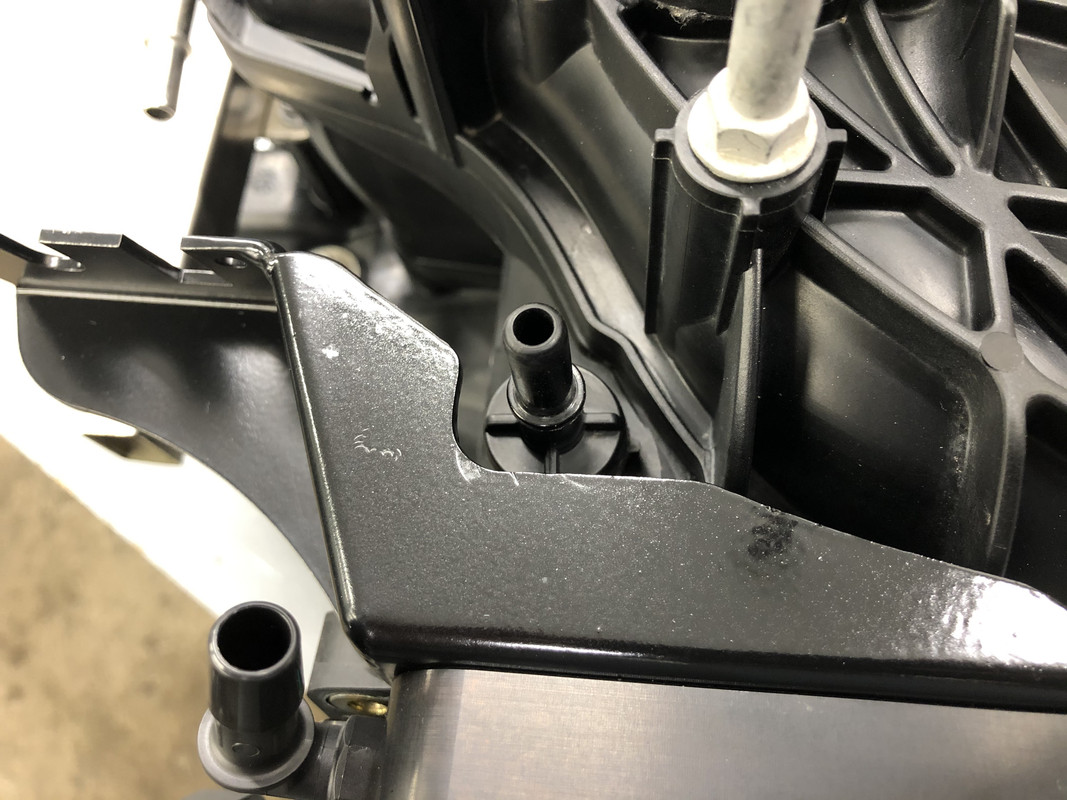 ...and then ran into this! The inner lip sit over the mounting flange of the intake. I'm pretty pissed at this point, how can they sell this with such a terrible fit? I've heard nothing but good things about NW parts up to this point.  I decided to set it aside and move onto other things. I flipped the fuel rail around and reinstalled it, and also added the Earl's quick connect adapter.  Intake is installed! 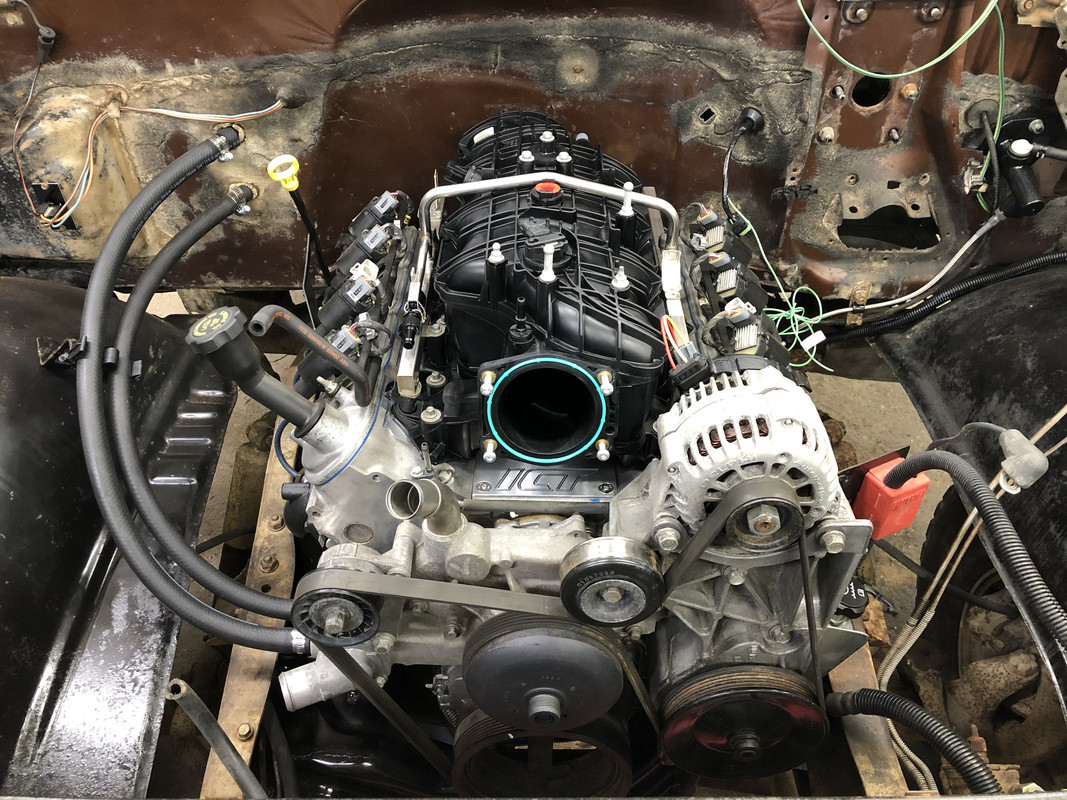 I had to also swap out the coolant crossover line as the old one wouldn't have allowed the hose to be installed as it was under the intake. 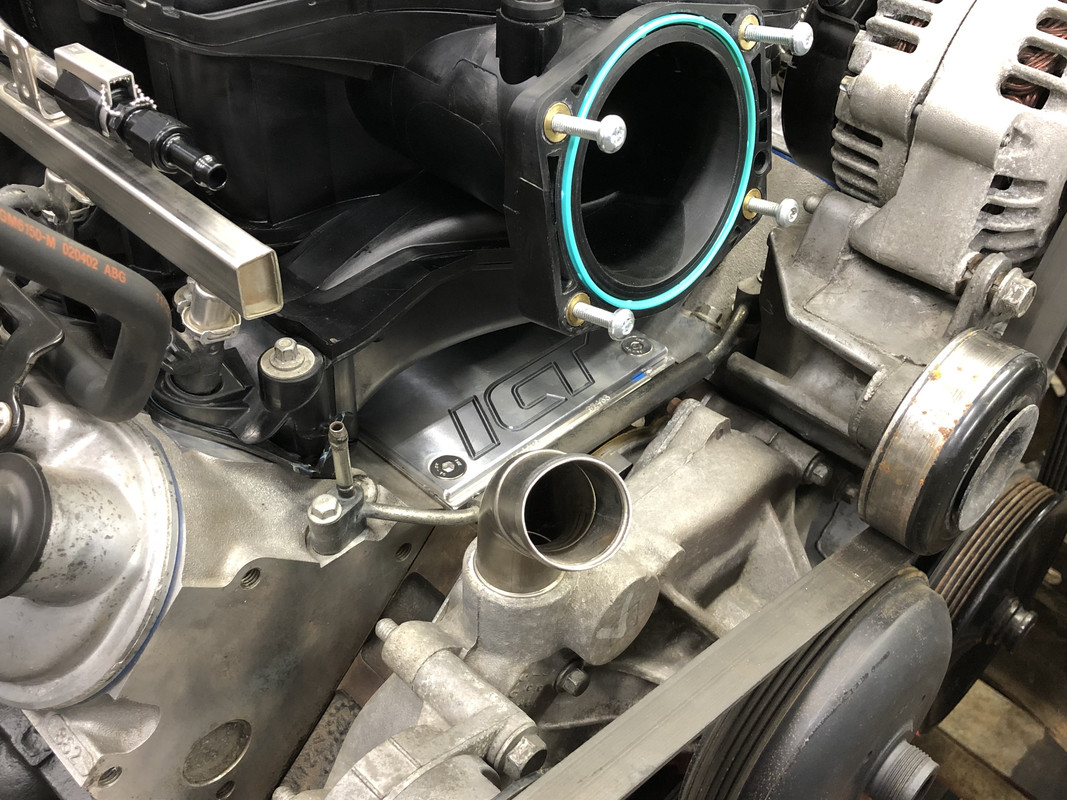 I ran the power steering cooling lines out front. I will need to get some conduit to protect the hoses before the front end goes back on. 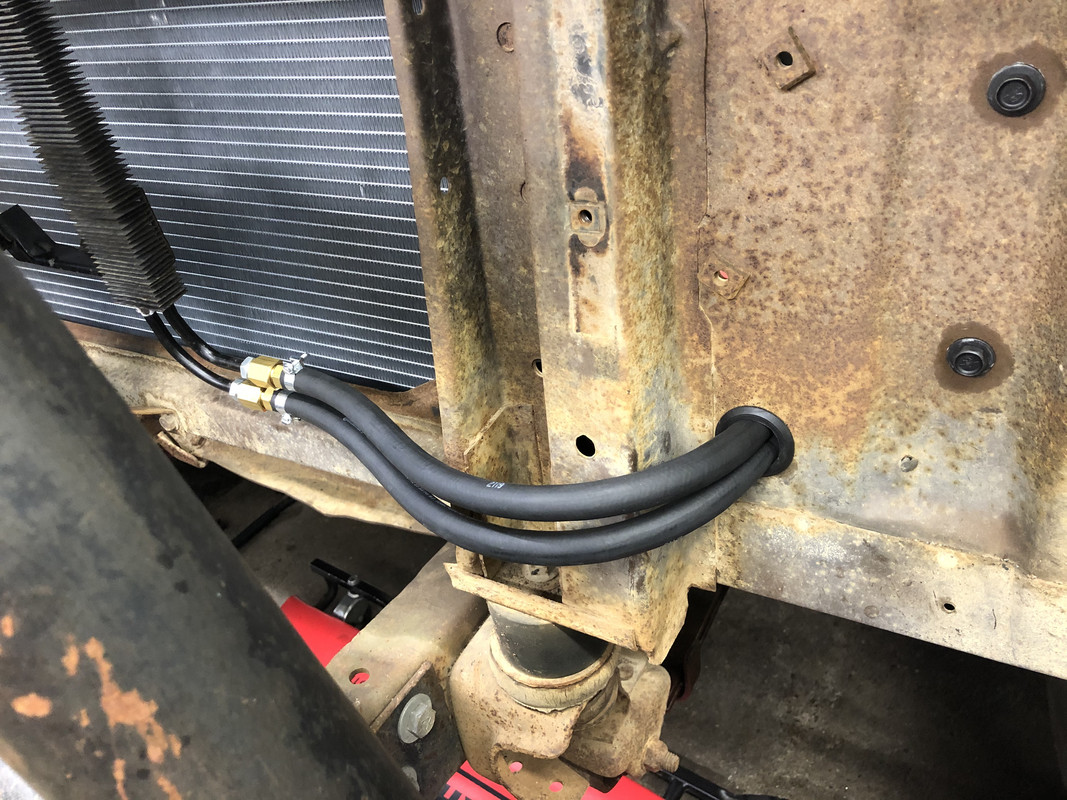 Connected the line to the box. 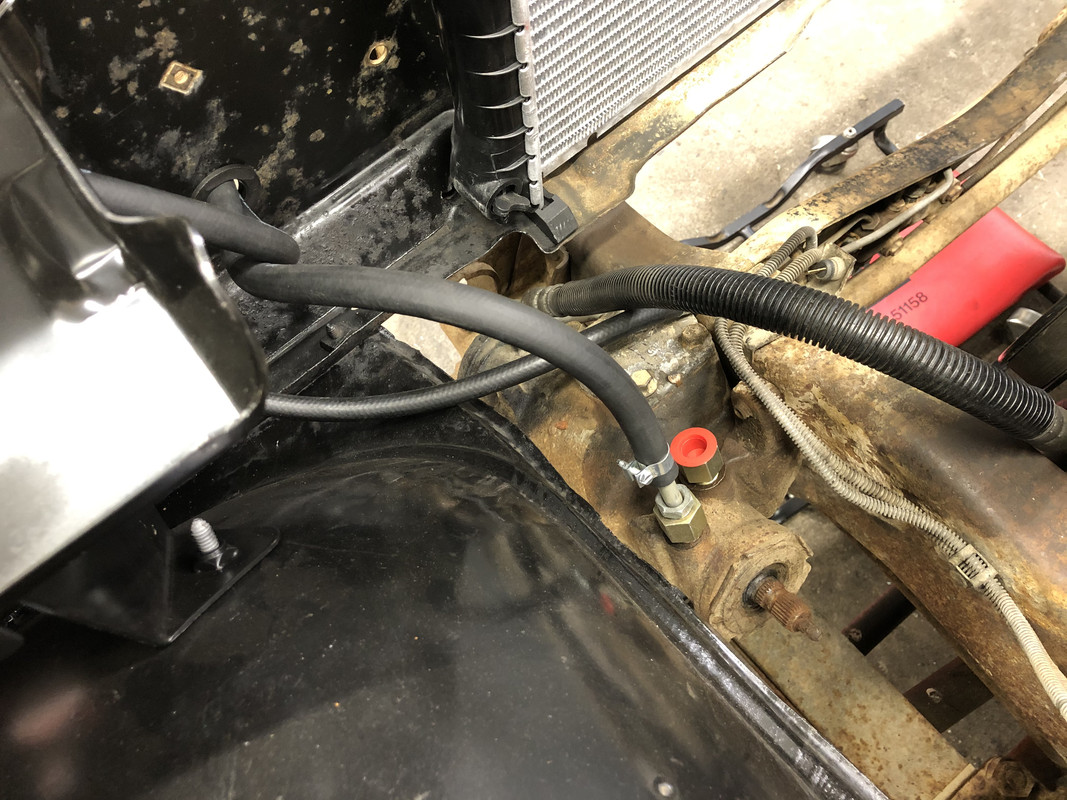 Installed the other side PTO cover plate! 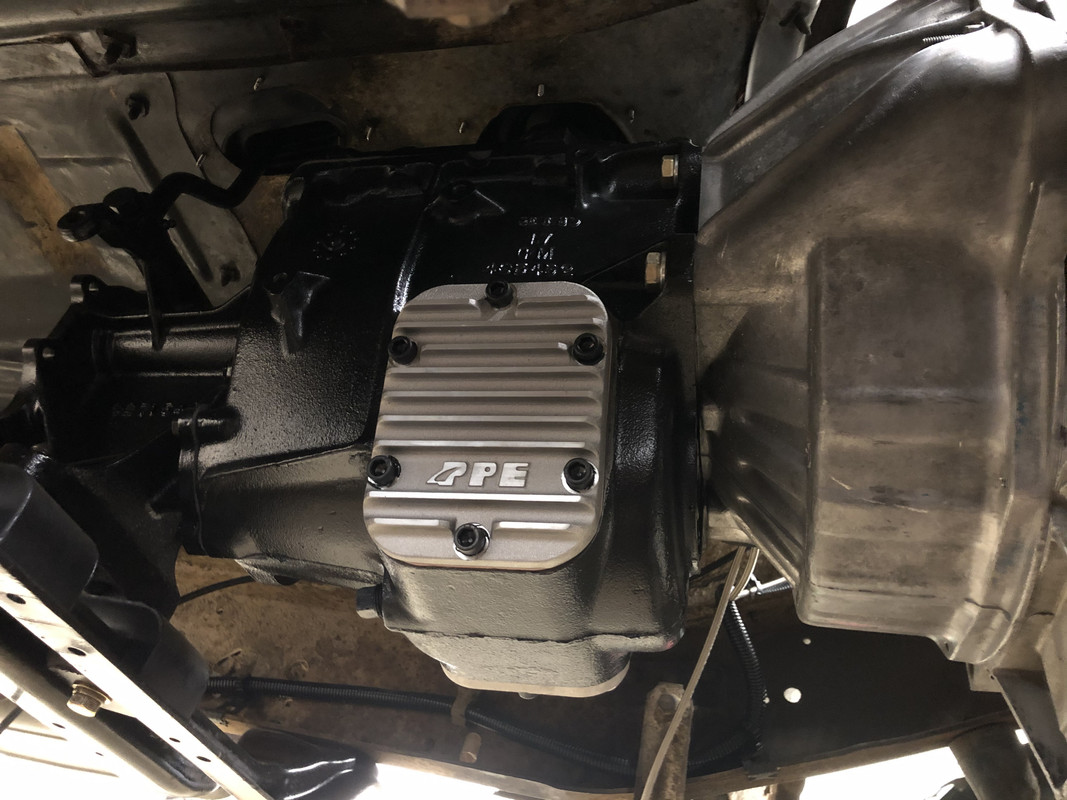 Came back to the throttle body and trimmed off the bottom lip from the bracket. 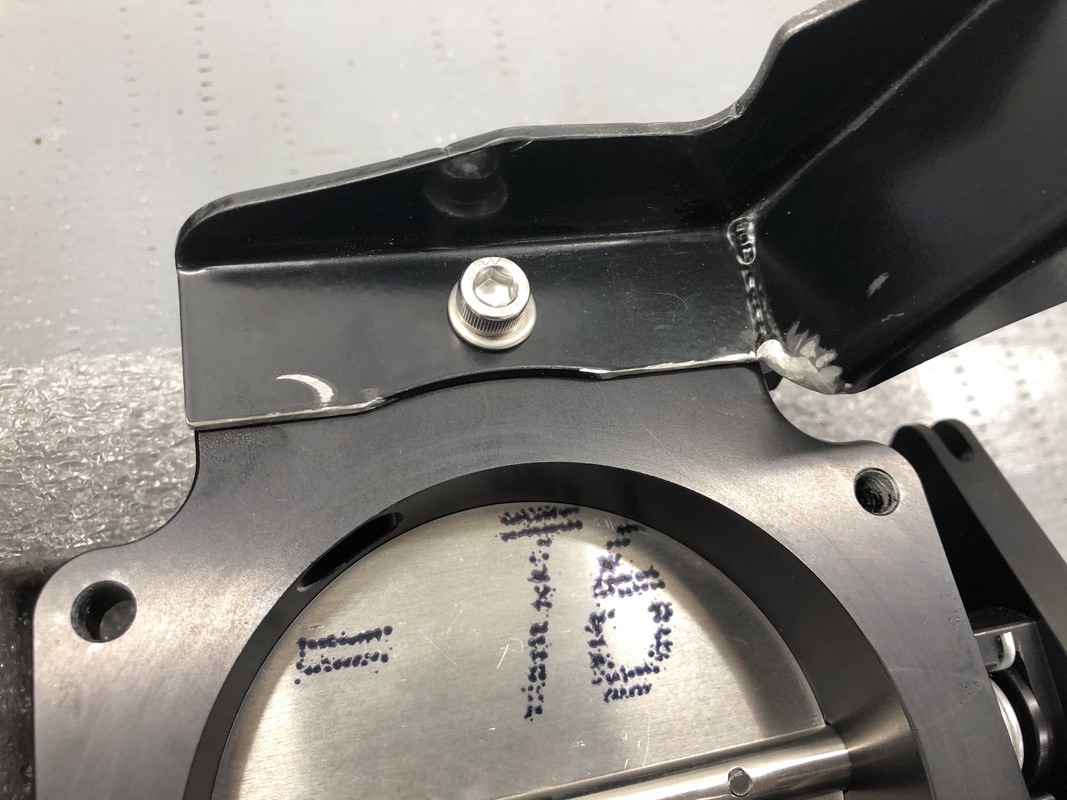 Aaaaannnnndddd it still hits. Seriously, I thought Nick Williams was supposed to be the best stuff out there. This is one of the ****tiest parts I've used on the truck so far! 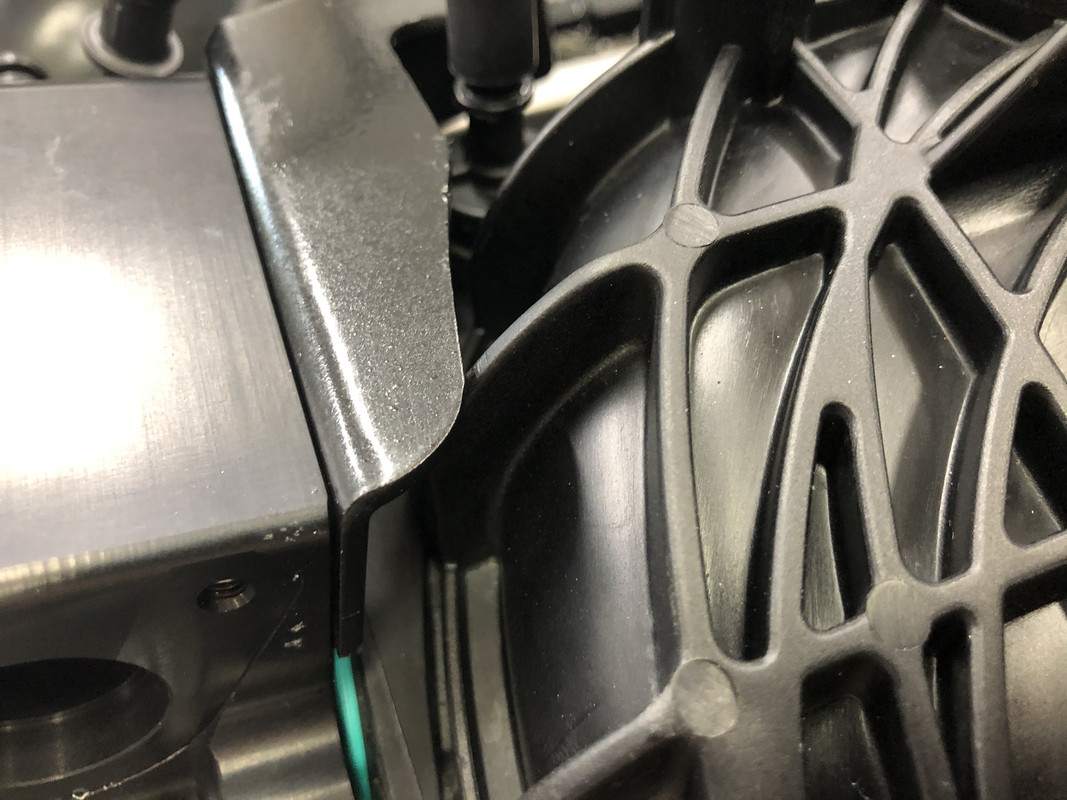 Clearanced it one last time, and it finally fit! Jesus christ that was an ordeal. I also decided to take advantage of the "wiring trays" cast into the intake and routed the alternator wire up through one of them. 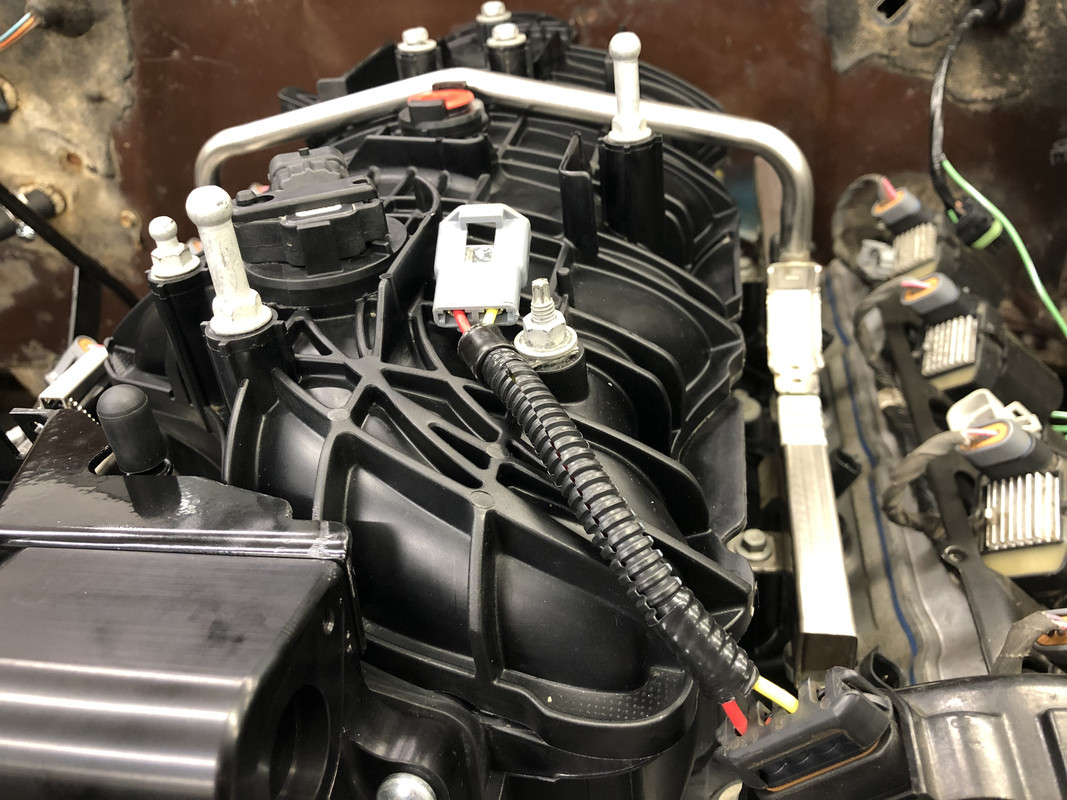 Finally, finally, finally installed!  Next, I moved to the rear and started changing out the taillight harness!  The new LED bulbs! Yes, they look like aliens. 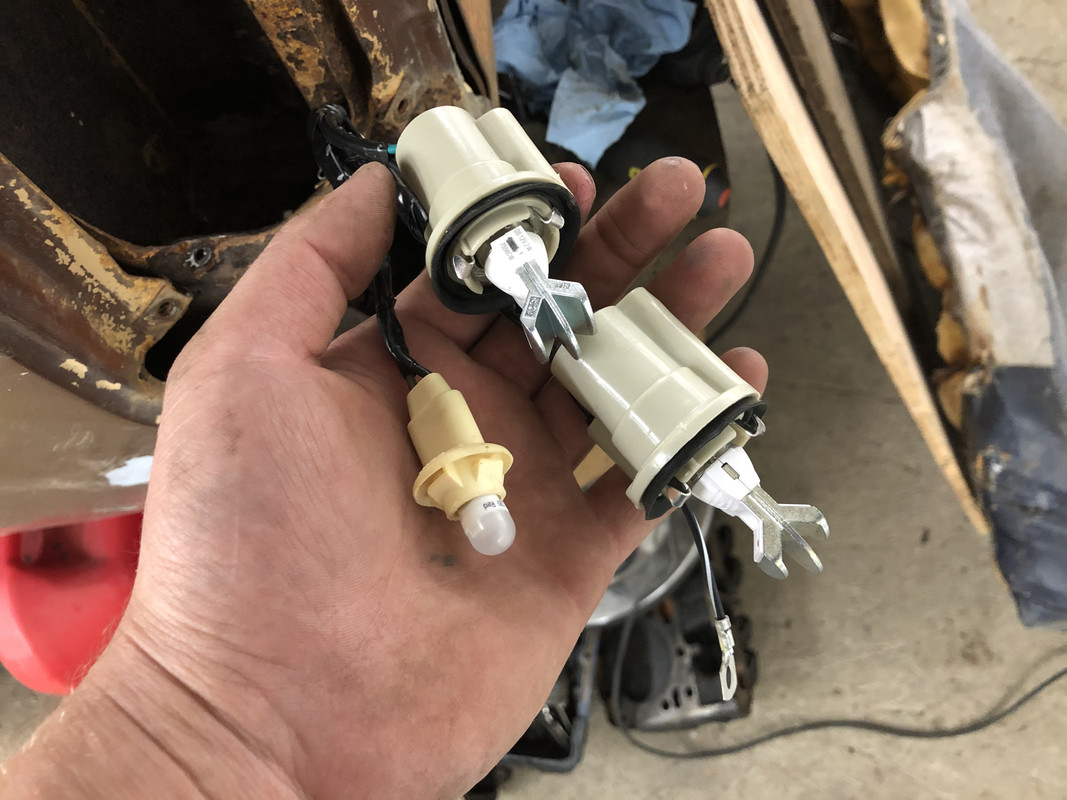 One new taillight, at least!  Under bed routing 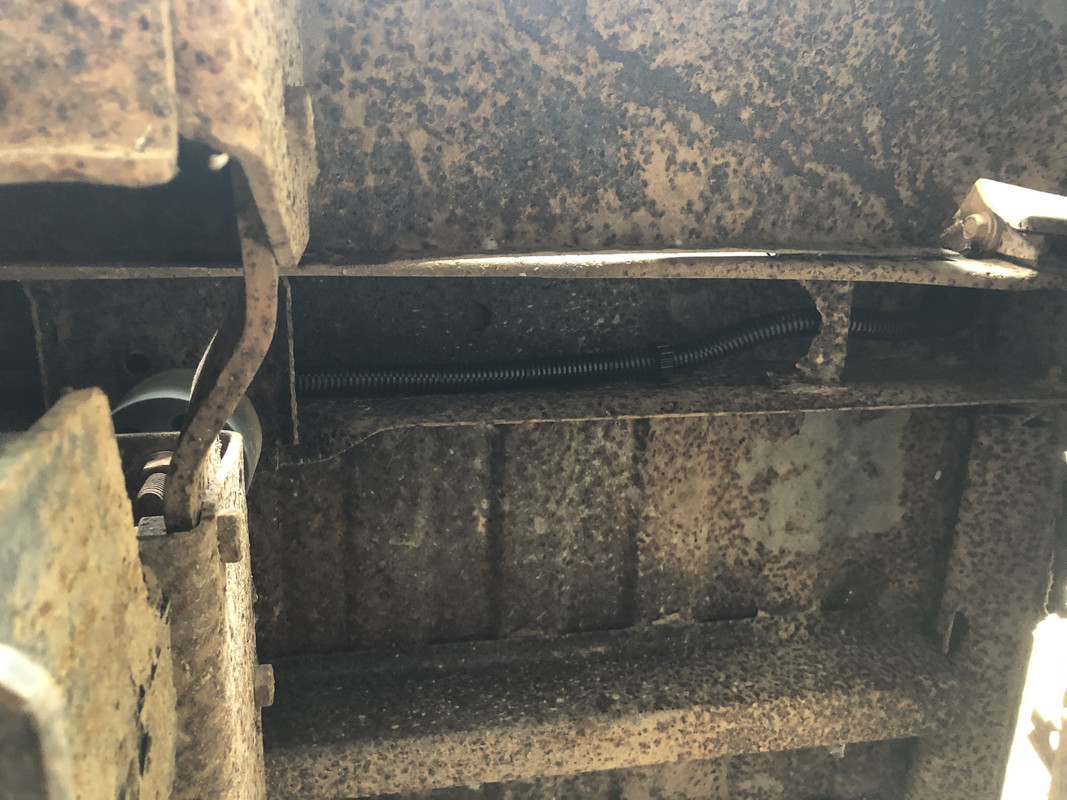 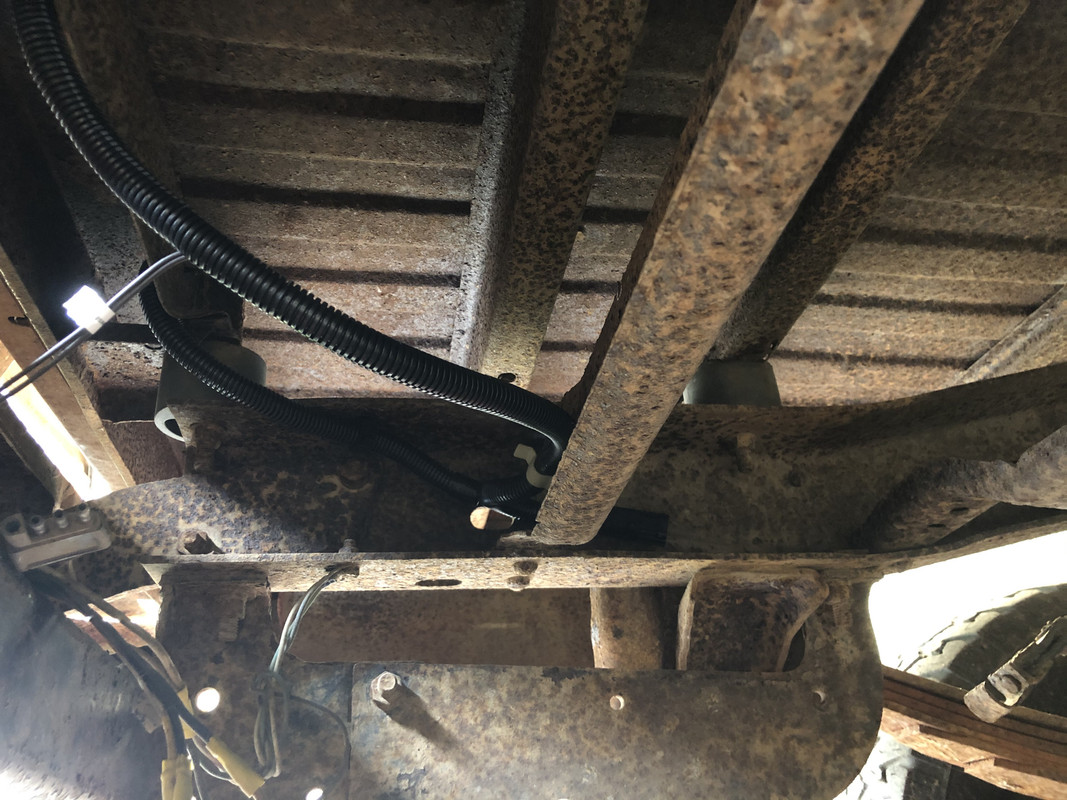 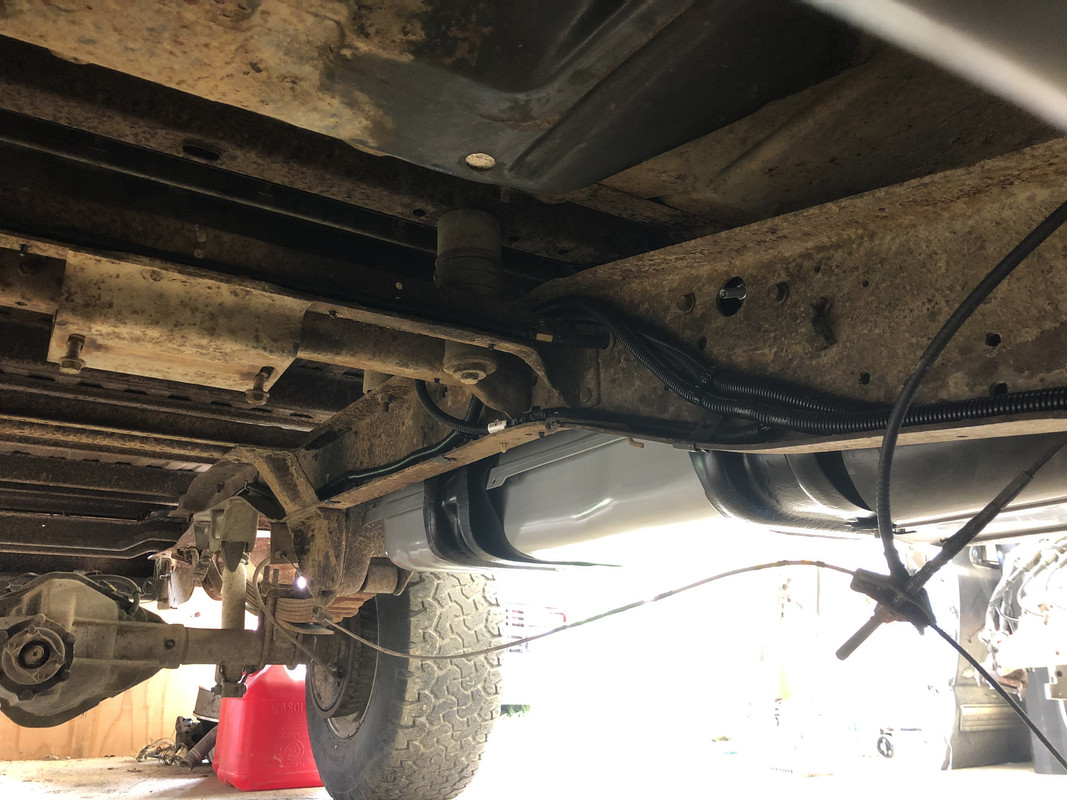  Cleaned this area up a little bit more. 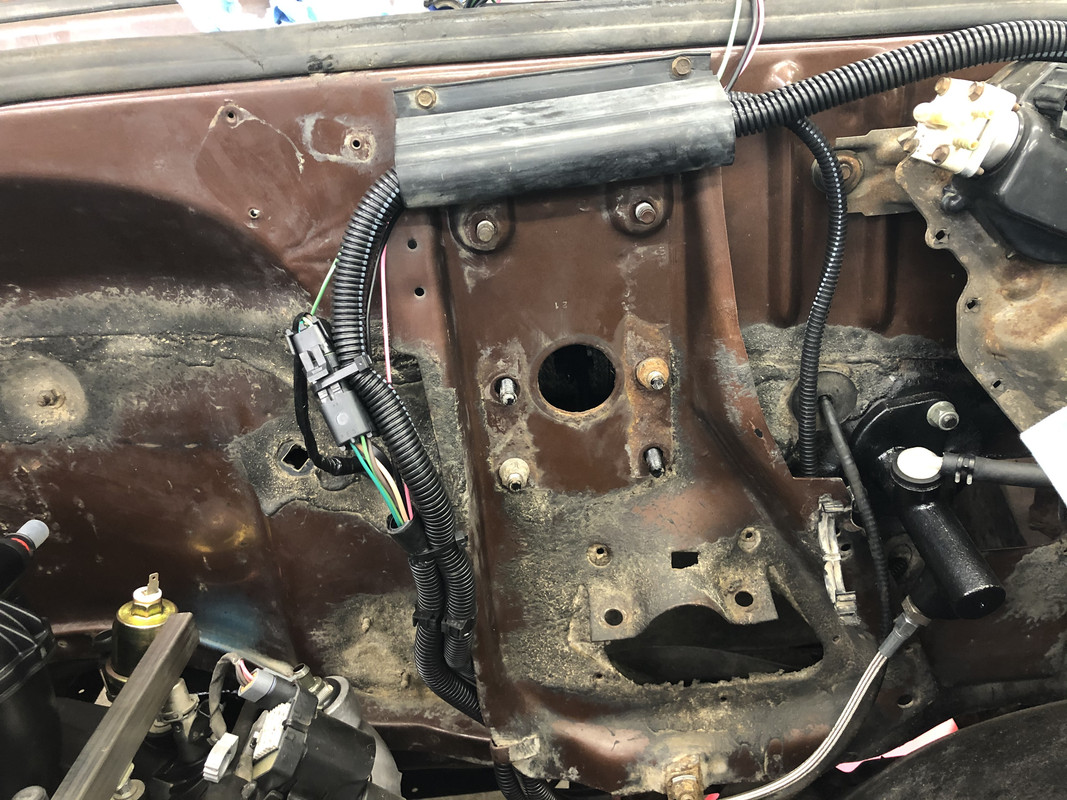 Ran some conduit and layed some heat tape on the reverse light switch wire. 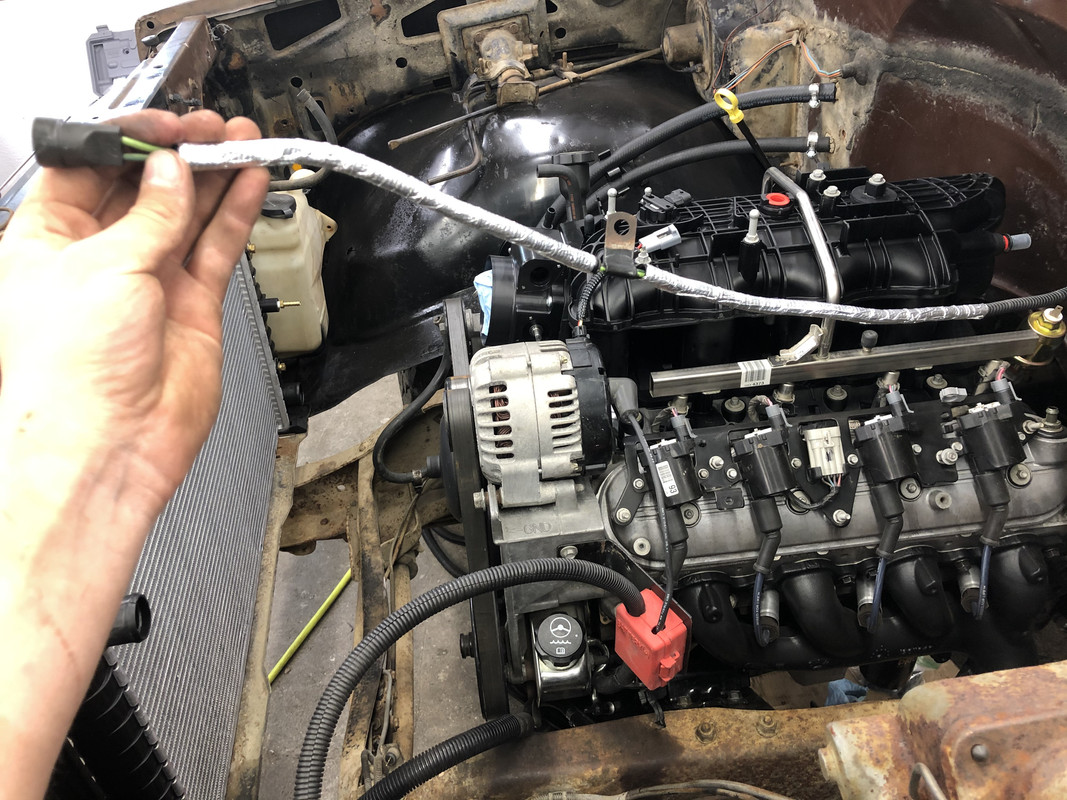 Installed! 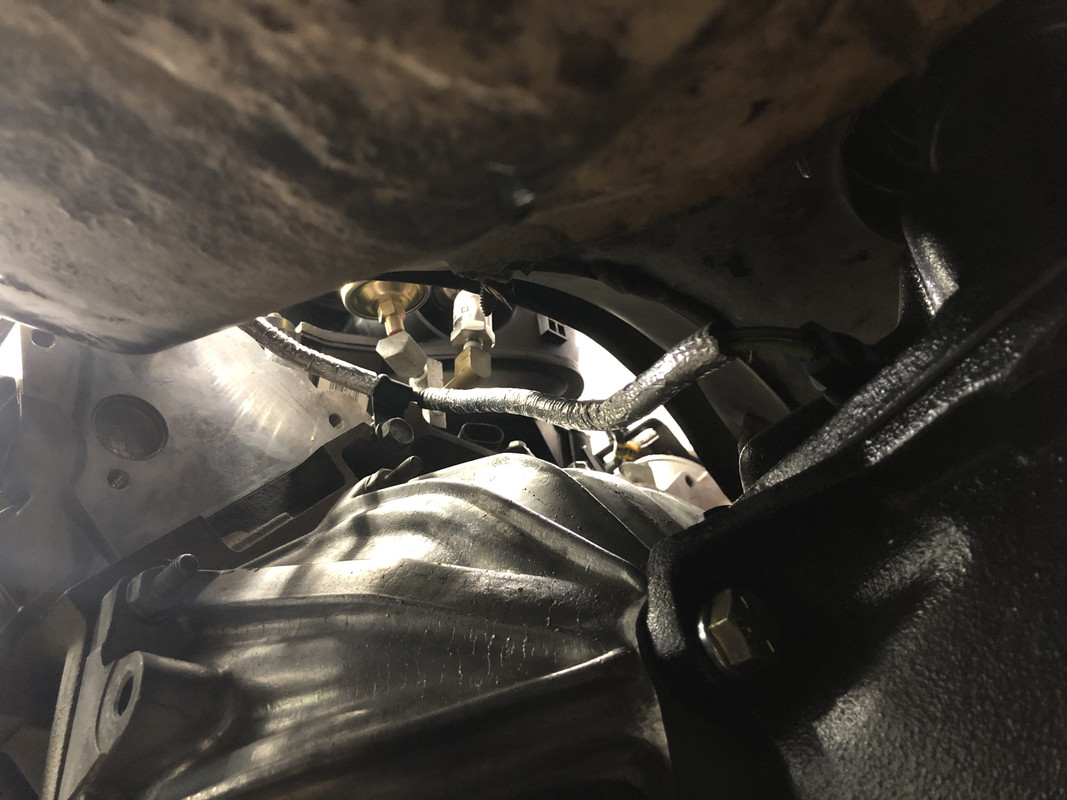  And to end the weekend off, I ran the headlight wiring harness! The routing on the passenger side may have to get redone, as I'm not quite sure yet how I'll be mounting the air filter housing, but for the most part this is how it should end up! 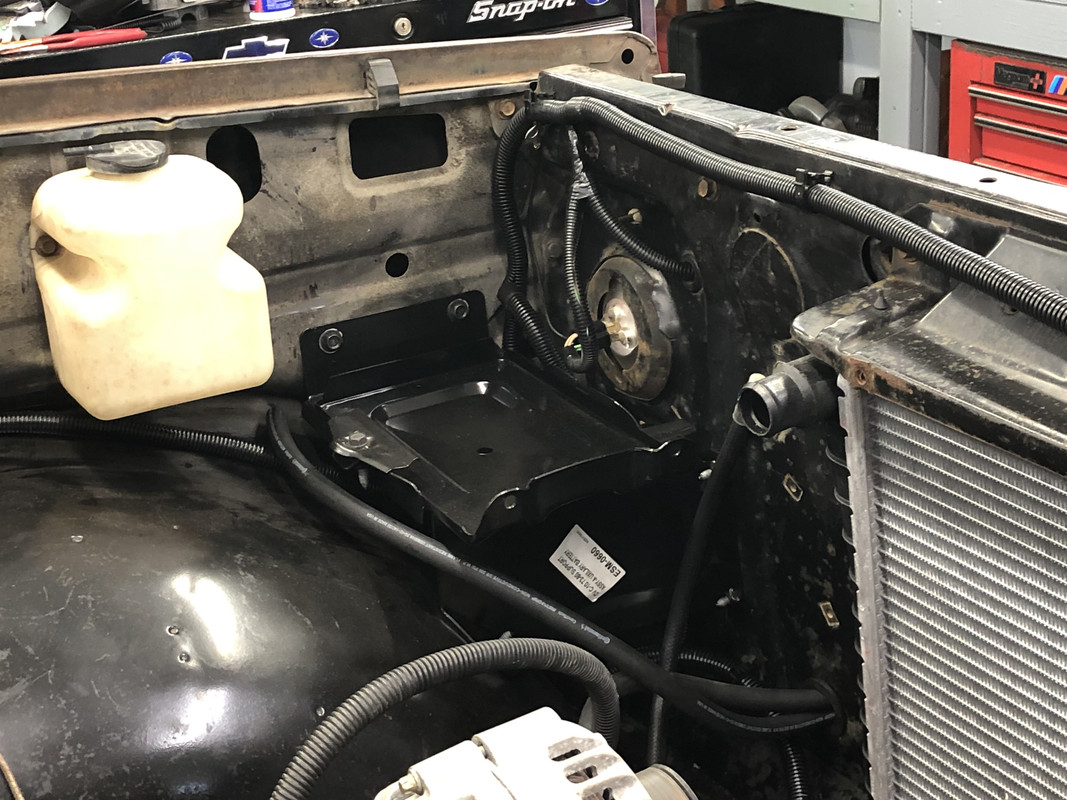 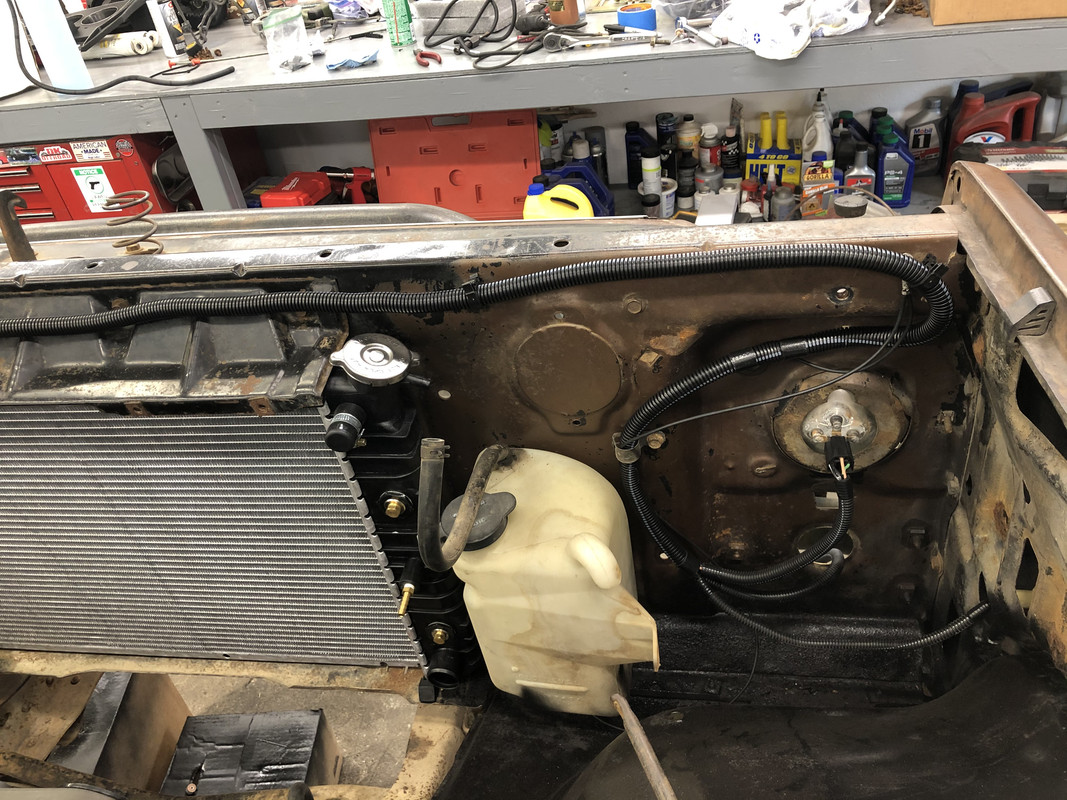
|
|
|
|
|
08-03-2020, 04:57 PM
|
#17 | |
|
Registered User
Join Date: Nov 2014
Location: Norfolk,NE
Posts: 136
|
Re: 1978 Chevy K20 longbed with nearly 500,000 miles! LS Swap begins!
Quote:
__________________
1982 Sierra Classic K15 RC/LB 6.2L Diesel 700R4 1988 GTA Trans AM 305 TPI 700R4 1993 Formula Firebird LT1 T56 1995 GMC K2500 ECLB 6.5L 4L80E 1996 GMC K3500 CCLB LB7 6L90 |
|
|
|
|
|
08-07-2020, 02:40 PM
|
#18 |
|
Registered User
Join Date: May 2016
Location: Willow, Alaska
Posts: 846
|
Re: 1978 Chevy K20 longbed with nearly 500,000 miles! LS Swap begins!
Pretty good start to this weekend already! The other side taillight came in!
 I also got started on the power steering pump change, or the real fun part Pulley is off!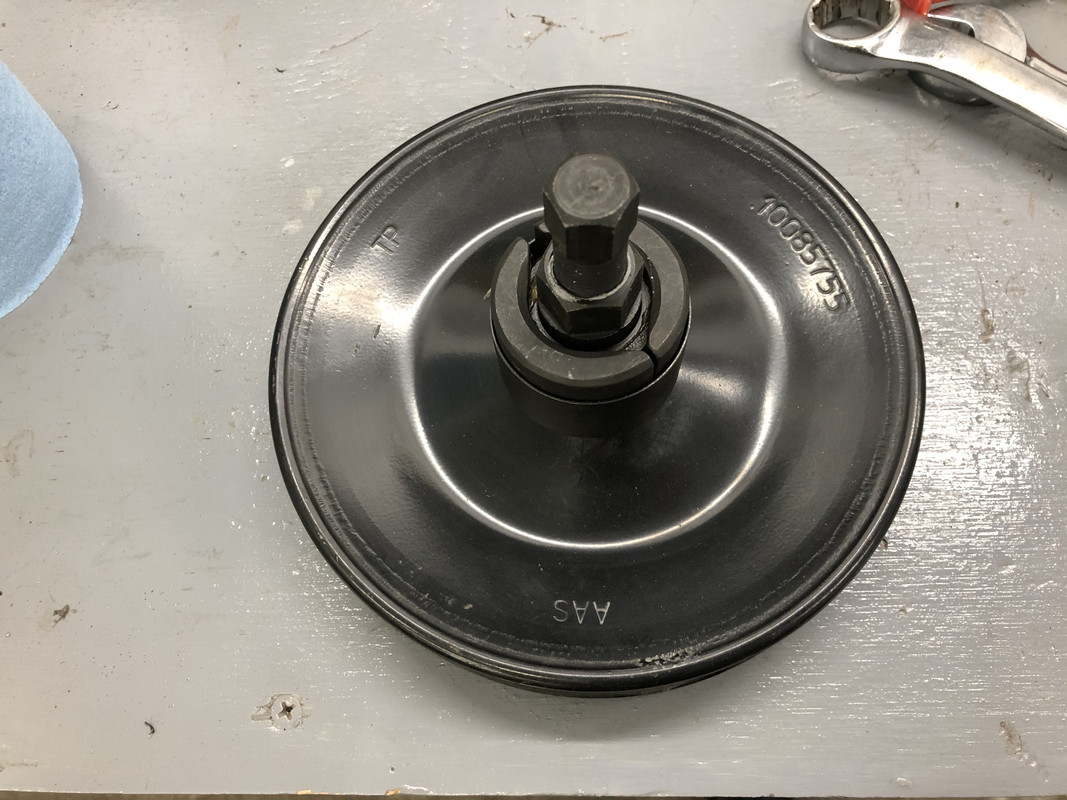 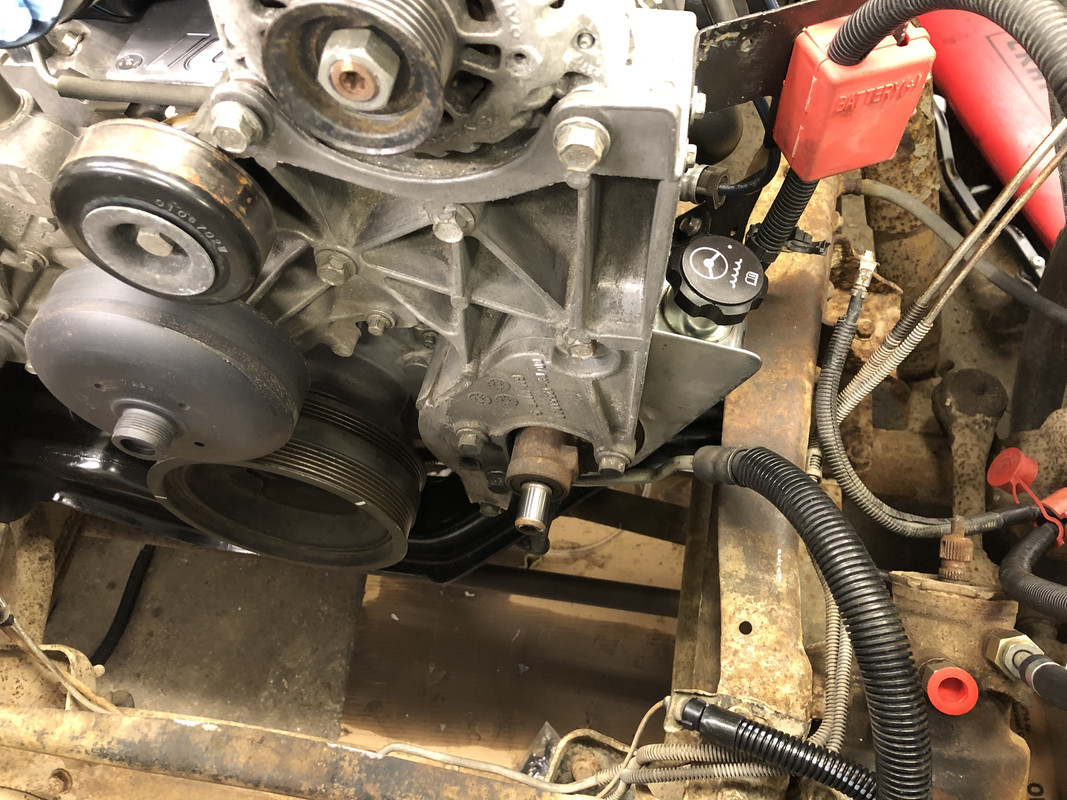 Old pump removed! 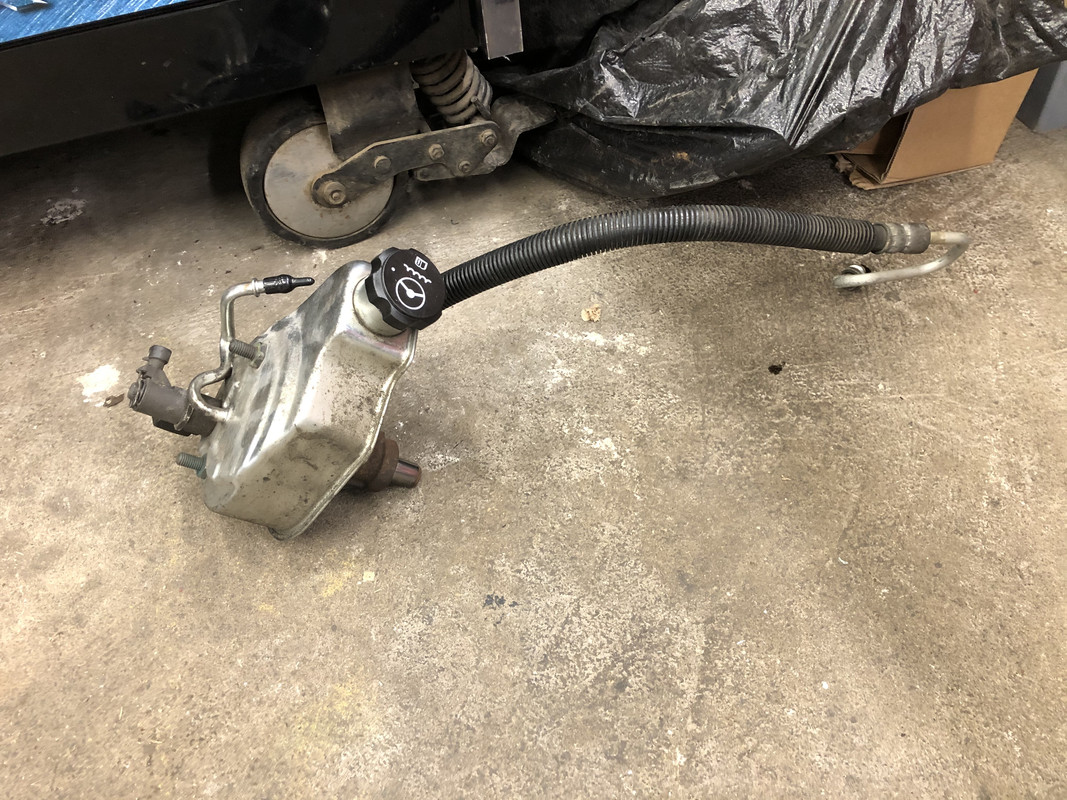 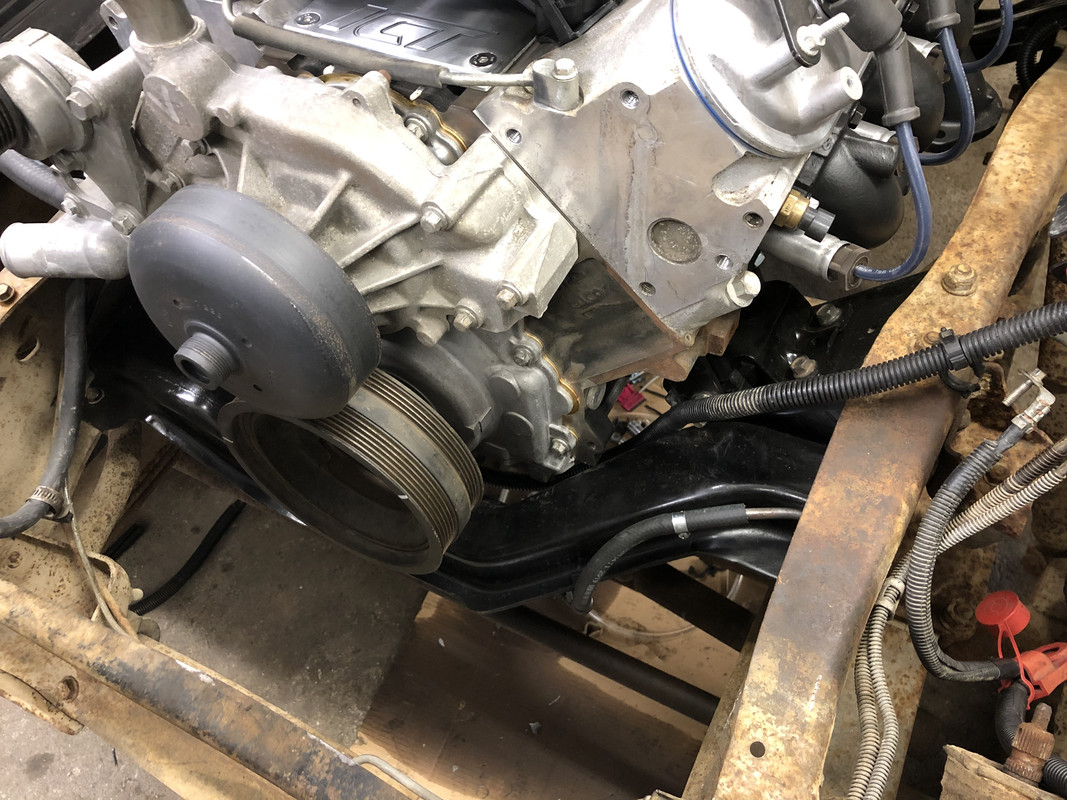 Here's our new pump, the pump and lines were ordered for a 2002 1500HD, as my DD uses the exact same parts. This pressure line is ran a little different than factory though. It will have to be fastened above the return line in order to clear the frame, rather than below it like the factory did. The lines also require a few easy tweaks. 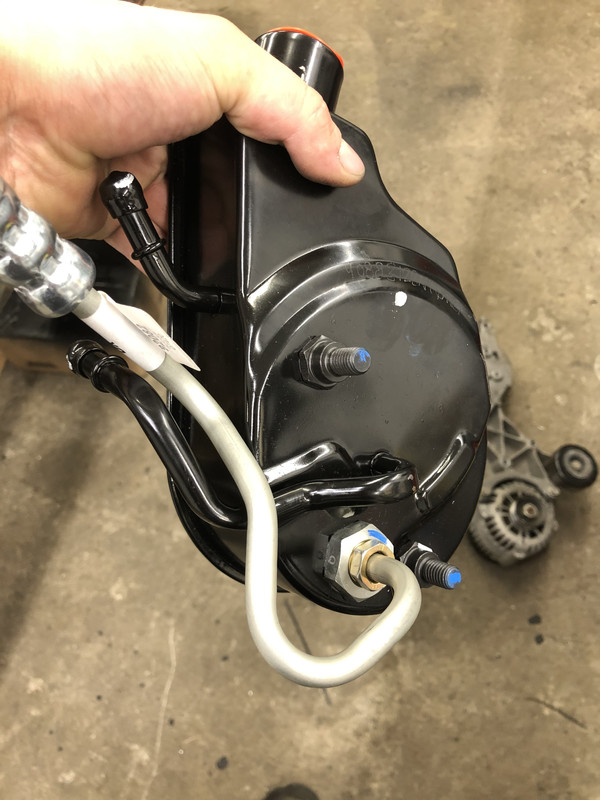 New pump installed for test fit! 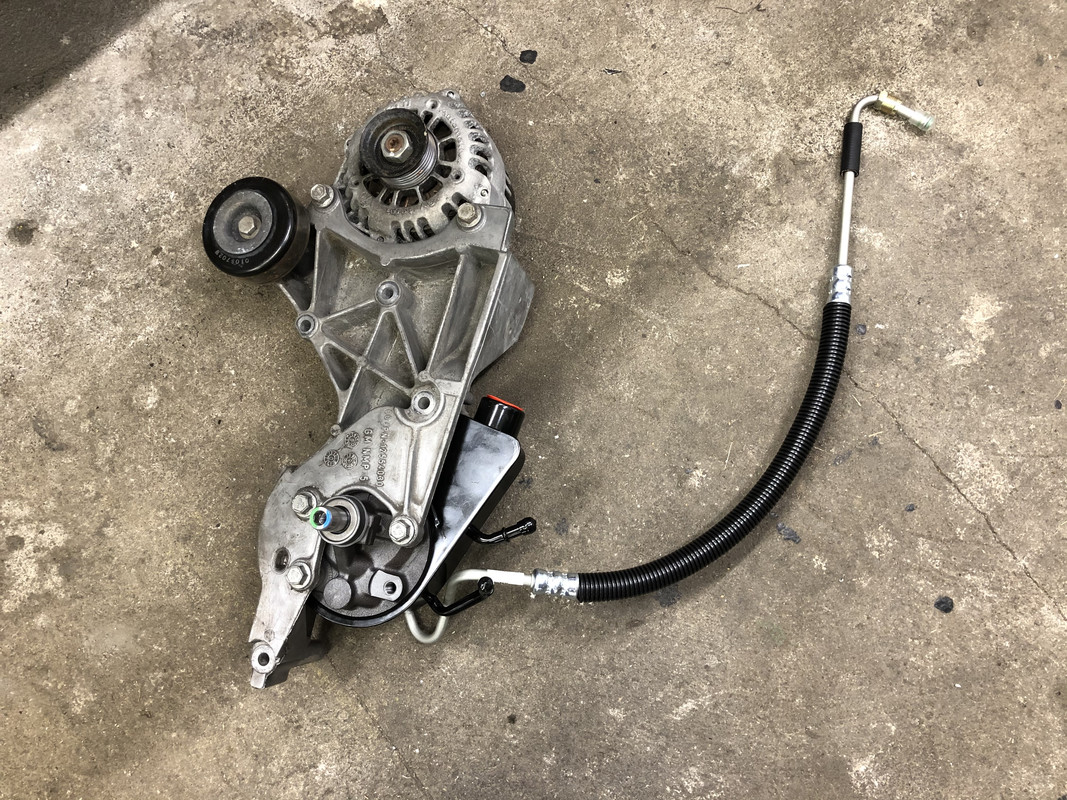 The pressure line will have to be bent so that the angle resembles the upper return line port. 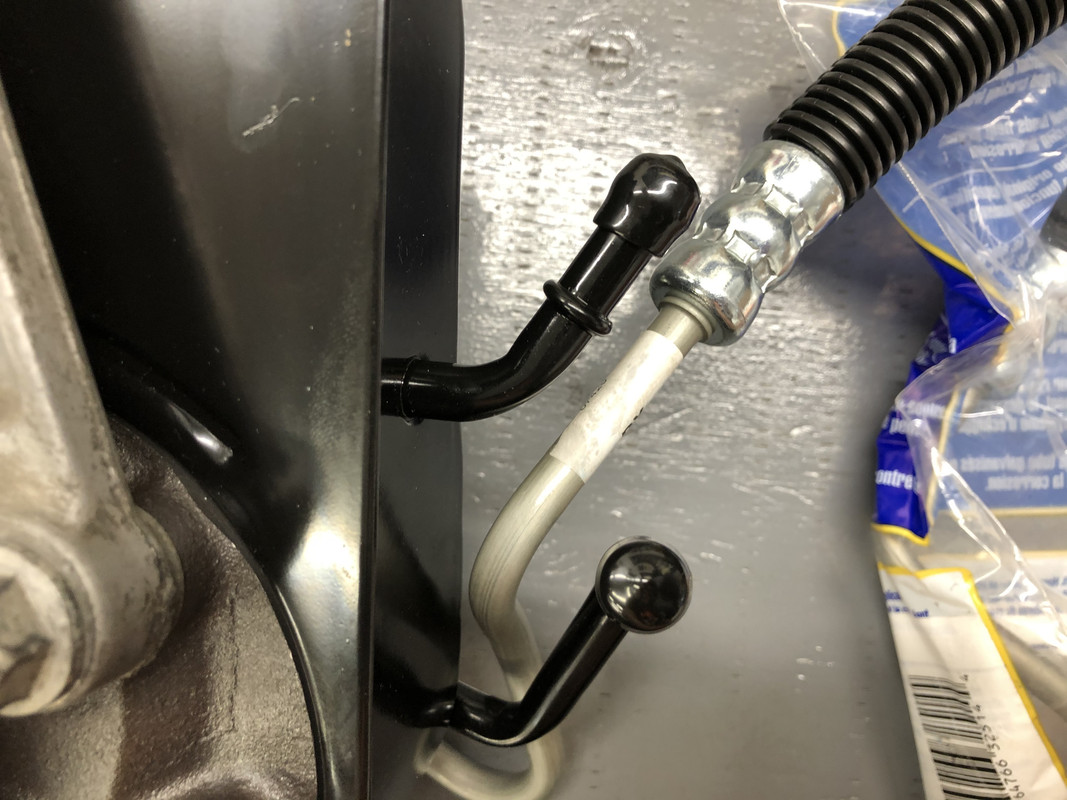 It also needs to be slightly twisted into a more upright position parallel to the rear portion of the bend. 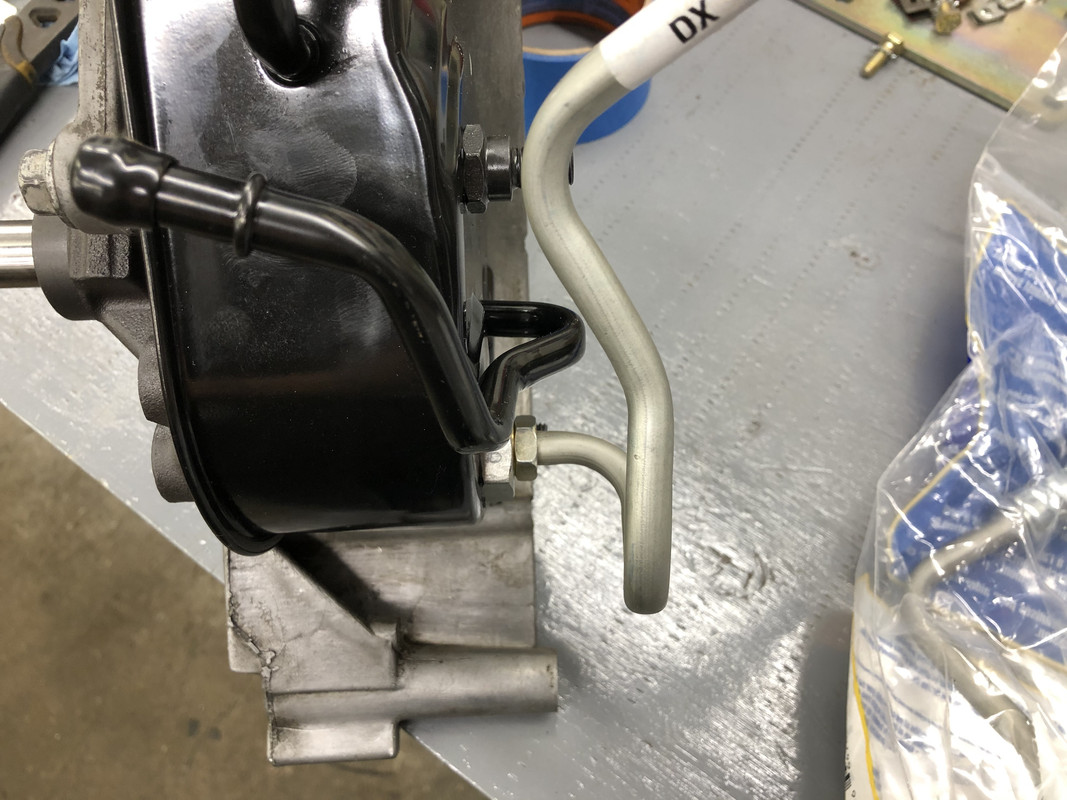 The lower return line needs to be slightly pushed down to sit horizontal. 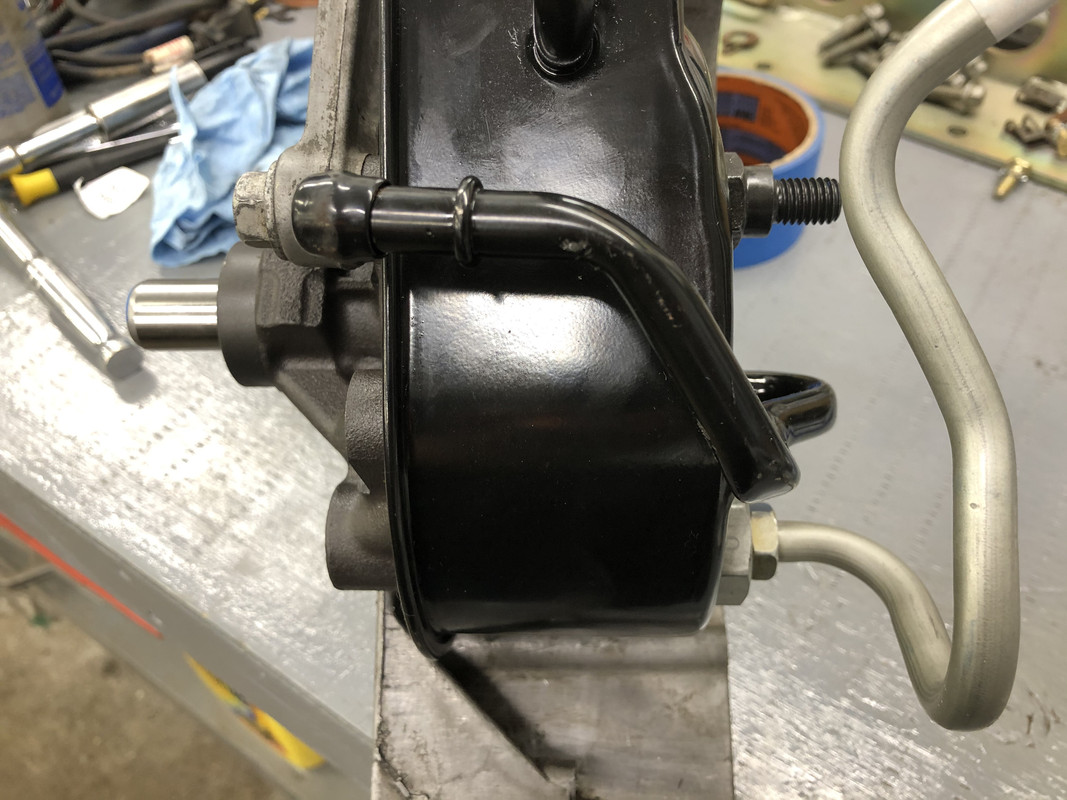 And turned just a bit more inward to allow for line clearance at the frame. 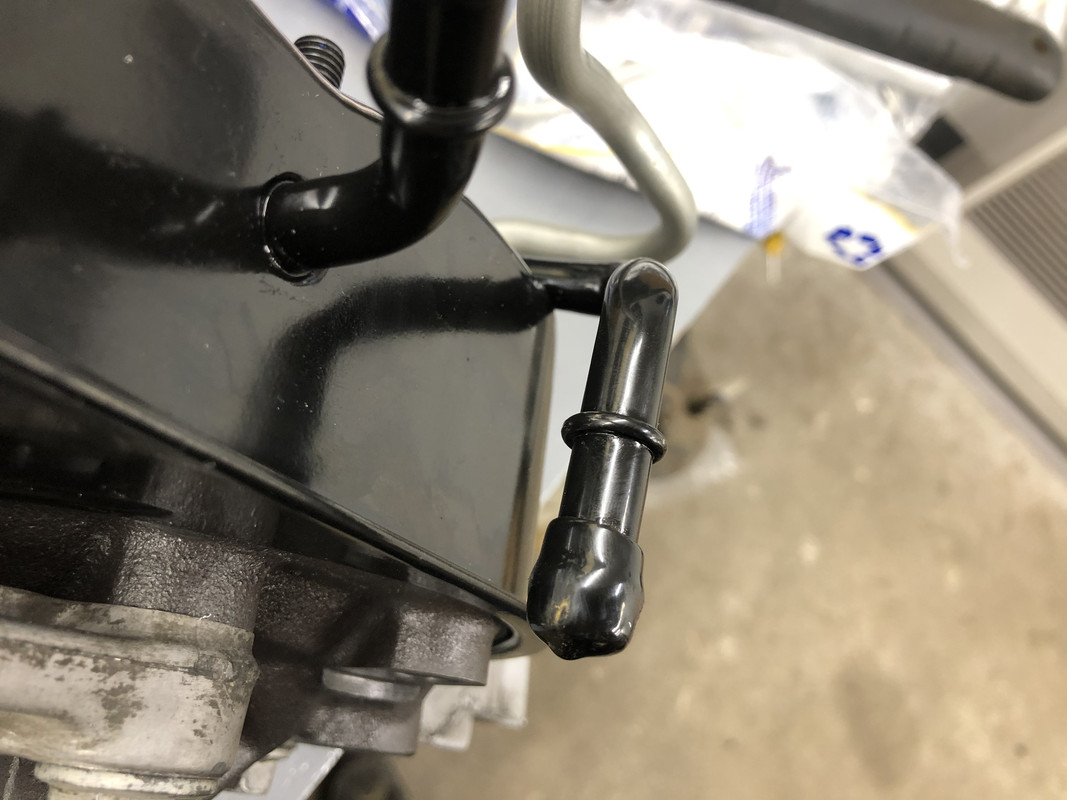 This is how everything will fit and clear afterwards! 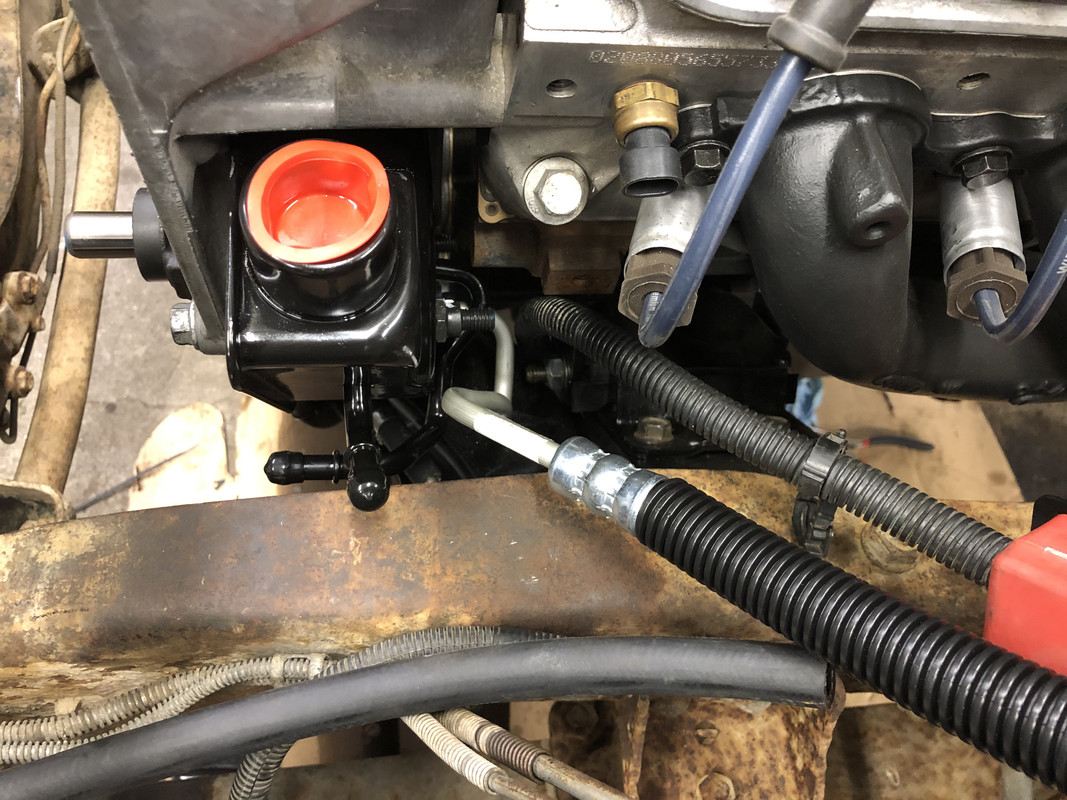 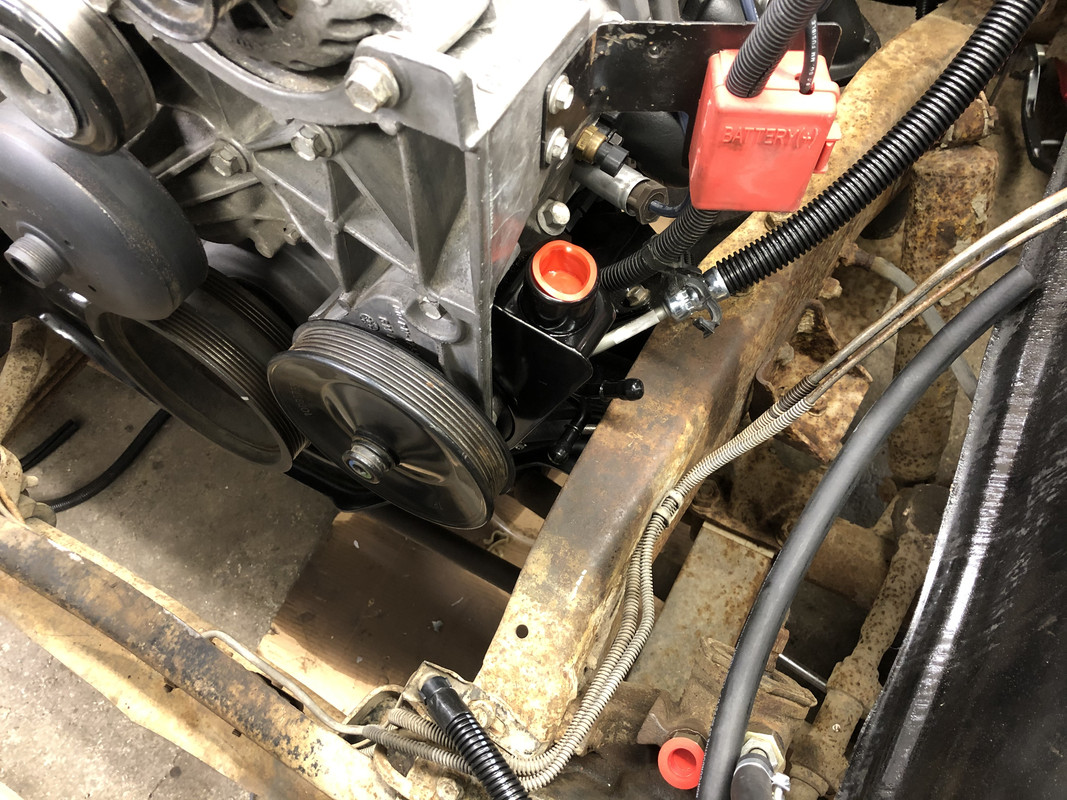 Lower return line hose routing. 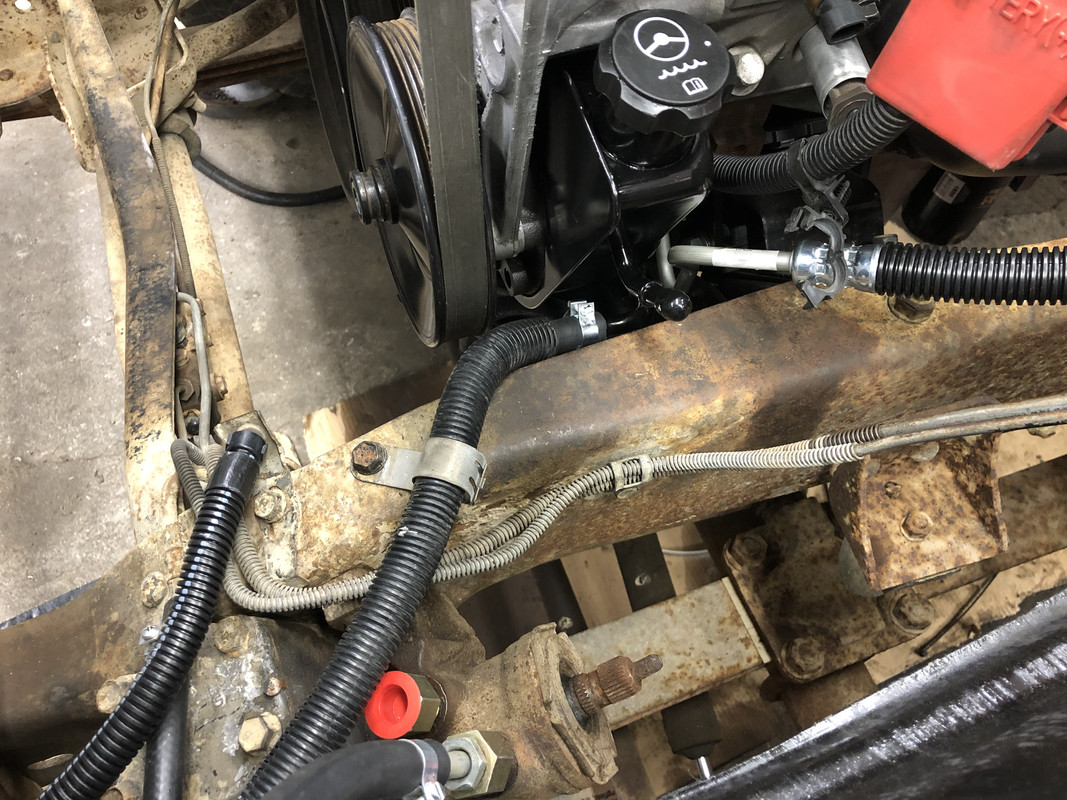 Pulley clearance, at least 3/8". 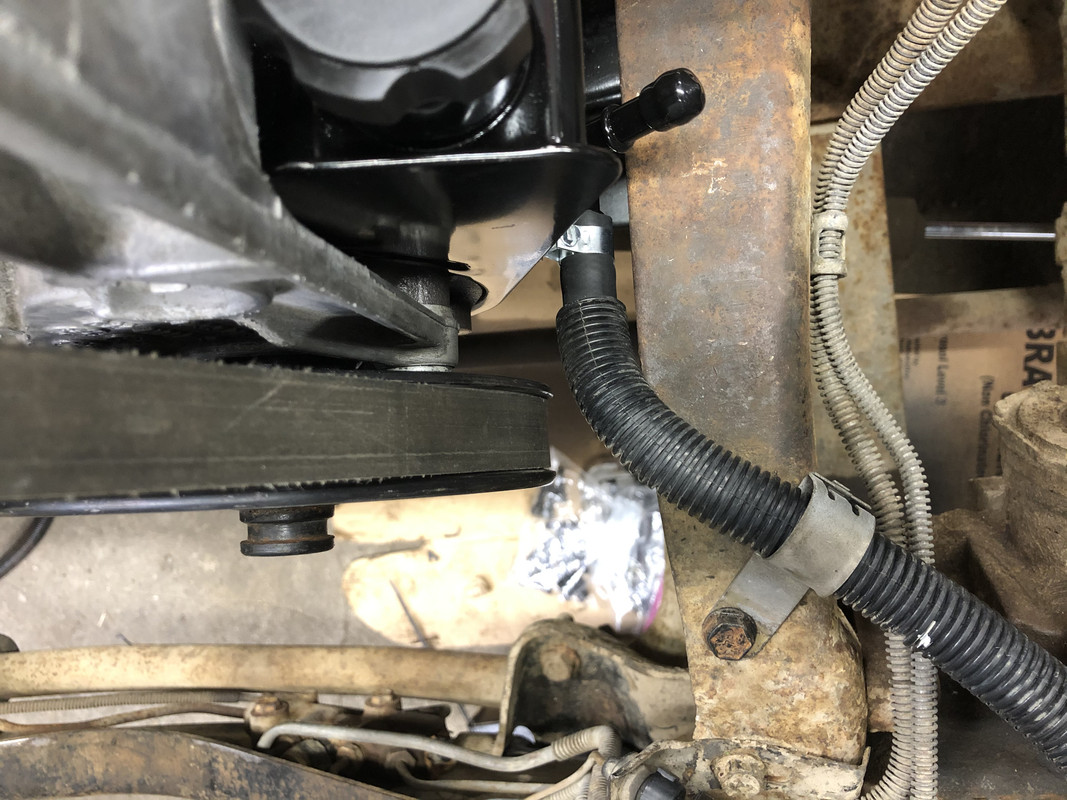 Pressure lines now perfectly reach the hydroboost area! (I hope) 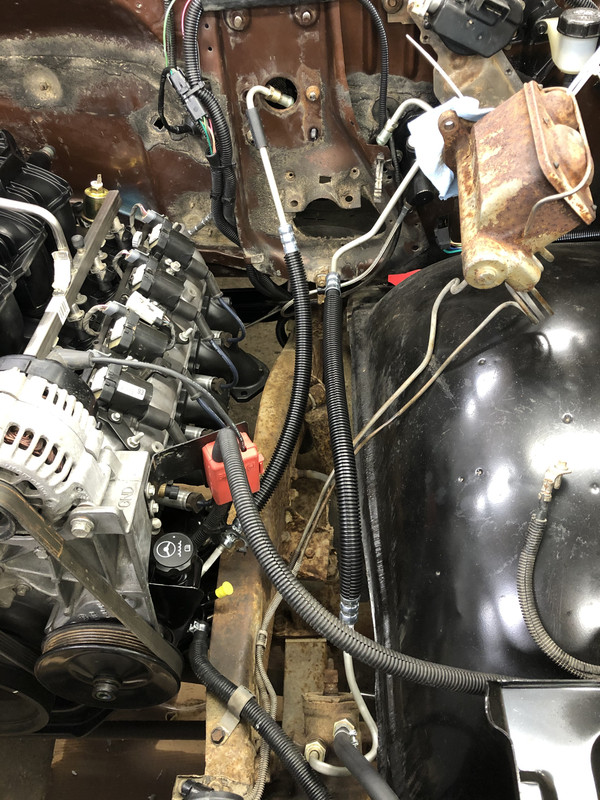
|
|
|
|
|
08-08-2020, 04:44 PM
|
#19 |
|
Registered User
Join Date: May 2016
Location: Willow, Alaska
Posts: 846
|
Re: 1978 Chevy K20 longbed with nearly 500,000 miles! LS Swap begins!
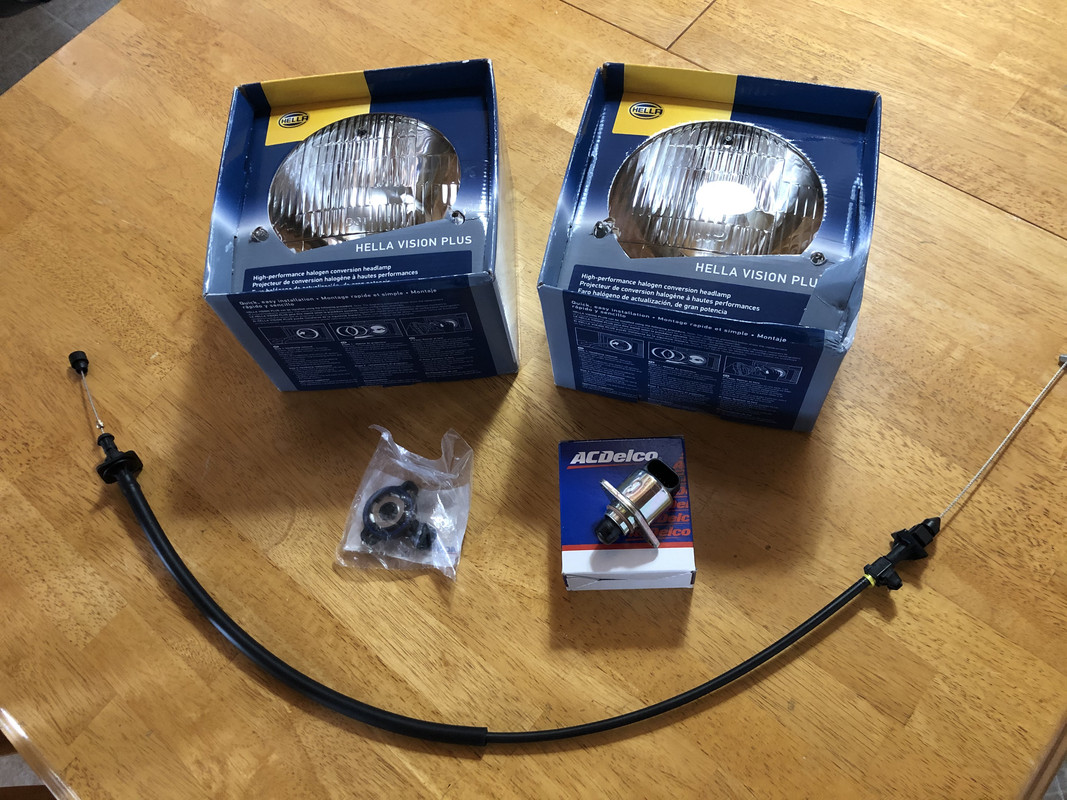
A few more things came in! The new H4 conversion headlights, a 99-09 Silverado throttle cable, and a TPS and IAC sensors. The throttle cable does not fit the Nick Williams throttle cable bracket, so I am even less impressed with their throttle body now. I will definitely not be wasting money on one of their products again.
 Old headlights removed! 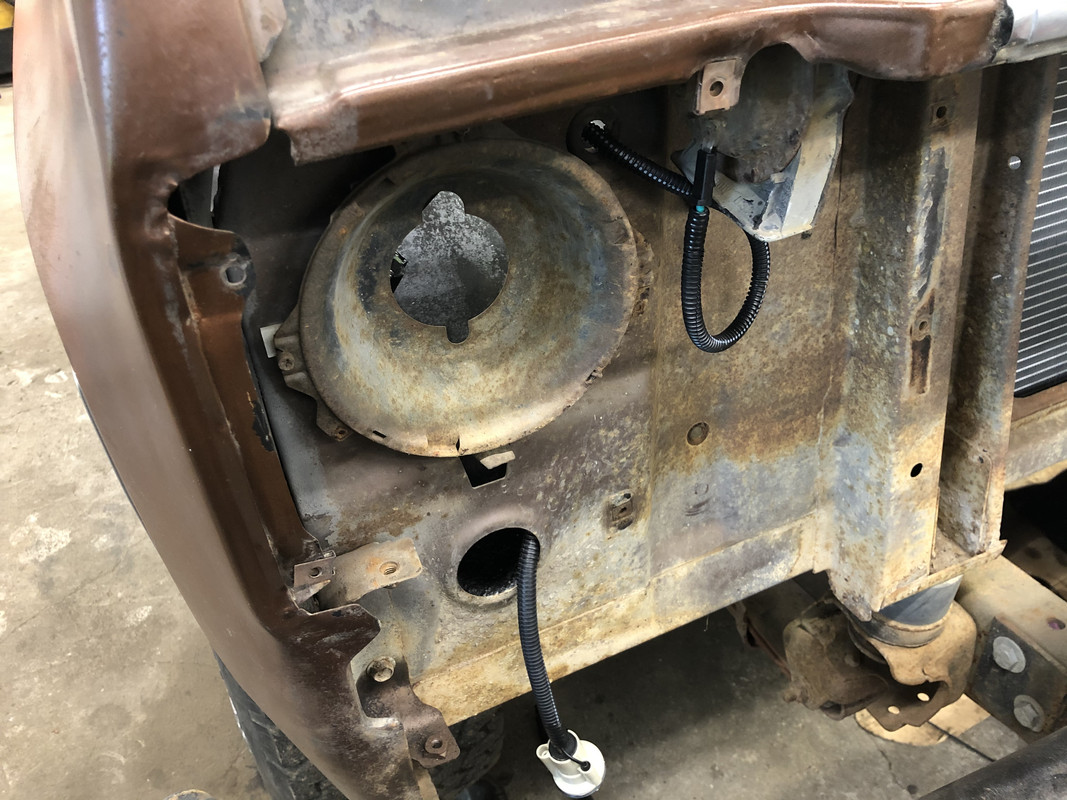 New lights! These are actually quite a bit flatter, unlike the stock ones which have a much more pronounced curve to the glass. 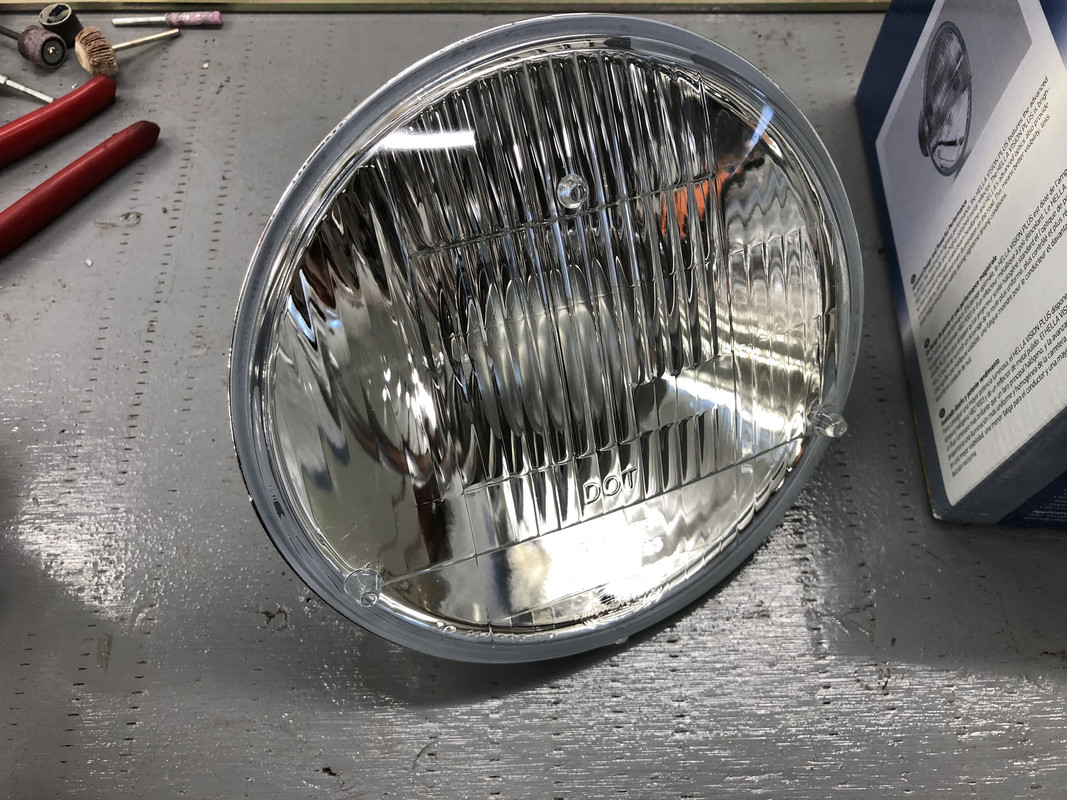 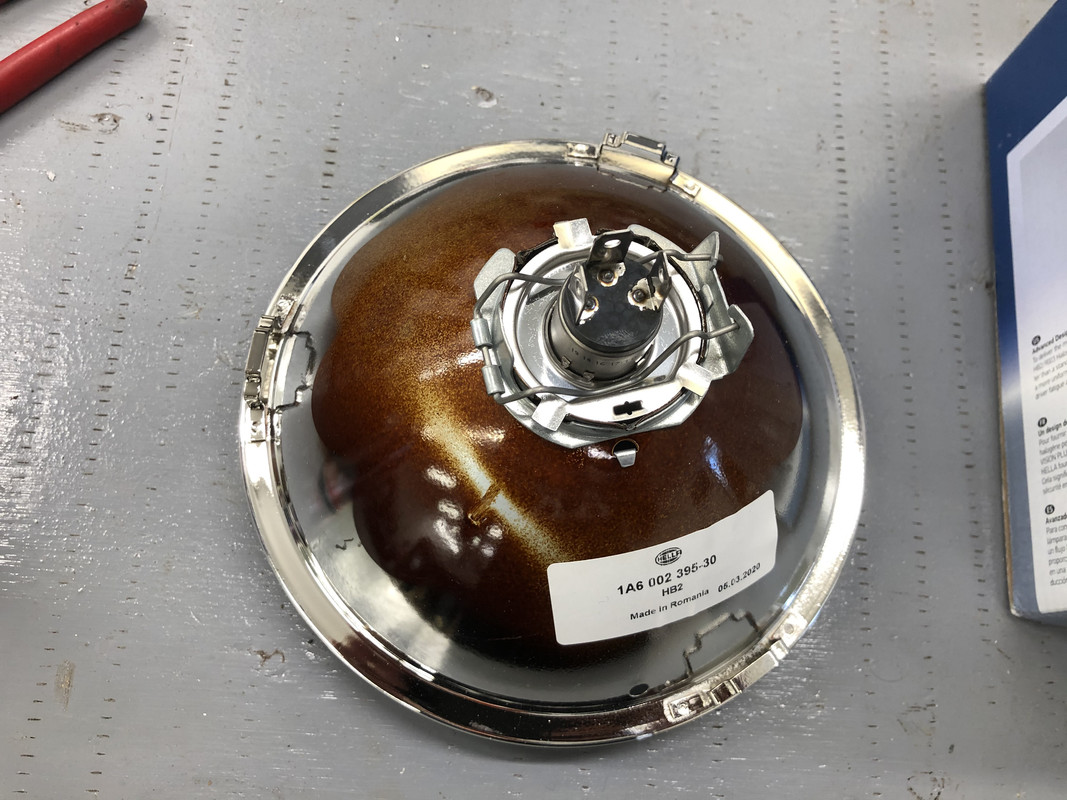 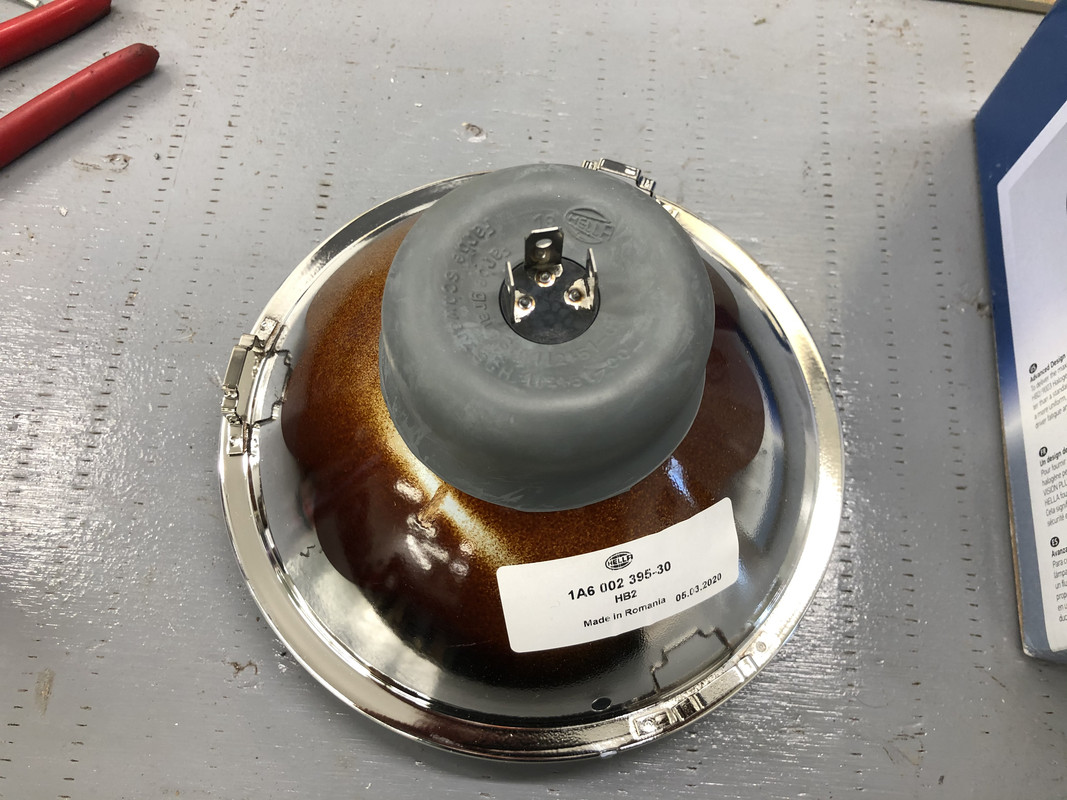 Installed! 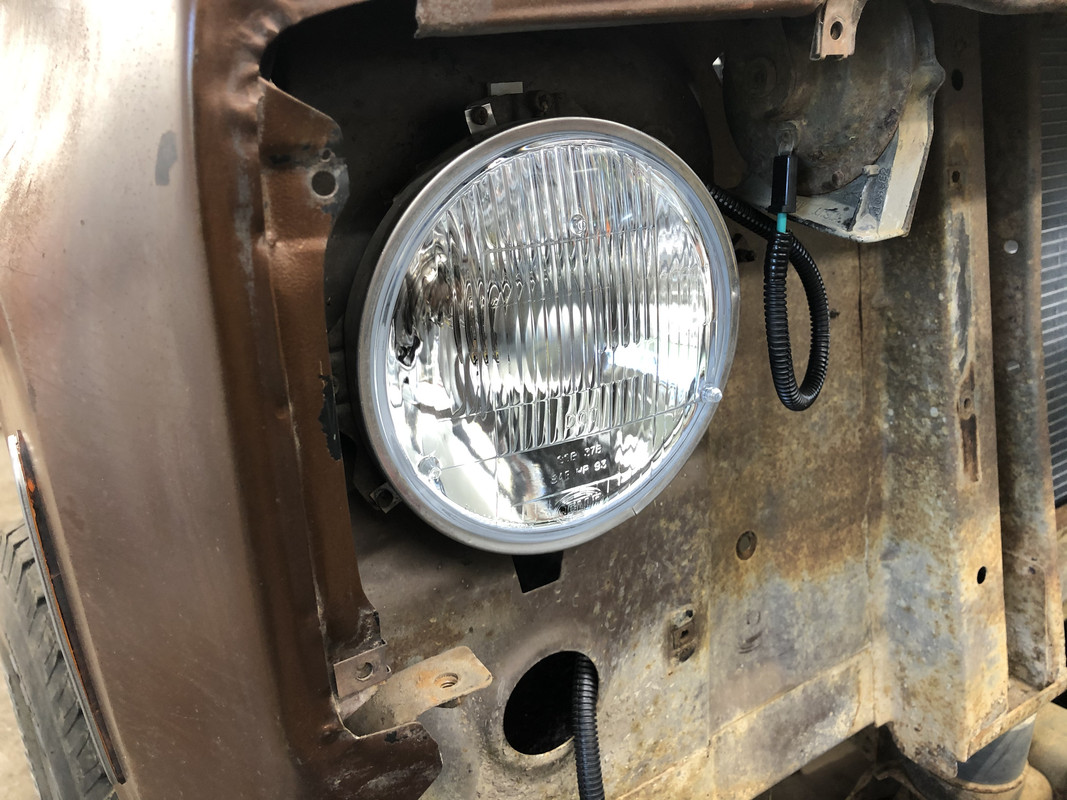 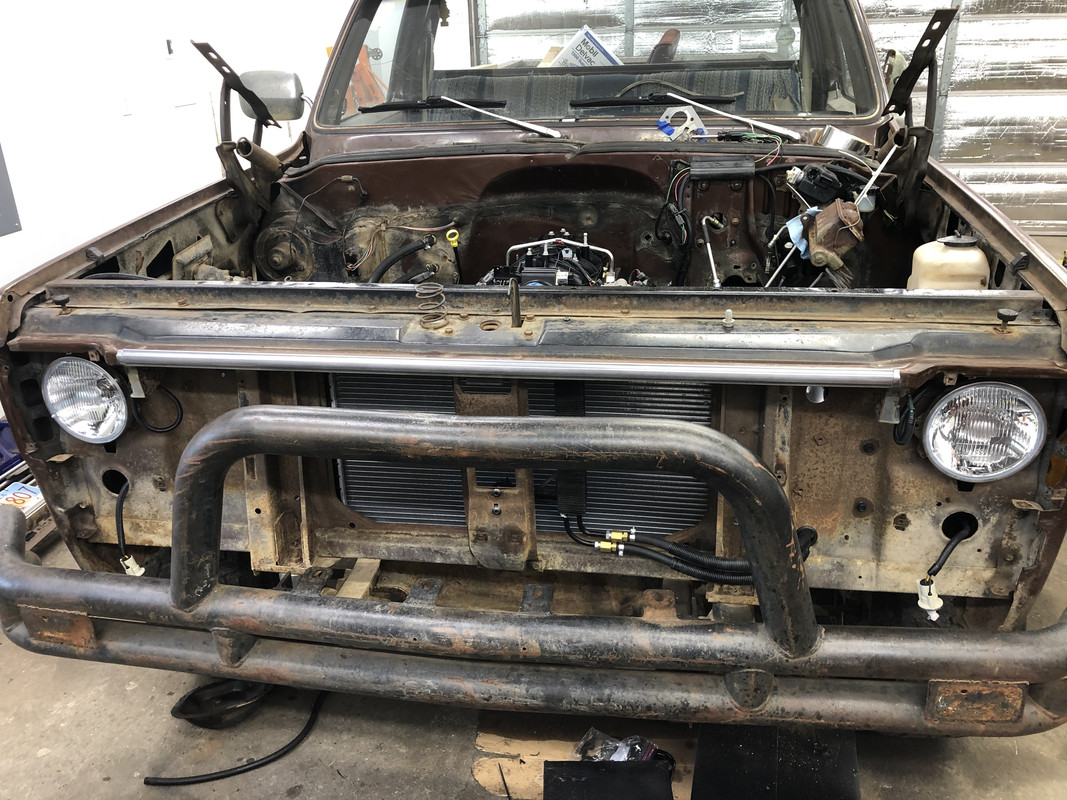 Also installed the two sensors to the throttle body. 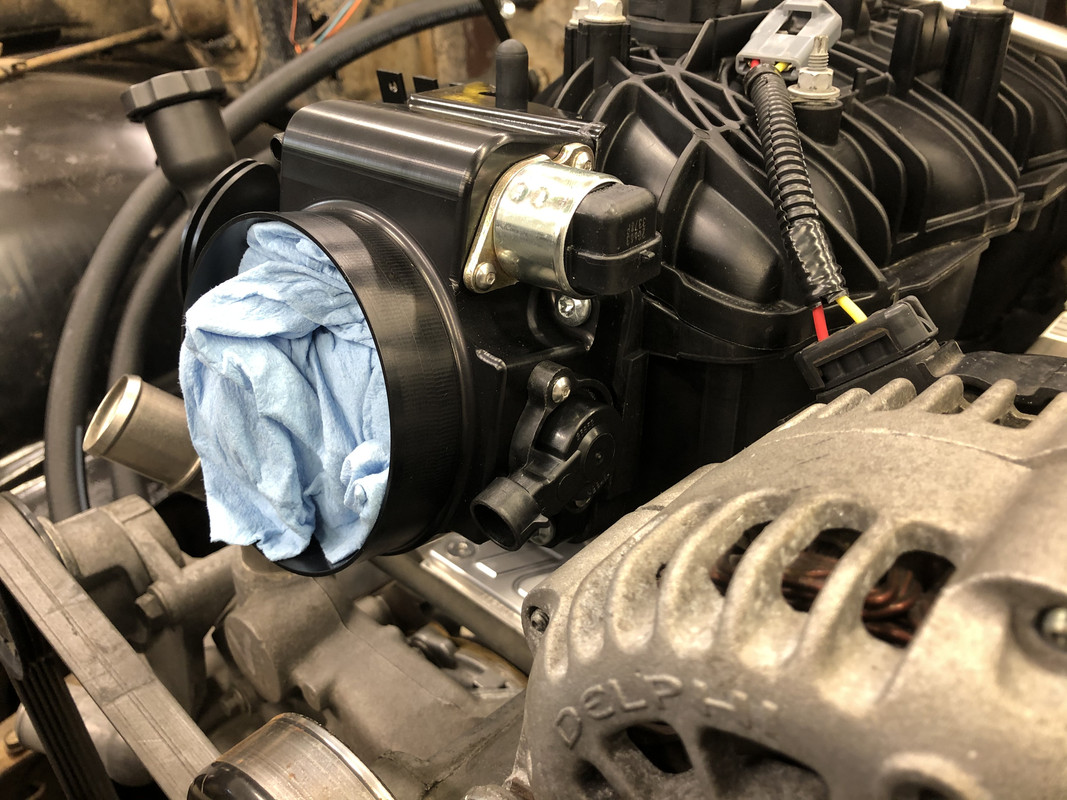 I picked up some license plate lights and battery terminal studs while I was out in town picking up parts for the Malibu. 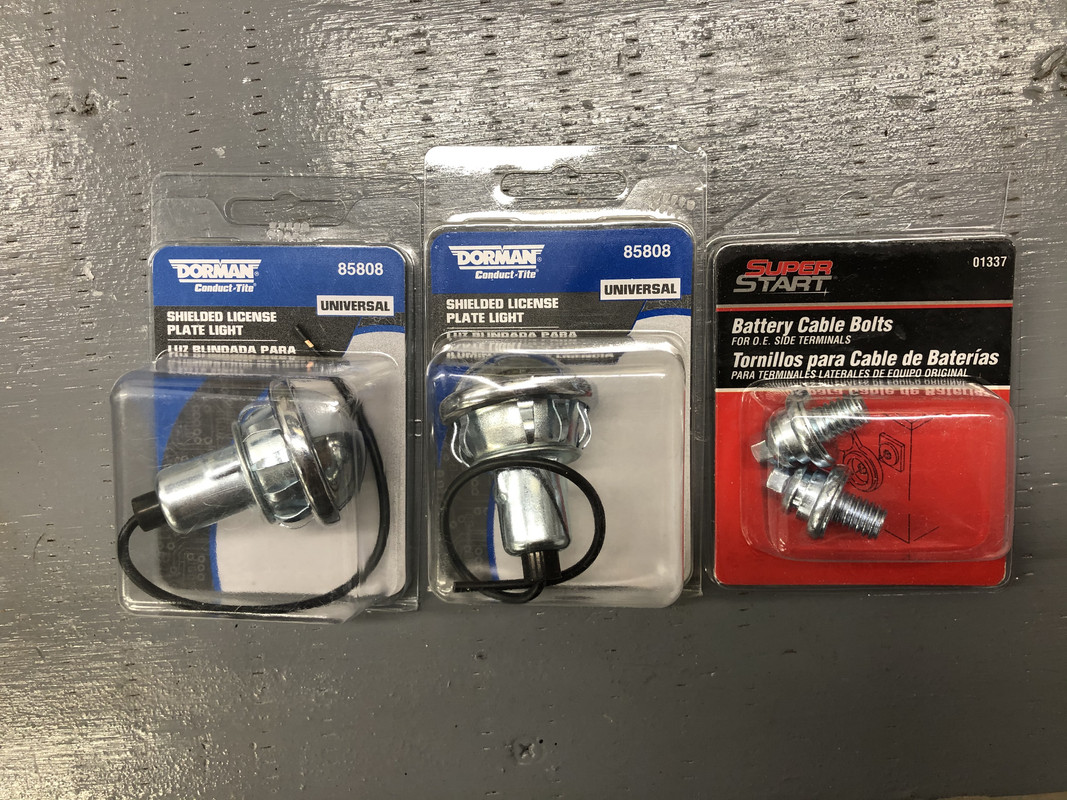 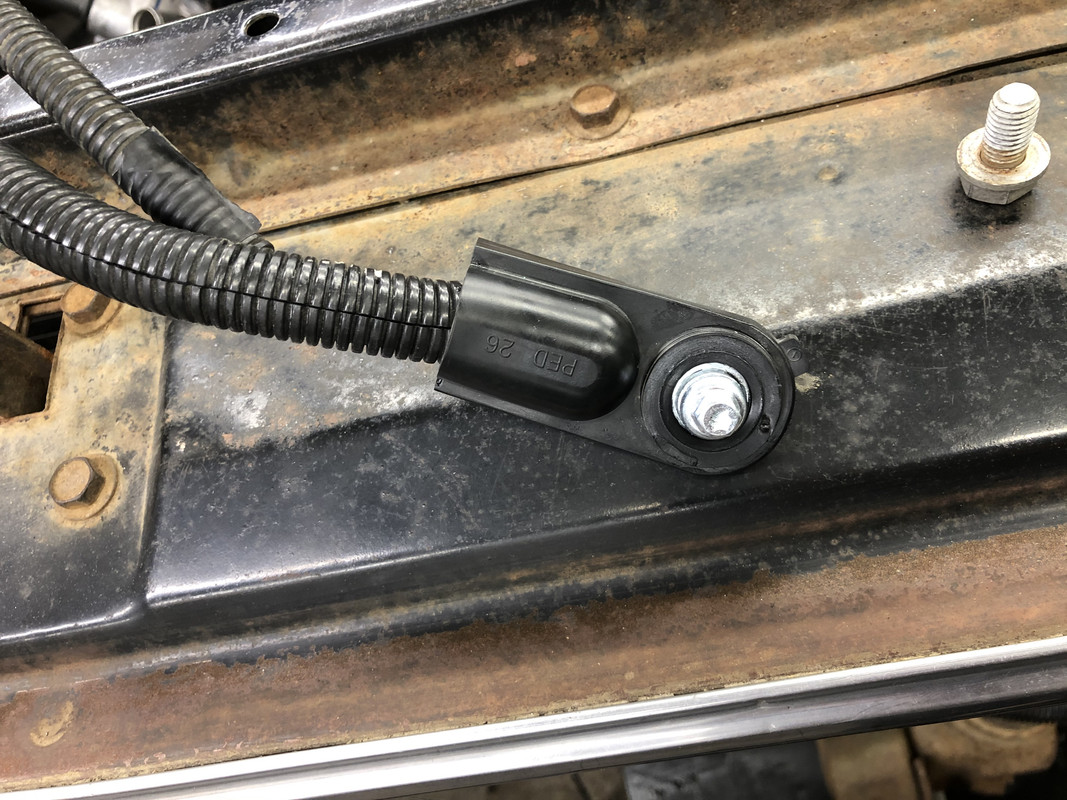 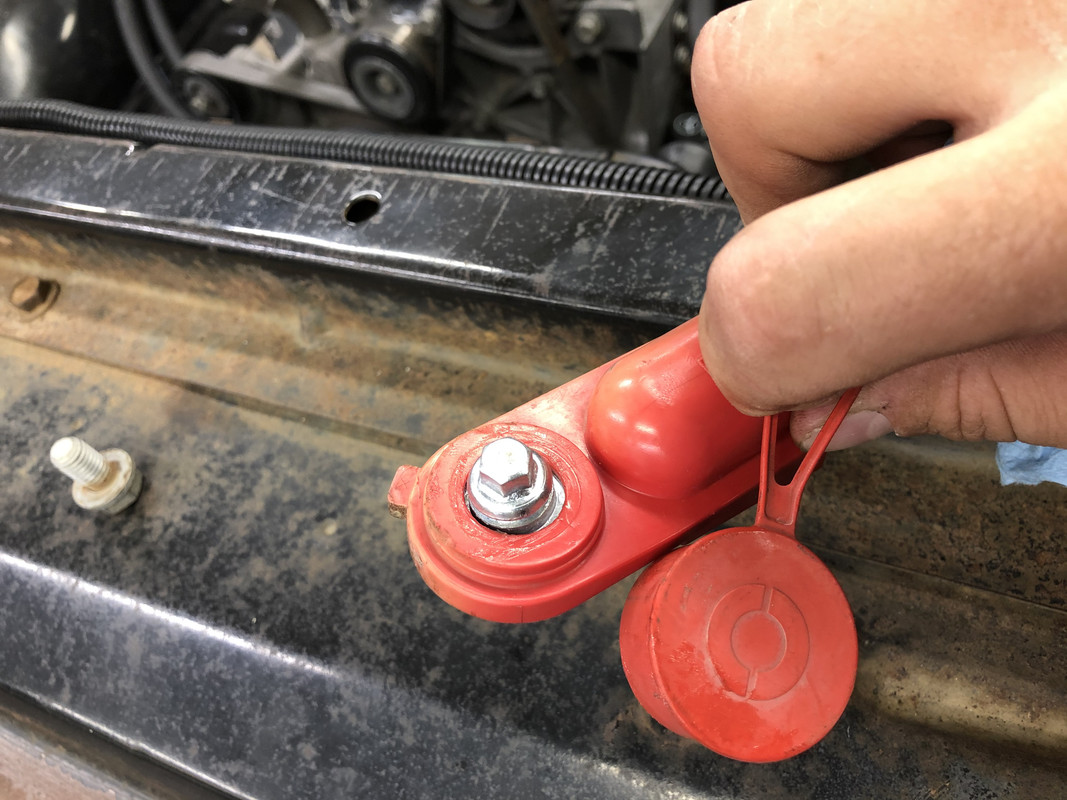 Also scored a HYDROBOOST!   Installing connectors on the license plate lights. 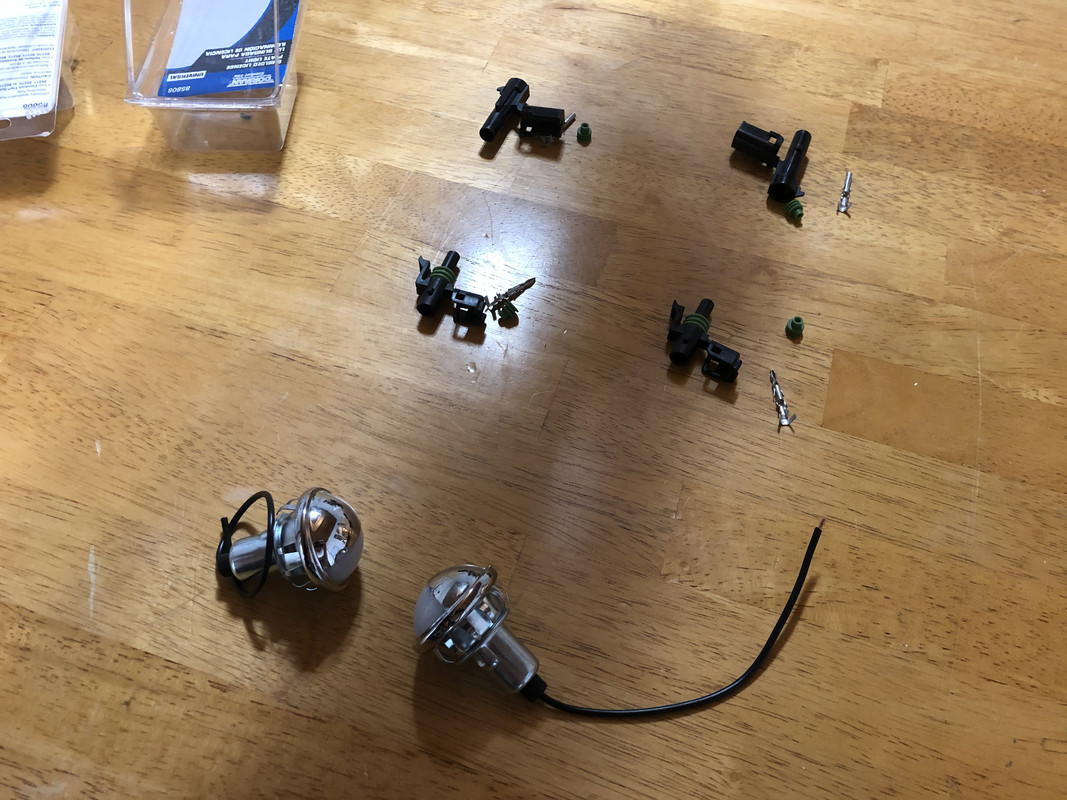 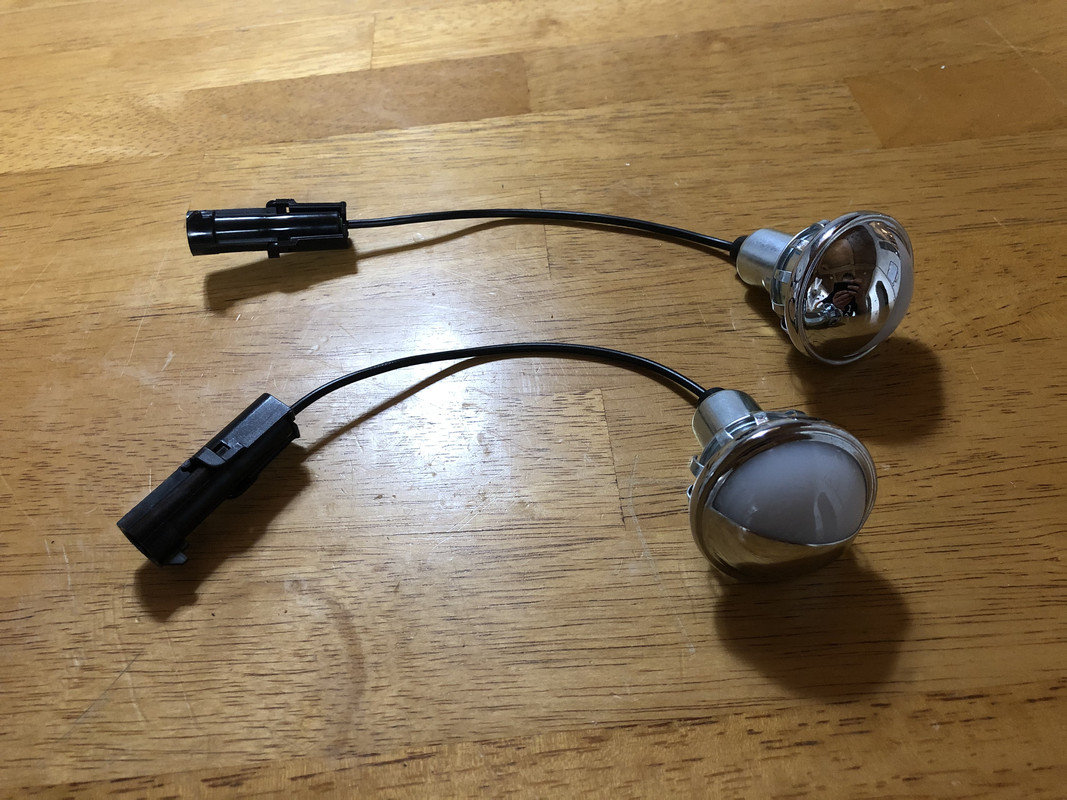 These also came in, but I wasn't expecting them for another week! LED H4 fanless headlight bulbs.  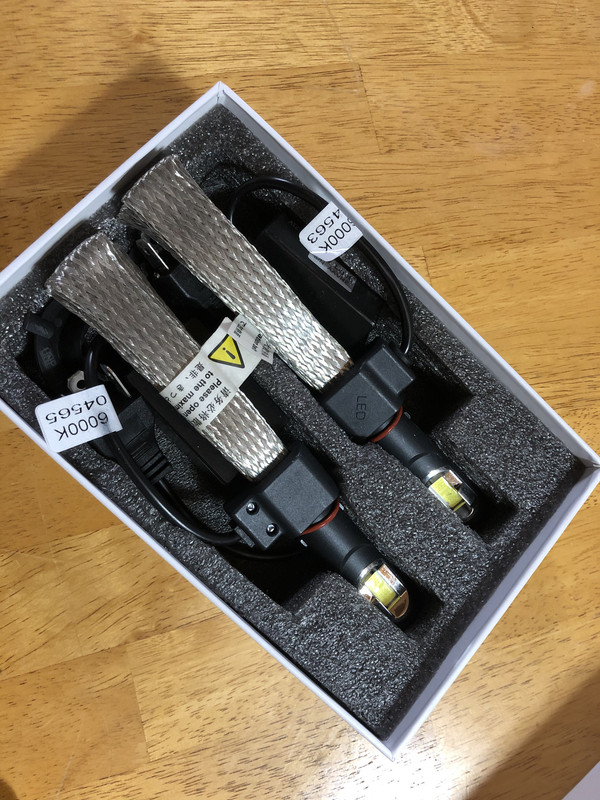 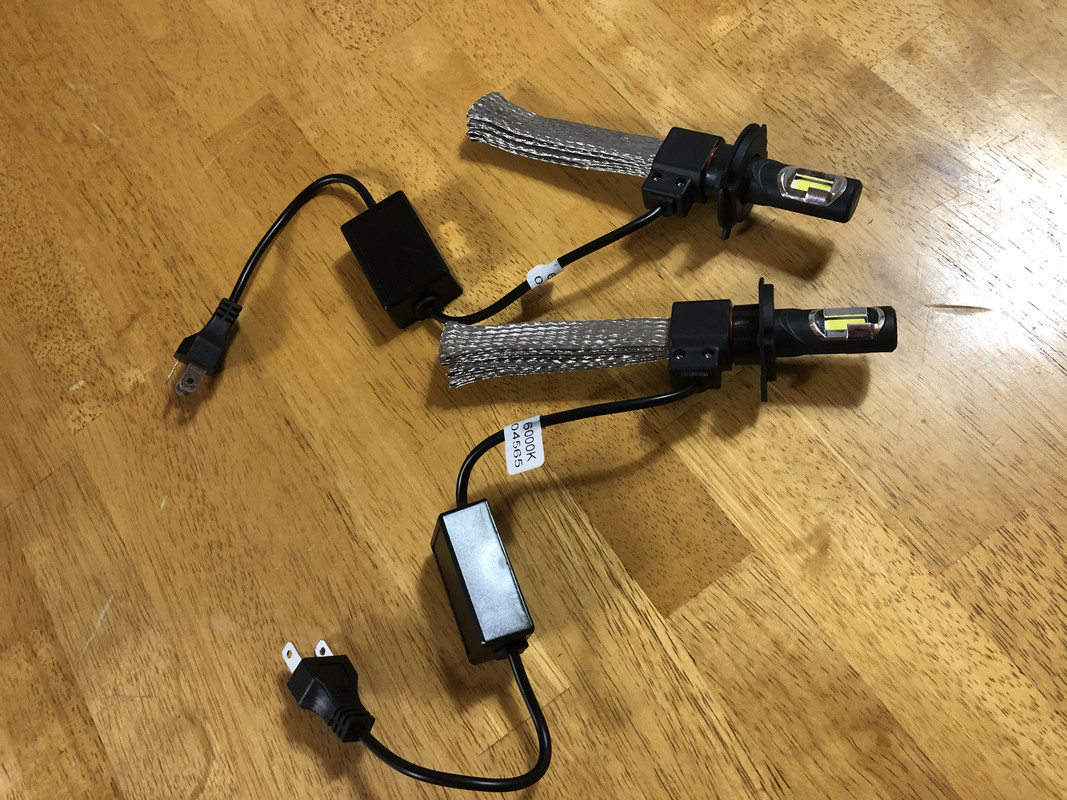
|
|
|
|
|
08-03-2020, 04:50 PM
|
#20 | |
|
Registered User
Join Date: Nov 2014
Location: Norfolk,NE
Posts: 136
|
Re: 1978 Chevy K20 longbed with nearly 500,000 miles! LS Swap begins!
Quote:
__________________
1982 Sierra Classic K15 RC/LB 6.2L Diesel 700R4 1988 GTA Trans AM 305 TPI 700R4 1993 Formula Firebird LT1 T56 1995 GMC K2500 ECLB 6.5L 4L80E 1996 GMC K3500 CCLB LB7 6L90 |
|
|
|
|
|
08-13-2020, 12:52 PM
|
#21 |
|
Registered User
Join Date: Feb 2012
Location: CA
Posts: 846
|
Re: 1978 Chevy K20 longbed with nearly 500,000 miles! LS Swap begins!
Nick the truck is looking great. It is a great feeling put parts on rather than taking them off. I did the H4 relay in my ‘88 and it made a huge difference, I am interested in those fanless bulbs.
__________________
"Dixie" - 1988 Chevrolet V30 CC DRW "3+3" | 7.4L 454 (L19) | TH400 | 4" lift | 35"s "Lucille" - 1949 Chevrolet 3100 (on hold) |
|
|
|
|
08-15-2020, 02:33 PM
|
#22 |
|
Registered User
Join Date: May 2016
Location: Willow, Alaska
Posts: 846
|
Re: 1978 Chevy K20 longbed with nearly 500,000 miles! LS Swap begins!
Thank you! And yes, it's certainly nice to be moving the needle more towards the assembly side of things!
As far as those LED lights, I think these are the way to go. I've used them on 10+ vehicles now, even 4 wheelers, and haven't had a single failure. I find them on ebay, I believe the seller's name is SOCALLED, but I think there's more than one seller with this style. It's usually a black box with "G6" on the side, although it looks like they may have white boxes now. regardless, they're easy to find in whatever socket size you need, just simply type in "H4 led fanless" (or whatever type you need) and they come up. They're about $41 for a pair, very reasonable.This weekend I started on rebuilding the hydroboost unit, which probably really didn't need it, but I've never done one before so I wanted to try it. They're almost stupid easy! Disassembled and painted the housings! 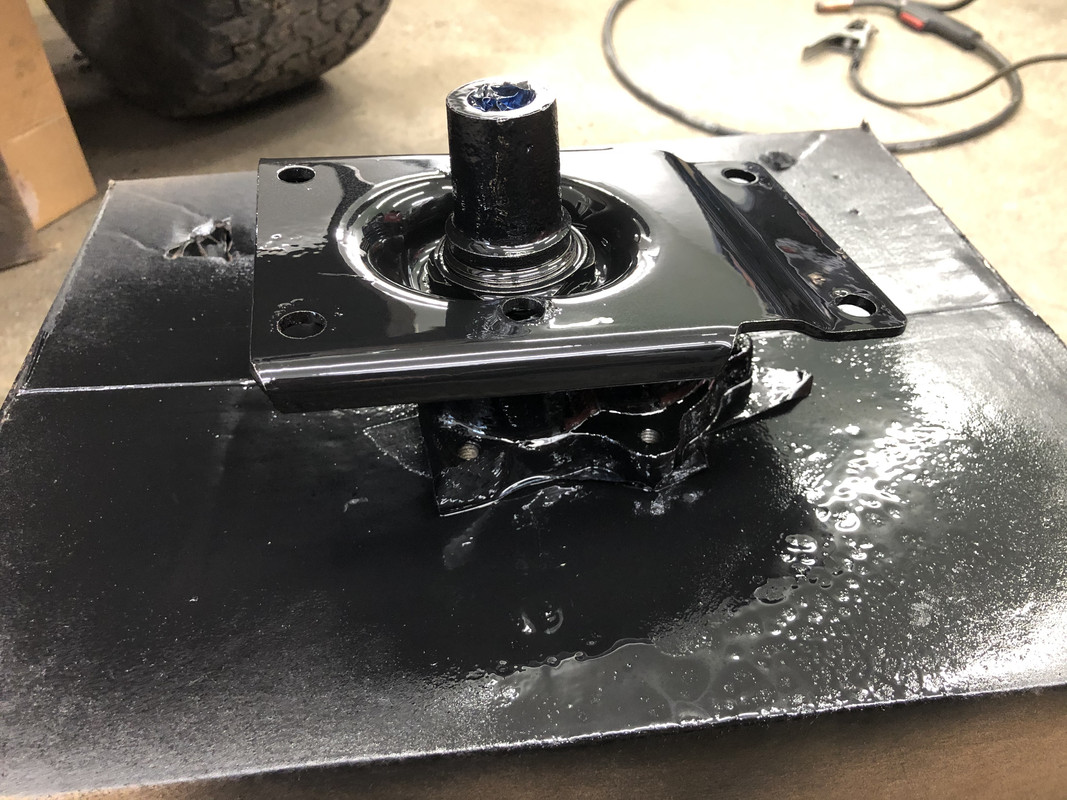 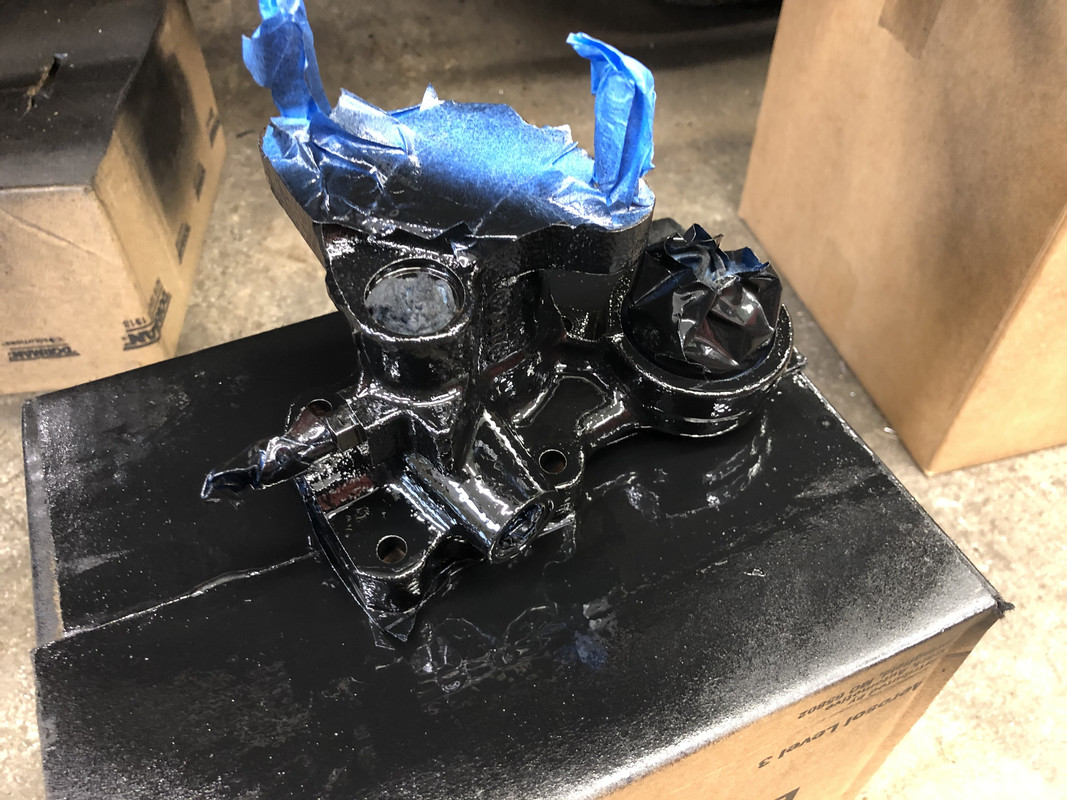 New seals on the actuator shaft. 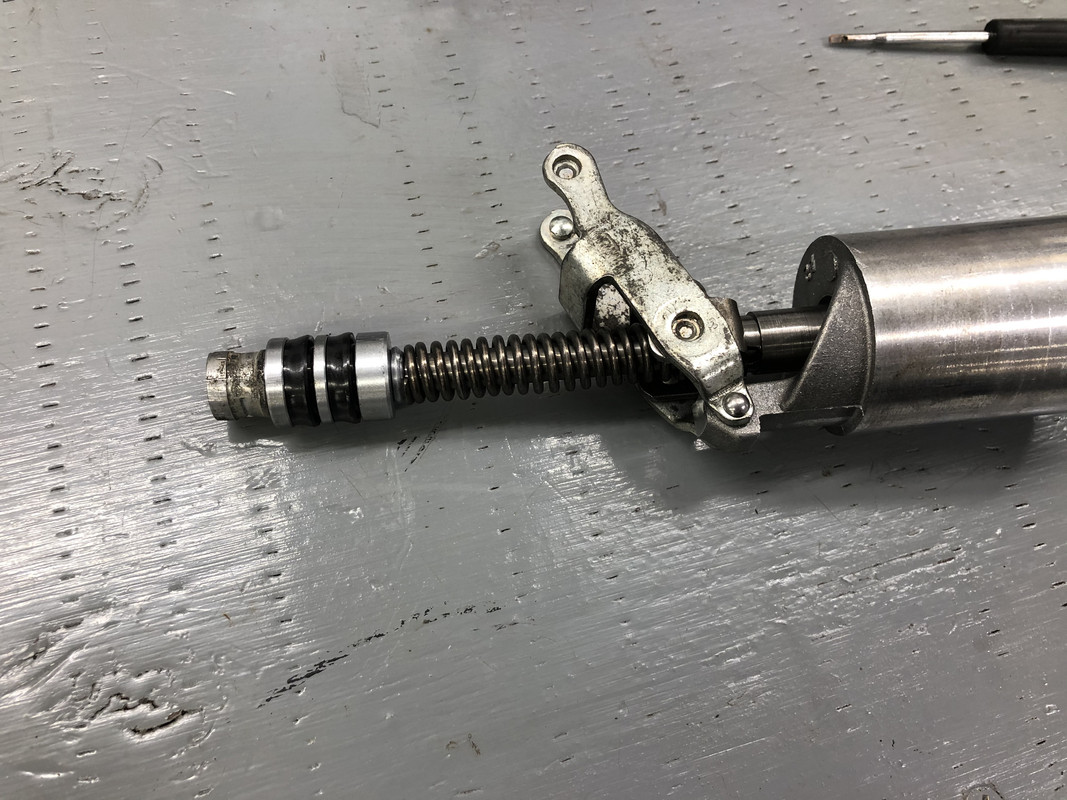 Paint is dry, lets get this together! 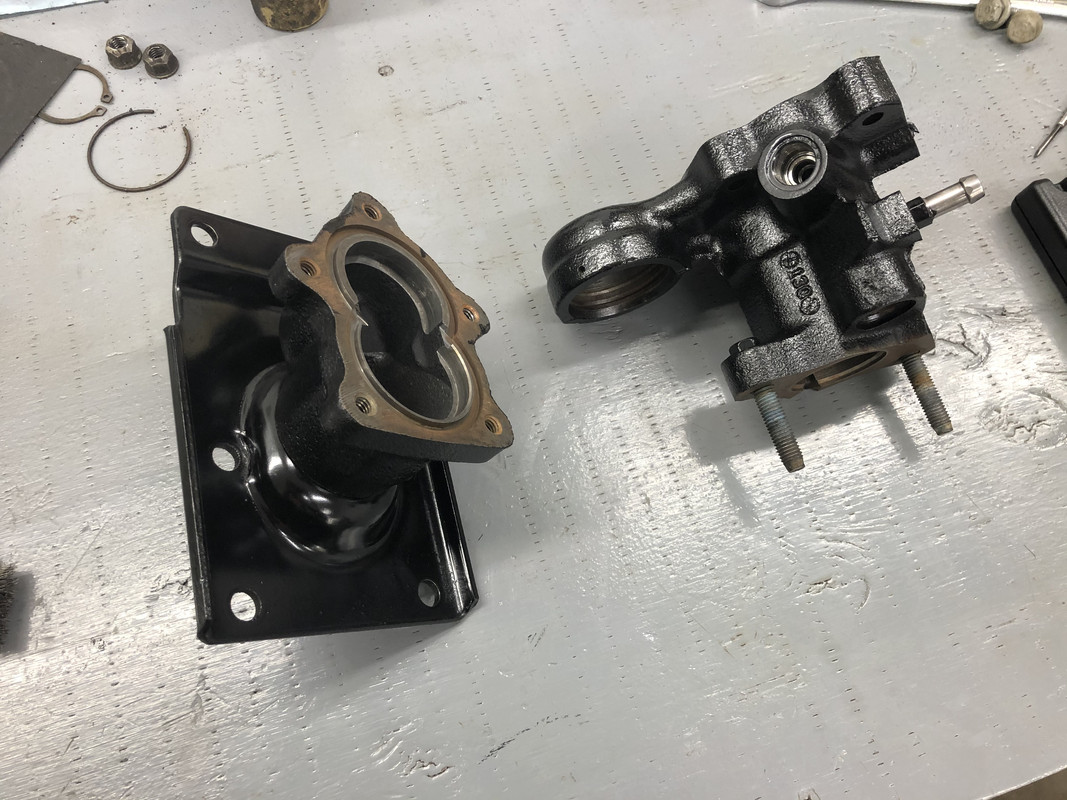 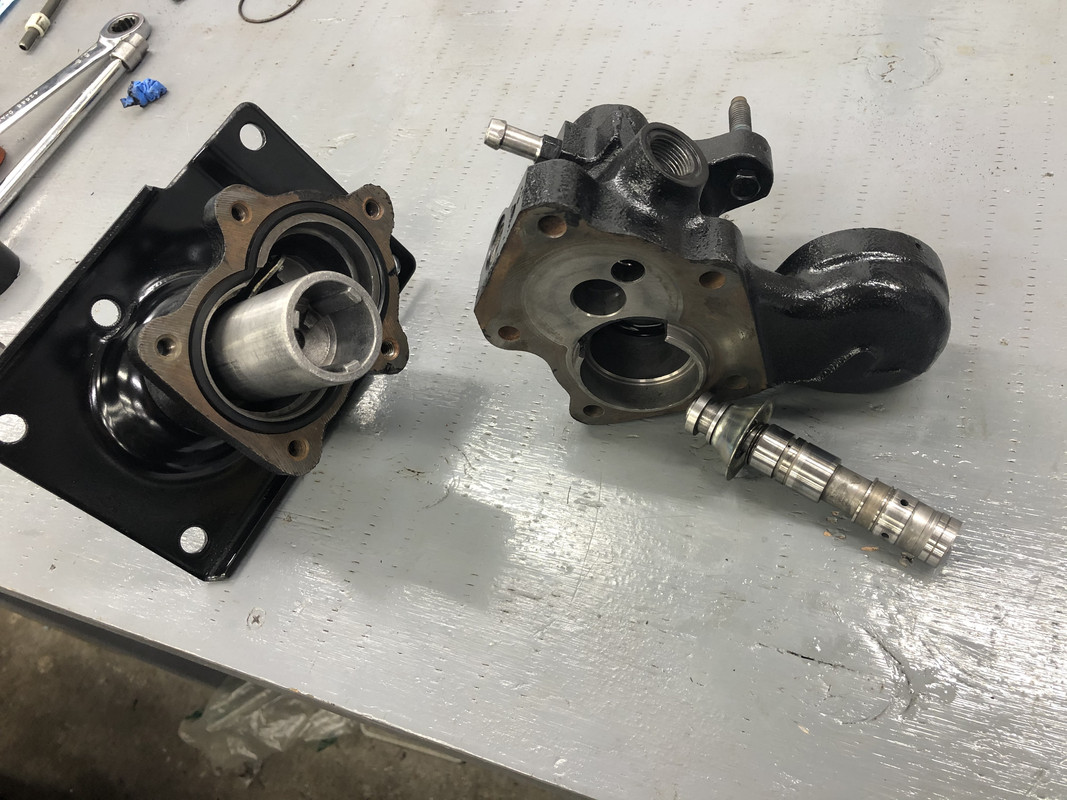 Guts installed, housing bolted back together! 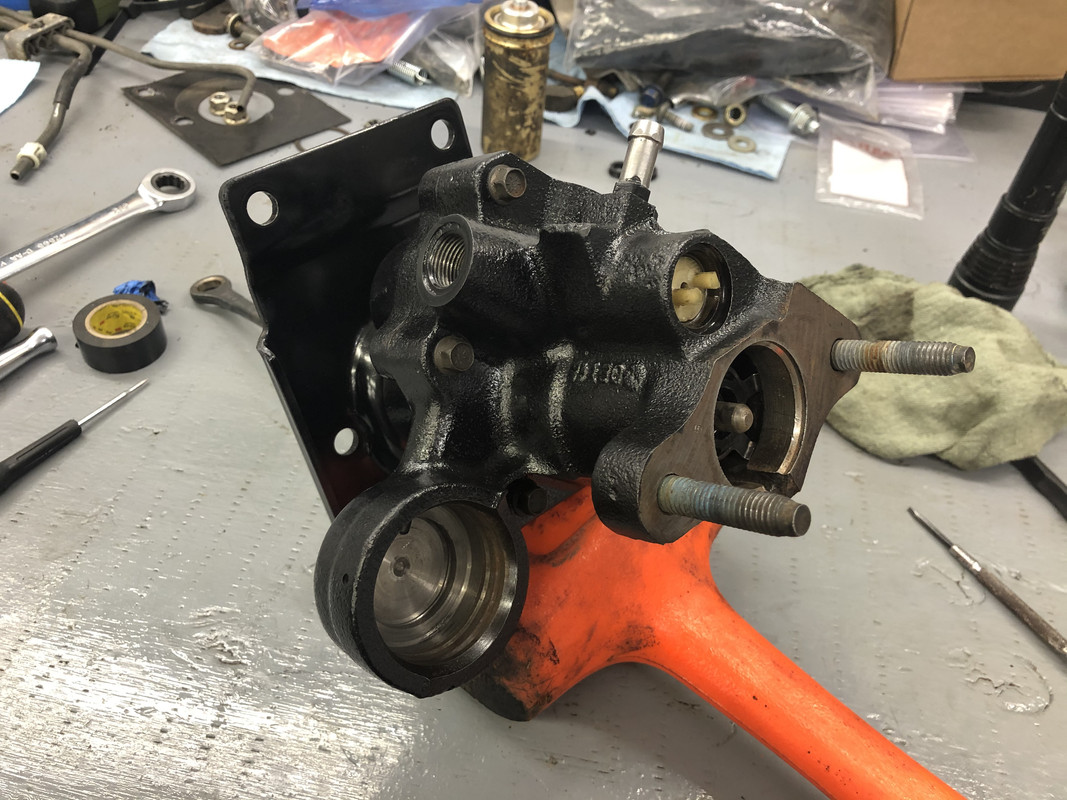 Gas canister installed! 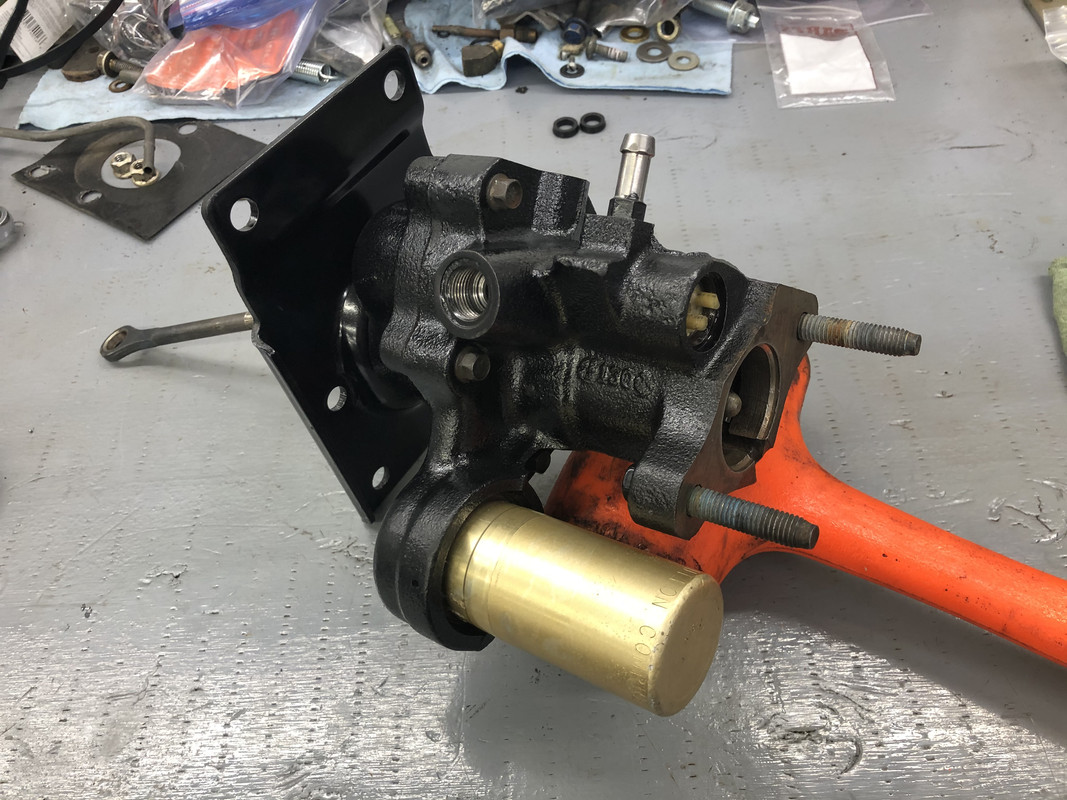 I also started running the wiring for the Holley Terminator X. I greatly underestimated how long the harness is, so I made a change of plans and decided to run the ECU outside, likely in about the same place that the air box will end up being. 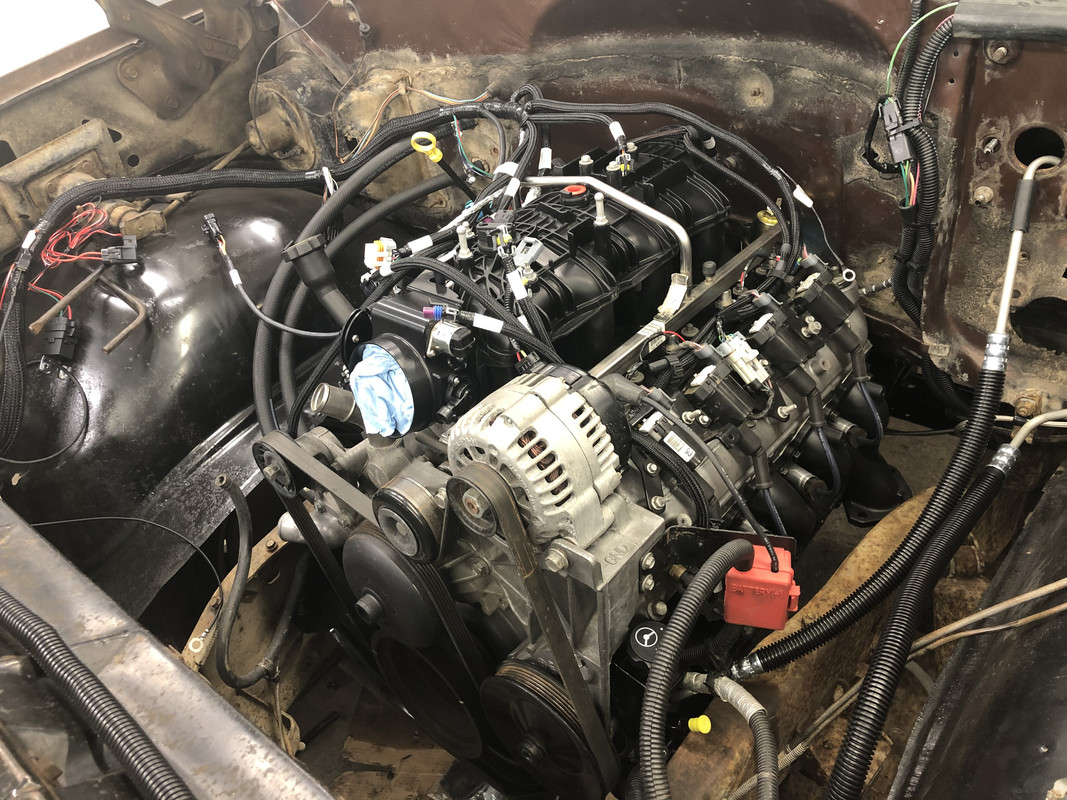 Hydroboost is installed! The lines fit just about perfect! 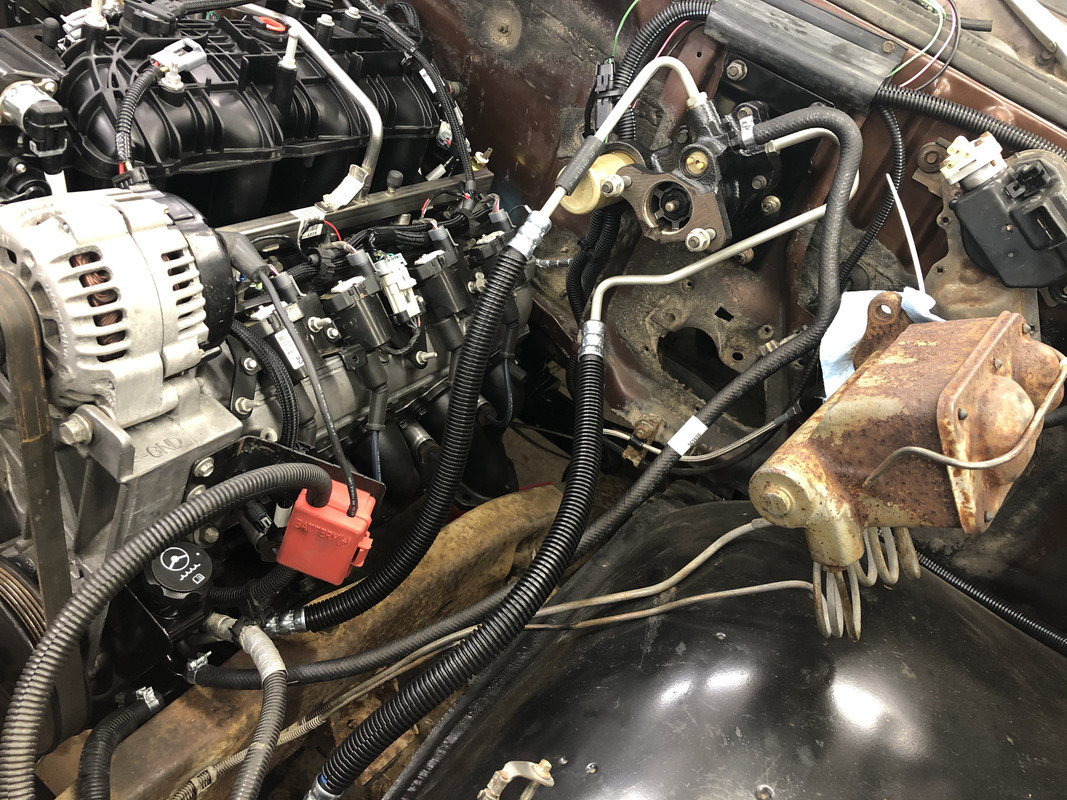 The engine bay as it sits now! 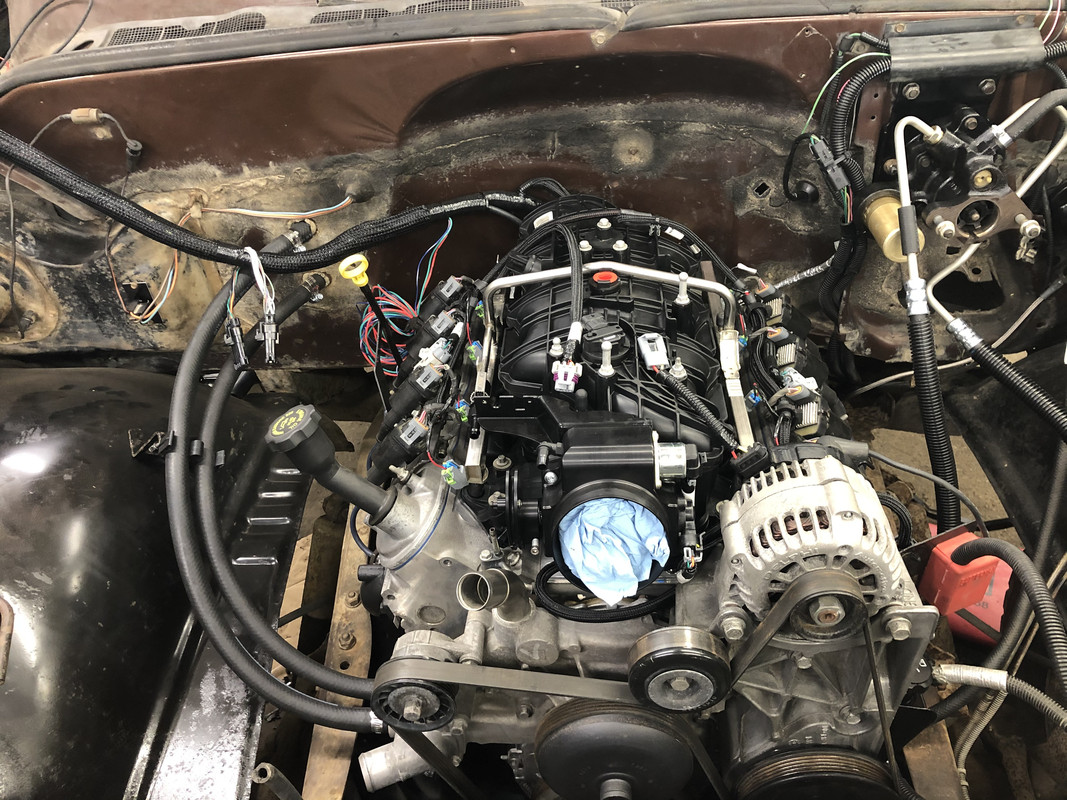 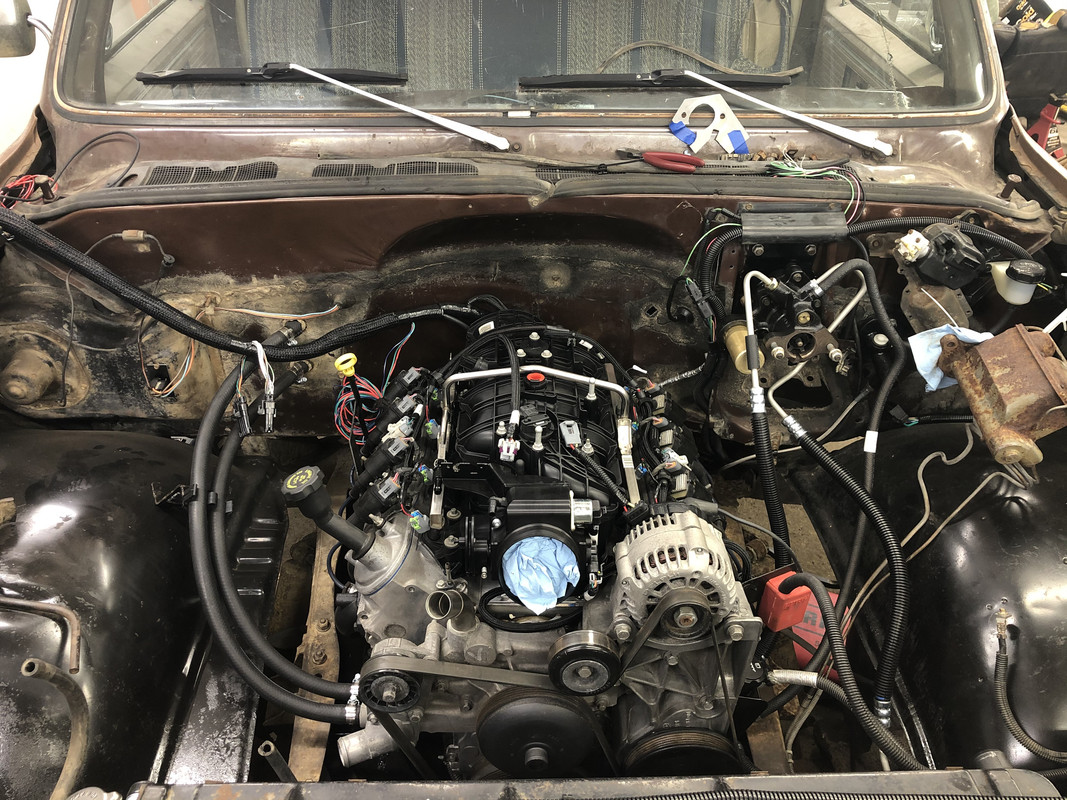
|
|
|
|
|
08-17-2020, 10:08 AM
|
#23 |
|
Registered User
Join Date: Nov 2014
Location: Norfolk,NE
Posts: 136
|
Re: 1978 Chevy K20 longbed with nearly 500,000 miles! LS Swap begins!
I absolutely love your attention to detail. Looks great!
__________________
1982 Sierra Classic K15 RC/LB 6.2L Diesel 700R4 1988 GTA Trans AM 305 TPI 700R4 1993 Formula Firebird LT1 T56 1995 GMC K2500 ECLB 6.5L 4L80E 1996 GMC K3500 CCLB LB7 6L90 |
|
|
|
|
10-18-2020, 03:45 PM
|
#24 |
|
Registered User
Join Date: May 2016
Location: Willow, Alaska
Posts: 846
|
Re: 1978 Chevy K20 longbed with nearly 500,000 miles! LS Swap begins!
Thank you!
So, I finally made a little more progress. I've ran into another transmission leak, this time the front bearing retainer plate and I've severely lacked the motivation to deal with that problem. However, after a month wait, the new dash harness has arrived! This is from M&H, and the quality is astounding! This is the Classic Update series, which has a few extra circuits built into it. I likely won't be utilizing those, however, it also updates all the fuses to the modern blade style! 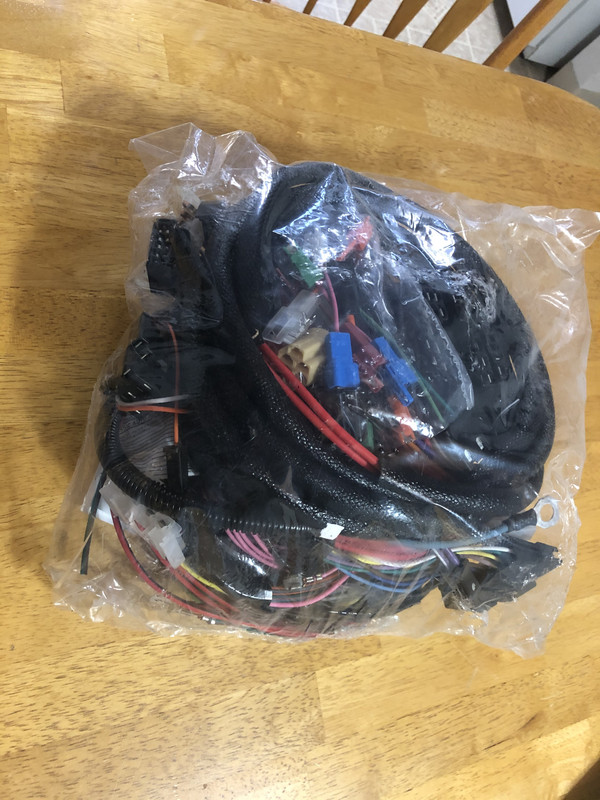  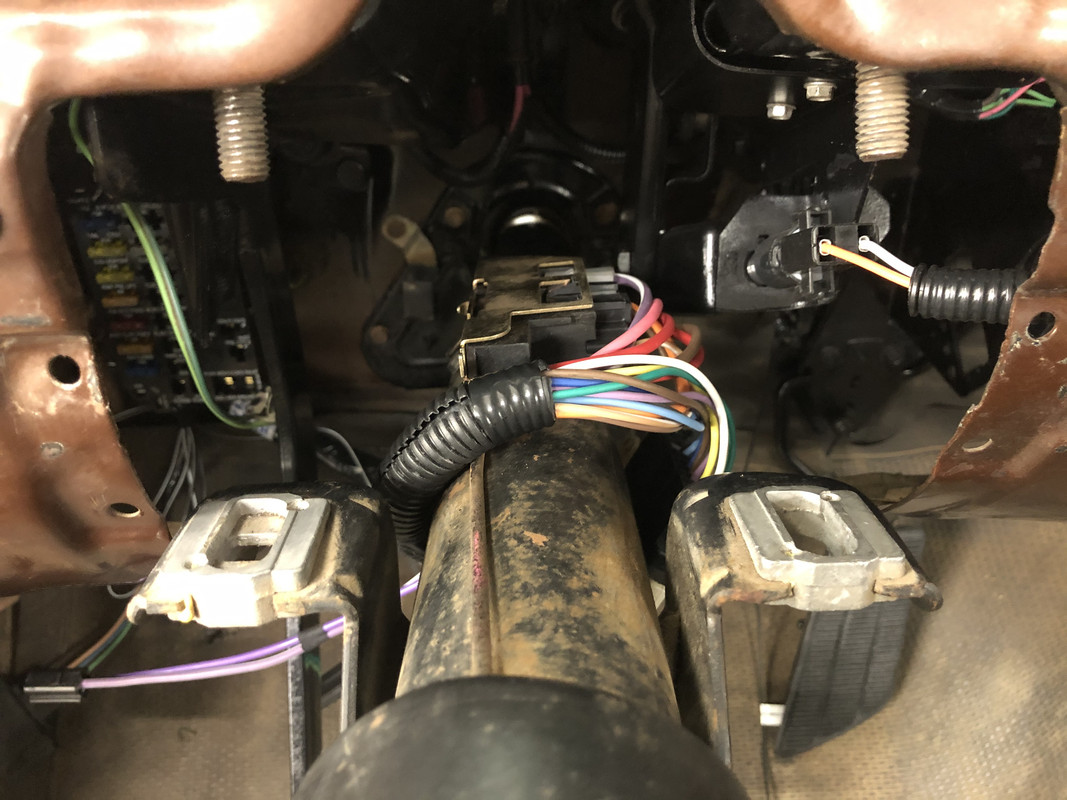 Once the harness was mostly laid out, the steering column was able to go back in! 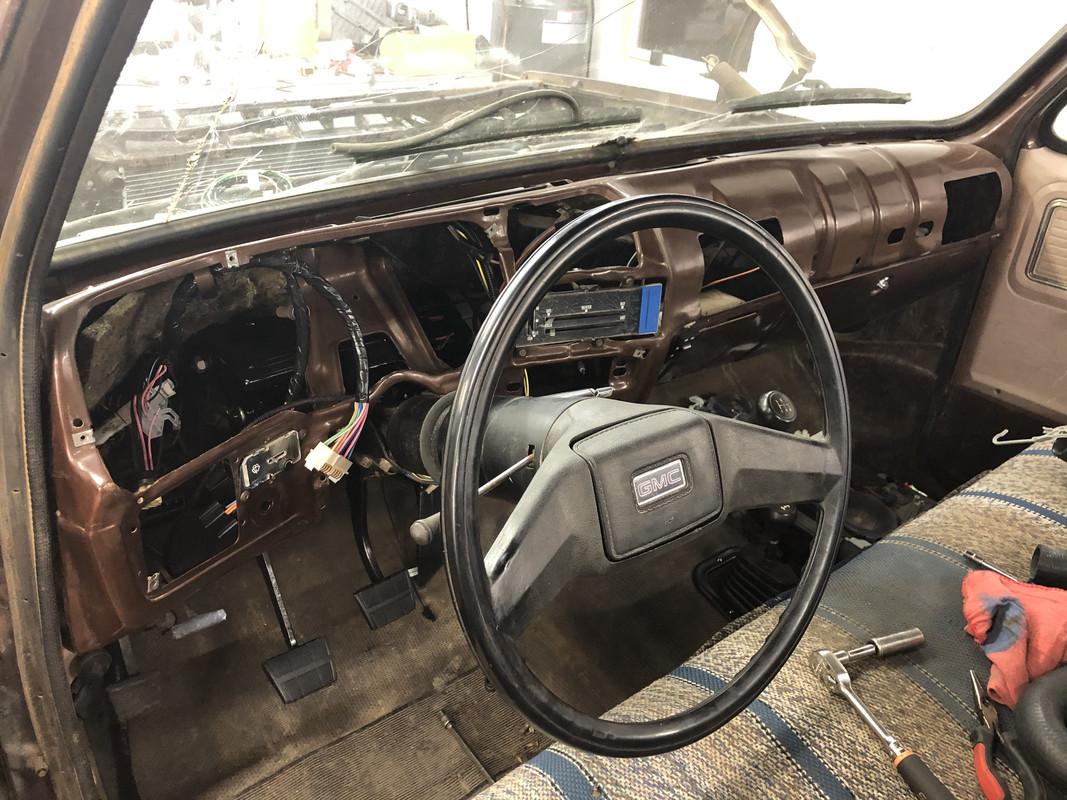 Along with the steering shaft! 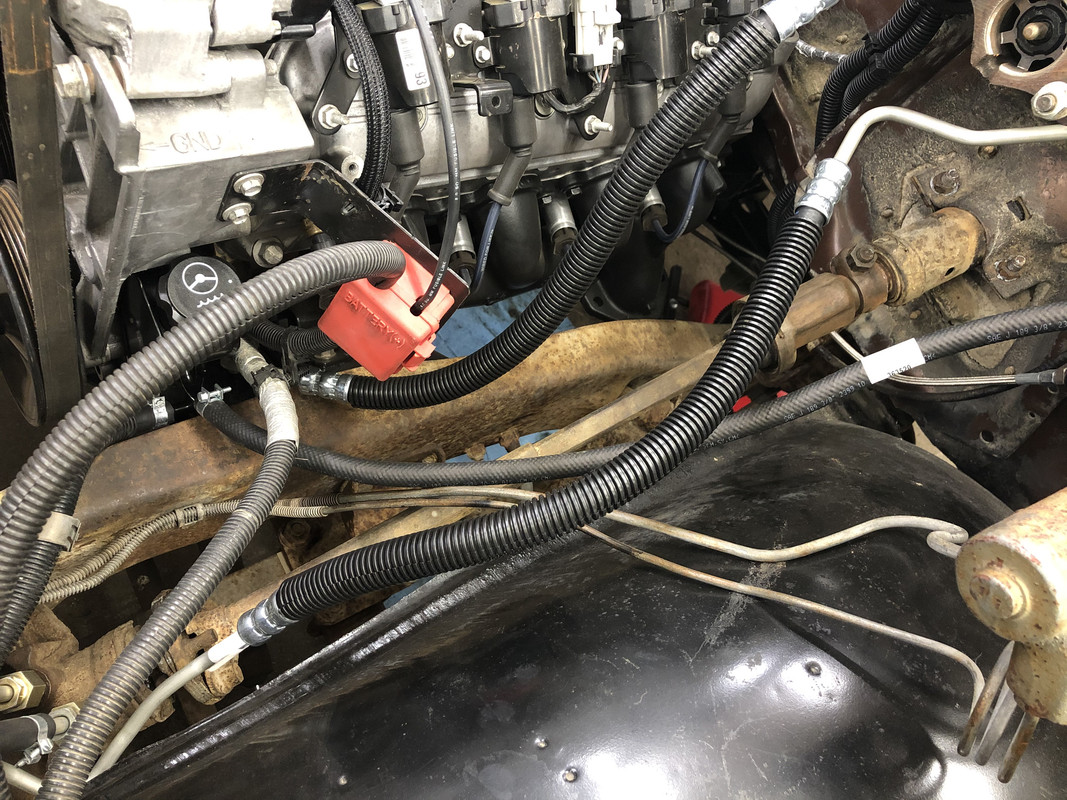 Two questions now - Does anyone know where to buy a 1978 clutch pedal safety switch? It seems that nobody lists these anywhere. Also, does anyone have a picture of where this is supposed to be clipped to? 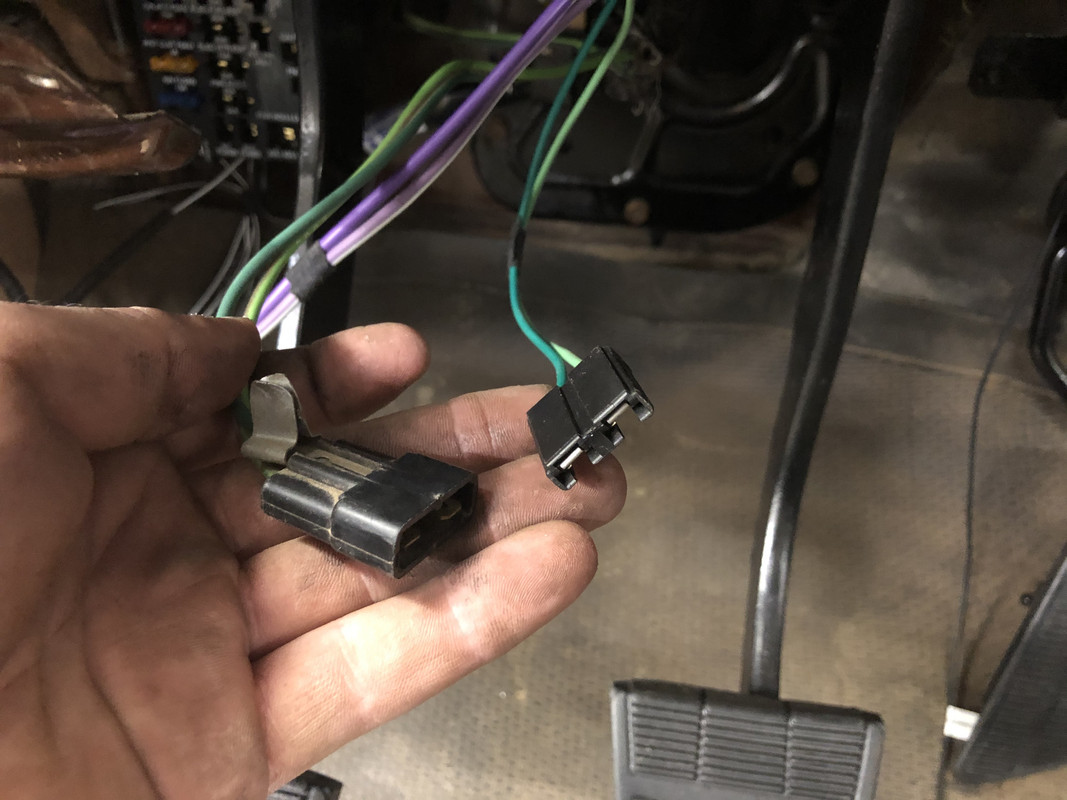
|
|
|
|
|
11-26-2020, 03:32 PM
|
#25 |
|
Registered User
Join Date: Jan 2010
Location: Tonasket, Washington
Posts: 316
|
Re: 1978 Chevy K20 longbed with nearly 500,000 miles! LS Swap begins!
Wow! Great work.
I'll definitely be watching and taking notes.
__________________
-Aaron '15.5 Chevy Duramax LTZ/Z71, LML, CC/SB '77 Chevy K10, 4" lift, 33-12.50, 350/350 '55 Chevy Short Box (In Pieces)MII,4-link,Bagged,383 Stroker,700r4,3.73posi (SOLD) My 55.2 Chevy 3100 Build |
|
|
|
|
| Bookmarks |
|
|


 Hybrid Mode
