
|
|
|
 10-24-2015, 08:49 PM
|
#1 |
|
K5Camper
 Join Date: Mar 2004
Location: Pueblo, CO
Posts: 1,513
|
Re: My K5 Blazer Story.
We do!
I stuck around late at work today to get some work done on the front driveshaft. As Larry found out on the desert trip last year, these late style flanged front shafts are easier to install/remove than the early style but GM left some extra material on the yokes. On a stock height truck it isn't much of a problem, but 4" of lift and some flexing will cause the yokes on the cv end of the shaft to hit each other and want to tear itself up. See Larry's post on the subject in the desert trip from last year. Following his recipe I got busy with an angle grinder with a cut off wheel. The lines show where I'm knocking the corners off.  After the cuts.  Both ends done. On the right you can see the appendage about an inch long sticking up on the end of the shaft. That needs removed too.  Cut off the appendage and switched to a grinder wheel from the cut-off wheel. Started shaping the ends of the yokes and smoothed things out.  Midway through the process on the yokes.  Final result. The CV turns tight without anything touching. It will get shipped off to the local driveline shop monday to get balanced and a little length added.  Got home and went right back to work cleaning up the rear shaft and the brake calipers. Still need to install the conversion u-joint for the 1/2ton shaft to the 14b yoke. Back to wire wheeling, cleanup and shooting some primer.  A few light coats of tractor black later...  Gave the Winch a scuff and laid down a final coat on it today too. Looks good. 
__________________
Rob Z. 1975 K5 350/465/205/D44/12b 4" lift on 35's- RIP 1991 K5 8.1L/NV4500/241/D44/14b FWC Camper |

|

|
|
10-25-2015, 05:23 PM
|
#2 |
|
Registered User
 Join Date: Oct 2011
Location: Wildomar, CA
Posts: 466
|
Re: My K5 Blazer Story.
Lookin' Good guys!
|
|
|
|
|
10-25-2015, 09:06 PM
|
#3 |
|
K5Camper
Join Date: Mar 2004
Location: Pueblo, CO
Posts: 1,513
|
Re: My K5 Blazer Story.
Thanks Jesse! Getting there for sure!
__________________
Rob Z. 1975 K5 350/465/205/D44/12b 4" lift on 35's- RIP 1991 K5 8.1L/NV4500/241/D44/14b FWC Camper |
|
|
|
|
10-28-2015, 06:08 PM
|
#4 |
|
Registered User
Join Date: May 2008
Location: Alta Loma, Ca.
Posts: 930
|
Re: My K5 Blazer Story.
Glad to see you found a solution to the air intake. Looks like a nice upgrade if anyone wanted to change their factory intake with the bulky silencer on it to something simpler with less restriction.
Nice progress on the Blazer, did you grind the bottom of the 14 bolt or leave it stock? The 8 lug stuff is hard to get used to at first, but the long term running gear reliability will make up for the inconvenience of the extra 2 lug nuts per wheel. |
|
|
|
|
10-28-2015, 11:30 PM
|
#5 |
|
K5Camper
Join Date: Mar 2004
Location: Pueblo, CO
Posts: 1,513
|
Re: My K5 Blazer Story.
The 14bolt is not getting cut. I'm not hitting extreme rock crawling trails with it.
__________________
Rob Z. 1975 K5 350/465/205/D44/12b 4" lift on 35's- RIP 1991 K5 8.1L/NV4500/241/D44/14b FWC Camper |
|
|
|
|
11-02-2015, 11:12 PM
|
#6 |
|
Windy Corner of a Dirty Street
Join Date: Jun 2003
Location: Pueblo West, Colorado
Posts: 2,926
|
Re: My K5 Blazer Story.
Ive been crazy busy with work and life lately and falling behind with posting progress pictures
Without further ado
..here are a few new pics of Zoo5
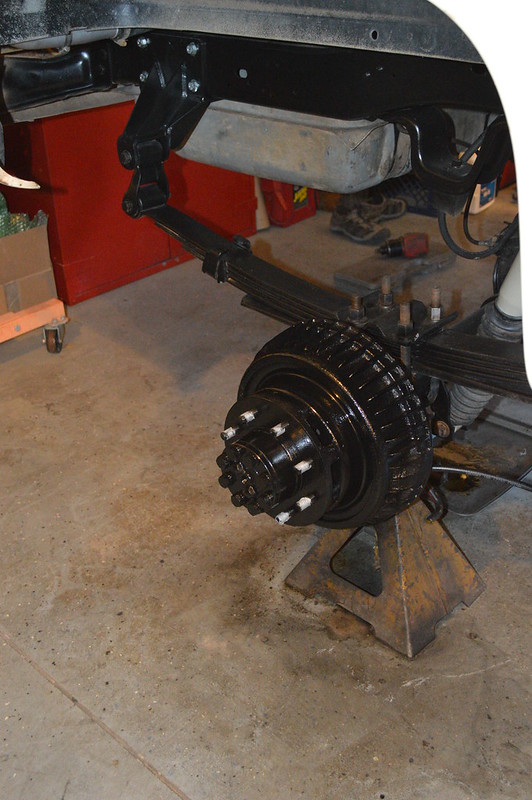
Cutting off the old spring hangers and exhaust hanger bracket 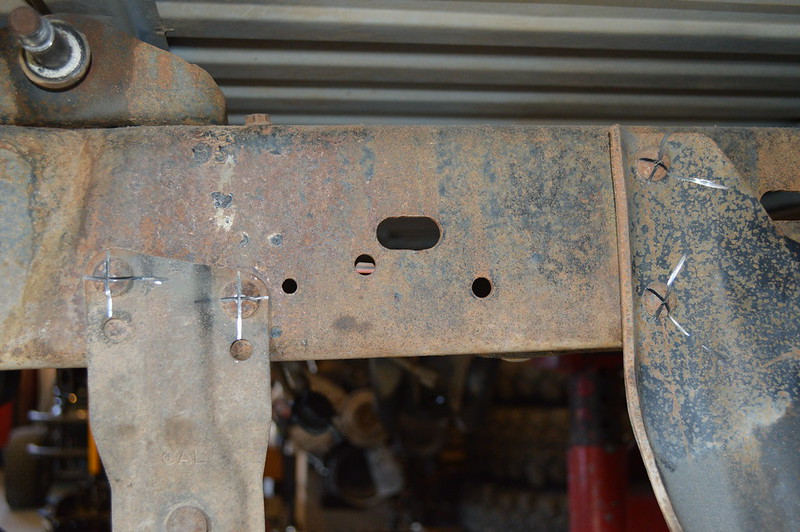 Cleaned up and ready for some ORD goodies. I still need to snap some pics of the after shackle swap 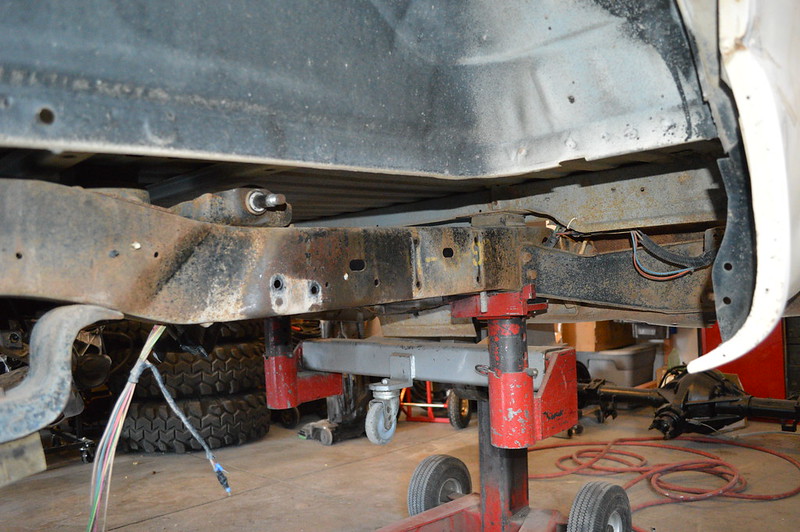 Were still working on giving this ole K5 some class but at least now its got glass!  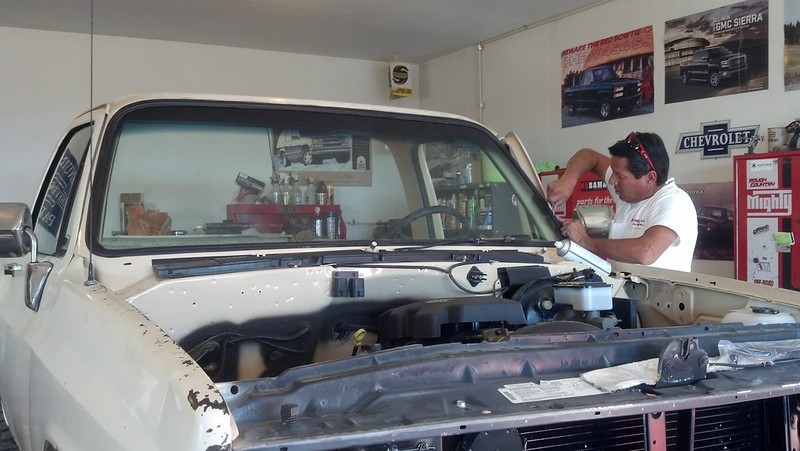 The chassis and suspension is pretty much done outside of some small things like front brake lines and drive shafts. Rob dropped off a set of nice meat for it last night! 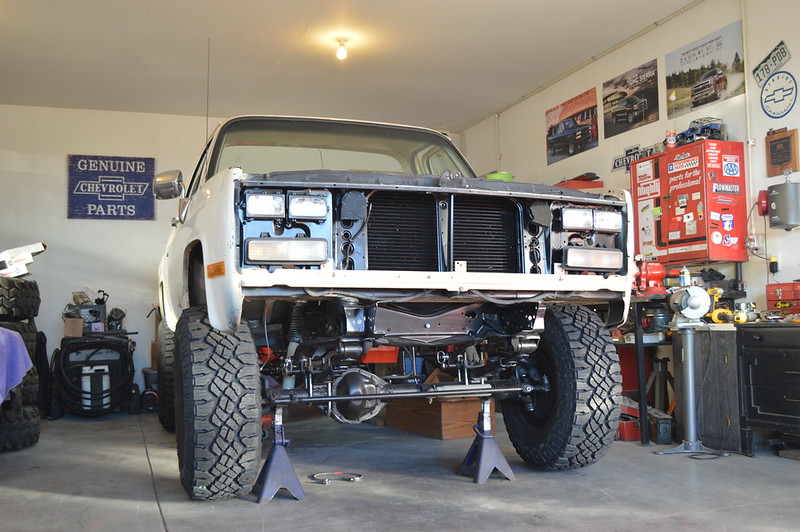  Passenger door after fresh paint and new weather stripping & window channels and lot of adjustments  Purdy! That door shuts better than a brand new truck now .hope I have the same luck with the drivers door. 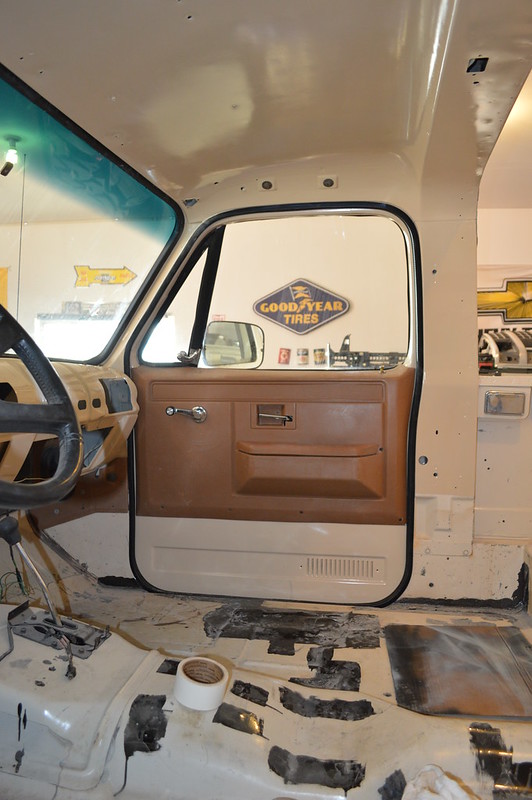 This door has a long ways to go but at least it has fresh paint and fresh weather stripping. It is also so far out of whack Ill probably have to pull the front fender off to get to the door hinges for front to back adjustment.  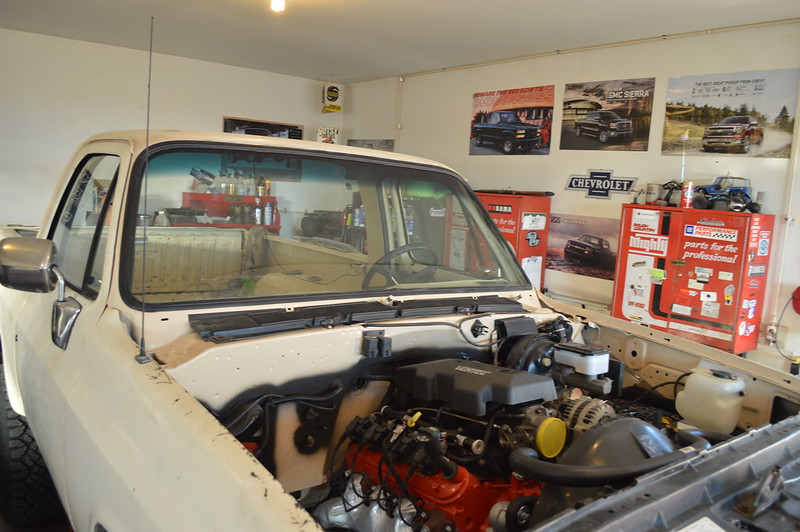 Thats it for now .the goal is to have it started and be able to drive it in and out of the garage by Thanksgiving. Well see! 
__________________
Current vehicle collection: 1978 Chevrolet K10, 8.1L, NV4500, NP205 1989 Chevrolet Suburban, 8.1L, NV4500, NP241 1993 Chevrolet C1500 Sportside, TBI 7.4L, 4L60E 2001 Chevrolet K2500HD, Ext Cab, SWB, 8.1L, ZF 6 speed 2014 Chevrolet Impala LTZ 3.6L Vortec 8.1L because life is too short to tolerate underpowered vehicles
|
|
|
|
|
11-02-2015, 11:55 PM
|
#7 |
|
K5Camper
Join Date: Mar 2004
Location: Pueblo, CO
Posts: 1,513
|
Re: My K5 Blazer Story.
We are moving right along. The fresh meat is killer. Glad I listened to you on the choice. The passenger side door shuts so nice now. The 75 was getting so bad you would have to mule kick it to shut and all it would do was bend the jamb where the striker pin was. I know you'll get the drivers side just as nice. Just remember to zap the bracket inside before you close it up!!
__________________
Rob Z. 1975 K5 350/465/205/D44/12b 4" lift on 35's- RIP 1991 K5 8.1L/NV4500/241/D44/14b FWC Camper |
|
|
|
|
11-03-2015, 12:40 AM
|
#8 |
|
Registered User
Join Date: Dec 2009
Location: Fairbanks, AK
Posts: 1,830
|
Re: My K5 Blazer Story.
Looking good fellas! I think your goal is reasonable.
__________________
-Marcus 1991 V3500 L29 454 4L80E NP205 D60/14 Bolt 4.56's 1984 K30 292 TH400 NP205 D60/14 Bolt 4.56's flat bed 7'6" Meyer Plow 2022 Silverado 3500 L8T Project Daily Driver Project Heavy Hauler Project Plow Truck |
|
|
|
|
11-03-2015, 07:12 PM
|
#9 |
|
Windy Corner of a Dirty Street
Join Date: Jun 2003
Location: Pueblo West, Colorado
Posts: 2,926
|
Re: My K5 Blazer Story.
The drivers door turned out really nice! Of course, it needed pins and bushings as with most old square bodies, but it was worth it. Since it was so far apart removing the fender made easy work of adjusting the door and removing the hinges to replace the bushings. I wish the drivers door operation on my K10 and Polar Bear Suburban turned out this nice.
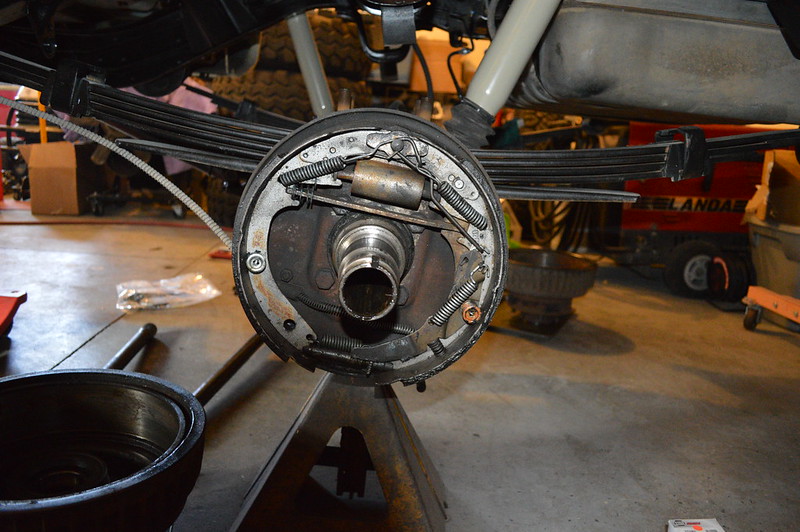
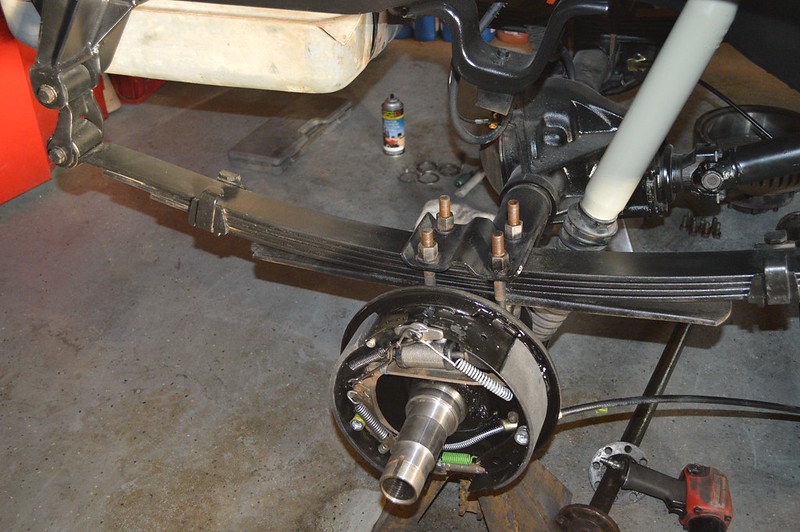
 Sealed the door before installing the door panel. Sure cuts down on dust and gives the door a more solid sound when you shut it. 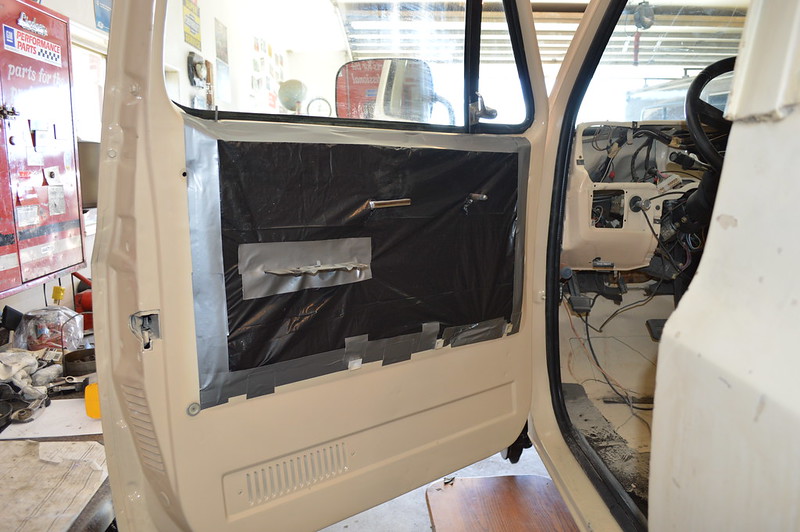 Rob still needs arm rests for the old girl someday. 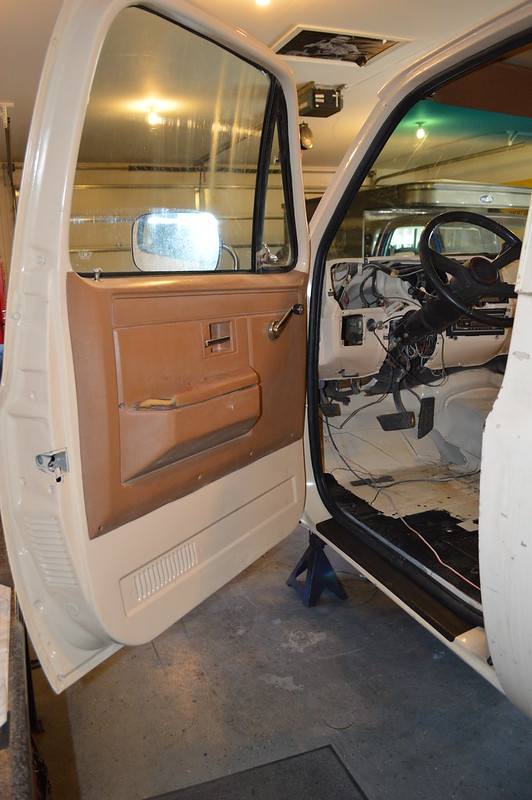 I had some neat 3M material that is used on the back of UPS trucks to protect the bodies from contact with shipping docks that I used on the rockers. It is really durable stuff almost like a bed liner but in stick-on form. 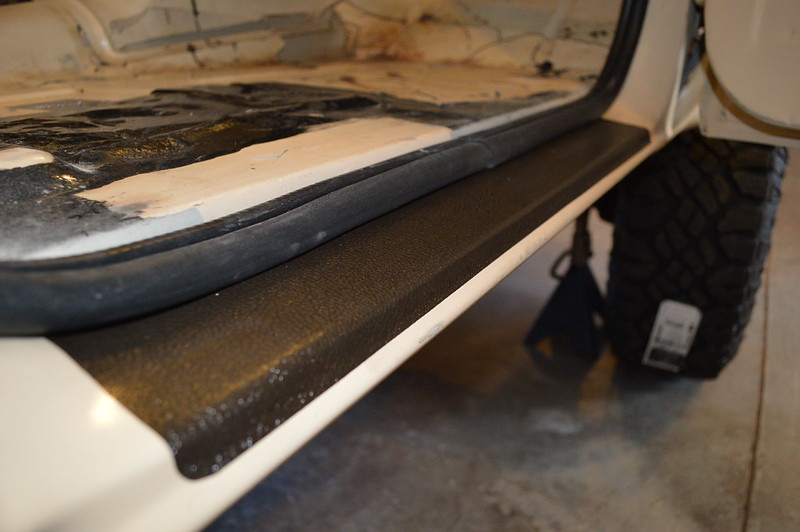 Next up .pull the full floater apart to replace the brake shoes, hardware kit and wheel cylinders.
__________________
Current vehicle collection: 1978 Chevrolet K10, 8.1L, NV4500, NP205 1989 Chevrolet Suburban, 8.1L, NV4500, NP241 1993 Chevrolet C1500 Sportside, TBI 7.4L, 4L60E 2001 Chevrolet K2500HD, Ext Cab, SWB, 8.1L, ZF 6 speed 2014 Chevrolet Impala LTZ 3.6L Vortec 8.1L because life is too short to tolerate underpowered vehicles
|
|
|
|
|
11-06-2015, 03:46 PM
|
#10 |
|
Windy Corner of a Dirty Street
Join Date: Jun 2003
Location: Pueblo West, Colorado
Posts: 2,926
|
Re: My K5 Blazer Story.
Brakes are done outside of fabricating the new parking brake cable brackets. On to other things
.like tearing back into the trans to figure out how we lost the Parking pawl when Rob tore it down to install the Bowtie Overdrive kit. Or
..sometangwong with our junkyard 241 score.
__________________
Current vehicle collection: 1978 Chevrolet K10, 8.1L, NV4500, NP205 1989 Chevrolet Suburban, 8.1L, NV4500, NP241 1993 Chevrolet C1500 Sportside, TBI 7.4L, 4L60E 2001 Chevrolet K2500HD, Ext Cab, SWB, 8.1L, ZF 6 speed 2014 Chevrolet Impala LTZ 3.6L Vortec 8.1L because life is too short to tolerate underpowered vehicles
|
|
|
|
|
11-06-2015, 10:03 PM
|
#11 |
|
Registered User
Join Date: Dec 2010
Location: Visalia, Ca
Posts: 707
|
Re: My K5 Blazer Story.
I like the build so far keep up the good work. Out of curiosity what was your reason for sticking with drums in the rear is it for the parking brake or is it just a preference I plan to run a driveline break on my 74 k5 when i get to that point but I haven't fully decided to run disc yet and I'm not sure If it will require more or less trimming than the front to clear my 15x10 rims
__________________
<Brandon> 1974 Chevrolet K5 Blazer 350sbc/SM465/NP205, dana44 front, corp 14bolt rear with 4.10s and a powertrax locker, custom rear bumper 400sbc in the works.  1981 GMC C1500 stepside 250i6, 3spd, 12bolt with 3.08s 2.5/4drop on 15x10 with 275/50r15 81 GMC C3500 cab-chassis dually with utility bed 350sbc, Sm465, 14bolt with 4.10s nv4500 getting ready to go in 1979 Chevrolet K5 R.I.P. http://67-72chevytrucks.com/vboard/s...d.php?t=434096 1976 Chevrolet C10 R.I.P. http://67-72chevytrucks.com/vboard/s...d.php?t=434195 |
|
|
|
|
11-06-2015, 11:59 PM
|
#12 |
|
K5Camper
Join Date: Mar 2004
Location: Pueblo, CO
Posts: 1,513
|
Re: My K5 Blazer Story.
There are multiple reasons we are sticking with drums. The size of the 3/4 ton drum brakes dwarfs the 1/2 ton stuff. This truck won't be "light" but compared to an actual 3/4 ton truck the drum brakes are still overkill. Plus we already have it. A few bucks spent to put fresh shoes, hardware and wheel cylinders and we will have good solid brakes.
Don't get me wrong I know disc brakes are great, but for this application it's just not needed. I'm not planning on mudding this rig so dealing with mud in the drums isn't a problem. Nor do I want extra complexity with an added driveline brake or dealing with finding the right prop valve to run on a 4 wheel disc setup. Besides, the future upgrade in my case is going to swap over to hydroboost for more braking power.
__________________
Rob Z. 1975 K5 350/465/205/D44/12b 4" lift on 35's- RIP 1991 K5 8.1L/NV4500/241/D44/14b FWC Camper |
|
|
|
|
11-07-2015, 12:24 AM
|
#13 |
|
Registered User
Join Date: Dec 2009
Location: Fairbanks, AK
Posts: 1,830
|
Re: My K5 Blazer Story.
I was thinking to myself Larry disc break rant in 3... 2... 1...
The master cylinder and booster on my V3500 were junk when I bought it. I replaced them earlier this year and that thing stops great. Even with a heavy trailer in tow.
__________________
-Marcus 1991 V3500 L29 454 4L80E NP205 D60/14 Bolt 4.56's 1984 K30 292 TH400 NP205 D60/14 Bolt 4.56's flat bed 7'6" Meyer Plow 2022 Silverado 3500 L8T Project Daily Driver Project Heavy Hauler Project Plow Truck |
|
|
|
|
11-07-2015, 12:31 AM
|
#14 | ||
|
Windy Corner of a Dirty Street
Join Date: Jun 2003
Location: Pueblo West, Colorado
Posts: 2,926
|
Re: My K5 Blazer Story.
Quote:
.....and the ballpeen hammer to the fingers is one of them  Quote:
 You know me too well.... at least I am consistent!
__________________
Current vehicle collection: 1978 Chevrolet K10, 8.1L, NV4500, NP205 1989 Chevrolet Suburban, 8.1L, NV4500, NP241 1993 Chevrolet C1500 Sportside, TBI 7.4L, 4L60E 2001 Chevrolet K2500HD, Ext Cab, SWB, 8.1L, ZF 6 speed 2014 Chevrolet Impala LTZ 3.6L Vortec 8.1L because life is too short to tolerate underpowered vehicles
|
||
|
|
|
|
11-07-2015, 12:45 AM
|
#15 |
|
Registered User
Join Date: Dec 2010
Location: Visalia, Ca
Posts: 707
|
Re: My K5 Blazer Story.
Well thank you for the input I'm in the process of rebuilding my axle now so I'll keep the drums for now. Put the Hammer back on the shelf Larry
__________________
<Brandon> 1974 Chevrolet K5 Blazer 350sbc/SM465/NP205, dana44 front, corp 14bolt rear with 4.10s and a powertrax locker, custom rear bumper 400sbc in the works. 1981 GMC C1500 stepside 250i6, 3spd, 12bolt with 3.08s 2.5/4drop on 15x10 with 275/50r15 81 GMC C3500 cab-chassis dually with utility bed 350sbc, Sm465, 14bolt with 4.10s nv4500 getting ready to go in 1979 Chevrolet K5 R.I.P. http://67-72chevytrucks.com/vboard/s...d.php?t=434096 1976 Chevrolet C10 R.I.P. http://67-72chevytrucks.com/vboard/s...d.php?t=434195 |
|
|
|
|
11-07-2015, 01:02 AM
|
#16 | |
|
Windy Corner of a Dirty Street
Join Date: Jun 2003
Location: Pueblo West, Colorado
Posts: 2,926
|
Re: My K5 Blazer Story.
Quote:
Got a nuisance thing out of the way tonight. Apparently Gen III engines like to rub the OEM engine crossmember. I wish I would have noticed this much sooner because the only way to deal with it at this point was to raise the engine with a floor jack and use a hand file to knock off the corner of the engine block. Damn, my arm is tired! 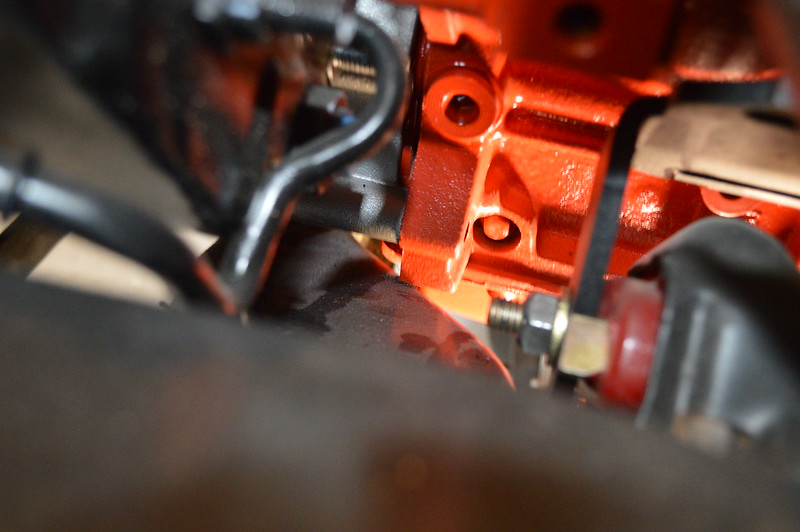 Still pretty close but this is as much clearance as I could make with a hand file. 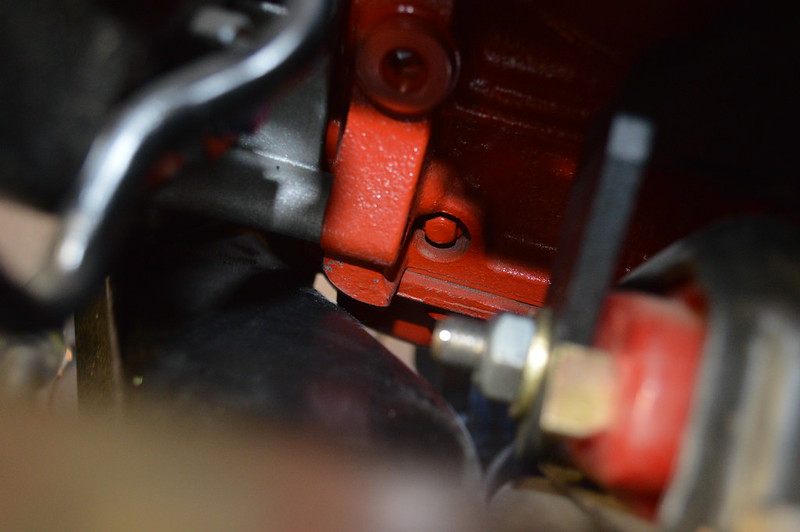
__________________
Current vehicle collection: 1978 Chevrolet K10, 8.1L, NV4500, NP205 1989 Chevrolet Suburban, 8.1L, NV4500, NP241 1993 Chevrolet C1500 Sportside, TBI 7.4L, 4L60E 2001 Chevrolet K2500HD, Ext Cab, SWB, 8.1L, ZF 6 speed 2014 Chevrolet Impala LTZ 3.6L Vortec 8.1L because life is too short to tolerate underpowered vehicles
|
|
|
|
|
|
11-07-2015, 01:28 AM
|
#17 | |
|
K5Camper
Join Date: Mar 2004
Location: Pueblo, CO
Posts: 1,513
|
Re: My K5 Blazer Story.
Quote:
__________________
Rob Z. 1975 K5 350/465/205/D44/12b 4" lift on 35's- RIP 1991 K5 8.1L/NV4500/241/D44/14b FWC Camper |
|
|
|
|
|
11-07-2015, 01:36 AM
|
#18 | |
|
Windy Corner of a Dirty Street
Join Date: Jun 2003
Location: Pueblo West, Colorado
Posts: 2,926
|
Re: My K5 Blazer Story.
Quote:

__________________
Current vehicle collection: 1978 Chevrolet K10, 8.1L, NV4500, NP205 1989 Chevrolet Suburban, 8.1L, NV4500, NP241 1993 Chevrolet C1500 Sportside, TBI 7.4L, 4L60E 2001 Chevrolet K2500HD, Ext Cab, SWB, 8.1L, ZF 6 speed 2014 Chevrolet Impala LTZ 3.6L Vortec 8.1L because life is too short to tolerate underpowered vehicles
|
|
|
|
|
|
11-07-2015, 01:14 AM
|
#19 |
|
K5Camper
Join Date: Mar 2004
Location: Pueblo, CO
Posts: 1,513
|
Re: My K5 Blazer Story.
Looks good dude.. I think all the hand file practice you got filing the nubs off your front driveshaft in the desert paid off!!
__________________
Rob Z. 1975 K5 350/465/205/D44/12b 4" lift on 35's- RIP 1991 K5 8.1L/NV4500/241/D44/14b FWC Camper |
|
|
|
|
11-07-2015, 01:25 AM
|
#20 | |
|
Windy Corner of a Dirty Street
Join Date: Jun 2003
Location: Pueblo West, Colorado
Posts: 2,926
|
Re: My K5 Blazer Story.
Quote:
Ya! Exactly the flashbacks I was having while machining your engine block with a precision cutting devise exactly like the 2 hours we spent filling my front CV in Canyonlands last year. Funny how a simple file can make such a huge difference. I bet even El Chapo agrees hand files are handy tools to have around. 
__________________
Current vehicle collection: 1978 Chevrolet K10, 8.1L, NV4500, NP205 1989 Chevrolet Suburban, 8.1L, NV4500, NP241 1993 Chevrolet C1500 Sportside, TBI 7.4L, 4L60E 2001 Chevrolet K2500HD, Ext Cab, SWB, 8.1L, ZF 6 speed 2014 Chevrolet Impala LTZ 3.6L Vortec 8.1L because life is too short to tolerate underpowered vehicles
|
|
|
|
|
|
11-07-2015, 09:29 PM
|
#21 |
|
K5Camper
Join Date: Mar 2004
Location: Pueblo, CO
Posts: 1,513
|
Re: My K5 Blazer Story.
Paid a visit to the Bigassgas Garage on the way home today. Had to drop off a brake line we made at work to replace the pinched one Larry found on the rear axle. I also got to survey my stupidity on the t-case.
Talked to Larry when I got there and between him and the research I did this morning I'm pretty sure he's right. I managed to get a 32 spline 241. He's going to pull it Monday and I'll take both 241's to work with me and get the 27 spline input installed in the good 241. The 32 spline input will NOT be tossed. We'll keep it for the possible change to a nv4500 if the budget were to allow it.
__________________
Rob Z. 1975 K5 350/465/205/D44/12b 4" lift on 35's- RIP 1991 K5 8.1L/NV4500/241/D44/14b FWC Camper |
|
|
|
|
11-10-2015, 01:28 AM
|
#22 |
|
K5Camper
Join Date: Mar 2004
Location: Pueblo, CO
Posts: 1,513
|
Re: My K5 Blazer Story.
Well it's confirmed. Larry pulled the t-case today. It's a 32 spline for sure. So it's loaded in the back of the S10 for a ride to work with the broken one to swap inputs. For anybody who cares I snapped a pic of both to show the difference. The 32 spline is on the left, 27 spline on the right.
 In the one step forward, two steps back mode...We attempted to bleed the brakes tonight when I stopped by to pick up the t-case. Starting with the rear, I'm pumping and Larry is working the bleeders. Not much of anything coming out of either side with multiple attempts. We move to the front and we have lots of fluid flow and get the air out. Move back to the rear and still nothing. Larry inspects the combination valve further and we find fluid leaking out of the valve on the end where one of the buttons are. Time to start looking for a combination valve. So to keep some positive vibe going here's a couple of pics I didn't post last week. The reworked driveshaft. Very nicely done.  Bringing the big baloneys home. 
__________________
Rob Z. 1975 K5 350/465/205/D44/12b 4" lift on 35's- RIP 1991 K5 8.1L/NV4500/241/D44/14b FWC Camper |
|
|
|
|
11-13-2015, 06:27 PM
|
#23 |
|
Windy Corner of a Dirty Street
Join Date: Jun 2003
Location: Pueblo West, Colorado
Posts: 2,926
|
Re: My K5 Blazer Story.
Well, what an absolute pain in the dick the last few days have been! So after the transfercase debacle Rob came by the other night to pick it up in order swap the input we tried to bleed the brakes while he was here only to discover we had no fluid going to the rear axle. Come to find out the proportioning valve was dead and badly leaking out of the rear section of the prop block with the valve hanging out. I tried to recenter the valve but there was no go
.the prop was shot. This must be a common theme with these as my dads 90 G-van did the same thing a few years ago.
The best part about this is this particular stinking prop valve is a 2 year only valve use on RWAL equipped 90-91 square bodies, while the GMT400 trucks used a completely different prop valve. After studying my K10 and Suburban for a while I determined it wouldnt be too painful just to convert it over to the earlier style and retrofit the earlier prop valve back down on the crossmember where it belongs. I tell ya, I would rather shave an angry Badgers balls than go through this again. So this is the mess before. The Red Arrow is the rear brake portion of the prop block. It was badly leaking from here. 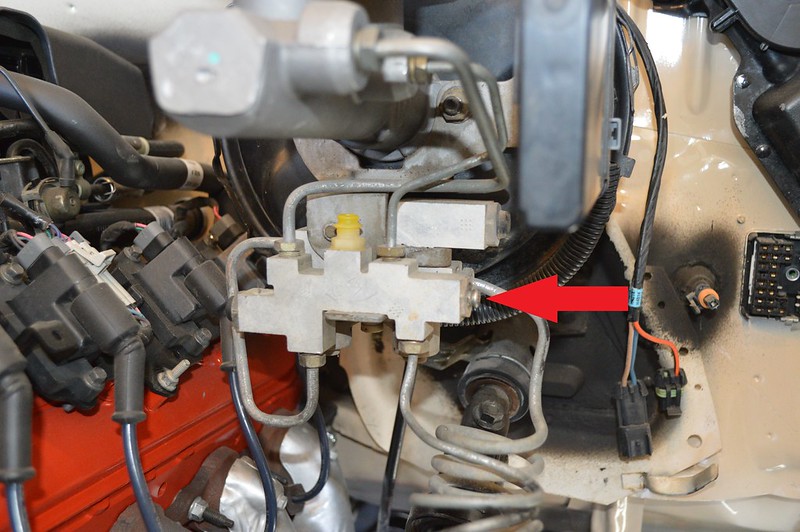 This is the spot on the crossmember where the prop valve would be on older rigs. The lines looked like they would almost line up close enough to an older prob valve. Well, this isnt horseshoes or hand grenades . And of course, the ORD steering box brace must come back off that I conveniently installed when the engine was OUT! 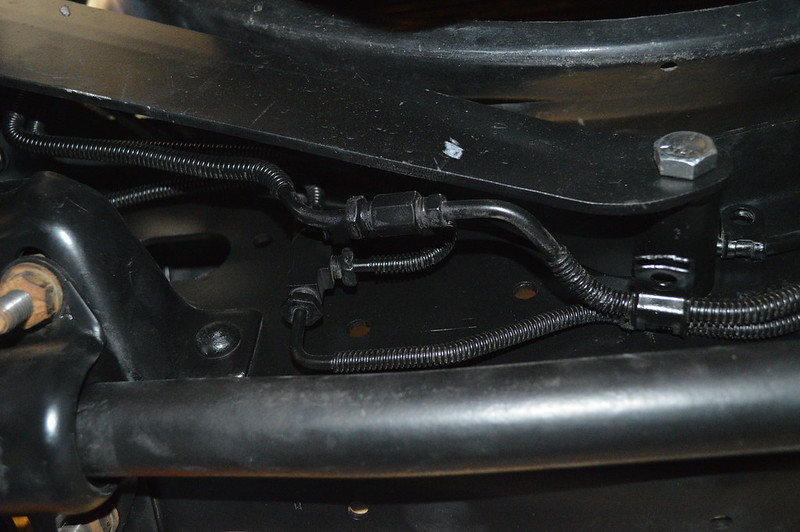 This here is what the 73-89 proportioning valves look like. This one happened to come off a 82 C20 or something like that. 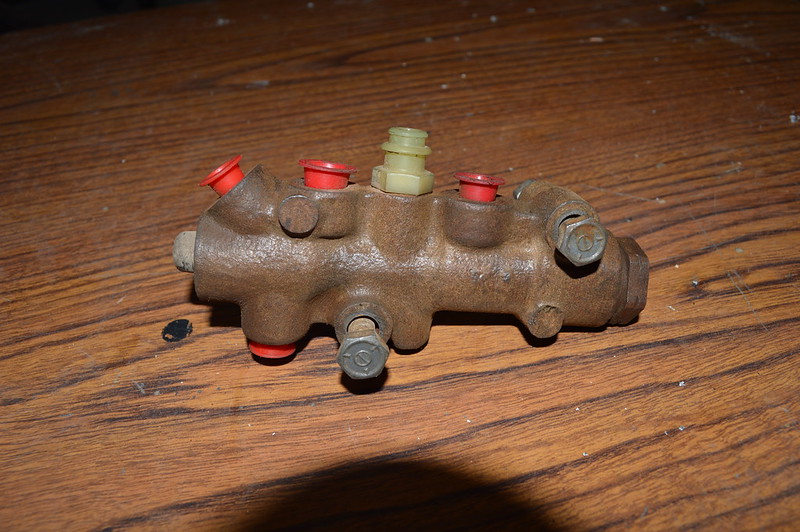 For the most part, the lines did almost line up with the older prop valve with the exception of two issues. First issue being the lines from the master cylinder to the prop valve must be changed as it would practically be impossible to bend them around to fit the valve and still clear the ORD steering brace. Second, the brake line to the rear is too long and has the wrong size tube nut. I dont know what size tube nut is the right one but it doesnt exist in any part store! So, Rob had to grab the M/C to prop valve lines and rear brake line tube nut from the boneyard. The line must be cut and double flared at the red line. Doing double flares is not my favorite thing to do and Ive never been good at them but I never had a good flare kit either so I made a trip to Sears for a fresh Craftsman Double Flare kit. It worked great! Im a double flaring building mofo now! 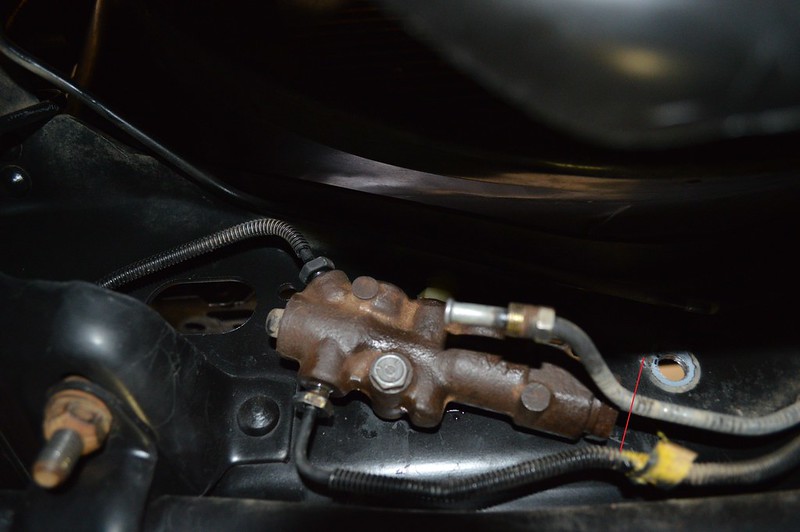 These were the original lines for the RWAL. Just no way to cleanly bend them to fit the older prop valve 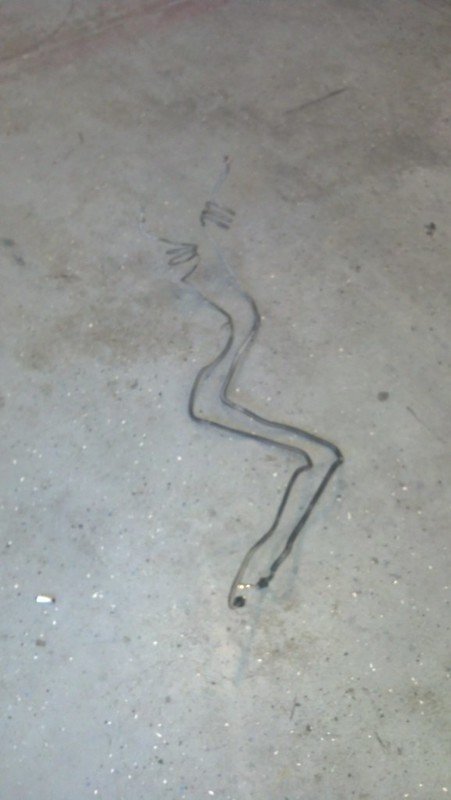 End result prop in place and ORD steering box reinstalled/torqued. Hope it doesnt leak once we bleed the brakes! 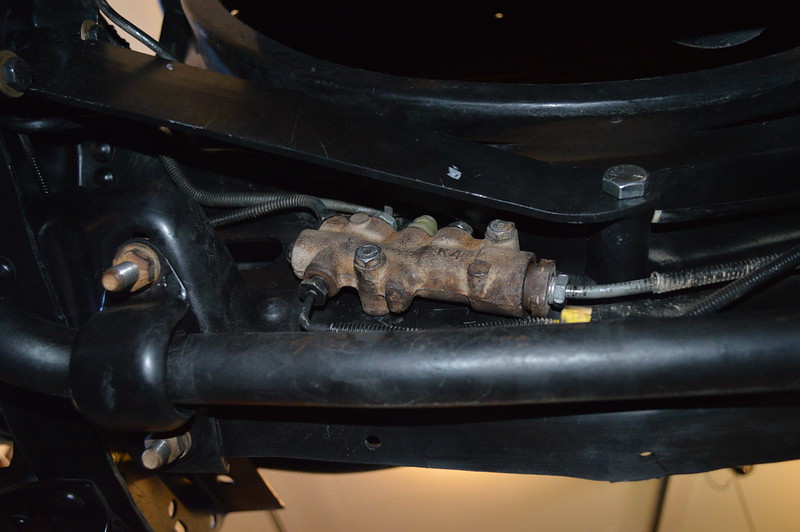 Looks better with less congestion now too. Vacuum brakes will do for a while until a hydroboost swap finds its way into the budget 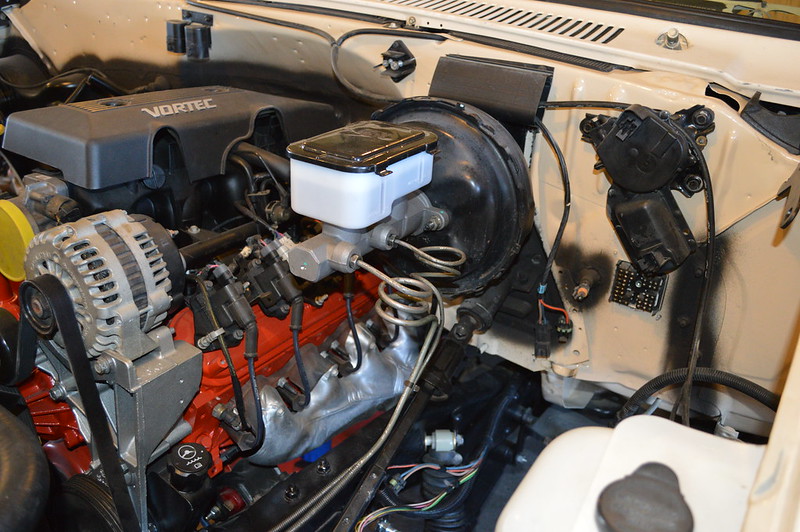 Also got the battery trays sand blasted and squirted this week as well. It seems I painted them on the windiest day of the week so theyre not perfect. 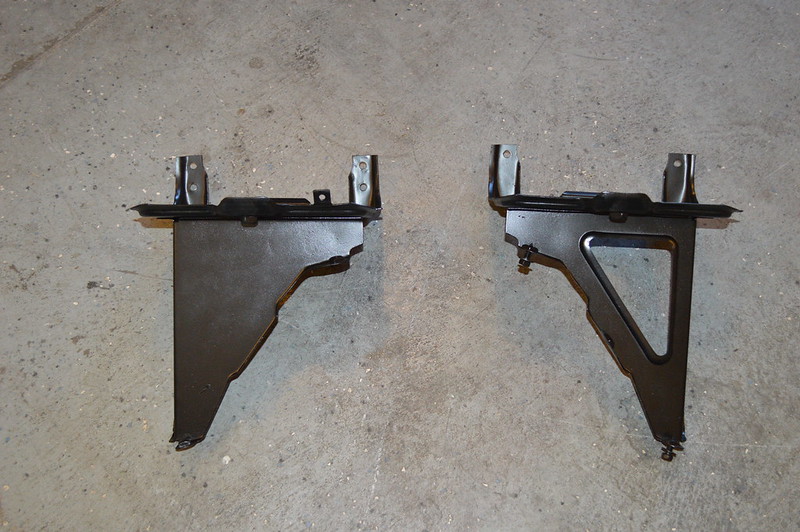 Oh, and I had to cut 2 F150s worth of aluminum weight out of the 700R4 dust cover to fit behind the Gen III oil pan. 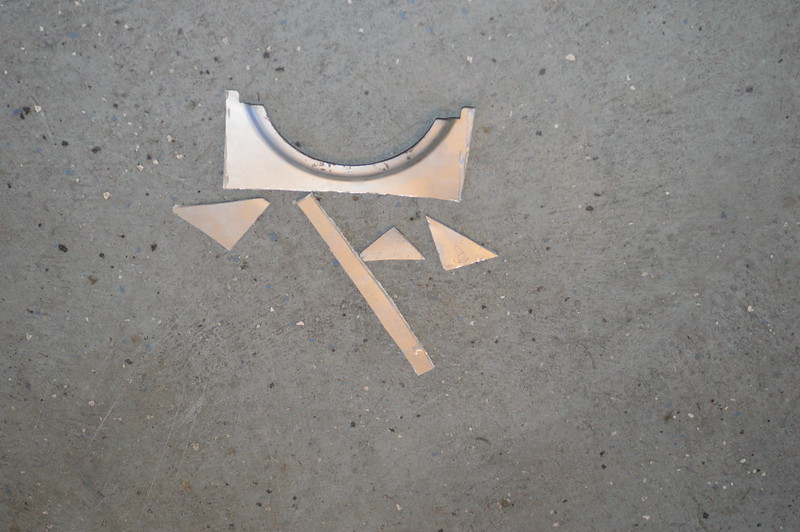 Now, I can finally get back on wiring where I had hoped to start this week!
__________________
Current vehicle collection: 1978 Chevrolet K10, 8.1L, NV4500, NP205 1989 Chevrolet Suburban, 8.1L, NV4500, NP241 1993 Chevrolet C1500 Sportside, TBI 7.4L, 4L60E 2001 Chevrolet K2500HD, Ext Cab, SWB, 8.1L, ZF 6 speed 2014 Chevrolet Impala LTZ 3.6L Vortec 8.1L because life is too short to tolerate underpowered vehicles
|
|
|
|
|
11-14-2015, 12:54 AM
|
#24 |
|
K5Camper
Join Date: Mar 2004
Location: Pueblo, CO
Posts: 1,513
|
Re: My K5 Blazer Story.
Yeah this week sucked as far as progress goes. Thank goodness I was able to secure the prop valve and lines from the local yard. Looking at work and online NOBODY sells that stupid valve for the 90-91 RWAL systems. Even more thanks for Larry's smart thinking to figure a way to retro-grade the unobtainable ABS system out of the truck and get back to stone simple reliable basic non-abs brakes. That being said, look out for a complete ABS module and dump valve going up on Craigslist.
The transfer case is getting it's operation tomorrow at work. So by the afternoon we can get back on track.
__________________
Rob Z. 1975 K5 350/465/205/D44/12b 4" lift on 35's- RIP 1991 K5 8.1L/NV4500/241/D44/14b FWC Camper |
|
|
|
|
11-14-2015, 11:18 PM
|
#25 |
|
K5Camper
Join Date: Mar 2004
Location: Pueblo, CO
Posts: 1,513
|
Re: My K5 Blazer Story.
So the transfer case is done. As expected the one we pulled out was beyond junk. Lots of metal on the magnet and more crap clogging the pump pickup.
 It's just nasty inside.  Pile-o-junk. Nothing here is worth reusing. Bearings are rough to spin and the chain is stretched.  So here's the only sore spot. Shown below is the dog teeth for the low range gear, this is on the 27 spline input. This has to be reused so it will couple up to the trans. It's not as clean as what the 32 spline teeth are, but it's what I'm going to run.  Inside the 2nd t-case. The blue RTV says somebody has been here recently. Shift fork pads were all complete and in place. We did replace the 4 short ones as they were brittle, but the two blue long pads were just fine. Chain is nice too. No crap anywhere inside the case.  A mainshaft that isn't bent. Amazing.  Brakes are still being a pain. Larry and I thought it would take a short time to bleed now with the ABS out and it turned into a full afternoon of banging our head on the truck. No flow to the rear. Need to regroup. I did bring the DRAC module home to recalibrate it for the axle ratio change and bigger tires.
__________________
Rob Z. 1975 K5 350/465/205/D44/12b 4" lift on 35's- RIP 1991 K5 8.1L/NV4500/241/D44/14b FWC Camper |
|
|
|
 |
| Bookmarks |
|
|


 Hybrid Mode
