
|
Register or Log In To remove these advertisements. |
|
|
|
|||||||
 |
|
|
Thread Tools | Display Modes |
 02-23-2012, 02:03 PM
|
#1 |
|
Registered User
Join Date: Aug 2009
Location: Corinth, TX
Posts: 210
|
Alternative A/C mounting Using S10 Compressor
Well, I stumbled onto this the other day. And thought that it might be of some benefit to some of us.
But, you have to have the truck engine belt drive system. Here is the full article. Thanks to MalibuRacing for this great info. A/C: Since the truck and some other LSx engines use a low mount A/C compressor, that would have required a frame notch, I decided to go a different route. I found a solution on the LS1tech.com forums that some others were using. I got a A/C bracket from a pre-Vortec 4.3L S-10. It will bolt right to the head and align perfectly with the other accessories on the truck motor. 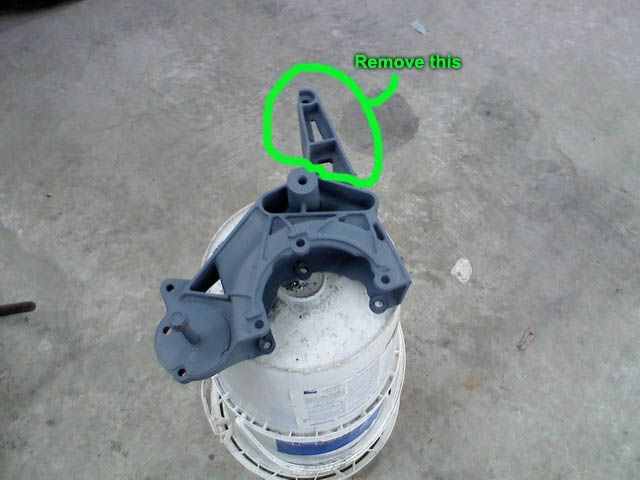 This is what the A/C bracket looks as it comes off the S-10. Notice that there is a small section that I have circled. This needs to be removed. I used a cut-off wheel to do this. 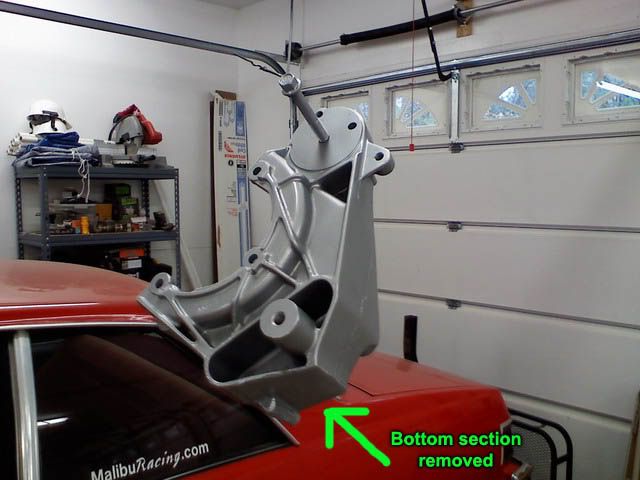 This is what the bracket looks like after removing the bottom section. 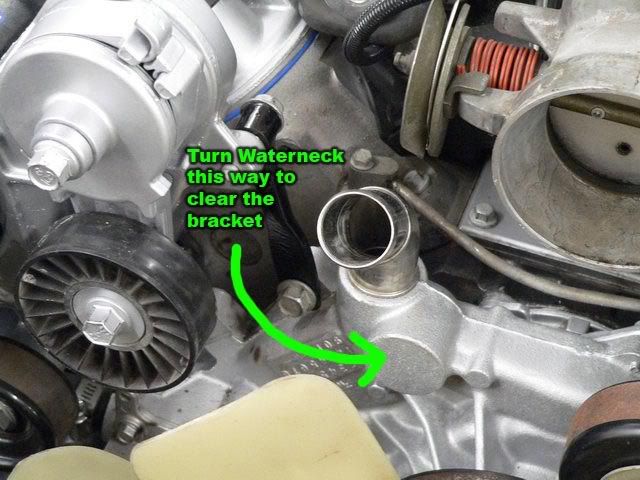 In order to clear the "new" location of the A/C compressor and bracket, the water neck needs to be turned counter clockwise. The waterneck is press into the pump housing. It was pretty simple to do this. I use a torch to heat around the aluminum at the base of the waterneck. I then inserted the handle of my floor jack into the waterneck and turned it so that it was facing straight forward. 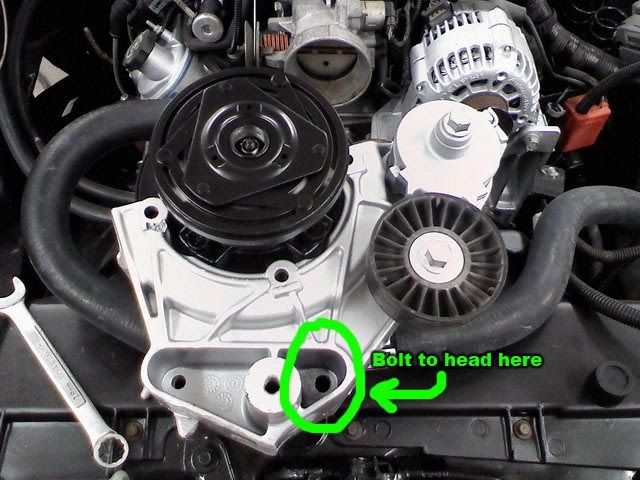 This is the hole I used to bolt the bracket to the head. 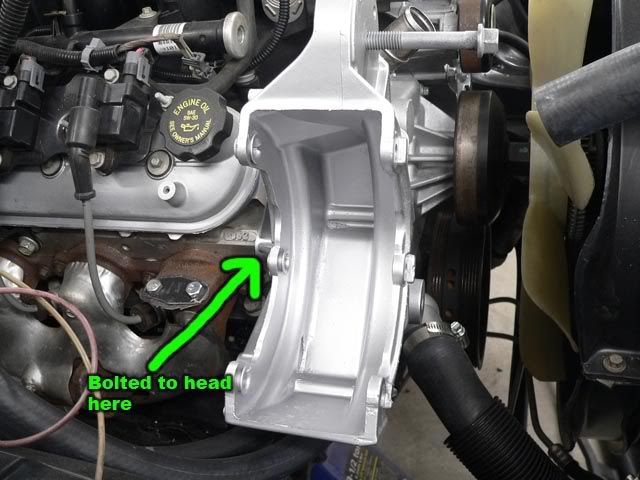 I bolted it to the accessory bolt hole in the head in the left top hand corner (facing the the engine). 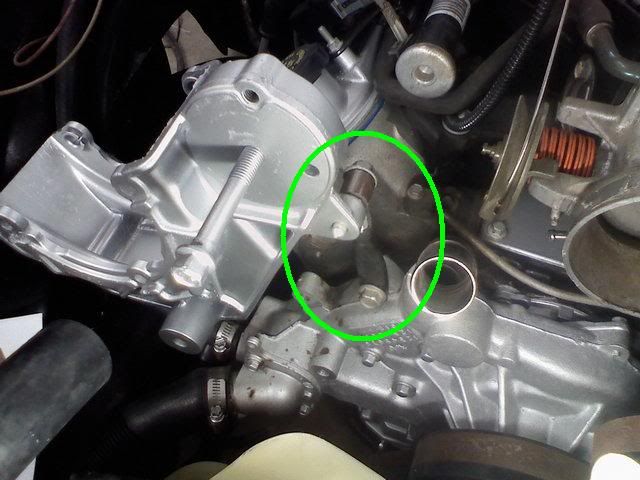 You need to make a support that can locate the bracket the proper angle (left to right). You should mock this up to determine the correct position for a particular length accessory belt. Here you can see the support bar I created using pieces that I cut and welded from junk yard support bars. 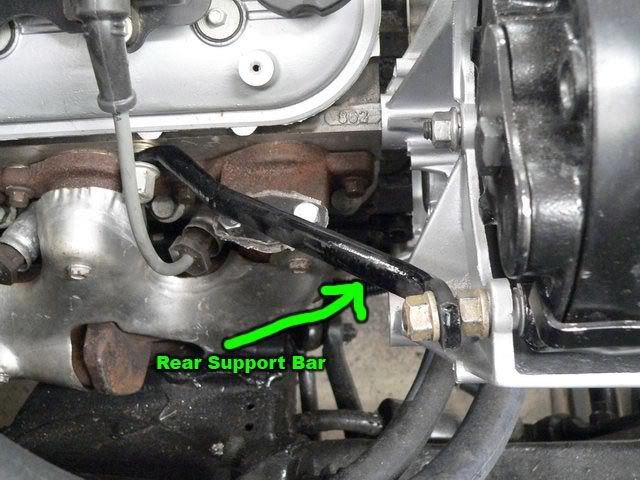 The bracket is supported in the rear by this brace I fabricated from pieces of junkyard parts. This prevents the bracket from moving front to back. 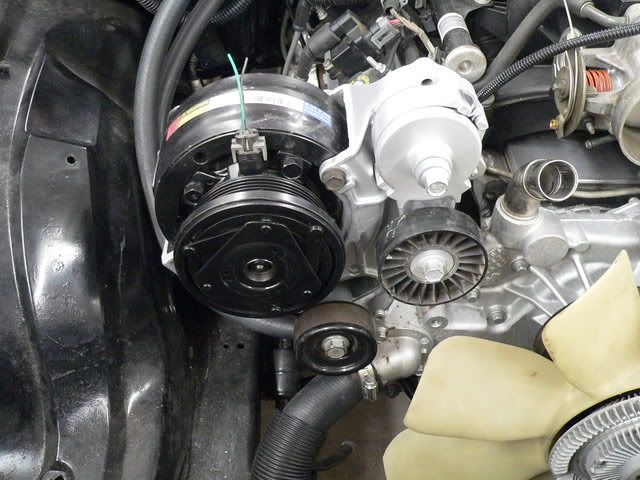 This is what it looks like when mounted. Notice you will need another idler pulley on the bottom to keep the belt clear of the thermostat housing and lower radiator hose. The A/C compressor is from a 1992 F-body (Camaro/Firebird). It has a different type of hose connection on the back (than 1979 Malibu), so I used the hose assembly for a '92 F-body. Just make sure you get a hose assembly with the correct connections for your application. 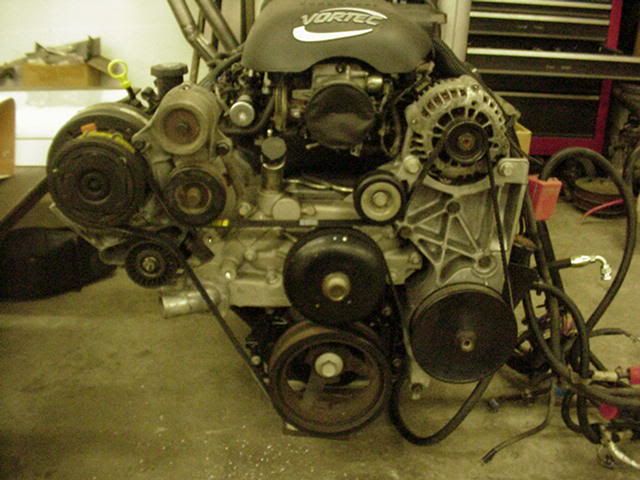 The final belt routing will look like this
__________________
Better to have it and not need it, then to need it and not have it. Fork In The Road....Cummins Build My Build Thread... Alternative A/C Mounting for LS Engines 4L60E Transmission Rebuild Info Trailing Arm How To |

|

|
|
| Bookmarks |
|
|


 Linear Mode

