
|
Register or Log In To remove these advertisements. |
|
|
|
|||||||
| View Poll Results: Engine color question, stock colors or?? | |||
| Stock Orange |
|
3 | 42.86% |
| Satin Black to match inner fenders |
|
1 | 14.29% |
| Body color with maybe matching finned valve covers |
|
3 | 42.86% |
| Don't give a damn, do what you want |
|
0 | 0% |
| Paint the aluminum intake to match? |
|
1 | 14.29% |
| Multiple Choice Poll. Voters: 7. You may not vote on this poll | |||
 |
|
|
Thread Tools | Display Modes |
|
|
 09-10-2015, 02:29 PM
|
#1 |
|
BlahBlahBlah
Join Date: Feb 2002
Location: Wa.
Posts: 19,788
|
Re: 68 Burb - Project - GoldMember
Looking forward to seeing this at the swap meet in Monroe next month
 You will be driving it up wont you? 
__________________
... |

|

|
|
09-10-2015, 02:41 PM
|
#2 |
|
Senior Member
 Join Date: Jul 2012
Location: Oblong, Illinois
Posts: 7,017
|
Re: 68 Burb - Project - GoldMember
Looks solid!
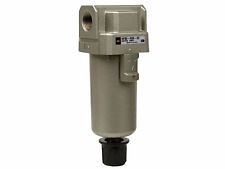
Guessing the water trap goes between the pumps and tanks? I have Ridetech system I will be installing and they don't mention a watertrap. Do your tanks have a drain? I noticed mine didn't. Finally read the instructions which advise to remove the tank annually for draining. Like that would really happen. |
|
|
|
|
09-10-2015, 04:11 PM
|
#3 | ||
|
Wide n'Low
Join Date: Jan 2007
Location: La Center, WA
Posts: 1,511
|
Re: 68 Burb - Project - GoldMember
Quote:
Quote:
 I also was reading through other threads on best practice for adding proper fusing to the system to handle the compressors, Accuair etc... This one was a pretty good read I Like the look of this as a means to fuse the compressors,  and will also add a main fuse right near the battery to..
__________________
Trippin Hazard.. 67 swb, Gold Member.. 68 Suburban Air Force Retired |
||
|
|
|
|
09-11-2015, 09:17 AM
|
#4 |
|
Senior Member
Join Date: Oct 2013
Location: Marietta, GA
Posts: 1,642
|
Re: 68 Burb - Project - GoldMember
Killer progress! Really glad your eye is okay.
__________________
- Robbie UNITED BY TRUCKS - classic truck video content YouTube: www.youtube.com/c/unitedbytrucks Instagram: @united_by_trucks Paw Paw '68 508 Dark Blue Custom C10 Teddy '68 GMC SWB 503 Light Green LS Build Mississippi Mud '75 Skyline Blue Patina SBC Build |
|
|
|
|
09-12-2015, 08:00 AM
|
#5 |
|
Registered User
Join Date: Mar 2015
Location: San Jose, CA
Posts: 130
|
Re: 68 Burb - Project - GoldMember
Awesome work. It should look and perform great once finished. I'll stay tuned. Thanks for keeping us all posted.
__________________
56 Chevy step-side 68 Chevy Suburban 69 Corvette Stingray 00 BMW 325 (Daily driver) 09 BMW M3 18 GMC Acadia (Wife's daily driver) |
|
|
|
|
09-14-2015, 11:12 AM
|
#6 | ||
|
Wide n'Low
Join Date: Jan 2007
Location: La Center, WA
Posts: 1,511
|
Re: 68 Burb - Project - GoldMember
Quote:
The eye is back to normal thankfully.. Progress seems slow to me only because in my head I should be done already... LOL Quote:
I certainly hope it does, I can't wait to drive her..
__________________
Trippin Hazard.. 67 swb, Gold Member.. 68 Suburban Air Force Retired |
||
|
|
|
|
09-14-2015, 12:09 PM
|
#7 |
|
Wide n'Low
Join Date: Jan 2007
Location: La Center, WA
Posts: 1,511
|
Re: 68 Burb - Project - GoldMember
Well, even though I didn't take a lot of pictures over the weekend, I was certainly busy. My water traps came in Friday afternoon, so first thing I did was to pull the air tanks off the mounting bracket and plumb in the water traps. I decided since these are steel tanks I would add one on each inlet from the compressors, and one on the outlet side that is headed for the VU4 valve. I put it all back together and it's ready to go.
I then worked on creating a mount for the compressors to hang off the frame rail. I looked around the shop for some material and found a couple heavy duty U shaped brackets that should fit the bill. I was able to sit them side by side and mock it all up. Here is pretty much how they will look when final install is done. 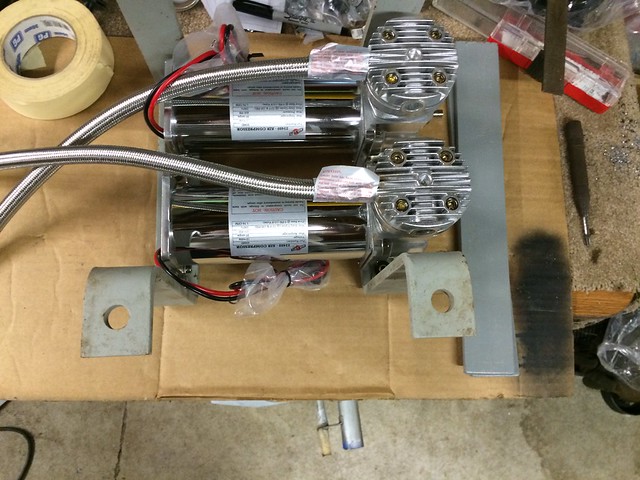 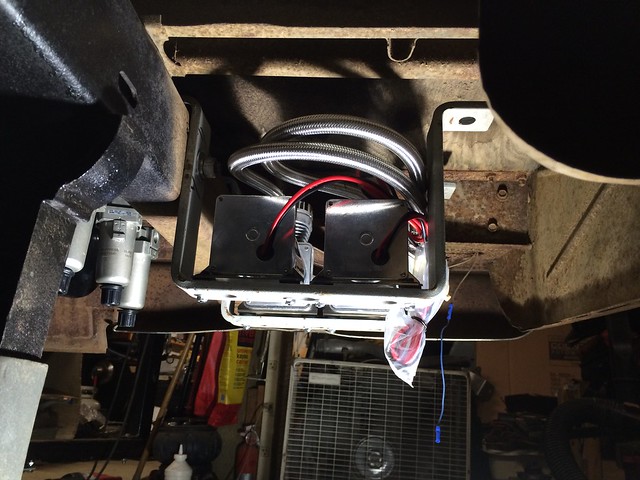 I might make a shield for the backside to block more splash or debris that comes from the rear tire. I am also going to extend the air inlets up as far as possible to keep them from drawing any water in if I happen to drive in the rain..(like we have no rain in the Northwest right) In order to route all the air lines and wiring to where I want the valve setup, I drilled an access hole in the filler neck cover. ( I would gladly thank the board member who's post I saw this idea on, but forget who it is) Found it, it was a thread from 72Mario http://67-72chevytrucks.com/vboard/s...light=air+ride I want to come up with a way to seal it, will have to think on that.. but for now I have a piece of hose split and wrapped around the opening to there are no sharp edges.  I began to run all the air line and ride sensor wiring, I installed and plumbed the rear bags, routed the air line for the fronts and just have to finish it with some additional loom and clamps. 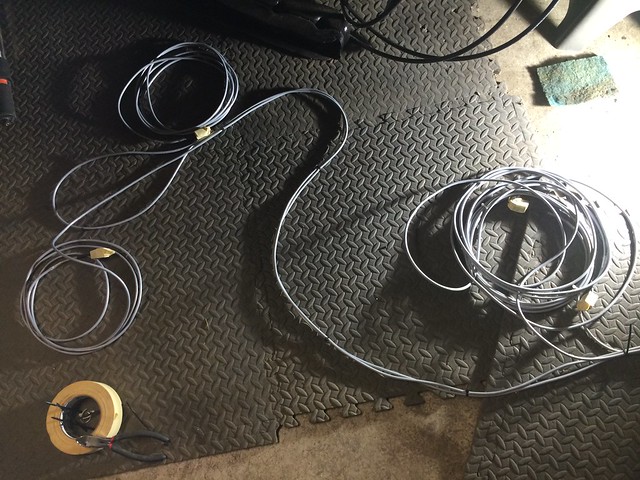 Not knowing yet exactly where my sensors will live, I left myself enough length for now, but will tidy things up as I go. Next I fabbed up a bracket/plate to hold all the Accuair components and did a test fit. looks like it will be an easy way to co-locate everything. I gave it a coat of primer but forgot to get pics.. While that was drying, I figured I would finish up the chassis cleanup.. I donned my birth control glasses long sleeve shirt, hat and mask before breaking out the scotch brite pads and brushes.. No way in hell was I going to get crap in my eyes this time!!! 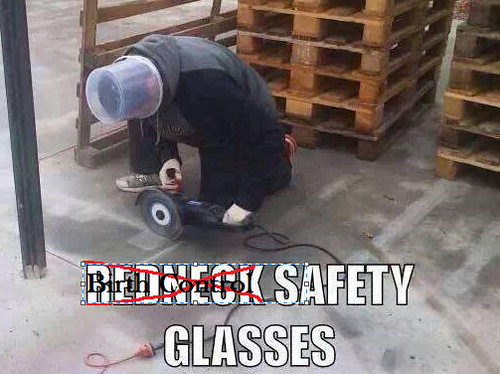 Well that took a me few hours to say the least.. I shot some chassis black on everything and took a break.. I turned my attention to the rear axle, I added some friction modifier for the posi, then went about tackling the brake lines for the rear disc. Again... my bad for not taking pics, but I have one short hard line left to bend up and it will be ready to mount. More to come this week, I have a short list of stuff to buy, but hope I have turned the corner on the exterior from the tear-down phase to the assembly phase.. Thanks for watching
__________________
Trippin Hazard.. 67 swb, Gold Member.. 68 Suburban Air Force Retired Last edited by Twisted78SS; 09-14-2015 at 05:18 PM. |
|
|
|
|
09-14-2015, 06:16 PM
|
#8 |
|
Senior Member
Join Date: Jul 2012
Location: Oblong, Illinois
Posts: 7,017
|
Re: 68 Burb - Project - GoldMember
Your brackets are just why we hang onto "stuff". Never know when you will need it. Good idea on the pump mounting. Wasn't even thinking along those lines for mine. Thanks!
Bucket safety...bwahaha... |
|
|
|
|
09-16-2015, 11:08 AM
|
#9 | |
|
Wide n'Low
Join Date: Jan 2007
Location: La Center, WA
Posts: 1,511
|
Re: 68 Burb - Project - GoldMember
Quote:
On the pump mounting, my first attempt didn't pan out, I was thinking that I would put them end to end on a shelf/bracket, but it ended up a bit longer than I wanted and didn't tuck in near the bumper bracket well enough. so that's when I got back online and looked for ideas around the web.. seeing several compressors sitting side by side on various vehicles, I knew that was the ticket and should have plenty of room in that configuration. I was late getting home, so by the time I hit the shop it was already well after 9:30. I did finish mounting the compressors last night and plumbed the leader lines to the water traps. It came out fairly tidy. I then finished the line between the two tanks, and ran the final line from the tank output to the interior where the VU4 will live. The only other thing I managed to get done was mounting the VU4 and ECU to the panel I made.. Better than nothing.. Hope the rest of the week goes better.
__________________
Trippin Hazard.. 67 swb, Gold Member.. 68 Suburban Air Force Retired |
|
|
|
|
|
09-18-2015, 02:46 PM
|
#10 |
|
Wide n'Low
Join Date: Jan 2007
Location: La Center, WA
Posts: 1,511
|
Re: 68 Burb - Project - GoldMember
Been slammed at work, which has left little time in the shop.
With help from my son we have been getting a few things out of the way. Last night we re-hung the gas tank, and got most of the wiring and air lines tucked away. a couple pics of the compressor install and tank. 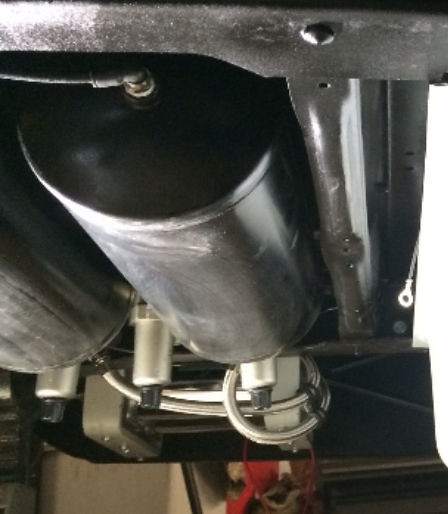 Just need to attach the ground strap and filler neck hose and the tank will be complete 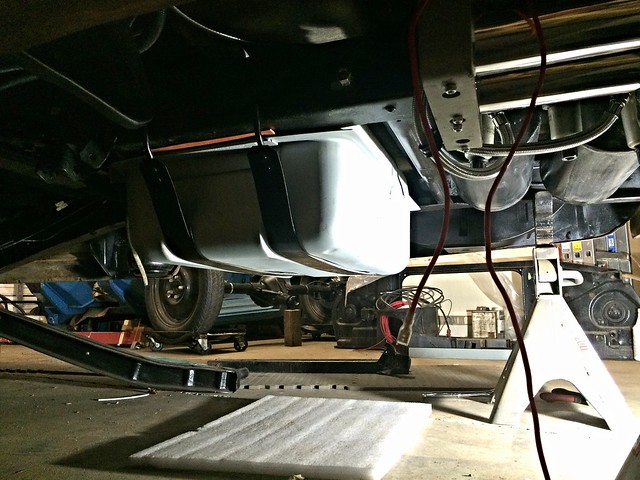 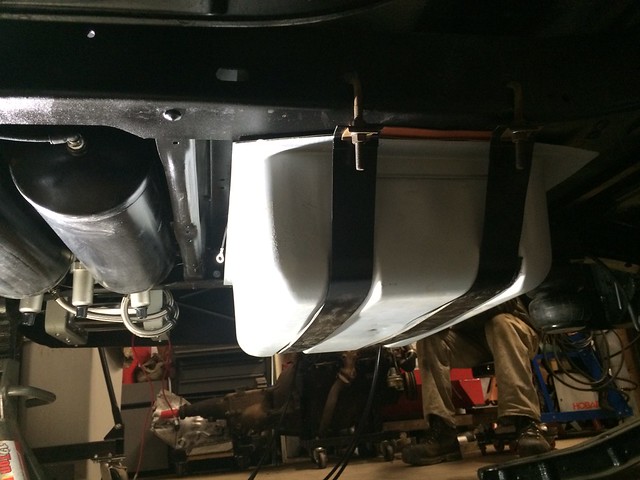 quite a difference from where it started 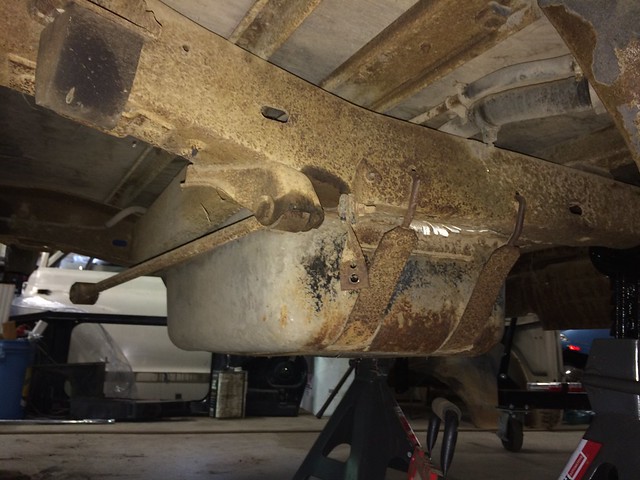 Also spent time to clean up the shop a bit, it needed it! been gathering the last few items for the wiring, think I have it all now. Using the panel I made, the relay's fuses, etc... should look decent when finished. going to take some time off next week to dedicate to shop time, hope to get things rolling.. if you know what I mean..
__________________
Trippin Hazard.. 67 swb, Gold Member.. 68 Suburban Air Force Retired |
|
|
|
|
09-18-2015, 04:11 PM
|
#11 |
|
Registered User
Join Date: Dec 2009
Location: Arizona City, AZ
Posts: 747
|
Re: 68 Burb - Project - GoldMember
How did I miss this one! Great looking ride. Vary clean. I need to get in gear and start on my air ride. I was thinking of putting the tanks in the same spot on mine. I have a hidden hitch to work around but you worked out a clean looking setup. Keep up the good work.
__________________
----------------------------------------------------------- Erik My 69 suburban http://67-72chevytrucks.com/vboard/s...d.php?t=530626 1970 C10 step Project Jiminy http://67-72chevytrucks.com/vboard/s...d.php?t=682647 RUST!? Thats just mother natures way of telling all of us.....MINE!!!! |
|
|
|
|
09-18-2015, 05:13 PM
|
#12 |
|
Senior Member
Join Date: Jul 2012
Location: Oblong, Illinois
Posts: 7,017
|
Re: 68 Burb - Project - GoldMember
Looks really good. Big improvement! Clean parts and pieces always speeds the heart up just a bit.
|
|
|
|
|
09-26-2015, 01:51 AM
|
#13 |
|
Wide n'Low
Join Date: Jan 2007
Location: La Center, WA
Posts: 1,511
|
Re: 68 Burb - Project - GoldMember
Dang it, can't seem to get my uploads going for my iPad again. But I'll give an update anyway and add pics as I can.
Been super busy both at work and home.. I'm sure many can relate.. Since my last update I have worked to fabricate a pan hard bar mount, bend up brake lines, rebuild the engine and update it with full roller internals, and then today, re install the rear axle. As soon as I rolled the axle back under the Burb, it became obvious to me that I had neglected to account for the width of the frame when I placed the tabs for the rear flex lines coming off the calipers. Bummer to say the least! So, that meant two things, one, move the tabs, and two, bend new brake hard lines.. That should teach me to a ting or two.. Pics coming soon..
__________________
Trippin Hazard.. 67 swb, Gold Member.. 68 Suburban Air Force Retired |
|
|
|
|
09-27-2015, 07:49 PM
|
#14 |
|
Wide n'Low
Join Date: Jan 2007
Location: La Center, WA
Posts: 1,511
|
Re: 68 Burb - Project - GoldMember
OK, pics to bring things up to date. Still have lots to do, but I had to share some first looks at the new stance,
We fabbed a pan hard bar mount modeled after the ECE one( pic is mid process) 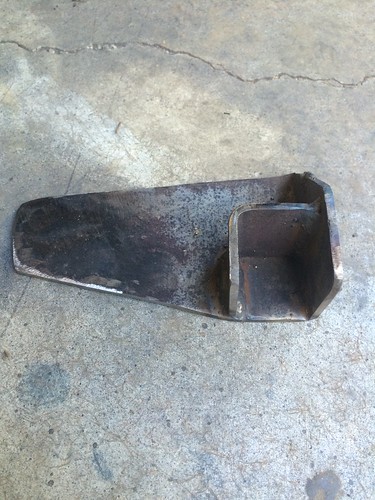 New parts painted and ready to install. 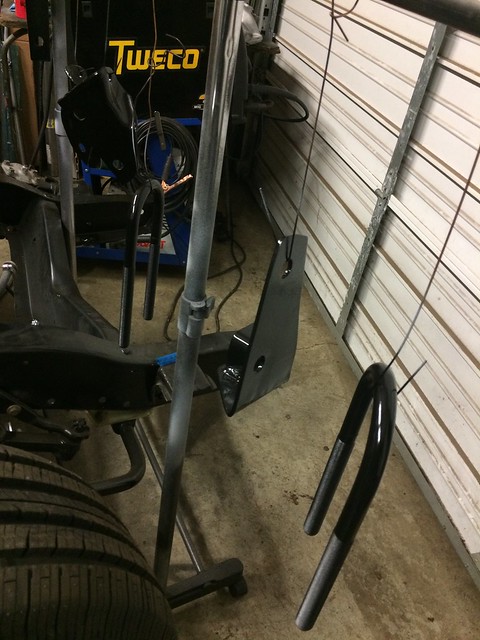 Rolling the axle in place 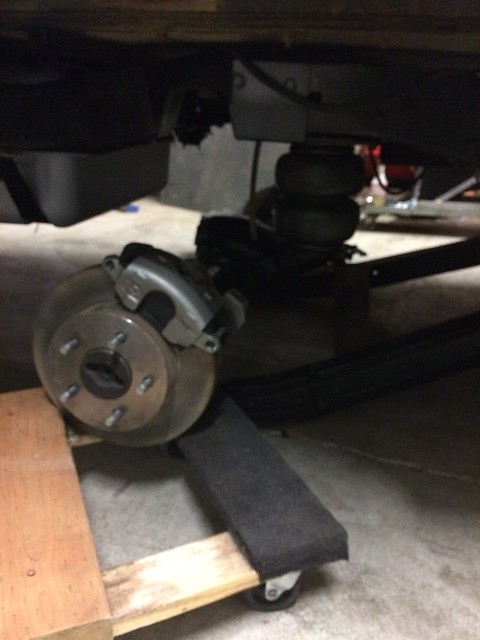 Some first glimpses 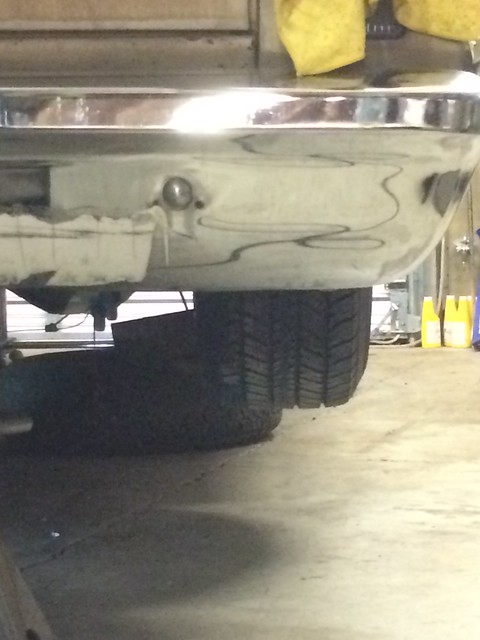 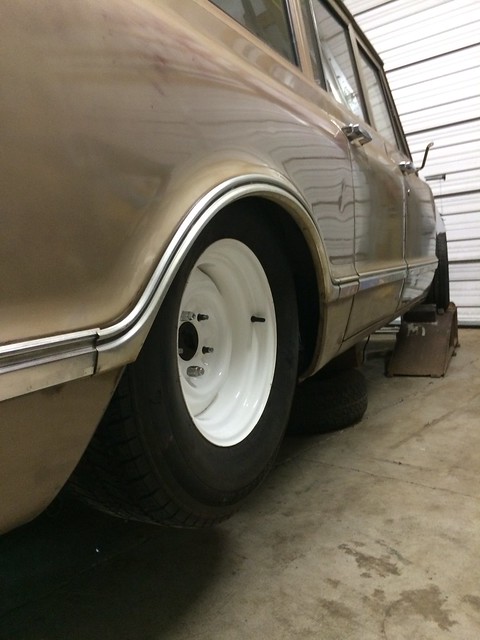 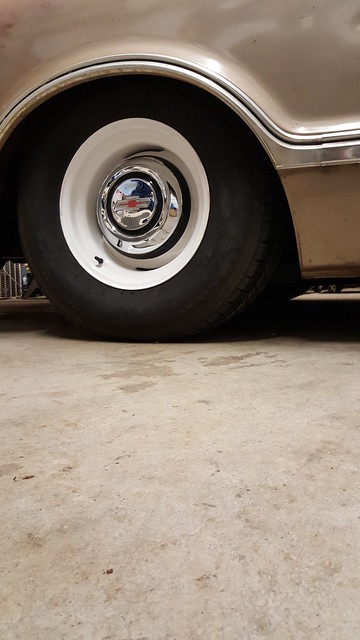 Touchdown!   Certainly could use some better pics, but we didn't stop to take very many.. one other item that was worked over the past week was the engine.. Just one typical pic for now, she's almost ready for paint and final assembly.. 
__________________
Trippin Hazard.. 67 swb, Gold Member.. 68 Suburban Air Force Retired |
|
|
|
|
09-27-2015, 08:26 PM
|
#15 |
|
Senior Member
Join Date: Jul 2012
Location: Oblong, Illinois
Posts: 7,017
|
Re: 68 Burb - Project - GoldMember
Very nice stance. Looking really good!
|
|
|
|
|
09-28-2015, 02:58 PM
|
#16 |
|
Wide n'Low
Join Date: Jan 2007
Location: La Center, WA
Posts: 1,511
|
Re: 68 Burb - Project - GoldMember
I know the pics in the shop don't really show the difference that well , so here is a before / after measured at the rear bumper which at least gives you an idea in hard numbers.
Can't wait to get her outside and show some full view shots.. 
__________________
Trippin Hazard.. 67 swb, Gold Member.. 68 Suburban Air Force Retired |
|
|
|
|
09-28-2015, 05:09 PM
|
#17 |
|
Strongman Garage
Join Date: Apr 2000
Location: Salinas, CA
Posts: 10,241
|
Re: 68 Burb - Project - GoldMember
Looks great!
Looking forward to full pics
__________________
Kalle 68 GMC Suburban 1500 4x4 SOLD 69 Pontiac Lemans 99 Silverado 4.8 5 speed ECSB [ Facebook Instagram Subscribe on YOUTUBE |
|
|
|
|
09-28-2015, 11:36 PM
|
#18 |
|
Registered User
Join Date: Feb 2009
Location: Southern Oregon
Posts: 1,352
|
Re: 68 Burb - Project - GoldMember
Nice work! Your wheel and tire combo look great.
__________________
1967 C10 Suburban 454/TH400/3.07's An Average Joe and His 'Burb: http://67-72chevytrucks.com/vboard/s...d.php?t=775843 |
|
|
|
|
09-29-2015, 12:49 AM
|
#19 |
|
Senior Member
Join Date: Oct 2013
Location: Marietta, GA
Posts: 1,642
|
Re: 68 Burb - Project - GoldMember
Really looks awesome!
__________________
- Robbie UNITED BY TRUCKS - classic truck video content YouTube: www.youtube.com/c/unitedbytrucks Instagram: @united_by_trucks Paw Paw '68 508 Dark Blue Custom C10 Teddy '68 GMC SWB 503 Light Green LS Build Mississippi Mud '75 Skyline Blue Patina SBC Build |
|
|
|
|
10-05-2015, 11:28 AM
|
#20 |
|
Wide n'Low
Join Date: Jan 2007
Location: La Center, WA
Posts: 1,511
|
Re: 68 Burb - Project - GoldMember
I have been super busy at work trying to put out some fires.. If it weren't for customers, work would be fun! lol..
anyway, that has slowed down progress a bunch over the last couple weeks.. I did manage to get a few things finished up, and progress continues albeit sloooowwww Lots of little details that are never going to be seen like looming up wiring, cleaning and painting hardware, etc... But for something at least worth a picture or two, I took these shots from the paint work on the engine and firewall. 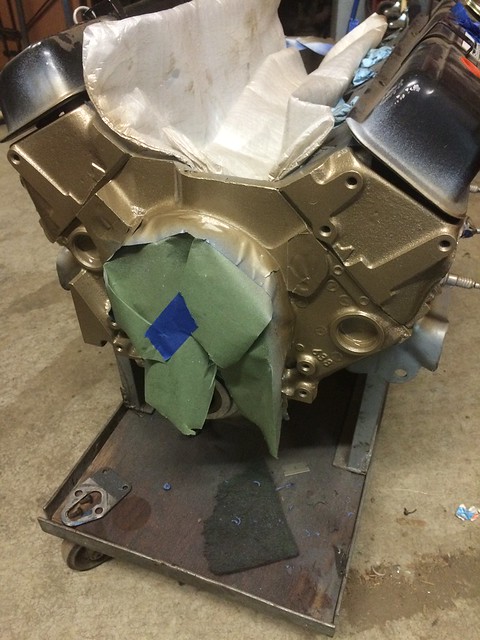 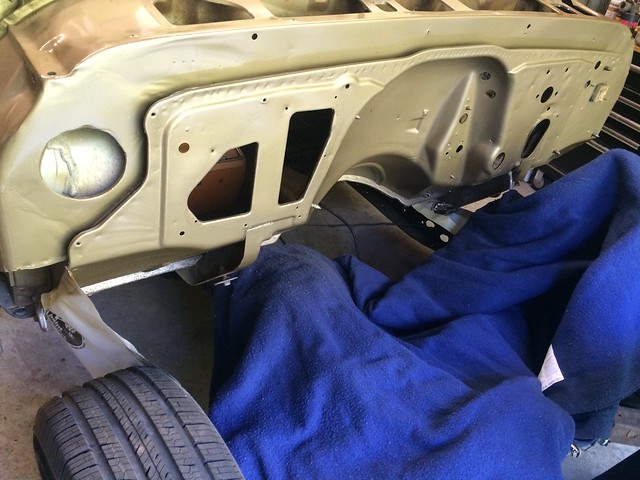 With so many factory wrinkles, bumps, divots, and wavy areas on the firewall, I could have spent a few days smoothing things out but I decided to just leave them alone and paint it.. At least now I can start the mockup of the hydroboost and stab the motor/trans in so I can get to working on exhaust and driveline.. I'm also going to update the gas pedal to a later cable style and retire the manual rod setup. I picked up the last few items for the Accuair, I was short a couple relays and fuses, but think I have it all now.. time to mount everything in its permanent location and try it out!! Another small but critical project has to do with the intake.. I am going to drill the front boss on one of my Edelbrock Performers to add an oil fill tube, that way I can run some vintage style valve covers with no holes.. (I'll plumb the PCV valve and vent into the backside like this thread from Dino) http://67-72chevytrucks.com/vboard/s...il+gate&page=8 I'm facing the inevitable that there is probably no way I can get everything done by this coming weekend so I could drive it to the Monroe swap meet, but I am not giving up just yet!
__________________
Trippin Hazard.. 67 swb, Gold Member.. 68 Suburban Air Force Retired |
|
|
|
|
10-05-2015, 07:02 PM
|
#21 |
|
Senior Member
Join Date: Jul 2012
Location: Oblong, Illinois
Posts: 7,017
|
Re: 68 Burb - Project - GoldMember
Engine and firewall look great! Hope you can make the show. Based on how much you do in a short time you have a good shot at it.
|
|
|
|
|
10-09-2015, 11:16 AM
|
#22 | |
|
Wide n'Low
Join Date: Jan 2007
Location: La Center, WA
Posts: 1,511
|
Re: 68 Burb - Project - GoldMember
Quote:
Well I would like to think things are going at a fast pace, but then again, all it takes is one hiccup to provide a new wrinkle and slow things back down again.. We have had some unusually busy days at work which meant I was getting home late and that cut into shop time.. While I'm going to make it to the swap this weekend come hell or high water, the Burb will stay tucked away in the shop.. I left off last night nearly finishing the install on all the Accuair.. I have to clean up the wiring and will add one more primary ground wire for the panel, but it's finally in!! Here is the spaghetti mess before any cleanup.. 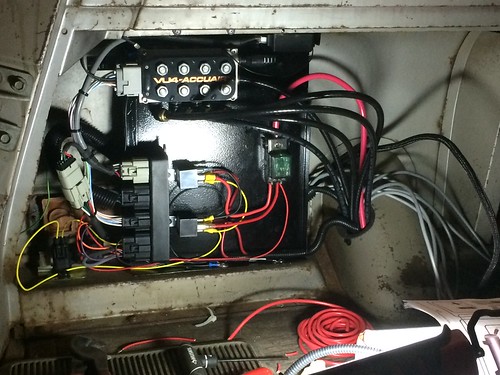
__________________
Trippin Hazard.. 67 swb, Gold Member.. 68 Suburban Air Force Retired |
|
|
|
|
|
10-09-2015, 02:05 PM
|
#23 |
|
Strongman Garage
Join Date: Apr 2000
Location: Salinas, CA
Posts: 10,241
|
Re: 68 Burb - Project - GoldMember
Its like you are reading my mind on a few of these things.
Painting engine body color, running script valve covers, drilling the edelbrock intake, etc... I'll continue to follow along 
__________________
Kalle 68 GMC Suburban 1500 4x4 SOLD 69 Pontiac Lemans 99 Silverado 4.8 5 speed ECSB [ Facebook Instagram Subscribe on YOUTUBE |
|
|
|
|
10-12-2015, 08:55 PM
|
#24 | |
|
Wide n'Low
Join Date: Jan 2007
Location: La Center, WA
Posts: 1,511
|
Re: 68 Burb - Project - GoldMember
Quote:
__________________
Trippin Hazard.. 67 swb, Gold Member.. 68 Suburban Air Force Retired |
|
|
|
|
|
10-14-2015, 10:38 PM
|
#25 |
|
Registered User
Join Date: Jan 2010
Location: Brandon, Manitoba, Canada
Posts: 782
|
Re: 68 Burb - Project - GoldMember
sub'd....
I just purchased it's not so distant cousin...lol. It's a GMC but getting one of my 67 grills swapped over. Should have it home Sunday, purchased out of Minot, North Dakota. Bought sight unseen so hope it is reasonably solid, thinking nowhere near as nice as yours though...haha. Will be keeping track on your build...this will be my first 67-72 build. Will be nice venturing into a new world for a change. Loving what your doing so far, and great attention to detail. Looks like it has weathered well. Keep up the great work!
__________________
1967 K30 4x4/12v Cummins/getrag/D60/D70/355s 1967 GMC suburban 4x4/LS swap 5.3/4500/205/10 bolt/14 bolt full floater 1963 C10 reg cab long box 1970 Chevelle 1968 Biscayne 2dr post "...there is no excuse for what I am about to do, but dangit....it's gonna be fun!" |
|
|
|
|
| Bookmarks |
|
|


 Hybrid Mode
