
|
|
|
 05-15-2023, 07:55 PM
|
#1 |
|
Senior Member
 Join Date: Jul 2010
Location: Race City U.S.A.
Posts: 1,005
|
Re: "Midnight Rider" 1970 C10 SWB Fleetside
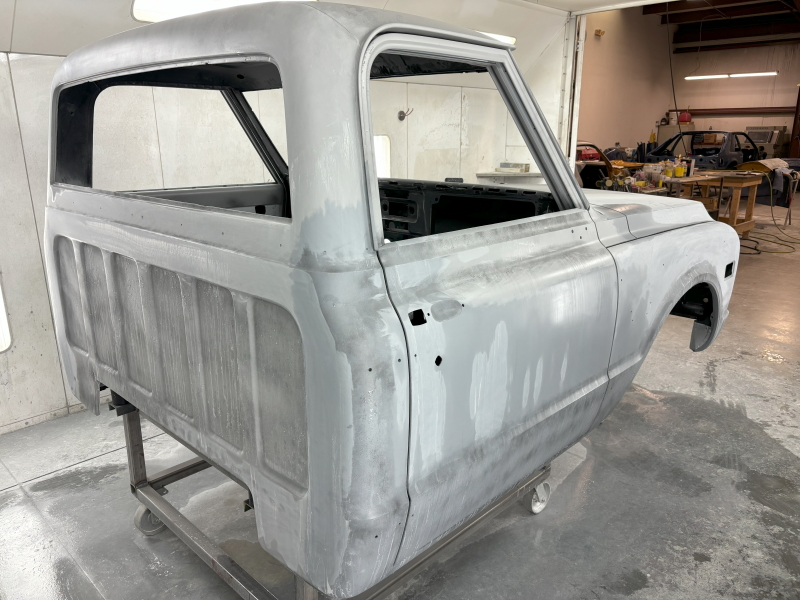
Life stuff has been happening, so the build has slowed down a bit lately.
There is more work to be done to the cab, but all of the other panels are in final primer now. Once the cab is finished, these will all be wet sanded and be ready for color.          
__________________
Board Member #87725 My build thread... http://67-72chevytrucks.com/vboard/s...d.php?t=813848 |

|

|
|
05-15-2023, 07:58 PM
|
#2 |
|
Senior Member
Join Date: Jul 2010
Location: Race City U.S.A.
Posts: 1,005
|
Re: "Midnight Rider" 1970 C10 SWB Fleetside
The rear cab panels won't really need any work, especially since they will be mostly hidden behind the seats and console. Epoxy primer for now.

__________________
Board Member #87725 My build thread... http://67-72chevytrucks.com/vboard/s...d.php?t=813848 |
|
|
|
|
05-19-2023, 09:27 AM
|
#3 |
|
Senior Member
Join Date: Jan 2007
Location: Turlock, CA
Posts: 8,435
|
Re: "Midnight Rider" 1970 C10 SWB Fleetside
That looks awesome.
__________________
I live in California, but identify as a Texan  "If a job's worth doing, it's worth doing well" Project "Little Sister" (70 c10 blue original paint refresh) Project "C10 Fever" (68 factory black 396 swb) Project "Blue Bomb" (70 c30 blue original paint refresh) Project "Vitamin C" (71 c10 orange original paint refresh) |

|
|
|
05-30-2023, 07:14 PM
|
#4 | |
|
Senior Member
Join Date: Jul 2010
Location: Race City U.S.A.
Posts: 1,005
|
Re: "Midnight Rider" 1970 C10 SWB Fleetside
Quote:
   
__________________
Board Member #87725 My build thread... http://67-72chevytrucks.com/vboard/s...d.php?t=813848 Last edited by omodified; 05-30-2023 at 07:20 PM. |
|
|
|
|
|
05-30-2023, 07:46 PM
|
#5 |
|
Senior Member
Join Date: Jul 2010
Location: Race City U.S.A.
Posts: 1,005
|
Re: "Midnight Rider" 1970 C10 SWB Fleetside
Still not much going on right now with the cab or otherwise. This weekend I installed a new part into the fuel system. Holley released a LiDar fuel sending unit that is really affordable. This eliminates the possibility of the float sticking on the mechanical unit that came with my Boyd tank. The Holley unit uses laser imaging to accurately report fuel levels. The supplied instructions were decent, but I found a YouTube video that filled in the gaps for me. I wired up the unit's positive and negative terminal to a 12v battery. Next, I wired my multimeter to the negative battery post and the output signal terminal on the fuel sending unit. Setup is fairly simple. First thing is a three point linear calibration. I wanted to set up for a 0-90ohm output. So, the first calibration point needed to be as close to 0 ohms as possible. The second calibration point should be right at 45 ohms. The third calibration point is 90 ohms. Next, I have to measure my tank depth, which is 9.75". I subtracted 0.50" for fuel reserves and calibrated the empty level point at 9.25" from a flat surface. Last, I calibrated full level by placing the sensor against the same flat surface. I had to adjust the calibration several times to get the level reading to make sense. Once, I got the readings correct, I installed onto the tank. I will wire this up later, once the cab is on. Since it is already setup, it will be plug and play with the dash.
    
__________________
Board Member #87725 My build thread... http://67-72chevytrucks.com/vboard/s...d.php?t=813848 Last edited by omodified; 06-09-2023 at 08:41 AM. |
|
|
|
|
06-06-2023, 08:25 PM
|
#6 |
|
Senior Member
Join Date: Jul 2010
Location: Race City U.S.A.
Posts: 1,005
|
Re: "Midnight Rider" 1970 C10 SWB Fleetside
Almost a year ago now, I posted about the glass I custom ordered. I'm finally getting around to working with the side glass. I guess the reason for the delay was that I was holding out for an NOS drivers side sash. I bought a pair of NOS at one point from Ebay and received two passengers. Then, I bought a single drivers side and received another passenger. I finally gave up and bought a really nice used one from board member Maldo. So today, it finally came time to install the windows into the sashes. Before I could install them, I had to prepare the sashes. I used the bead blaster to clean the surface. Then I painted them satin black. The installation was a breeze, very similar to when I installed my vent windows into the frames. I found some NOS 0.040" setting tape. I folded the tape over the bottom edge and used scotch tape to hold in place. I liberally applied kerosene to the setting tape and quickly used a rubber mallet to set the glass inside the sash. I had already measured and marked the glass where the edges of the sash should be. For the finish, I set the windows in the sun so the setting tape would swell a bit. Time to package these guys up and store them away for later.
        
__________________
Board Member #87725 My build thread... http://67-72chevytrucks.com/vboard/s...d.php?t=813848 |
|
|
|
|
06-06-2023, 08:29 PM
|
#7 |
|
Senior Member
Join Date: Jul 2010
Location: Race City U.S.A.
Posts: 1,005
|
Re: "Midnight Rider" 1970 C10 SWB Fleetside
Cab is getting ready to get on this rotisserie so the sport bucket braces can be rosette welded in place.

__________________
Board Member #87725 My build thread... http://67-72chevytrucks.com/vboard/s...d.php?t=813848 |
|
|
|
|
07-10-2023, 10:55 AM
|
#8 |
|
Registered User
Join Date: Oct 2017
Location: Northeast, Pa
Posts: 287
|
Re: "Midnight Rider" 1970 C10 SWB Fleetside
Looking great. I really like that rear interior cab panel. I need to do something like that, one day.
|
|
|
|
|
07-11-2023, 09:37 AM
|
#9 |
|
Registered User
Join Date: Feb 2015
Location: Atlanta, GA
Posts: 36
|
Re: "Midnight Rider" 1970 C10 SWB Fleetside
Awesome work on that pedal assembly!
|
|
|
|
|
08-05-2023, 01:08 PM
|
#10 | ||
|
Senior Member
Join Date: Jul 2010
Location: Race City U.S.A.
Posts: 1,005
|
Re: "Midnight Rider" 1970 C10 SWB Fleetside
Quote:
Quote:
__________________
Board Member #87725 My build thread... http://67-72chevytrucks.com/vboard/s...d.php?t=813848 Last edited by omodified; 08-07-2023 at 10:58 AM. |
||
|
|
|
|
08-05-2023, 01:55 PM
|
#11 |
|
Senior Member
Join Date: Jul 2010
Location: Race City U.S.A.
Posts: 1,005
|
Re: "Midnight Rider" 1970 C10 SWB Fleetside
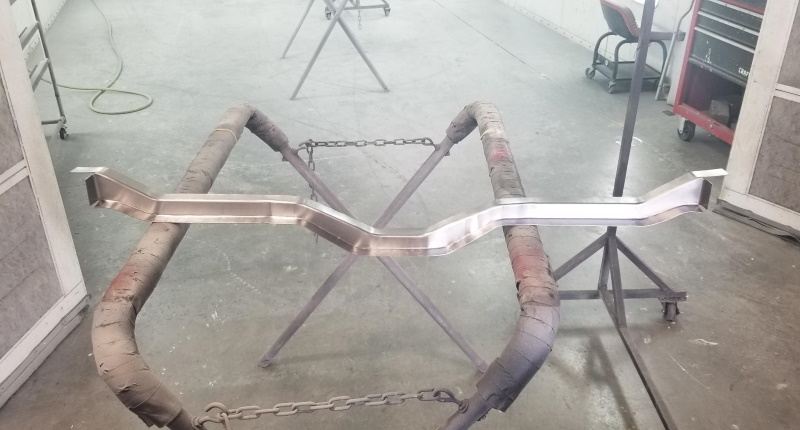
Had to take some time off but things are rolling again. Finally got the cab on the rotisserie. It's time to mount the sport bucket seats and console.
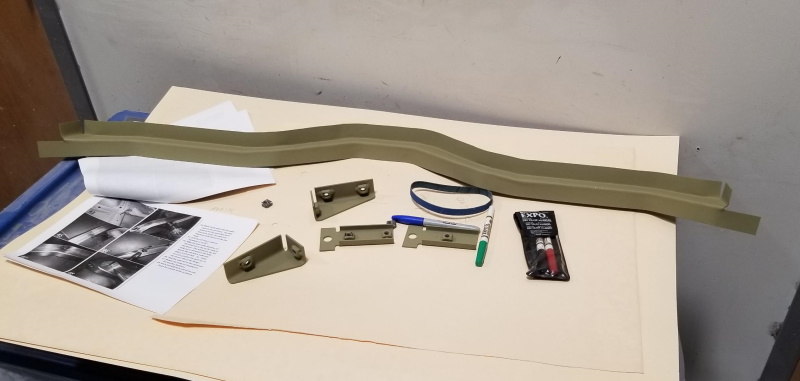
 I read through a lot of information on these boards about this process. In the end, there were two threads that had all of the info I needed. To start, you definitely need mounting braces. There are a total of five. You can find them used sometimes from any truck that had factory buckets installed, but they are hard to find. Luckily for me, there are two board members that sell the correct reproduction braces. RogerKoop sells the rear braces. They already have weld nuts in place for the 5/16-18 seat mounting bolts. 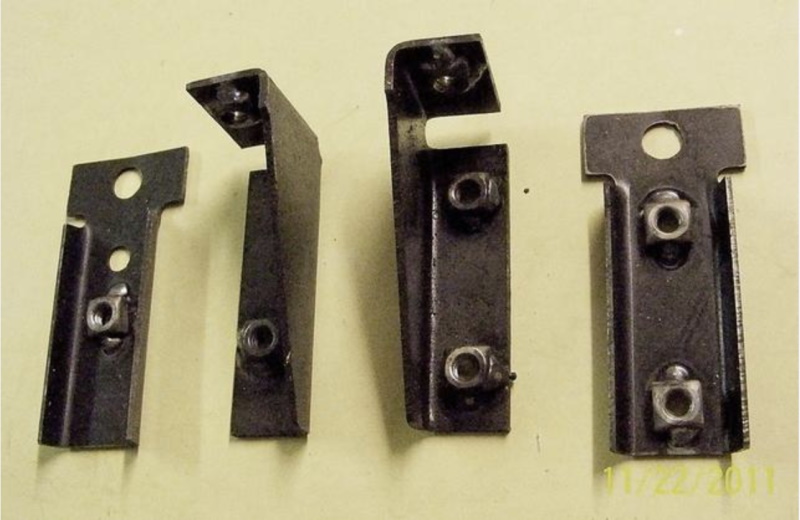 Old_Truck_Fan sells the front brace. This reproduction is made from the same thickness steel as the original and looks almost identical to the original. 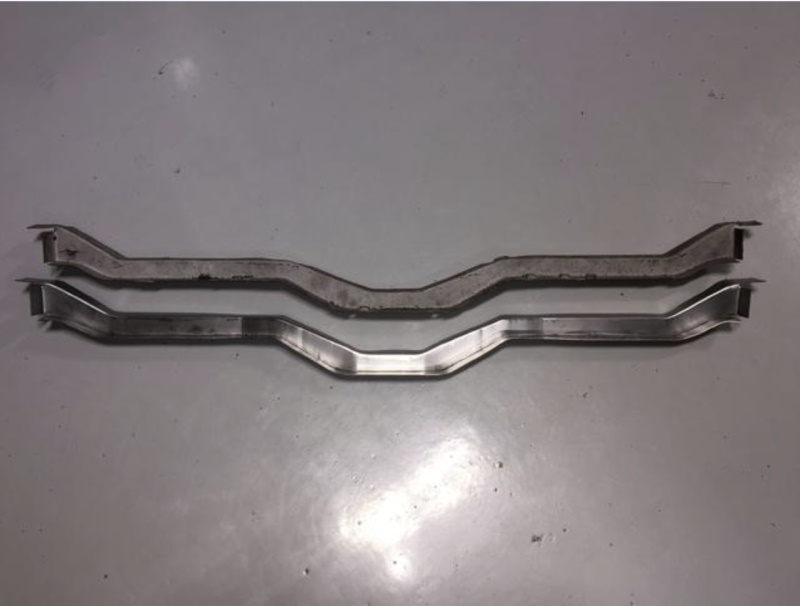 The front brace came with enough weld nuts to mount the front seats and the console. Apparently, the factory used sheet metal screws to mount the console, but I think the weld nuts in this case will just be a lot cleaner. Unlike the rear brackets, you have to weld them in place yourself. This kit comes with a super nice set of installation instructions. There are measurements scattered throughout but nothing simplified. I found some other measurements scattered around these forums, but again nothing complete. So, I took notes from all of these sources and came up with my own. I borrowed this next photo from the instructions, but I added my measurements to it. 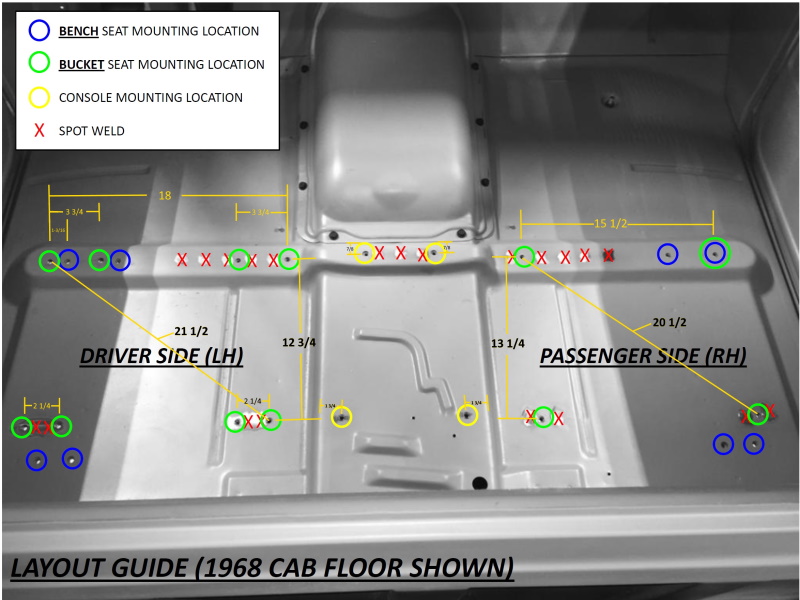 Now, to install all this stuff...
__________________
Board Member #87725 My build thread... http://67-72chevytrucks.com/vboard/s...d.php?t=813848 Last edited by omodified; 05-04-2024 at 11:20 AM. |
|
|
|
|
08-05-2023, 04:43 PM
|
#12 |
|
Senior Member
Join Date: Jul 2010
Location: Race City U.S.A.
Posts: 1,005
|
Re: "Midnight Rider" 1970 C10 SWB Fleetside
I wanted to get the braces in epoxy primer before they are installed. Since the rear brackets are small enough, I was able to blast those in the cabinet. The front brace is too big so I used a scotchbrite pad to prep the surface for paint. Last, was two coats of epoxy primer.
  Next was mapping out the holes on the floor of the cab. I think we measured every way possible, fifty times each way. Once there was a high level of confidence, each bolt hole was drilled to 11/32". When each side was finished, the seats went in to check the fit. The seats fit perfectly so we drilled the holes for the console. 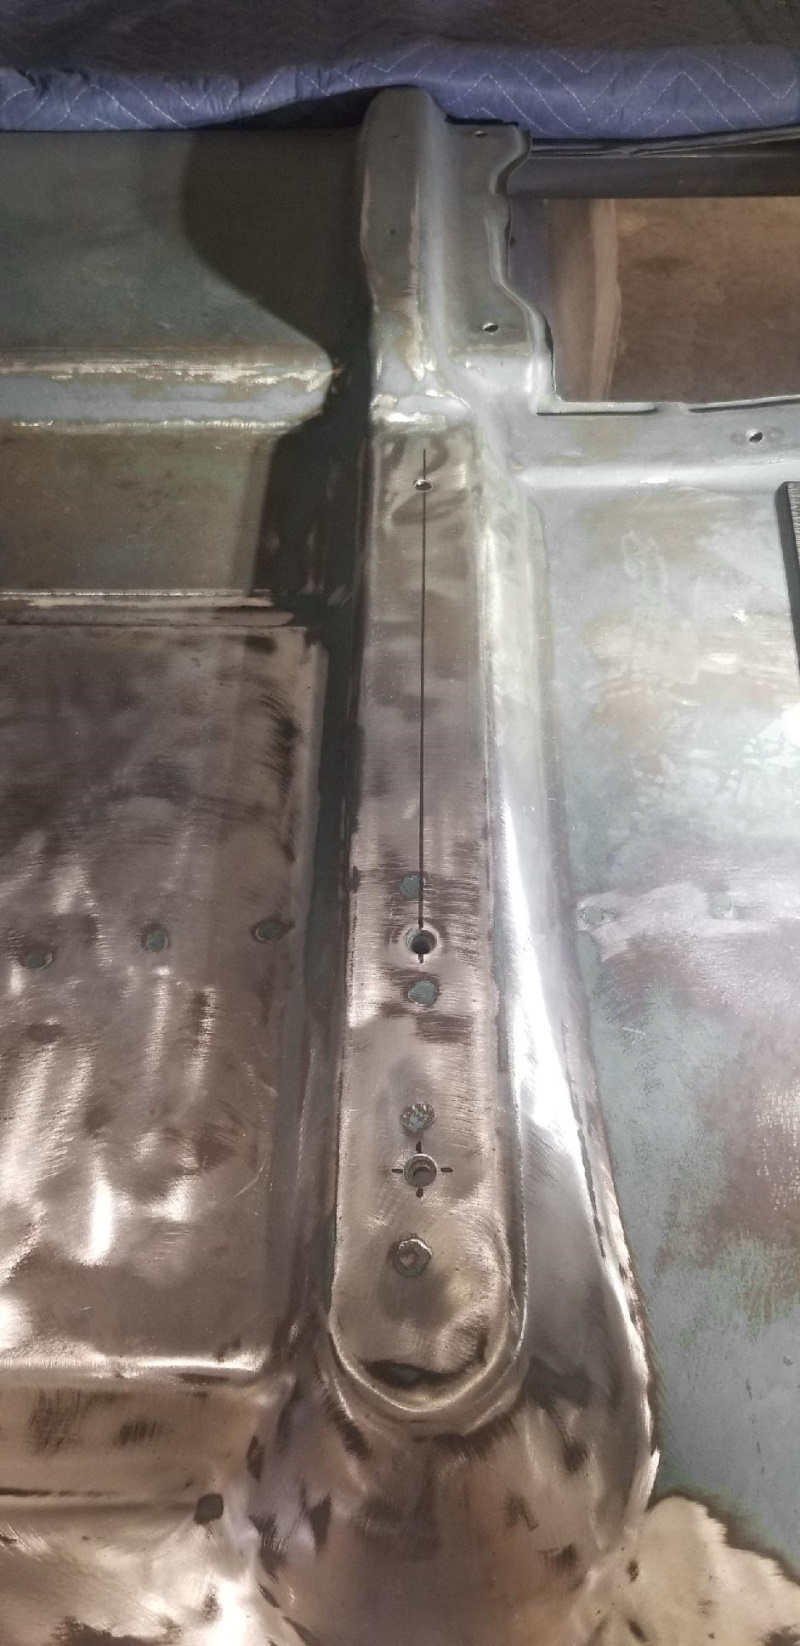  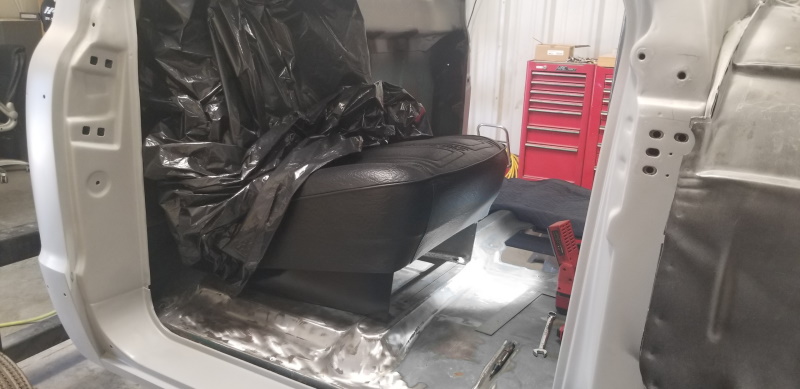 After drilling the holes, I started vacuuming. I then realize by rotating the cab around it was shaking stuff loose between the sheet metal. All sorts of stuff was coming out from every hole, mostly dirt from mud dobbers and stones. I probably spent an hour with a blow tool and the vacuum to get it all out. I always used to hear stuff rattling/rolling around but I could never figure out where it was coming from. 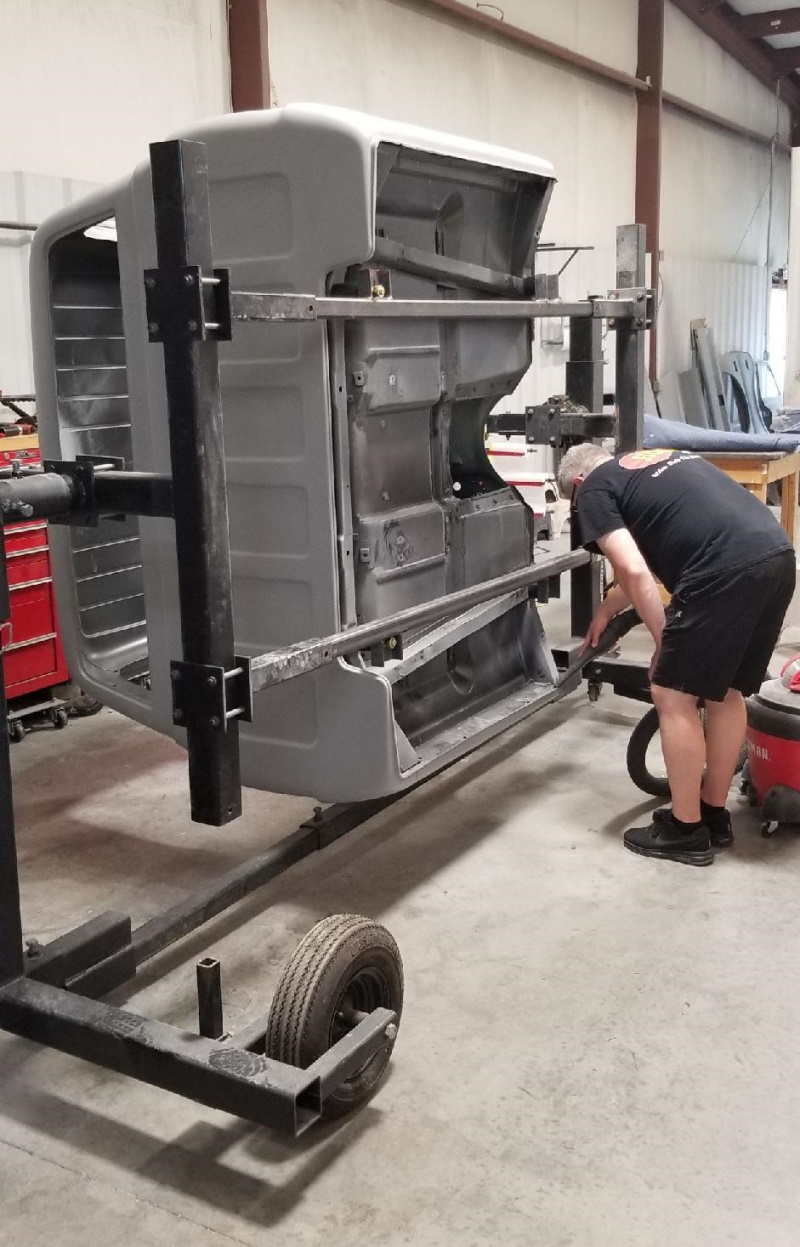 Back to the install... Unfortunately, the rear brackets didn't quite fit. It appeared to be a mixture of the weldnuts already being welded onto the brackets, and maybe the factory manufacturing tolerances of the cab itself. The fix was just cutting the weldnuts off, an installing new ones where things end up being happiest. This made things line up perfect. 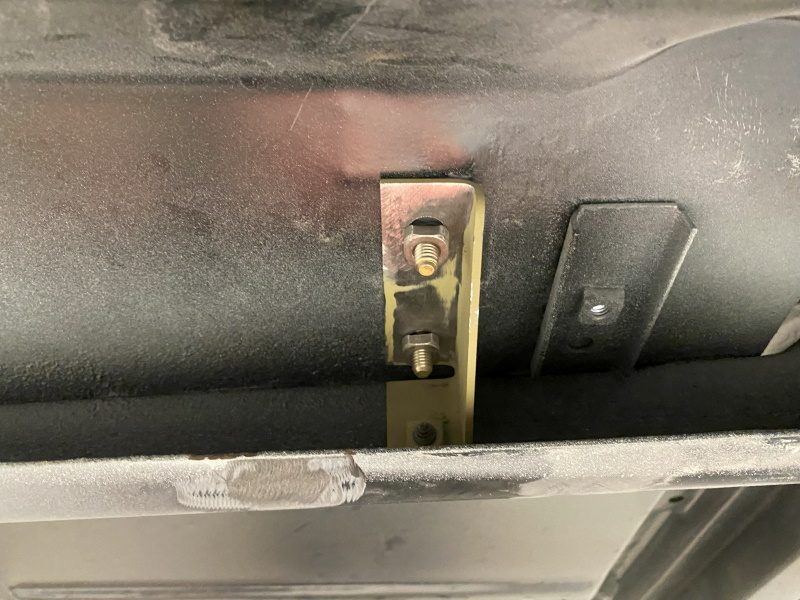 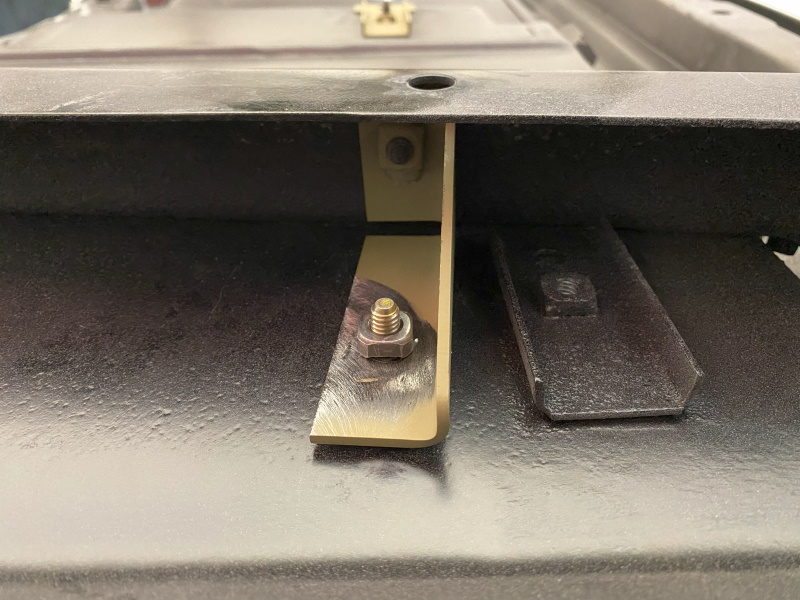 Next, the front brace was clamped down so the holes from the cab could be transferred and drilled into the brace. Once the holes were drilled, weldnuts were tightened down into place. Then all of the wlednut were welded into place, including weldnuts for the console. 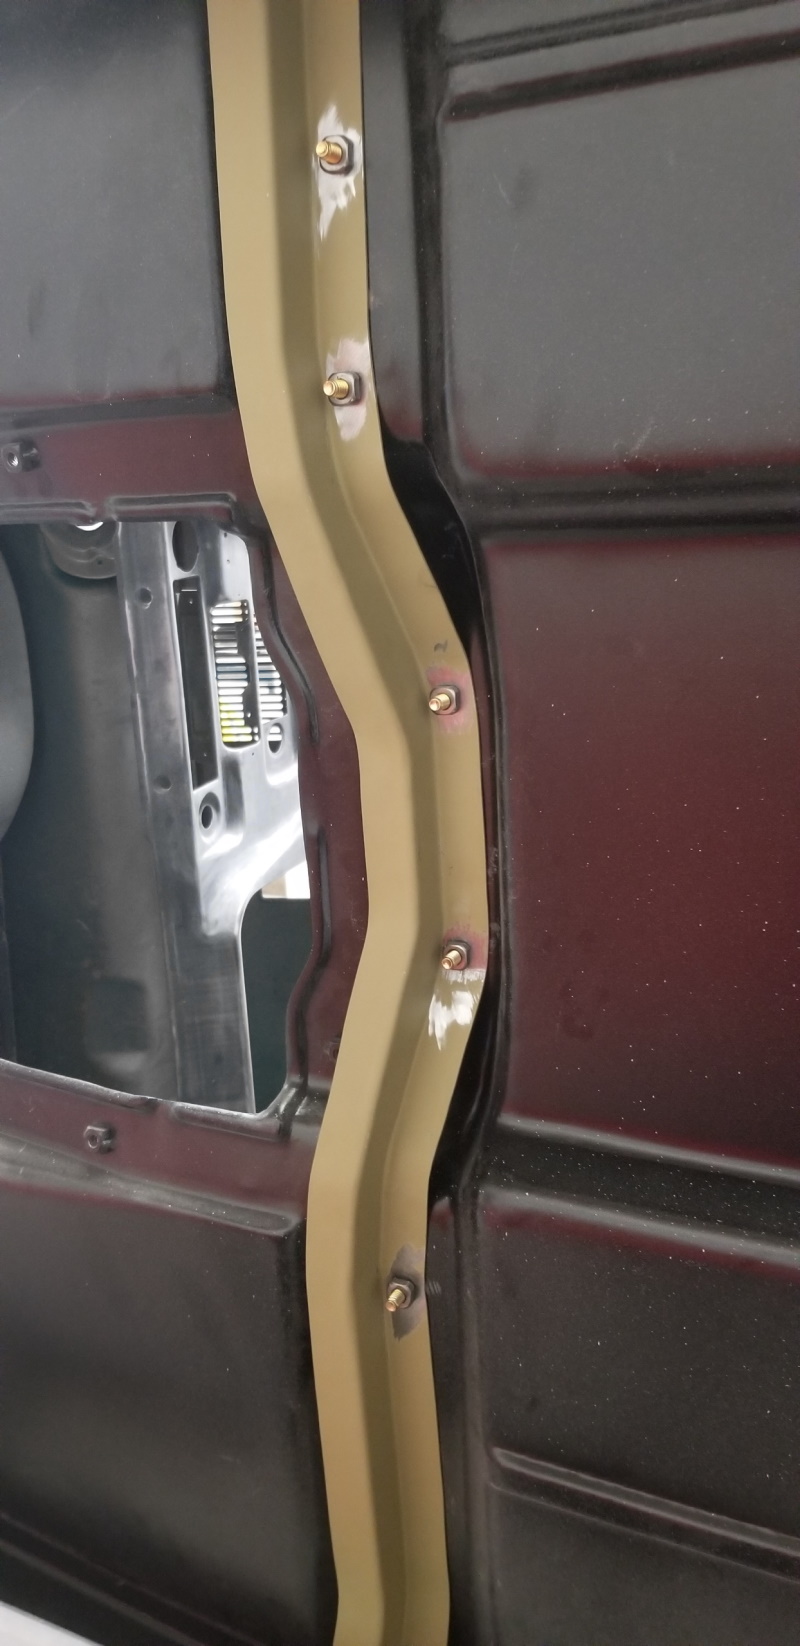 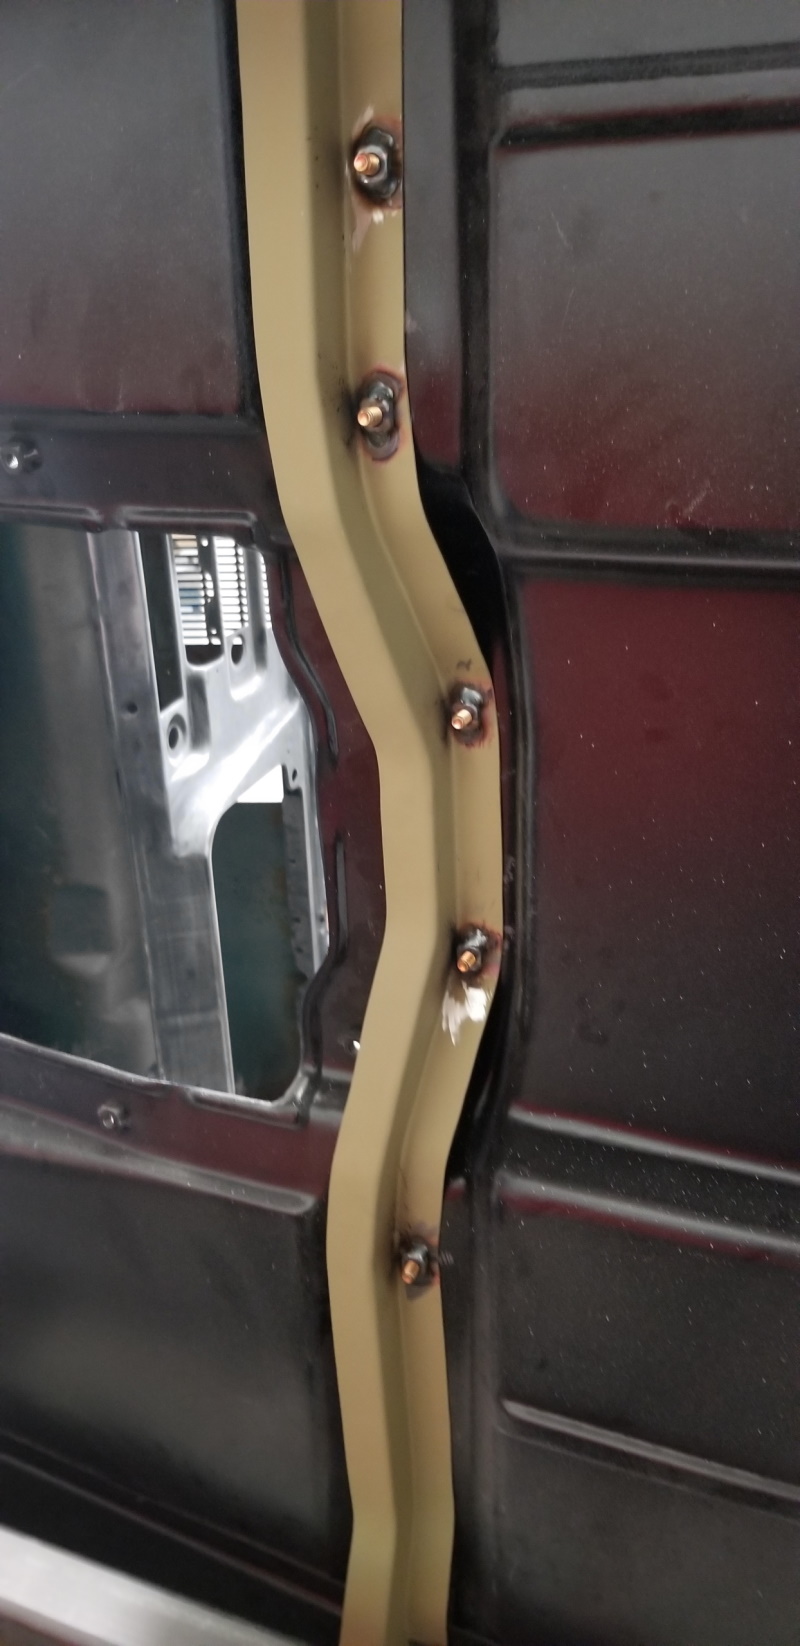 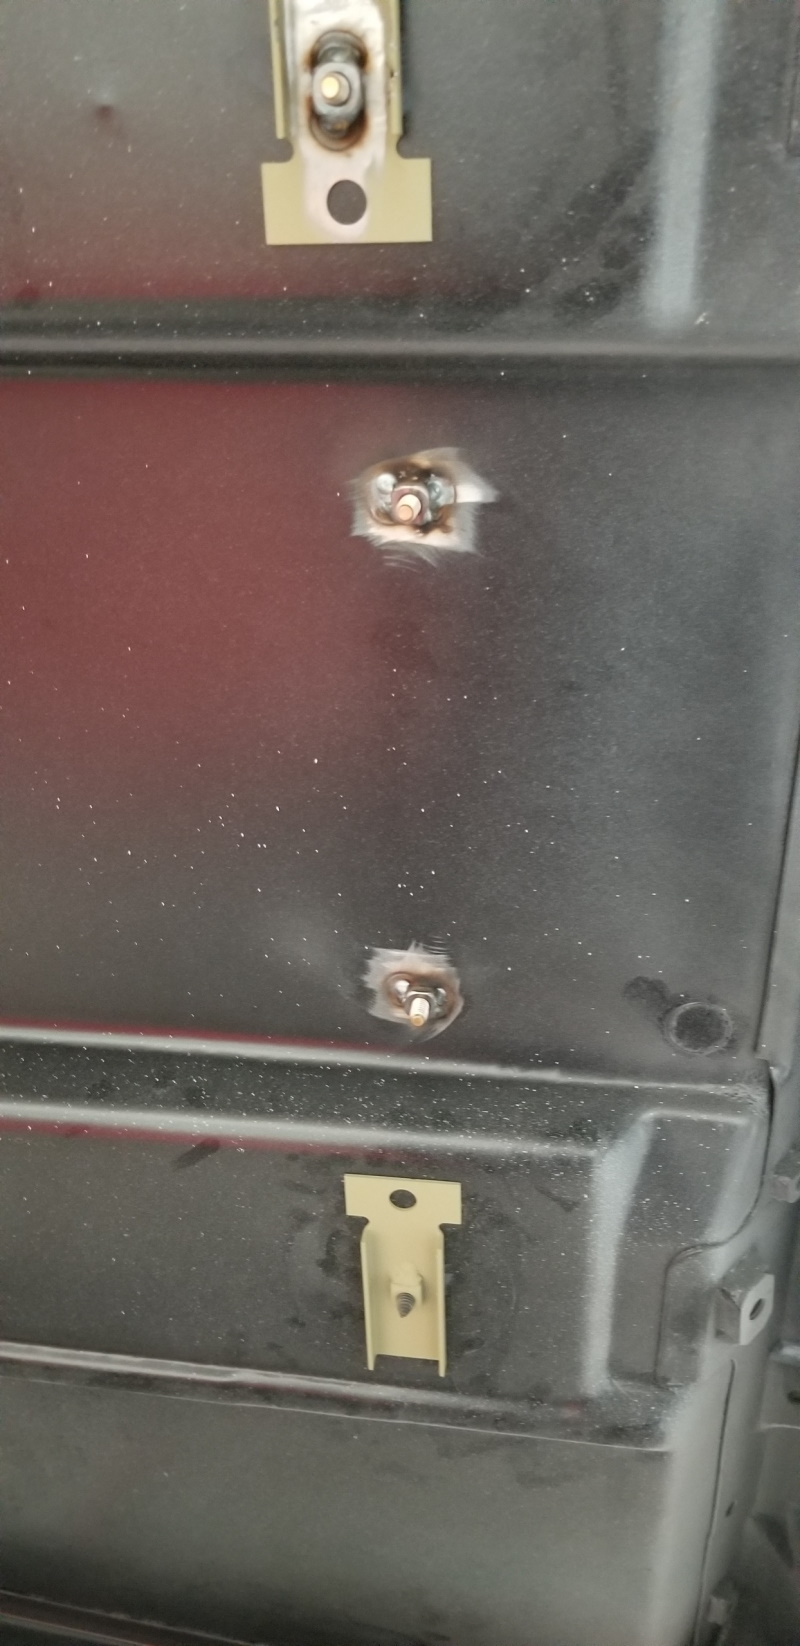 Next, the holes were drilled for the spot welds (plug welds) and the welds were made. 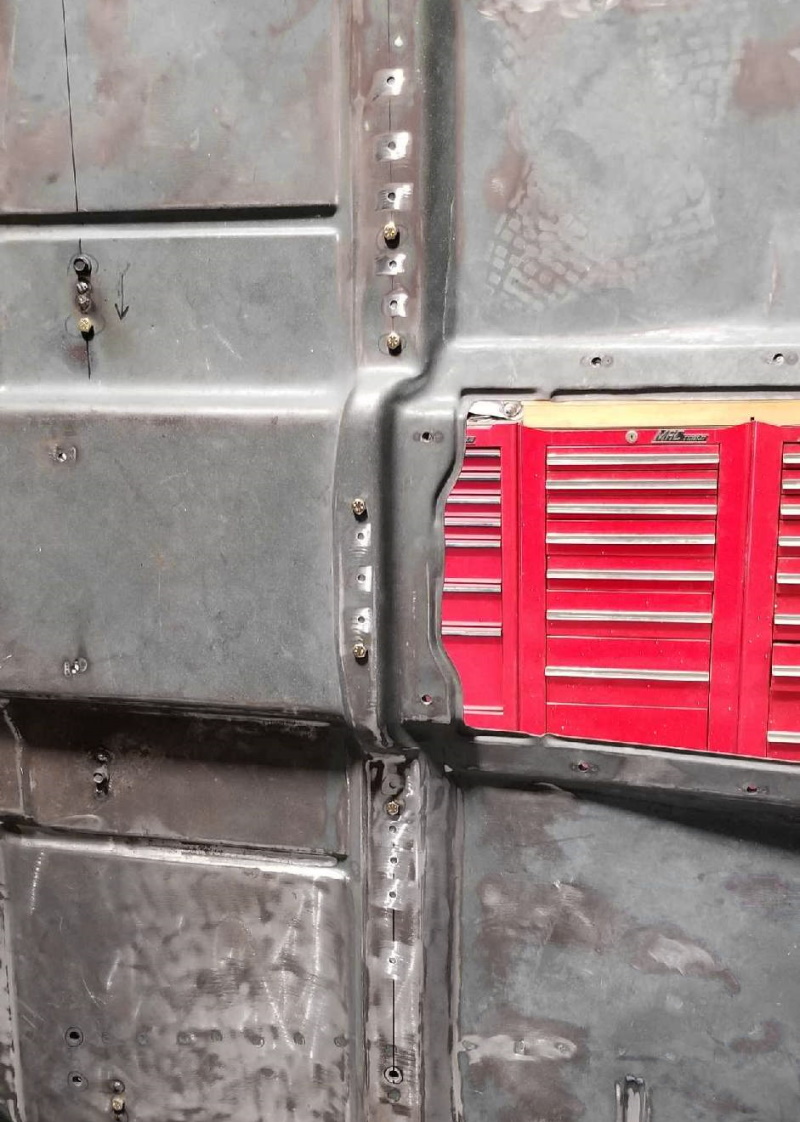 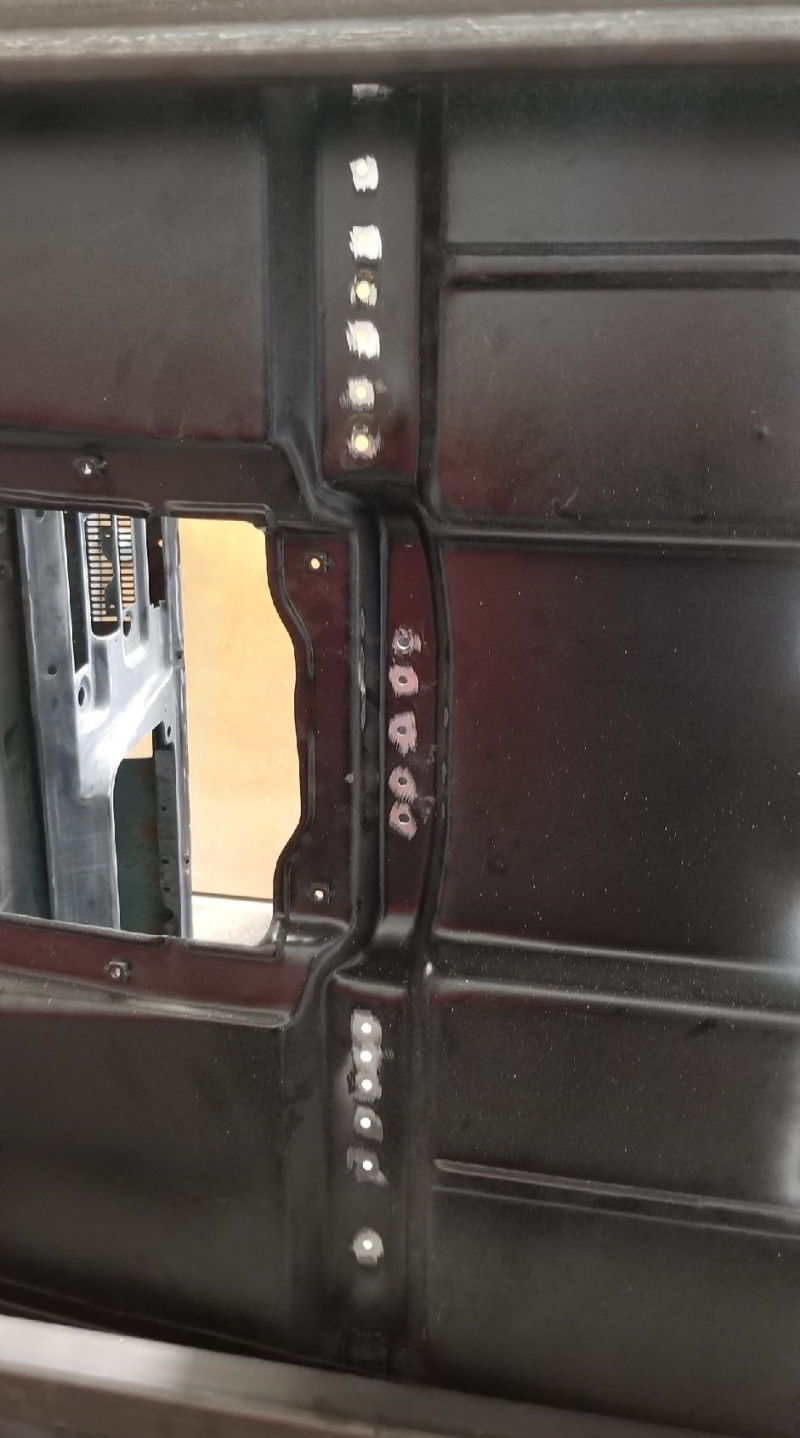  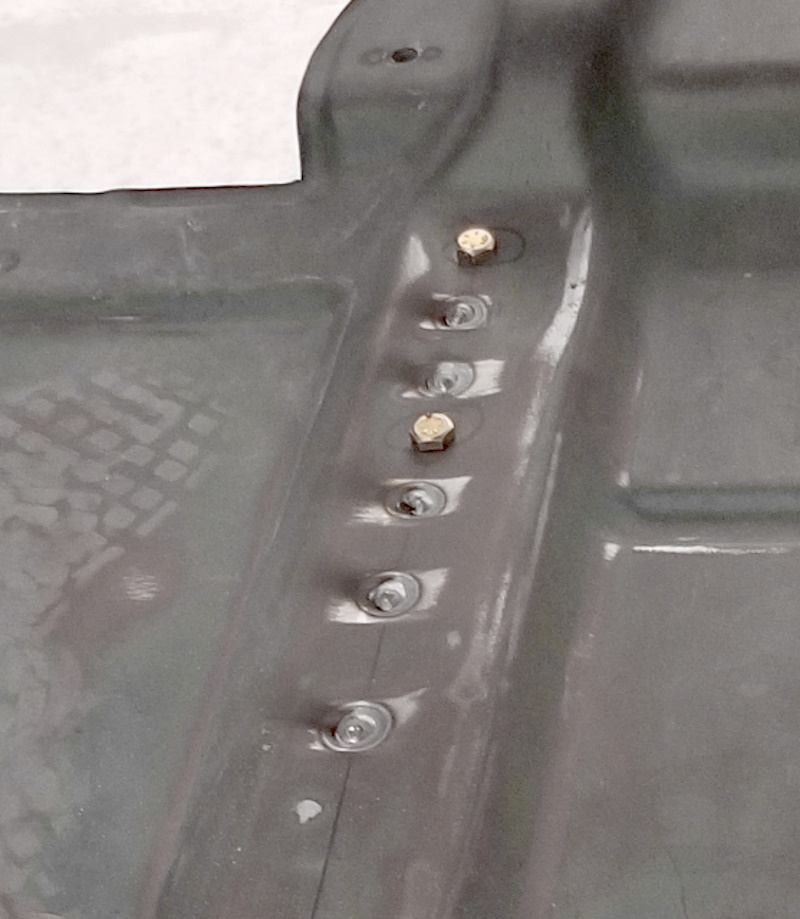 Last, was grinding all of the welds flush. 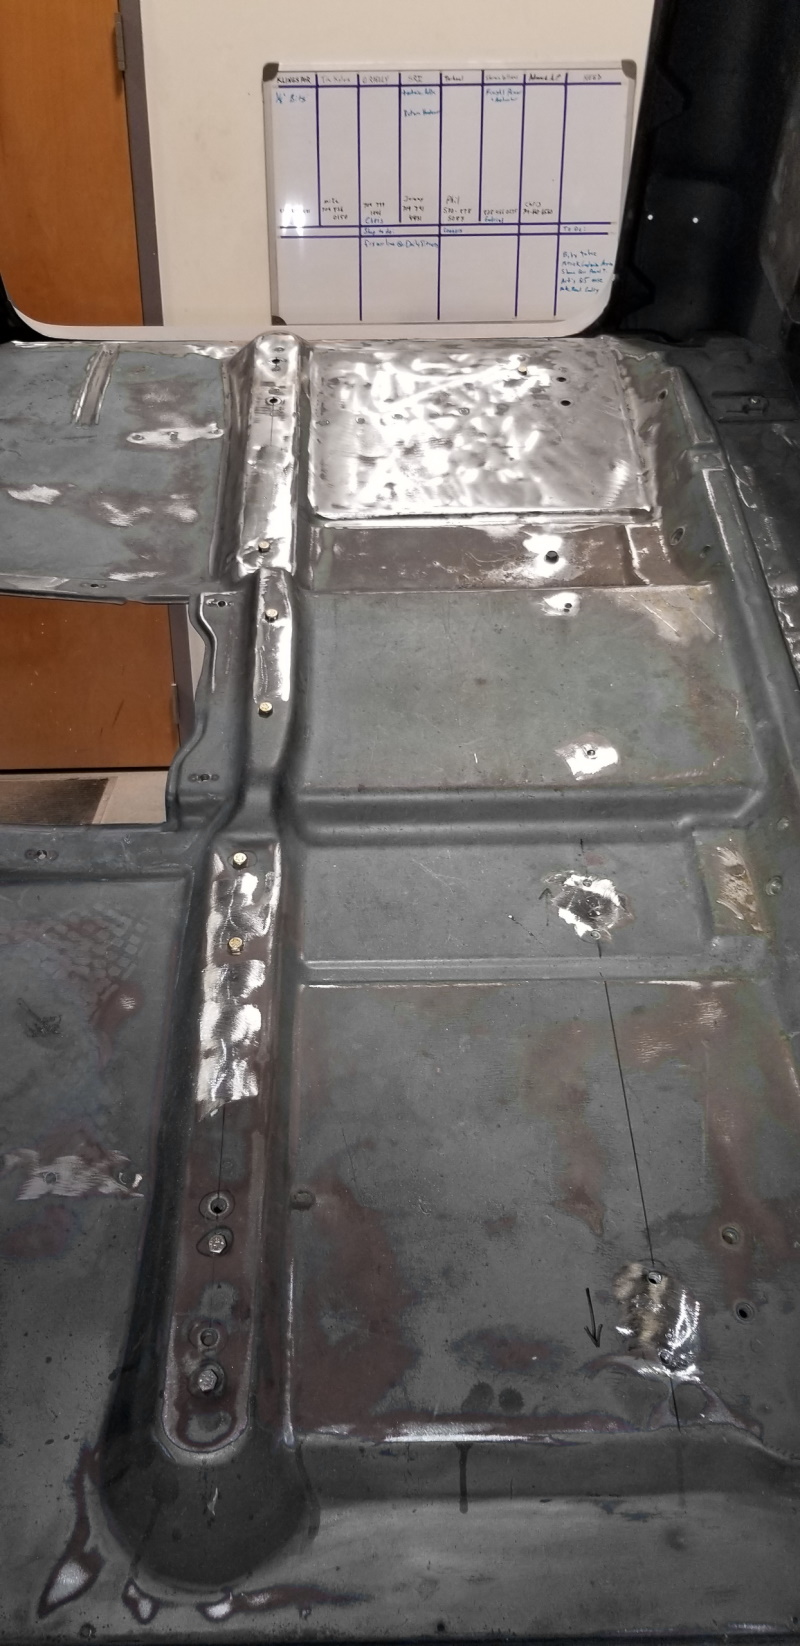 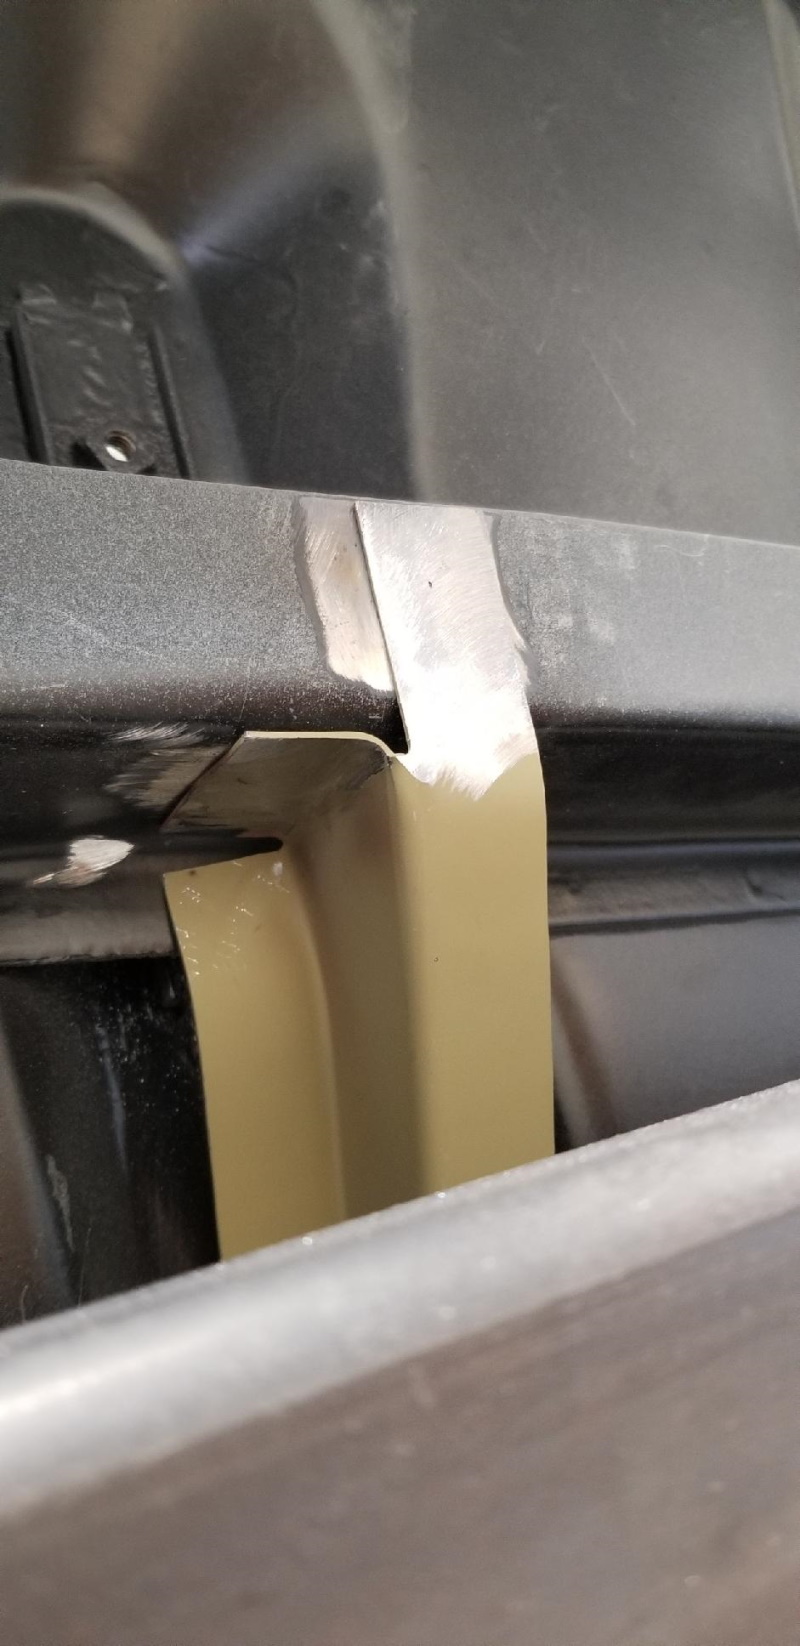 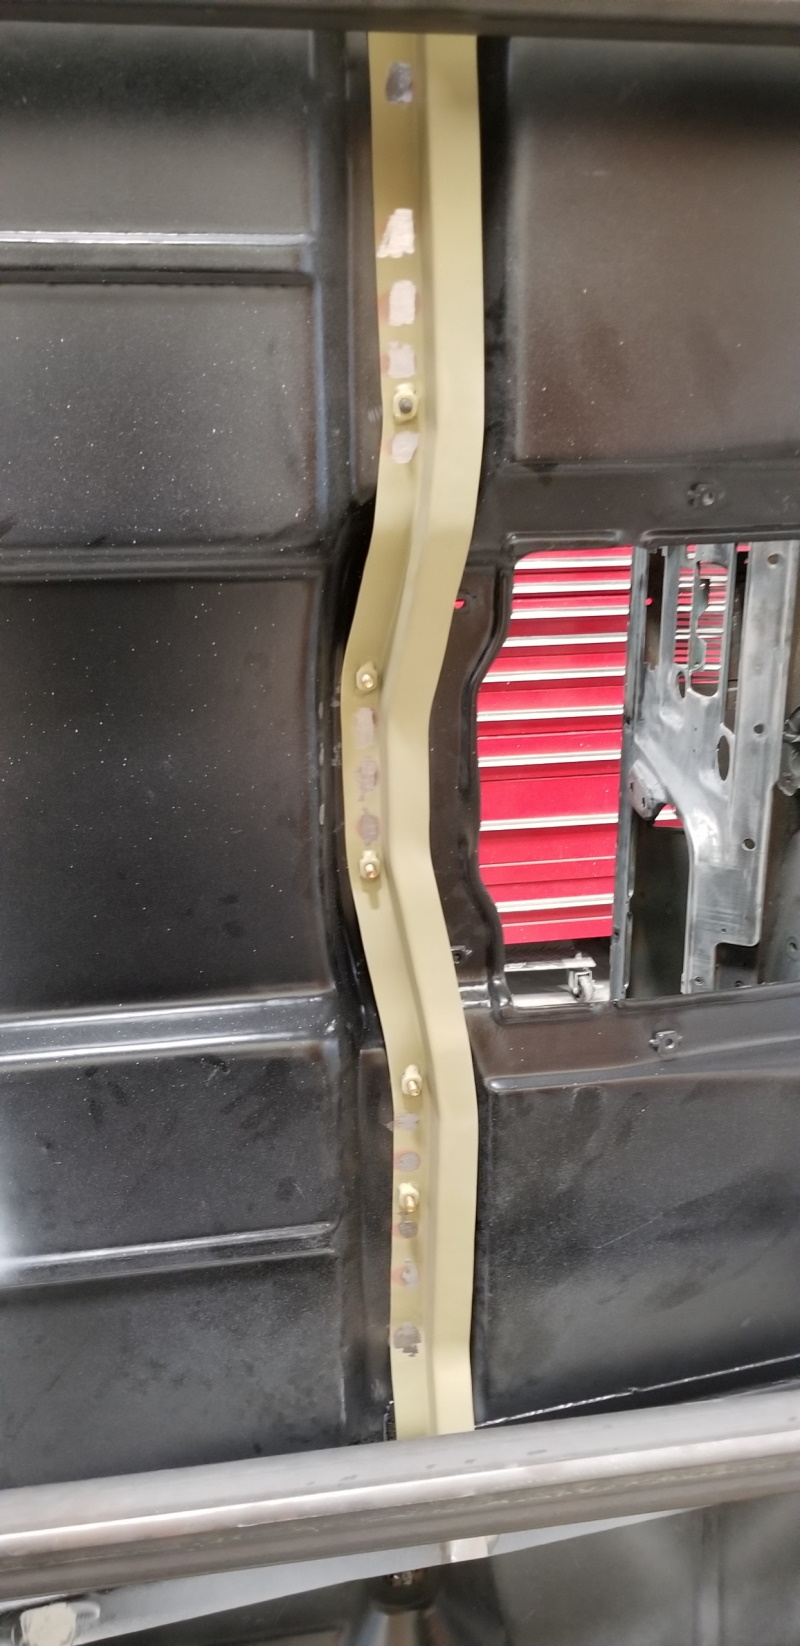 Everything is finished and back in primer. Now onto some more body work. I found a few pinholes on the inside rocker.  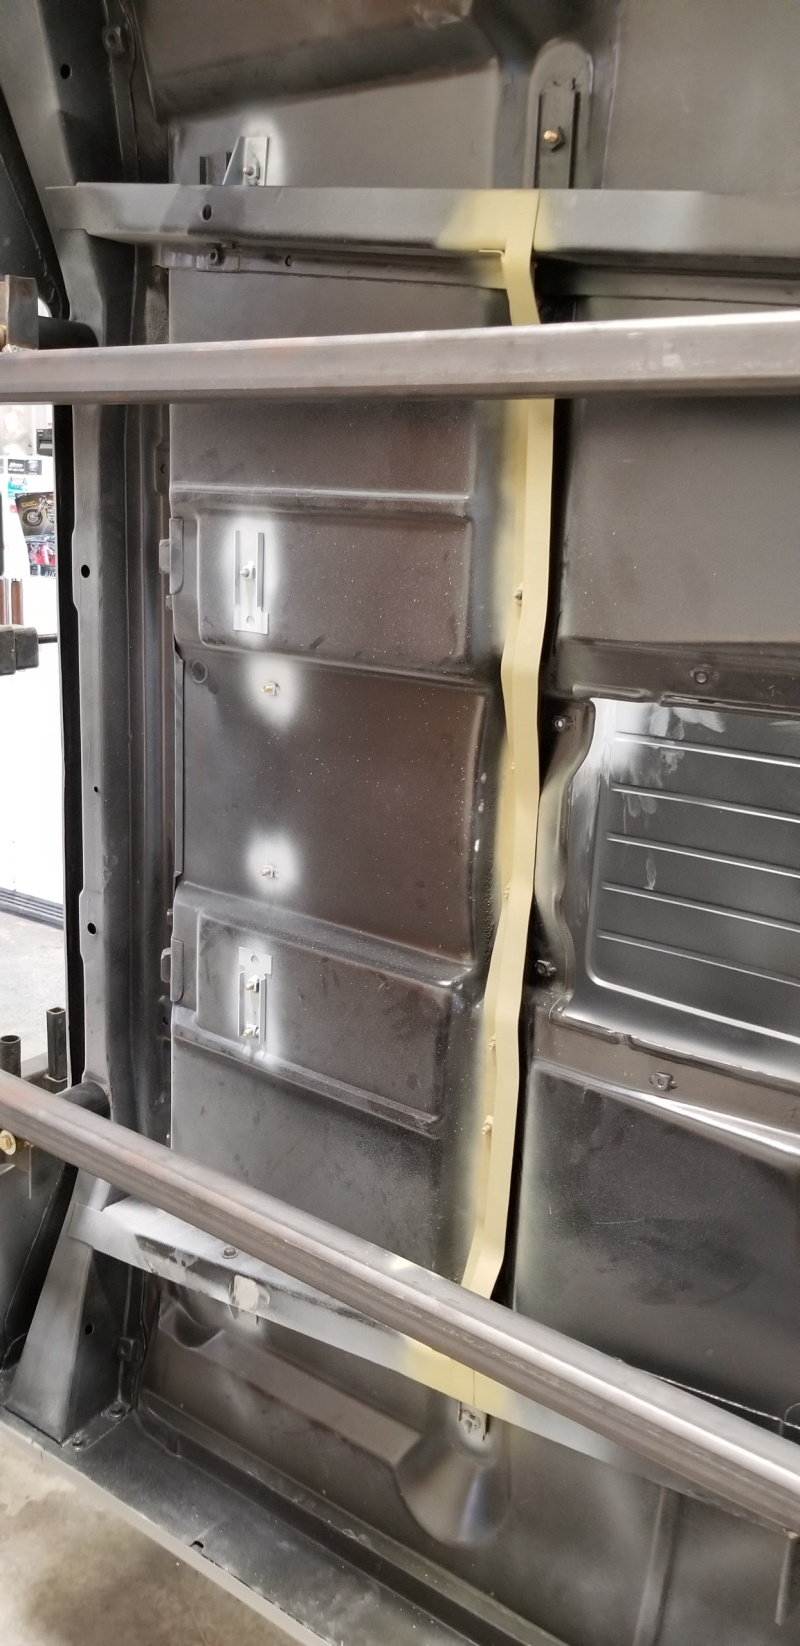
__________________
Board Member #87725 My build thread... http://67-72chevytrucks.com/vboard/s...d.php?t=813848 Last edited by omodified; 05-04-2024 at 04:14 PM. |
|
|
|
|
08-05-2023, 10:01 PM
|
#13 |
|
Registered User
Join Date: Apr 2014
Location: Azle,Texas
Posts: 2,248
|
Re: "Midnight Rider" 1970 C10 SWB Fleetside
You have one sweet rotisserie sir, I may have to make one like it if I ever do another truck. You're doing an exceptionally clean work to boot, thanks for showing so many details.
__________________
Brian 1972 C10, "Loyd", LWB to SWB, 5.3, L83/6L80e, 4:11 Tru Trac, Air Ride, VA, DD, 20" Coys, 4 wheel disc, A quick LS swap turned into a 6 year frame off resto-mod. |
|
|
|
|
11-28-2023, 07:35 PM
|
#14 |
|
Registered User
Join Date: Mar 2009
Location: Conyers, Ga.
Posts: 121
|
Re: "Midnight Rider" 1970 C10 SWB Fleetside
I’m assuming you are stuck in body shop prison? Great attention to detail!
__________________
Eric 68 Anniversary Gold C-20 LWB to C-10 SWB build thread: http://67-72chevytrucks.com/vboard/s...d.php?t=637492 It's hard to explain puns to kleptomaniacs because they always take things literally. |
|
|
|
|
11-29-2023, 12:06 AM
|
#15 |
|
The Niner
 Join Date: Nov 2010
Location: Broad Brook, CT
Posts: 2,491
|
Re: "Midnight Rider" 1970 C10 SWB Fleetside
I spent tonight reading your old thread and this one. Unreal work and attention to detail.
How many miles have you driven the truck since you got it in 2011?
__________________
"A good racer is one whose head is in communication with his balls." - Richie Evans 1970 C/20 - 402/TH400/3.54s - 74K miles 2003 GMC Sierra 2500 - Wheatland Yellow Niner Progression Thread: http://67-72chevytrucks.com/vboard/s...d.php?t=697183 Classic Trucks article: https://www.motortrend.com/features/...et-c20-driven/ |
|
|
|
|
12-03-2023, 11:09 AM
|
#16 |
|
Registered User
Join Date: Jun 2018
Location: Washington, DC
Posts: 645
|
Re: "Midnight Rider" 1970 C10 SWB Fleetside
Man your truck is going to be a work of art. You have all the details covered in your build.
|
|
|
|
|
01-28-2024, 08:07 AM
|
#17 |
|
Registered User
Join Date: Jun 2014
Location: Mocksville, NC
Posts: 1,737
|
Re: "Midnight Rider" 1970 C10 SWB Fleetside
Update overload! The time, effort, and level of patience you put into that bed floor is insane. I'm glad I will be lucky enough to see it in person one day. I also like that swivel thermostat housing. When I did mine I ended up using the original housing and a Jeep lower hose. It works, but not trick like yours.
__________________
Builds: Green Gus the 68 C10 ; Sullii the 72 1500 - Instagram: @dr.hewitt - C10 Concept/Development Photos: Master Thread |
|
|
|
|
03-15-2024, 10:31 PM
|
#18 |
|
Senior Member
Join Date: Jul 2010
Location: Race City U.S.A.
Posts: 1,005
|
Re: "Midnight Rider" 1970 C10 SWB Fleetside
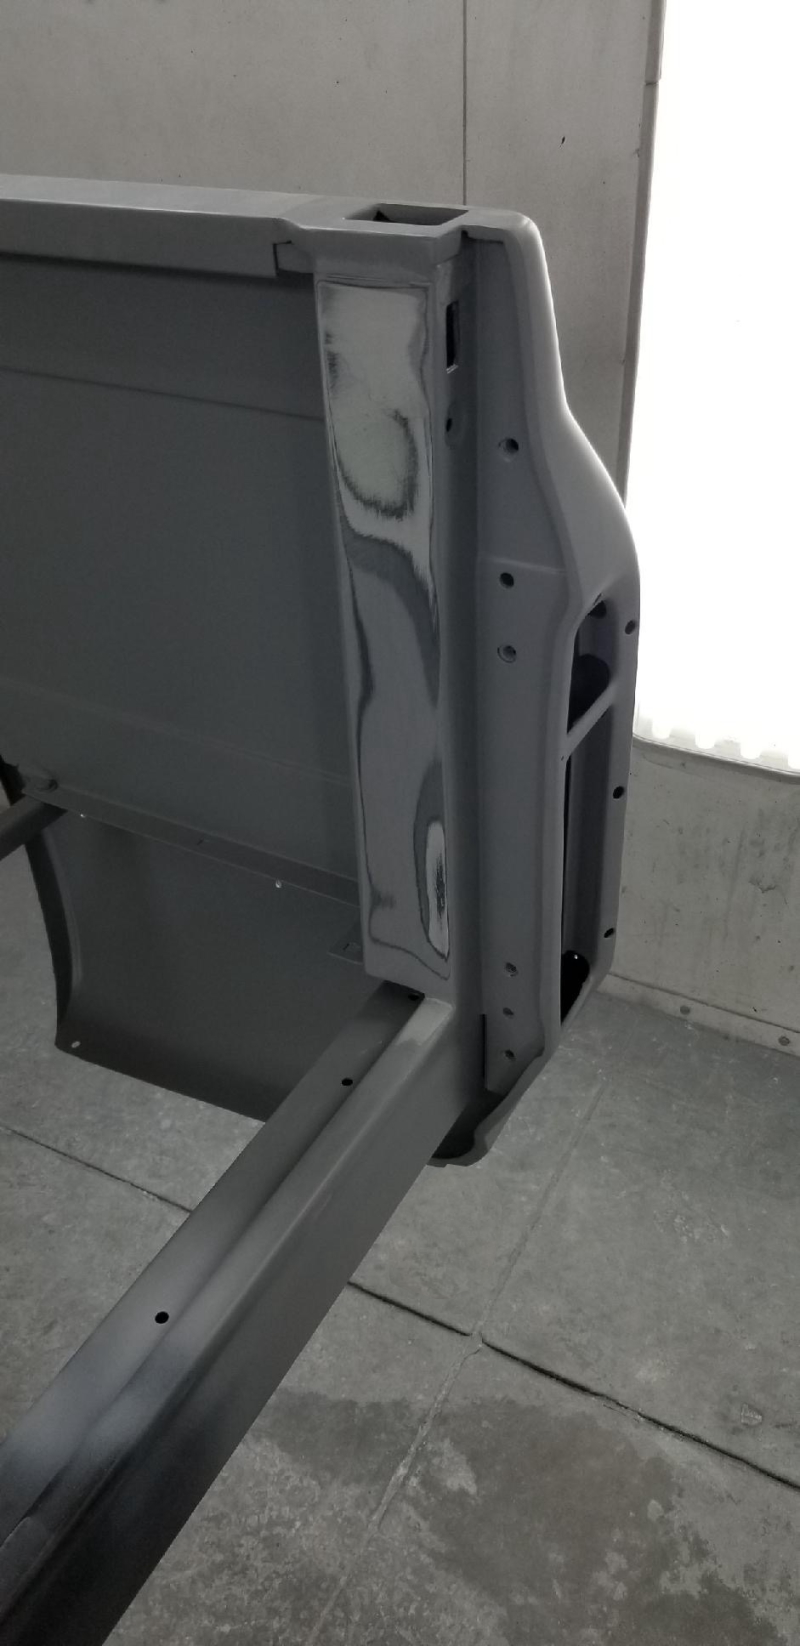
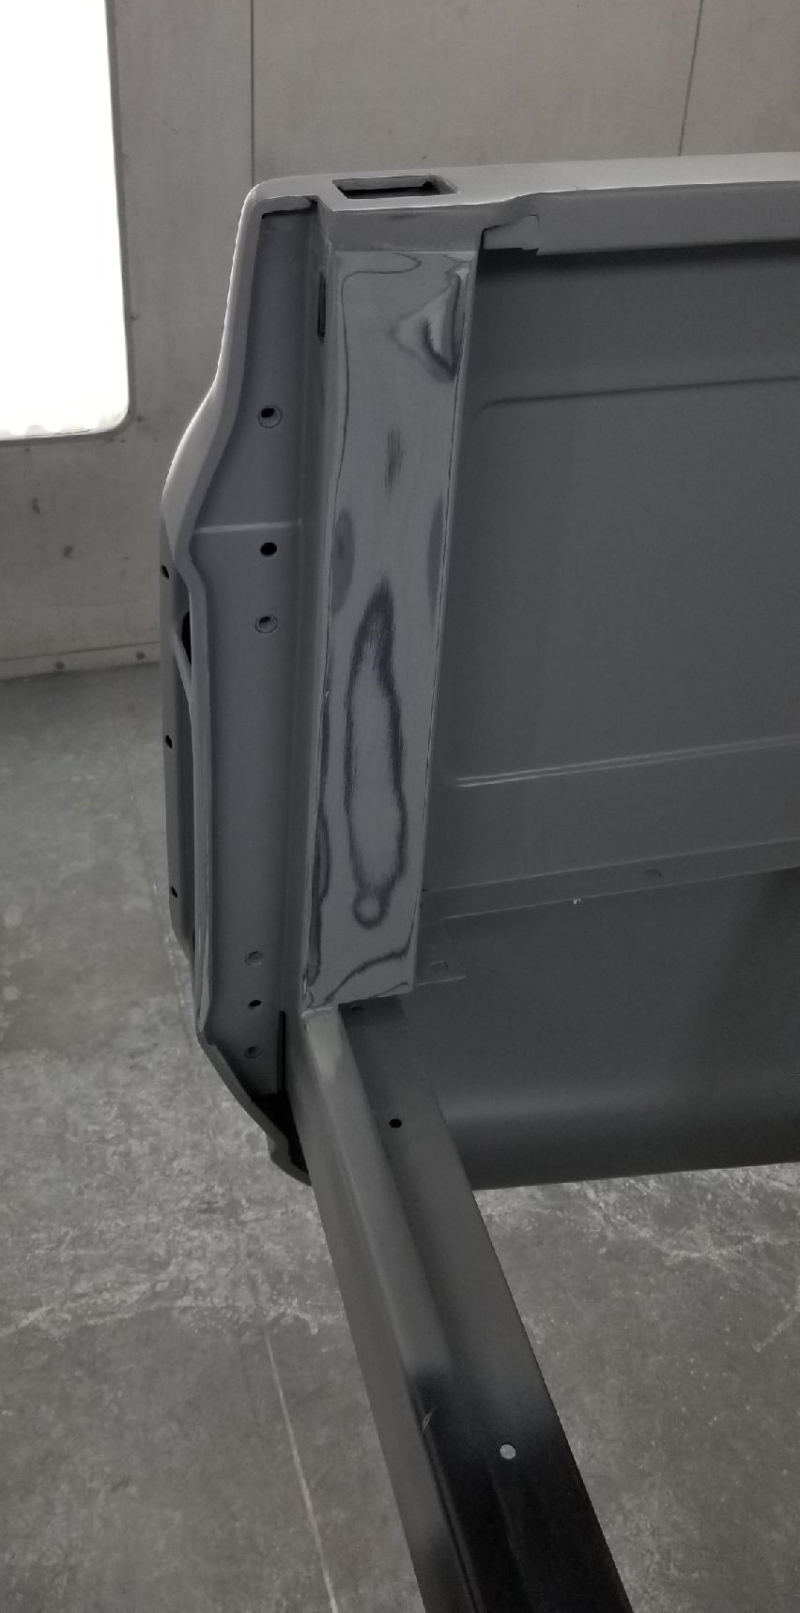
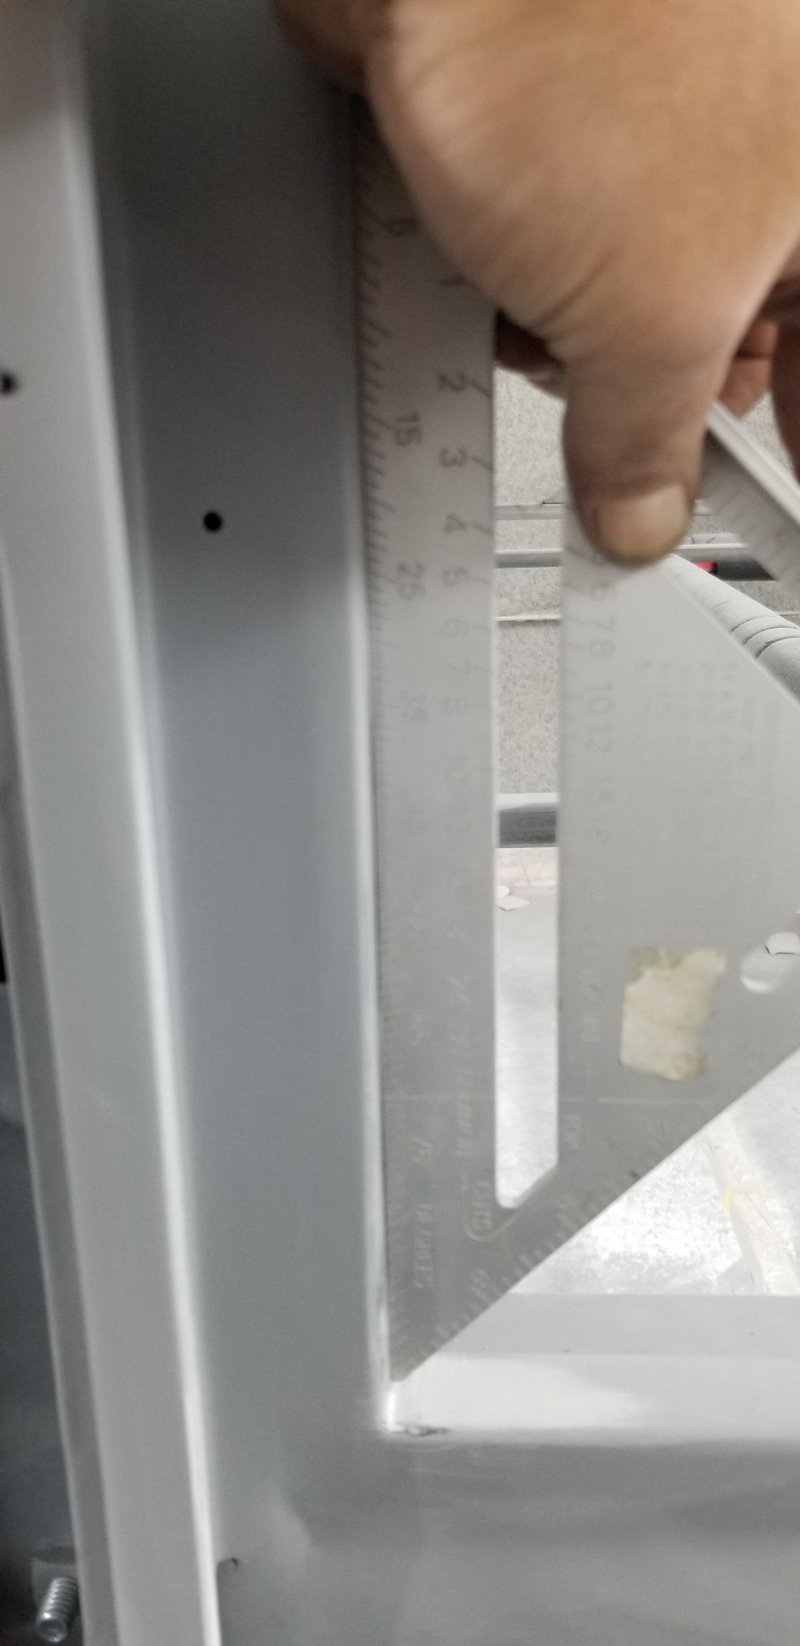
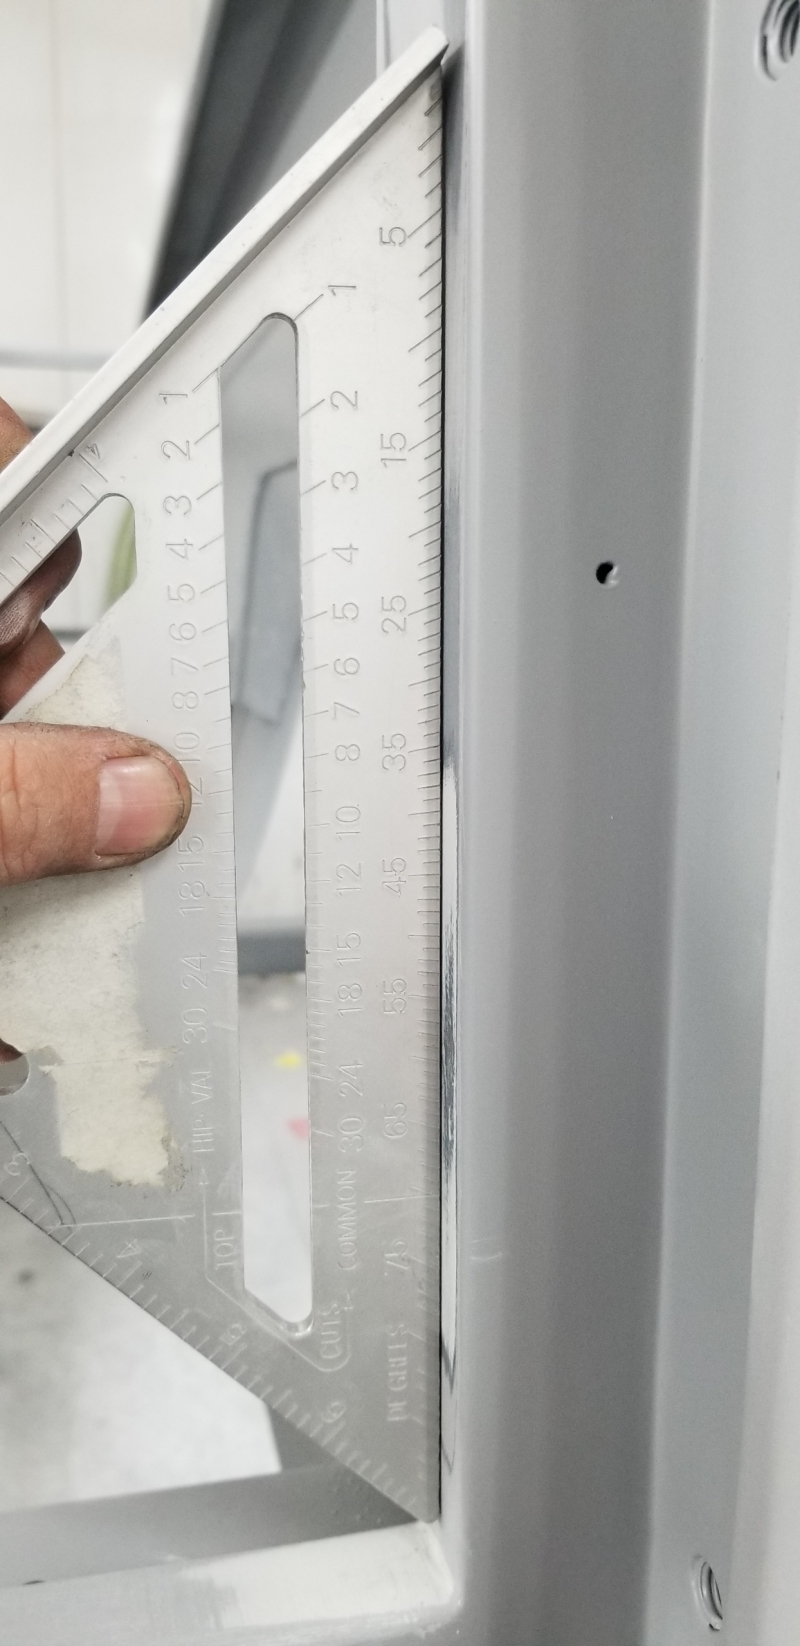
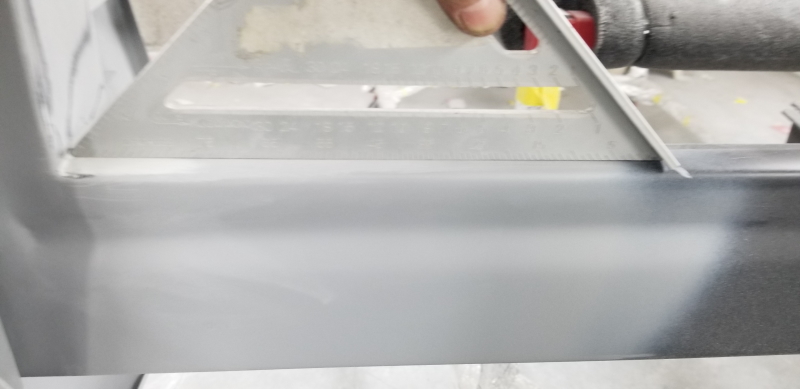
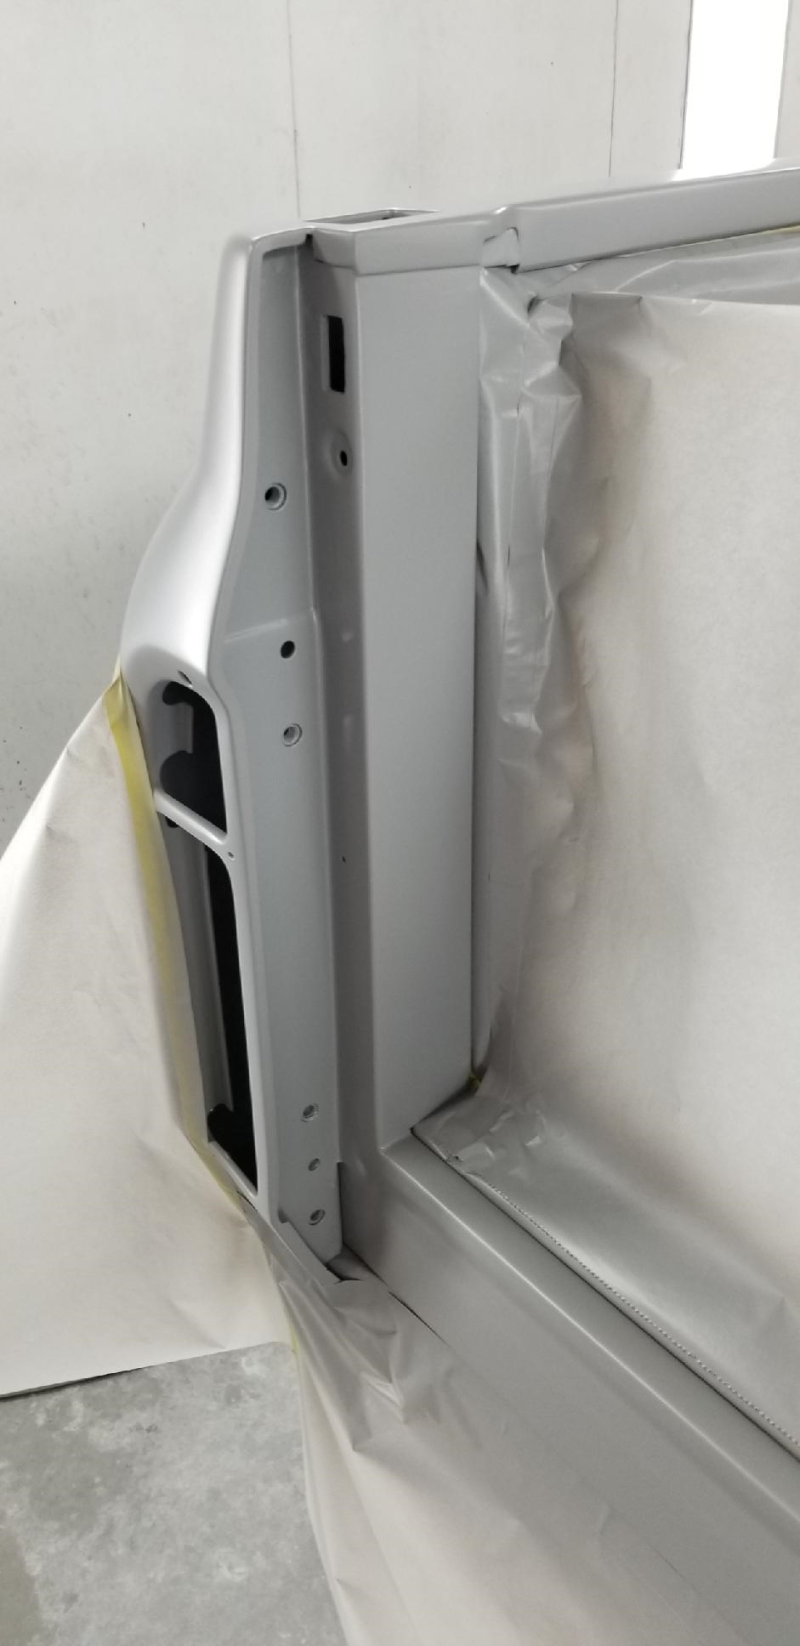
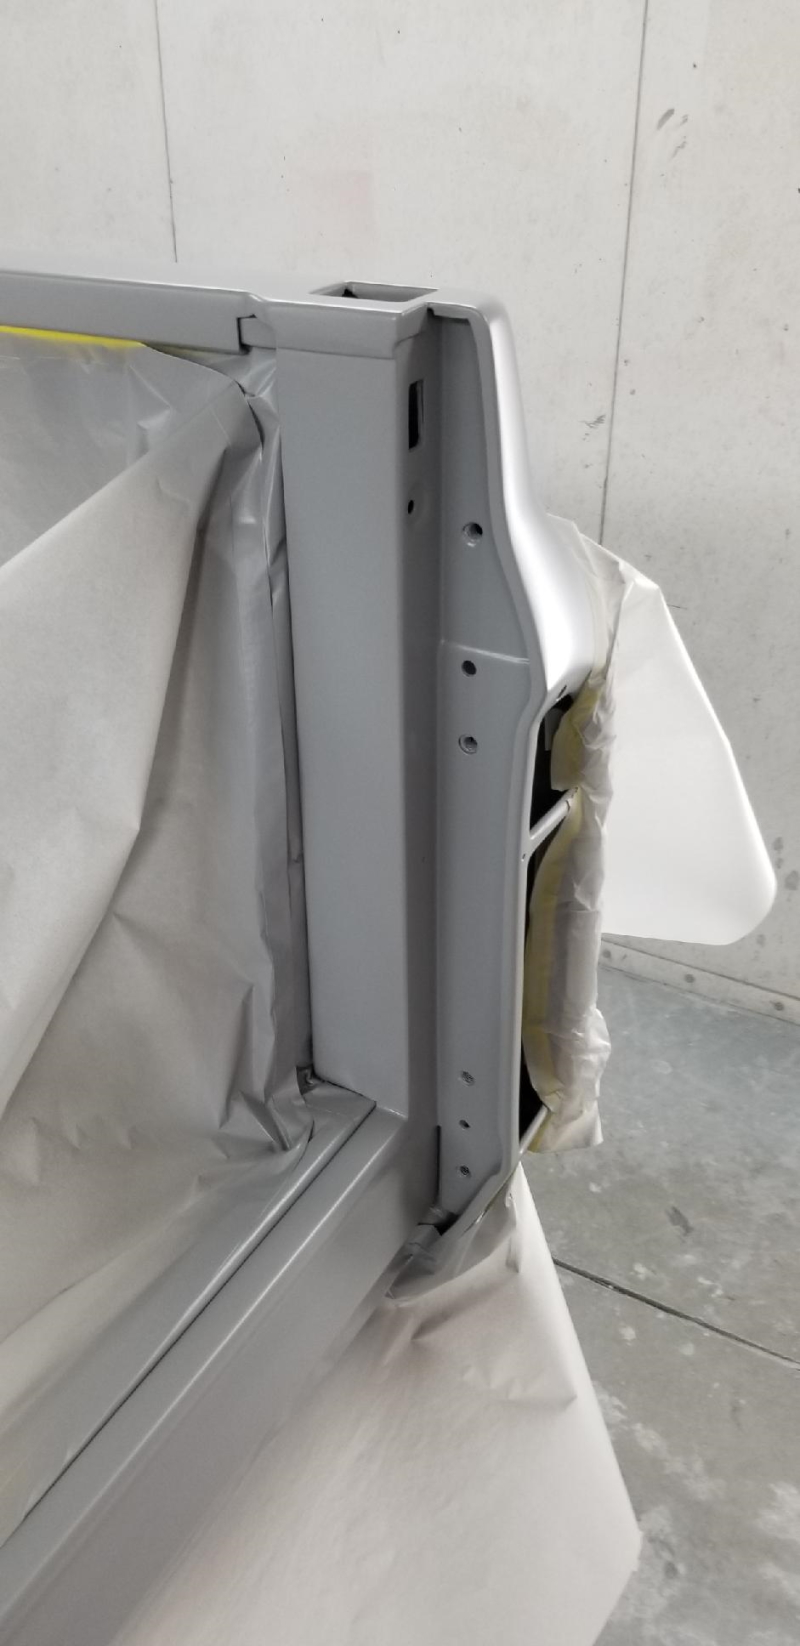
During one of my last visits to check on the truck, I noticed the rear of the bed wasn't square. I don't mean that it's not assembled square. It's like the sheet metal itself wasn't flat and the area where the sides were welded to the back support needed reshaped. I put an actual square on the sides and bottom at the rear, where the tailgate will mount and it proved what I was seeing. So, the guys have been working on this area. All better now.
__________________
Board Member #87725 My build thread... http://67-72chevytrucks.com/vboard/s...d.php?t=813848 Last edited by omodified; 05-04-2024 at 04:05 PM. |
|
|
|
|
03-16-2024, 09:33 PM
|
#19 |
|
Registered User
Join Date: Apr 2014
Location: Azle,Texas
Posts: 2,248
|
Re: "Midnight Rider" 1970 C10 SWB Fleetside
All I can say is God help the poor guy who dings this truck.
__________________
Brian 1972 C10, "Loyd", LWB to SWB, 5.3, L83/6L80e, 4:11 Tru Trac, Air Ride, VA, DD, 20" Coys, 4 wheel disc, A quick LS swap turned into a 6 year frame off resto-mod. |
|
|
|
|
03-27-2024, 09:15 PM
|
#20 | |
|
Senior Member
Join Date: Jul 2010
Location: Race City U.S.A.
Posts: 1,005
|
Re: "Midnight Rider" 1970 C10 SWB Fleetside
Quote:
__________________
Board Member #87725 My build thread... http://67-72chevytrucks.com/vboard/s...d.php?t=813848 Last edited by omodified; 05-04-2024 at 04:05 PM. |
|
|
|
|
|
03-27-2024, 09:24 PM
|
#21 |
|
Senior Member
Join Date: Jul 2010
Location: Race City U.S.A.
Posts: 1,005
|
Re: "Midnight Rider" 1970 C10 SWB Fleetside
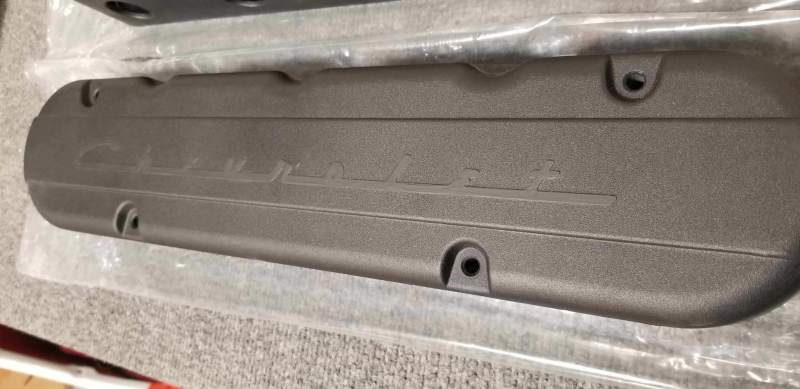
I have decided over time that I'm not real fond of the Chevrolet script on the valve covers. Decided to match the script with the same color as the valve cover. I let Sleeveless Bob in Mooresville handle it for me. This guy has a steady hand for sure!
__________________
Board Member #87725 My build thread... http://67-72chevytrucks.com/vboard/s...d.php?t=813848 Last edited by omodified; 05-04-2024 at 04:05 PM. |
|
|
|
|
03-31-2024, 09:59 AM
|
#22 |
|
Senior Member
Join Date: Jun 2002
Location: Murray, Kentucky
Posts: 3,392
|
Re: "Midnight Rider" 1970 C10 SWB Fleetside
Nice work throughout the whole build. I can appreciate how long it takes to get some of these things done! Rg
__________________
Roger '68 Short step - https://67-72chevytrucks.com/vboard/...d.php?t=849675 '69 ('70?) 2wd Blazer '70 GMC Jimmy 2wd |
|
|
|
|
04-21-2024, 03:13 PM
|
#23 |
|
Senior Member
Join Date: Jul 2010
Location: Race City U.S.A.
Posts: 1,005
|
Re: "Midnight Rider" 1970 C10 SWB Fleetside
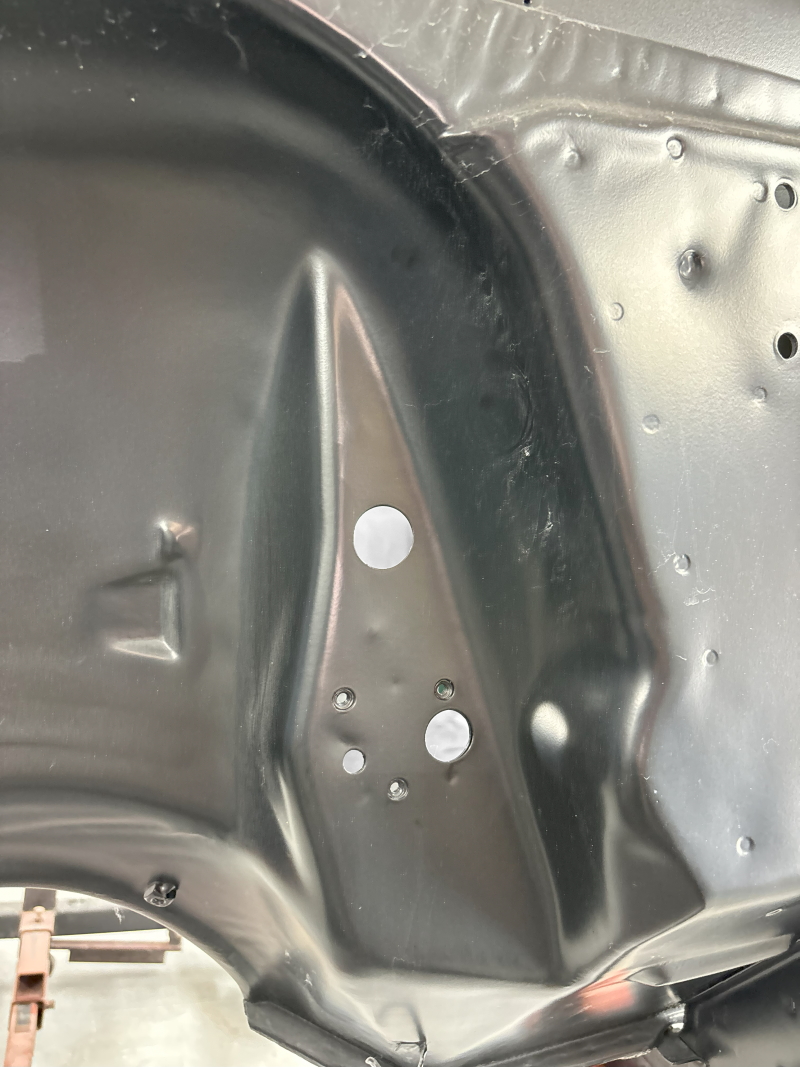
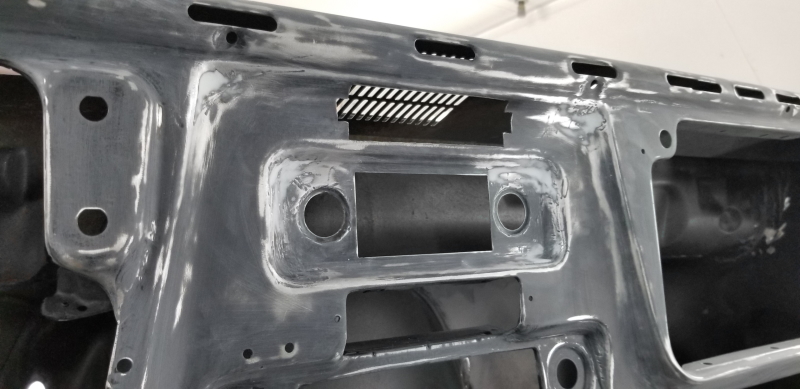
I was organizing some parts related to the windshield washer/wiper system. I realized during this, that the hole in firewall for the washer hoses was accidentally deleted. Fortunately, it is still very apparent where the hole is suppose to be. A one inch hole saw made quick work of it. I'm glad to not be in a rush and have extra time to find things like this.
__________________
Board Member #87725 My build thread... http://67-72chevytrucks.com/vboard/s...d.php?t=813848 Last edited by omodified; 05-04-2024 at 03:53 PM. |
|
|
|
|
04-21-2024, 07:16 PM
|
#24 |
|
Senior Member
Join Date: Jul 2010
Location: Race City U.S.A.
Posts: 1,005
|
Re: "Midnight Rider" 1970 C10 SWB Fleetside
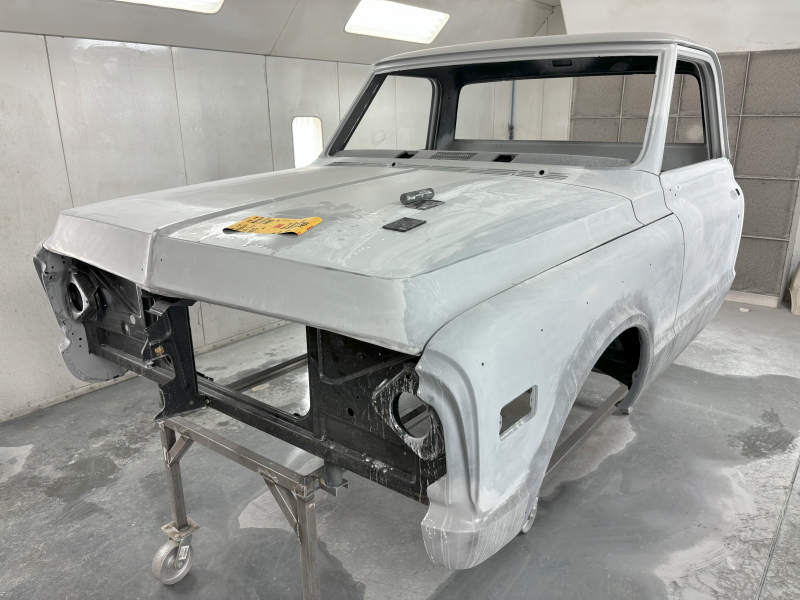
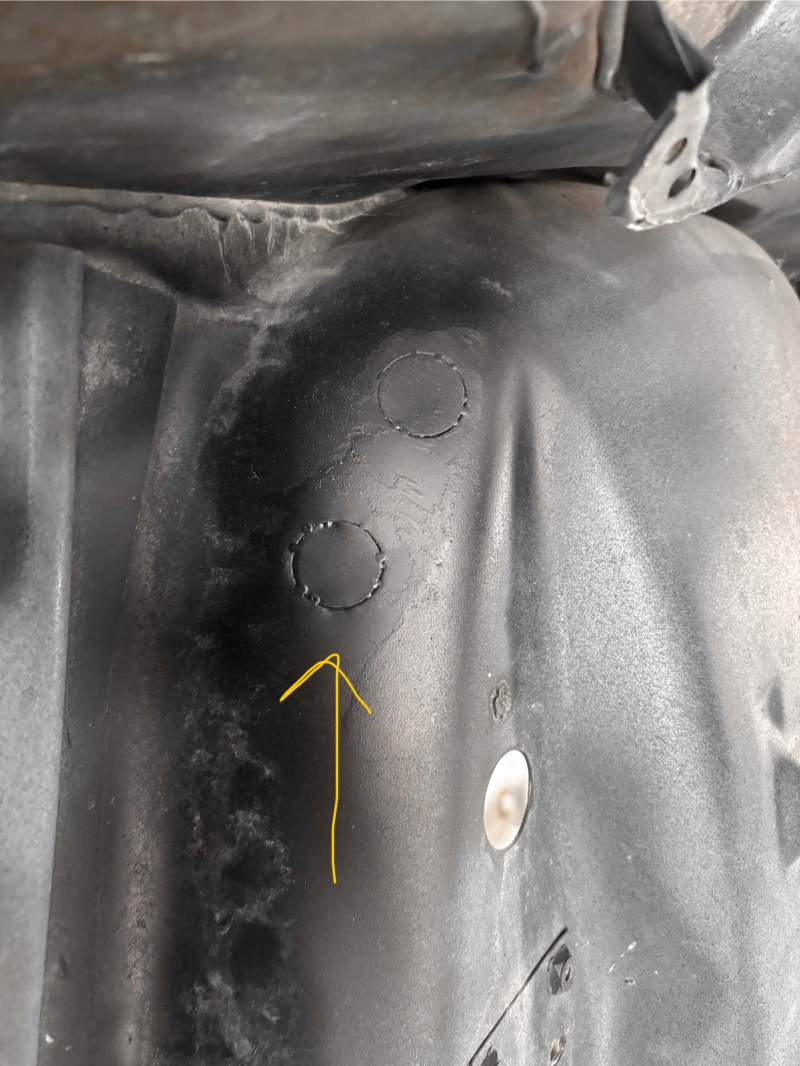
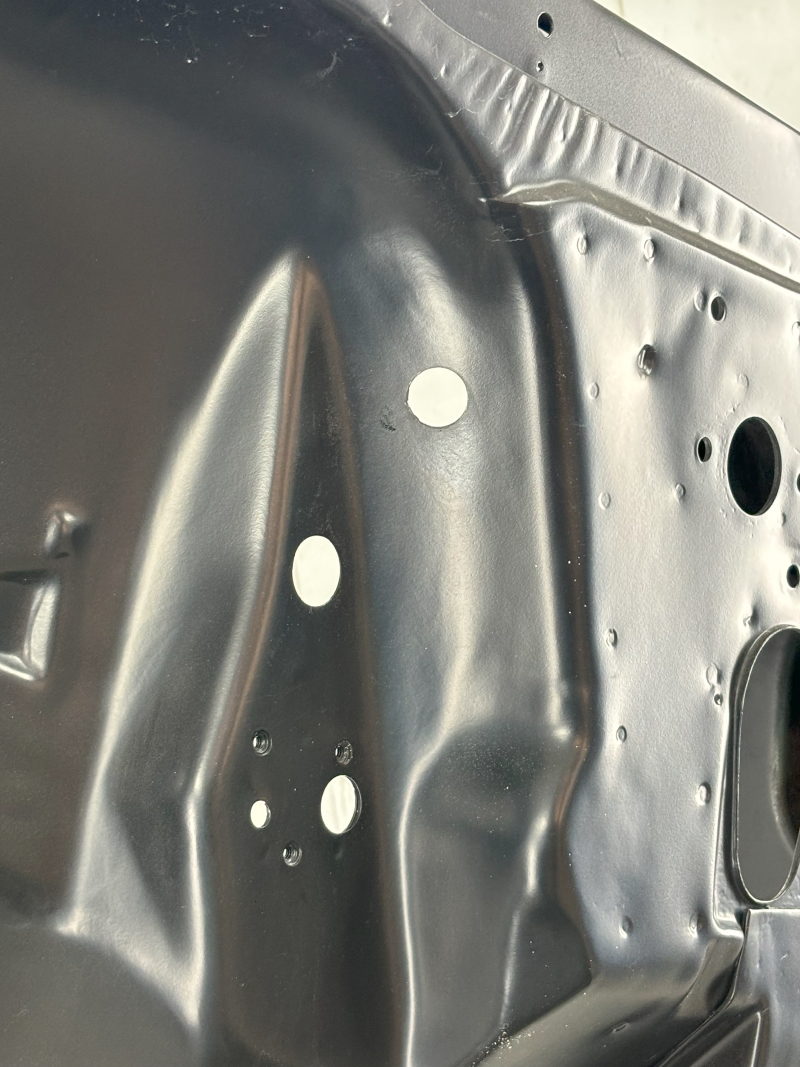
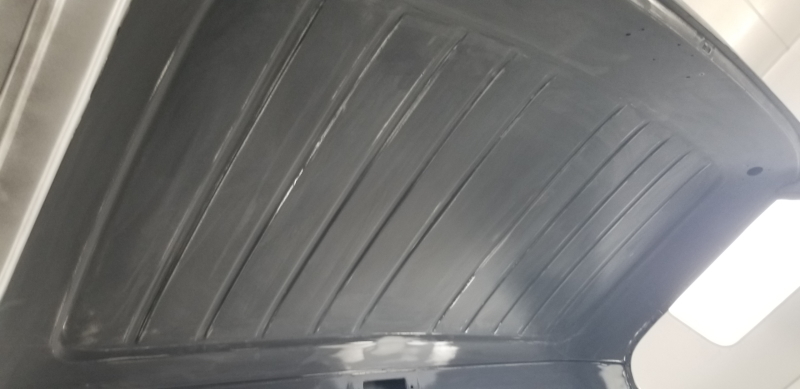
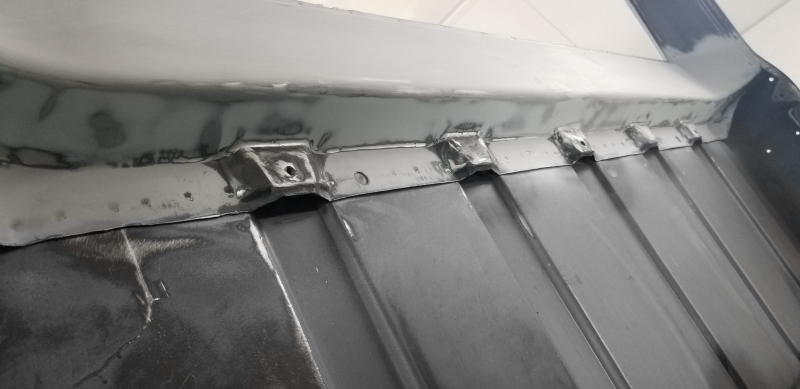
I noticed the first time the cab was on the rotisserie that there were a few areas that were going to be hard to prep for paint. One of the areas is where the floor pans meet the weather-strip. There is a pretty good recess there that makes it hard to get anything in there to prep the surface. The other area is on the underside in the back where the rear crossmember meets the back panel. Again, this area is recessed and it's hard to get anything in there to prep the surface. What could be reached, got sanded and a wire wheel was used to get the rest. Also, sanded some factory undercoating off of the front side of the rear crossmember.
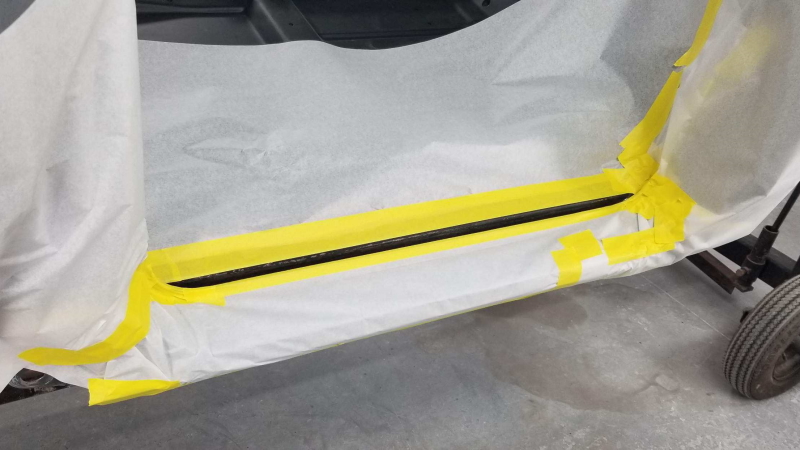 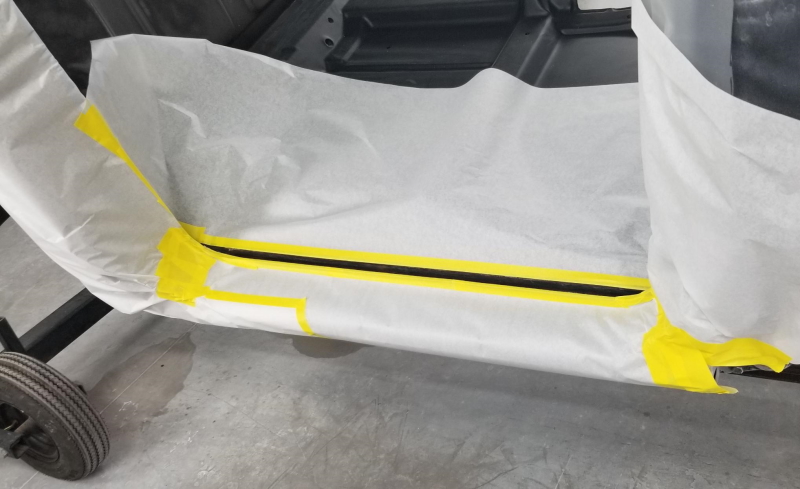 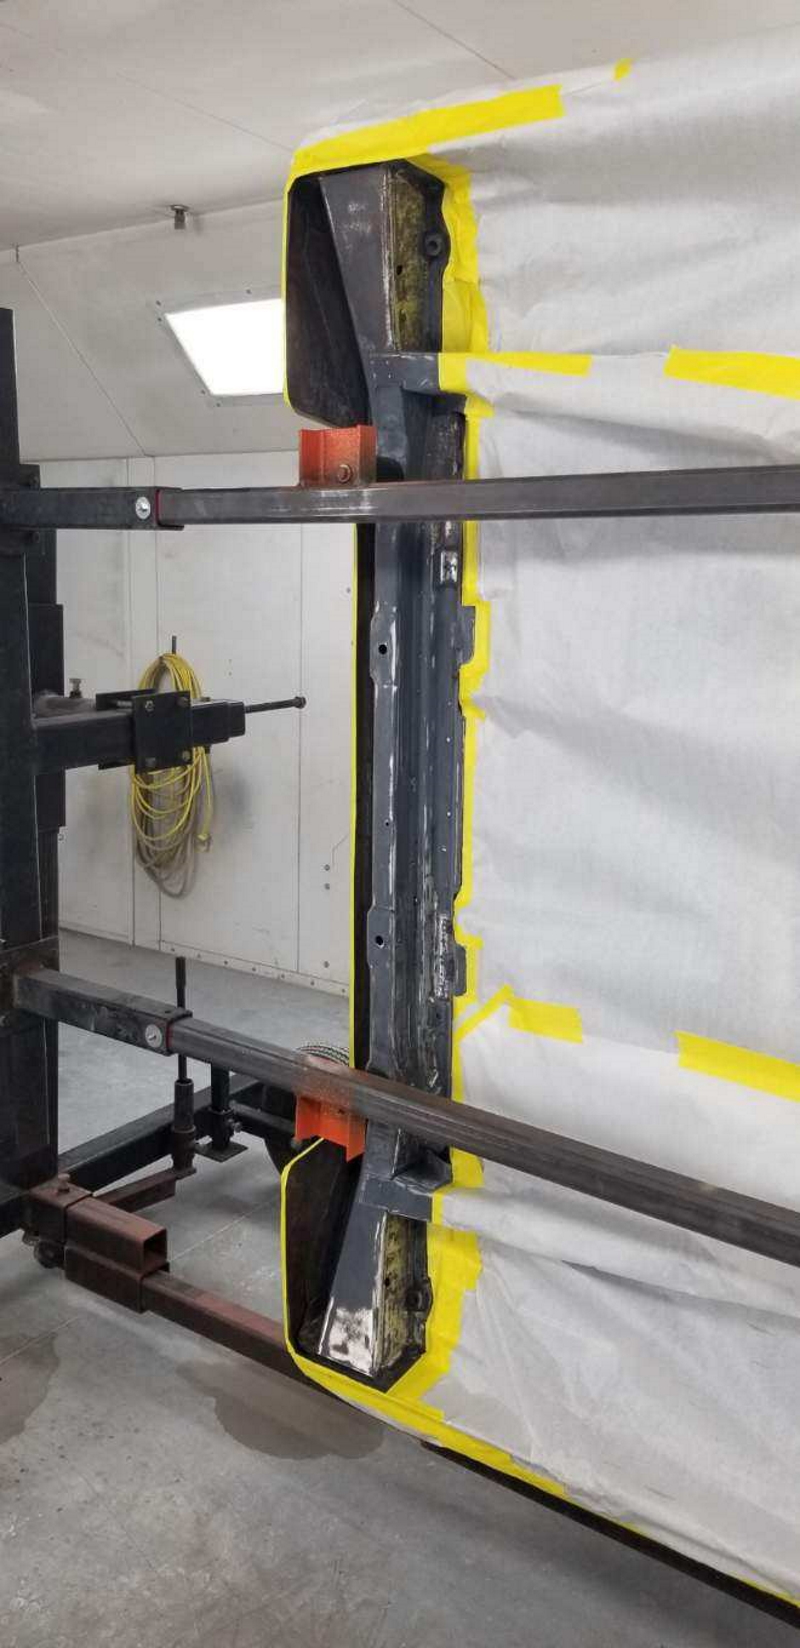 To protect these surfaces, we sprayed a rust encapsulator from Eastwood. 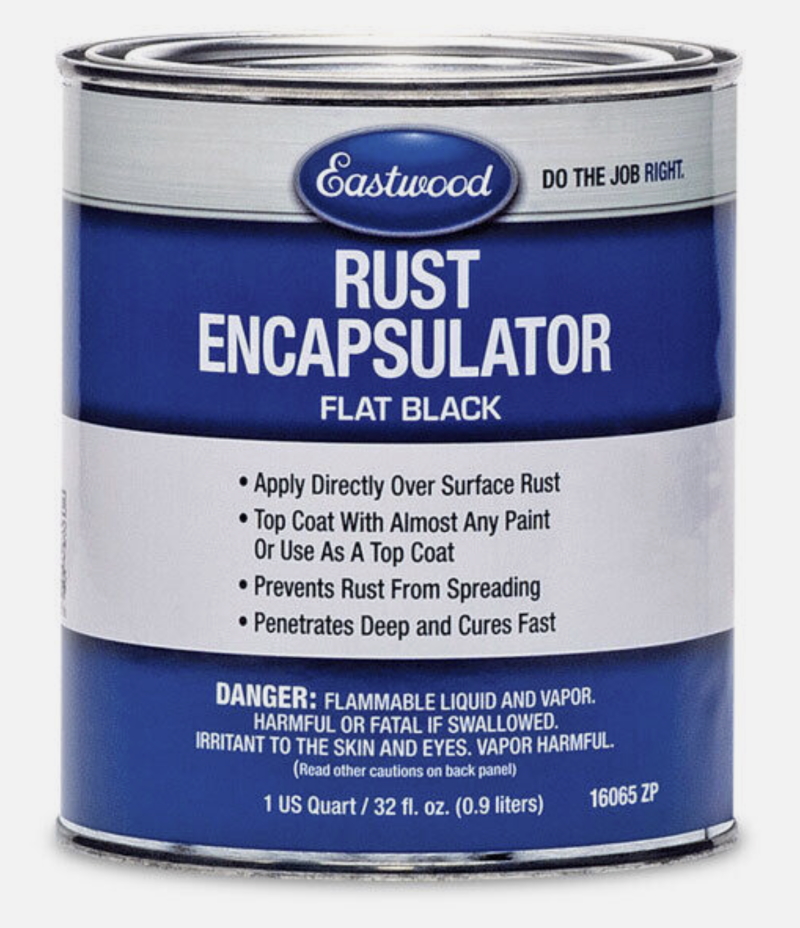 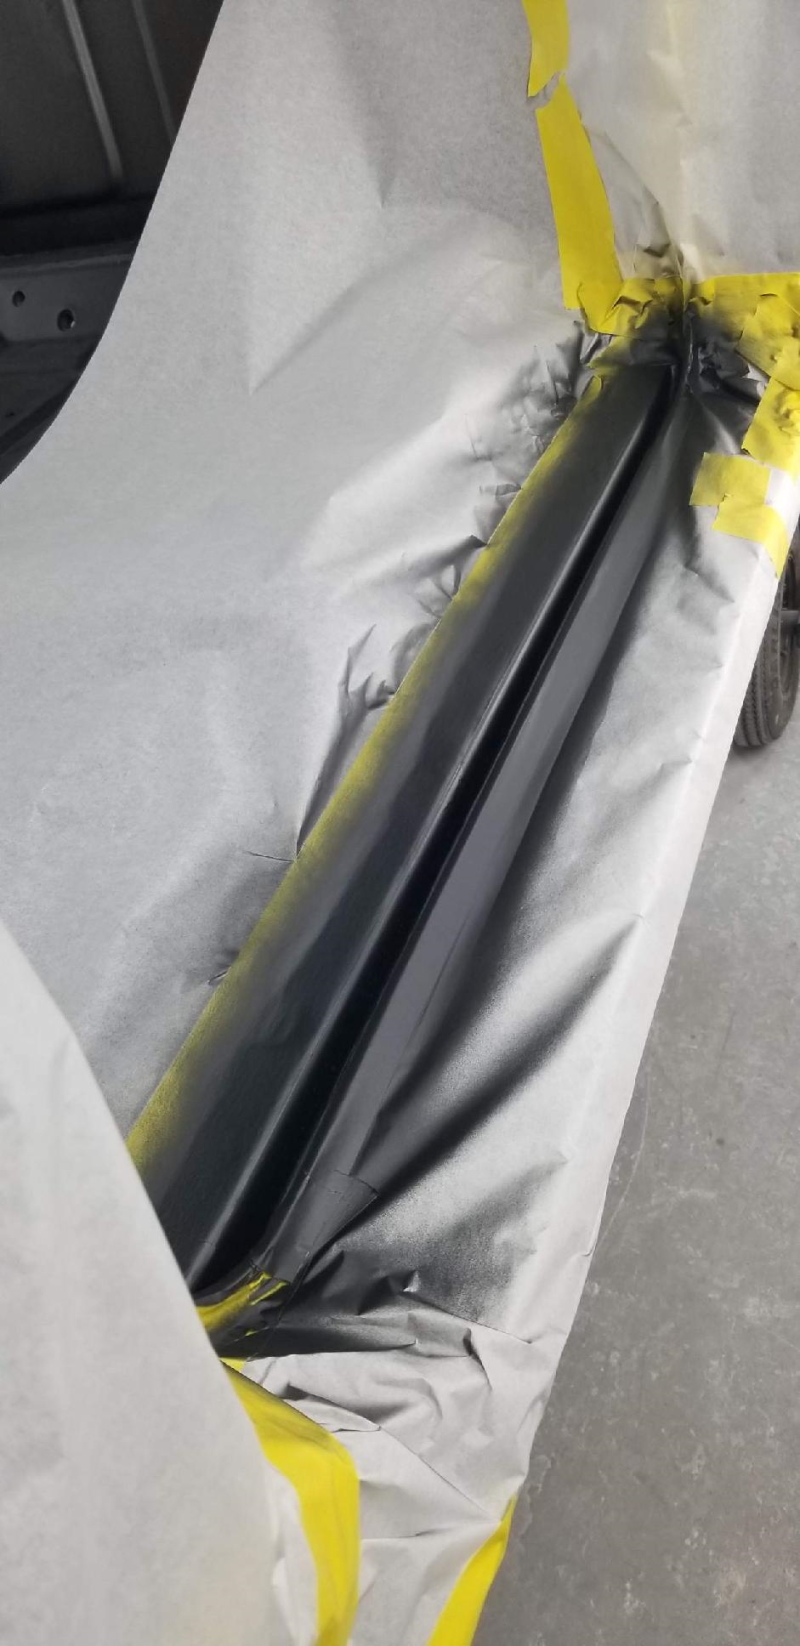 
__________________
Board Member #87725 My build thread... http://67-72chevytrucks.com/vboard/s...d.php?t=813848 Last edited by omodified; 05-04-2024 at 03:53 PM. |
|
|
|
|
04-21-2024, 07:36 PM
|
#25 |
|
Senior Member
Join Date: Jul 2010
Location: Race City U.S.A.
Posts: 1,005
|
Re: "Midnight Rider" 1970 C10 SWB Fleetside
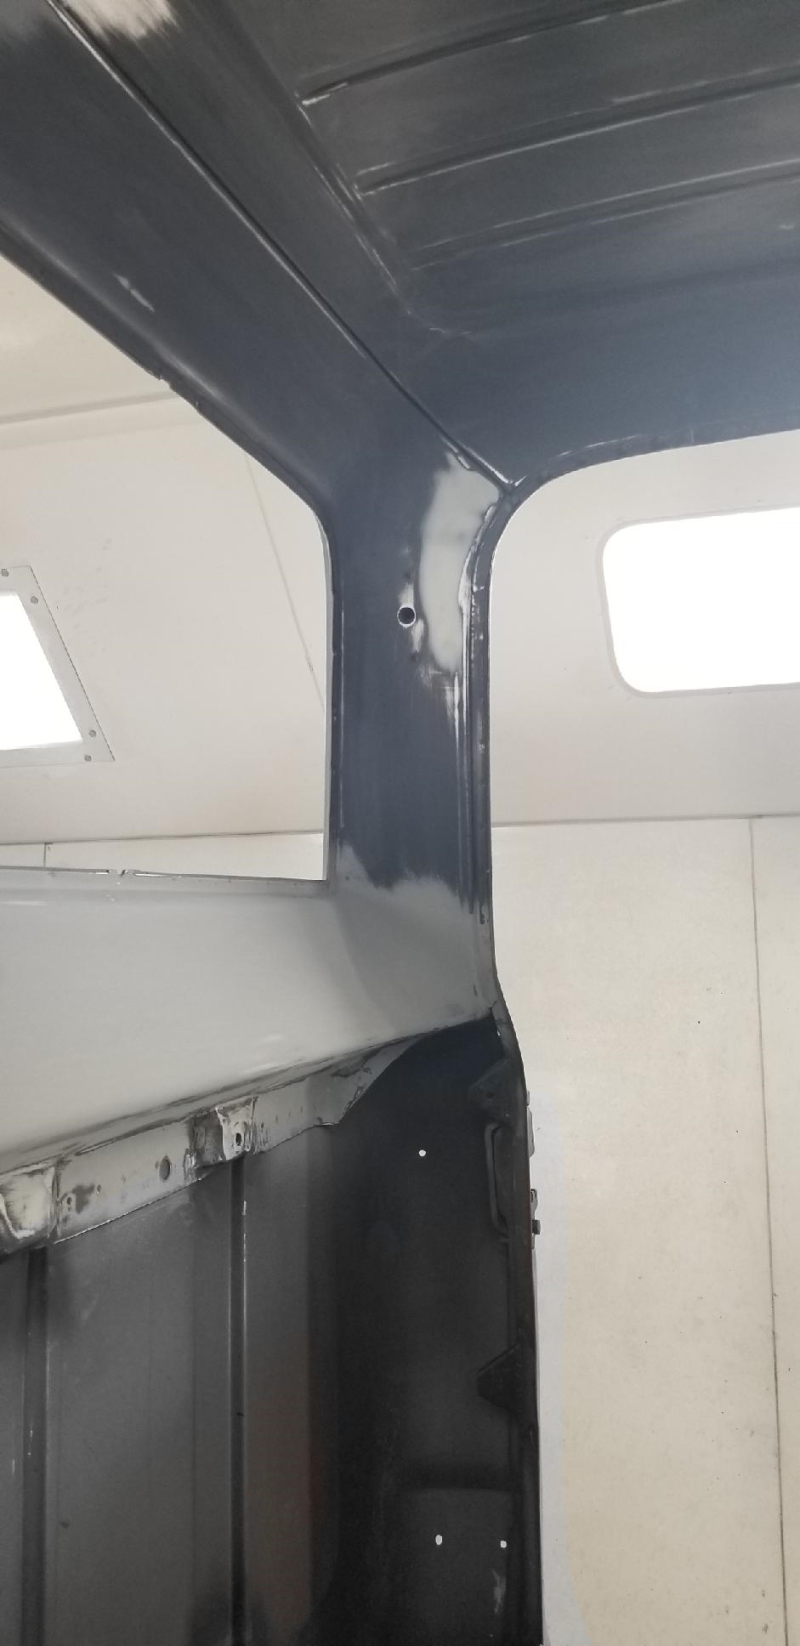
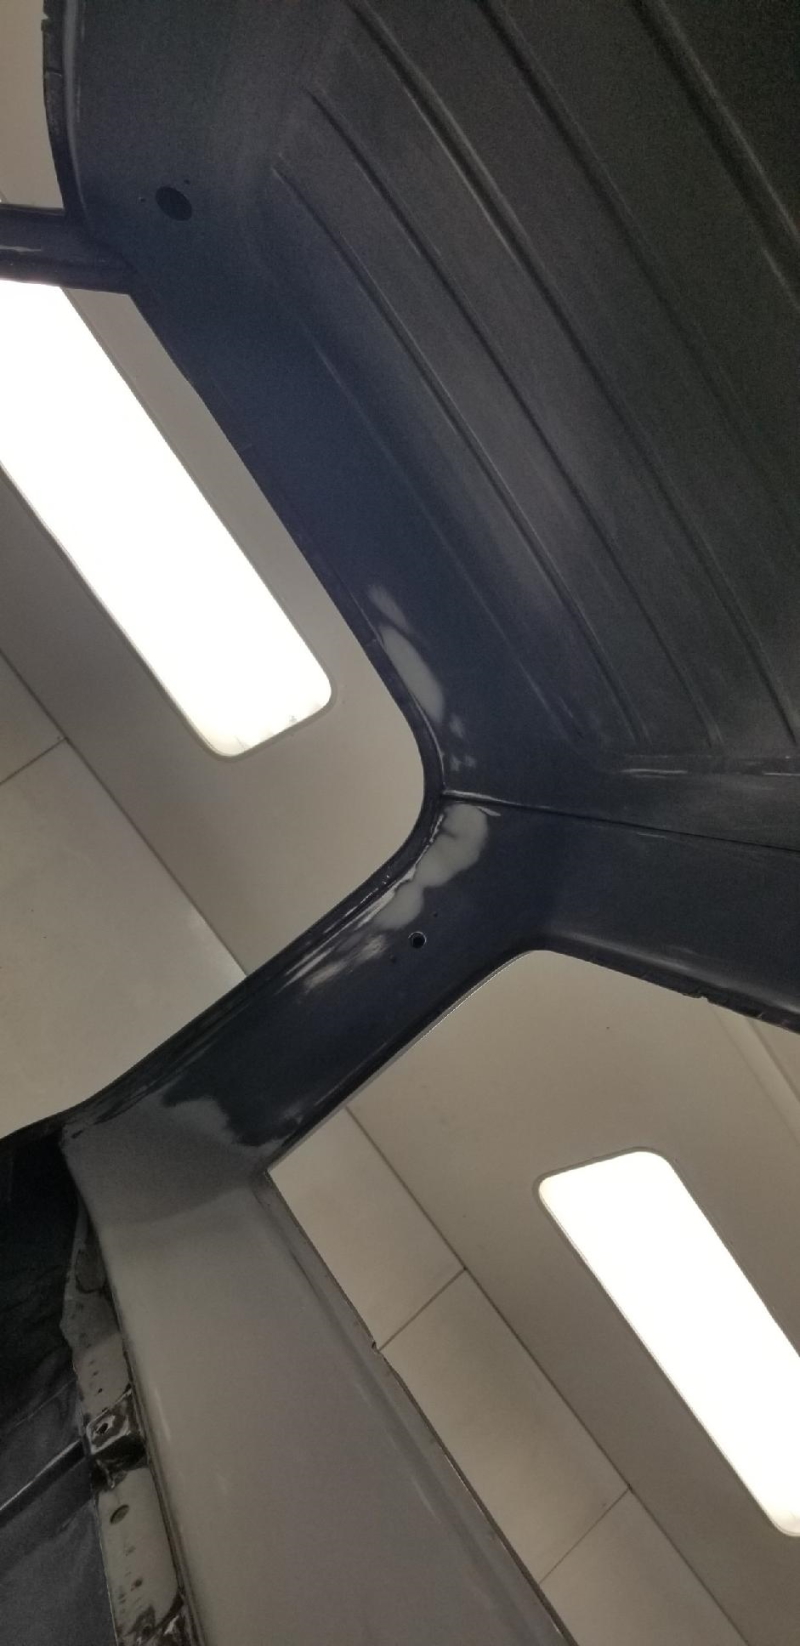
Working on the inside of the cab. Found some areas that needed a little massaging. Final sanding other areas, getting ready for paint. Soooo close now...
__________________
Board Member #87725 My build thread... http://67-72chevytrucks.com/vboard/s...d.php?t=813848 Last edited by omodified; 05-04-2024 at 03:54 PM. |
|
|
|
 |
| Bookmarks |
|
|


 Hybrid Mode
