
 |
Register or Log In To remove these advertisements. |
|
|
|
|||||||
|
|
Thread Tools | Display Modes |
|
|
#1 |
|
Senior Member
Join Date: May 2004
Location: johnstown, NY
Posts: 2,393
|
HOW TO: One piece floor pan install
To read the original thread and discussion on this topic go here- LINK
So...I bought this BEAUTY of a cab up here in the northeast where it like finding a needle in a haystack. Every bit of this cab is mint except the cab supports, and the usual rockers, cab corners, etc. Same ol song and dance. I thought this was a great opportunity to purchase Tri-pros new one piece floor. I ordered the floor, both sets of A and B pillar patches, kickpanel patches, rockers, and cab corners. The cab is a 68 C-30. 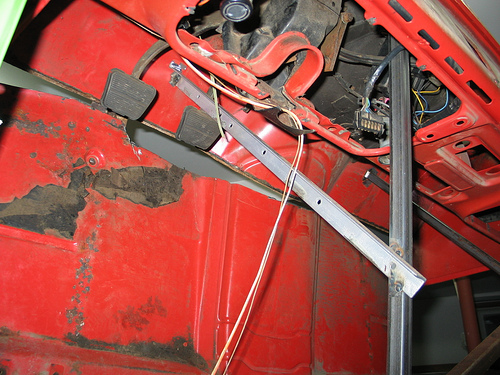 Here are some closeups of the carnage: 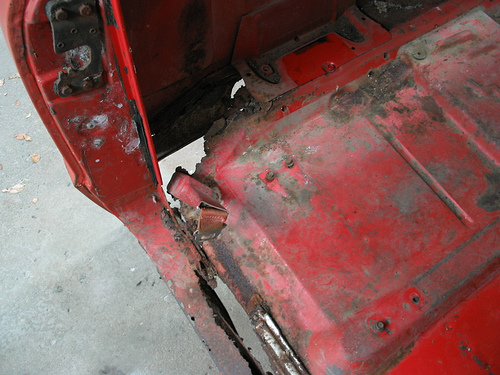  I know what your thinking, " that floor looks pretty nice!" Yes, it was, but all the cab supports are gone, so instead of screwing with replacing all those, I got this:   OHHH, isn't she purdy! So the first step I took was to brace this bad boy up. The more the better I believe. So I put two braces from the rear wall to the firewall, and then tied those together. Then I ran some across the door openings, and tied those together. Lastly, I ran two vertical braces to tie the upper and lower together. Hopefully this will do the trick. Other people I have seen do the floor swap only put the first two braces in from rear wall to firewall and they did not report any issues with movement, so I think I am all set. 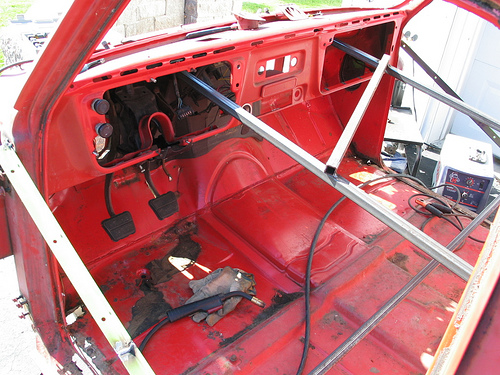  After the cab was braced, the first thing I did was remove the rockers. This is the first time I've done any sheet metal work, so I was expecting this was going to be a....well you know. Anyway, the rockers came out real easy! I was pleasantly surprised. The first thing I did was clean off the area to find the spot welds, then I center punched them. Last edited by augie; 02-15-2012 at 07:21 PM. |
|
|
|
|
#2 |
|
Senior Member
Join Date: May 2004
Location: johnstown, NY
Posts: 2,393
|
Re: HOW TO: One piece floor pan install
I got this spot weld remover from harbor freight and was expecting it to be junk, but it actually worked really well.
  It popped right off with a little chisel work: 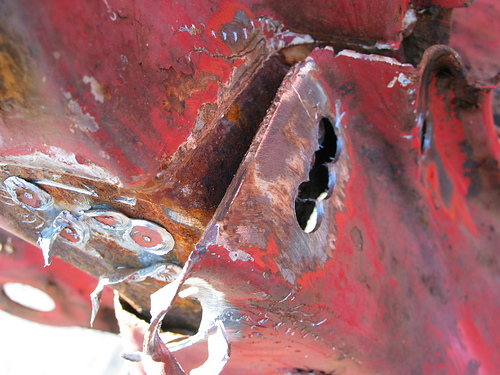 Here it is removed:  After I got both rockers off, I drilled out the spot weld on the firewall lip.  Sometimes it may be hard to find the spot welds. I found that if you take a angle die grinder and lightly hit the area, the spot weld will show up for ya. Also, a little soap and water helps too.  After I got the spot welds drilled out on the firewall, I went in the cab and cleaned out all the factory seam sealer and started to separate the floor and the firewall. I made a slice with an angle grinder about an inch away from the seam. Then removed the remaining piece between the cut and the seam. 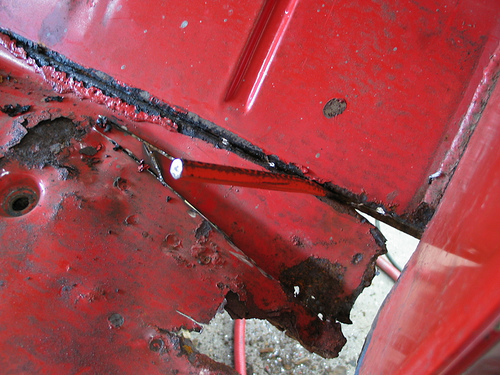 Again, this came out really easy. I hope Im not jinxing myself   
Last edited by augie; 02-15-2012 at 07:11 PM. |
|
|
|
|
#3 |
|
Senior Member
Join Date: May 2004
Location: johnstown, NY
Posts: 2,393
|
Re: HOW TO: One piece floor pan install
Ok, time to do the rear seam. I drilled out the spot welds on the rear of the cab.
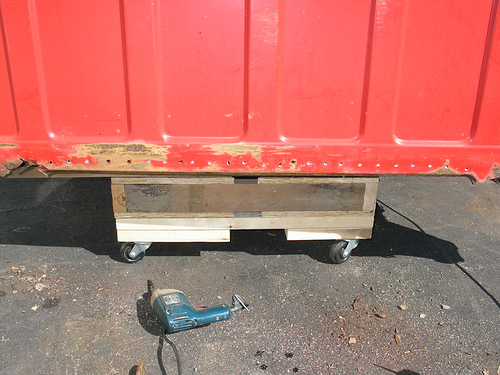 So this is as far as I got this weekend. Until next weekend... Last edited by augie; 02-15-2012 at 07:12 PM. |
|
|
|
|
#4 |
|
Senior Member
Join Date: May 2004
Location: johnstown, NY
Posts: 2,393
|
Re: HOW TO: One piece floor pan install
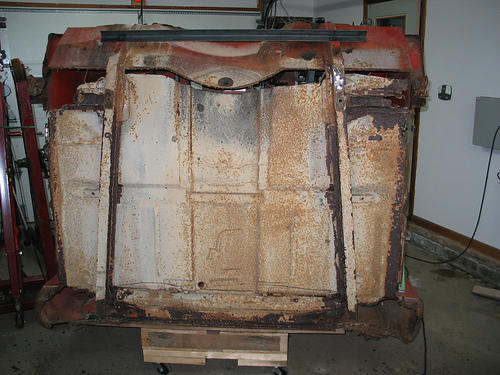
Got a chance to do some more work today. The first thing I did was get the cab on its back. Then I decided to add more bracing. Fore anybody doing this, i would recommend additional bracing as close to the floor as possible. After I got the floor out, the cab is a bit flimsy, but honestly, I think this is going to happen no matter how much bracing you put in. In this pic, you can also see the slice I put in the floor near the rear wall.
 Here is the additional bracing I put in the cab from the firewall to the center supports:  I also made use of the threaded holes in these cab supports: 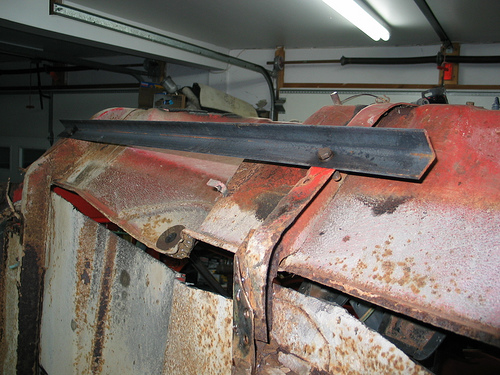 The only thing left to do was remove the spot welds where the outrigger meets the firewall supports: 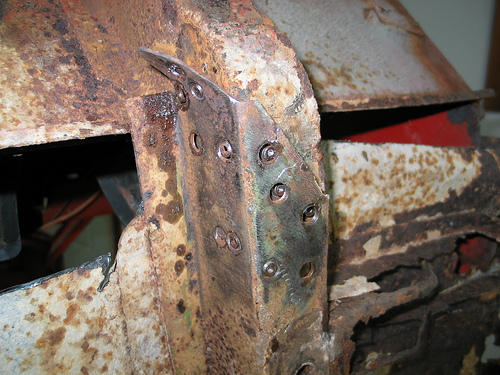  And shes OUT! 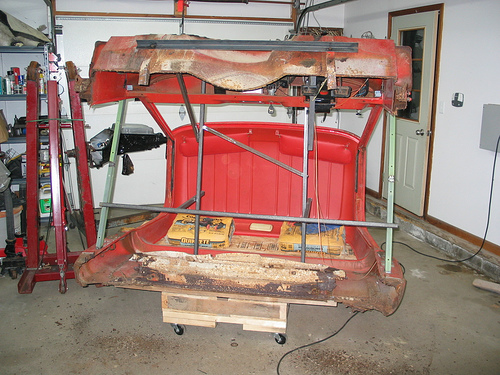 Anybody need a patch? 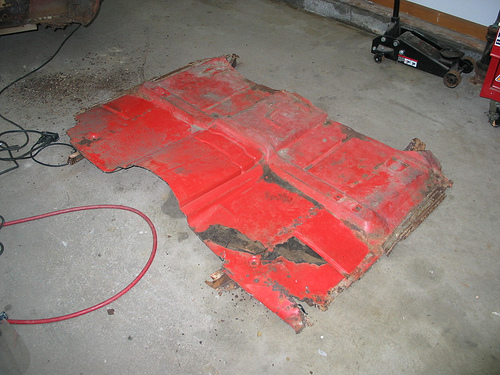 Thats it for today. Hopefully I will be able to work on it tomorrow. Last edited by augie; 02-15-2012 at 07:18 PM. |
|
|
|
|
#5 |
|
Senior Member
Join Date: May 2004
Location: johnstown, NY
Posts: 2,393
|
Re: HOW TO: One piece floor pan install
The floor will be in this weekend. Unfortunately, i am having some problems with the fit of the floor flange at the firewall, particularly at the tranny hump. Theres about a 1/2 gap at the hump. Its too large to hammer. I'm going to have to cut it out and make a new piece. It sucks to have to cut that new floor, but its got to be done. I was thinking about the other people that documented the floor install on this board that didn't have this problem, but there might be a reason for that. msgross has a high hump so he didn't have to match the hump up with the firewall. The other, Tri-Pro, used their new firewall replacement, so again, didn't match up a stock firewall hump to the floor.
Here is the gap: |
|
|
|
|
#6 |
|
Senior Member
Join Date: May 2004
Location: johnstown, NY
Posts: 2,393
|
Re: HOW TO: One piece floor pan install
Overall, I really like this one-piece floor, I just needed a small amount of tweaking at the firewall flange. For some reason, the last couple of inches of the flange angled down which didn't match my firewall flange which is completely straight across. Instead of forcing it into place(it wouldnt of fit as nice), I made a pie cut and will put a little patch in. No biggie. Here are before and after pics and the area at the firewall it should match up to, then installed and tacked.
before:  after:  installed:  tacked: 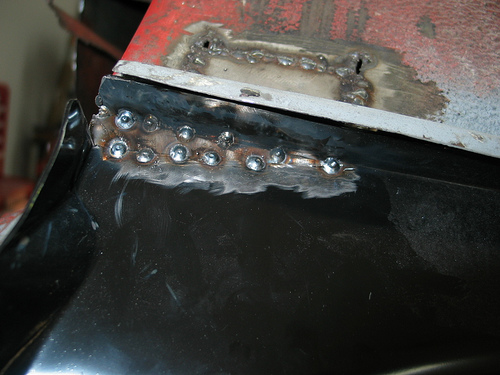 here are the areas to be welded cleaned and sprayed with weld thru. 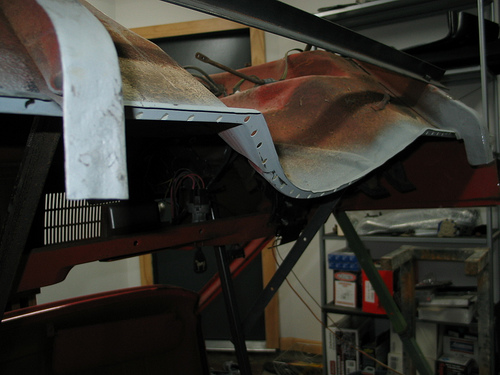 I also put the cab on the floor to insure it was on a solid, flex-free surface. 
Last edited by augie; 02-15-2012 at 07:18 PM. |
|
|
|
|
#7 |
|
Senior Member
Join Date: May 2004
Location: johnstown, NY
Posts: 2,393
|
Re: HOW TO: One piece floor pan install
and here is the MONEY SHOT!

Last edited by augie; 02-15-2012 at 07:17 PM. |
|
|
| Bookmarks |
|
|