
|
|
|
 10-16-2014, 08:06 AM
|
#1 |
|
Registered User
Join Date: Jan 2013
Location: Leonardtown, MD
Posts: 1,636
|
Re: 55 Wagon Progress
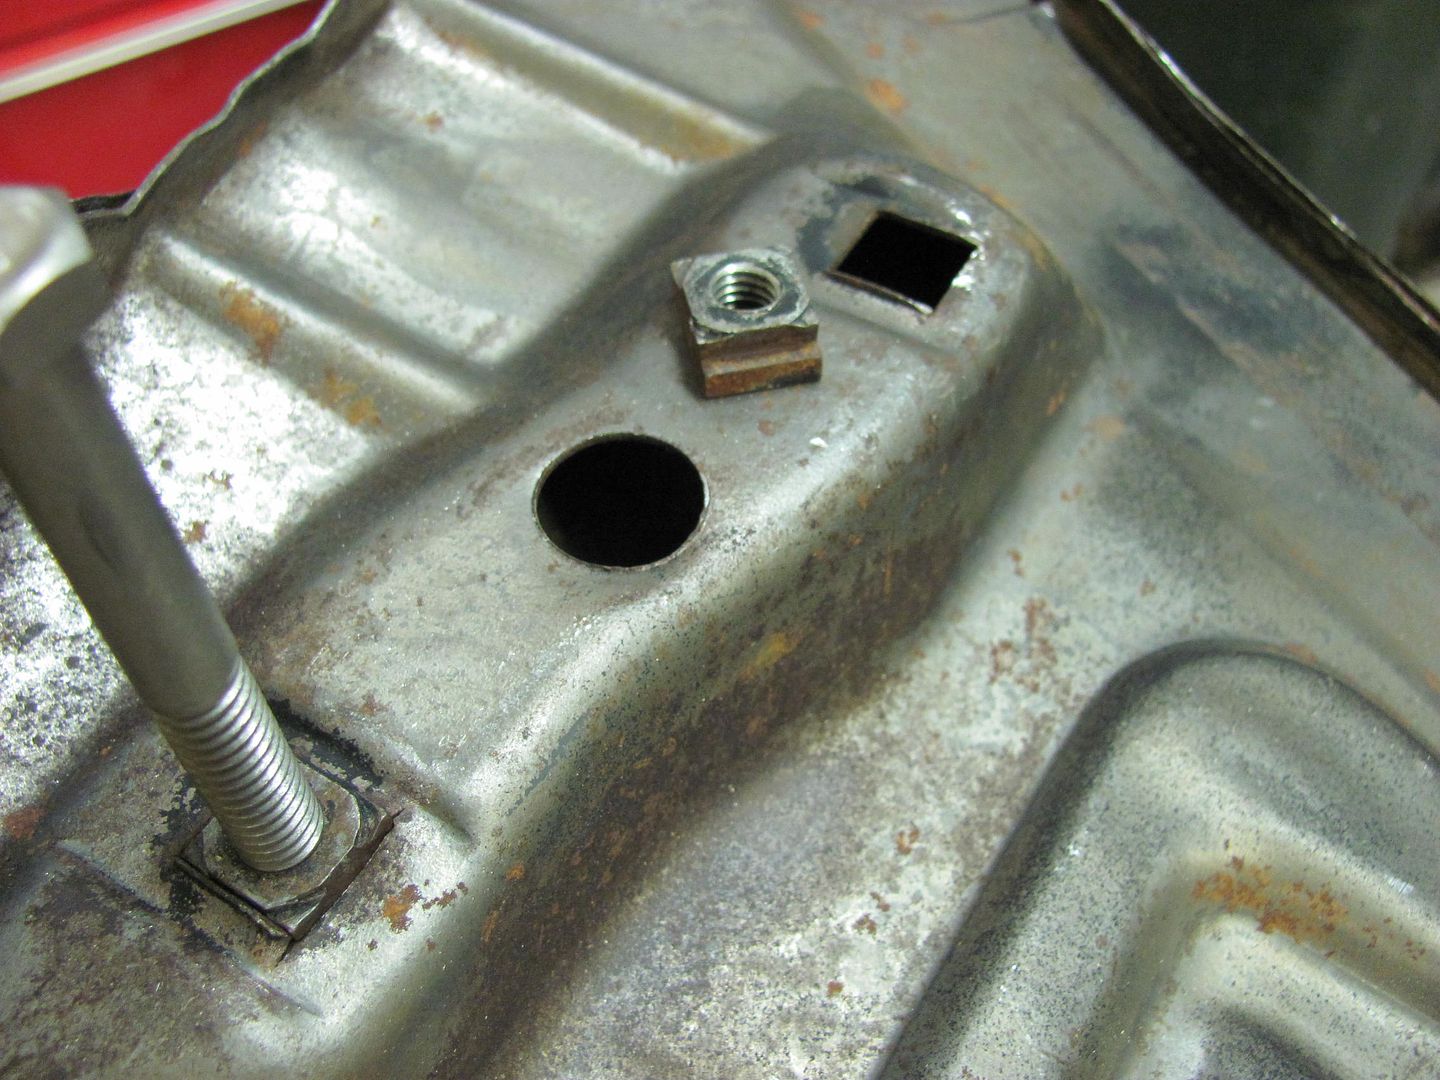
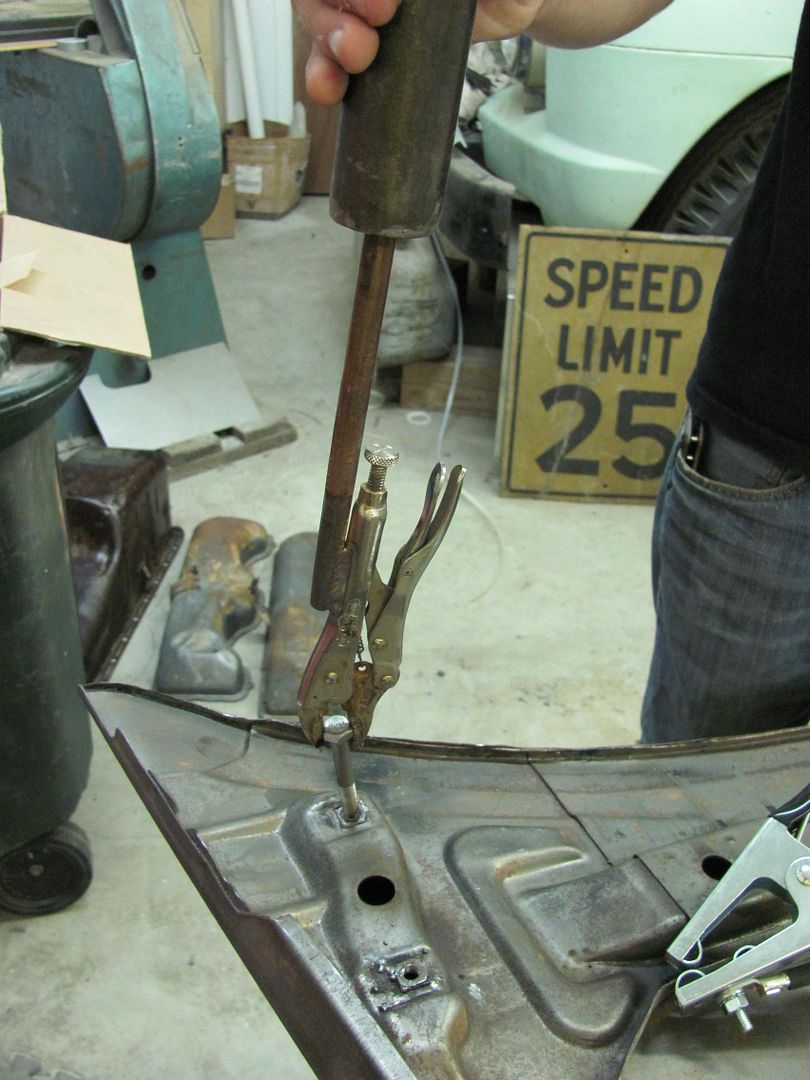
A bit more progress last night on the front end fitment. We've taken the hood off and reinstalled so much that one of the captive nuts came out. Once we fished it out of the hole, it still looked intact, so it will get reinstalled. It was proving difficult to pull back up into the hole, so a bolt was threaded into the nut and the fancy dent puller clamped onto the bolt head. One pull and it was back in place..
  It was tacked in place, and to prevent a reoccurrence with the other three, they received tack welds also. 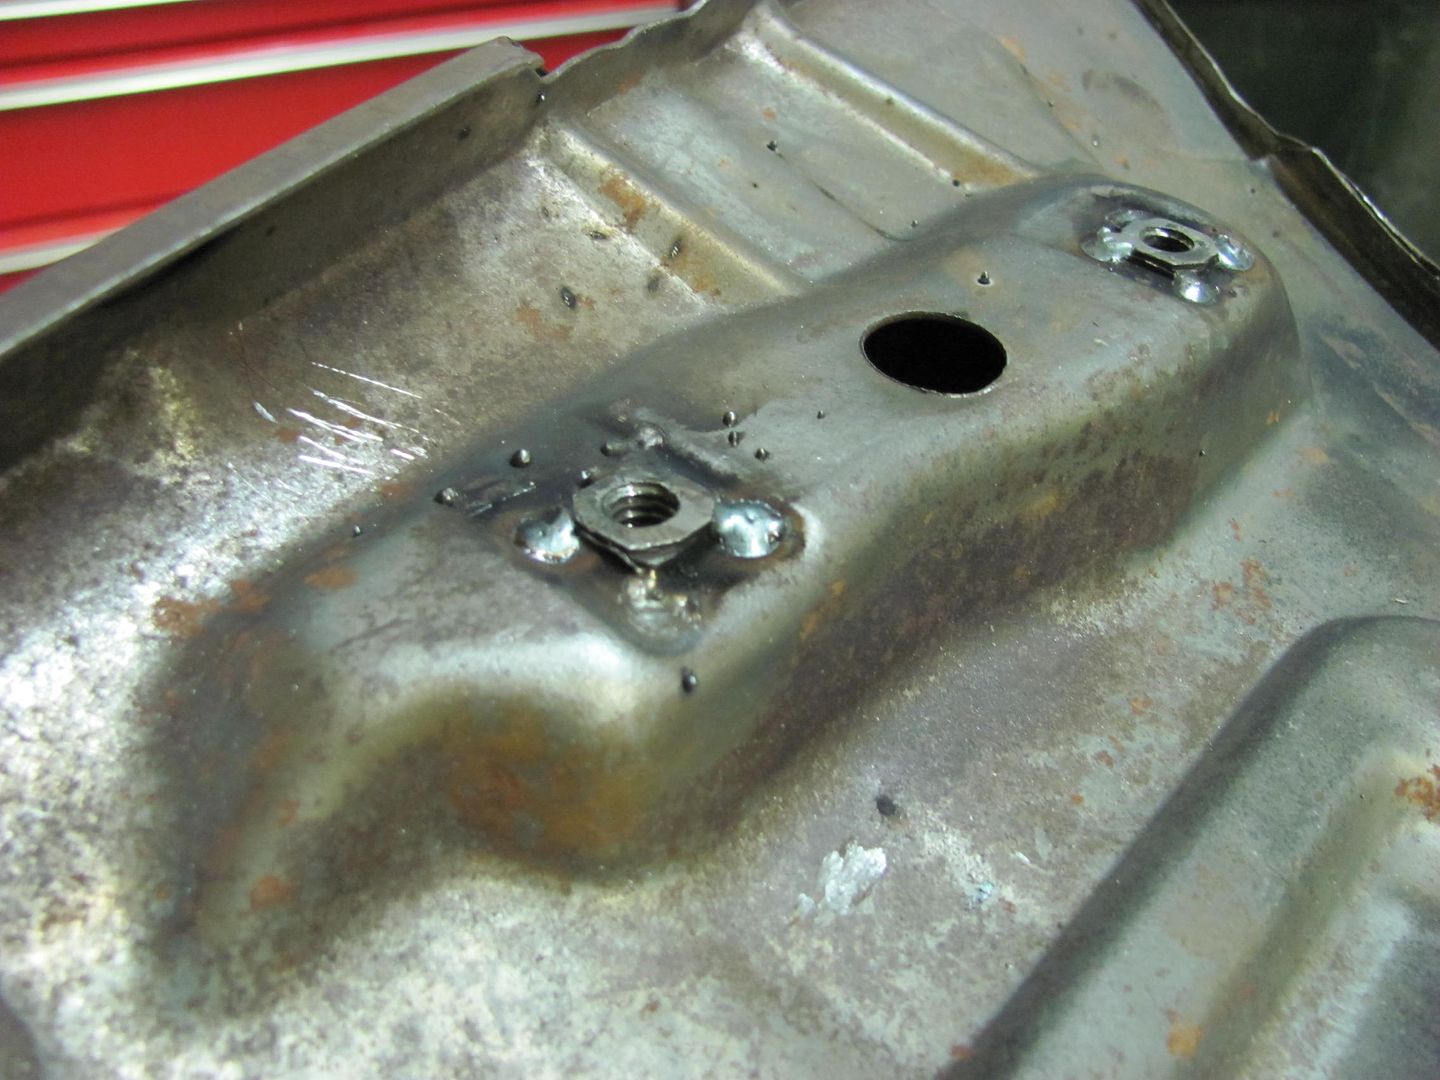 Next, we were working on the hood to cowl gap. We noticed towards the ends of this gap it tended to tighten up. The highly calibrated gap feeler gauge was used... 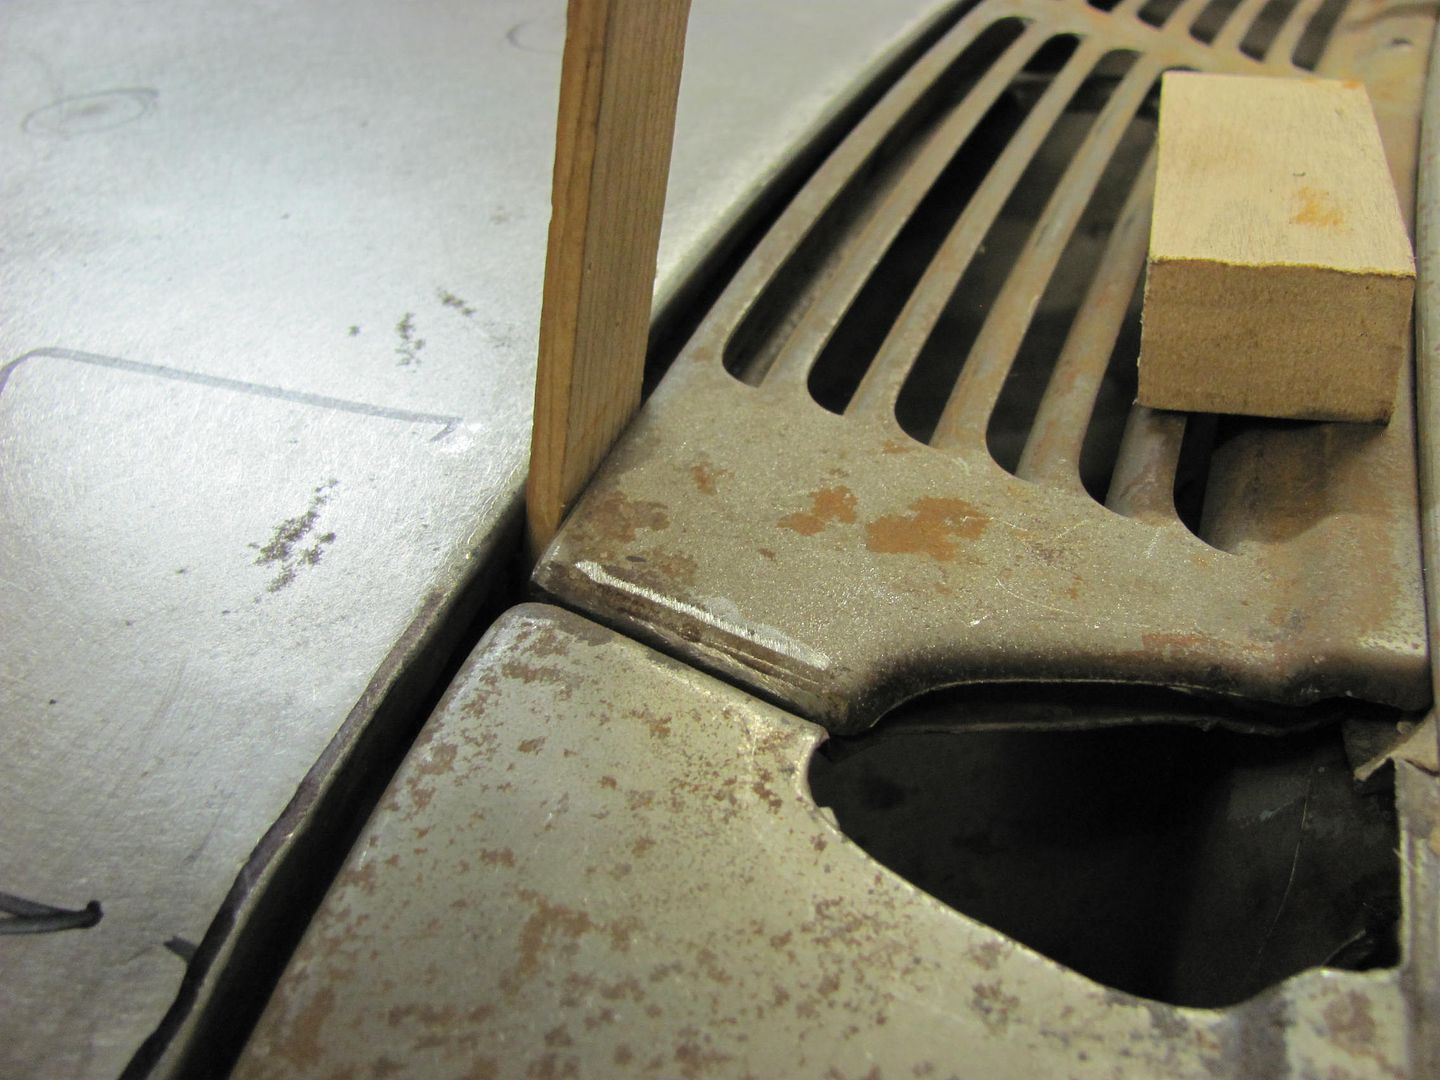 Here the gap tool had no chance, we need to reform the rear fold on the ends...   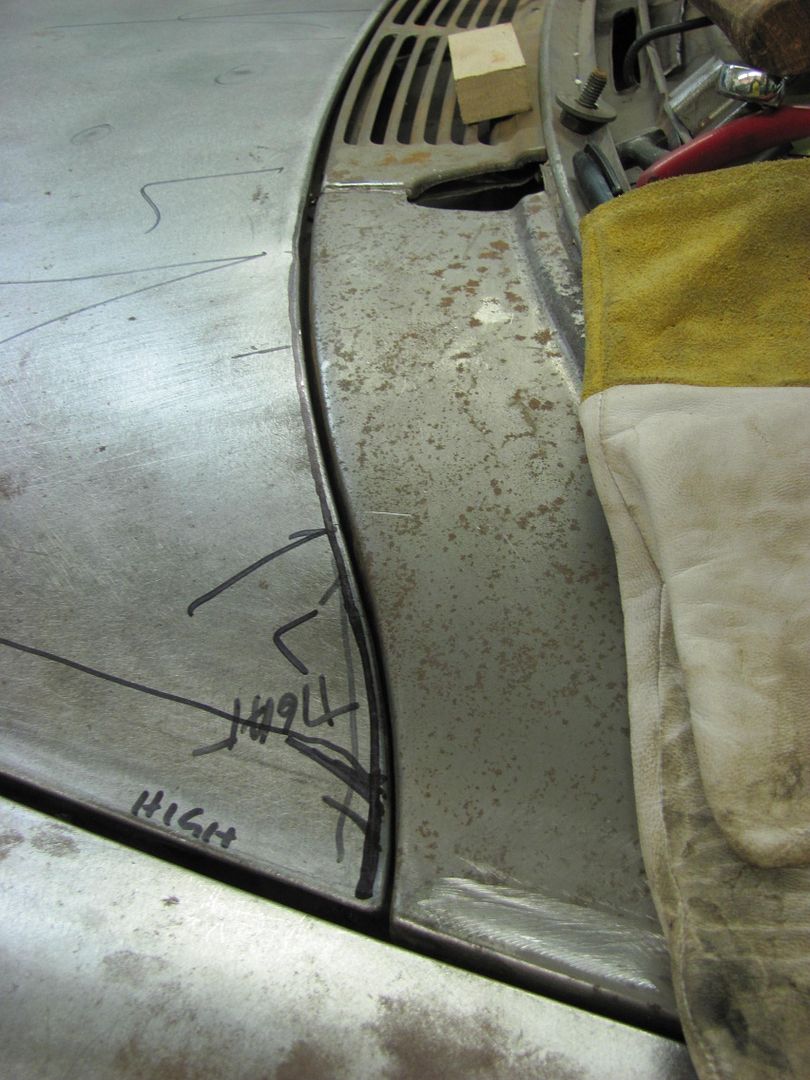 The wedge anvil was used, along with a x-large cold chisel that had a radiused edge formed for the more curvaceous profiles, to reform the rear fold inward for this tight area..  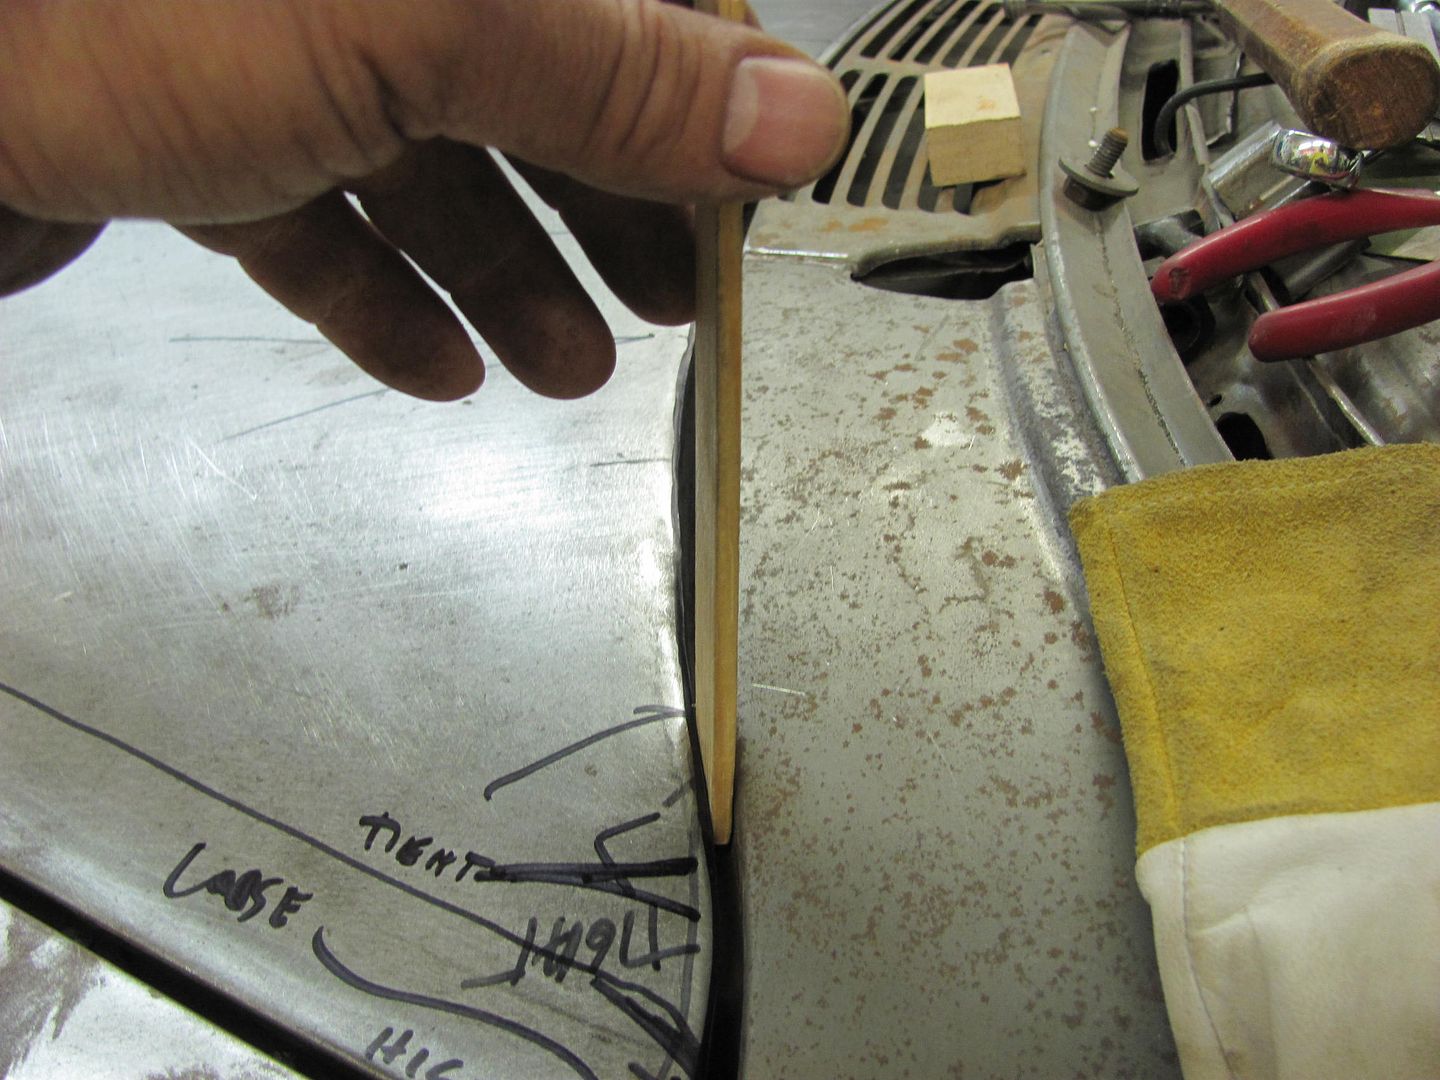 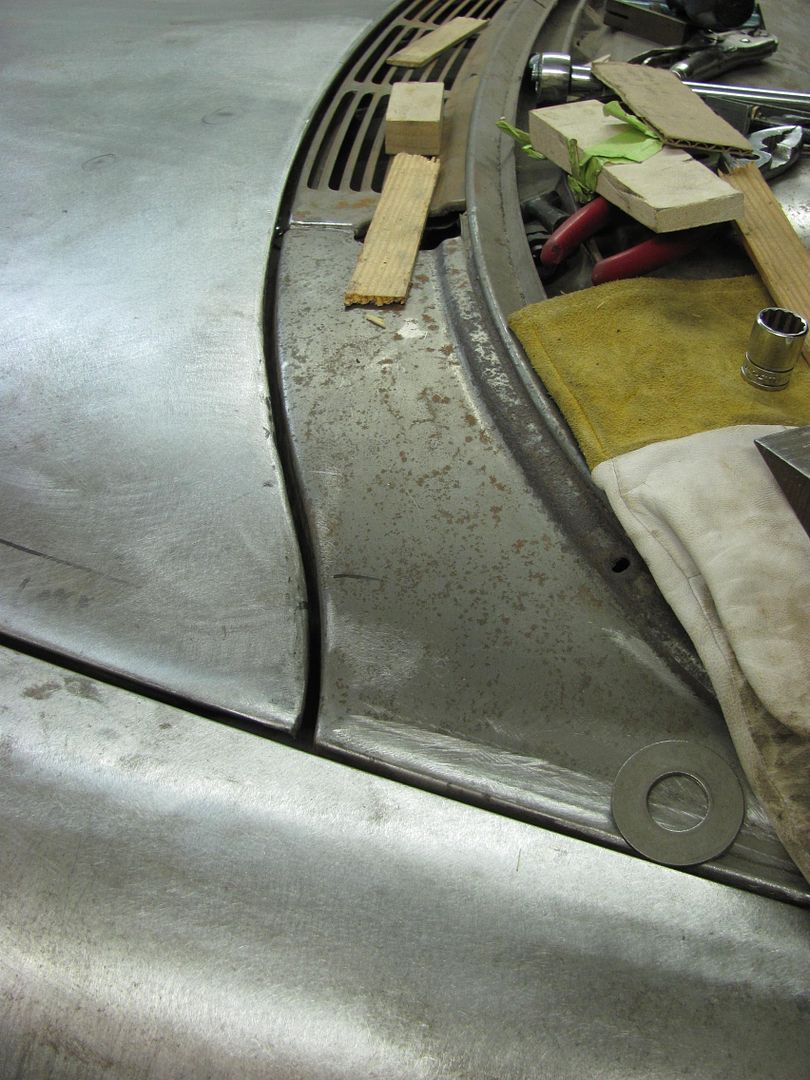 Gap looks much more consistent there, a quick look at the passenger side shows it needs reforming as well, but not nearly as much. Getting late, so we'll finish this up next time... 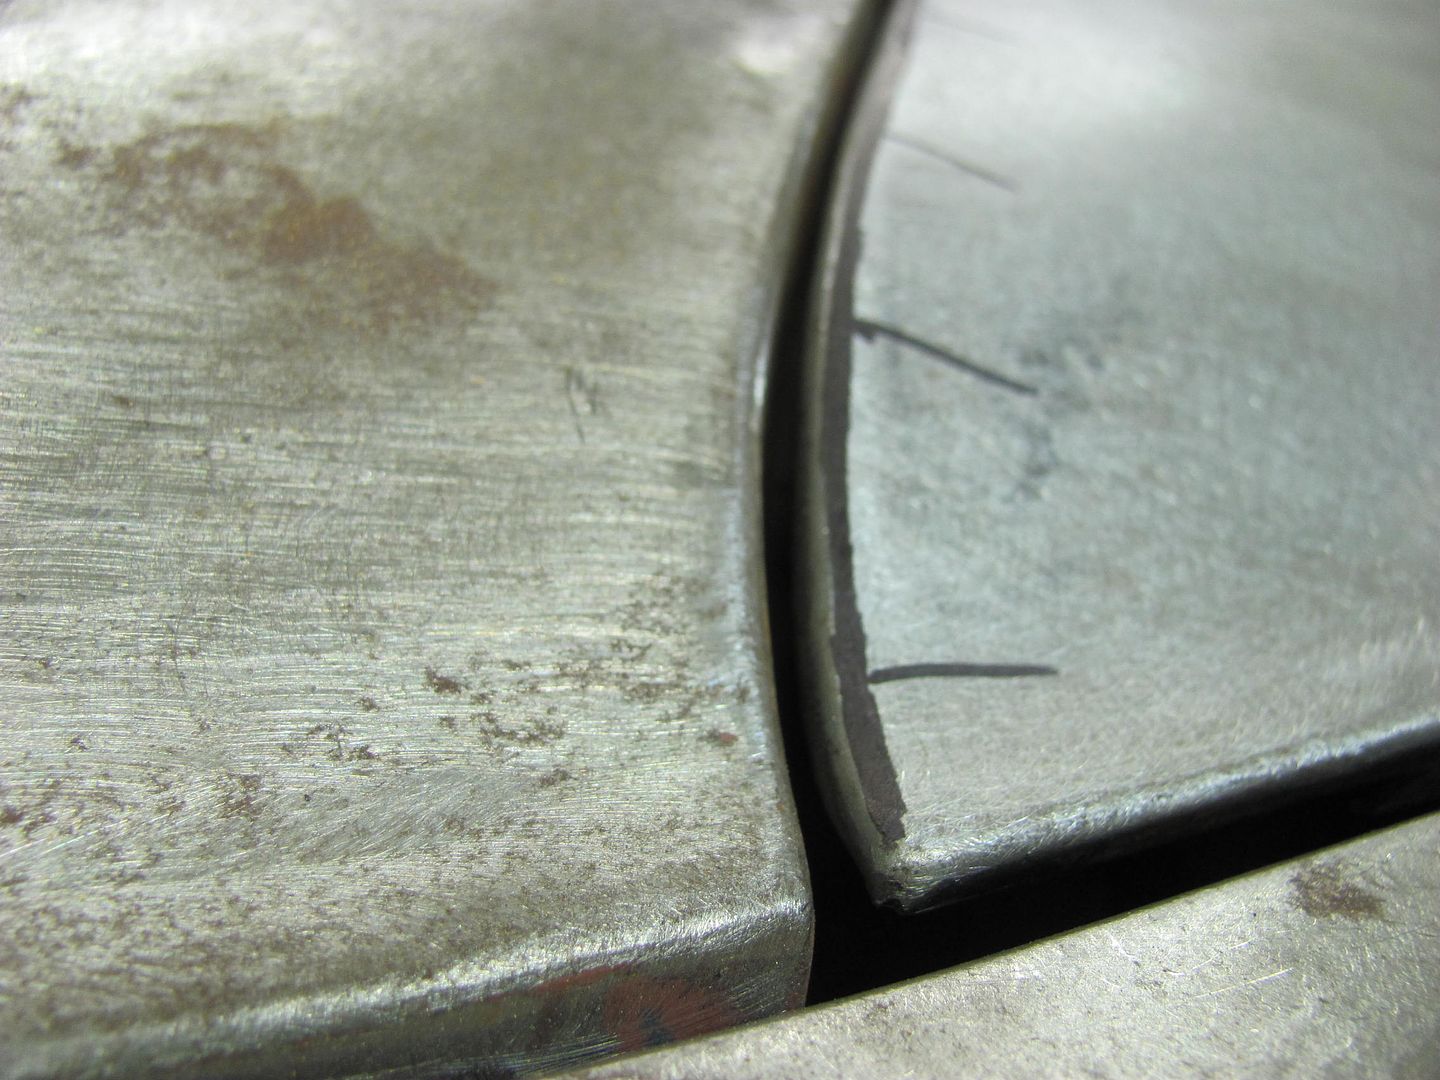 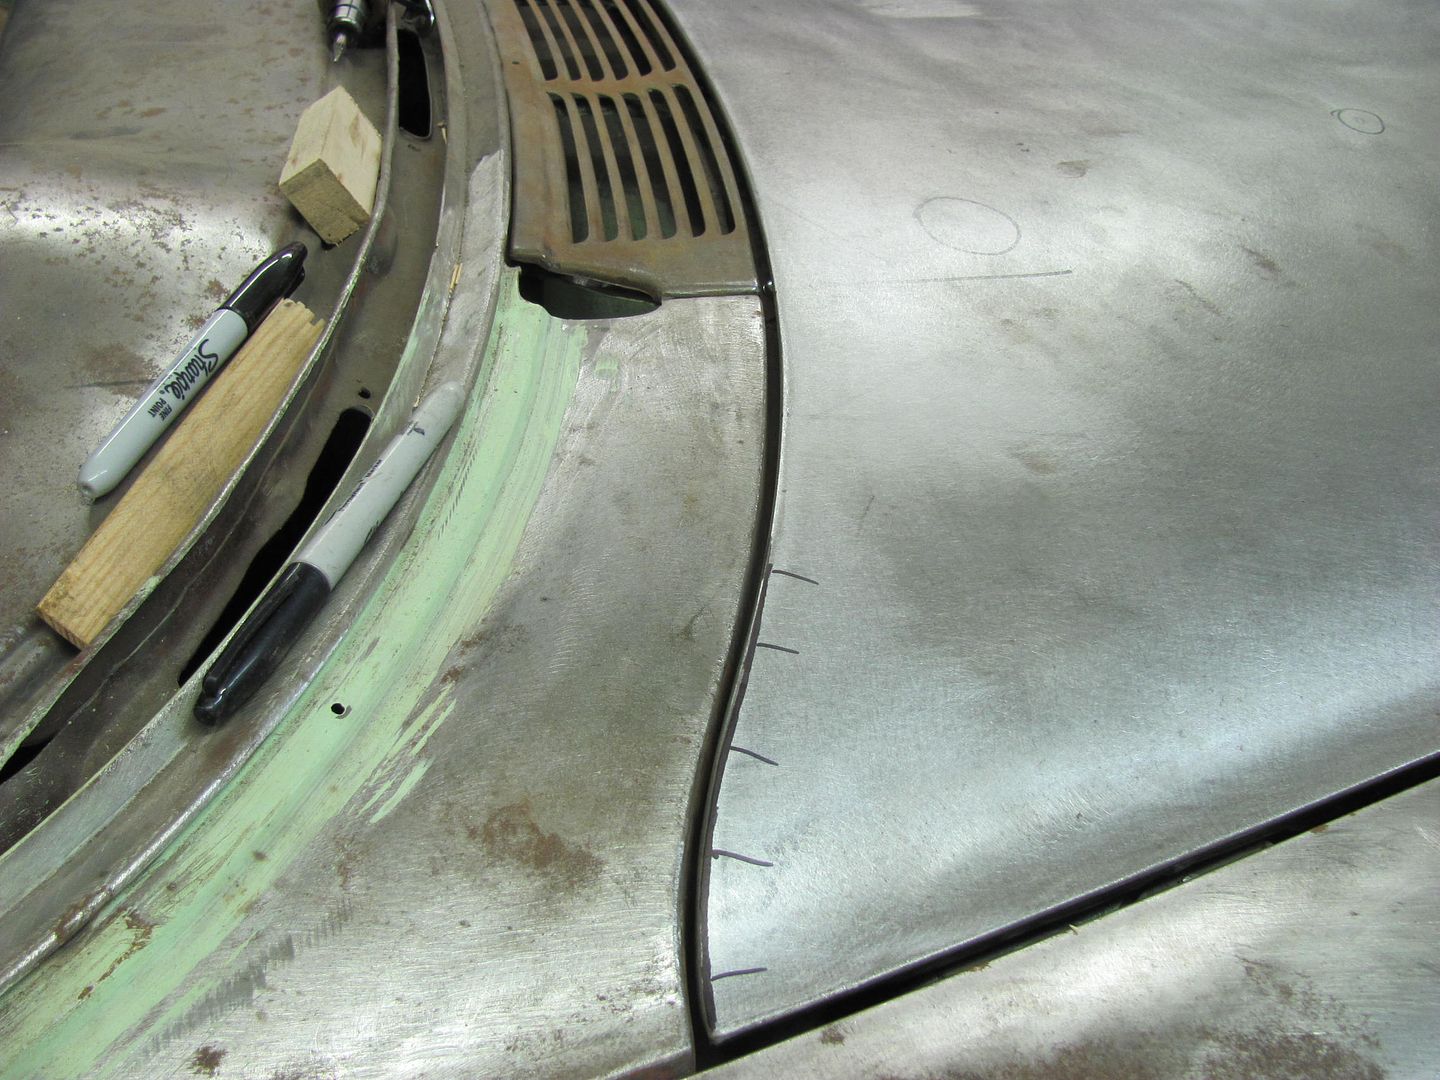 
__________________
Robert |

|

|
|
10-16-2014, 08:30 AM
|
#2 |
|
Senior Member
 Join Date: Jul 2012
Location: Oblong, Illinois
Posts: 7,017
|
Re: 55 Wagon Progress
Very nice work! Love the dent puller.
You've followed a great and logical sequence on fitting to get to this point. My luck (or lack of sequence) I could fit my hood to cowl then realize I was off up toward the front. Not wishing to be a burden, what is a quick summary of the sequence? Was it doors to body, then fenders to doors, then front of hood to fenders (fore and aft, side to side) then hood to cowl? Apologies if you have this in the build. Lotta great work and information here. Thank you for sharing. |
|
|
|
|
10-16-2014, 09:13 AM
|
#3 |
|
Registered User
Join Date: Jan 2013
Location: Leonardtown, MD
Posts: 1,636
|
Re: 55 Wagon Progress
I've always been told that on this car you should start with door fitment, then fenders and hood, working your way forward. It seems that every piece I've touched has needed some work to get good, consistent gaps. 1955 tolerances leave a lot to be desired...
__________________
Robert |
|
|
|
|
10-16-2014, 05:43 PM
|
#4 |
|
6>8 Plugless........
 Join Date: Sep 2007
Location: Prairie City, Ia
Posts: 17,141
|
Re: 55 Wagon Progress
Great work, it is looking super.
__________________
Ryan 1972 Chevy Longhorn K30 Cheyenne Super, 359 Inline 6 cylinder, Auto Trans, Tilt, Diesel Tach/Vach, Buckets, Rare Rear 4-link and air ride option Build Thread 1972 GMC Sierra Grande Longhorn 4x4 1972 Chevy Cheyenne Super K20 Long Step side tilt, tach, tow hooks, AC, 350 4 speed 1972 C10 Suburban Custom Deluxe 1969 Chevy milk truck 1971 Camaro RS 5.3 BTR STG3 Cam Super T10 1940 Ford 354 Hemi 46RH Ford 9" on air ride huge project Tired of spark plugs? Check this out. |
|
|
|
|
10-18-2014, 09:34 PM
|
#5 |
|
Registered User
Join Date: Jan 2013
Location: Leonardtown, MD
Posts: 1,636
|
Re: 55 Wagon Progress
Thanks!
More progress today, part of our hood fitment has been hindered by the hinges. When closing the hood they didn't want to close properly and the back corners of the hood had to be pushed down by hand. Don (acardon) on Trifive website suggested replacing the original shouldered rivets with some bolts and sleeves. We hadn't heard anything promising with the reproduction hinges, so what did we have to lose. First to come up with a hinge spring removal tool...    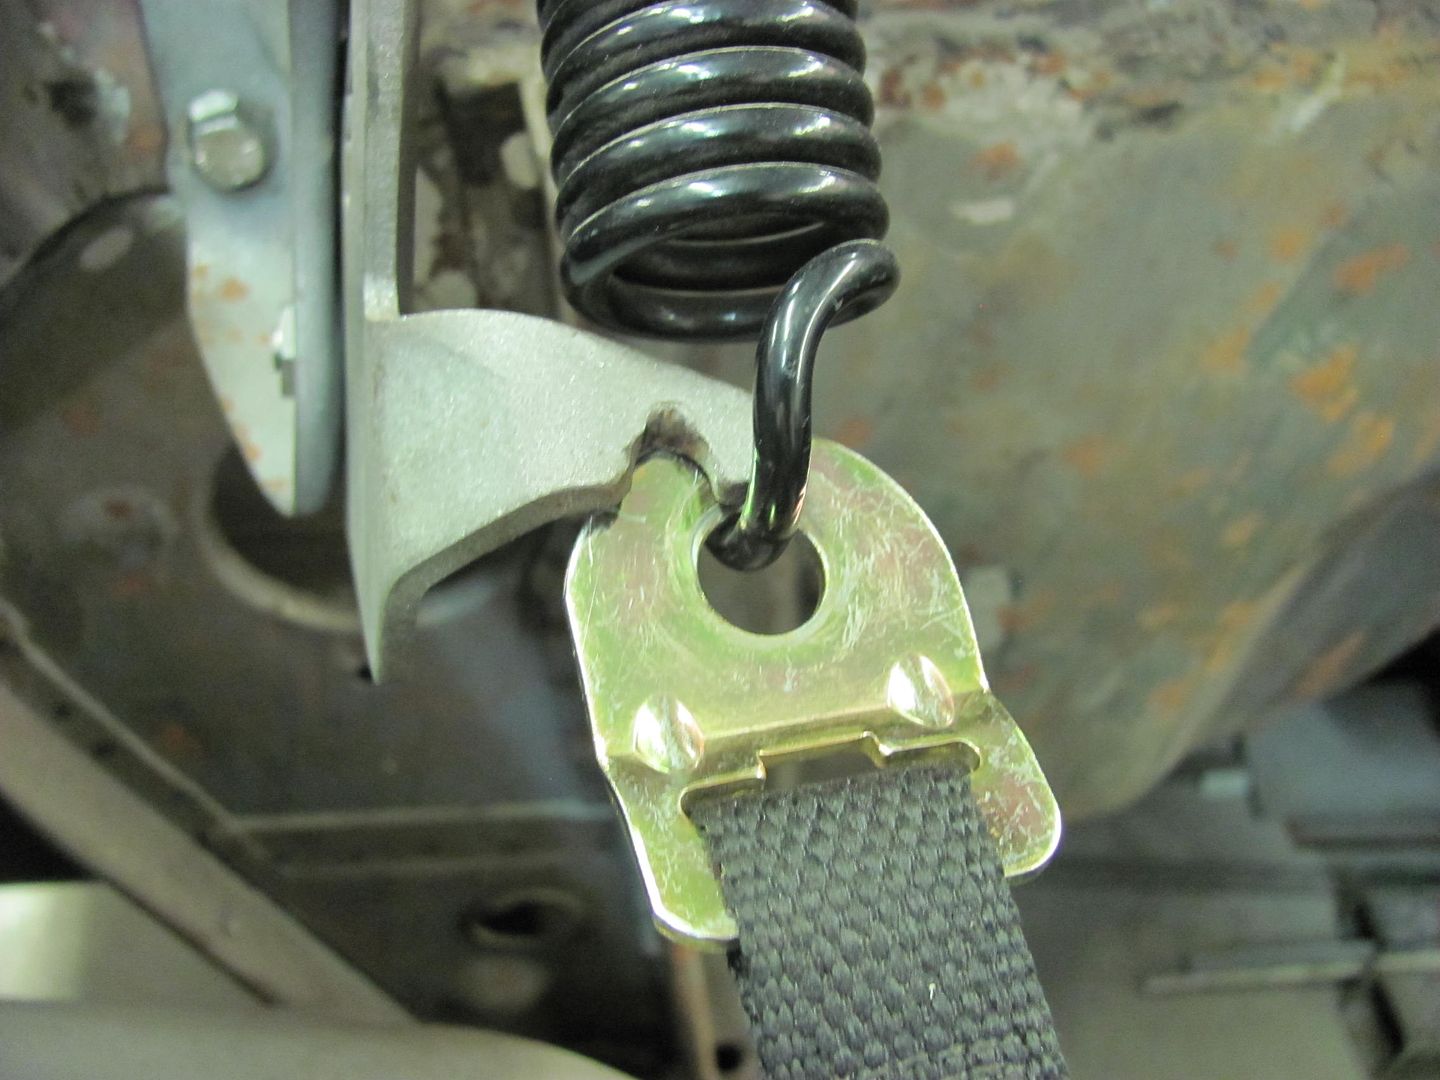 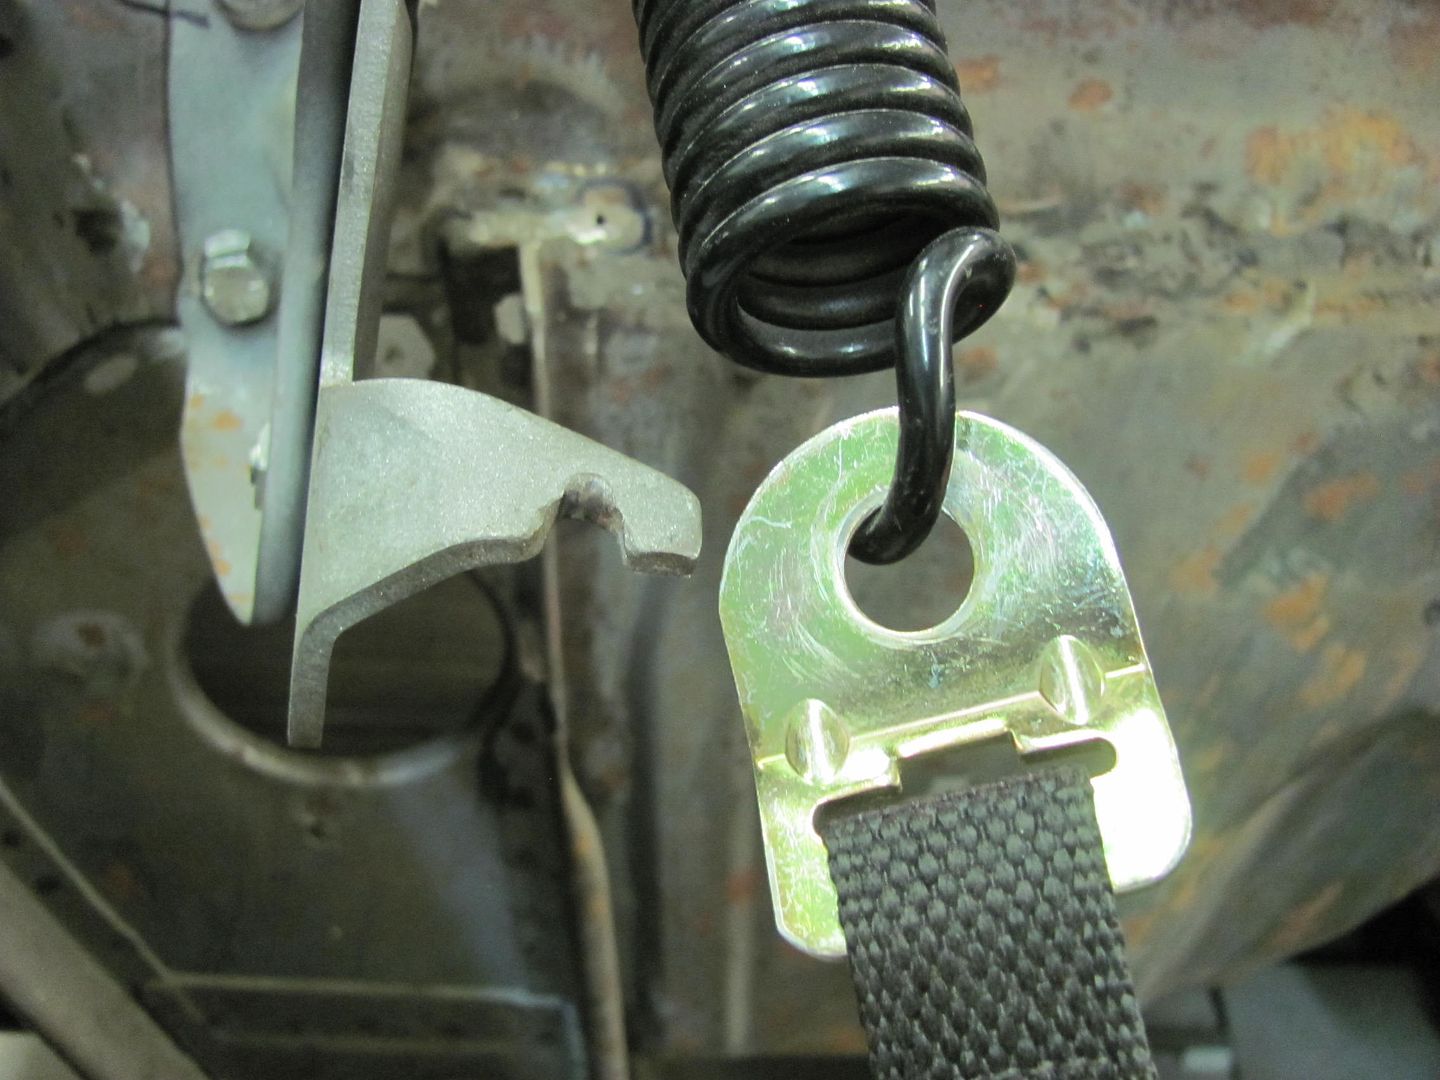 Now to disassemble the hinge and remove the rivets.. 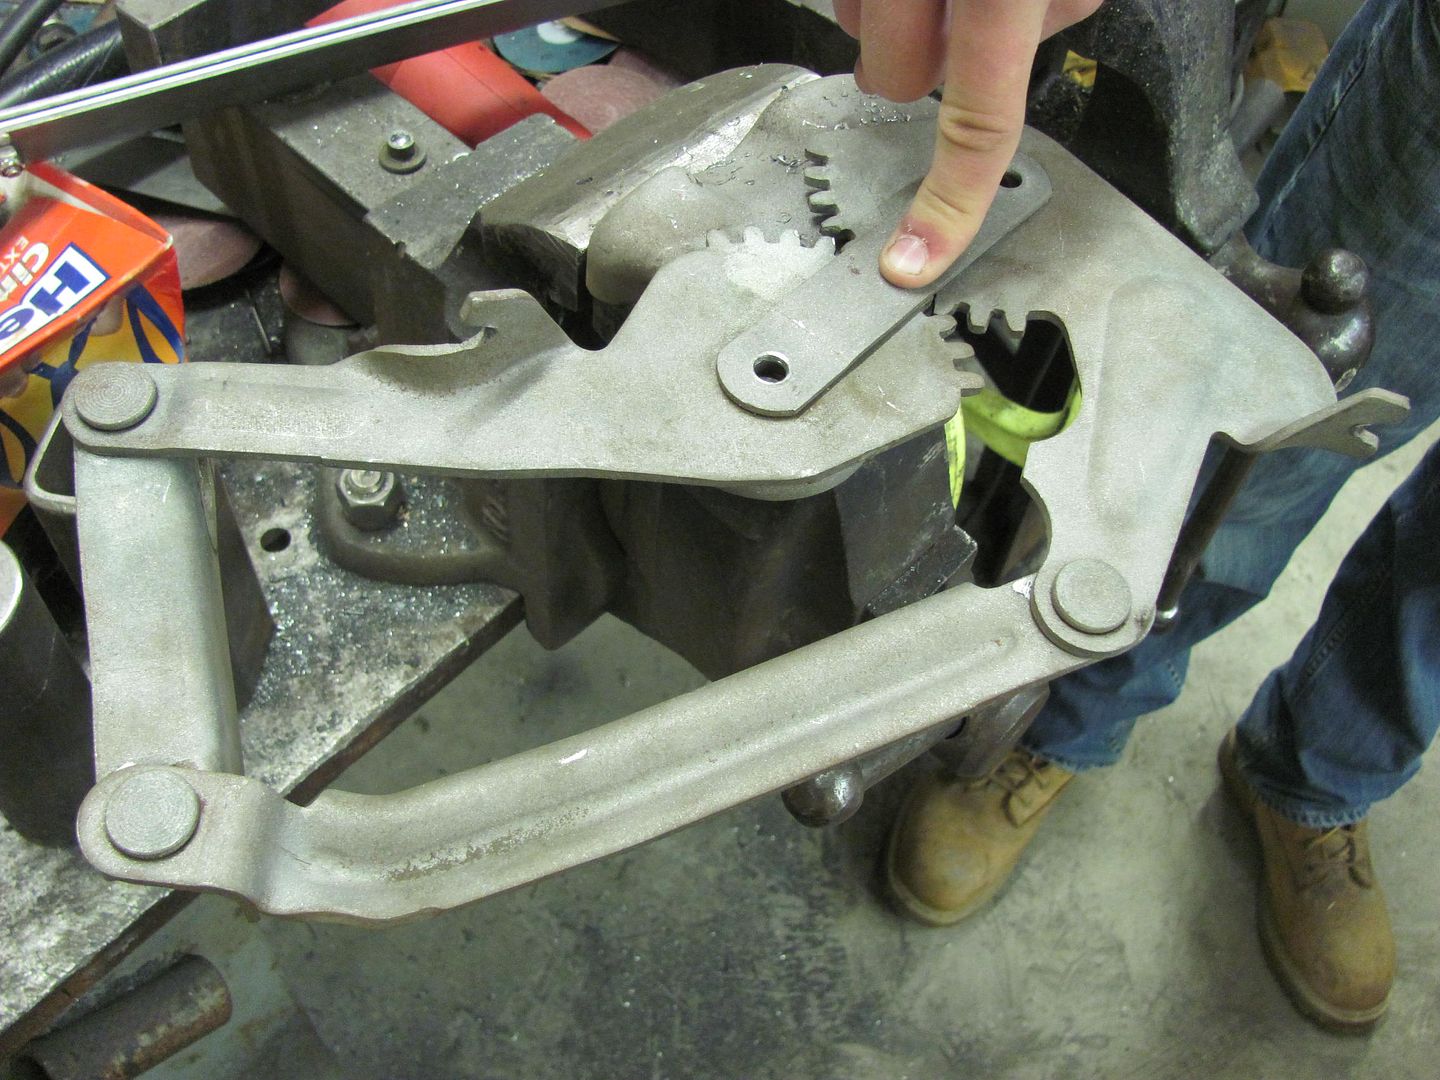 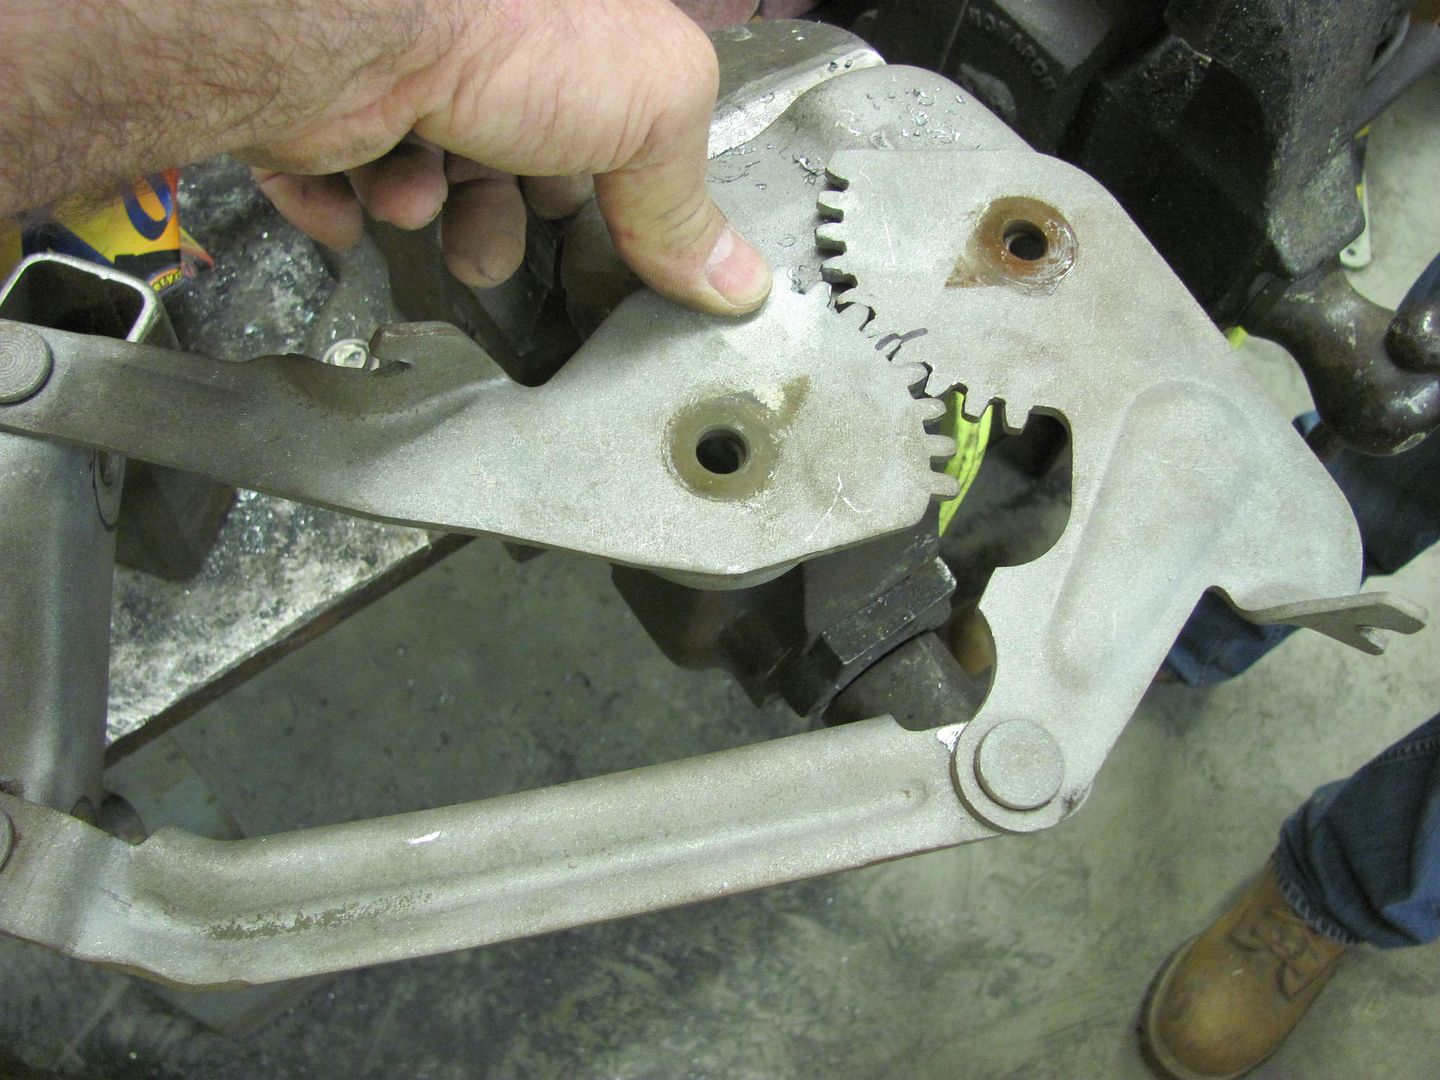 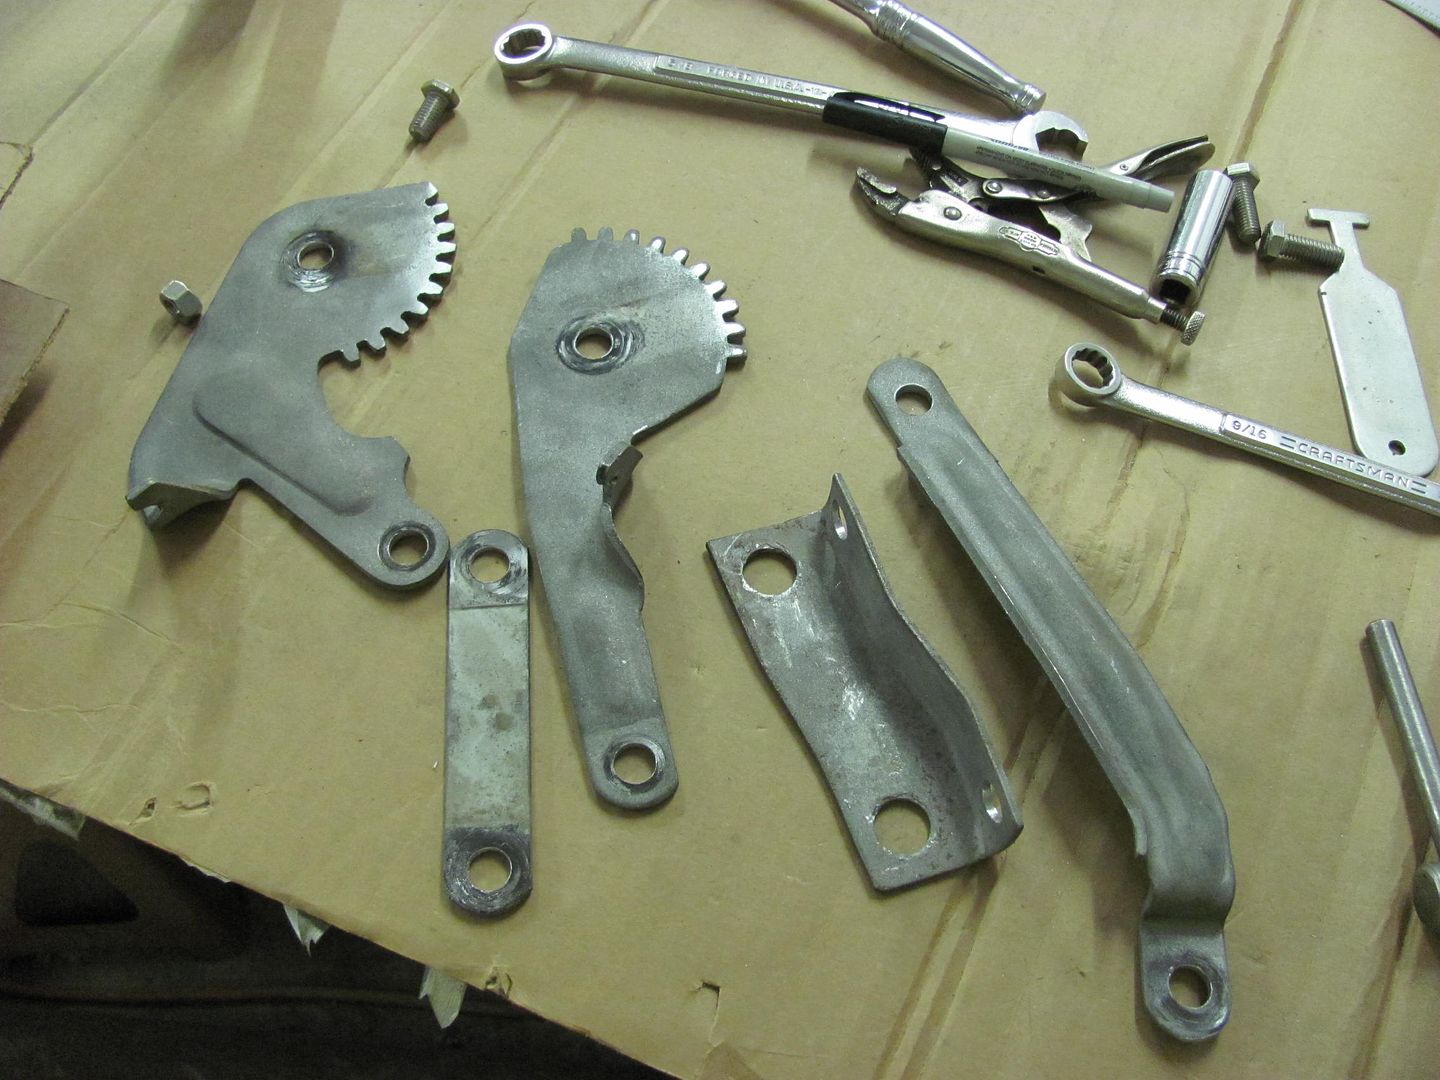 Some 3/8-16 rivnuts were used to make some spacers, and used the lathe to trim them to size, allowing a few thousandths clearance. All of the rivet holes were drilled out for the spacers.. 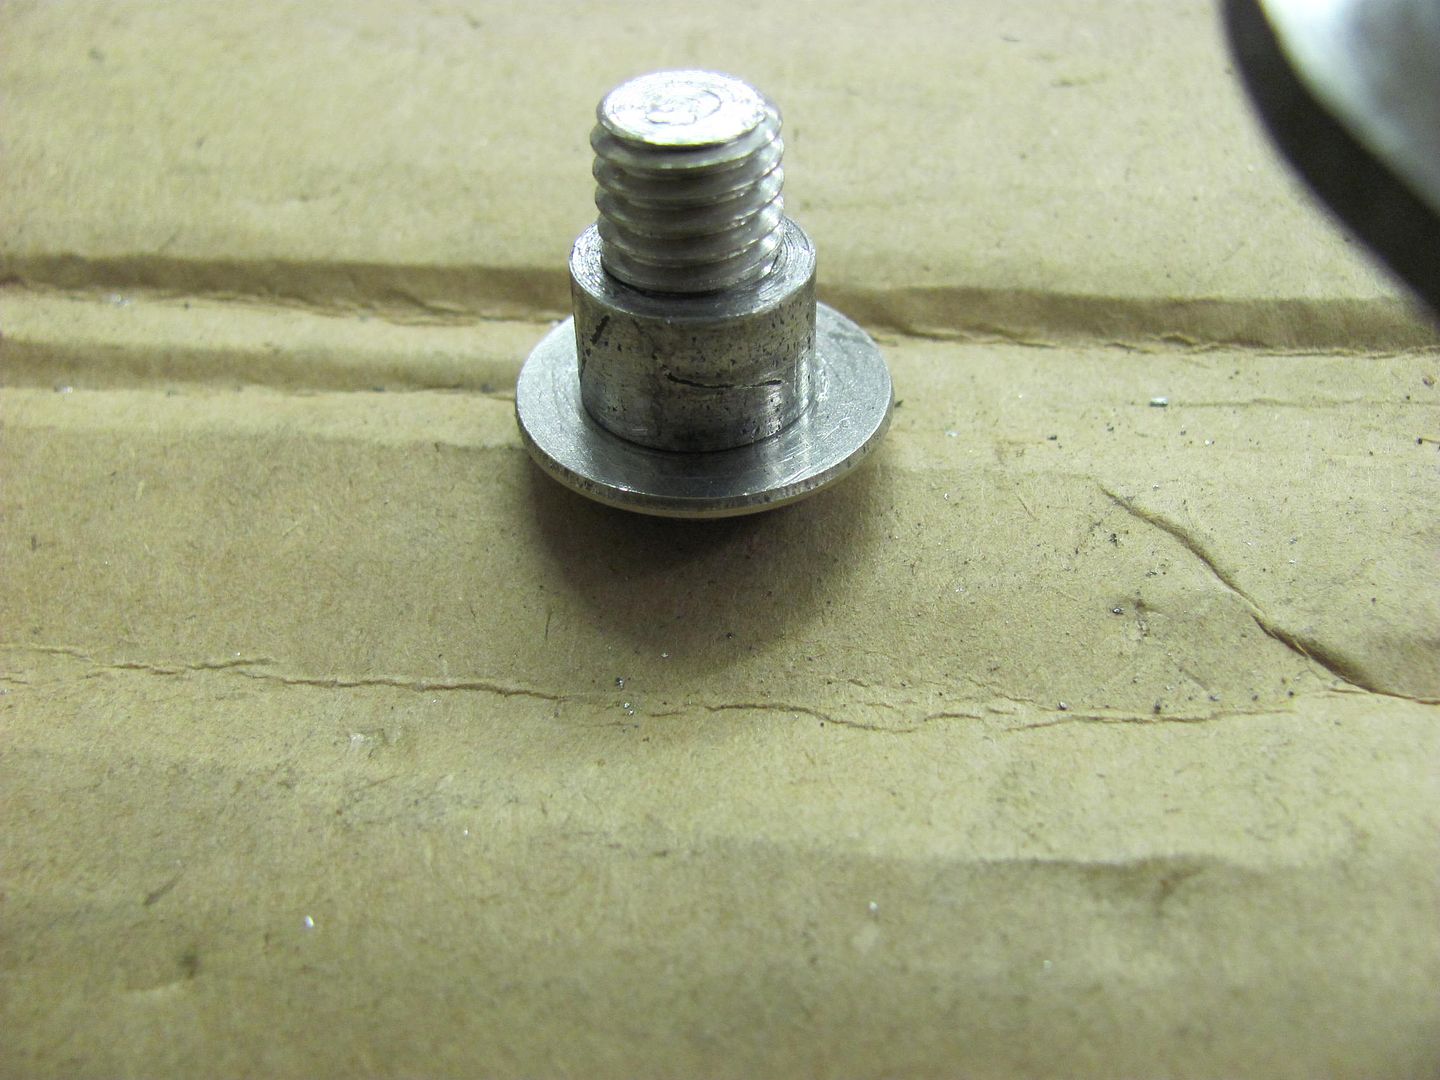 Here are the results, click on the pic for video  Thanks much to Don for the suggestion!
__________________
Robert |
|
|
|
|
10-18-2014, 09:51 PM
|
#6 |
|
Registered User
Join Date: May 2007
Location: Deale Md
Posts: 4,663
|
Re: 55 Wagon Progress
Solved that problem.
__________________
James 63 GMC V6 4speed carryall 65 chevy swb bbw V8 auto 68 K20 327/4 speed, buddy buckets 2002 GMC CC Dually Duramax 64 GMC lwb 3/4 V6 4speed SOLD 66 GMC swb bbw buddy buckets SOLD IG duallyjams The only thing that stays the same is constant change! |
|
|
|
|
10-20-2014, 04:58 AM
|
#7 |
|
Registered User
Join Date: Oct 2007
Location: Spanaway
Posts: 8,451
|
Re: 55 Wagon Progress
Nice work! I found a company that rebuilds hood hinges, obviously you don't need the link. LOL!
__________________
Mike. Swamp Rat build thread : http://67-72chevytrucks.com/vboard/s...d.php?t=595019 72 3/4T 4X4 4" BDS Lift 33" BFG's |
|
|
|
|
10-20-2014, 07:25 PM
|
#8 |
|
Senior Member
Join Date: Jul 2012
Location: Oblong, Illinois
Posts: 7,017
|
Re: 55 Wagon Progress
Great idea and nice work. That is the smoothest operating hood hinge I've ever seen.
|
|
|
|
|
10-22-2014, 10:59 PM
|
#9 |
|
Registered User
Join Date: Jan 2013
Location: Leonardtown, MD
Posts: 1,636
|
Re: 55 Wagon Progress
Thanks for the comments guys. Yeah, real pleased with how the hood is now closing.
Tonight we worked on some more front end pieces. The drivers side inner fender extension had been slightly mangled, looks like perhaps a tire ran over road kill or something and threw it up, breaking some spot welds.   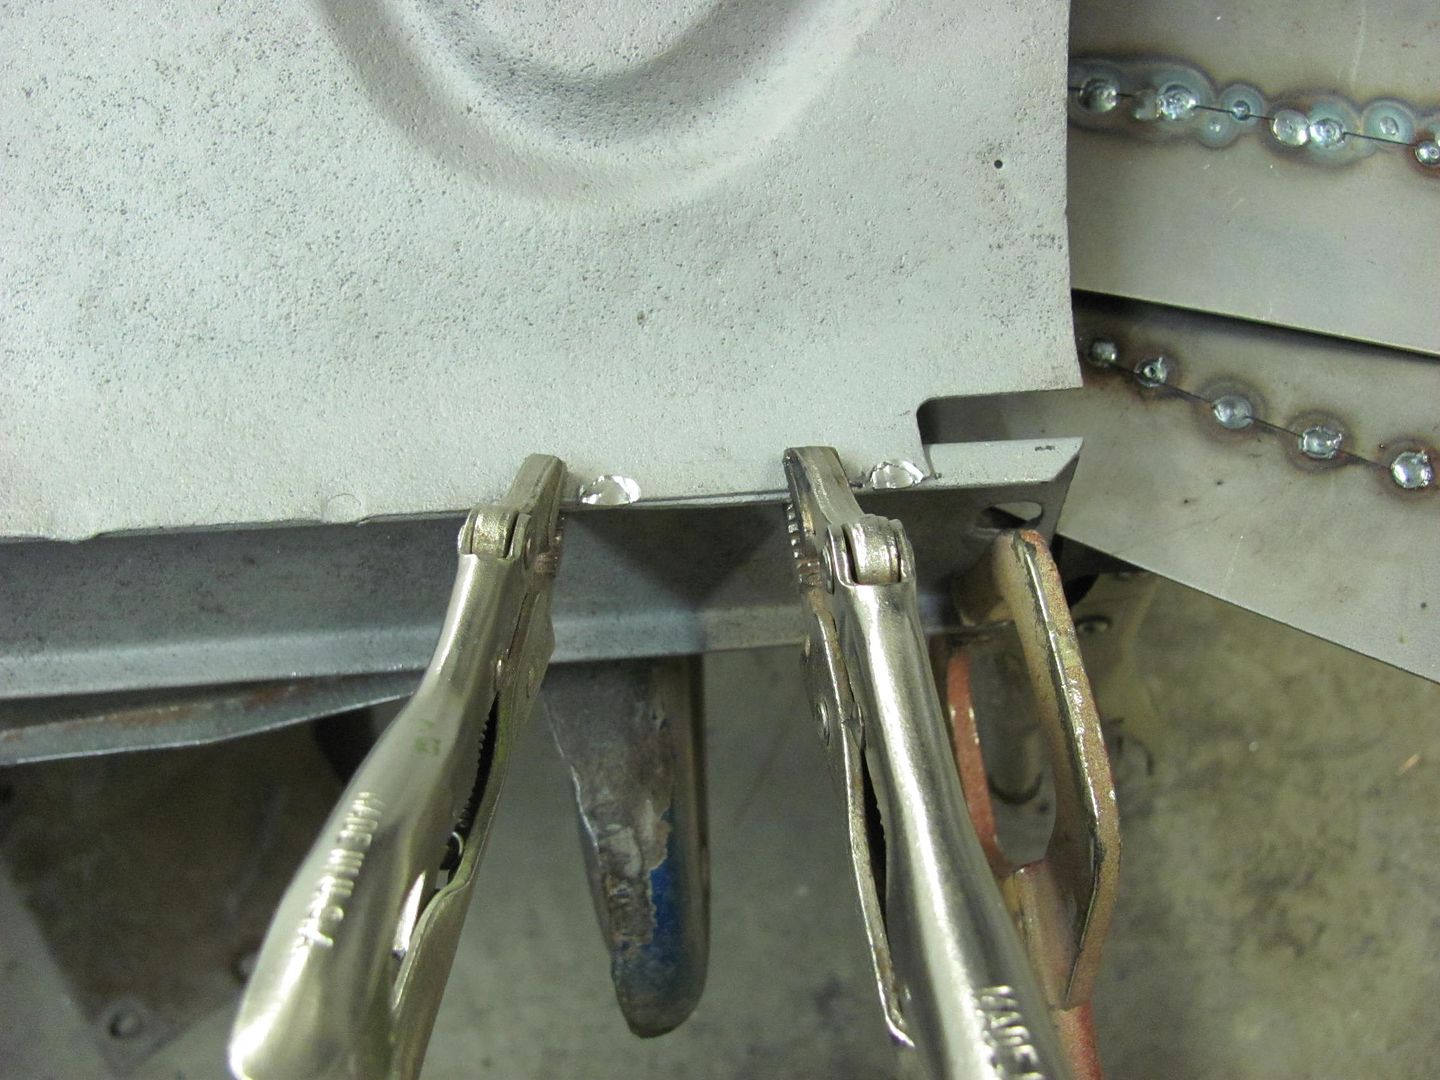 Kyle had already worked on straightening the lower bracket, and after I re-welded the broken spot welds, he got into some metal bumping to repair the rest of the mangle in the sheet metal. Meanwhile, with the hood fitment about done it was time to weld up the rear corners after the rear flanges in the corners had been persuaded forward to provide consistent gap across the back edge of the hood. The Crud Thug was used to clean out the inside corners for welding..  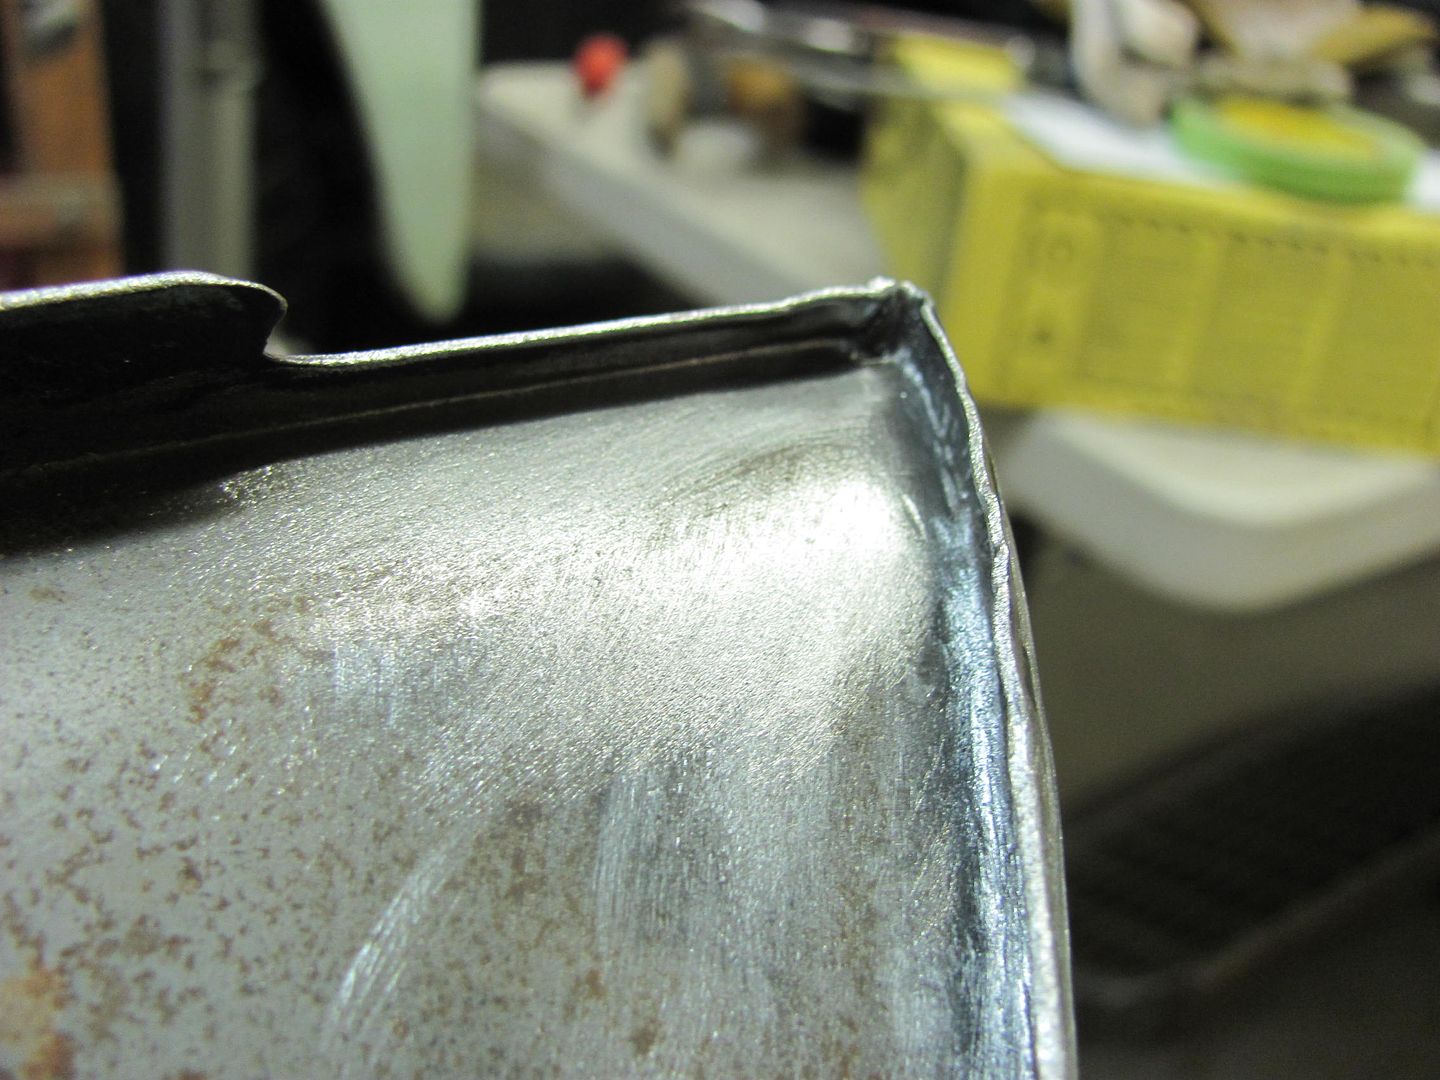 A copper flat bar was trimmed to fit the inside corner snugly to help manage weld penetration where inside cleanup wouldn't be needed. 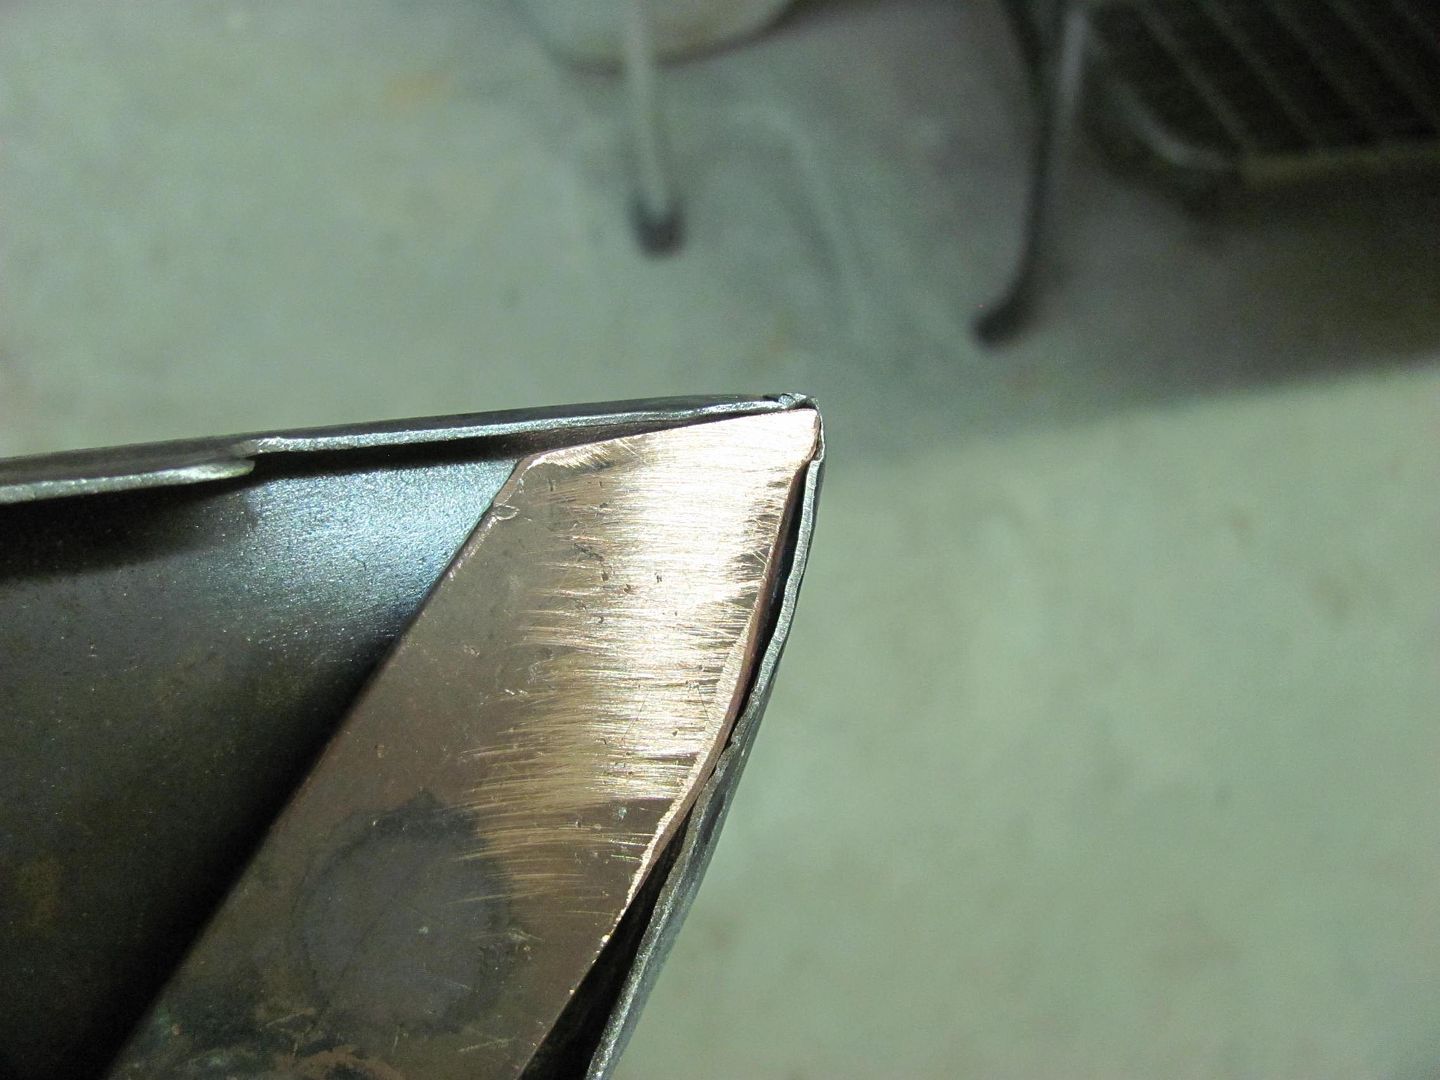 Welded and dressed.... 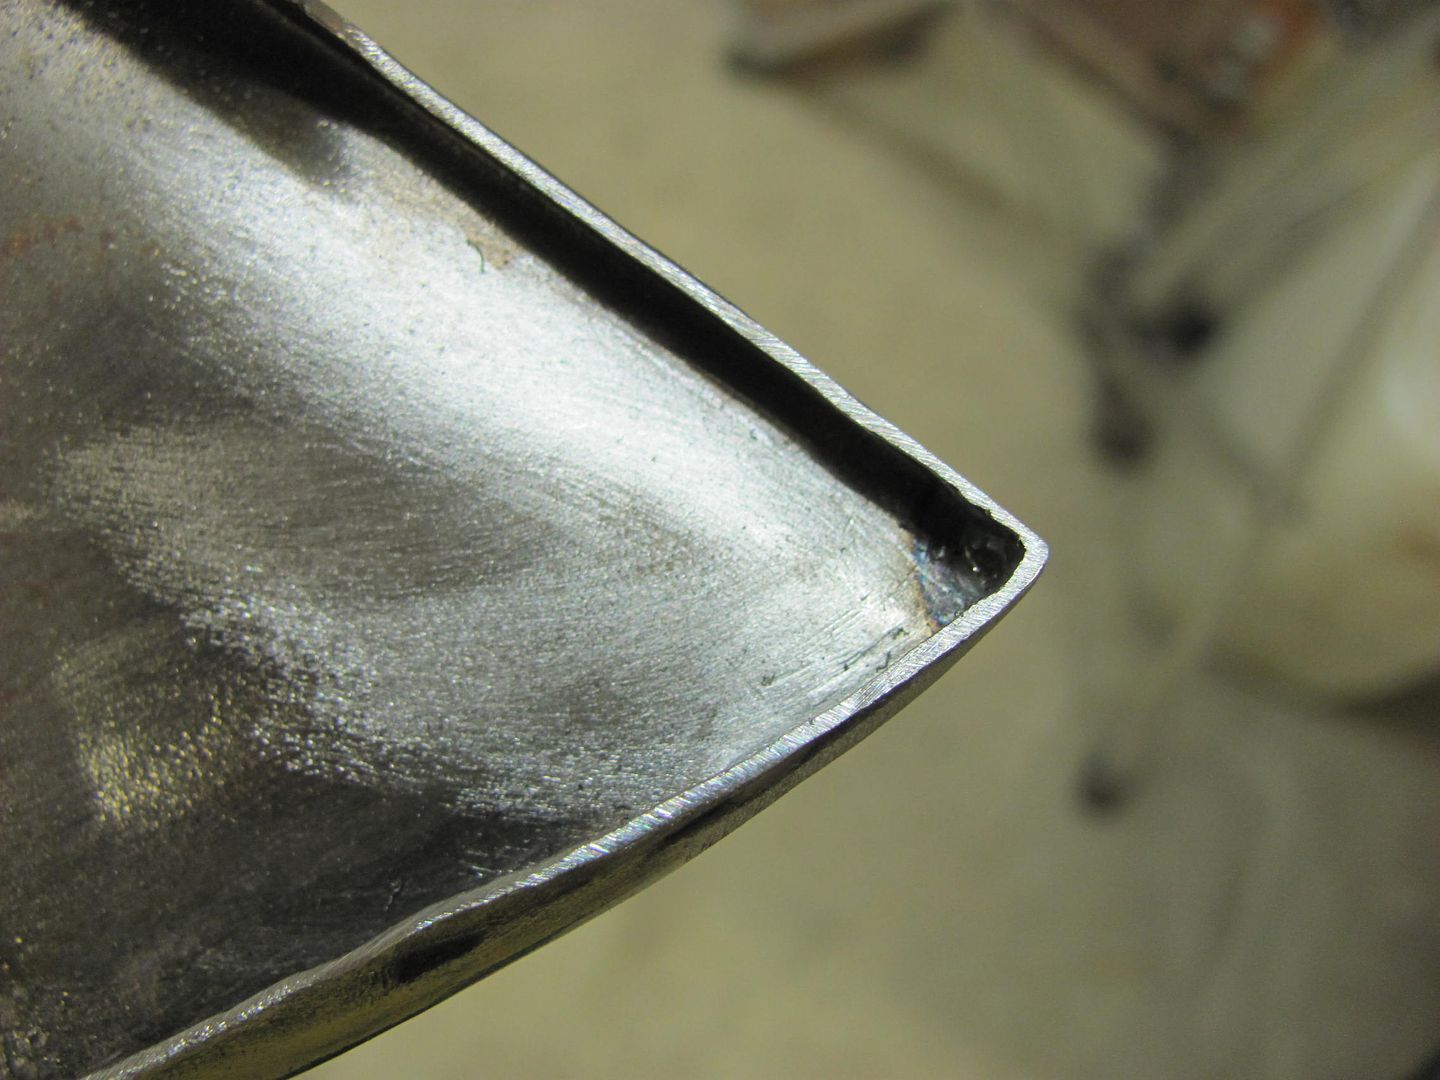 Then the peak on the hood was addressed, after peaking the front of the hood awhile back I had yet to fix the low areas. A consistent crown would be essential on provide good support for the hood, and there were a few low spots along the peak. To be able to match up the low areas, a magnetic rule was placed on the underside and top. After sighting the peak and finding the lows, they were marked and the measurement notated.  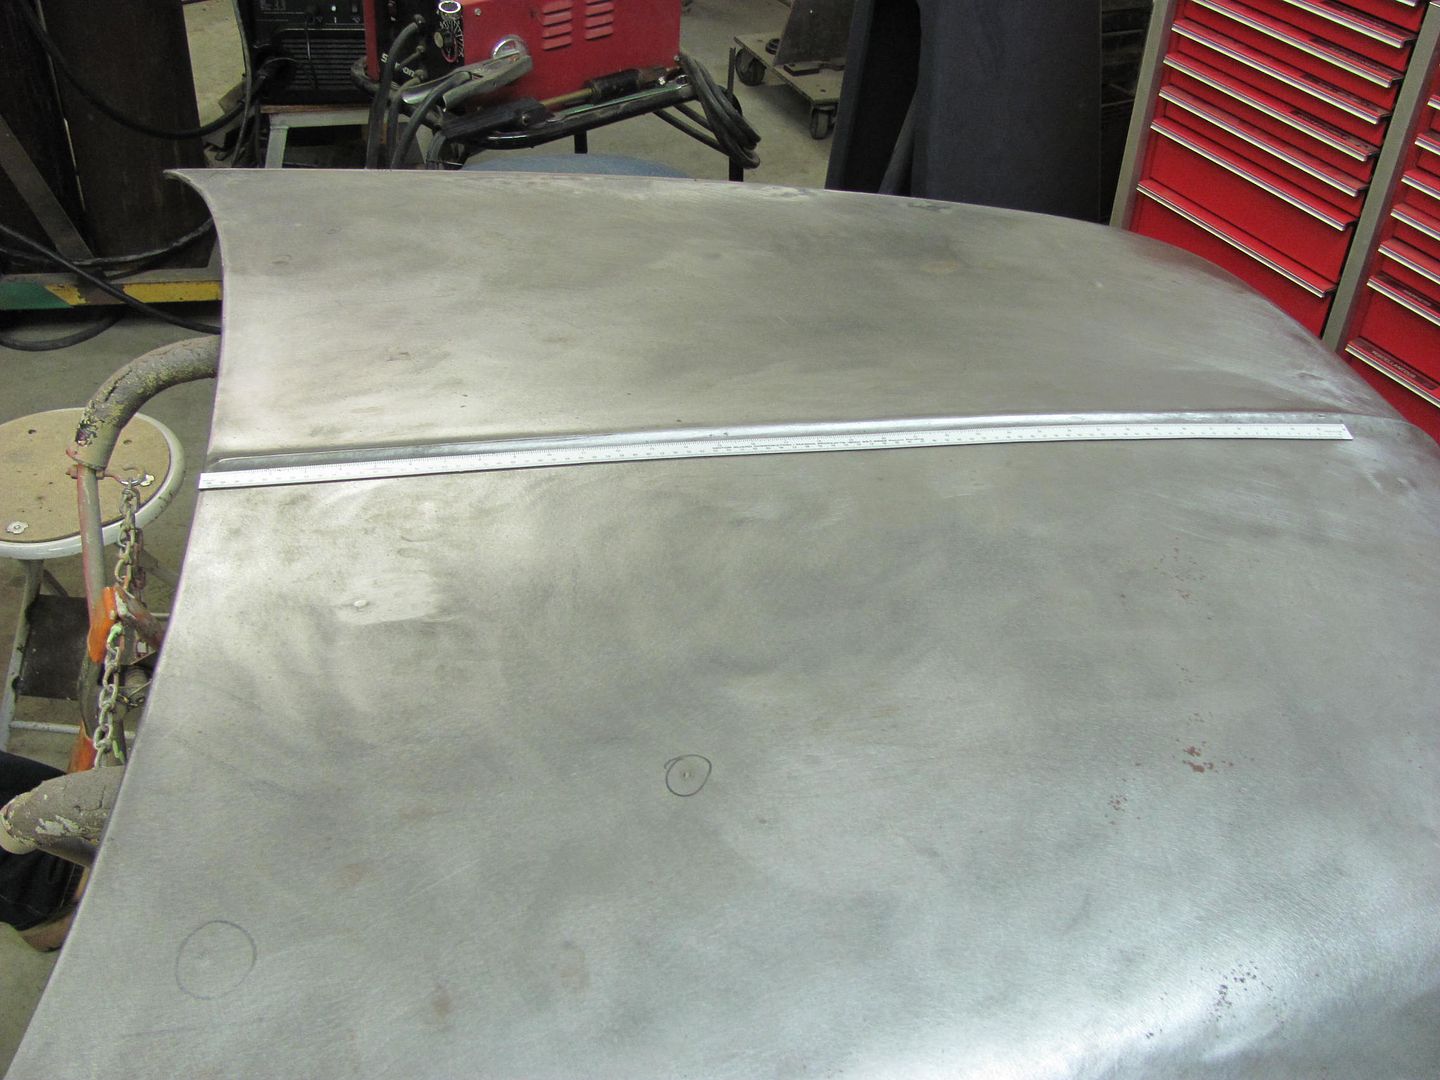 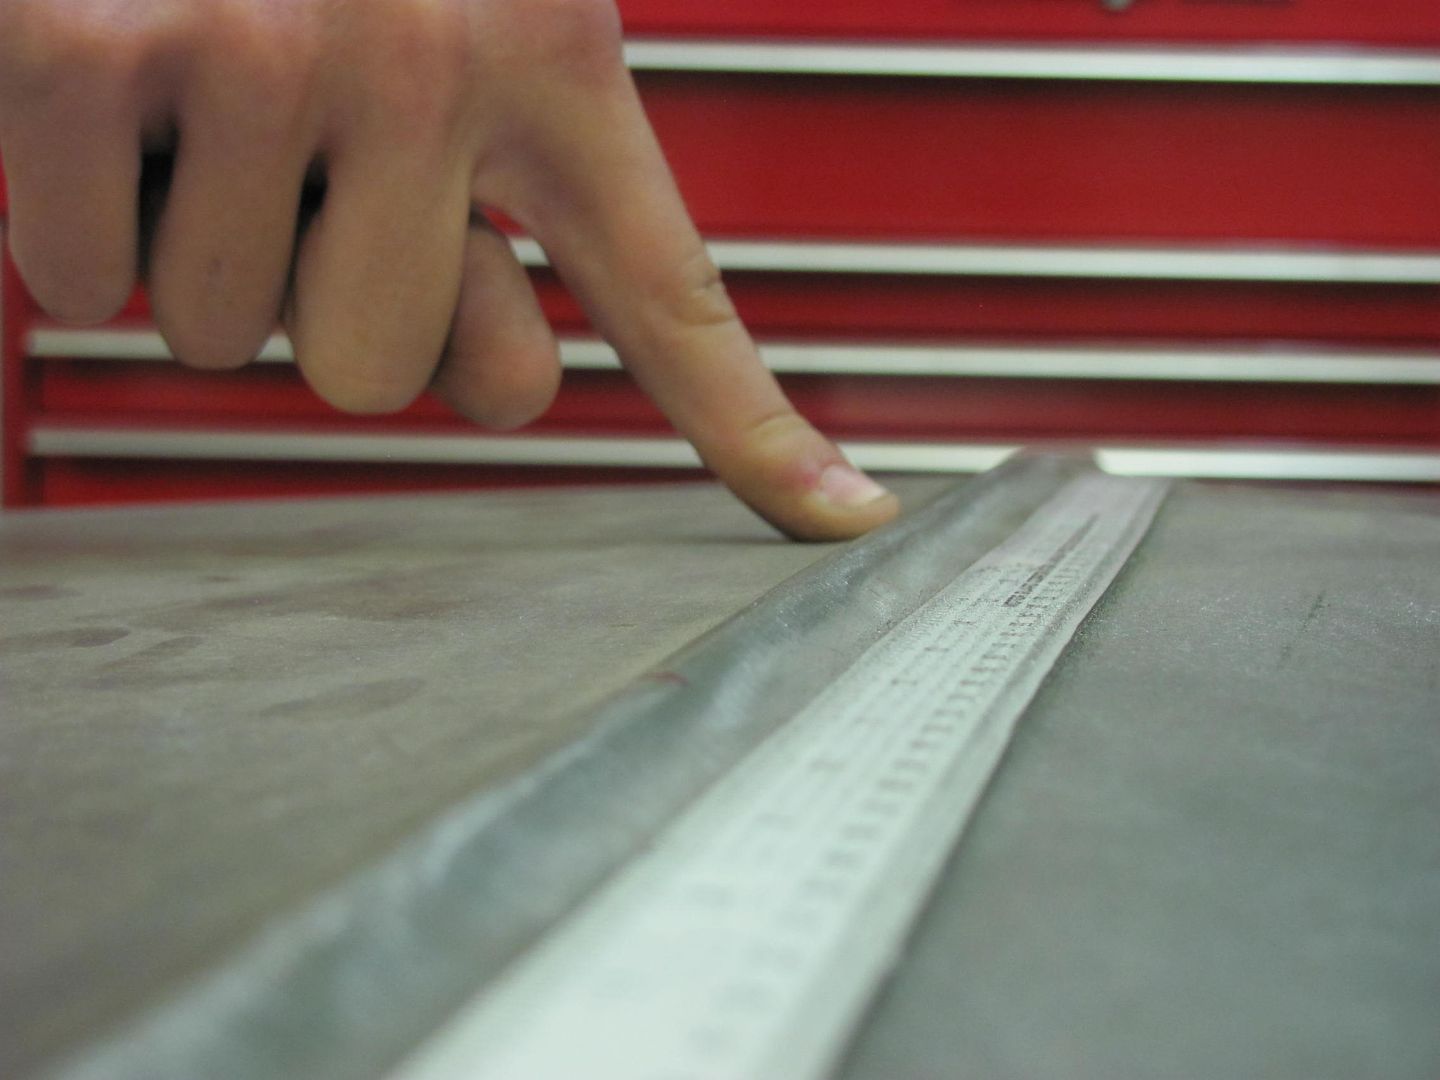 Flipping the hood over, the same dimensioned areas were persuaded downward. A screen door tool was used, but proved to be rather ineffective. 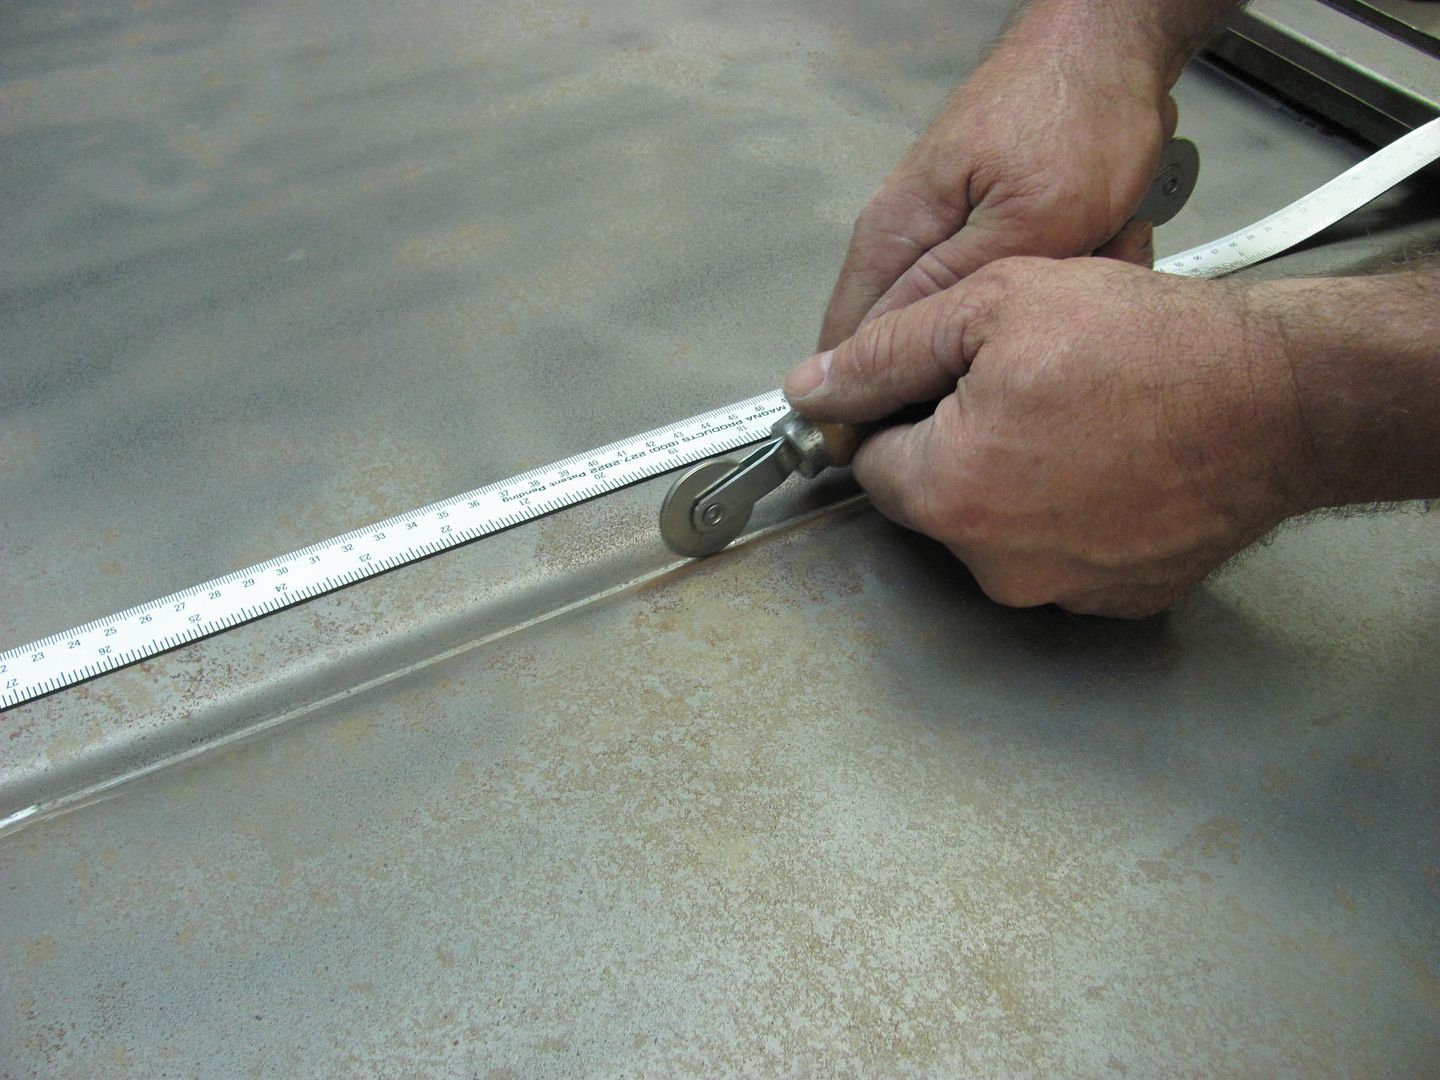 Time to break out the heavy duty implements, a rounded/radiused cold chisel and a dead blow hammer, along with the small shot bag held against the opposite side.... 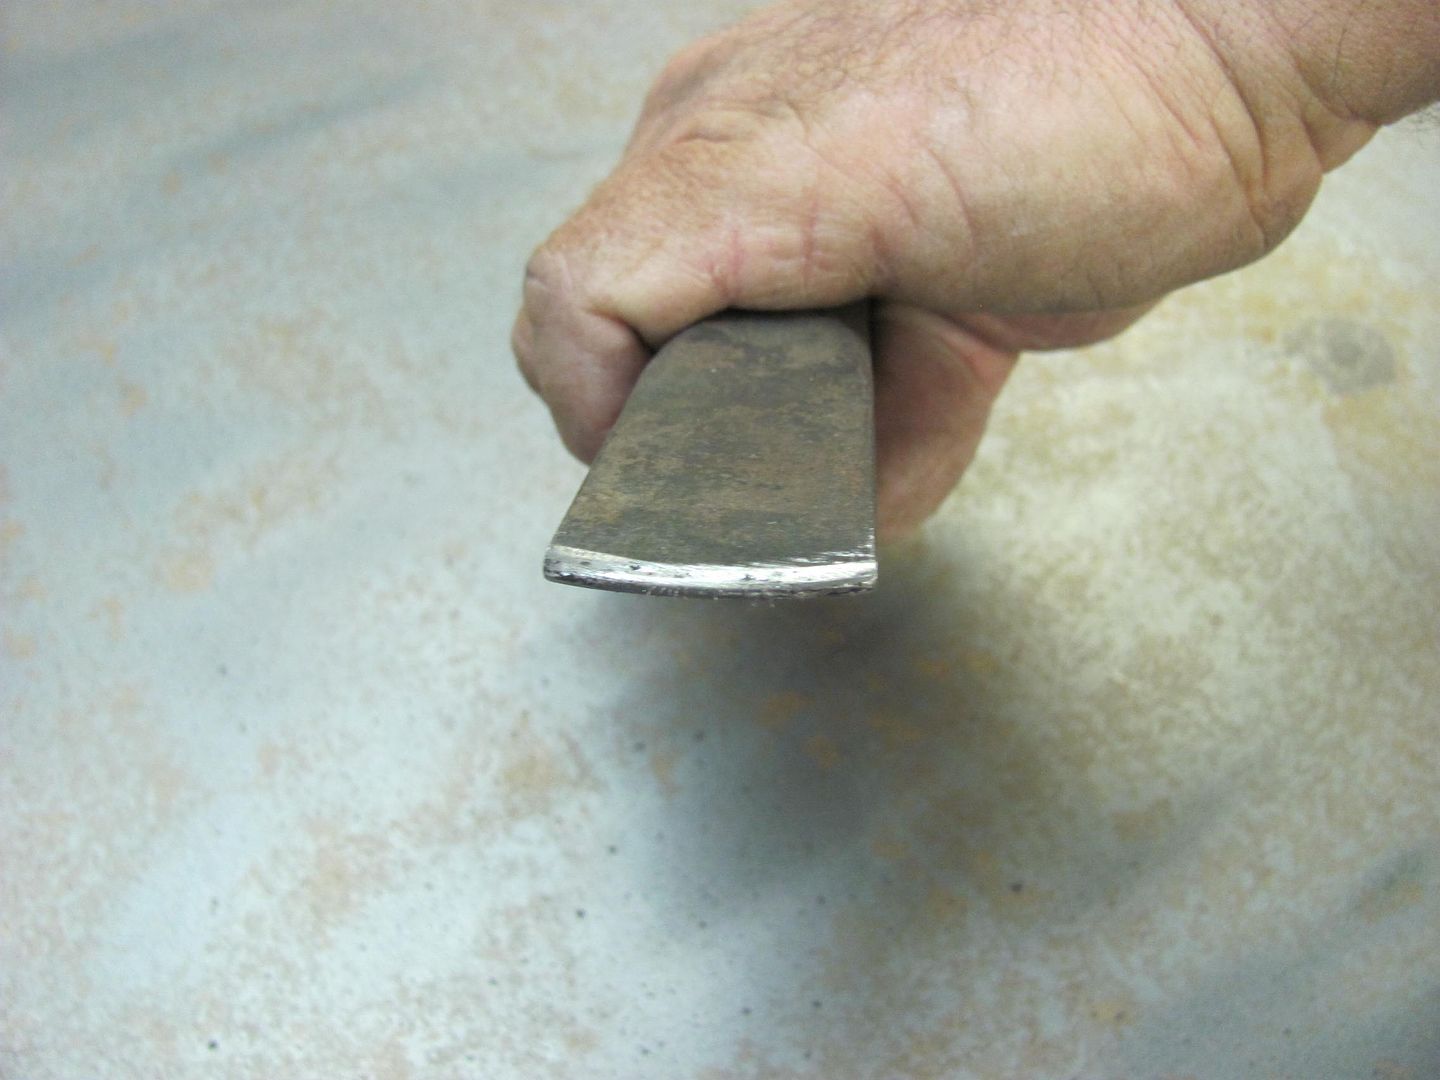 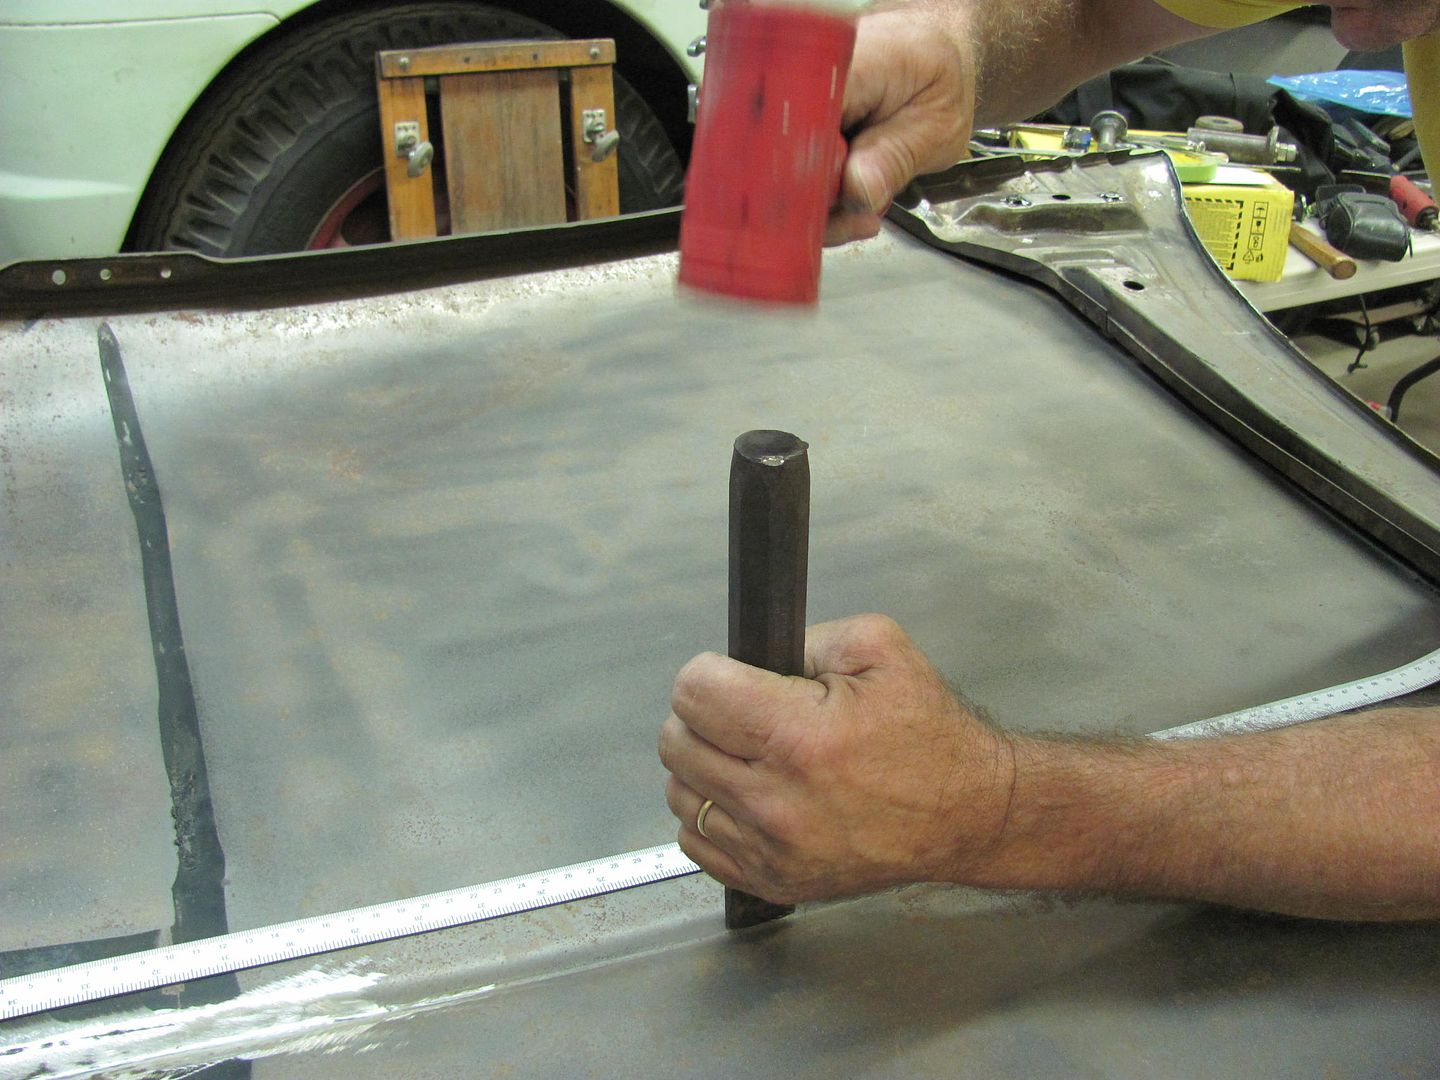 That worked better, and showed dramatic improvement. Still a bit more to do, but we're running out of time this evening, so we'll finish this up on Saturday..
__________________
Robert |
|
|
|
|
10-23-2014, 06:03 PM
|
#10 |
|
6>8 Plugless........
Join Date: Sep 2007
Location: Prairie City, Ia
Posts: 17,141
|
Re: 55 Wagon Progress
Nice work on the hood hinges, and awesome metal work again. Very nice.
__________________
Ryan 1972 Chevy Longhorn K30 Cheyenne Super, 359 Inline 6 cylinder, Auto Trans, Tilt, Diesel Tach/Vach, Buckets, Rare Rear 4-link and air ride option Build Thread 1972 GMC Sierra Grande Longhorn 4x4 1972 Chevy Cheyenne Super K20 Long Step side tilt, tach, tow hooks, AC, 350 4 speed 1972 C10 Suburban Custom Deluxe 1969 Chevy milk truck 1971 Camaro RS 5.3 BTR STG3 Cam Super T10 1940 Ford 354 Hemi 46RH Ford 9" on air ride huge project Tired of spark plugs? Check this out. |
|
|
|
|
10-23-2014, 08:13 PM
|
#11 |
|
Registered User
Join Date: May 2007
Location: Deale Md
Posts: 4,663
|
Re: 55 Wagon Progress
This thread will live for ever as a reference for metalwork.
__________________
James 63 GMC V6 4speed carryall 65 chevy swb bbw V8 auto 68 K20 327/4 speed, buddy buckets 2002 GMC CC Dually Duramax 64 GMC lwb 3/4 V6 4speed SOLD 66 GMC swb bbw buddy buckets SOLD IG duallyjams The only thing that stays the same is constant change! |
|
|
|
|
10-26-2014, 12:09 AM
|
#12 |
|
Registered User
Join Date: Jan 2013
Location: Leonardtown, MD
Posts: 1,636
|
Re: 55 Wagon Progress
Thanks guys!
More progress today, some of the factory hardware for the inner fender and inner fender extensions used sheet metal screws and clips that had been spot welded on. We plan on using machine screws, so the clips were drilled out for 1/4-20 rivet nuts. 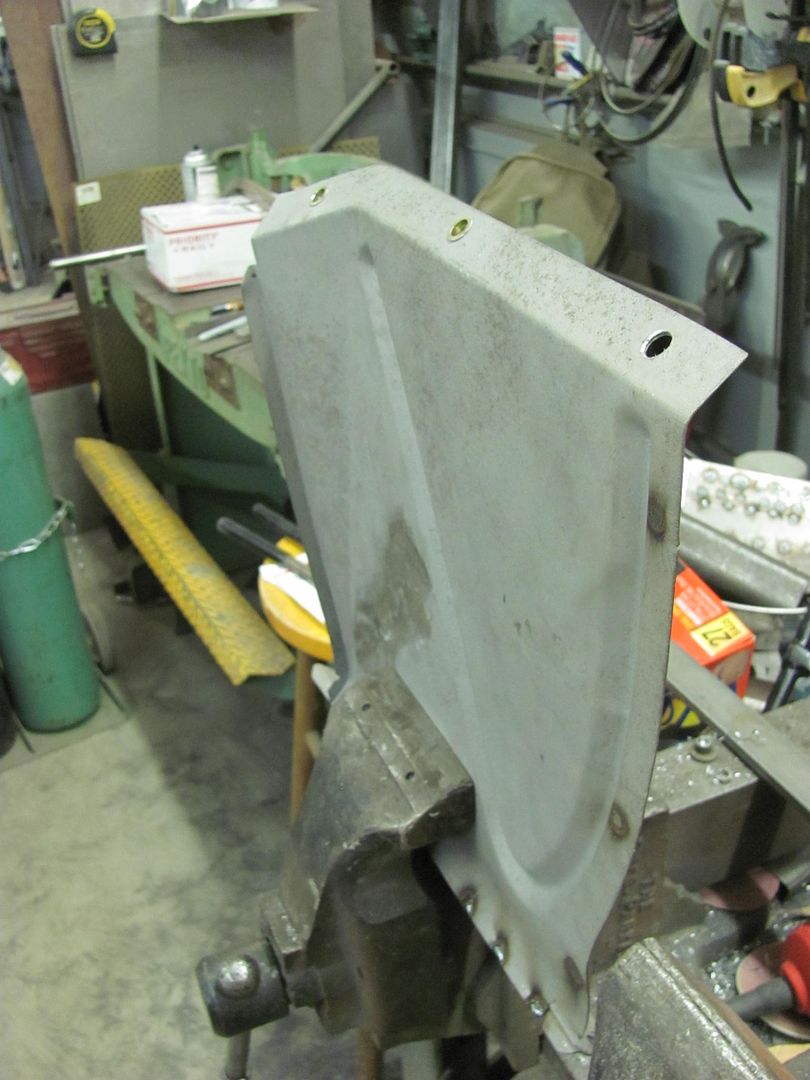 Kyle used the BF Goodrich installing tool. First the rivet nut is threaded onto the tool for full thread engagement.. 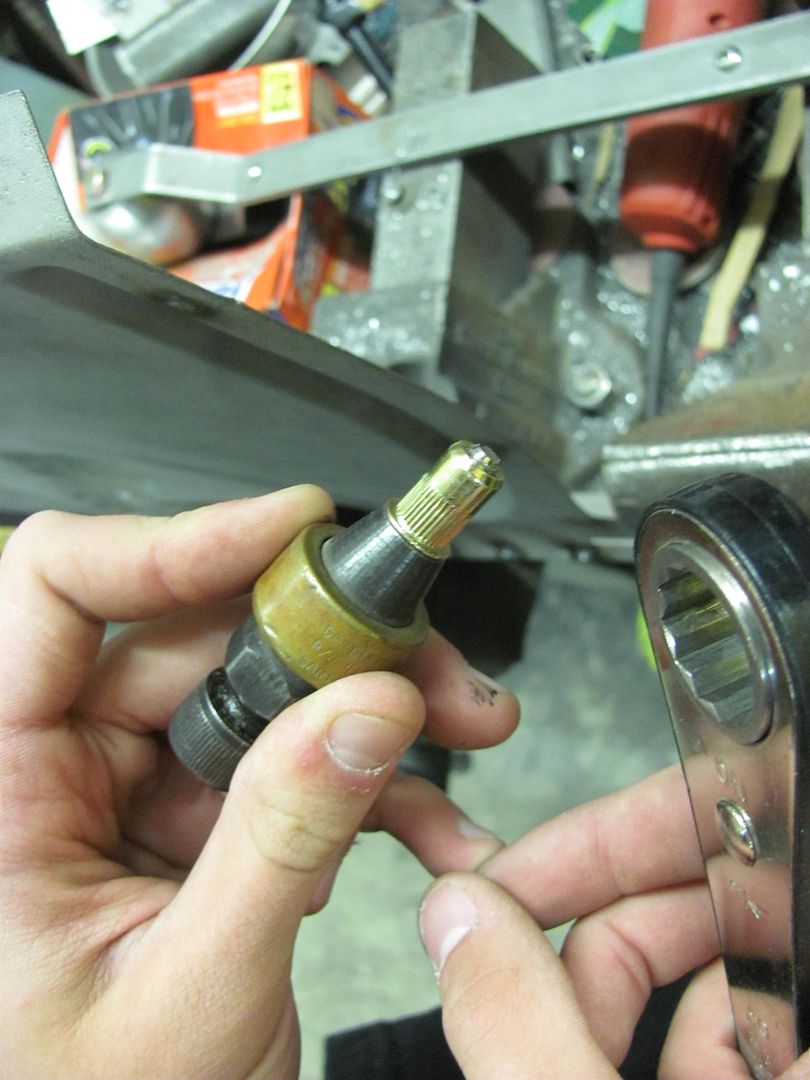 Next, the allen wrench is held stationary, and is also held to stabilize the tool perpendicular to the work piece. The ratchet wrench adds the rotational movement where the "jack screw" draws up the rivet nut, similar to installing a pop rivet.. 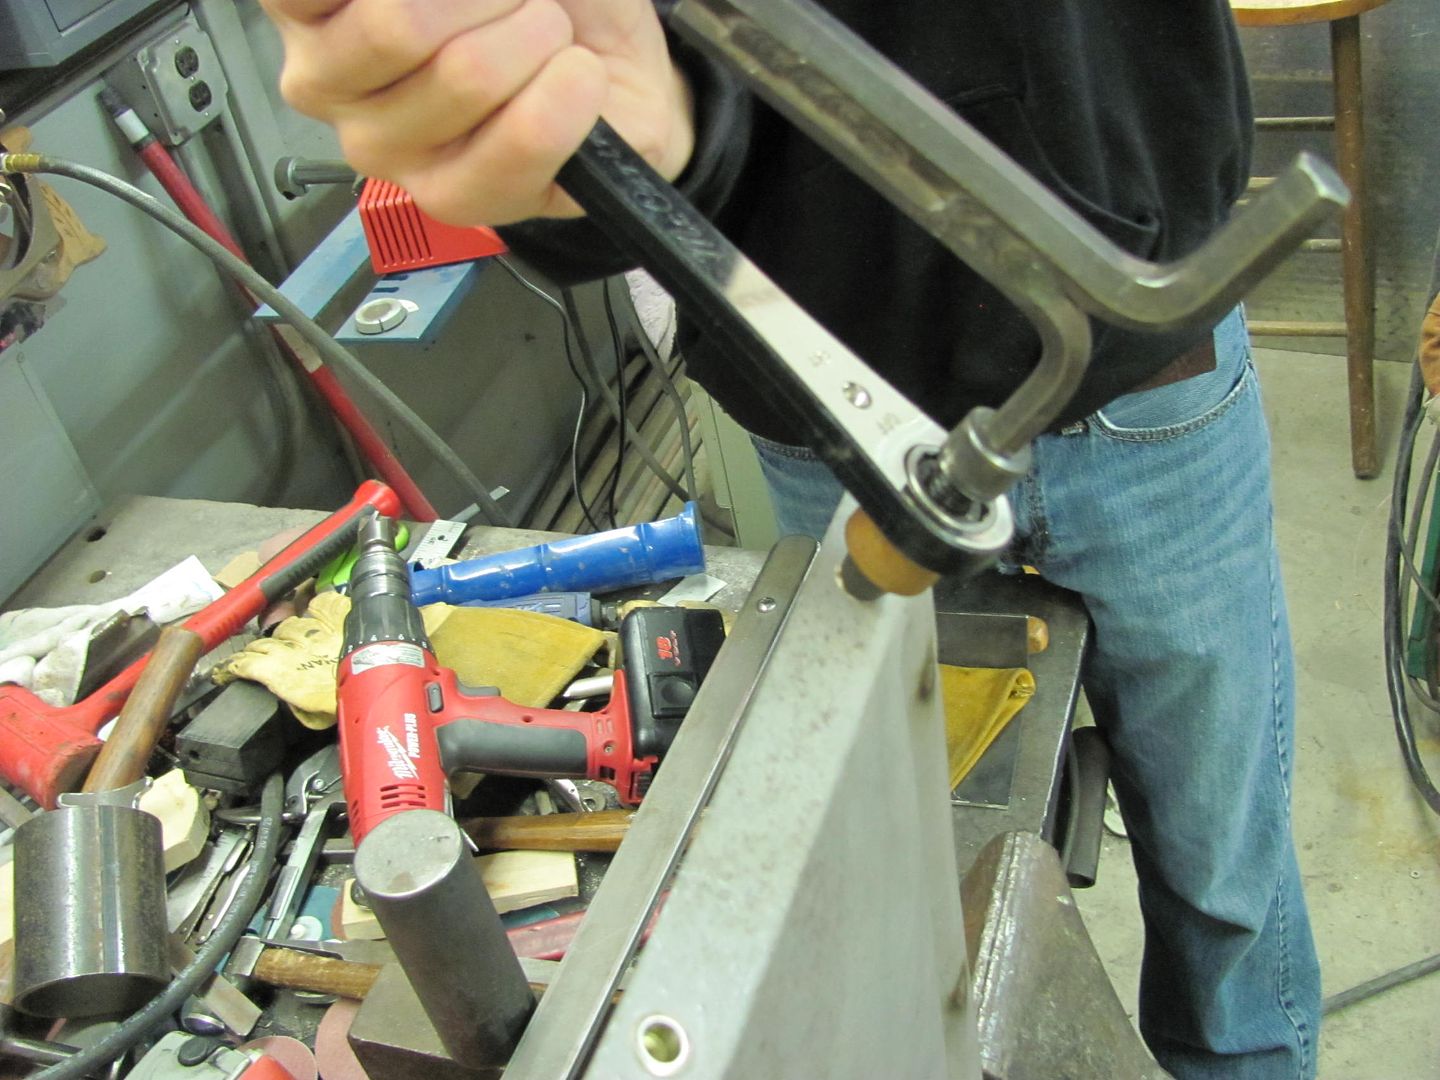 While he was doing that, I used some transfer punches to add the holes to the recently repaired inner fenders for the grille hardware... 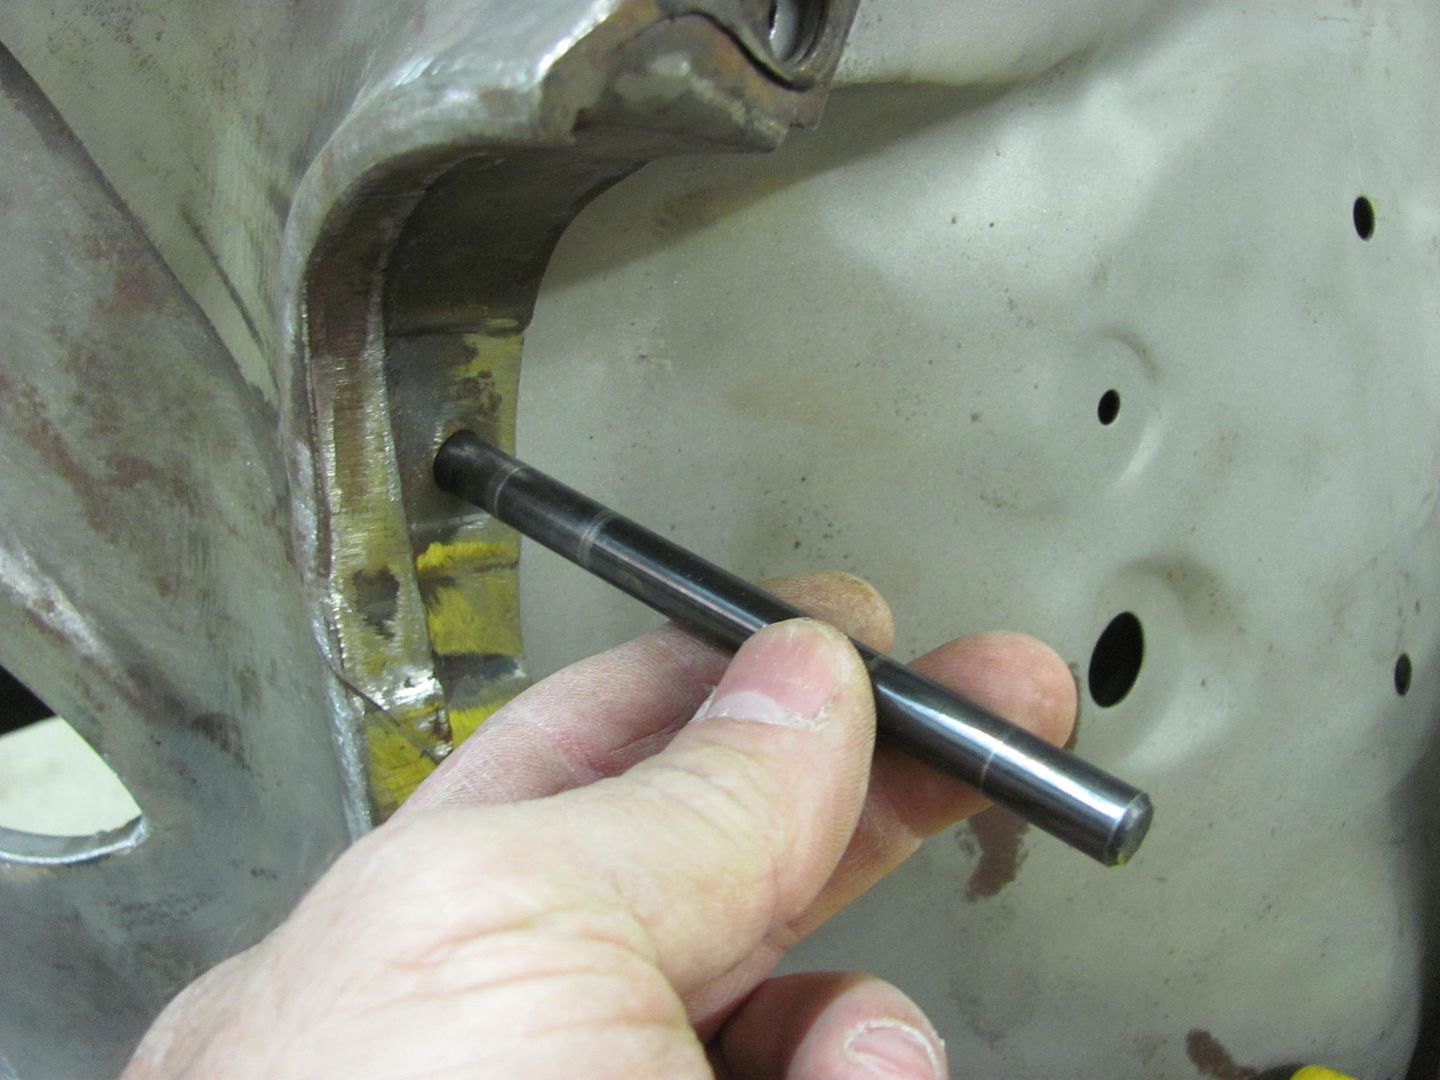 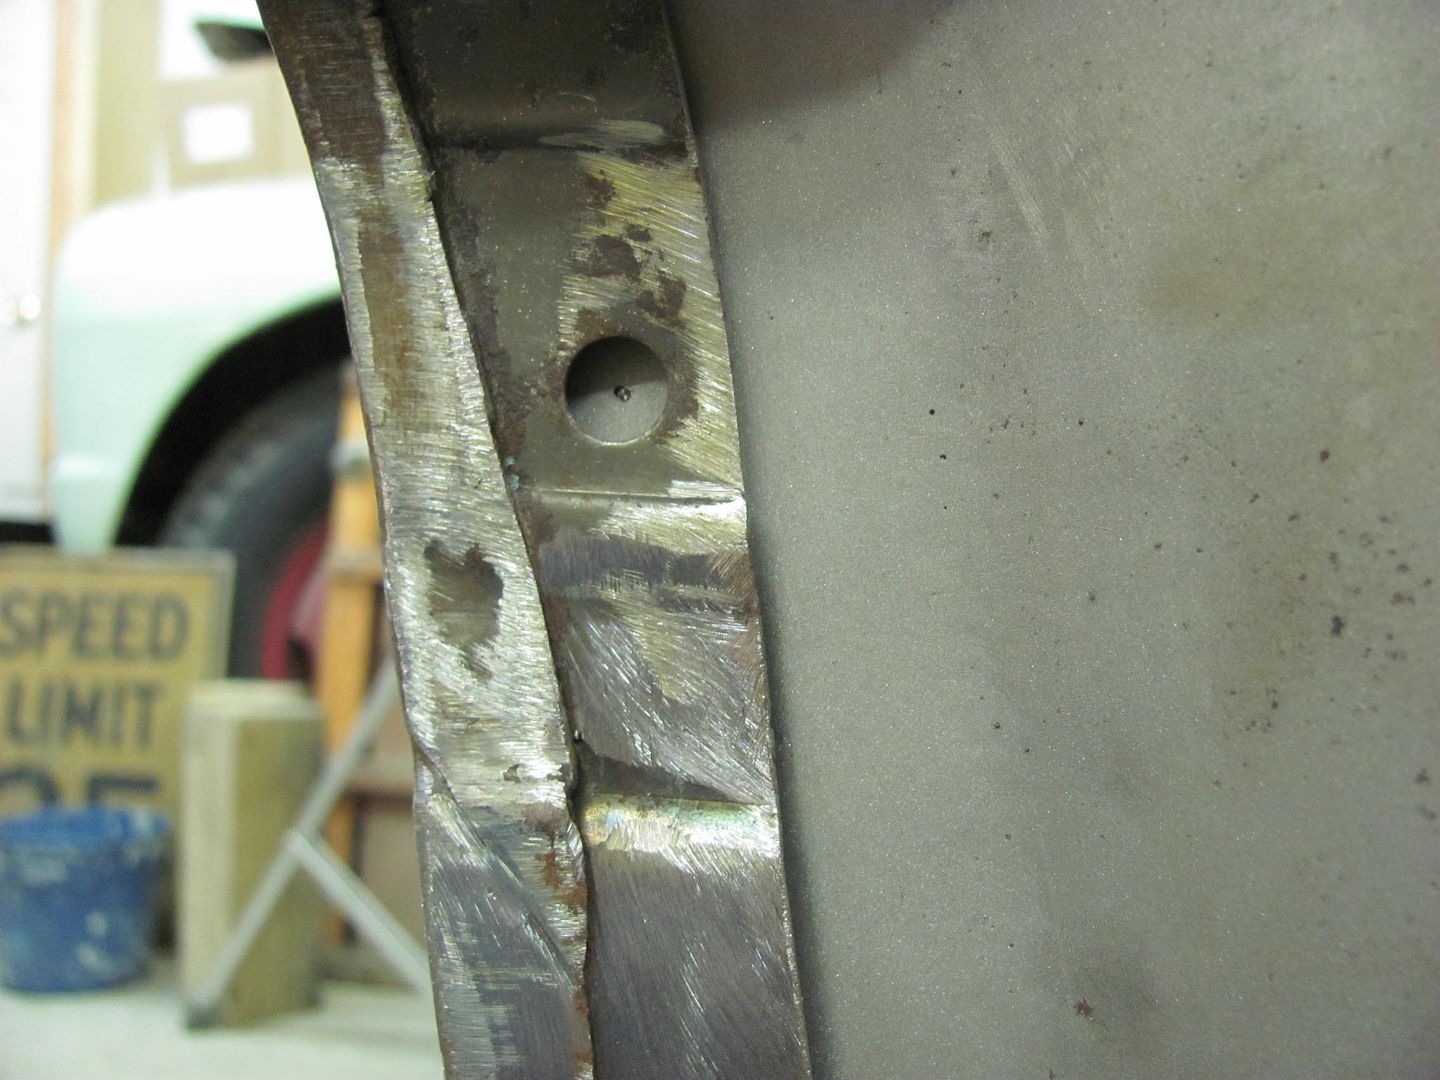 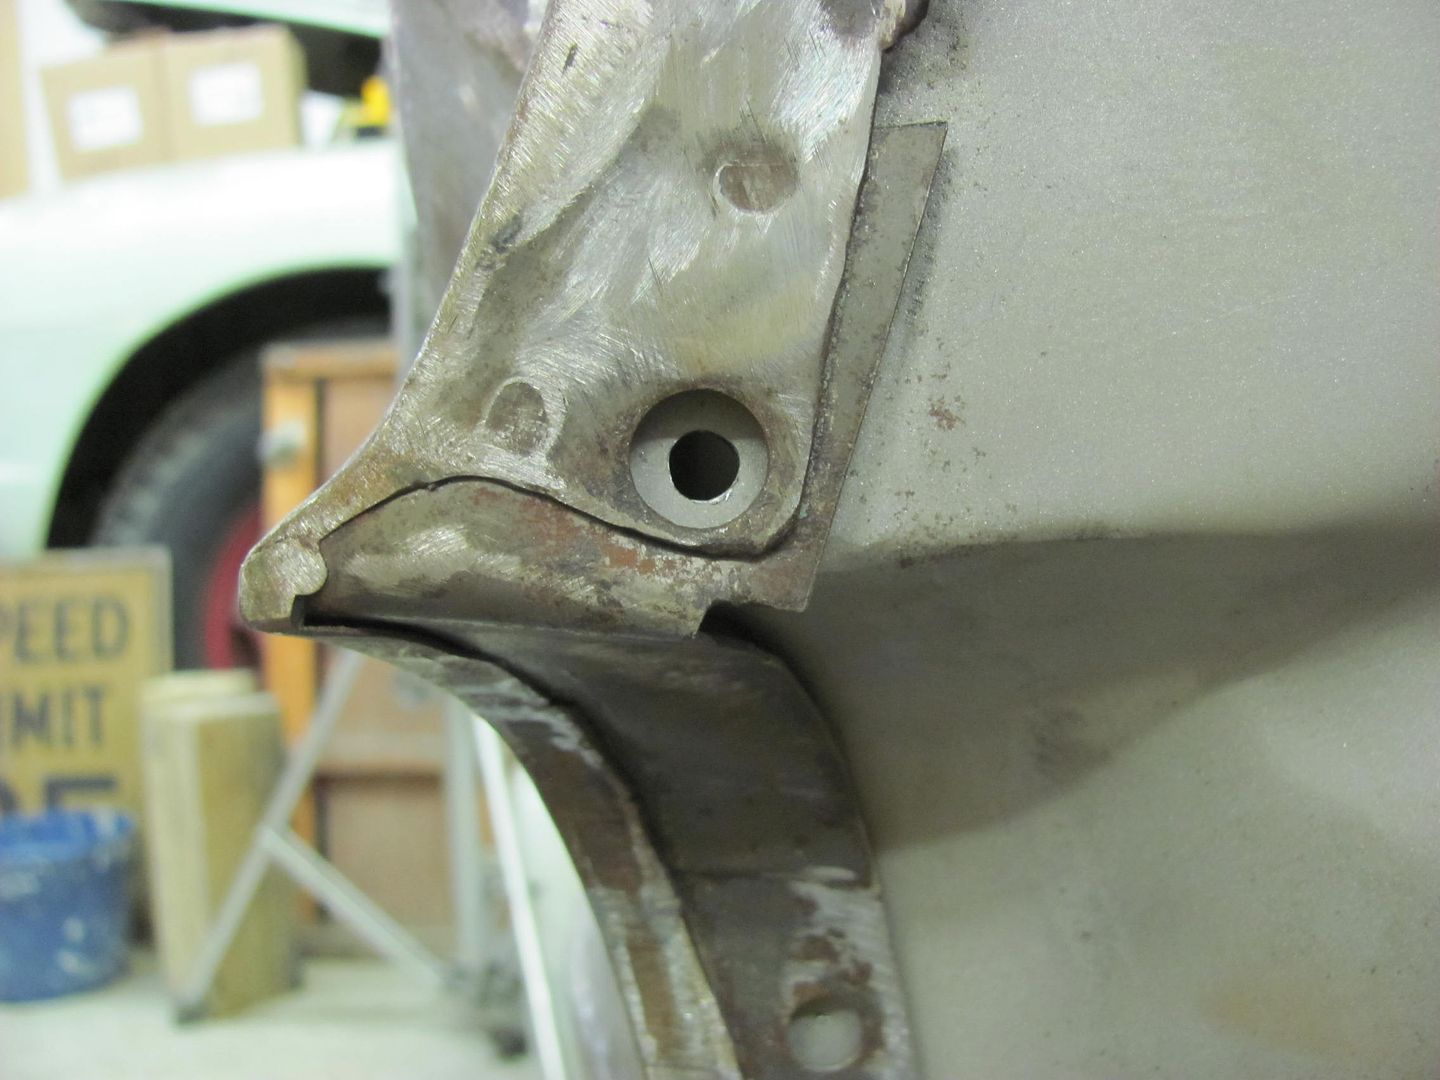 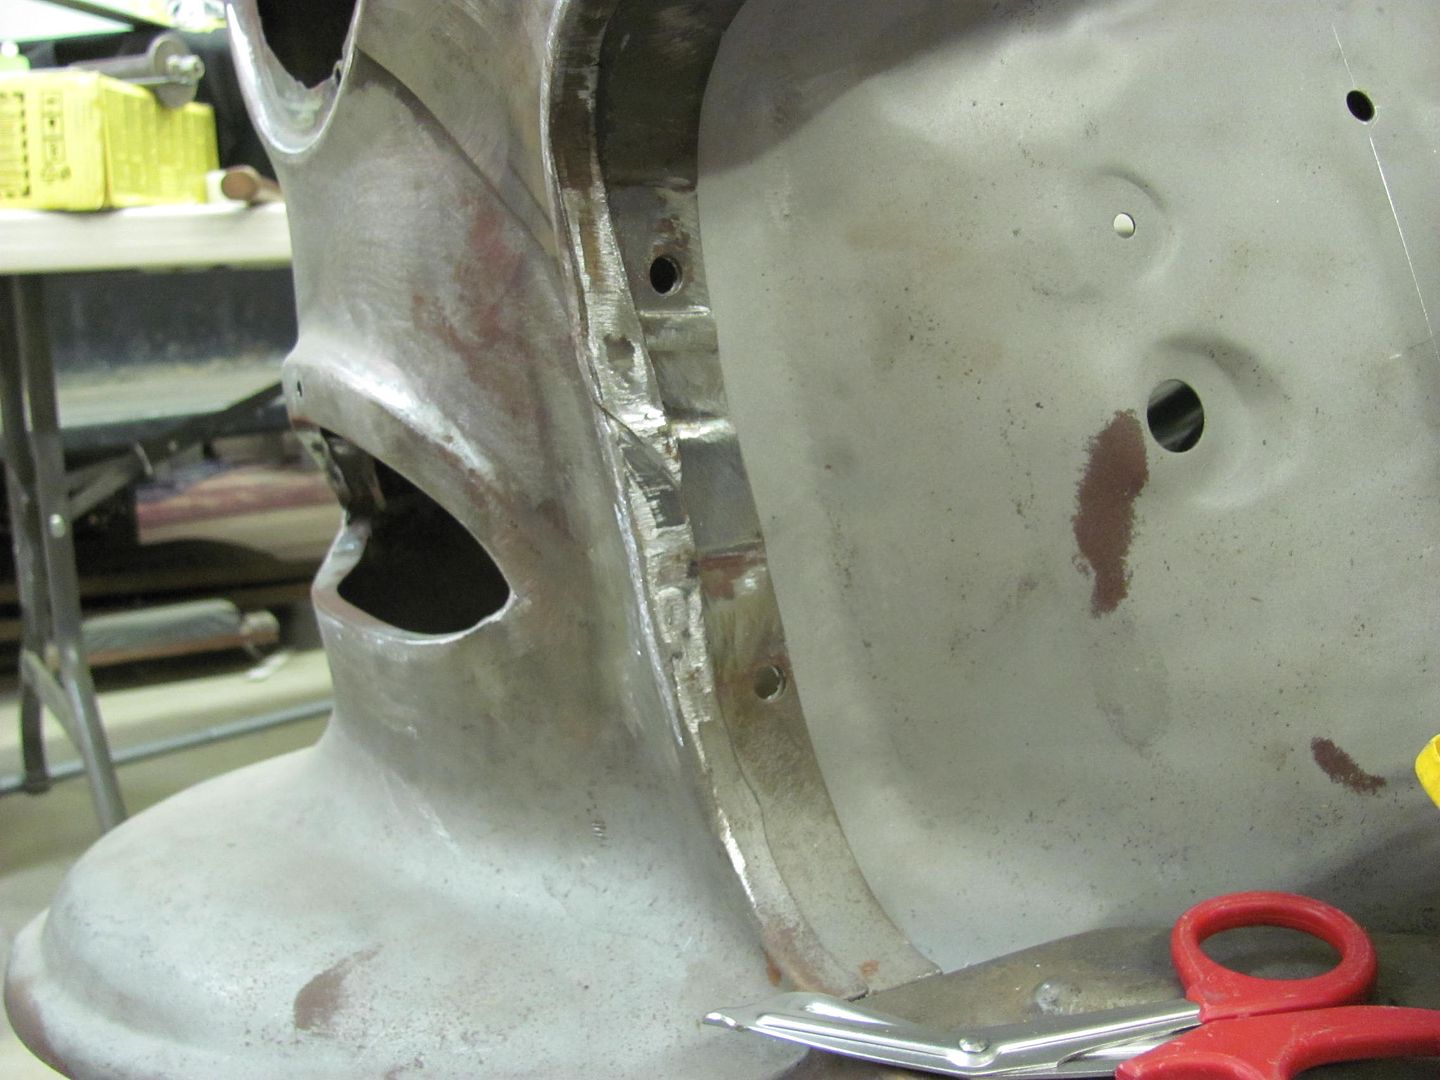 Then we knocked off early and made a speed run to Annapolis for Jalopyrama. Here are some of the sights: 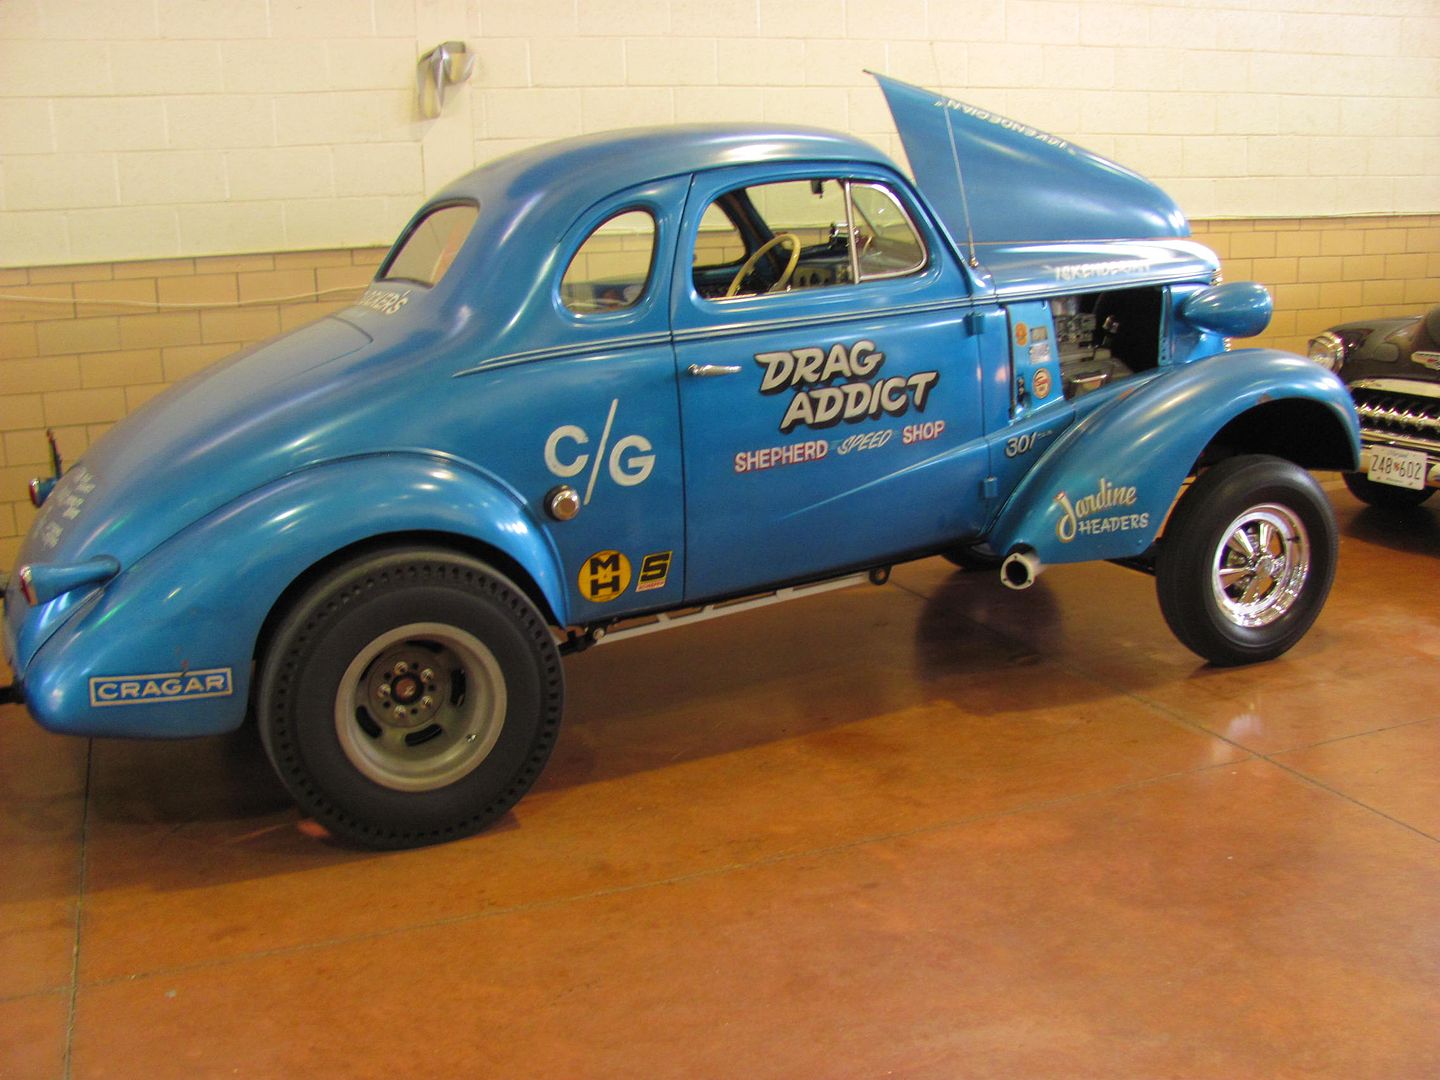 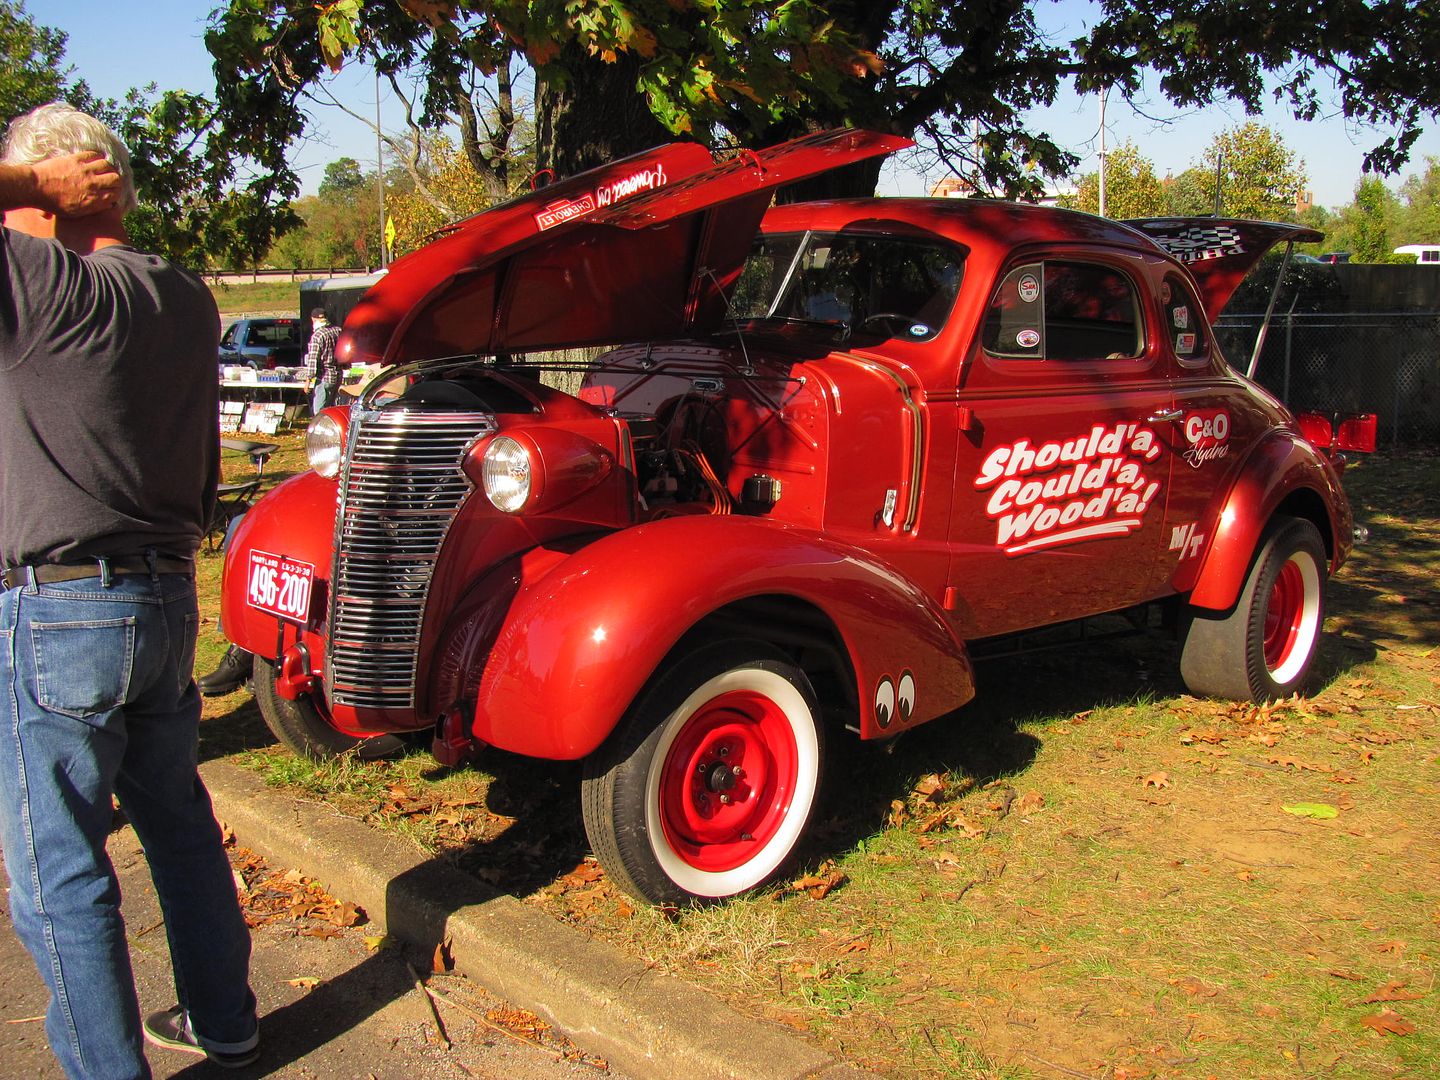   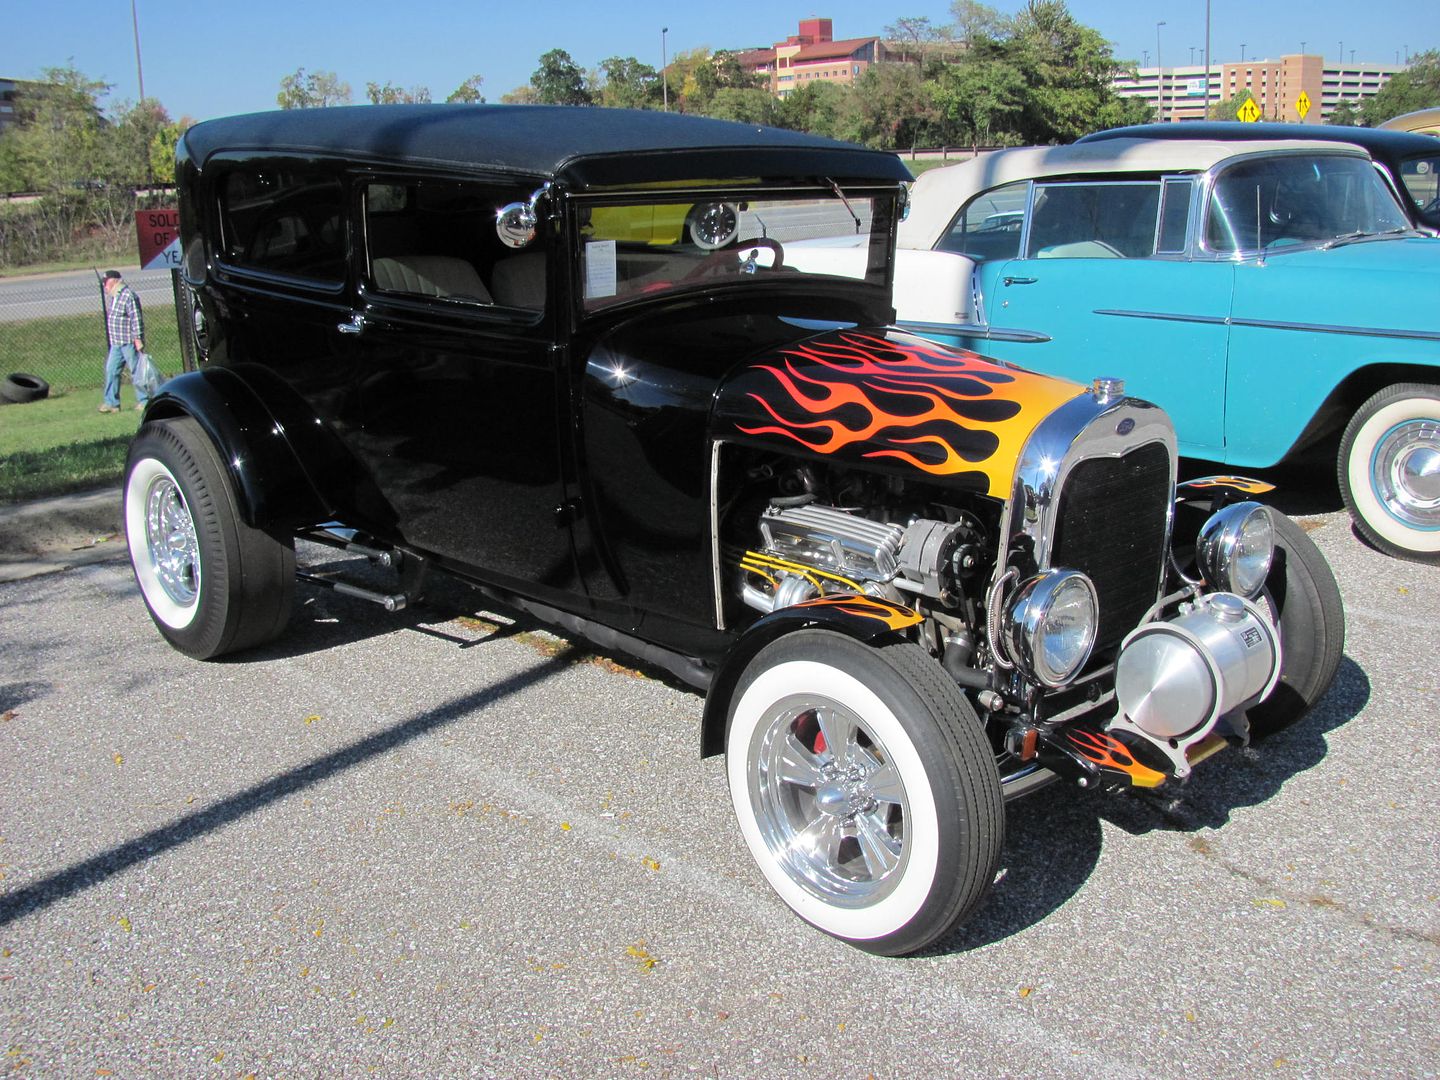 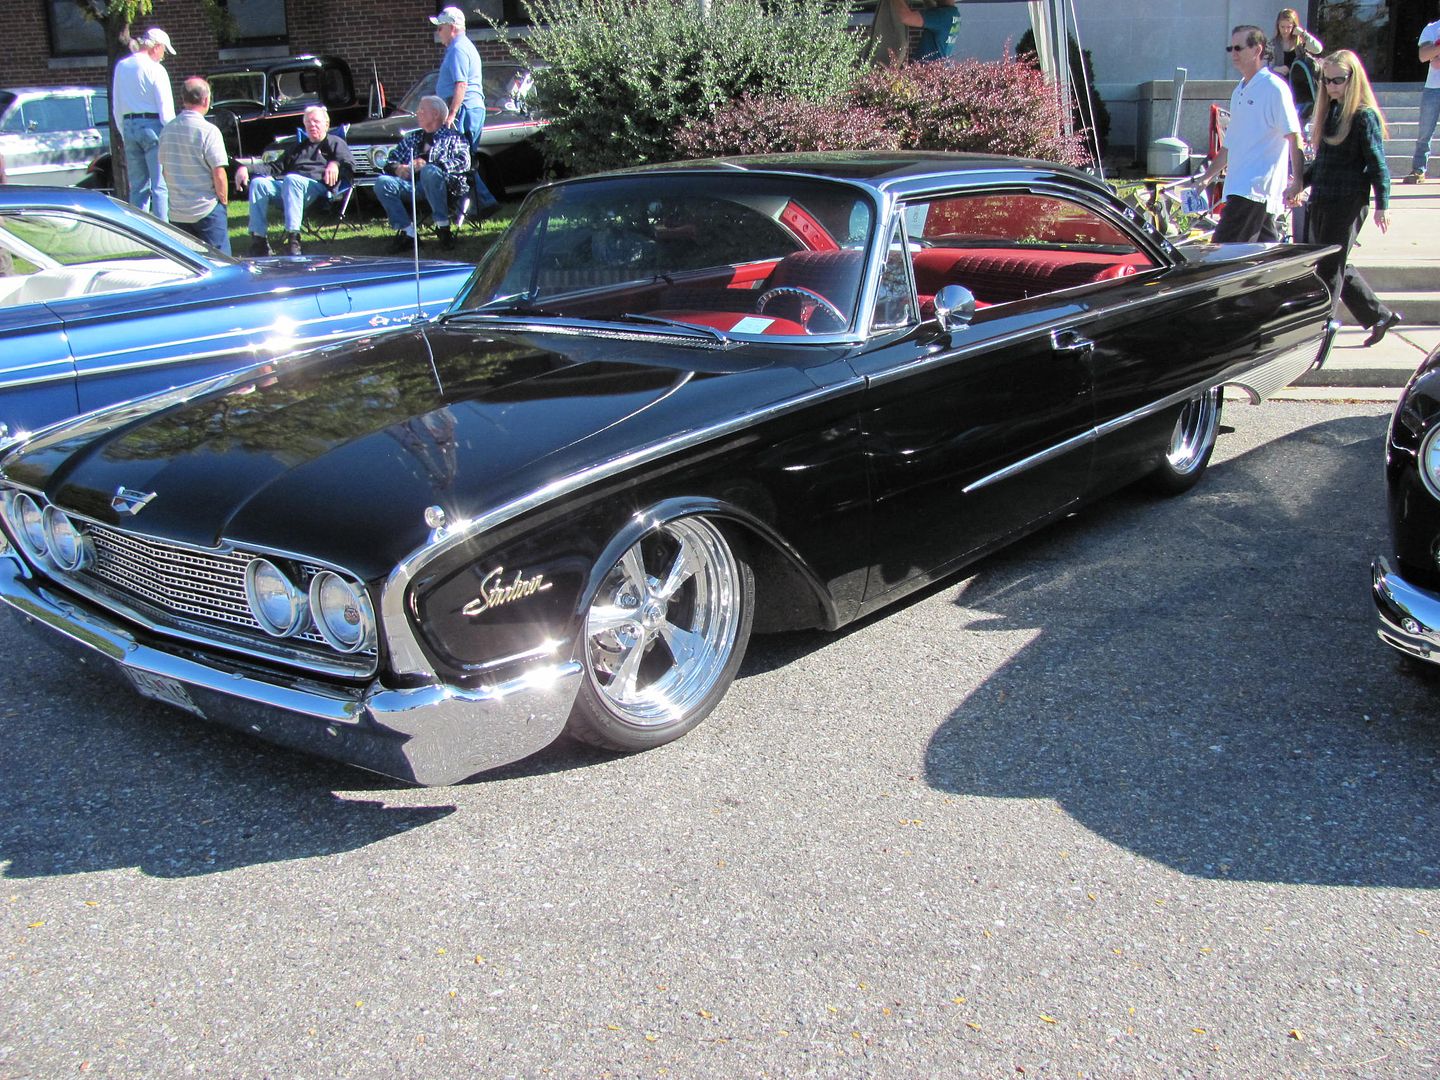 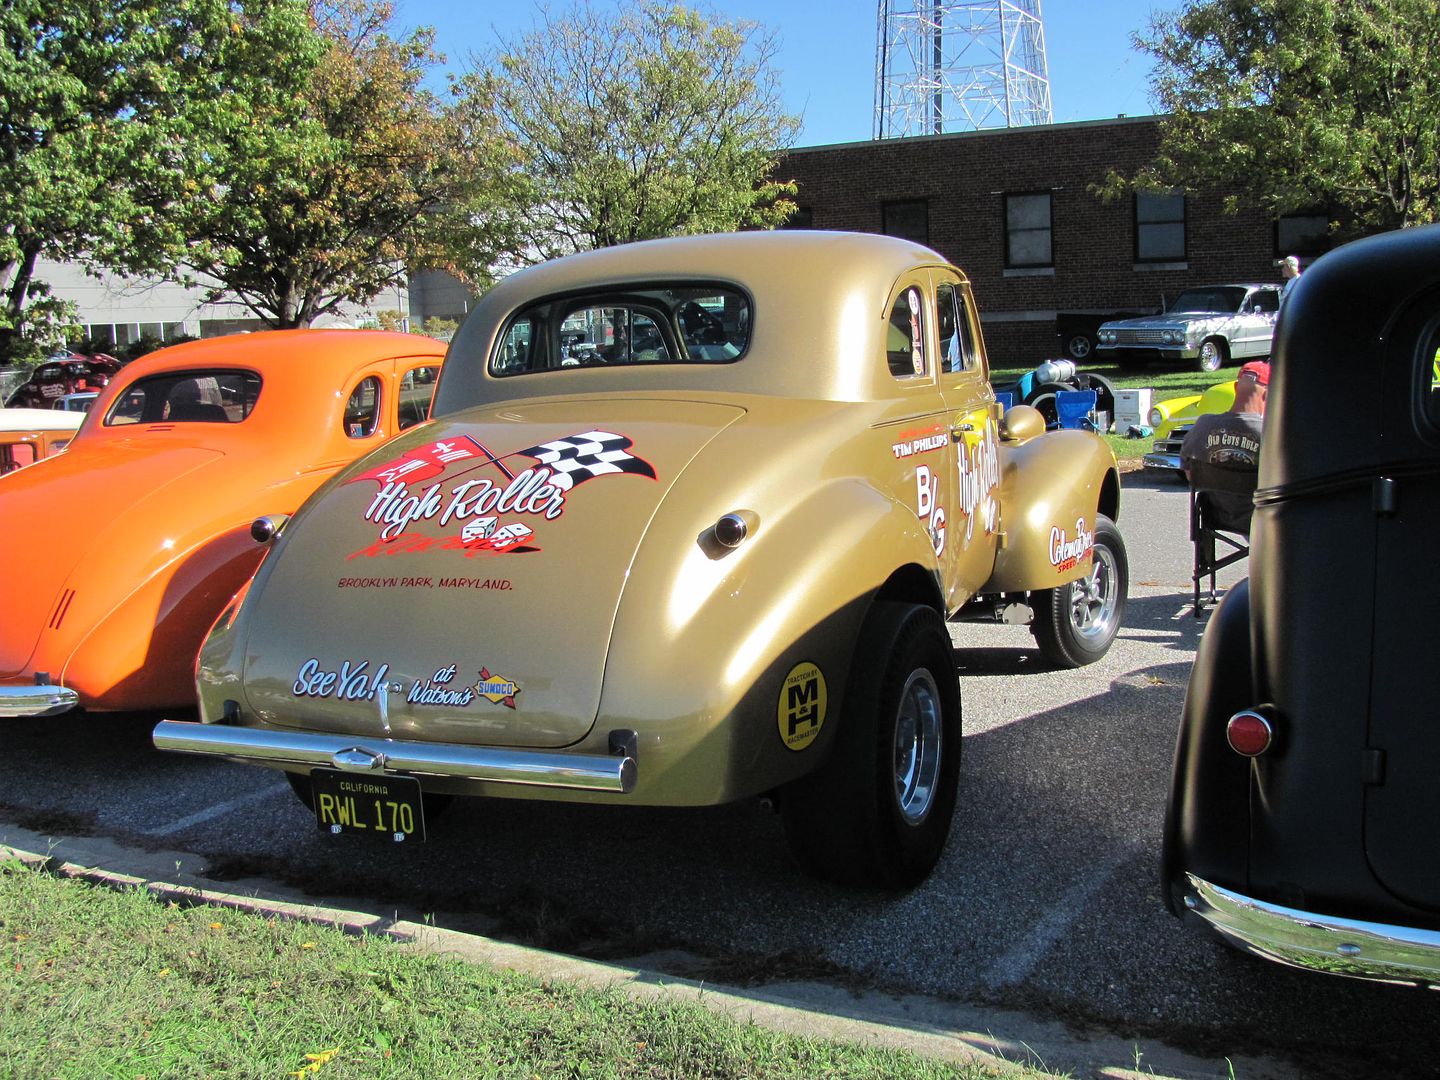 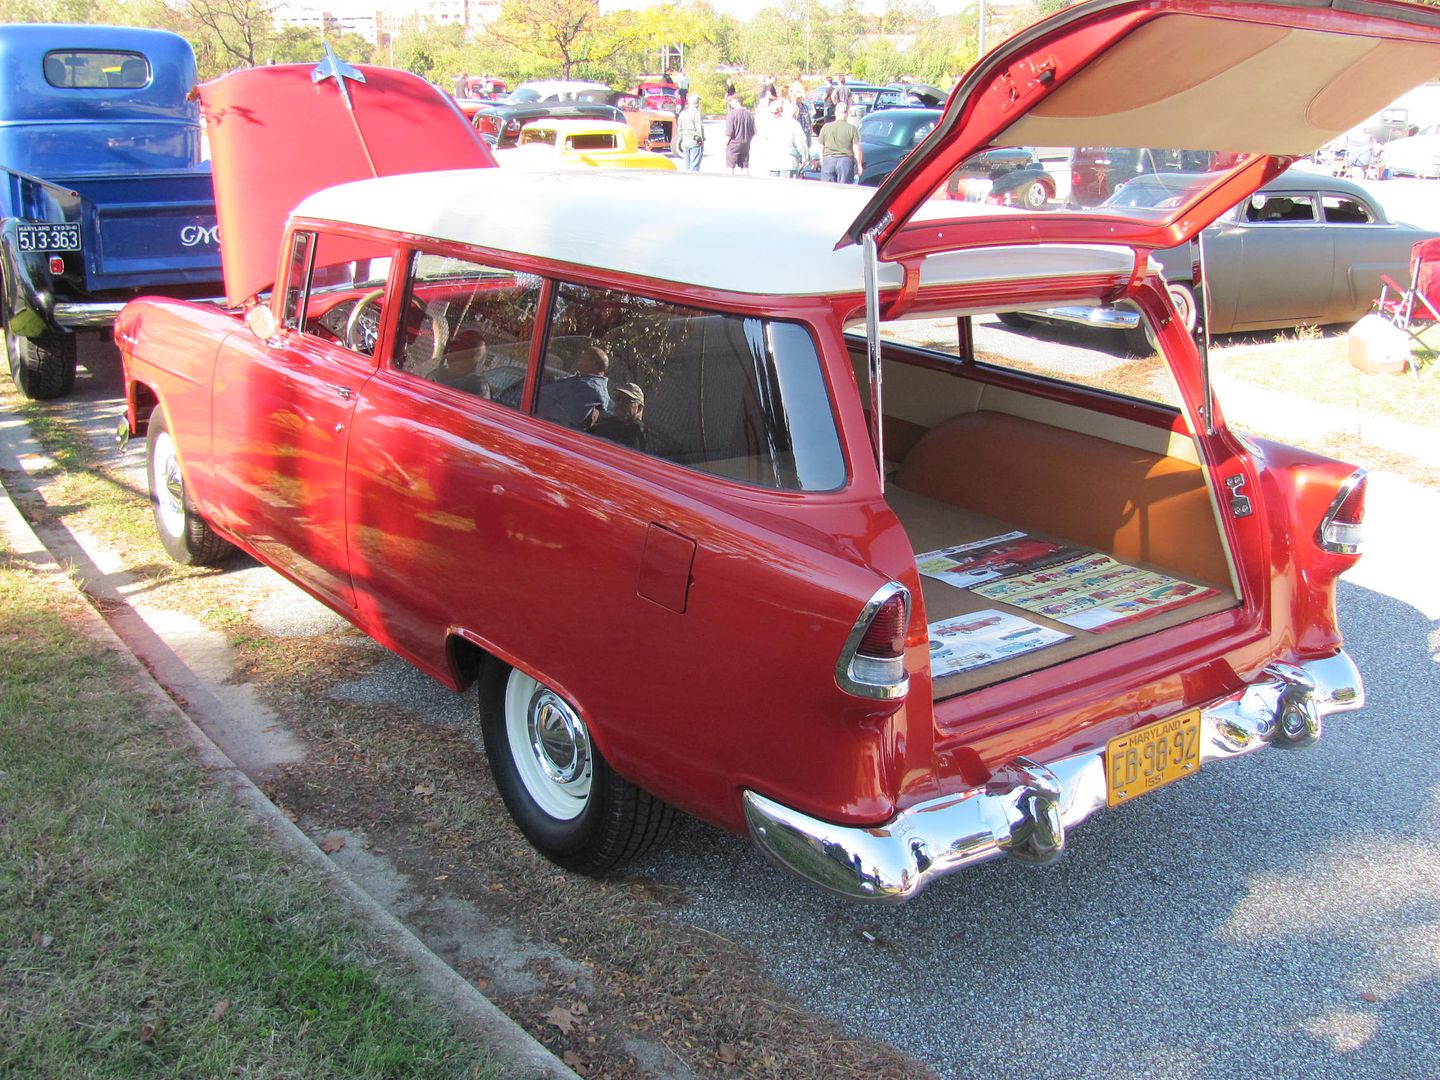 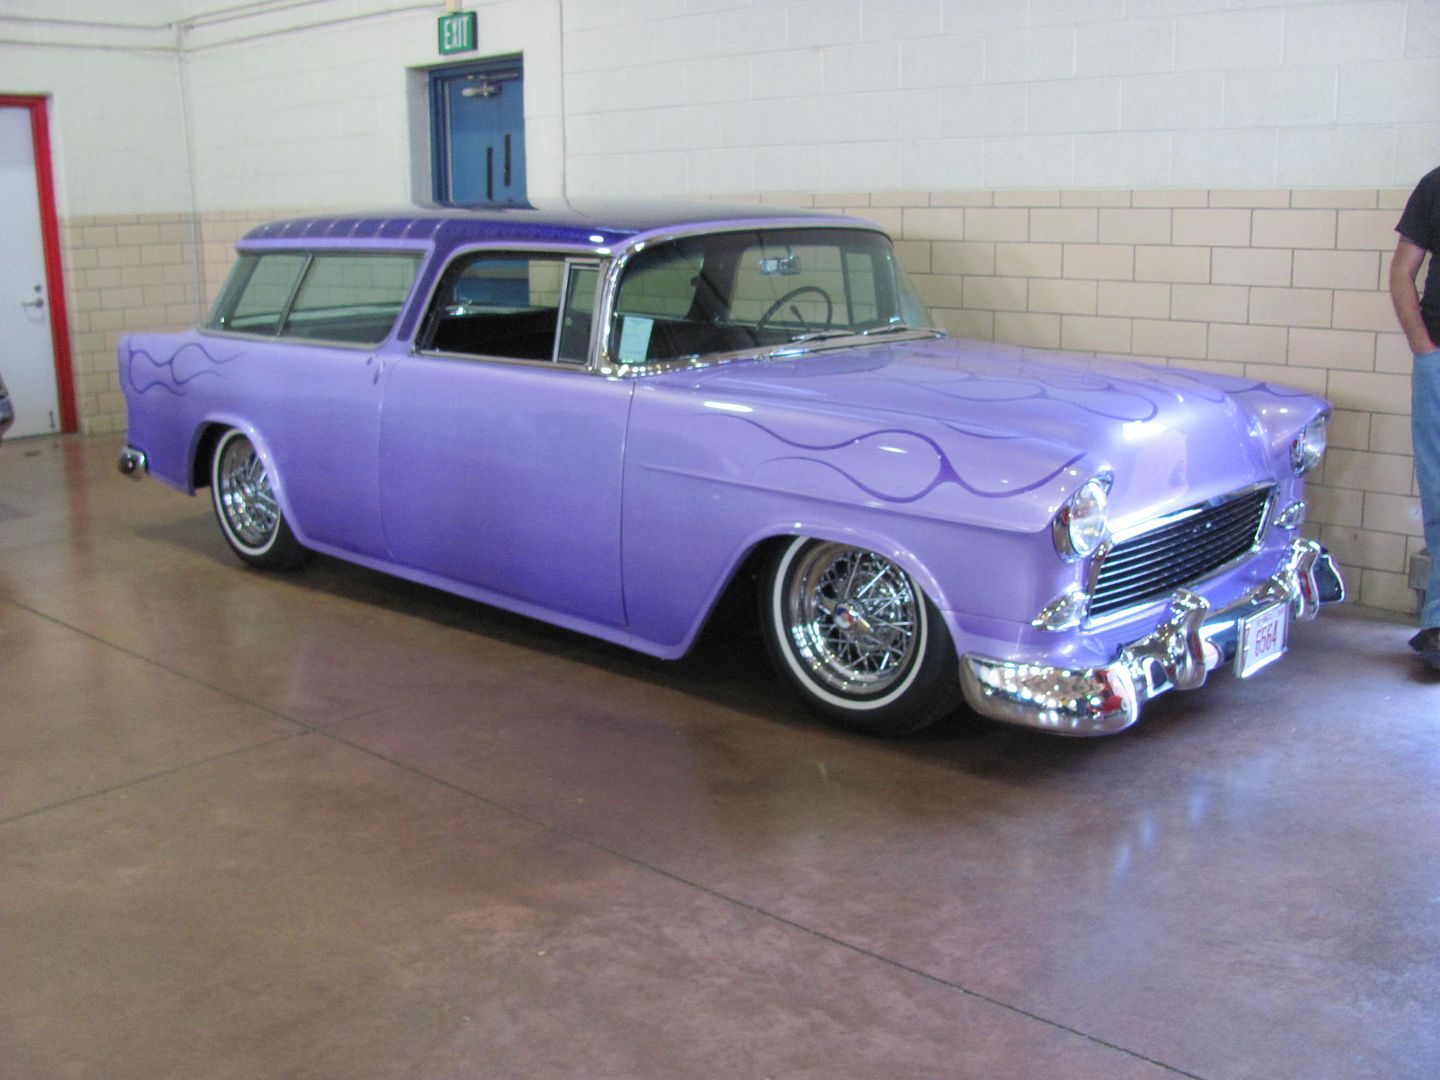 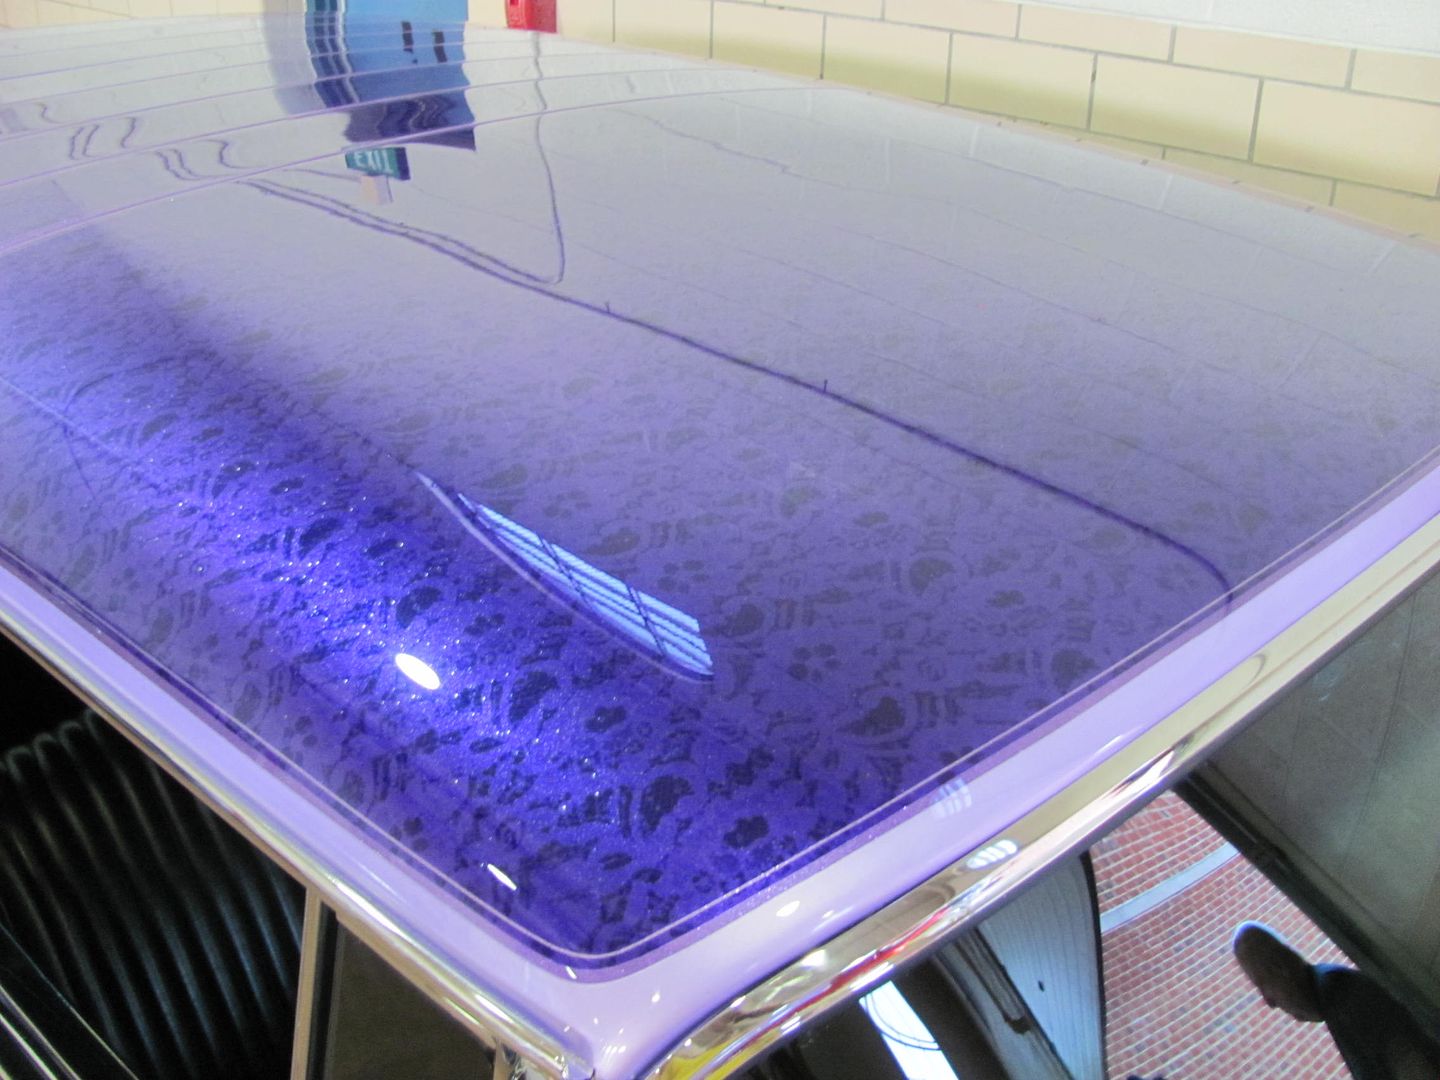 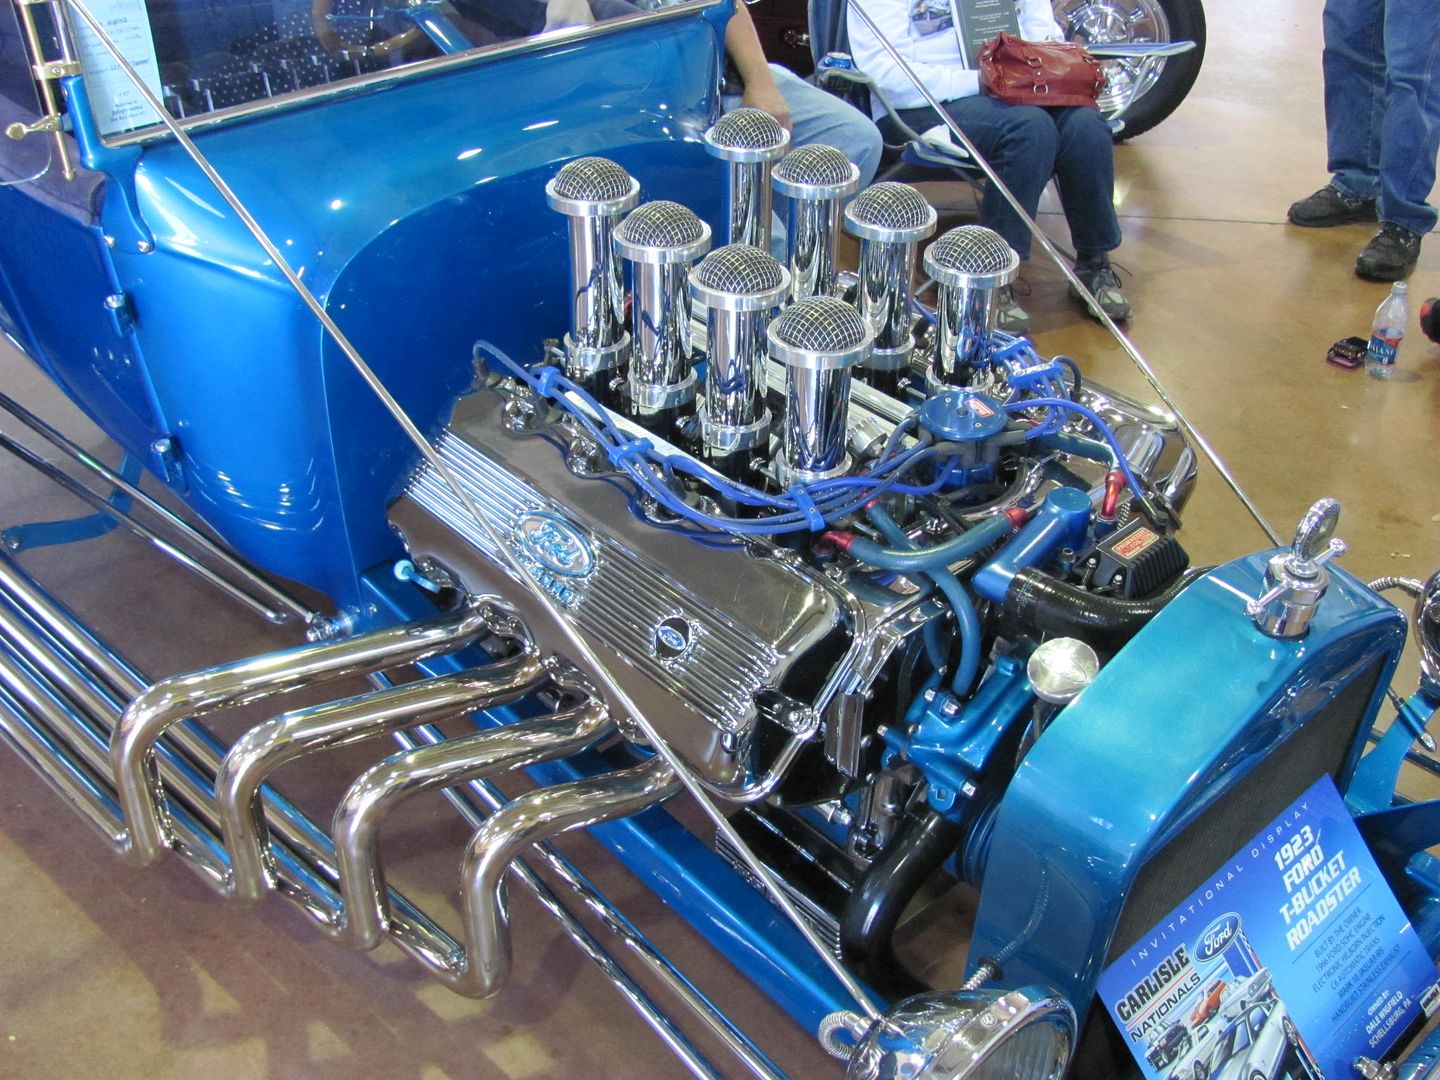 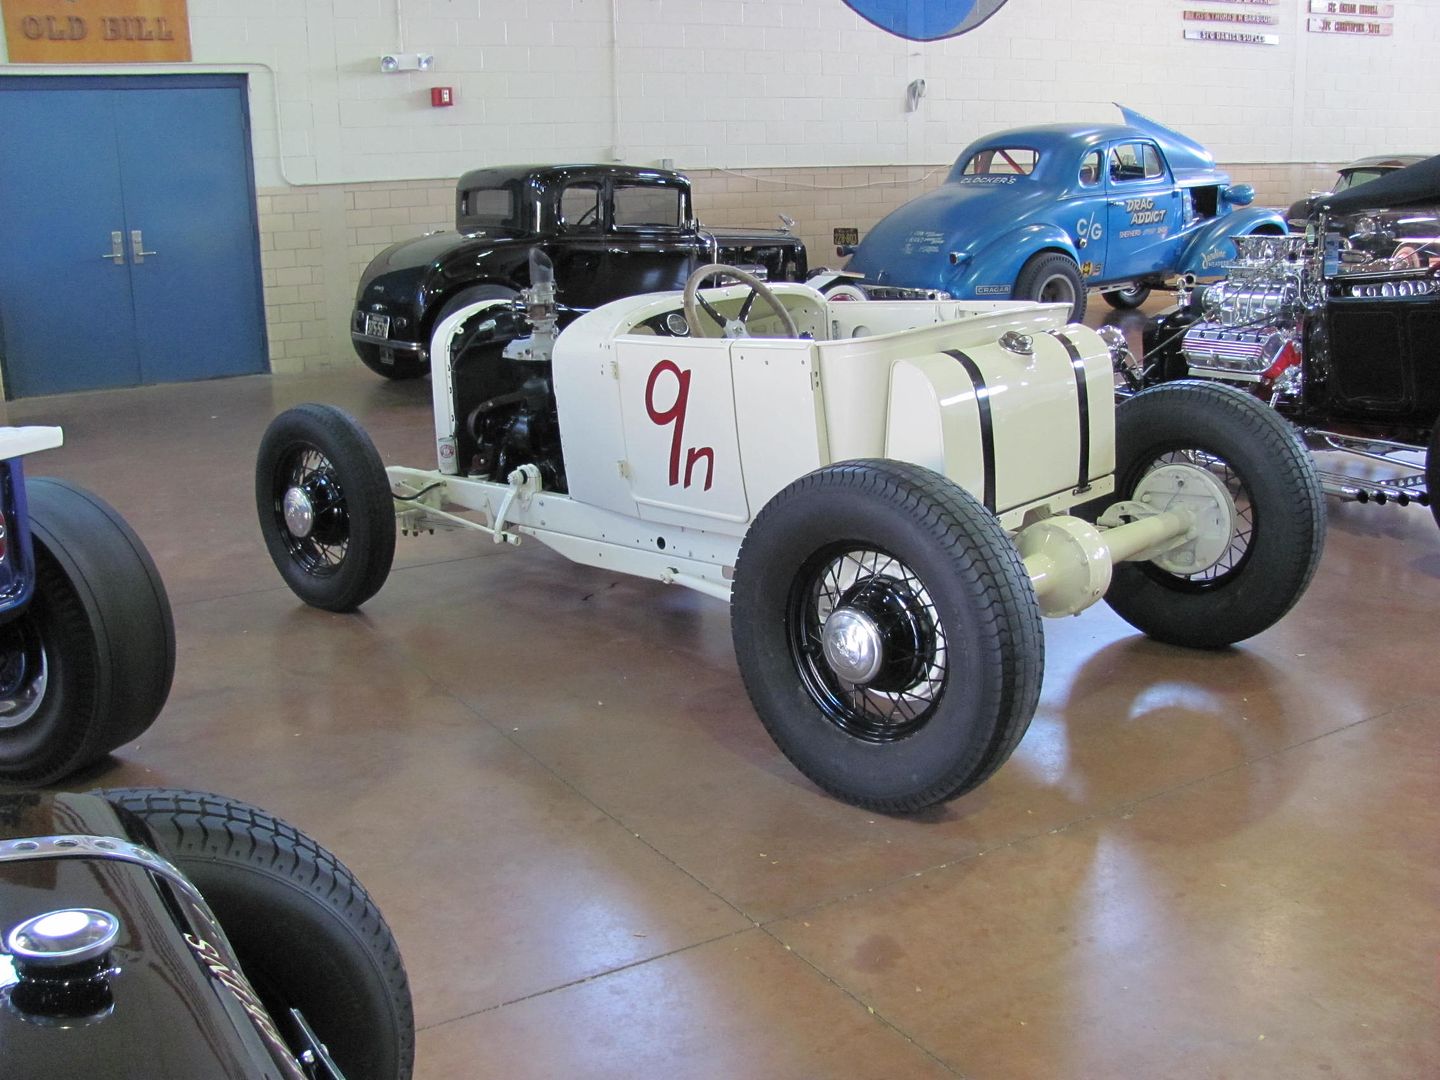 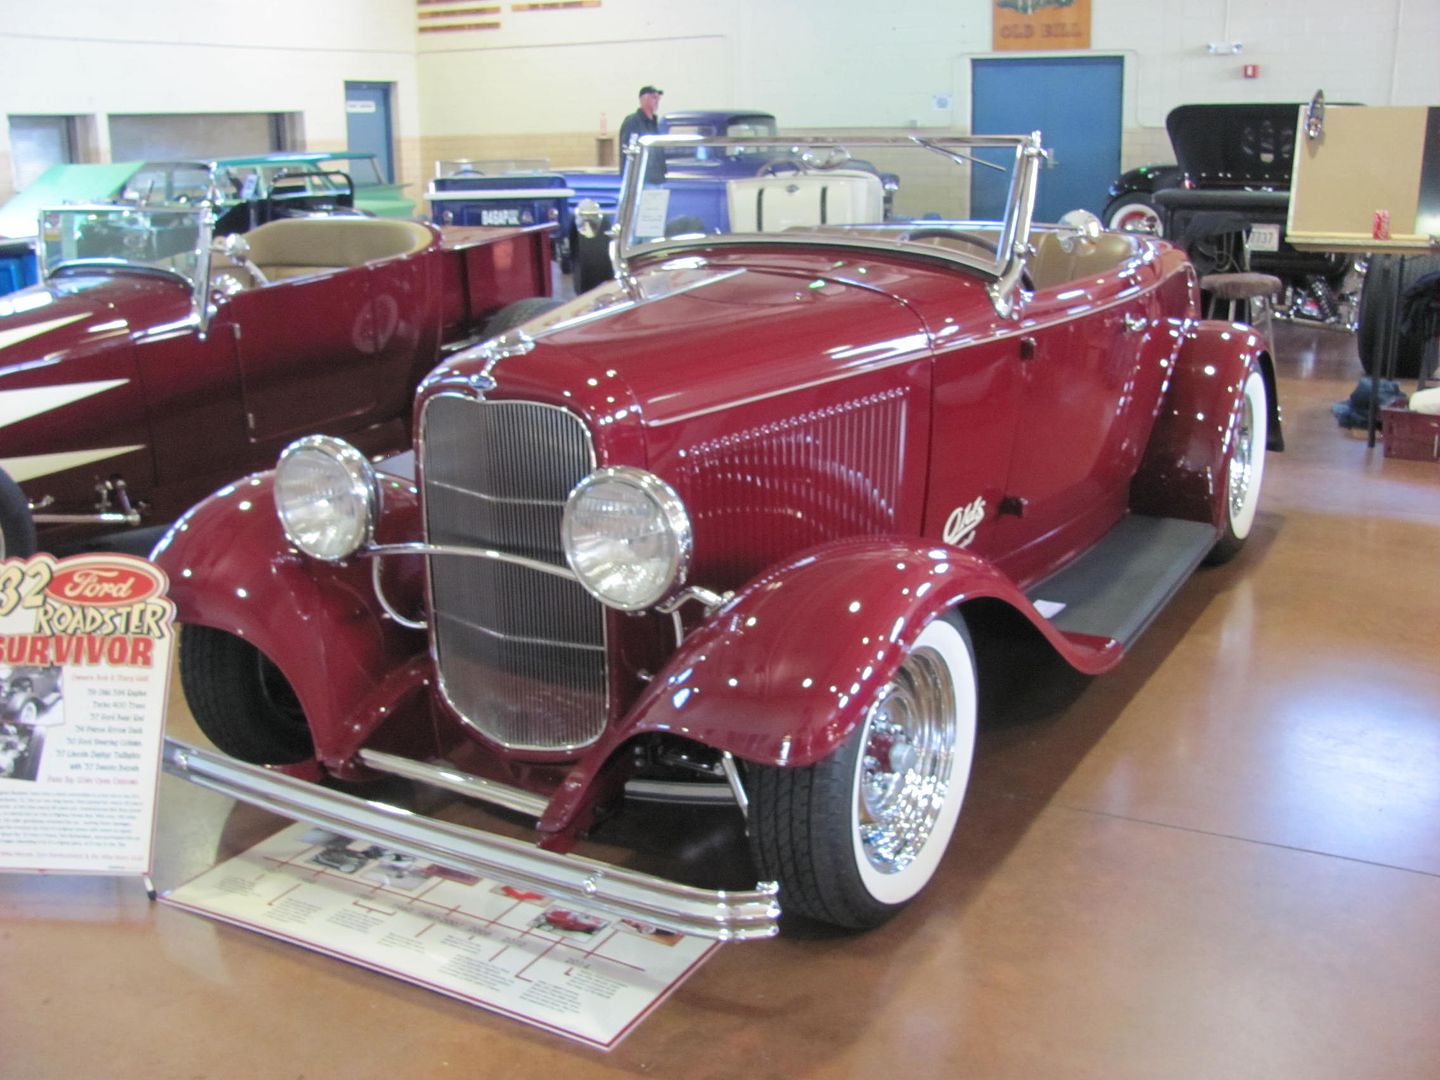 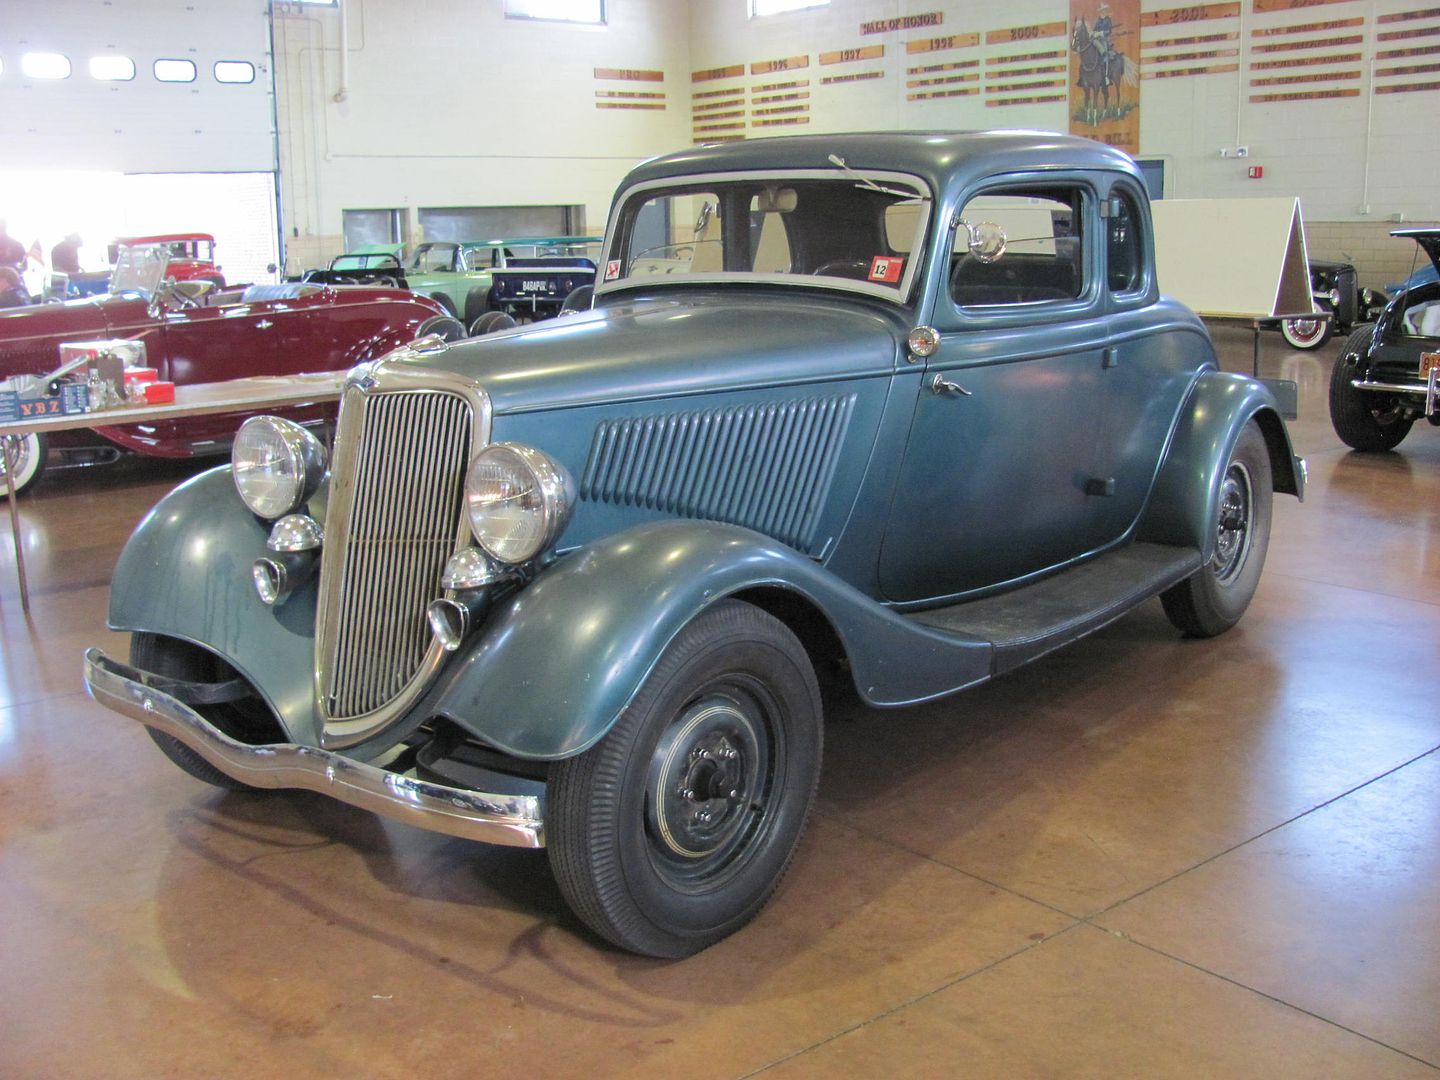 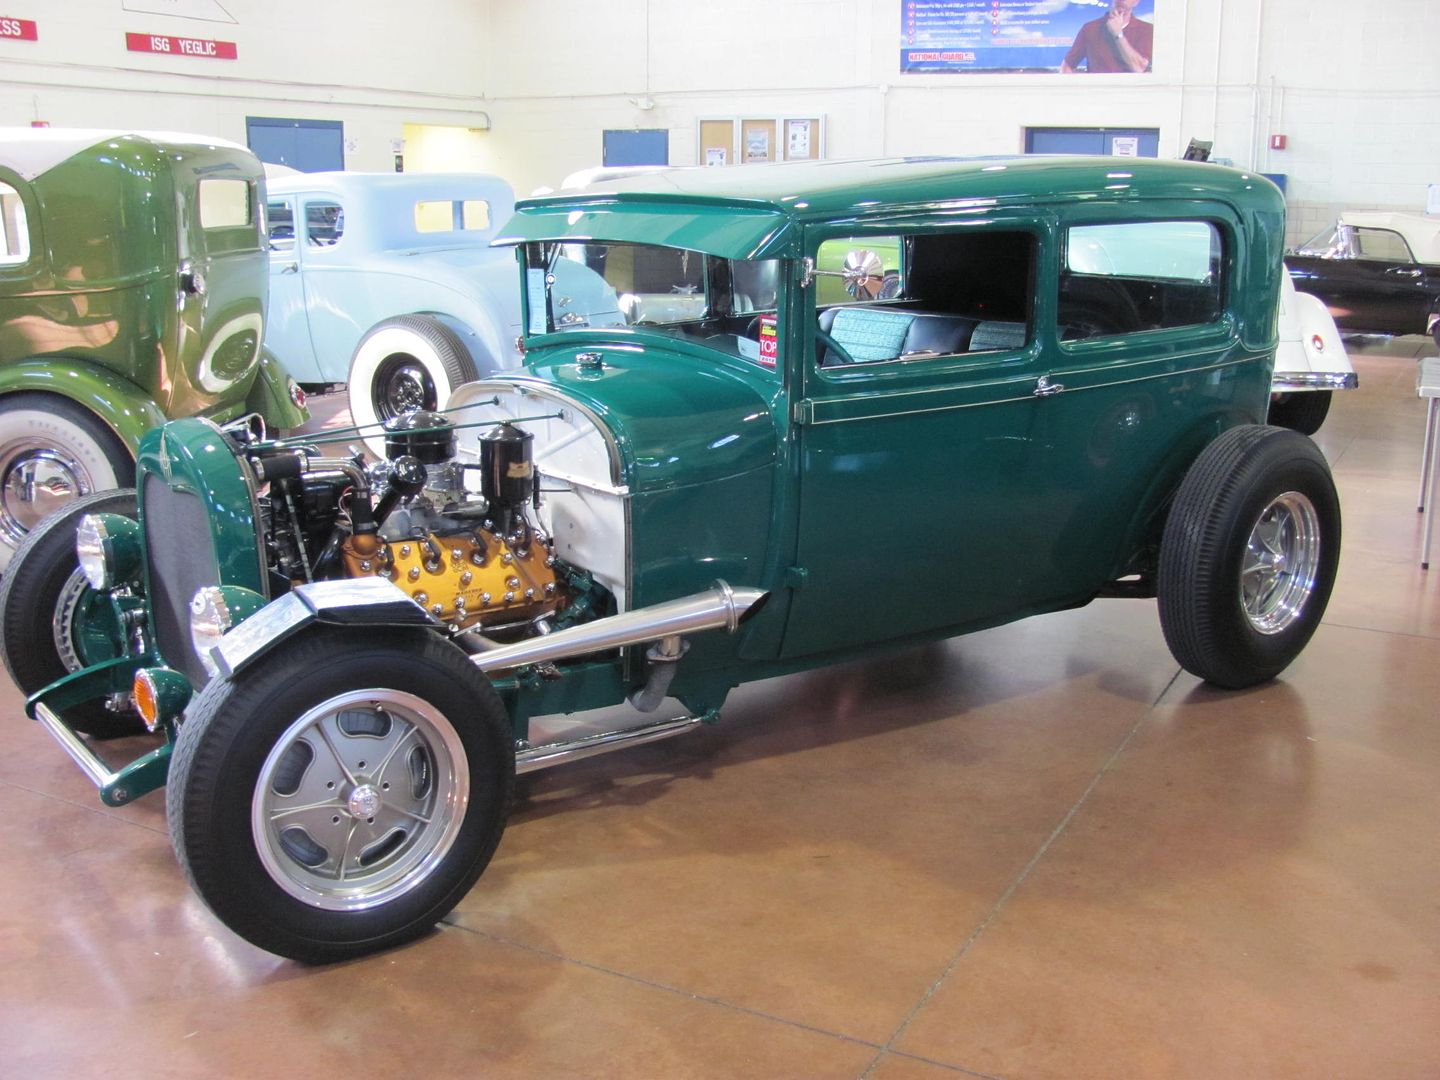 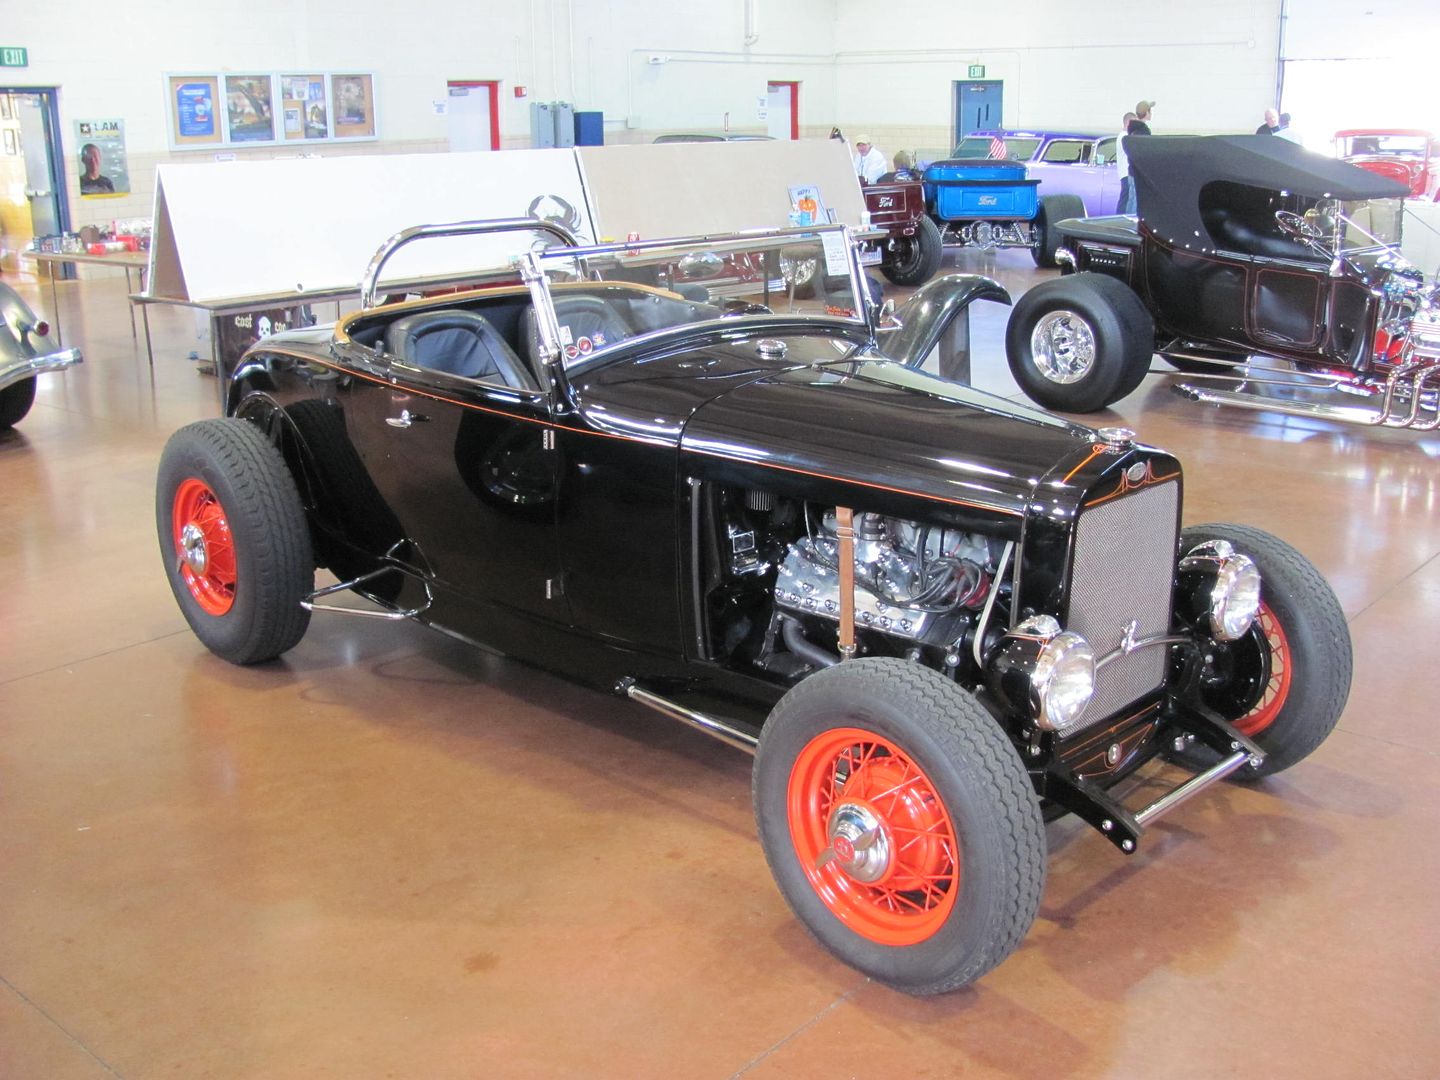 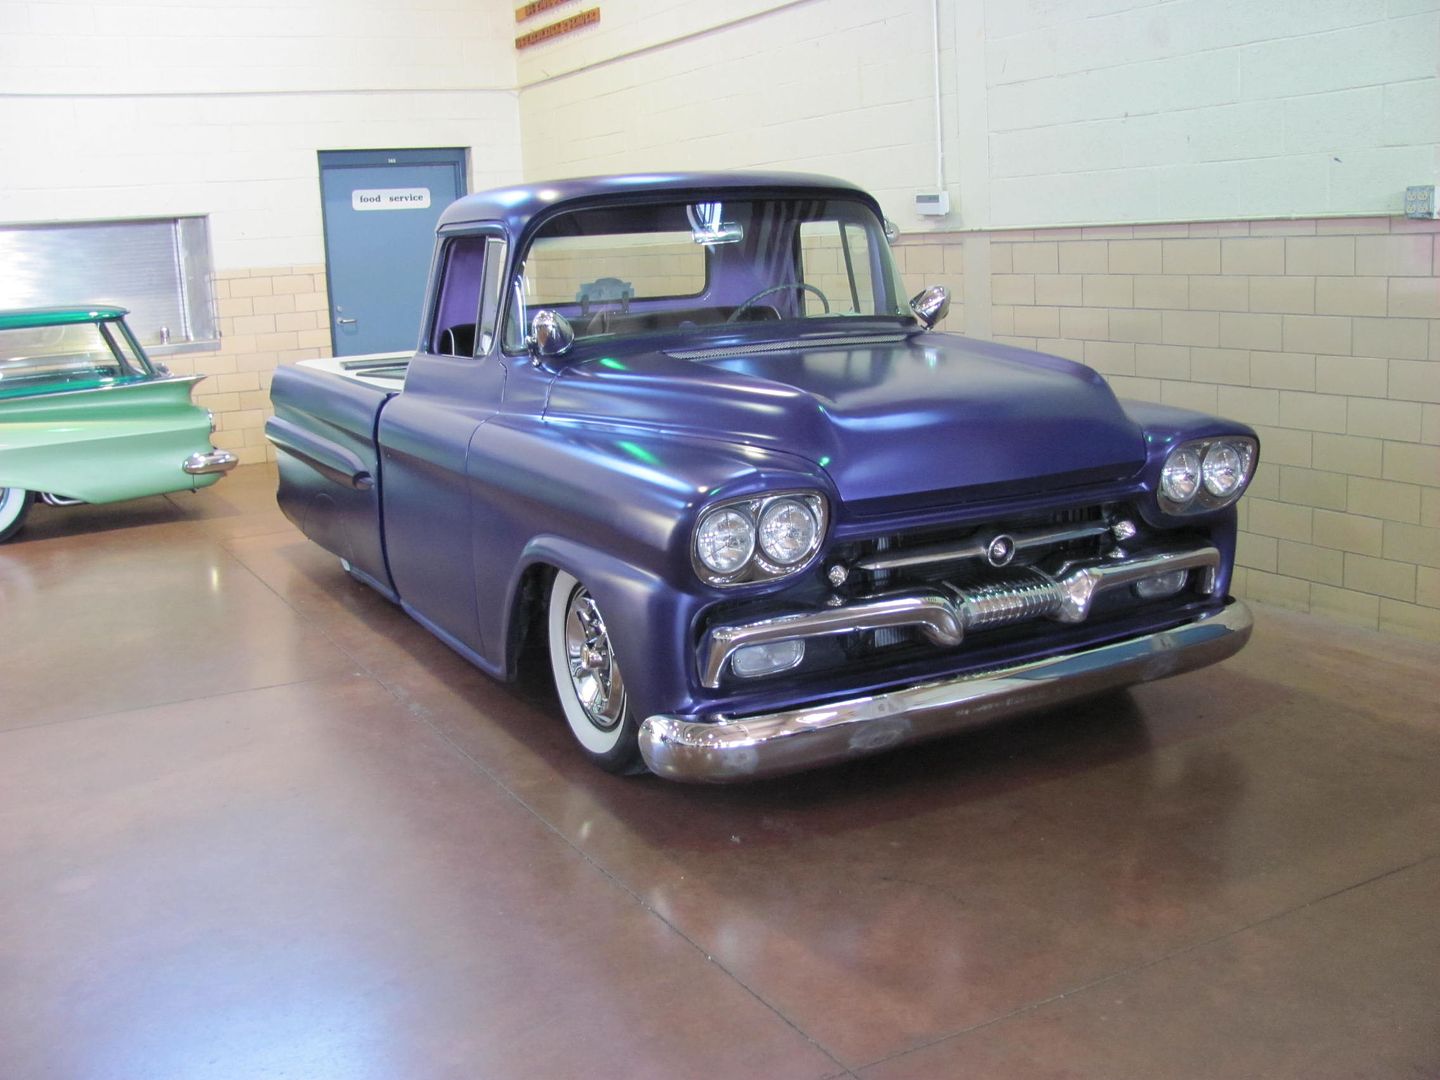 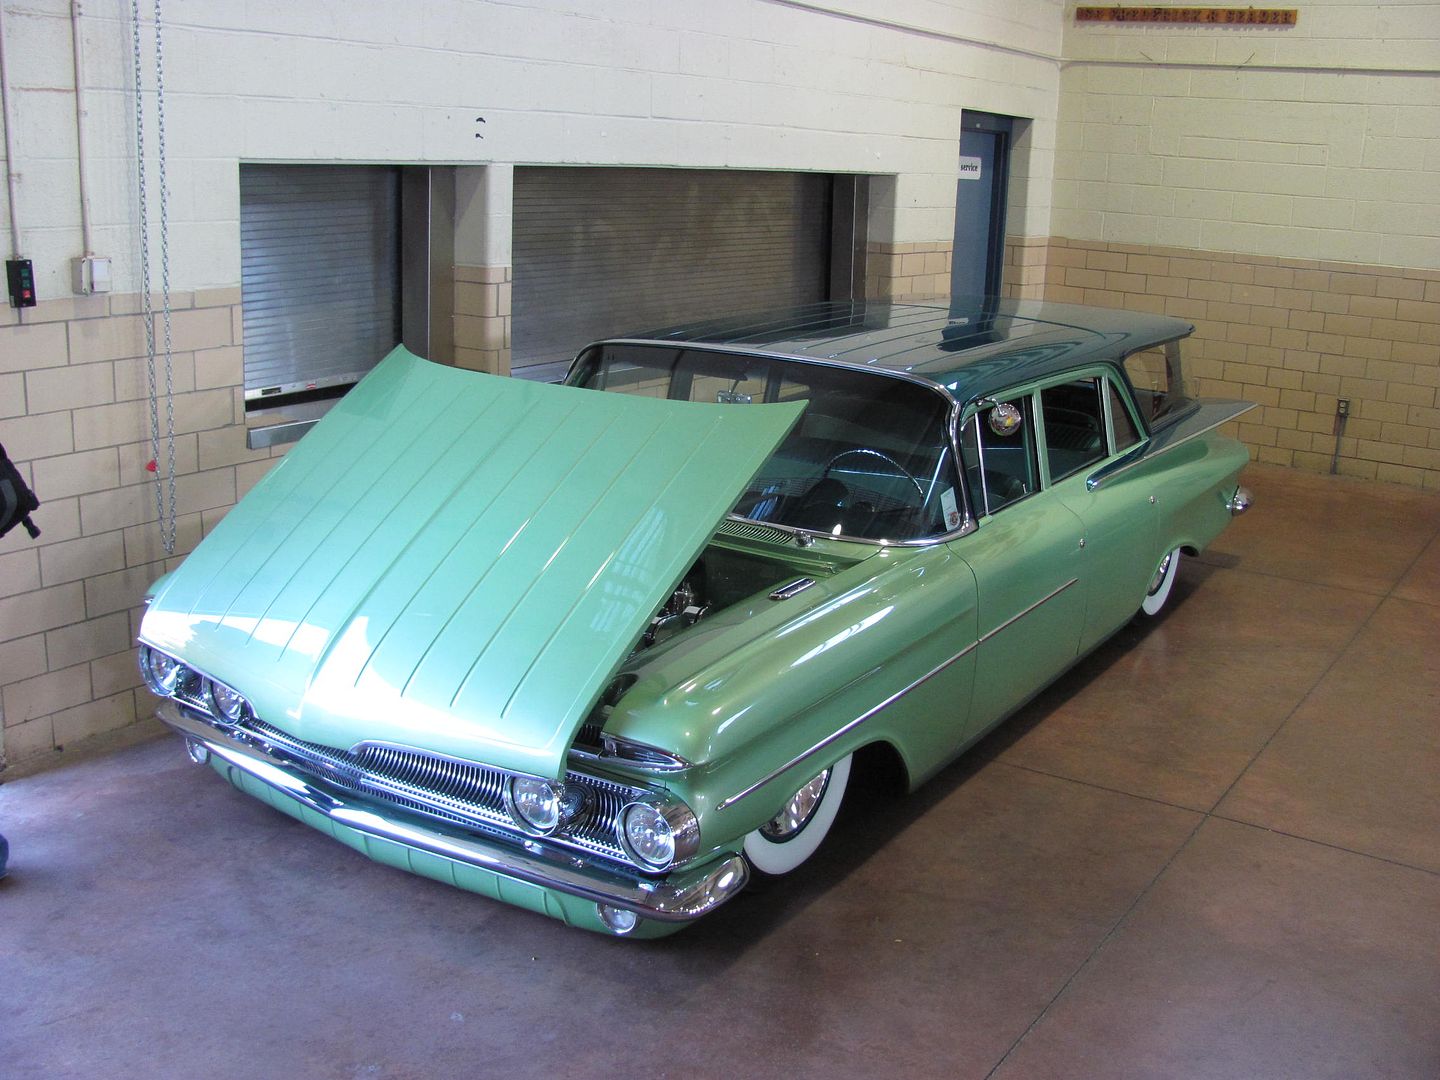 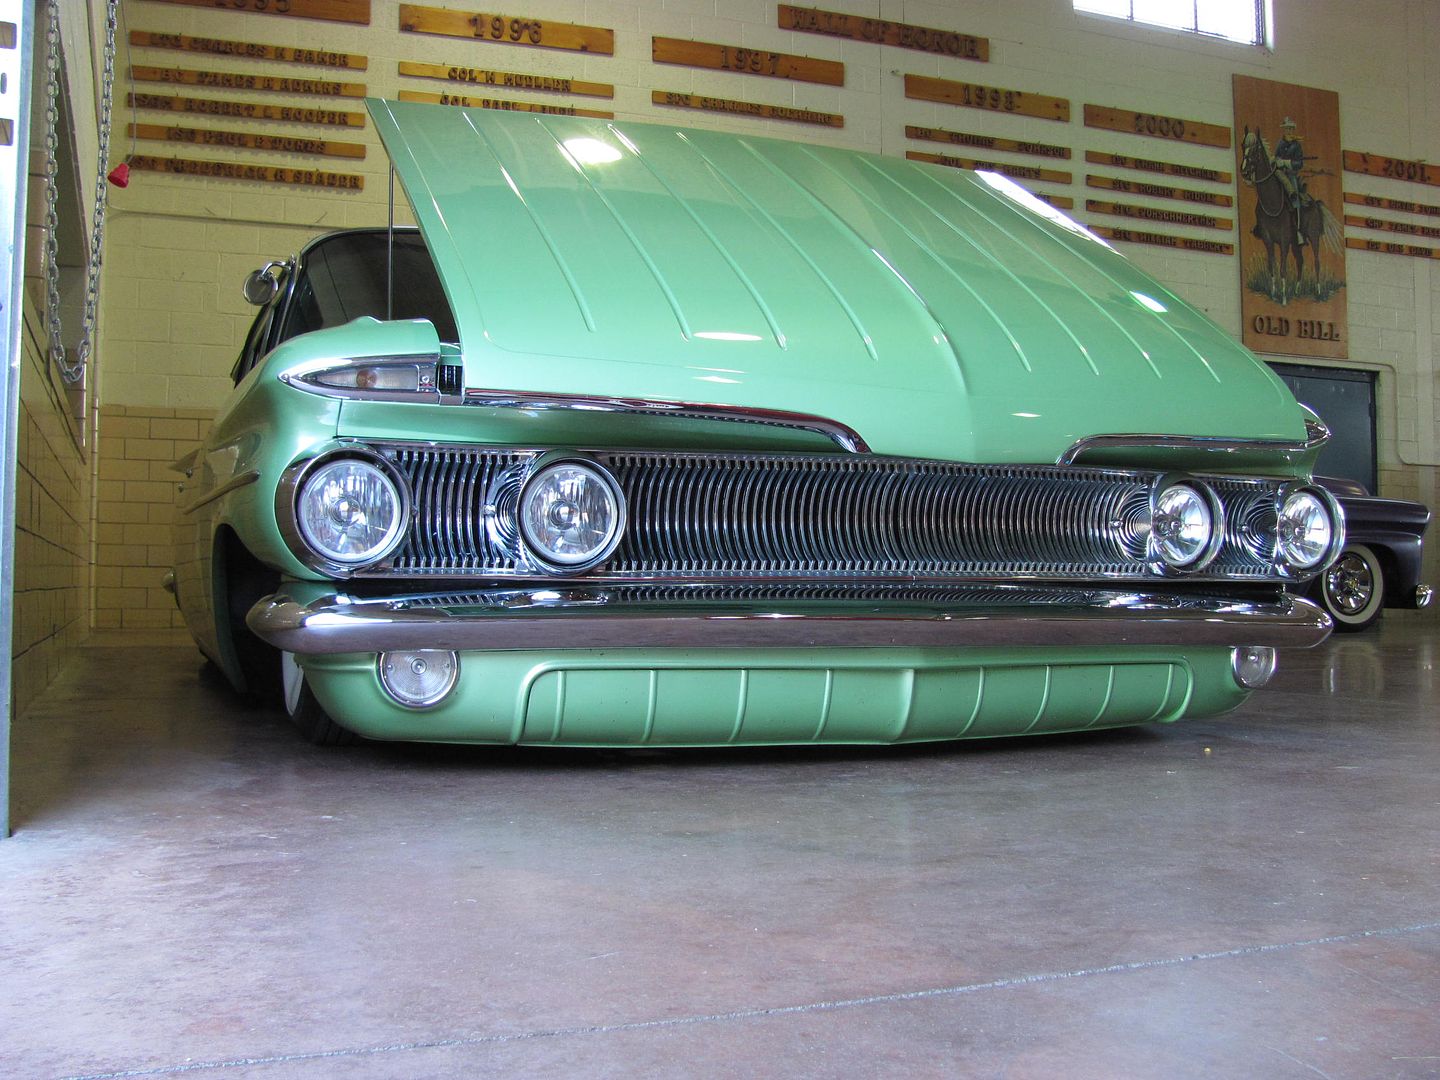 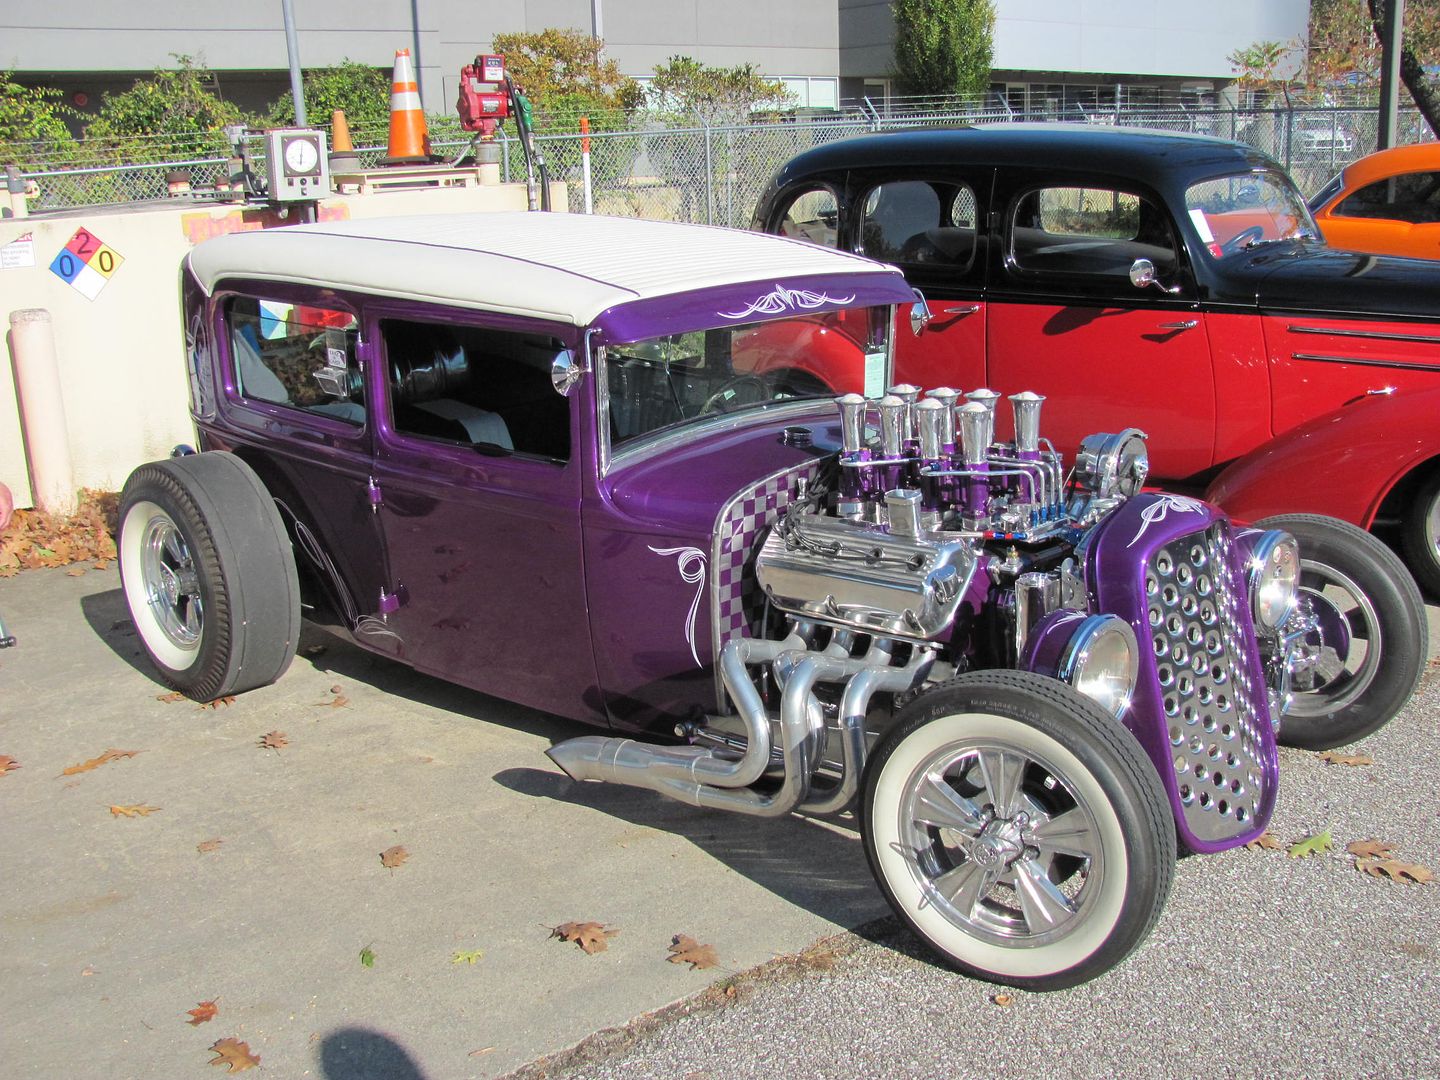 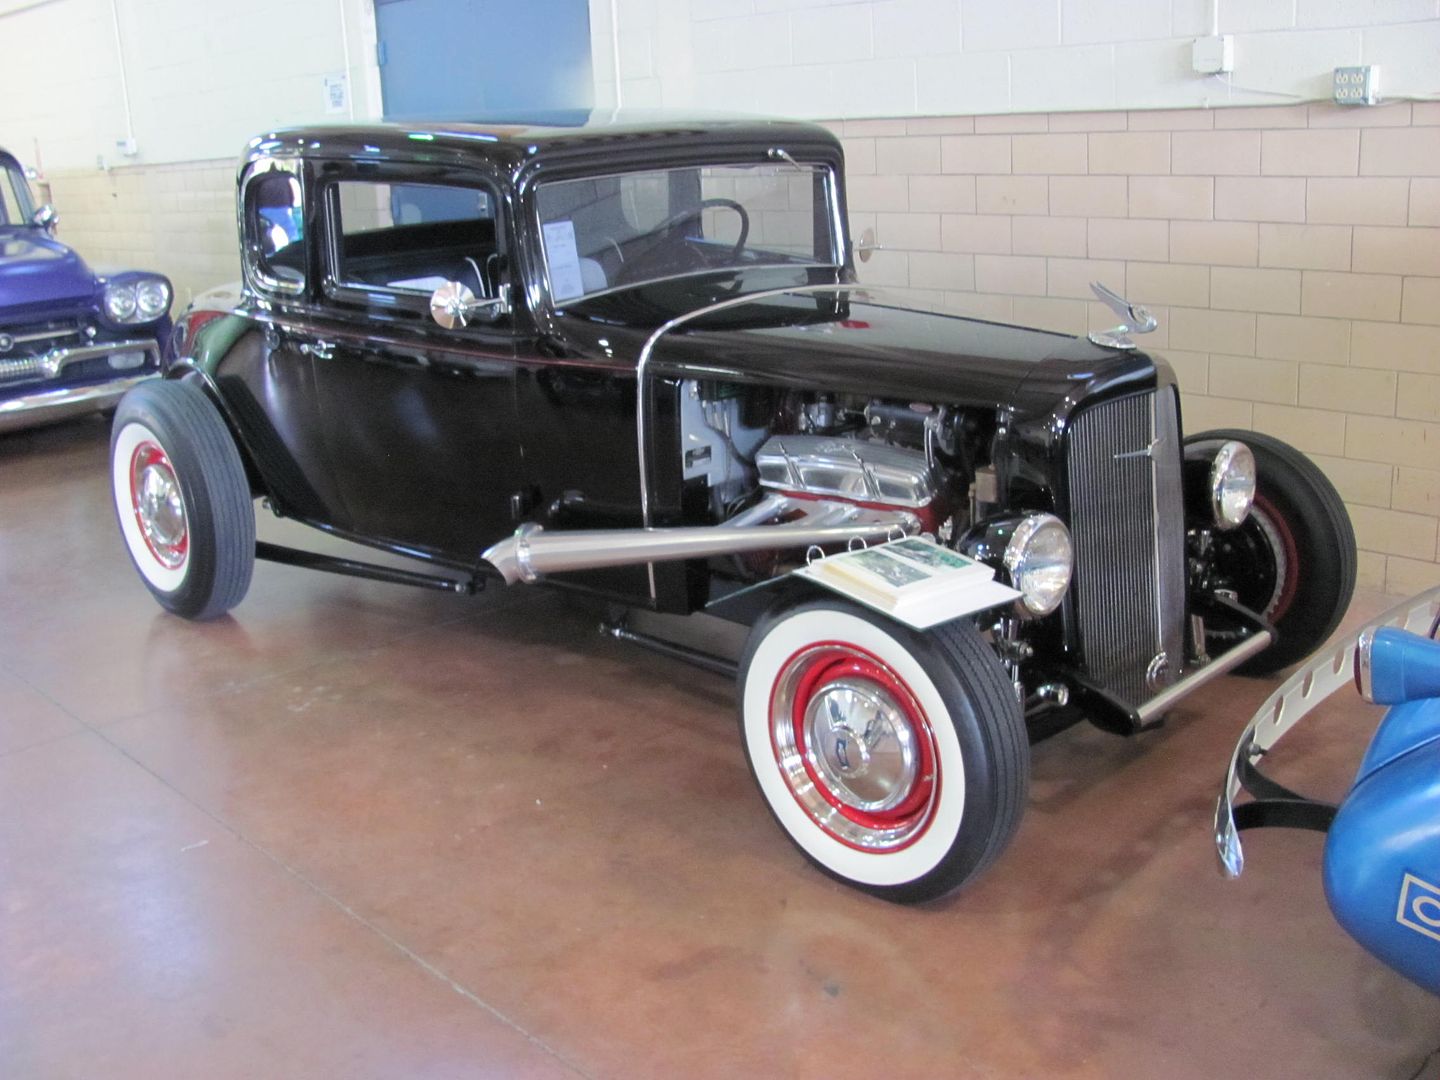 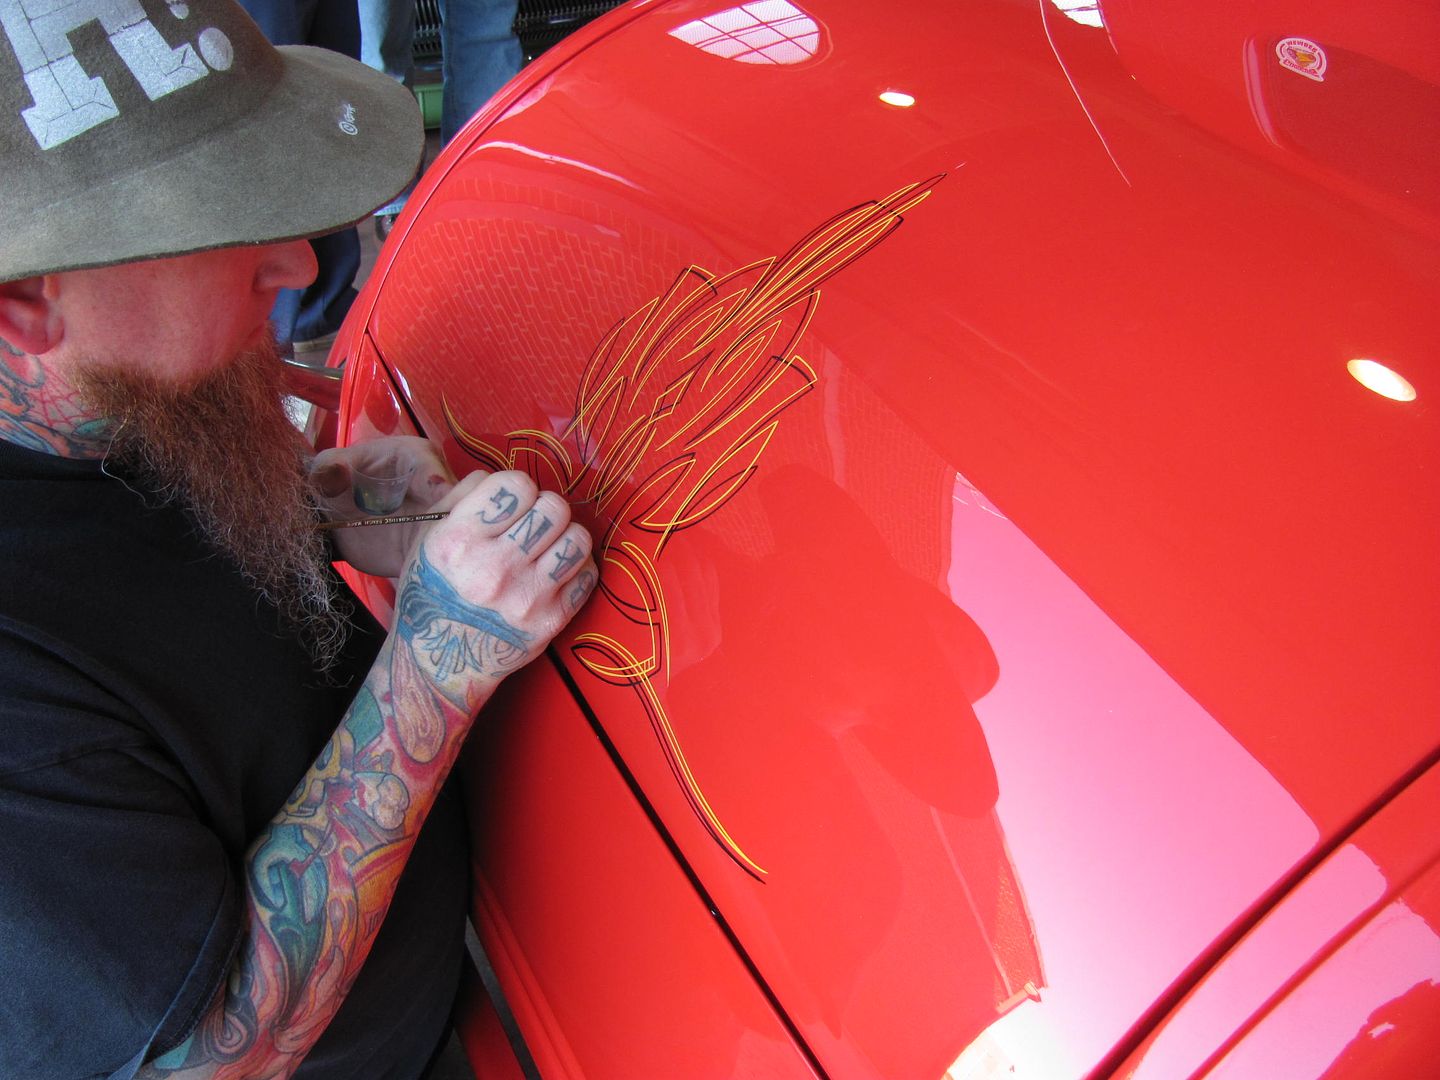
__________________
Robert |
|
|
|
|
10-26-2014, 08:01 AM
|
#13 |
|
Registered User
Join Date: Jan 2012
Location: Eastern Ontario, Canada
Posts: 1,041
|
Re: 55 Wagon Progress
Cool stuff Robert! Can you post some more pictures and info on the rivet nut tool? I think I have one in my tool box at work but never knew what it was used for.
__________________
1952 Canadian Chevy 1300 C4 IFS & D44 IRS 5.3 HO L33 My Build: http://67-72chevytrucks.com/vboard/s...d.php?t=632938 
|
|
|
|
|
10-26-2014, 05:15 PM
|
#14 |
|
Registered User
Join Date: May 2007
Location: Deale Md
Posts: 4,663
|
Re: 55 Wagon Progress
That wagons is really nice, it was at the rodder journal at Pimlico, the front roll pan, hood and roof ribs all line up and match.
__________________
James 63 GMC V6 4speed carryall 65 chevy swb bbw V8 auto 68 K20 327/4 speed, buddy buckets 2002 GMC CC Dually Duramax 64 GMC lwb 3/4 V6 4speed SOLD 66 GMC swb bbw buddy buckets SOLD IG duallyjams The only thing that stays the same is constant change! |
|
|
|
|
10-26-2014, 07:40 PM
|
#15 |
|
Senior Member
Join Date: Jul 2012
Location: Oblong, Illinois
Posts: 7,017
|
Re: 55 Wagon Progress
Nice work on the wagon, great car show and more details on the rivnut tool would be interesting.....haven't seen one like that.
|
|
|
|
|
10-26-2014, 09:56 PM
|
#16 |
|
Registered User
Join Date: Apr 2011
Location: .
Posts: 3,104
|
Re: 55 Wagon Progress
Cool pics of some cool cars but I gotta say your info is TOPS.
|
|
|
|
|
10-27-2014, 08:50 AM
|
#17 |
|
Registered User
Join Date: Jan 2013
Location: Leonardtown, MD
Posts: 1,636
|
Re: 55 Wagon Progress
I was going to post a youtube link on the proper use of the rivnut tool shown, but all of the videos I've seen thus far show using the tool incorrectly. So I'll have to make one myself and I'll post up a link when done...
__________________
Robert |
|
|
|
|
10-27-2014, 07:56 PM
|
#18 |
|
6>8 Plugless........
Join Date: Sep 2007
Location: Prairie City, Ia
Posts: 17,141
|
Re: 55 Wagon Progress
Great work and thanks for the pics from the show. A lot of nice rides there. That riv nut tool looks pretty nice. I'm looking forward to the vid you will make.
__________________
Ryan 1972 Chevy Longhorn K30 Cheyenne Super, 359 Inline 6 cylinder, Auto Trans, Tilt, Diesel Tach/Vach, Buckets, Rare Rear 4-link and air ride option Build Thread 1972 GMC Sierra Grande Longhorn 4x4 1972 Chevy Cheyenne Super K20 Long Step side tilt, tach, tow hooks, AC, 350 4 speed 1972 C10 Suburban Custom Deluxe 1969 Chevy milk truck 1971 Camaro RS 5.3 BTR STG3 Cam Super T10 1940 Ford 354 Hemi 46RH Ford 9" on air ride huge project Tired of spark plugs? Check this out. |
|
|
|
|
10-29-2014, 04:37 AM
|
#19 |
|
Registered User
Join Date: Oct 2007
Location: Spanaway
Posts: 8,451
|
Re: 55 Wagon Progress
That's a nice collection of rides!
__________________
Mike. Swamp Rat build thread : http://67-72chevytrucks.com/vboard/s...d.php?t=595019 72 3/4T 4X4 4" BDS Lift 33" BFG's |
|
|
|
|
10-29-2014, 10:07 PM
|
#20 |
|
Registered User
Join Date: Jan 2013
Location: Leonardtown, MD
Posts: 1,636
|
Re: 55 Wagon Progress
A slight diversion, as the Migmaster 250 has left the building.....
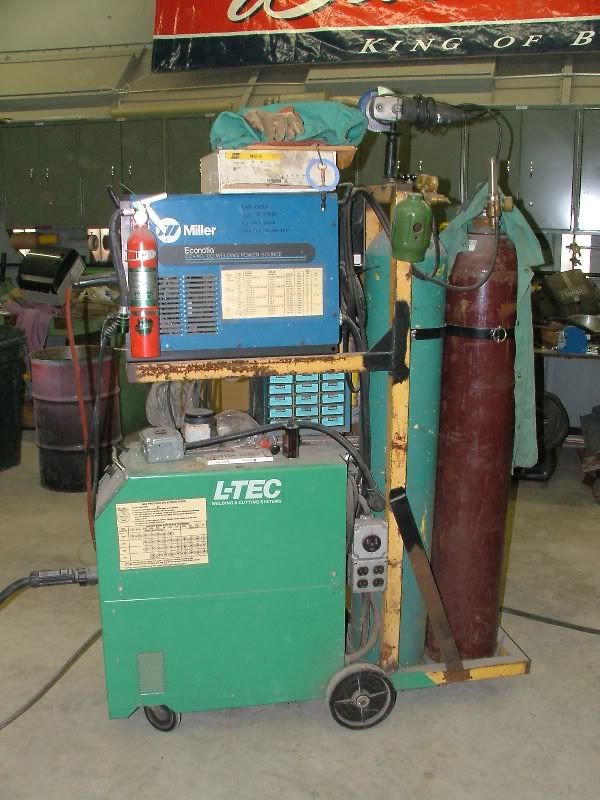 Sold it this past weekend on CL, time now to consolidate, where the old machine was a two-story deal, the new one will be a three story. In order to take up less floor space, I need to incorporate the Miller 211, the Hypertherm Tig, and the Snap On dent puller, and two bottles:    Starting with the base, some 1-1/2 square tubing makes up the frame. This stuff was free, and as with most free stuff, it isn't. Kyle spent most of the time in the shop this evening media blasting rusty square tubing that has been sitting outdoors for a number of years. He also learned a bit more of mig welding.. 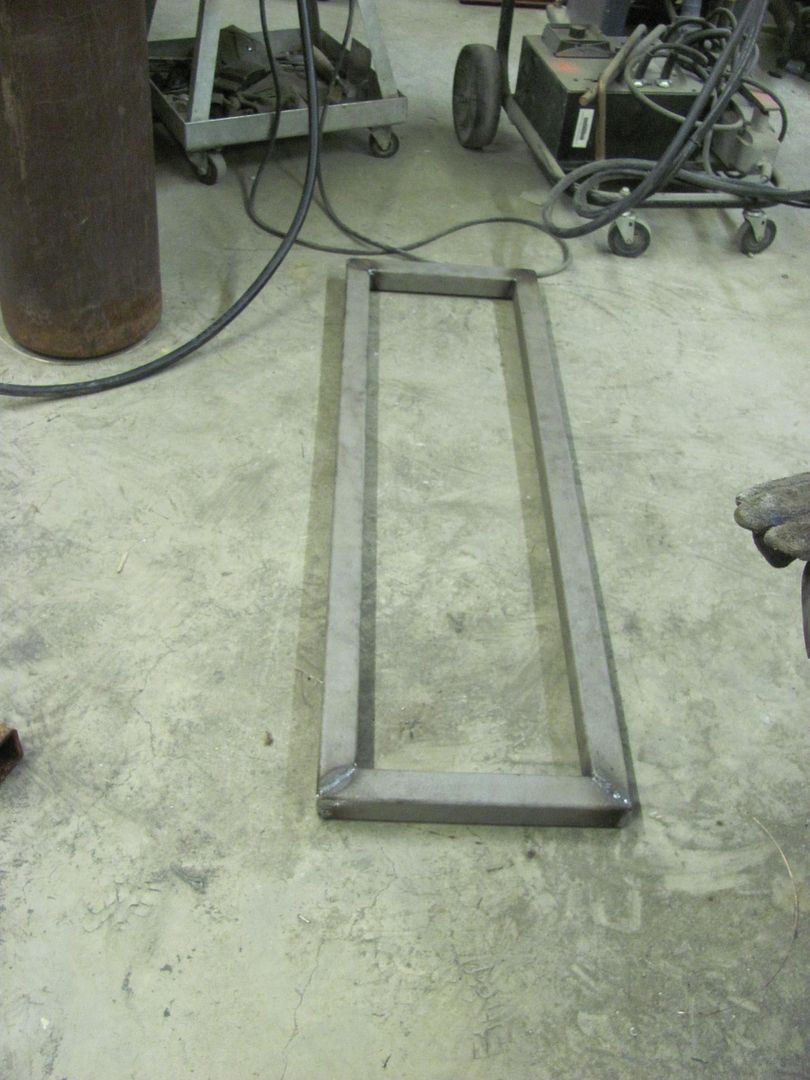 The Tig will go on the bottom, and it has some mounting holes on the bottom side...  So some 3/4 square stock was used to make some rails for the Tig, along with some holes to tie in the front end.. 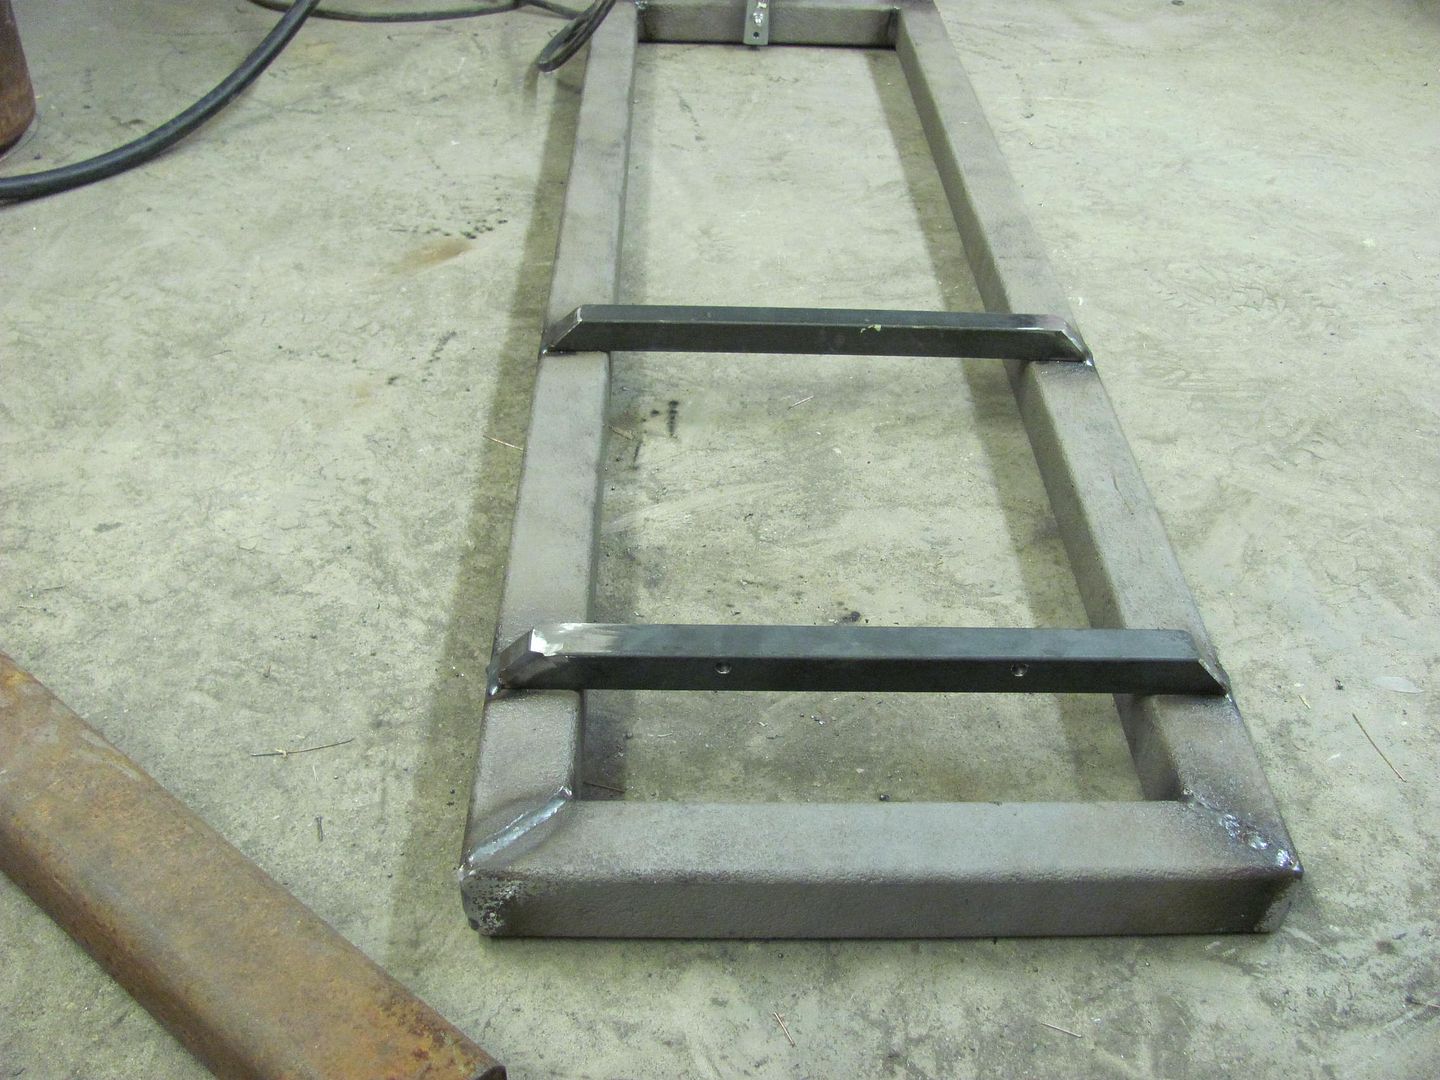 To be continued....
__________________
Robert |
|
|
|
|
11-02-2014, 12:14 AM
|
#21 |
|
Registered User
Join Date: Jan 2013
Location: Leonardtown, MD
Posts: 1,636
|
Re: 55 Wagon Progress
Worked some more on the welder cart tonight. Started by adding the front casters.....
 A cross brace was added under the center line of the 2 bottles... 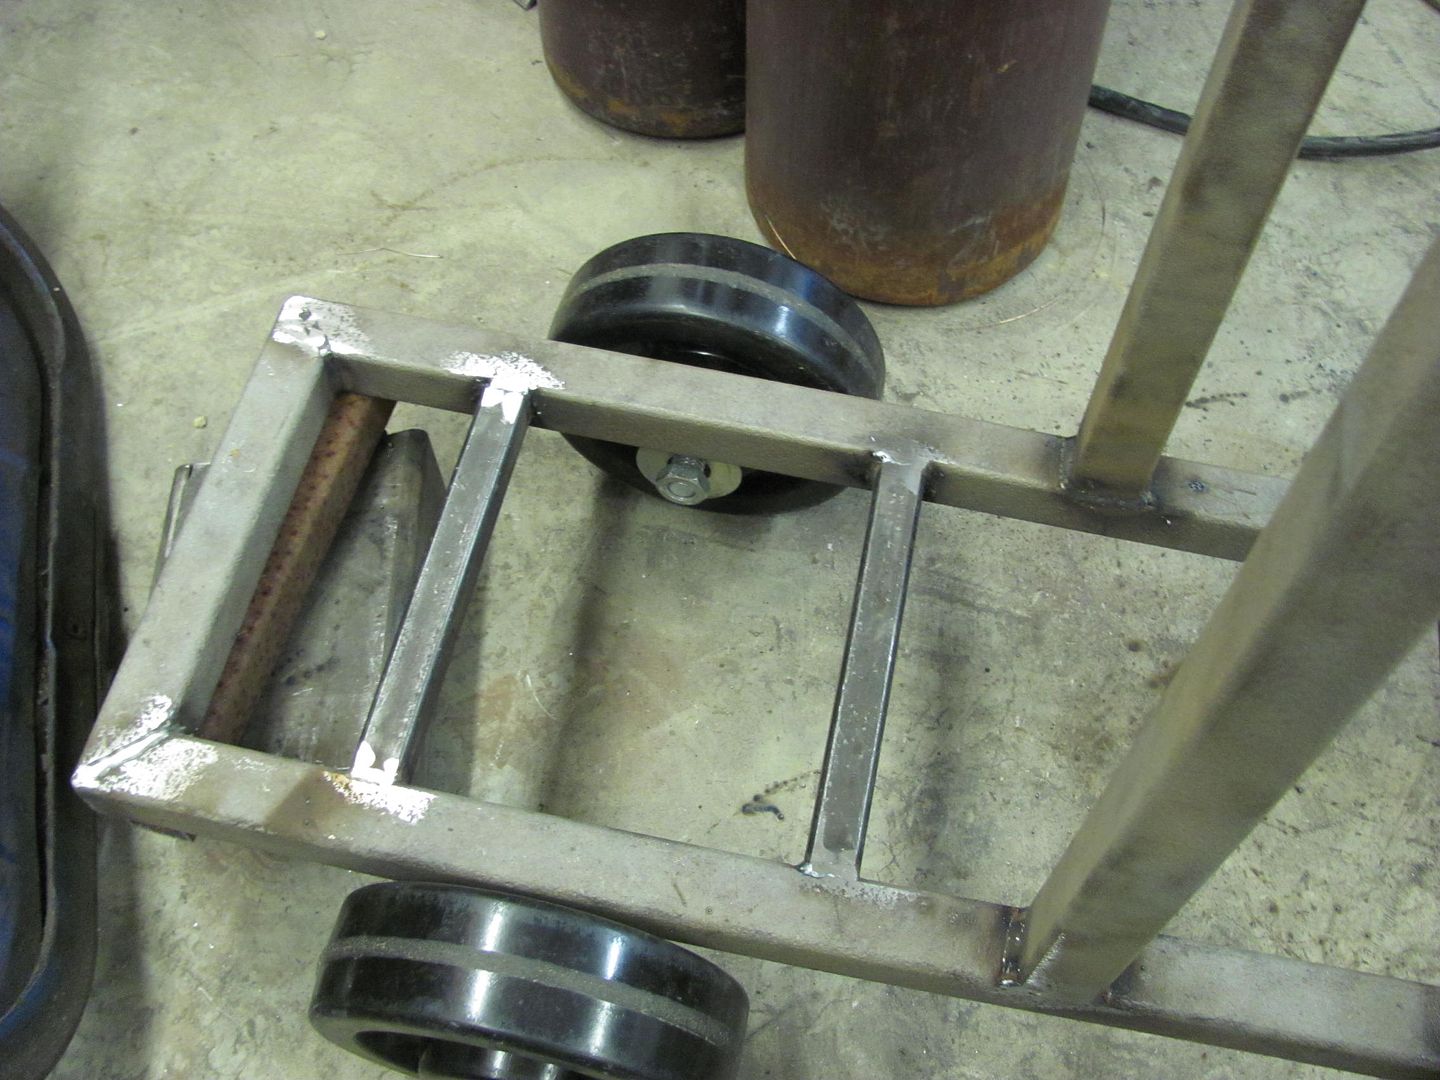 12 gauge will be used to form a tray under the bottles...  Support bracket added for Mig welder: 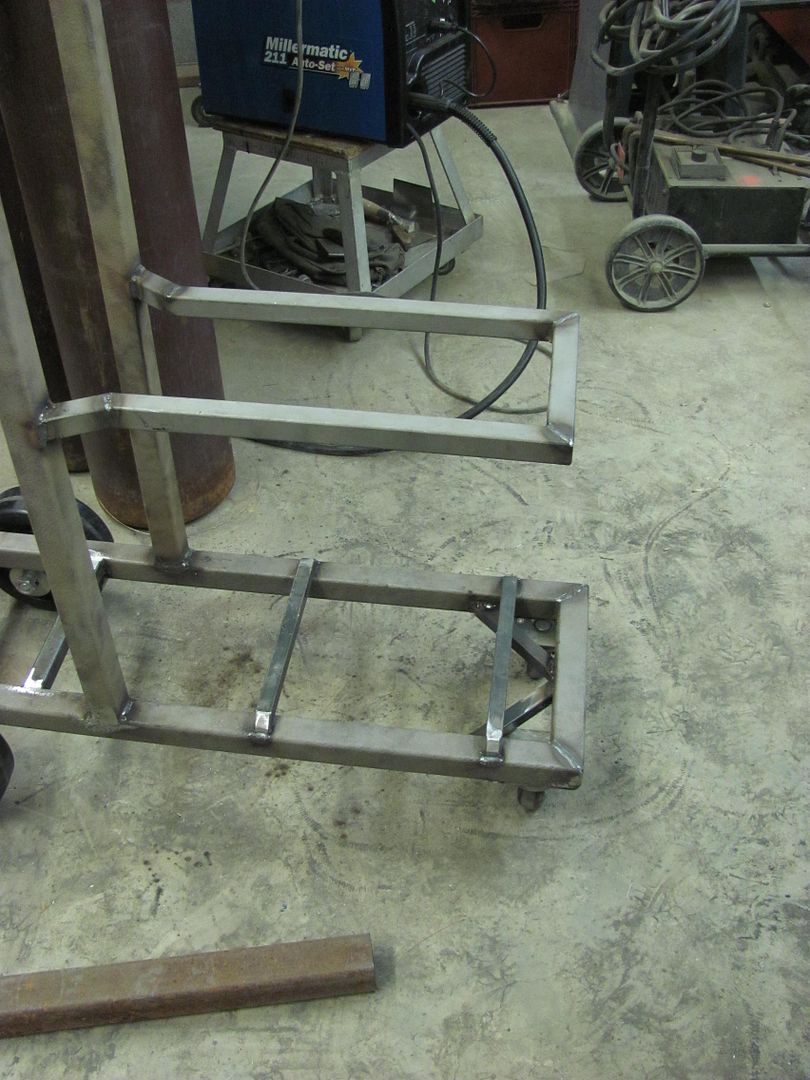 Next time we'll add the bracket for the dent puller... 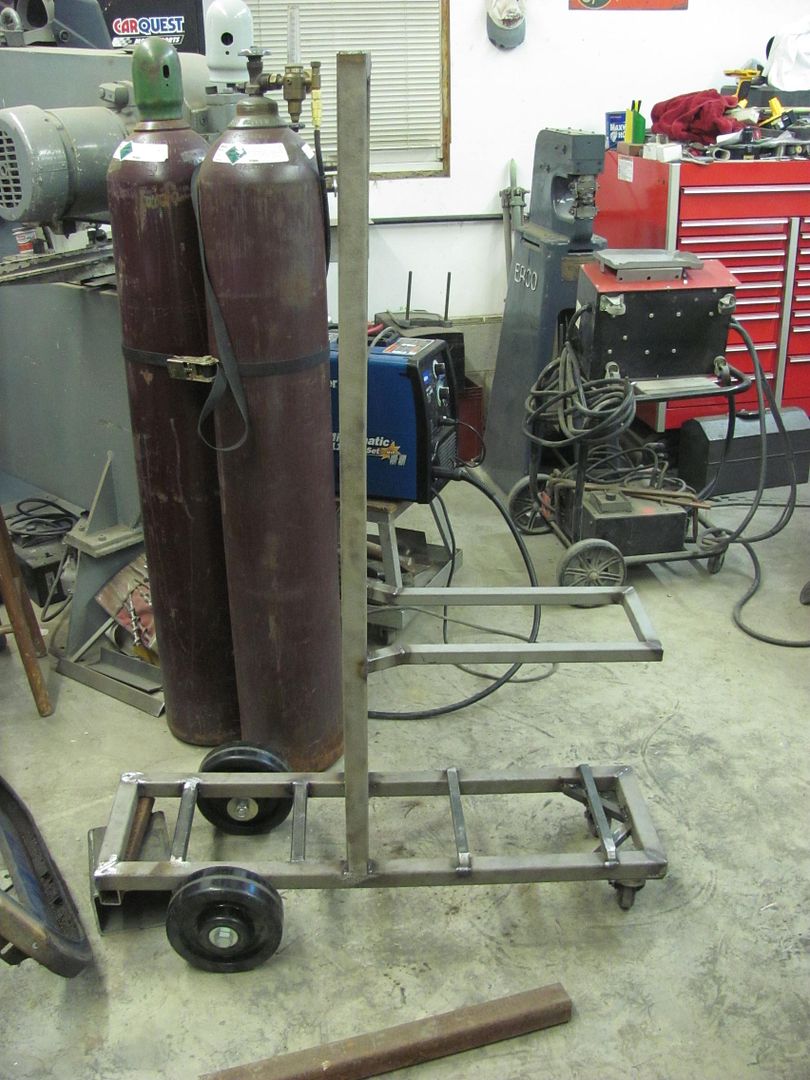
__________________
Robert |
|
|
|
|
11-02-2014, 07:33 AM
|
#22 |
|
Registered User
Join Date: May 2007
Location: Deale Md
Posts: 4,663
|
Re: 55 Wagon Progress
did you pick up anything from the auction ?
__________________
James 63 GMC V6 4speed carryall 65 chevy swb bbw V8 auto 68 K20 327/4 speed, buddy buckets 2002 GMC CC Dually Duramax 64 GMC lwb 3/4 V6 4speed SOLD 66 GMC swb bbw buddy buckets SOLD IG duallyjams The only thing that stays the same is constant change! |
|
|
|
|
11-02-2014, 10:19 AM
|
#23 |
|
Registered User
Join Date: Jan 2013
Location: Leonardtown, MD
Posts: 1,636
|
Re: 55 Wagon Progress
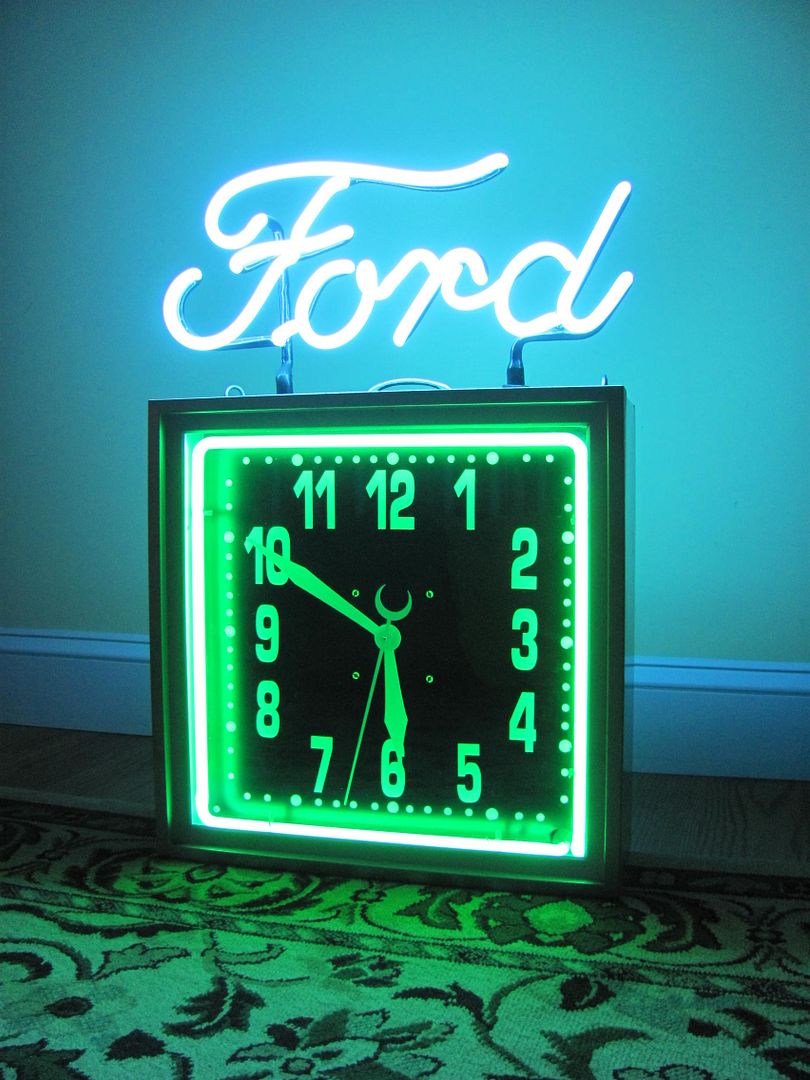
I picked up a new shop clock at the auction.. My old Budweiser clock had quit about a month or so ago. This is a vintage neon Ford clock, looks to be a dealer only item as near as I can tell..
  Also got a small machinists tool box, primarily for the adjustable reamers it had inside, and the casters/wheels you see above for the welder cart..
__________________
Robert |
|
|
|
|
11-02-2014, 09:25 PM
|
#24 |
|
Registered User
Join Date: Jan 2013
Location: Leonardtown, MD
Posts: 1,636
|
Re: 55 Wagon Progress
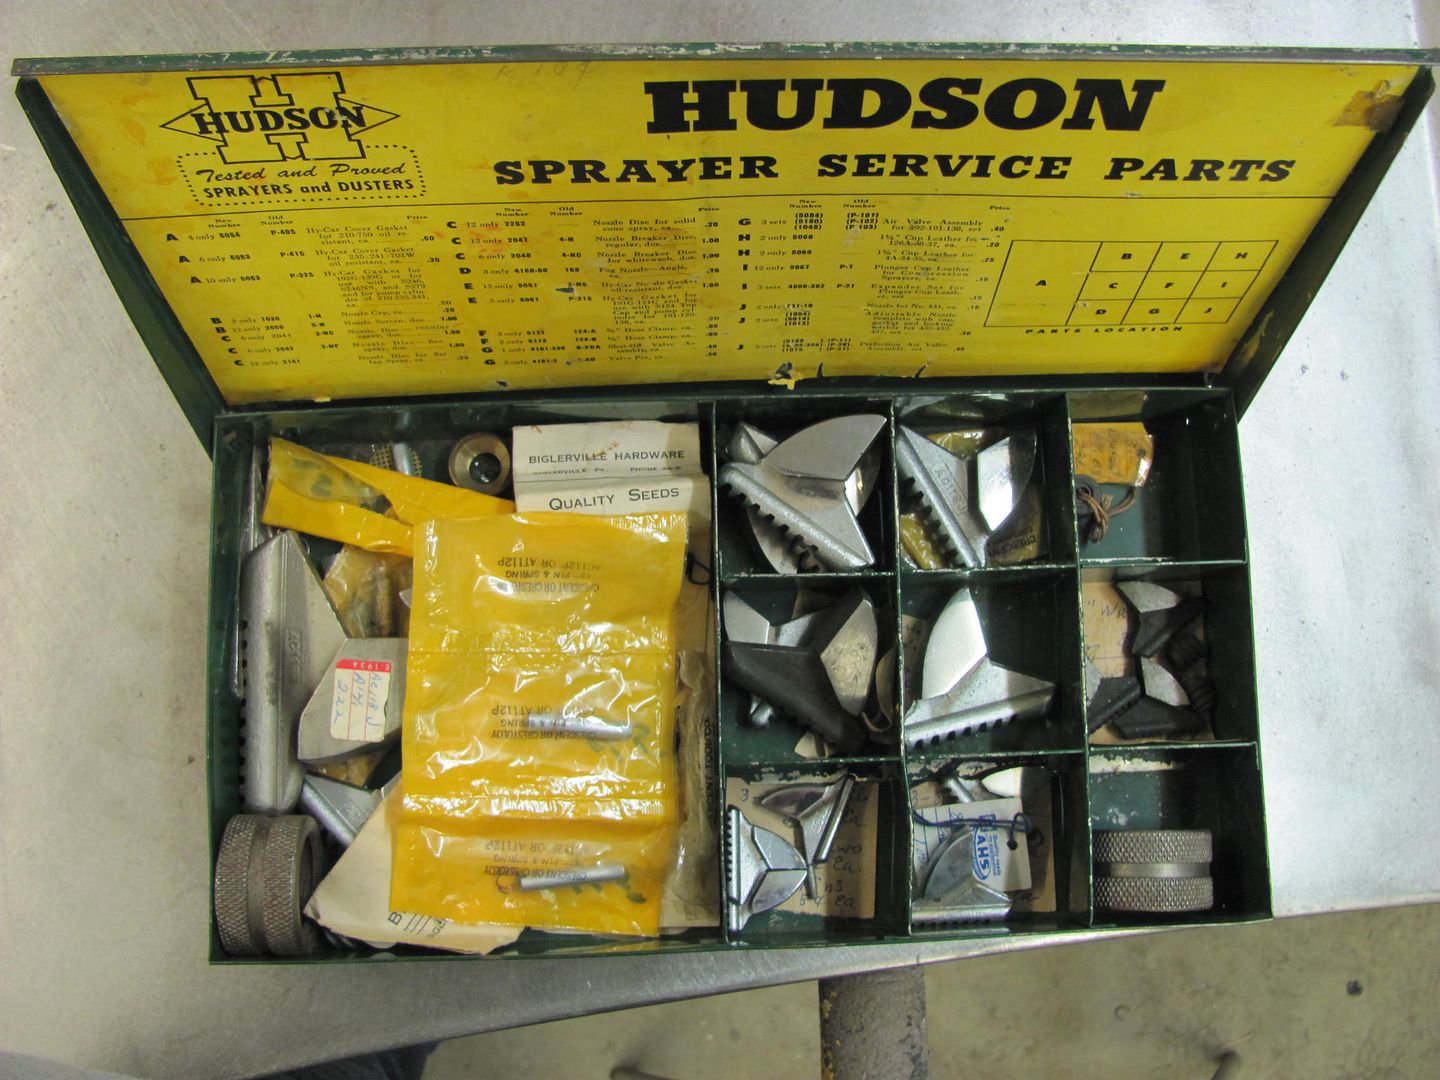
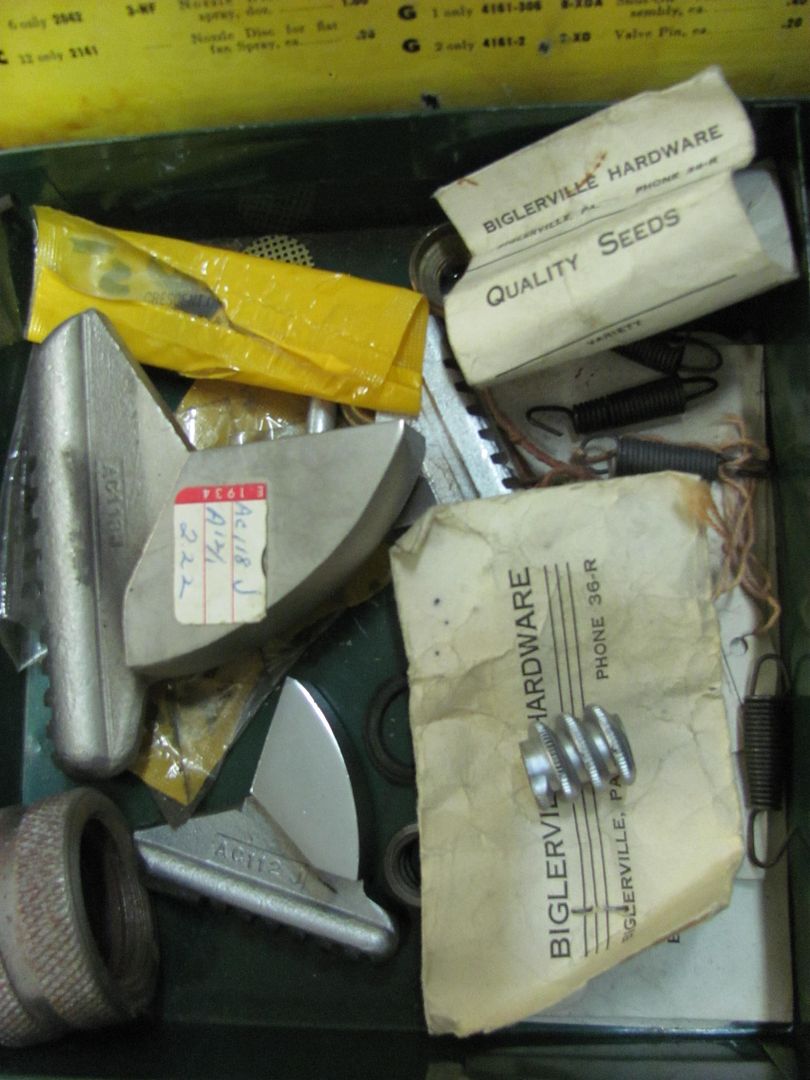
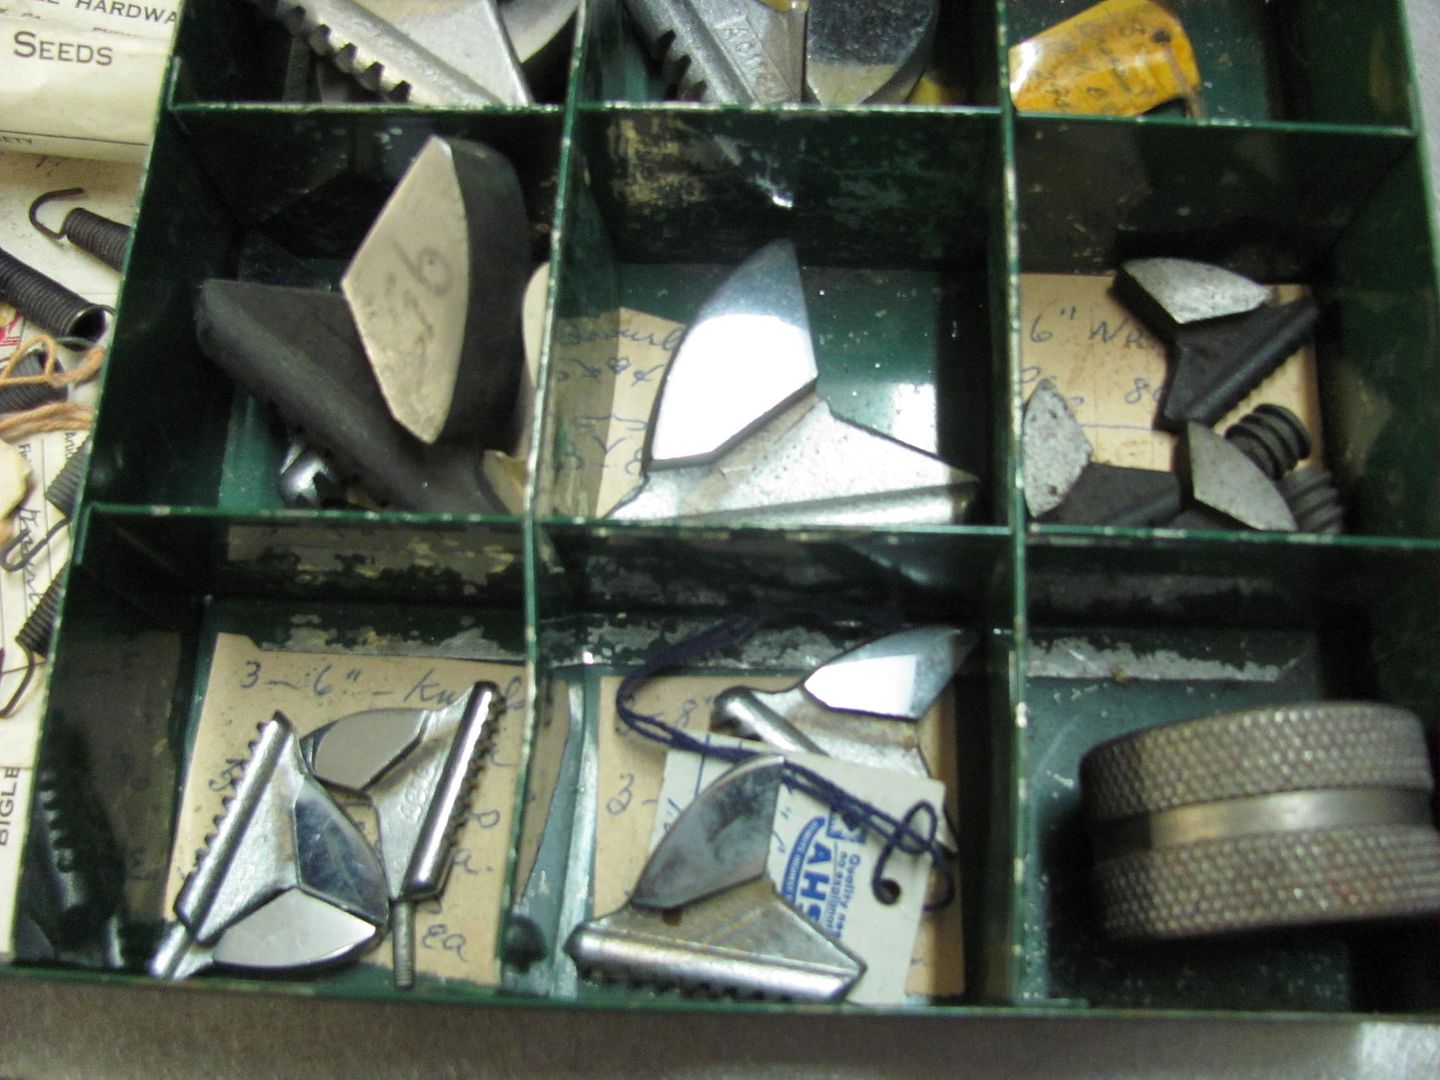
Also got this crescent wrench rebuild kit that originally came out of a now closed hardware store. New jaws, thumbwheel/gears, and even vise grip springs (which I actually need a couple). Not items you're likely to see at a big box store..
__________________
Robert |
|
|
|
|
11-02-2014, 10:24 PM
|
#25 |
|
Registered User
Join Date: May 2007
Location: Deale Md
Posts: 4,663
|
Re: 55 Wagon Progress
never seen one those
__________________
James 63 GMC V6 4speed carryall 65 chevy swb bbw V8 auto 68 K20 327/4 speed, buddy buckets 2002 GMC CC Dually Duramax 64 GMC lwb 3/4 V6 4speed SOLD 66 GMC swb bbw buddy buckets SOLD IG duallyjams The only thing that stays the same is constant change! |
|
|
|
 |
| Bookmarks |
|
|


 Hybrid Mode
