
|
Register or Log In To remove these advertisements. |
|
|
|
|||||||
 |
|
|
Thread Tools | Display Modes |
 06-28-2012, 01:17 AM
|
#1 |
|
Registered User
Join Date: Jun 2010
Location: Jackson, ME
Posts: 287
|
65 Short Step driver build
I have decided to start a build thread after working on the truck for about 1.5years. This is what the truck looked like when I first brought it home, It started and moved so I drove it.
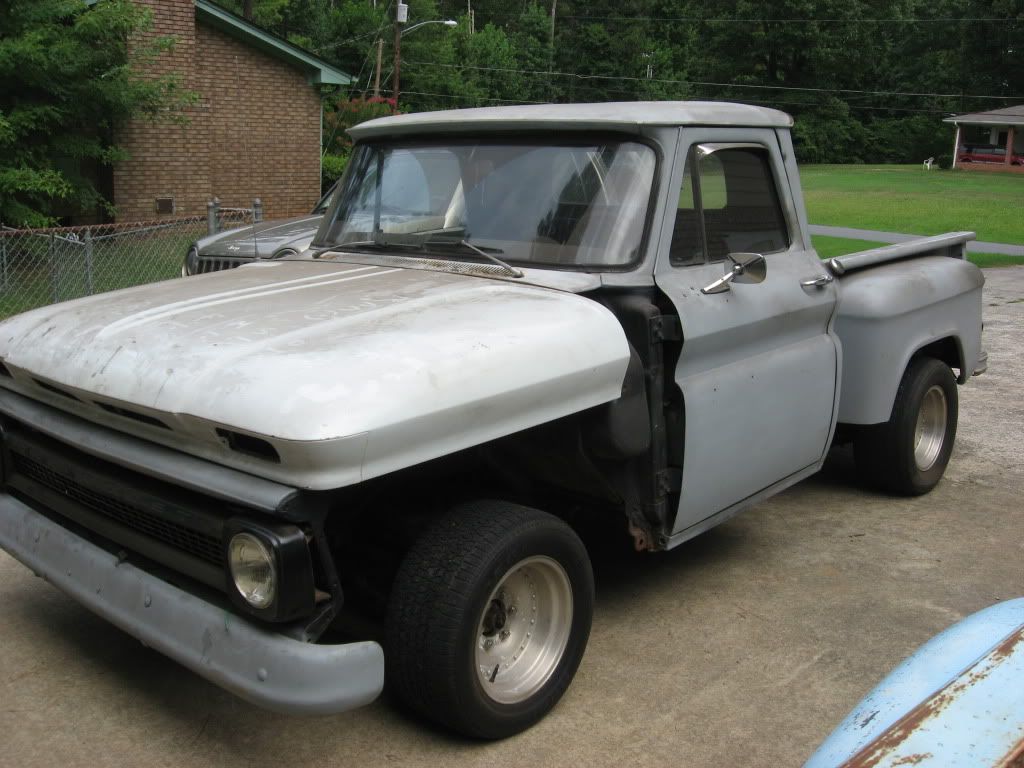 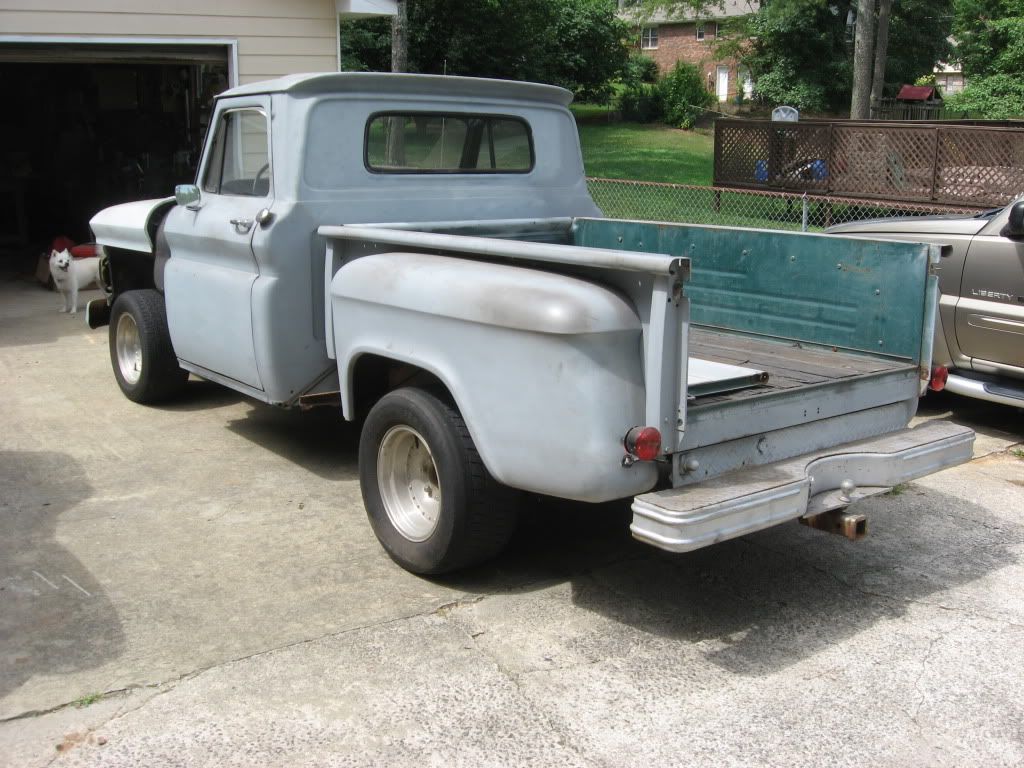 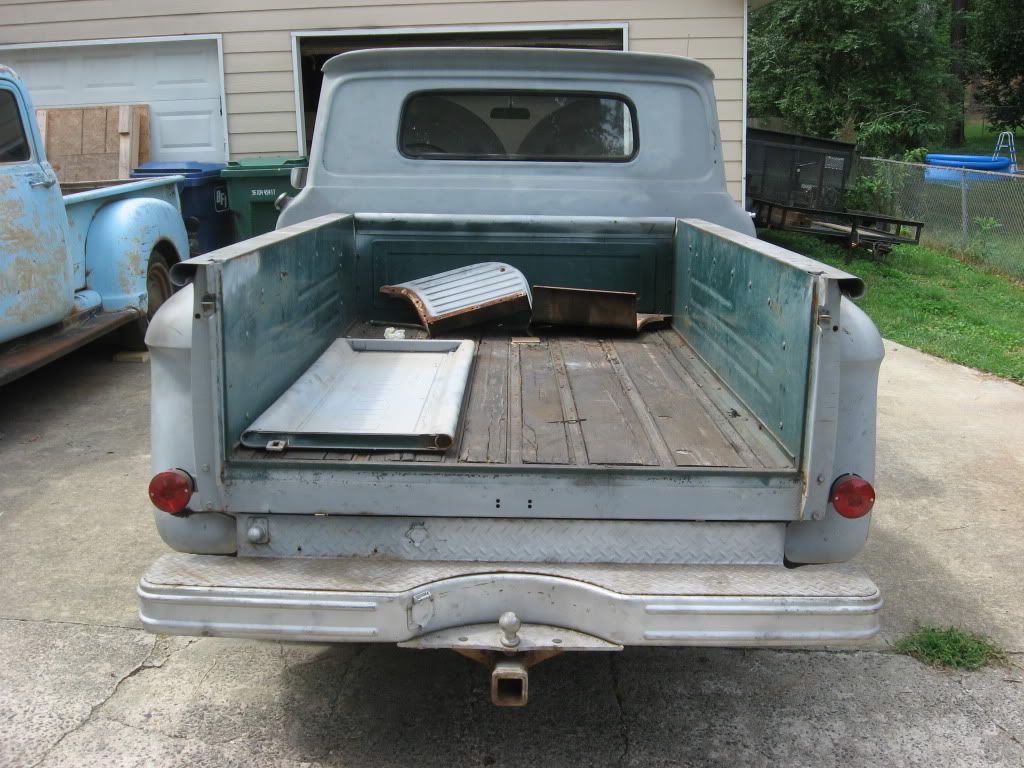  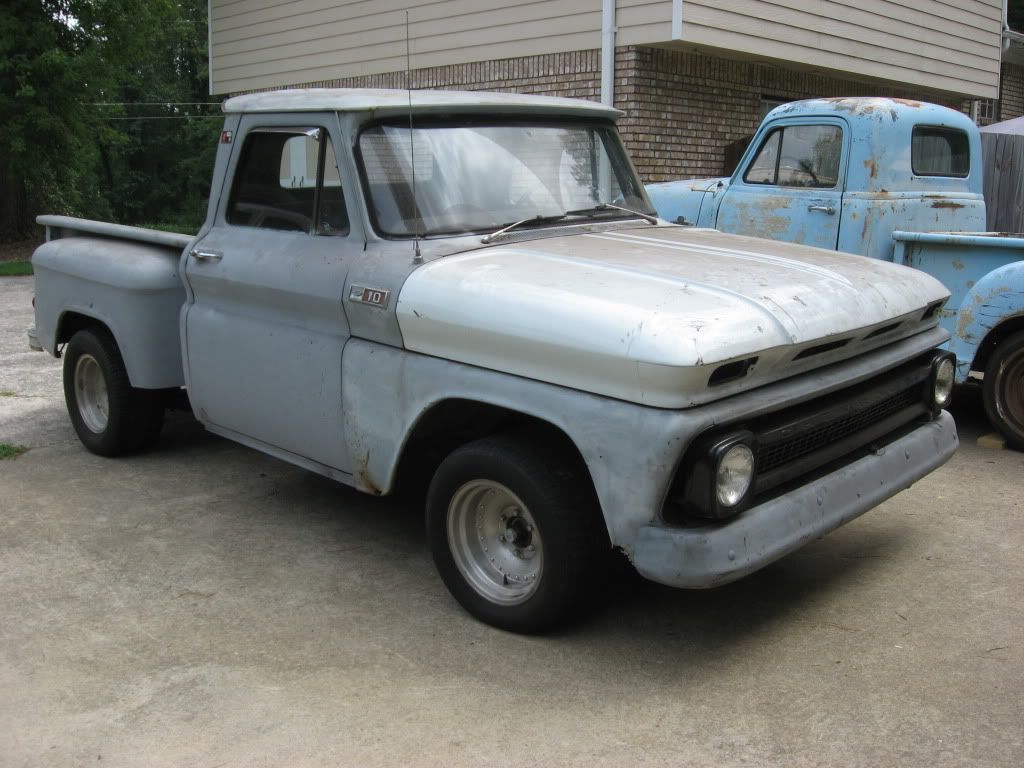   I got it home, put the panels and peices back on it and drove it until I figured out which direction I wanted to go. It was mostly original with the only changes being the trans had been swapped out at some point from a 3 on the tree to 4 speed with a high hump. For some reason someone had sprayed the whole truck with primer over the original green paint. Here is the current state that it is in. 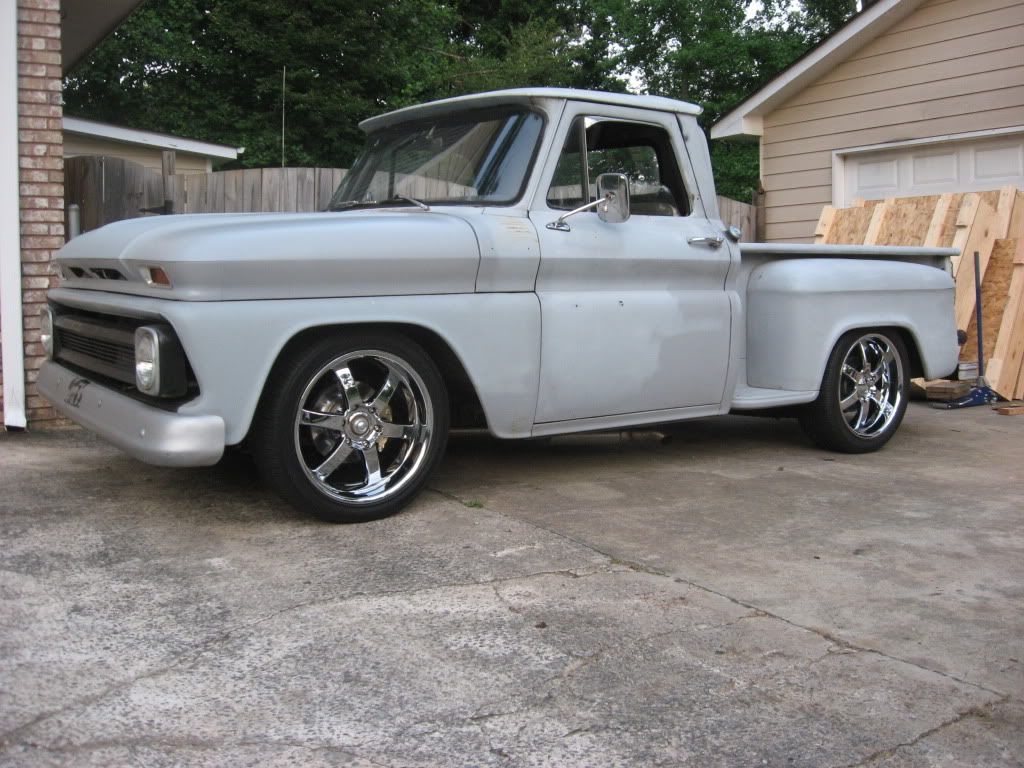 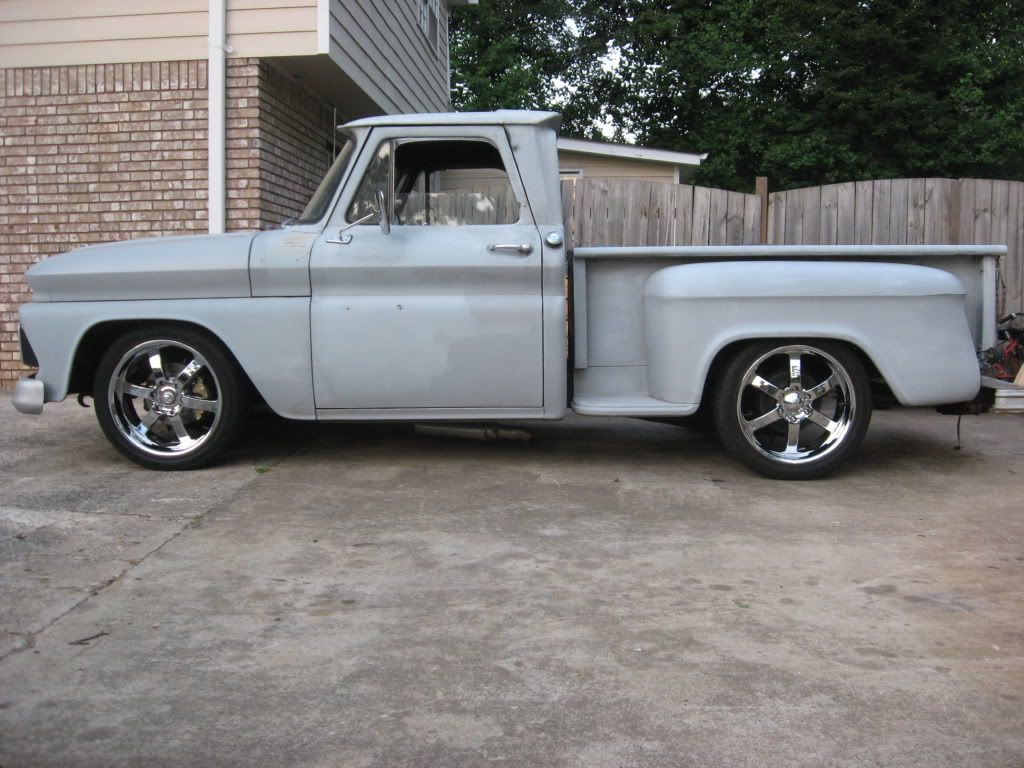 I will sort of put together a build with pics of course of what I have done along the way and progress from here out. This picture is a quick photo shop of what I want it to look like when finished. I would like to get a nice rendering done by somebody with real talent  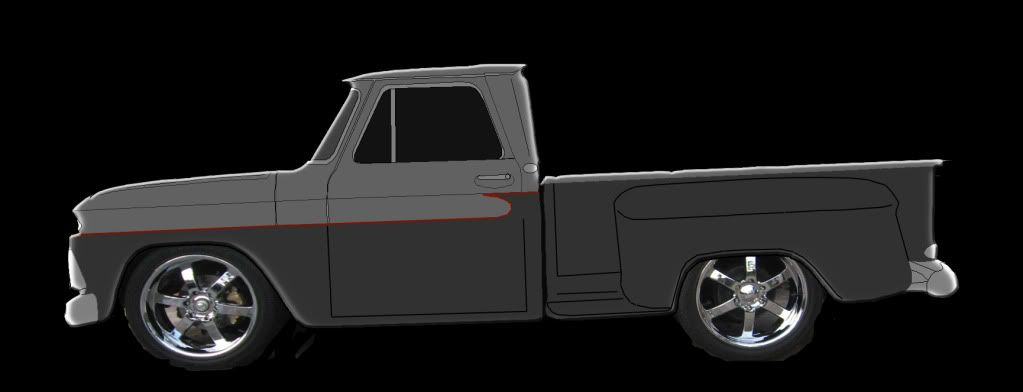
__________________
65 short step edited by staff |

|

|
|
06-28-2012, 01:22 AM
|
#2 |
|
Registered User
Join Date: Apr 2010
Location: bartlett Tn
Posts: 276
|
Re: 65 Short Step driver build
Cool truck man dig the wheels
Posted via Mobile Device
__________________
STEVES 63 BUILD http://67-72chevytrucks.com/vboard/s...d.php?t=412554 GIBSON63 YouTube channel https://www.youtube.com/user/1gibsonl4 |
|
|
|
|
06-28-2012, 02:14 PM
|
#3 |
|
Registered User
Join Date: Jun 2010
Location: Jackson, ME
Posts: 287
|
Re: 65 Short Step driver build
The following pictures of some of the work that has been done up to this point. The first thing was to add power steering. I had a hard time backing up a trailer with manual steering. The second thing I did when the 6 cyl was still in the truck was to swap out the big 4 speed for a T5. Since then everything has come together quicker since I collected parts for about 6 months for my suspension and engine project. I have install a L98 TPI 350 cu with mild upgrades.
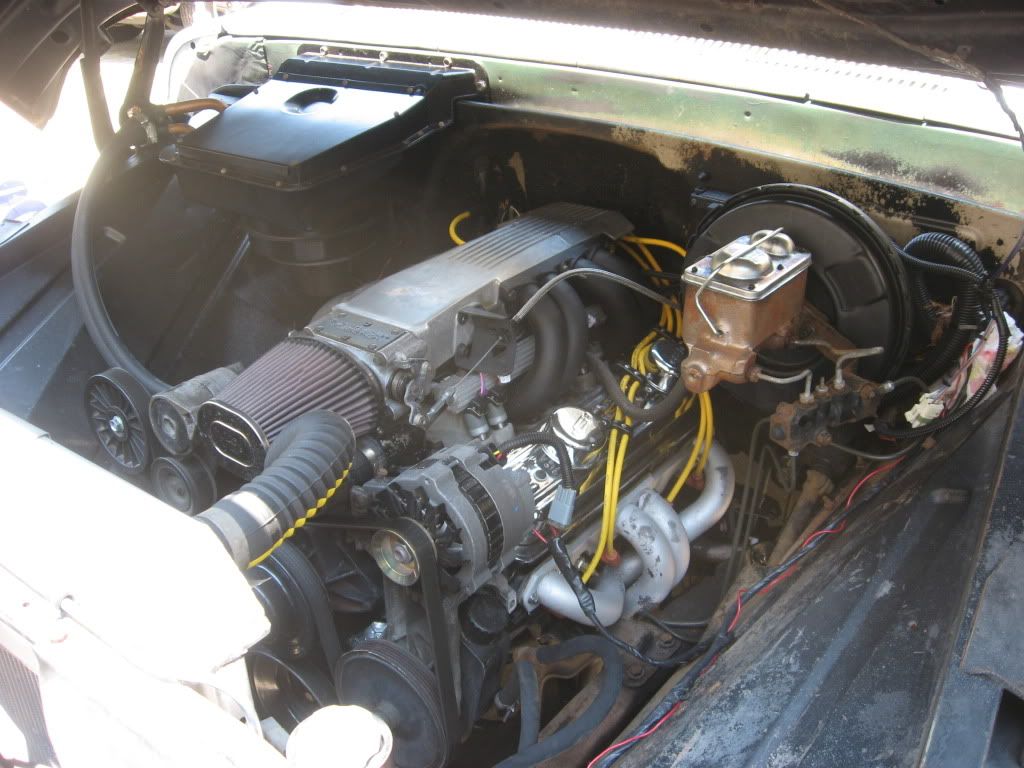   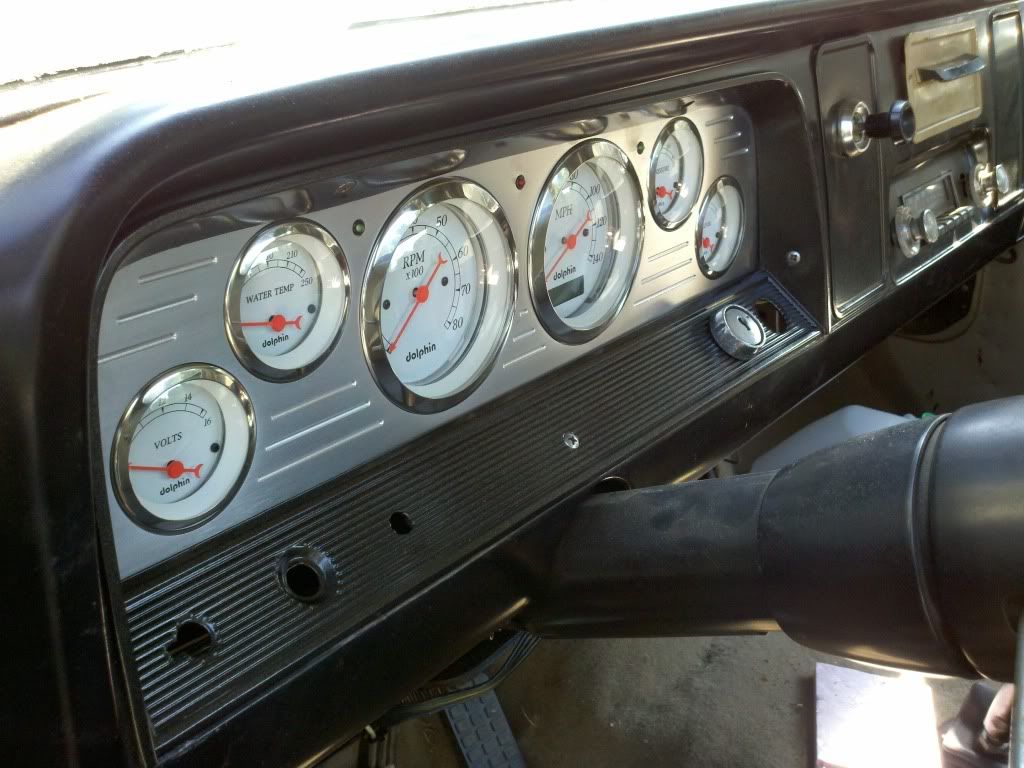 I swapped out the dash and had to modify my sending unit to accept the correct level sensor I swapped out the dash and had to modify my sending unit to accept the correct level sensor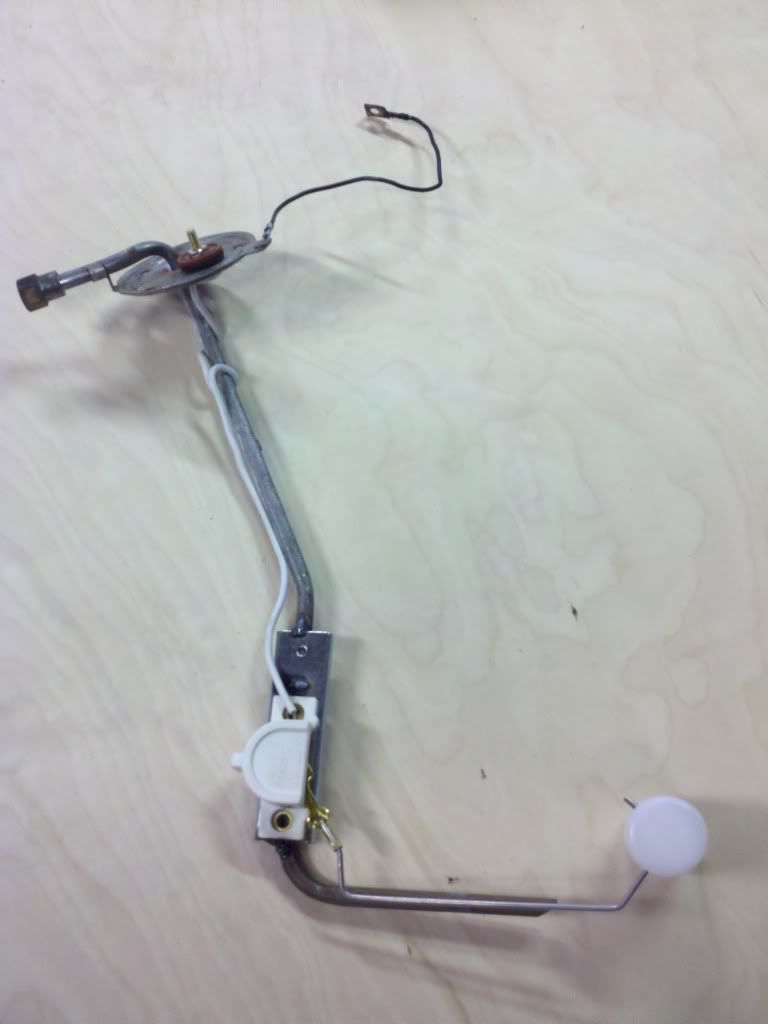
__________________
65 short step edited by staff |
|
|
|
|
06-28-2012, 02:24 PM
|
#4 |
|
Registered User
Join Date: Jun 2010
Location: Jackson, ME
Posts: 287
|
Re: 65 Short Step driver build
The most recent part of the build was to make the ride better, lower and stop.
 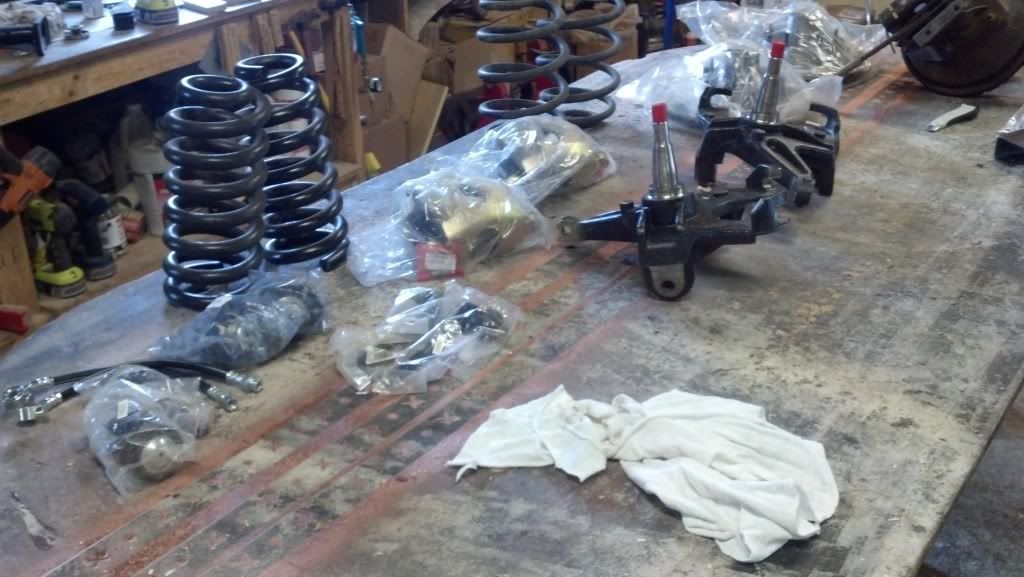 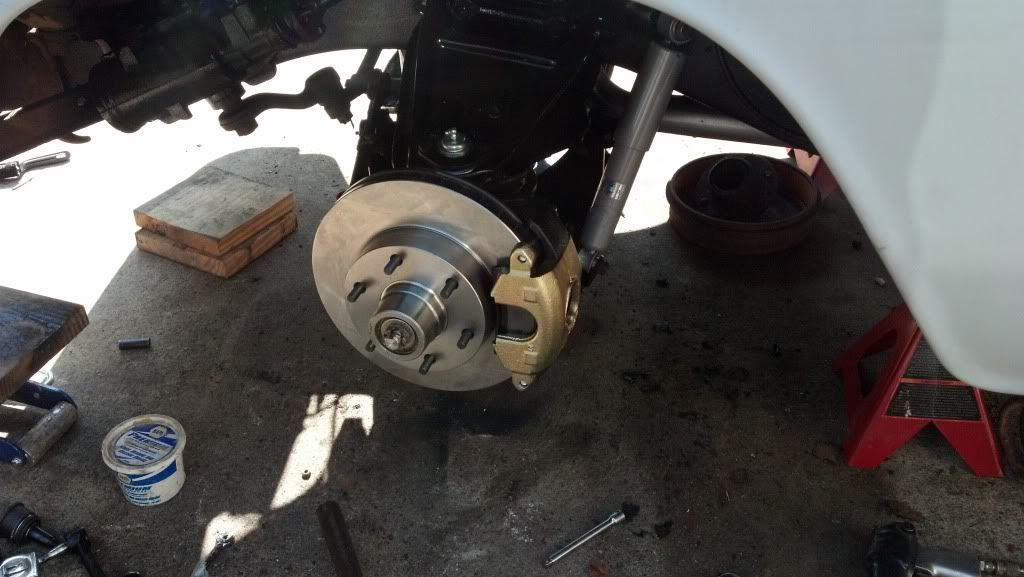 I used 2.5" drop spindles and 2" springs in the front. The rear has 2" blocks and 3" spings. The front end got all new ball joints, tie rod ends, bushings etc. I used CPP 6 lug rotors.
__________________
65 short step edited by staff |
|
|
|
|
08-28-2012, 12:26 AM
|
#5 |
|
Registered User
Join Date: Jun 2010
Location: Jackson, ME
Posts: 287
|
Re: 65 Short Step driver build
So I started this build thread but have not posted anything since. I have decided to do another engine swap. Wifey thinks I'm crazy but I have had some drivability issues with the TPI engine so I have moved on to a Corvette LT1 that has been juiced up a little. The PCM is better the injection system is better. I will be doing a write up on the LT1 swap. I am waiting on some parts to show up before the install and then I will be back on this.
__________________
65 short step edited by staff |
|
|
|
|
08-28-2012, 09:57 AM
|
#6 |
|
Registered User
Join Date: Aug 2012
Location: Bibb CO.Alabama
Posts: 321
|
Re: 65 Short Step driver build
Lookin good i like that two tone look and the wheels are cool
Posted via Mobile Device
__________________
1966 C10 short stepper KMHK 
|
|
|
|
|
08-29-2012, 04:31 PM
|
#7 |
|
Registered User
Join Date: Apr 2012
Location: Searcy, AR
Posts: 4,203
|
Re: 65 Short Step driver build
Looking forward to watching your progress... Good looking Stepper!
__________________
DON Proverbs 27:17  US Air Force Retarded errr Retired My '65 Stepper Build:http://67-72chevytrucks.com/vboard/s...d.php?t=533920 My '60 Rusty Patina Build:http://67-72chevytrucks.com/vboard/s...66#post7402266 My '72 http://67-72chevytrucks.com/vboard/s...59#post7204359 SOLD |
|
|
|
|
08-30-2012, 09:56 PM
|
#8 |
|
Registered User
Join Date: Jun 2010
Location: Jackson, ME
Posts: 287
|
Re: 65 Short Step driver build
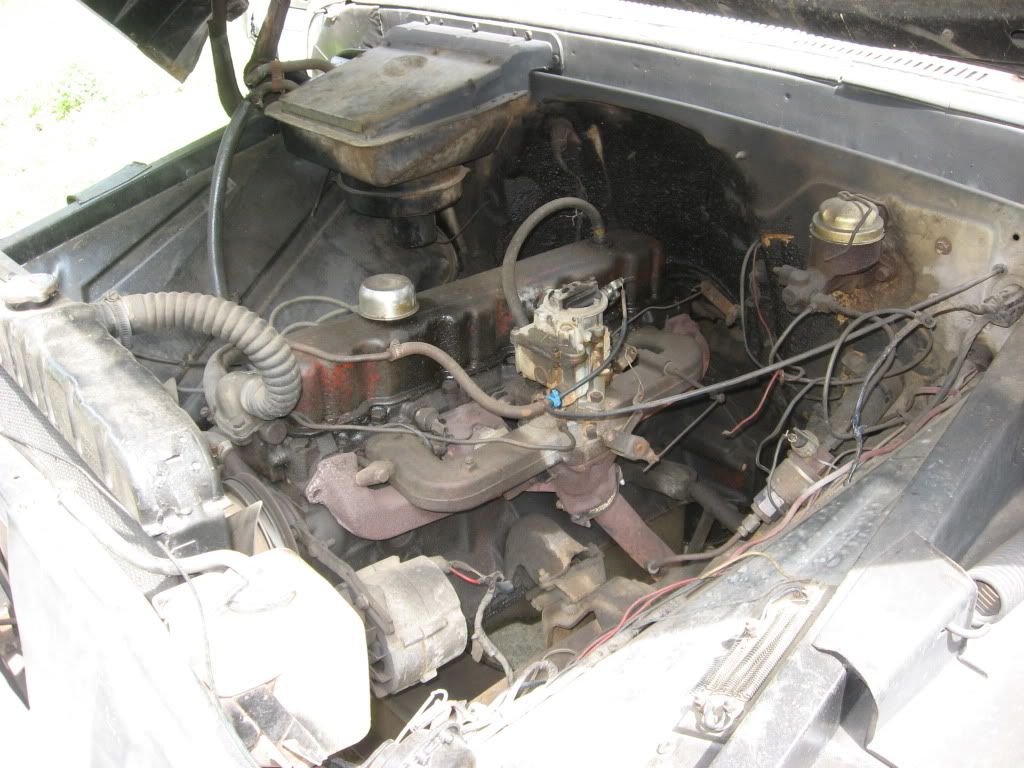
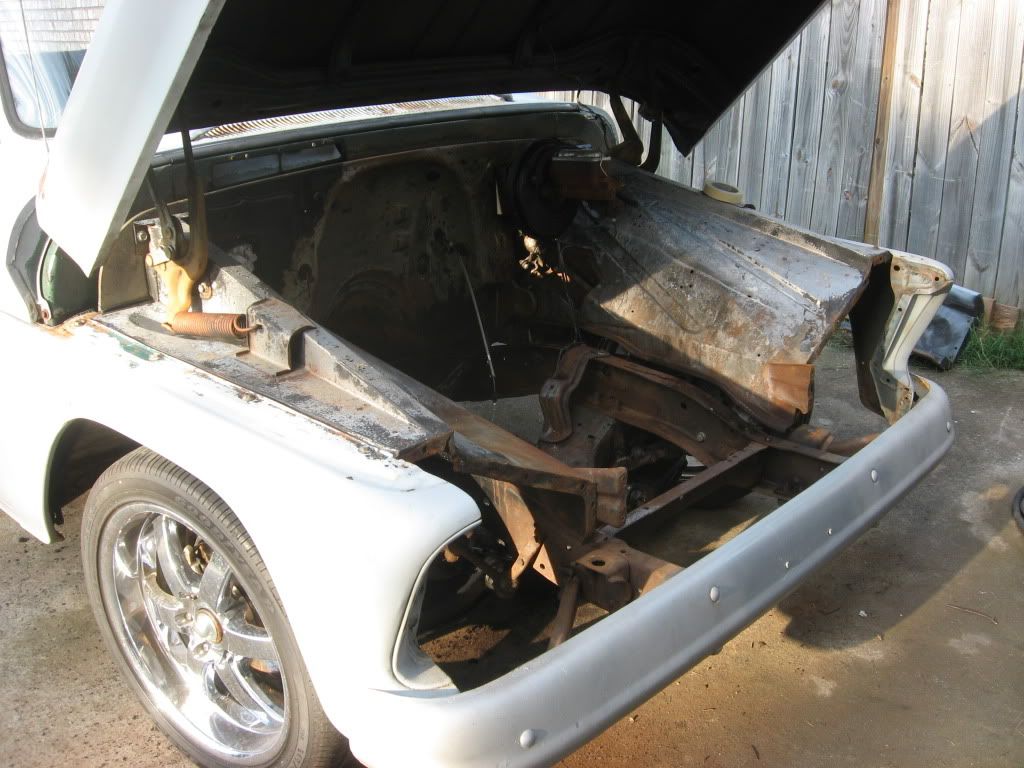
Finally got my engine bay cleaned up, the grease was the easy part, the undercoating on the firewall was terrible. I started with oven cleaner, moved to aircraft paint remover and then another product from Klean strip for paint, epoxy and poly. It took a few times of spraying and scraping, some places it was thick. I finished with the last step or spraying it down, let stand for 10-15 min and scrub with a scotch brite pad. If there is no rain tomorrow I will prime and paint.
  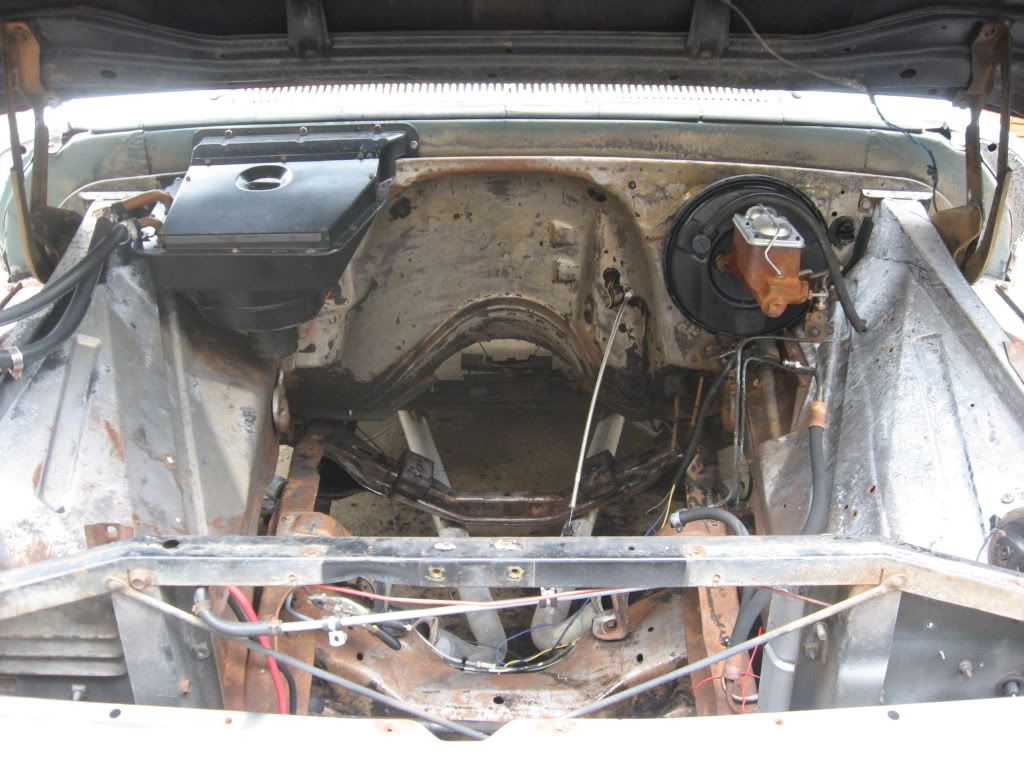 Some needed parts for the swap came today also;  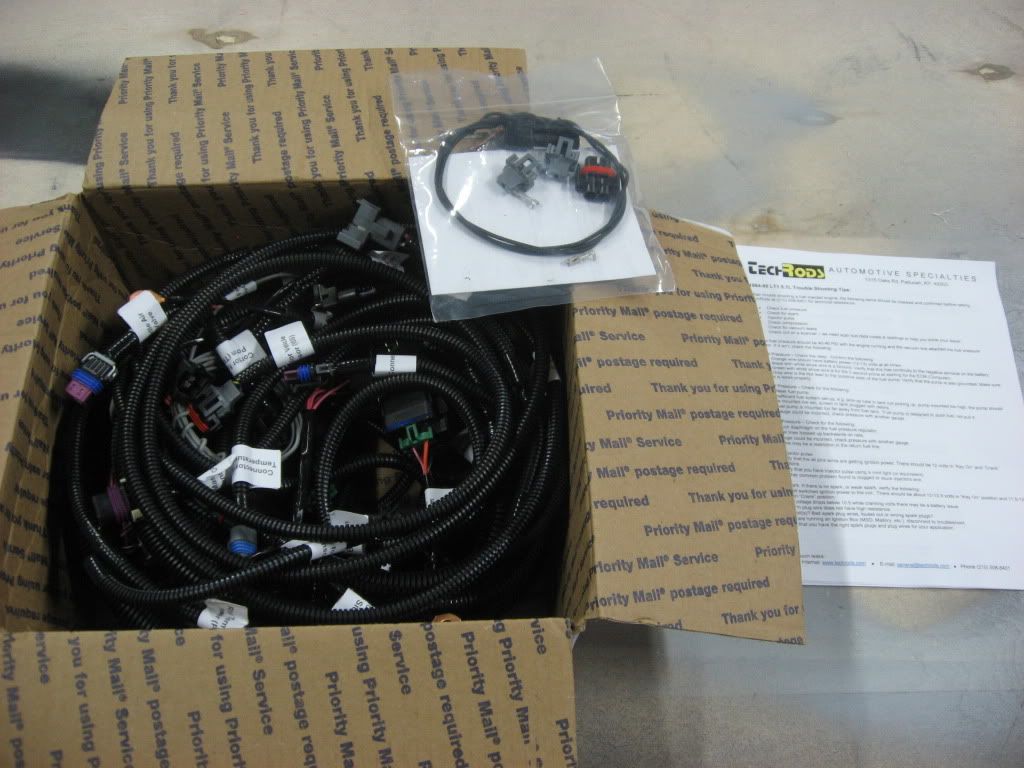 Engine getting close to going in, should be ready by the weekend. 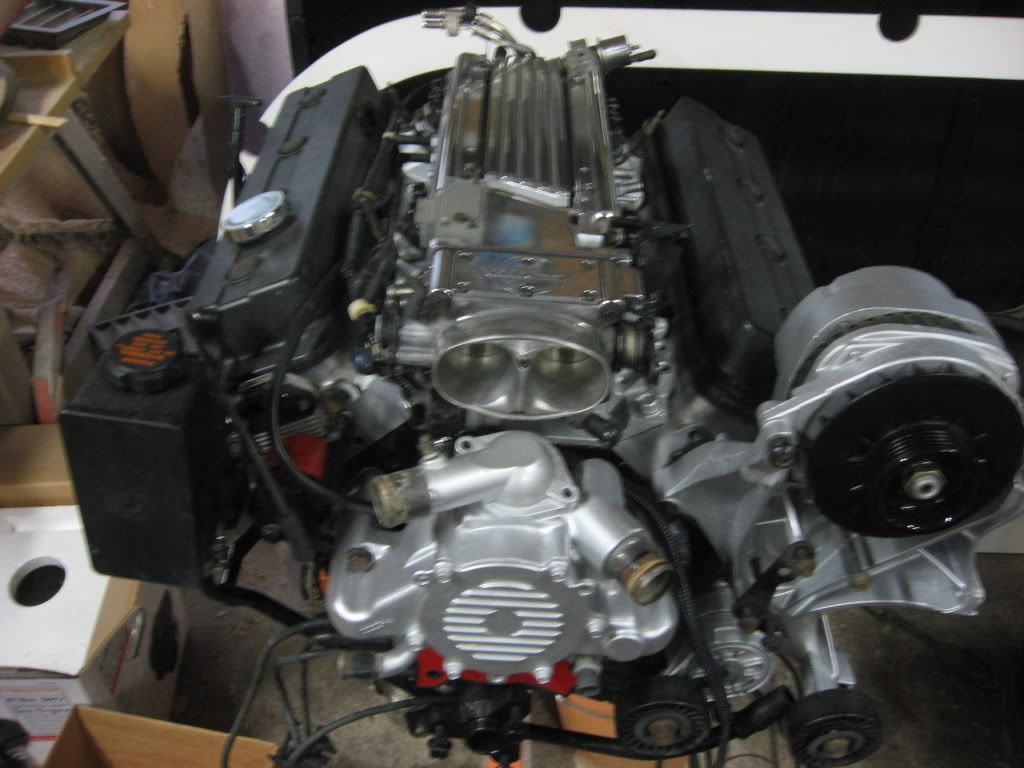 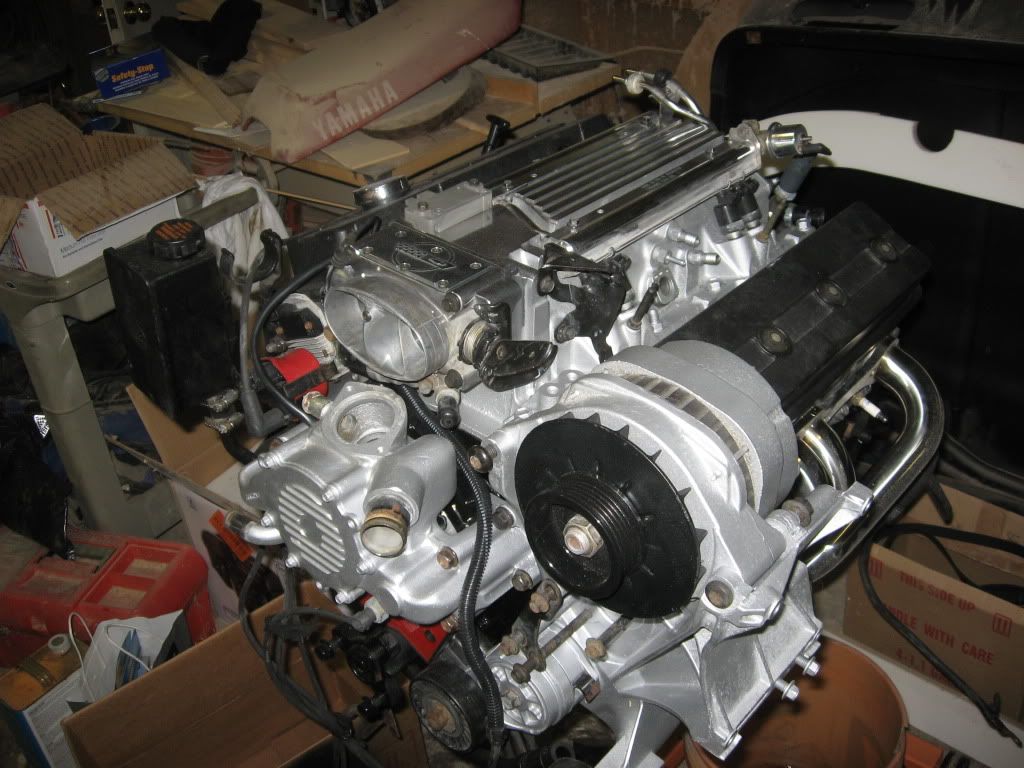 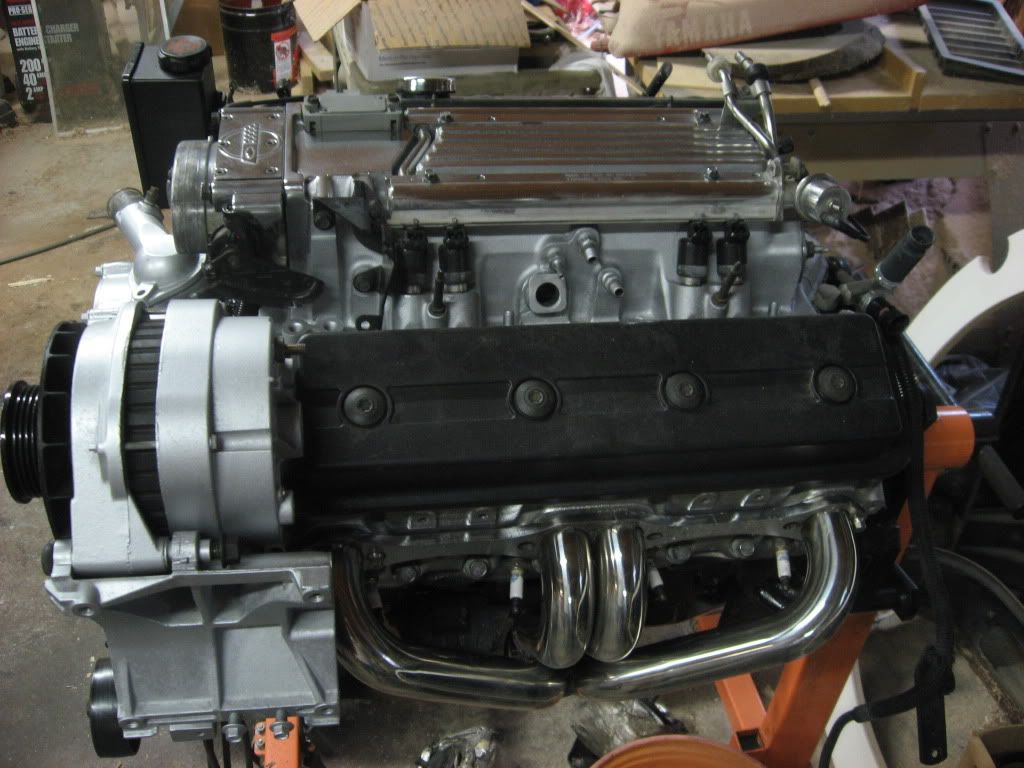
__________________
65 short step edited by staff |
|
|
|
|
08-31-2012, 06:54 PM
|
#9 |
|
Registered User
Join Date: Jun 2010
Location: Jackson, ME
Posts: 287
|
Re: 65 Short Step driver build
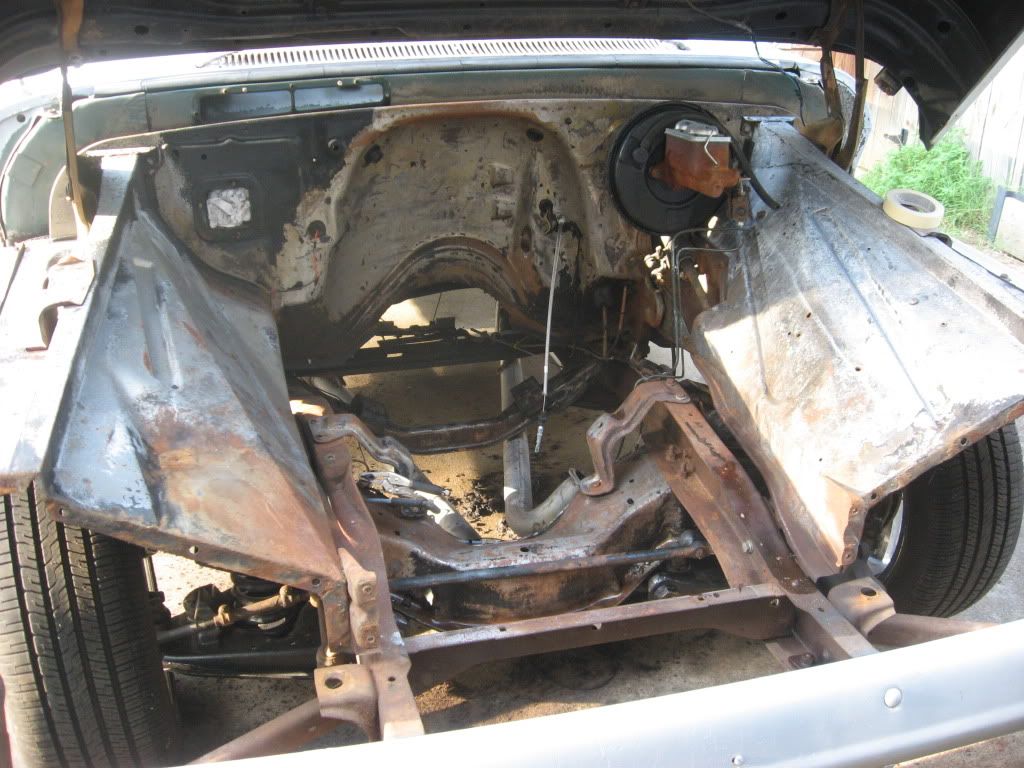
Needed to replace the radiator support so I decided to strip down the rest of the front end and clean and paint it right. Engine may not go in this weekend but it will be right when it does.
__________________
65 short step edited by staff |
|
|
|
|
08-31-2012, 08:01 PM
|
#10 |
|
Registered User
Join Date: Aug 2012
Location: Bibb CO.Alabama
Posts: 321
|
Re: 65 Short Step driver build
that engine is nice good work man
__________________
1966 C10 short stepper KMHK
|
|
|
|
|
08-31-2012, 09:59 PM
|
#11 |
|
1 thing at a time is progress.
Join Date: Jun 2007
Location: Ball Ground GA
Posts: 5,511
|
Re: 65 Short Step driver build
I'm late to the race. I just saw this build. Nice to see that you have a build now. Thought I would never see it.
 JK Making some nice progress. Subscribed. JK Making some nice progress. Subscribed.Have you done anything with the hood that you got from me?
__________________
Alan
Philippians 2:14-16 |
|
|
|
|
09-01-2012, 01:20 AM
|
#12 |
|
Registered User
Join Date: Jun 2010
Location: Jackson, ME
Posts: 287
|
Re: 65 Short Step driver build
Thanks guys.
Alan, I have not done anything with it, too many other projects getting in my way. When the engine swap is complete (again) I will be back on to one panel at a time. Since the I have replacement doors and the hood I got from you they will be first so I can still drive it. I wish that I had a spot to do a complete tear down like you did but I don't (well I do but I need to work out of there every day ). I figure I can make it pretty nice and when I move back to Maine I can push it into a corner some winter and do it complete.Much easier to clean all apart. 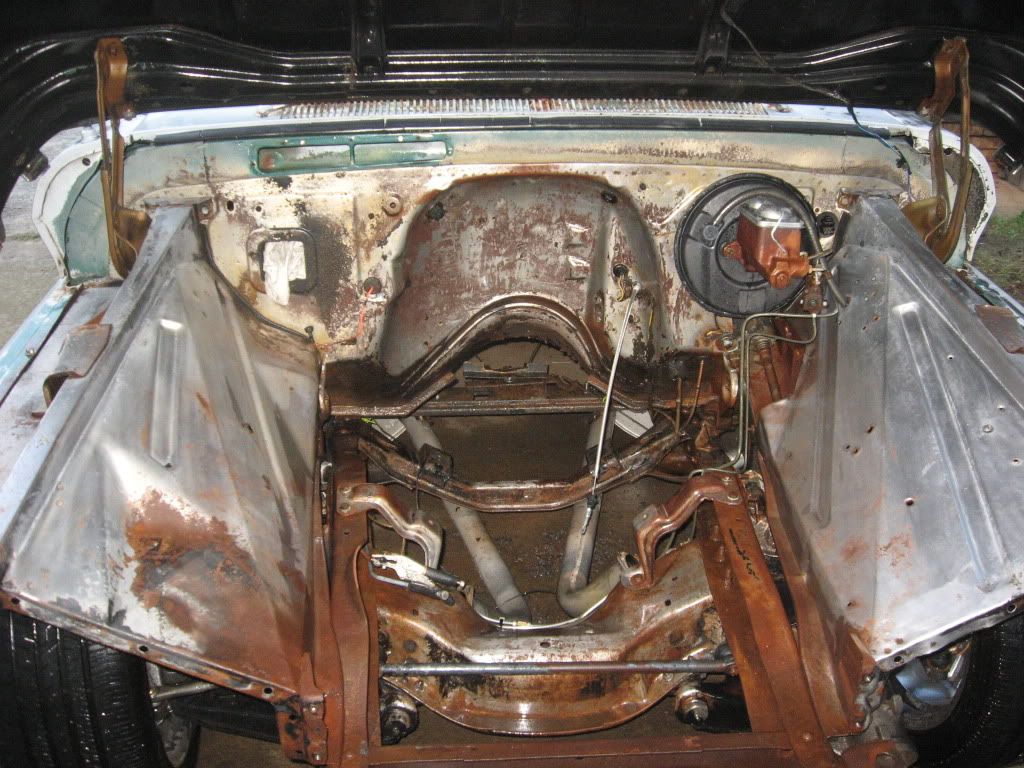 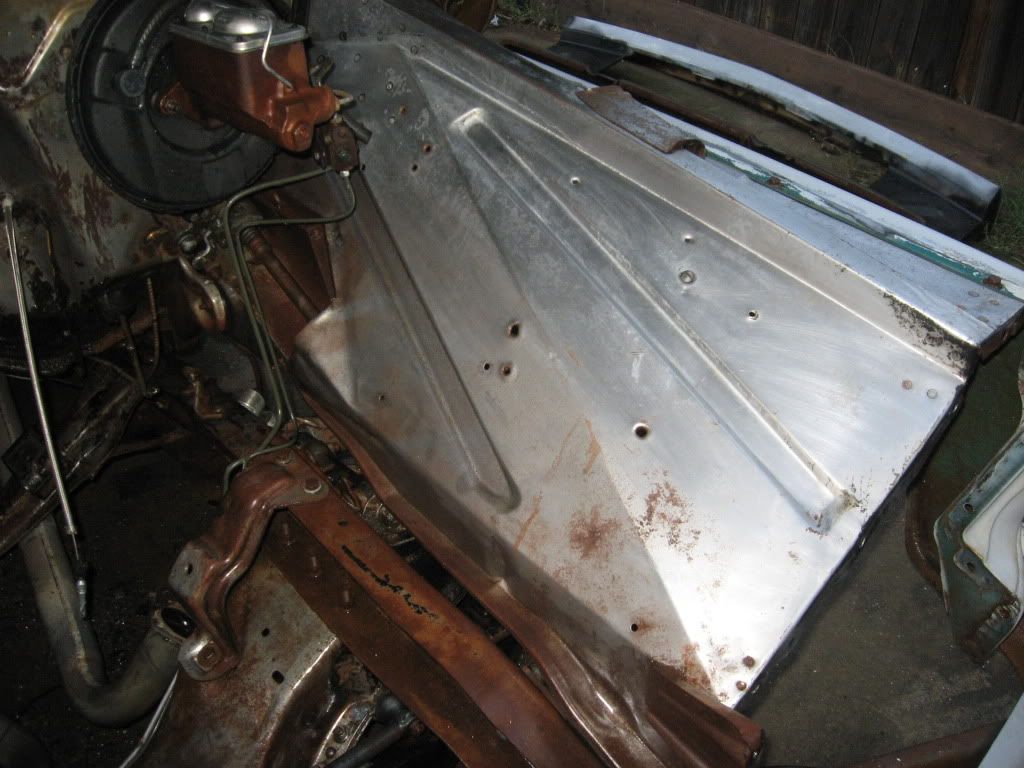 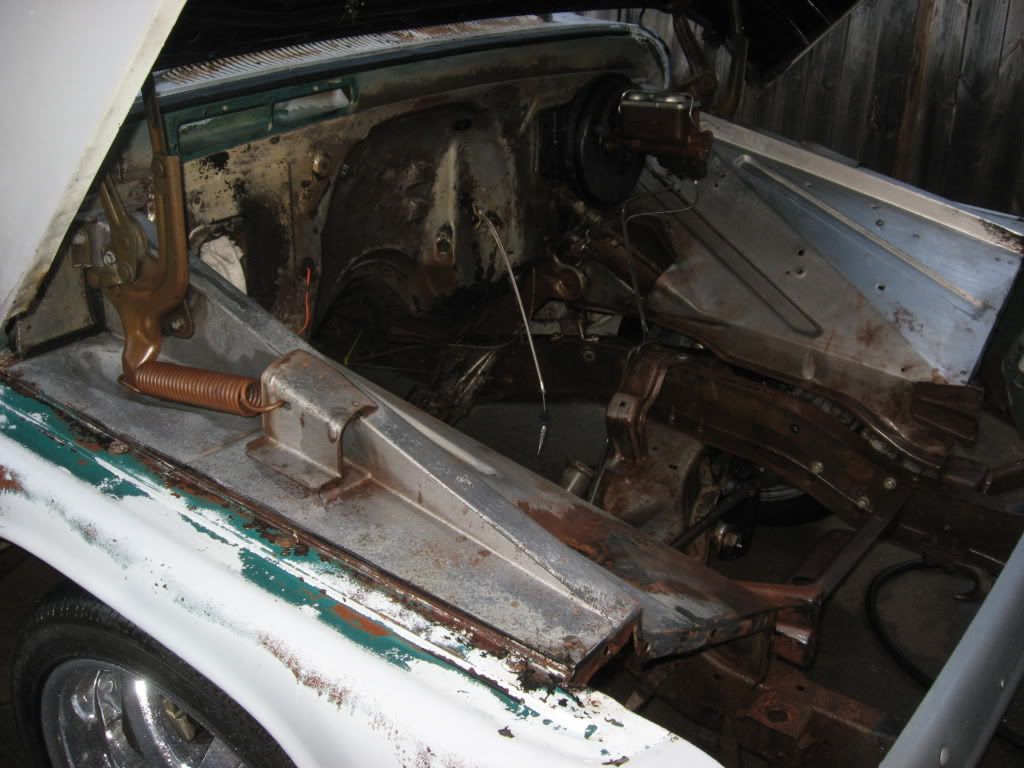 A little sanding tomorrow and it'll be ready for some primer and paint.
__________________
65 short step edited by staff |
|
|
|
|
09-01-2012, 06:30 AM
|
#13 |
|
Registered User
Join Date: Aug 2012
Location: Bibb CO.Alabama
Posts: 321
|
Re: 65 Short Step driver build
Sorry Man but just my 2 cents but while you have the front tore down as far as you do why not take the 3 bolts out the fender and the 5 on the inner fender where they bolt to the cab and do the whole firewall and under hood at one time just wondering. But nice truck it's gonna be fun with that motor in a stepper
 Posted via Mobile Device
__________________
1966 C10 short stepper KMHK
|
|
|
|
|
09-01-2012, 11:12 AM
|
#14 | |
|
Registered User
Join Date: Jun 2010
Location: Jackson, ME
Posts: 287
|
Re: 65 Short Step driver build
Quote:
__________________
65 short step edited by staff |
|
|
|
|
|
09-01-2012, 01:41 PM
|
#15 |
|
Registered User
Join Date: Aug 2012
Location: Bibb CO.Alabama
Posts: 321
|
Re: 65 Short Step driver build
ya i hear ya on that. i was just wondering when i took mine apart i thought it was gonna be alot of work to get them off but 8 bolts and like 15/20 mins of work and i was like wahhhhh thats it huh that was easy lol and its well worth the few mins for a driver and you wont have to tear into it again till you wanna do a full resto
__________________
1966 C10 short stepper KMHK
|
|
|
|
|
09-23-2012, 09:06 PM
|
#16 |
|
Registered User
Join Date: Jun 2010
Location: Jackson, ME
Posts: 287
|
Re: 65 Short Step driver build
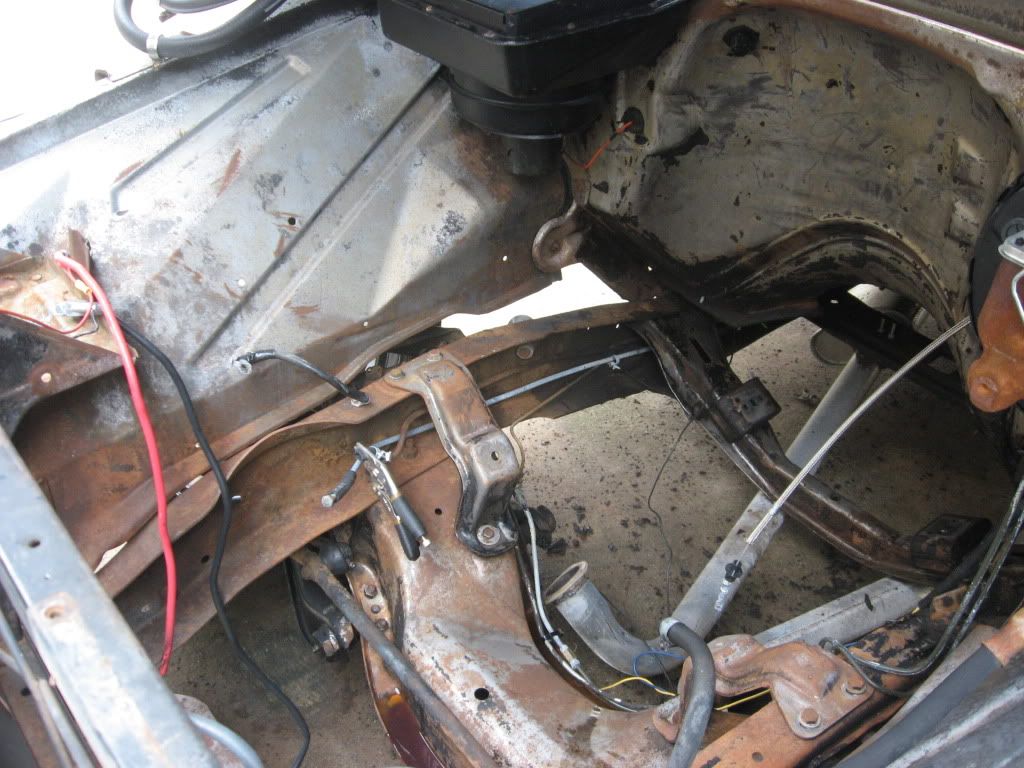
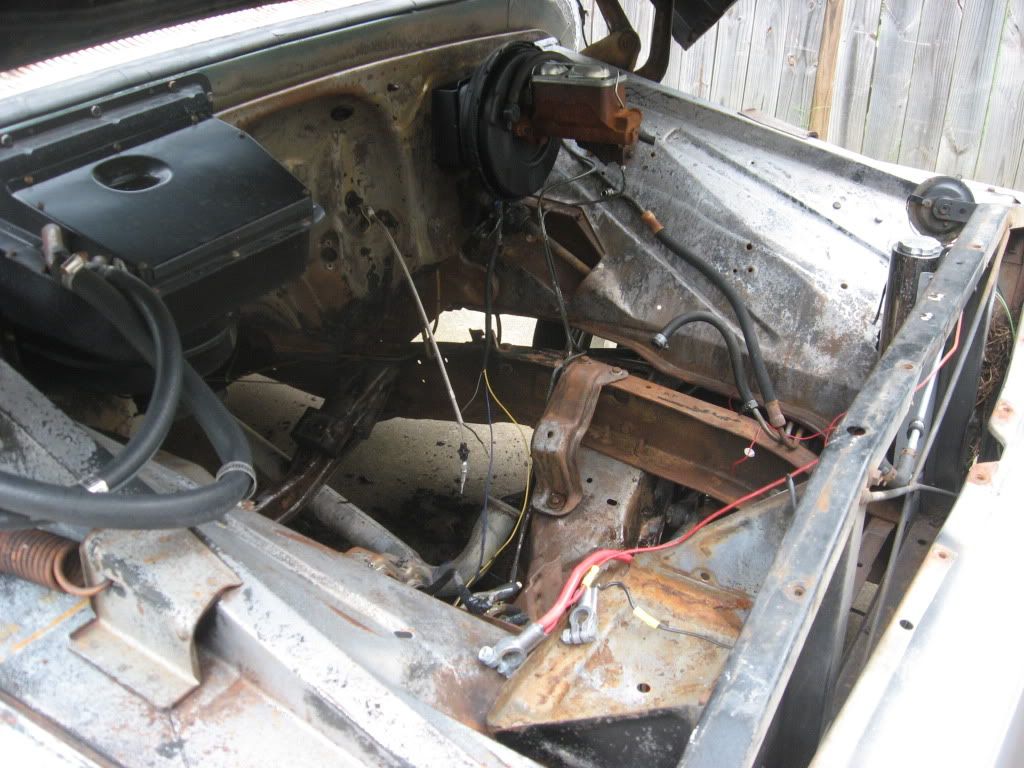
Engine bay all clean and painted. Got my engine dropped in yesterday.
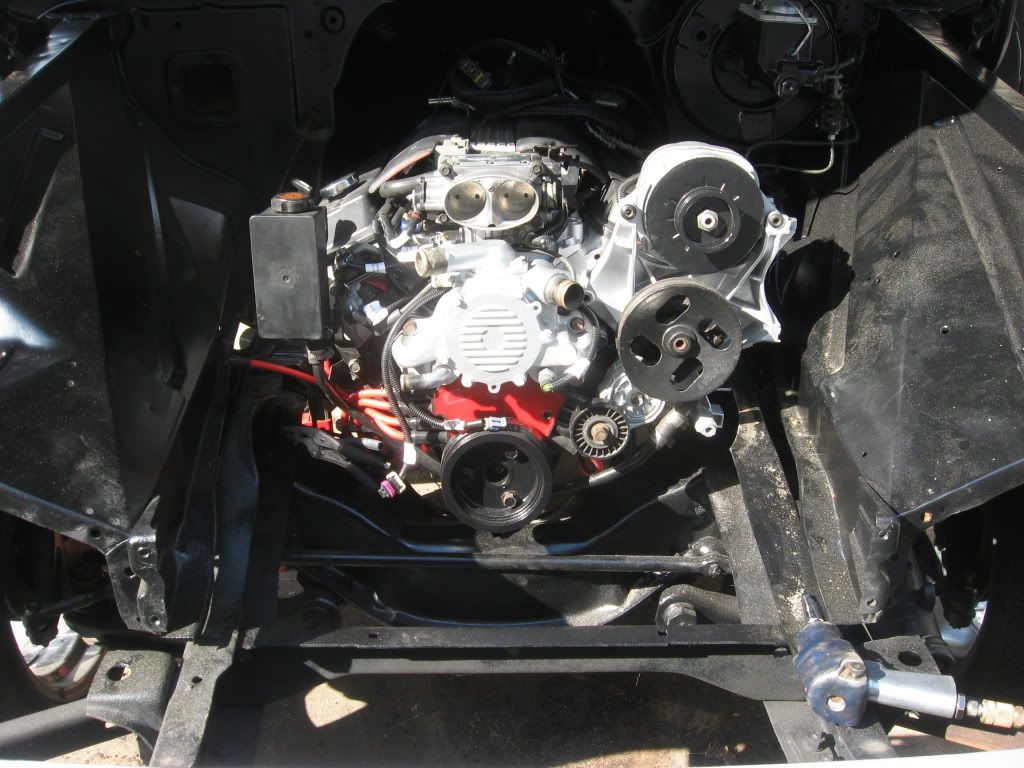 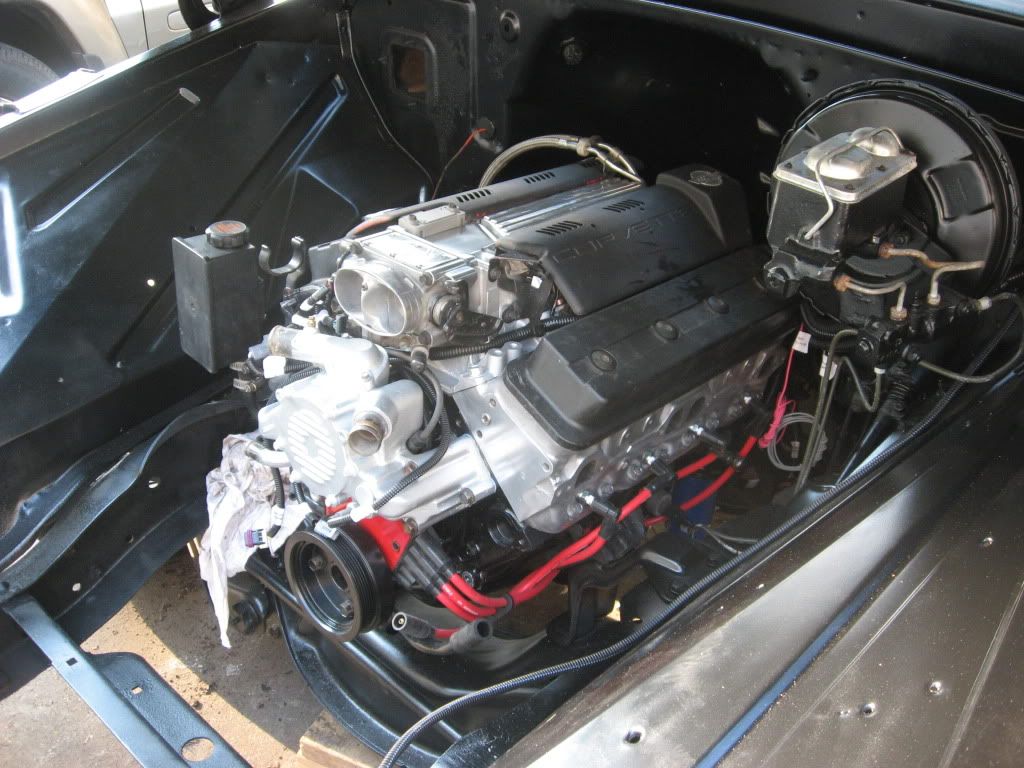  I also got my wiring all set inside the cab and mounted extra fuse block and relays.
__________________
65 short step edited by staff |
|
|
|
|
09-23-2012, 09:51 PM
|
#17 |
|
Registered User
Join Date: Jun 2010
Location: Jackson, ME
Posts: 287
|
Re: 65 Short Step driver build
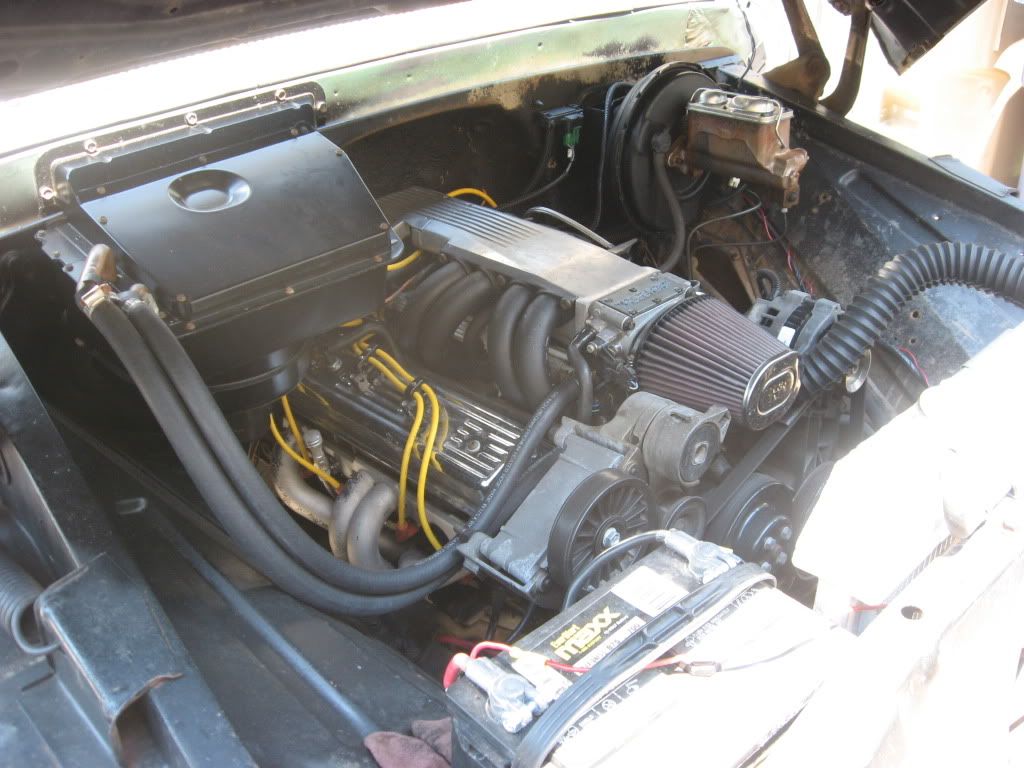
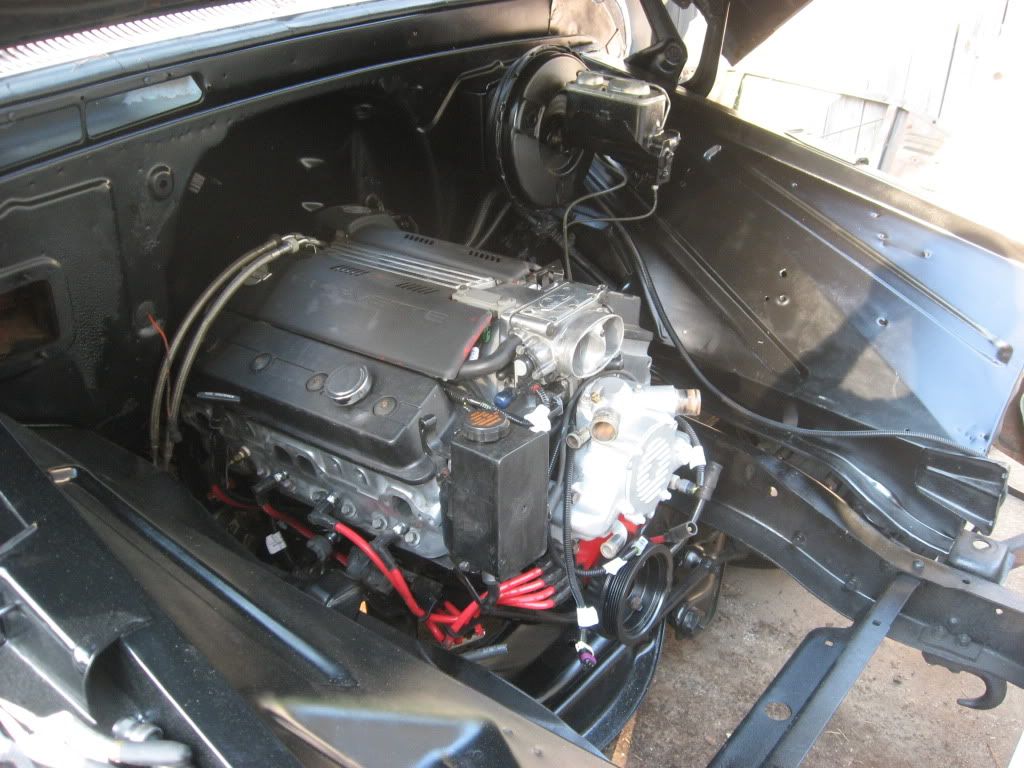
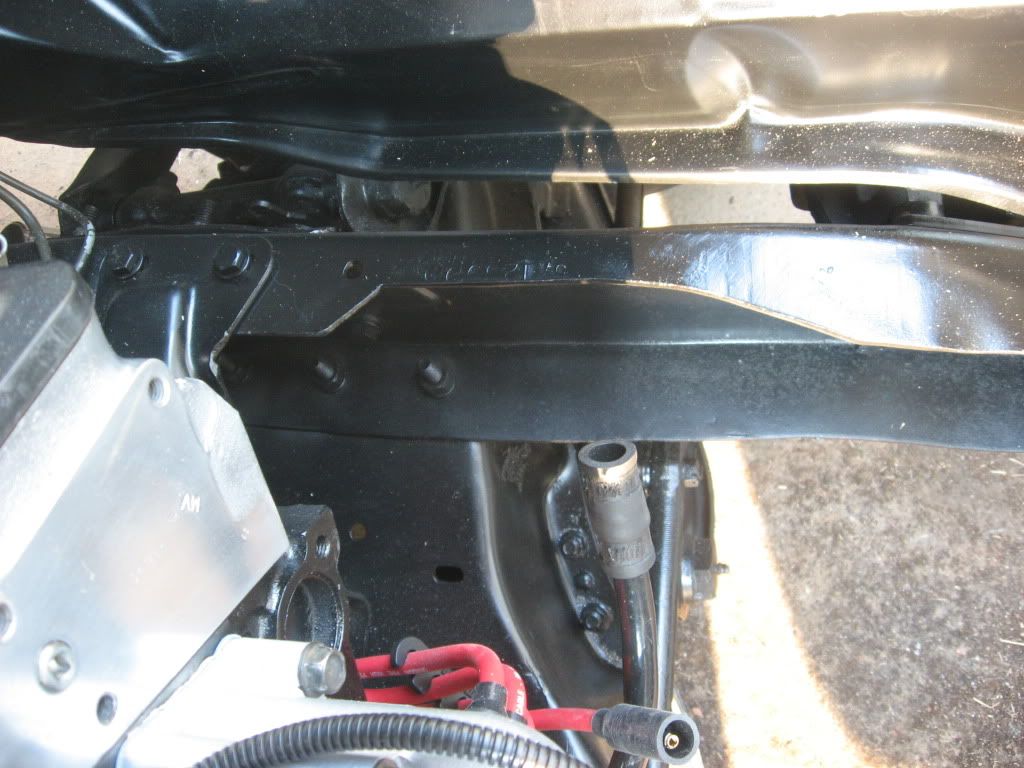
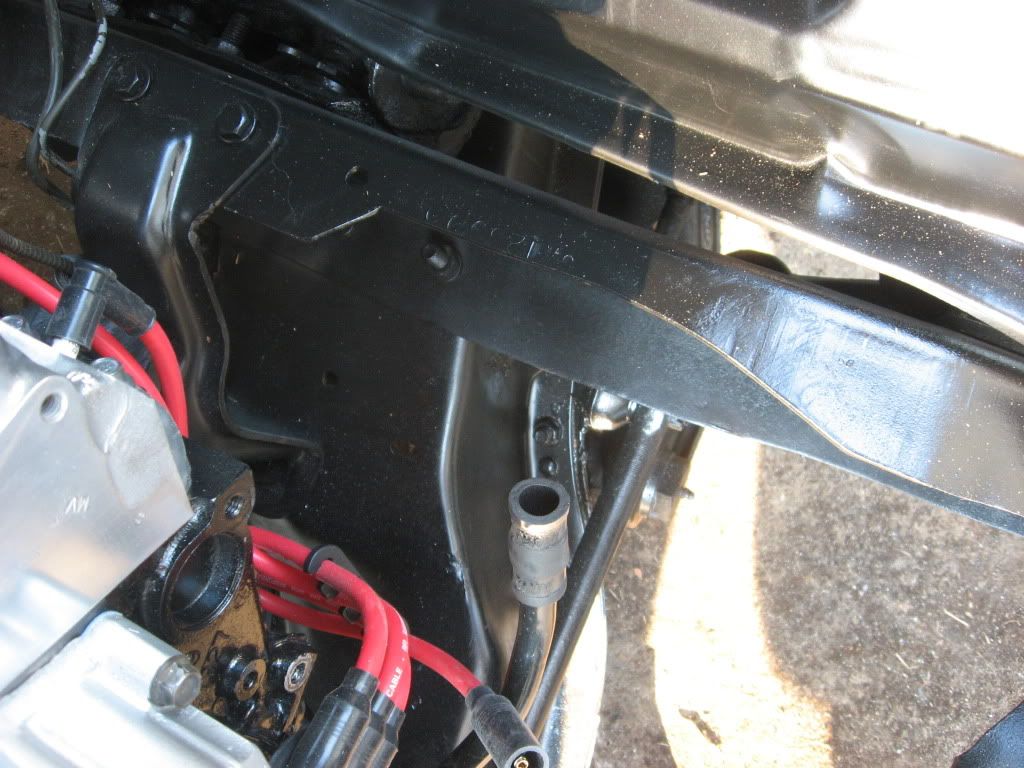
I had to make a small adjustment to the upper frame rail to make room for the idler and surpentine belt set up from the Corvette setup. The Camaro and Caprice all have the accessories on the passenger side with the AC compressor on the bottom.
  I got the power steering line fabricated. I used the Vette pressure line which is a metric o-ring fitting. I cut off the end that would go to the gear, swapped the fitting and double flared the end. The space is a little tight but got it worked out. 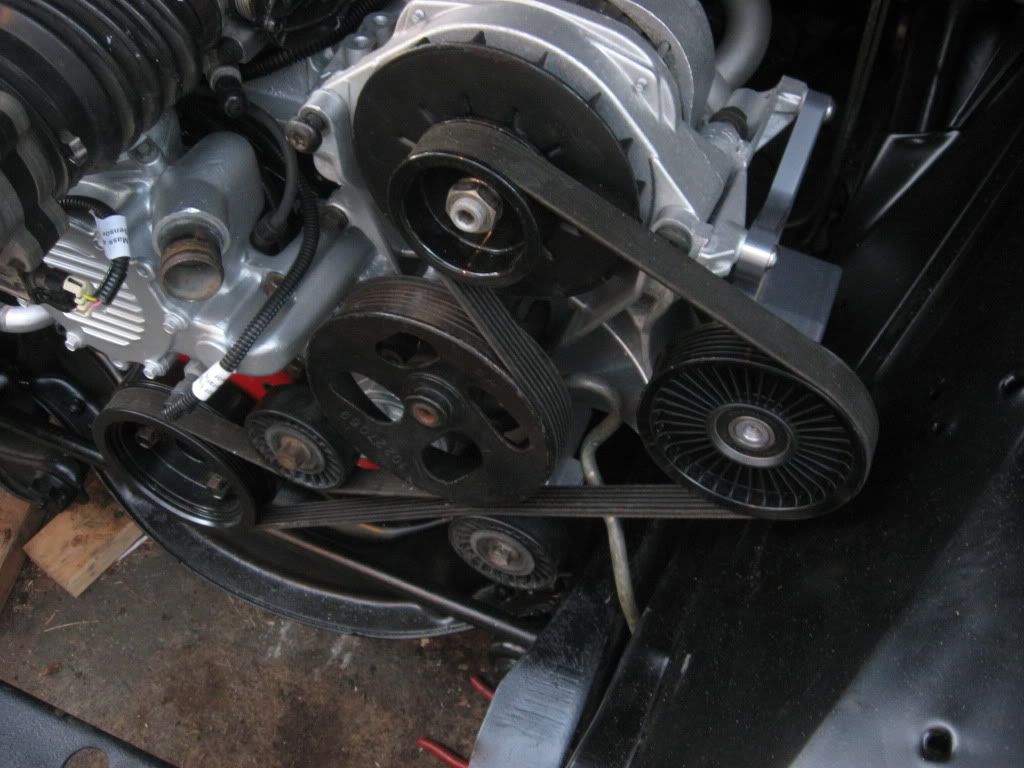
__________________
65 short step edited by staff |
|
|
|
|
09-23-2012, 11:03 PM
|
#18 | |
|
But Found Her 25yrs Later!
 Join Date: Oct 2010
Location: Oregon City, Oregon
Posts: 10,507
|
Re: 65 Short Step driver build
Quote:
__________________
I lost my 65 - Found it 25 years later: http://67-72chevytrucks.com/vboard/s...d.php?t=426650 66 C20 Service Truck: http://67-72chevytrucks.com/vboard/s...d.php?t=428035 |
|
|
|
|
|
09-24-2012, 10:08 AM
|
#19 |
|
Registered User
Join Date: Jun 2010
Location: Jackson, ME
Posts: 287
|
Re: 65 Short Step driver build
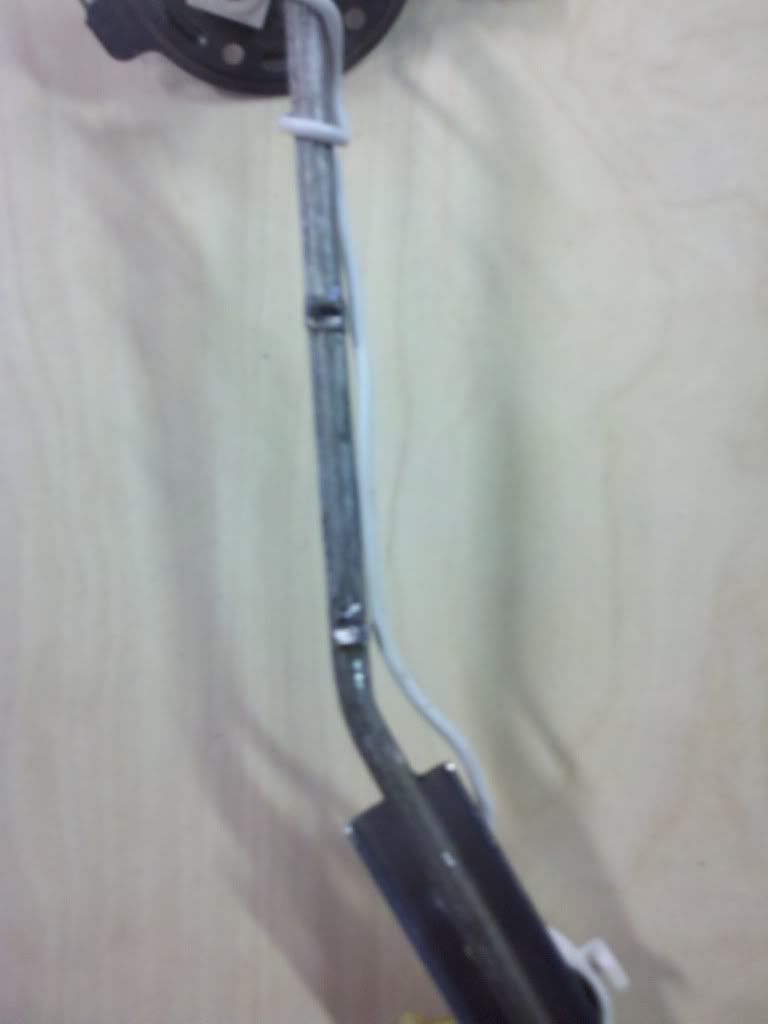
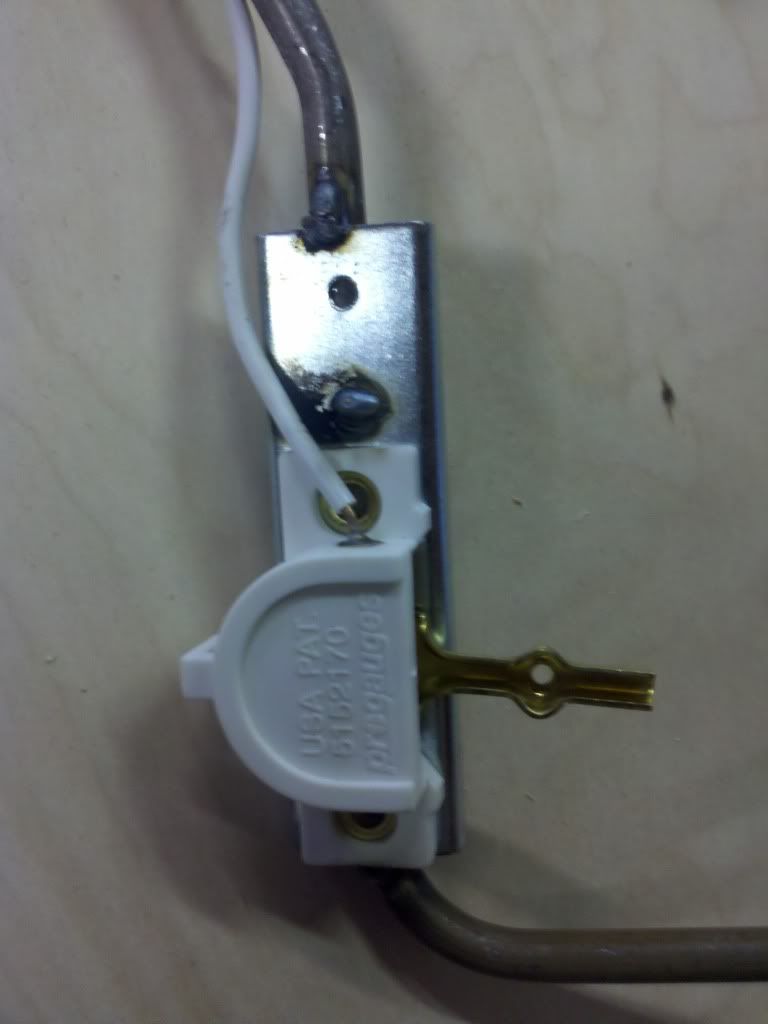
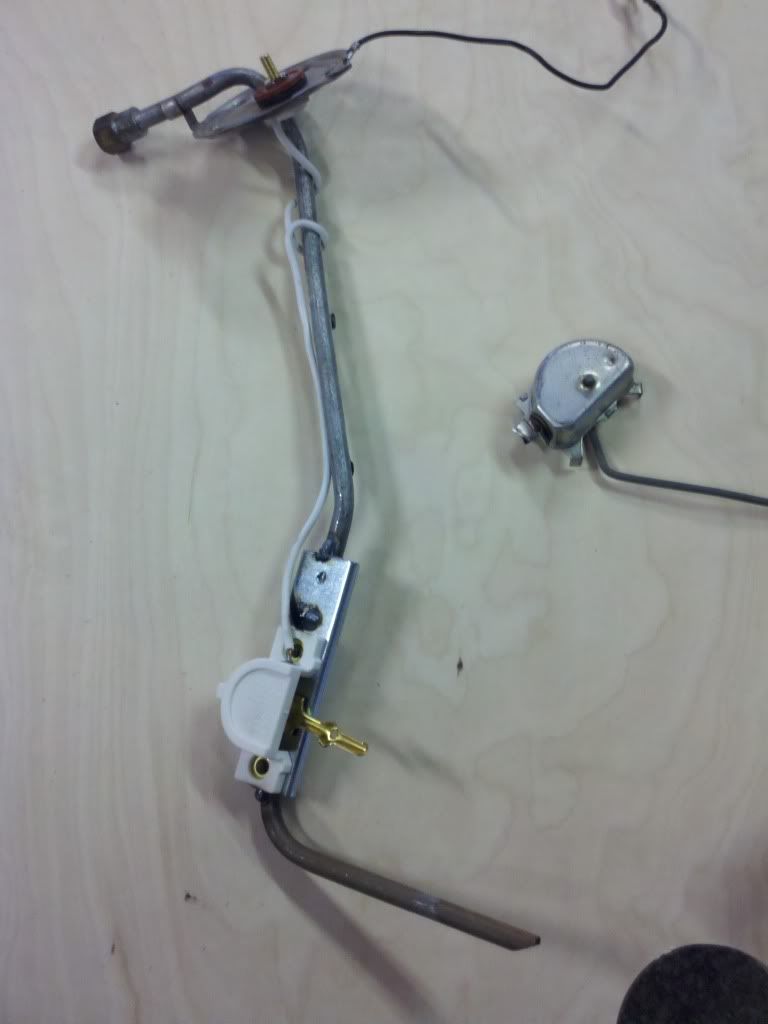
I cut off the old sending unit and then found the spot where the new level sensor needed to sit and be level. Clamped it in place and weld a couple spots on each end. The wire is really still like house wire so I ran the extra up the tube and coiled it around. Carful when welding since both parts are very thin, holes in your pick up tube would not be good. I checked mine with air pressure when finished. Here are some more pictures, not sure if they will help much or not.
__________________
65 short step edited by staff |
|
|
|
|
09-24-2012, 03:07 PM
|
#20 |
|
Registered User
Join Date: Jun 2012
Location: Austin, Texas
Posts: 59
|
Re: 65 Short Step driver build
Love the truck, amazing progress. That thing should haul some serious ass!
|
|
|
|
|
09-24-2012, 05:15 PM
|
#21 |
|
Registered User
Join Date: Jun 2010
Location: Jackson, ME
Posts: 287
|
Re: 65 Short Step driver build
Thanks, I'm going to need to find a posi unit soon. I had traction issues with the TPI engine, it will just be worse now but fun.
I got the grill support and radiator supports sanded down to bare metal and sprayed with epoxy primer. I need to get get some regular primer and paint so I can spray the back sides before it all goes back together. 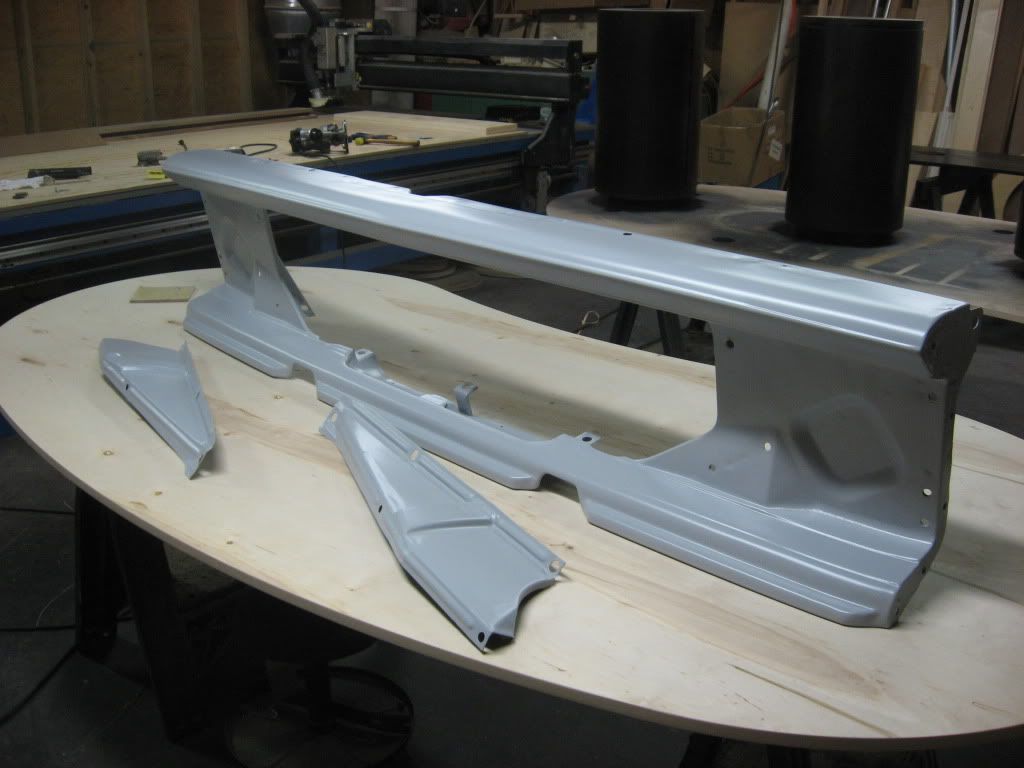
__________________
65 short step edited by staff |
|
|
|
|
09-24-2012, 10:00 PM
|
#22 |
|
Registered User
Join Date: Feb 2012
Location: Grand Rapids, Michigan, otherwise known as Beer City U.S.A.
Posts: 1,081
|
Re: 65 Short Step driver build
Regular primer? What's that?
If you have the drying time, & muscle to work the epoxy primer, you will be much better off in the end...No shrink over time, & much better anti-corrosive characteristics. IMO |
|
|
|
|
09-24-2012, 10:58 PM
|
#23 | |
|
Registered User
Join Date: Jun 2010
Location: Jackson, ME
Posts: 287
|
Re: 65 Short Step driver build
Quote:
__________________
65 short step edited by staff |
|
|
|
|
|
09-25-2012, 06:21 AM
|
#24 |
|
Registered User
Join Date: May 2009
Location: Brandon Manitoba Canada
Posts: 342
|
Re: 65 Short Step driver build
Man, I love the look of a tpi!
|
|
|
|
|
09-25-2012, 10:14 AM
|
#25 | |
|
Registered User
Join Date: Jun 2010
Location: Jackson, ME
Posts: 287
|
Re: 65 Short Step driver build
Quote:
__________________
65 short step edited by staff |
|
|
|
|
|
| Bookmarks |
|
|


 Linear Mode

