
 |
Register or Log In To remove these advertisements. |
|
|
|
|||||||
 |
|
|
Thread Tools | Display Modes |
|
|
#76 |
|
Registered Cruiser
Join Date: May 2002
Location: Las Vegas NV
Posts: 2,230
|
Re: Let's see your homemade crafts!
As do You. Your beautiful teardrop trailer has inspired me to build one. I have the donor trailer already. One of these days...

__________________
I intend to live forever. So far, so good. |
|
|

|
|
|
#77 | |
|
Registered User
Join Date: Dec 2012
Location: Rochester, KENT
Posts: 10,505
|
Re: Let's see your homemade crafts!
Quote:
Thank you!! I would say that the most important thing to remember with a teardrop is that it will take longer than you think to complete. And also allow your wildest dreams to come to reality, you can with a teardrop build. Here is a link to my CBG build. http://www.retrorides.proboards.com/...having-youtube Along with an electric Diddley bow I made using two pool cues. 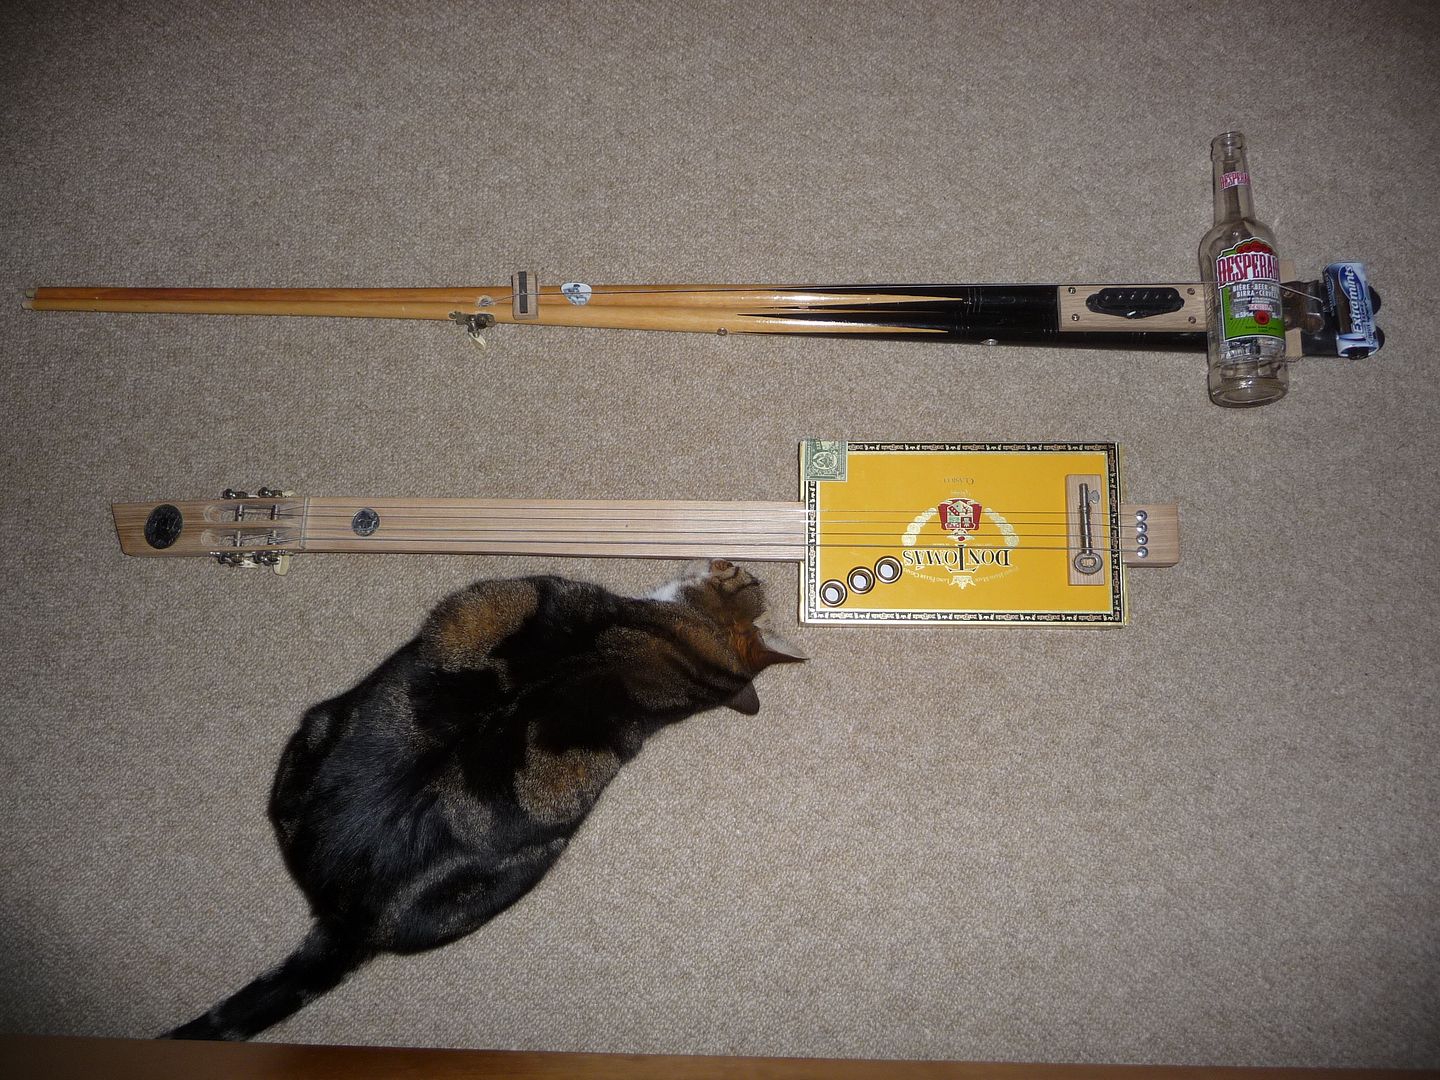 Tested by Mickey my neighbor. 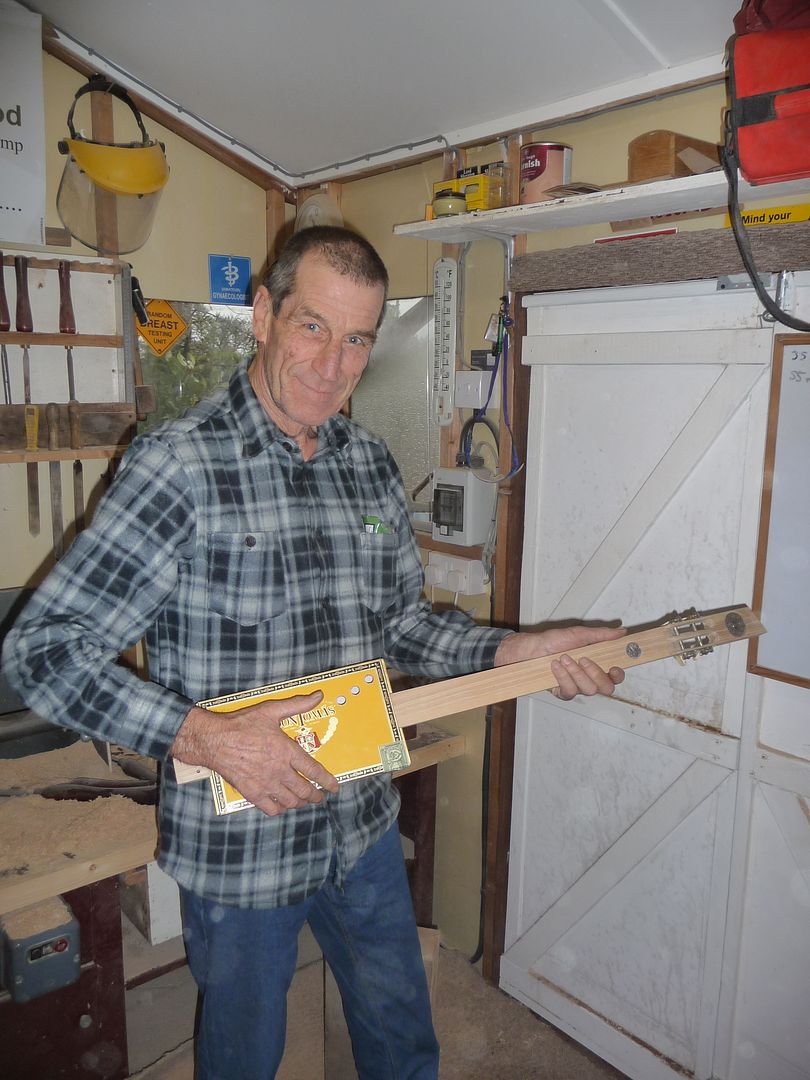 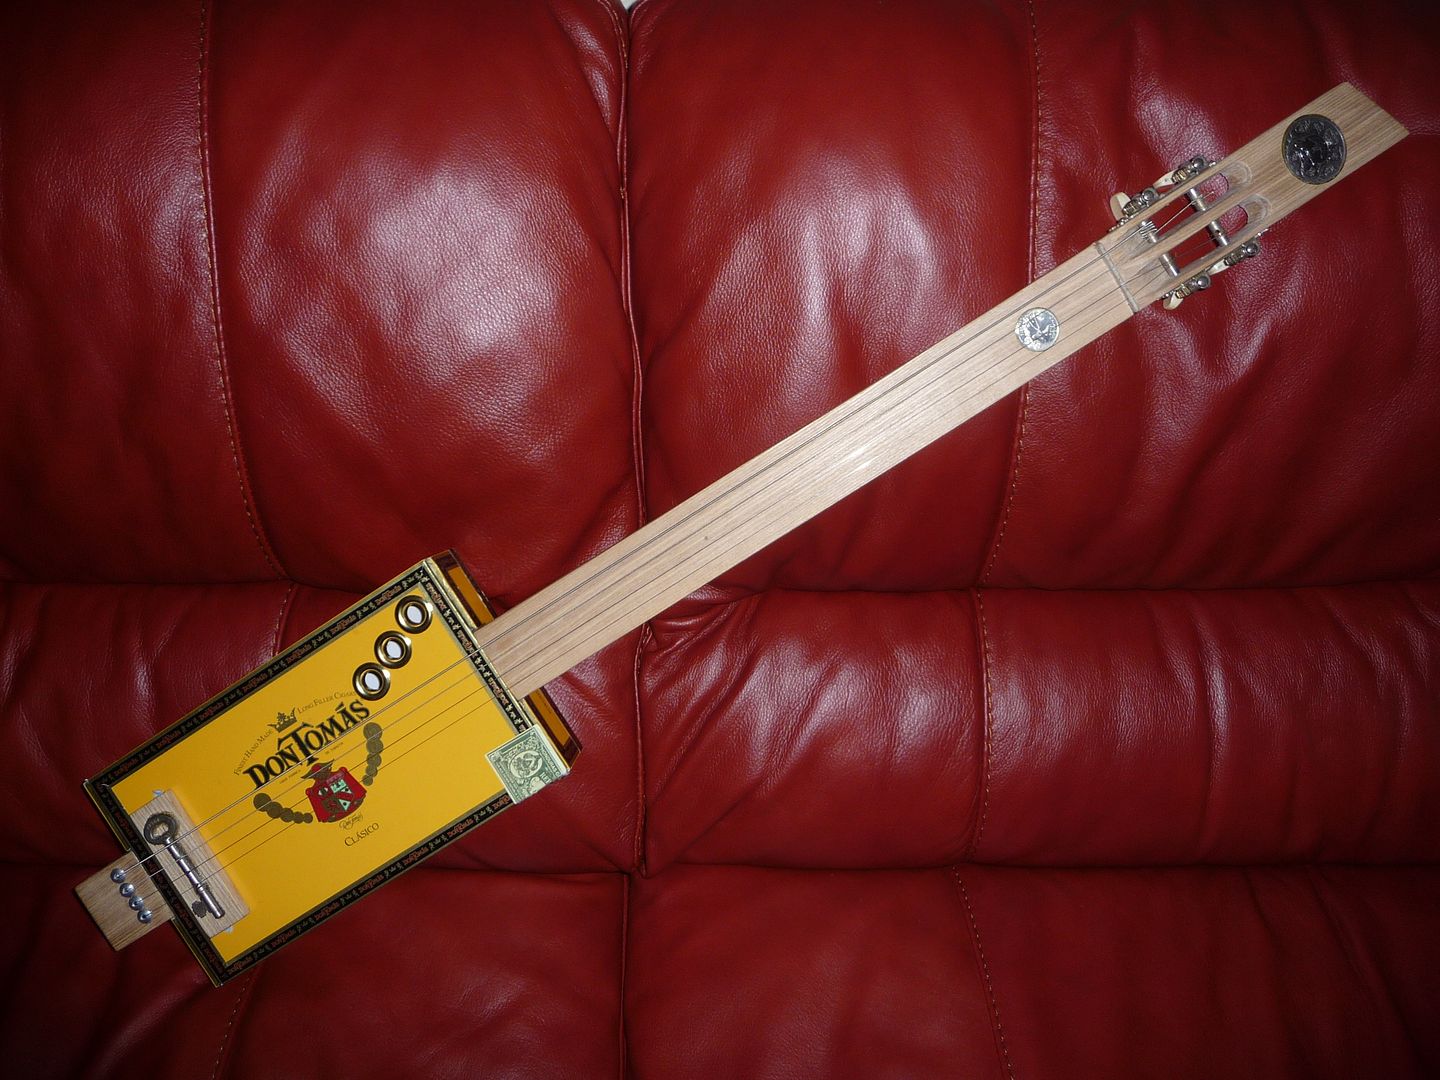
__________________
MY BUILD LINK: http://67-72chevytrucks.com/vboard/s...585901]Redneck Express - 1966 C10 Short Fleetside MY USA ROADTRIPS http://forum.retro-rides.org/thread/...2018-humdinger IF YOU CAN'T FIX IT WITH A HAMMER, YOU'VE GOT AN ELECTRICAL PROBLEM MATE. |
|
|
|

|
|
|
#78 |
|
Senior Member
 Join Date: Jun 2007
Location: Red Deer Ab Canada
Posts: 756
|
Re: Let's see your homemade crafts!
Here is my gas pump amplifier.
__________________
1966 427 biscayne with a 5 spd tremec on old school torque thrusts. 1972 Cheyenne Short Bed 1958 Apache short fleet 1980 Chevy short bed http://67-72chevytrucks.com/vboard/s...d.php?t=761005 1959 "Henry" http://67-72chevytrucks.com/vboard/s...d.php?t=670461 1966 Biscayne http://67-72chevytrucks.com/vboard/s...d.php?t=444419 1972 Suburban http://67-72chevytrucks.com/vboard/s...d.php?t=478828 |
|
|

|
|
|
#79 |
|
Registered User
Join Date: Oct 2009
Location: canton ga
Posts: 12,728
|
Re: Let's see your homemade crafts!
Ya'll are quite talented .
|
|
|

|
|
|
#80 |
|
Registered Cruiser
Join Date: May 2002
Location: Las Vegas NV
Posts: 2,230
|
Re: Let's see your homemade crafts!
Cool, here's one that I built to look like and old radio. The amplifier is a 50yo mono vacuum tube hi-fi that I converted to a guitar amp.

__________________
I intend to live forever. So far, so good. |
|
|

|
|
|
#81 |
|
Registered User
Join Date: Oct 2003
Location: Chesapeake, VA
Posts: 724
|
Wow! What a bunch of talented guys.
 Here are a few projects I've done over the last few years, most within the last couple. Wood shop in high school and mining industry experience as an adult have really paid off for me. New headboard for the bed w/ room for a radio, books, etc. (red oak and oak plywood, carved wave and fleur de lis finial for decoration. The fleur de lis matches the curtain rod for the window and, well, I just like fleur de lis!).  Gun cart for NRA and CMP high power rifle competition (oak and poplar). The ammo box is removable.    Long gun vise / gun cleaning station. This was made completely of leftover materials from other projects. Even the stain and finish were "surplus". Cost = free, the best kind!  Modified Steadi-Stock for my Pentax K-x SLR camera. It really helps in shooting airplanes in flight at longer distances. It has a remote trigger assembly which I had to fabricate since, like most modern cameras, mine uses an infrared remote. The cable attaches to an "artificial finger" to depress the shutter release.  I took the inspiration for the forend from the IWI Tavor bullpup rifle. The aluminum is chemically blackened, not painted. I took the inspiration for the forend from the IWI Tavor bullpup rifle. The aluminum is chemically blackened, not painted.  Fishing rod rack (select white pine).  My new mailbox, my first ground-up masonry project. It has a welded steel rebar core encased in concrete for stability. I like this hybrid look much, much better than the "ammo bunker" look of round-top brick mailboxes. As I'm in the USCG AUX, I added our CG racing stripe and house number to mimic the front end of a CG cutter. The stripes are painted on for durability. I salvaged all of the bricks from the back yard and the original steps that I had to remove for the new deck. I dug many of them up when I laid the electric line out to the new garage I built. They were the remains of an old koi pond that I ran into. Again, free bricks = good!  Sorry for so many photos, but seeing others' projects and sharing my own is too much FUN! 
__________________
Semper Paratus |
|
|

|
|
|
#82 |
|
Senior Member
 Join Date: Jun 2007
Location: Red Deer Ab Canada
Posts: 756
|
Re: Let's see your homemade crafts!
looks fantastic!
__________________
1966 427 biscayne with a 5 spd tremec on old school torque thrusts. 1972 Cheyenne Short Bed 1958 Apache short fleet 1980 Chevy short bed http://67-72chevytrucks.com/vboard/s...d.php?t=761005 1959 "Henry" http://67-72chevytrucks.com/vboard/s...d.php?t=670461 1966 Biscayne http://67-72chevytrucks.com/vboard/s...d.php?t=444419 1972 Suburban http://67-72chevytrucks.com/vboard/s...d.php?t=478828 |
|
|

|
|
|
#83 |
|
Old Duffer
 Join Date: Mar 2003
Location: Maine
Posts: 1,821
|
Re: Let's see your homemade crafts!
Semper Paratus! Good looking projects! Very nice mason work!
I lived in Dunedin up Rt 17 from Churchland in '77, '78 while assigned to CGC Ingham which tied up at Craney Island.
__________________
'68 Short C20 Flatbed Dually w/ 292 4bbl, Langdon cast headers, and WC T5 trans. '81 G10 Shorty Van "Good judgement comes from experience, and a lot of that comes from bad judgement." Will Rogers "Under promise, then over achieve." |
|
|

|
|
|
#84 | |
|
Registered User
Join Date: Oct 2003
Location: Chesapeake, VA
Posts: 724
|
Re: Let's see your homemade crafts!
Quote:
http://www.uscgcingham.org/ 
__________________
Semper Paratus |
|
|
|

|
|
|
#85 |
|
The Older Generation
   Join Date: Aug 2006
Location: Montezuma, Iowa
Posts: 25,365
|
Re: Let's see your homemade crafts!
-
Neat stuff guys. Only problem is I'm gettin' more ideas than I have time left to execute. This is one thread my wife isn't allowed to see...  LockDoc
__________________
Leon Locksmith, Specializing In Antique Trucks, Automobiles, & Motorcycles (My Dually Pickup Project Thread) http://67-72chevytrucks.com/vboard/s...d.php?t=829820 - |
|
|

|
|
|
#86 |
|
Registered User
Join Date: May 2010
Location: Hibbing, MN
Posts: 197
|
Re: Let's see your homemade crafts!
Here is my latest knife. The handle scales are maple and the steel is 1095 high carbon.
__________________
Build thread for my SWB 4x4 http://67-72chevytrucks.com/vboard/s...d.php?t=447938  1968 Chevy K/10 short box fleetside (my project) 1969 Chevy Z/28 Camaro (my dad's project) 1968 Chevy C/20 long box fleetside (parts truck) |
|
|

|
|
|
#87 |
|
Registered User
Join Date: Dec 2010
Location: Carnation, Wa
Posts: 142
|
Re: Let's see your homemade crafts!
Cool stuff on here!
I dabbled in custom guitar construction as well:  
|
|
|

|
|
|
#88 |
|
Registered User
Join Date: Dec 2010
Location: Carnation, Wa
Posts: 142
|
Re: Let's see your homemade crafts!
I was too cheap to buy furniture (didn't fit the single-guy expenditure profile: Food, Cars, or Tools) so I made my own kitchen chairs out of square tube and a busted truck tool box.
 
|
|
|

|
|
|
#89 |
|
Registered User
Join Date: Dec 2012
Location: Rochester, KENT
Posts: 10,505
|
Re: Let's see your homemade crafts!
Not sure if this fits in here......
Will just post up the before and up to date pics, copied and pasted from a thread. THREAD HERE: http://www.retrorides.proboards.com/...dVcg=undefined Started with this..... 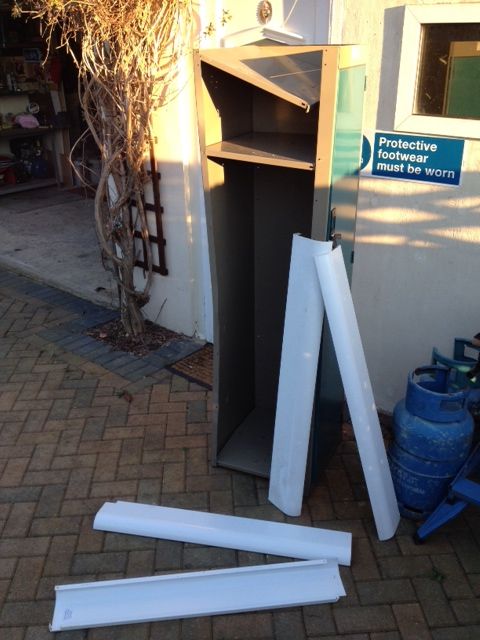 Which came home from the wife's work skip. 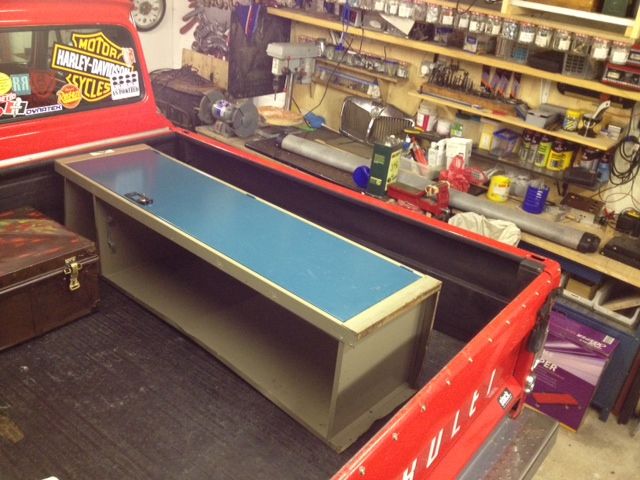 Been pressure cleaning the deck, furniture and repairing and painting all the stuff. While waiting for paint to dry today I also applied the stickers I had made this week by a mate on the body of the dummy pump. 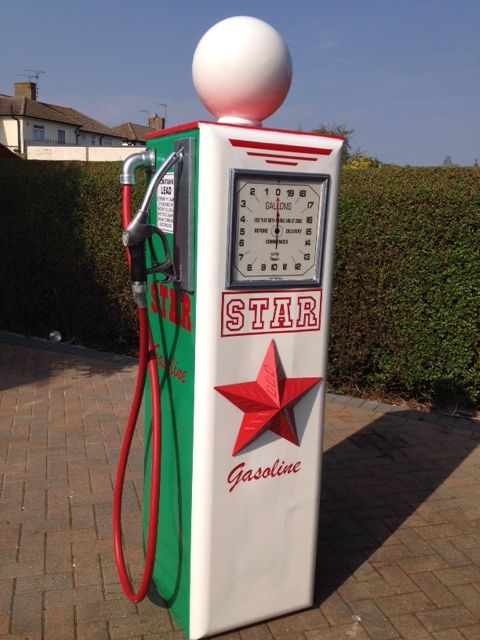 Other side...... 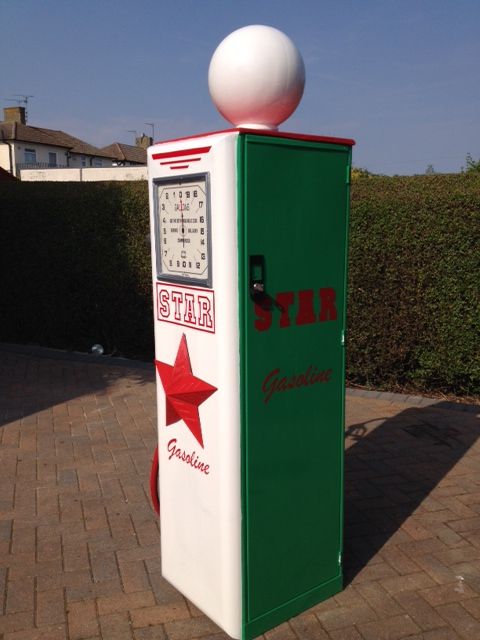 I still need to draw up the design and hand paint the Belisha beacon. But am procrastinating.
__________________
MY BUILD LINK: http://67-72chevytrucks.com/vboard/s...585901]Redneck Express - 1966 C10 Short Fleetside MY USA ROADTRIPS http://forum.retro-rides.org/thread/...2018-humdinger IF YOU CAN'T FIX IT WITH A HAMMER, YOU'VE GOT AN ELECTRICAL PROBLEM MATE. |
|
|

|
|
|
#90 |
|
Registered User
Join Date: Dec 2012
Location: Rochester, KENT
Posts: 10,505
|
Re: Let's see your homemade crafts!
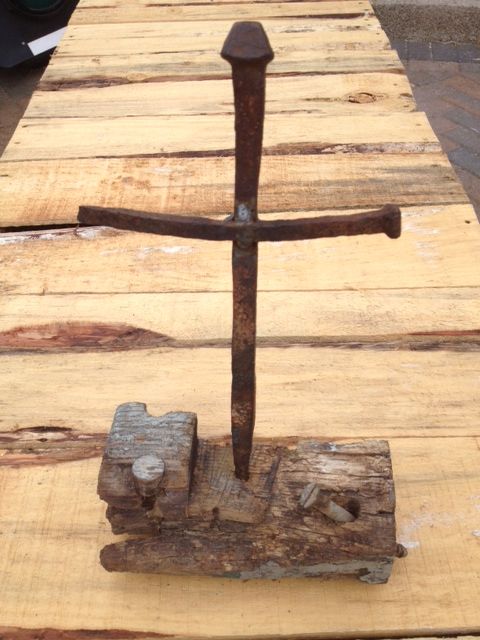
Found this 300mm spike in a piece of driftwood next to the Medway river, removed it an came home to make a crucifix that has been in my head for years.
__________________
MY BUILD LINK: http://67-72chevytrucks.com/vboard/s...585901]Redneck Express - 1966 C10 Short Fleetside MY USA ROADTRIPS http://forum.retro-rides.org/thread/...2018-humdinger IF YOU CAN'T FIX IT WITH A HAMMER, YOU'VE GOT AN ELECTRICAL PROBLEM MATE. |
|
|

|
|
|
#91 |
|
Registered User
Join Date: May 2014
Location: Pahrump Nv
Posts: 2
|
Re: Let's see your homemade crafts!
Don't have anything for the truck forums, yet, except for this new project, so I'll put my first post here in homemade...
I designed and built this 24"x24" vacuum former so I could get away from using fiberglass for my projects.. It's due for a rebuild soon as it was a learn as you go project...... Changing the coils to 220v for more heat... Was having a problem up loading the pics, I decided to link to the thread... http://www.tk560.com/phpBB2/viewtopic.php?t=1362.. Now I'll try to post my last vacuuming project.... The reason it's on a toy truck is because my 66 Chev truck doesn't have a slider back window, and it need a new trans first before it gets a back slider........ (back slider?,wait, that sounds like me  ) )The third pic is of the plaster mold after it was poured, the fourth is the mold on the vacuum table, and the last is the front half in plastic before it's cut out.. The finished unit is on the truck and running..... It works as well as any swamp cooler will... It all depends on the relative humidity.. Today it's about 6-8%. Have applied for a provisional patent even with the long odds... It was cheap enough if you diy and the specs. are not made public until a non-provisional patent is applied for.. |
|
|

|
|
|
#92 | |
|
The Older Generation
   Join Date: Aug 2006
Location: Montezuma, Iowa
Posts: 25,365
|
Re: Let's see your homemade crafts!
Quote:
Welcome to the board!! That looks pretty neat. Being from the North I'm not that familiar with swamp coolers. Do you put Ice in it for the cool air? LockDoc
__________________
Leon Locksmith, Specializing In Antique Trucks, Automobiles, & Motorcycles (My Dually Pickup Project Thread) http://67-72chevytrucks.com/vboard/s...d.php?t=829820 - |
|
|
|

|
|
|
#93 |
|
Registered User
Join Date: Oct 2009
Location: Gardnerville Nv No Mo Cali!!
Posts: 869
|
Re: Let's see your homemade crafts!
After almost choking on my water bill last summer (+ $400.00 Month), I decided to do something about it. My front yard has two rather large lawns so I decided to eliminate one of them in favor of some sort of arid type landscaping. I figured I'd save at least 30% on the water bill by replacing the lawn with something that needs little or no water.
This is a shot of the lawn about two weeks after I started to kill it and cut down two trees. The existing curbing had a radius in the corner, so I needed to straighten it out for fencing. 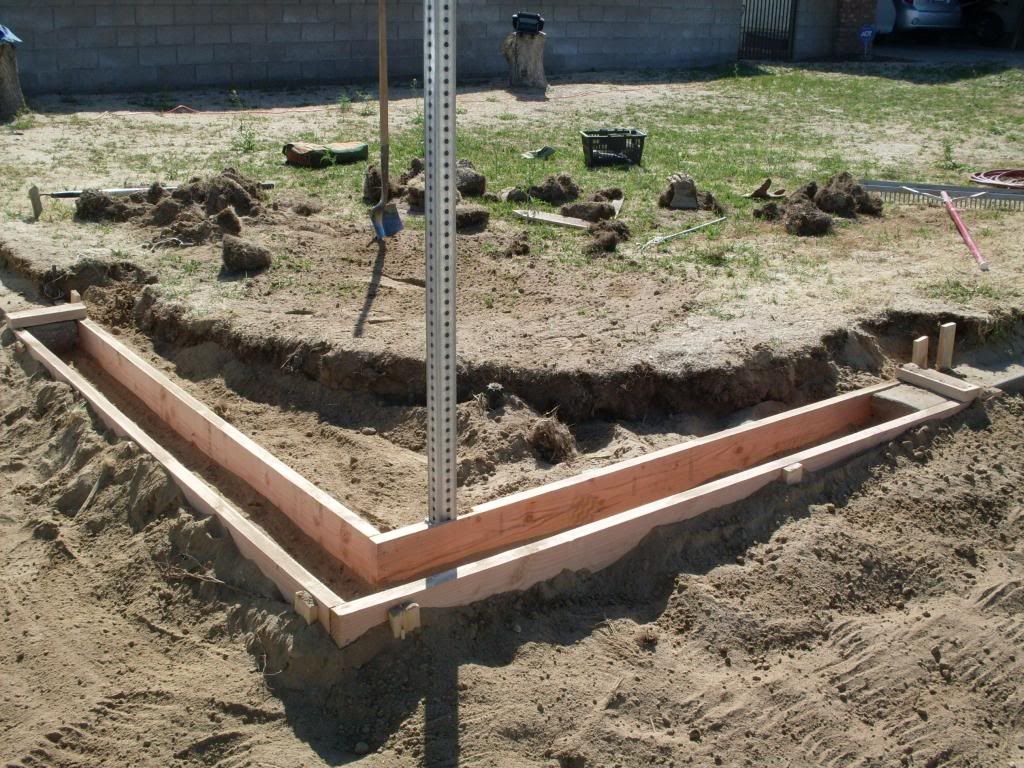 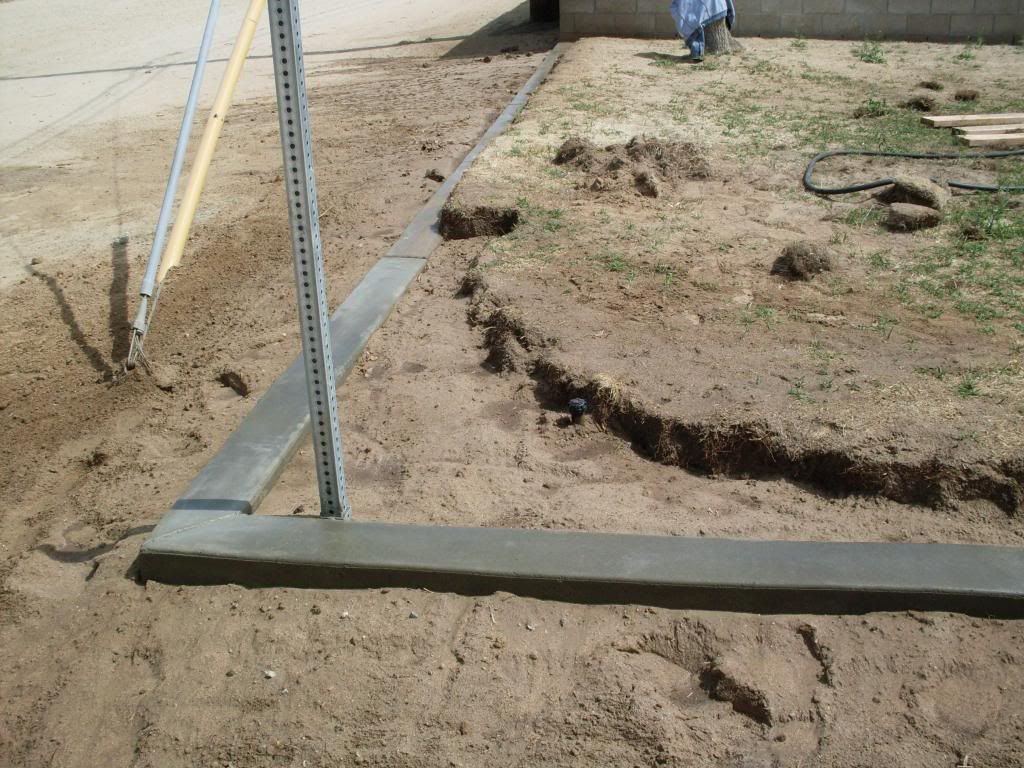 Then I had to remove the lawn by rototilling it out. When that was done I built a bridge over the curb for the Bobcat to get in. 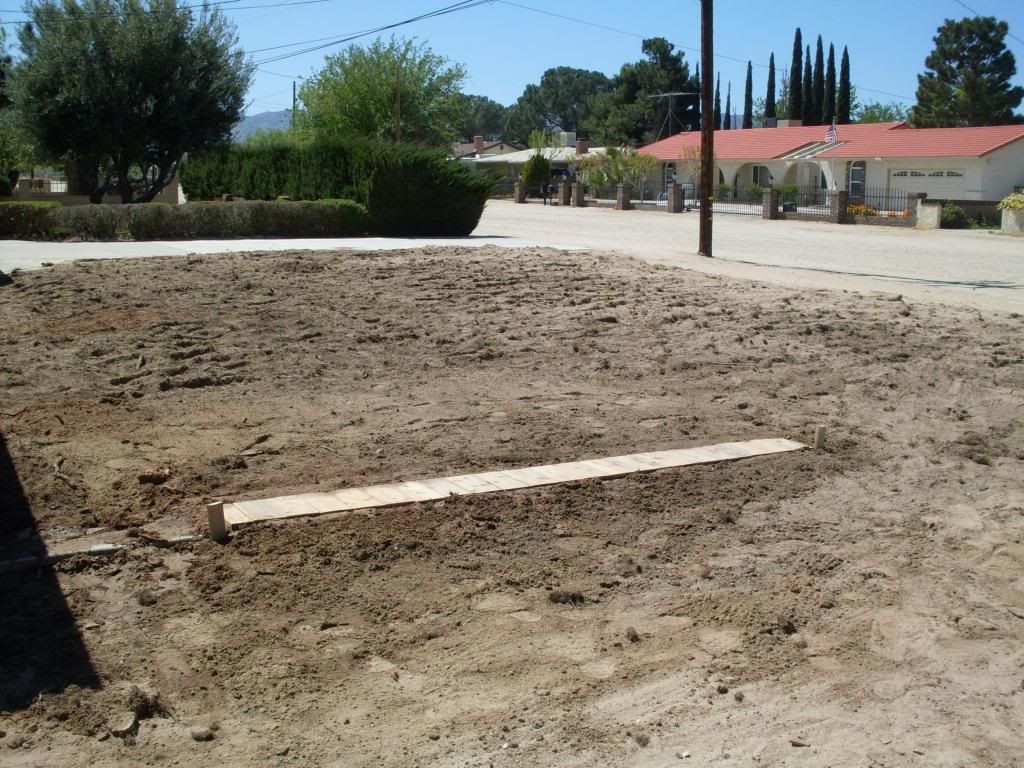 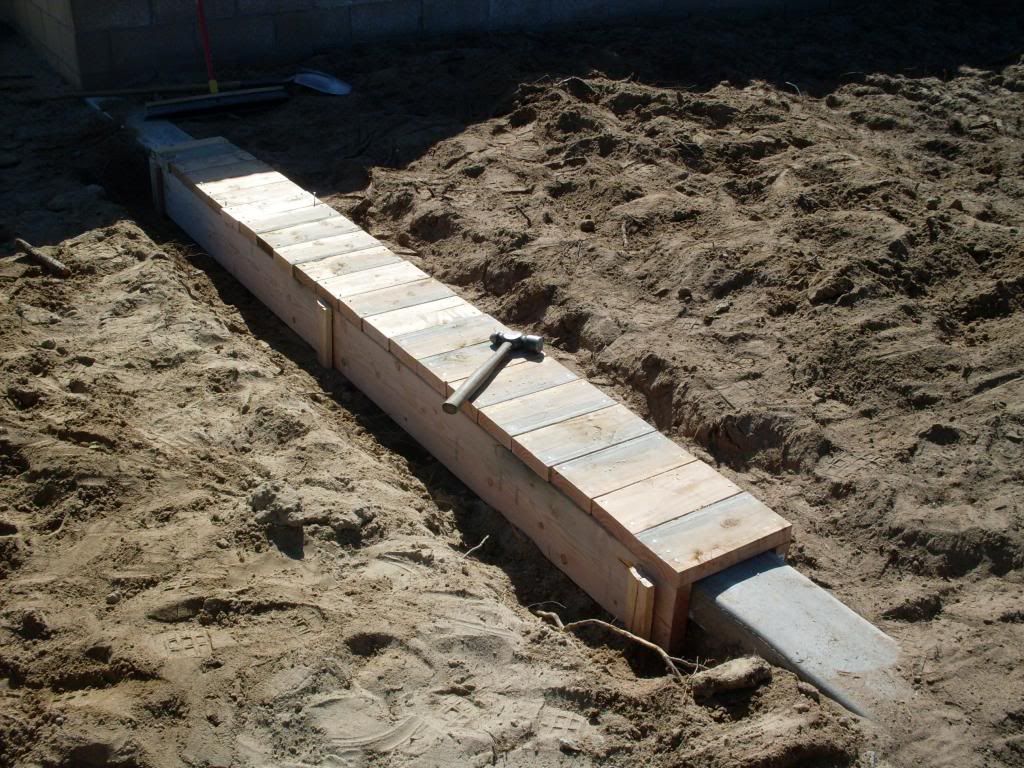 Got the Bobcat and started to remove many yards of dirt. 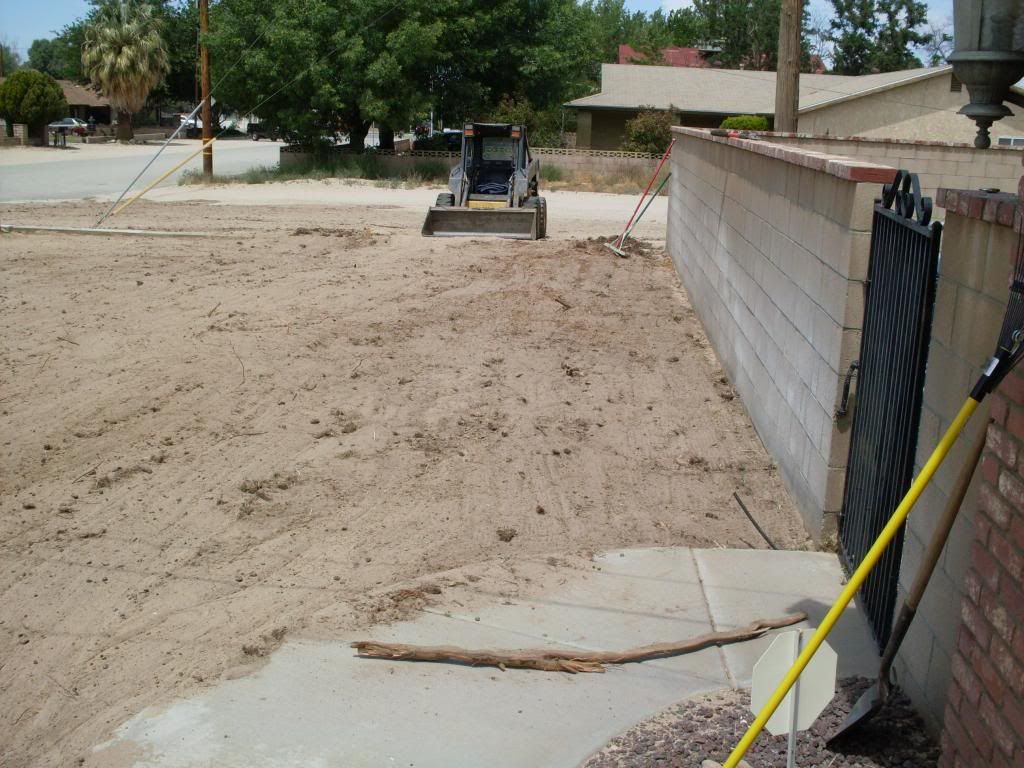 And started to put back many yards of new dirt, in hopes of making a crude looking sort of mound. 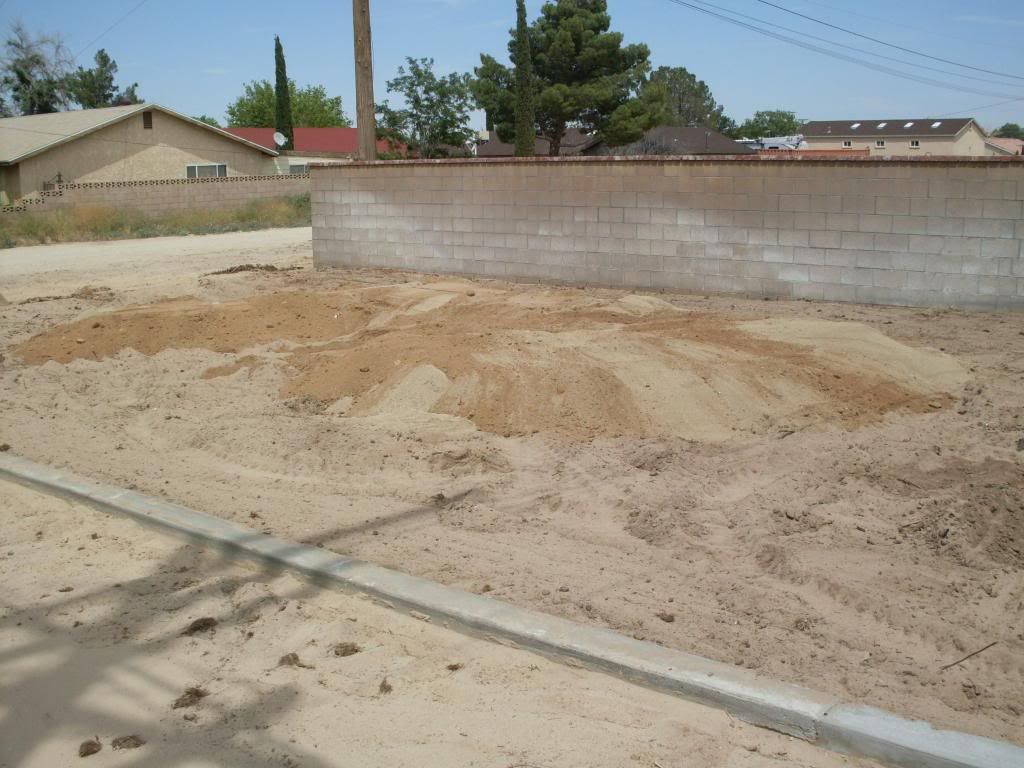 I then just sort of raked and shaped... 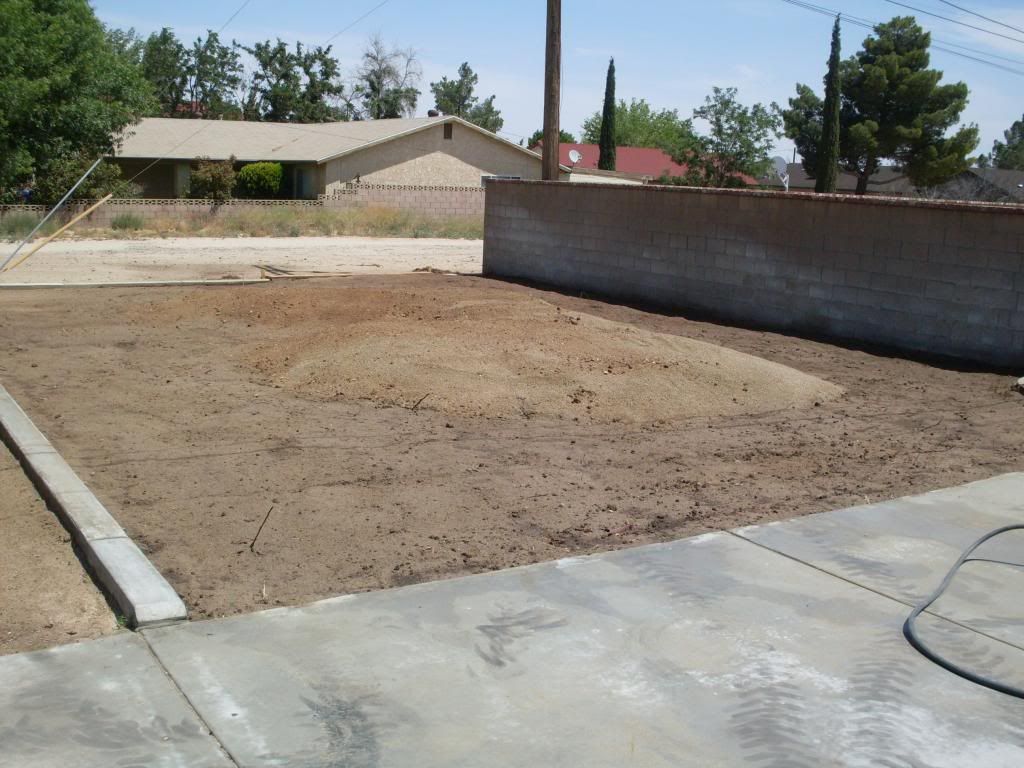 After that I built a raised block planter against the wall so I can eventually plant Oleanders to hide it. 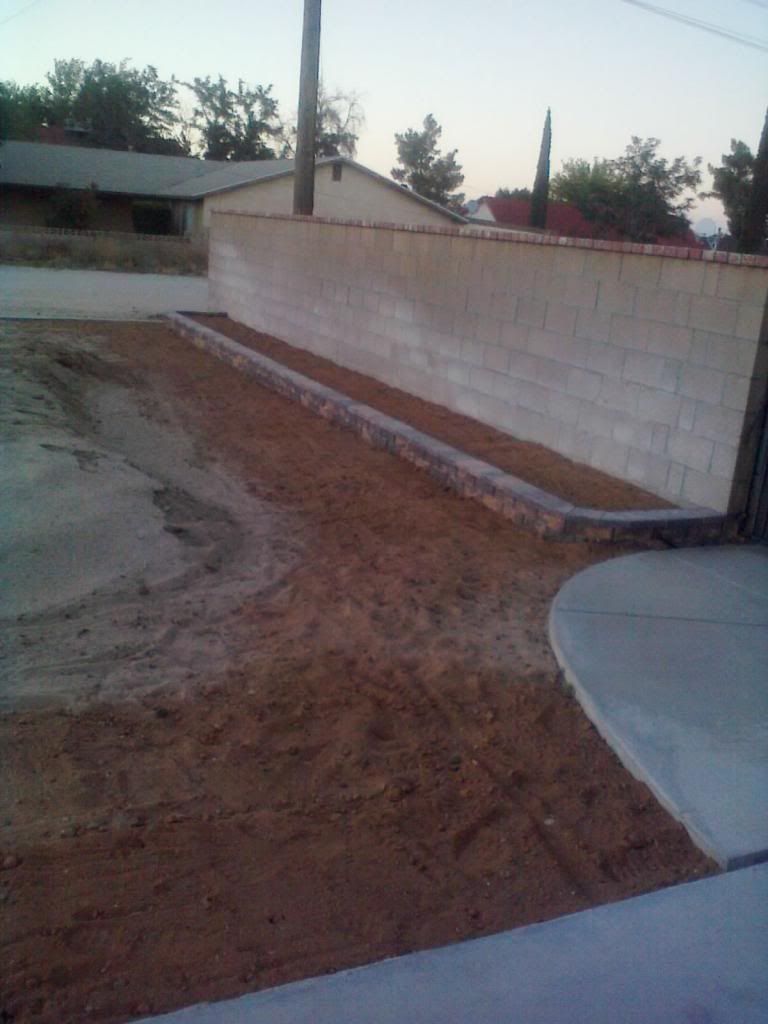 And laid in some curbing to separate the rock, hedge and mound area. 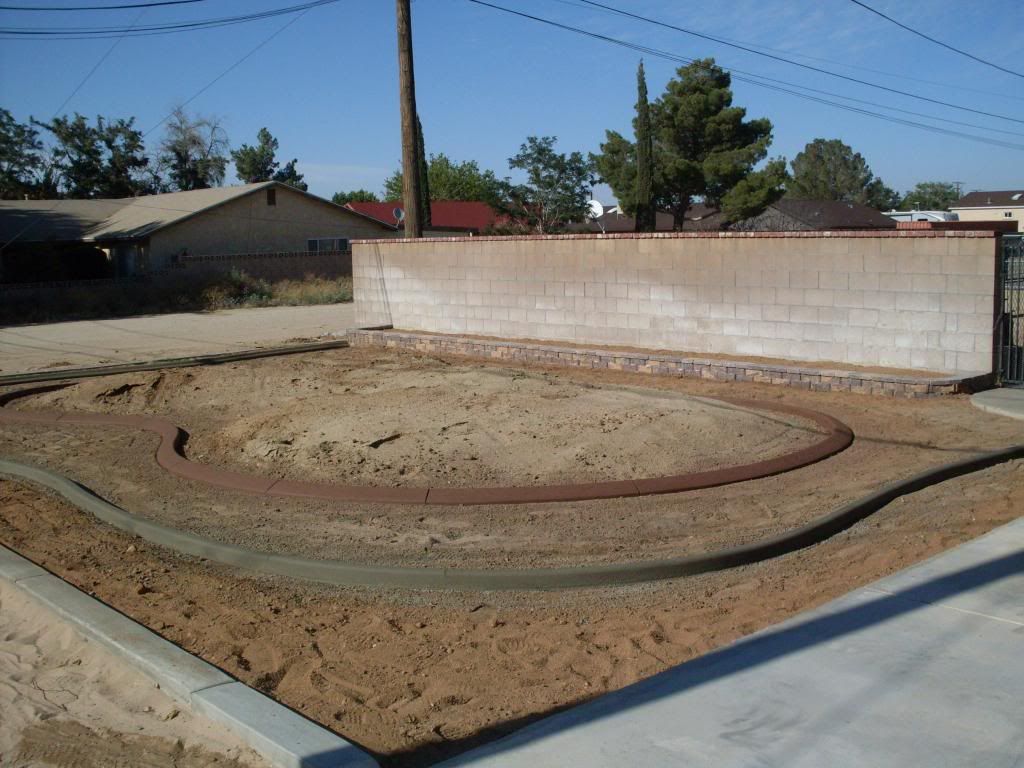 The next step was to erect a nice Idaho ceder split rail fence around the perimeter. 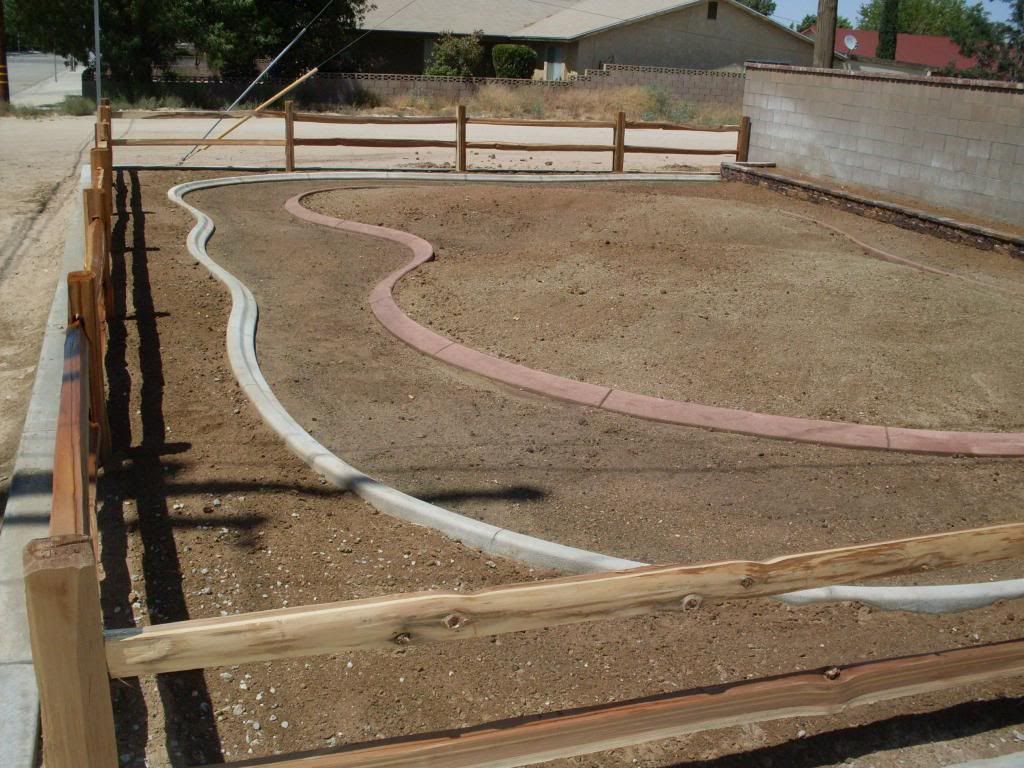 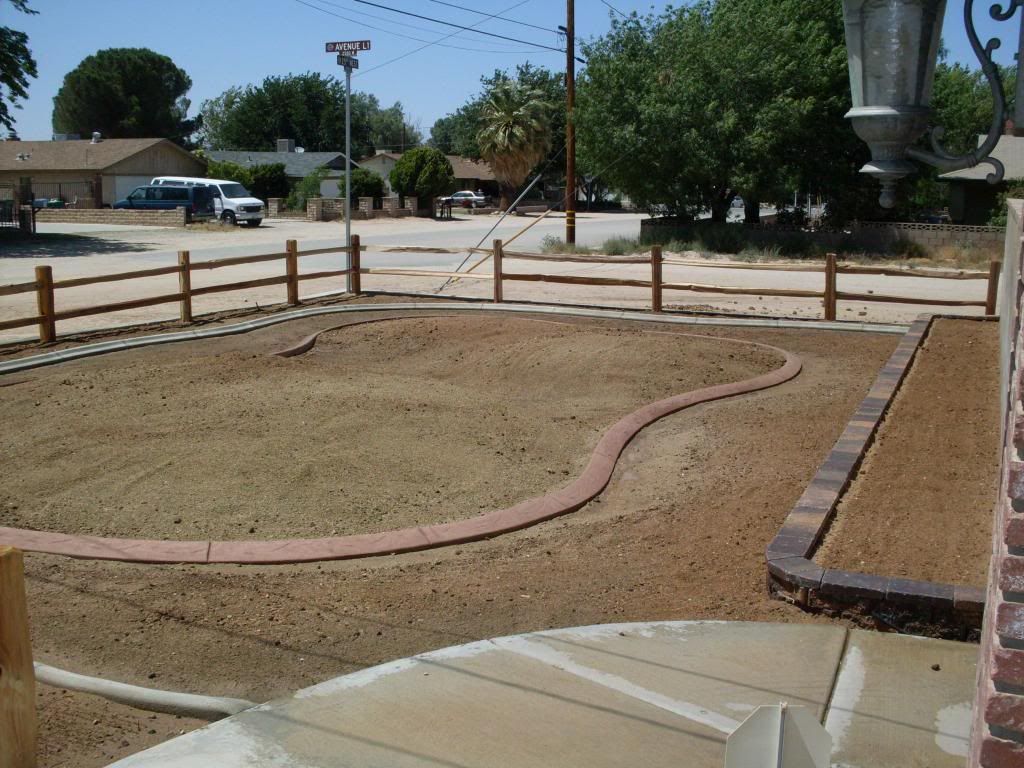 That's all I have for now but I hope I'll have it all completed in about another month. |
|
|

|
|
|
#94 |
|
Old Duffer
 Join Date: Mar 2003
Location: Maine
Posts: 1,821
|
Re: Let's see your homemade crafts!
Excellent! I'll be following this closely. Are you free-lancing or do you have a plan or picture you're following? Pea gravel, and pavers, or just low ground cover?
Keep us posted!
__________________
'68 Short C20 Flatbed Dually w/ 292 4bbl, Langdon cast headers, and WC T5 trans. '81 G10 Shorty Van "Good judgement comes from experience, and a lot of that comes from bad judgement." Will Rogers "Under promise, then over achieve." |
|
|

|
|
|
#95 |
|
Registered User
Join Date: Oct 2009
Location: Gardnerville Nv No Mo Cali!!
Posts: 869
|
Re: Let's see your homemade crafts!
I just have a picture in my head as to what I want it to look like. The area between the curbing will get an assortment of 1-3 inch Arizona River Rock. The area just behind the fencing will get Juniper hedging all around. The mounded area in the center will get a Myrtle tree on each mound and bordered with various Cacti and ground cover. The raised planter will get oleanders to hide the block wall.
|
|
|

|
|
|
#96 |
|
Registered User
Join Date: Oct 2009
Location: canton ga
Posts: 12,728
|
Re: Let's see your homemade crafts!
Very impressive ,I like that .
|
|
|

|
|
|
#97 |
|
Registered User
Join Date: Oct 2009
Location: Gardnerville Nv No Mo Cali!!
Posts: 869
|
Got the Hard Part Done
Quote:
Weed block 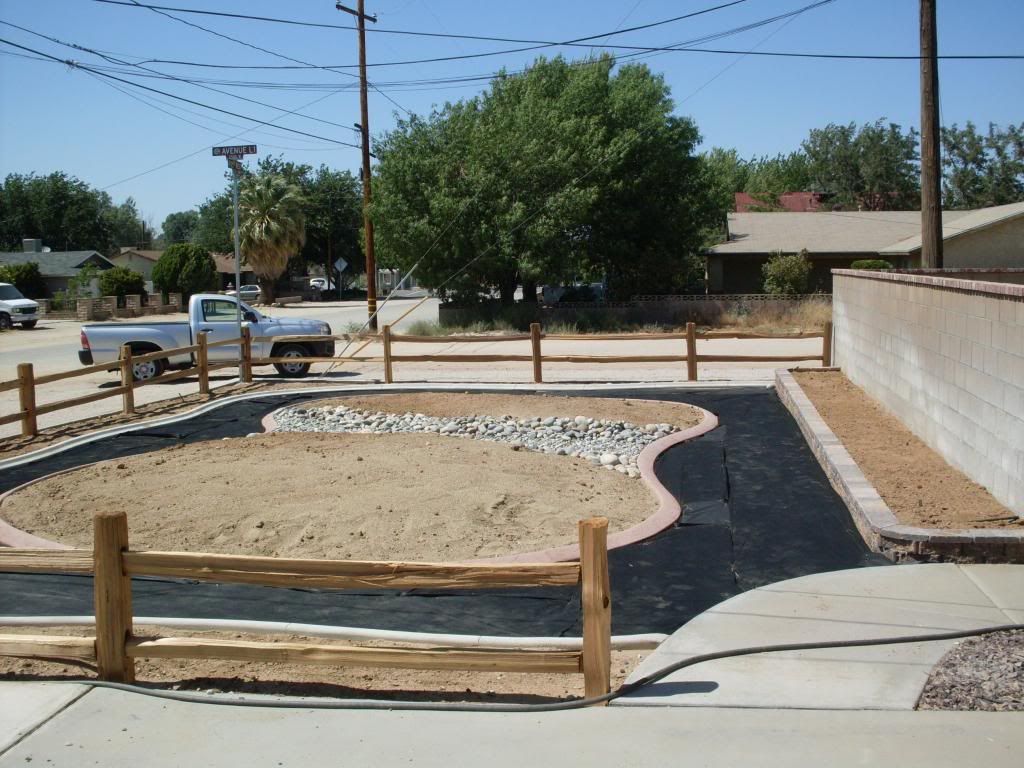 Rock 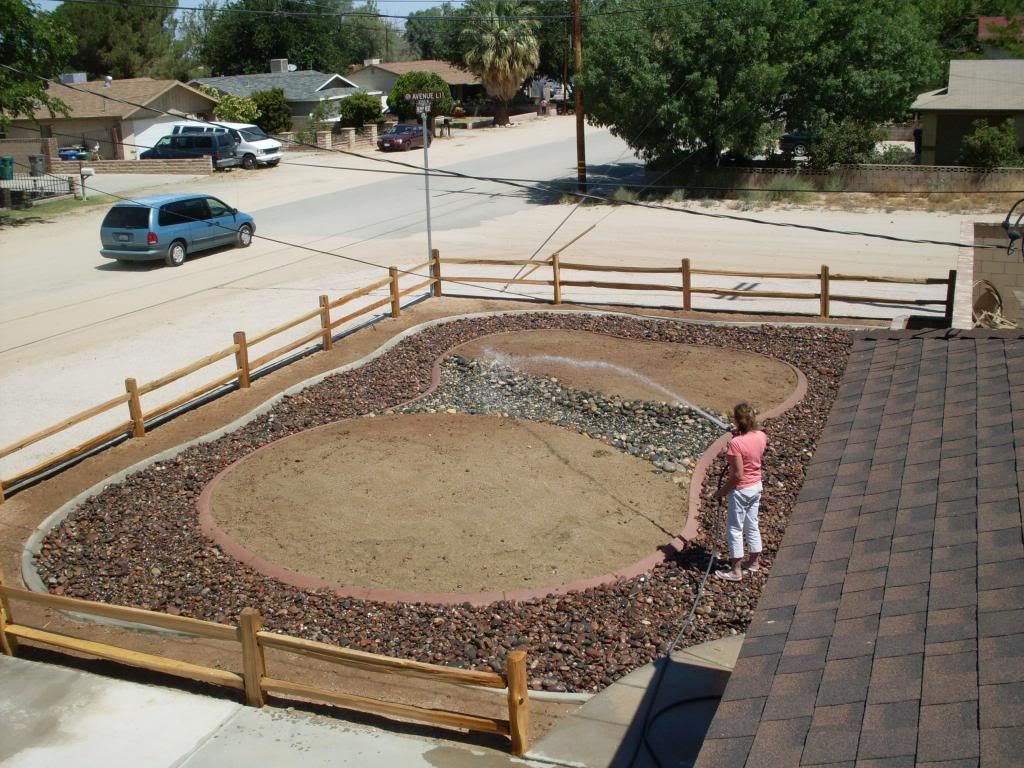
|
|
|

|
|
|
#98 |
|
Registered User
Join Date: Oct 2009
Location: canton ga
Posts: 12,728
|
Re: Let's see your homemade crafts!
That looks great ,how did you do the curbing ,by hand or a machine of some sort ?
|
|
|

|
|
|
#99 |
|
Registered User
Join Date: Oct 2009
Location: Gardnerville Nv No Mo Cali!!
Posts: 869
|
Re: Let's see your homemade crafts!
Thanks, the curbing was the only part that I had to contract out. They come in with a machine specially designed to lay it. It's a small electric thing on wheels with a hopper that comes with different shaped dies depending on what shape you desire. That part only took about an hour to do.
|
|
|

|
|
|
#100 |
|
Registered User
Join Date: May 2014
Location: Pahrump Nv
Posts: 2
|
Re: Let's see your homemade crafts!
Been on vacation, thought I'd do this follow up on my first post with some data I've collected after running the cooler the past few weeks...
Also I cast this in aluminum to replace the original shift knob that came with the truck.. The casting is still on the sprue.. Needs to be cut off, drilled and tapped yet.. With the swamp cooler, I used a 5 gal bucket as a reservoir and a 12v bilge pump to recirculate the water over the pad... This proto-type was used for testing different type pads for air flow volume and temp data... Using PWM speed controllers, air flow and and water feed are controllable from 0-100% ... On a dry day it'll deliver air at 24-28*f below ambient air.. When I say dry I mean 2-8% humidity, with an average of 6% at days end.. Max air flow on this model was 8-10 cubic ft a second.... Measured with a cheap anemometer at +/- 3.5%.. and depending on what pad was being tested... Even with the error factor, the temp. shift between conditioned air and ambient air should be close to accurate.. This morning 10:30 ambient air 92*f humidity 13%, fan on low, air off the cooler 66*f... My 24/7 shadow couldn't go with me in the summer because of the heat, and the fact that sometimes she needs to stay in the truck for a short time... With this she sits in a cool breeze and keeps an eye on me and we both feel better... |
|
|

|
 |
| Bookmarks |
| Thread Tools | |
| Display Modes | |
|
|