
 |
Register or Log In To remove these advertisements. |
|
|
|
|||||||
 |
|
|
Thread Tools | Display Modes |
|
|
#1 |
|
Registered User
Join Date: Aug 2012
Location: Salem Mo
Posts: 663
|
1957 Chevy truck re-rebuild
Hi everyone. My name is Jim, I've wondered the posts for a while now. There's nothing like pictures of other projects to spark others imagination, or just to get you through some tough spots by seeing what others have gotten through.
The short history... My dad bought and went though this truck back in the early 80's. He had help, but I don't think anyone really had their heart into the project. Before he bought it, it did have a front subframe from an el-camino installed. This was a great start to getting this truck on the right track. He had it for nearly 30 years and maybe put a couple hundred miles on it. He never had the confidence to drive it too far. For instance, the 327 had some worrying sounds, the charging system didn't work well, the carb had a bad hesitation, ect. As a gift for all he had taught and instilled in me over the years I finally got a nice workshop put together so we brought it over for a total redo. The plan wasn't to go too far from original, just get it to a turn key reliable truck. He was retired and I really wanted him to be able to drive it to car shows and enjoy the day anytime he wanted take a drive. Sad to say, he passed away 4 months into the project. That was Sept. 2010. It sat in my shop til a couple months ago and it's time to finish it as a memorial project. It took a while for me to get my heart into the project, first, it wasn't my truck, and it wasn't supposed to happen this way. Once I got back into the project, I recalled all the things he wanted to change and upgrade, once I got going I would imagine the excitement on his face as I got working on it again and my heart warmed to the project. Ok, let me grab a kleenex here....  Onto the present time. I'll run a few pics of where I am now and go back in time on how I got to where I am. I have details pics of most of the progress, if anything perks interest, let me know, I probably have good learning pics. Most of the work is not nearly as deep as some of the projects I've been viewing, such as Kims truck, wow. One area I just finished is the rear tailgate and bumper. Dad wanted the chains gone and the taillights mounted somewhere other than on the old brackets. 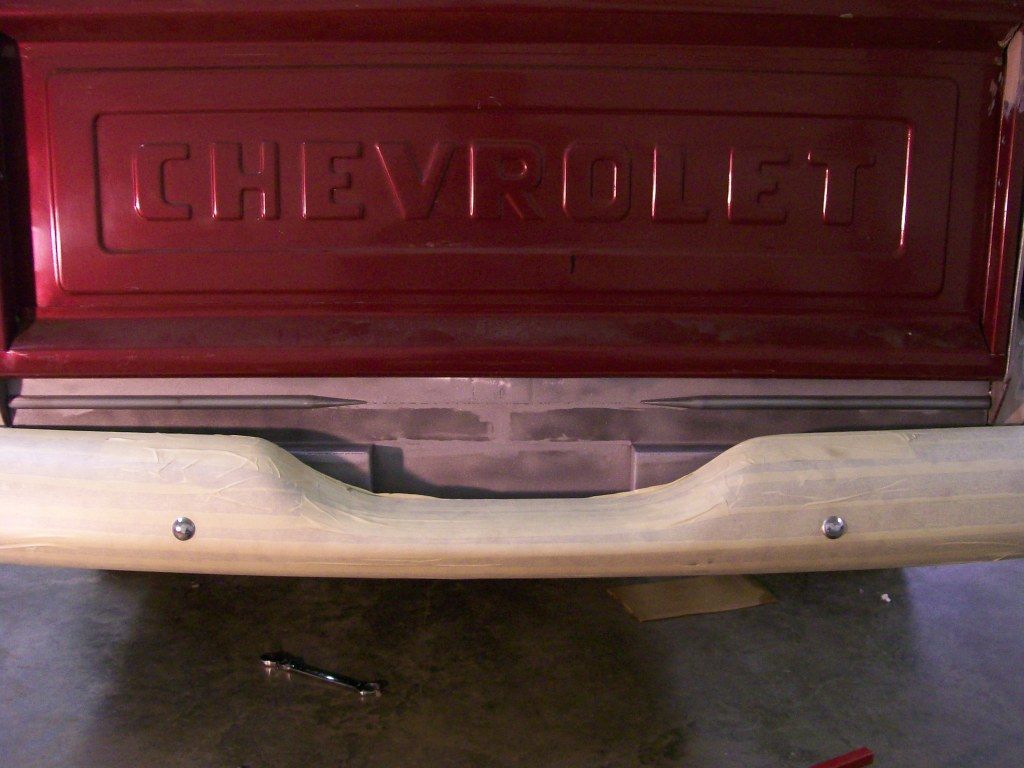 More pics to follow. |
|
|

|
|
|
#2 |
|
Registered User
Join Date: Jul 2011
Location: Auburn ca.
Posts: 2,886
|
Re: 1957 Chevy truck re-rebuild
Hi Jim, looks good so far.
|
|
|

|
|
|
#3 |
|
Registered User
Join Date: Aug 2007
Location: Corona, California
Posts: 7,998
|
Re: 1957 Chevy truck re-rebuild
Welcome.
Do keep the pics coming. Kim |
|
|

|
|
|
#4 |
|
Registered User
Join Date: Aug 2012
Location: Salem Mo
Posts: 663
|
Re: 1957 Chevy truck re-rebuild
More pictures I can do.....
One way they got rid of the taillight brackets back in the 80's was to install a different bumper. I removed the bumper before I got a picture of it, but it had the taillights built into the bumper. Taillight bracket issue solved.. My issue was the bumper was off a more square bodied vehicle. In other words, the front bumper on the truck was rounded, as it was original, and the rear didn't match the same flow as the front. I ordered an original bumper and brackets. Now to satisfy the "no bracket" taillight situation. By using the down post of the rear of the bed and using led reproduction taillights, I cut a half moon shape out of it. Then I fabricated an outer taillight housing to enclose the rest of the taillight. The picture will explain better than I can. 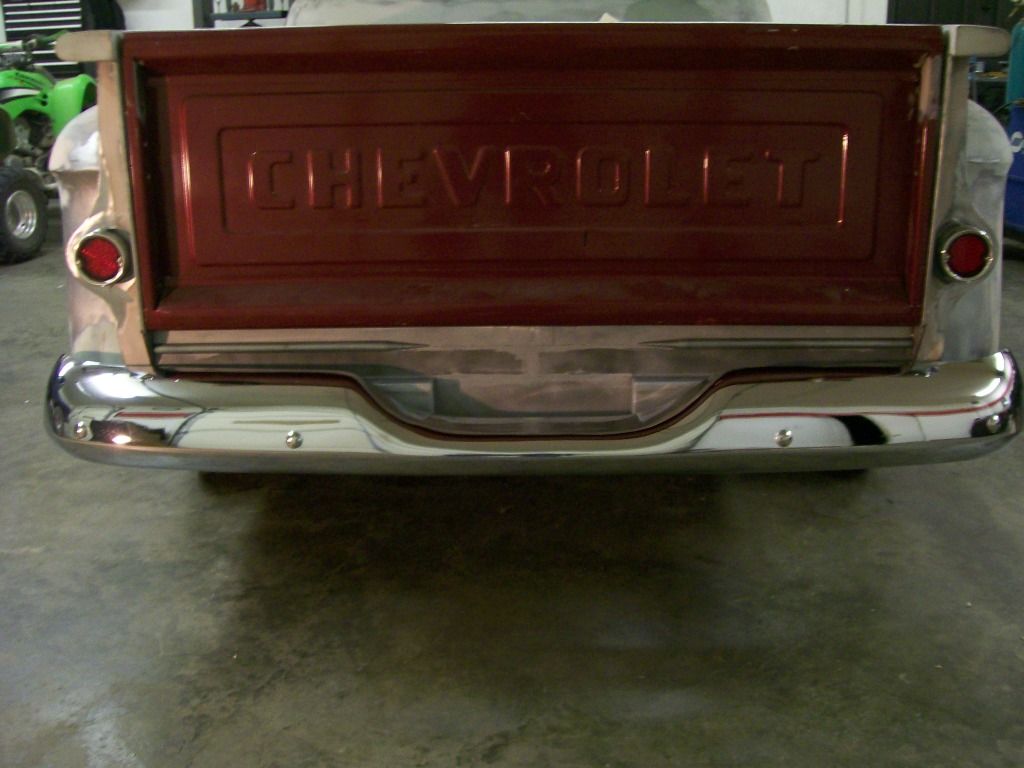 Once I finished with the taillights I just felt something was missing. I walked by it for another week or so, then it hit me. Oh yeah, I remember something that was done back in the day. I don't know what to call them, but both taillights got one.  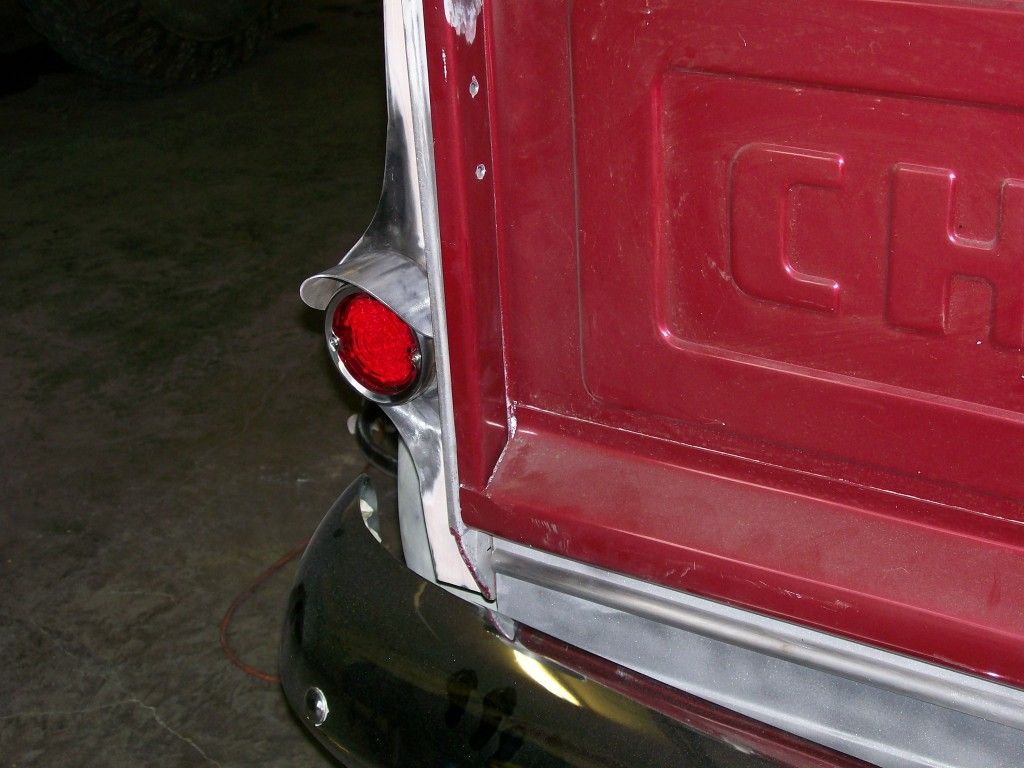
|
|
|

|
|
|
#5 |
|
Registered User
Join Date: Aug 2007
Location: Corona, California
Posts: 7,998
|
Re: 1957 Chevy truck re-rebuild
Looks nice. I think they call them eye brows but I could be wrong.
Kim |
|
|

|
|
|
#6 |
|
Registered User
Join Date: Jan 2012
Location: Motown
Posts: 7,680
|
Re: 1957 Chevy truck re-rebuild
you teasing us?
3 pics all of the tailgate??? wtf?   
__________________
cool, an ogre smiley  Ogre's 58 Truk build Ogre's 58 Truk buildhow to put your truck year and build thread into your signature shop air compressor timer |
|
|

|
|
|
#7 |
|
Registered User
Join Date: Aug 2012
Location: Salem Mo
Posts: 663
|
Re: 1957 Chevy truck re-rebuild
Lol, would you get to the point.
 Ok. will do. I'll do a run of pics dealing with making the taillight out housings. First mark where I decided to have the tailligts. 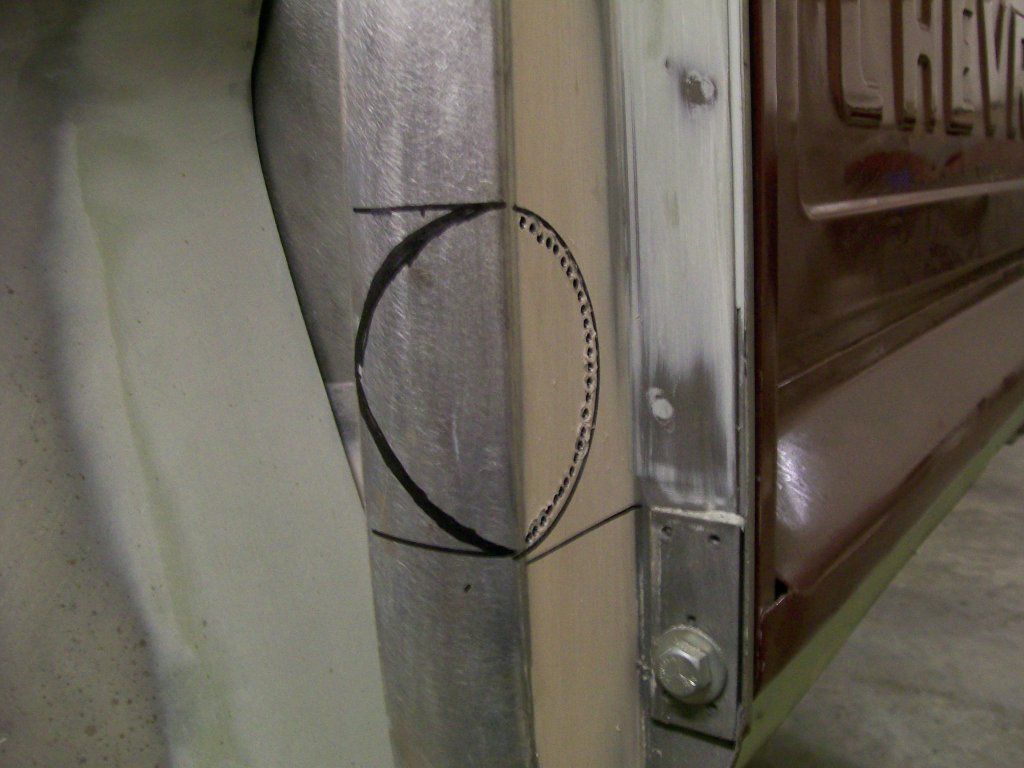 Once the half hole was cut I taped the light in place and used construction paper to get an idea of the size and dimention of the outer housing I had to make. 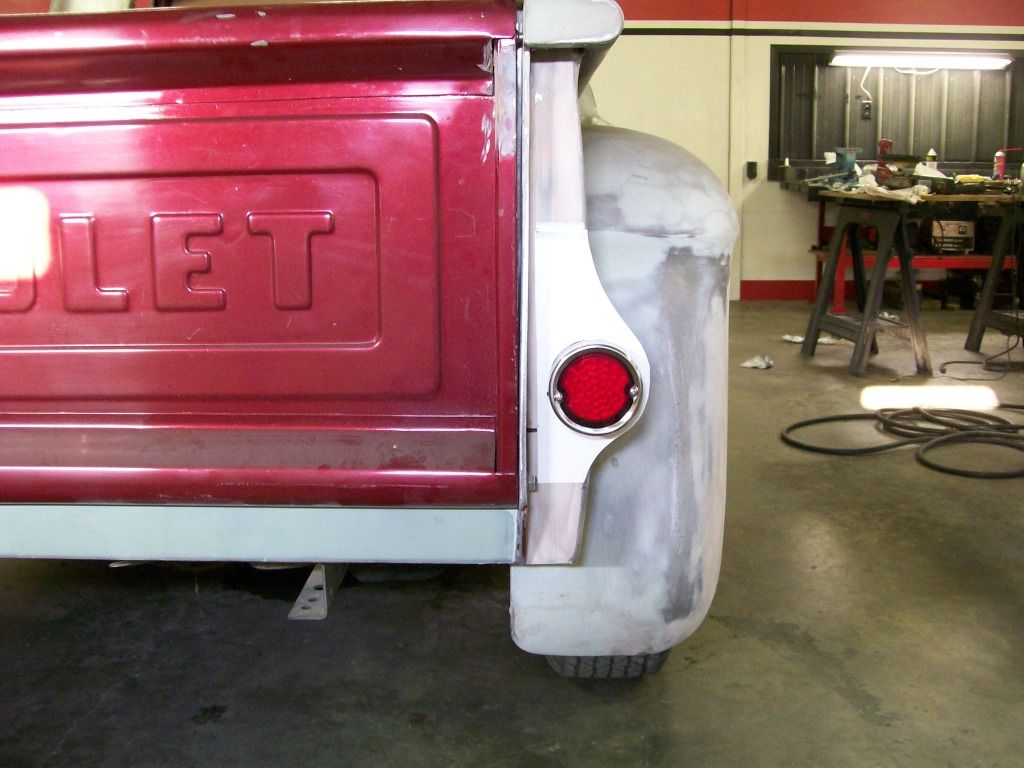 Once I had the construction paper cut for the front, back and outer pieces I used a Torchmate plasma cutter to convert the paper to metal pieces. The round item in this picture was made from 3" exhaust pipe. I will not be using the original housing, this round piece will be what will hold the led light and what the 2 screws that holds the stainless bezel in place. 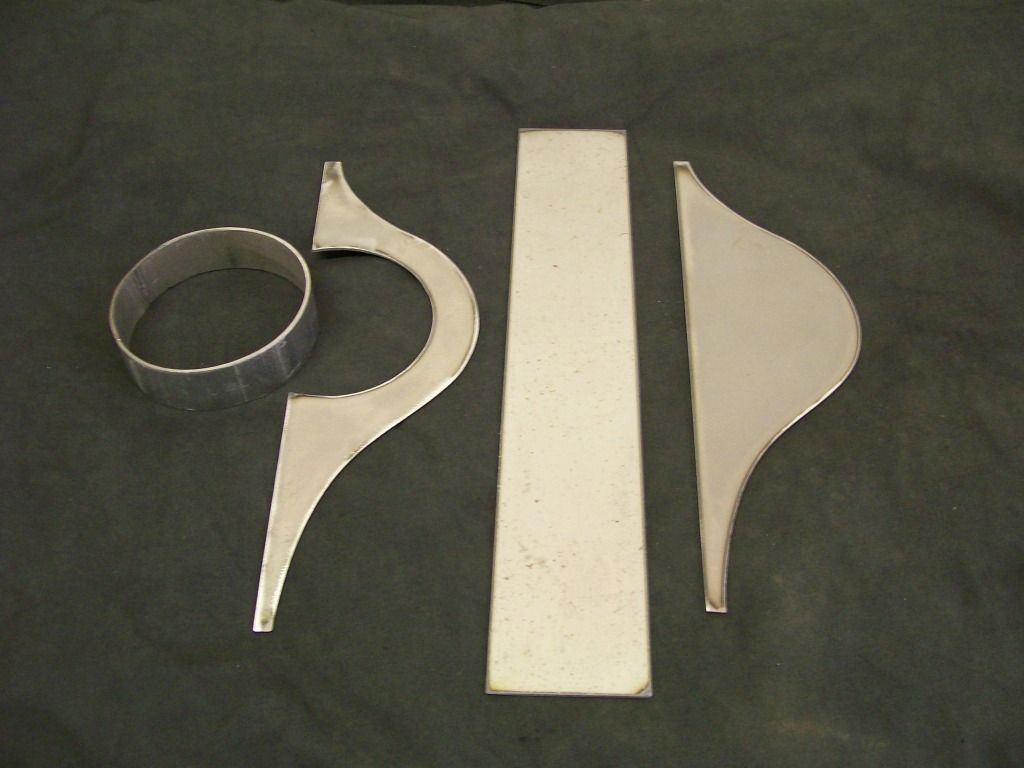 Three inch pipe was too small, my only other choice was 4" that was too big. I used the 3" and split and spread it to the right size. Then welded a piece to fill the gap. At the time I had no 4" in my shop, otherwise I probably would have used it. 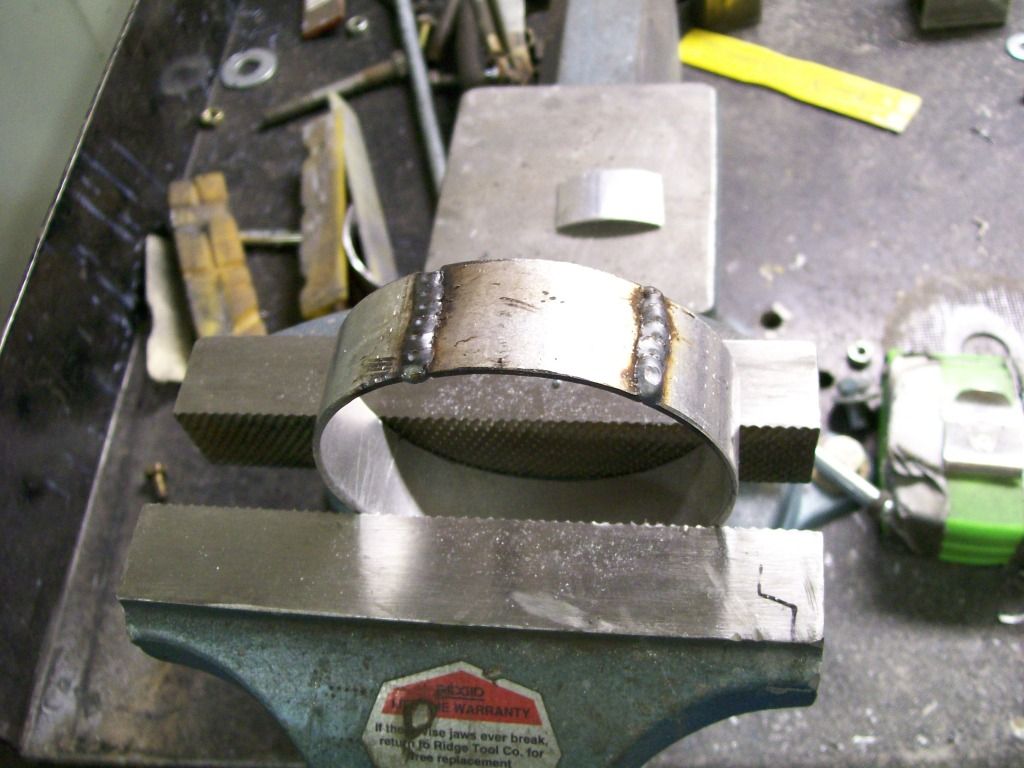 After a little grinding. 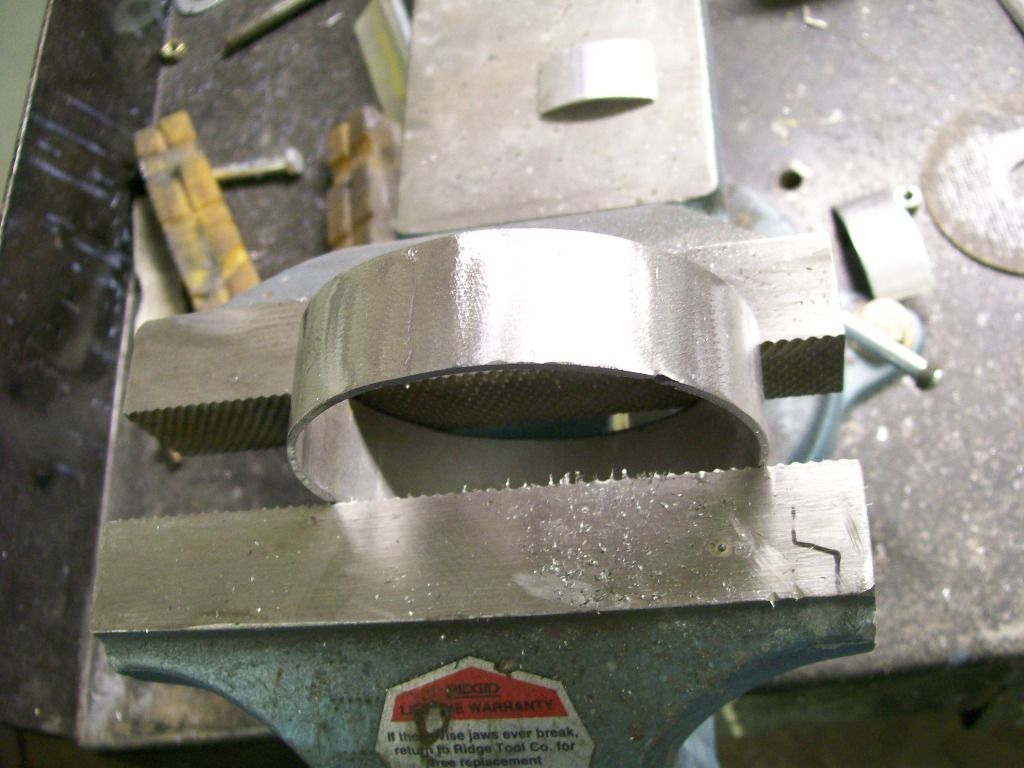 Both are made and the bezel fits great. I still have to weld the nuts inside the round pieces for the bexel screws to attach to. 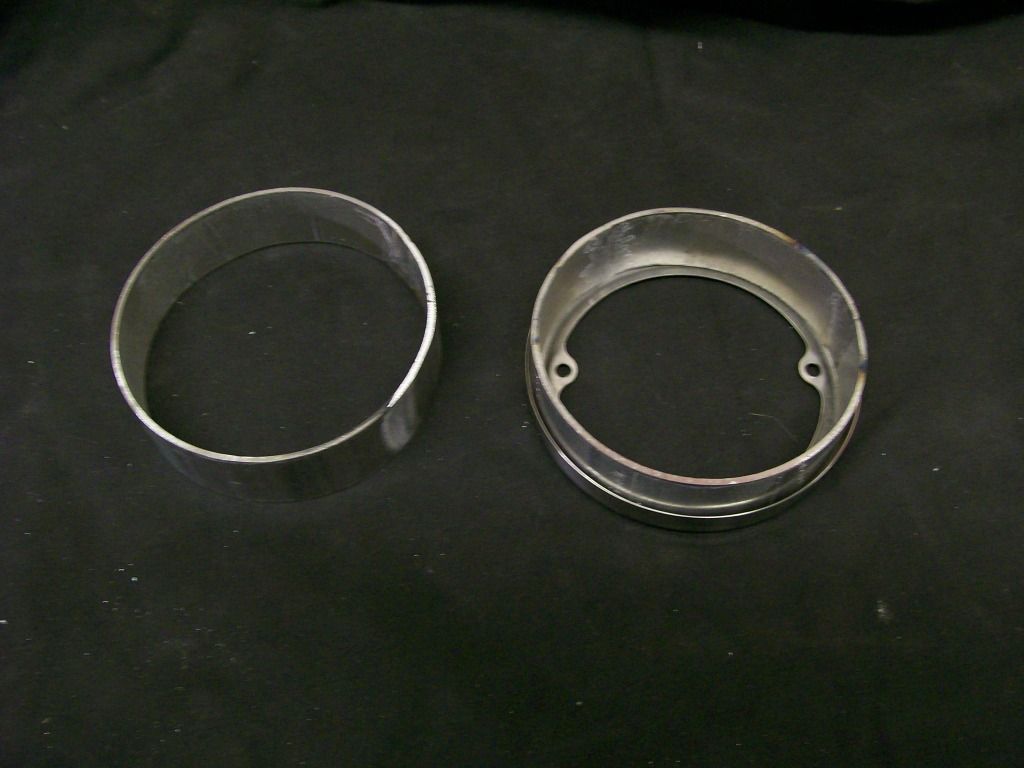 Pieces tack welded together. 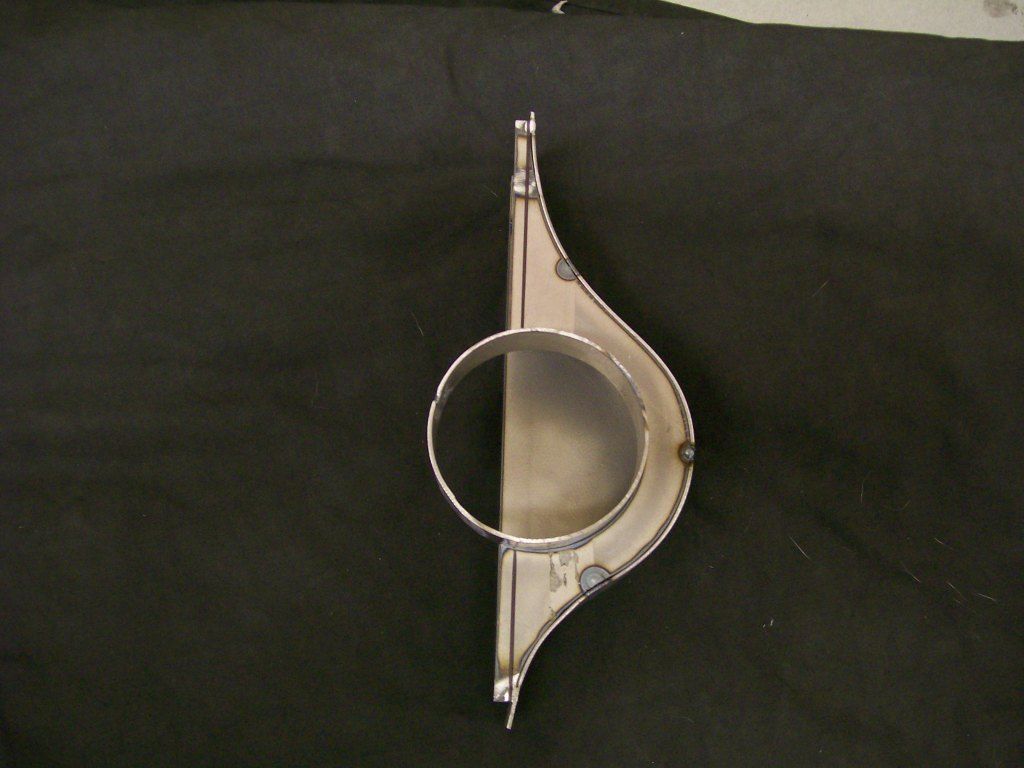 I cut with extra material so I could final fit the housings. Here is the test fit. 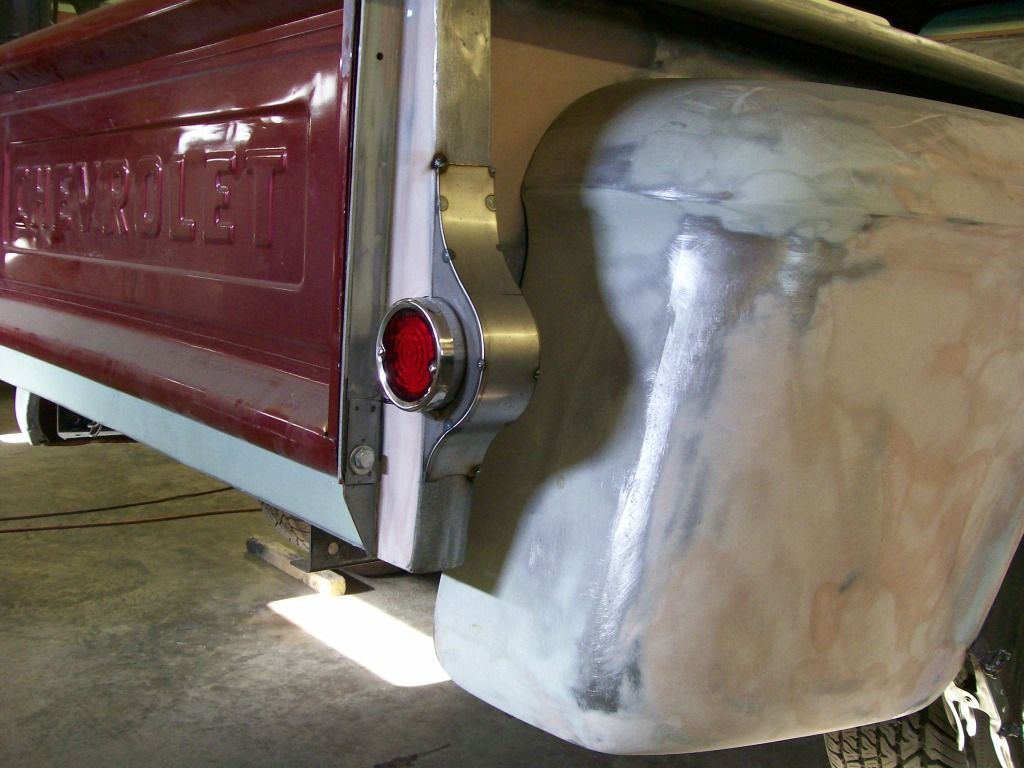 Once I got the pieces fitted, it was time for welding. 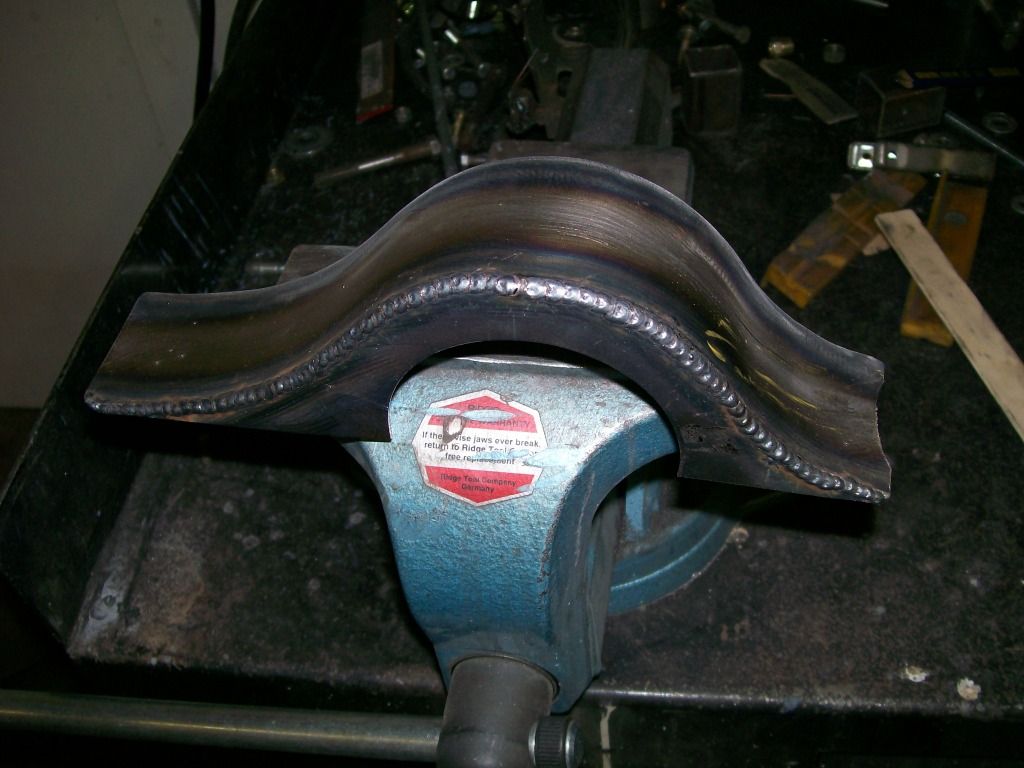 Although welded on the outside, the penetration was spot on. 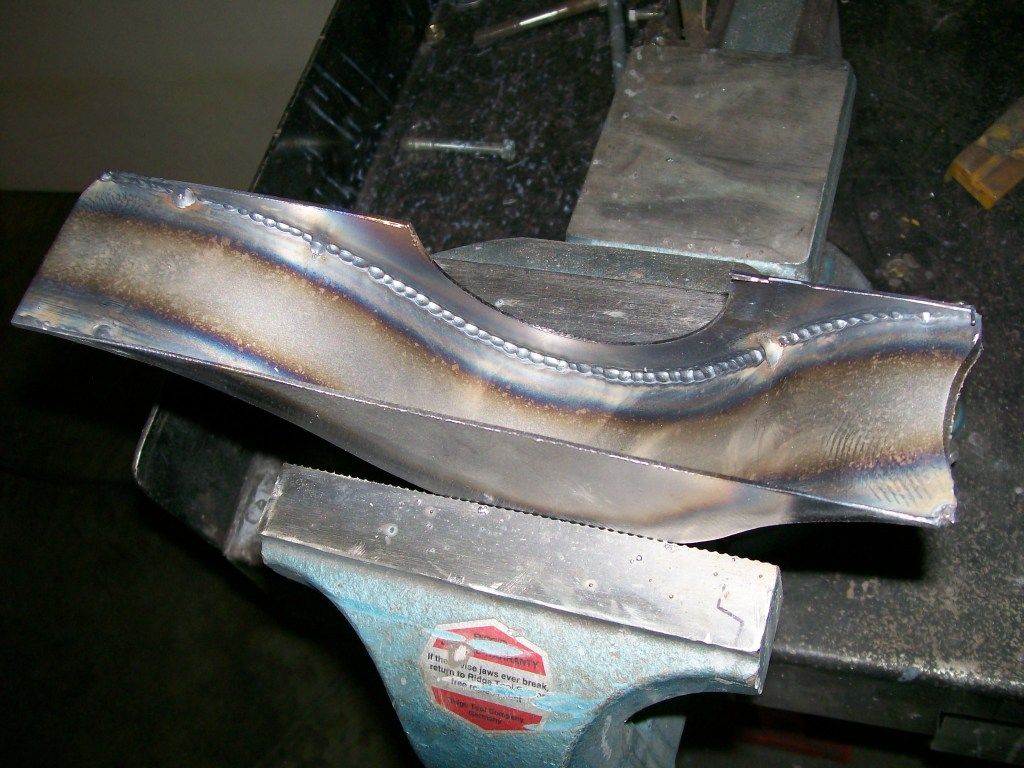 The nice part of the torchmate is the consistancy of reproducing multiple items. 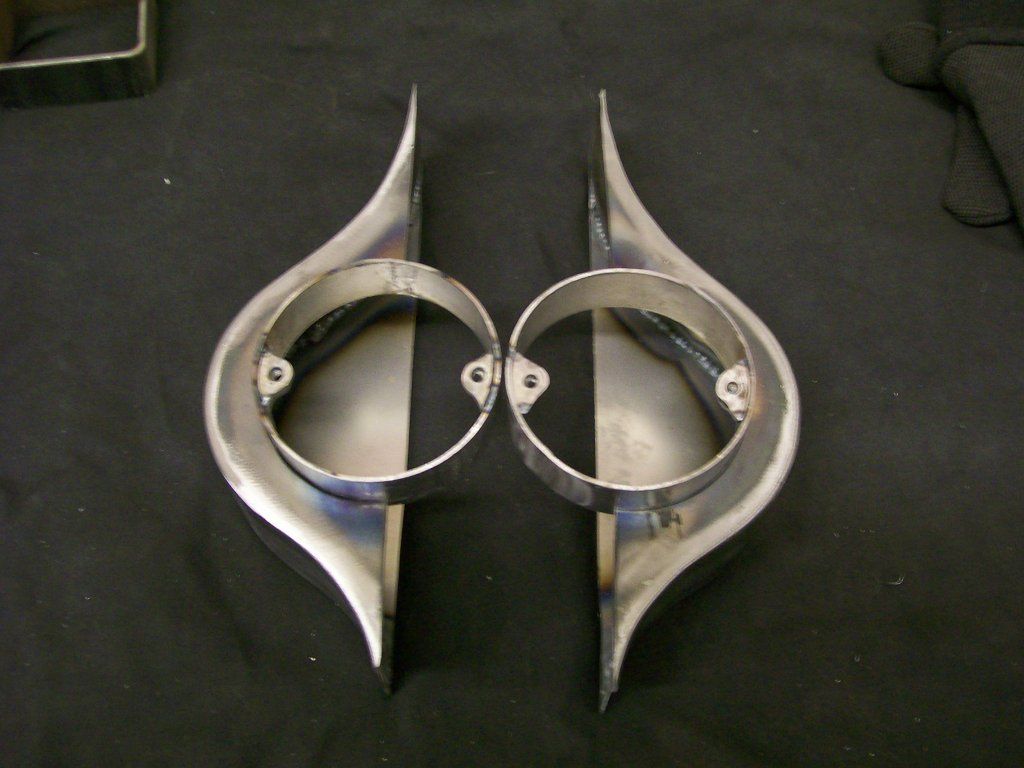 With the housings made I used them as a templet for the cut. 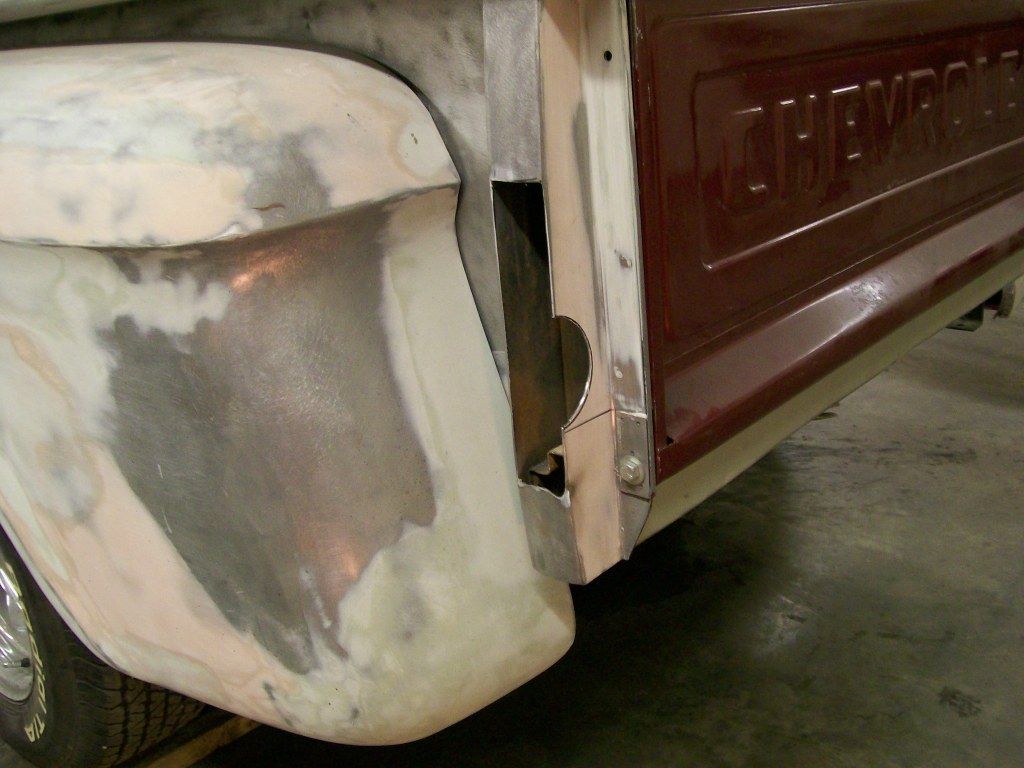 I welded the ring to the body first. There is a sheet metal ridge near the tailgate that got in the way of the welder tip if I welded it later. 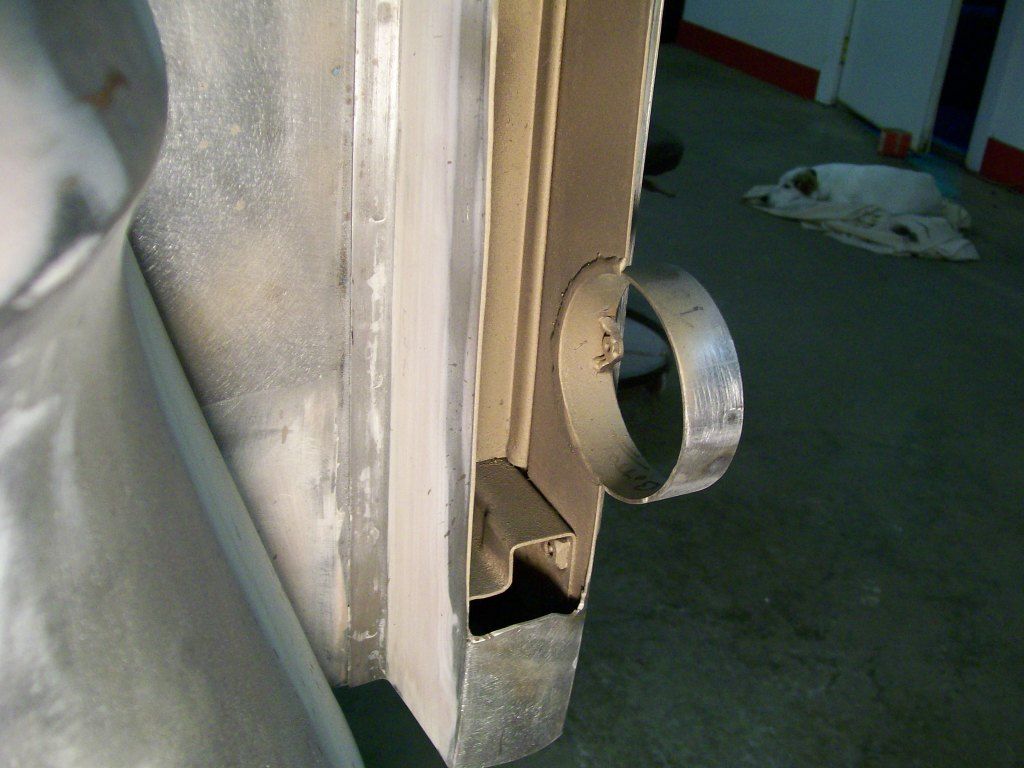 After welding and grinding. 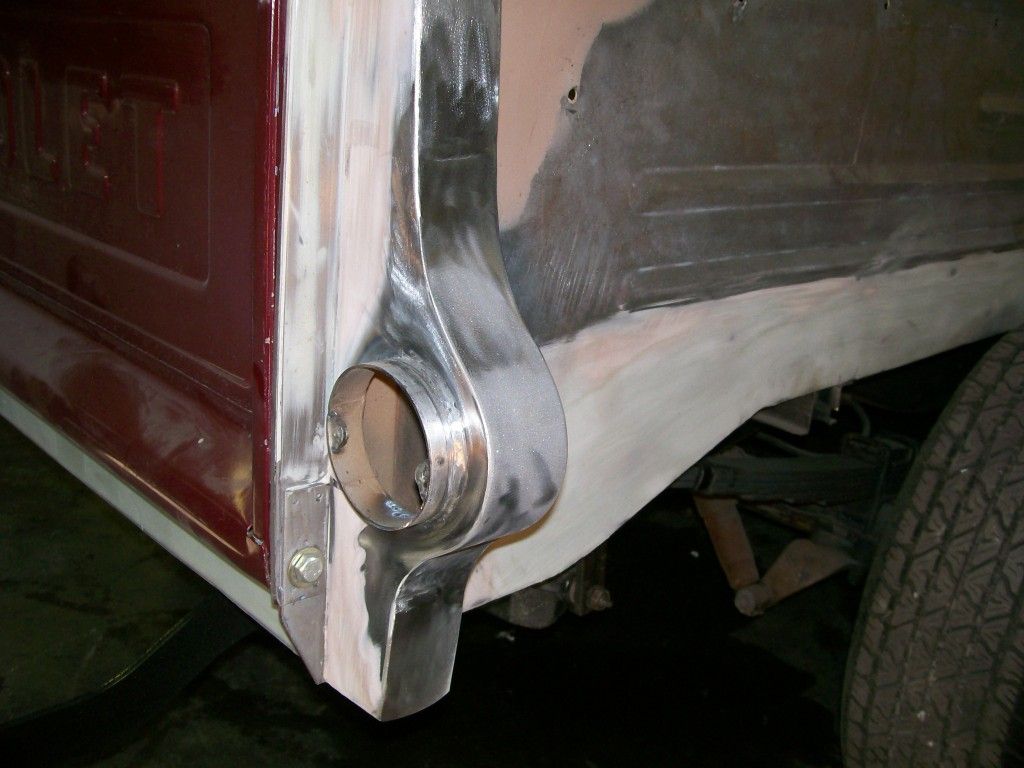 I hope that fills the picture needs for a while.  Enjoy. Enjoy.
|
|
|

|
|
|
#8 |
|
Registered User
Join Date: Nov 2011
Location: Langley, BC
Posts: 702
|
Re: 1957 Chevy truck re-rebuild
Nice design and great fab work on the tail lights. Lookin' good.
__________________
56 Chevy PU http://67-72chevytrucks.com/vboard/s...d.php?t=531955 Question: Know how to sell your truck for $50,000? Answer: Spend $100,000 building it. |
|
|

|
|
|
#9 |
|
Registered User
Join Date: Aug 2007
Location: Corona, California
Posts: 7,998
|
Re: 1957 Chevy truck re-rebuild
Real nice work on the tail lights.
Kim |
|
|

|
|
|
#10 |
|
Registered User
 Join Date: Mar 2011
Location: Valley of the Sunstroke, Arizona
Posts: 1,210
|
Re: 1957 Chevy truck re-rebuild
Goes perfectly! Knocked that one outta the park, well done!
__________________
My build thread - Devastation and Reform http://67-72chevytrucks.com/vboard/s...d.php?t=567131 |
|
|

|
|
|
#11 |
|
Registered User
Join Date: May 2010
Location: Lawrenceville, Ga
Posts: 2,648
|
Re: 1957 Chevy truck re-rebuild
You do nice work. That's why I like this forum, lots of skills and ingenuity on display.
Last edited by Russell Ashley; 09-03-2012 at 08:13 AM. Reason: corrected mistake. |
|
|

|
|
|
#12 |
|
Registered User
Join Date: Dec 2010
Location: Dallas Texas
Posts: 158
|
Re: 1957 Chevy truck re-rebuild
Nice like the tail lights looks like a good start/
|
|
|

|
|
|
#13 |
|
Registered User
Join Date: Jul 2011
Location: Auburn ca.
Posts: 2,886
|
Re: 1957 Chevy truck re-rebuild
look good and the eyebrows are a nice touch!
|
|
|

|
|
|
#14 |
|
Registered User
Join Date: Jan 2012
Location: Motown
Posts: 7,680
|
Re: 1957 Chevy truck re-rebuild
ogre's are known for being subtle
 nice tail lite mod but we've still only seen the butt of your truck
__________________
cool, an ogre smiley  Ogre's 58 Truk build Ogre's 58 Truk buildhow to put your truck year and build thread into your signature shop air compressor timer |
|
|

|
|
|
#15 |
|
Registered User
Join Date: Aug 2012
Location: Salem Mo
Posts: 663
|
Re: 1957 Chevy truck re-rebuild
I know everybody says this....but, thanks for the encouraging replies.
Most of you also have build threads and know rebuilding these old vehicles can wear on one's patience over time. Having a community with the same interests sure helps keep the momentum moving forward. I have many different projects going on, most do not involve whole truck pictures. I'll move to changing the rear springs to the one's that lower the rear end, they have a couple whole truck pictures.  With the front change to independant suspension back in the 80's, the front dropped a couple inches. From what I can tell, they removed a couple leafs out of the rear to lower it to match the front. It did drop the rear but not enough for my liking. I ordered the ones advertised as a 3" drop. Don't be fooled, I looked at the picture in the catalog for a long time, I couldn't see how it was gonna happen. Plus I didn't want a full 3" drop anyway, so I figured I'd be happy with a less than3" drop. The design is great, they simple rolled the spring bushing eye the opposite direction on the rear or the leaf spring. This altered the rear of the spring a couple inches. The front of the spring stayed the same however. Since the axle is located in the middle of the bushing eyes, the the drop is only a little over an inch. The front is still at the same pivot point. 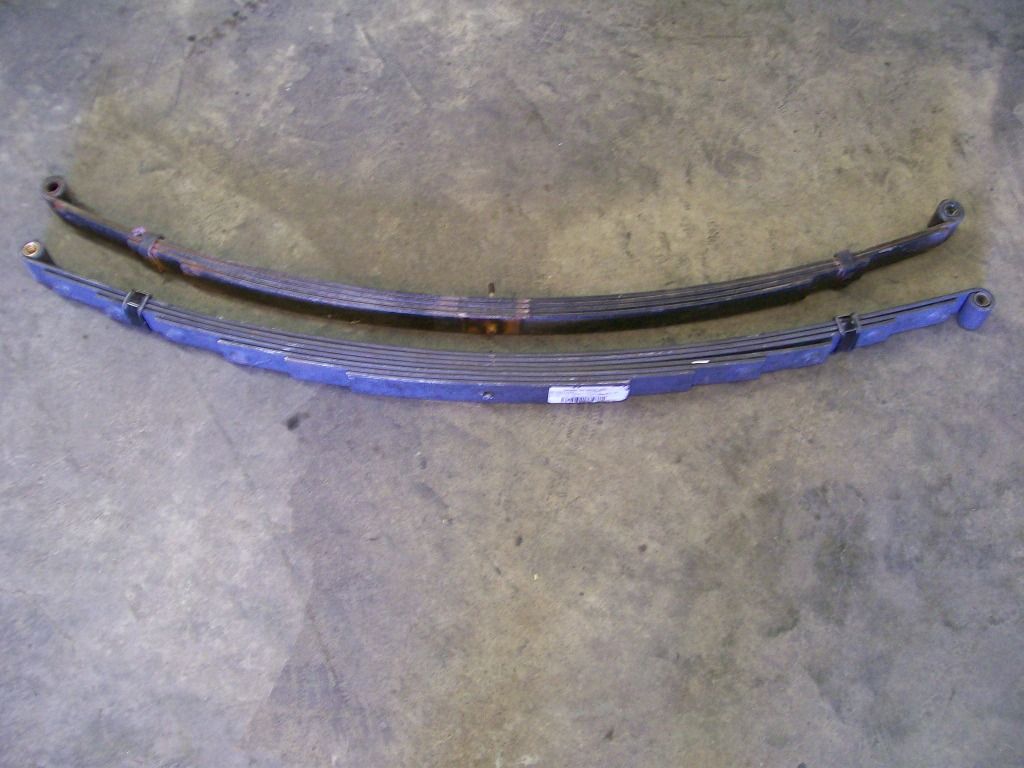 This pic is with the old springs, even with the couple of leafs missing. 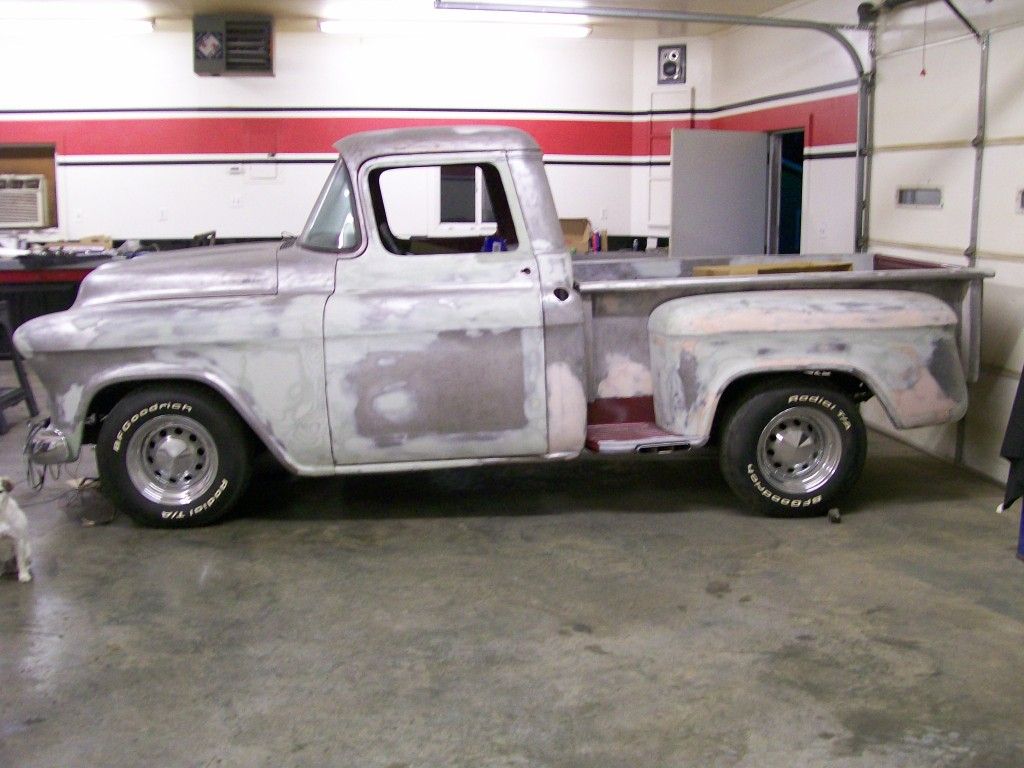 This next pic is after the spring change. Just installing the new leafs did not give me this much drop. I wanted 2 ", the new leafs gave me almost 1 1/2". Keep in mind, if the old leafs already had a couple leafs missing, the change change would be greater. I eneded up making some longer shackles to get another 5/8" further drop. Know this, in order to get 5/8" drop from the shackles, I had make them 1 1/4" longer. 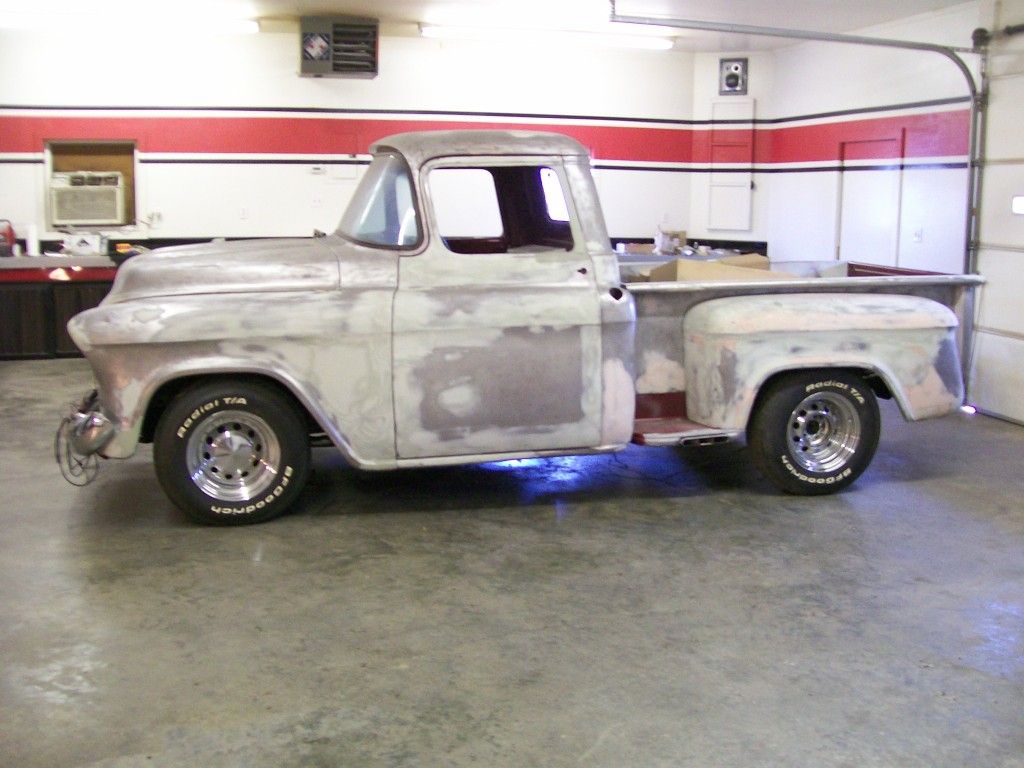
|
|
|

|
|
|
#16 |
|
Registered User
Join Date: Aug 2007
Location: Corona, California
Posts: 7,998
|
Re: 1957 Chevy truck re-rebuild
The new stance looks better. The new spring may settle a little over time.
Kim |
|
|

|
|
|
#17 |
|
Registered User
Join Date: Sep 2009
Location: Monroe,Iowa
Posts: 4,370
|
Re: 1957 Chevy truck re-rebuild
Finally a picture of the truck!! Only kidding you do good work and explain it so even a Dumb azz like me can understand it. Keep the pictures coming of this I think it will be a fine example of TF Trucks . Lookin Good
|
|
|

|
|
|
#18 |
|
A320 Pilot/USAF Retired
Join Date: Mar 2009
Location: Charleston, SC
Posts: 2,629
|
Re: 1957 Chevy truck re-rebuild
Sweet looking truck! Keep the pics coming!!
__________________
JJ My 1957 build: http://67-72chevytrucks.com/vboard/s...d.php?t=334552 http://www.trifive.com/forums/showthread.php?t=22037 Instagram - Chuckdriver57 |
|
|

|
|
|
#19 | |
|
Registered User
Join Date: Aug 2012
Location: Salem Mo
Posts: 663
|
Re: 1957 Chevy truck re-rebuild
Quote:
I am chuckling on this end, does the "TF" mean Task Force? |
|
|
|

|
|
|
#20 |
|
Registered User
Join Date: Sep 2009
Location: Monroe,Iowa
Posts: 4,370
|
Re: 1957 Chevy truck re-rebuild
|
|
|

|
|
|
#21 |
|
Registered User
Join Date: Aug 2012
Location: Salem Mo
Posts: 663
|
Re: 1957 Chevy truck re-rebuild
Great, I didn't know about the Task Force until a couple months ago.
I love watching old car commercials. I have some tapes and DVD's. One of the last DVD's I bought had a long commercial from 1957. It was based on a fleet of 57 Chevy trucks making what's called the Alcan run. Had I not seen that, I would have no idea of the task Force. Good stuff. Also, I'm glad you like my desciptive posts, I have a build thread for a Willys truck going also. It began as a showing thread and has turned into a teaching thread. It's been very satisfying. I suppose I've carried the same narrative writings to this thread also. I didn't have these next pics loaded into photobucket before. Sorry to say, I'm on dial-up, it takes forever to load pics. This picture is of the day we started working on it. Don't be fooled by how nice it looks. As I mentioned before, it was all redone years ago, it just wasn't properly redone. 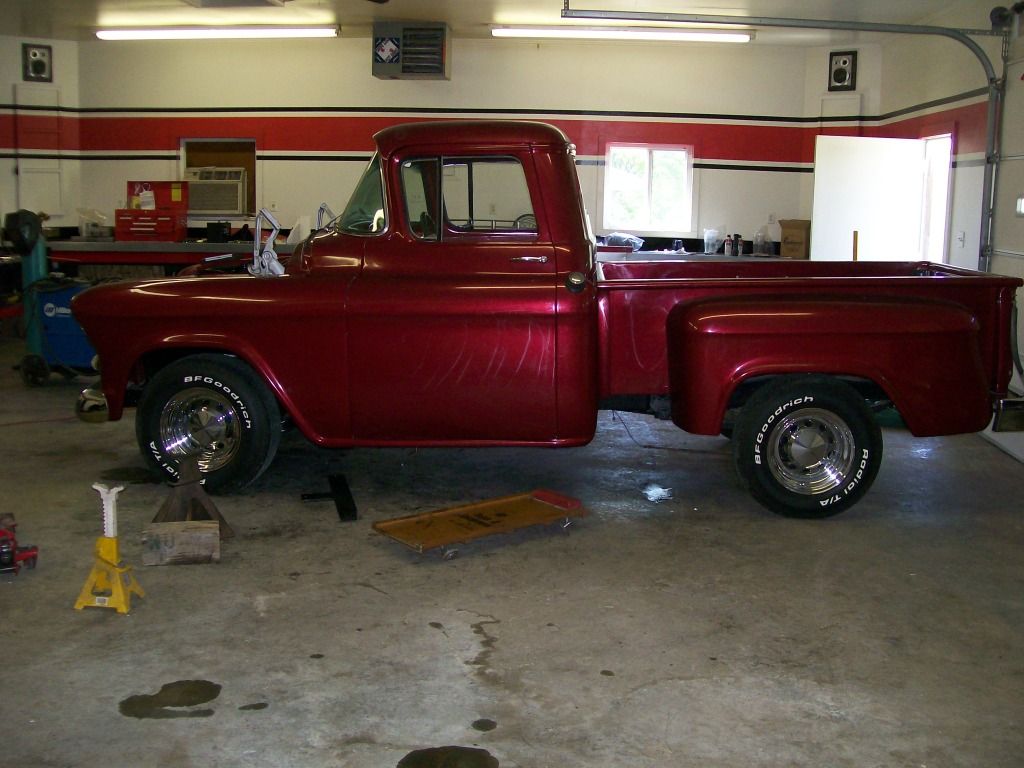 I will say however, I am very fortunate to start with a truck that is complete. My intent was to give dad one fun truck. Something that was everyday reliable, yet had an aggressve attitude and plenty of power to make him smile from ear to ear. He had a 327 that had issues, right here I've taken out the 327 and fitting a 396 in it's place. 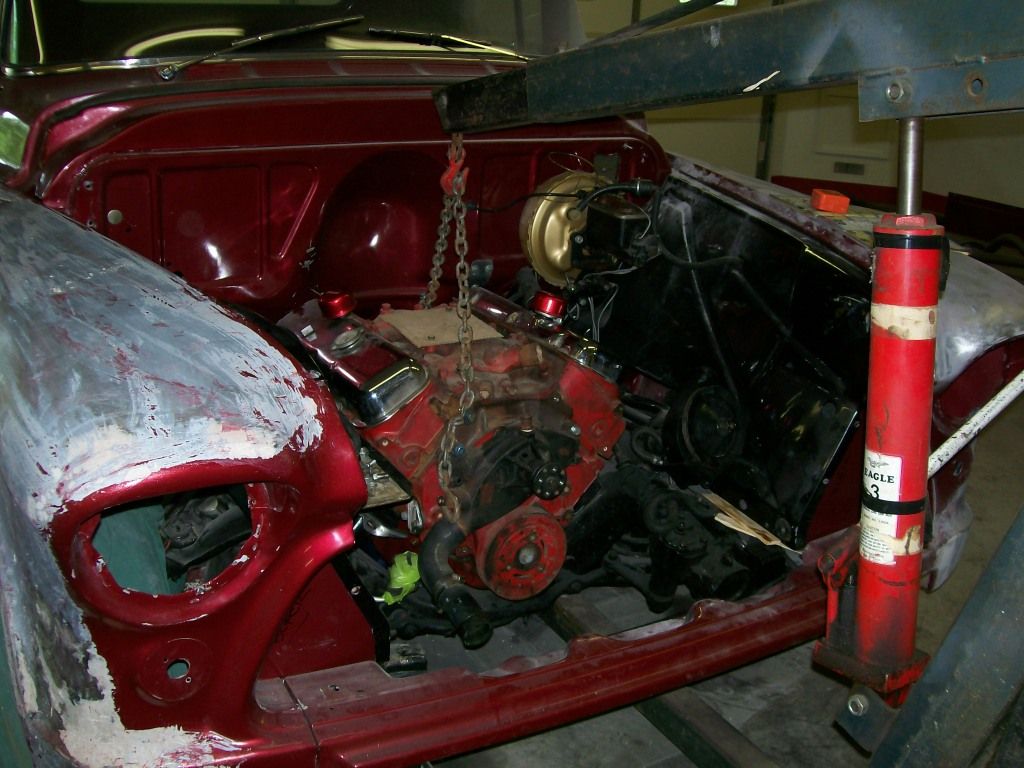
|
|
|

|
|
|
#22 |
|
Registered User
Join Date: Aug 2007
Location: Corona, California
Posts: 7,998
|
Re: 1957 Chevy truck re-rebuild
The BB should give it plenty of get up and go.
Kim |
|
|

|
|
|
#23 |
|
Certified Car Nut
Join Date: Jan 2005
Location: Inglewood, California
Posts: 3,118
|
Re: 1957 Chevy truck re-rebuild
Nice tail light mod and very nice truck. Thanks for posting pics and keep them coming.
|
|
|

|
|
|
#24 |
|
Registered User
Join Date: Aug 2012
Location: Salem Mo
Posts: 663
|
Re: 1957 Chevy truck re-rebuild
Hi Kim57, definetly he would have liked the power of the Big Block. I was also hoping to give him a truck that when he opened the hood, the engine bay would have the visual impression he would be happy to show off.
Since dad was coming to visit during the beginning of the project, I was working on both the drivetrain and body work at the same time. One reason was to give him a moment of excitement when he saw the progress. Plus he wanted to be a part of the work. He had his choice to work on body or engine, which he did both. 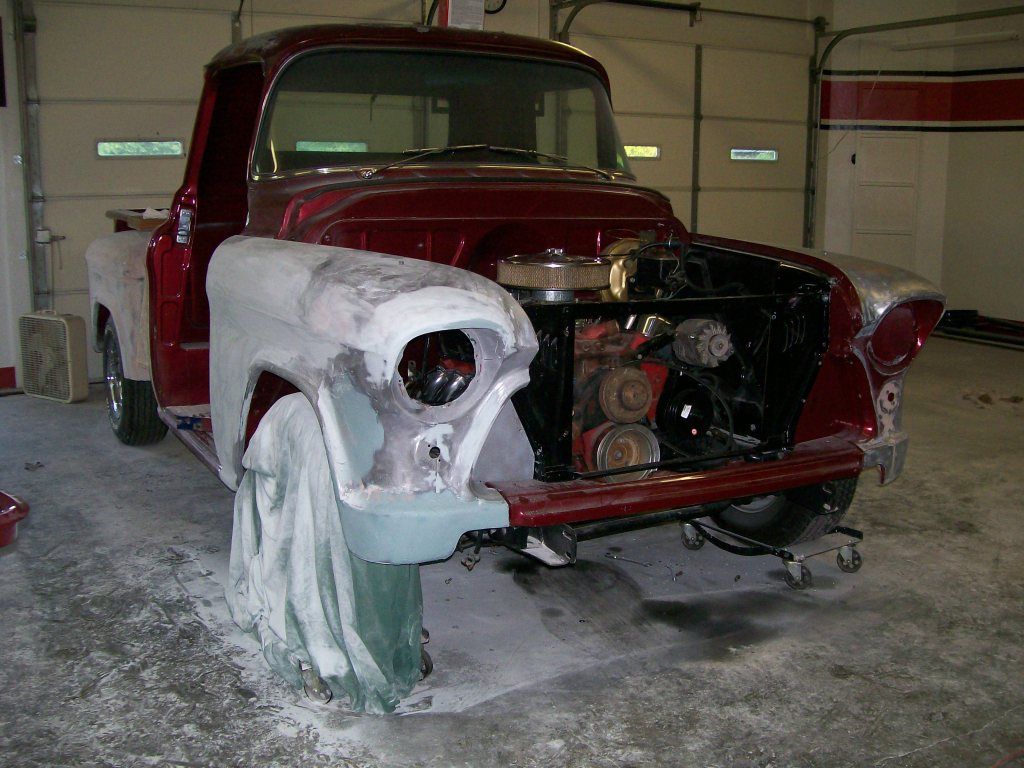 After checking and measuring and fitting and checking again, I finally settled on engine placement. When done, I had about an inch clearance from side to side and front to back. The front, between the engine and radiator was a tight fit. I used an alternator and power steering brackety from a 1960's corvette. If I had used a newer, say 1970 or newer, the water pump and bracketry are moved forward about 3/4". I went to a dual electric fan, With the dual fan motors, the space between the two motors gave me an open area that the water pump pulley fits between. Altough a close fit, everything is still easy to work on. 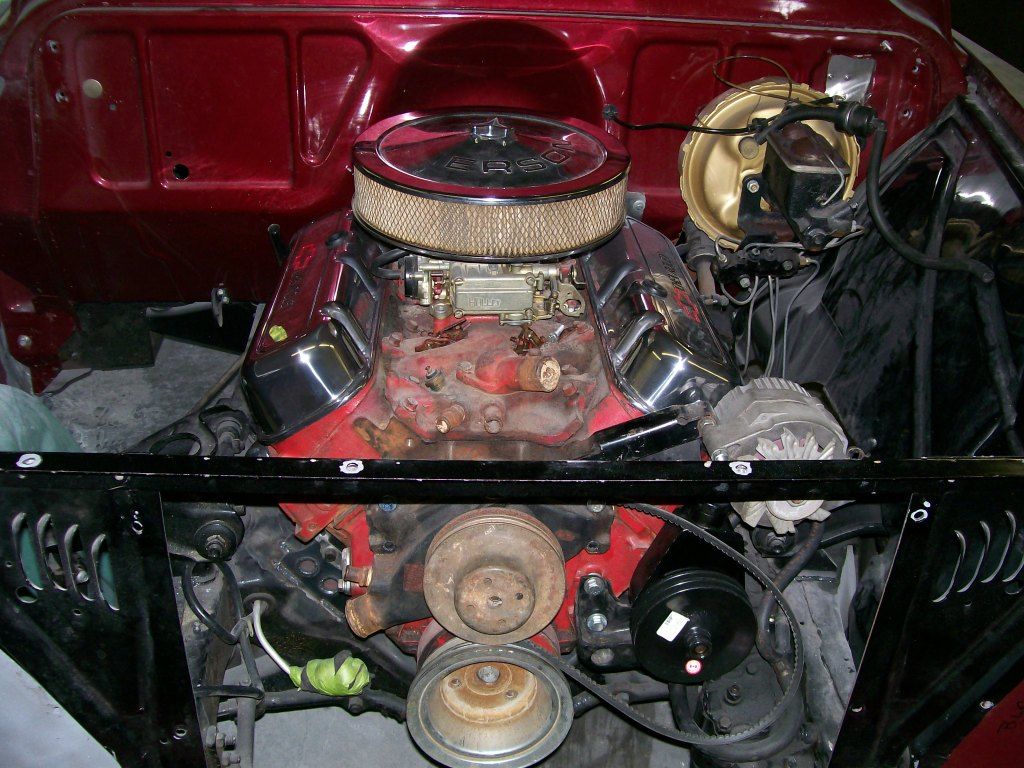 More on the engine later. One small detail I did to the bed was the same as many, I closed off the rolled edge of the top rail of the bed. Before I closed off the ends I extended them 3/4". Such a small addition, but it added something to the visual of the flow of the back of the bed. 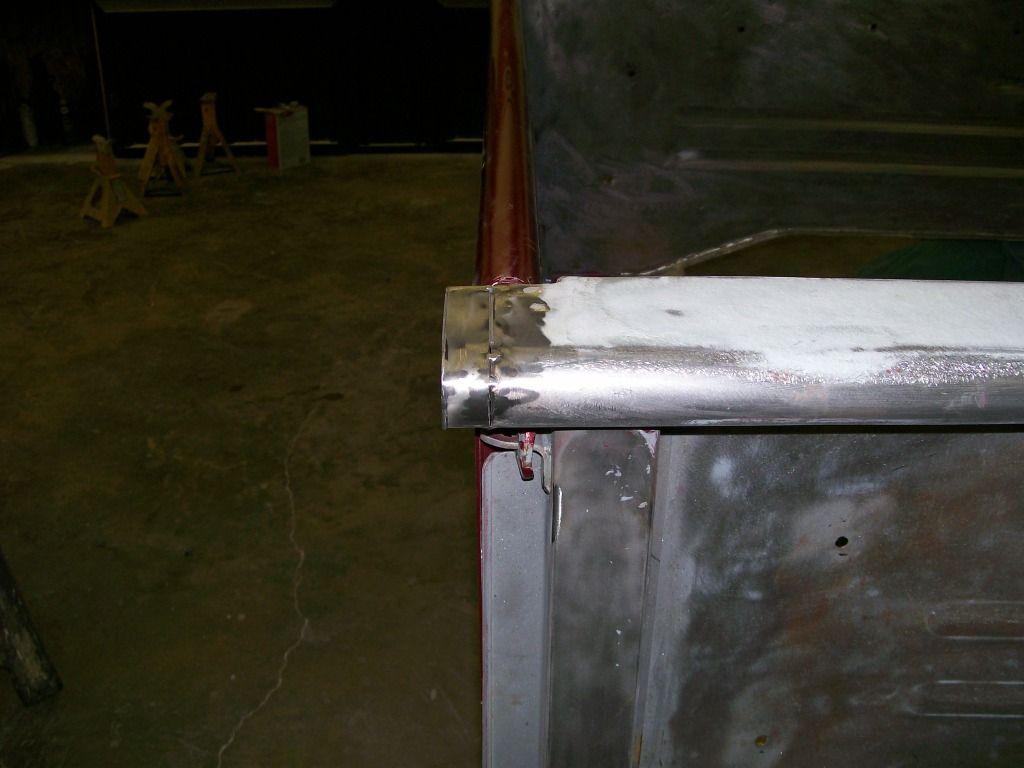 I originally closed the ends, then I noticed from the side I could see into the edge of the top of the tailgate. It had an unfinished look, this was my remedy. |
|
|

|
|
|
#25 |
|
Registered User
Join Date: Aug 2007
Location: Corona, California
Posts: 7,998
|
Re: 1957 Chevy truck re-rebuild
Looking good.
Kim |
|
|

|
 |
| Bookmarks |
| Thread Tools | |
| Display Modes | |
|
|