
|
Register or Log In To remove these advertisements. |
|
|
|
|||||||
|
|
Thread Tools | Display Modes |
 09-02-2012, 11:32 PM
|
#7 | |
|
Registered User
Join Date: Aug 2012
Location: Salem Mo
Posts: 681
|
Re: 1957 Chevy truck re-rebuild
Quote:
 Ok. will do. I'll do a run of pics dealing with making the taillight out housings. First mark where I decided to have the tailligts. 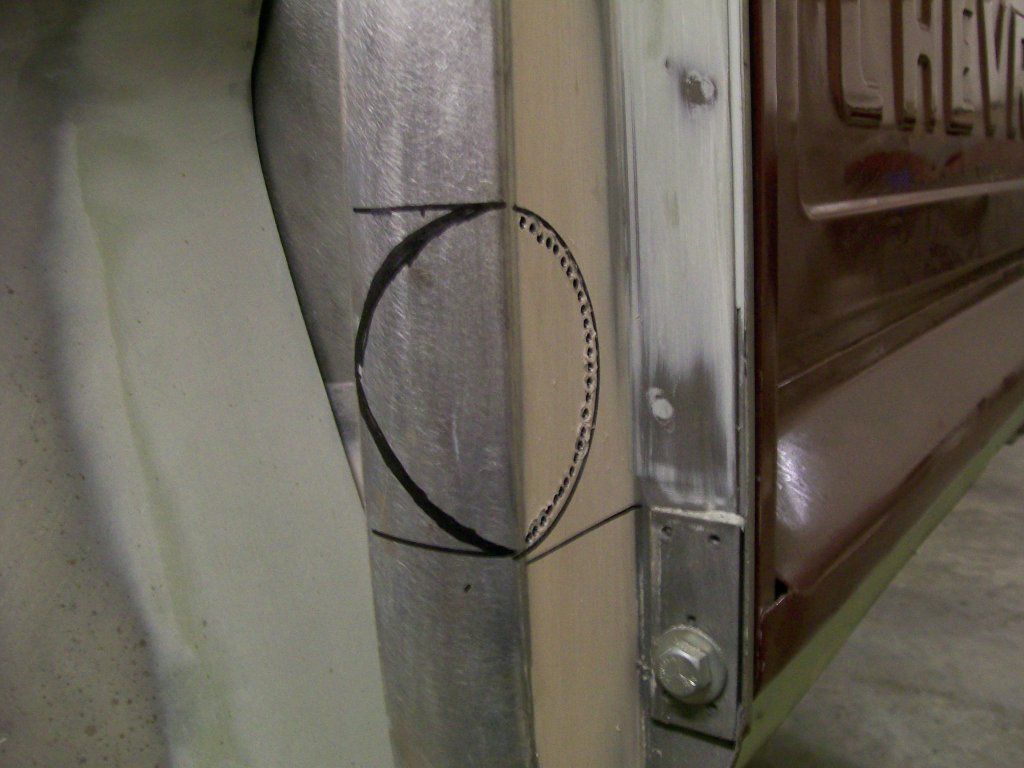 Once the half hole was cut I taped the light in place and used construction paper to get an idea of the size and dimention of the outer housing I had to make. 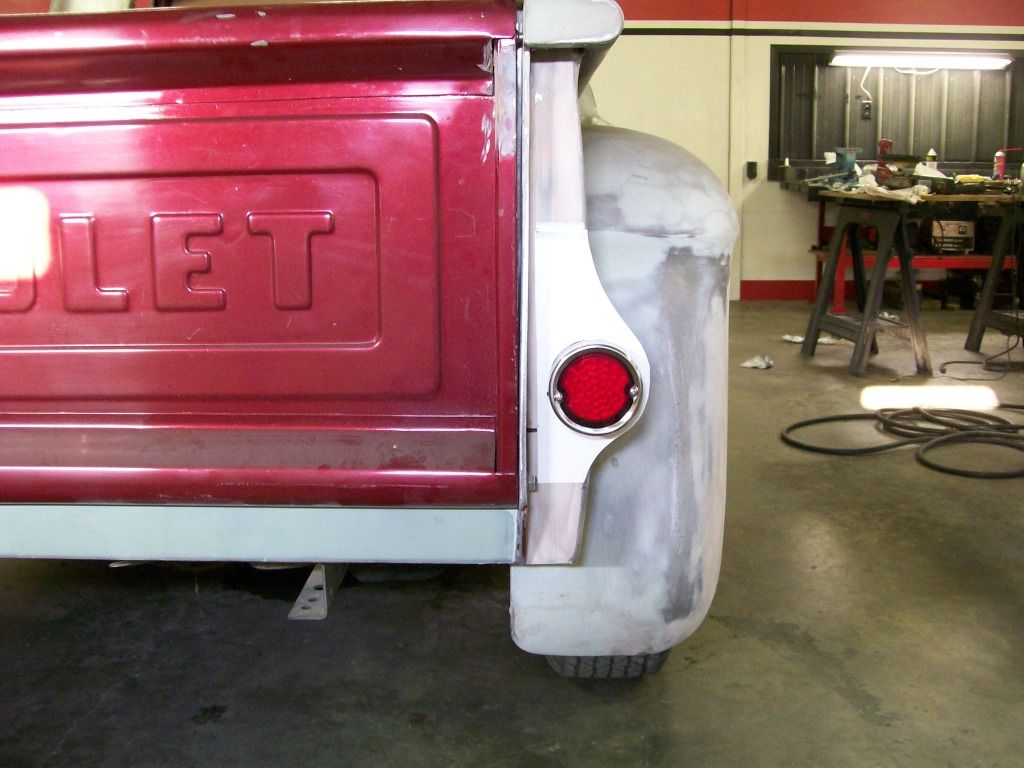 Once I had the construction paper cut for the front, back and outer pieces I used a Torchmate plasma cutter to convert the paper to metal pieces. The round item in this picture was made from 3" exhaust pipe. I will not be using the original housing, this round piece will be what will hold the led light and what the 2 screws that holds the stainless bezel in place. 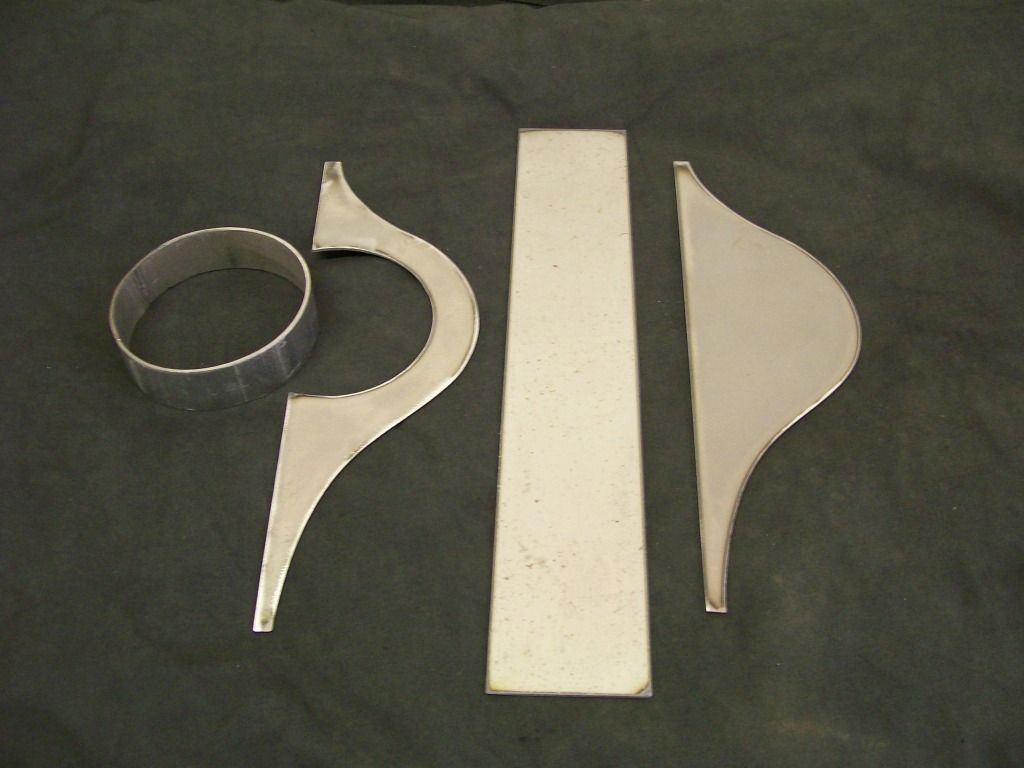 Three inch pipe was too small, my only other choice was 4" that was too big. I used the 3" and split and spread it to the right size. Then welded a piece to fill the gap. At the time I had no 4" in my shop, otherwise I probably would have used it. 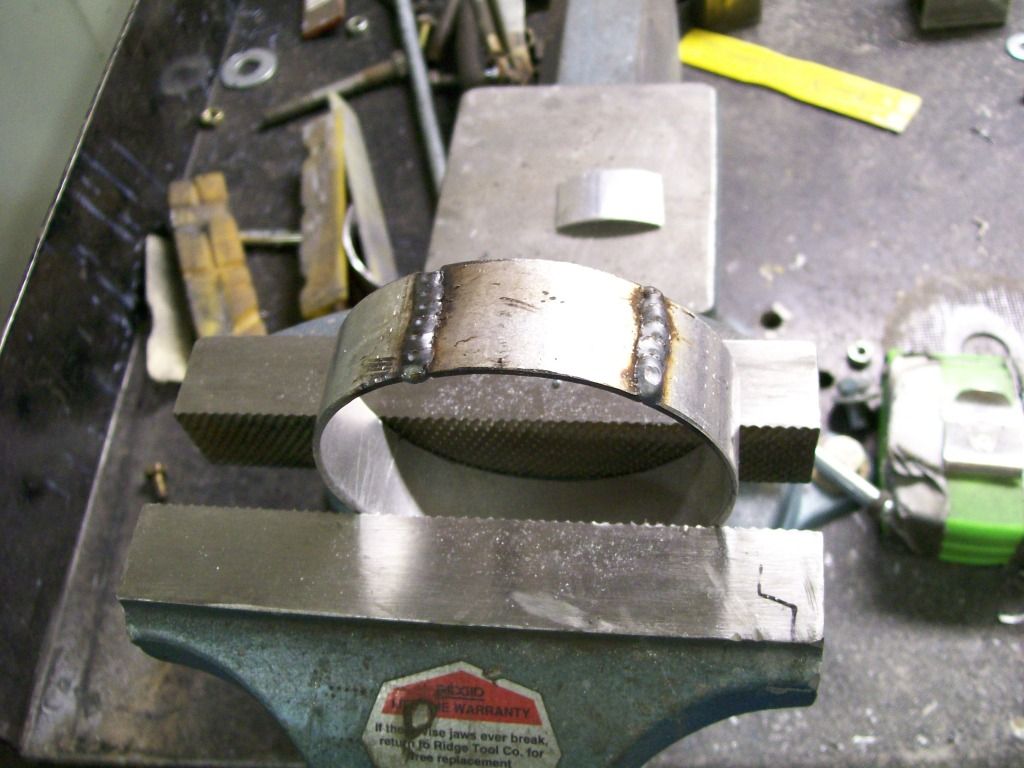 After a little grinding. 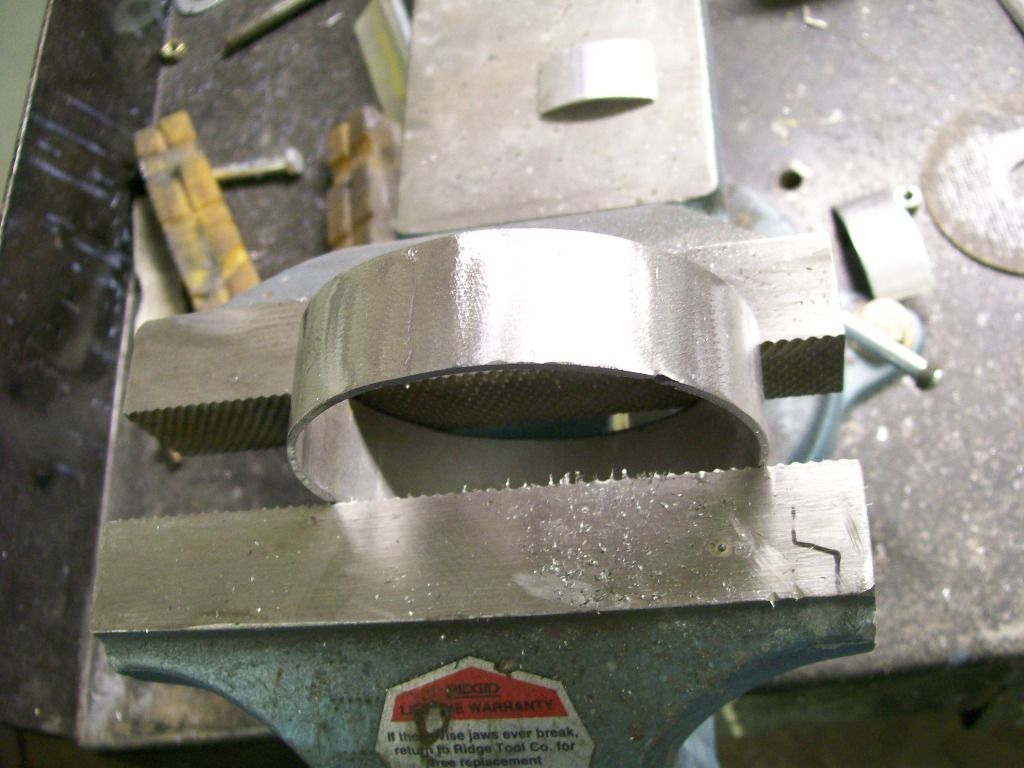 Both are made and the bezel fits great. I still have to weld the nuts inside the round pieces for the bexel screws to attach to. 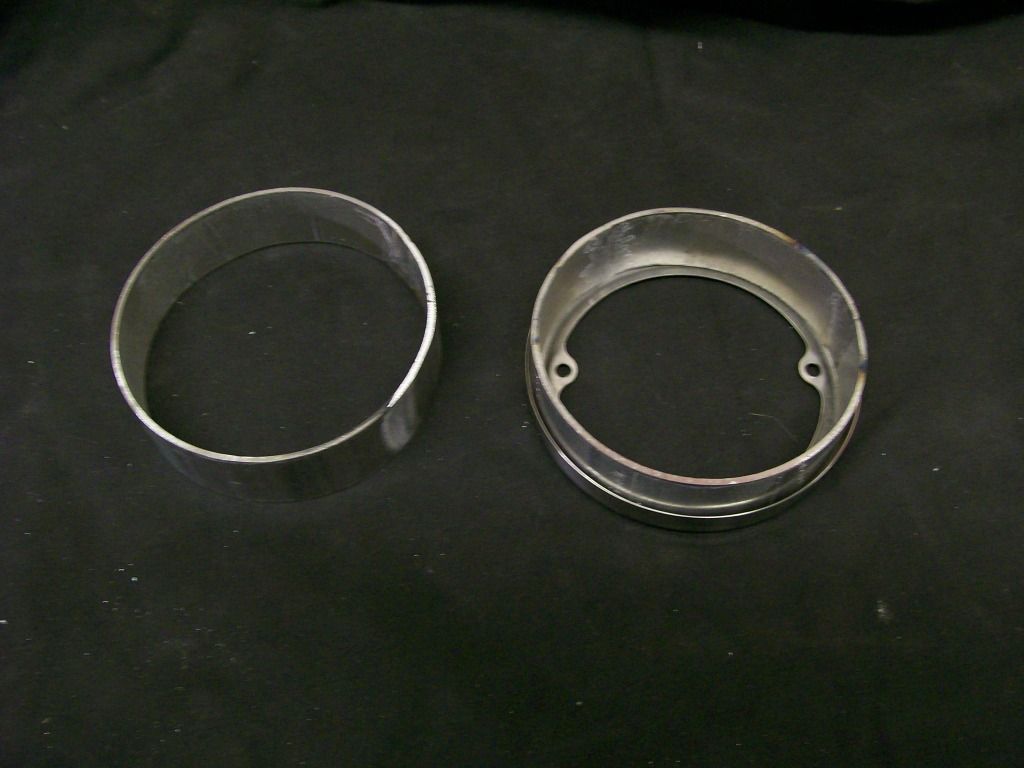 Pieces tack welded together. 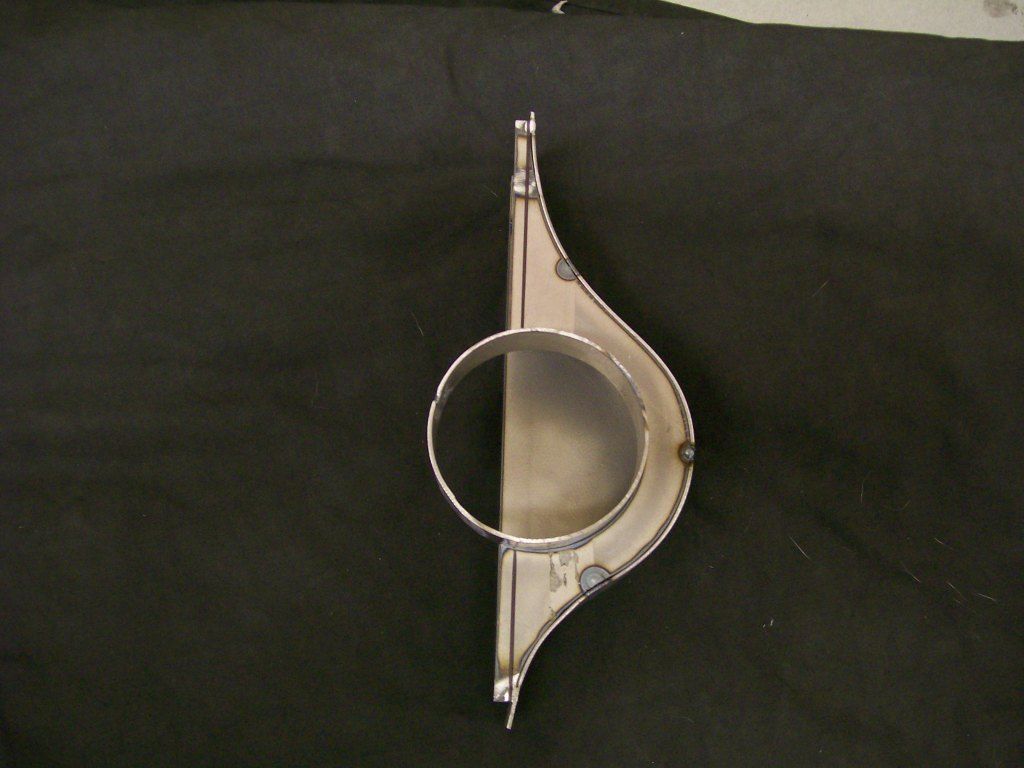 I cut with extra material so I could final fit the housings. Here is the test fit. 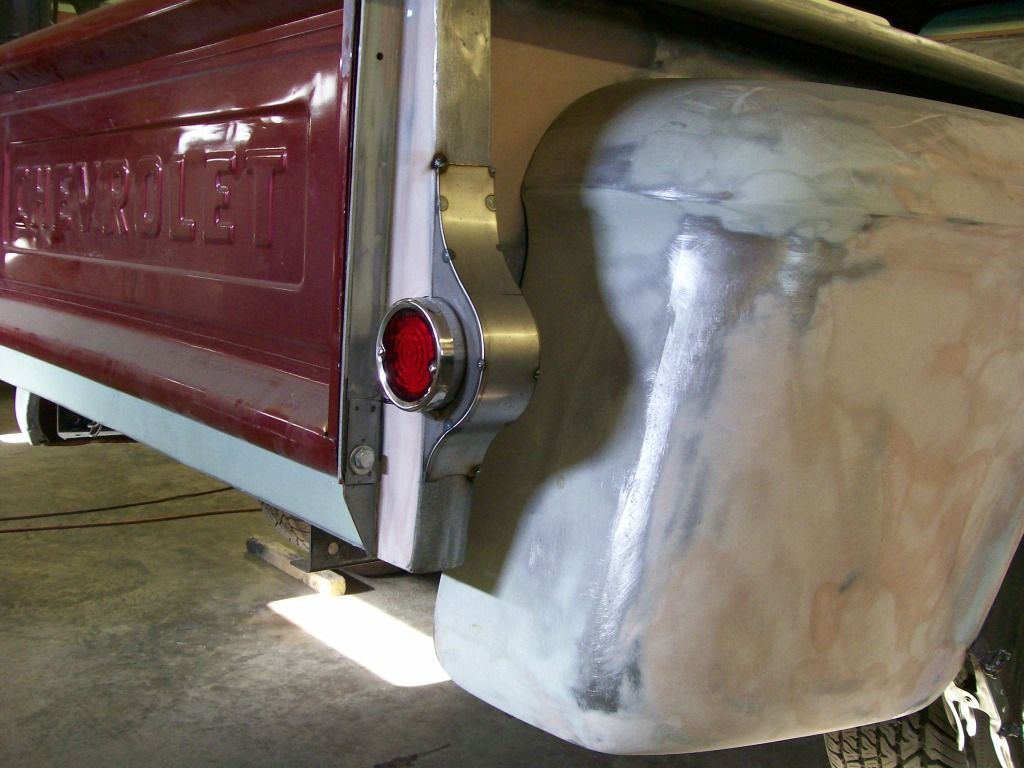 Once I got the pieces fitted, it was time for welding. 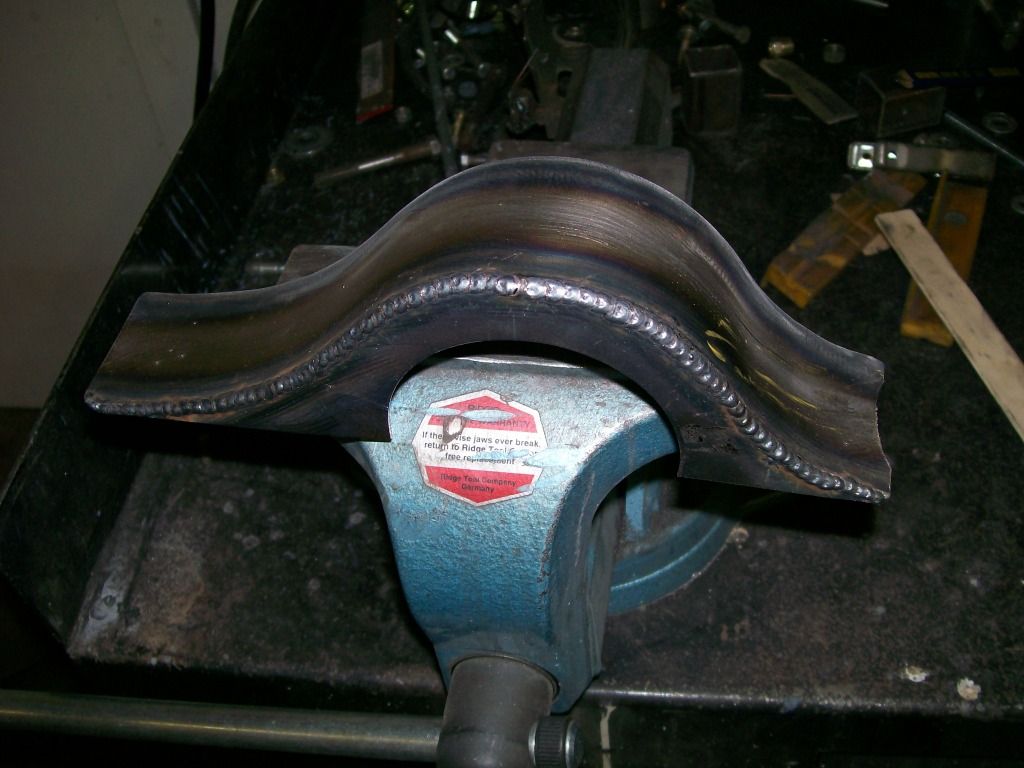 Although welded on the outside, the penetration was spot on. 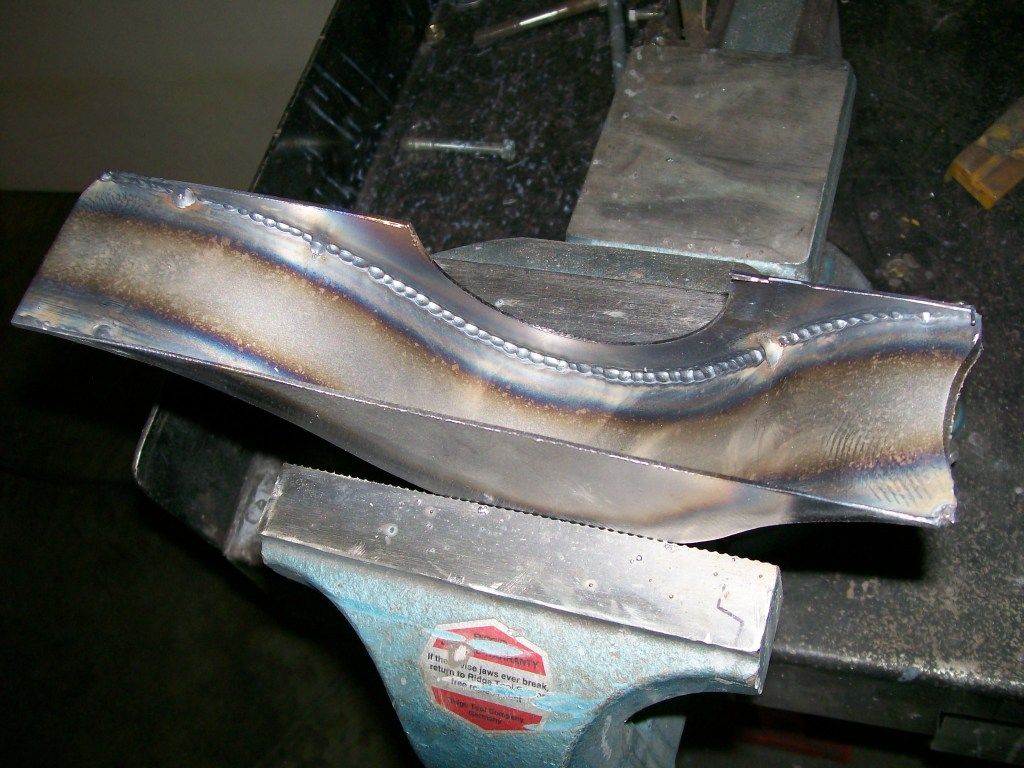 The nice part of the torchmate is the consistancy of reproducing multiple items. 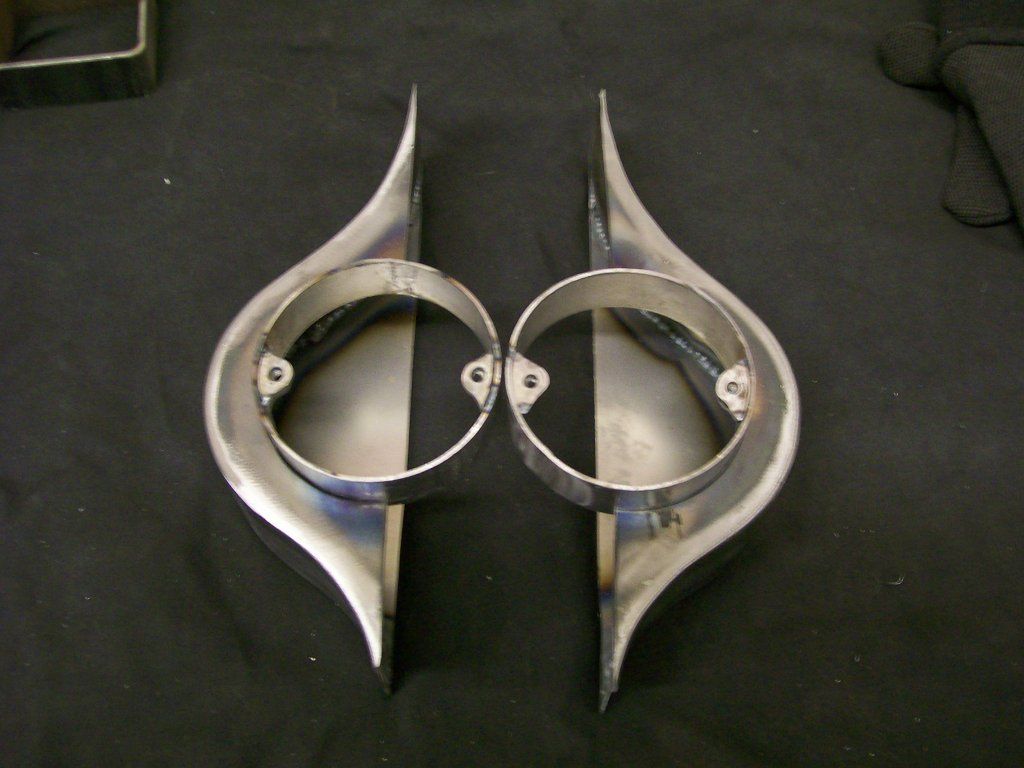 With the housings made I used them as a templet for the cut. 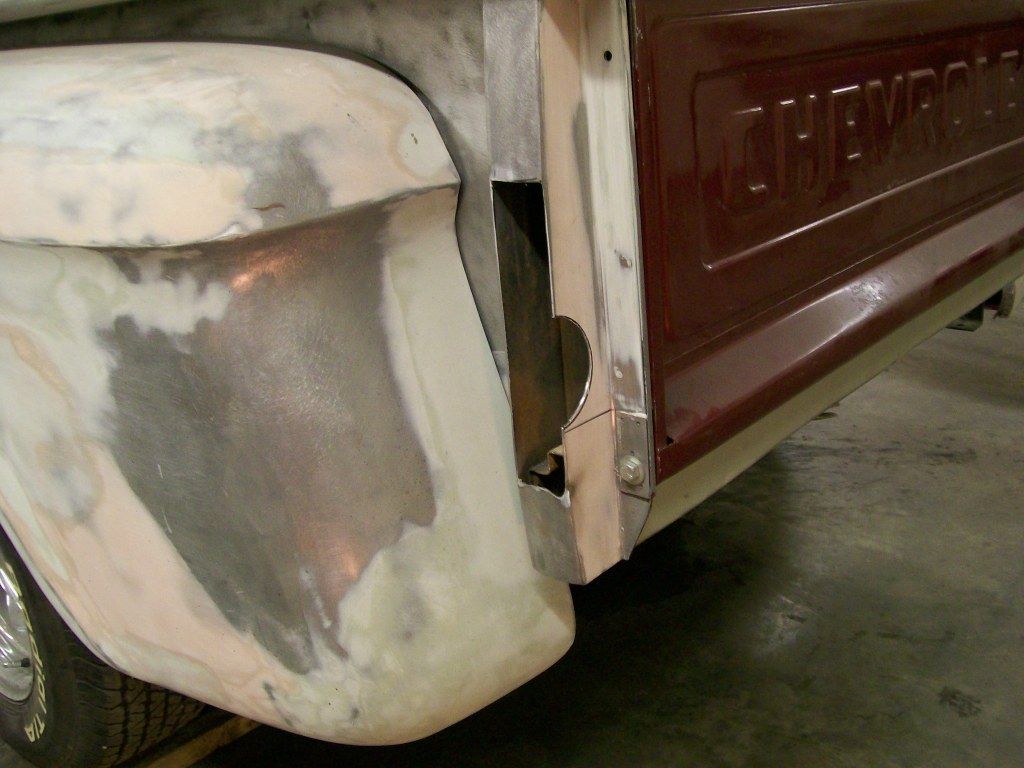 I welded the ring to the body first. There is a sheet metal ridge near the tailgate that got in the way of the welder tip if I welded it later. 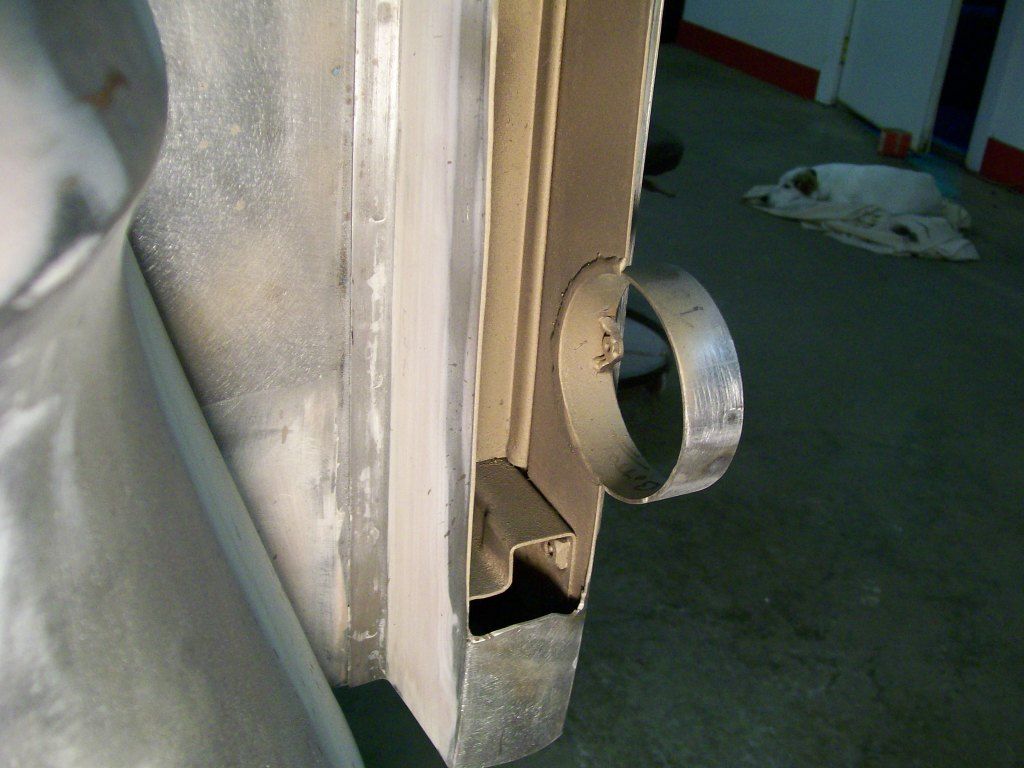 After welding and grinding. 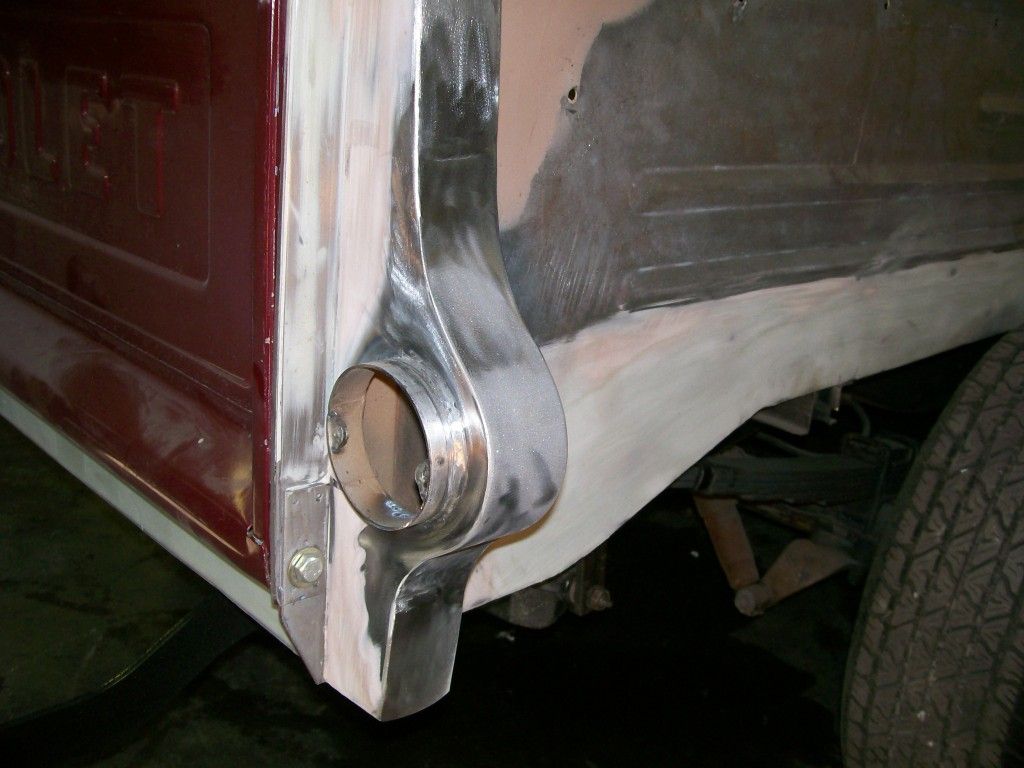 I hope that fills the picture needs for a while.  Enjoy. Enjoy.
|
|

|

|
| Bookmarks |
|
|


 Threaded Mode