
 |
Register or Log In To remove these advertisements. |
|
|
|
|||||||
 |
|
|
Thread Tools | Display Modes |
|
|
#1 |
|
Registered User
Join Date: Mar 2008
Location: Clinton, MS
Posts: 545
|
I know this has been covered before several times on the forum, but I have to say that if anyone has a truck that hasn't performed this upgrade, you don't know what you are missing. It is unbelievable that 2 relays, a circuit breaker, 5 bucks worth of wire, and about 20 minutes could change the lighting and overall electrical system so much. HIGHLY RECOMMENDED!!!!

__________________
'72 Chevy C10 383, 700r4, 3.73's A little rust never hurt anyone. I consider it weight reduction. |
|
|
|
|
#2 |
|
Can't ReMember
Join Date: Dec 2006
Location: Orlando area
Posts: 258
|
Re: Headlight Relay Upgrade
Give a poor old man a link...............................
__________________
Adversity doesn't test your character; it reveals it. 71 C-10 LWB 350/TH350. I purchased it in 1978 for $1400. I'm currently abusing it daily. (when it's running  ) )
|
|
|
|
|
#3 |
|
Registered User
Join Date: Jun 2007
Location: Edmonton, Alberta
Posts: 423
|
Re: Headlight Relay Upgrade
|
|
|
|
|
#4 |
|
Registered User
 Join Date: Oct 2006
Location: Southern Kalifornia
Posts: 3,066
|
Re: Headlight Relay Upgrade
I wil see if I can locate the thread. But here is a run down...
Tools needs:test light,soldier iron/soldier(60-40),shrink tube,heat gun/lighter,wire cutters/strippers,(2)30amp Bosch style relays SPDT,female spade connectors,10g ring terminals,(2)inline fuse holders w/30amp fuses,small roll of 10g automotive grade primary red wire,14g balck primary wire for the ground,electrical tape and plastic wire loom. I may have frogotten something,but as you go you'll firgure out if you need something. First off,DISCONNECT BATTERY,then unplug the headlight socket on the drivers side,turn on the lights and find the "LOW" beam wire with the test light, then hit the "HIGH BEAMS" and repeat. Mark each wire. I strip back the factory wire wrapping about 12-18" BEFORE the driver side loght socket and expose the wires. Find the wires that you marked for the "LOW" and "HIGH" and cut them. Strip back the ends COMING FROM THE FIREWALL CONNECTOR,slide a piece of shrink tube onto each wire,then either crimp AND/OR soldier on a female spade connector. Then heat shrink the tube on the ends. That will plug into the #85 position on the relays.(mark your relays HIGH-LOW) Now take and strip the other end of the wires you cut,slide a piece of shrink tube over and crimp AND/OR soldier on another female spade connector to those. Match the wire colors and plug into the #87 position of the relays. Now take your 10g RED primary wire and run from the BATTERY + side terminal across the radiator support to you relays. Instal a ring terminal on the battery end. On the relays,the position #30 is the power side. Take your inline fuse holders,install a female spade connector on ONE end and plug into relay(#30 position). Now strip back the other end of both AND the 10g RED wire from the battery and soldier all three wires together...DONT FORGET TO SLIDE ON SOME SHRINK TUBE. Now heat shrink the splice. Now take the 14g BLACK primary wire(you'l need 2 pieces at least 8-10" long)and strip back both ends,one end gets a female spade,the other gets a ring terminal. This plugs into the #86 position on the relays and the ring terminals go to a GOOD ground. And that should do it. Reconnect the battery,install the 10g RED wire to the + side terminal on the battery,and turn on the headlights and check. Good Luck. I dont have a schematic drawn,but a few pics of the way I have done mine. Also I go to the wrecking yards and find the headlight harness out of another truck so I can position the relays where I want. I will cut the harness thats in the truck off at the drivers side connector then cut the "NEW" donor harness off back BEFORE the connector about 12-18", so I will have enough to play with. If you pm me with your email I will send you pics of mine. Good Luck. -Lance If I forgot something,please someone chime in. Thanks
__________________
------------------------------------------------------ -Lance 2000 Chevy C2500, 5.7, 4L80e 1999 Suburban K2500, 7.4, 4L80e 1980 Camaro..son's car...PROJECT |
|
|
|
|
#5 |
|
Registered User
Join Date: Mar 2008
Location: Clinton, MS
Posts: 545
|
Re: Headlight Relay Upgrade
Don't forget to put some kind pf circuit breaker between the relays and the battery. I got a little 30 amp circuit breaker from Advanced in the electrical section that will open and re shut itself if needed...no fuses required.

__________________
'72 Chevy C10 383, 700r4, 3.73's A little rust never hurt anyone. I consider it weight reduction. |
|
|
|
|
#6 |
|
Gettin By on Gettin By
Join Date: Jan 2008
Location: Cedar Creek, Tx
Posts: 1,033
|
Re: Headlight Relay Upgrade
Well i put the same relay setup on my electric fans but with no breaker. Should i stop and get a breaker???
__________________
69 CST10 LWB 455 Buick 00 S10 2.2 Vin5 76 GL1000 Naked 1bl VW carb "Adios to all the concrete; Gonna get me some dirt road back streets" |
|
|
|
|
#7 |
|
Registered User
Join Date: Mar 2008
Location: Clinton, MS
Posts: 545
|
Re: Headlight Relay Upgrade
Jayherrell i'd recommend a breaker or at least fuses. I am putting the ford taurus fan on mine monday and i think everyone says at least a 30 amp fuse is required. most fans will blow a 20 amp. after seeing my friend's 240sx almost burn to the ground because his fans had no fuses and grounded out, i definitely try to do my electrical work with Murphy's Law in mind.
__________________
'72 Chevy C10 383, 700r4, 3.73's A little rust never hurt anyone. I consider it weight reduction. |
|
|
|
|
#8 |
|
someday it will be done!
Join Date: Sep 2004
Location: Lloydminster,AB. Canada
Posts: 1,620
|
Re: Headlight Relay Upgrade
Just for the record,I'm completely illiterate when it comes to auto electric,but this is something you can do!
I did it on my '80 with stuff I either had or bought from napa. P.S.I would have used shrink wrap on the yellow connections,but I didn't have large enough tubes at the time. *edit*The single 10awg wire comes from the firewall bulkhead(on an 80,I believe 72 and earlier are on the core support).That wire runs through a 30amp breaker(if something goes wrong,the lights will flash on and off,unlike a fuse which will be a daaaarrrrkk ride).From there,I split it off into to bright and dim relays.
__________________
'72 C-10 Proud owner of a million new and used pieces that used to be and will once again be(god willing) a testament to the term "they don't build em like that anymore.    '80 LWB 2wd beater '67 GMC long fleet (cab donor) '66 long step (parked till it's turn comes around) '65 short step (parts truck that will donate it's bed and possibly frame to the '66) '06 Grand Prix wife's car (she hardly lets me touch it) my pics |
|
|
|
|
#9 |
|
its all about the +6 inches
Join Date: Jan 2001
Location: Hilliard Ohio
Posts: 2,690
|
Re: Headlight Relay Upgrade
I used H.D. relays off a scrapped '96 P/30 step van. Got the plug with weather pack connections, and cut the pigtail off nice and long.
Now I just need to do the burb. |
|
|
|
|
#10 |
|
its all about the +6 inches
Join Date: Jan 2001
Location: Hilliard Ohio
Posts: 2,690
|
Re: Headlight Relay Upgrade
That was Rollie396's post, not mine. Although, i would say go to the junk yard. There's a million of them in there.
I don't have any photos of my set up, and most of it is hidden under the second battery in the longhorn, so basicly, I ain't getting any photos either.  When i get around to doing the burb... I'll try to do a FAQ thread, and it'll certianly bbe seen on here, and highlights in my build thread. When i get around to doing the burb... I'll try to do a FAQ thread, and it'll certianly bbe seen on here, and highlights in my build thread.
|
|
|
|
|
#11 |
|
someday it will be done!
Join Date: Sep 2004
Location: Lloydminster,AB. Canada
Posts: 1,620
|
Re: Headlight Relay Upgrade
That's actually a 30 amp breaker.I got it at Napa,but Longhorn's suggestion is a good one as well.
__________________
'72 C-10 Proud owner of a million new and used pieces that used to be and will once again be(god willing) a testament to the term "they don't build em like that anymore.    '80 LWB 2wd beater '67 GMC long fleet (cab donor) '66 long step (parked till it's turn comes around) '65 short step (parts truck that will donate it's bed and possibly frame to the '66) '06 Grand Prix wife's car (she hardly lets me touch it) my pics |
|
|
|
|
#12 |
|
Registered User
Join Date: Feb 2004
Location: Fort Leonard Wood Mo
Posts: 299
|
Re: Headlight Relay Upgrade
I did this conversion a long time ago to my old '76 C30. It works great. I did it not too long ago to my '69. This time I placed the relays(like 2.50 each from O'rielies) on the inner fender and ran 2 power wires from my secondary fuse panel($13, from O'rielies) I powered that from a 10ga from the junction block. It also powers my electric fan, and I can't think what elese. It looks neat and organized. I just cut the factory wiring right about where the relays are. I took the wire from the switch and went to the relay and the other side to the lights. I have thought about incresing the size of the wires to the lights but they are much brighter and the right is no less bright than the left, that is like 1ft away from the relay, so there isn't power drop. I haven't checked with volt gage, don't have one might get one...
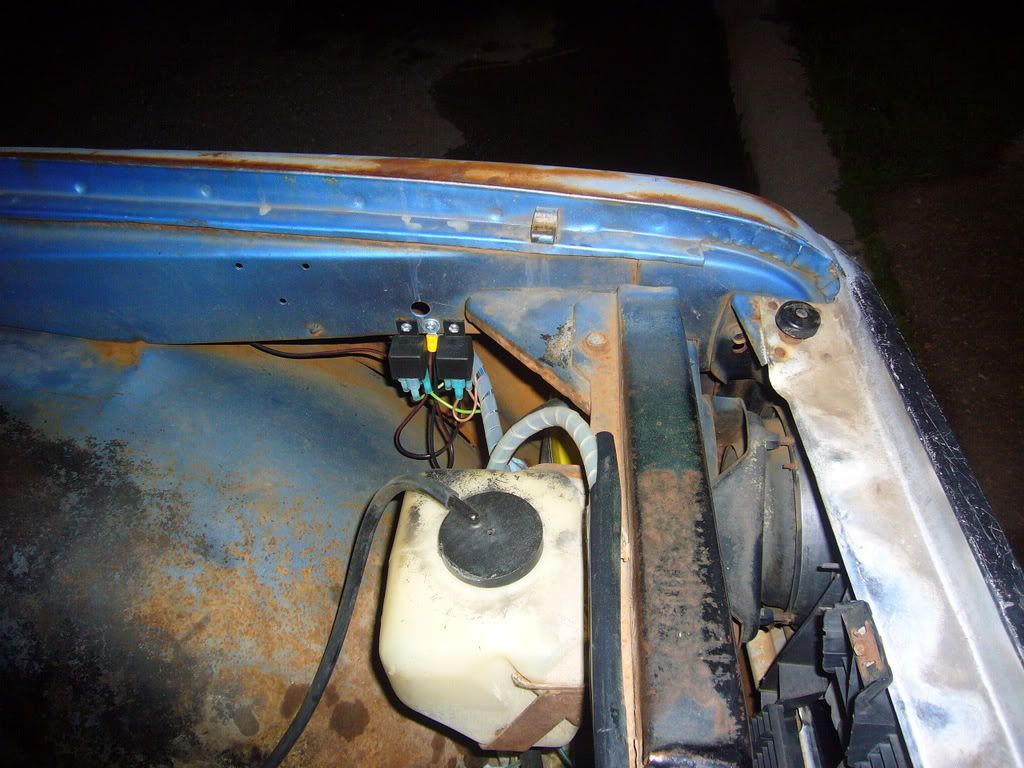 The relays on the inner fender. 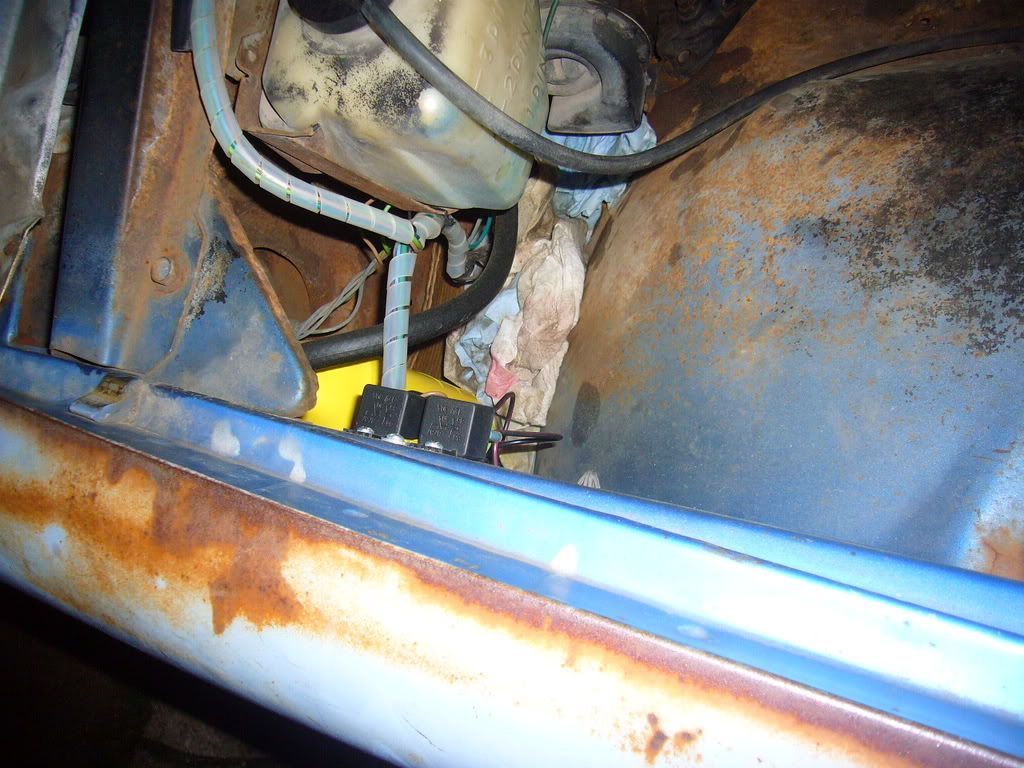 The wires in aftermarket loom, I like sprial loom better. The screw in the middle is for the ground. 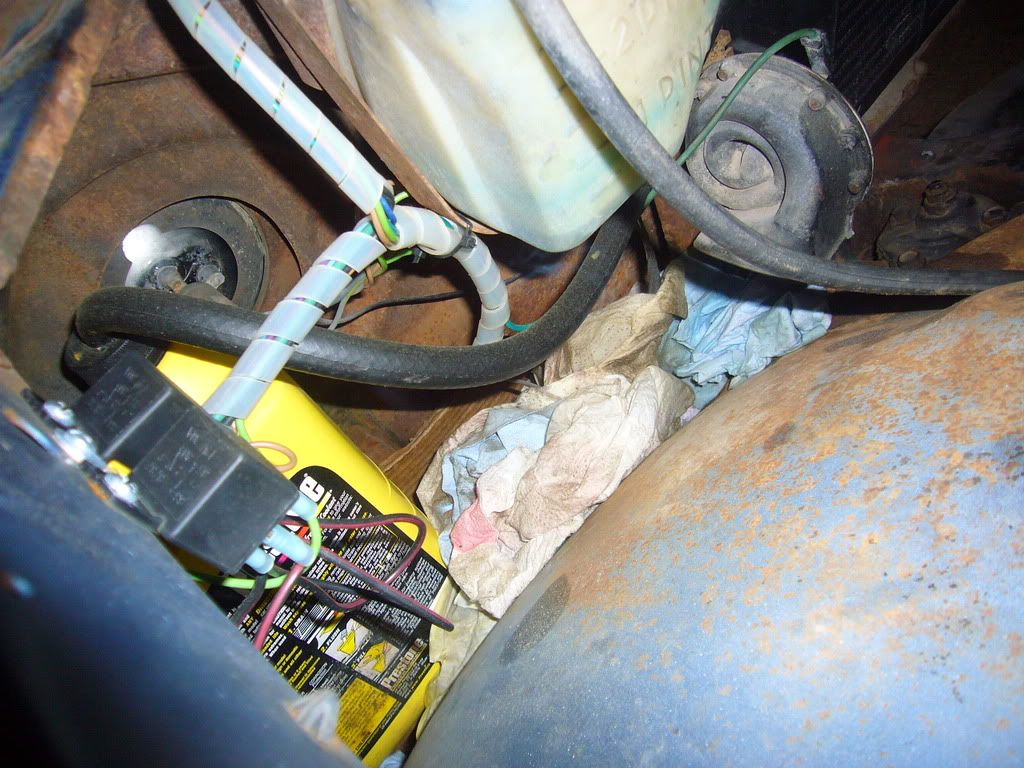 Notice the anti-freeze jug? Thats my radiator overfill, 3/8 hose from the rad. Notice the collection of paper towels, LOL 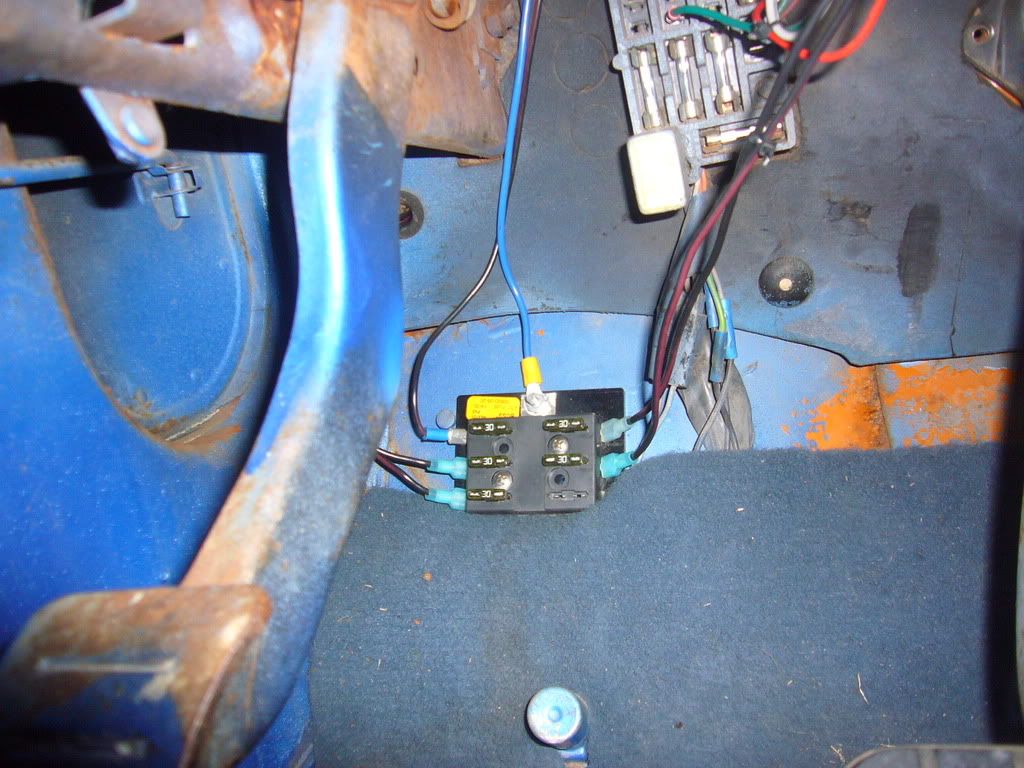 The sub fuse panel, it has 6 slots. 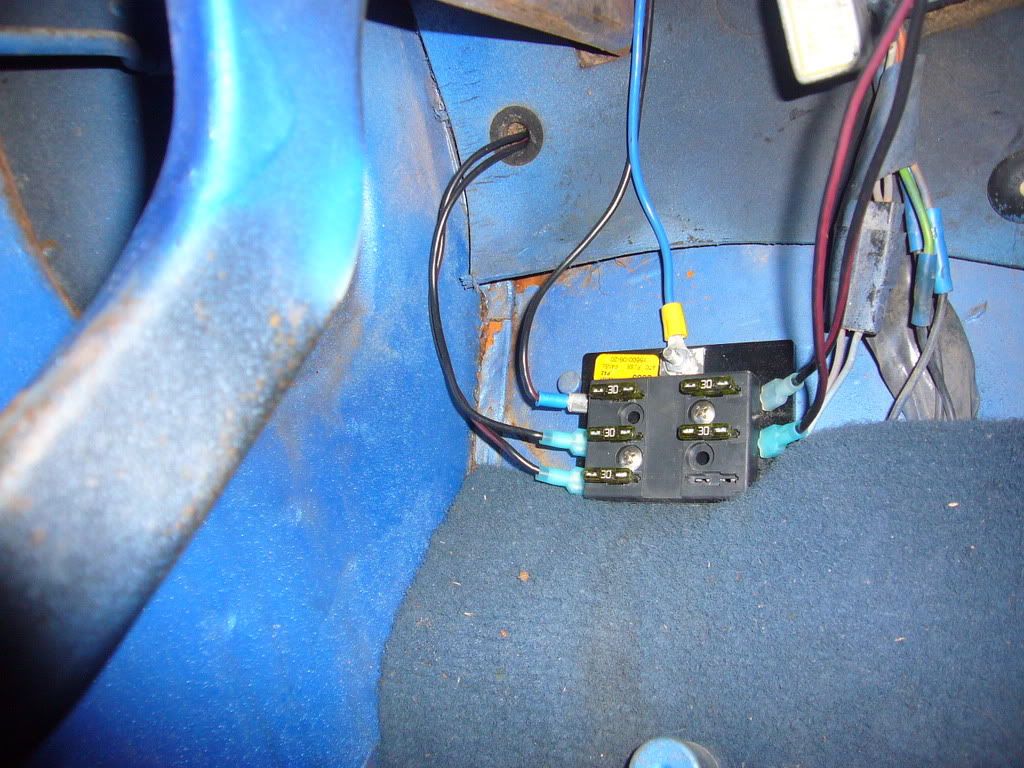 Ran the power wires out thru the firewal. Then between inner fender and outer fender. 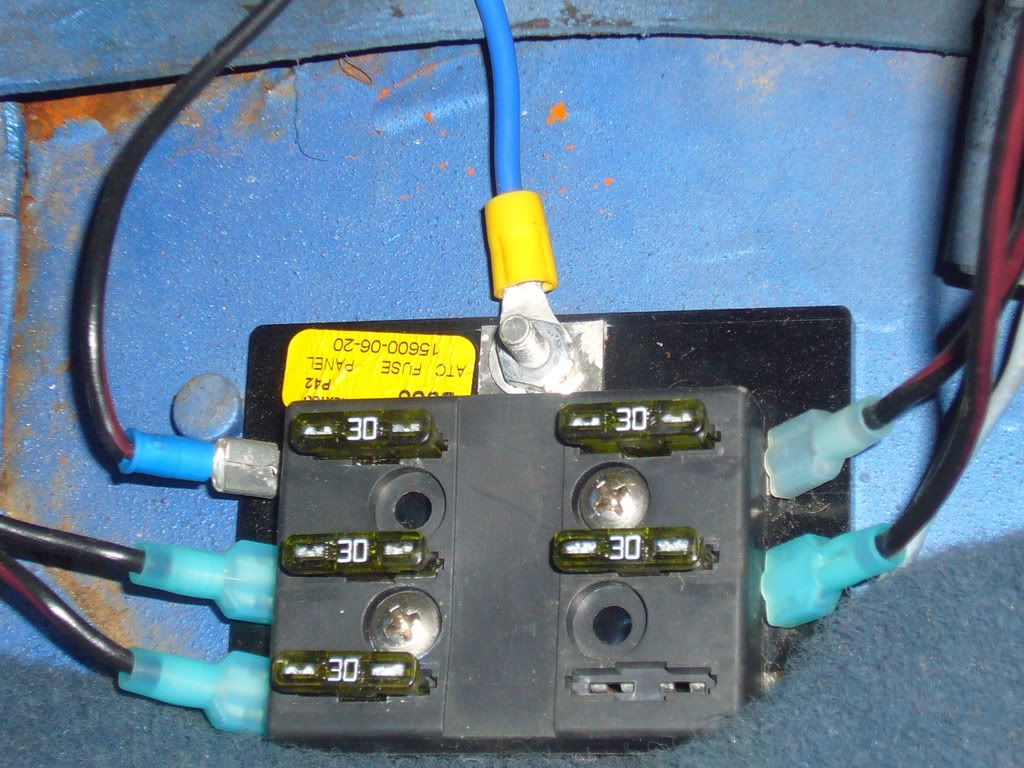 Ohi the lovely crapy blue over paint by the P.O. uggg, I love the original orange... And the rust ugh. Some time I at least need to sand and paint it so it does not rust...
__________________
 '69 Chevy C10 '69 Chevy C10 400sb-350 crank 400 destroker!!! 377 2.02 dart pro1 alum.heads msd, holley db hooker pro-comps-3in exh. 3 spd. saginaw-3.73posi Flat Bed...want Reg bed...trades? |
|
|
|
|
#13 | |
|
Like a Rock!
Join Date: May 2002
Location: USA
Posts: 1,092
|
Re: Headlight Relay Upgrade
Quote:
__________________
69 LWB Runs great - work in progress Mess with me and you mess with the whole trailer park! 
|
|
|
|
|
|
#14 |
|
Registered User
Join Date: Jan 2009
Location: Edgewood, WA
Posts: 108
|
Re: Headlight Relay Upgrade
Everyone has their own level of quality when it comes to stuff like this, so I recommend just going to this link for the information, and shopping for the supplies to pull it off. That way you'll get exactly what you want and it will be done to your satisfaction.
http://www.danielsternlighting.com/t...ys/relays.html (Spoken like the picky bastid I really am... ;-)
__________________
I may be old, but I still enjoy the feeling of the earth rotating beneath my wheels... |
|
|
|
|
#15 |
|
Registered User
Join Date: Jun 2006
Location: Indiana
Posts: 4,859
|
Re: Headlight Relay Upgrade
That site has some very good information. He does however overly complicate things a bit. That is not really a bad thing, but it does confuse the electrically challenged.
Only one relay will be pulling current at a time, so only one power source and fuse is needed. Do not use a fuse. Use a breaker. Re-wiring the headlamp is only necessary if you are going to use very powerful lamps like HIDs. Hologen and H4 bulbs will be fine with the factory wire.
__________________
'70 GMC C1500 LWB Power disc brakes. WooHoo! Posi 6 Lug Dana 60 |
|
|
 |
| Bookmarks |
|
|