
|
Register or Log In To remove these advertisements. |
|
|
|
|||||||
 |
|
|
Thread Tools | Display Modes |
 04-21-2009, 02:38 PM
|
#1 |
|
Registered User
Join Date: Sep 2008
Location: Creston, BC Canada
Posts: 376
|
It finally starts... another S10 swap...
So, after having been lurking and researching on these and other forums for the last 9 months, the time has finally come to start the posts for, yes, my S10 Swap... Ive had the opportunity to purchase 3 AD trucks last summer and since I was unable to get started on the body work and such
I had to start up with the frame work. The starting trucks
well here they are!
A 1947 Chevy 5 window 1/2 ton pickup 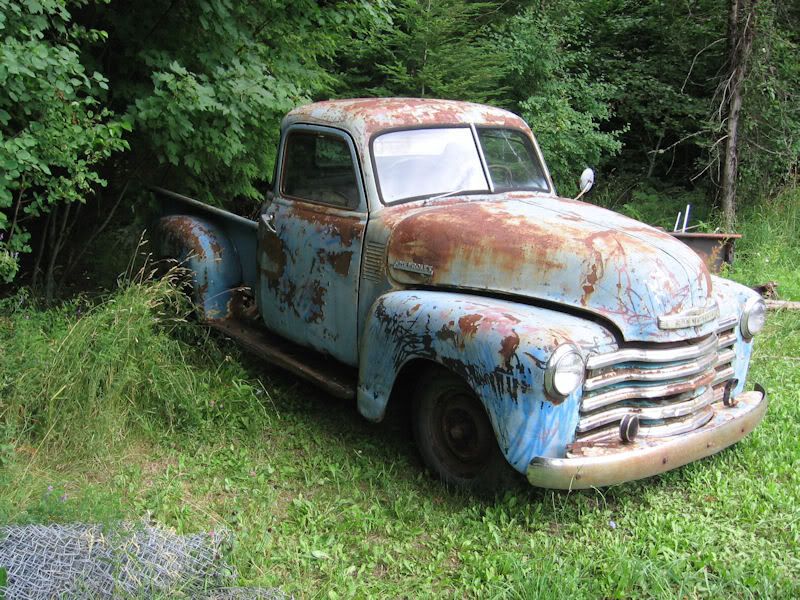 A 1952 GMC 3 Window pickup 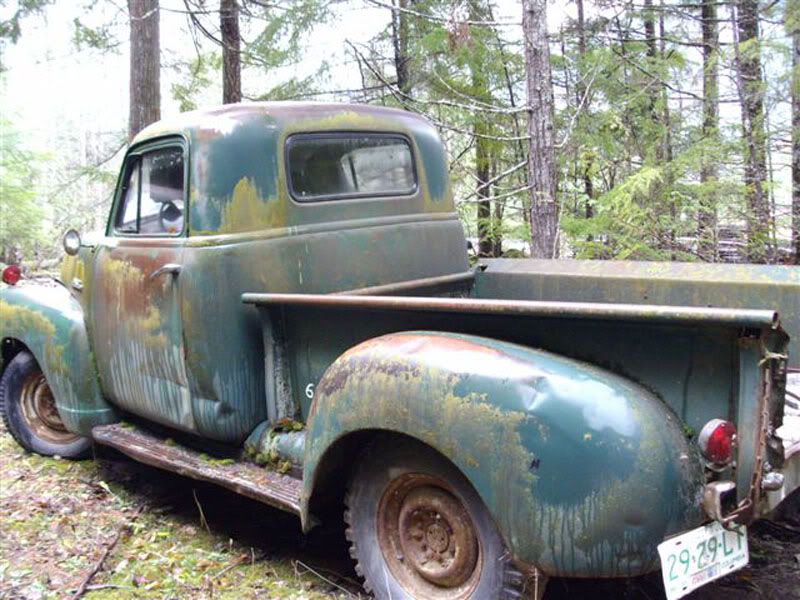 A 1952 GMC 5 Window pickup 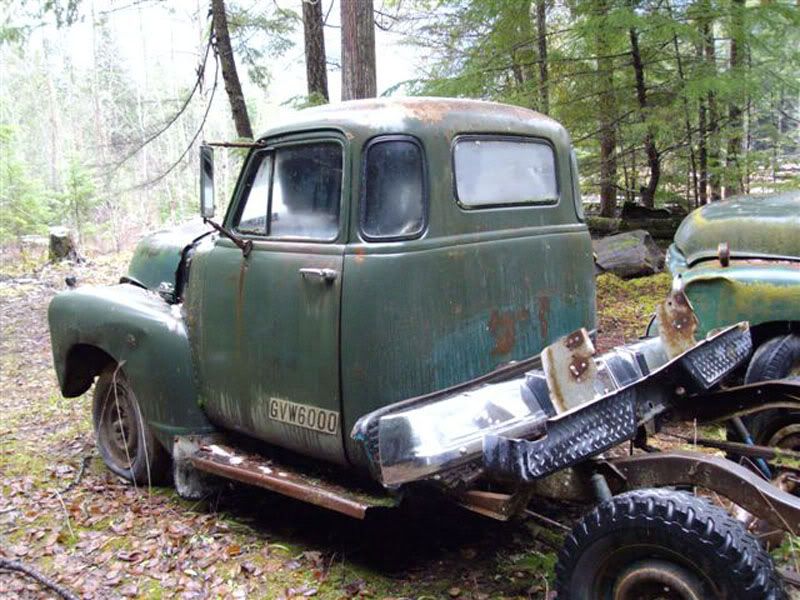 The intention is to take these 3 trucks and amalgamate all of the best sheet metal to create one 5 window pickup with a Chevy front end (I like them the best). The remaining parts will be put together for a second truck with spare parts and sold off to help pay for the costs. I've bought all 3 of these so far and the following 1991 GMC Sonoma S-15 for the drivetrain and chassis to put the finished truck on for a more "modern" day driving experience. 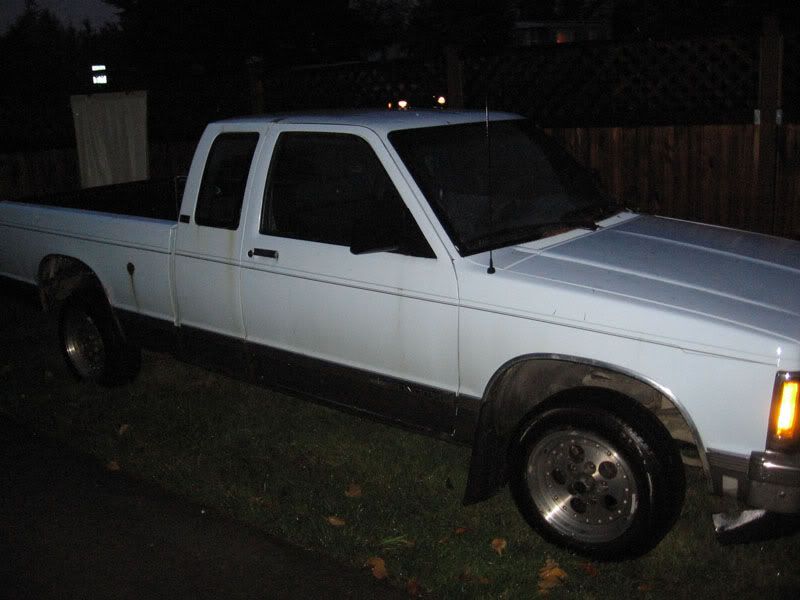 9 Jan 09 So far, I've broken down the S-15 to drivetrain components and started the rebuild/modifications/painting of the parts. All new suspension bushings, seals, brakes, brakelines are going in as I go. 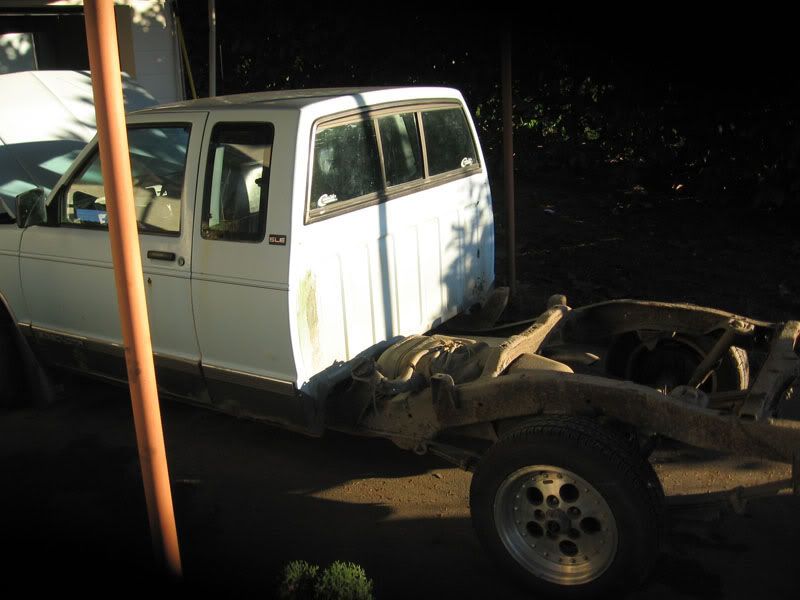 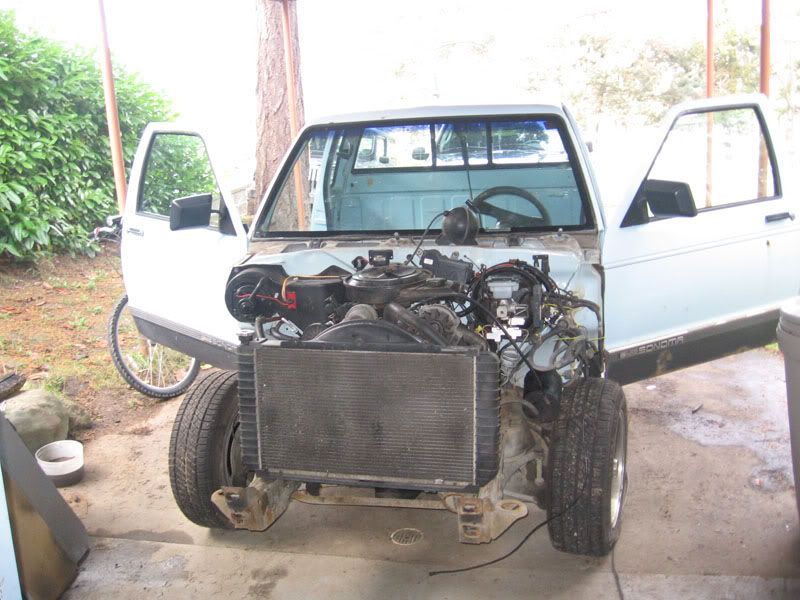 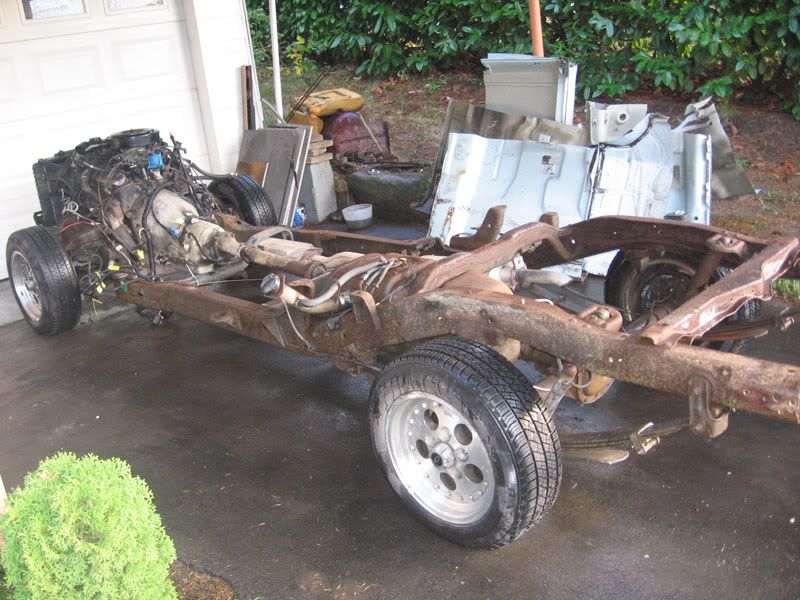 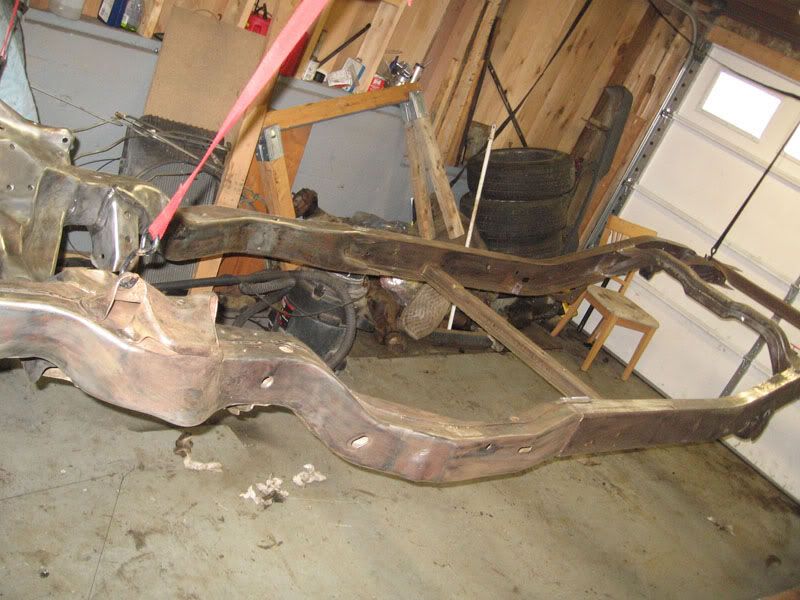 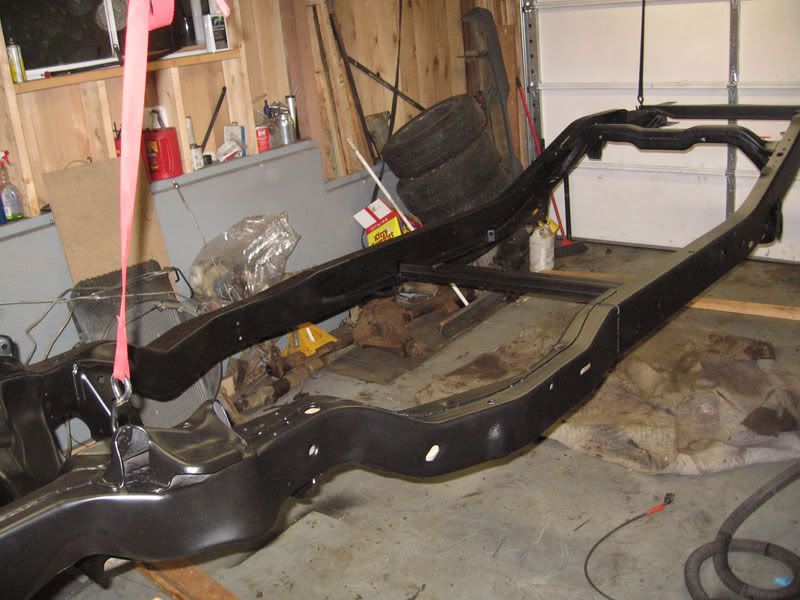 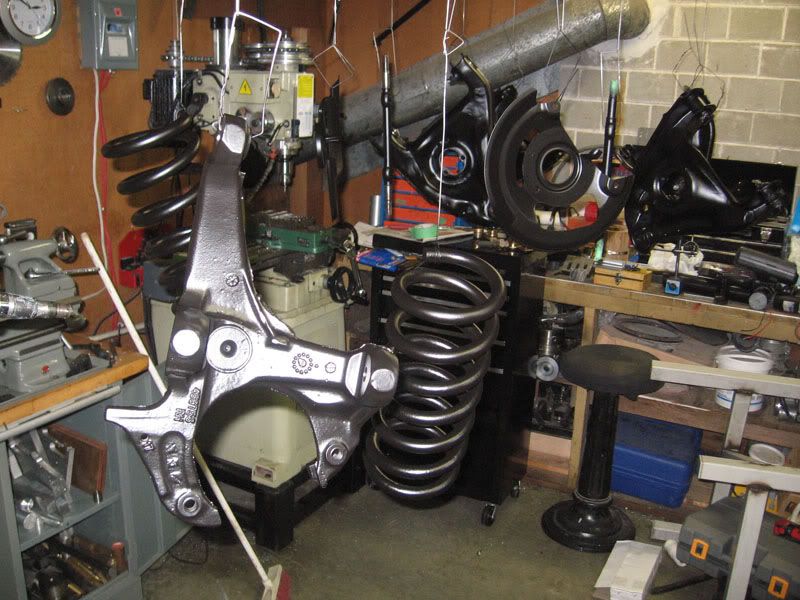 Im going to be using the 4.3 ltr (262) throttle body fuel injection system with a TH700R4 auto trans w/overdrive and 3.42 gears in the rear on a chevy 10 bolt . The intended rims are 15x8 Torque thrusts.
__________________
'51 Chevy Build - In the design stages Aut viam inveniam aut faciam - I will either find a way or make one. If you don't have time to do it right the first time, when will you... My new build - https://67-72chevytrucks.com/vboard/...70#post8958970 |

|

|
|
04-21-2009, 02:39 PM
|
#2 |
|
Registered User
Join Date: Sep 2008
Location: Creston, BC Canada
Posts: 376
|
Re: It finally starts... another S10 swap...
6 Feb 09
So this has been what I've accomplished so far... don't you just love the wintertime in Victoria BC ? It's tough building a truck in an igloo, ever tried? Seriously tho... Here's the frame, needlegunned, wire wheeled, painted and reassembled! The entire IFS on the front end was stripped down and repainted with Zerorust, and new Energy Suspension polyurethane bushings installed. New balljoint boots, new armored brakelines, new performance cross drilled rotors, pads and calipers installed. New pinion and axle seals in the rear end. New brake shoes, brake cylinders, springs and hardware also installed in the rear. To top it all of, brand new shocks for a smooth ride. 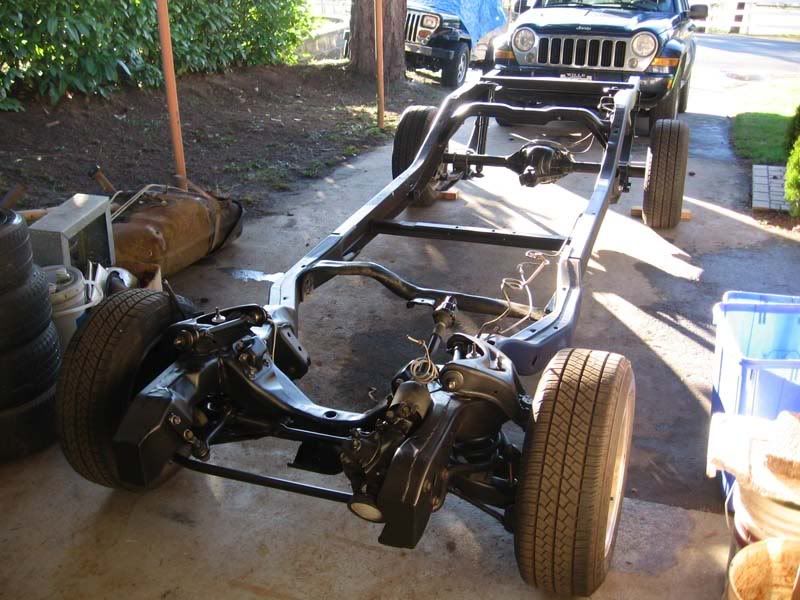 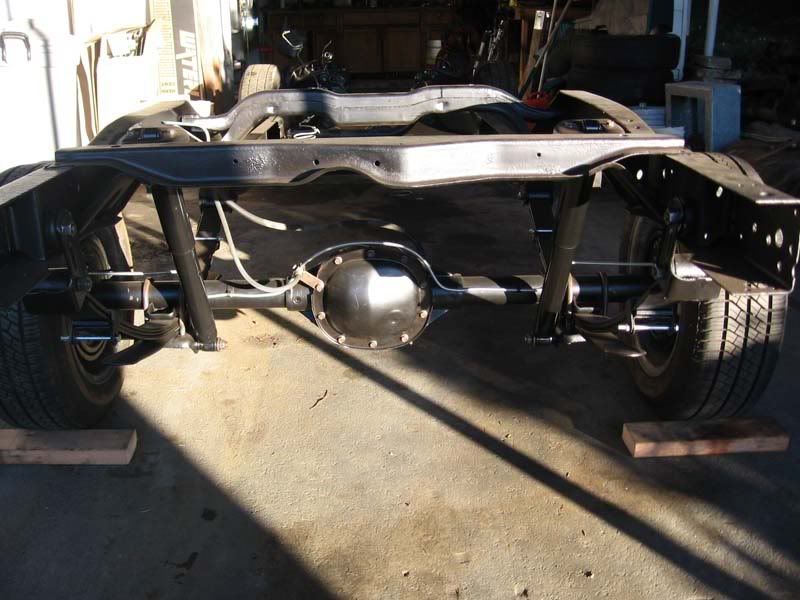 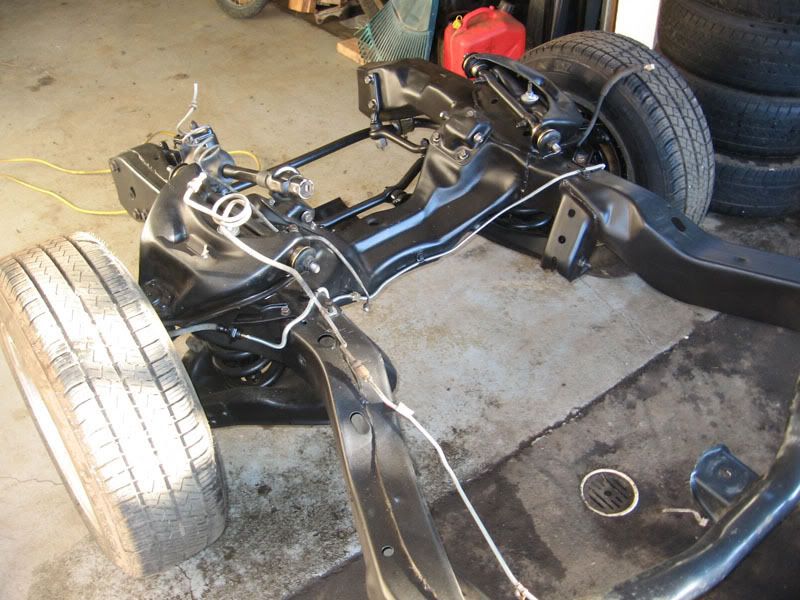 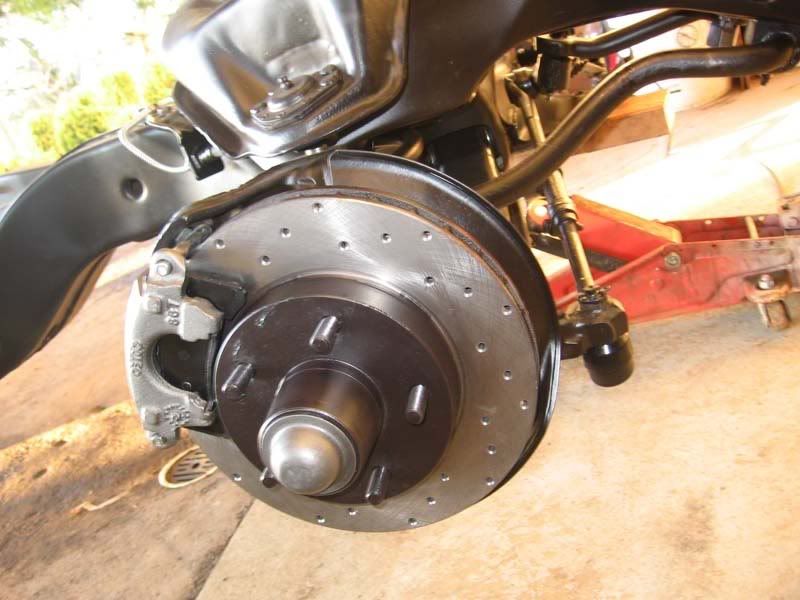 8 Mar 09 Well... a bit more time has passed and last week I decided that the compression in the cylinders was great (min 180, max 192 psi (10% deviation is deemed acceptable, so 5% was great) so it was definitely worthwhile to rebuild to replace the valve seals (which leaked) and a rebore and ring job wasn't necessary. Well... I couldn't leave it in the mess of crap that it was.... now could I? 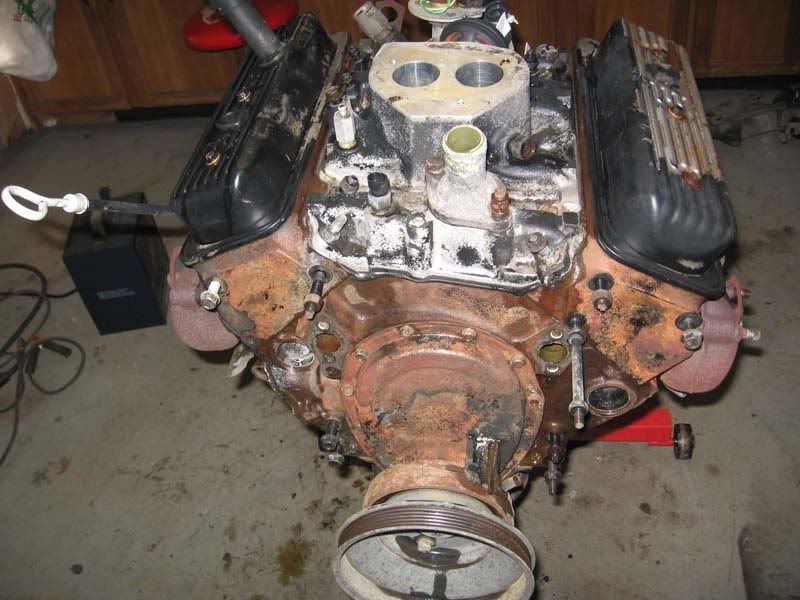 Hell no! So... after tearing it down, ultrasonic bathing the heads and intake, some sandblasting, laquer thinner bathing and much needed primer an paint... this is what I ended up with... 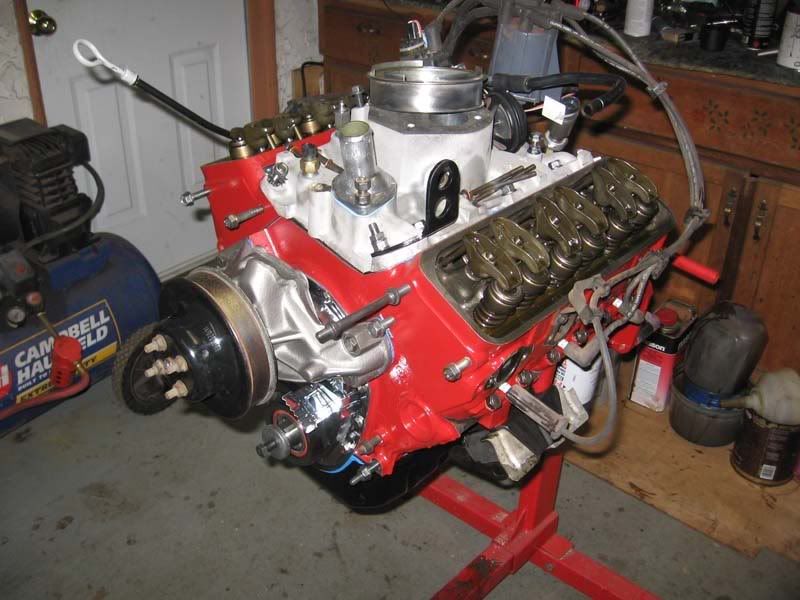 But... yet again... we can't leave it on the stand forever... So... I mounted the beam clamp overhead inside my garage, pulled out the 2 ton chain lift and remounted the engine (the board in the back of the block is to prevent the engine from rolling backwards until I get the transmission back in (that's next on the chopping block)). 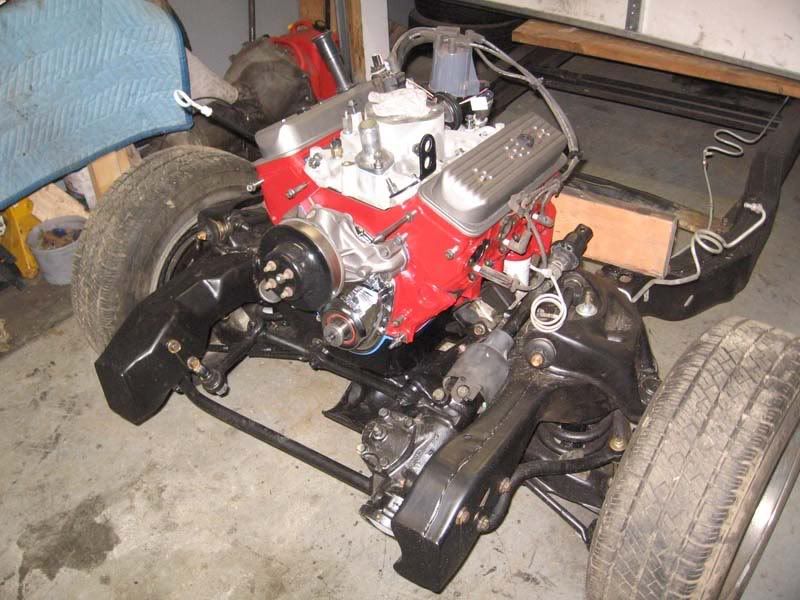 So... next is the shift kit and trans rebuild... 18 Apr 09 Well, everything that can be done in preperation, has been done. After all the work of rewiring and reinstalling everything, here's where it sits.... 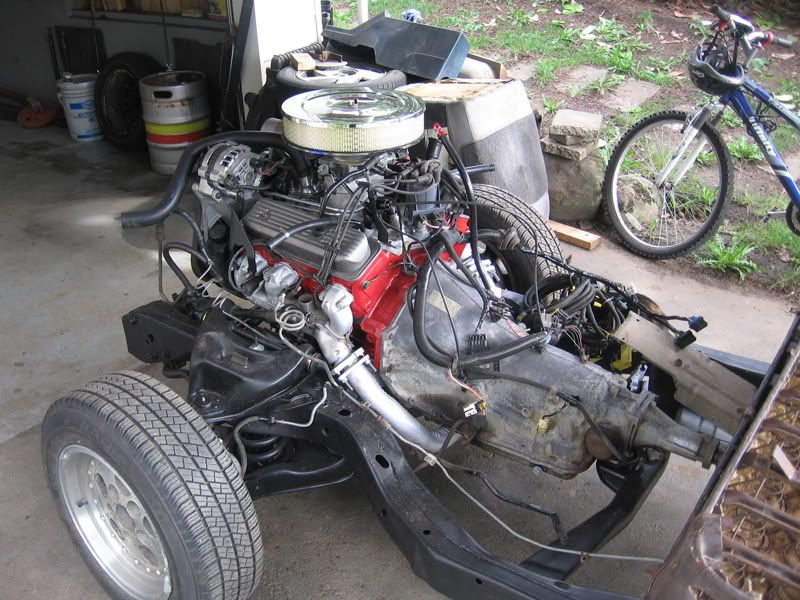 Next, the trip to go pick up the body! A couple of buddies and myself will be heading up on friday to start the swapping of parts and finally pulling the product about 600 miles to the coast for it's placement on the "new" frame. **crosses fingers for great weather** Cheers, Ted.
__________________
'51 Chevy Build - In the design stages Aut viam inveniam aut faciam - I will either find a way or make one. If you don't have time to do it right the first time, when will you... My new build - https://67-72chevytrucks.com/vboard/...70#post8958970 |
|
|
|
|
04-21-2009, 04:54 PM
|
#3 |
|
Registered User
Join Date: Dec 2007
Location: caldwell, idaho
Posts: 132
|
Re: It finally starts... another S10 swap...
Ted,
It looks like you are putting in the work to make the swap as quick as possible. Good luck with the next nine days. I'll cross my fingers and hope for sunshine. Jeff |
|
|
|
|
04-21-2009, 05:18 PM
|
#4 |
|
Registered User
Join Date: Aug 2007
Location: pittsburgh pa
Posts: 1,970
|
Re: It finally starts... another S10 swap...
Very Nice start!! Frame and engine look great... I too have just started a swap... I am being told by some you have to move the engine back roughly 7"??? Have you heard this?? It looks as if yours is in the stock location...
__________________
68 C10 Shorty TPI,Bagged, and all the good stuff. Classic trucks feature June 06, On the cover of Jegs Christmas Catalog 08 67 C10 Shorty Shop truck project Bagged and Z'd under destruction and getting nowhere fast. 64 C10 Shop Truck/Daily driver, Bagged, Dropmember, SOLD!!!! Gone but not forgotten.. 54 GMC under the knife getting a S10 chassis swap and bagged. See my build thread... 07 GMC Sierra 5/7 drop, 22's and 24's Air ride on my mind.. http://67-72chevytrucks.com/vboard/s...d.php?t=339340 See pics of my trucks in my profile |
|
|
|
|
04-21-2009, 07:43 PM
|
#5 | |
|
Registered User
Join Date: Apr 2008
Location: Sylva NC
Posts: 92
|
Re: It finally starts... another S10 swap...
Quote:
Josh |
|
|
|
|
|
04-21-2009, 08:34 PM
|
#6 |
|
Registered User
Join Date: Sep 2008
Location: Creston, BC Canada
Posts: 376
|
Re: It finally starts... another S10 swap...
From the understanding that I have by SgtUSMC is that the 4.3 can stay where it is due to the loss in 2 cylinders, and if you use an electric fan... (If memory serves)... otherwise, yep, 3/8" plate and a shift to the rear... not really a big deal... just time.
Cheers, Ted.
__________________
'51 Chevy Build - In the design stages Aut viam inveniam aut faciam - I will either find a way or make one. If you don't have time to do it right the first time, when will you... My new build - https://67-72chevytrucks.com/vboard/...70#post8958970 |
|
|
|
|
04-21-2009, 08:43 PM
|
#7 |
|
Registered User
Join Date: Mar 2008
Location: Cali.
Posts: 958
|
Re: It finally starts... another S10 swap...
I'm running the 2.8, however, the 4.3 isn't to much longer. If you run either stock engines you do not need to move it at all. Look at my build thread and you can see how much room there is. If it gets tight for you, (don't see how it could thou) you could run an E-fan.
__________________
My build, 53 GMC / S10 swap http://67-72chevytrucks.com/vboard/s...d.php?t=305723 My build, 59 Chevy / 88 fullsize swap http://67-72chevytrucks.com/vboard/s...hlight=sgtusmc U.S. Marines - Certified Counselors to the 72 Virgins Dating Club. |
|
|
|
|
04-21-2009, 08:51 PM
|
#8 |
|
Registered User
Join Date: Mar 2008
Location: Cali.
Posts: 958
|
Re: It finally starts... another S10 swap...
Sorry thought I had pics of the engine in my build thread. Here's the room I'm talking about in the stock location
__________________
My build, 53 GMC / S10 swap http://67-72chevytrucks.com/vboard/s...d.php?t=305723 My build, 59 Chevy / 88 fullsize swap http://67-72chevytrucks.com/vboard/s...hlight=sgtusmc U.S. Marines - Certified Counselors to the 72 Virgins Dating Club. |
|
|
|
|
04-22-2009, 10:04 AM
|
#9 |
|
Registered User
Join Date: Mar 2009
Location: Helena, Alabama
Posts: 453
|
Re: It finally starts... another S10 swap...
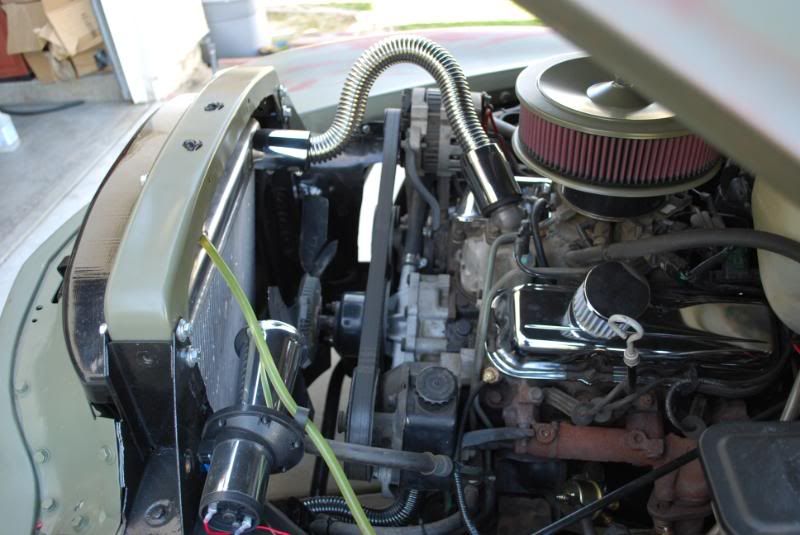
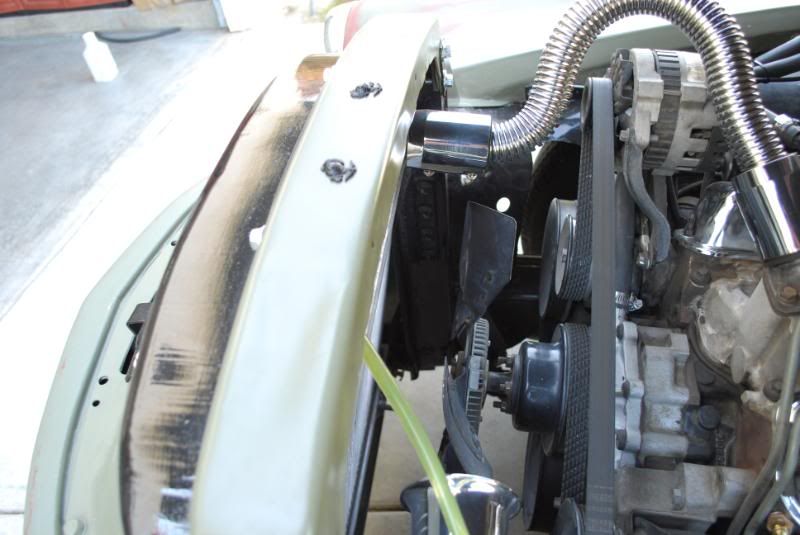
Thadius,
The 4.3 does get tight. I had to remove my fan and pust the radiator out about 2 inches to get it to work without moving the motor. I have pics on a thread labled options for moving the radiator forward. look it up and It show what I had to do. |
|
|
|
|
04-22-2009, 04:06 PM
|
#10 |
|
Registered User
Join Date: Sep 2008
Location: Creston, BC Canada
Posts: 376
|
Re: It finally starts... another S10 swap...
I see that you tossed the rad on the forward side of the rad supports...
Any idea if it'd work better with the rad in it's normal spot with an electric minus the motor fan? Cheers, Ted.
__________________
'51 Chevy Build - In the design stages Aut viam inveniam aut faciam - I will either find a way or make one. If you don't have time to do it right the first time, when will you... My new build - https://67-72chevytrucks.com/vboard/...70#post8958970 |
|
|
|
|
04-22-2009, 04:27 PM
|
#11 | |
|
Registered User
Join Date: Mar 2008
Location: Cali.
Posts: 958
|
Re: It finally starts... another S10 swap...
Quote:
__________________
My build, 53 GMC / S10 swap http://67-72chevytrucks.com/vboard/s...d.php?t=305723 My build, 59 Chevy / 88 fullsize swap http://67-72chevytrucks.com/vboard/s...hlight=sgtusmc U.S. Marines - Certified Counselors to the 72 Virgins Dating Club. |
|
|
|
|
|
04-22-2009, 05:43 PM
|
#12 |
|
Registered User
Join Date: Mar 2009
Location: Helena, Alabama
Posts: 453
|
Re: It finally starts... another S10 swap...
mine was moved forward even after I removed the fan. the pullys wewre still to close to the factory mounting location for the radiator. It is really amazing how much further the 4.3 ltr stick forward than the 2.8 ltr. I cant believe how much room SGT. Although the 4.3 is basically a 350 with 2 cylinders cut off.
|
|
|
|
|
05-05-2009, 08:57 PM
|
#13 |
|
Registered User
Join Date: Sep 2008
Location: Creston, BC Canada
Posts: 376
|
Re: It finally starts... another S10 swap...
Well, a couple of good buddies and I travelled up to the parent's place to finally pick and choose the parts that is to be my truck. We spent 7 glorious days up drinking beer, eating fantastic food, having some great laughs and somewhere in there we got to get some work done on the trucks.
The first day ended up with all of the trucks at the same place for the first time and ready for the next day's teardown! 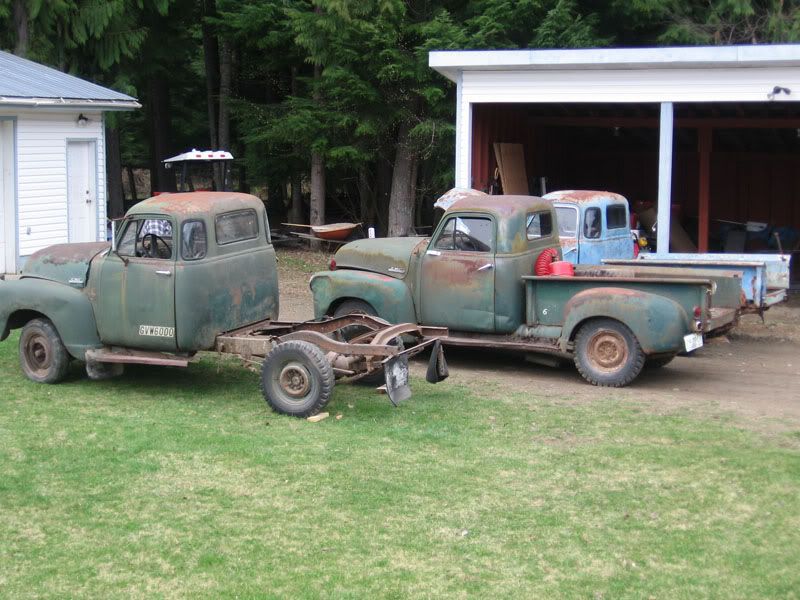 After a week, we had 2 partial trucks and 1 full one... which was bound for my place... 600 miles away. 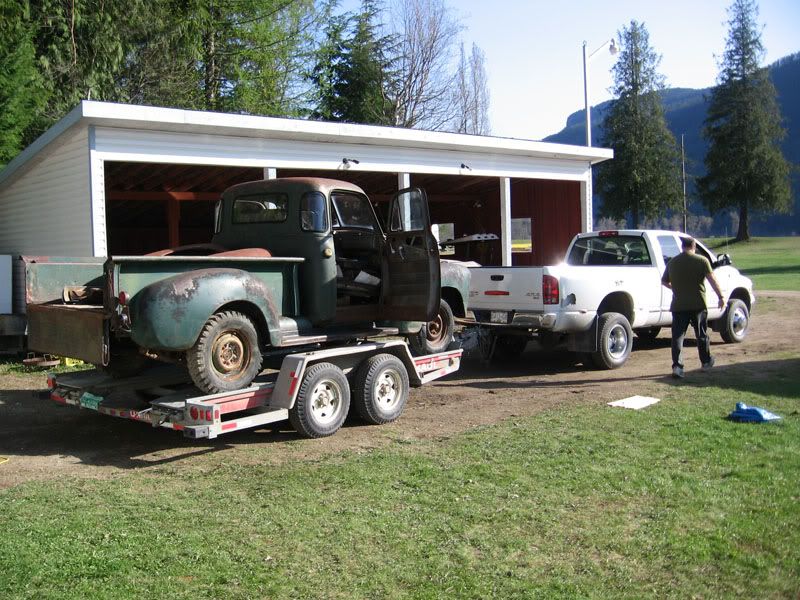 So, ready to roll, we were off at a god forsaken hour of 5am... gah! 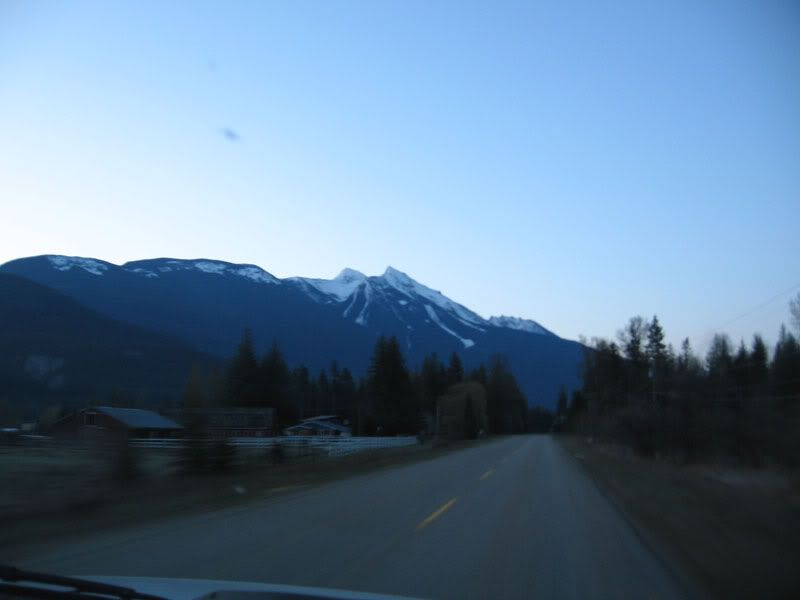 Eventually the sun decided to make an appearance and we couldn't resist the pic... was also an opportunity to check the straps and chain hauldowns before the first town (good thing we did, one had slipped off!) 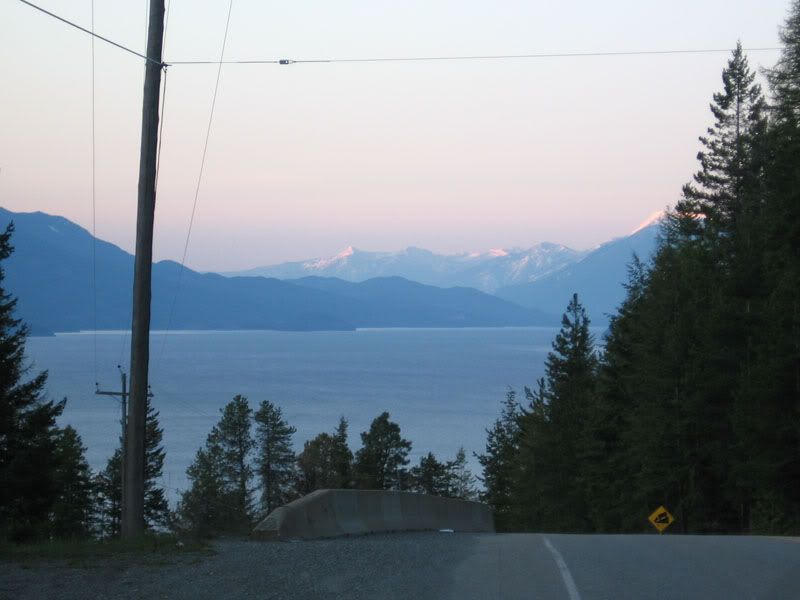 By mid morning we were well on our way and the scenery was excellent... time for a morning watering break and strap check! 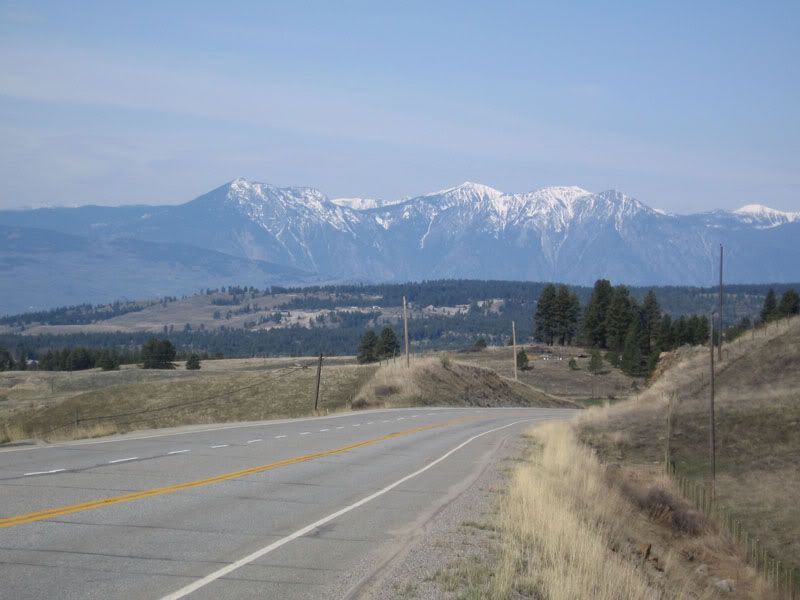 So, with everything finally home safe and sound... the time had come to finally put a body on the frame and engine that I'd been prepping for so long. Well, after two days (didn't take any the first day) here's where I sit... the front has been trimmed to fit and the cap is in place... the two bolted together, but not mounted to the frame as of yet. 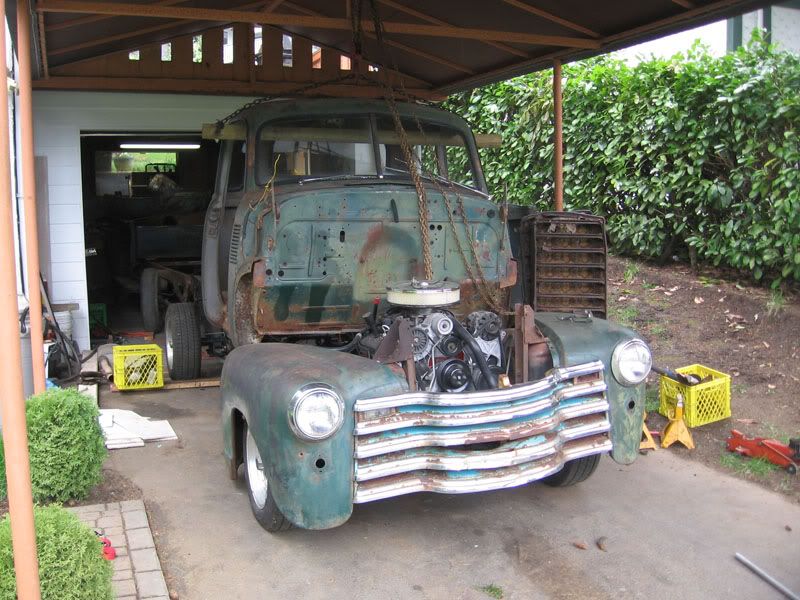 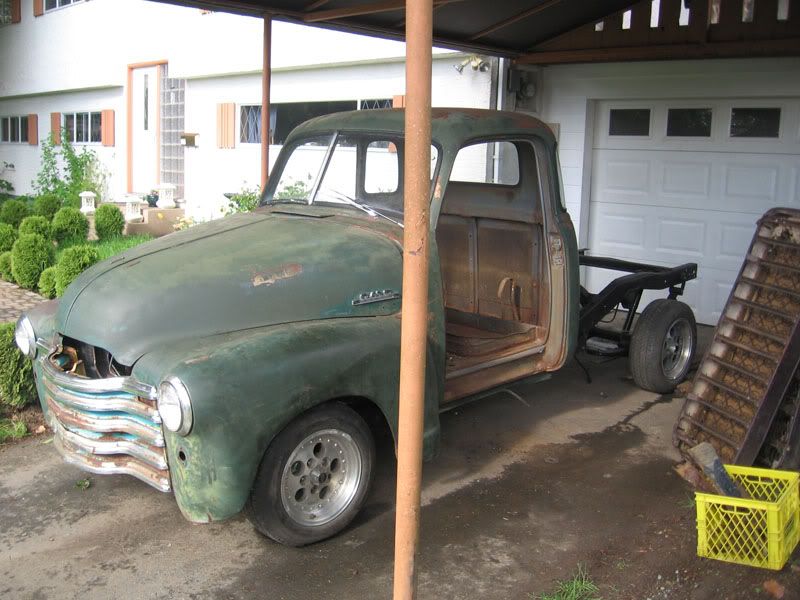 Now, clearing out the box and running boards and getting ready to fit them as well and then get them all fittin properly. I'd like to extend a great thanks so far to Jeffs51chevy for his measurement and assistance so far... making the trimming of the sheetmetal soooooo much easier! Cheers, Ted. PS Yes I know it's a GMC hood and Chev grill... the chevy hood is in the shop atm getting worked on... just wanted to keep the dust and rain outta the engine bay.
__________________
'51 Chevy Build - In the design stages Aut viam inveniam aut faciam - I will either find a way or make one. If you don't have time to do it right the first time, when will you... My new build - https://67-72chevytrucks.com/vboard/...70#post8958970 Last edited by Thadious; 05-05-2009 at 08:59 PM. |
|
|
|
|
05-05-2009, 10:10 PM
|
#14 |
|
Registered User
Join Date: Dec 2007
Location: caldwell, idaho
Posts: 132
|
Re: It finally starts... another S10 swap...
Ted,
Great looking first day of sheet metal hanging. I wish it went that fast for me. You will be driving it in no time.  Keep up the great work. Keep up the great work.I'm glad I could help. Let me know if you need anything else. Jeff |
|
|
|
|
05-06-2009, 06:58 PM
|
#15 |
|
Registered User
Join Date: Apr 2008
Location: Sylva NC
Posts: 92
|
Re: It finally starts... another S10 swap...
Looking real good. Love the scenery pics too! You've got a good start on it all.
Later Josh |
|
|
|
|
05-27-2009, 11:56 AM
|
#16 |
|
Registered User
Join Date: Mar 2008
Location: Waukee, Iowa
Posts: 1,608
|
Re: It finally starts... another S10 swap...
Are you planning on shortening the ext. cab frame to long bed specs, or using a longer bed on the truck?
Thanks!
__________________
build threads: 86 Suburban 88 Jeep 6.0 swap 49 Chevy truck 54 Chevy wagon 86 Suburban lowered 4/6 54 Chevy wagon 49 Chevy/s10 mix 88 Jeep Wrangler rockcrawler |
|
|
|
|
05-27-2009, 02:03 PM
|
#17 |
|
Registered User
Join Date: Sep 2008
Location: Creston, BC Canada
Posts: 376
|
Re: It finally starts... another S10 swap...
Actually, I cut 5" out of the frame to 117" as this sets the wheelbase almost perfect. These frame are relatively easy to shorten, just make sure you make lots of alignment marks! I laid out the cuts with a scriber, but I also made measurements on taped lines to make sure the end result was well within 1/32". Also made front tape marks for straightness of the frame (up and down) and diagonal reference marks as well. All in all, it came out pretty damn square and level!
Cheers, Ted.
__________________
'51 Chevy Build - In the design stages Aut viam inveniam aut faciam - I will either find a way or make one. If you don't have time to do it right the first time, when will you... My new build - https://67-72chevytrucks.com/vboard/...70#post8958970 |
|
|
|
|
05-27-2009, 03:10 PM
|
#18 |
|
Registered User
Join Date: Mar 2008
Location: Waukee, Iowa
Posts: 1,608
|
Re: It finally starts... another S10 swap...
Any pictures of that process? Did you split it at the factory seam?
I have a frame out of a 95 s10, and it's boxed clear back to the rear kickup so it'd be more work to cut it down...
__________________
build threads: 86 Suburban 88 Jeep 6.0 swap 49 Chevy truck 54 Chevy wagon 86 Suburban lowered 4/6 54 Chevy wagon 49 Chevy/s10 mix 88 Jeep Wrangler rockcrawler |
|
|
|
|
05-27-2009, 05:11 PM
|
#19 |
|
Registered User
Join Date: Sep 2008
Location: Creston, BC Canada
Posts: 376
|
Re: It finally starts... another S10 swap...
The frame that I started with came from a 91' S15 Sonoma (same as the S10) but was only boxed up to the joint (just under the cab door).
Basically, layout a cut line 5" back from the original end, using a square, scribe the line all the way around it. I laid out two pieces of tape, the first about 4" infront of the original joint and drew a verticle line on it (perpendicular to the frame). Then another line on a piece of tape 17" back from there. Reason for this is that after the cut and re-alignment, the tape lines will end up being 12" or 1' apart. I found this to be crutial since there always seemed to be little 'bits' stuck inside the back corners of the original welds. Next, take a 4' level and lay it on the long straight section on the frame above the joint, place a piece of tape and a mark on the forward kickup section. This will help to ensure that the frame is aligned horizontally when you put it back together. Finally, lay 4 pieces of tape on the frame, 2 forward of the place to be welded and 2 rearward of. Make 4 marks on these tapes so that, diagonally, the marks are the same distance apart. The location isn't critical, just as long as the marks are the same distance diagnally apart. Cut out the weld, cut off what you don't need (in this case 5") and butt everything back up. Triple check all measurements to within your acceptable tolerances (mine was 1/32") and start welding. Make your final verification checks after welds are complete, clean up and remove tape marks... Voila! Good luck, Ted. PS Sorry... didn't take any picks of the chop process, but feel free to PM me if you have any further questions... I'd be happy to advise.
__________________
'51 Chevy Build - In the design stages Aut viam inveniam aut faciam - I will either find a way or make one. If you don't have time to do it right the first time, when will you... My new build - https://67-72chevytrucks.com/vboard/...70#post8958970 |
|
|
|
|
05-27-2009, 07:04 PM
|
#20 |
|
Registered User
Join Date: Jun 2006
Location: Idaho
Posts: 8,800
|
Re: It finally starts... another S10 swap...
I'm not even doing a swap but appreciated Thadious detail layout instructions. diagonal check points are critical. Only thing I would add is to set and check the frame for level across the rails (perpendicular to the two frame rails) too. A long framing level works well for that.
__________________
1959 Chevy Short Fleetside w/ 74 4WD drive train (current project) OrrieG Build Thread 1964 Chevelle Malibu w/ 355-350TH (daily driver) Helpful AD and TF Manual Site Old Car Manual Project Last edited by OrrieG; 05-27-2009 at 07:05 PM. |
|
|
|
|
06-24-2009, 04:52 PM
|
#21 |
|
Registered User
Join Date: Jun 2009
Location: Nashville, TN
Posts: 54
|
Re: It finally starts... another S10 swap...
anything to update? im just starting my swap and curious how everybody else is coming along. my progress is slow, actually sloth like, but i was checking to see everybody elses
__________________
55 1st Series 5 window, getting an s10 frame and 350 sbc Keeping it LOUD and ROUGH - just like BOONEMAN 
|
|
|
|
|
06-24-2009, 06:31 PM
|
#22 |
|
Registered User
Join Date: Sep 2008
Location: Creston, BC Canada
Posts: 376
|
Re: It finally starts... another S10 swap...
Currently working on a multitude of different aspects of the (re)build. As of late I've been spending alot of time de-rusting everything that I can via electrolysis. I've spent a fair bit of time trying to find phosphoric acid around this town so I can get inside the doors to get them prepped for coatings and hopefully get the conversion of '52 doors to '47 door and install power windows (I'm working on a way to use the ones from a '93 Grand Cherokee, since they are dirt simple and look like they will match up easily with minor mods).
I managed to score a "new" set of front fenders and a hood that some PO had sandblasted and ended up sending them to a wrecking yard... $150 for the works. They are apparantely straight and clean with minor surface rust to cleam up... and about 600 miles away... Hopefully I'll see them by the end of the month if all goes well. Waiting on those to get the final front end alignment done. As well, my box sides were trashed so I've opted to refab a new set myself with a sheet of 16 guage cold rolled steel and 1 5/8" x 1/16" tubing. The only thing I have to buy repro is stake pockets ($50 per) for the rear since mine were royally trashed, but the fronts are good, so I'll be reusing them. One of the things I'd like to do is to trim the lower pockets so they curve in nicely at the bottom... not completely just enough to get a wrench in and not alot more. Anyone got a straight set of front stake pockets they wanna part with?  Other than that... a whole lot of everything and a little of nothing... but progressing none the less! Cheers, Ted.
__________________
'51 Chevy Build - In the design stages Aut viam inveniam aut faciam - I will either find a way or make one. If you don't have time to do it right the first time, when will you... My new build - https://67-72chevytrucks.com/vboard/...70#post8958970 |
|
|
|
|
07-25-2009, 10:06 PM
|
#23 |
|
Registered User
Join Date: Sep 2008
Location: Creston, BC Canada
Posts: 376
|
Re: It finally starts... another S10 swap...
Well...it's been awhile since I posted the updates... so here goes...
Had to wait about a month n a half to get the new fenders and hood so I could carry on with the front end. In the meantime I redesigned and fabb'd up a new radiator core support and designed the new front bumper brackets to weld to the frame... a quick rebuild and spray bomb job on the grill and we were ready to finish mocking up the front end... 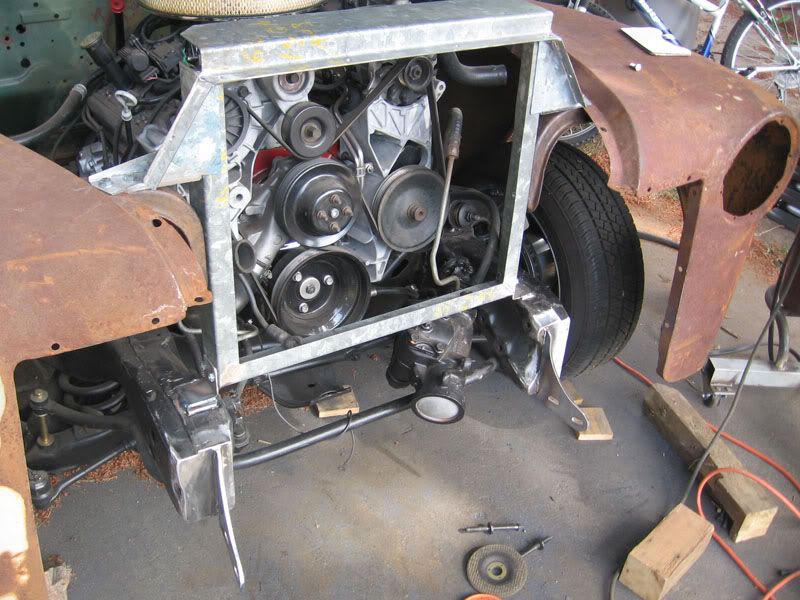 I had to cut off the front cab brackets and reweld them (wasn't quite happy) and redo the front bumper brackets 3 times to get them just right! 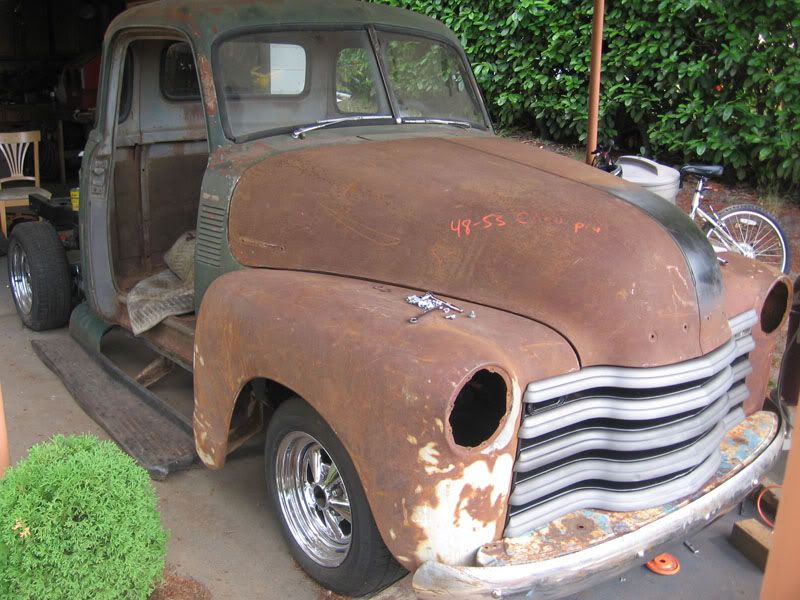 Well... next week I start on the box and building new sides from scratch! Wish me luck... Cheers, Ted.
__________________
'51 Chevy Build - In the design stages Aut viam inveniam aut faciam - I will either find a way or make one. If you don't have time to do it right the first time, when will you... My new build - https://67-72chevytrucks.com/vboard/...70#post8958970 |
|
|
|
|
07-26-2009, 06:29 AM
|
#24 |
|
and a few others
Join Date: Jun 2007
Location: Blue Ridge Mountains of VA
Posts: 5,638
|
Re: It finally starts... another S10 swap...
Wow, that looks great Ted. Really nice work you're doing there.
__________________
Bill  US Army Vet -193rd Infantry US Army Vet -193rd InfantryBlueRidgeMuscleCars.com The greatness of a nation and its moral progress can be judged by the way its animals are treated Gandhi |
|
|
|
|
07-26-2009, 12:35 PM
|
#25 |
|
Registered User
Join Date: Jun 2009
Location: Nashville, TN
Posts: 54
|
Re: It finally starts... another S10 swap...
that looks good
__________________
55 1st Series 5 window, getting an s10 frame and 350 sbc Keeping it LOUD and ROUGH - just like BOONEMAN
|
|
|
|
|
| Bookmarks |
|
|


 Linear Mode

