
|
 01-16-2010, 12:54 PM
|
#1 |
|
Senior Member
 Join Date: Jan 2009
Location: Raleigh, NC
Posts: 444
|
Patch fitment
This seems easy at first, but maybe I'm missing something. I bought this truck as you see it, as someone elses project. I cant figure out what is going on with the rocker fitment. I can tell that the lower hinge pocket was mounted too high based on the hinge spacing to the door and the outer skin would fit better with the pocket lower. but the where it welds to the floor looks almost ok.
The rear of the rocker is a similar story. Probably shouldnt has a big hole in there. see pic. All this because it seems that the door hangs about .5 lower than the rocker. 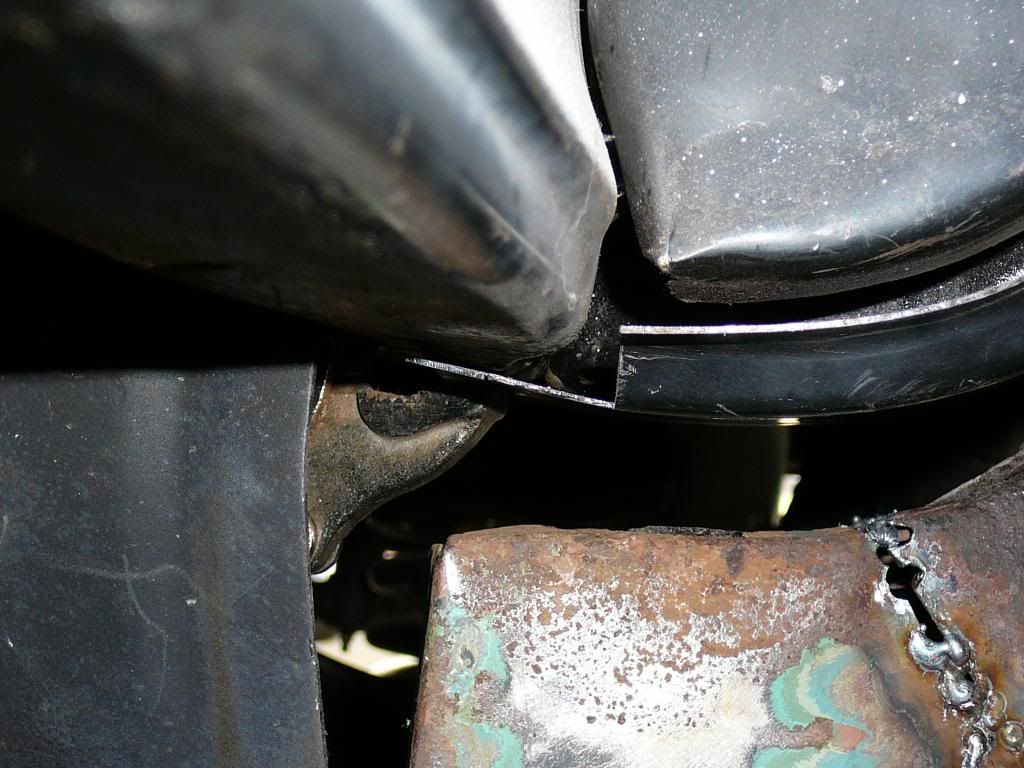 http://i260.photobucket.com/albums/i...s/P1170971.jpg http://i260.photobucket.com/albums/i...s/P1170977.jpg Any ideas on an easy way to fix this? I'd like not to have to remove all of this. Thanks! First time posting pics. hope they work
__________________
1949/1954 with LS swap-yeah! http://s260.photobucket.com/albums/i...0/AD%20trucks/jumbled mess of unorganized photos |

|

|
|
01-17-2010, 04:06 PM
|
#2 |
|
and a few others
Join Date: Jun 2007
Location: Blue Ridge Mountains of VA
Posts: 5,638
|
Re: Patch fitment
I just noticed that nobody's replied yet. I think you'll need to give more information. First, what kind of truck is it? And maybe some pics from a wider angle.
__________________
Bill  US Army Vet -193rd Infantry US Army Vet -193rd InfantryBlueRidgeMuscleCars.com The greatness of a nation and its moral progress can be judged by the way its animals are treated Gandhi |
|
|
|
|
01-17-2010, 04:50 PM
|
#3 |
|
Registered User
Join Date: Aug 2005
Location: Pasadena,Tx /Pto Pta DR
Posts: 5,415
|
Re: Patch fitment
I don't like to comment much on peoples work but that looks pretty bad. take some pics further back.
looks like a 47-54 By the welding on the other pics looks like they would com back off easily and start over. Hard to tell though Last edited by mbgmike; 01-17-2010 at 05:06 PM. |
|
|
|
|
01-17-2010, 05:21 PM
|
#4 |
|
Registered User
Join Date: Dec 2009
Location: hawaii
Posts: 114
|
Re: Patch fitment
in the pic that weld doesnt look like the person finished the job, but a pic from furthur away might help in trying to see the misaligned area your talking about
|
|
|
|
|
01-17-2010, 05:22 PM
|
#5 |
|
Hollister Road Co.
Join Date: Apr 2005
Location: Houston
Posts: 6,131
|
Re: Patch fitment
That was my thought. Take it off and start over
|
|
|
|
|
01-17-2010, 06:28 PM
|
#6 |
|
Senior Member
Join Date: Jan 2009
Location: Raleigh, NC
Posts: 444
|
Re: Patch fitment
I hope thats not the answer. I probably know it already.
 The truck ( 1954 ) has a complete new floor all the rockers, inner and outer cab corners and full cowl panels. The pass side wasn't done when I got the truck. When I tried to put the door on to check the gaps I notice how high the hinge sits The truck ( 1954 ) has a complete new floor all the rockers, inner and outer cab corners and full cowl panels. The pass side wasn't done when I got the truck. When I tried to put the door on to check the gaps I notice how high the hinge sits 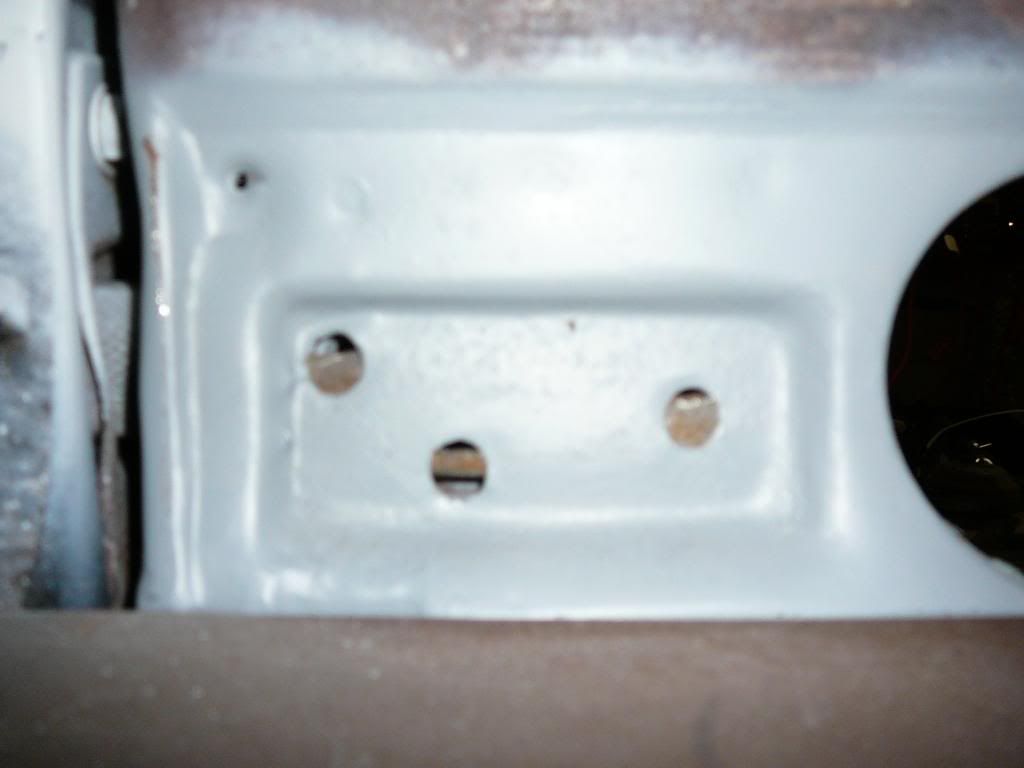 And the bottom of the door is too low I think. Still no outer skin. Is the bottom of the door supposed to be flush with the bottom of the rocker? 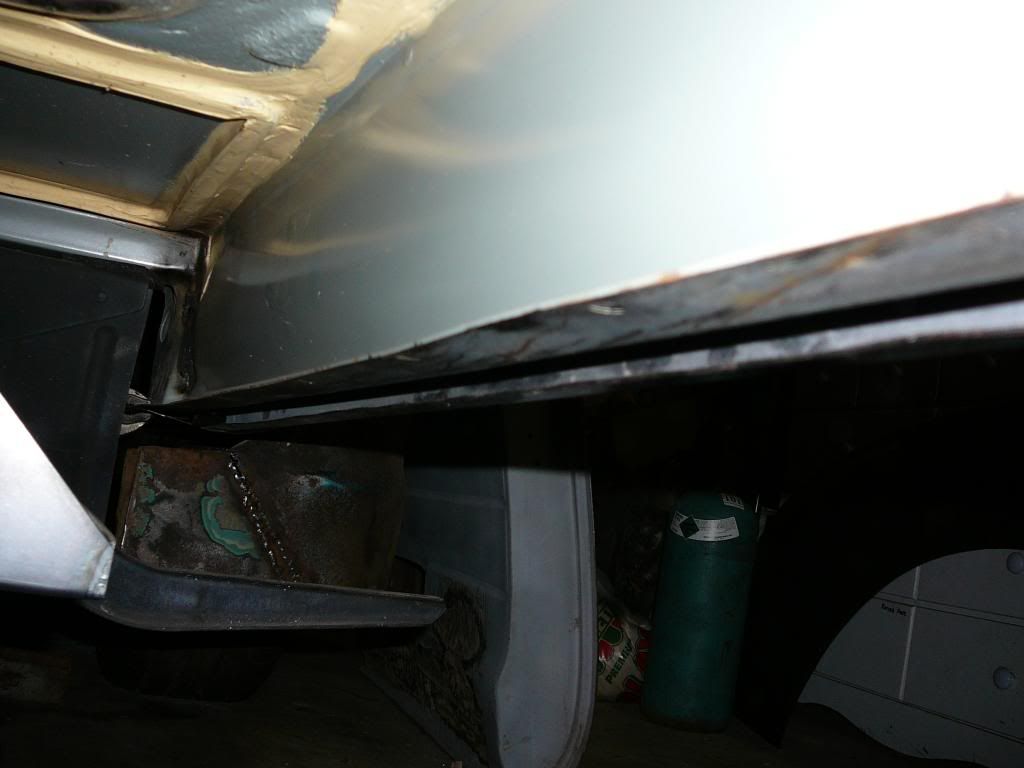 Most everything is welded in complete. Perhaps someone has a picture of what it should look like at this angle? I dont have a known good one to measure from.  Thanks, I really enjoy this site and the wealth of info. I think I've read every post for months. Hopefully I can contribute good info someday. Oh, and the fender repair and door skin is a different story. Cant find good help. I'm trying to learn to fix it all.
__________________
1949/1954 with LS swap-yeah! http://s260.photobucket.com/albums/i...0/AD%20trucks/jumbled mess of unorganized photos |
|
|
|
|
01-17-2010, 06:30 PM
|
#7 |
|
Senior Member
Join Date: Jan 2009
Location: Raleigh, NC
Posts: 444
|
Re: Patch fitment
In the last pic, you can see a large gap between the hinge panel and the lower edge of the rocker/ cowl. But the top is even with the floor. I think that means move the whole floor down with the pocket. Any thoughts?
__________________
1949/1954 with LS swap-yeah! http://s260.photobucket.com/albums/i...0/AD%20trucks/jumbled mess of unorganized photos |
|
|
|
|
01-17-2010, 08:27 PM
|
#8 |
|
Registered User
Join Date: Jul 2007
Location: Toppenish, WA
Posts: 15,735
|
Re: Patch fitment
I'd have to go out and look at one of my cabs to see what is going on with yours but it looks like they missed when they welded it together.
I picked up one of these a while back http://cgi.ebay.com/ebaymotors/1947-...sQ5fLiterature It is actually a reprint of the 1954 Assembly manual and has tons of drawings and exact measurements for the cabs on these trucks. It has a lot of stuff you would never use but it has tons of drawings and measurements on every section of the cab and how it goes together right down to where the spot welds are supposed to be. |
|
|
|
|
01-18-2010, 12:09 AM
|
#9 |
|
Registered User
Join Date: Jun 2006
Location: Idaho
Posts: 8,800
|
Re: Patch fitment
I think you need to find someone in your area with a AD truck and park it next to yours and start taking lots of reference measurements and lots of photos. It looks like the last guy that owned it just cut out all the bad stuff without squaring or reinforcing what was left AND without measuring or documenting what was there. He may have assumed that the new panels would be perfect (they aren't) and he could just weld them together. When I did mine I did one side at a time so I had the other for reference and got an assembly manual so I could see how the factory intended things to line up. It looks like you might be doing a lot of it over. I couldn't tell from the closeups but if it isn't on the frame I would get it on there so you don't have a whole set of new challenges. The AD's are fussy about how the front clip and hood align to so take some time to look at alignment threads and make sure to trial fit those as well. Good luck, its not going to be impossible to fix but you need to get some good reference points.
__________________
1959 Chevy Short Fleetside w/ 74 4WD drive train (current project) OrrieG Build Thread 1964 Chevelle Malibu w/ 355-350TH (daily driver) Helpful AD and TF Manual Site Old Car Manual Project |
|
|
|
|
01-18-2010, 04:17 PM
|
#10 |
|
Registered User
Join Date: Dec 2009
Location: hawaii
Posts: 114
|
Re: Patch fitment
looks like either the floor is too high or that rocker by the hinge pocket was mocked up wrong and the welded it anyway. best bet would be to compare it to another truck which would be easier.
the fender is fixable, just get a decent mig welder and practice on some scrap metal to get the hang of it and finish what that dude started. looking at how that fender is welded i hope thats not how all the other parts that were replaced were dont as you may want to redo all of it for safety reasons Last edited by lonelywanderer; 01-18-2010 at 04:18 PM. |
|
|
|
|
01-18-2010, 09:07 PM
|
#11 |
|
Registered User
Join Date: Mar 2006
Location: Ontario
Posts: 514
|
Re: Patch fitment
You may not like this answer but....
If the previous owner did not weld in a support structure to the dash, rear of the cab and door to door when he removed/welded in all those patch panels and floor your cab could be "Sprung". By this I mean it's fallen out of alignment when all those structural parts were removed and rewelded in. I've heard of this done and the NEW owner had to basically cut all the welds, reposition the cab and stitch it all together. Also, have you checked to see if the frame is straight? I hope this isn't your case and you find an easy fix! OrrieG and mr48chev have some good suggestions to try and figure out where the problem is. |
|
|
|
|
01-18-2010, 11:33 PM
|
#12 |
|
Registered User
Join Date: Apr 2007
Location: Callander Ont.
Posts: 387
|
Re: Patch fitment
I think you know your answer... Save yourself a lot of head aches
Take that hinge panel off and do it the way it should have been done in the first place. Then everything else will fall into place. You'll be glad you did after it's painted.
__________________
--Glenn-- http://67-72chevytrucks.com/vboard/s...d.php?t=345975 http://67-72chevytrucks.com/vboard/s...d.php?t=564403 |
|
|
|
|
01-27-2010, 08:45 PM
|
#13 |
|
Senior Member
Join Date: Jan 2009
Location: Raleigh, NC
Posts: 444
|
Re: Patch fitment
So, I measured a pair of cabs and got some similar results. Build quality not super important I guess, but a good place to start. After leveling the frame on the floor, I cut out the hinge panel and the inner fender piece in front of it. I also drilled out the spot welds and split the floor section where it had been replaced. This surprised me as that corner of the truck sprung up about 3/8".
Good or Bad, this is how I'm fixing it. I put a jack from my BMW between the cab bolt on the floor and the brace under the dash and spread it a little. This allowed me to hang the door and fit the cab to it instead of the other way around. so far so good......lots of work left, though. Thanks for the help guys![IMG] 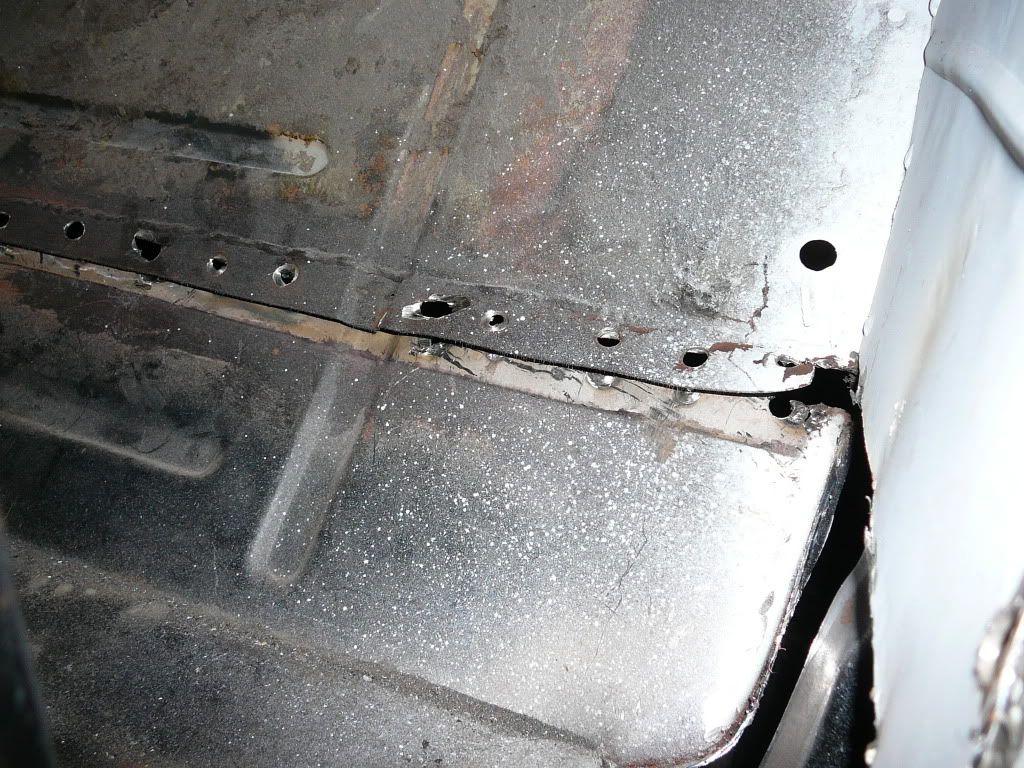 [/IMG] [/IMG][IMG] 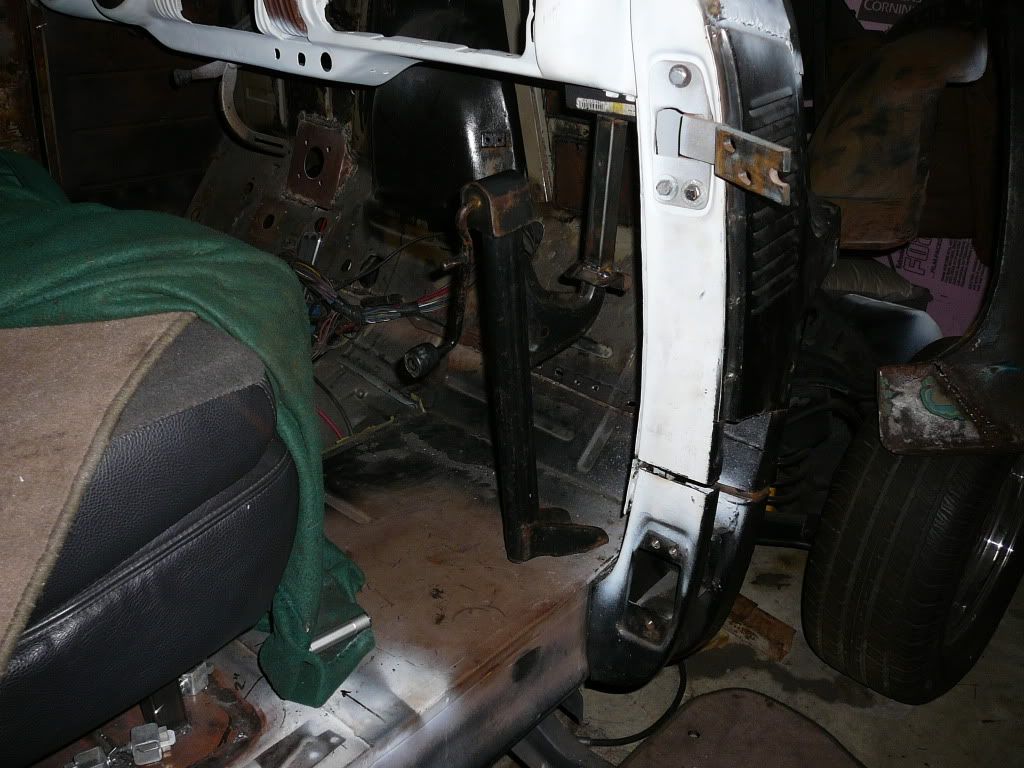 [/IMG] [/IMG][IMG] 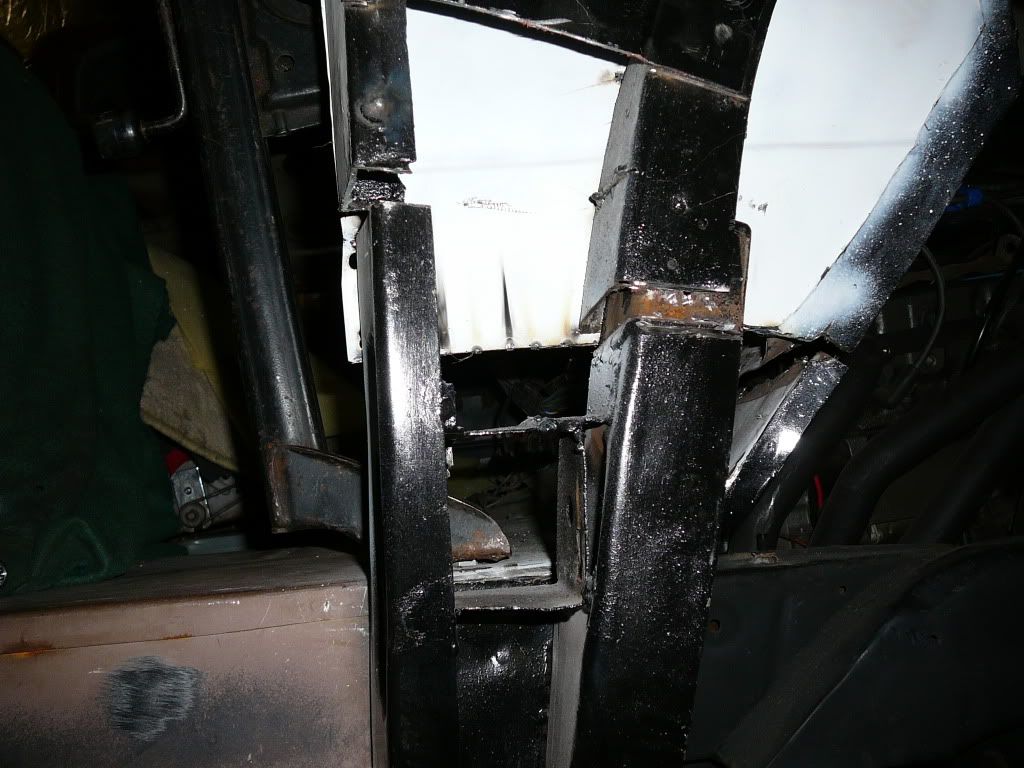 [/IMG] [/IMG][IMG] 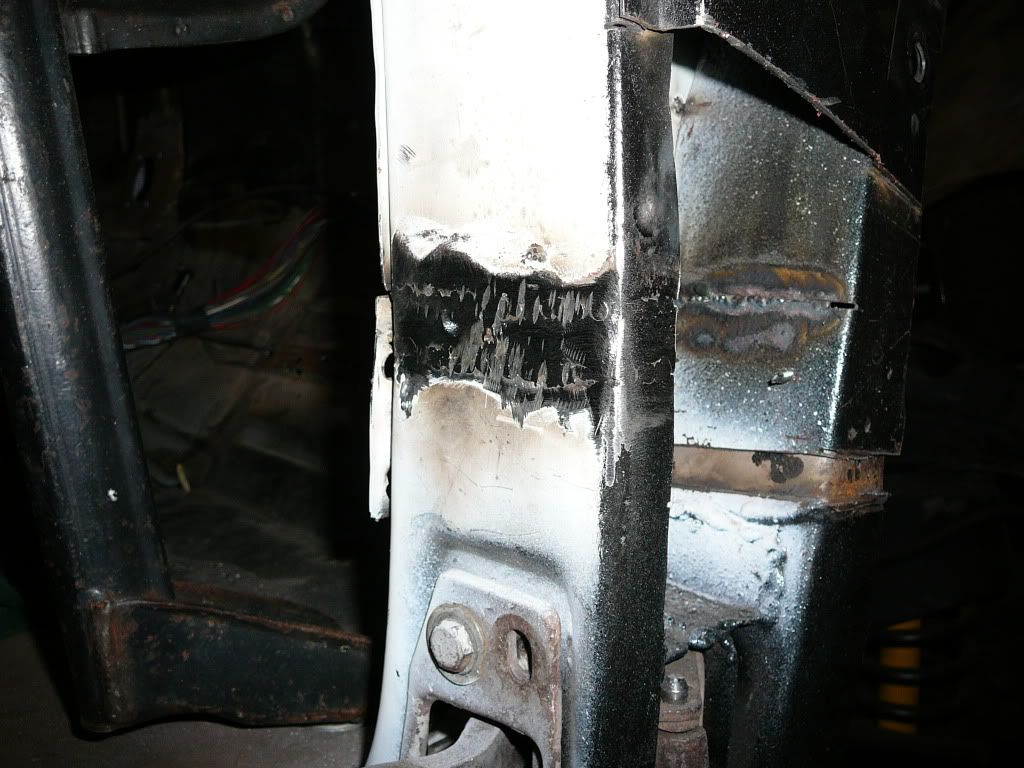 [/IMG] [/IMG]
__________________
1949/1954 with LS swap-yeah! http://s260.photobucket.com/albums/i...0/AD%20trucks/jumbled mess of unorganized photos |
|
|
|
|
01-27-2010, 09:29 PM
|
#14 |
|
Registered User
Join Date: Sep 2006
Location: thousand oaks, California
Posts: 732
|
Re: Patch fitment
it looks like your headed in the right direction. i would caution you to mount and align the hood and fenders before you do any finish welding. these alignment issues have a tendency to travel to new areas once one area is repaired. additionally install the hood springs during the alignment. one step that was missed on my build that is still out of whack
GT
__________________
Greg 1953 chevy 1/2 ton 5 window, chevy 350 330 horse 700r tranz, lowering spindels mustang 2 frount. ford 9", airbags on 4 corners . purchased in 1983 for $325 while in high school http://67-72chevytrucks.com/vboard/s...=215079&page=5 |
|
|
|
|
01-28-2010, 12:39 AM
|
#15 |
|
Registered User
Join Date: Jun 2006
Location: Idaho
Posts: 8,800
|
Re: Patch fitment
Glad it is going well, the "boing" confirms that something was not braced correctly when the previous owner did his work. Like mylow said spot everything into place then trial fit. Do the final welds in stages so it does not pull the metal out of alignment.
__________________
1959 Chevy Short Fleetside w/ 74 4WD drive train (current project) OrrieG Build Thread 1964 Chevelle Malibu w/ 355-350TH (daily driver) Helpful AD and TF Manual Site Old Car Manual Project |
|
|
|
|
01-28-2010, 01:22 AM
|
#16 |
|
Registered User
Join Date: Jun 2007
Location: Saskatoon, Saskatchewan,:
Posts: 2,901
|
Re: Patch fitment
I would have to agree with OrrieG, not supported properly when welded/fitted together the first time, you are definetly goin in the right direction. Good job, keep us posted.
__________________
James 1968 GMC "HAVOC" 1986 GMC "Frank" J.J.R.H. Design & Consulting My 68`Rebuild "HAVOC": http://67-72chevytrucks.com/vboard/s...d.php?t=316300 A 58' chev build thread: http://www.67-72chevytrucks.com/vboa...d.php?t=311238 1969 Camaro Pro Touring http://67-72chevytrucks.com/vboard/s...61#post3513361 Swiss Cheese: http://67-72chevytrucks.com/vboard/s...d.php?t=384390 Adjustable Trailing Arm How-To: http://67-72chevytrucks.com/vboard/s...d.php?t=321100 1968 Ford Farm Truck: http://67-72chevytrucks.com/vboard/s...=1#post6555587 |
|
|
|
 |
| Bookmarks |
|
|


 Linear Mode

