
|
Register or Log In To remove these advertisements. |
|
|
|
|||||||
 |
|
|
Thread Tools | Display Modes |
|
|
 03-01-2011, 02:56 PM
|
#1 | |
|
Just here to tinker
 Join Date: Jun 2008
Location: Holland, MI
Posts: 3,687
|
Re: Project '64 Cheapskate
Quote:
 Seriously. And now that saws-all's are easier and cheaper to get, it is even more dangerous out there. Seriously. And now that saws-all's are easier and cheaper to get, it is even more dangerous out there.
__________________
78 C10 SWB Diesel #1 (wrecked)http://67-72chevytrucks.com/vboard/s...1978+silverado 78 C10 SWB Diesel #2 (sold)http://67-72chevytrucks.com/vboard/s...d.php?t=650751 60 GMC Suburban (sold)http://67-72chevytrucks.com/vboard/s...d.php?t=445526 60 GMC 1000 (sold)http://67-72chevytrucks.com/vboard/s...d.php?t=298235 67 GMC 1500 (sold) http://67-72chevytrucks.com/vboard/s...d.php?t=803695 86 Suburban(summer unit) http://67-72chevytrucks.com/vboard/s...d.php?t=810697 88 Suburban 4x4(winter unit)https://67-72chevytrucks.com/vboard/...25#post8900725 |
|

|

|
|
03-02-2011, 01:07 AM
|
#2 |
|
Registered User
Join Date: Mar 2005
Location: apple valley, ca
Posts: 2,670
|
Re: Project '64 Cheapskate
This truck lived a hard life, and had a cabover camper for a good part of it's life that caused a lot of issues. The rear cab mounts are broken, and there are areas all over the truck where the metal is torn because of the forward camper support struts and the spare tire that was mounted in front of the grille. I grabbed the driver's side cowl extension to show you some of the damage:
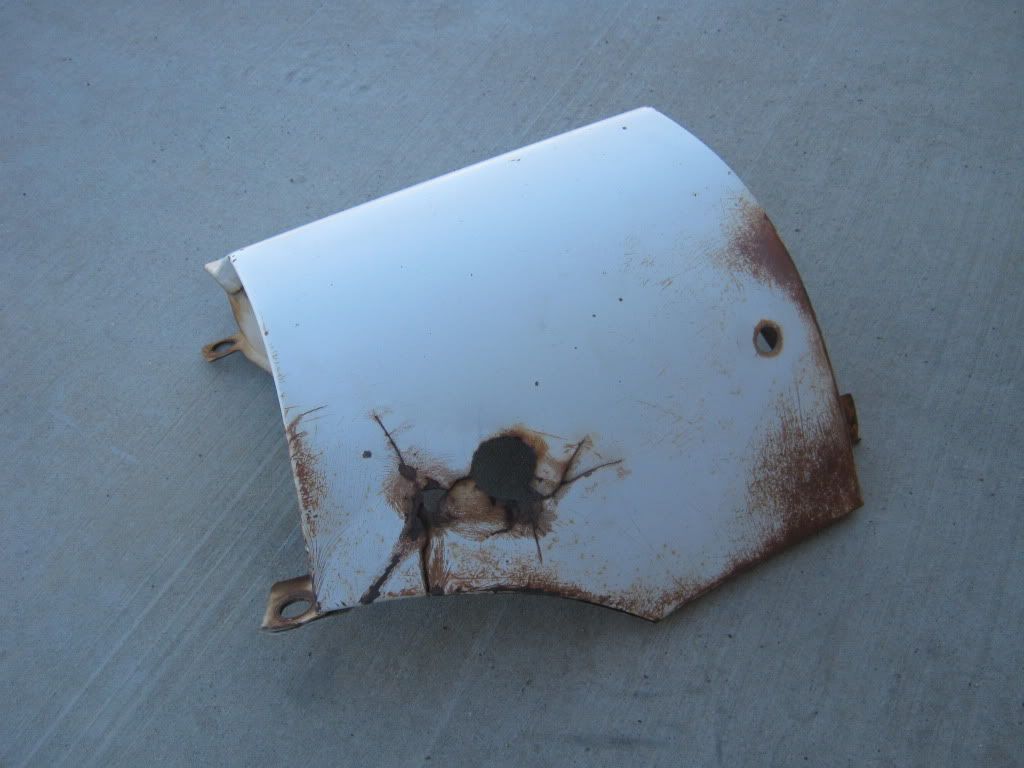 The metal is torn badly, and the previous owner drilled numerous holes. The paint on the truck is original, and I want to save what's there because I like the patina. This repair is going to be tricky because I have to hammer and dolly the metal back into place, shrink the stretched areas, make a few patches, and at the same time save as much of the original paint as I can. I saw a link on this site about a guy in Texas who used CLR and a Scotchbrite on his '59 ElCamino with AMAZING results, so I just had to try it for myself: 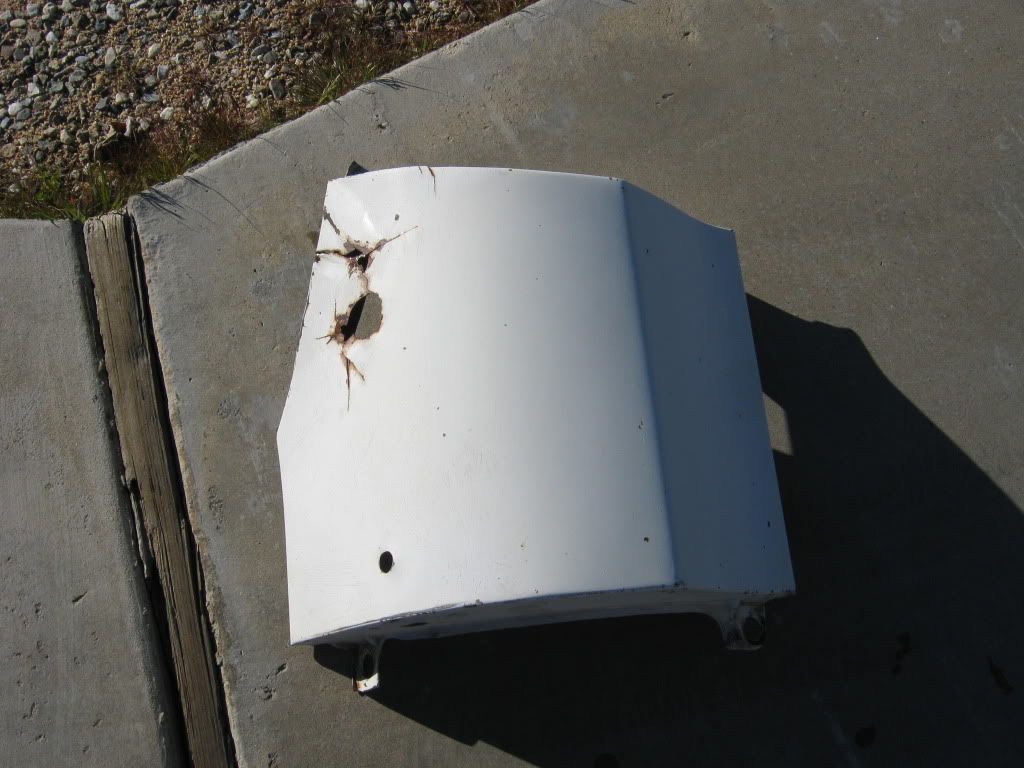 CLR is amazing! I used very little with some hot water and just light hand pressure on the Scotchbrite. 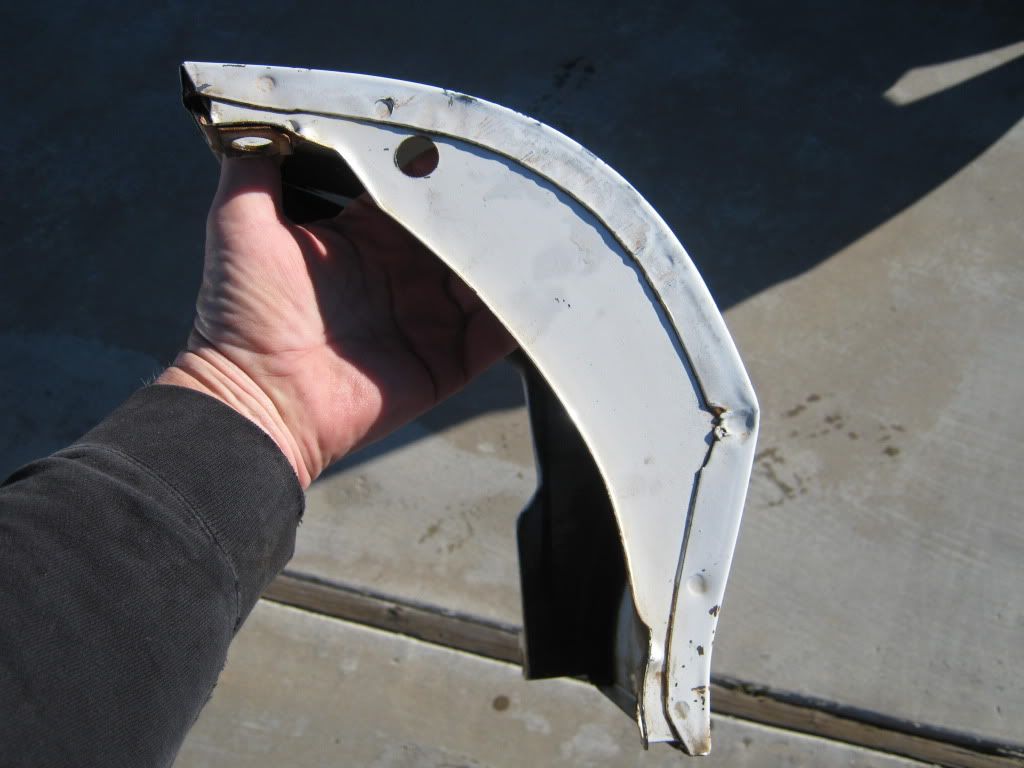 As soon as it warms up I'm doing the entire truck!!! I'm still working on the repair of the cowl extension, and I'll post more pics soon.
__________________
Check out my latest endeavor: https://roundsixpod.com My build threads: '55 Chevy: http://67-72chevytrucks.com/vboard/s...d.php?t=247512 '64 C-20: http://67-72chevytrucks.com/vboard/s...d.php?t=446527 |
|
|
|
|
03-02-2011, 01:21 AM
|
#3 |
|
Registered User
Join Date: Mar 2005
Location: apple valley, ca
Posts: 2,670
|
Re: Project '64 Cheapskate
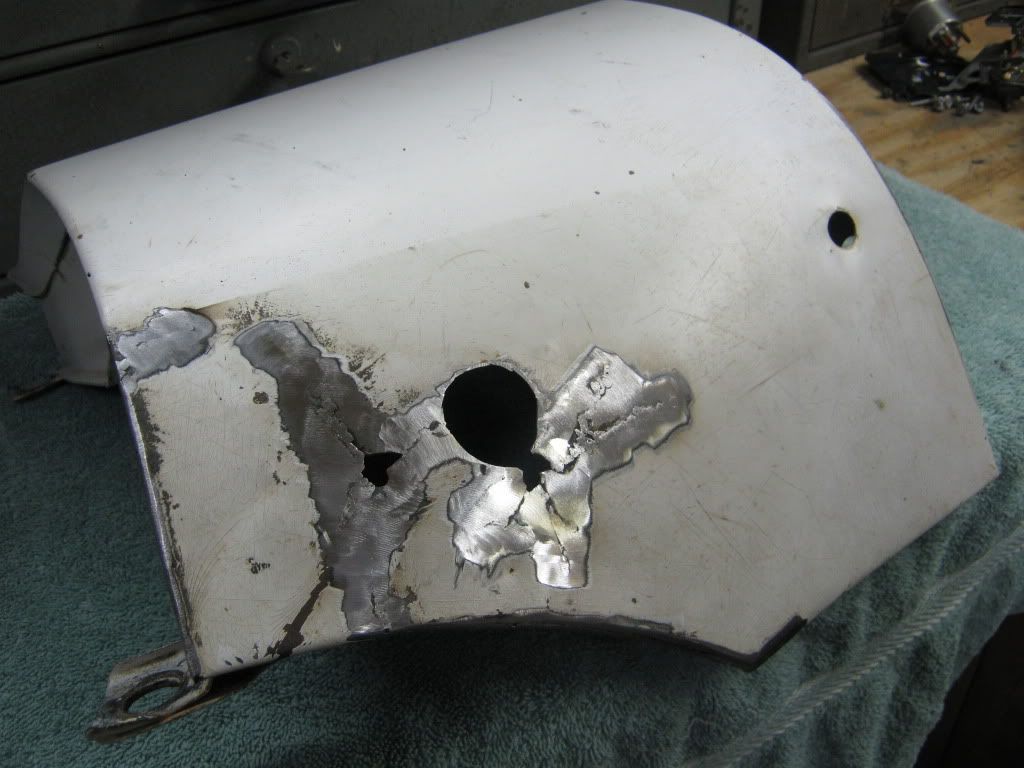
Here is the panel after I did a bunch of hammer and dolly work and slowly stitched the torn areas back together. I drilled about 15 .098 holes to stop-drill all of the cracks. The cracks had spread everywhere. Getting it all dollied and stitched back together helped get the outer shape back to where it needed to be. I'm still deciding on whether to make the patch panels the circular shape or just cut a large square panel that fixes them in one shot. The skin was also torn around the edge of the entire area where it meets the cowl, an area about 10" total. I still have to fill the 1/2" hole in the front corner, but that'll be a snap.
__________________
Check out my latest endeavor: https://roundsixpod.com My build threads: '55 Chevy: http://67-72chevytrucks.com/vboard/s...d.php?t=247512 '64 C-20: http://67-72chevytrucks.com/vboard/s...d.php?t=446527 Last edited by chevyrestoguy; 03-02-2011 at 01:28 AM. |
|
|
|
|
01-27-2012, 03:24 PM
|
#4 | |
|
Registered User
Join Date: Sep 2009
Location: Albuquerque, NM
Posts: 540
|
Re: Project '64 Cheapskate
Quote:
__________________
FAT MIKE My 59 http://67-72chevytrucks.com/vboard/s...d.php?t=400201 My 47 http://67-72chevytrucks.com/vboard/s...d.php?t=386848 |
|
|
|
|
|
| Bookmarks |
|
|


 Hybrid Mode
