
 |
|
|
#1 |
|
Registered User
Join Date: May 2014
Location: kennesaw geaorgia
Posts: 38
|
introduction
New to the forum, some great projects on the board. I've wanted a 73-87 since I was a little kid and finally got my hands on one a few weeks ago. I used to be a fabricator and worked for muscle car shops for about 7 years, I've restored more cars then I can remember and have done more ls swaps then I can count on both hands... It's about time I built one for my self... Hopefully I'll have my self a project thread up soon but I've got an 81 I've already lowerd it with spindles, springs, and a flip kit in the rear, Names Jeremy by the way..
Last edited by old Rusty C10; 06-01-2014 at 04:51 PM. |
|
|

|
|
|
#2 |
|
Registered User
Join Date: May 2014
Location: kennesaw geaorgia
Posts: 38
|
Re: introduction
Guessing I'll need a photo bucket to post pictures?
|
|
|

|
|
|
#3 |
|
Registered User
Join Date: May 2014
Location: kennesaw geaorgia
Posts: 38
|
Re: introduction
Just realized I put this in the blazer section.. I've got a c10 if admin can move it... Thanks
|
|
|

|
|
|
#4 |
|
Registered User
Join Date: Feb 2008
Location: Houston
Posts: 970
|
Re: introduction
welcome
__________________
2014 LTZ Z71 Silverado 82 C15 LQ4/4L80E Conversion 78 Suburban build (SOLD) 83 4x4 Suburban(SOLD) 82 C15 (my first truck) |
|
|

|
|
|
#5 |
|
Registered User
Join Date: May 2010
Location: Rochester NY
Posts: 831
|
Re: introduction
Welcome!
__________________
1973 k20 Suburban 350 1974 Custom stepside c-10 250 1975 Chevy stepside 454 1986 K30 Crewcab SRW 350 R.I.P- glimmertwin01- board member and good friend, you will be missed |
|
|

|
|
|
#6 |
|
Registered User
Join Date: May 2014
Location: kennesaw geaorgia
Posts: 38
|
Re: introduction
|
|
|

|
|
|
#7 |
|
Registered User
Join Date: May 2014
Location: kennesaw geaorgia
Posts: 38
|
Re: introduction
|
|
|

|
|
|
#8 |
|
Registered User
Join Date: May 2014
Location: kennesaw geaorgia
Posts: 38
|
Re: introduction
A few pictures from stock to how she sits now... The mags are hitting the lower control arms too much to just clearance so I will be picking up some 20's here soon, looking at running the mb oldschools right now
|
|
|

|
|
|
#9 |
|
Registered User
Join Date: May 2014
Location: kennesaw geaorgia
Posts: 38
|
Re: introduction
|
|
|

|
|
|
#10 |
|
Registered User
Join Date: May 2014
Location: kennesaw geaorgia
Posts: 38
|
Re: introduction
|
|
|

|
|
|
#11 |
|
Registered User
Join Date: Sep 2012
Location: Midway, NC
Posts: 3,275
|
Re: introduction
Welcome aboard. Looks like a very nice truck!
__________________
http://67-72chevytrucks.com/vboard/s...d.php?t=581873 The low buck build threads. Check'em out! http://67-72chevytrucks.com/vboard/s...d.php?t=666022 My build thread Crossmembers CC |
|
|

|
|
|
#12 |
|
Registered User
Join Date: Oct 2009
Location: canton ga
Posts: 12,724
|
Re: introduction
Welcome from a little ways up the road ,nice truck.
|
|
|

|
|
|
#13 |
|
Registered User
Join Date: Mar 2000
Location: Clute, TX.
Posts: 1,935
|
Re: introduction
I thought about a flip kit but didn't want to mess with the notch..... Fantastic looking truck there.... Love the black
__________________
2004 Silverado Crewcab 1972 Chevy Monte Carlo 2017 Chevy Tahoe |
|
|

|
|
|
#14 |
|
Registered User
Join Date: May 2014
Location: kennesaw geaorgia
Posts: 38
|
Re: introduction
Thanks guys!
After removing the bump stops and brackets the truck actually has a good 4" of clearance between the axle and frame, the exhaust even clears... If I go any lower I'll have to look into a notch but otherwise she's fine with out one.. |
|
|

|
|
|
#15 |
|
Registered User
Join Date: May 2014
Location: kennesaw geaorgia
Posts: 38
|
Re: introduction
|
|
|

|
|
|
#16 |
|
Registered User
Join Date: May 2014
Location: kennesaw geaorgia
Posts: 38
|
Re: introduction
Anyone have experience with discount tire? I'm looking at the mb old schools but they are special order and I'm not sure how long it would take to get them... If it's too long I I may just go to summit, they are only about an hour and a half away...
|
|
|

|
|
|
#17 |
|
Registered User
Join Date: May 2014
Location: kennesaw geaorgia
Posts: 38
|
Re: introduction
|
|
|

|
|
|
#18 |
|
Registered User
Join Date: May 2014
Location: kennesaw geaorgia
Posts: 38
|
Re: introduction
Been busy but I did pick up the wheels last week and got some work done on her. When I ordered my drop spindles I measure the passenger side rotor and it was 1.25" but mid install I realized the other side was 1" in the end it turns out everything but the passenger side spindle and rotor was a 1" setup so I had to replace onerotor, both calipers and even the brake hoses... Nothing was in stock pain in the ass but everything is new now and I'm done with that ordeal...
|
|
|

|
|
|
#19 |
|
Registered User
Join Date: Dec 2006
Location: SLC, UT
Posts: 706
|
Re: introduction
The project is turning out great so far!
|
|
|

|
|
|
#20 |
|
Registered User
Join Date: May 2014
Location: kennesaw geaorgia
Posts: 38
|
Re: introduction
|
|
|

|
|
|
#21 |
|
Registered User
Join Date: May 2014
Location: kennesaw geaorgia
Posts: 38
|
Re: introduction
Decided to pull off the chrome rails today, welded up the holes and the twenty other holes from god knows what that had been drilled over the years... While I was at it I decided to shave the stake holes cause I sure as hell won't be needing them...
Figured I would do a little step by step for anyone that may be new to welding or just curious... First I cut out some filler panels... 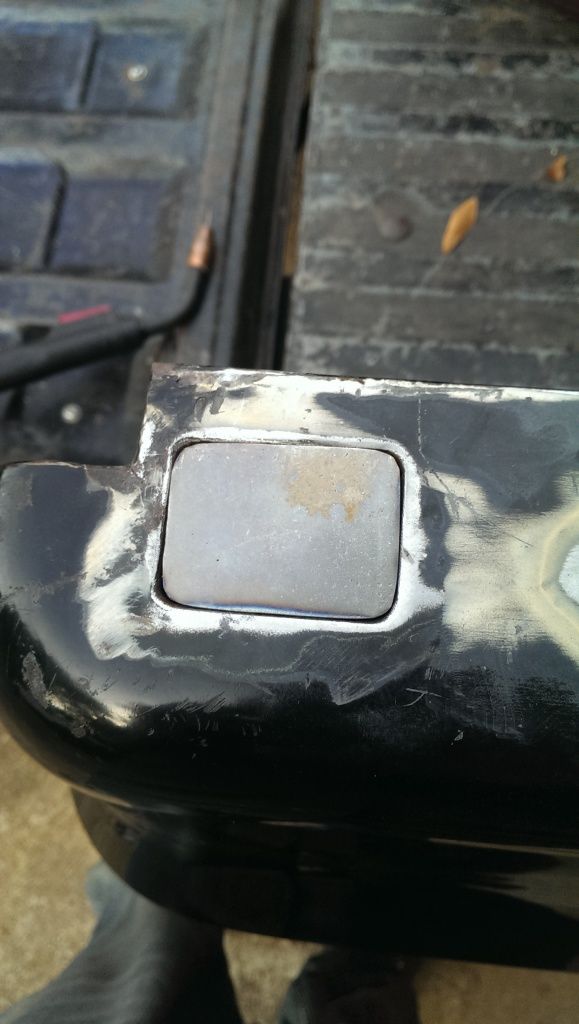 Then I tacked in place side to side then the corners making sure to keep it flush along the way... 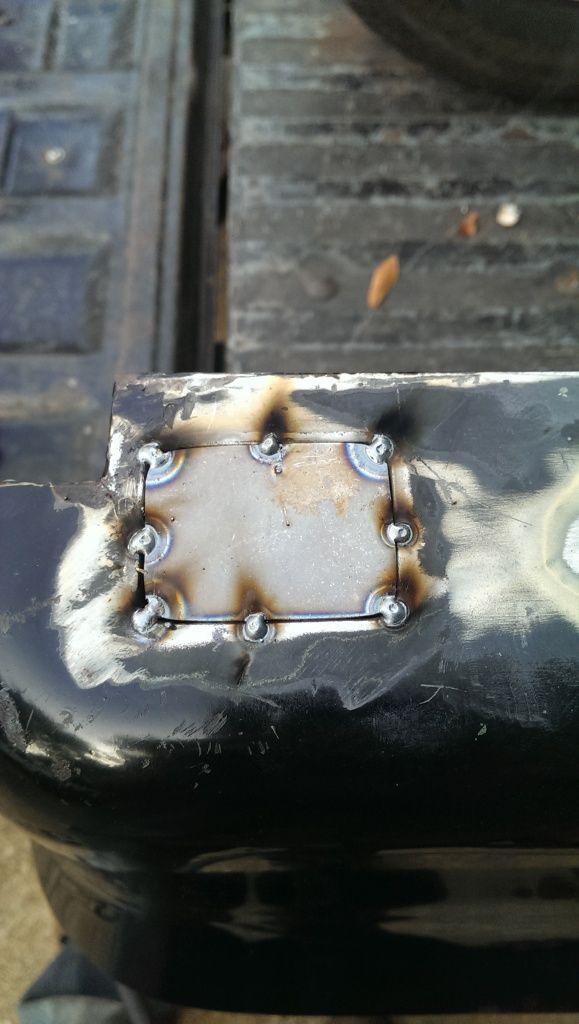 Then finish weld, I welded this different then your typical filler panel in two ways. First, I welded it a little hot since I was using 18 guage and the bed rails are two layers with a rolled lip around the stake pockets so I wasn't worried about warpage. Second, I welded it a little fat to fill in the low spots from the rolled edge... 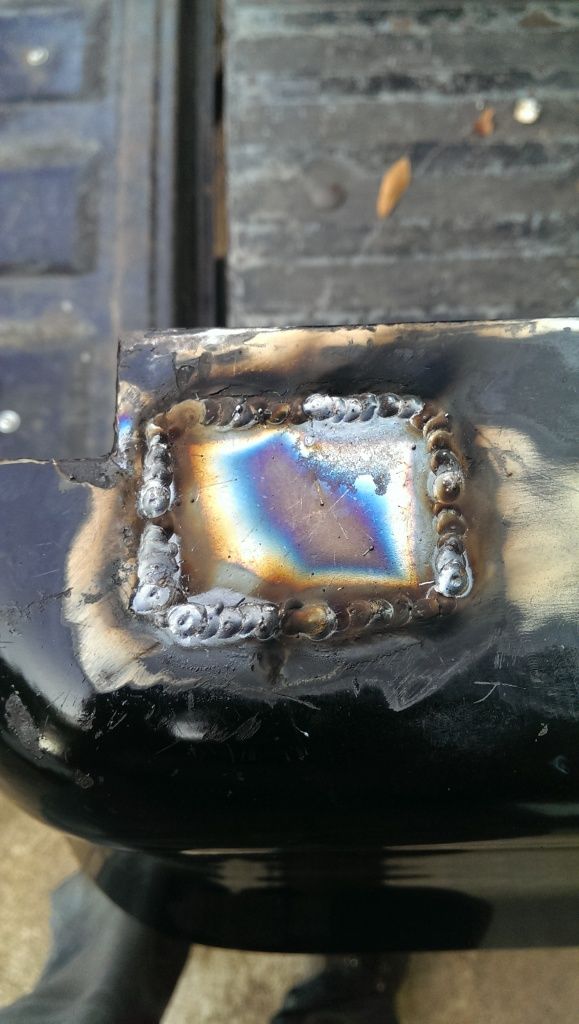 Next I ground it smooth with a flap disc making sure to keep it flat and keep it on the weld. You do not want to grind the metal thin. Then finished it off with an orbital sander.... 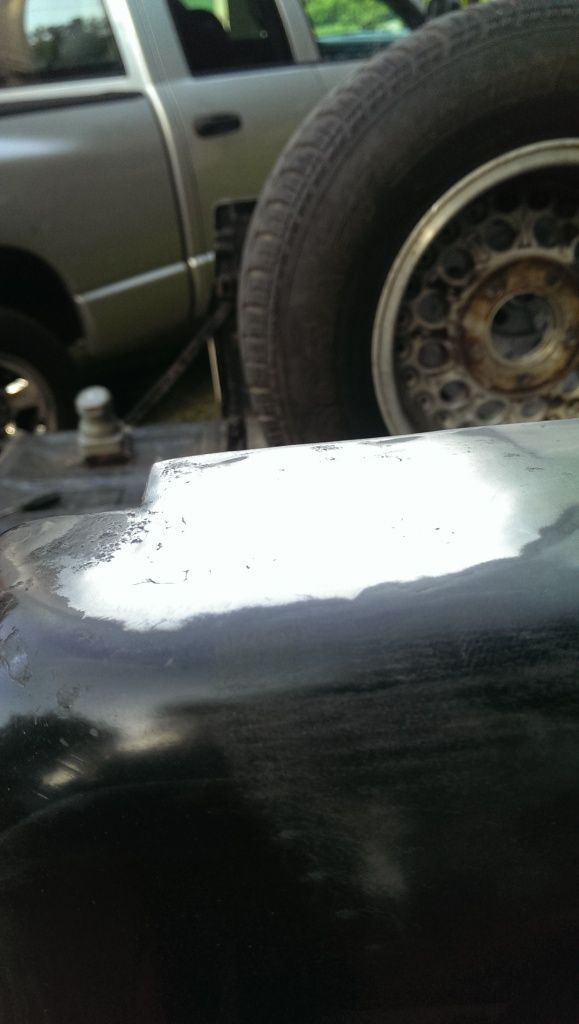 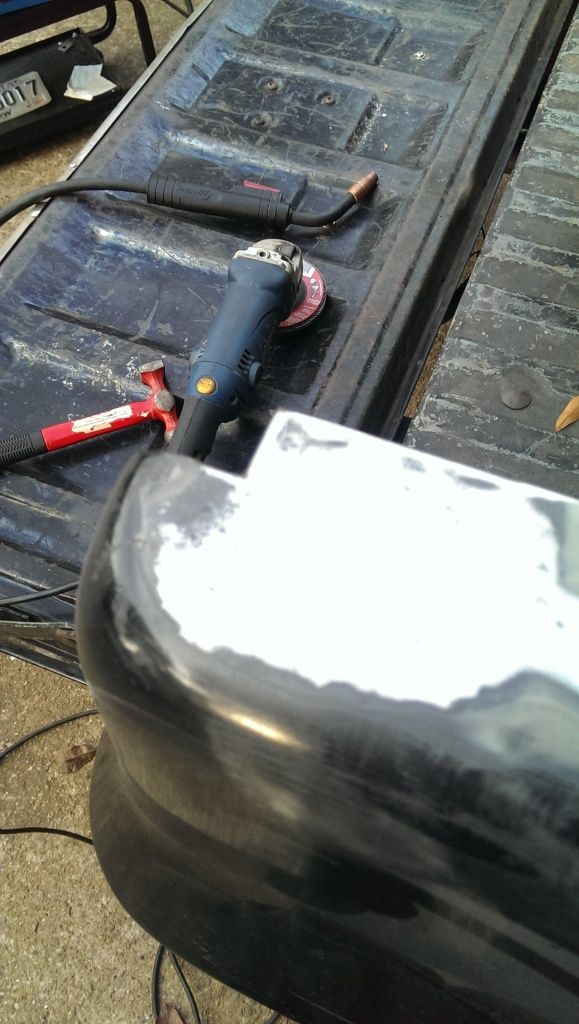 Next I just threw some spray can primer on there till I'm ready to strip her down for body work and paint... 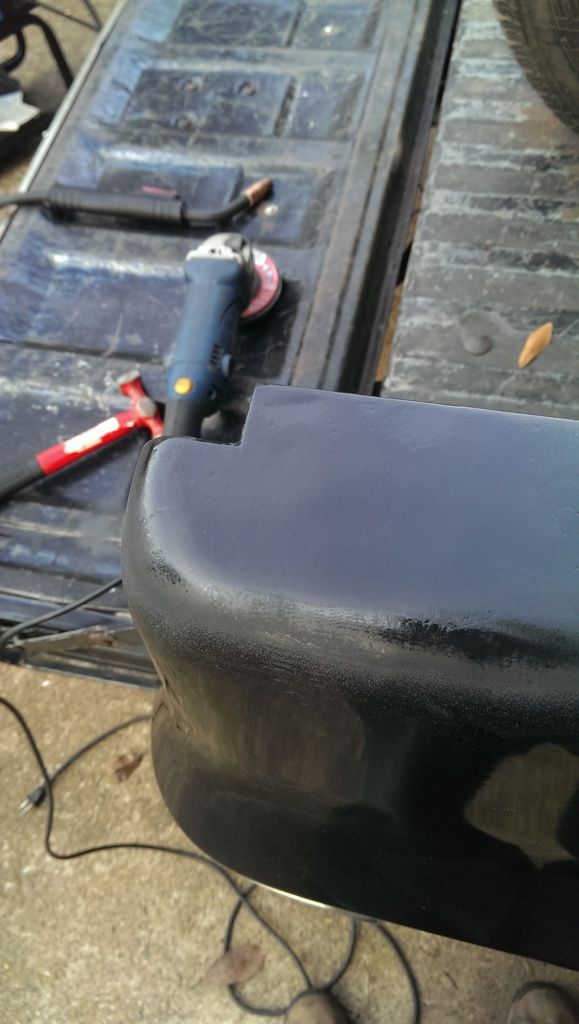 I've got some perfect match paint in a spray can I'm going to throw on there just to keep her looking shiney till I'm ready for body work I'll post some pictures of the whole truck minus the chrome rails and stake pockets later... |
|
|

|
|
|
#22 |
|
Registered User
Join Date: May 2014
Location: kennesaw geaorgia
Posts: 38
|
Re: introduction
I may be picking up a wrecked Tahoe tomorrow for the ls swap so this progress may start coming sooner then expected...
If an admin could move this to the project thread and change the title to 81 swb build or what ever seems fit for it I would appreciate it Thanks, Jeremy |
|
|

|
|
|
#23 |
|
Registered User
Join Date: May 2014
Location: kennesaw geaorgia
Posts: 38
|
Re: introduction
|
|
|

|
|
|
#24 |
|
Registered User
Join Date: Jan 2009
Location: Louisville,Ky
Posts: 5,811
|
Re: introduction
What year is that white old ford in the garage?
|
|
|

|
|
|
#25 |
|
Registered User
Join Date: May 2014
Location: kennesaw geaorgia
Posts: 38
|
Re: introduction
79
|
|
|

|
 |
| Bookmarks |
|
|