 |
|
|
#1 |
|
Registered User
Join Date: Aug 2012
Location: Tooele, Utah
Posts: 327
|
Headlight adjustment
Does somebody have the factory specs for headlight adjustment? How many feet away to adjust, how high, etc. I have a 1964 Chevrolet C10. Thanks!
__________________
1936 Chevrolet 1/2t 1964 Chevrolet C10 1964 Chevrolet C10 (sons) 1965 Chevrolet K10 Suburban 1969 Chevrolet C10 1937 Plymouth P4 |
|
|

|
|
|
#2 |
|
Registered User
Join Date: May 2011
Location: Anderson SC
Posts: 3,901
|
Re: Headlight adjustment
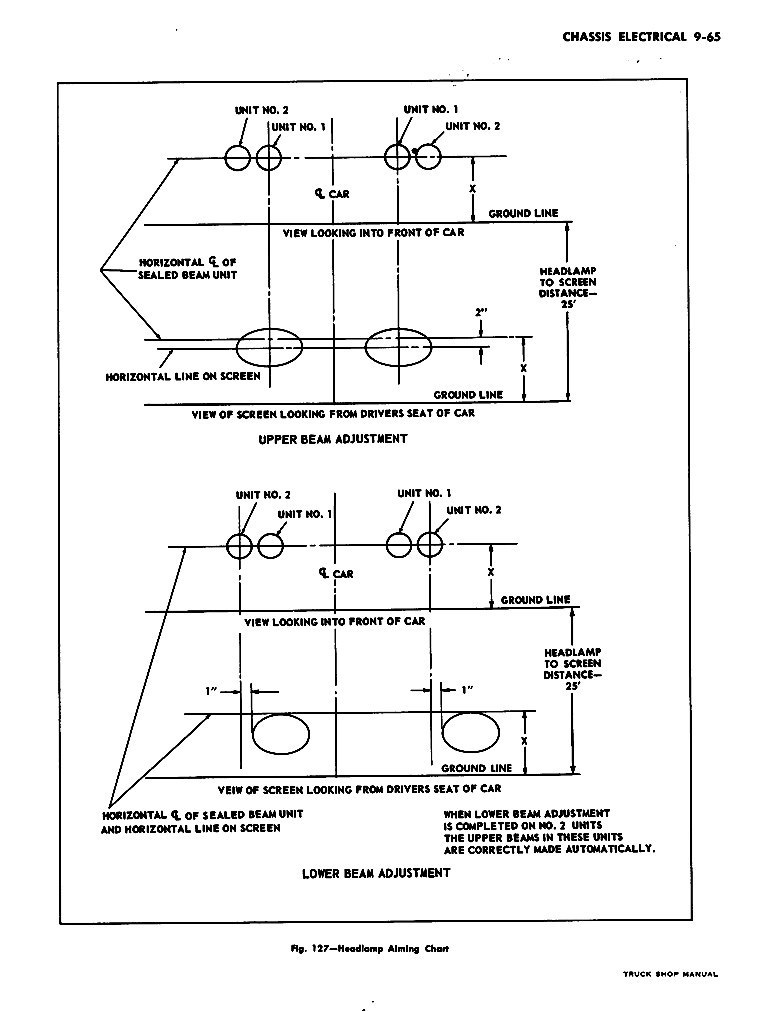
The low beam pattern needs to drop 3" over 25 feet. Measure from the center of your headlight to the ground, and subtract three inches. Find a level spot and park 25 feet from a wall, then mark the wall at that height with masking tape. The top of your low beam pattern needs to be just under the tape line. If you have sealed beams than the light pattern will be a "blob" of light that can make aiming more difficult- there won't be a defined line where the upper half of the low beam pattern stops off. If you have H4 headlights that are E-code, you'll have a sharp cut off on the top half of the low beam pattern that makes aiming easier.
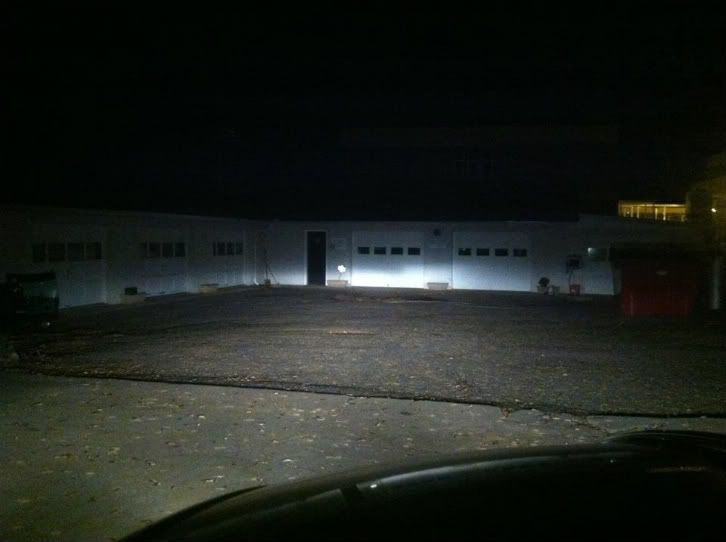
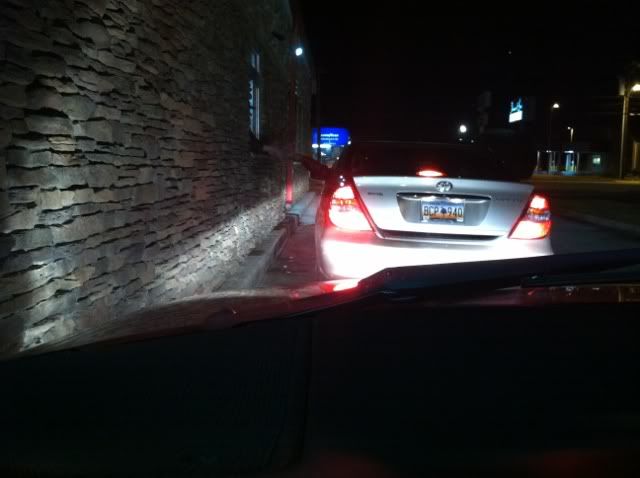
Here's a diagram. Here's a shot that compares the E-code pattern (left) to SAE/sealed beam pattern (right side). You can see that the E-code makes a sharper line for easier aiming, and less glare for oncoming traffic. 
__________________
Project Goldilocks '66 C10 Short Fleet BBW Build '65 C10 Highly Detailed Stock Restoration Thread '78 Camaro Targa Roof Build '55 International Metal/Body/Paint Work '66 F100 Full Rotisserie Restoration '40 Packard 120 Convertible Coupe Restoration How To Restore and Detail an Original Gauge Cluster How To Detail Sand Body Panels, Edges, Corners, Etc Last edited by theastronaut; 02-19-2013 at 06:02 PM. |
|
|

|
|
|
#3 |
|
Registered User
Join Date: Aug 2012
Location: Tooele, Utah
Posts: 327
|
Re: Headlight adjustment
Thanks for the info. That was exactly what I was looking for!
__________________
1936 Chevrolet 1/2t 1964 Chevrolet C10 1964 Chevrolet C10 (sons) 1965 Chevrolet K10 Suburban 1969 Chevrolet C10 1937 Plymouth P4 |
|
|

|
|
|
#4 |
|
Senior Enthusiast
Join Date: Feb 2007
Location: Spokane Valley, WA
Posts: 8,356
|
Re: Headlight adjustment
And a second thank you. I like the idea of the light pattern enough that might convince me to upgrade my headlights.
__________________
My Build Thread: http://67-72chevytrucks.com/vboard/s...d.php?t=444502 |
|
|

|
|
|
#5 |
|
Registered User
Join Date: May 2011
Location: Anderson SC
Posts: 3,901
|
Re: Headlight adjustment
Glad to help! Here's a shot of upgraded Cibie H4 E-code headlights in my '64 VW with 80/100 watt bulbs and a home built relay harness. Very wide, very bright light on low beams with a sharp upper cut off so oncoming traffic isn't blinded. I'd stick with Cibie, Hella, or Bosch for H4 housings- they are VERY high quality and produce a very well controlled beam battern. Cheaper/no-name housings won't have as good of a beam pattern- wasting light output and producing more glare for oncoming traffic. One of the best upgrades you can do!
This is in an early VW bug with the "fish bowl" headlights- the bulb is sunk into the fender so the low beam pattern isn't as wide as it would be in a flush mount application like our trucks.  This shot shows the cut off up close against a wall, these are Hella H4's in our S10 with the same harness and bulbs.  Here's the difference between cheap H4's and quality H4's. These were Delta Tech 7" Classic Convex housings. They're just remarketed chinese Weiseim housings- don't waste your money on these! They're better than sealed beams, but definitely not worth what they cost. Sharp cut off, but very narrow beam pattern.  Cibie Z Beam housings. Much wider and more evenly distributed light. 
__________________
Project Goldilocks '66 C10 Short Fleet BBW Build '65 C10 Highly Detailed Stock Restoration Thread '78 Camaro Targa Roof Build '55 International Metal/Body/Paint Work '66 F100 Full Rotisserie Restoration '40 Packard 120 Convertible Coupe Restoration How To Restore and Detail an Original Gauge Cluster How To Detail Sand Body Panels, Edges, Corners, Etc |
|
|

|
|
|
#6 |
|
Registered User
Join Date: Apr 2012
Location: Cambridge, Ontario, Canada
Posts: 1,771
|
Re: Headlight adjustment
And a third thank you to the OP, and the contributors... saved this thread in my electrical thread folder for future reference!
__________________
Craigerrr My build thread, CRGRS 66 Winter Build: http://67-72chevytrucks.com/vboard/s...09#post5638709 |
|
|

|
|
|
#7 |
|
Registered User
 Join Date: Aug 2011
Location: Kingman, AZ
Posts: 1,574
|
Re: Headlight adjustment
Quick question if I may?
We installed a 4 headlight system from various parts and pieces from a variety of trucks. Because we had to assemble the system from lots of parts the lights are pointed in all different directions and I need to know a starting point on where (how) they should be aimed to begin with. I guess the question is.... Where (how) do you get the lights aimed more or less where they are supposed to be so you have a starting point to finish the fine tuning?
__________________
http://s994.photobucket.com/albums/af62/ScottAz2/ |
|
|

|
|
|
#8 |
|
Registered User
Join Date: Nov 2013
Location: Comox BC
Posts: 337
|
Re: Headlight adjustment
Bringing this up for Figuarus.
|
|
|

|
|
|
#9 | |
|
Senior Enthusiast
Join Date: Feb 2007
Location: Spokane Valley, WA
Posts: 8,356
|
Re: Headlight adjustment
Quote:
 Just park the truck 25 feet from the measuring surface, and make sure it is on level ground. I find it easiest to block the low beam lamps when doing the high beams with either cardboard or a helper. It can also be helpful to block everything but one lamp at a time if they are really goofed up in the beginning.
__________________
My Build Thread: http://67-72chevytrucks.com/vboard/s...d.php?t=444502 |
|
|
|

|
 |
| Bookmarks |
|
|