
 |
|
|
|
|
#1 |
|
Senior Member
 Join Date: May 2007
Location: Doodah Kansas
Posts: 7,774
|
Re: '51 Hodge Podge
looks cool!
__________________
the mass of men live lives of quiet desperation if there is a problem, I can have it. new project WAYNE http://67-72chevytrucks.com/vboard/s...d.php?t=844393 |
|
|

|
|
|
#2 |
|
Registered User
Join Date: Nov 2013
Location: nanaimo, bc
Posts: 19
|
Re: '51 Hodge Podge
Thanks, I had a look through your thread and I enjoy the symbiosis of your builds. I imagine it's more cost effective that way, not to mention time saved hunting down parts. One day I'd like to try doing a swap with a Crown Vic chassis, keeping all the systems, and a TF body. It would take some planning tho, the missus gets annoyed with just one vehicle blown apart around the yard. Something about having to park on the street...
|
|
|

|
|
|
#3 |
|
Registered User
Join Date: Nov 2013
Location: nanaimo, bc
Posts: 19
|
Re: '51 Hodge Podge
Ok, what's next. I put the stock truck exhaust manifolds on and there was definitely a spatial conflict between them and the frame rails.
[IMG] 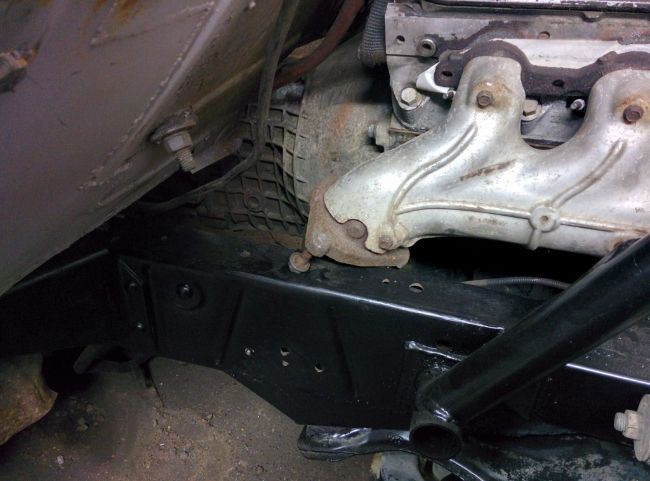 [/IMG] [/IMG]The drivers side is worse but nothing a little surgery couldn't cure. I also had to make a relief for the steering shaft, it protrudes about a 1/4" into the exhaust path. The drivers side will still flow better than the stock stock passenger side tho so I'm content with the way it turned out. I have no idea whether they'll hold up after a few heat cycles but they are currently crack free. I'll get some pics with them mounted as soon as the engine is back in. |
|
|

|
|
|
#4 |
|
Registered User
Join Date: Nov 2013
Location: nanaimo, bc
Posts: 19
|
Re: '51 Hodge Podge
I finally got around to doing some work on the firewall, a chore I was loathing since the beginning. Filled 83 holes, moved the steering column hole over an inch and welded on a backing plate for the brake booster.
I also test fit the cross member and trailing arms from a '71 c-10 and bolted up an 8.8 rear end from an Explorer. I'm not too sure what path I'll head down for the rear suspension. I'm leaning towards a basic shrader valve air bag set up. I like the idea of having adjustable spring rate as well as the ability to haul stuff on occasion. [IMG] 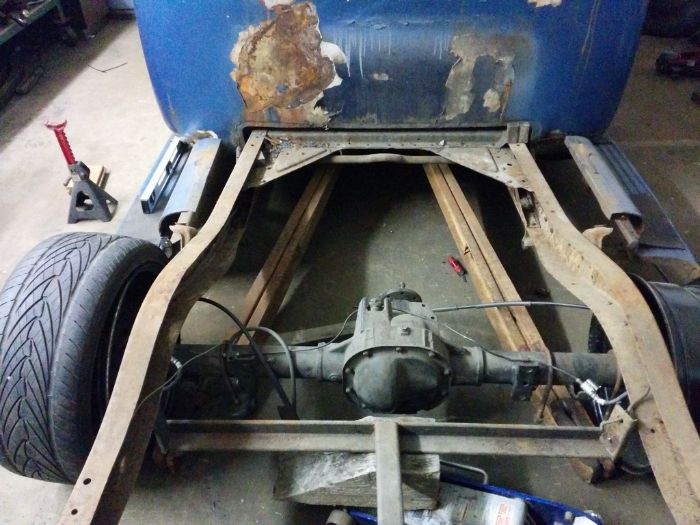 [/IMG] [/IMG]
|
|
|

|
|
|
#5 |
|
Registered User
Join Date: Nov 2013
Location: nanaimo, bc
Posts: 19
|
Re: '51 Hodge Podge
I've been slacking this week and haven't done a whole lot on the truck. I find that if my momentum slows on a build, I start working on something else so I decided to put the bed on to check the fit. I bought some 18x7.5" steel wheels a few months back from a Ford Escape, they have a fairly high positive offset that worked perfect on the front, not so much on the back. The bedsides fouled by about 3" each side so I had a go at flipping the barrels on the wheels.
[IMG] 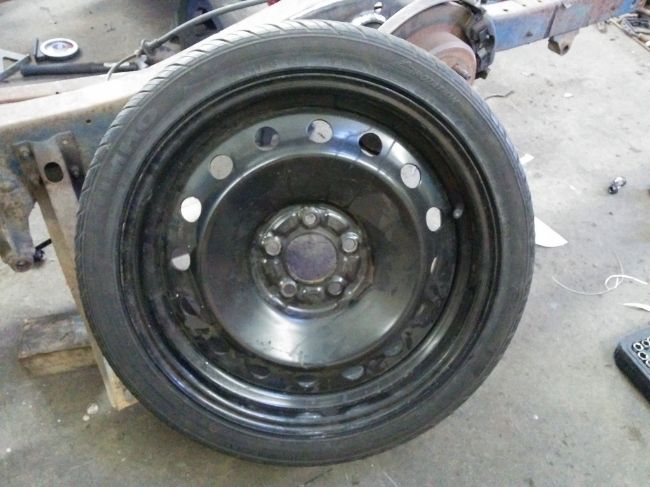 [/IMG] [/IMG][IMG] 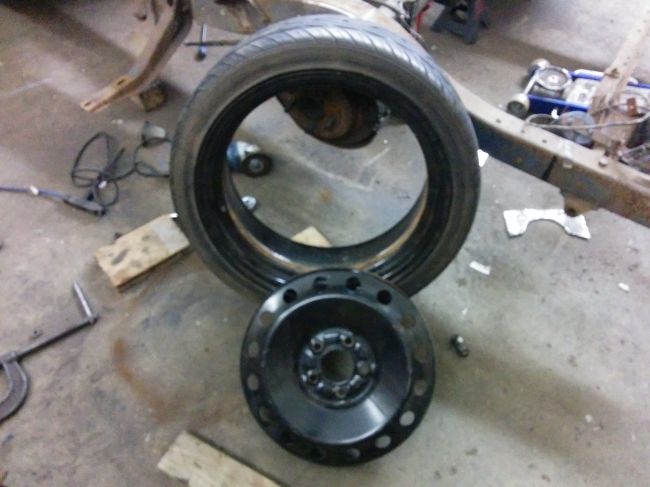 [/IMG] [/IMG][IMG] 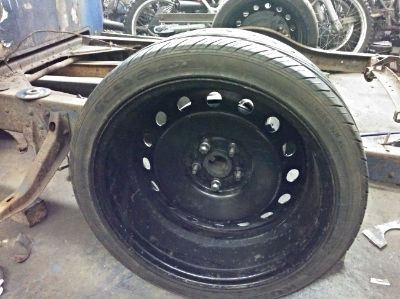 [/IMG] [/IMG]I should have about 1/2" of clearance to the fender if I measured right ( sometimes a crapshoot tho). I'll put the bed on tomorrow and see what's up. |
|
|

|
|
|
#6 | |
|
Senior Member
 Join Date: May 2007
Location: Doodah Kansas
Posts: 7,774
|
Re: '51 Hodge Podge
Quote:
I like how you flipped the barrels, I was thinking of 18" camaro steels with reverse offset for the next one
__________________
the mass of men live lives of quiet desperation if there is a problem, I can have it. new project WAYNE http://67-72chevytrucks.com/vboard/s...d.php?t=844393 |
|
|
|

|
|
|
#7 |
|
Registered User
Join Date: Nov 2013
Location: nanaimo, bc
Posts: 19
|
Re: '51 Hodge Podge
That sounds like the perfect setup Joedoe. Our next house will definitely have an expansive yard, I'd love to have somewhere to park a trailer.
The 18" Camaro steelies would be a nice choice, I've only seen one set for sale and fella wanted $800 for them. I'm assuming they are more reasonable around your parts. |
|
|

|
|
|
#8 | |
|
Registered User
Join Date: Feb 2013
Location: Fallbrook California
Posts: 250
|
Re: '51 Hodge Podge
Quote:
|
|
|
|

|
|
|
#9 |
|
Registered User
Join Date: Nov 2013
Location: nanaimo, bc
Posts: 19
|
Re: '51 Hodge Podge
|
|
|

|
|
|
#10 |
|
Registered User
Join Date: Nov 2013
Location: nanaimo, bc
Posts: 19
|
Re: '51 Hodge Podge
I managed to put the box on yesterday to check the wheel offset and the wheelbase, quite the ordeal by yourself.
[IMG] 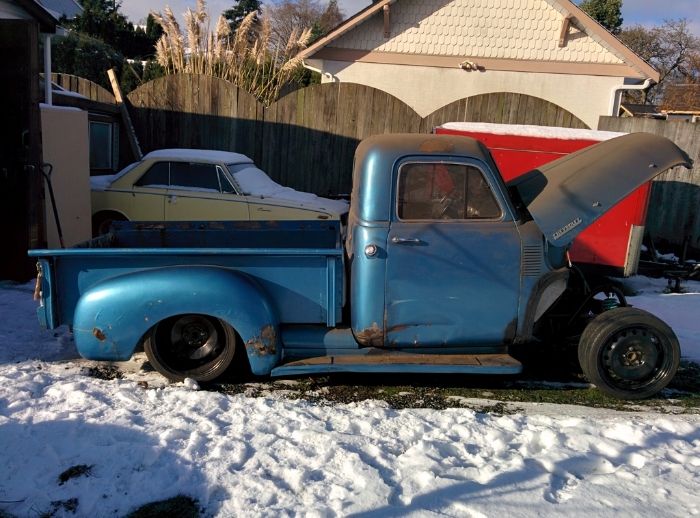 [/IMG] [/IMG]I'm happy with the way the wheels sit in the fenders so I trued up the centers and welded them in. Wound up with 5.5" of backspacing on the 7.5" rims. It gives me about 3/4" clearance on each side. Hopefully it will be enough with Heim joints on the panhard bar. [IMG] 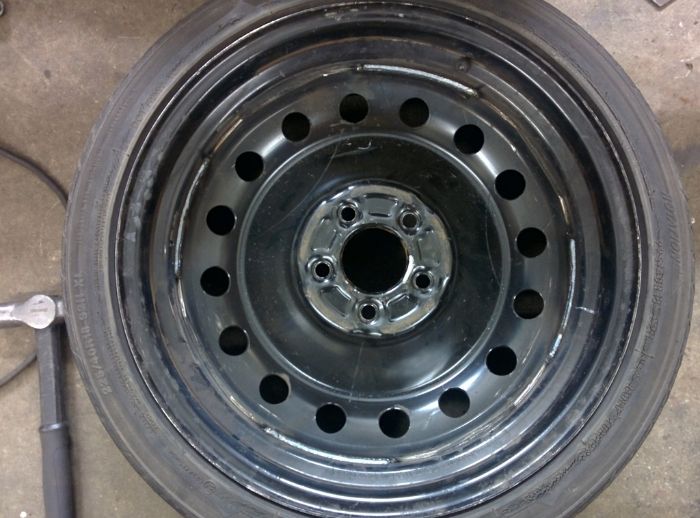 [/IMG] [/IMG]I also decided to put in a small notch in the frame. I used some 4" pipe and then I got ridiculous with the reinforcements. A 5/16" plate in the center of the frame over the notch, another on the outside of the frame and then boxed the inside as well. There is a thread on here where someone ran all the numbers and said that with the outside plate and the boxing plate, the frame would be as strong as original so I added one more to the equation just in case. I plan to use it as a truck on occasion. [IMG] 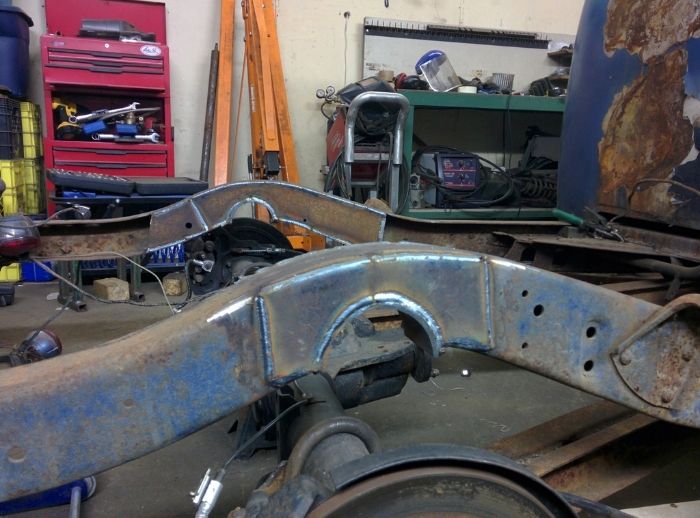 [/IMG] [/IMG]
|
|
|

|
|
|
#11 |
|
Registered User
Join Date: Feb 2013
Location: Fallbrook California
Posts: 250
|
Re: '51 Hodge Podge
Quote:
|
|
|

|
 |
| Bookmarks |
|
|