
|
Register or Log In To remove these advertisements. |
|
|
|
|||||||
 |
|
|
Thread Tools | Display Modes |
 11-03-2016, 11:03 PM
|
#26 |
|
Formerly- 1972SuperCheyenne
 Join Date: Oct 2008
Location: Wake Forest NC
Posts: 5,782
|
Re: Project "Molly" - 1952 Chevy 3100 S10 swap
Looks awesome so far! Can't wait to see more!
__________________
--Josh My Build Thread:http://67-72chevytrucks.com/vboard/s...d.php?t=799218 A good crossthread is better than Loctite any day. Life is not about what you have, but who you have to share it with. |

|

|
|
11-05-2016, 09:31 AM
|
#27 |
|
Registered User
Join Date: Oct 2016
Location: Hephzibah, GA
Posts: 33
|
Re: Project "Molly" - 1952 Chevy 3100 S10 swap
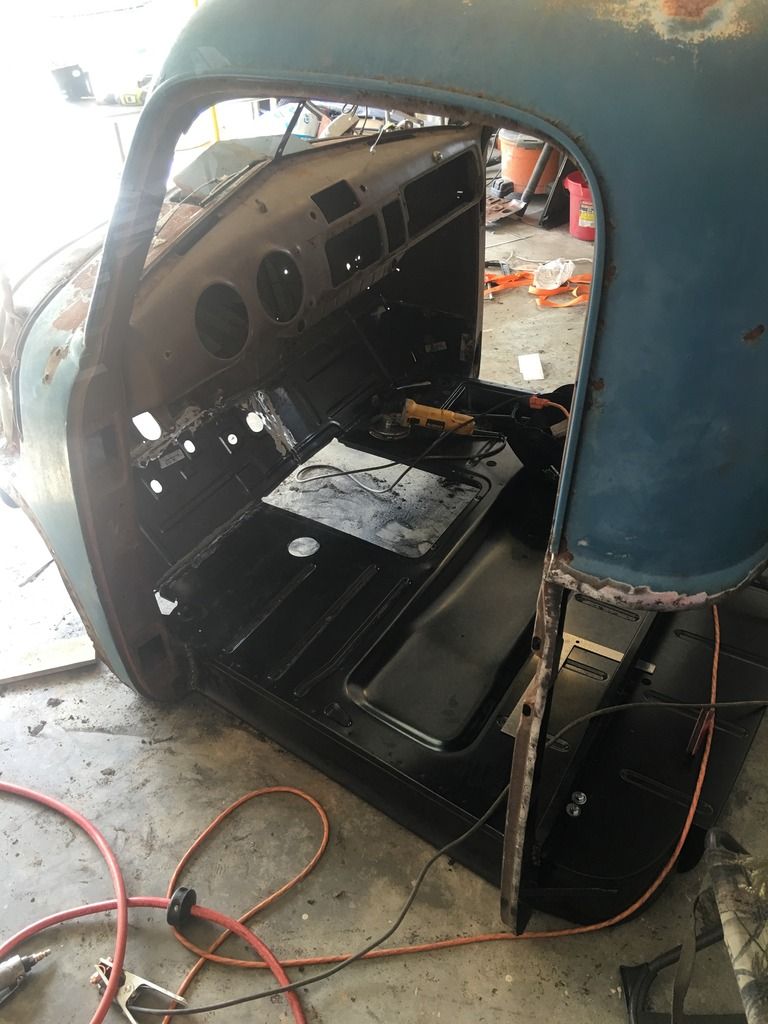
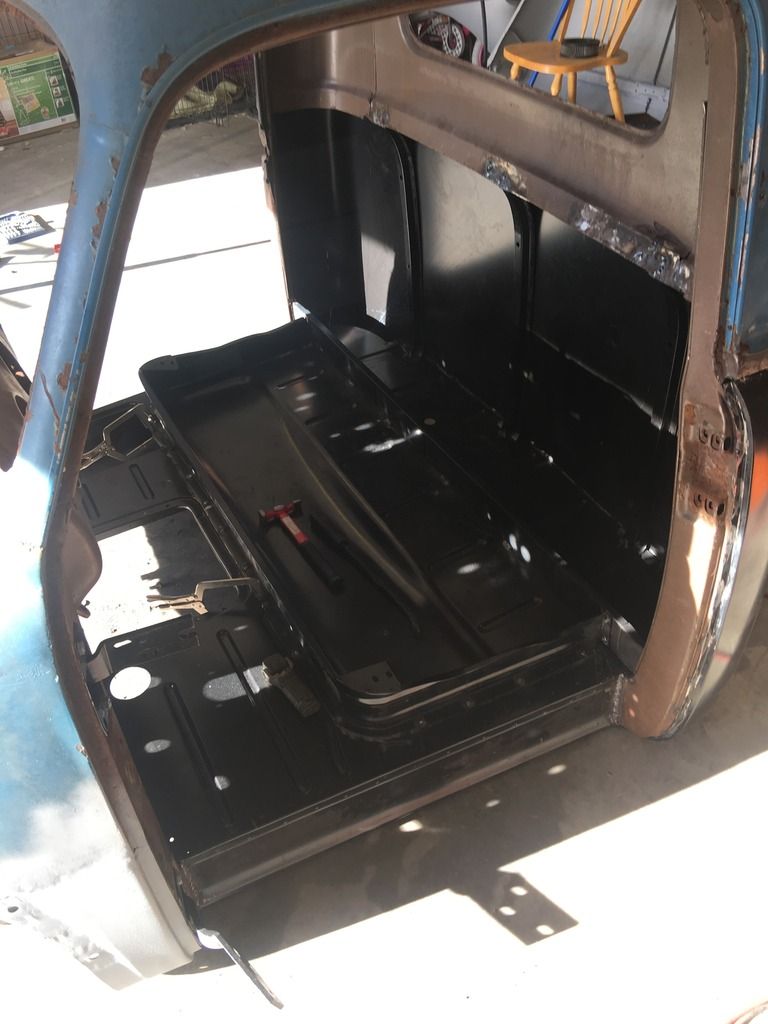
Well it's my weekend off and I've been itching to get some work done. My wife came out and helped me prep and prime the inside of the cab. Omni epoxy primer from PPG is great stuff. Mixes smooth and shoots even smoother out of the gun. Also got my cab mounts welded up. Frame should be ready tomorrow to tack the mounts on.
Finished welding the cab mounts 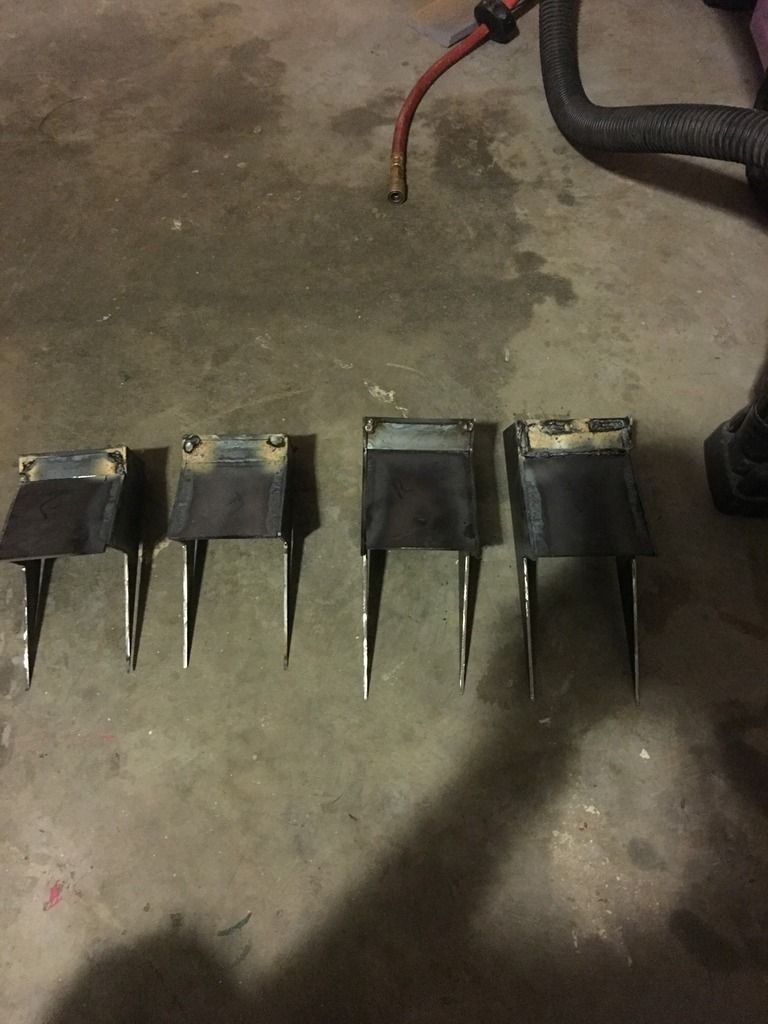 Got the inside primed 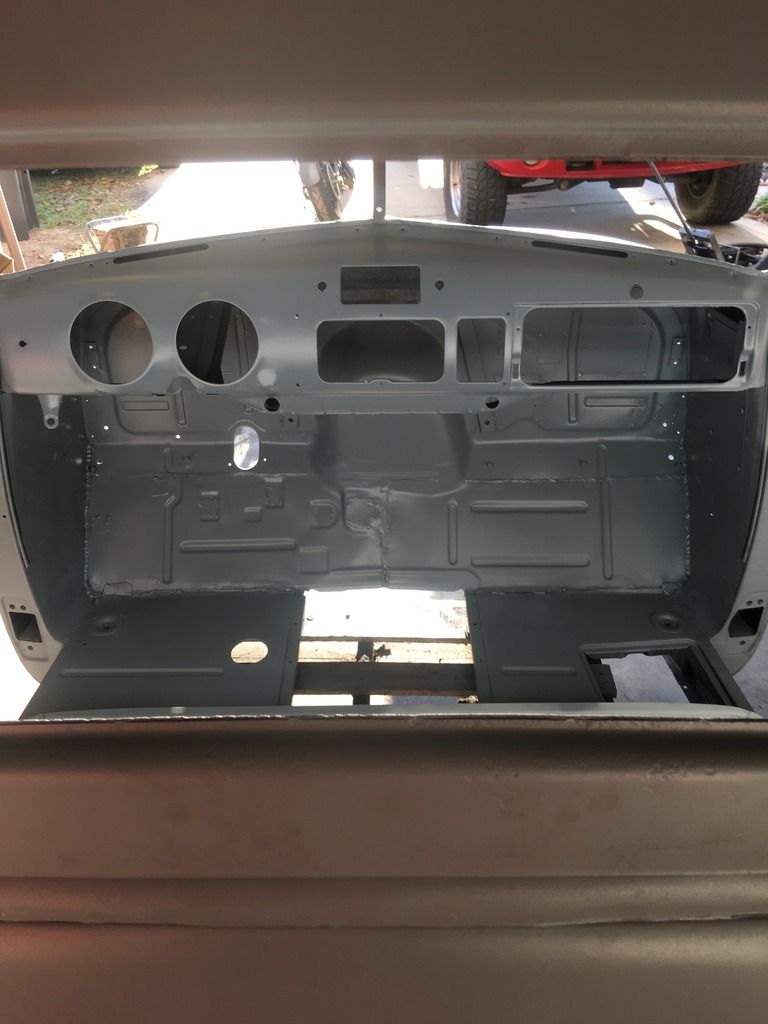 Someone's excited!!!! 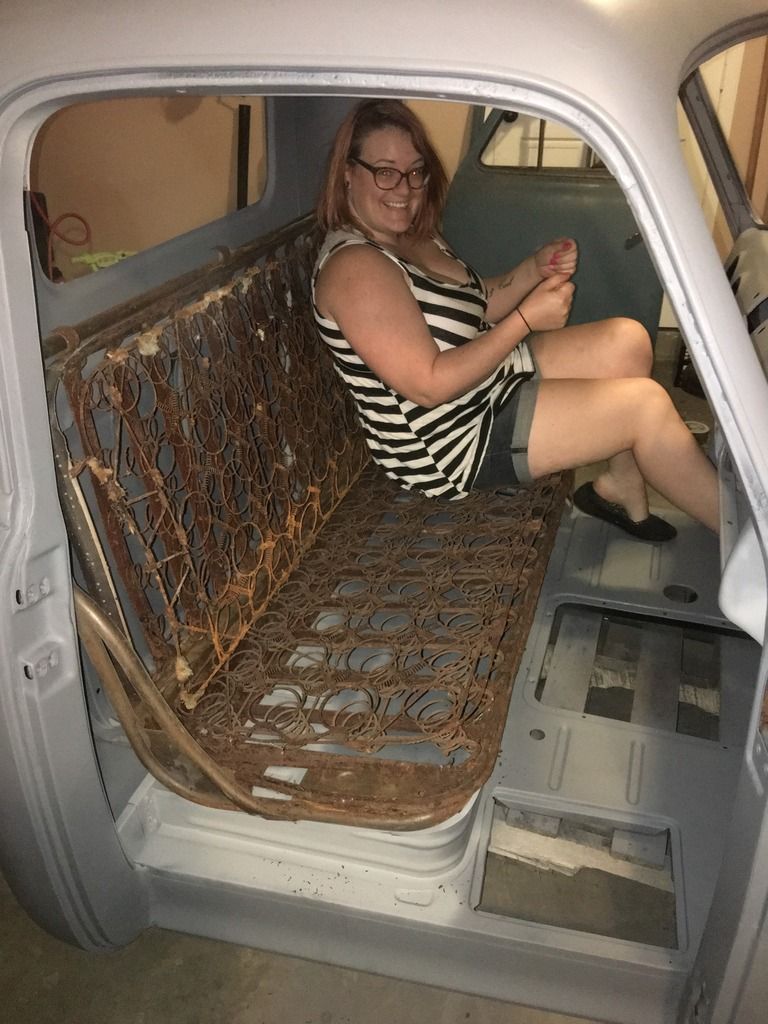
|
|
|
|
|
11-05-2016, 12:19 PM
|
#28 |
|
Senior Member
Join Date: Jul 2012
Location: Oblong, Illinois
Posts: 7,028
|
Re: Project "Molly" - 1952 Chevy 3100 S10 swap
Good progress. It certainly is a plus to have the wife involved!
|
|
|
|
|
11-11-2016, 02:24 PM
|
#29 |
|
Registered User
Join Date: Oct 2016
Location: Hephzibah, GA
Posts: 33
|
Re: Project "Molly" - 1952 Chevy 3100 S10 swap
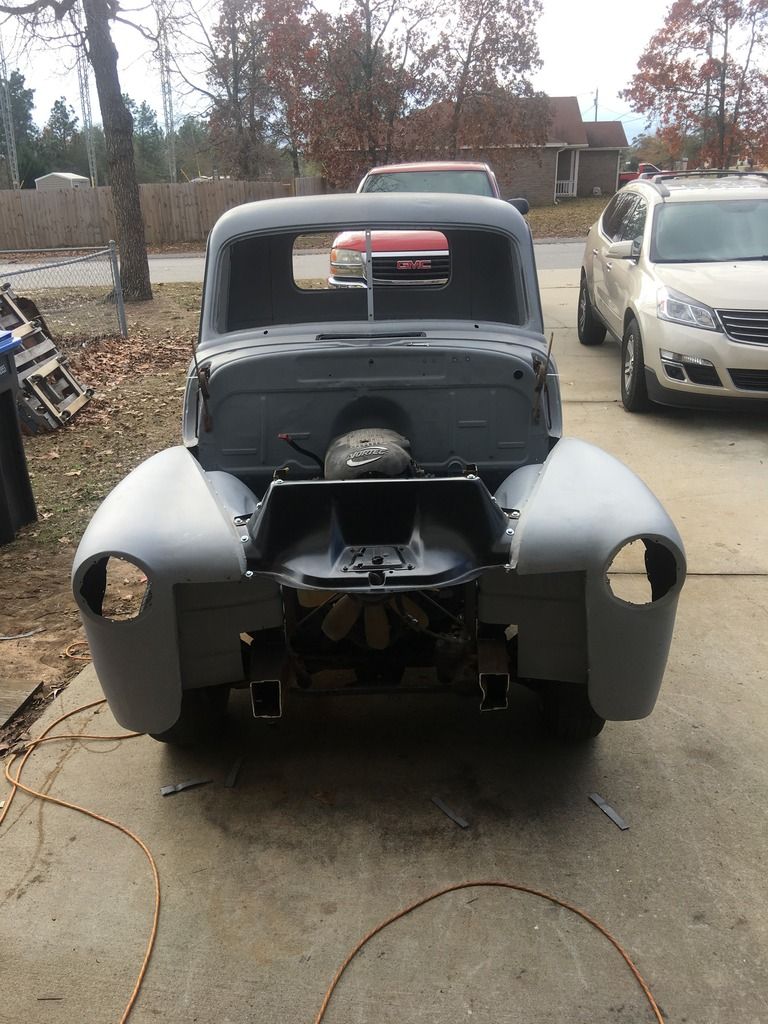
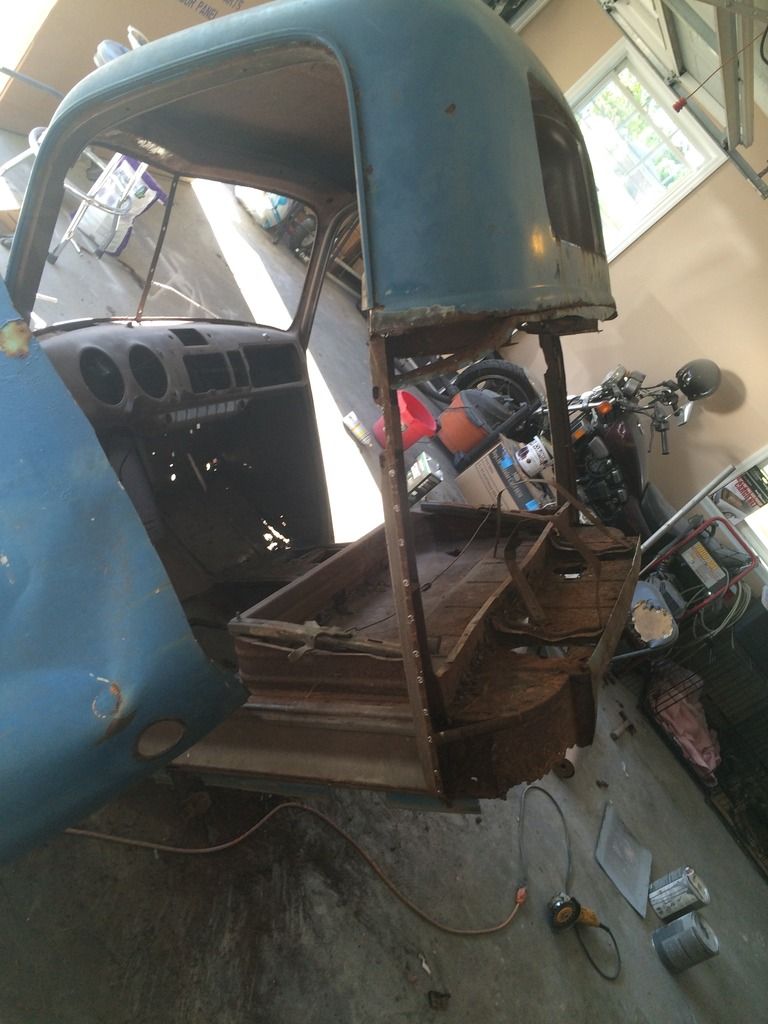
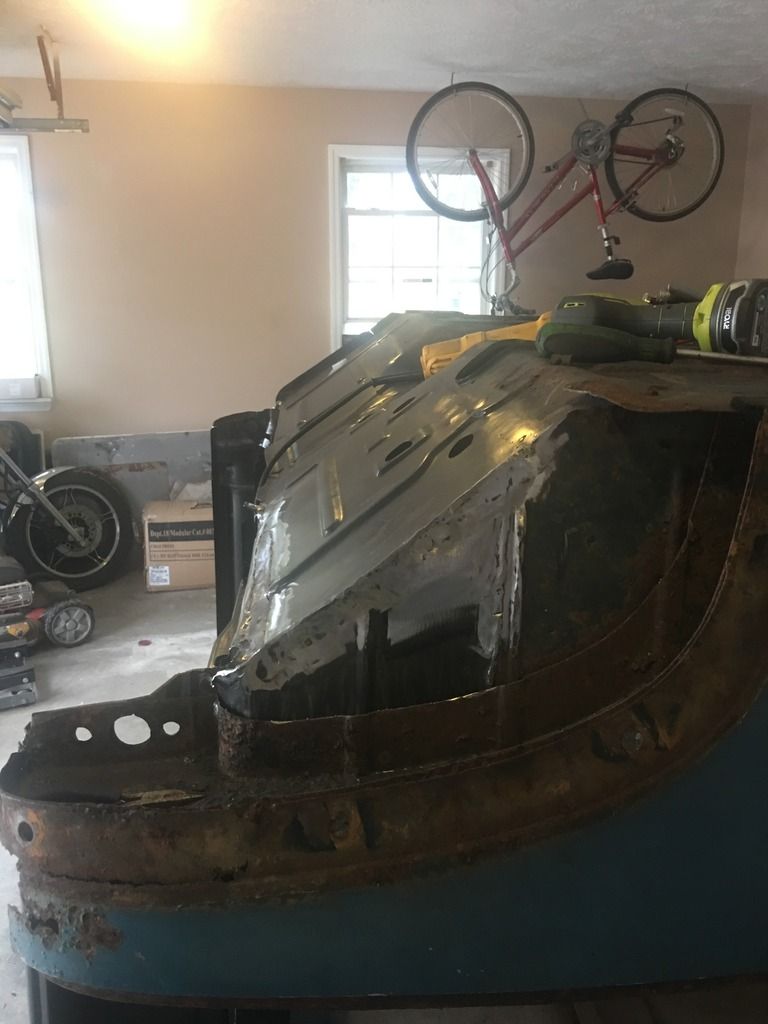
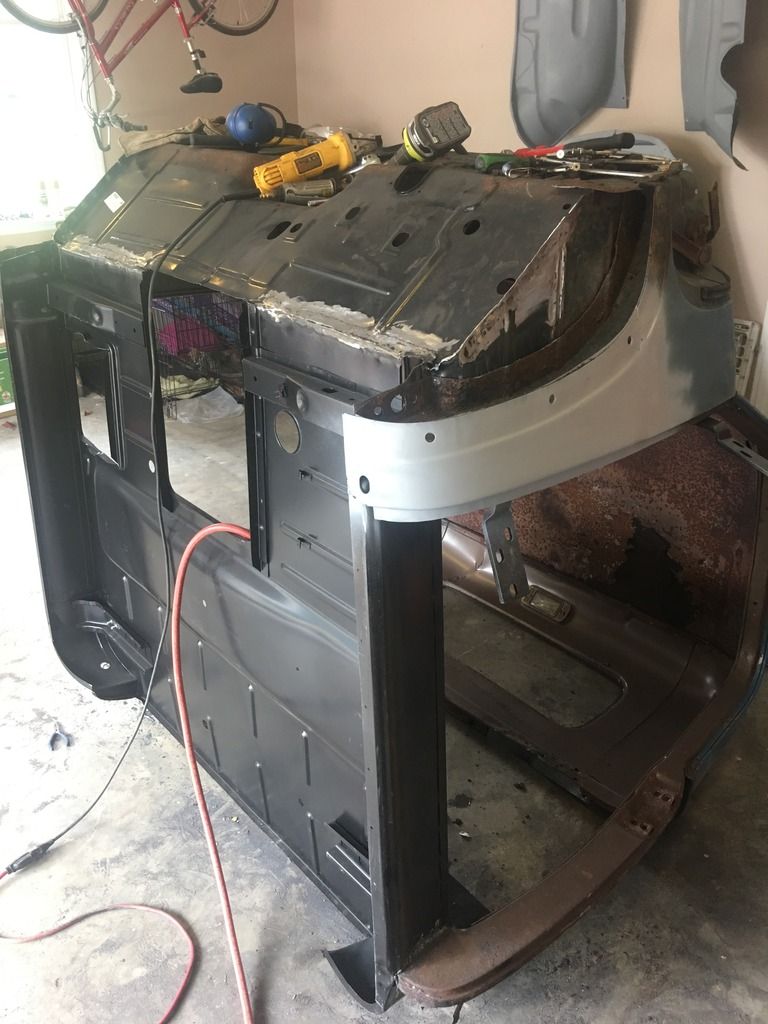
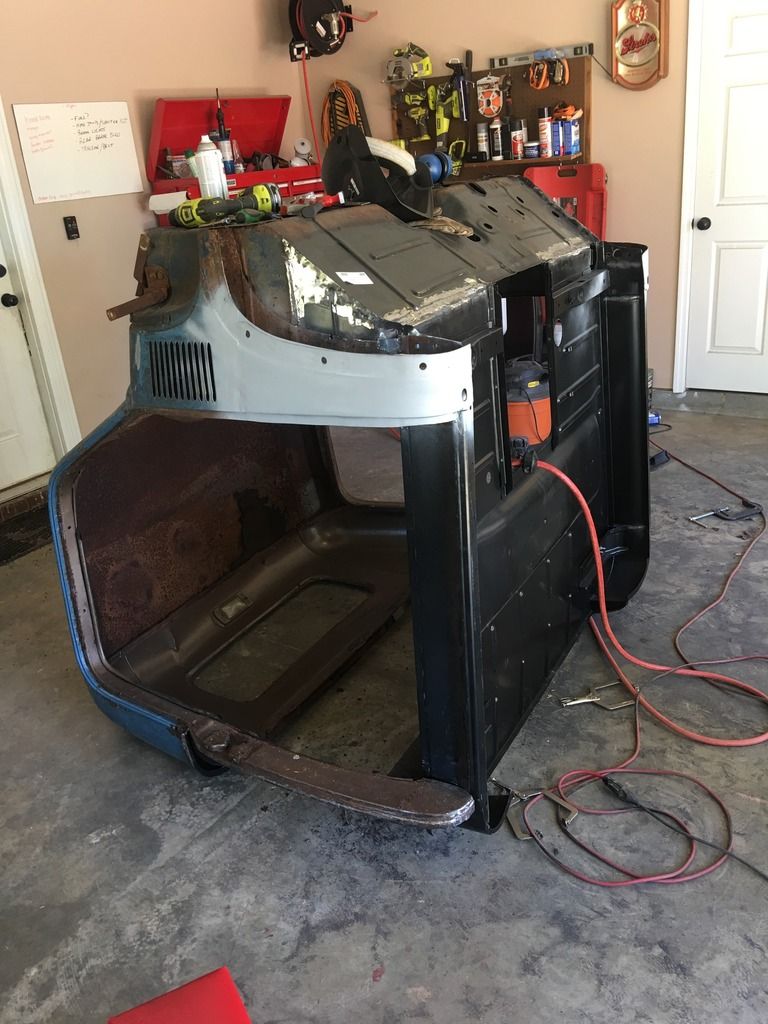
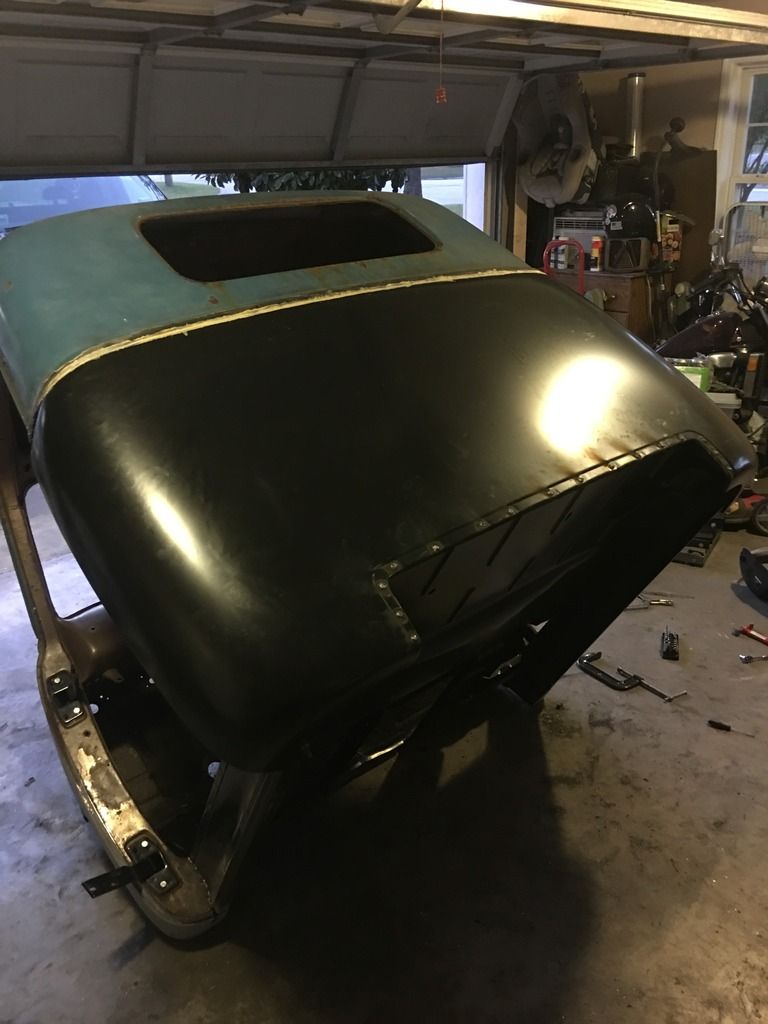
Well, I feel like I got a lot of work done the past few days. I sold the body panels off the S10 and the guy was supposed to take them off about 2 weeks ago. I went over to his shop and he had barely touched it. I picked it up on the trailer and brought it back to the house. It took me about 3 hours to get the whole body and motor/tranny pulled and back on the trailer. I washed the center part of the frame with muriatic acid and neutralized it with ammonia to get the wax and nastiness off the frame for welding.
Got my cab mounts tacked on the frame 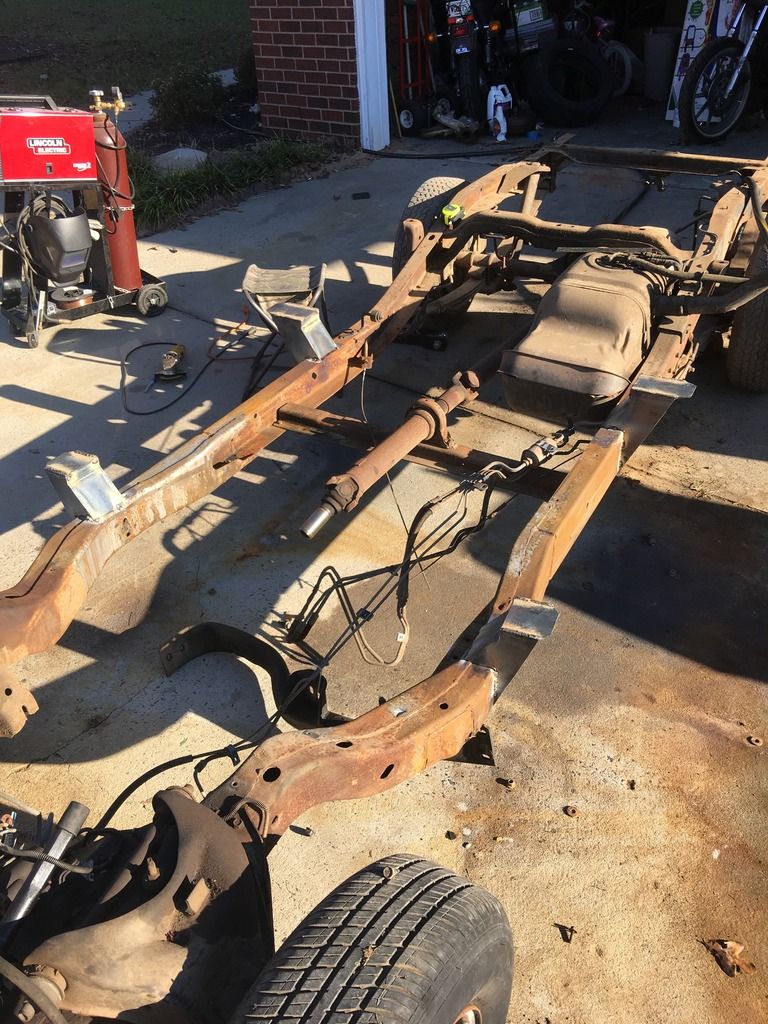 Getting the cab up on the frame by myself was a bit sketchy, but I got it figured out. 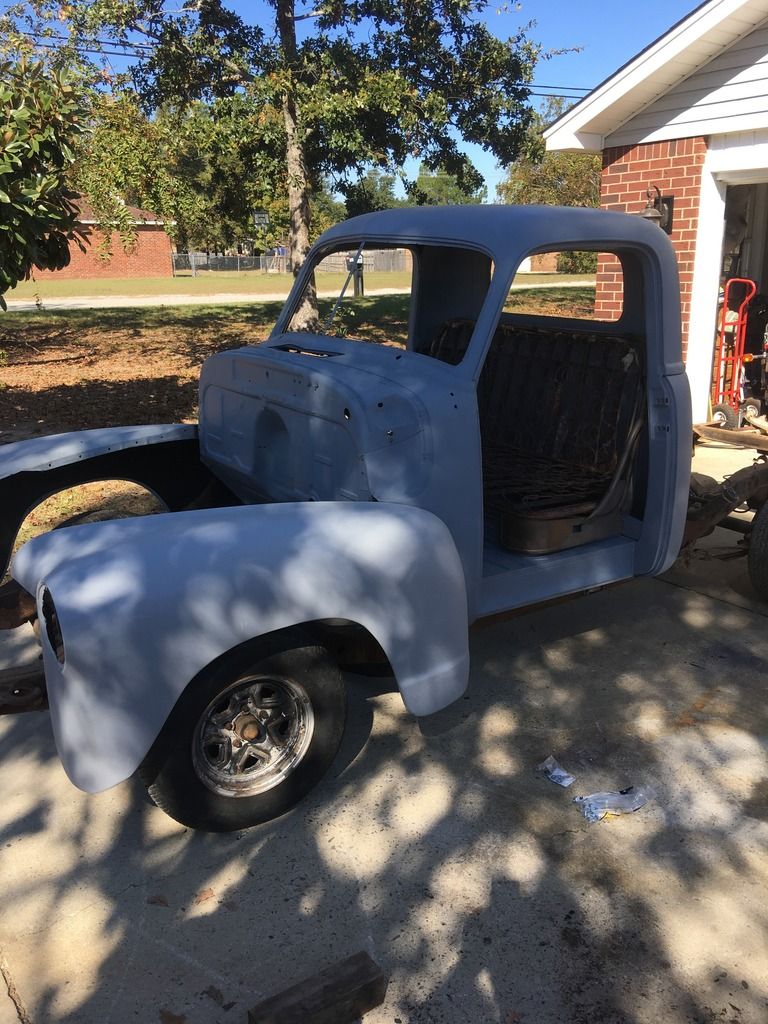 Checked the fenders and hood for fit. it's a bit off, but nothing that can't be fixed with a bit of massaging. 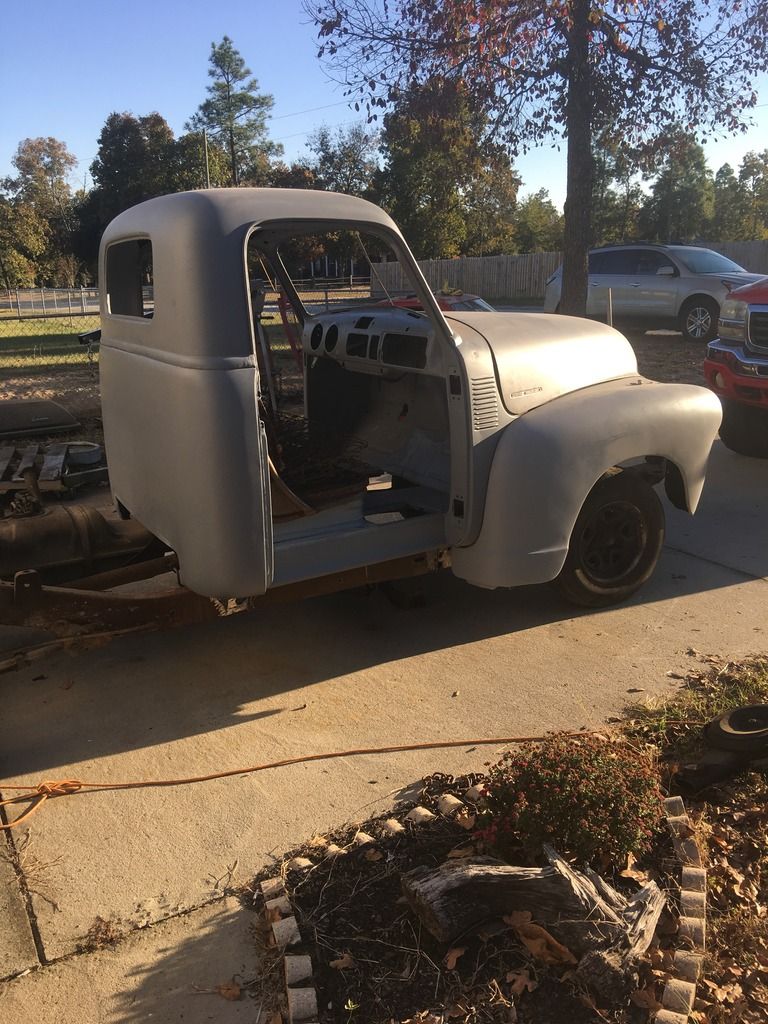 Next is to get the core support welded in and the motor mocked up to see how far back I have to move it. |
|
|
|
|
11-11-2016, 09:02 PM
|
#30 |
|
Registered User
Join Date: Dec 2009
Location: San Angelo, Texas
Posts: 268
|
Re: Project "Molly" - 1952 Chevy 3100 S10 swap
Post #3, #4, and #15 show where you shot primer on body parts. The pictures do not appear to indicate any over spray in your work area. What did you do to prevent this? Thanks, Clay
|
|
|
|
|
11-11-2016, 09:35 PM
|
#31 | |
|
Senior Member
Join Date: May 2007
Location: Doodah Kansas
Posts: 7,774
|
Re: Project "Molly" - 1952 Chevy 3100 S10 swap
outstanding work! for moving cabs by yourself, I like using the cherry picker with a 2x4 frame, its so easy. although I think I may watch for a second cherry picker on craigslist and put off road wheels on it, the small wheels work nicely for small compact engines but are murder to swivel with a big cab lifted high.
really really nice Quote:
sarcasm below: miraclepieco disagrees with you, he made the bold statement that it would take days to strip a donor. 
__________________
the mass of men live lives of quiet desperation if there is a problem, I can have it. new project WAYNE http://67-72chevytrucks.com/vboard/s...d.php?t=844393 |
|
|
|
|
|
11-12-2016, 07:56 AM
|
#32 | |
|
Registered User
Join Date: Oct 2016
Location: Hephzibah, GA
Posts: 33
|
Re: Project "Molly" - 1952 Chevy 3100 S10 swap
Quote:
|
|
|
|
|
|
11-12-2016, 01:03 PM
|
#33 | |
|
Registered User
Join Date: Aug 2012
Location: West Side of the valley, CA
Posts: 878
|
Re: Project "Molly" - 1952 Chevy 3100 S10 swap
Quote:
|
|
|
|
|
|
11-12-2016, 01:33 PM
|
#34 | |
|
Registered User
Join Date: Dec 2009
Location: San Angelo, Texas
Posts: 268
|
Re: Project "Molly" - 1952 Chevy 3100 S10 swap
Quote:
|
|
|
|
|
|
11-21-2016, 02:47 PM
|
#35 |
|
Registered User
Join Date: Oct 2016
Location: Hephzibah, GA
Posts: 33
|
Re: Project "Molly" - 1952 Chevy 3100 S10 swap
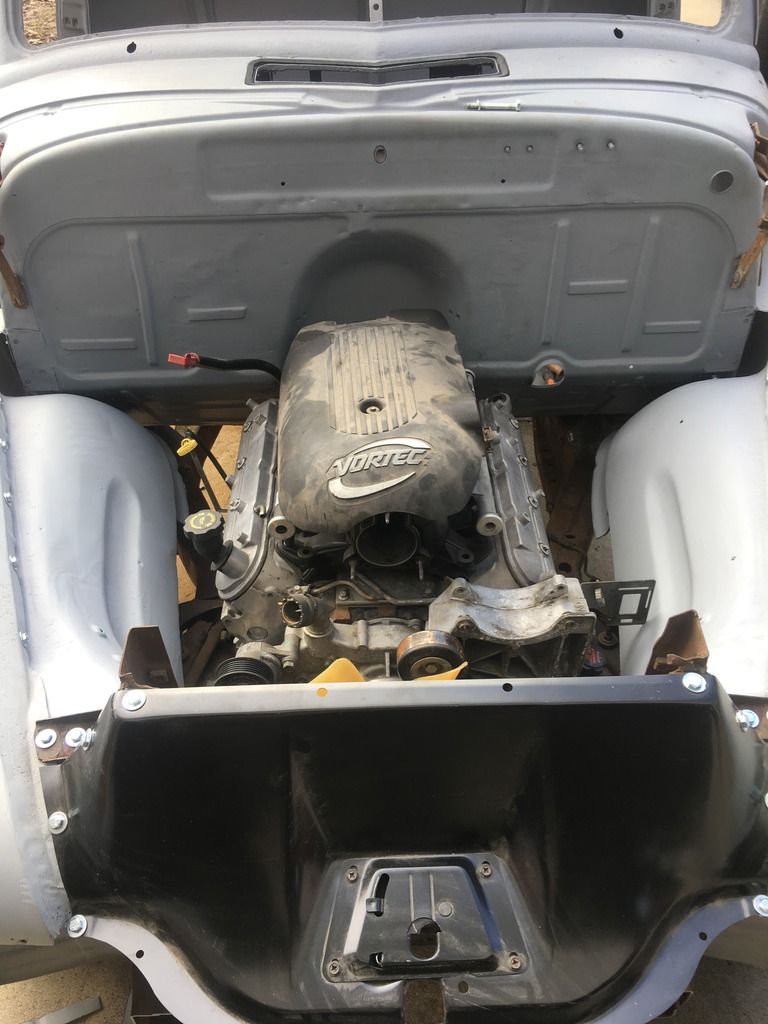
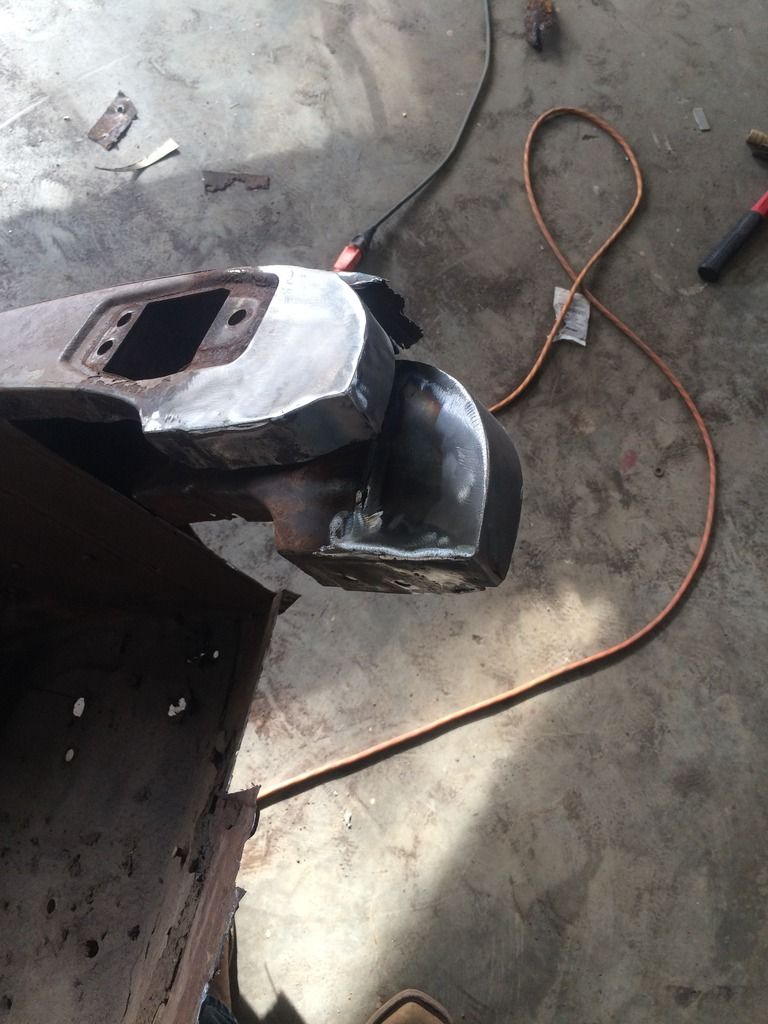
Well, I feel like I got a good amount of work done. Once I pulled the old motor, I realized that the 5.3 needed to come back about 5". I wanted to keep the motor about an inch off the firewall.
Here's the new motor mounts. I used some 3/16" plate and fabbed up some brackets to hold the underside against the frame. I test fit the motor and marked the holes for the rubber mounts. I drilled and tapped the holes as well. 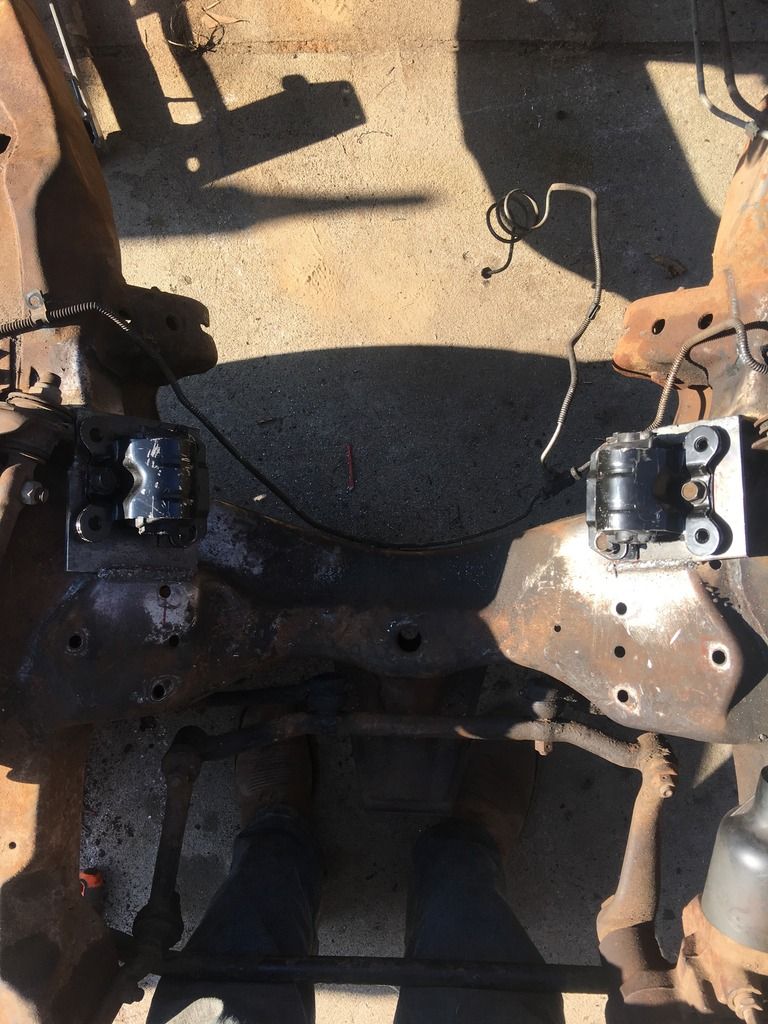 Next, I fit the motor and trans in to check for square. The mounts are adjustable by 1" so I was able to do minor adjustments. The tail shaft for the tranny is now centered between the frame rails. 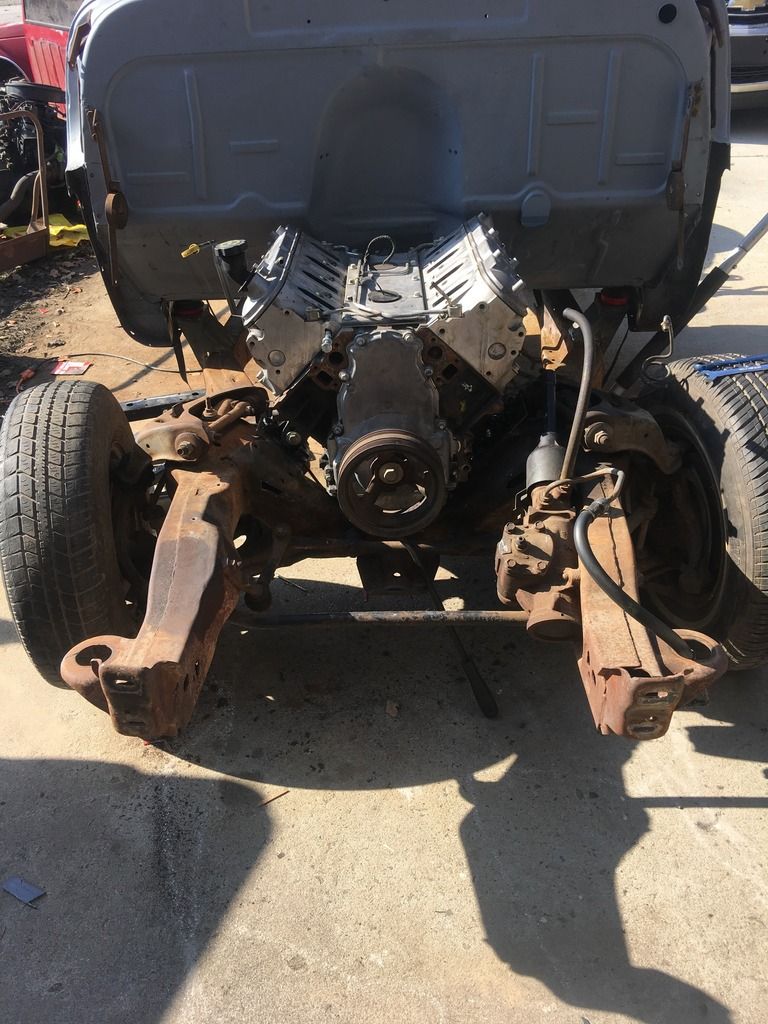 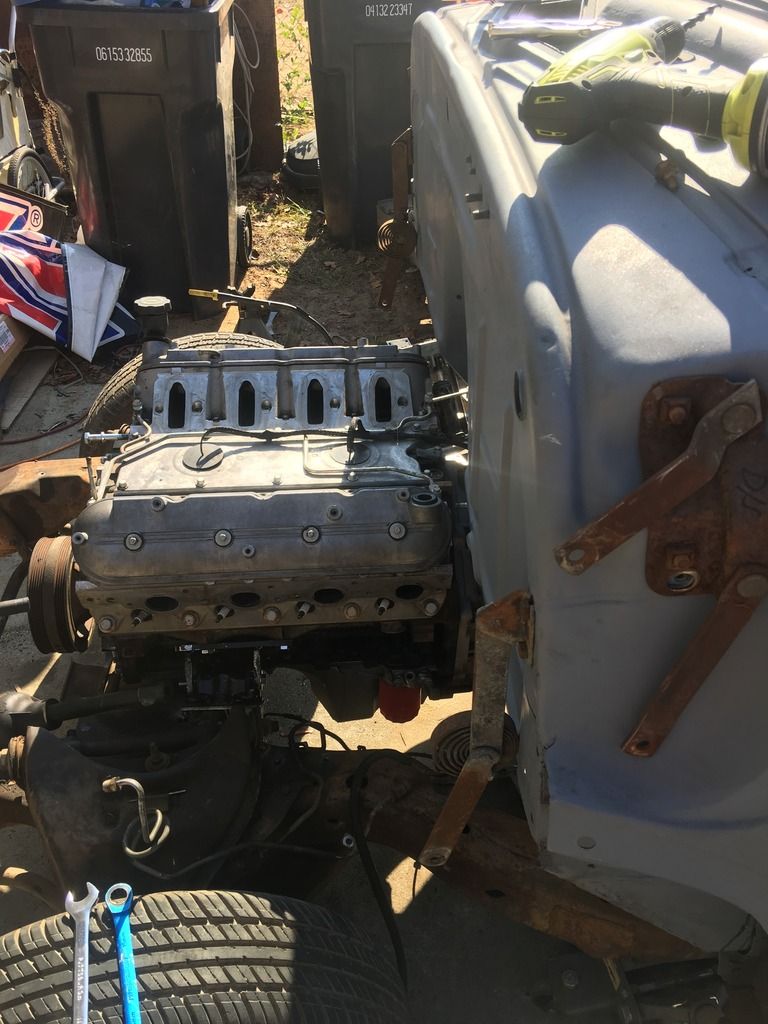 Hooray!!! As I drank my celebratory beer(s), I thought I'd better try to mount the PS pump and bracket. It literally clears by 1/32". I'll do a little shimming and trimming on the flange on the gearbox for a little more clearance. Probably should've measured that the first time. You live and you learn I suppose. 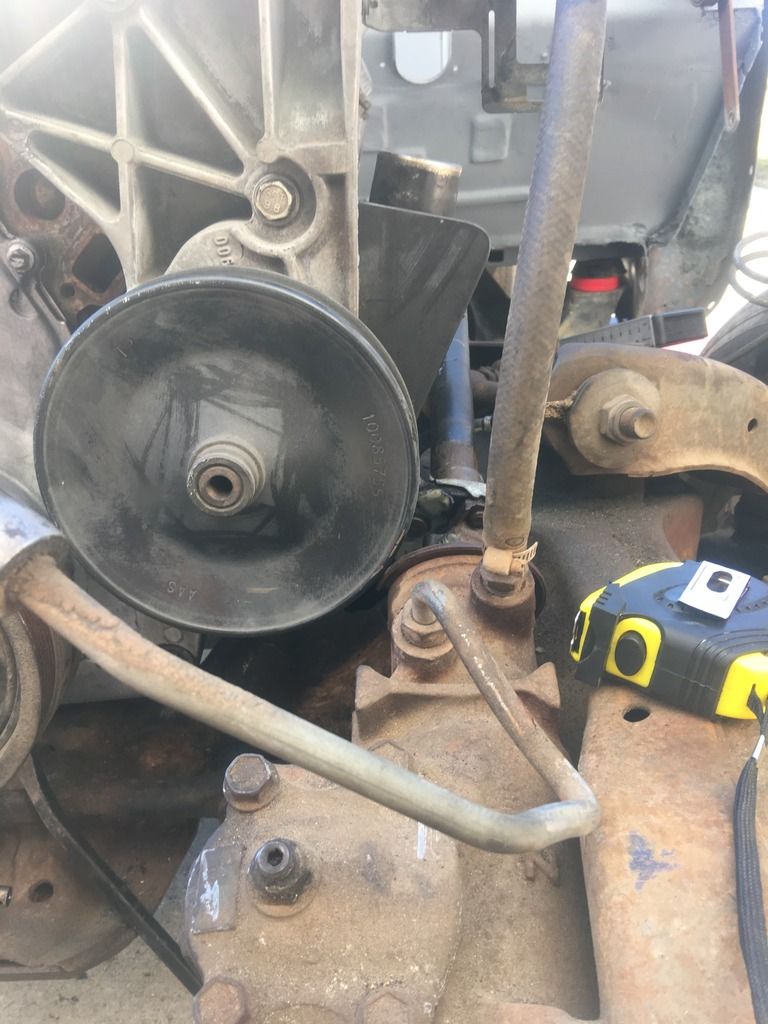 Next is building the trans crossmember. More to come soon. |
|
|
|
|
11-22-2016, 10:59 AM
|
#36 |
|
Registered User
Join Date: Feb 2012
Location: Memphis, TN
Posts: 285
|
Re: Project "Molly" - 1952 Chevy 3100 S10 swap
Your truck is looking really good. On your power steering pump, just use a smaller diameter pulley - that is what I did on my GTO (same motor, same pulley set up, same issue-different car!).
__________________
Rick's 55 TF/Fleetside/LSx build 1958 Corvette LS1/T56 Build 1966 GTO LQ9/T56 Restomod Last edited by ricott; 11-22-2016 at 11:06 AM. |
|
|
|
|
11-22-2016, 03:44 PM
|
#37 |
|
Senior Member
Join Date: May 2007
Location: Doodah Kansas
Posts: 7,774
|
Re: Project "Molly" - 1952 Chevy 3100 S10 swap
looking good! moving the engine back makes the steering so light, I second getting a smaller pulley.
__________________
the mass of men live lives of quiet desperation if there is a problem, I can have it. new project WAYNE http://67-72chevytrucks.com/vboard/s...d.php?t=844393 |
|
|
|
|
11-22-2016, 09:46 PM
|
#38 | |
|
Registered User
Join Date: Oct 2016
Location: Hephzibah, GA
Posts: 33
|
Re: Project "Molly" - 1952 Chevy 3100 S10 swap
Quote:
|
|
|
|
|
|
12-18-2016, 11:36 PM
|
#39 |
|
Registered User
Join Date: Oct 2016
Location: Hephzibah, GA
Posts: 33
|
Re: Project "Molly" - 1952 Chevy 3100 S10 swap
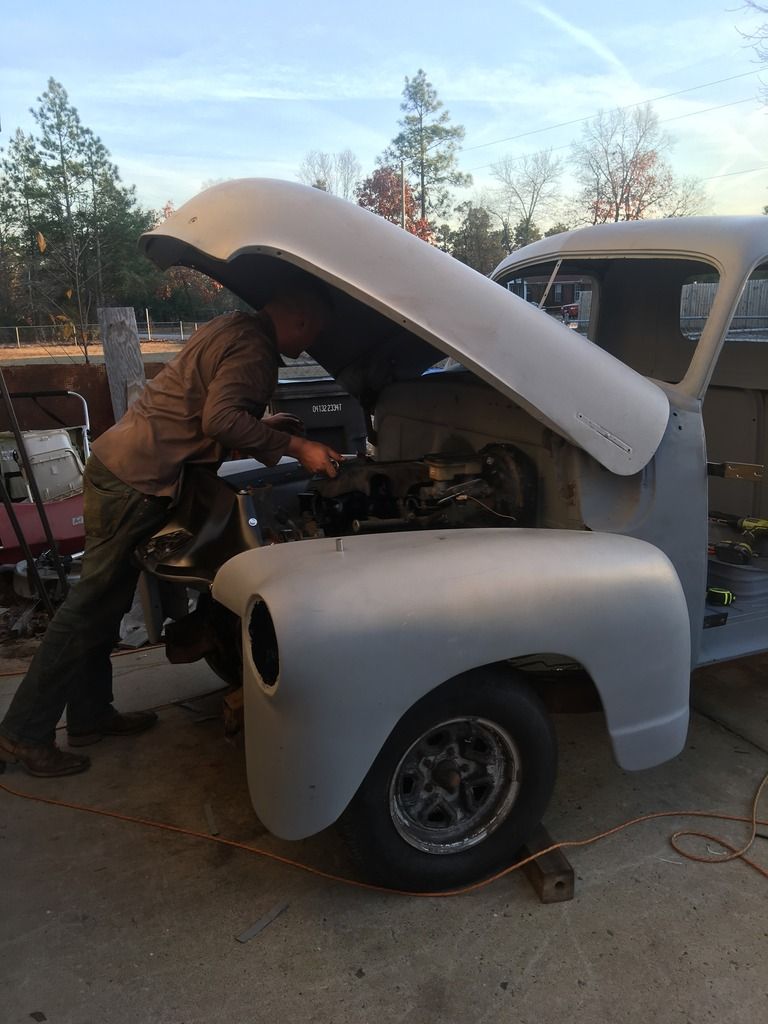
Work has been slow on the truck with the holidays. Pulled the motor back out and decided to notch the frame rather than relocate the AC compressor higher. Cut and notched everything and test fit. Seems to fit right.
All welded up. 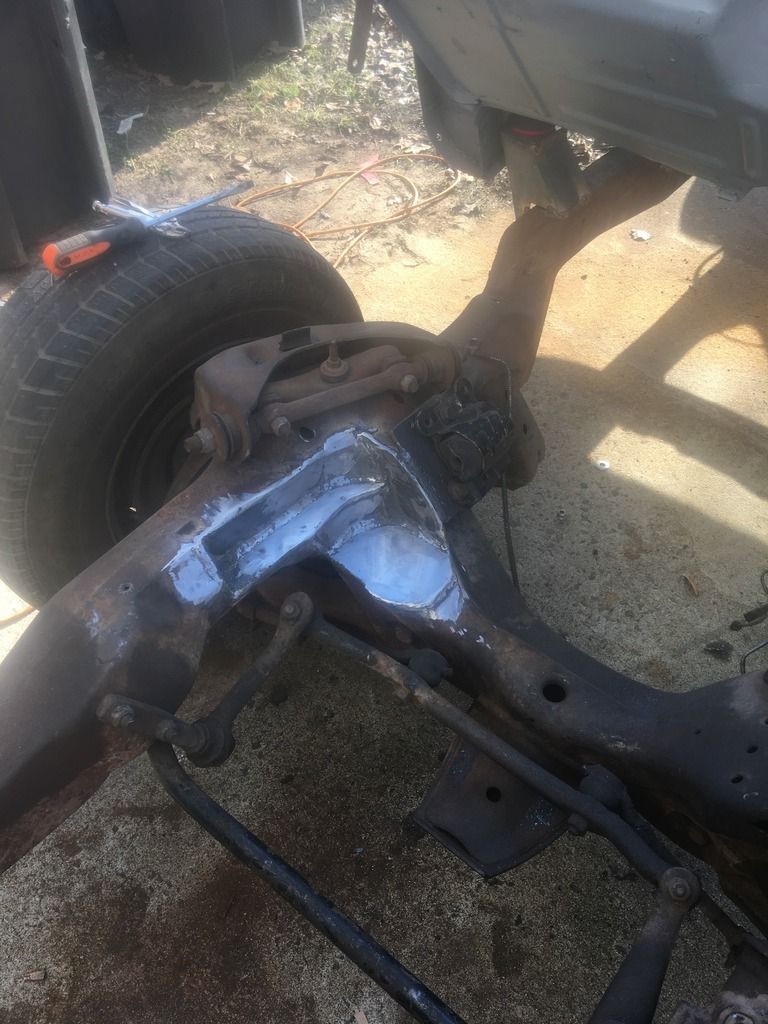 Fits well. 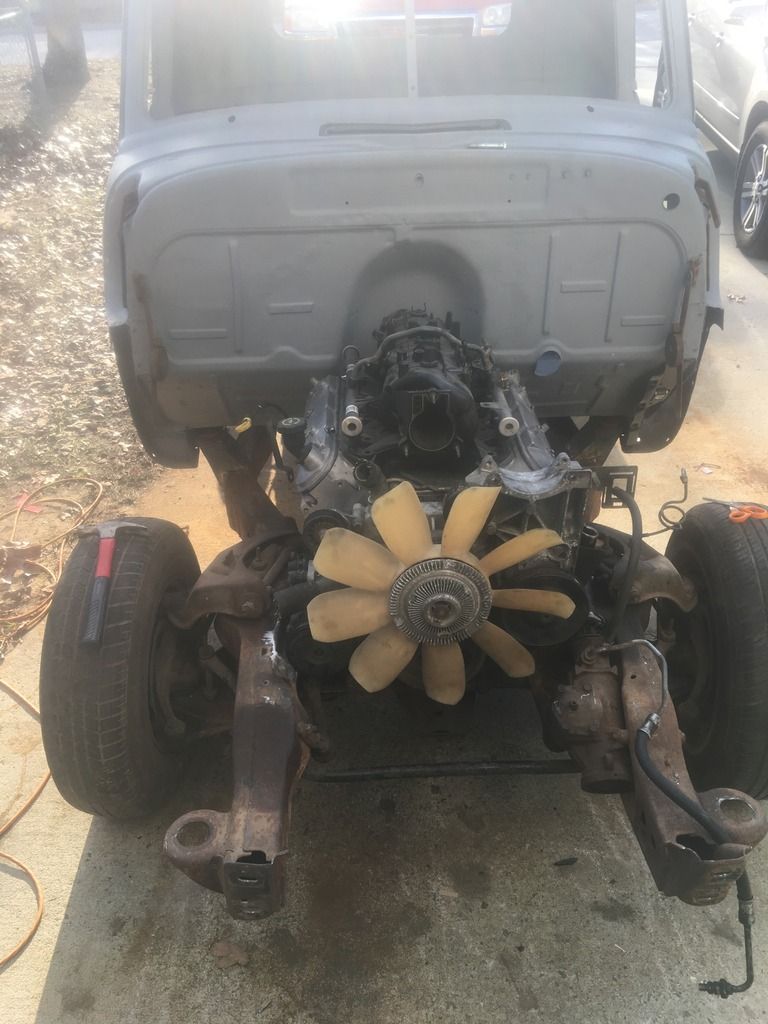  Next on the list is ordering new front suspension components (ball joints, control arm bushings, tie rod ends, new coil springs, and 2" drop spindles) |
|
|
|
|
12-19-2016, 11:05 AM
|
#40 |
|
Registered User
Join Date: Oct 2016
Location: Hephzibah, GA
Posts: 33
|
Re: Project "Molly" - 1952 Chevy 3100 S10 swap
I have a question about wheels and tires. I want to run the classic smoothie wheels with center caps and Coker wide whitewalls on the truck. That being said, the front of the truck is currently 54.5" WMS to WMS. I plan on using 2" spacers on the front which would put me at 58.5" roughly.
I'm having a Ford 8.8 axle cut down to center the pinion. The rear WMS to WMS will be about 56.5" (I'll have to wait and see what it'll actually be). Now, the wheels I'm looking at are the Coker Steel Smoothies and are drilled for 5x4.5 and 5x4.75 which will allow me to not have the rear axle shafts redrilled for the Chevy pattern. However, they come with a 4" backspacing. Will these wheels cause issues? I'm planning on running 15x7 wheels with 215/75/R15 tires. Any advice is more than welcome. |
|
|
|
|
12-22-2016, 10:35 PM
|
#41 |
|
Registered User
Join Date: Oct 2016
Location: Hephzibah, GA
Posts: 33
|
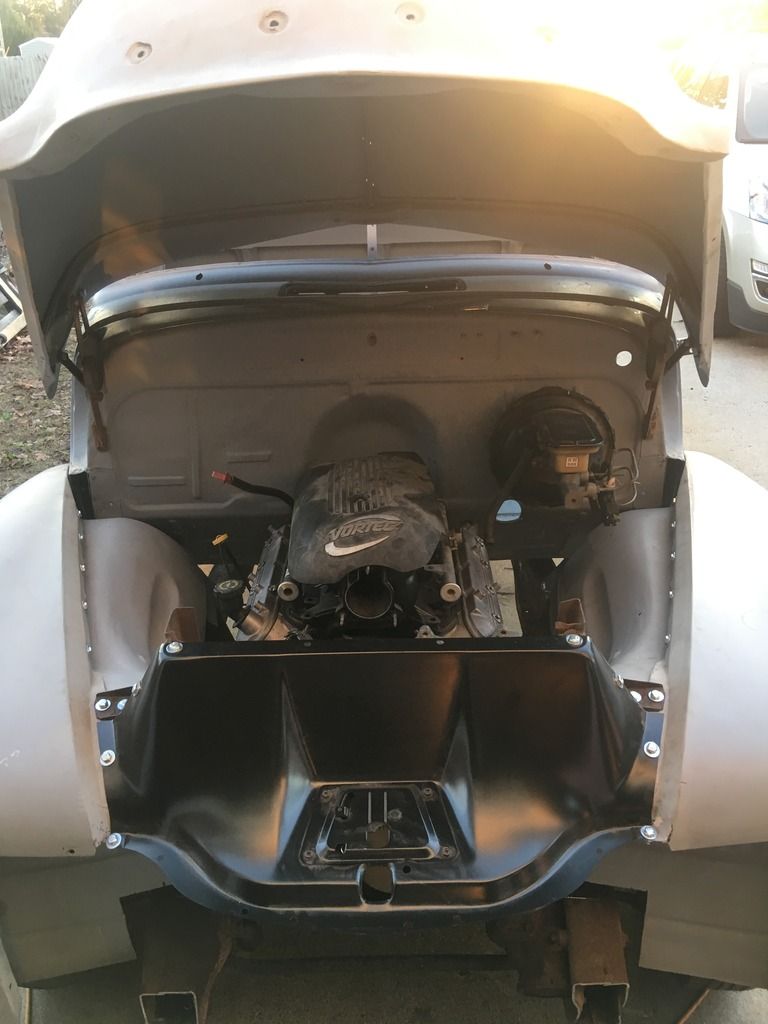
Re: Project "Molly" - 1952 Chevy 3100 S10 swap
Wow, it felt like a productive day today!! I cut down my inner fenders and bolted everything up so I could weld down my core support. I'm pleasantly surprised how well everything lined up this time around. A few pics since I know everyone comes here for them
|
|
|
|
|
12-24-2016, 11:26 PM
|
#42 |
|
Senior Member
Join Date: May 2007
Location: Doodah Kansas
Posts: 7,774
|
Re: Project "Molly" - 1952 Chevy 3100 S10 swap
a lot of great progress! gotta feel good.
your 4" backspace on a 7" wheel is equal to a zero offeset. I had an s10 axle and 2" spacers on each side with 15x8 4.5 backspace wheels and they fit no trouble, I think you will be happy.
__________________
the mass of men live lives of quiet desperation if there is a problem, I can have it. new project WAYNE http://67-72chevytrucks.com/vboard/s...d.php?t=844393 |
|
|
|
|
12-25-2016, 03:16 PM
|
#43 | |
|
Registered User
Join Date: Oct 2016
Location: Hephzibah, GA
Posts: 33
|
Re: Project "Molly" - 1952 Chevy 3100 S10 swap
Quote:
Thanks for the input on the wheels. I hoped it would work correctly. Looks like it will |
|
|
|
|
|
01-16-2017, 07:59 PM
|
#44 |
|
Registered User
Join Date: Oct 2016
Location: Hephzibah, GA
Posts: 33
|
Re: Project "Molly" - 1952 Chevy 3100 S10 swap
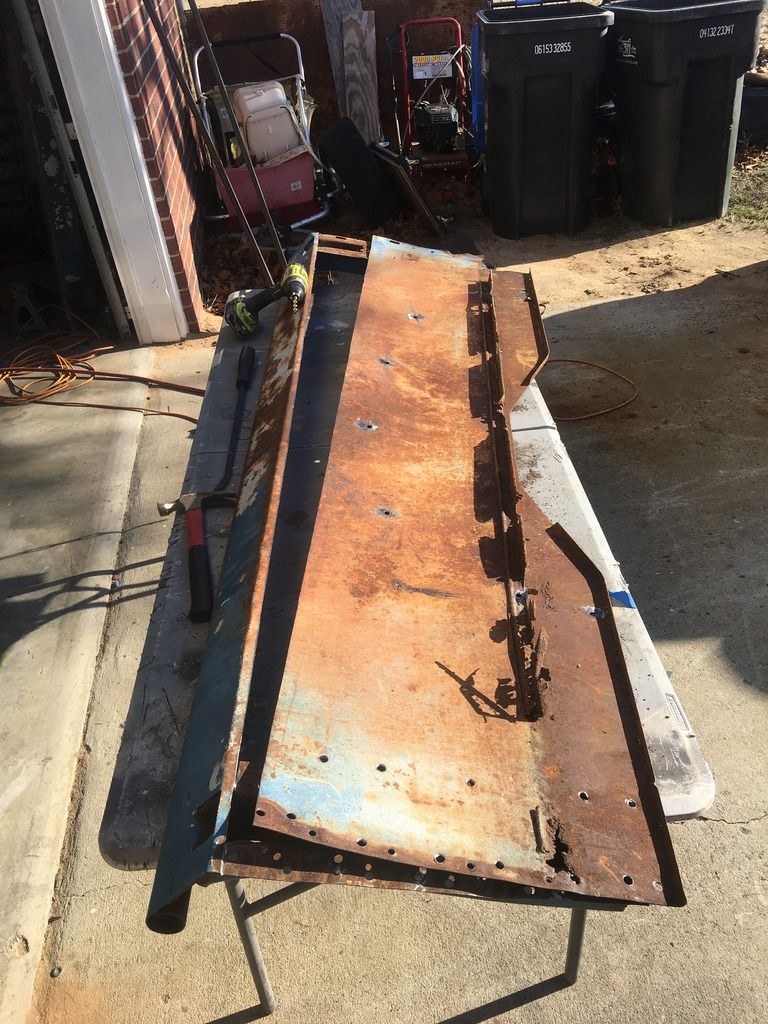
Lots of progress done this weekend. I started working nights again (we switch back and forth every 3 months), so work has been sparse. This weekend, I was able to get out there and get some work done. I figured its time to start on the bed. The old bedsides were pretty rusted and warped, so it was time for new steel. I cut about 1/2" below the scroll and drilled the spot welds.
 I used butt weld clamps to hold everything together and finished up all my welds and spot welds along the stake pocket uprights. The welds ground down pretty well. 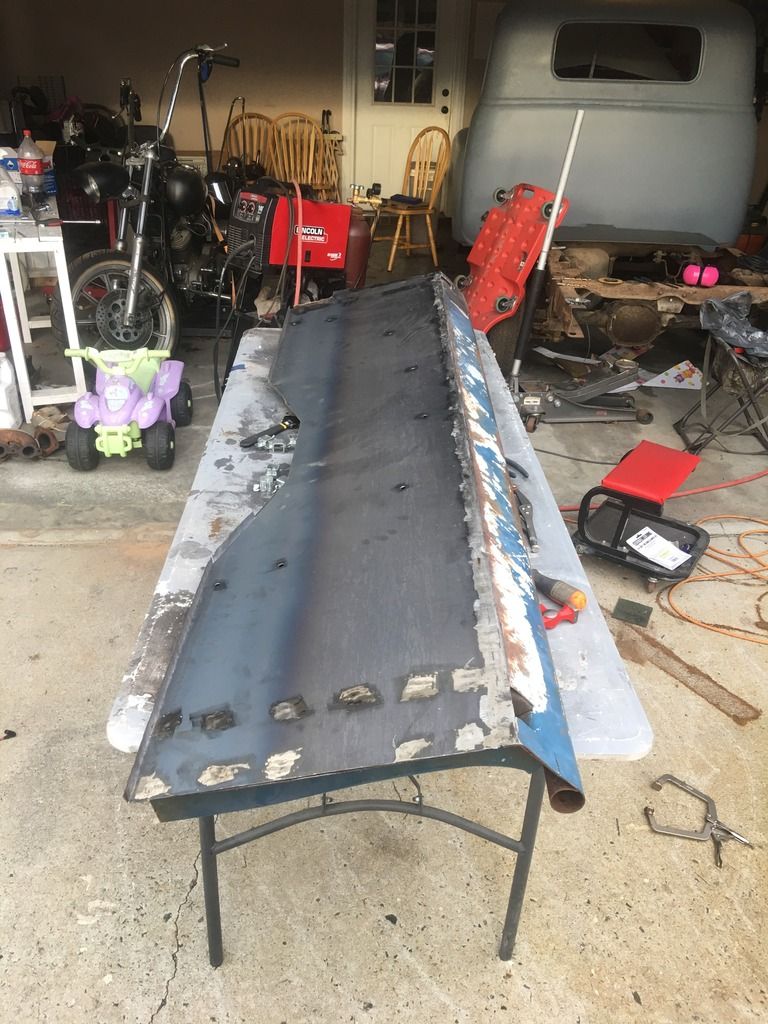 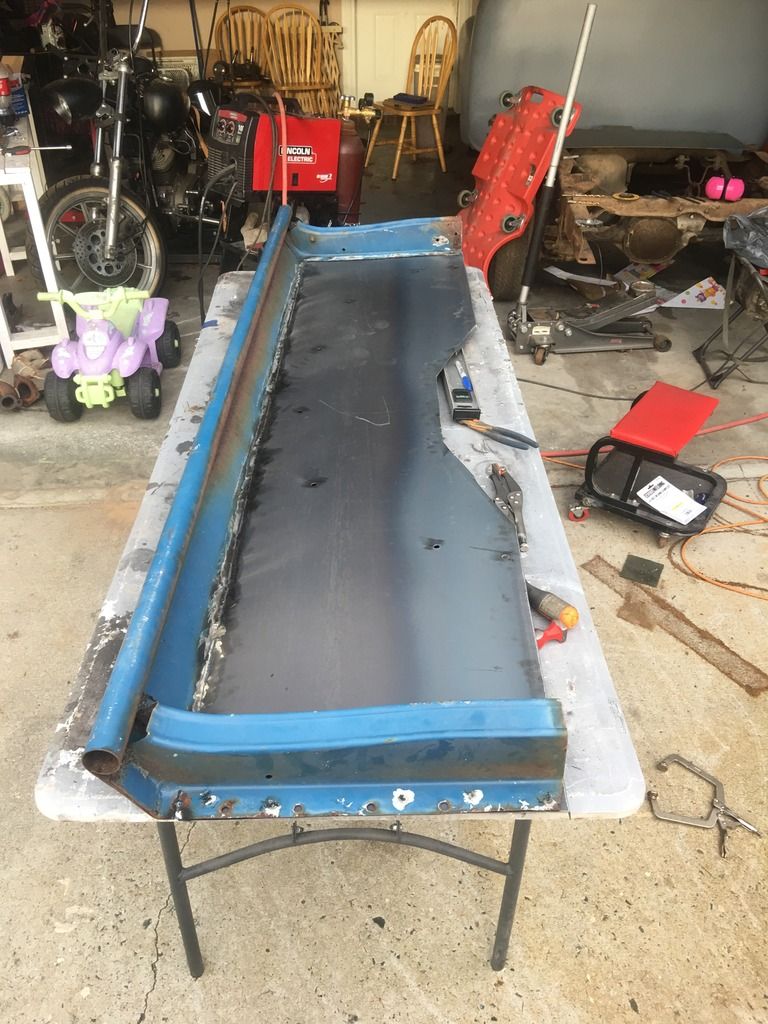 I ordered new bed angles, tailgate, bed strips, hinges, and rear sill from Classic Industries. Everything looked great and arrived pretty quickly. I clamped the bed angles on to mark everything and drill the holes for the spot welds from the opposite side.  All welded up and ground down. 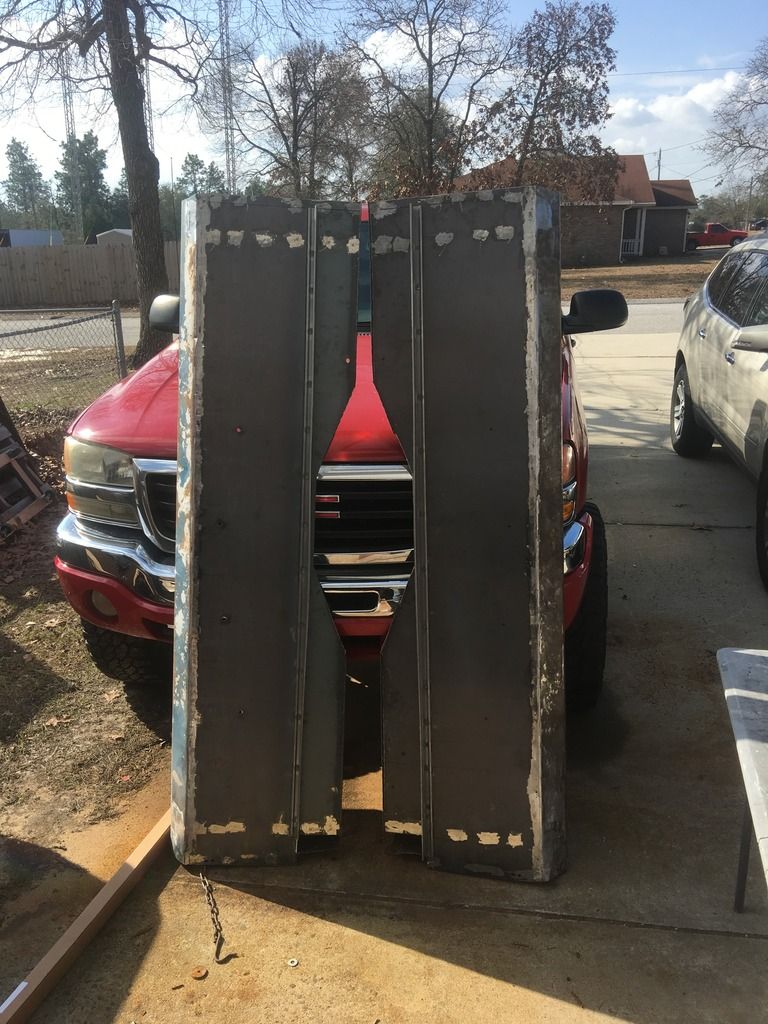 I hit everything with the flap disk and the sander with 80 grit to knock down any welding spatter. Here's the finished product. 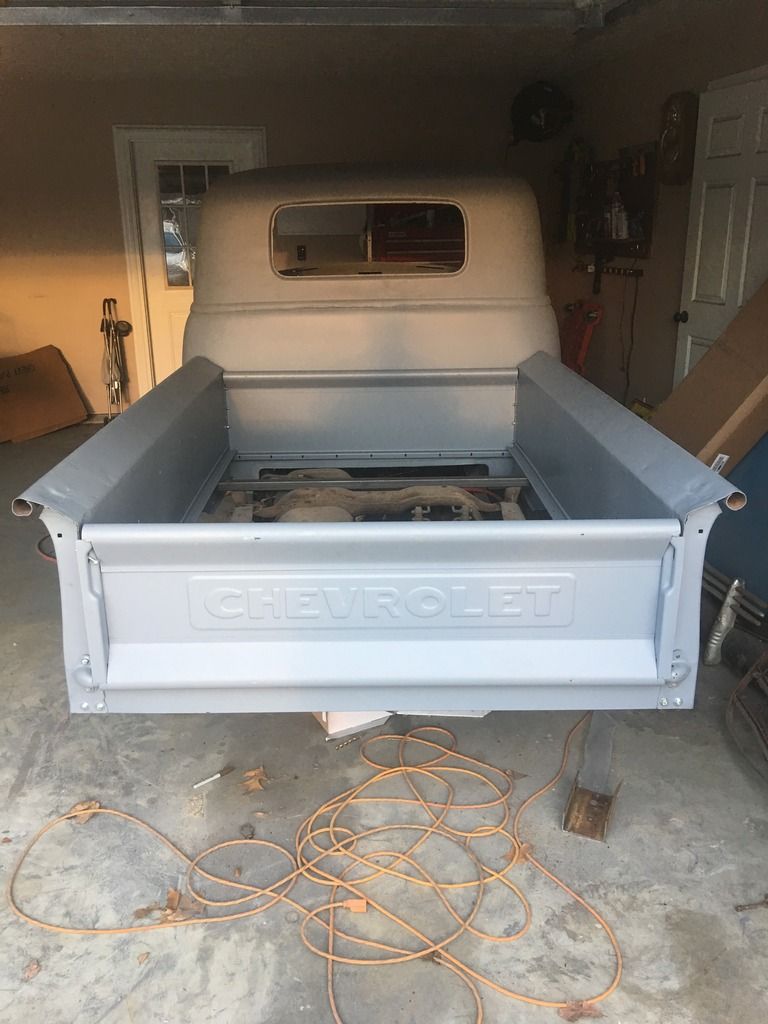 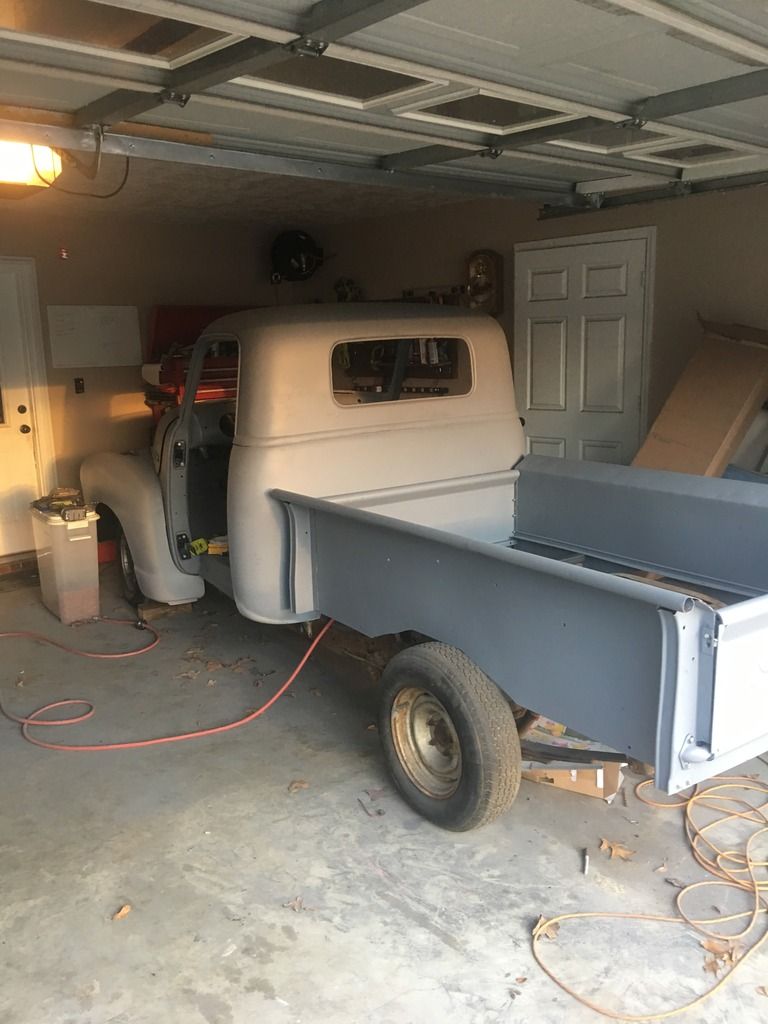 I was able to order the steering column, radiator and electric fan, as well as the transmission rebuild kit. Next up is the rear fenders and running board mockup. Stay tuned!!! |
|
|
|
|
01-16-2017, 11:37 PM
|
#45 |
|
Registered User
Join Date: Aug 2012
Location: West Side of the valley, CA
Posts: 878
|
Re: Project "Molly" - 1952 Chevy 3100 S10 swap
Nice.
You'll be driving by summer. |
|
|
|
|
01-17-2017, 08:38 AM
|
#46 | |
|
Registered User
Join Date: Apr 2009
Location: New Freedom Pa.
Posts: 1,335
|
Re: Project "Molly" - 1952 Chevy 3100 S10 swap
Quote:
__________________
Desert |
|
|
|
|
|
01-17-2017, 01:30 PM
|
#47 | |
|
Registered User
Join Date: May 2015
Location: SoCal
Posts: 1
|
Re: Project "Molly" - 1952 Chevy 3100 S10 swap
Quote:
__________________
Ray Yager Merchandising Director [SIGPIC]http://www.autopartsdb.net/assets/images/maintemplate/ci-logo.png[/SIGPIC] Classic Industries 18460 Gothard Street Huntington Beach, CA 92648 |
|
|
|
|
|
| Bookmarks |
|
|


 Linear Mode

