
|
Register or Log In To remove these advertisements. |
|
|
|
|||||||
 |
|
|
Thread Tools | Display Modes |
 08-15-2015, 10:01 AM
|
#26 |
|
Registered User
Join Date: Jun 2012
Location: Portland
Posts: 1,334
|
Re: Building a Custom GMC Dash Bezel from the ground up :).
I'd be willing to make them for others yeah. Once I'm done I'll figure out material costs, machine time etc and if members think it's worth it I'll get a vendor license and create a thread for them. And yeah other gauge configs shouldn't be too hard.
Posted via Mobile Device |

|

|
|
08-18-2015, 11:39 PM
|
#27 |
|
Registered User
 Join Date: Jul 2015
Location: Milwaukie, Oregon
Posts: 115
|
Re: Building a Custom GMC Dash Bezel from the ground up :).
Hi Sorry for the delay. I had a hard time getting a good picture that shows the taper. So basically the bottom is flat but the top and side have a good taper.
My gauges:
__________________
http://67-72chevytrucks.com/vboard/s...d.php?t=675881 1972 C-10 SWB 1962 3/4 ton LWB 2011 GMC Sierra LML Z71 crewcab shortbed |
|
|
|
|
08-19-2015, 01:56 PM
|
#28 |
|
Registered User
Join Date: Jun 2012
Location: Portland
Posts: 1,334
|
Re: Building a Custom GMC Dash Bezel from the ground up :).
Are the tabs that hold the bezel in threaded, or is it supposed to fit via the taper wedging it in, and pins through the 4 tabs not letting it come out? If it was threaded it would be a lot easier, as the bolts could hold it in place, and the taper wouldn't have to be exact fit. Looks like I see nuts on them, so that might work . . .
I'm going to test fit tonight, and will try and do 2-sided milling to get some taper in there tomorrow or Friday. |
|
|
|
|
08-22-2015, 02:06 PM
|
#29 |
|
Registered User
Join Date: Jul 2015
Location: Milwaukie, Oregon
Posts: 115
|
Re: Building a Custom GMC Dash Bezel from the ground up :).
The tabs are not threaded but do have j-nuts. I was envisioning pins holding in the top and you would reach under the dash to screw in the bottom.
__________________
http://67-72chevytrucks.com/vboard/s...d.php?t=675881 1972 C-10 SWB 1962 3/4 ton LWB 2011 GMC Sierra LML Z71 crewcab shortbed |
|
|
|
|
08-30-2015, 03:53 PM
|
#30 |
|
Registered User
Join Date: Jun 2012
Location: Portland
Posts: 1,334
|
Re: Building a Custom GMC Dash Bezel from the ground up :).
More good progress
Hey all, Just wanted to update this thread. So I am about 99% done with the fit, including the taper. I think I need to adjust the taper a few degrees, and shrink the outer size by a hair. But I got a snug fit in my GMC dash with the foam outline piece. With the finished piece being a harder material, I want to shrink it a bit since the foam may have compressed slightly going into the cutout. 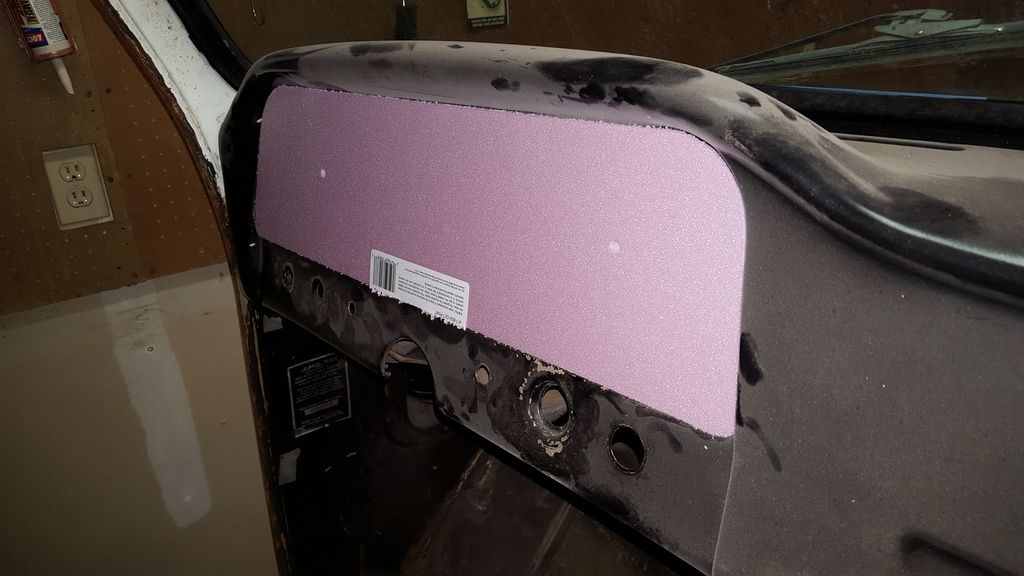 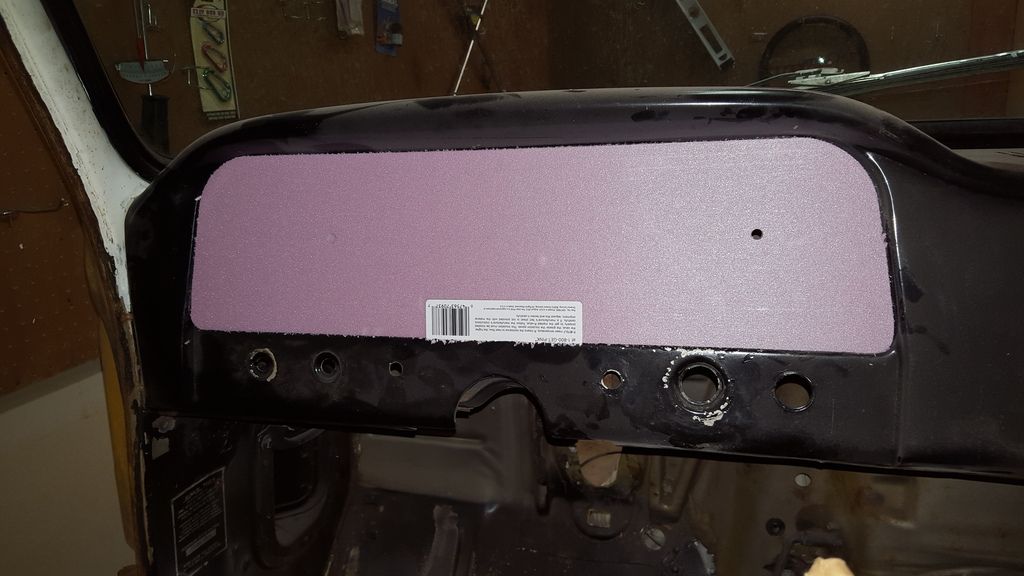 Also, I did my first attempt at building the vectors/cutouts I needed for the New Vintage indicator piece that I bought, and I think I pretty much nailed it on the first try. I cut it into a scrap piece I had upside down, so in my design it will be on the bottom, though after seeing the design I may flip it and put it at the top of the gauge cluster. The only change I need to make is to recess it about a 1/16th-1/8th more so it's flush and the back threads have more room: 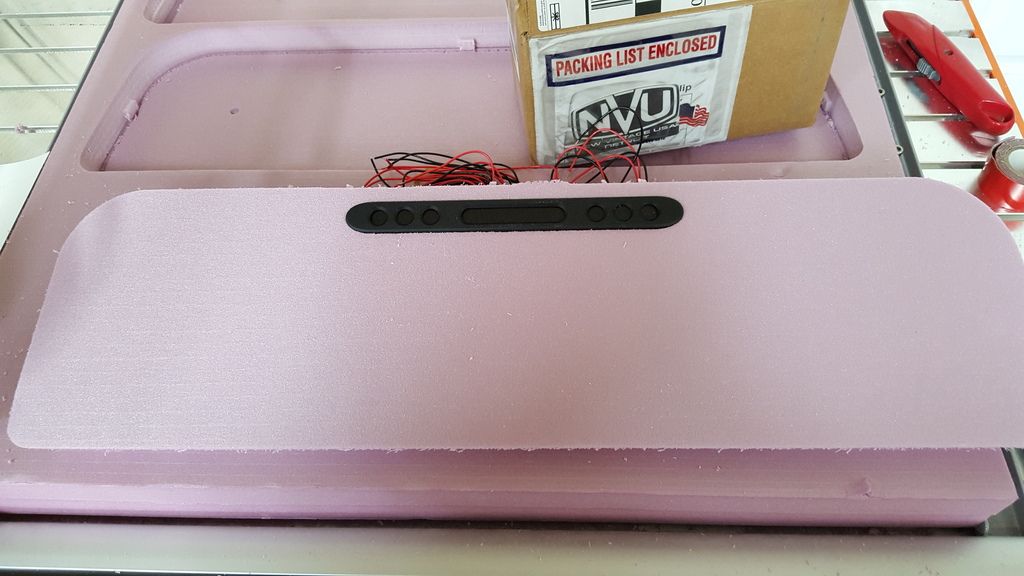  I'll be taking my 4'x2'x1" plastic sheet and making it into 1'x2' sections today I think so I might be able to do a full prototype in the finished material today or tomorrow. Stay tuned! |
|
|
|
|
09-21-2015, 05:45 PM
|
#31 |
|
Registered User
Join Date: Jun 2012
Location: Portland
Posts: 1,334
|
Re: Building a Custom GMC Dash Bezel from the ground up :).
Minor updates
I am going to try splitting the design and make it a modular unit. I am going to separate the trim ring from the back piece, and will split out the New Vintage signal piece as yet a 3rd piece that will all bolt together. This is for a few reasons: 1. It will allow me to use different backing materials without having to re-mill the entire unit. 2. I can use different processes that might be more suitable for each piece. Due to the taper on the back side, I have to mill both sides of the material, meaning if I am slightly off when centering I ruin the whole piece. Not an issue for the pros, but for me, I can see it happening and suddenly a $40 piece of plastic is ruined. So the new processes, in theory, will go as follows: 1. I will 3D print the trim ring, which will handle the taper and I can print in tabs that a backing plate would screw to. 2. The backing plate can then be milled from plastic, wood, aluminum, carbon fiber, etc based on preference. 3. The turn signal holder can either be printed or milled. In thinking ahead of potentially productizing something I am making it a separate unit so someone could add it remove it and not have to buy a whole new setup. This will also bolt to the trim ring and through the backing plate. Designs to come, but I should have all the material coming I'll need to print a prototype trim ring by the weekend. Progress is slow but steady! |
|
|
|
|
01-05-2016, 01:46 PM
|
#32 |
|
Registered User
Join Date: Jun 2012
Location: Portland
Posts: 1,334
|
Re: Building a Custom GMC Dash Bezel from the ground up :).
Updates:
Hey all, It's been awhile since I have had a chance to work on this, but was able to get a few hours in over the holidays. I haven't been able to get a good 3D print of this size going. Unfortunately I think the method I detailed above isn't going to work with the equipment I have. However, I still think milling it as one piece is a viable solution, so I have begun that route again. I started by finding the exact center of the workpiece, and then drilling two holes, one at center/center, and the other at center/bottom. I drilled it through the material and into the spoil board so that I can flip the workpiece over to mill the back side and ensure it's in the same location as before. My overall design consists of 8 toolpaths: 1. Indicator area pocket (for turn signal/engine light bezel to sit) 2. Indicator area cutout (so the wires can come out the back of the housing) 3. Info panel pocket 1 - this is where the center hole is. I'm going to mill an aluminum plate here that says something like "GMC - Premium Unleaded Only" to add some detail to the panel as well as cover the center locating hole 4. Info panel pocket 2 - This creates the pocket for the aluminum plate to sit in 5. Gauge pockets - This mills away about .75" of material everywhere but where the gauges go and the indicator/info panels go. 6. Gauge cutouts - This cuts away the material in the center of the gauge areas so a gauge can actually go in. 7. Gauge pocket 2 - This reduces the material on the rings around the gauges, so the gauges aren't flush with the outer trim ring, but instead sit about .25" off the back panel. 8. Panel taper and profile cut - This path does the taper on the back side, and cuts out the entire piece, freeing it from the source material. Lots of info, and all hard to imagine without photos, which I'll add to this later so you can see how it's made. I went ahead and cut the first 4 paths in the material and did a test-fit with the indicator panel, which fit great. Here are a few photos, but again I'll add more later when I'm home. I expect there is another 2-4 hours of milling, but I am taking it slow as I'm still learning the right feeds and speeds for the machine.  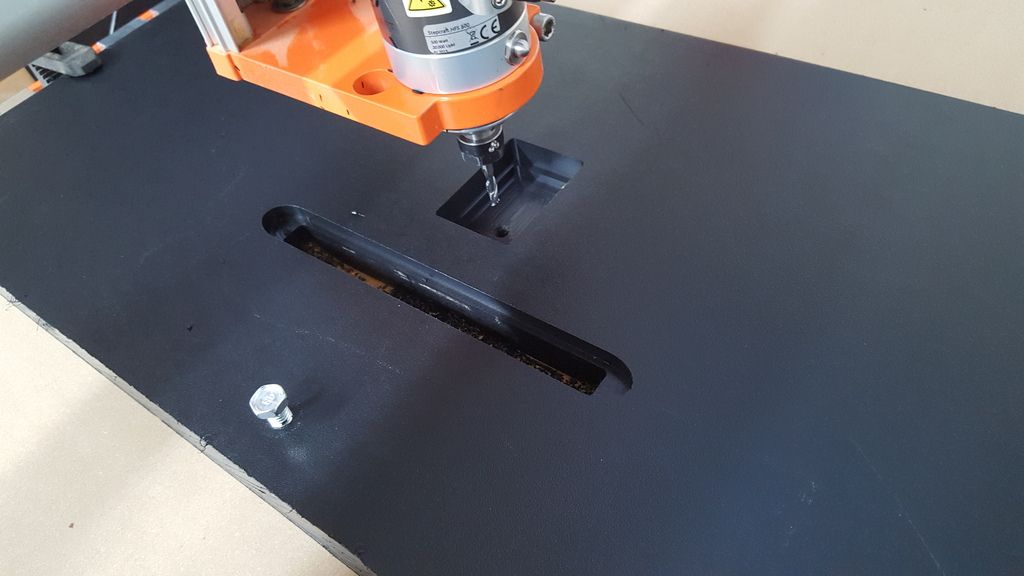
|
|
|
|
|
01-05-2016, 01:52 PM
|
#33 |
|
I'm just glad to be here!
Join Date: Jan 2008
Location: Longview, TX
Posts: 4,788
|
Re: Building a Custom GMC Dash Bezel from the ground up :).
Nice update!
__________________
Karl  1965 Chevy Stepside(Grandpa's Old Blue) and (July 2015 Shop Build!)(2020, the Saga Continues) http://67-72chevytrucks.com/vboard/s...d.php?t=372424 The LST Challenge: http://67-72chevytrucks.com/vboard/s...=1#post7812257 Korbin's 1st Square: "Sunburn" http://67-72chevytrucks.com/vboard/s...d.php?t=418618 1985 GMC Sierra: "White Trash", Korbin's 2nd now... http://67-72chevytrucks.com/vboard/s...d.php?t=632305 Henry - 1984 Chevrolet, Owen's 1st Square |
|
|
|
|
01-05-2016, 07:25 PM
|
#34 |
|
Registered User
Join Date: Feb 2013
Location: Mt. Pleasant, Michigan
Posts: 143
|
Re: Building a Custom GMC Dash Bezel from the ground up :).
Cluster for my 64 GMC
__________________
 1961 Apache 10 with side trim 1964 4 door crew cab C20 1966 Chevy Suburban with custom trim 1961 K30 with a 4-53T Detroit diesel 1966 GMC 4X4 Suburban |
|
|
|
|
01-05-2016, 07:39 PM
|
#35 |
|
Registered User
Join Date: Jan 2016
Location: sea tac
Posts: 7
|
Re: Building a Custom GMC Dash Bezel from the ground up :).
Looking good!
Wish I had that talent. |
|
|
|
|
01-05-2016, 07:39 PM
|
#36 |
|
Registered User
Join Date: Jun 2012
Location: Portland
Posts: 1,334
|
Re: Building a Custom GMC Dash Bezel from the ground up :).
Looks great 64Chevy! Originally I modified my stock cluster, but at some point there was only so much I could do to make it work for me. I'm hoping to build a stand-alone unit so I don't have to keep finding/modifying stock clusters. That way there are more original units out there for people who want to go the classic route
 . .
|
|
|
|
|
02-20-2016, 03:18 PM
|
#37 |
|
Registered User
Join Date: Jun 2012
Location: Portland
Posts: 1,334
|
Re: Building a Custom GMC Dash Bezel from the ground up :).
Incremental progress. Been busy at work, but managed to finalize the indicator pocket design and size. Used the scrapped piece to finalize. The actual pocket will sure about 1" north of where it is now.
 
|
|
|
|
|
03-20-2017, 04:00 PM
|
#38 |
|
Registered User
Join Date: Aug 2016
Location: Laveen Arizona
Posts: 27
|
Re: Building a Custom GMC Dash Bezel from the ground up :).
How did this project turn out! Looks awesome!
|
|
|
|
|
| Bookmarks |
|
|


 Linear Mode

