
 |
|
|
|
|
#1 | |
|
Registered User
Join Date: Apr 2004
Location: Tigard, Or
Posts: 503
|
Re: 1966 C10 Project Truck
Quote:
 I got the chance to work on the truck all weekend. While I didn't get to make progress on the things I wanted to, I was able to hammer out a bunch of little things that had popped up and I did get to hear it run! I still have to tinker with the alternator bracket and build my power steering adjuster bracket before I can run it for longer but hearing it run was definitely awesome! Work was a little slow on Friday so I was able to break away from my desk for a few and hammer out the pieces I needed to hook my clutch pedal up to the master. 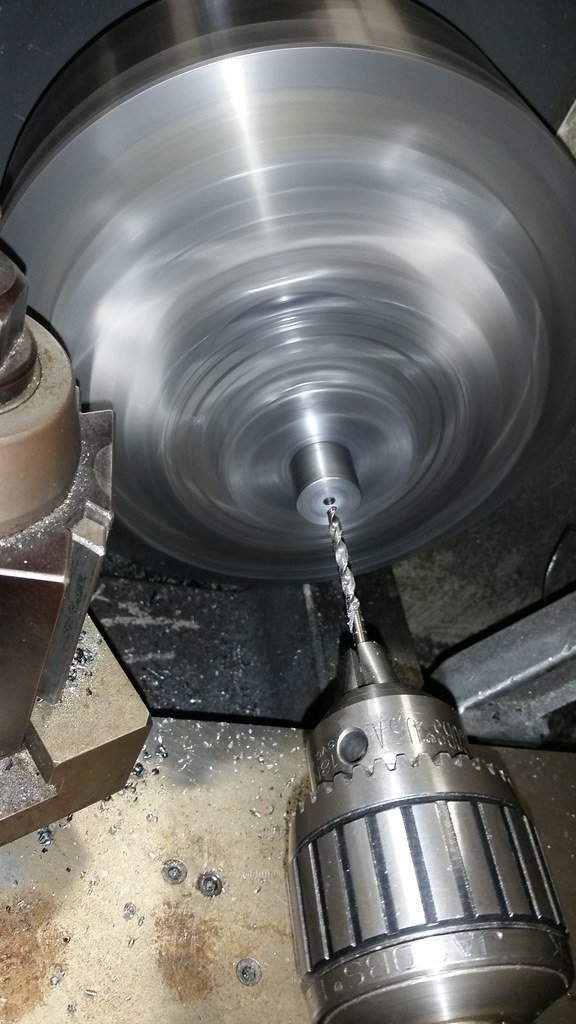 I had tapped one of them to 5/16-18 but needed 5/16-24, doh! I actually cut a section of the factory panhard bar to remake it, worked slick! 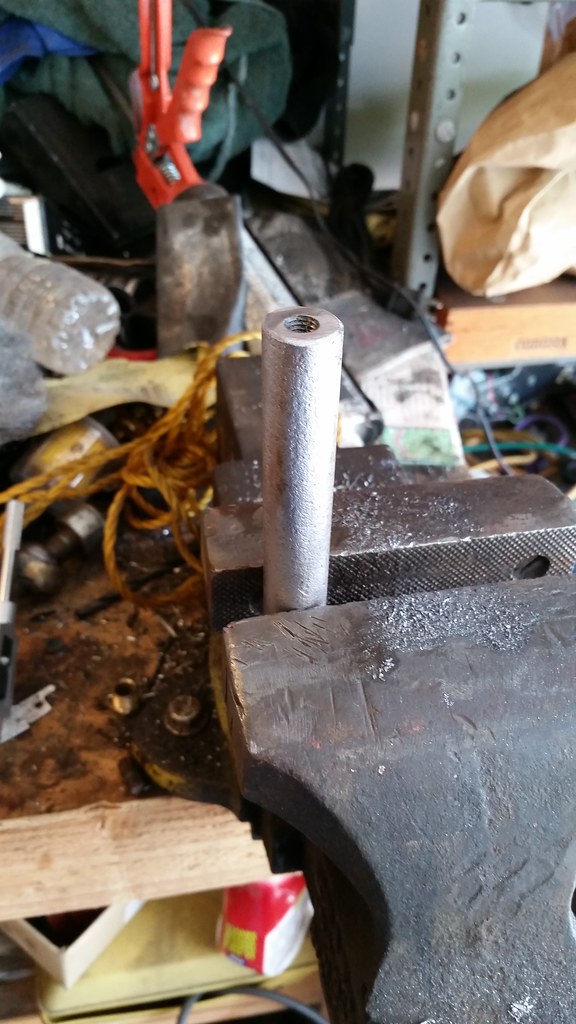 Linkage shot 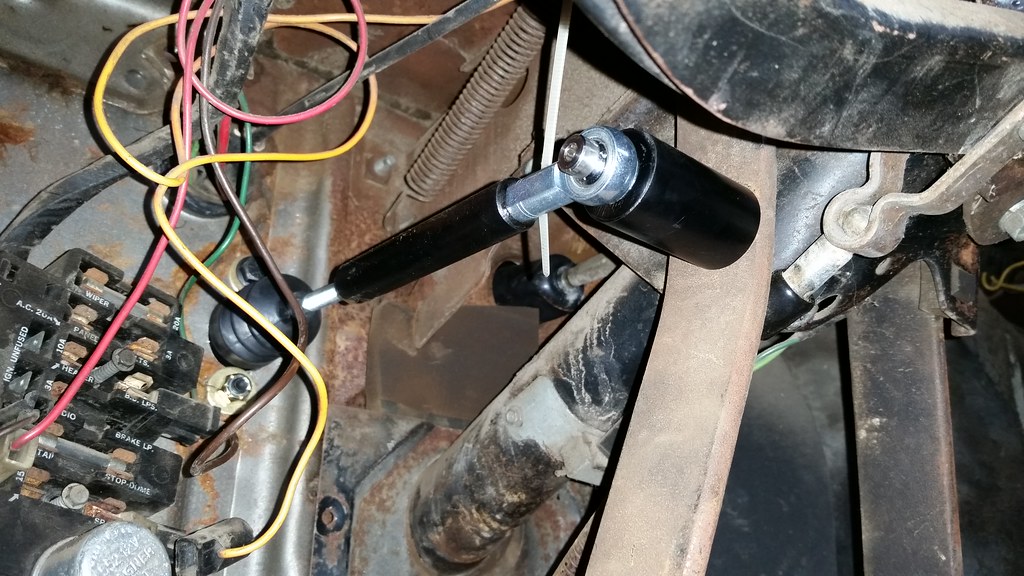 Pedal is right in line with the brake pedal, much better for me  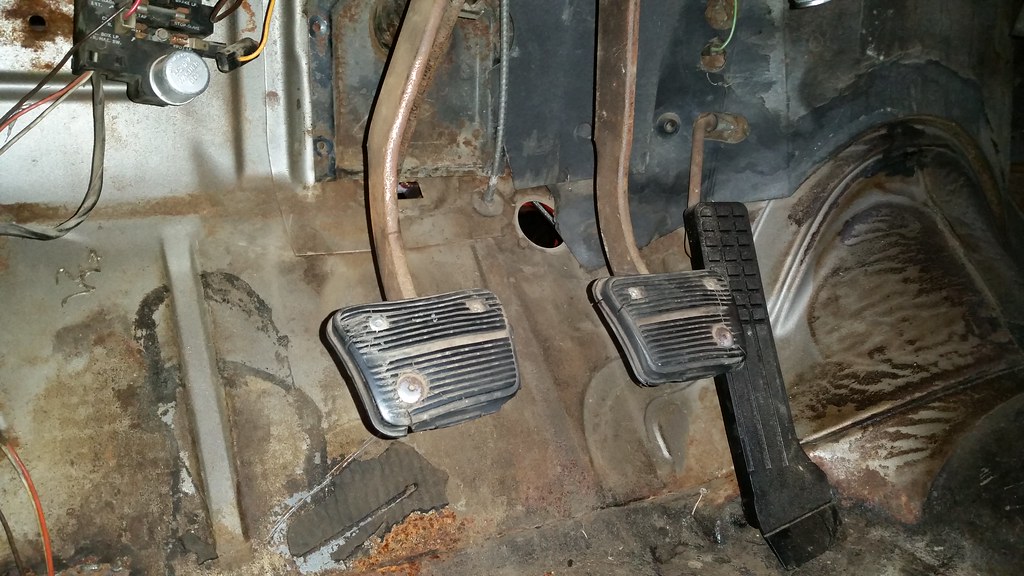 The lower radiator hose put up more of a fight than I thought. I spent easily half the day on Saturday just trying to find one that worked. Thought I had it but when I got home, it still didn't work. I had some 1.75 tubing laying around from an old project and had the perfect bend in it. Lucky! 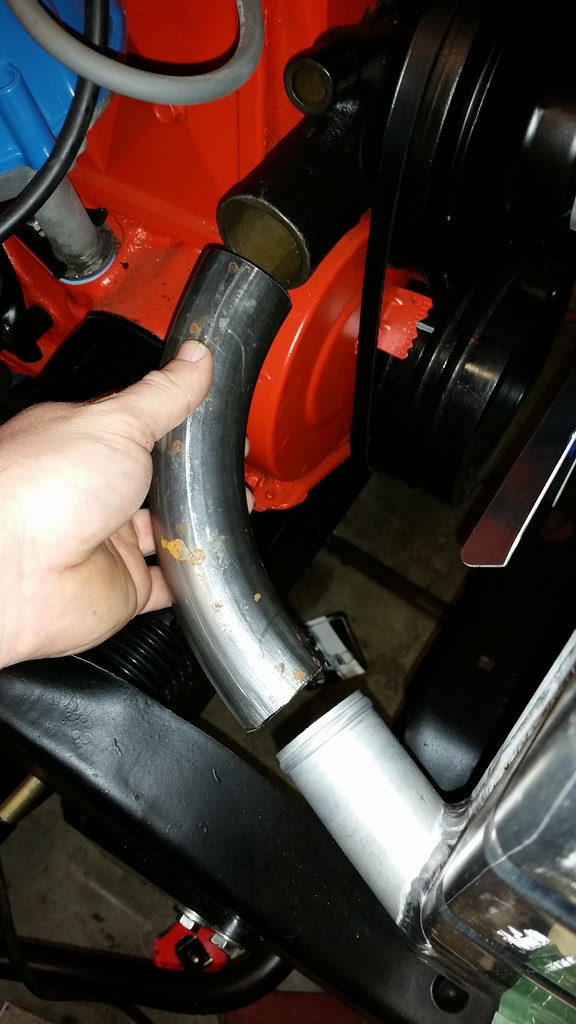 Finished up, looks great! I did run a weld bead around each end to create a lip so the hoses don't slip off later. 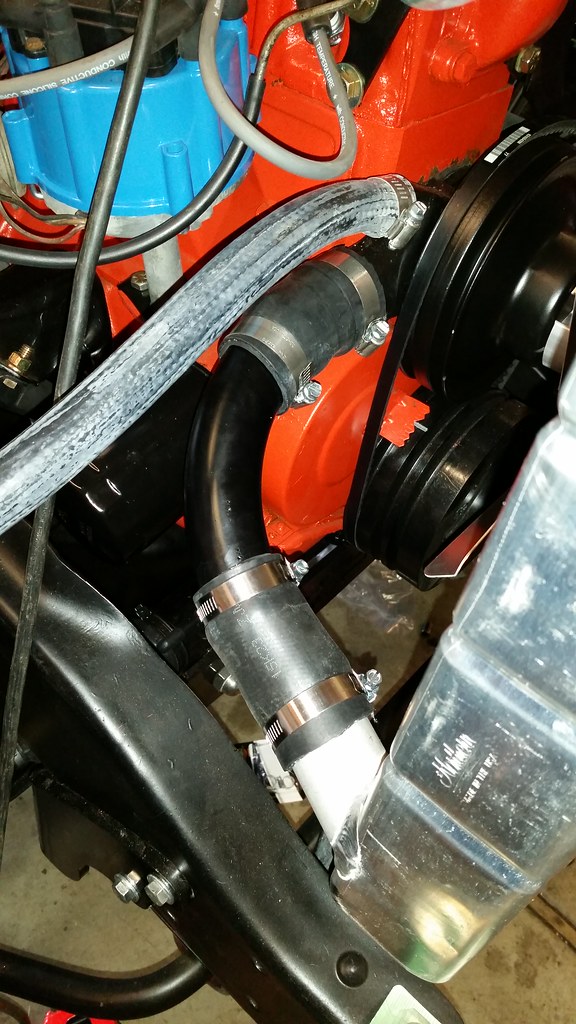 Got the shocks on 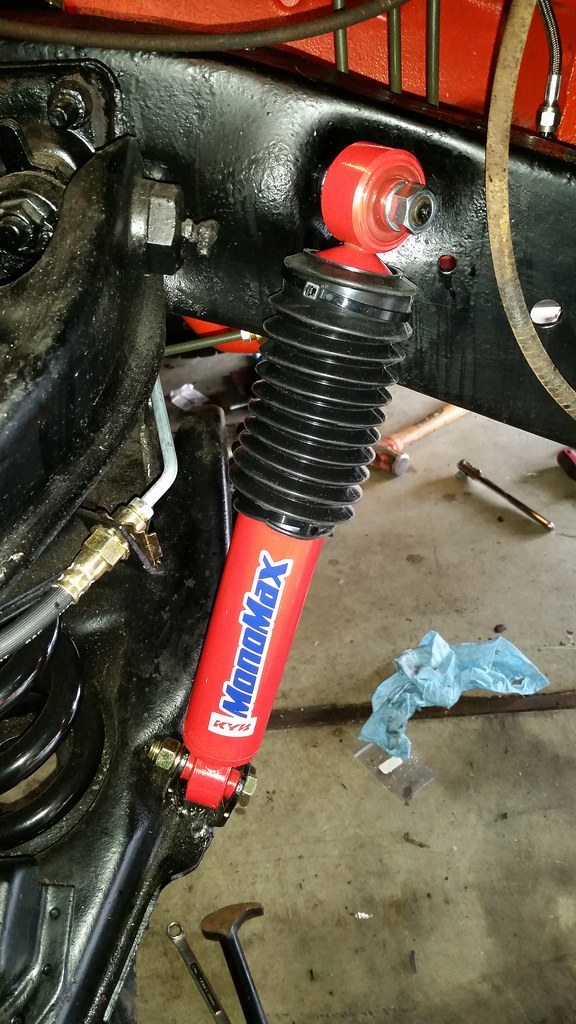 Sunday night, I pushed it out of the garage to give it some fresh air and make room for the bed pieces. This is the first time it's been outside since March! 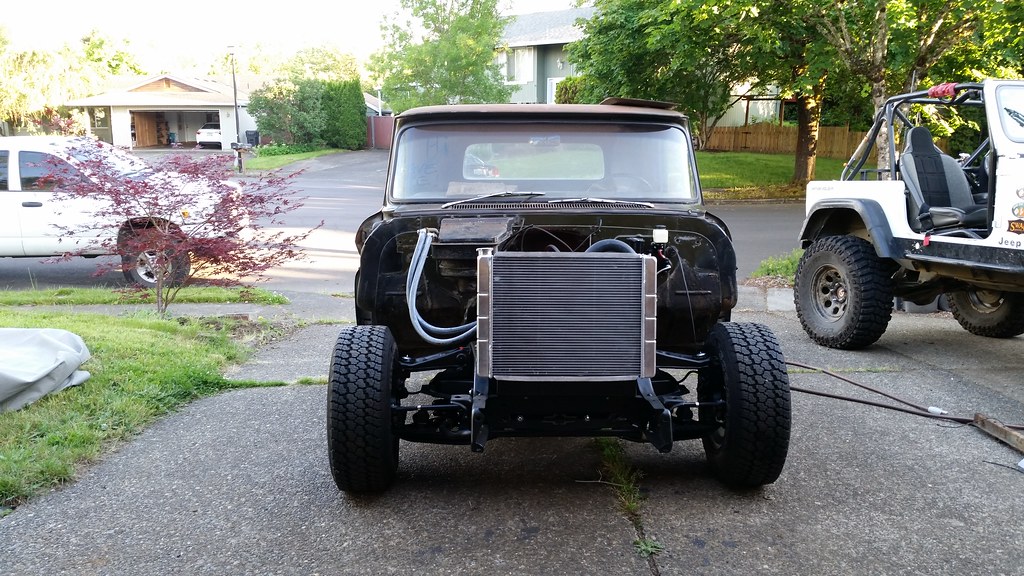 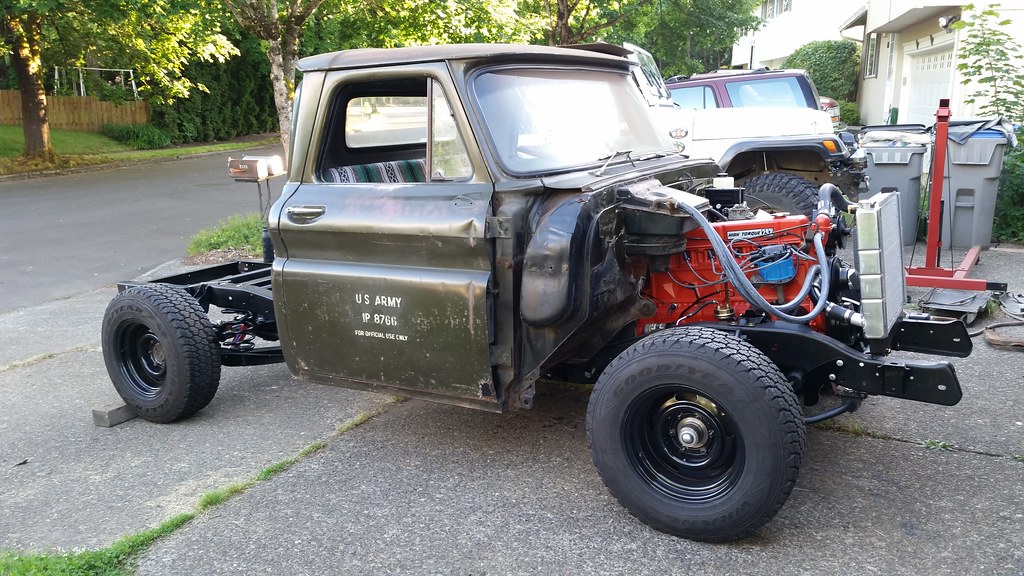 I did get a wild hare and fired it up too. I didn't have the belts on it so I only ran it for a short time. It seems to run great! https://www.youtube.com/watch?v=3e9-tnDUMeo Yesterday, I worked on the bed and dad came by to help troubleshoot the clutch. He fixed some of it but it appears that the throwout bearing isn't 100% correct on the shift fork so looks like I get to pull the tranny and fix that. Bed wood turned out great! I wish it had the holes in it but that's also looking like why this kit was cheaper than anywhere else. No biggie. 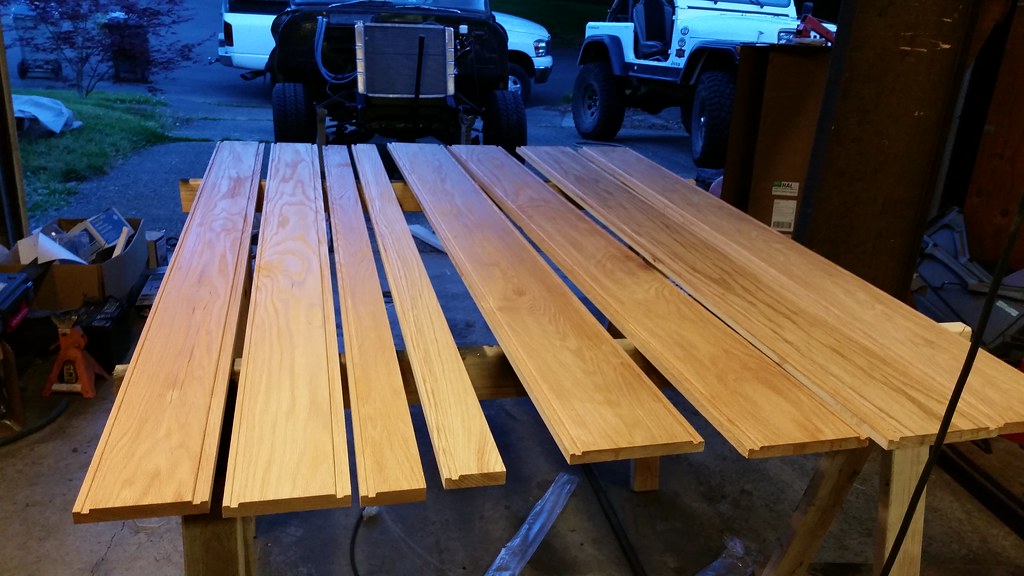
|
|
|
|

|
|
|
#2 |
|
Registered User
 Join Date: Mar 2013
Location: Southern Oregon
Posts: 10,384
|
Re: 1966 C10 Project Truck
Looking real good!
 Engine sounds good! Might retard the timing a hair. Hope the clutch is an easy fix! Engine sounds good! Might retard the timing a hair. Hope the clutch is an easy fix! 
__________________
1966 Chevy C10 "Project Two Tone" http://67-72chevytrucks.com/vboard/s...d.php?t=596643 1964 GMC "Crustine" semi-build:http://67-72chevytrucks.com/vboard/s...d.php?t=665056 My youtube channel. Username "Military Chevy": https://www.youtube.com/channel/UC_h...fzpcUXyK_5-uiw |
|
|

|
|
|
#3 |
|
Registered User
Join Date: Aug 2015
Location: Kelowna, B.C, Canada
Posts: 1,747
|
Re: 1966 C10 Project Truck
Nice work, your sure getting a lot done
__________________
Nik...................____ 62 lwb c10 step-side 261 5 spd .........________//__{\_____ ,,,,,,,/__(O)___//___/__(O)_/ my build thread. Sending unit solution |
|
|

|
|
|
#4 | |
|
Registered User
Join Date: Apr 2004
Location: Tigard, Or
Posts: 503
|
Re: 1966 C10 Project Truck
Quote:
Thanks! Being single does have it's benefits sometimes 
|
|
|
|

|
|
|
#5 |
|
Registered User
Join Date: Oct 2013
Location: Oklahoma City Okla
Posts: 196
|
Re: 1966 C10 Project Truck
I don't know if you have tried this but one way to remove and replace the transmission and make it easier to do is to buy two bolts that are about 4-5 inches long. Cut the heads off, and place them in the block so that you can use them as sliders to slide the transmission in straight. After it is in place and the other bolts in place then put the original bolts back in one at a time. It makes it easier especially if doing it by yourself.
Dwight |
|
|

|
|
|
#6 |
|
Registered User
Join Date: Apr 2004
Location: Tigard, Or
Posts: 503
|
Re: 1966 C10 Project Truck
My buddy and I checked some things out on the old pickup last night hoping to solve the problem without dropping the tranny. We didn't come up with anything except a list of what it's not and what it could be.
Here's what it's not: It's not air in the system It's not a clutch fork throw problem It's not a fork geometry problem Here's what it could be: It could be the input bearing retainer bottoming out on the clutch disc It could be the input sticking on the crank (doubtful but not ruling it out) It could be the input shaft bottoming out on the pilot bushing. It could be something in the tranny It could be something with the clutch itself Looks like instead of enjoying the truck at the show tomorrow, I'll be tinkering with the tranny and trying to figure out what's going on. Oh well, that's hot rodding 
|
|
|

|
|
|
#7 |
|
Registered User
Join Date: Apr 2004
Location: Tigard, Or
Posts: 503
|
Re: 1966 C10 Project Truck
Update from the weekend. I dropped the tranny down Friday night to take some measurements and everything seemed to have plenty of clearance, until I measured the length of the input and compared it to the dimension from bottomed out on the crank to the bellhousing. I had a bunch of interference there. I put the tranny in my vise and chopped about 1/4" off the end of the input shaft. When we went to stab it back in, we kept hitting a hard stop and no matter what, we couldn't get it to slide in. What had happened was after the tranny came out, I put the clutch alignment tool in the clutch and had dad push the clutch pedal, the clutch released and I must have pulled the alignment tool out a little too soon and the clutch disc dropped down so the hard stop that we were feeling was the pilot bushing.
Last night, I put the new pilot bushing in place and got the clutch and bellhousing on the motor. Tonight, the tranny will go back on and hopefully work like it's supposed to. Fingers crossed! 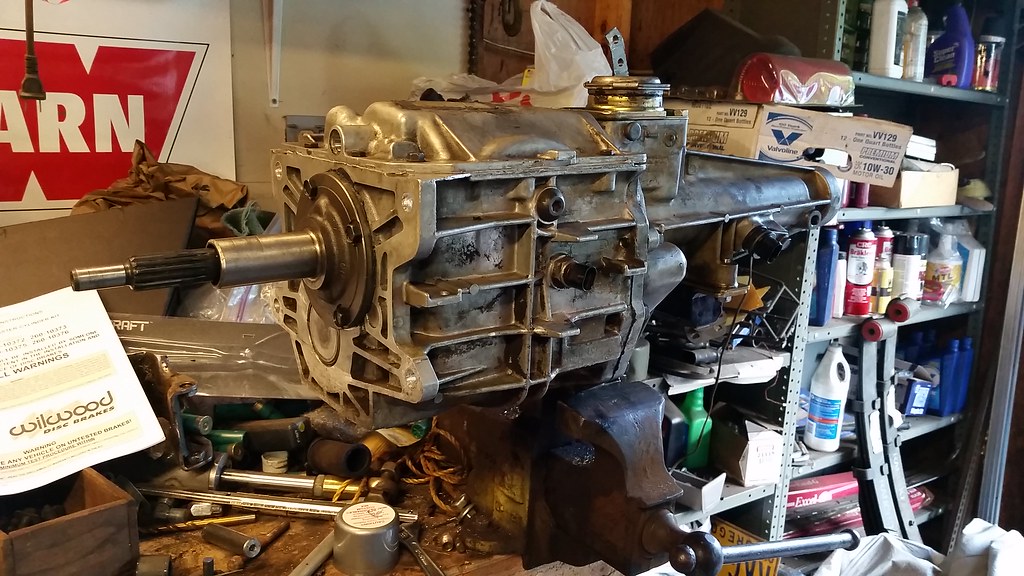 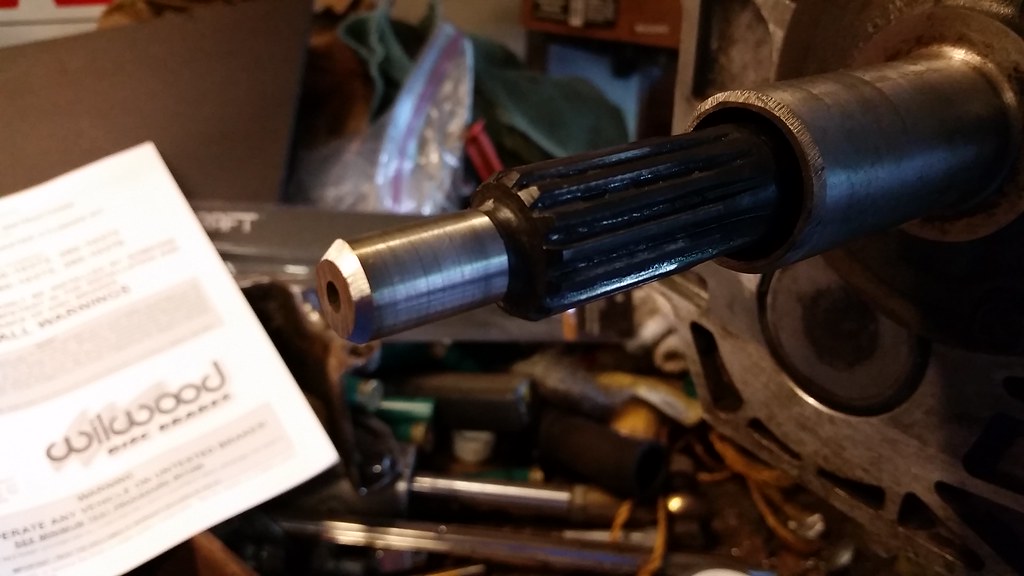 New throwout bearing, it'll get rid of the free play in the pedal. 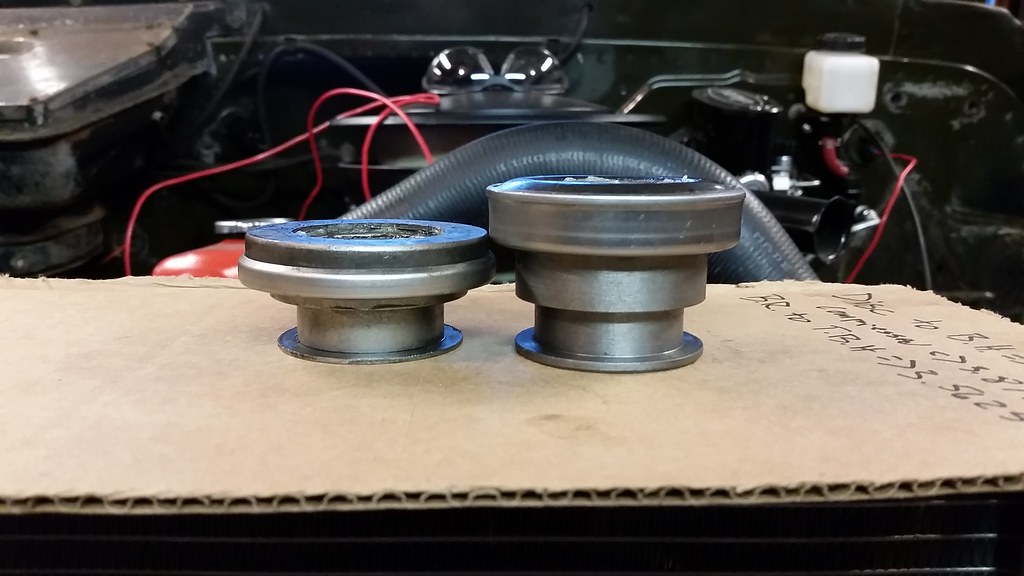 Gotta love backwards progress! 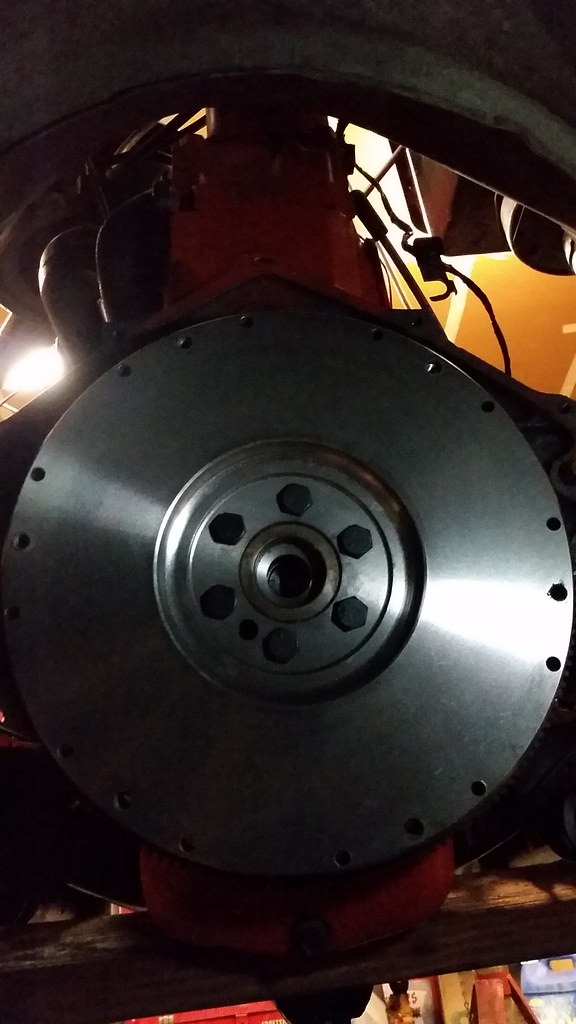 The awesome pilot bushing 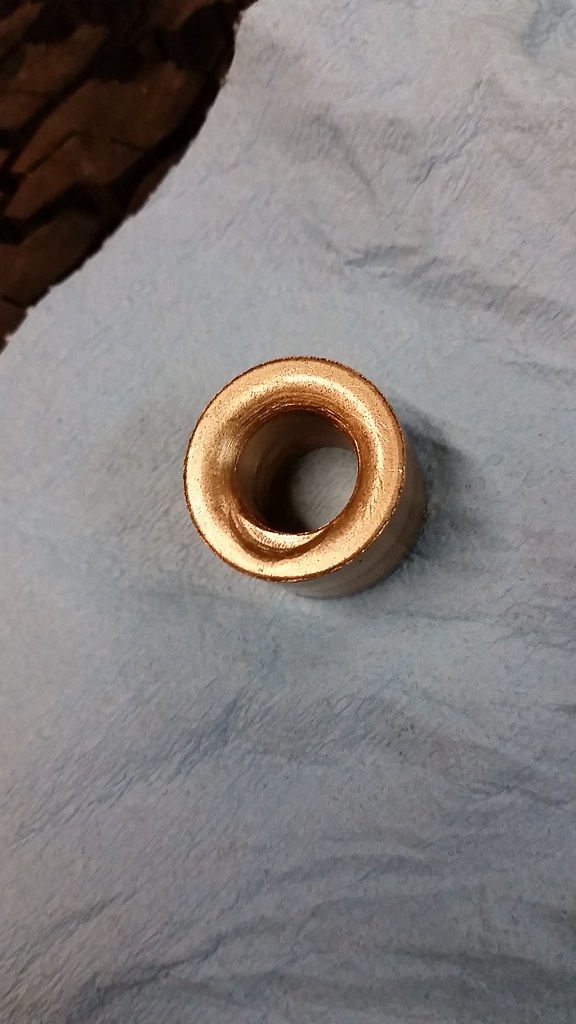
|
|
|

|
|
|
#8 |
|
Registered User
 Join Date: Mar 2013
Location: Southern Oregon
Posts: 10,384
|
Re: 1966 C10 Project Truck
Fingers Crossed!
__________________
1966 Chevy C10 "Project Two Tone" http://67-72chevytrucks.com/vboard/s...d.php?t=596643 1964 GMC "Crustine" semi-build:http://67-72chevytrucks.com/vboard/s...d.php?t=665056 My youtube channel. Username "Military Chevy": https://www.youtube.com/channel/UC_h...fzpcUXyK_5-uiw |
|
|

|
|
|
#9 |
|
Registered User
Join Date: Apr 2004
Location: Tigard, Or
Posts: 503
|
Re: 1966 C10 Project Truck
I made some good progress last night on the transmission front. I put it all back together and the tranny was still bound up, slid it back on the bolts and everything worked like it should so we pulled it down and I cut another 1/8" or so off the input and put it back in place. This time, it seems that I didn't have the pilot bushing in as far so the splines were hitting it but it was almost working properly! I ended up screwing that bushing up too so today I will make an install tool and try again Thursday night.
While bummed, I'm still making forward progress so that's what counts 
|
|
|

|
|
|
#10 |
|
Registered User
Join Date: Apr 2004
Location: Tigard, Or
Posts: 503
|
Re: 1966 C10 Project Truck
I did just order everything I need for the power steering hoses. All I'll need is a belt and that system will be done

|
|
|

|
|
|
#11 |
|
Registered User
 Join Date: Mar 2013
Location: Southern Oregon
Posts: 10,384
|
Re: 1966 C10 Project Truck
Progress is always a good thing.

__________________
1966 Chevy C10 "Project Two Tone" http://67-72chevytrucks.com/vboard/s...d.php?t=596643 1964 GMC "Crustine" semi-build:http://67-72chevytrucks.com/vboard/s...d.php?t=665056 My youtube channel. Username "Military Chevy": https://www.youtube.com/channel/UC_h...fzpcUXyK_5-uiw |
|
|

|
|
|
#12 |
|
Registered User
Join Date: Apr 2004
Location: Tigard, Or
Posts: 503
|
Re: 1966 C10 Project Truck
Been busy with other things the last few nights, a buddy at work decided to break his leg a couple weeks ago so work has been busier and I've been helping them out outside work whenever I can. I also got AC installed in the house yesterday too, this summer is going to be so nice!
Tonight, I plan on getting back to the truck so I can swap the pilot bushing out. I decided to make myself an install tool on lunch the other day. Should work well and hopefully end my days of munching pilot bushings  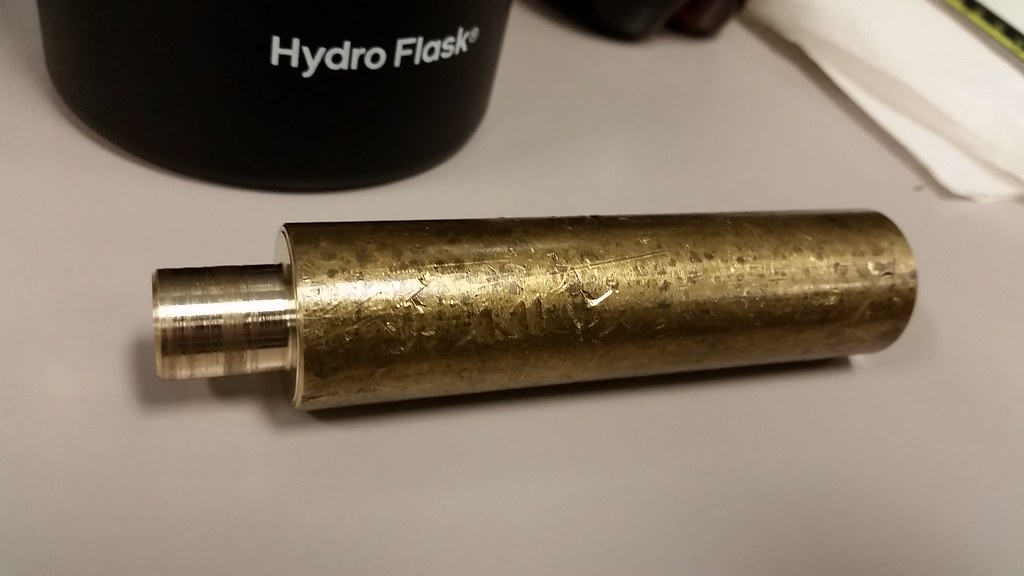 I should get some good truck time this weekend again, hopefully I get to work on something other than the transmission! 
|
|
|

|
|
|
#13 |
|
Registered User
Join Date: Feb 2008
Location: Sidney,b.c.
Posts: 4,425
|
Re: 1966 C10 Project Truck
is the shaft the right size also for the clutch disc? then you would also have your line up shaft
ron |
|
|

|
|
|
#14 | |
|
Registered User
Join Date: Apr 2004
Location: Tigard, Or
Posts: 503
|
Re: 1966 C10 Project Truck
Quote:
 What I think the issue has been is most of the guys add a spacer between the transmission and bellhousing, I originally thought it was an adapter but after playing with my setup, it appears that it's a spacer. This spacer keeps the input shaft out of the crank and the pilot bushing and unfortunately isn't a route that I want to pursue at this time due to not wanting to re-do the driveline again. The next time it will get modified is when the truck has a V8 and a 6 speed  I guess it all boils down to learning lessons the hard way but hopefully I will have valid input for others doing the same thing 
|
|
|
|

|
|
|
#15 |
|
Registered User
Join Date: Feb 2012
Location: pleasant valley--placerville ca
Posts: 3,039
|
Re: 1966 C10 Project Truck
rings are avl in the after market. ck advanced adapters for one.
__________________
1961 chevy K10 my build is------------61K10 build |
|
|

|
|
|
#16 |
|
Registered User
Join Date: Apr 2004
Location: Tigard, Or
Posts: 503
|
Re: 1966 C10 Project Truck
Alright, here's what I'm going to do. I'm going to have my buddy cut out a spacer on his plasma table and space both the transmission and the bearing retainer the same amount and then install the bushing ring from Novak to get the bearing retainer to fit proper in the bellhousing.
This should get me everything I need and have it all work like it's supposed to. |
|
|

|
|
|
#17 |
|
Registered User
Join Date: Apr 2011
Location: .
Posts: 3,104
|
Re: 1966 C10 Project Truck
That is slick.
|
|
|

|
|
|
#18 |
|
Registered User
Join Date: Apr 2004
Location: Tigard, Or
Posts: 503
|
Re: 1966 C10 Project Truck
Cleaned up the spacers on lunch yesterday and got the ring for the bearing retainer turned down to the right diameter. Fit it up when I got home and it all fit
 The motor and tranny came with another bearing retainer that was in bad shape and I wasn't going to use. I bolted the ring to the retainer and put the snout in the lathe. Worked great! 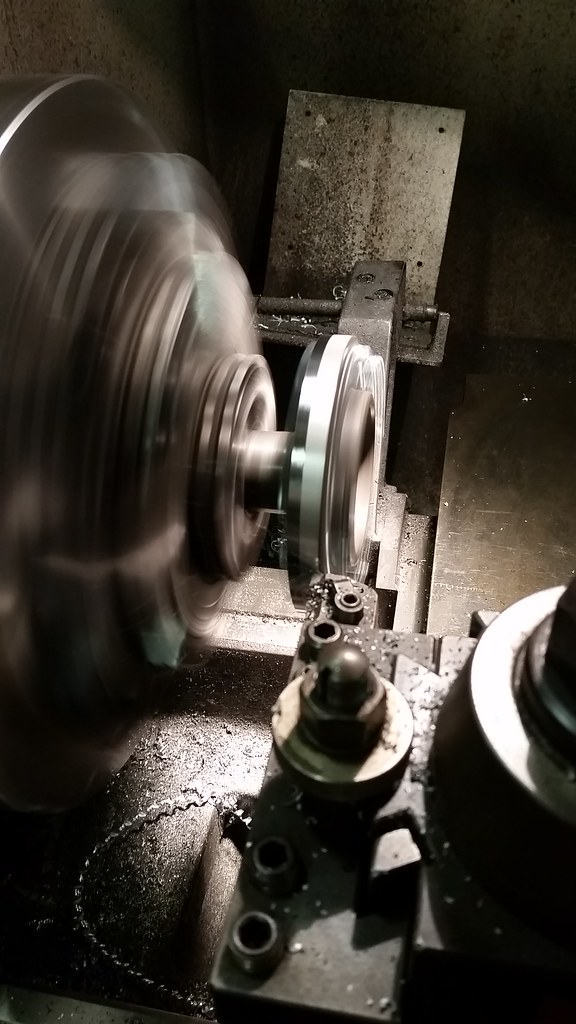 Test fit everything just to make sure it all fit. 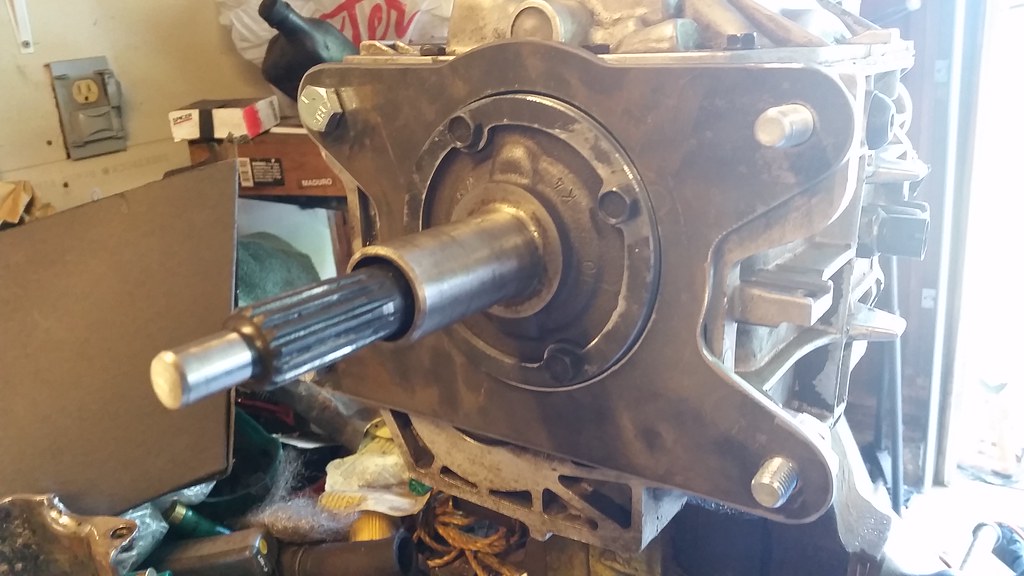 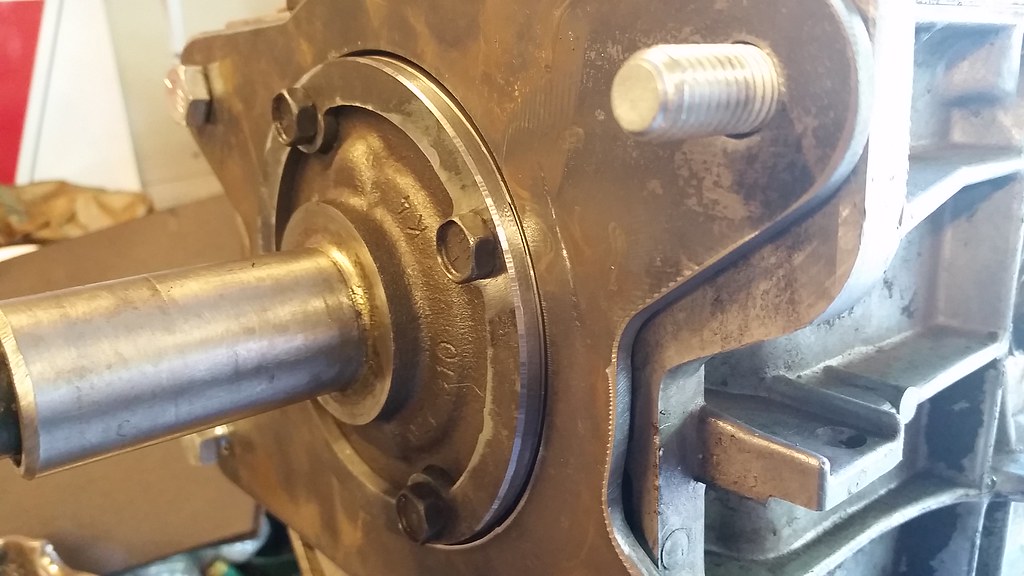 Also, my buddy needed a new coolant bypass plug made so I played around and made this. Turned out killer! 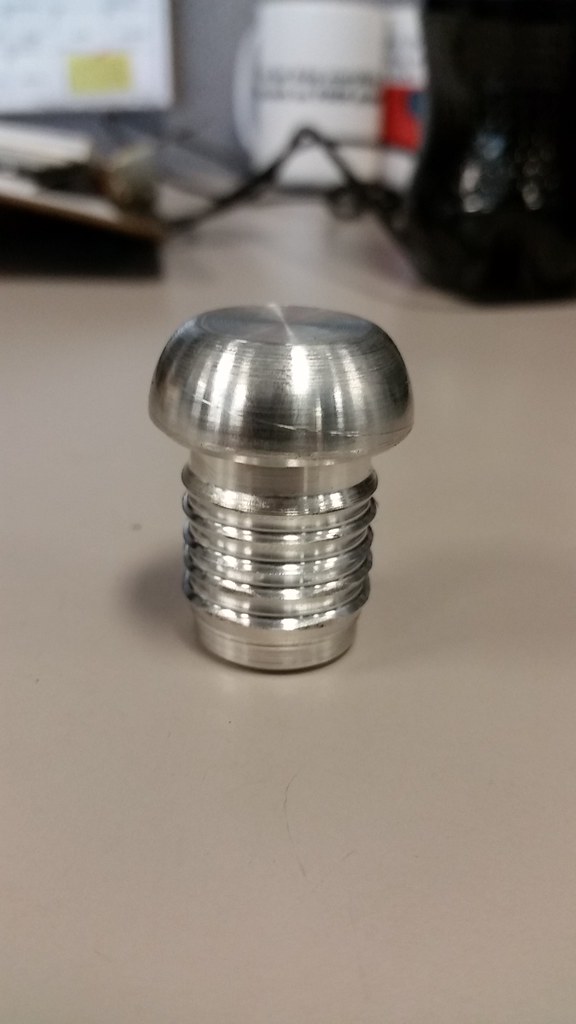 Tonight, I'm going to help my buddy with the brakes on his truck so he can hit up a track night on Friday. I'll see about stabbing the tranny back in my truck Friday night or Saturday. |
|
|

|
|
|
#19 |
|
Registered User
Join Date: Aug 2015
Location: Kelowna, B.C, Canada
Posts: 1,747
|
Re: 1966 C10 Project Truck
Nice work Scott, you'll be an expert at removing and installing tranny's by the time you're done

__________________
Nik...................____ 62 lwb c10 step-side 261 5 spd .........________//__{\_____ ,,,,,,,/__(O)___//___/__(O)_/ my build thread. Sending unit solution |
|
|

|
|
|
#20 |
|
Registered User
Join Date: Apr 2004
Location: Tigard, Or
Posts: 503
|
Re: 1966 C10 Project Truck
A few more times of installing and removing the tranny and I have a setup that works! The spacer worked perfect and all the parts worked together like they were supposed to. So happy to be able to move on and re-start the assembly process!
Between tinkering on the truck this weekend, I had a little "Scoot time" and walked down to the park for the Hot Air Balloon Festival Saturday night and did some rock therapy in the Jeep on Sunday. It was a great weekend! There were supposed to be 8 or so balloons all lit up but I guess there was too much wind so only one was brave enough. It was pretty cool to see the process to get it all setup and ready to fly though.  This is what my Jeep is built for, it still blows my mind on how capable it is for in my mind a fairly stock looking rig. Yes, I do enjoy my toys   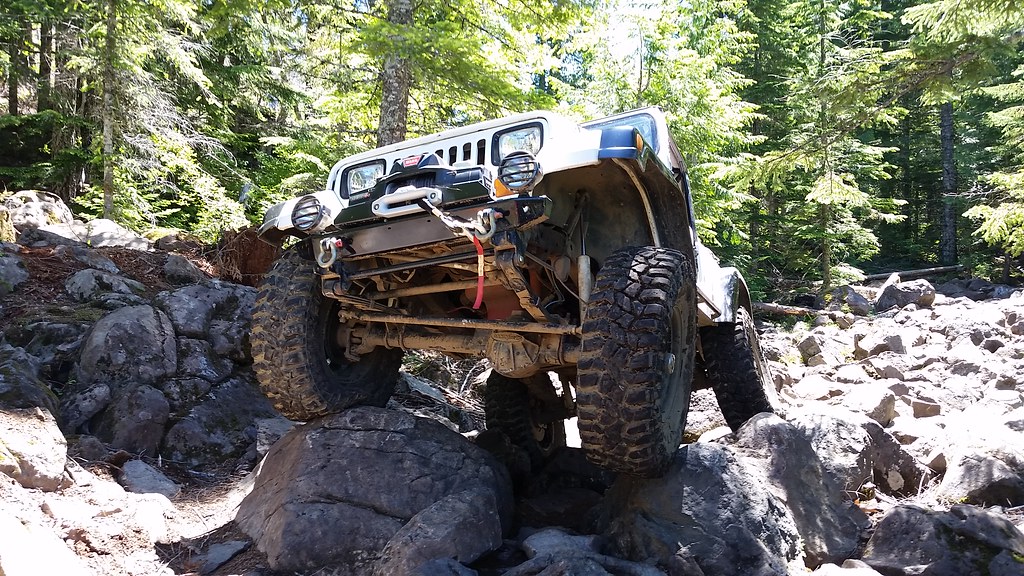 A little paint transfer from a tree that someone else rubbed against. The Jeep is almost strictly a wheeler so I don't worry about the body so much  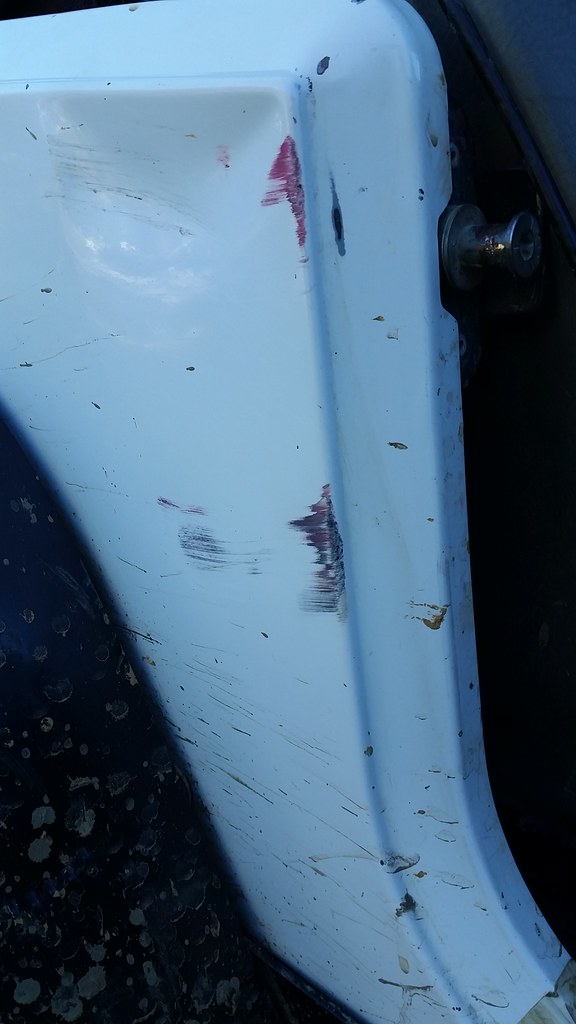 I painted the bed strips body color a while back and last night rounded up all the strip hardware and gave them a coat of body color also. I think it'll look good and finish off the bed a bit. 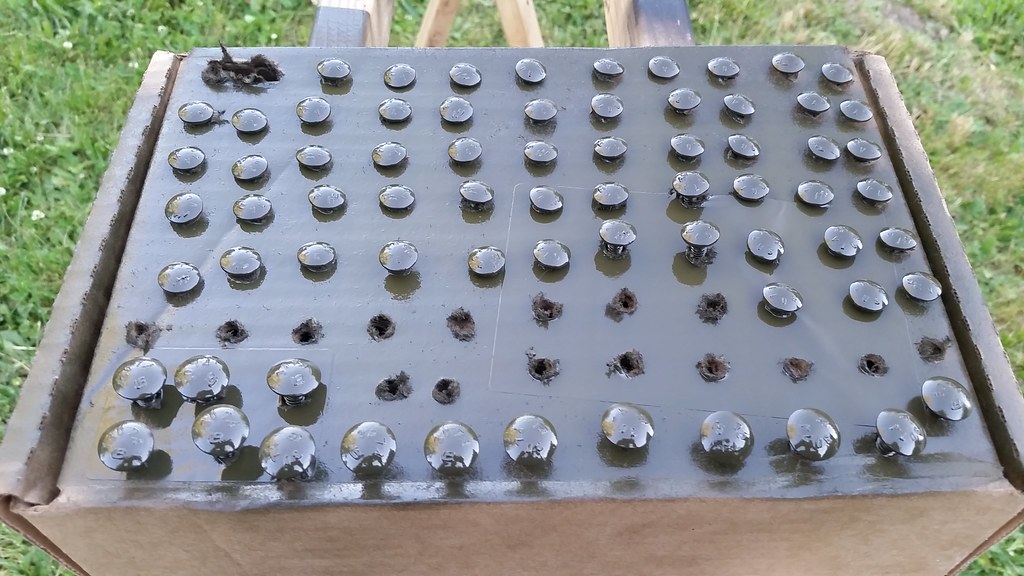 More to come this week. If everything goes right, I should have the bed back on the truck and the driveline sent out to get shortened due to my spacer. |
|
|

|
|
|
#21 |
|
Registered User
Join Date: Apr 2004
Location: Tigard, Or
Posts: 503
|
Re: 1966 C10 Project Truck
Tinkered with it last night, I gotta say that messing with the tranny for so long killed the motivation levels a bit. I wasn't sure what I would need to do to the tranny crossmember to get it bolted back up and all it needed was opening the holes on the frame attachment side. Easy!
The shifter was a bit of a reach into 3rd and 5th was way out there so I cut a couple slices at the base of the lever and pulled it over to close the slices. Worked well and is much much better! 1st gear 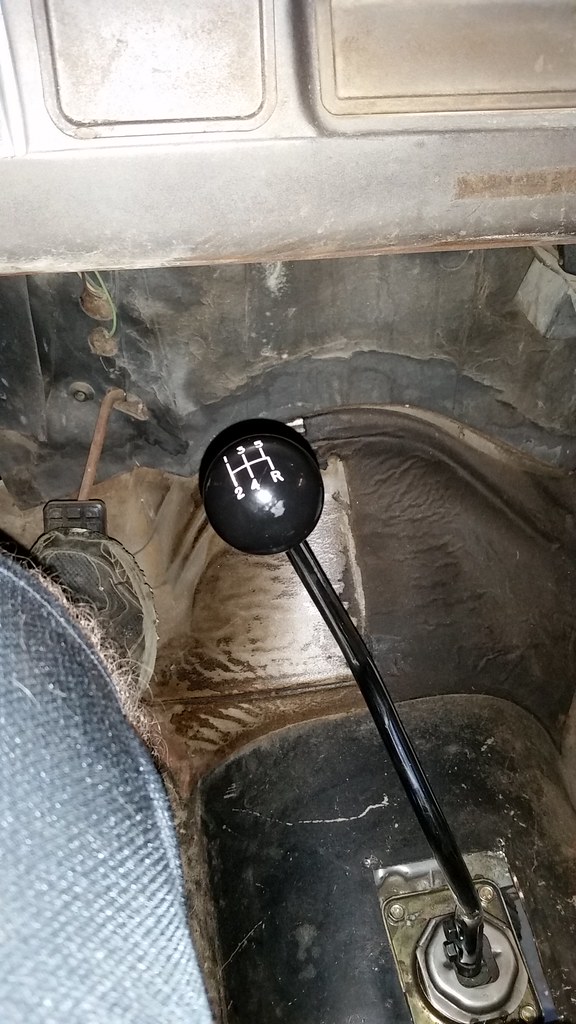 5th gear. It's about where 3rd used to be, can't get much better than that! 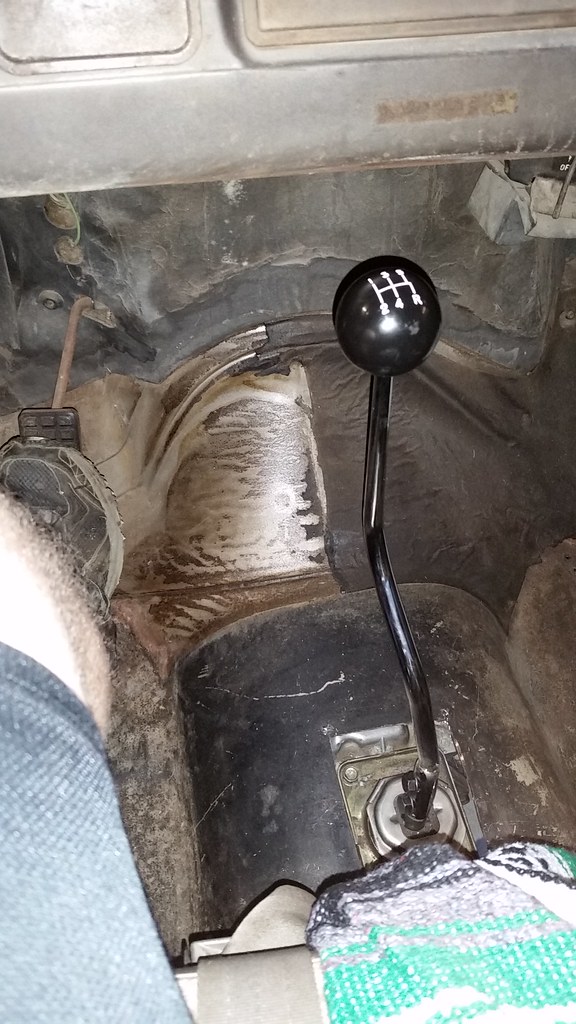 Here you can see the bend that I put in it 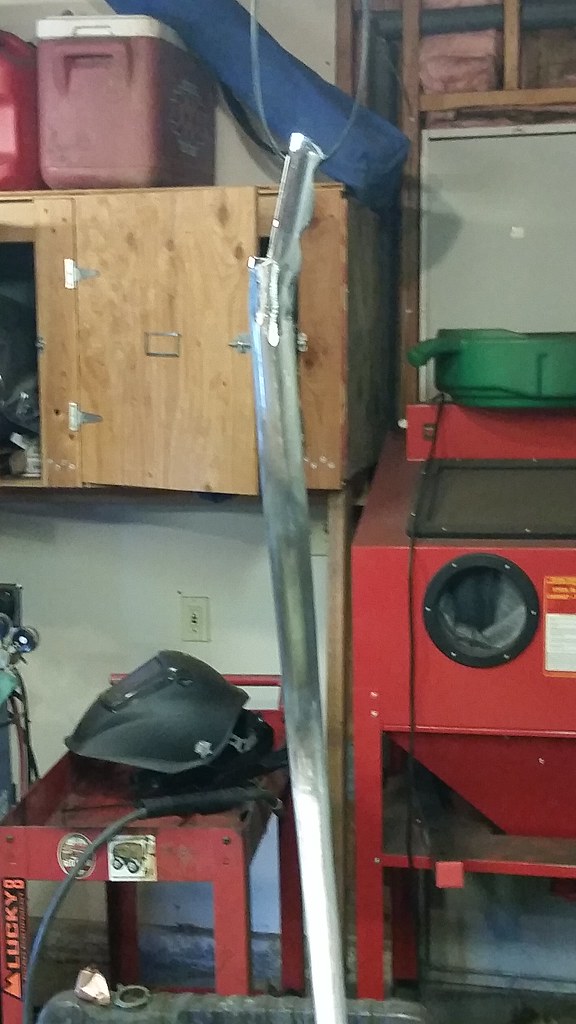 And just because the chrome looked out of place, I painted it black. It should look way better now! 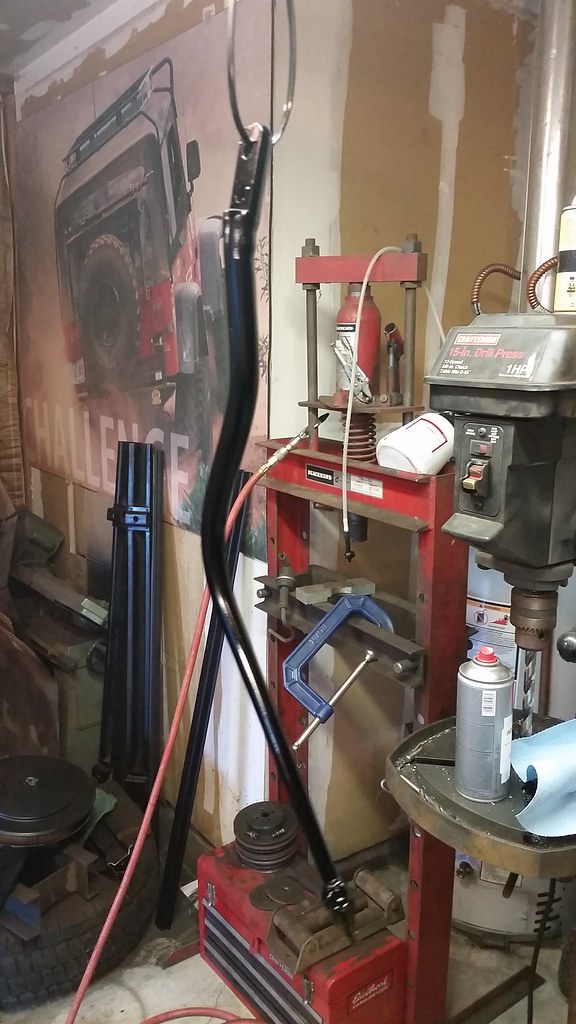 Here's a shot of what the bed will look like. I painted the strips and the hardware body color with a semi-gloss sealer on the oak. It's going to look great. 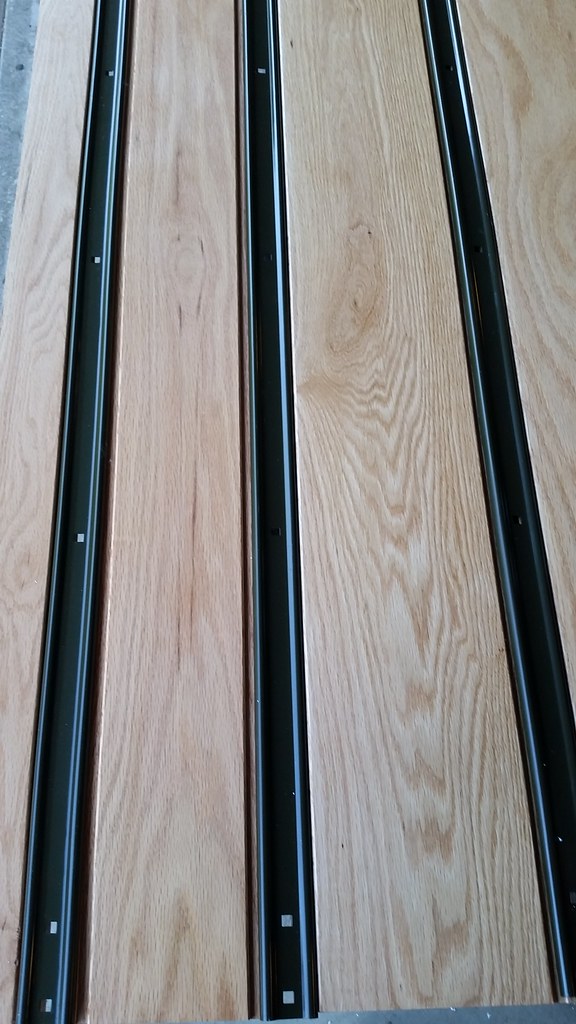
|
|
|

|
|
|
#22 |
|
Registered User
Join Date: Apr 2011
Location: .
Posts: 3,104
|
Re: 1966 C10 Project Truck
Great work on the fender and everything else I read, (getting caught back up).
Should move along with the 5 speed at a quick clip. |
|
|

|
|
|
#23 |
|
Registered User
Join Date: Apr 2004
Location: Tigard, Or
Posts: 503
|
Re: 1966 C10 Project Truck
Well, the plan was to clean the inner fenders and core support up and paint it. Not pull it all apart
 . I'll be able to get a better job done now so it's worth it! I'll more than likely do a little rust repair before I put it all back together, just some minor things. Under the battery looked amazing which was awesome to see! . I'll be able to get a better job done now so it's worth it! I'll more than likely do a little rust repair before I put it all back together, just some minor things. Under the battery looked amazing which was awesome to see!
|
|
|

|
|
|
#24 |
|
Registered User
 Join Date: Mar 2013
Location: Southern Oregon
Posts: 10,384
|
Re: 1966 C10 Project Truck
Looking good! Making great progress.

__________________
1966 Chevy C10 "Project Two Tone" http://67-72chevytrucks.com/vboard/s...d.php?t=596643 1964 GMC "Crustine" semi-build:http://67-72chevytrucks.com/vboard/s...d.php?t=665056 My youtube channel. Username "Military Chevy": https://www.youtube.com/channel/UC_h...fzpcUXyK_5-uiw |
|
|

|
|
|
#25 |
|
Registered User
Join Date: Apr 2004
Location: Tigard, Or
Posts: 503
|
Re: 1966 C10 Project Truck
Got a bunch done on the front clip this weekend! My buddy finished up the other fender and even found time on Saturday to shoot both of them for me. I wasn't expecting that! When I got home from his house, I tore into the inner fenders and started the rust repair. It took a while but I got both done between Saturday afternoon and yesterday. Squirted some paint on them and the core support last night and maybe get to installing them tonight if the weather holds out. I'm also hoping to get it into the exhaust shop on Saturday as well. It's coming right along!
52 years of dirt and rust in here 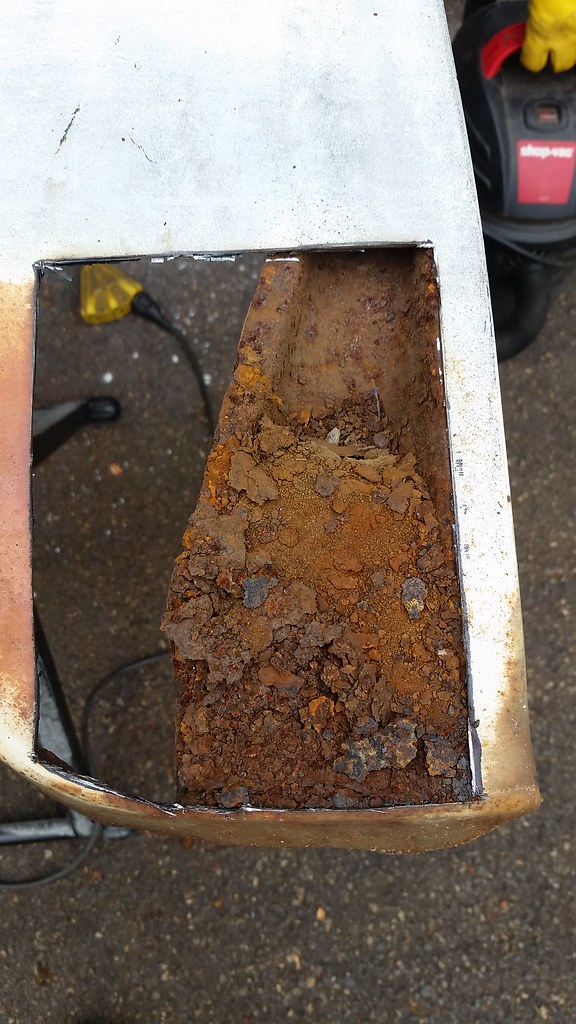 Patch all welded and sanded smooth, didn't take too much filler on this one 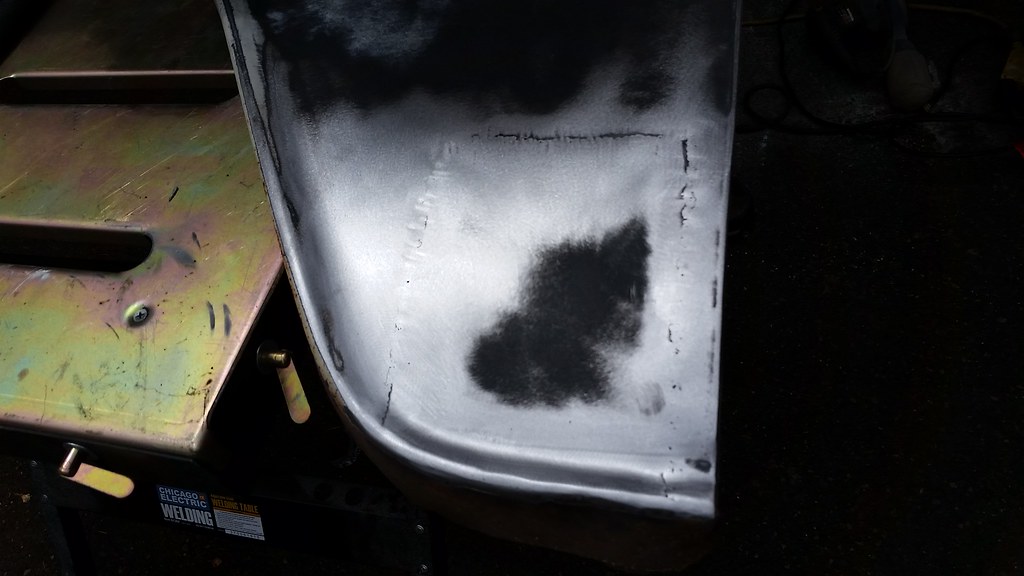 Paint! We have our work cut out for us to make the truck look as good as it can to match the fenders as much as possible before we degrade the finish of the fenders to match the rest of the truck  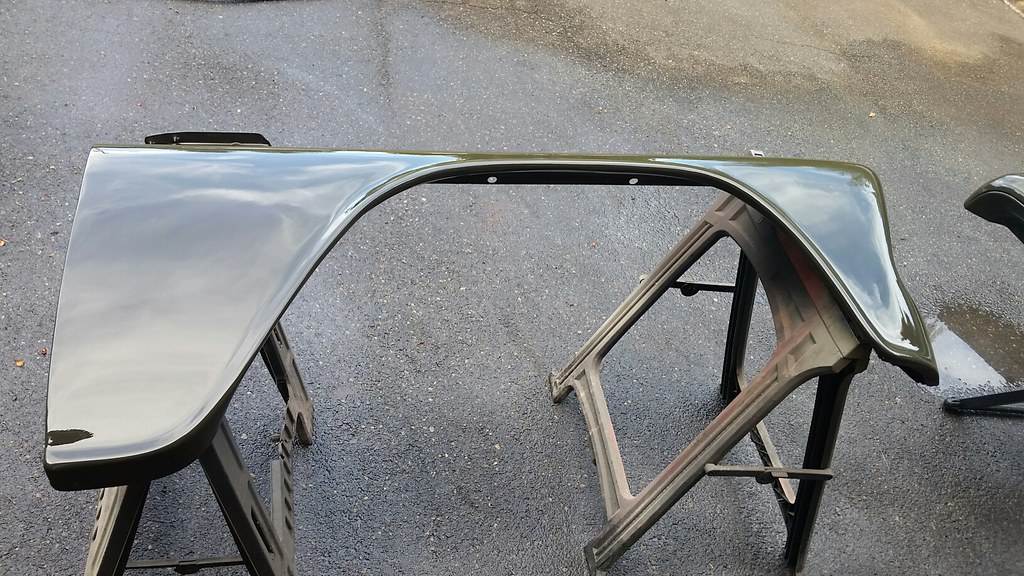 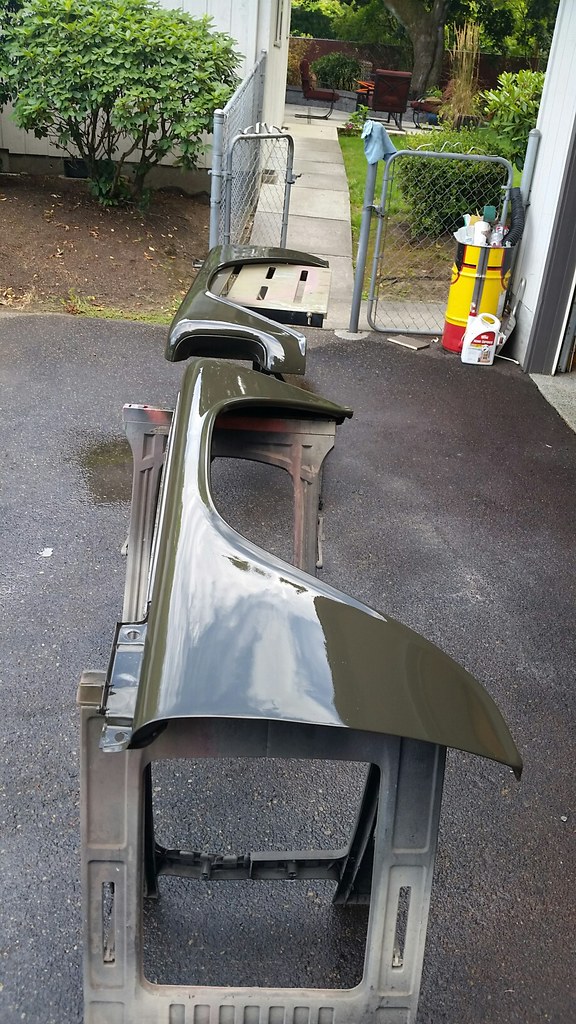 Driver inner fender had a bunch of rust [url=https://flic.kr/p/KfDz2V] 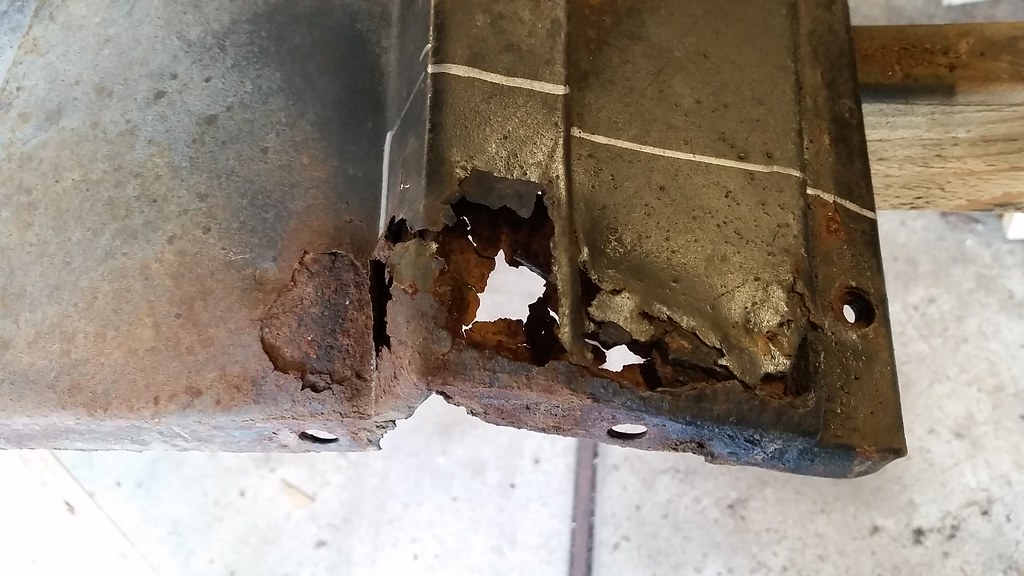 Patch all welded in 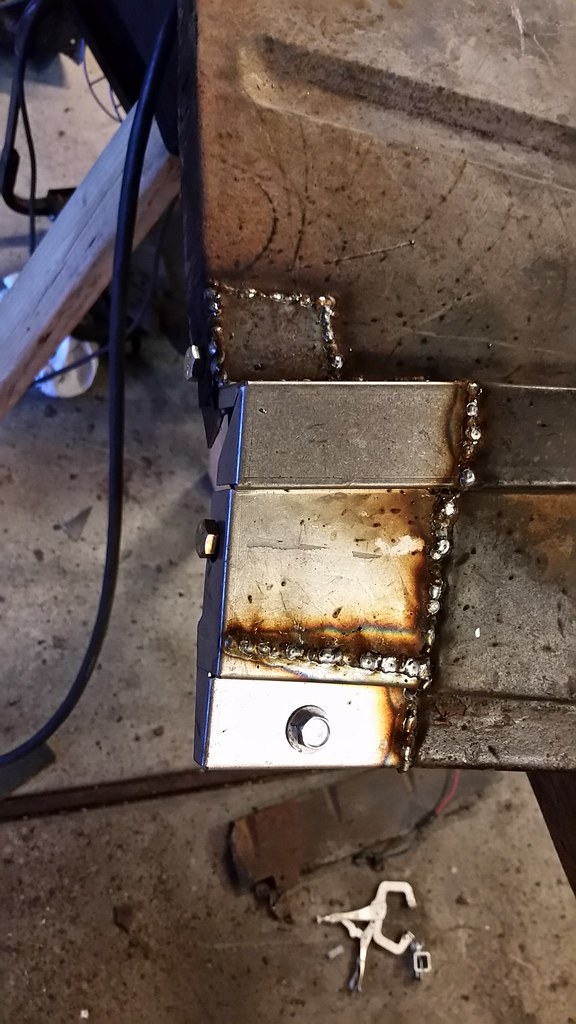 I also had to rebuild the braces for both sides as well. They aren't perfect but nobody will see them so they are perfect for the truck! 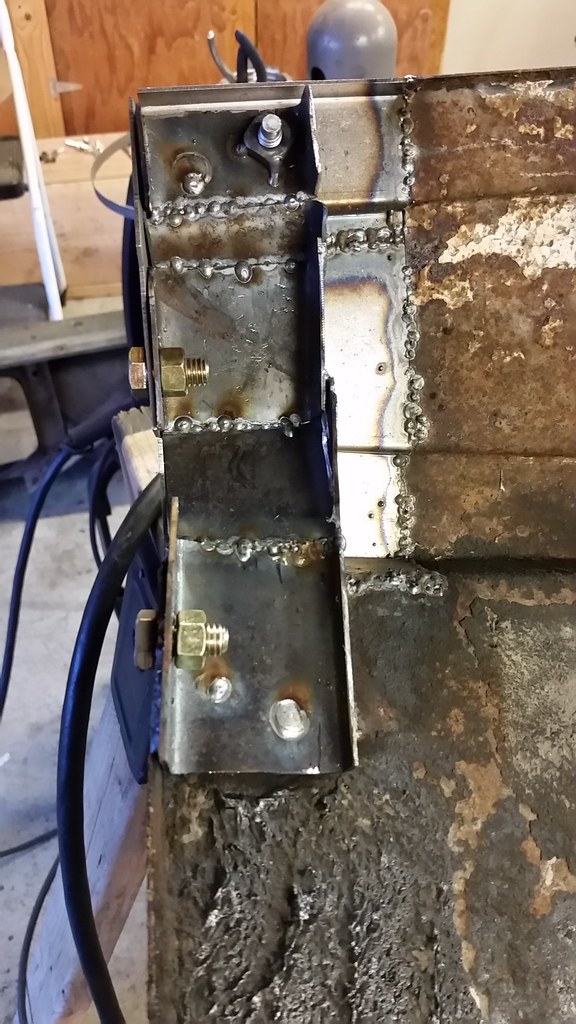 Passenger side had some as well, it went a little quicker than the driver's side because I had a plan and jumped right in 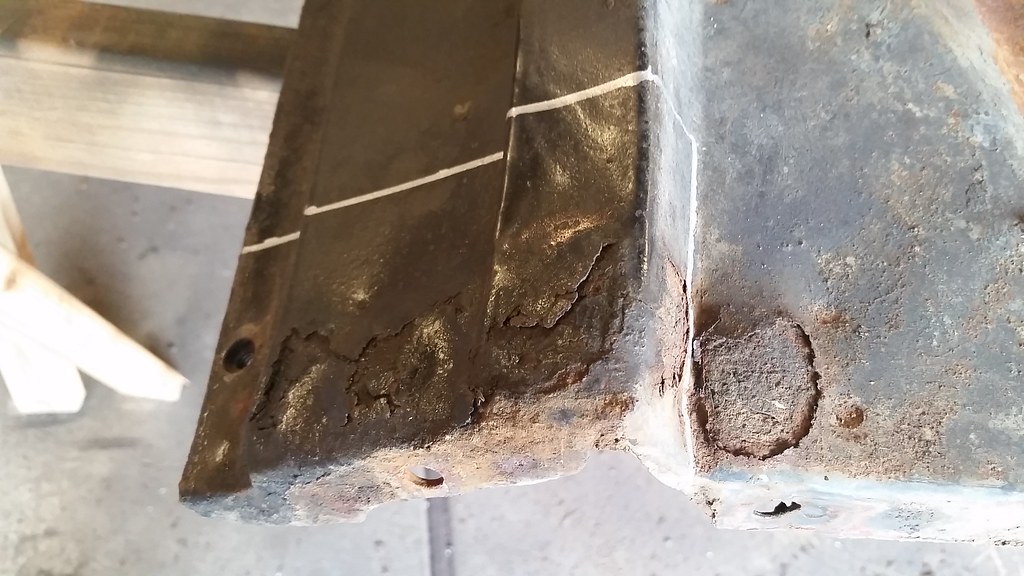 Patch all welded in and primed 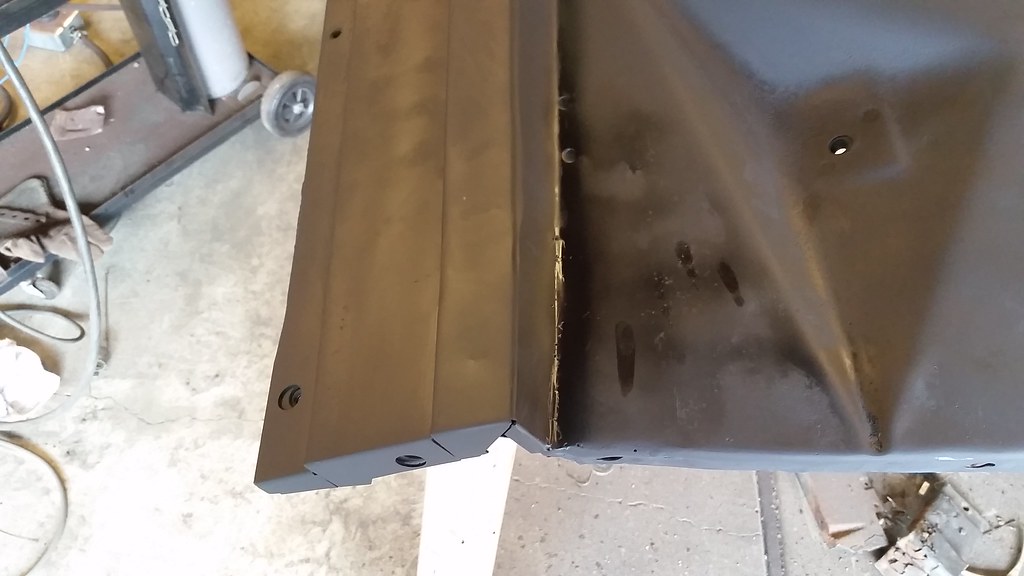 Just for fun, I set the core support on the frame to check a couple things. Fresh paint makes everything look great! 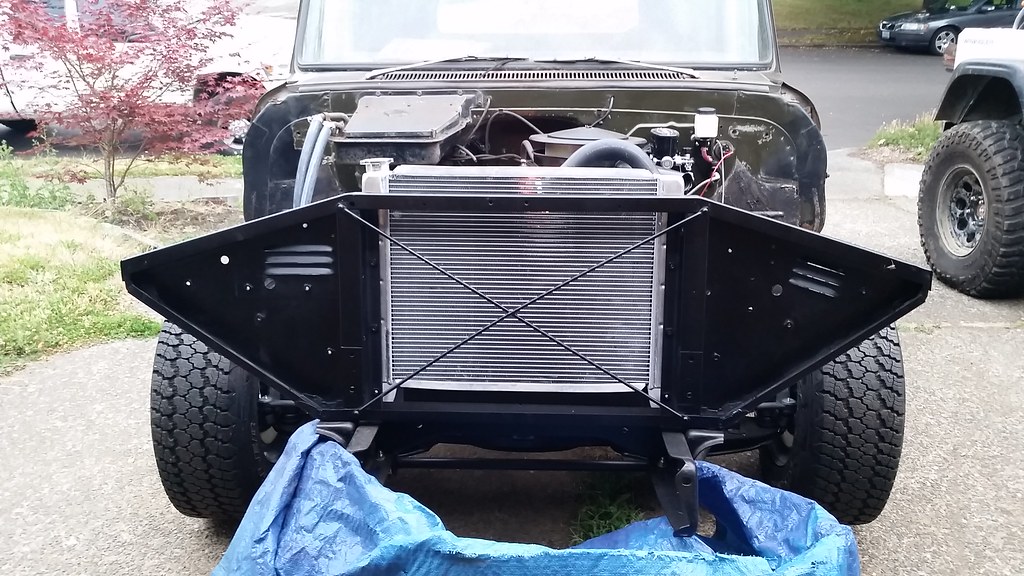 That's all I've got for now. |
|
|

|
 |
| Bookmarks |
|
|