
|
|
|
 10-24-2014, 09:13 PM
|
#1 |
|
Registered User
Join Date: Jun 2006
Location: Utah
Posts: 1,562
|
Re: Project Reno - 72 cheyenne rebuild
Man that sucks!!
The rest of the truck is absolutely beautiful and I love to see the updates...well, except the carnage 
|

|

|
|
10-25-2014, 12:52 AM
|
#2 |
|
Registered User
 Join Date: Oct 2012
Location: Burnet, Tx
Posts: 332
|
Re: Project Reno - 72 cheyenne rebuild
I have spent all evening reading through your build thread. You've done an awesome job especially with all the issues you've been up against. Top notch work on everything you've done, clean build and I like the root beer color.
Thanks for taking the time over the years to keep posting updates, it's a good reminder to those of us just starting a project that it will take years. None of this stuff happens over night. When I get frustrated with my lack of progress I look at builds like yours that have gone on for years but have turned out to be works of art. Thanks. |
|
|
|
|
10-25-2014, 05:21 PM
|
#3 | |
|
Registered User
Join Date: Nov 2007
Location: baltimore, maryland
Posts: 617
|
Re: Project Reno - 72 cheyenne rebuild
Quote:
__________________
Project Reno Build http://67-72chevytrucks.com/vboard/s...d.php?t=392636 Easier to beg forgiveness than ask permission! 
|
|
|
|
|
|
10-26-2014, 08:27 AM
|
#4 |
|
Senior Member
Join Date: Jul 2009
Location: Tomball, Texas
Posts: 1,592
|
Re: Project Reno - 72 cheyenne rebuild
Looks like you are on the home stretch with the wiring. Too bad on the broken clutch fork, but better to deal with it parked in the garage than for it to break when you are driving it! Now you have me wondering about mine - I didn't even know there were a bunch of measurements to make. My clutch fork ball isn't adjustable though, so I assume it's just the push rod from the pedal I'll have to worry about adjusting.
__________________
Rick 78 GMC K15 SWB, 350/NV4500/NP205/4.10s Project Hazel 71 GMC C25 350/TH400 - Project Angie 59 Chevy SWB Stepside (next in line? Not sure now )2001 GMC Sierra K2500 |
|
|
|
|
10-26-2014, 09:07 AM
|
#5 | |
|
Registered User
Join Date: Nov 2007
Location: baltimore, maryland
Posts: 617
|
Re: Project Reno - 72 cheyenne rebuild
Quote:
__________________
Project Reno Build http://67-72chevytrucks.com/vboard/s...d.php?t=392636 Easier to beg forgiveness than ask permission!
|
|
|
|
|
|
10-25-2014, 02:04 PM
|
#6 |
|
Registered User
Join Date: Aug 2013
Location: San Jose Ca
Posts: 965
|
Re: Project Reno - 72 cheyenne rebuild
Now I see the deference with my factory hydraulic clutch and the aftermarket one. my pivot ball does not adjust like yours. glad your able to figure it out.
|
|
|
|
|
10-28-2014, 05:16 PM
|
#7 |
|
Registered User
Join Date: Nov 2007
Location: baltimore, maryland
Posts: 617
|
Re: Project Reno - 72 cheyenne rebuild
On the road again!
Well, was in Savanna for the weekend, nice town, and while I was away the new clutch fork arrived. It is definitely a re-design. The fingers that retain the spring clip are much beefier and the spring clip is much beefier. New at top, old on bottom.  A different rivet has also been used. Old first then new below.   Bottom line, the new fork fit tightly into the throwout bearing. It all went together nicely. I also discovered that the piston on the slave cylinder had moved all the way out as a result of the fork slipping off the ball stud. I had to crack open the bleeder and push the rod and piston back to recover some of the slaves throw. Once I did that and hooked everything back up I re-bled the clutch system. It now works absolutely perfect. Pedal feels very nice with a significant throw. I love it when a plan works. I also received all my parts to finish the cab so tomorrow, it will be done. Ahhhhh, the smell of victory. After going through all this with the Novak hydraulic kit I am going to do some drawings and a write up to make it easier. There is definitely a gap between what they give you for installation and what is truly needed to easily understand how to make it work well.
__________________
Project Reno Build http://67-72chevytrucks.com/vboard/s...d.php?t=392636 Easier to beg forgiveness than ask permission!
|
|
|
|
|
05-29-2016, 04:37 PM
|
#8 | |
|
A guy with a truck
Join Date: Sep 2005
Location: Germany, for now
Posts: 5,920
|
Re: Project Reno - 72 cheyenne rebuild
Quote:
Killer build, by the way. Hope you're enjoying her
__________________
-Chris Instagram _elgringoloco_ '70 Short-Wide How to: Ruin a perfectly good C10 70 Blazer ConversionHow To: Ruin a Perfectly Good 4wd '72 Highlander How To: Ruin a Perfectly Good K/5 (SOLD) '72 Blazer 2WD How to: Ruin a perfectly good Blazer (SOLD) '05 Yukon Daily Driven (not so stock) Yukon (SOLD) 07 Yukon Denali (daily) Members met list: SCOTI, darkhorse970, 67cheby, 67cheby'sGirl, klmore, porterbuilt, n2billet, Fastrucken, classicchev, Col Clank, GSFMECH, HuggerCST, Spray-Bomb, BACKYARD88, 5150, fine69, fatbass, smbrouss70, 65StreetCruiser, GAc10boy |
|
|
|
|
|
06-06-2016, 12:40 PM
|
#9 |
|
Registered User
Join Date: Nov 2007
Location: baltimore, maryland
Posts: 617
|
Re: Project Reno - 72 cheyenne rebuild
Hi Chris. here are the drawings I did. Hope this helps. I thought they might be as confusing as the Novak site directions? My system is still working well. Best clutch pedal feel I have ever had.
Good luck Chris
__________________
Project Reno Build http://67-72chevytrucks.com/vboard/s...d.php?t=392636 Easier to beg forgiveness than ask permission!
|
|
|
|
|
10-26-2016, 09:30 PM
|
#10 |
|
Senior Member
Join Date: Jul 2009
Location: Tomball, Texas
Posts: 1,592
|
Re: Project Reno - 72 cheyenne rebuild
Ok Chris, been some time since there's been an update on this thread. I need a little better closure on this
I think you need to post at least a few pictures of how the truck's being used, or places it has taken you to. Help a guy out, please
__________________
Rick 78 GMC K15 SWB, 350/NV4500/NP205/4.10s Project Hazel 71 GMC C25 350/TH400 - Project Angie 59 Chevy SWB Stepside (next in line? Not sure now )2001 GMC Sierra K2500 |
|
|
|
|
10-26-2016, 11:26 PM
|
#11 | |
|
Registered User
Join Date: Nov 2007
Location: baltimore, maryland
Posts: 617
|
Re: Project Reno - 72 cheyenne rebuild
Quote:
I try and drive the truck at least 2-3 times a month to keep it happy and enjoy the fruits of all those years labor. I continue to upgrade when time, but just had a little one, my first, and time is less of a surplus than before her arrival. I did get a square body sway bar setup for the truck and plan to install as soon as I finish rebuilding my jeep's motor. I also still intend to upgrade the interior with more woodwork, but that will have to wait till next Summer. With the miles I have put on the truck I have had zero issues. It rides great and runs smooth as can be. The motor could use a few more horses for my taste so a cam will likely be put in this coming Summer as well. So here's some pics of the summer fun. 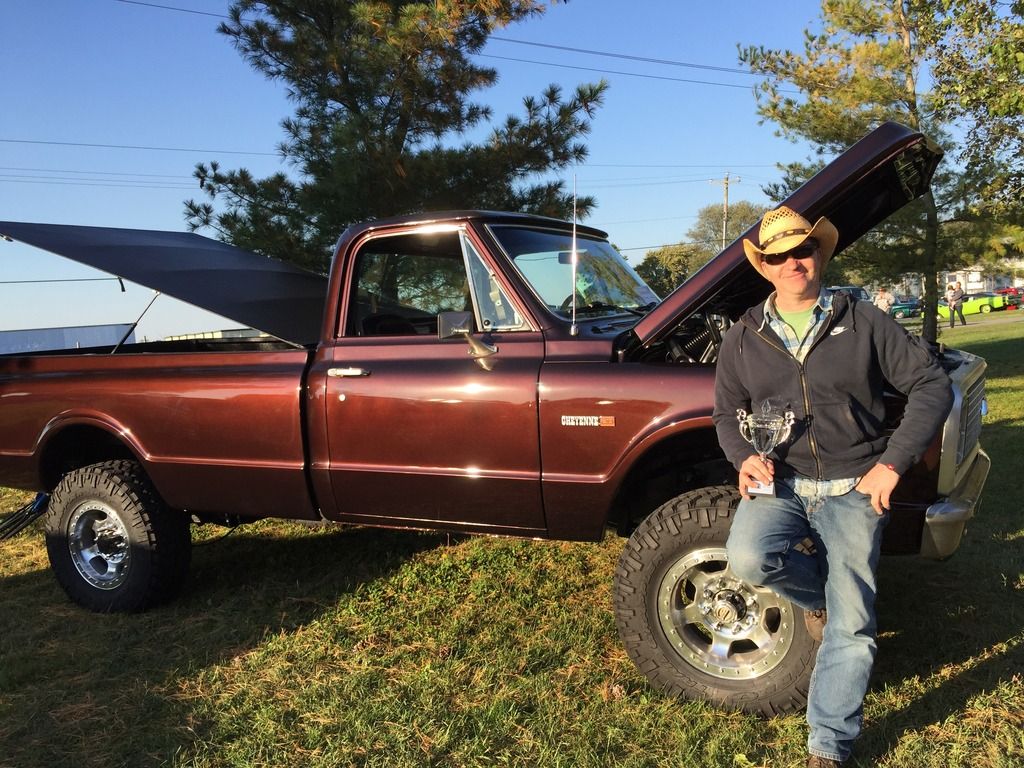 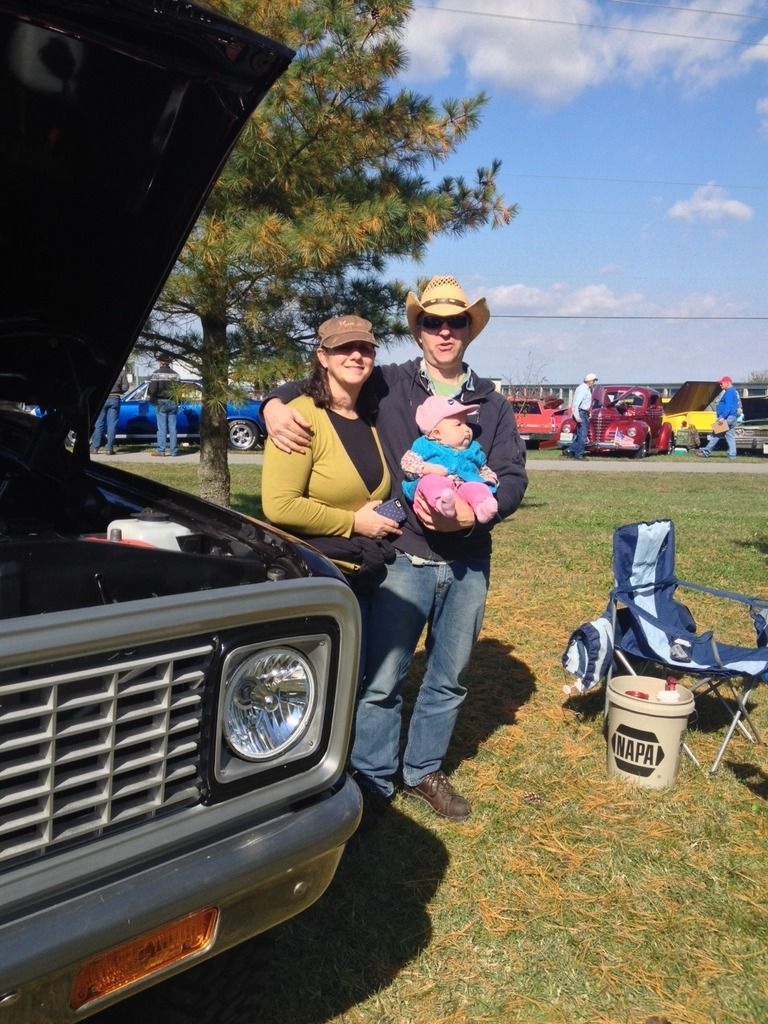 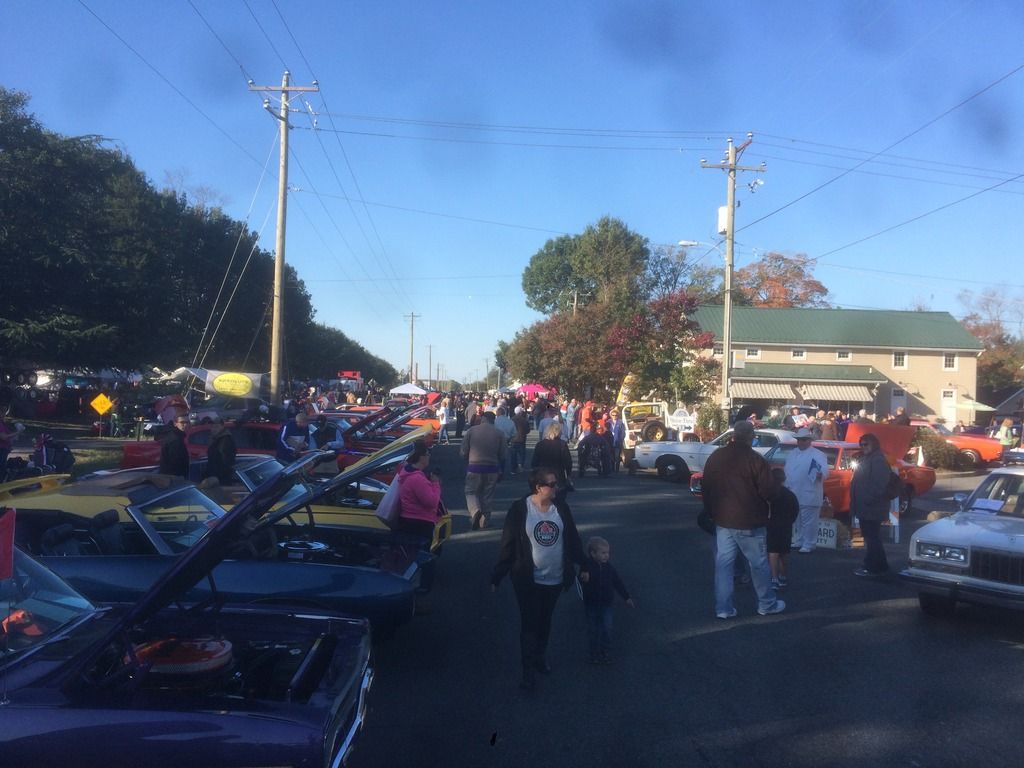 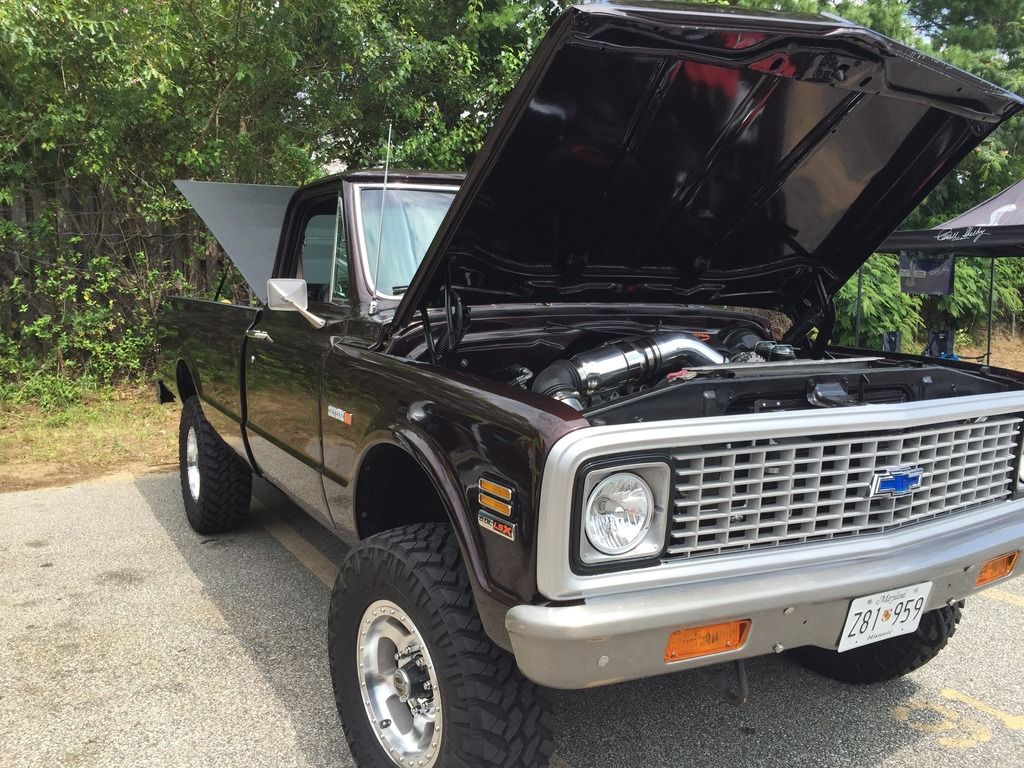 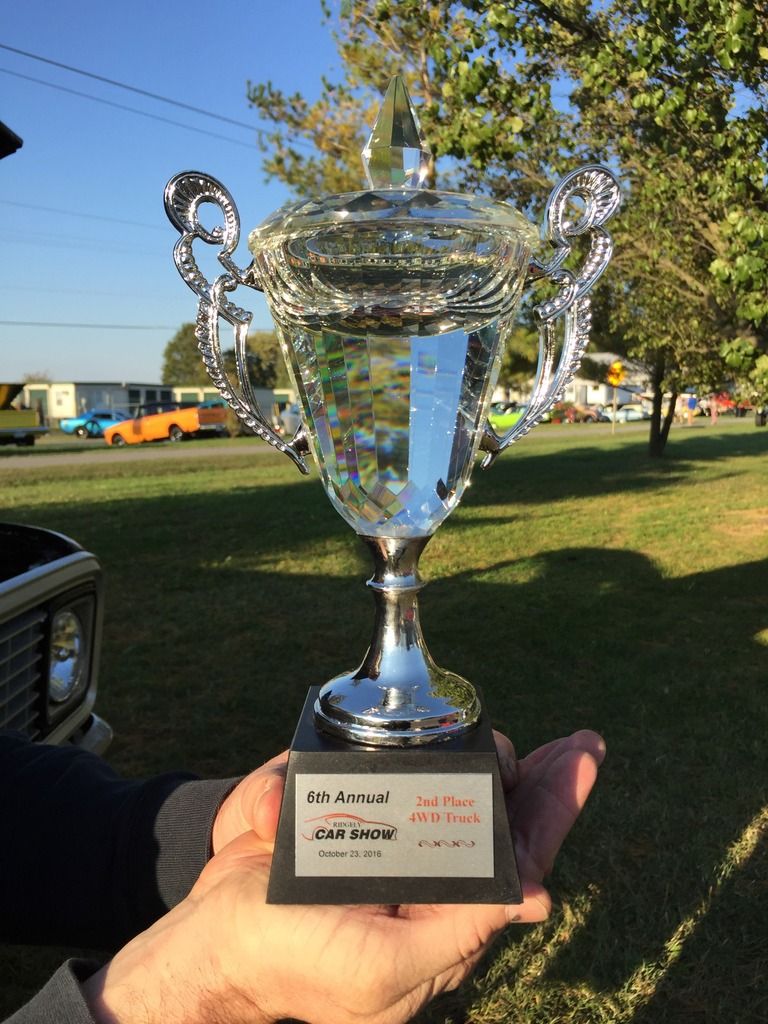
__________________
Project Reno Build http://67-72chevytrucks.com/vboard/s...d.php?t=392636 Easier to beg forgiveness than ask permission!
|
|
|
|
|
|
10-28-2014, 05:24 PM
|
#12 |
|
Registered User
Join Date: Oct 2012
Location: Burnet, Tx
Posts: 332
|
Re: Project Reno - 72 cheyenne rebuild
Man that's good news, glad they made it right. The new piece does look beefier for sure.
|
|
|
|
|
10-28-2014, 06:00 PM
|
#13 |
|
Senior Member
Join Date: Jul 2009
Location: Tomball, Texas
Posts: 1,592
|
Re: Project Reno - 72 cheyenne rebuild
"so tomorrow, it will be done"
The whole truck? Done? Woohoo!!!
__________________
Rick 78 GMC K15 SWB, 350/NV4500/NP205/4.10s Project Hazel 71 GMC C25 350/TH400 - Project Angie 59 Chevy SWB Stepside (next in line? Not sure now )2001 GMC Sierra K2500 |
|
|
|
|
10-29-2014, 01:37 PM
|
#14 | |
|
Registered User
Join Date: Nov 2007
Location: baltimore, maryland
Posts: 617
|
Re: Project Reno - 72 cheyenne rebuild
Quote:
and fuel line back on etc. before I can get the front wired. Still... not too far off.
__________________
Project Reno Build http://67-72chevytrucks.com/vboard/s...d.php?t=392636 Easier to beg forgiveness than ask permission!
Last edited by cmabolt; 10-29-2014 at 10:57 PM. |
|
|
|
|
|
11-01-2014, 09:15 AM
|
#15 |
|
Registered User
Join Date: Nov 2007
Location: baltimore, maryland
Posts: 617
|
Re: Project Reno - 72 cheyenne rebuild
Got the trans back in and everything hooked back up. Glad that little detour is over.
 The dash is back in for a bit and to my joy bolted right in with no issue. I can't wait to see it lit up.  I pulled the grill down from the dusty loft in the garage and pulled it apart. It's in need of a little tlc. This is the inner grill re-painted and disassembled from the outer grill.  I replaced the Bowtie as the old was cracked and weathered.  I spent the rest of the day getting the oxidation and chrome off the aluminum outer grill. Pain in the rear, but it is coming along. By the end of the day I had it pretty cleaned up. I still have a little cleanup, need to paint the headlight bezels and then a final polish. The first polish was good, but needs more for the brushed look to match the rest of the trim pieces. 
__________________
Project Reno Build http://67-72chevytrucks.com/vboard/s...d.php?t=392636 Easier to beg forgiveness than ask permission!
|
|
|
|
|
11-03-2014, 02:08 PM
|
#16 |
|
Registered User
Join Date: Nov 2007
Location: baltimore, maryland
Posts: 617
|
Re: Project Reno - 72 cheyenne rebuild
****Bumper help please ****
Well, I didn't remove the bumpers, the original body shop did. I am having a hell of a time figuring our the brackets I have. Specifically, the outer front bumper brackets and the orientation of the rear step bumper brackets. On the rear, I only have one bolt that lines up on the frame. It should be two bolts according to the assembly manual. On the front both my outer brackets correspond to a slotted hole in the frame, but that only work on the passengers side. The steering box is in the way on the drivers side. Anybody have pics that could make this a little less of a guessing game? I would really appreciate it. Chris Here are pics of what I have. Rear bracket  Rear frame. Rear lower hole lines up. Nothing else does.  Front outer brackets  Front passengers frame area with slotted hole? 
__________________
Project Reno Build http://67-72chevytrucks.com/vboard/s...d.php?t=392636 Easier to beg forgiveness than ask permission!
|
|
|
|
|
11-04-2014, 12:14 PM
|
#17 |
|
Registered User
Join Date: Jun 2013
Location: Burnet,Tx
Posts: 57
|
Re: Project Reno - 72 cheyenne rebuild
The pic you have labeled "front outer brackets" look just like my rear brackets on my 80.
|
|
|
|
|
11-04-2014, 01:36 PM
|
#18 | |
|
Registered User
Join Date: Nov 2007
Location: baltimore, maryland
Posts: 617
|
Re: Project Reno - 72 cheyenne rebuild
Quote:
Chris
__________________
Project Reno Build http://67-72chevytrucks.com/vboard/s...d.php?t=392636 Easier to beg forgiveness than ask permission!
|
|
|
|
|
|
11-04-2014, 05:07 PM
|
#19 |
|
Still Learning
Join Date: Jul 2009
Location: Central Oklahoma
Posts: 10,108
|
Re: Project Reno - 72 cheyenne rebuild
Those brackets you have pictured look different than my front brackets. :PIC HERE
You can see my outer and inner brackets at the bottom. FYI, I did have to grind some clearance on my driver side bracket where it was hitting on the power steering gear box if I remember correctly. |
|
|
|
|
11-04-2014, 07:22 PM
|
#20 | |
|
Registered User
Join Date: Nov 2007
Location: baltimore, maryland
Posts: 617
|
Re: Project Reno - 72 cheyenne rebuild
Quote:
Thanks for the pics. Chris
__________________
Project Reno Build http://67-72chevytrucks.com/vboard/s...d.php?t=392636 Easier to beg forgiveness than ask permission!
|
|
|
|
|
|
11-05-2014, 07:59 AM
|
#21 |
|
Senior Member
Join Date: May 2003
Location: Sandown, NH
Posts: 2,824
|
Re: Project Reno - 72 cheyenne rebuild
Hey Chris !
This is what your front brackets should look like. 71 & 72's have this indent in the bracket to clear the directionals in the bumper. I don't know what the rears should look like for a step bumper. Gary
__________________
Gary 72 SWB 4x4 My 72 SWB Build http://67-72chevytrucks.com/vboard/s...d.php?t=259859 |
|
|
|
|
11-05-2014, 11:05 PM
|
#22 | |
|
Registered User
Join Date: Nov 2007
Location: baltimore, maryland
Posts: 617
|
Re: Project Reno - 72 cheyenne rebuild
Quote:
As for progress I dropped off the bumpers for clear powder coat today. Hopefully they turn out good and that will preserve the raw metal look. In the mean time I have been focusing on the doors. I got the door panels dyed up and passengers door with all internals put back together. It looks like the door glass was dragged down a gravel road. Very scratched up and in a couple places deep scratches. Bummer. I know I made some of the scratches, but there must have been plenty from age and disassembly.    Steering wheel installed  [IMG][/IMG] On this pic you can kinda see the brush work I did on the chrome. It just tones everything down a bit.  today I also received my grill center support which didn't make the trip from out west. Once I finish brushing the outer grill that can all go back together. 
__________________
Project Reno Build http://67-72chevytrucks.com/vboard/s...d.php?t=392636 Easier to beg forgiveness than ask permission!
|
|
|
|
|
|
11-06-2014, 07:19 PM
|
#23 |
|
Senior Member
Join Date: Jul 2009
Location: Tomball, Texas
Posts: 1,592
|
Re: Project Reno - 72 cheyenne rebuild
Interior is coming along nicely, and I really like the brushed look on the mirror. Its probably not the right term, but it looks kind of "antiqued" in the picture with the darker areas around the rivets and all. I'm anxious to see how your bumpers turn out with this treatment.
__________________
Rick 78 GMC K15 SWB, 350/NV4500/NP205/4.10s Project Hazel 71 GMC C25 350/TH400 - Project Angie 59 Chevy SWB Stepside (next in line? Not sure now )2001 GMC Sierra K2500 |
|
|
|
|
11-07-2014, 10:09 PM
|
#24 |
|
Registered User
Join Date: Oct 2012
Location: Burnet, Tx
Posts: 332
|
Re: Project Reno - 72 cheyenne rebuild
Those bumpers turned out nice.
|
|
|
|
|
11-08-2014, 10:04 AM
|
#25 | |
|
Registered User
Join Date: Nov 2007
Location: baltimore, maryland
Posts: 617
|
Re: Project Reno - 72 cheyenne rebuild
Quote:
__________________
Project Reno Build http://67-72chevytrucks.com/vboard/s...d.php?t=392636 Easier to beg forgiveness than ask permission!
|
|
|
|
|
 |
| Bookmarks |
|
|


 Hybrid Mode
