
|
|
|
 01-11-2012, 08:05 PM
|
#1 |
|
Account Suspended
Join Date: Aug 2007
Location: USA
Posts: 1,223
|
Re: Build #2 Crusader!
thank you.
I was curios myself what I had into it. Since I bought items from different places, and with other parts for the truck, I didn't know the complete total for just the rear disc conversion. I have gotten pretty good at finding great deals on my parts. It is not easy either it takes lots of time, diligence and patience, plus a little heat from the wife. ("I think you like that computer more than me") I probably have twice as much time in finding the best price per item, then I have putting them on the truck. for the rear conversion the parts came from Rockauto and Advance Auto (online). I use discount codes when buying online. they literally save hundreds of dollars when your spending hundreds of dollars. here is a itemized list of what you need and the cost. (your pricing may vary) 1976 K20 front rotors $35.10 each 76 K20 calipers $13.59 each plus $20 each for core's if you dont have any 76 K20 Pads $18.55 you can use 76 K20 brake hoses, but they are to long for my taste so I got some hoses from a 77 caprice $14.62 (pair) 14 bolt rear disc bracket $47.95 $218 was the total and that was including shipping and taxes. Now, I put in new bearings and seals for a additional $48.62 bringing the total to $267.12 so I guess it was a little more than just replacing the drums. If someone were to have a pair of calipers to use for cores and/or didn't need to replace the bearing & seals. it could be right around $180 for a disc conversion. Last edited by mrhino; 01-11-2012 at 08:11 PM. |

|

|
|
01-13-2012, 05:36 PM
|
#2 |
|
Registered User
Join Date: Feb 2011
Location: Lake, Michigan
Posts: 219
|
Re: Build #2 Crusader!
How do you like the rear disc brackets that you used? Doing the same thing right now myself on my 91 (79) CCSWB. I ready to order them but I figured Id get you opinion.
Last edited by gmech; 01-13-2012 at 05:48 PM. |
|
|
|
|
01-13-2012, 05:50 PM
|
#3 | |
|
Account Suspended
Join Date: Aug 2007
Location: USA
Posts: 1,223
|
Re: Build #2 Crusader!
Quote:
|
|
|
|
|
|
01-13-2012, 06:07 PM
|
#4 |
|
Registered User
Join Date: Feb 2011
Location: Lake, Michigan
Posts: 219
|
Re: Build #2 Crusader!
One more thing, where did you get them for 48 bucks? Online, local or do you have incriminating pics of someone! I checked online and there $66
|
|
|
|
|
01-13-2012, 06:28 PM
|
#5 |
|
Account Suspended
Join Date: Aug 2007
Location: USA
Posts: 1,223
|
Re: Build #2 Crusader!
pm sent
|
|
|
|
|
01-16-2012, 06:24 PM
|
#6 |
|
VA72C10
 Join Date: Mar 2008
Location: Midlothian, VA
Posts: 25,269
|
Re: Build #2 Crusader!
Nice progress on this! Just found the build and you're moving right along upgrading it nicely!
__________________
Looking for a 67-72 swb or blazer project in or around VA. 
|
|
|
|
|
01-16-2012, 10:18 PM
|
#7 | |
|
Account Suspended
Join Date: Aug 2007
Location: USA
Posts: 1,223
|
Re: Build #2 Crusader!
Quote:
hurt my back Last week so I was down a few days, but got back on the truck yesterday. Got my brake hoses in from Good old RockAuto on friday so Ill be able to finish off the rear brakes. 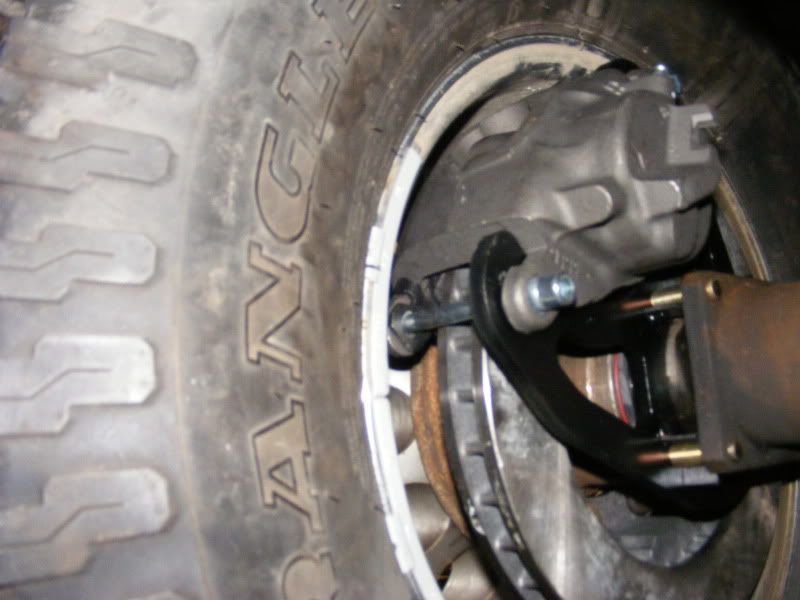 I started by making some little brackets out of some flat stock to hold the brake hoses from just flopping around back there. 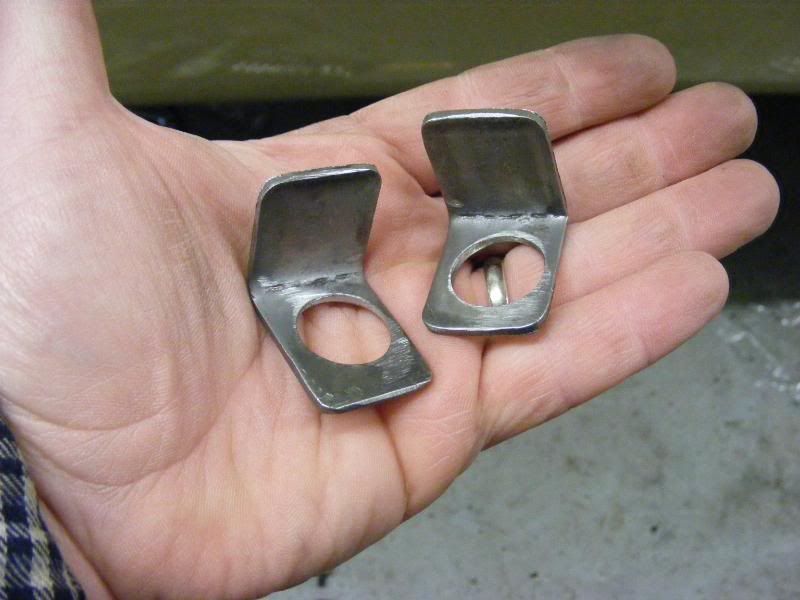 cleaned off the axle tube installed the brake hose clip and welded them in place. 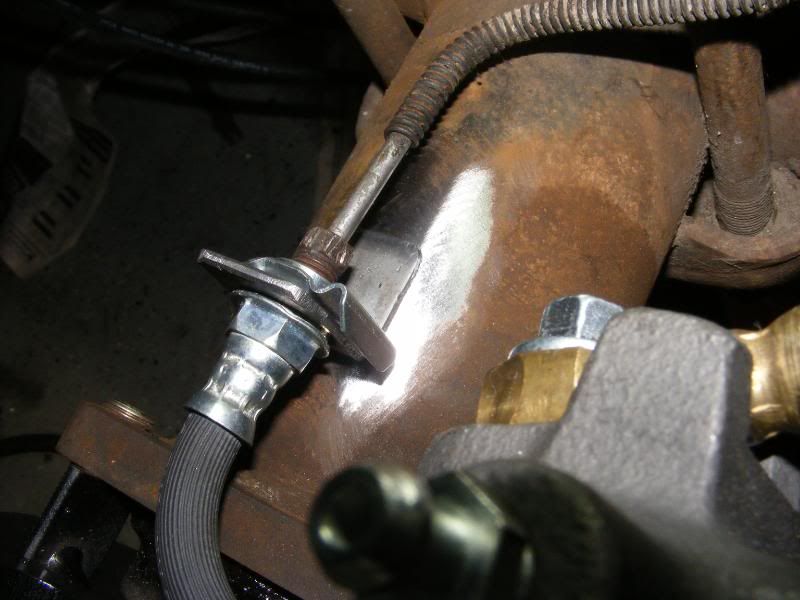 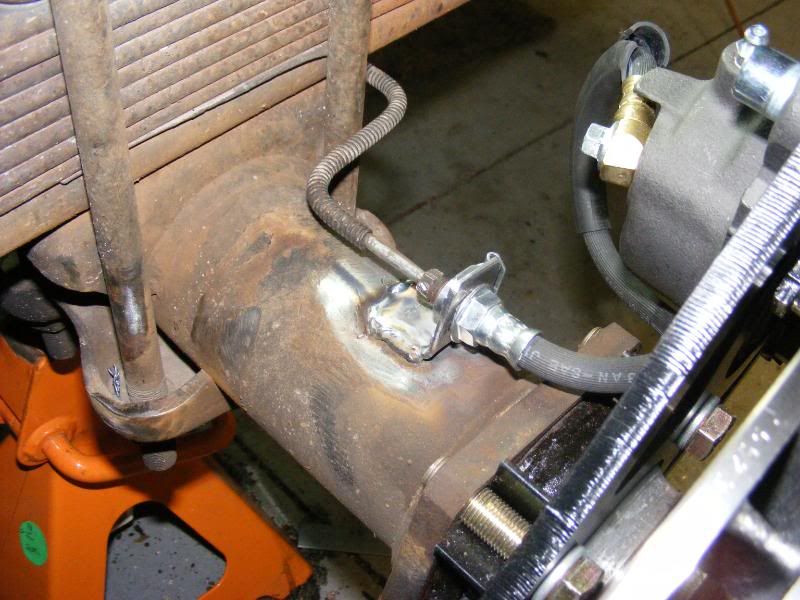 Don't make fun of my welding, Im pretty Self-conscious about it. The hose looks a little curled up but it should be alright. It wont be flexing anywhere its tucked up so it shouldn't get caught on anything and its not rubbing. 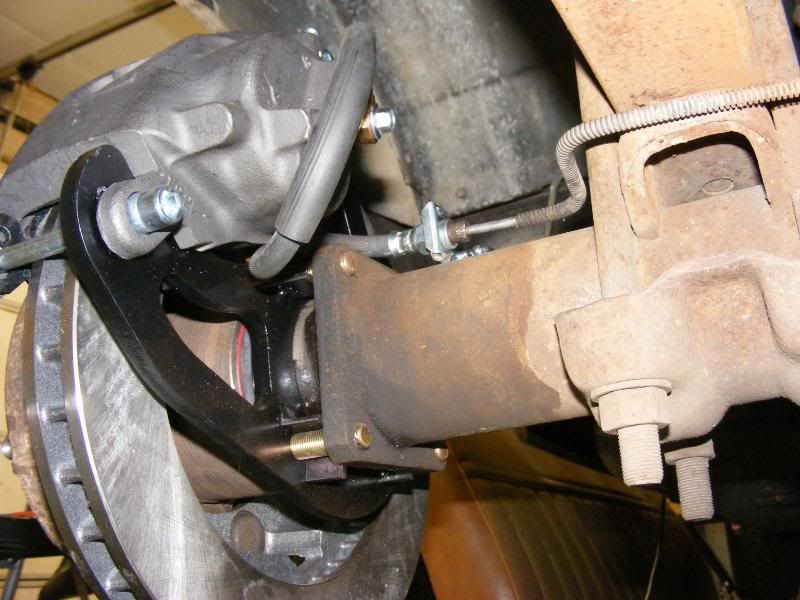 now that Im done with the rear assembly Im gonna get back on the floor. so I can get some seats in there. more tomorrow. Last edited by mrhino; 01-16-2012 at 10:24 PM. |
|
|
|
|
|
01-17-2012, 07:02 AM
|
#8 | |
|
Registered User
Join Date: Dec 2011
Location: Elkhart, IN
Posts: 1,308
|
Re: Build #2 Crusader!
Quote:
__________________
1985 Chevrolet K10 Custom Deluxe---SOLD 1997 Ram 2500 5.9 Cummins 1985 Chevrolet Camaro Z28 1987 Chevrolet K10 Silverado "The Beast" build 1987 Silverado http://67-72chevytrucks.com/vboard/s...=1#post6150257 |
|
|
|
|
|
01-18-2012, 04:16 PM
|
#9 |
|
Registered User
Join Date: Nov 2011
Location: Splendora Texas
Posts: 87
|
Re: Build #2 Crusader!
I like the break setup but what will you or can u run for a parking brake?
Posted via Mobile Device |
|
|
|
|
01-18-2012, 08:50 PM
|
#10 | |
|
Account Suspended
Join Date: Aug 2007
Location: USA
Posts: 1,223
|
Re: Build #2 Crusader!
Quote:
A brick! Just kidding. Here in the rust belt most of them don't work. (unless its used all the time like with a manual shift. Usually they are rusted and when u would apply them they would not release. plus our state does not require them. however if someone was to want to put a E-brake on. All you would need to do is use rear calipers from late 70's Cadillac or Trans am. |
|
|
|
|
|
01-18-2012, 10:17 PM
|
#11 |
|
Account Suspended
Join Date: Aug 2007
Location: USA
Posts: 1,223
|
Re: Build #2 Crusader!
Back on the floor. I took txlowtrucks advise and cut the piece in two. Hopefully I wont cut to much out of the passenger side and we wont have this problem.
after cutting it into two pieces I burned in each side leaving about a 2" gap down the center 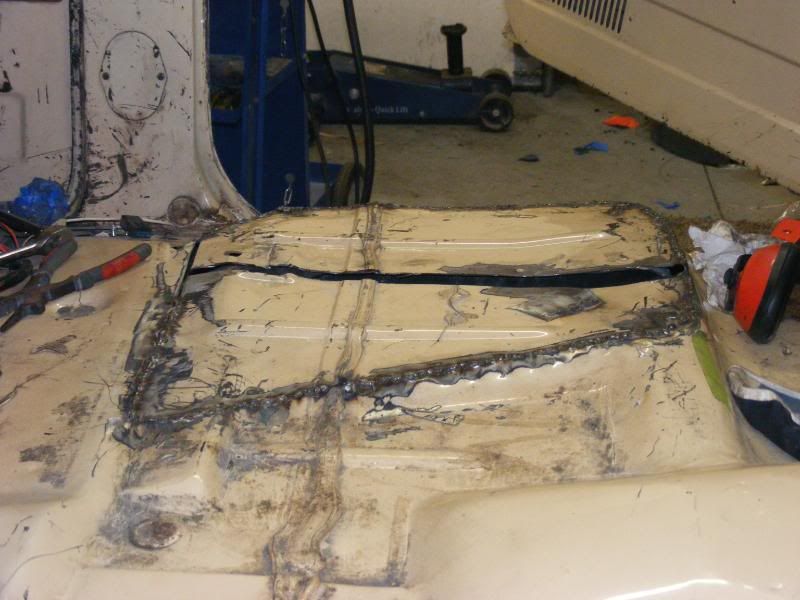 while welding I thought man I need to turn the heater down its gettin damn hot in here. I raised my hood to find myself on FIRE... I burnt a good size hole in one of my good shirts. I told Deb what I done and she said with no concern " that was stupid". I have a real nice welding jacket in the closet. That way it stay nice. 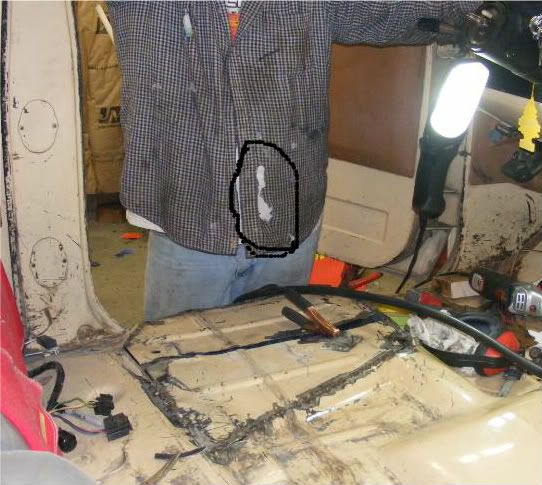 I could see Tyler watching me. chomping at the bits to try it out. I barley got the words out of my mouth and he was right there to give it a go. he did pretty well to. 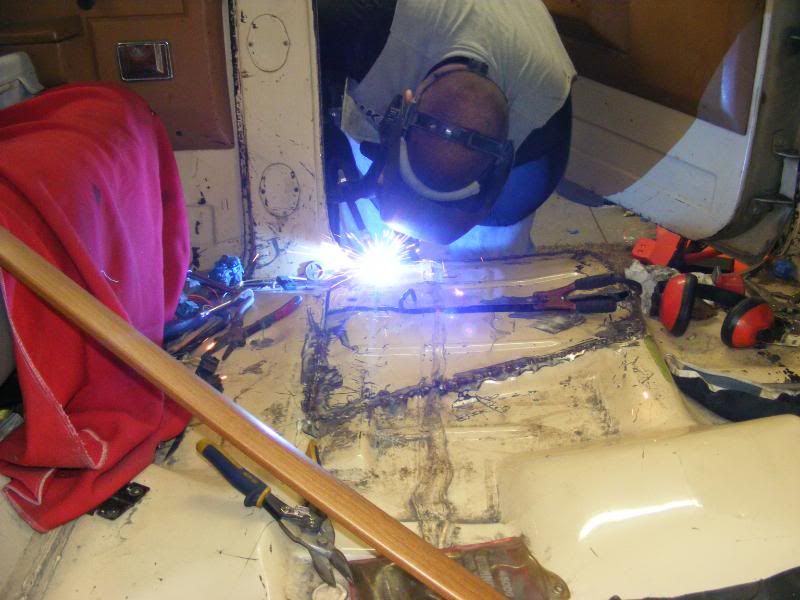 I used the left over piece that I cut from the hump to fill in the gap down the center and across the back. Its a good thing that its under the seat and carpet because it looks like sh!t. I will weld in a couple of pieces of flat stock where the seat will bolt through the floor and then give all the seams a good coat of seam sealer 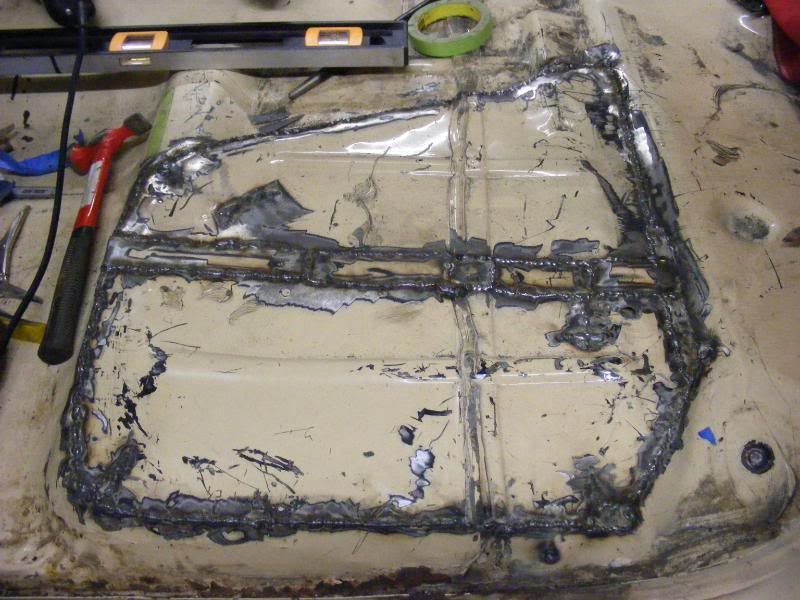 with the floor lower and flat I threw the seat up in there to get a feel for how its going to set and I think its right on the money. 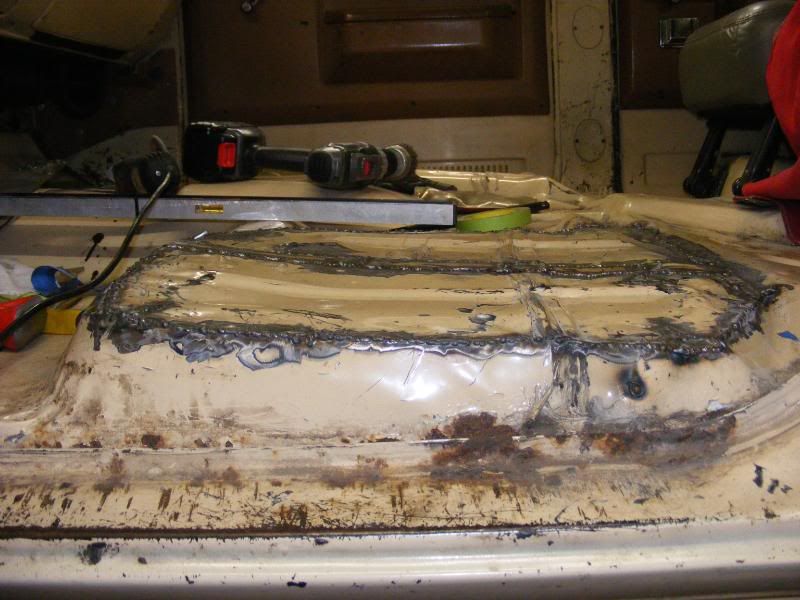 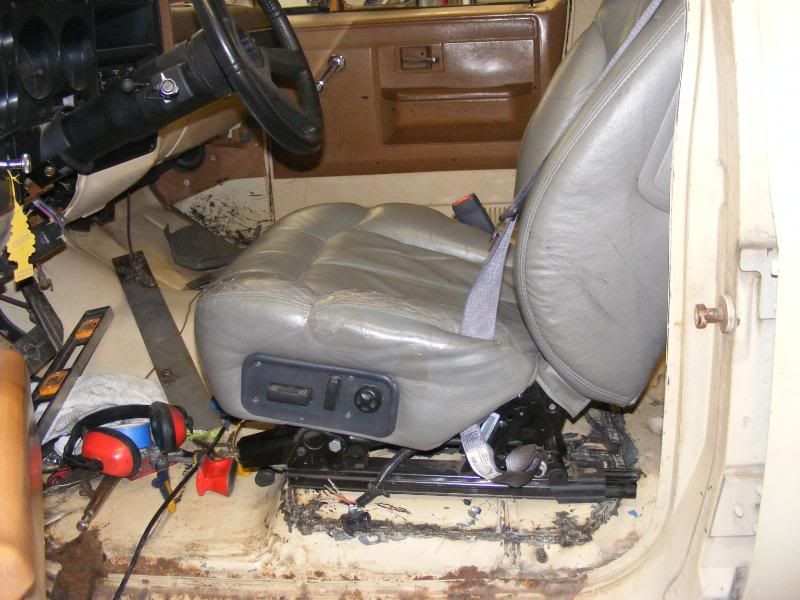  I even jumped in the back seat to see what kinda room Im gonna have. although its not a lot of room I did sit comfortably and my knees were not in the back of the seat  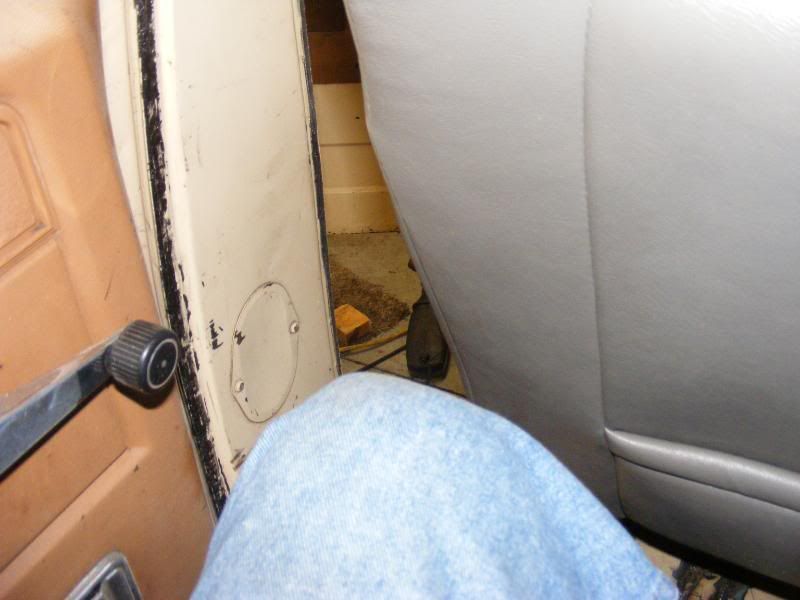 now on to the other side. |
|
|
|
|
01-18-2012, 10:21 PM
|
#12 |
|
Registered User
Join Date: Dec 2011
Location: Elkhart, IN
Posts: 1,308
|
Re: Build #2 Crusader!
Great work, good thing that fire wasn't a little lower, you could have had a sad day.
__________________
1985 Chevrolet K10 Custom Deluxe---SOLD 1997 Ram 2500 5.9 Cummins 1985 Chevrolet Camaro Z28 1987 Chevrolet K10 Silverado "The Beast" build 1987 Silverado http://67-72chevytrucks.com/vboard/s...=1#post6150257 |
|
|
|
|
01-19-2012, 01:01 PM
|
#13 |
|
Registered User
Join Date: Feb 2011
Location: newcastle texas
Posts: 41
|
Re: Build #2 Crusader!
It looks good, you can take a grinder to the welds if you're not happy with the way they look. Then the seam sealer will hide everything else. Most of the new crew cabs don't have anymore knee room. Mike
|
|
|
|
|
01-19-2012, 10:41 PM
|
#14 |
|
Registered User
Join Date: Nov 2011
Location: Paris, MO
Posts: 290
|
Re: Build #2 Crusader!
Looks good I used a piece of 1/4X3 ran it across the entire floor and then bolted the seat and console through it and the floor I used bolts and put a piece of 1/4x4x4 essentially a giant washer on the bottom and bolted the seats in that way.
__________________
Clint Youse Paris, MO 1984 Chevrolet 3+3 K30 with Cummins 1966 IH Scout has been a work in progress for 16 yrs |
|
|
|
|
01-20-2012, 02:07 AM
|
#15 |
|
Registered User
Join Date: Oct 2005
Location: Branchville SC
Posts: 1,647
|
Re: Build #2 Crusader!
MAN great thread so far and love the truck!
__________________
2004 z71, 96 z71 on 38s, 88 Chevy k5 blazer, 4in lift. 84 swb project, 82 SWB project , 84 chevy 4x4 lwb project, 88 Jimmy beater/highschool ride. 79 c30. 99 tahoe 4x4 project. and a bunch of parts trucks.. |
|
|
|
|
01-27-2012, 09:58 AM
|
#16 |
|
Registered User
Join Date: Nov 2007
Location: Las Vegas, NV
Posts: 103
|
Re: Build #2 Crusader!
What are you doing for the back seat?
__________________
New Tan 86 c30 "Tow Rig" Sold white 89 c30 Sold white 98 c3500 BrooKLyn |
|
|
|
|
01-27-2012, 05:15 PM
|
#17 |
|
Account Suspended
Join Date: Aug 2007
Location: USA
Posts: 1,223
|
Re: Build #2 Crusader!
The back seats are done, I did those last summer, I was going to show pics and give some details when i got the fronts all in. hopefully I will get the fronts in and mounted up this weekend. I used the the matching rear set from the donor tahoe. They look great and are function-able. meaning they fold up or down in this case. ill get some photos and details posted up soon.
|
|
|
|
|
01-27-2012, 08:51 PM
|
#18 |
|
6>8 Plugless........
 Join Date: Sep 2007
Location: Prairie City, Ia
Posts: 17,141
|
Re: Build #2 Crusader!
Your seat/floor work is coming together nicely. I may have to do this to my 76 too.
__________________
Ryan 1972 Chevy Longhorn K30 Cheyenne Super, 359 Inline 6 cylinder, Auto Trans, Tilt, Diesel Tach/Vach, Buckets, Rare Rear 4-link and air ride option Build Thread 1972 GMC Sierra Grande Longhorn 4x4 1972 Chevy Cheyenne Super K20 Long Step side tilt, tach, tow hooks, AC, 350 4 speed 1972 C10 Suburban Custom Deluxe 1969 Chevy milk truck 1971 Camaro RS 5.3 BTR STG3 Cam Super T10 1940 Ford 354 Hemi 46RH Ford 9" on air ride huge project Tired of spark plugs? Check this out. |
|
|
|
|
01-29-2012, 12:50 PM
|
#19 |
|
Account Suspended
Join Date: Aug 2007
Location: USA
Posts: 1,223
|
Re: Build #2 Crusader!
Yesterday I got the the passenger side hump knocked down.
This time I cut around the hump at the height i wanted, then I tried flatting out the top. that was a no go. So I cut some releif cuts into the corners but it still wouldn't go flat. 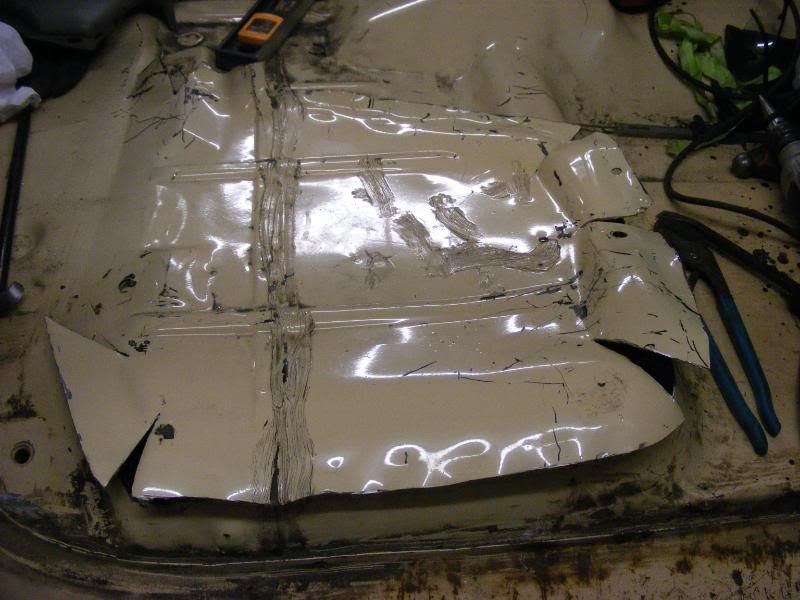 So I ended up cutting it all the way out. 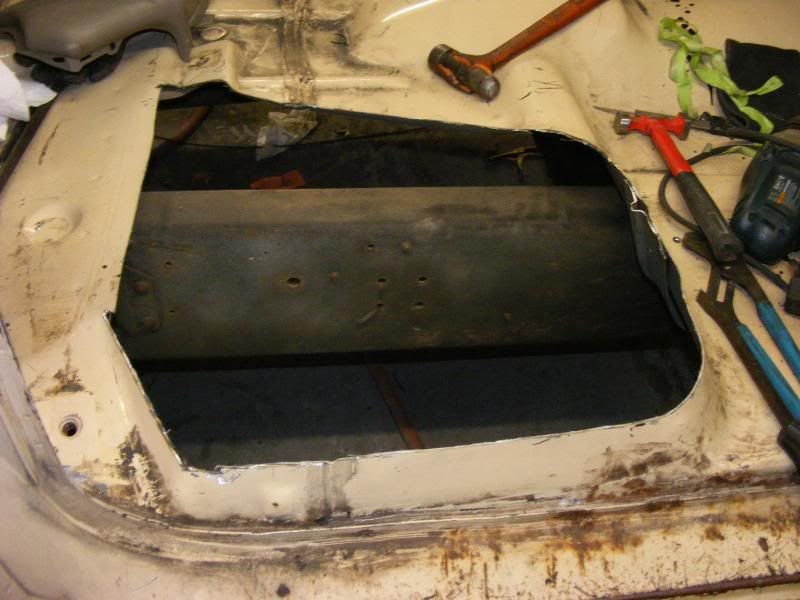 Laid it on the garage floor and beat the sh!t out of it untill it was flat. 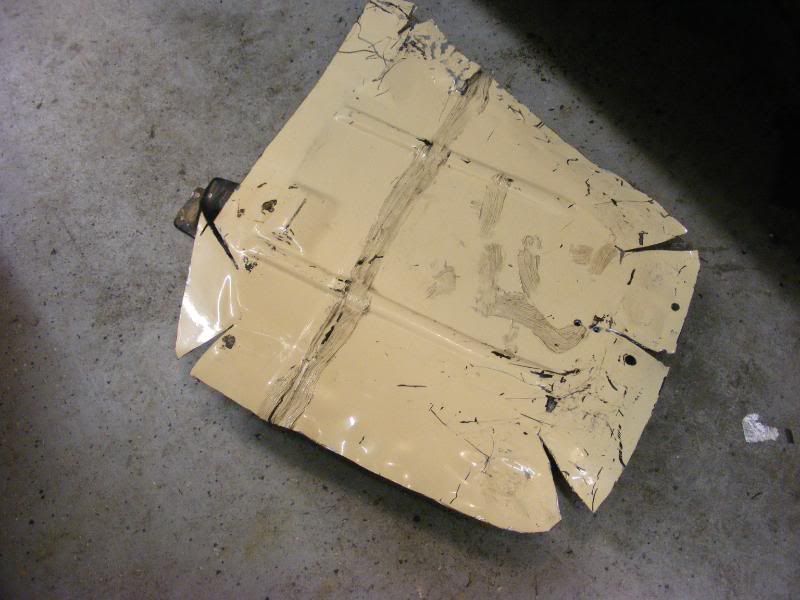 I then lined it up on the floor. Cut off the excess around the outside and welded it back on. 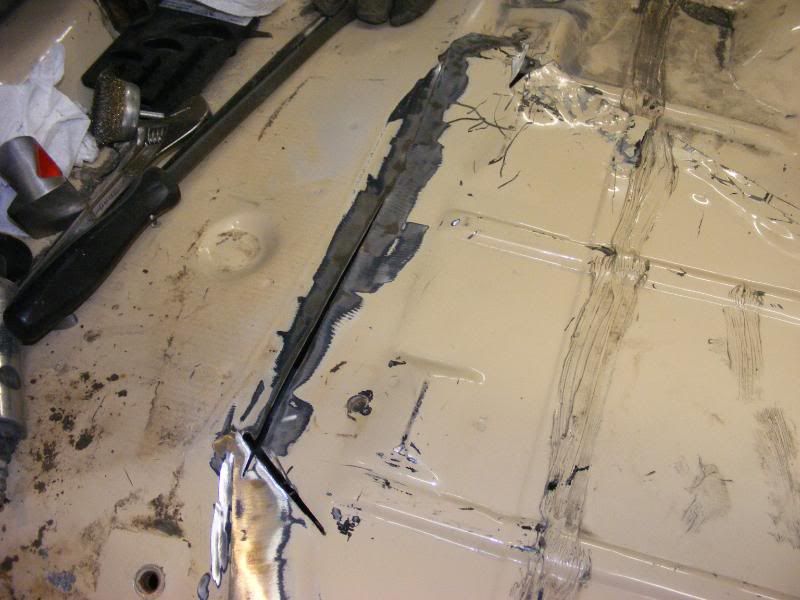 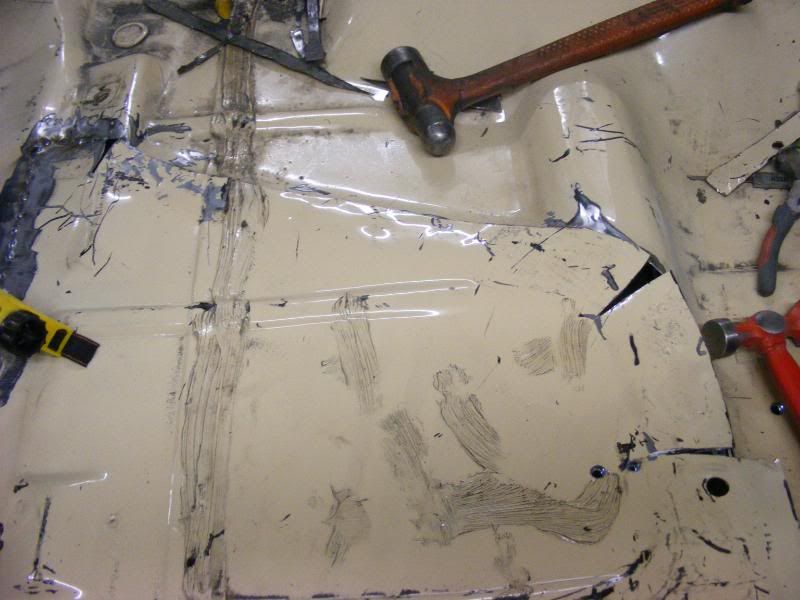 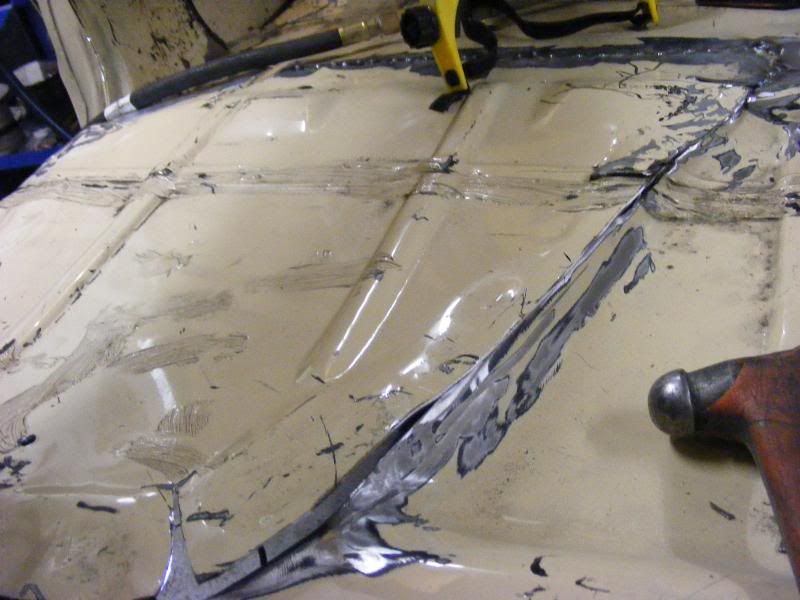  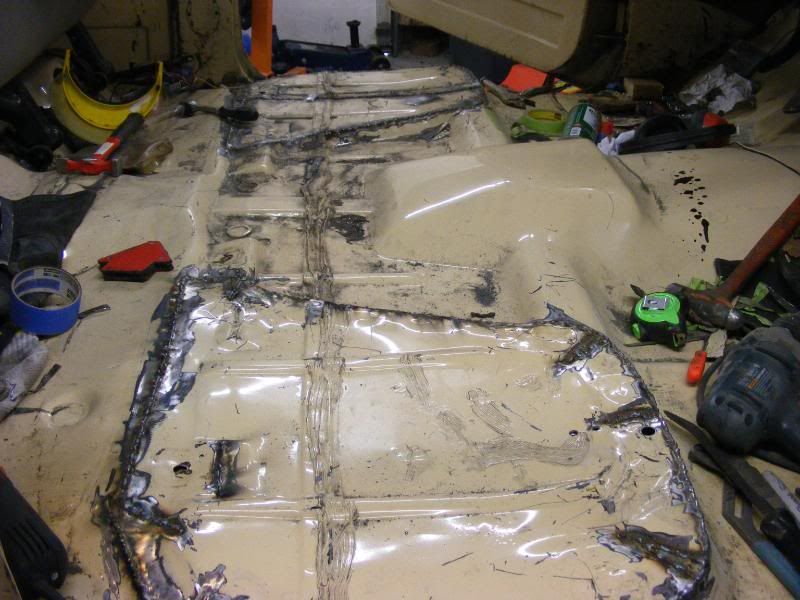 (boy! I sure made that sound easy. Too bad it wasn't) here is a nice level shot of the floor. You can see that now the middle hump is higher than the floor. Im going out right now to mount in the seats hopefully they will be at a good ride height and will bolt in with out too much problems. Ill get you all some pics later of the finished product. 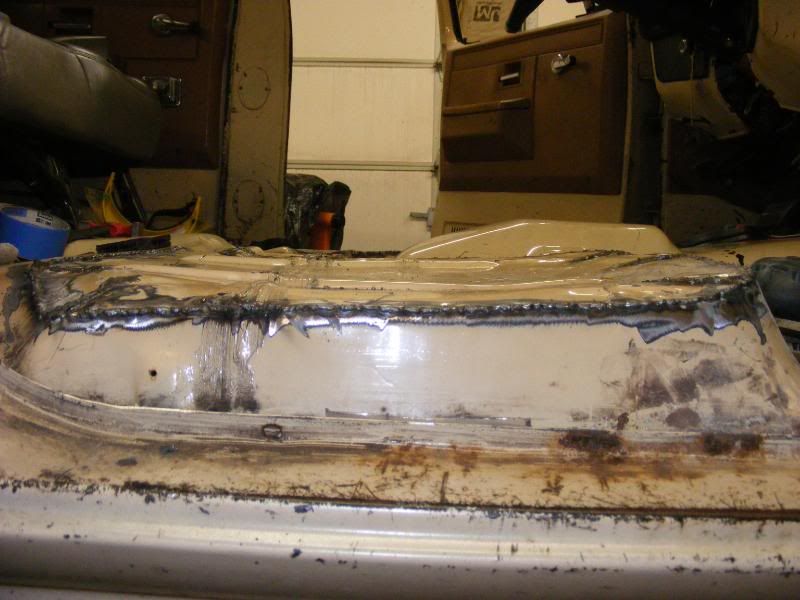
|
|
|
|
|
01-29-2012, 01:11 PM
|
#20 |
|
Registered User
Join Date: Dec 2011
Location: Elkhart, IN
Posts: 1,308
|
Re: Build #2 Crusader!
Great work so far, I wish I had a garage I could work on my truck in.
__________________
1985 Chevrolet K10 Custom Deluxe---SOLD 1997 Ram 2500 5.9 Cummins 1985 Chevrolet Camaro Z28 1987 Chevrolet K10 Silverado "The Beast" build 1987 Silverado http://67-72chevytrucks.com/vboard/s...=1#post6150257 |
|
|
|
|
01-30-2012, 06:40 AM
|
#21 |
|
Account Suspended
Join Date: Aug 2007
Location: USA
Posts: 1,223
|
Re: Build #2 Crusader!
No pics yet! I spent half of the day on the pass side measuring cutting, welding and grinding supports for the seat. then realized that this way its not going to work. the seat was not going to sit flat. (not so much level front to back but flat so that it bolts flat to the floor. Then spent the other half of the day, removing what I had done and thinking about how to mount it to make it flat. Im thinking Im going to have to elevate it just a little. but not sure just how yet.
|
|
|
|
|
02-05-2012, 08:39 PM
|
#22 |
|
Account Suspended
Join Date: Aug 2007
Location: USA
Posts: 1,223
|
Re: Build #2 Crusader!
I have been working out the details of starting my own internet based business. I have many Items lined up to sell and Im hoping to kick it off, right here on the Forum, then branch out into eBay, Amazon and then my own website. Im hoping there is a good market for the products here with older trucks and hotrods. some of the Items are: Auto-dimming rear view mirrors, either plain or with temp and compass, Home-link (garage door openers) back up cameras a 3" screen on the mirror turns on when the vehical is put into reverse. I can even get them with Navigation in them as well. some other things include Bluetooth for your truck. Seat heaters that you can add to your factory seat and stand alone home link for either the headliner, sun-visor or any where else you can think of.
sorry I getting excited about that. and cant help myself. Any way i got on the seats this weekend heres how it turned out. with the humps removed from the floor I thought it best to tie the front part of the floor into the rear and not necessarily use the part I cut out to support the seat. so I welded a a piece of 1/8 flat stock to the front. Heated it till i could get it to bend to the curv of the floor. 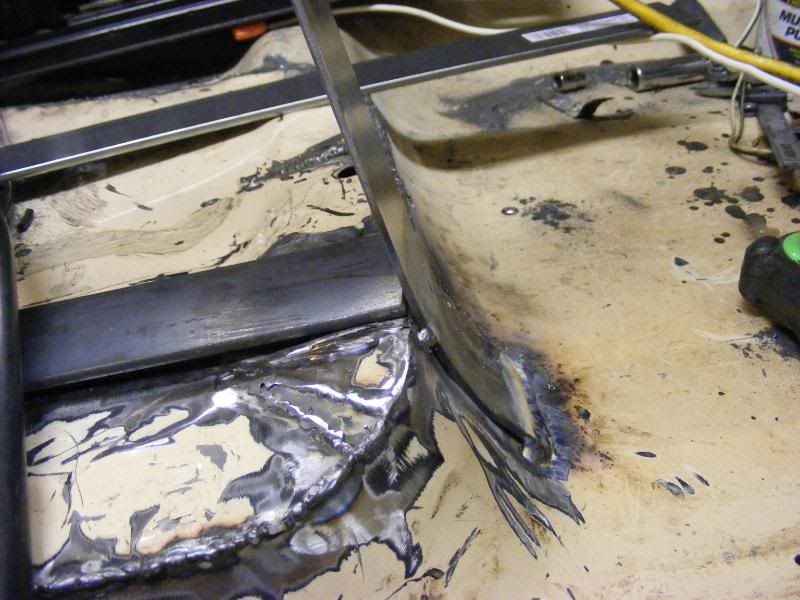 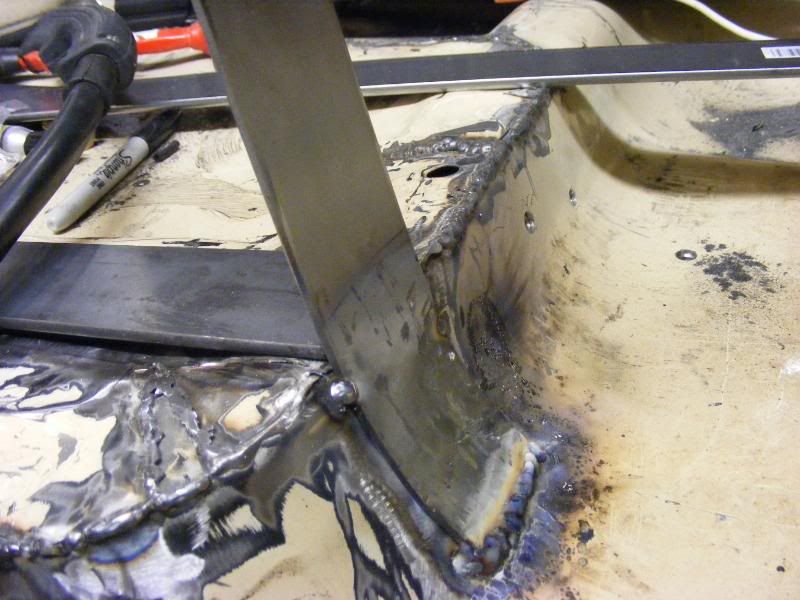 then I took 3/16 flat stock all the way across the floor to the back. I welded that to the front piece I welded to the floor. 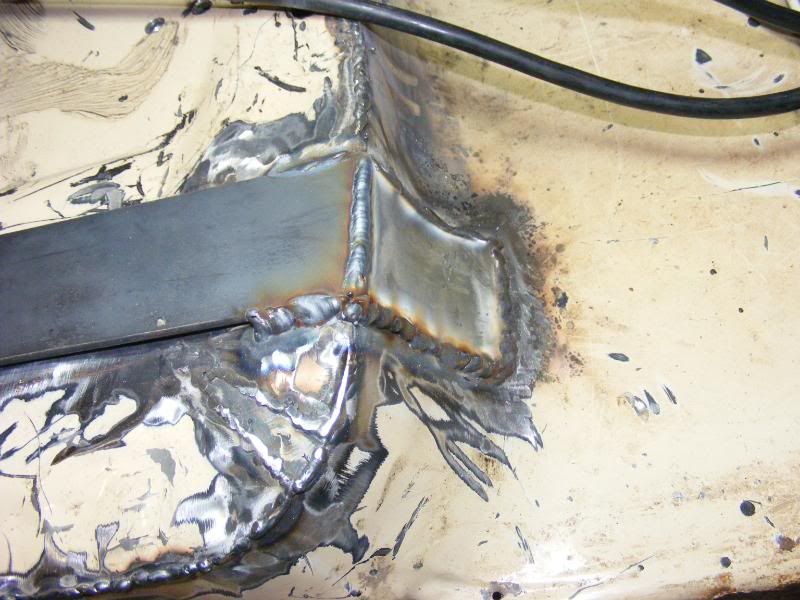 In the rear I "Boxed" it in and then welded that to the floor. 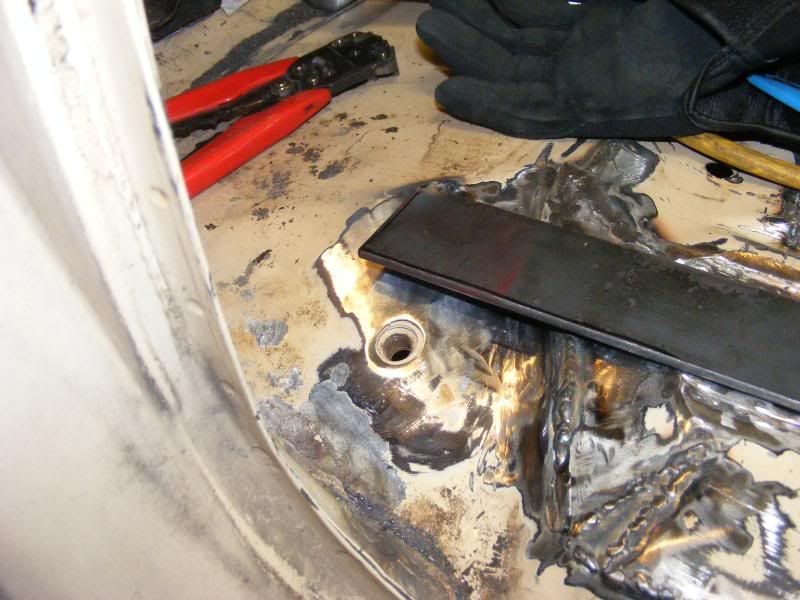 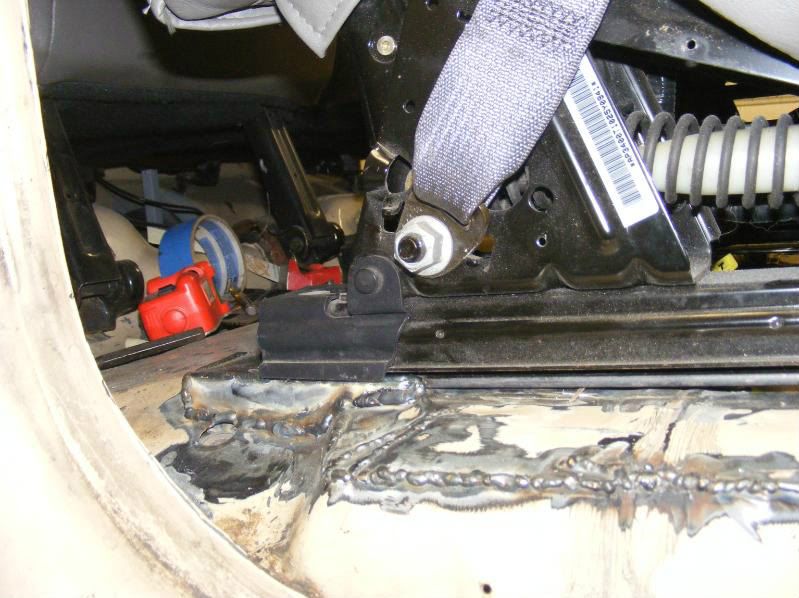 Then I set the seat back up there to measure for the other side. 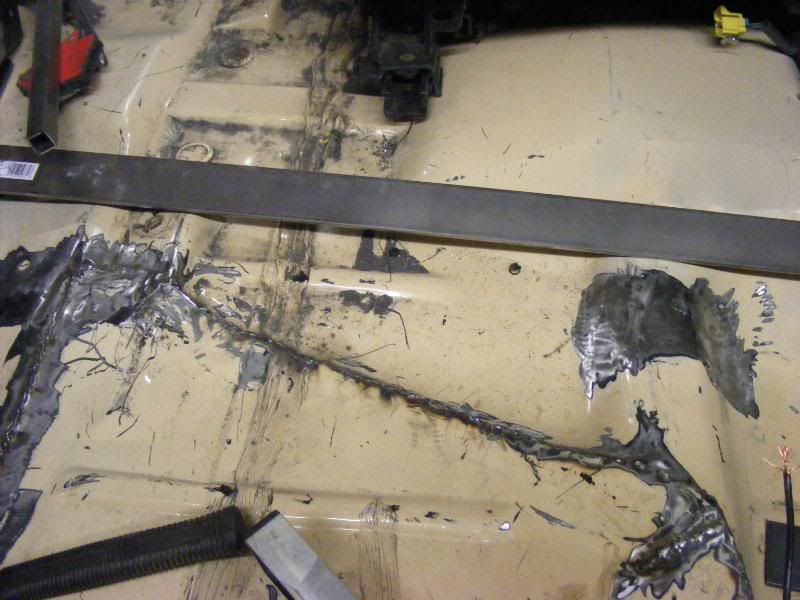 I welded a piece of 1/8 plate to the small raised part in the floor 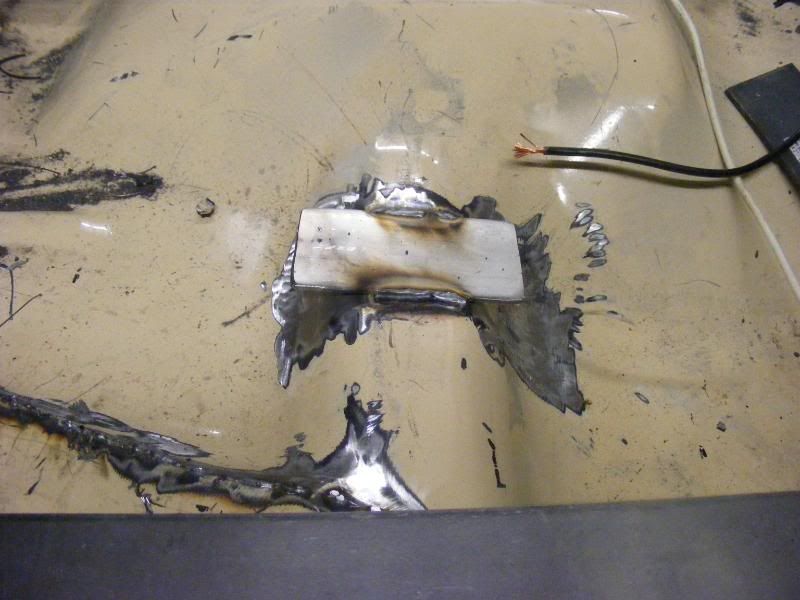 heated it till I could bend it around the hump 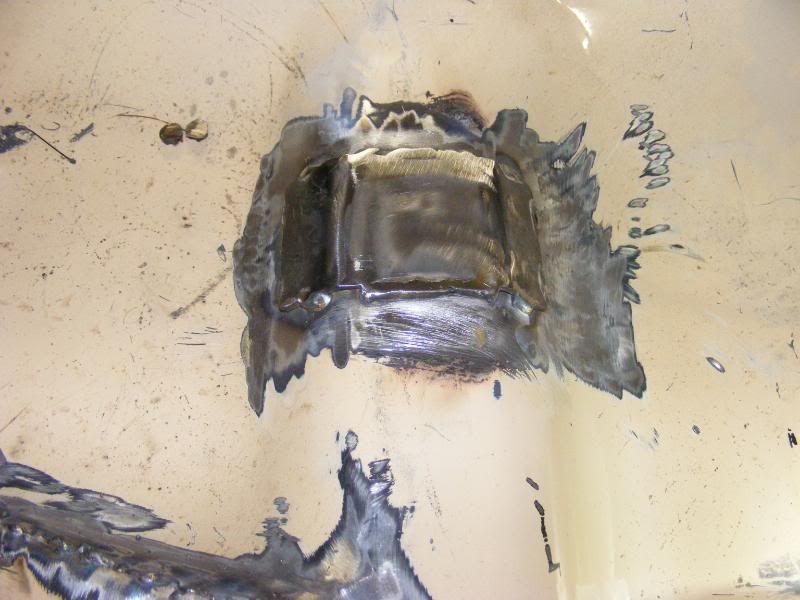 Once again took my 3/16 piece and welded that to the hump. I also had to heat it up and put a slight bend in it. 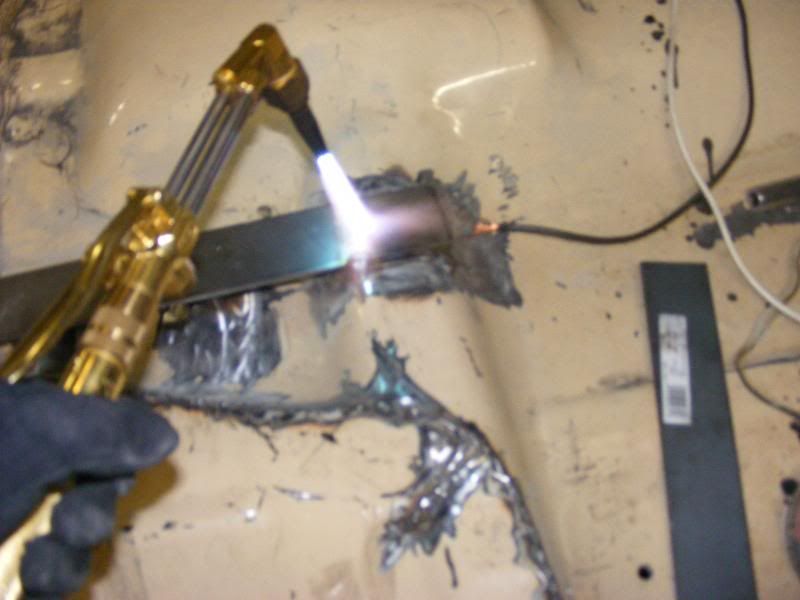 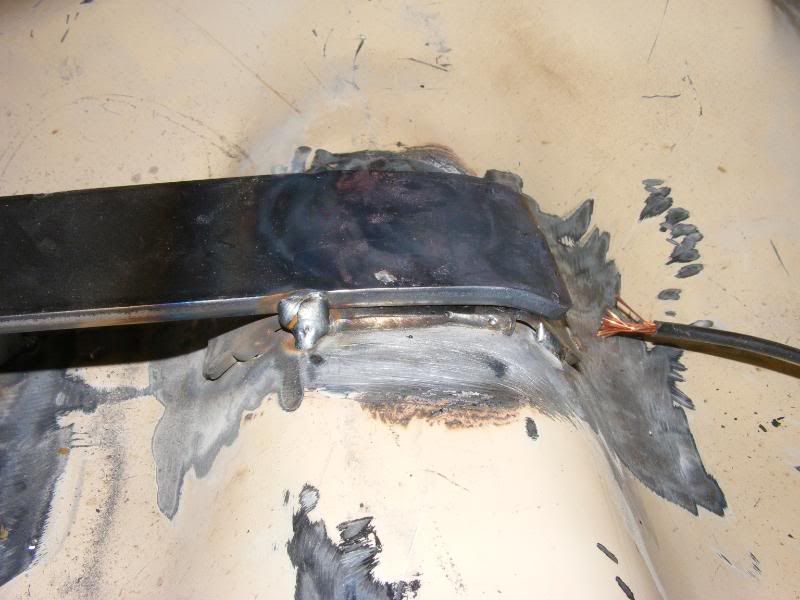 Same thing in the rear, gave it some heat so i could bend it then welded it to the floor 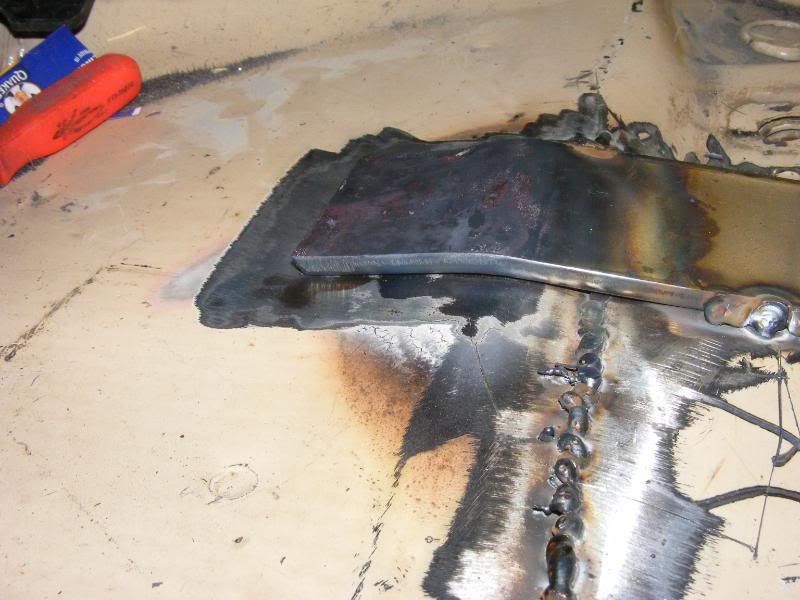 essentially what Iv done is tied the front and rear together for the best strength. and still keep it low. 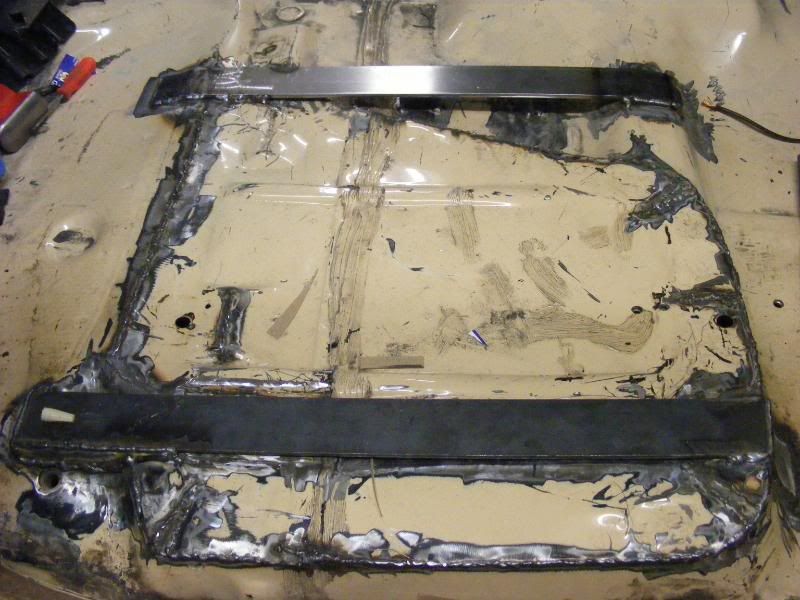 Next drilled some Mounting holes, weld a small washer to the bottom of the seat track just to keep the track off of the floor a little, then bolted the seat in with Hardened bolts. 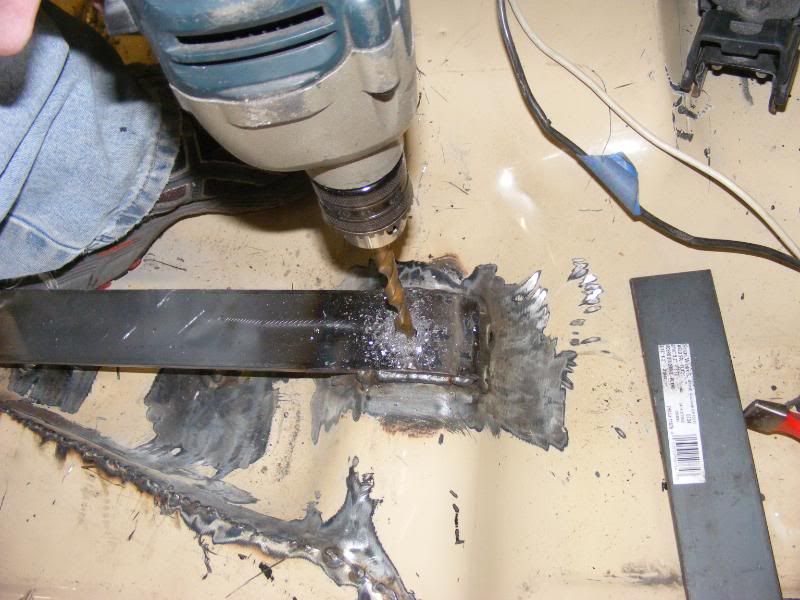 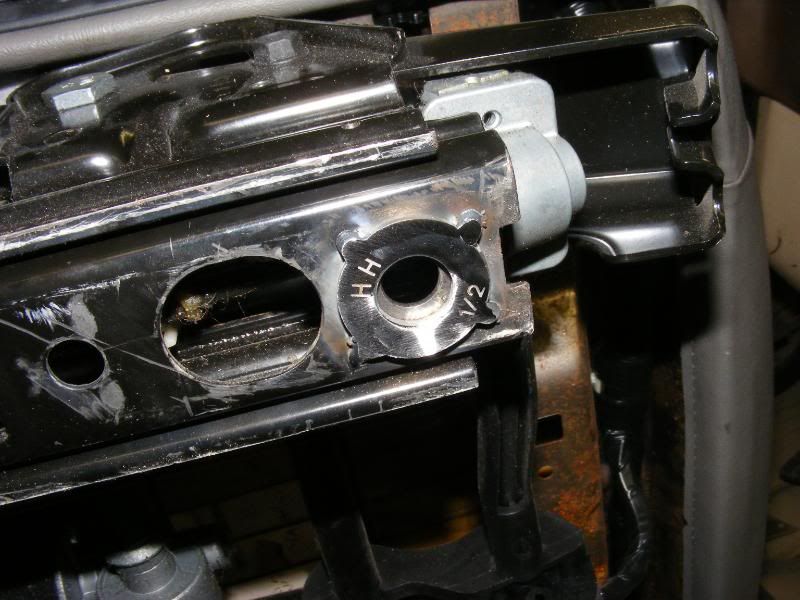  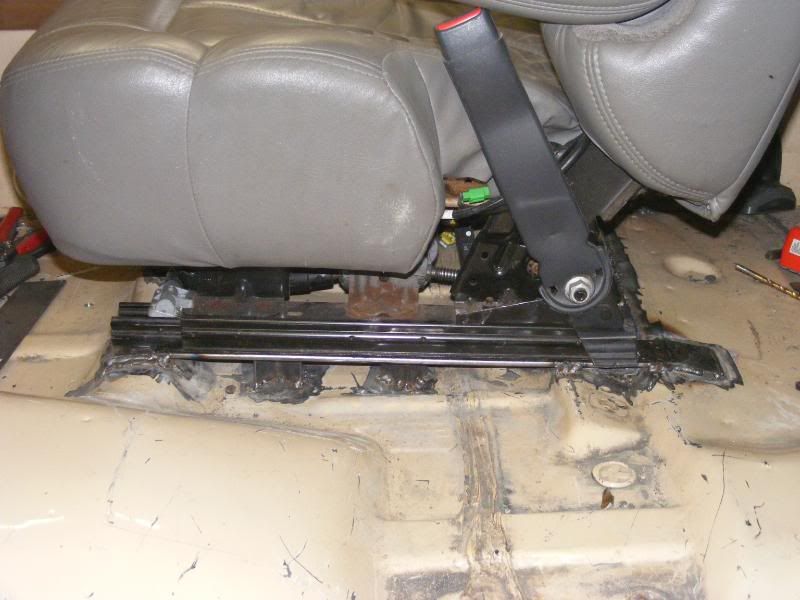 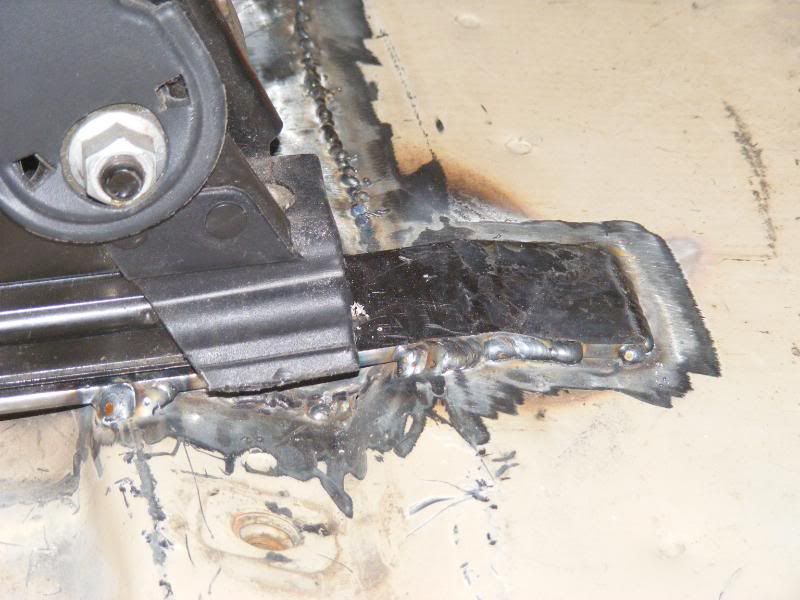 Once it was all mounted in I put some battery power to it and took it for a ride. As you can see there is plenty of room, Tyler is almost 6' tall and there is a good 8" or so of head room, I even had Deb climb in and tyler got in the back. It looks snug but hes a big boy, I got back there its comfortable. 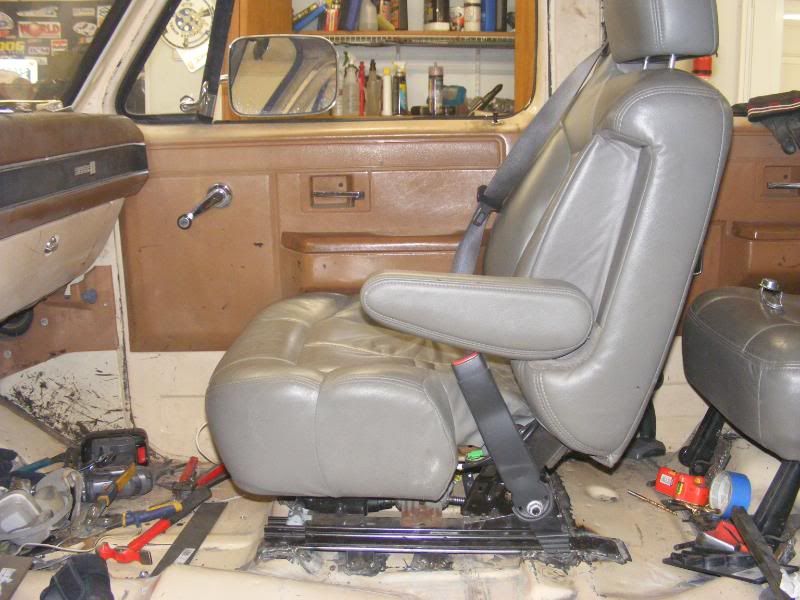 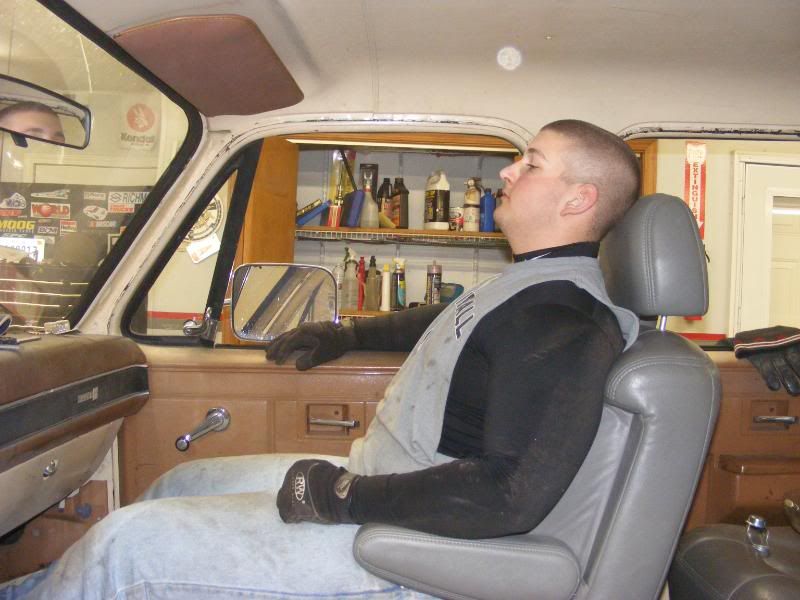 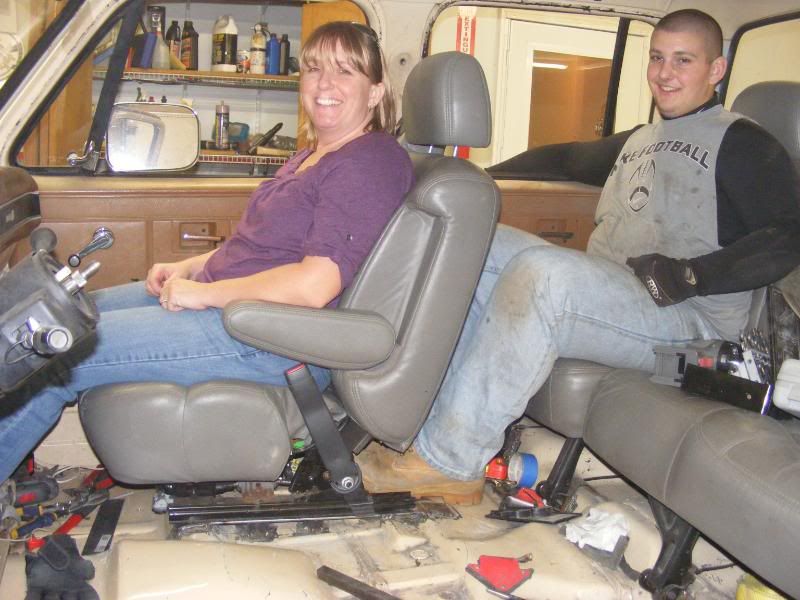 Im pretty stoked about how it turned out, still need to finalize some stuff. Oh and do the drivers side. |
|
|
|
|
02-05-2012, 09:04 PM
|
#23 |
|
Registered User
Join Date: Dec 2011
Location: Elkhart, IN
Posts: 1,308
|
Re: Build #2 Crusader!
Very smart "rigging" your doing there. Hope all your business stuff works out for you. I'm also trying to get a crewcab in Shipshewana. I hope it works out, but with my luck it won't. Do you know how long these are wheelbase wise?
__________________
1985 Chevrolet K10 Custom Deluxe---SOLD 1997 Ram 2500 5.9 Cummins 1985 Chevrolet Camaro Z28 1987 Chevrolet K10 Silverado "The Beast" build 1987 Silverado http://67-72chevytrucks.com/vboard/s...=1#post6150257 |
|
|
|
|
02-05-2012, 11:04 PM
|
#24 |
|
Robert Olson Transport
 Join Date: Oct 2002
Location: recent transplant to NC USA
Posts: 20,272
|
Re: Build #2 Crusader!
If youre planning on selling here you do need to become a vendor for the volume that you are anticipating.
__________________
Bob 1951 International running on a squarebody chassis "If a man's worth is judged by the people he associates himself with, then i am the richest man in the world knowing some of the fine people of this board" http://67-72chevytrucks.com/vboard/a...t.php?f=25&a=9 (you can review the site rules here!) PM Me for your vehicle/parts hauling needs in the North East US or see my Facebook page Robert Olson Transport Live each day to the fullest.. you never know when fate is going to pull the rug out from under you... I hate cancer!! |
|
|
|
|
02-05-2012, 11:59 PM
|
#25 |
|
Registered User
Join Date: Dec 2007
Location: Palmer, Alaska
Posts: 13,821
|
Re: Build #2 Crusader!
I love the seats!!
Nice work! Posted via Mobile Device
__________________
CHEVY ONLY
|
|
|
|
 |
| Bookmarks |
| Tags |
| black, disc, paint, seats, shortbed |
|
|


 Hybrid Mode
