
|
Register or Log In To remove these advertisements. |
|
|
|
|||||||
 |
|
|
Thread Tools | Display Modes |
|
|
 11-19-2009, 04:30 PM
|
#1 |
|
Senior Member
Join Date: Jul 2005
Location: Winters Ca. 95694
Posts: 4,843
|
LFD something a bit different for you all!
I thought I might change things up a bit and show you how I built the inner wheel tub covers for my Tahoe. I posted a few pics last night in the built thread and had a few guys PM me questions on how it was done. That got me thinking that maybe more people would like to see the process. For me this is second nature but for most this might be the first time seeing something like this. You can see more at Lazze Metal Dreams for some real cool tools and check out the free video gallery!
Ok I started with a piece of 198ga AKDQ sheet metal and drew out the rough shape of what I needed. I made the circle by placing a screw in the sheet at the radius point and using a tape and pencil I drew the line. [IMG] 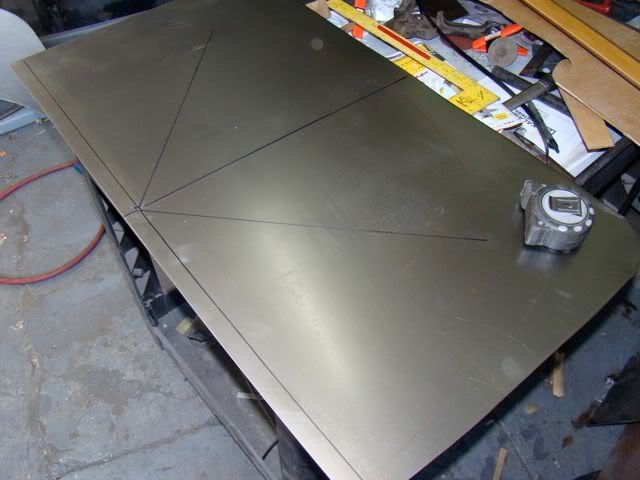 [/IMG] [/IMG]Next I placed the piece in front of the wheel tub to make sure it was correct and also so I could get a few measurements for my next step. [IMG] 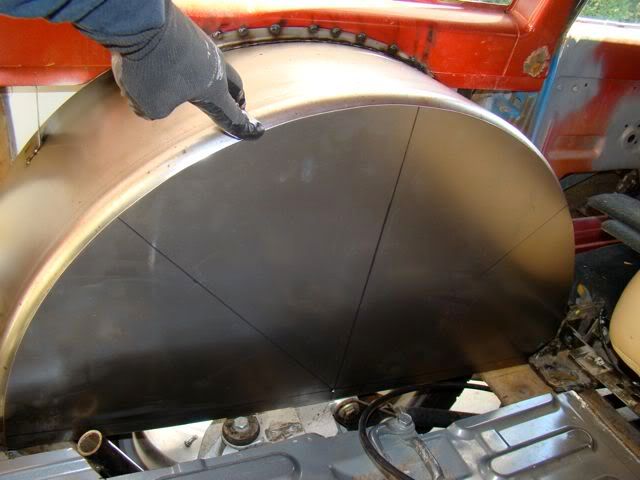 [/IMG] [/IMG]I then set up my Lazze Power bead roller with the male and female die's that I wanted (these two are not made for each other but with this machine being so adjustable you can do all kinds of cool things over the regular style bead roller) so I could start running the bead. What this combo of dies will do is form a nice round bead that is not as deep as if the dies matched. I wanted this for 2 reasons, first I do not have much clearance on the inside of my tubs and did not want the tire to touch if it was too deep. The second reason is when you roll a bead in metal it takes up metal from the surrounding area causing distortion in the sheet so this way I get a crisp bead with out warping the sheet very much. [IMG] 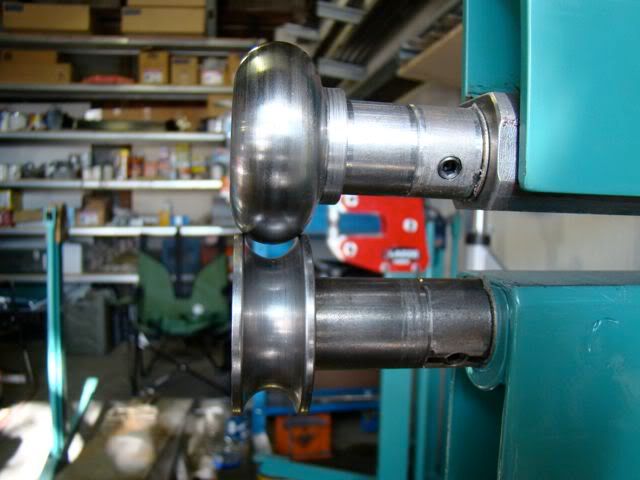 [/IMG] [/IMG]Notice the red guide I have the right side of the sheet up against. The sheet follows this guide and that keeps the bead parallel to my edge so it is very important that your edge is perfect. I use a 2x48 belt sander to fine tune my edge otherwise any irregularity would be telegraphed into the bead. [IMG] 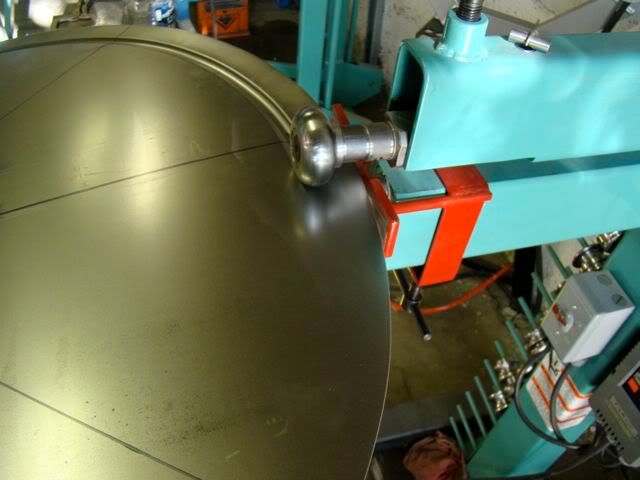 [/IMG] [/IMG][IMG] 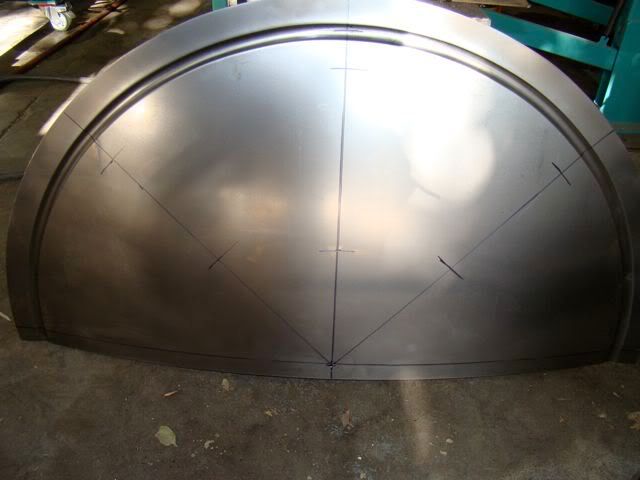 [/IMG] [/IMG]Then I set the piece inside the wheel tub so I could scribe a line showing me where to trim. You want to be very exact at this to end up with a tight fit for welding. [IMG] 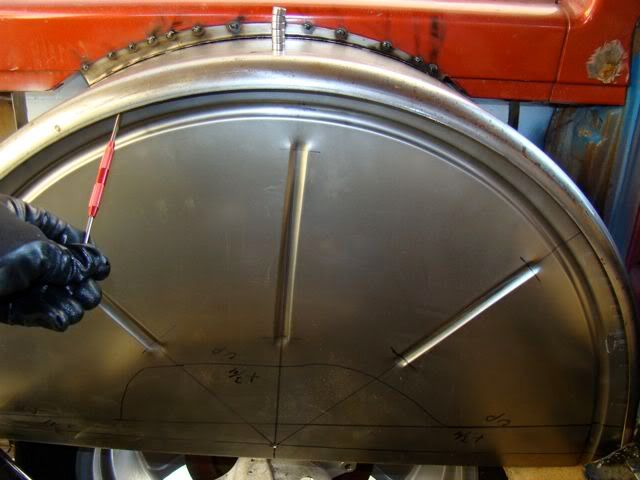 [/IMG] [/IMG]After it was trimmed I laid my template for the suspension cut out over the piece and marked it using a divider so I could get a parallel line 5/8" of an inch away that would end up being my floor return lip when all was said and done. [IMG]  [/IMG] [/IMG]I then trimmed on my new line and set the bead roller up with a new combination that would allow me to roll a 90* edge on the sheet since this can not be done in a brake due to not being strait. You can do this is several pieces and then weld them together but I am sure you agree this looks much cleaner and takes far less time. This took 1 1/2 hours and that was from layout to tack welding it in place. [IMG] 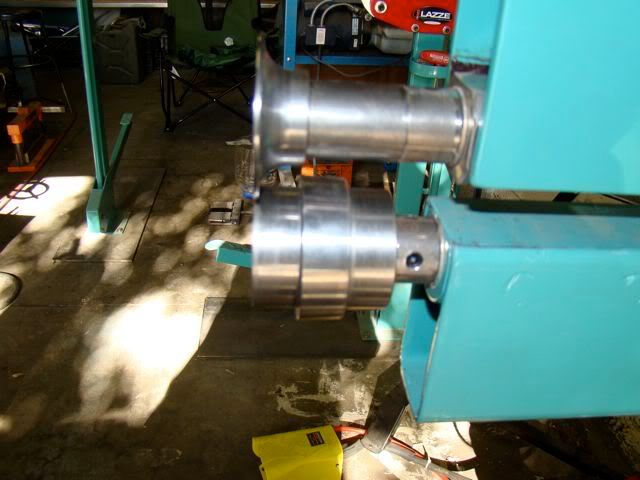 [/IMG] [/IMG]After the first of 4 runs through the bead roller. Notice how the edges start to deform. This is because any time you bend a curved edge you will ether end up with too much metal *(inside curve) or not enough metal (*out side curve) and all this will be dealt with in the shrinker and stretcher. [IMG] 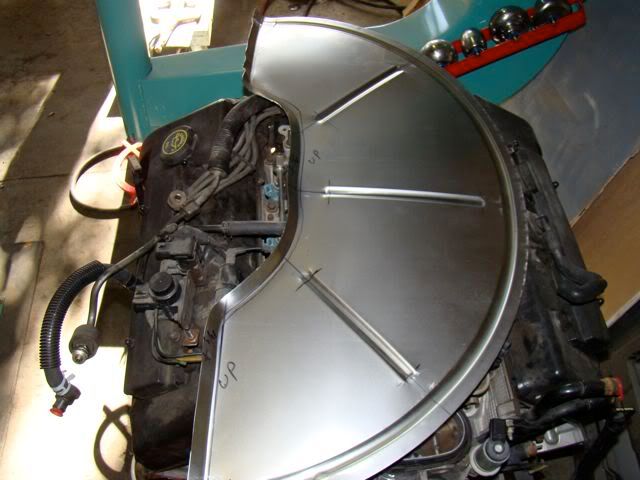 [/IMG] [/IMG]After the second pass you can really start seeing the lip deform. [IMG] 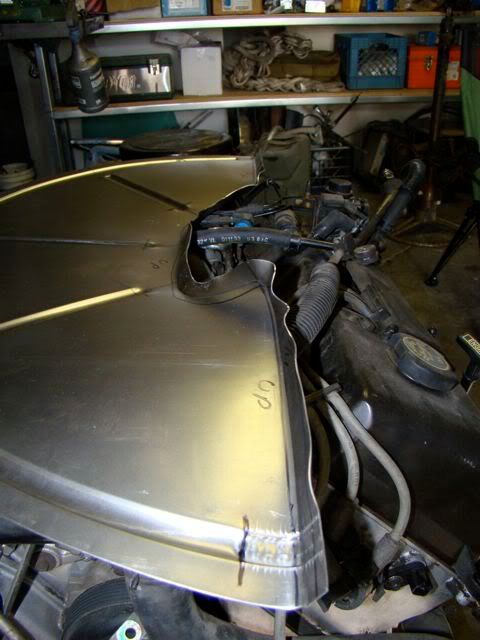 [/IMG] [/IMG]Kevin LFD Inc. Last edited by Rokcrln; 11-19-2009 at 04:44 PM. |

|

|
|
11-19-2009, 04:31 PM
|
#2 |
|
Senior Member
Join Date: Jul 2005
Location: Winters Ca. 95694
Posts: 4,843
|
Re: LFD something a bit different for you all!
Between passes 2 & 3 I had to use my shrinker to straighten out the edges before moving on.
[IMG] 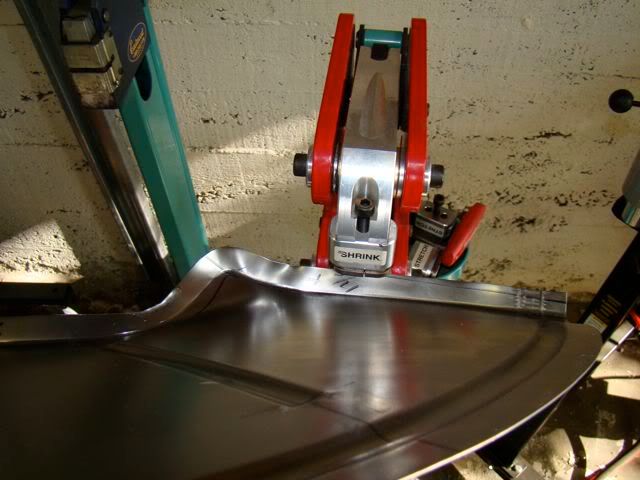 [/IMG] [/IMG][IMG] 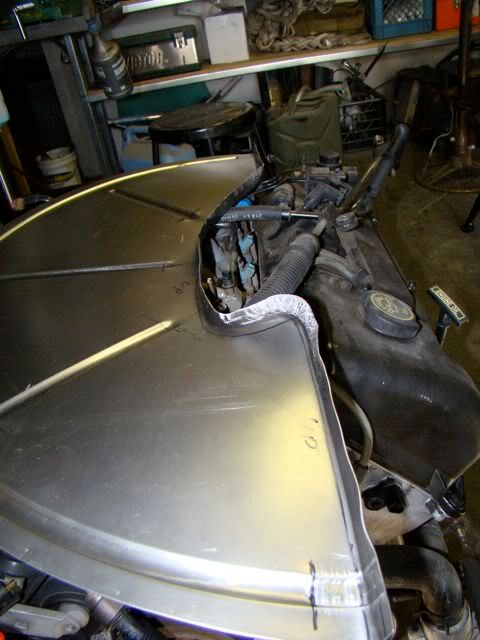 [/IMG] [/IMG]Kind of a bad pic but it shows the last pass through the bead roller. [IMG] 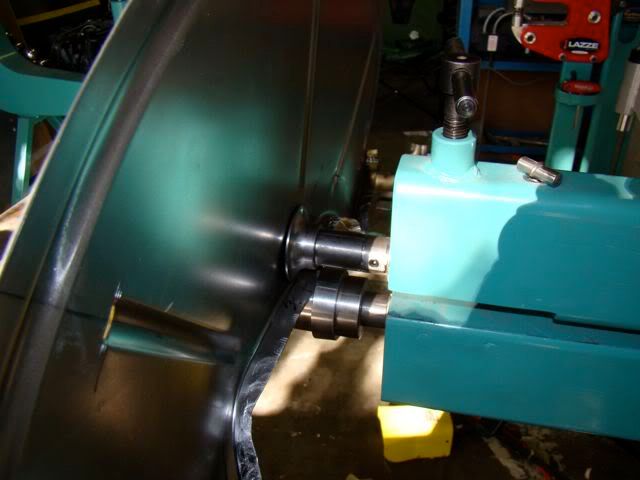 [/IMG] [/IMG]Then after about 2 minutes with a hammer and dolly to fine tune the edge it was ready for install. [IMG] 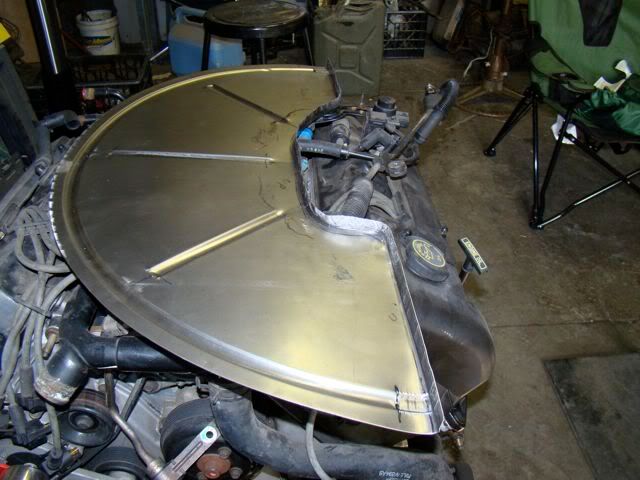 [/IMG] [/IMG]Here is the finished product ready for final welding. [IMG] 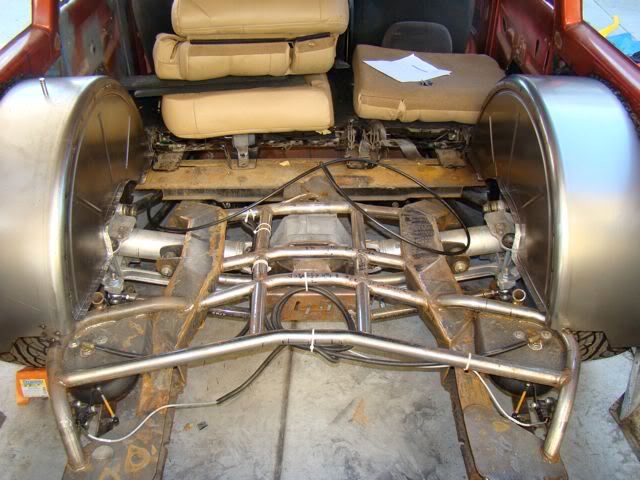 [/IMG] [/IMG][IMG] 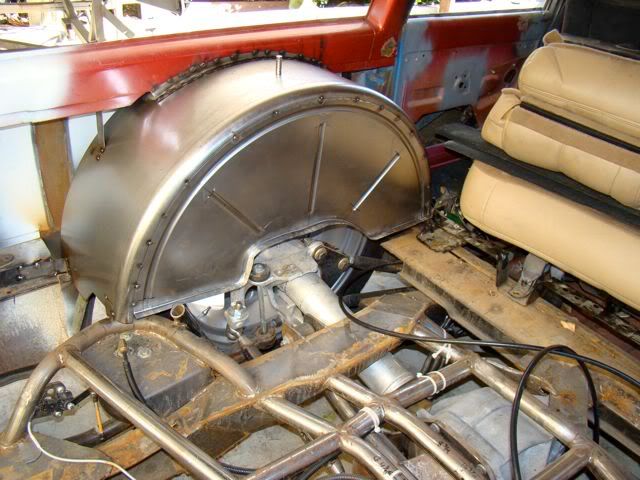 [/IMG] [/IMG][IMG] 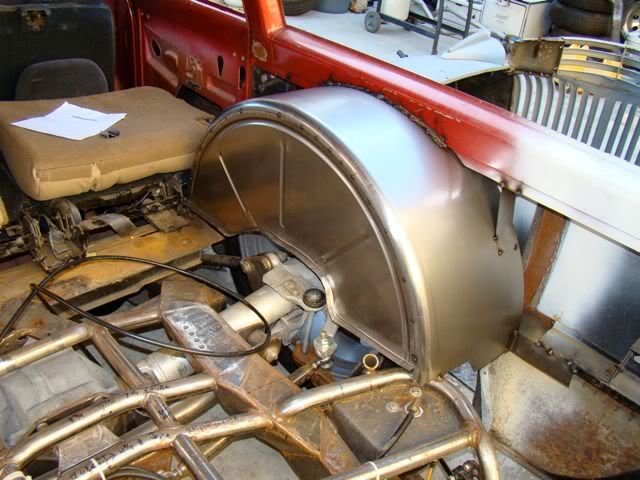 [/IMG] [/IMG]Here is a bonus pic of a small (1/2 scale) roadster pick up I am building for my son. This was built using a lot of the same process I just went through for the wheel tubs plus much more. It will have a bed, hood with sides and a tube chassis. I have not decided if it will be powered or not, we will see down the road. [IMG] 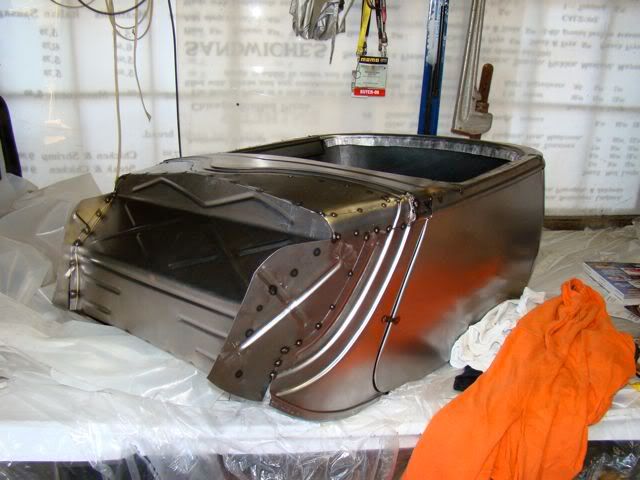 [/IMG] [/IMG]Kevin LFD Inc. Last edited by Rokcrln; 11-19-2009 at 09:58 PM. |
|
|
|
|
11-19-2009, 05:27 PM
|
#3 |
|
Registered User
Join Date: Jun 2008
Location: Boise Idaho
Posts: 117
|
Re: LFD something a bit different for you all!
Great work Kevin (as always), hope you have or will have a buid tread for that roadster pickup?
|
|
|
|
|
11-19-2009, 05:31 PM
|
#4 | |
|
Senior Member
Join Date: Jul 2005
Location: Winters Ca. 95694
Posts: 4,843
|
Re: LFD something a bit different for you all!
Quote:
 Kevin LFD Inc. |
|
|
|
|
|
11-19-2009, 06:51 PM
|
#5 |
|
Between Trucks...
Join Date: Mar 2002
Location: Los Angeles, CA.
Posts: 3,830
|
Re: LFD something a bit different for you all!
That's Bad a$$. Awesome work.
__________________
Beat it to fit, Paint it to match... 
|
|
|
|
|
11-19-2009, 07:17 PM
|
#6 |
|
Registered User
 Join Date: Nov 2007
Location: Turlock California 95380
Posts: 2,075
|
Re: LFD something a bit different for you all!
Just another easy day for you huh ? Those are nice wheel tubs ! Thanks for sharing !

__________________
72 C20 Longbed 05 1500 Z71 |
|
|
|
|
11-19-2009, 07:14 PM
|
#7 |
|
Registered User
Join Date: Jul 2009
Location: Houston, Tx
Posts: 1,133
|
Re: LFD something a bit different for you all!
Dude you are awesome!!
__________________
1972 SWB Medium Olive South Houston Instagram: Antbish84 |
|
|
|
|
11-19-2009, 07:48 PM
|
#8 |
|
Senior Member
Join Date: Aug 2005
Location: tulsa OK
Posts: 3,070
|
Re: LFD something a bit different for you all!
nice write up, thanks
|
|
|
|
|
11-19-2009, 10:03 PM
|
#9 | ||
|
Senior Member
Join Date: Jul 2005
Location: Winters Ca. 95694
Posts: 4,843
|
Re: LFD something a bit different for you all!
Quote:
 Quote:
Kevin LFD Inc. |
||
|
|
|
|
05-14-2011, 01:45 AM
|
#10 |
|
Registered User
Join Date: Feb 2008
Location: Carson, CA
Posts: 585
|
Re: LFD something a bit different for you all!
I know this is an old thread, but did you learn all of your metal shaping skills from Lazze and practice or did you have some experience prior to taking his class? I'm thinking about taking a class or two and want to get the right expectations before I do anything.
Thanks!
__________________
69 C10 SWB -- Left to me by a loving father. Finishing the build we never got the chance to do together |
|
|
|
|
05-14-2011, 11:02 AM
|
#11 |
|
chevy only
 Join Date: Sep 2006
Location: Phoenix, AZ
Posts: 6,619
|
Re: LFD something a bit different for you all!
skills!!nice work
__________________
CHEVY ONLY... Nothin Else ! |
|
|
|
|
05-14-2011, 03:14 PM
|
#12 |
|
67cheby
 Join Date: Sep 2008
Location: siloam springs ar 72761
Posts: 17,890
|
Re: LFD something a bit different for you all!
never cease to amaze me ....any idea on whats going on with whoever bought the tahoe ??
|
|
|
|
|
| Bookmarks |
|
|


 Hybrid Mode
