
|
 11-11-2010, 10:25 PM
|
#1 |
|
Dr. Frankentruck's Monster
 Join Date: Aug 2007
Location: Gainesville, FL
Posts: 147
|
Project Slomo
Here it is. A slow moving project. The project, that is, not the truck.
Truck with bed. 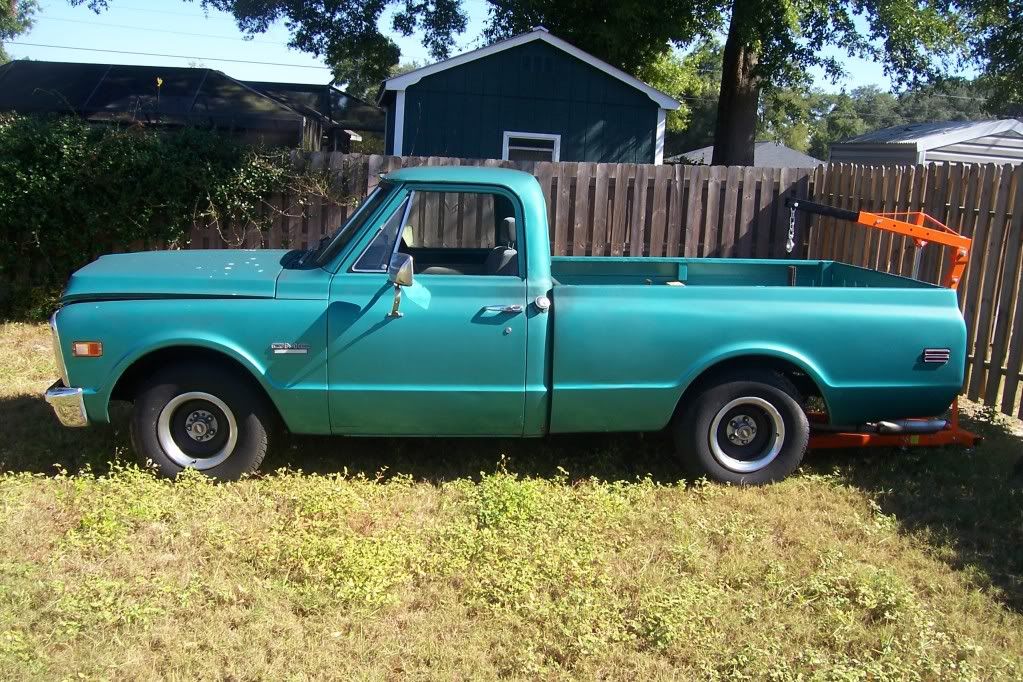 Mid bed removal. 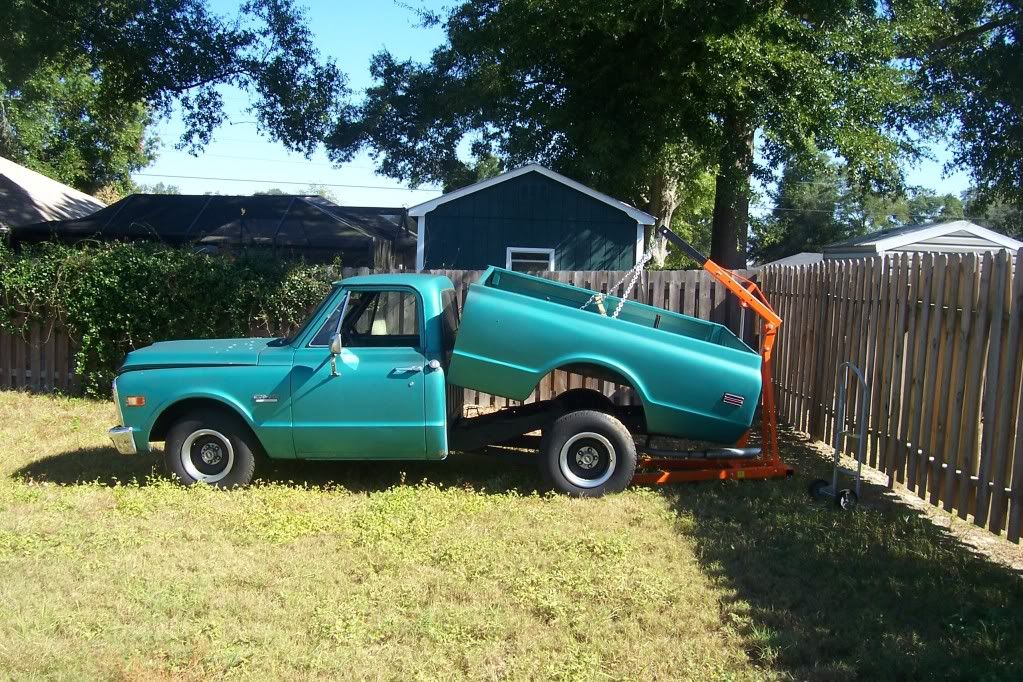 Sans bed. 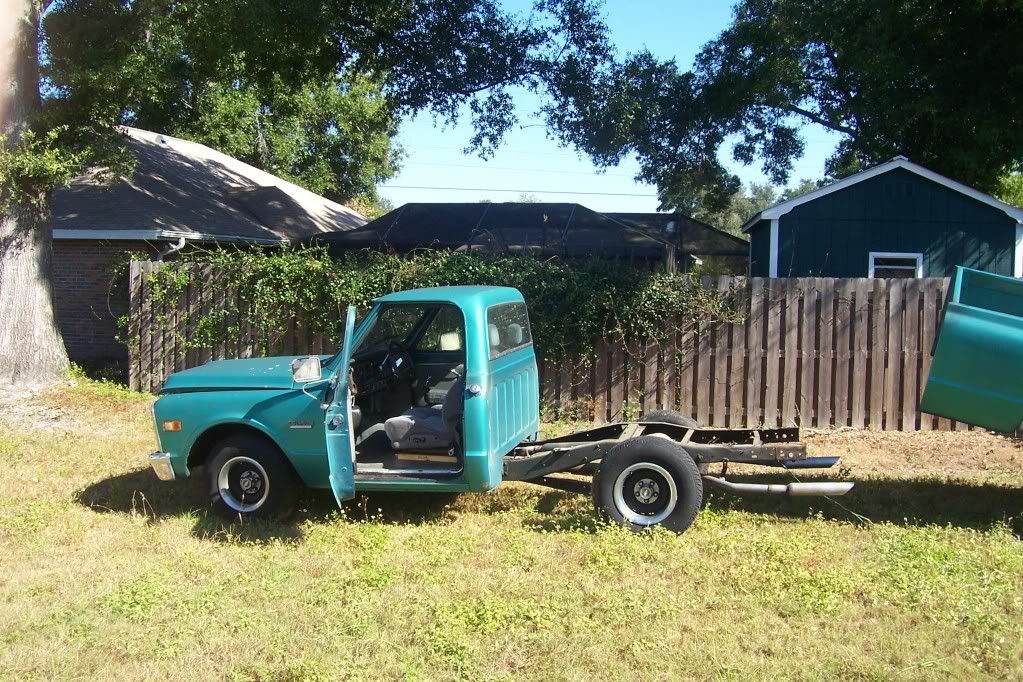 Truck on wheel dollies in garage. 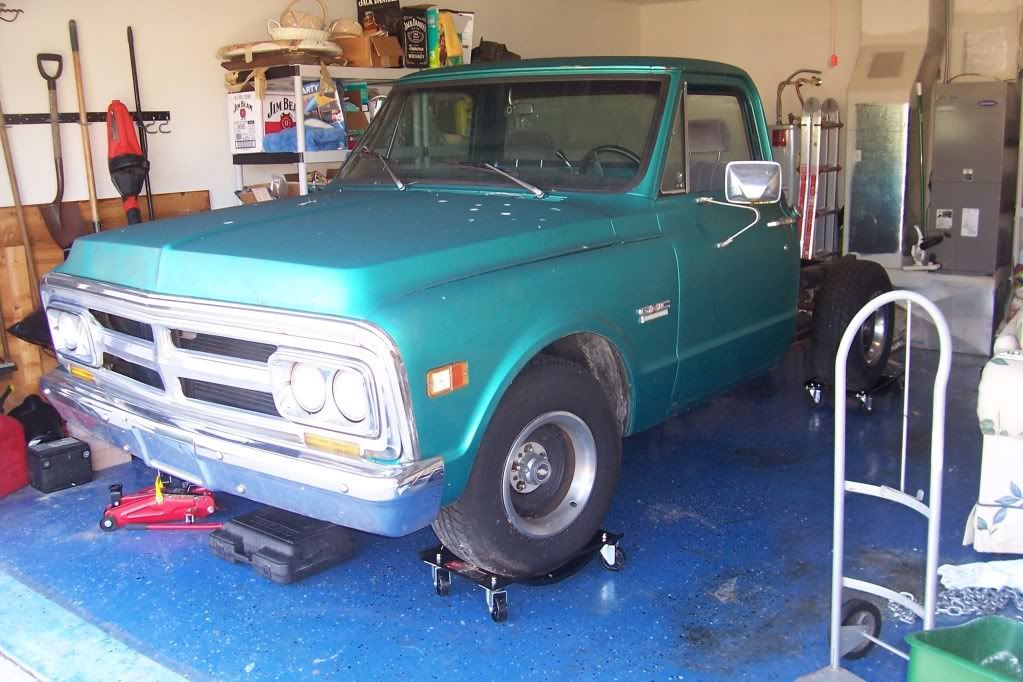 Hence the wheel dollies. 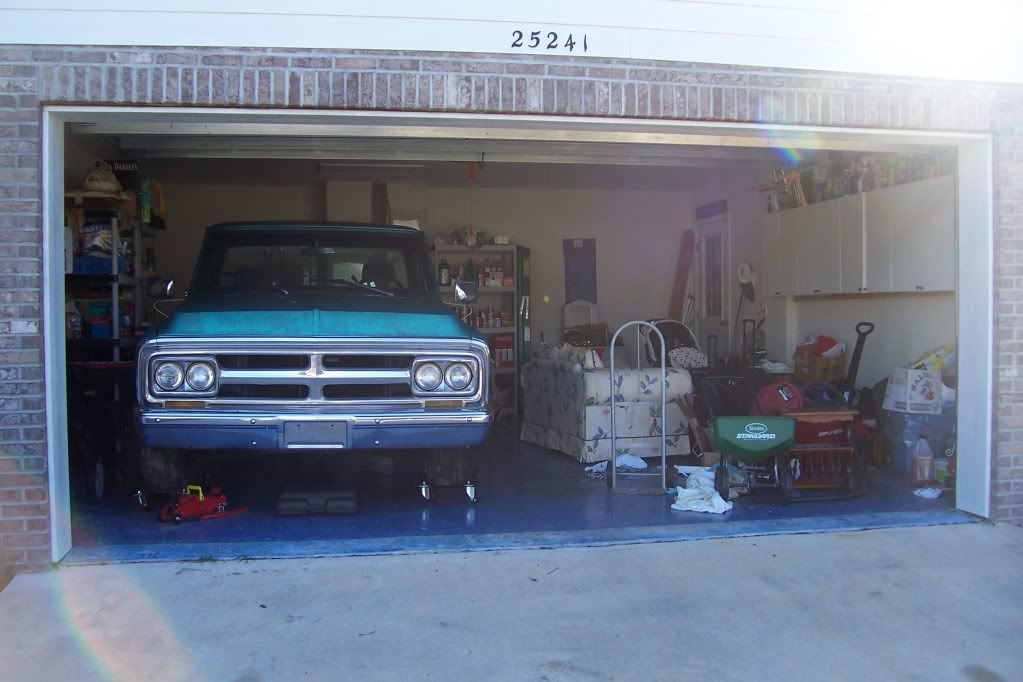 Even though it is my mancave, my wife has easement rights to park her car on the right side. So all that stuff in her parking space will have to find a place. Another weekend of garage organizing, again. ...and he was all ready to work on the truck until mom said something about "bath time". 
__________________
I'm not prejudiced, I hate everyone. Project SLOMO http://67-72chevytrucks.com/vboard/s...d.php?t=430494 |

|

|
|
11-15-2010, 08:07 AM
|
#2 |
|
Dr. Frankentruck's Monster
Join Date: Aug 2007
Location: Gainesville, FL
Posts: 147
|
Re: Project Slomo
I actually got to work on my truck yesterday. Actually, I spent more time reorganizing the garage, but that's the price of admission.
I cut off the the exhaust at the cab and have disconnected the rear brake line. I plan to completely rebuild the rear of the truck before moving on to the front since space is at a premium. I am at the point now to where I can drop the rear end. Therein lies my question. What is the safe and correct way to drop the rear end. Keep in mind that I have never done this before. Thanx everyone!
__________________
I'm not prejudiced, I hate everyone. Project SLOMO http://67-72chevytrucks.com/vboard/s...d.php?t=430494 |
|
|
|
|
11-15-2010, 08:33 AM
|
#3 |
|
Dr. Frankentruck's Monster
Join Date: Aug 2007
Location: Gainesville, FL
Posts: 147
|
Re: Project Slomo
I also forgot to add. Saturday was my birthday (I'm old.). As a birthday gift, my parents decided to help out with the build and gave me a crisp $500 check. Only $9500 left to go for all the tools i want!!!
__________________
I'm not prejudiced, I hate everyone. Project SLOMO http://67-72chevytrucks.com/vboard/s...d.php?t=430494 Last edited by Solego; 11-15-2010 at 08:34 AM. |
|
|
|
|
11-15-2010, 08:46 AM
|
#4 |
|
Tot Roddin'
Join Date: Apr 2005
Location: Mid-MO
Posts: 24,461
|
Re: Project Slomo
So what's the plan for the project?
__________________
-Nate  1969 CST SWB - Project Blank Slate (4.5/6" ECE Static Drop, 6-lug disc brake upgrade (manual), Billet Specialties Vintec 20x8.5 255/40 (F) 20x10 295/40 (R), 250 I-6) 1960 AMF Skylark - Tot Roddin' (Lowered with custom frame; soon to include custom push bar and interior) 2008 Silverado CrewCab 1LT (5.3L, 3:73, 4x4, LT1, Z-71, Towing Package) |
|
|
|
|
11-15-2010, 09:52 AM
|
#5 |
|
Dr. Frankentruck's Monster
Join Date: Aug 2007
Location: Gainesville, FL
Posts: 147
|
Re: Project Slomo
My plan is to have a truck in almost brand new condition. I am going to restore parts when possible and keep new parts to a minimum. It has a 1966 327c.i. Chevy accodring to the numbers on the block. If I'm correct, it's the same block used for the 350. If it is, then I will probably make it a 350. I'm not going to wild with it. I want the engine to be more durable than powerful. I also plan on doing all of the rust repair on the body myself, of which I have never done. That should be a learning experience. The painting will done by a body shop nearby.
One thing I have learned so far is the amount of proper tools that I am currently not in possession of. I don't have a welder, a proper air compressor, proper air tools, engine stand, body tools, etc. And the reason this project will be going so slowly is not due to a lack of funds, but because the funds are going towards silly things like my son's college fund, retirement, mortgage, savings, and the ever rising health insurance. Buuuut, my wife is re-entering the work force after two years of being a stay at home mom. She has much more education and earning potential than do I. Once she gets an eight figure a year job (I can dream), than she won't mind a little more money going into the project.
__________________
I'm not prejudiced, I hate everyone. Project SLOMO http://67-72chevytrucks.com/vboard/s...d.php?t=430494 Last edited by Solego; 11-15-2010 at 09:54 AM. |
|
|
|
|
11-15-2010, 10:03 AM
|
#6 |
|
Account Suspended
Join Date: Aug 2007
Location: USA
Posts: 1,223
|
Re: Project Slomo
Look forward to seeing this project come along. Dont be to intimated about trying things for the first time. There was a lot of first for me on my project. and they came out better than I thought they would.
Your Signature; I say that all the time. except I add "Equally" (to be far of coarse) Last edited by mrhino; 11-15-2010 at 10:05 AM. |
|
|
|
|
11-15-2010, 10:25 AM
|
#7 |
|
Dr. Frankentruck's Monster
Join Date: Aug 2007
Location: Gainesville, FL
Posts: 147
|
Re: Project Slomo
So, can anyone tell the safest and correct way to drop my rear end? I'm afraid that if I remove the rear A-arms(?) from the front, the springs will slam it down to the floor. Am I correct on this, or do the springs not store that much energy for me to worry about?
Also, I planned on wire wheelin' the frame to bare metal for POR-15 application, but that seams very labor intensive. Has anyone done that, or should I invest in an inexpensive sandblaster? And thanx for commenting everyone!
__________________
I'm not prejudiced, I hate everyone. Project SLOMO http://67-72chevytrucks.com/vboard/s...d.php?t=430494 Last edited by Solego; 11-15-2010 at 10:26 AM. Reason: I have the attention span of a gnat. |
|
|
|
|
11-15-2010, 12:18 PM
|
#8 |
|
Account Suspended
Join Date: Aug 2007
Location: USA
Posts: 1,223
|
Re: Project Slomo
put a jack under the A arms, loosen the ball joint nuts (dont take off) smack the spindle with a hammer were the ball joint fits in till it comes loose then remove the nut and lower the jack slowly and the spring should drop out.
|
|
|
|
|
11-15-2010, 12:20 PM
|
#9 |
|
Account Suspended
Join Date: Aug 2007
Location: USA
Posts: 1,223
|
Re: Project Slomo
Sorry that was for the front springs. Same thing though jack up the rear end, unbolt spring then lower slowly.
|
|
|
|
|
11-15-2010, 12:39 PM
|
#10 |
|
Dr. Frankentruck's Monster
Join Date: Aug 2007
Location: Gainesville, FL
Posts: 147
|
Re: Project Slomo
Okay, thanx. That makes sense. The wife and kid are going to visit family out of town this weekend, so that's my next goal. Then it will be to disassemble the rear end.
Unfortunately, I can't get the lug nuts off the rear wheels. I had new tires put on when I bought the truck and I believe they may not have hand threaded them at first and gunned them on. I have had that happen before. As soon as there are any changes I'll post pictures. Thanx for the help mrhino!
__________________
I'm not prejudiced, I hate everyone. Project SLOMO http://67-72chevytrucks.com/vboard/s...d.php?t=430494 |
|
|
|
|
11-20-2010, 10:55 PM
|
#11 |
|
Dr. Frankentruck's Monster
Join Date: Aug 2007
Location: Gainesville, FL
Posts: 147
|
Re: Project Slomo
Since the family was out of town today, I did a lot of what I most enjoy, sleeping. I also worked on the truck as well.
I didn't get any in progress pics as the wife had the camera. I went out the other day and got a cheap CH air gun, angle grinder, impact sockets (twice as expensive as the danged gun), and a really freakin' expensive grinding wheel and knotted wire wheel. $13 for each! How much for all? $150 with tax! Well, I started this morning taking off the wheels, the shocks, and then moved on to the u-bolts (shackles?) I then realized that I had neither a socket or wrench big enough for the nut. I hate using adjustable wrenches as I tend to round off nuts when I use it. So, off to Sears I went! $96 and an hour and a half later, I returned home with a 26 piece wrench set that goes up to 1 1/8" and a socket set that goes up to 1 5/16". Having the right tools makes a world of a difference! Air tools rock also. Now, I have a double barrel Rigid air compressor for my nail gun that only blows 3.7 cfm and 135 PSI, so I don't think I'm getting the full 250 ft/lbs the gun offers. But, some breaker fluid and a breaker bar, and the gun zips the nuts right off! I found a 20 year old CH air compressor, 60 gal, and blows 9 cfm and 90 psi for $175 on craig's list. I'm thinking about getting it. Enough chit chat, here are the pics. The over all day's work. 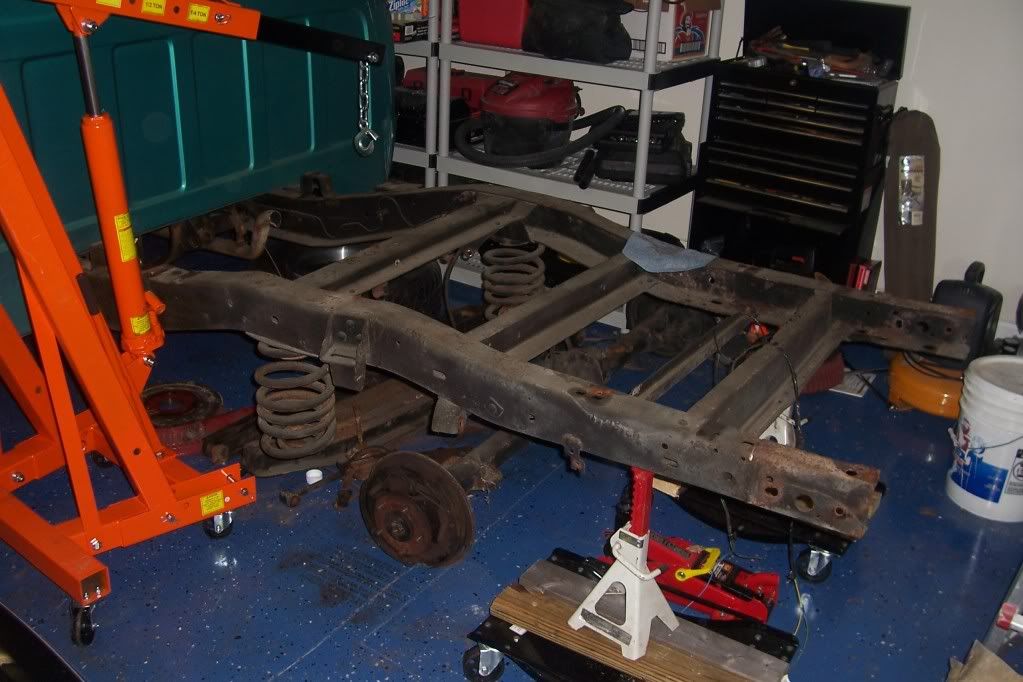 The only significant rust on the frame I've found so far. It's the rear most crossmember. 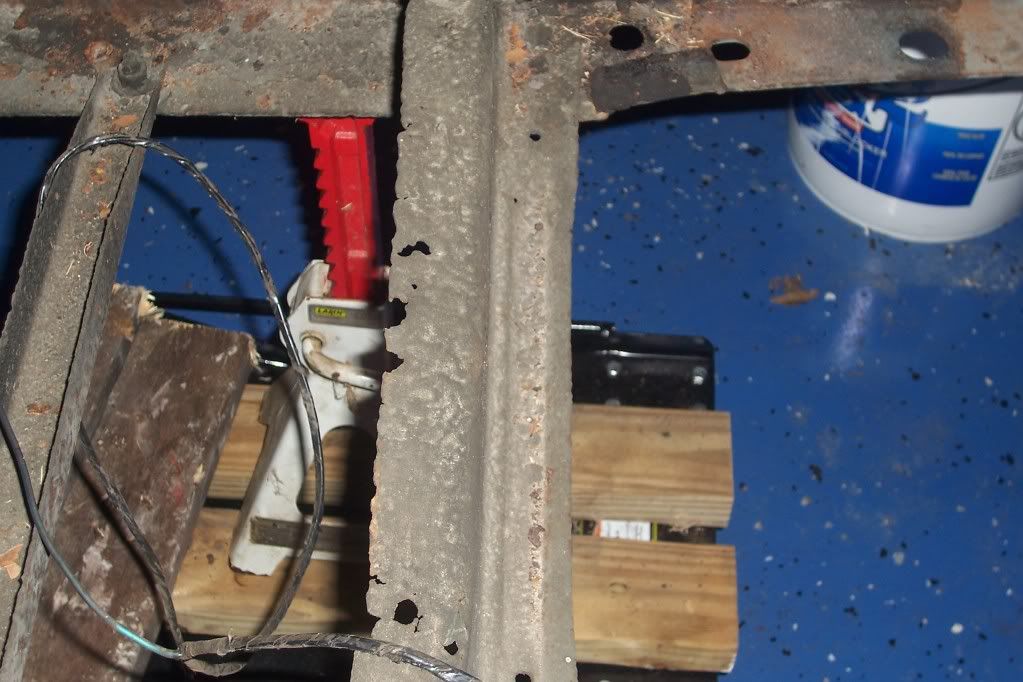 The springs are giving me a heck of a time as well. It's going to take me a lot of breaker fluid and effort to remove these. I don't have an impact extension for my air gun. 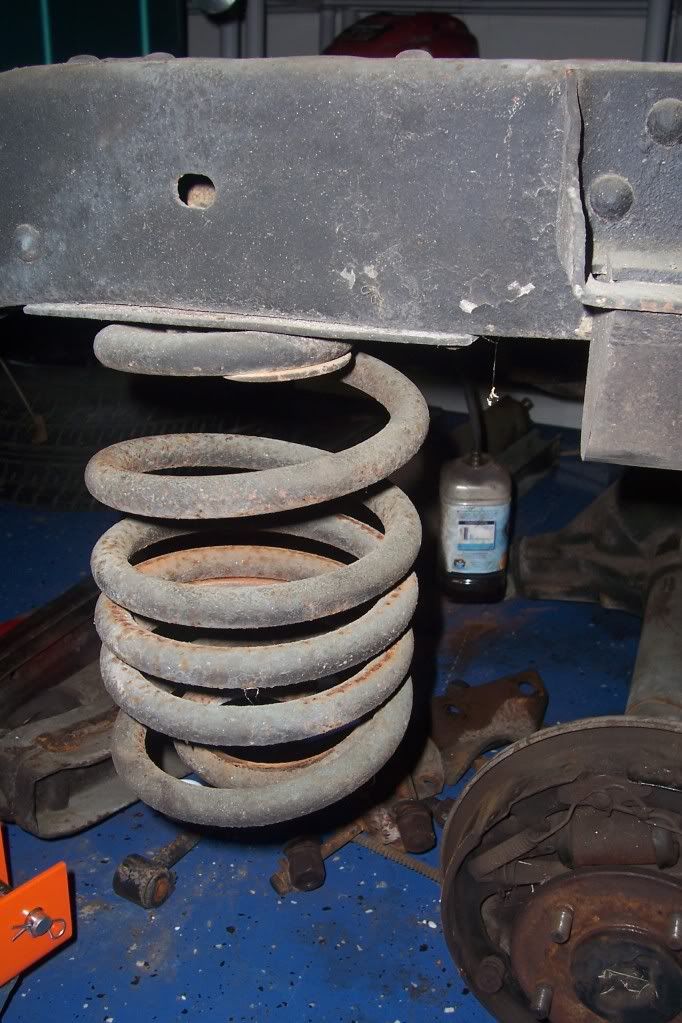 The rear and other parts not pictured neatly placed on the floor. 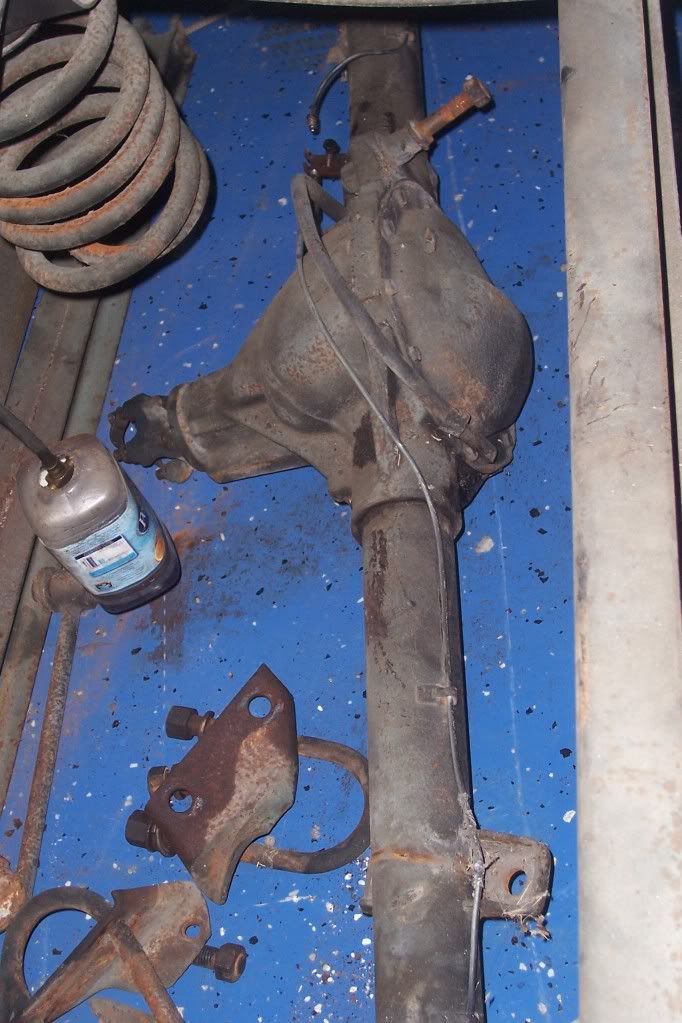 One of the extensions welded to the rear frame horn to accomodate the odd length bed. I got a metal cutoff wheel for angle grinder, so we'll see how that goes. I would get a cheap cut off tool, but my air compressor couldn't push it for very long. Do they make electric cut off tools? 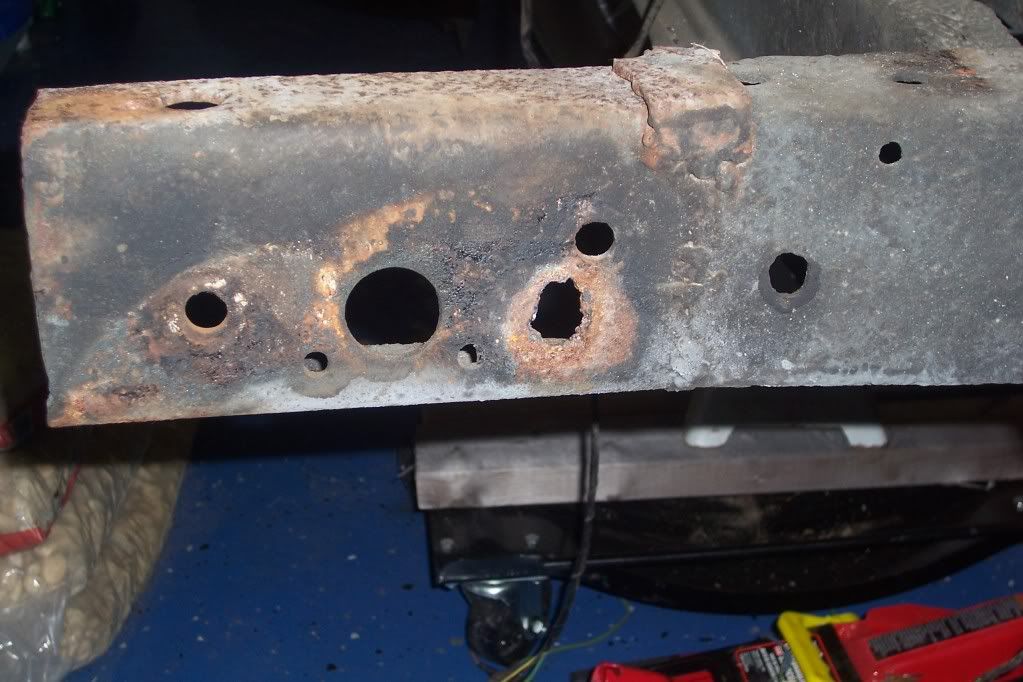 Remember the price of admission? Paid in full! 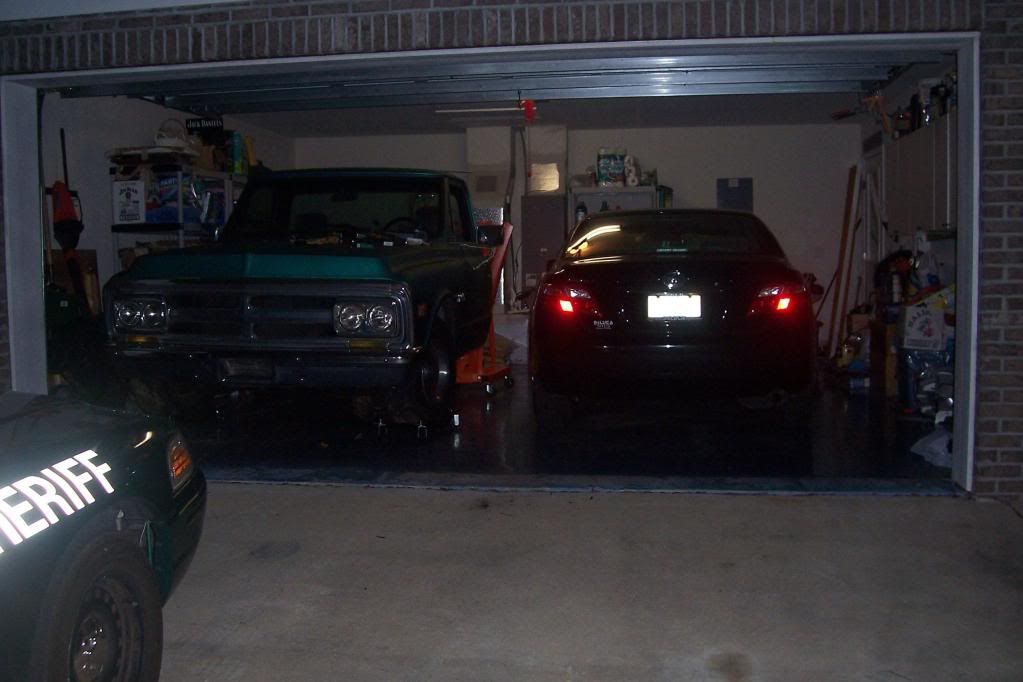
__________________
I'm not prejudiced, I hate everyone. Project SLOMO http://67-72chevytrucks.com/vboard/s...d.php?t=430494 |
|
|
|
|
11-21-2010, 10:15 AM
|
#12 | |
|
Account Suspended
Join Date: Aug 2007
Location: USA
Posts: 1,223
|
Re: Project Slomo
Quote:
|
|
|
|
|
|
11-21-2010, 11:01 AM
|
#13 |
|
Dr. Frankentruck's Monster
Join Date: Aug 2007
Location: Gainesville, FL
Posts: 147
|
Re: Project Slomo
I feel so retarded now. Thanks.
Really, though, that's the greatest idea I never thought of. I do have an electric angle grinder. I also have a metal cutoff wheel to try and cut off those frame horn extensions. I have planned on getting new stock height springs, so spring cutterage will not be an issue. Unfortunately, I have no idea when I will next be able to work on the truck. I sitting on my butt now while my not yet two year old son is roaming the house in diapers and a t-shirt leaving cracker crumbs all over the floor. And mom is at work. She should have birthed a 10 year old. :P
__________________
I'm not prejudiced, I hate everyone. Project SLOMO http://67-72chevytrucks.com/vboard/s...d.php?t=430494 |
|
|
|
|
12-30-2010, 10:21 PM
|
#14 |
|
Dr. Frankentruck's Monster
Join Date: Aug 2007
Location: Gainesville, FL
Posts: 147
|
Re: Project Slomo
More than a month later and I finally get a day to do some work on the truck. Tuesday, I rented a box truck to take the bed to the scrap yard. The bed fit with only six inches on each side to spare.
This is the before the work began today. Here I have the springs and the rear frame extensions cut off. 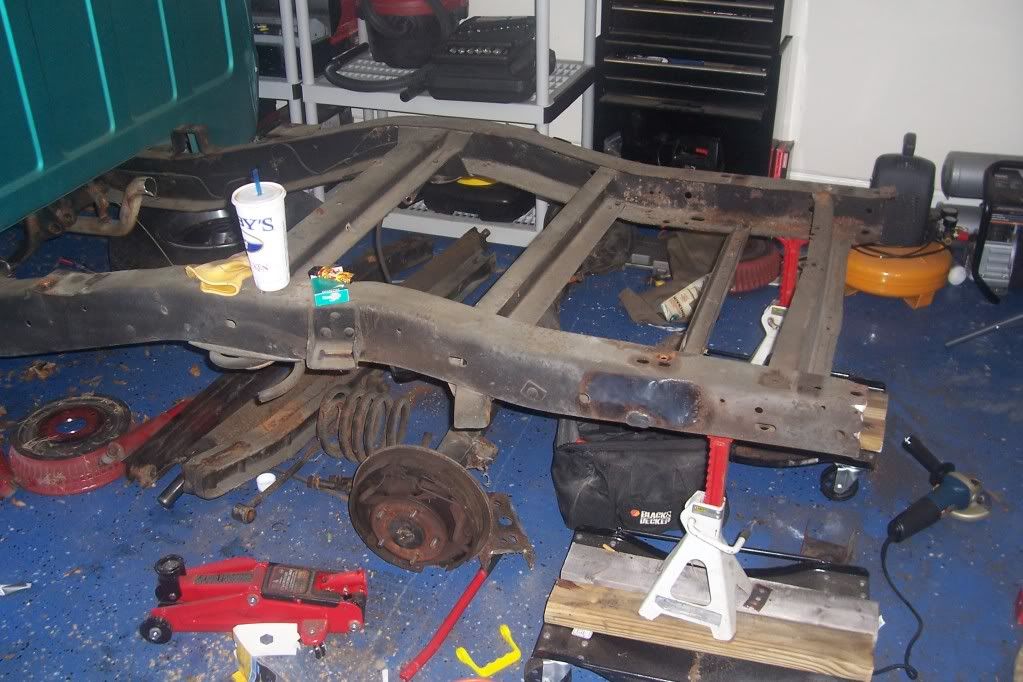 Here you can see I still have some clean up work to do on the frame ends. 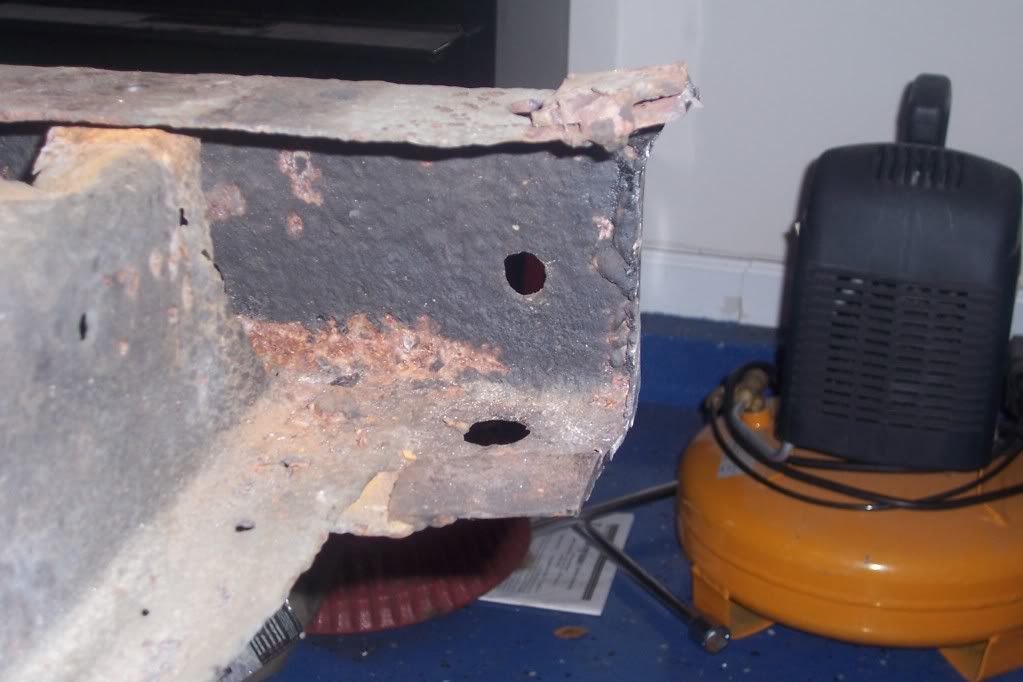 I then removed the rear most crossmember as it is rusted pretty bad on the passenger side. I might have a line on one from our classifieds board. 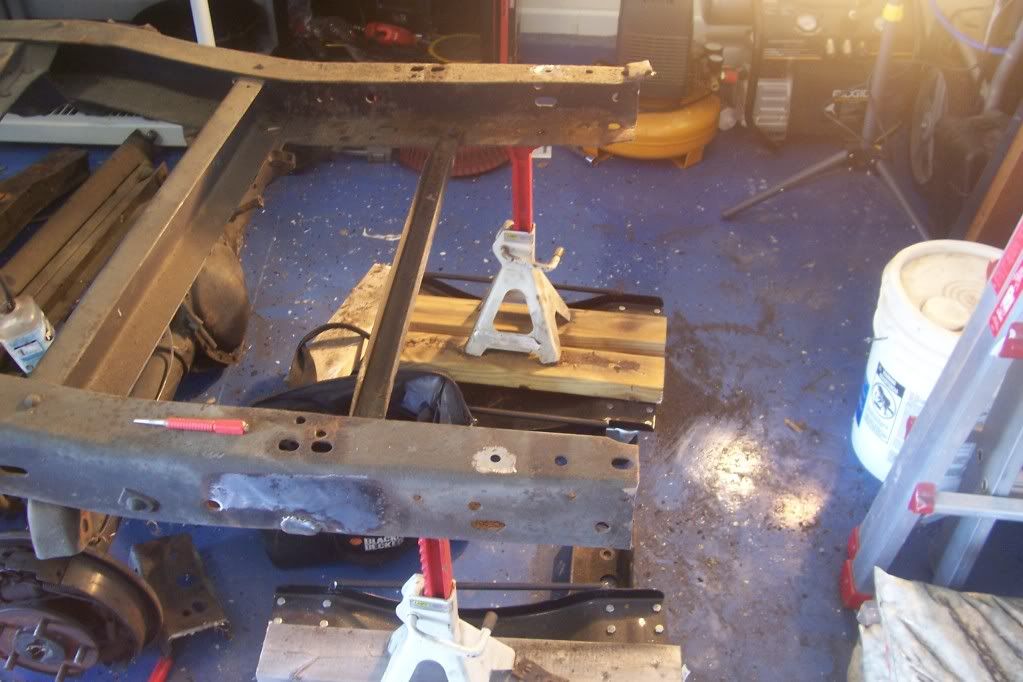 I used the method described on this very board of grinding the rivet down flush and hammering it out with a punch. It worked like a charm! 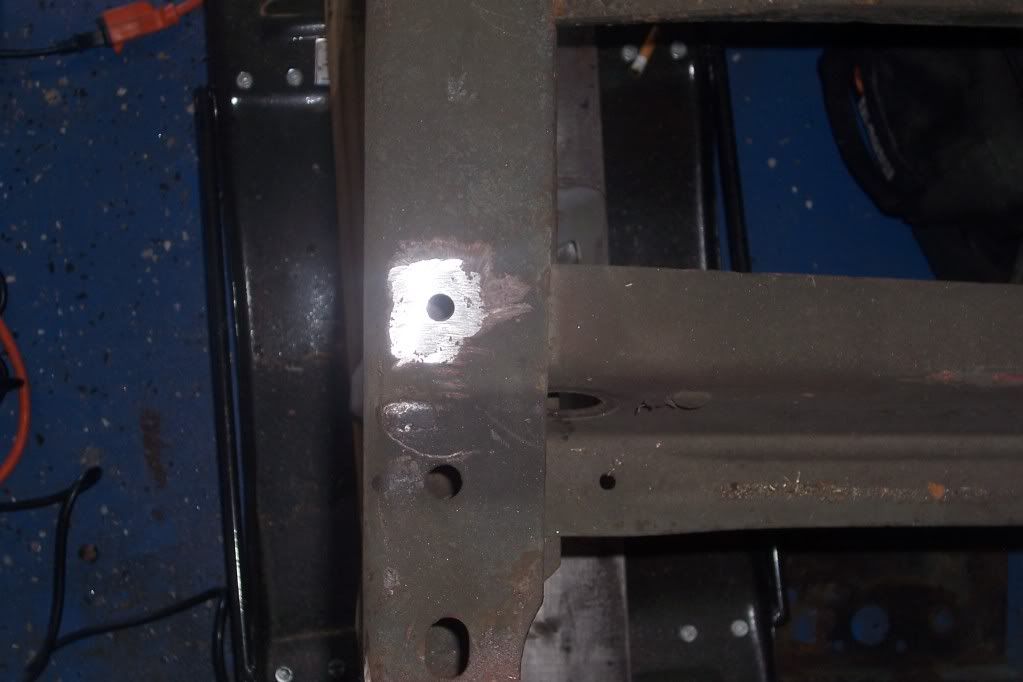 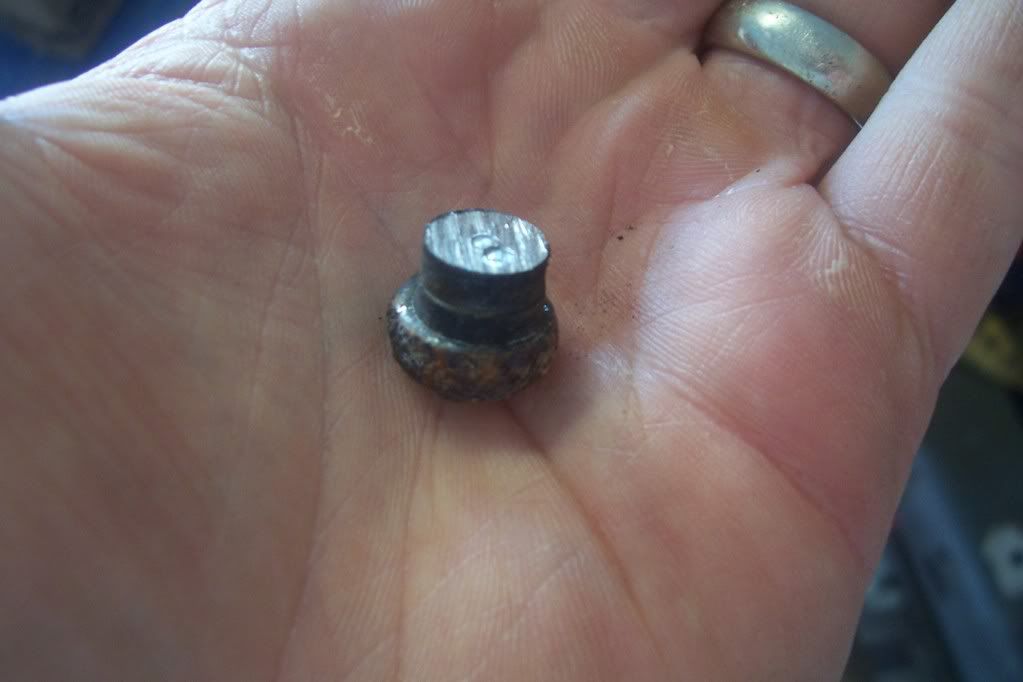 Here is the xmember removed. 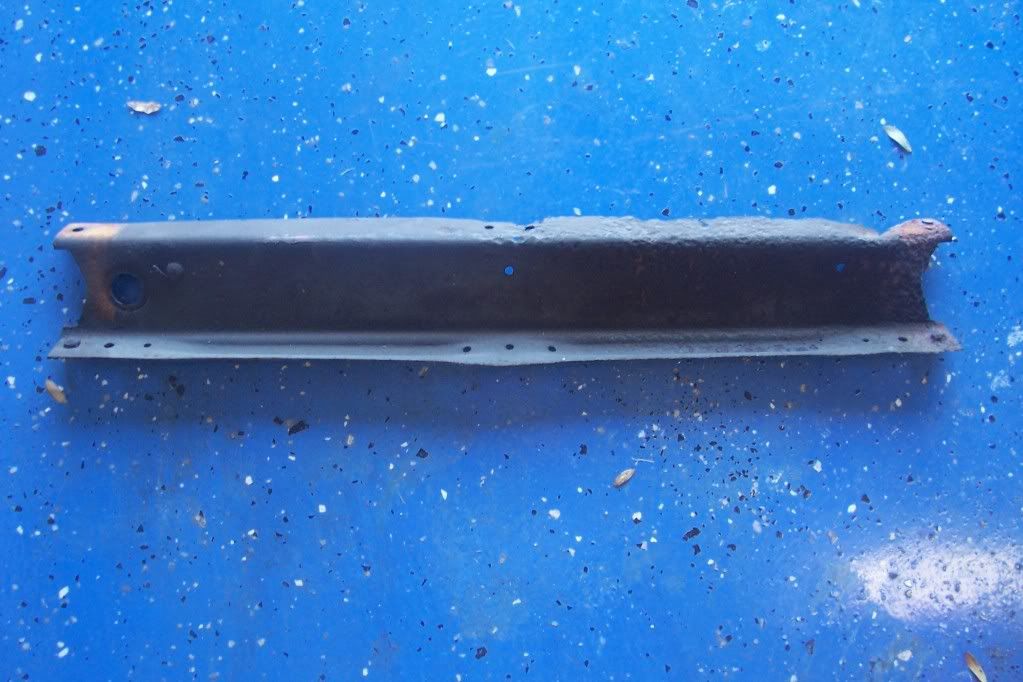 And here is a closeup of the crappy part. 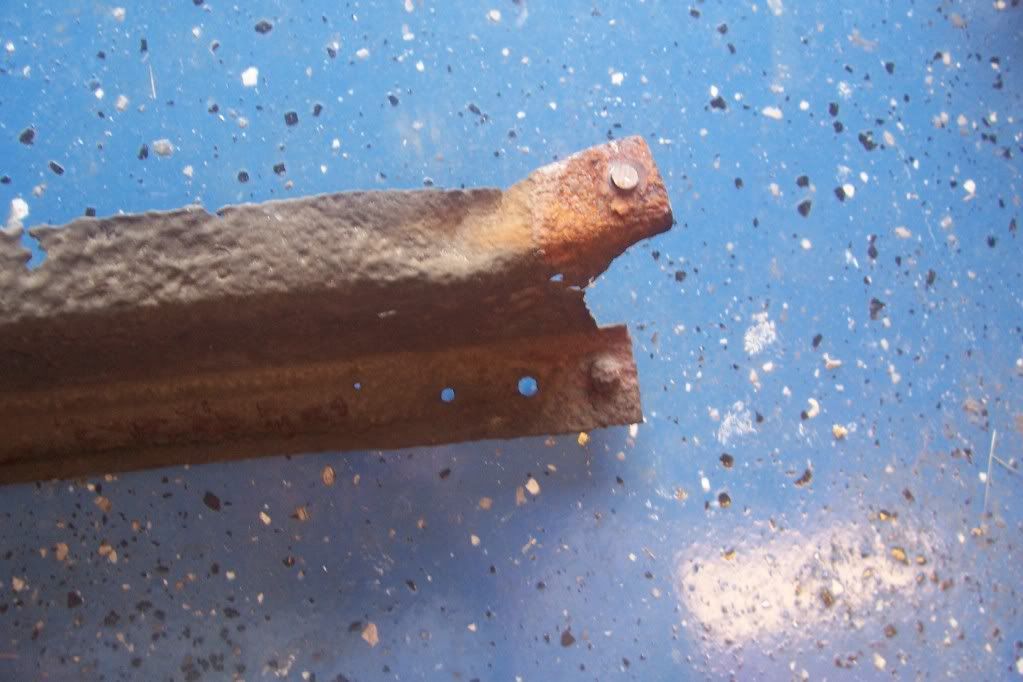 I also removed the xmember where the gas tank will go. Here is the day's work in it's entirety. 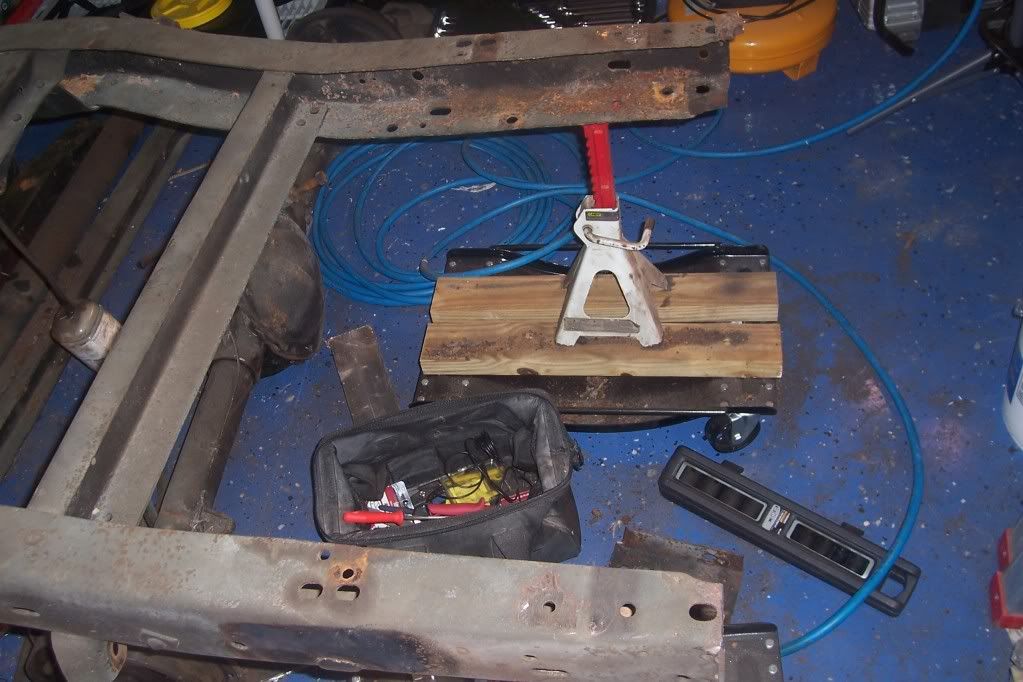 Saturday, the wife will be at work and the kid will be at grandma and grandpa's place. I will have the day all to myself!!! Hmm, what to do...
__________________
I'm not prejudiced, I hate everyone. Project SLOMO http://67-72chevytrucks.com/vboard/s...d.php?t=430494 |
|
|
|
|
12-31-2010, 07:50 AM
|
#15 |
|
Account Suspended
Join Date: Aug 2007
Location: USA
Posts: 1,223
|
Re: Project Slomo
Holy crap, a month later, i would have gone crazy, not working on it for a month, this early in the build. If I were Towards the end, not so much.
looks good, keep getting after it. |
|
|
|
|
12-31-2010, 04:54 PM
|
#16 |
|
Registered User
Join Date: Mar 2010
Location: a t w a t e r cali 95301
Posts: 10,713
|
Re: Project Slomo
wow that was hammered!
|
|
|
|
|
01-01-2011, 04:38 PM
|
#17 |
|
Dr. Frankentruck's Monster
Join Date: Aug 2007
Location: Gainesville, FL
Posts: 147
|
Re: Project Slomo
Wrapping up the day as the kid and wife will be home soon. I will have pictures and many questions forthcoming!!
Coming soon...
__________________
I'm not prejudiced, I hate everyone. Project SLOMO http://67-72chevytrucks.com/vboard/s...d.php?t=430494 |
|
|
|
|
01-01-2011, 10:03 PM
|
#18 |
|
Dr. Frankentruck's Monster
Join Date: Aug 2007
Location: Gainesville, FL
Posts: 147
|
Re: Project Slomo
Finally, the wife and kid are in their pajamas watching TV, so I finally get a moment to upload these pictures.
The first thing I noticed was I had nothing to sit on. Then, I remembered that I got a Craftsman stool three Christmases ago. So that was my first project. 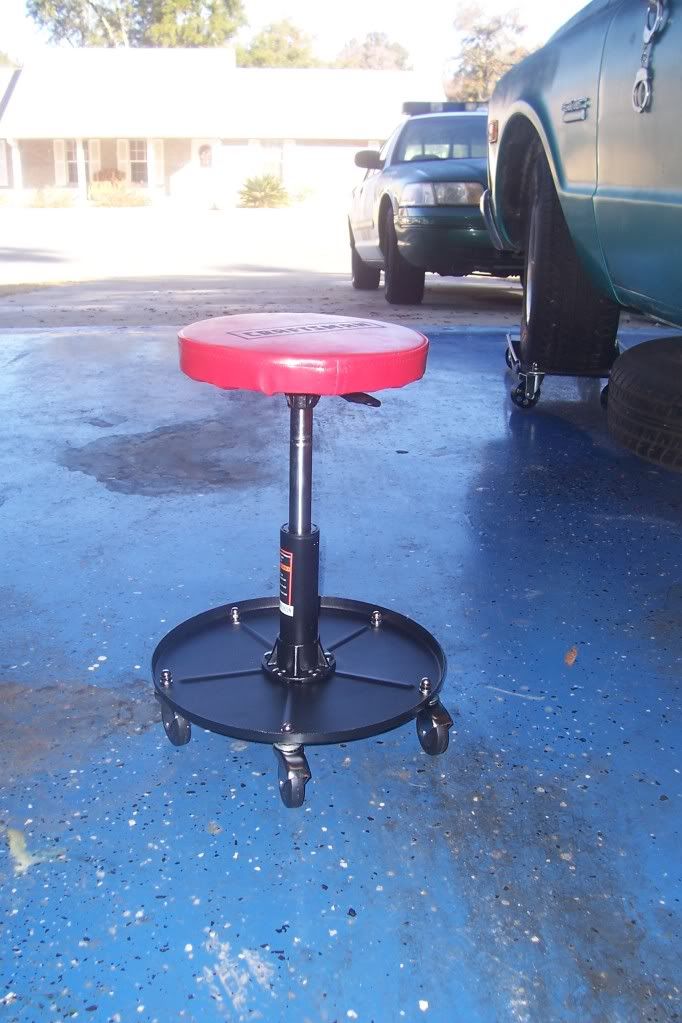 Today I worked on disassembling the rear end. First to remove the brakes. 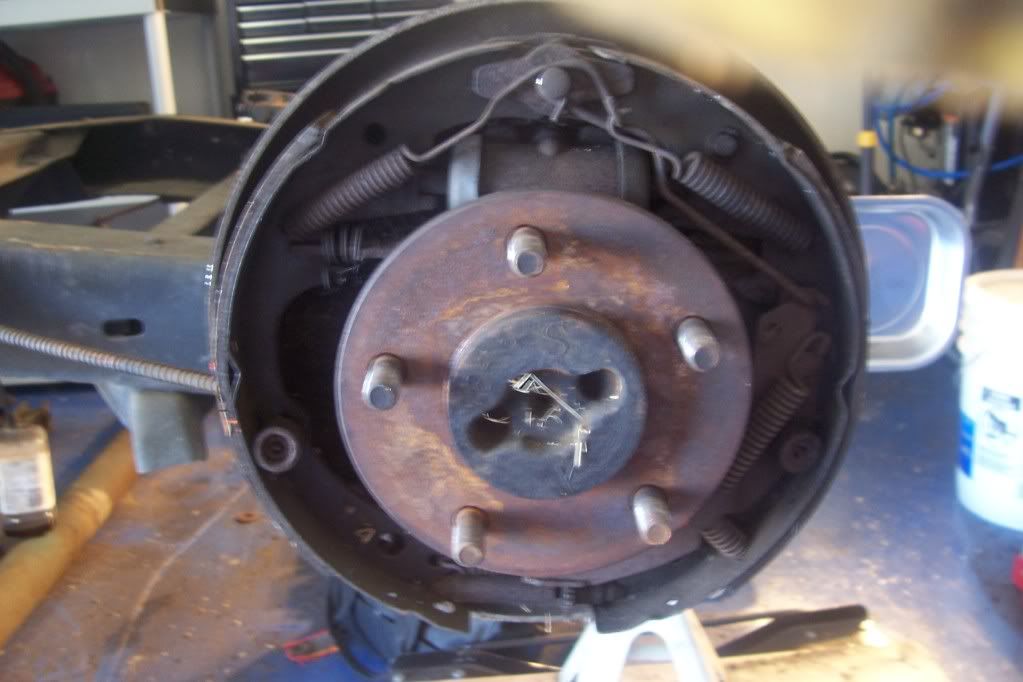 I got the brakes removed. 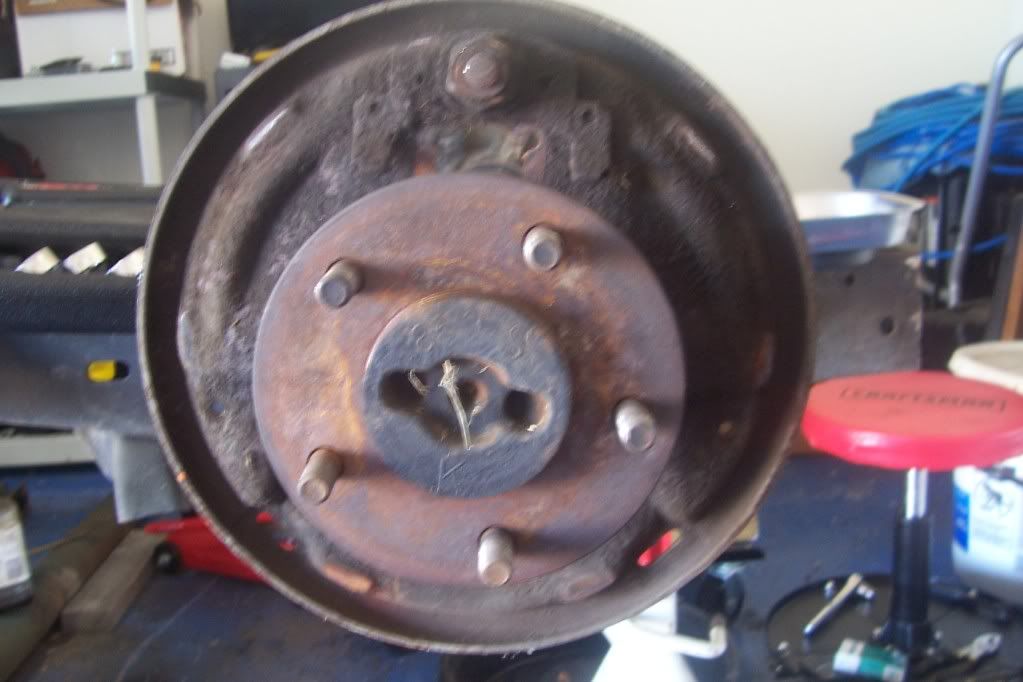 And then moved on to the differential. 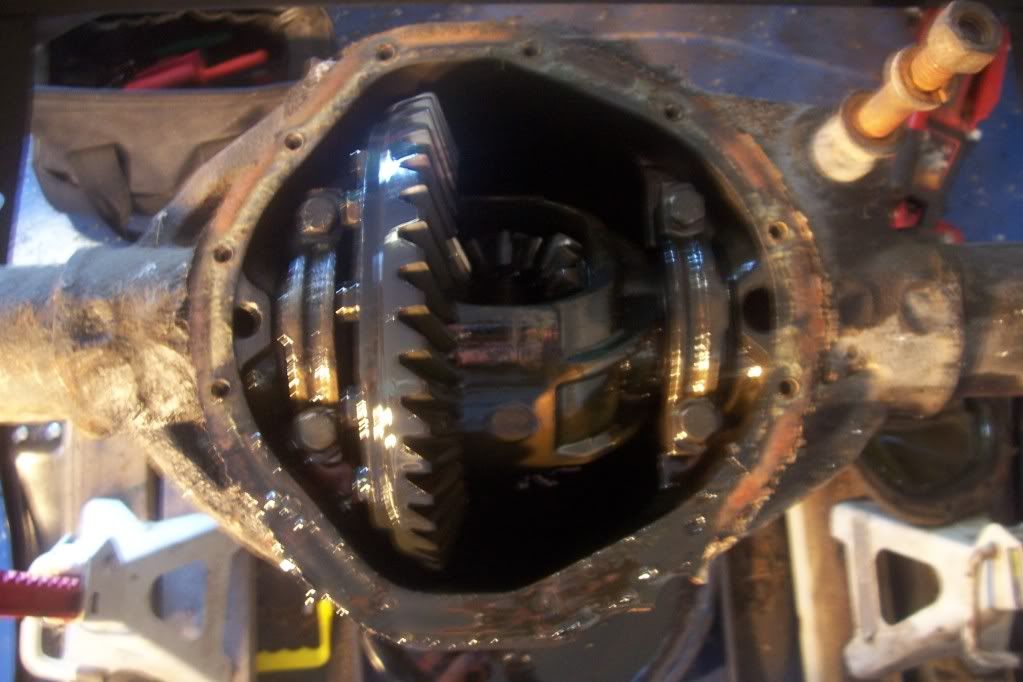 I got the differential out. 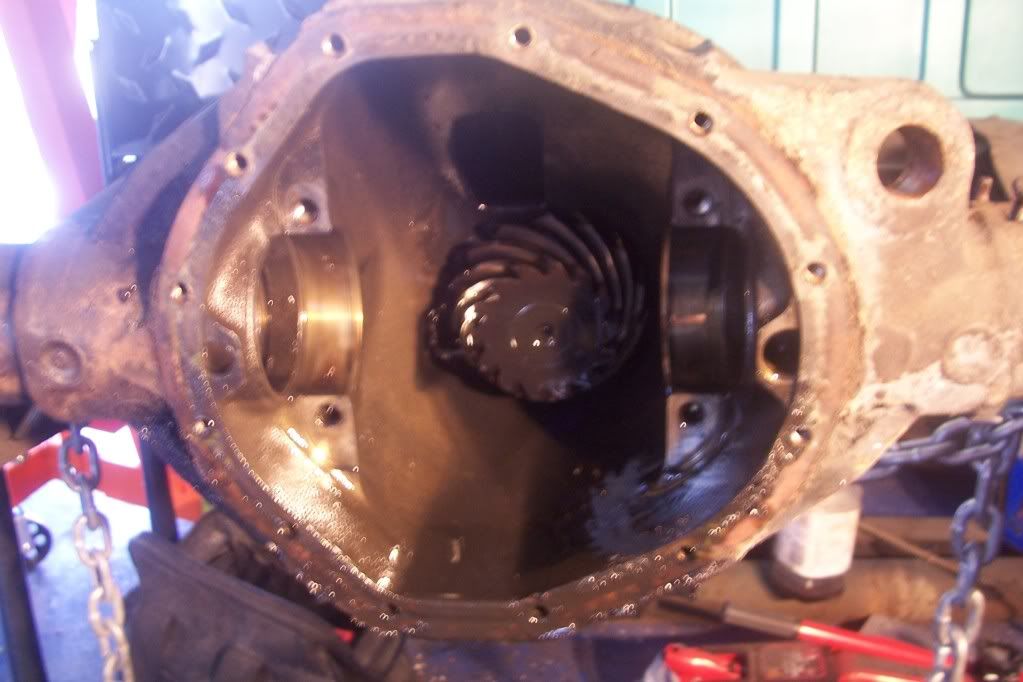 And moved on to getting the axles out and the backing plates(?) off. 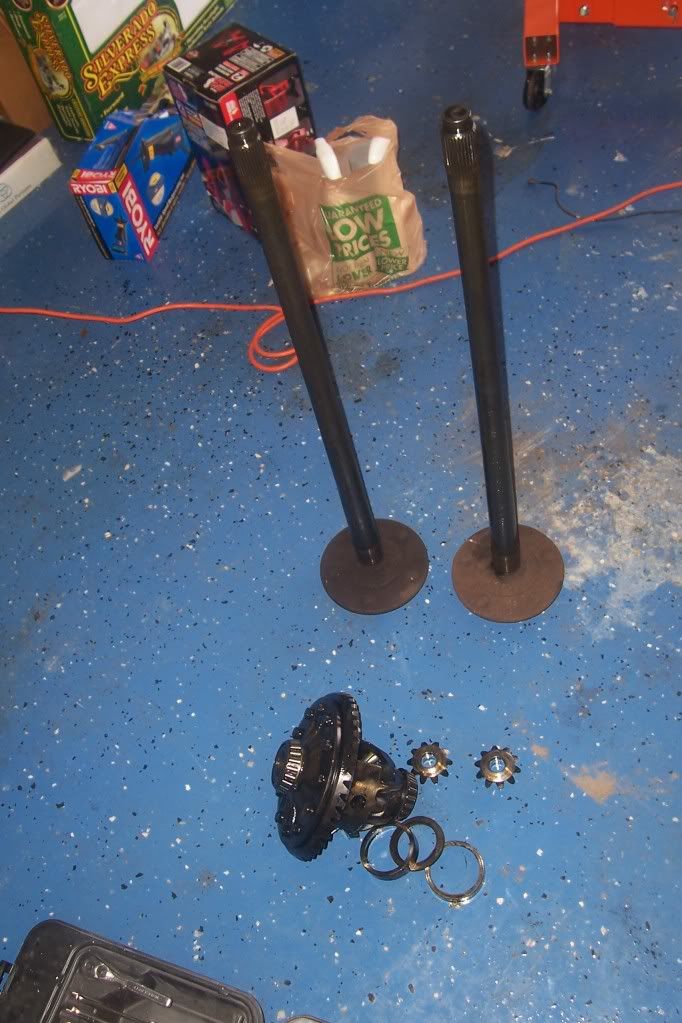 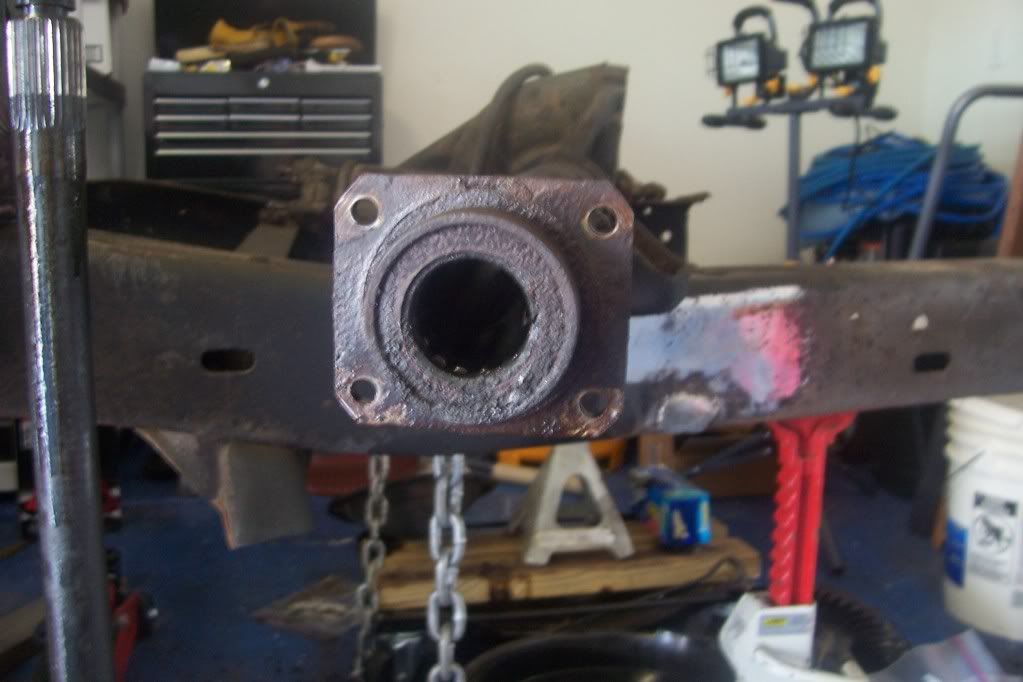 Keep in mind that I have never done this. I took two years of auto in high school, but that was about 15 or so years ago. I'm pretty sure that when I took out the differential, I was supposed to do all sorts of markings. Oh well. I plan on having a brand new diff in there in anyways. I did actually separate the two caps in different baggies and marked them. Sooooo, I moved on to the drive pinion shaft. I learned that today from the interwebs. I also learned that I should have done that first, as it was free wheelin'. Great! So, I decided that some good ole fashion garagineerin' should get the job done! Here you can see the precision attachment device to secure the free wheelin' pinion drive shaft in place. 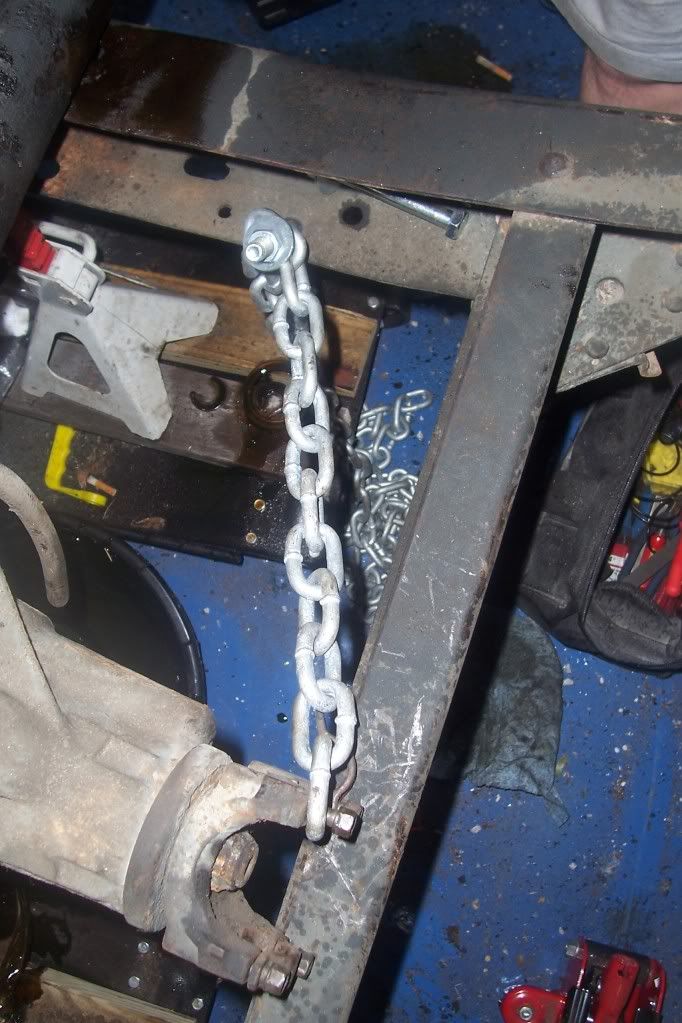  So, I got the nut off...  ...but it still won't come off. I'm confused as to what's holding it in. Anybody with greater mechanical knowledge than I? I checked my service manual, but it wasn't very helpful. Here is the result of the day's work. It's nowhere near the amount of accomplishments that many here get done in a day, but everyday is a day closer to completion. 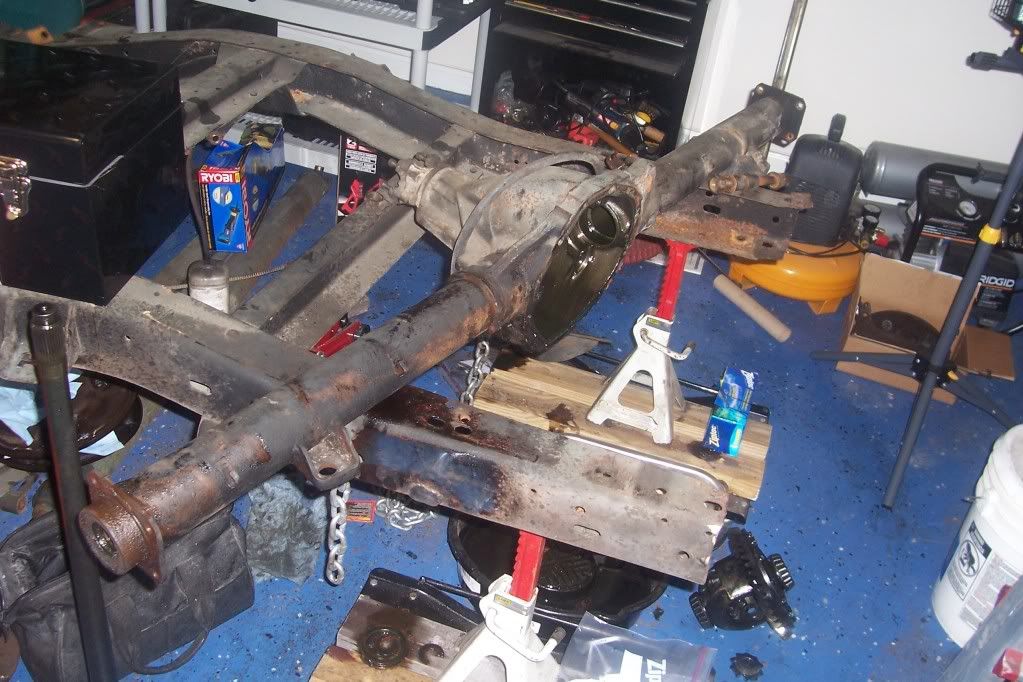 I also took a two hour break to eat lunch and do some shopping with my Home Depot gift cards. I spent $99. I'm going to get almost half of that back, though. I bought some supplies to prep and prime some of the metal parts, but after dousing the two backing plates in engine degreaser, and still having to use the angle grinder with a wire cup brush, I decided this would be a lot easier if I had all this crap sand blasted! A powder coating shop was recommended to me by the paint shop i'm going to use to have some stuff sand blasted. So I got to thinking, why not have them powder coat all this stuff as well? So that's the plan. One more question. My truck was already converted to five lugs when I got it, so I would like to keep the axles. What do I need to look at to determine whether or not they need to be replaced? Thanx, all!
__________________
I'm not prejudiced, I hate everyone. Project SLOMO http://67-72chevytrucks.com/vboard/s...d.php?t=430494 Last edited by Solego; 01-01-2011 at 10:08 PM. Reason: I hate bad grammar. |
|
|
|
|
01-02-2011, 08:49 AM
|
#19 |
|
Account Suspended
Join Date: Aug 2007
Location: USA
Posts: 1,223
|
Re: Project Slomo
great photos nice and clear. on the pinion nut, do you have a impact gun? thats what you should use you can hold the yoke with your hand and bang the **** out of it with the impact, the yoke will need to be knock off with a hammer. if you have a torch that will help but just bang on it it will come loose. the race surface on the axle is what you want to check the smooth surface where the bearing rides if its smooth and no discoloration,chips or burrs on it your good to go. are you going with rear disc? obviously you'll be going with a Limited slip, but what gears are you thinking about? keep it up.
|
|
|
|
|
01-02-2011, 03:38 PM
|
#20 |
|
Dr. Frankentruck's Monster
Join Date: Aug 2007
Location: Gainesville, FL
Posts: 147
|
Re: Project Slomo
I'm confused about what your saying about the yolk. The only thing sticking out now is the big screw that the nut was attached to. Are you saying that I only need to heat it up and then bang it out through the diff
Just to make sure, the bearings that you're referring to where the axle rests, are those what are referred to as "wheel bearings"? I think I understand, I just want to be sure. I don't plan on going to rear discs. I don't think it's warranted for the intended purposes of the truck. I'm not sure what gear ration I need, actually. I would love to stick a six speed Tremec in the truck. To me, you're not really driving unless you're manually shifting. I also intend to build the truck to use for its intended purpose, a vehicle of great utility. It's going to be comfortable and I have a lot of nifty ideas for it. But, I'm not building it for any SCCA racing. So, I have no idea what gear ratio I should select. That's one of those bridges I'm going to cross later. I've also gotten to the point to where I'm either going to have to stop for lack of space right now, or, continue with my plan. My plan is to disassemble the truck completely while only taking the single space that it currently occupies. As I've said before, my wife has the easement rights to park the babymobile in the garage. So, this is my plan. I'm going to kick her out of the garage for just a few weeks. I'm then going to tear the truck down completely to the frame. Then, I will stop work on the frame and build a rig to stand it up on its side. There it will stay. Then, I will build a cart, of sorts, for the cab. As the cab is wider than it is long, it will take up even less space turned sideways. There is an out of the way space for the engine and tranny, so that will not be an issue. I will then commence work on the body until it is ready to shoot with paint. The frame will be completed and so on. I'm actually going to complete a "load plan" for the placement of everything in the garage such as I in the army to get a better feel for the layout. I have one more day of disassembly on the rear end, then the tear down of the front clip will begin. Tschuss!
__________________
I'm not prejudiced, I hate everyone. Project SLOMO http://67-72chevytrucks.com/vboard/s...d.php?t=430494 |
|
|
|
|
01-02-2011, 07:16 PM
|
#21 |
|
Account Suspended
Join Date: Aug 2007
Location: USA
Posts: 1,223
|
Re: Project Slomo
The Yoke will slide off of the pinion gear. Heat up the yoke not the threaded part. if you plan on changing gears you can hit the threaded part with the hammer, but if you were to keep the gears, just hit the yoke. its just stuck from years of rust and crud. the threaded part is part of the pinion gear. behind the yoke is the pinion seal and outer pinion bearing. because you dont have the carrier in, the housing the pinion gear will fall out when the yoke is taken off so watch your toes. and the inner bearing will come with it (they are pressed on) dont forget to knock out the bearing races. Gears will all depend on the trans you choose. 6, 5, 4, speeds will all dictate what gear choice would be best. I posted a pic and description for you, it might help. dont mind the queer font i used. Yes the smooth part of the axle is where the wheel bearing rides if is still smooth your golden if not the make a "reedy sleeve" or repair bearing. I only ask about the disc brakes cause its not that much more to up grade and if you plan on redoing all the brakes, including M/C you would be better of. Disc brakes are by far better the drum no matter what how you plan drive your truck. i also took my truck apart. to do the body work. I used four wooden carts from harbor freight to wheel my cab around the shop, and when it was time to start body work, I just put four Jack stands on them to raise the truck. the cab is only a couple hundred pounds, and the carts will hold the weight.

Last edited by mrhino; 01-02-2011 at 07:24 PM. |
|
|
|
|
01-03-2011, 02:46 PM
|
#22 |
|
Dr. Frankentruck's Monster
Join Date: Aug 2007
Location: Gainesville, FL
Posts: 147
|
Re: Project Slomo
Gotcha!
When I will be able to work on it again remains to be seen.
__________________
I'm not prejudiced, I hate everyone. Project SLOMO http://67-72chevytrucks.com/vboard/s...d.php?t=430494 |
|
|
|
|
02-08-2011, 09:47 PM
|
#23 |
|
Dr. Frankentruck's Monster
Join Date: Aug 2007
Location: Gainesville, FL
Posts: 147
|
Re: Project Slomo
Finally, I had some time to work on the truck again. I was painting the book/storage case I made for my son's play room when I decided to do some work on it while waiting for the pain to dry. I actually got quite a bit done.
Over the weekend, I had removed the hood and grill. I attempted to remove the rest of the front clip, but become flabergasted on how to remove the fenders. I don't have my reproduction assembly yet, so I had nothing to reference it to. Then, I remembered my LMC catalog, which lists fastners and diagrams to show where they go. Voila! So, today I removed the bolts that could be unscrewed and ground out the bolts that couldn't. I was able to remove both fenders and and inner fender wells in two hours. Next, I plan to drain all fluids and then remove the core support. Then, it is on to the interior so that I may remove the cab and place it on a dolly that I plan to build. Then will be the complete tear down of the frame. Here are the day's results. 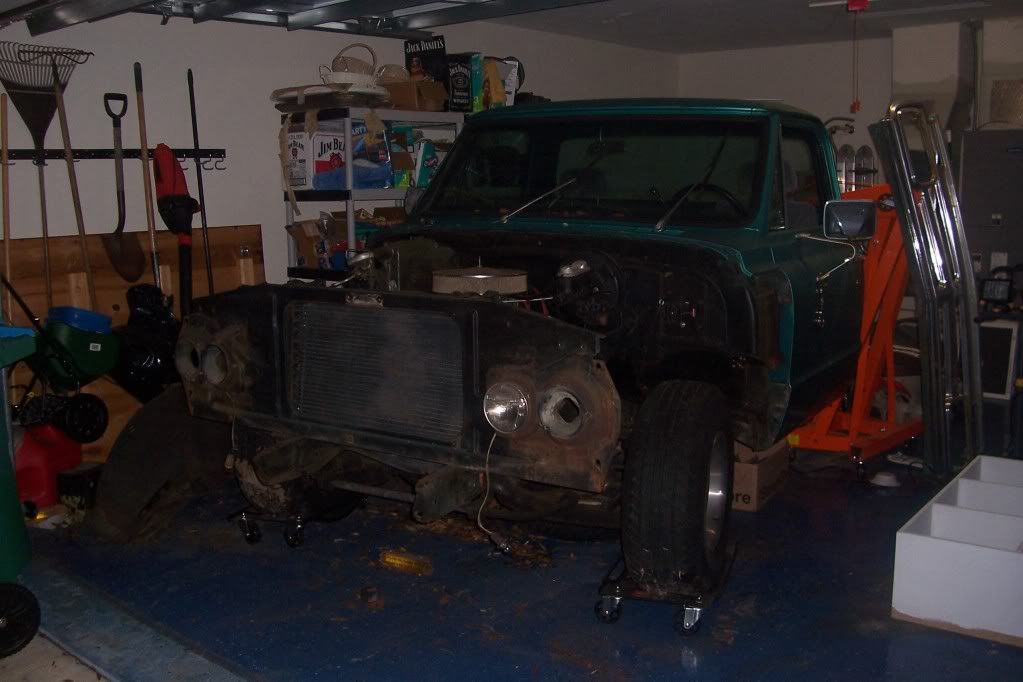 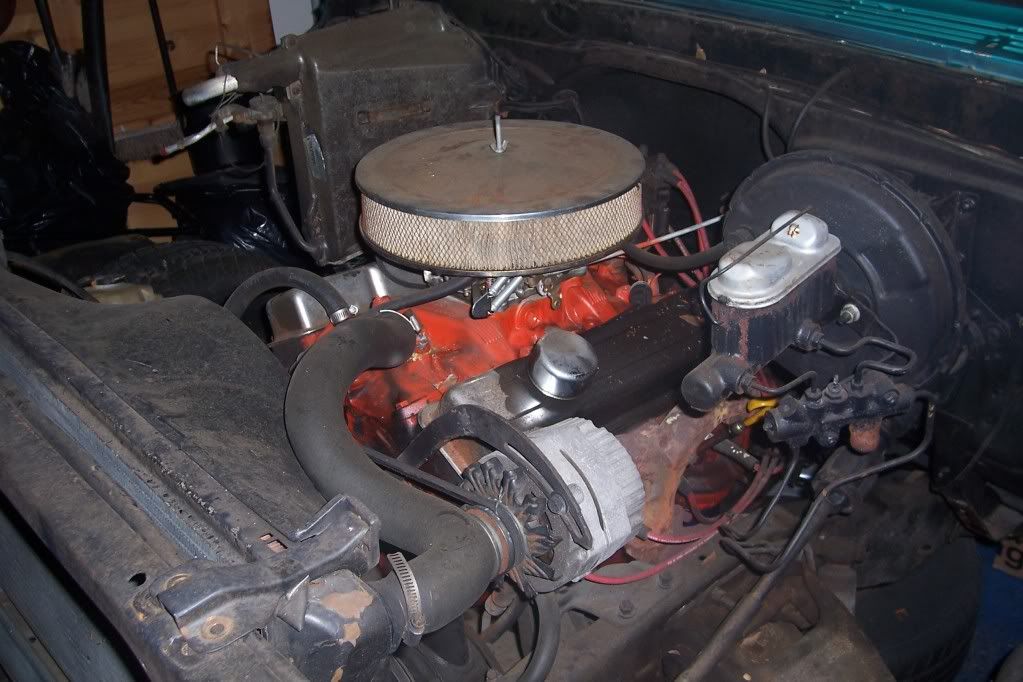 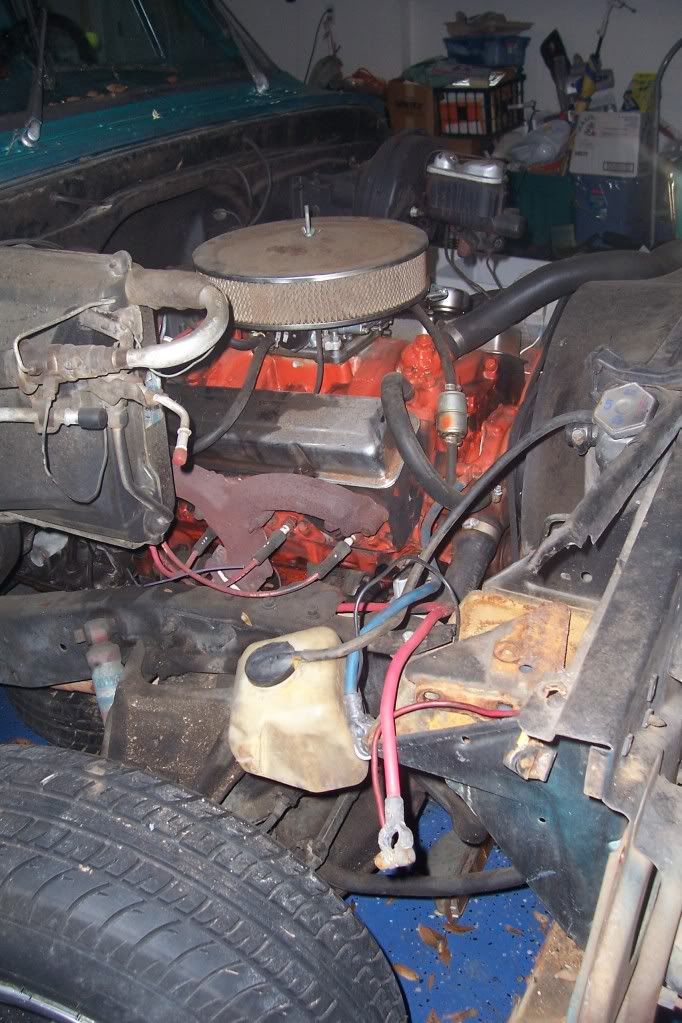 Here is a patch I discovered on the driver's side of the cab. I'm not impressed. 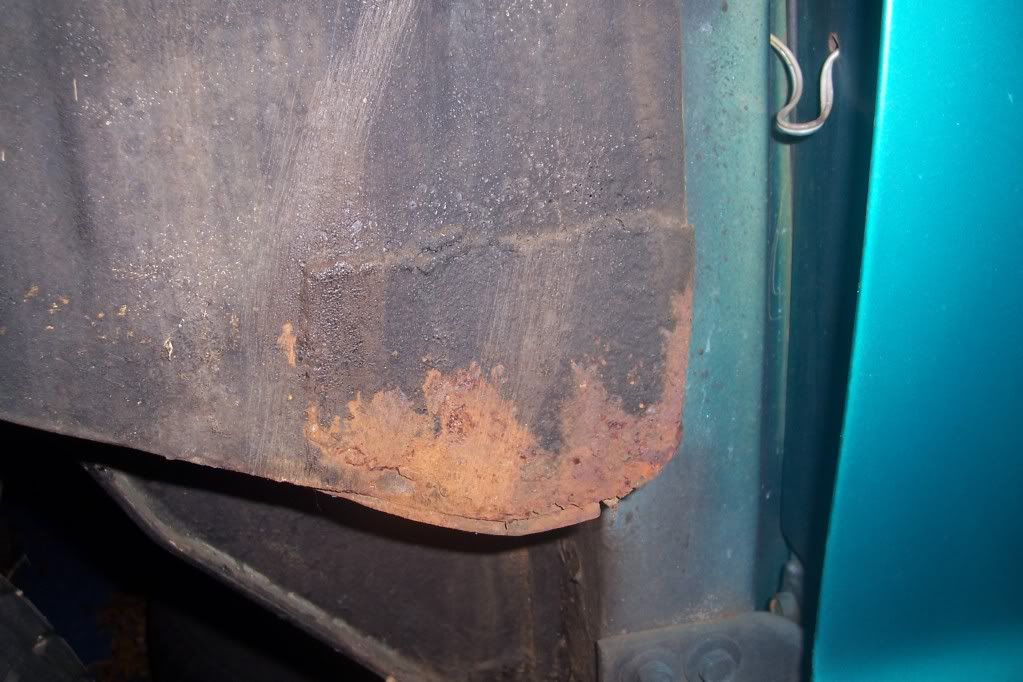 I don't foresee any work on the truck until at least Sunday as the wife works every day from now until then. However sporadic, it is still fun to see it coming along.
__________________
I'm not prejudiced, I hate everyone. Project SLOMO http://67-72chevytrucks.com/vboard/s...d.php?t=430494 |
|
|
|
|
02-09-2011, 08:16 AM
|
#24 |
|
Dr. Frankentruck's Monster
Join Date: Aug 2007
Location: Gainesville, FL
Posts: 147
|
Re: Project Slomo
I know it's coming along slower than every other truck, but, geesh! Not even an attaboy?
__________________
I'm not prejudiced, I hate everyone. Project SLOMO http://67-72chevytrucks.com/vboard/s...d.php?t=430494 |
|
|
|
|
02-09-2011, 09:20 AM
|
#25 |
|
Registered User
Join Date: Jun 2010
Location: Leesburg GA
Posts: 547
|
Re: Project Slomo
Unfortunatly, De-construction is a pretty thankless job
 It seems to be coming along pretty good. Something to keep in mind. I have a milk crate full of ziplocks. Each ziplock is from a particular area, Marked with a permanent marker. Hood and fenders, Front suspension, Ect. Now months later, Reassembling my truck. Those labels are a life saver. Even if the bolts were bad, I kept them. And as far as the patch on the air box. I'm impressed someone tried to fix it  My truck, I did not see one patch in my truck, Nor did anyone try to knock out a dent, Before bondoing them up to 1 1/2" thick (hardener optional)  But I'll be watching your build, If I can help in some way, I'll be happy to. Spike 
__________________
68 stepside http://67-72chevytrucks.com/vboard/s...0&goto=newpost |
|
|
|
 |
| Bookmarks |
|
|


 Linear Mode

