
 |
|
|
#1 |
|
Registered User
 Join Date: May 2011
Location: Long Island NY
Posts: 787
|
1969 Olive Stepper
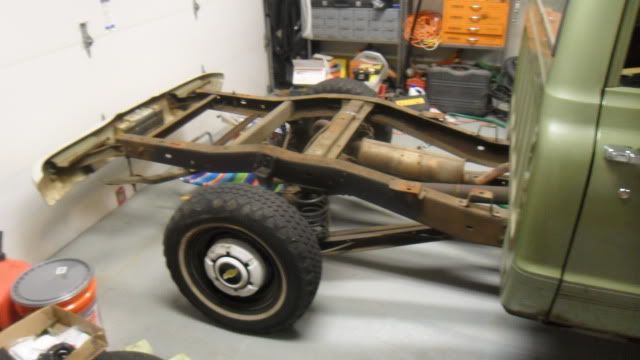
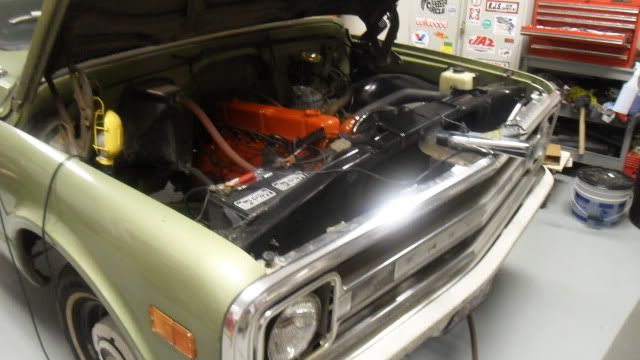
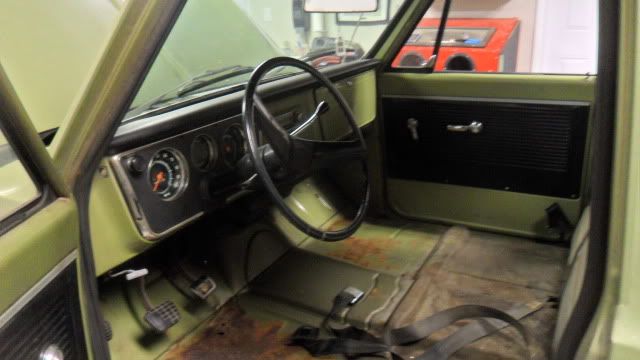
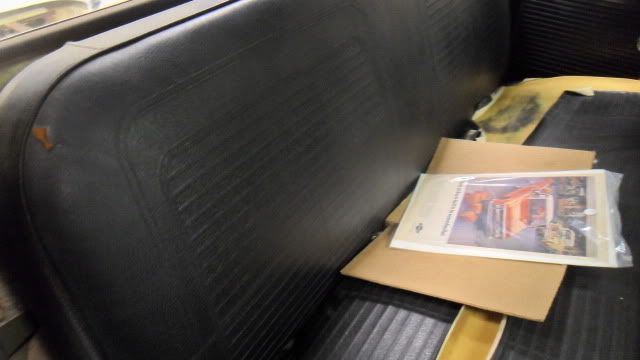
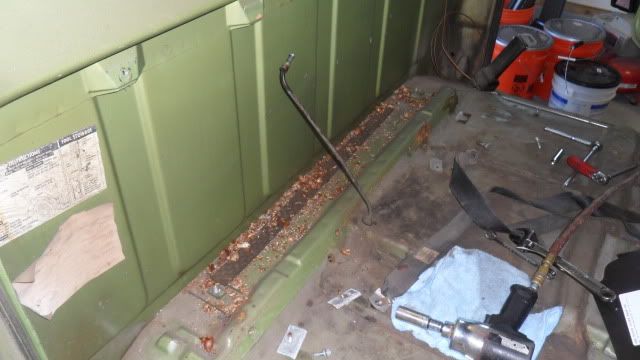
Well, Been reading here everyday. Time to start my build thread. I took my bed off this weekend, and stripped the floor tonight to see what I have to work with. A little worse than I hoped, but all the right parts should be on there way, Gonna start the right side of the cab first. Than the left. Than pull it altogether to re-work the chassis.
Last edited by blkcorvair; 11-28-2011 at 02:07 PM. |
|
|

|
|
|
#2 |
|
Registered User
 Join Date: May 2011
Location: Long Island NY
Posts: 787
|
Re: 1969 Olive Stepper
Does anyone offer the above 69 base model seat cover? Without the scroll work like the CST?
|
|
|

|
|
|
#3 |
|
Registered User
Join Date: Sep 2010
Location: Michigan
Posts: 14
|
Re: 1969 Olive Stepper
Looks good! Keep at it. Same olive color as mine.
__________________
_________________________ 1970 Chevrolet K5 Blazer 1971 Chevrolet Cheyenne Super C10 
|
|
|

|
|
|
#4 |
|
VA72C10
 Join Date: Mar 2008
Location: Midlothian, VA
Posts: 25,267
|
Re: 1969 Olive Stepper
Looks like a good start. Not sure on the seat cover. Hopefully someone else will know.
__________________
Looking for a 67-72 swb or blazer project in or around VA. 
|
|
|

|
|
|
#5 |
|
Registered User
Join Date: Jul 2010
Location: Vista Ca.
Posts: 2,405
|
Re: 1969 Olive Stepper
Very cool and nice representation of a shortstepper.
The stepside is the best side. |
|
|

|
|
|
#6 |
|
fat old dude
 Join Date: Feb 2010
Location: fresno, california
Posts: 1,424
|
Re: 1969 Olive Stepper
looks pretty solid. nice color.
__________________
1972 c-10 shortbed 350/400 build thread http://67-72chevytrucks.com/vboard/s...d.php?t=389157 1968 workhorse http://67-72chevytrucks.com/vboard/s...d.php?t=446216 Accepting part donations |
|
|

|
|
|
#7 |
|
Registered User
Join Date: Mar 2010
Location: a t w a t e r cali 95301
Posts: 10,713
|
Re: 1969 Olive Stepper
beautiful truck sad to see its going to be torn aprt actually lol and the seat cover i can tell you that theres about 5 or 7 companys that dont make them so your chances are slim VERY slim with an original stlye repo seat coverings.... good luck (take off the old one very very nicley, just incase you can have one made using a template)
|
|
|

|
|
|
#8 |
|
Registered User
 Join Date: May 2011
Location: Long Island NY
Posts: 787
|
Re: 1969 Olive Stepper
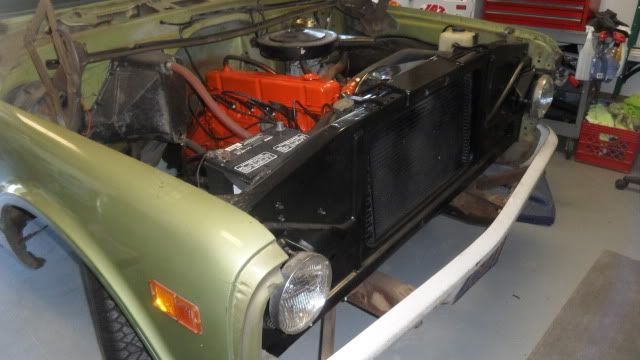
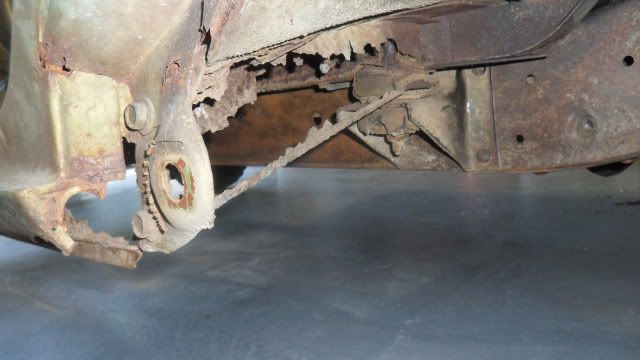
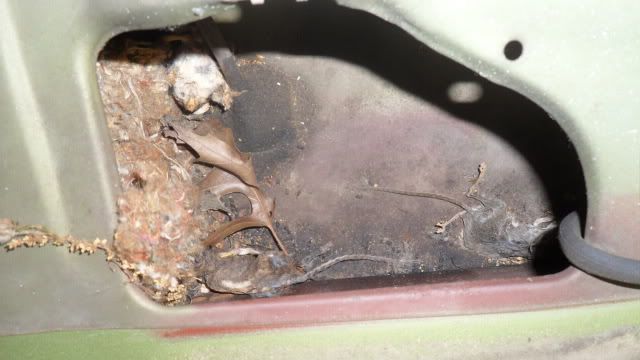
Got into in a bit more today. (While my son was napping) Tore down the front right side. Panels and supplies should all be here by next week and Im anxious to start cutting. Looks like only the very bottoms of the pillars are rotted. The whole front cab mount needs to go. Found some unwelcome resident deceased in the front cowl. Maybe that was the smell my wifes complaining about....
|
|
|

|
|
|
#9 |
|
Registered User
 Join Date: May 2011
Location: Long Island NY
Posts: 787
|
Re: 1969 Olive Stepper
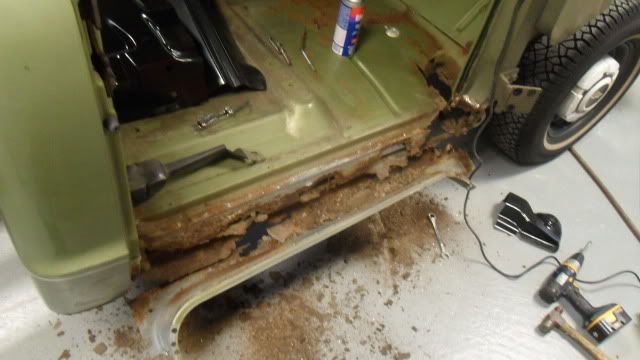
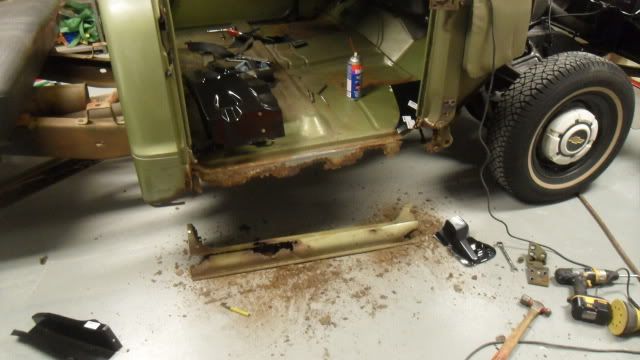
Took off the Outer Rocker. Yikes. Now I think Im building a truck. At least tearing one apart. Im hoping to do the front Pillar, Kick Panel, Floor and Cab mount this week. Than Ill strat to cut the cabcorners and rear mount.
|
|
|

|
|
|
#10 |
|
Tot Roddin'
Join Date: Apr 2005
Location: Mid-MO
Posts: 24,461
|
Re: 1969 Olive Stepper
Nice progress and a great looking project.
__________________
-Nate  1969 CST SWB - Project Blank Slate (4.5/6" ECE Static Drop, 6-lug disc brake upgrade (manual), Billet Specialties Vintec 20x8.5 255/40 (F) 20x10 295/40 (R), 250 I-6) 1960 AMF Skylark - Tot Roddin' (Lowered with custom frame; soon to include custom push bar and interior) 2008 Silverado CrewCab 1LT (5.3L, 3:73, 4x4, LT1, Z-71, Towing Package) |
|
|

|
|
|
#11 |
|
Registered User
Join Date: Feb 2011
Location: wichita ks
Posts: 28
|
Re: 1969 Olive Stepper
I love your truck. My gramps had one just like it.
|
|
|

|
|
|
#12 |
|
Registered User
 Join Date: May 2011
Location: Long Island NY
Posts: 787
|
Re: 1969 Olive Stepper
Thanks guys.
Well I dove into removing the cab corner, Rear Cab Support and rear floor section. Im not to happy with the rear cab support. Its rotted a ways past the patch piece. Now I am debating Hanging the door back on and squaring the cab. Welding in a bunck of bracing and doing a full floor replacement.... Hmmm.. something to dream about. Last edited by blkcorvair; 02-06-2012 at 06:52 PM. |
|
|

|
|
|
#13 |
|
Registered User
 Join Date: May 2011
Location: Long Island NY
Posts: 787
|
Re: 1969 Olive Stepper
Woo Hoo. Christmas! Thanks GMC Pauls!
This was at work waiting for me today! Tomorrow Im taking the cab off the truck an hopefully Ill get this installed this week! 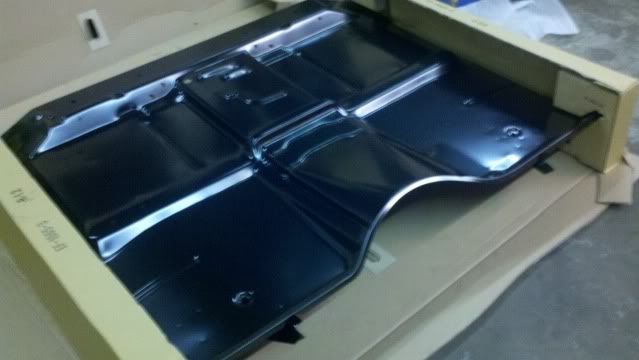 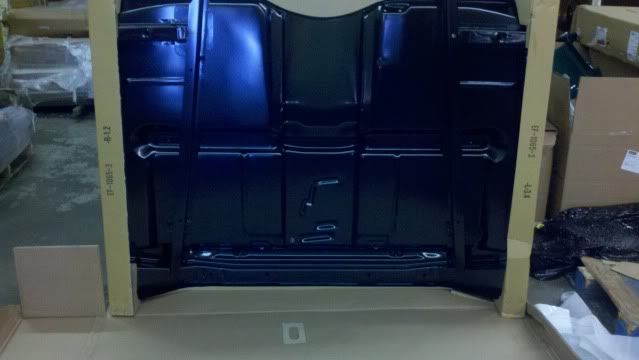
|
|
|

|
|
|
#14 |
|
Registered User
Join Date: Jul 2011
Location: Des Moines, Iowa
Posts: 3,016
|
Re: 1969 Olive Stepper
Not a fan of step-sides, but your shop looks cool. See that blasting cabinet in the corner, should come in handy! Looks like you're prepared - should be a good build!
__________________
project: "my happy mess" |
|
|

|
|
|
#15 |
|
Registered User
 Join Date: May 2011
Location: Long Island NY
Posts: 787
|
Re: 1969 Olive Stepper
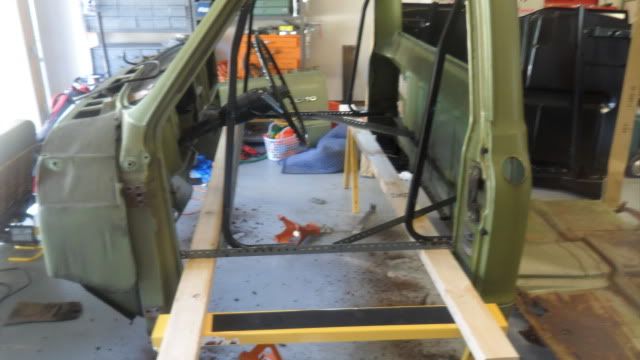
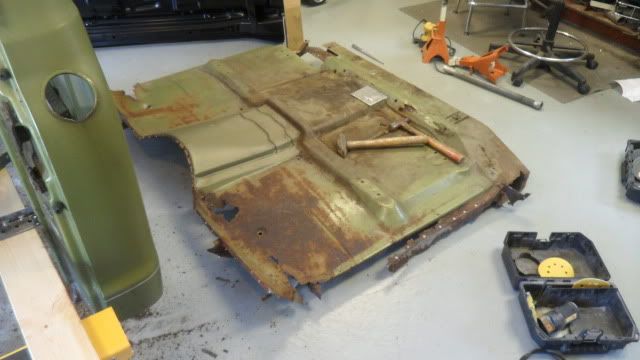
Going Flintstone!.. Drilled out all the welds last night. Made a make shift cab stand and hammered the floor out real quick, Now off to the yankee game!
|
|
|

|
|
|
#16 |
|
Registered User
 Join Date: May 2011
Location: Long Island NY
Posts: 787
|
Re: 1969 Olive Stepper
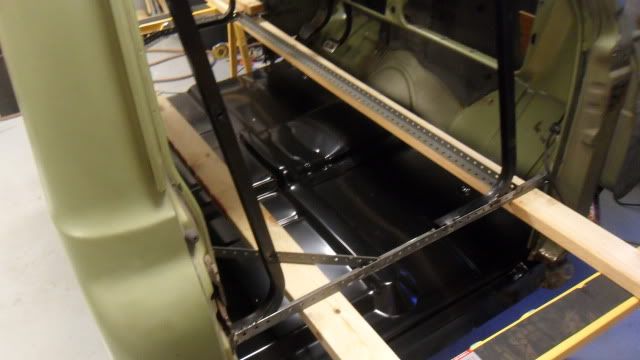
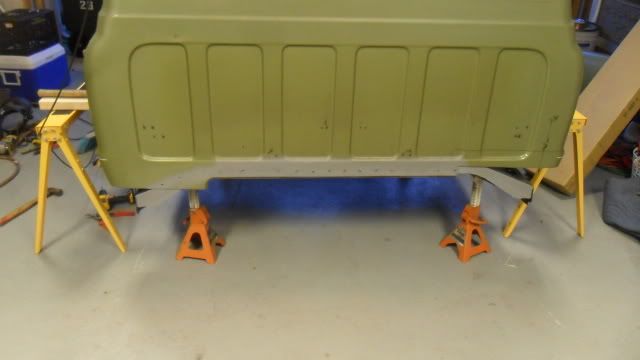
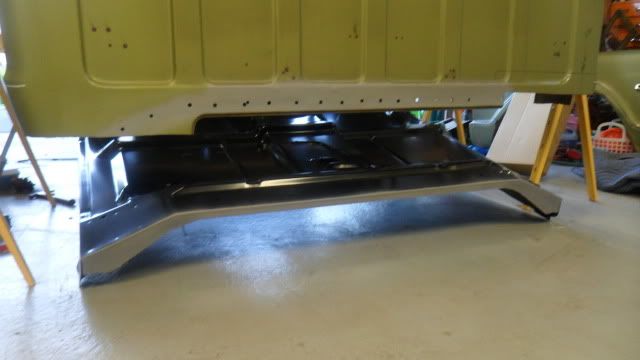
Cleaned up the metal and test fit the floor. Does fit much better than I anticipated. Got no gap at the hump. The radius at the gas pedal is to shallow though and doesnt line up great. If I shave an 1/8" off the lip at the far right I think I can get it to sit far enough down to not upset me too much. Dont see the justice in making a bunch of relief cuts to make it 100% when its going to be covered with Floor matting later anyhow. Other than that I am so glad I chose to go the full floor route rather than a bunch of pieces. Going to look the part when its done now!
|
|
|

|
|
|
#17 |
|
Registered User
Join Date: Mar 2010
Location: a t w a t e r cali 95301
Posts: 10,713
|
Re: 1969 Olive Stepper
wow that looks nice
|
|
|

|
|
|
#18 |
|
Registered User
 Join Date: May 2011
Location: Long Island NY
Posts: 787
|
Re: 1969 Olive Stepper
Thank you. Heres some more. Got home from a short Vacation in the city yesterday and went to town on the passenger side. Really Happy with how it came out. Got both Pillars done, The Rocker Welded in, The Fott Well repaired and the cab corner in. I did have to modify the cab corner like most have. Needed to make a wedge relief cut where it met the pillar and pull it in to fit right.
The Passenger sid epanels should be intoday or tommorow. 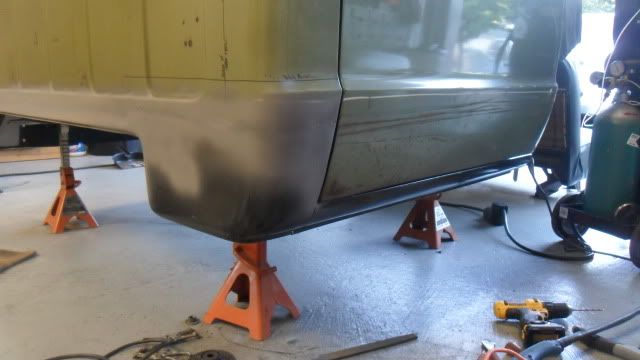 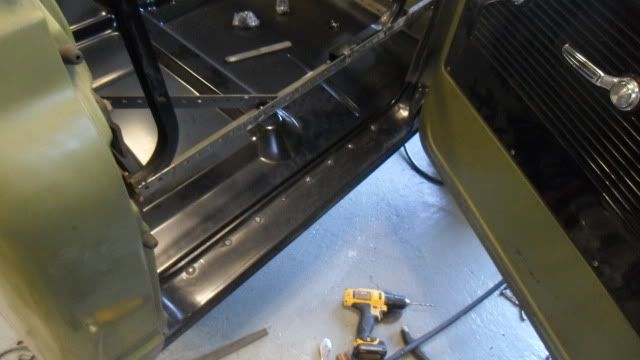
|
|
|

|
|
|
#19 |
|
Its a Truck Thing......
Join Date: Dec 2004
Location: Sierra Vista, Arizona
Posts: 3,179
|
Re: 1969 Olive Stepper
Nice Work....
Smitty
__________________
71 C10 283/3SPD Full Resto 71 GMC 1500 Sierra Grande http://67-72chevytrucks.com/vboard/s...d.php?t=518599 70 C10 Suburban Former military GSA truck. 72 Chevy Blazer 4X4, Sloppy Jo, Mountain Climber. Wife says no more trucks. http://67-72chevytrucks.com/vboard/s...d.php?t=707378 72 GMC 1 Ton Motor Home, wife said no more trucks until she saw this one. Gen 3 6.0/4L80E 4.10 http://67-72chevytrucks.com/vboard/s...d.php?t=761110 68 GMC Suburban was 3/4 ton, now 1/2.Wife shook her head 71 C30 Wrecker 71 C20 Scott-Bilt As weird as it gets..BB Cheyenne AC Truck 68 GMC Long Stepside. They keep following me home 69 C30 Former Motor Home, Flat Bed time 70 G20 Red-E-Kamp Conversion "I'm your Boogy Van" |
|
|

|
|
|
#20 |
|
Registered User
Join Date: Dec 2003
Location: Thomasville, NC
Posts: 1,877
|
Re: 1969 Olive Stepper
Very nice work,keep the pictures coming & keep on truckin'
 
__________________
My Truck: 2.5 drop front, 4 & 5/8 in rear, 350cubic in. been bored .60 over, 700r4 (soon), 3 speed (on tree for now).rims & tires size,15x8 ralleys 5 on 5,P275/60R15. Members I have met: Pickupman, 1972 Super Cheyenne, Stepside,Chis Mc Bride. tsnow67,joel.e, 
|
|
|

|
|
|
#21 |
|
Registered User
Join Date: Jul 2011
Location: Athens, AL
Posts: 42
|
Re: 1969 Olive Stepper
subscribed. looking good
|
|
|

|
|
|
#22 |
|
Registered User
Join Date: Oct 2010
Location: Ocean Springs, MS
Posts: 1,746
|
Re: 1969 Olive Stepper
great metal work!
__________________
Gary 1971 Chevrolet C/10 1951 GMC 100 1977 GMC C15 1955 Chevrolet 3100 |
|
|

|
|
|
#23 |
|
Registered User
 Join Date: May 2011
Location: Long Island NY
Posts: 787
|
Re: 1969 Olive Stepper
Thanks guys. Been slacking this week. I did get the Drivers side done. However I really dislike the Cab corner. It actually fit better than the pass side, but the edge doesnt have the right bend in it like the pass side did. They were both Triplus, but I did get them from the PO so who knows how old. I ordered a new one yesterday for the drivers side. Hopefully better. Also ordered the lower door skin. Gotta fix the very bottom corners on both doors. Hopefully this weekend the metal work will be done on the cab and I can get it bolted up to a dolly to be able to move it around. Id like to get it flipped on its back and spray the floor pan. Everything else will be left for the body shop.
|
|
|

|
|
|
#24 |
|
Registered User
 Join Date: May 2011
Location: Long Island NY
Posts: 787
|
Re: 1969 Olive Stepper
Okay Lets get some updates!
I re-did the Drivers Cab Corner. Much better. Should look fine after all the final body work. I also removed all the cab bracing (Finally) and gutting the rest of the interior Including the doors. I do have to make a small corner patch for each door, Other than that they are very solid. Also spent a day fabbing up a dolly to get this thing rolling around. Got the wheels for like $75 at Harbor freight. And Some old 2x3 steel. 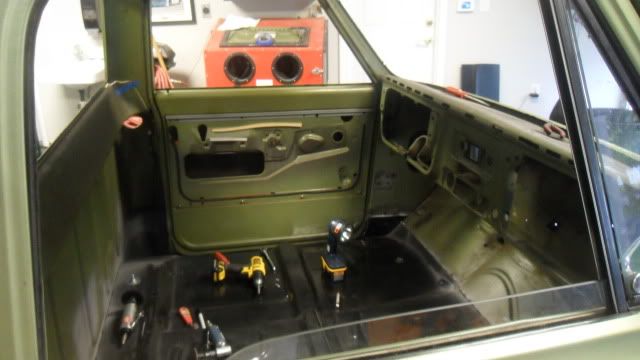 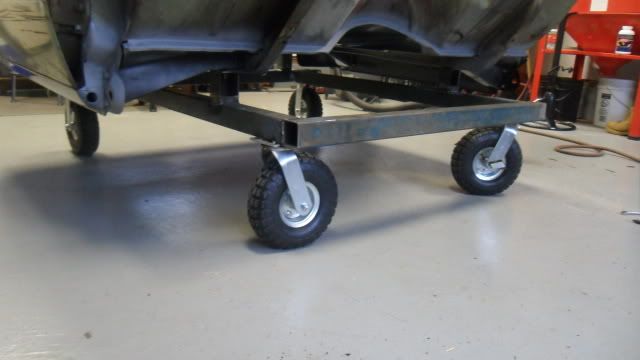 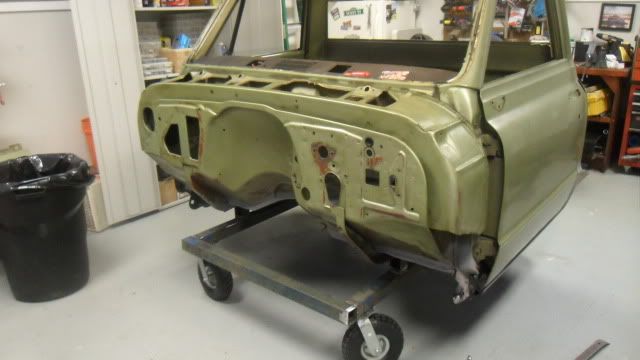
|
|
|

|
|
|
#25 |
|
Registered User
 Join Date: May 2011
Location: Long Island NY
Posts: 787
|
Re: 1969 Olive Stepper
Last night I had a neighbor help flip it up onto the firewall (After removing the doors.) This morning I lightly sanded the floor bottom and hit it with three coats of PPG Red Oxide epoxy Primer. Later in the day I Re-sprayed the undercoating. (I matched what the factory had done on my original pan- Including missing the outside under the cab support brace)
Im going for an as original resto as I can so this floor is done. Once I get it back on the dolly and finish the doors the rest Ill have done by the painter. 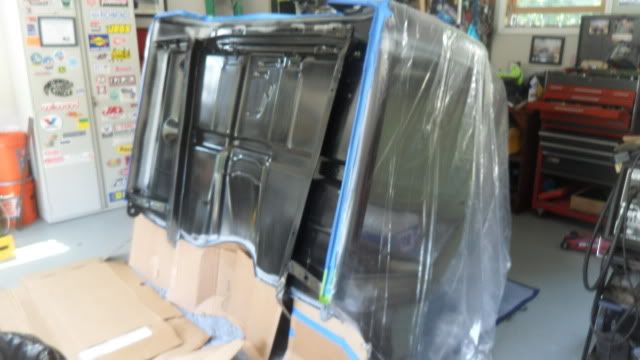 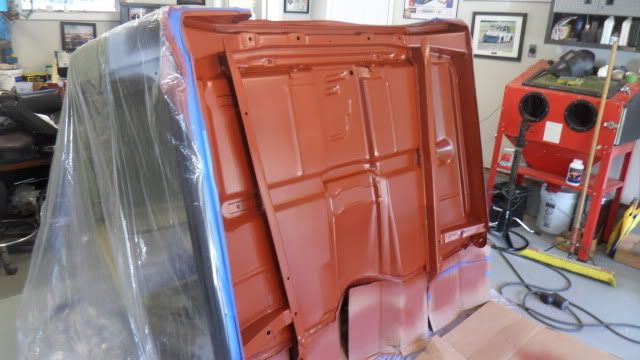 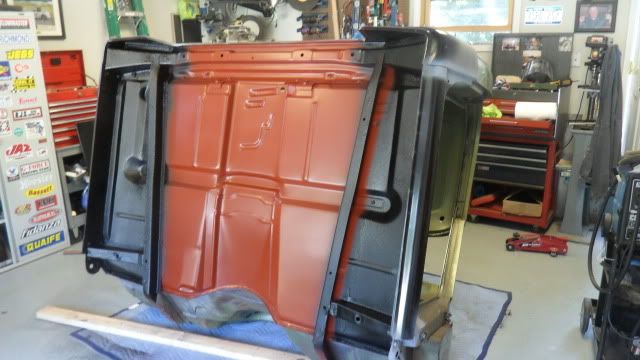
|
|
|

|
 |
| Bookmarks |
|
|