The 1947 - Present Chevrolet & GMC Truck Message Board Network


Register or Log In To remove these advertisements.

Go Back   The 1947 - Present Chevrolet & GMC Truck Message Board Network > 47 - Current classic GM Trucks > The 1947 - 1959 Chevrolet & GMC Pickups Message Board

Web 67-72chevytrucks.com


Reply
 
Thread Tools Display Modes
Old 08-30-2011, 02:32 PM   #1
Denee007
Senior Member
 
Denee007's Avatar
 
Join Date: May 2011
Location: Cypress, Tx.
Posts: 1,504
Mocking seat, column, engine(very rough)

Hi all!

Ok, got the gas tank out of the cab and it's pushed back as far as I'd like it, plus the seat lines up with the bolt holes(the 2 front), it's being supported in the back by 4x6's on the 6" sides. Puts the seat as seen here.


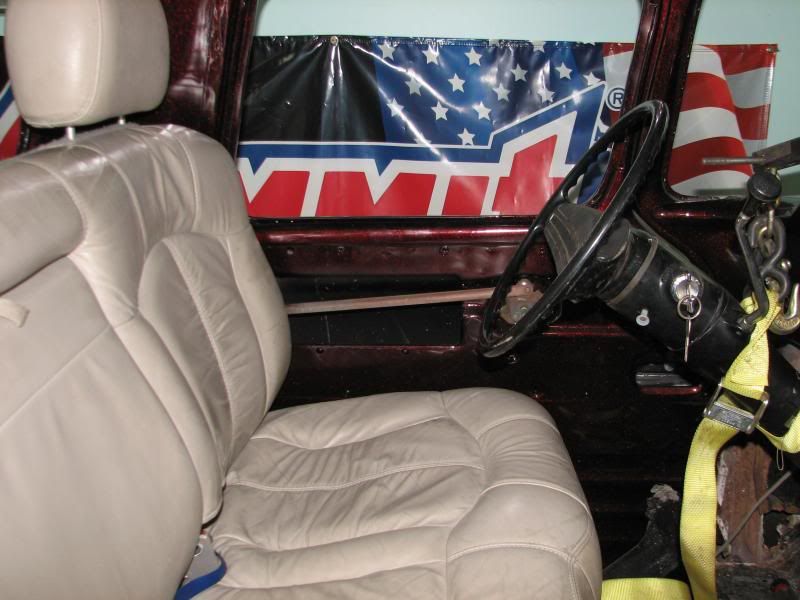
The Impala column is a tilt column; with the column hanging on my Little Mule, it's easy to manipulate where I want it except at the floor I use a block to keep it in place. The column is tilted as far as it can tilt in the photo.


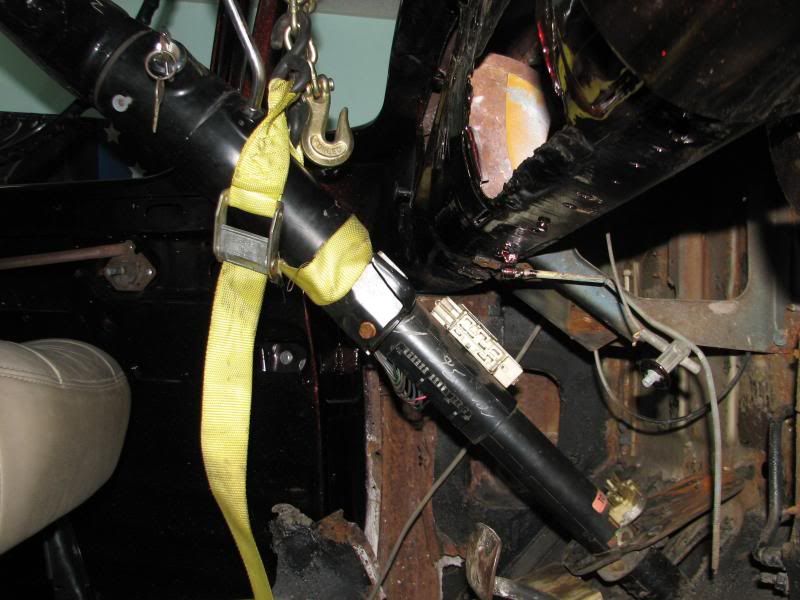
Where it gets a little sticky is How much needs to stick through the firewall? Looks like I may have to go with the Saginaw gear. If I let the column go further into the cab, I don't know what will look ok and function for the extension leading to the gearbox.


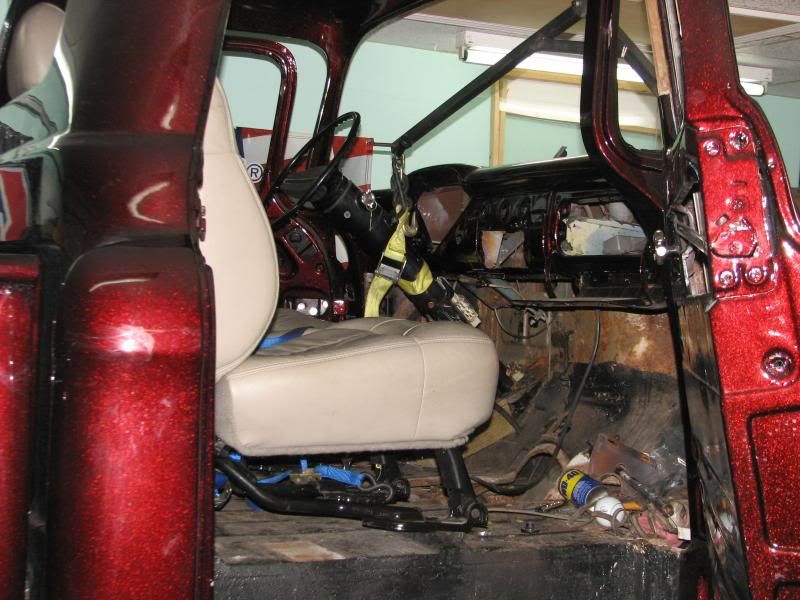
Here, I have the plastic engine sitting as the bubble say, but the truck is not sitting the way it would. My truck is on 4 really tall jack stands.
I know the engine is supposed to be a 4degrees tilted back, but this is false then what you're seeing here! Is it 4degrees with the truck the way it will be sitting? oh, the engine is mounted to the old bell housing which is bolted to the crossmember. I think I will add spacers to set the engine out an inch or so away from the bell housing,
I really need some advice here ; )


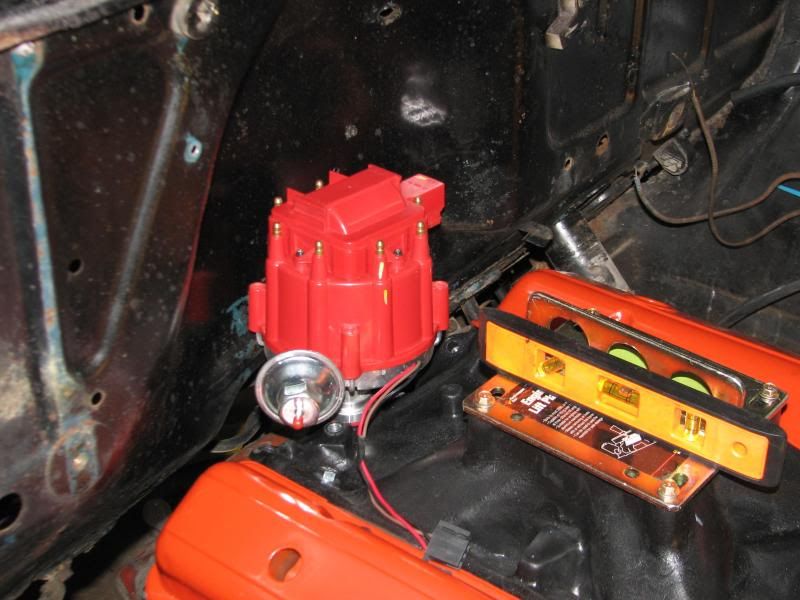
The truck is being held up by 4- 2 ton jackstands. I was able to remove my Maxjax lift allowing access to the cab. The truck sits unlevel at an upward slant. I can level it easy enough, but what would be the best way to put the truck to get the engine level as correct as possible?


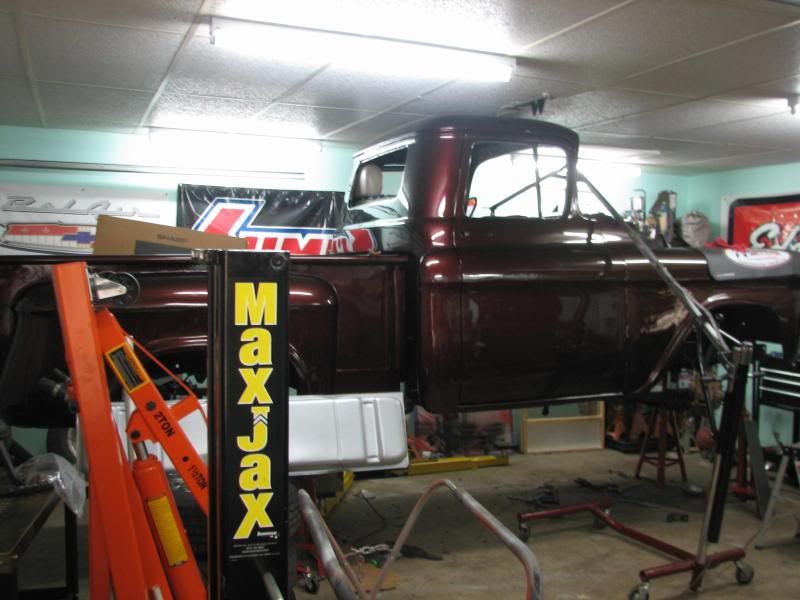
Ps, I did get the Impala gas tank today, but won't be messing with it until another day!

Last edited by Denee007; 08-30-2011 at 02:59 PM. Reason: grammar
Denee007 is offline   Reply With Quote
Old 08-30-2011, 03:09 PM   #2
OrrieG
Registered User
 
OrrieG's Avatar
 
Join Date: Jun 2006
Location: Idaho
Posts: 8,800
Re: Mocking seat, column, engine(very rough)

Is the transmission the one you will be using? You will need to check you linkage for interference with the brake pedal through total range of movement for the pedal and shift arm. Some get it to work, I couldn't and went with a cable set up. If you can move the engine forward it will help with the dist and valve cover clearance. They type of exhaust you run will affect it too, looking at my pictures I remembered I had interference with the rams horn manifold too.
Attached Images
 
__________________
1959 Chevy Short Fleetside w/ 74 4WD drive train (current project) OrrieG Build Thread
1964 Chevelle Malibu w/ 355-350TH (daily driver)
Helpful AD and TF Manual Site Old Car Manual Project
OrrieG is offline   Reply With Quote
Old 08-30-2011, 03:27 PM   #3
Intimidator
Registered User
 
Join Date: Jul 2009
Location: Minneapolis
Posts: 97
Re: Mocking seat, column, engine(very rough)

I dig it. I like the seat style.

But, you're gonna have a heck of a time figuring out how to seal the windshield up around your column mount Ha. J/K

Nice. Looking good!!!!
Intimidator is offline   Reply With Quote
Old 08-30-2011, 05:09 PM   #4
mknittle
Registered User
 
mknittle's Avatar
 
Join Date: Jul 2011
Location: Auburn ca.
Posts: 2,886
Re: Mocking seat, column, engine(very rough)

Quote:
Originally Posted by Intimidator View Post
I dig it. I like the seat style.

But, you're gonna have a heck of a time figuring out how to seal the windshield up around your column mount Ha. J/K

Nice. Looking good!!!!
Nah, just wear goggles!


This is the fun part. looks like you are getting closer.
__________________
Mark

My GMC build.
http://67-72chevytrucks.com/vboard/s...d.php?t=536602
mknittle is offline   Reply With Quote
Old 08-30-2011, 05:58 PM   #5
Denee007
Senior Member
 
Denee007's Avatar
 
Join Date: May 2011
Location: Cypress, Tx.
Posts: 1,504
leveling the frame and engine, etc.

Hey Orrie and all!!
the fake engine is bolted to the old bell housing that was mounted to the crossmember. I was told to use that as a line up, for lack of better description. The actual tranny will be a Th350. The distance between the dist and firewall is about 1/2"(the aluminum part/just below the dist cap).
I think I'm going to level the frame via my adjustable jackstands, then I can adjust my engine by spacing it out from the bell housing it is attached at this moment. I'm going to move the engine as far forward a possible, the put the 4 degrees or so~ so I'll go ahead and install my waterpump,fanwith fan clutch, and the old radiator that was in the truck. So, that should be good enough to see how far forward I can put the engine. Does this plan sound OK?

I think once I have the engine where it's going to be, then I can take a closer look at the shift linkage, where the steering column is going to actualluy be, and what steering gear I'll be using. As it stands now, looks like the Saginaw gear system.(I have a difficult time with RIVETS!!)

Oh, the gas tank is toooo big! back to the drawing board on that~ that can rest for later on! too busy with what's going on up above

Quote:
Originally Posted by OrrieG View Post
Is the transmission the one you will be using? You will need to check you linkage for interference with the brake pedal through total range of movement for the pedal and shift arm. Some get it to work, I couldn't and went with a cable set up. If you can move the engine forward it will help with the dist and valve cover clearance. They type of exhaust you run will affect it too, looking at my pictures I remembered I had interference with the rams horn manifold too.
Denee007 is offline   Reply With Quote
Old 08-30-2011, 07:22 PM   #6
Denee007
Senior Member
 
Denee007's Avatar
 
Join Date: May 2011
Location: Cypress, Tx.
Posts: 1,504
waterpump installed

I went ahead and bolted the waterpump/pulley and fan, looking for distance between the fan and where the radiator will be. IT's 6" from the fan clutch to the radiator support. The factory radiator that was in is about 4" total, doesn't leave a whole lot. So I can move the radiator forward a little bit. NOt sure about if the engine needs to be elevated too?


Denee007 is offline   Reply With Quote
Old 08-30-2011, 07:51 PM   #7
parkwood
Registered User
 
parkwood's Avatar
 
Join Date: Jul 2011
Location: shingle springs, calif
Posts: 771
Re: Mocking seat, column, engine(very rough)

007,
If i can give you my two cents worth, i would start off by telling you that you might save yourself a lot of problems if you could get the front and rear suspension installed before you try to install the motor and trans. The reason for this is the truck will be sitting at the ride height you want or can be set at the height you want.
When it's sitting like you want it then the motor can be set in and leveled on the manifold like you have it in one of your pictures. It will save you time and money if you also have the transmission you'll be using. It will help you set the motor front to back to clear the fire wall.

I've got a lot of pictures of motors being installed to give you help if you would like. I love that you're doing this but would hate to see you waste your time and money..

Wayne
parkwood is offline   Reply With Quote
Old 08-31-2011, 01:16 AM   #8
bobinbc
Senior Member
 
bobinbc's Avatar
 
Join Date: Mar 2009
Location: Vancouver Island, Courtenay B.C. CANADA
Posts: 575
Re: Mocking seat, column, engine(very rough)

Denee
Another thing I would look at is the intake manifold you have on that dummy engine. Because it's an aftermarket single plane I'd want to check that it has the carb mounting pad angled 4* to the block surface like a factory one...

Looking really good, love the seat and the jackstands!
__________________
1962 Chevy blue SBFS
1957 Chevy yellow SBSS
1956 GMC red SBSS Nov 2017 ToTM

https://www.facebook.com/groups/Cana...geChevyTrucks/
bobinbc is offline   Reply With Quote
Old 08-31-2011, 07:31 AM   #9
Denee007
Senior Member
 
Denee007's Avatar
 
Join Date: May 2011
Location: Cypress, Tx.
Posts: 1,504
Re: Mocking seat, column, engine(very rough)

Hi Bob~ the intake I know has an angled pad, it's supposedly made identical to the factory manifold. It's also a replica(plastic)intake. ; )
dne'
Denee007 is offline   Reply With Quote
Old 08-31-2011, 03:01 PM   #10
OrrieG
Registered User
 
OrrieG's Avatar
 
Join Date: Jun 2006
Location: Idaho
Posts: 8,800
Re: Mocking seat, column, engine(very rough)

Did you decide to remove the stock trans crossmember? With the engine forward the TH350 pan will interfere with the crossmember.
__________________
1959 Chevy Short Fleetside w/ 74 4WD drive train (current project) OrrieG Build Thread
1964 Chevelle Malibu w/ 355-350TH (daily driver)
Helpful AD and TF Manual Site Old Car Manual Project
OrrieG is offline   Reply With Quote
Old 08-31-2011, 03:39 PM   #11
Denee007
Senior Member
 
Denee007's Avatar
 
Join Date: May 2011
Location: Cypress, Tx.
Posts: 1,504
what's next?

oh, darn, forgot about that! Thanks Orrie! OK, modification of the crossmember? My transmisson man is bringing by a hollow case of a th350 for me to use tomorrow, so maybe that will help visually. I think I'll just bolt my plastic engine to the th350 body and re-install it and see what I get.

Quote:
Originally Posted by OrrieG View Post
Did you decide to remove the stock trans crossmember? With the engine forward the TH350 pan will interfere with the crossmember.
Denee007 is offline   Reply With Quote
Old 08-31-2011, 09:55 PM   #12
ChuckDriver
A320 Pilot/USAF Retired
 
ChuckDriver's Avatar
 
Join Date: Mar 2009
Location: Charleston, SC
Posts: 2,622
Re: Mocking seat, column, engine(very rough)

You can run the "short style" water pump for more clearance. Nice work so far. I agree that you need to have the truck sitting at ride height to get the driveline angles correct.
ChuckDriver is offline   Reply With Quote
Reply

Bookmarks


Posting Rules
You may not post new threads
You may not post replies
You may not post attachments
You may not edit your posts

BB code is On
Smilies are On
[IMG] code is On
HTML code is Off

Forum Jump


All times are GMT -4. The time now is 07:37 PM.


Powered by vBulletin® Version 3.8.11
Copyright ©2000 - 2024, vBulletin Solutions Inc.
Copyright 1997-2022 67-72chevytrucks.com