
|
Register or Log In To remove these advertisements. |
|
|
|
|||||||
 |
|
|
Thread Tools | Display Modes |
 04-23-2012, 11:22 PM
|
#1 |
|
Registered User
Join Date: Feb 2012
Location: Marysville, CA
Posts: 165
|
Dad's 66 Custom Camper - Big Family/Small Budget
Well I made my first dent in the project. A little history my dad purchased the truck in 1969 used with 15,000 miles and put a camper on it a decade or so later. We used it for camping as I grew up as a kid until we upgraded to a full motorhome. At this point we pulled a set of 1 ton springs from under it as well as a set of hellwigs changing it back to 3/4 tons springs and pulled the camper off. I drove the truck from ages 16-20 until I joined the Air Force. I finally have an opportunity to begin working on this truck and will be headed to southern Cal to pick it up in a few months. This truck is fully operational and used occasional to pull loads and what not. it's equipped with a stock 327 with 98k original miles and a 4 on the floor w/ granny low.
Successfully drove her 440 Miles home with nothing but some extra power steering fluid. Also redid the exhaust real quick to help make the drive home more tolerable. http://67-72chevytrucks.com/vboard/s...d.php?t=517854 Today's progress, began gutting the interior for a glimpse at the rust  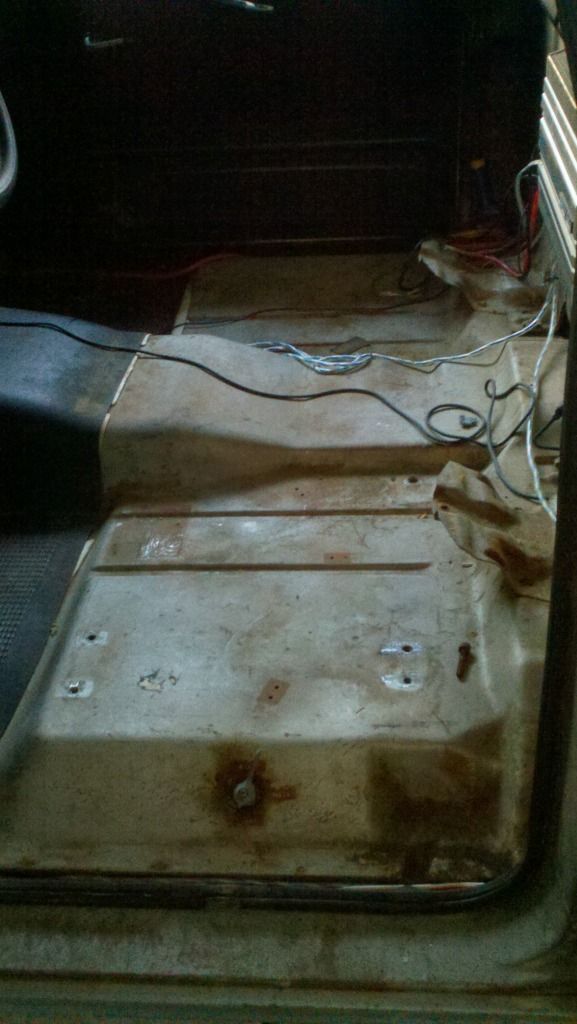 Passenger side looks good! 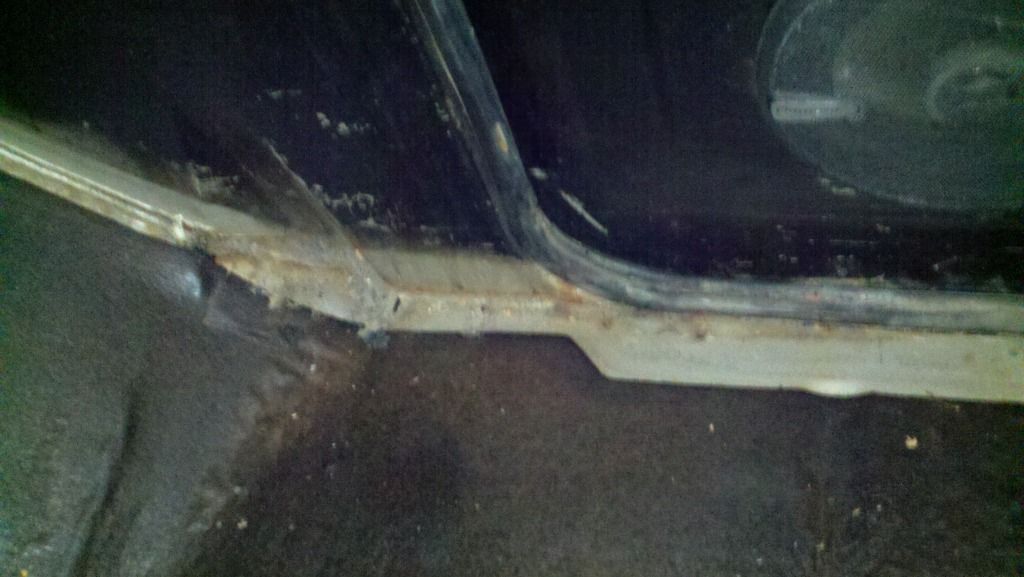 Drivers side has some cancer but overall not bad! 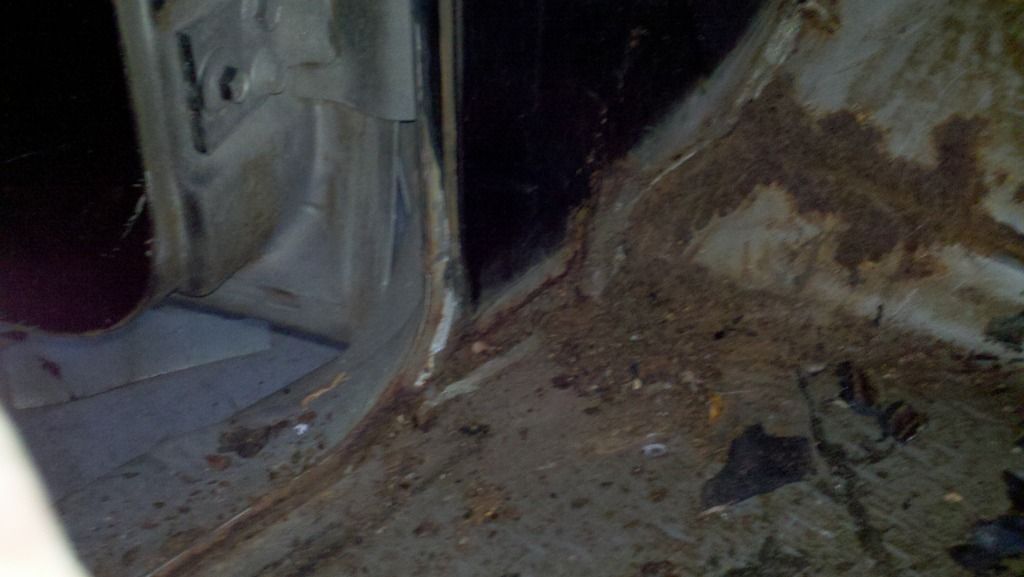 Got dark so I quit for the night 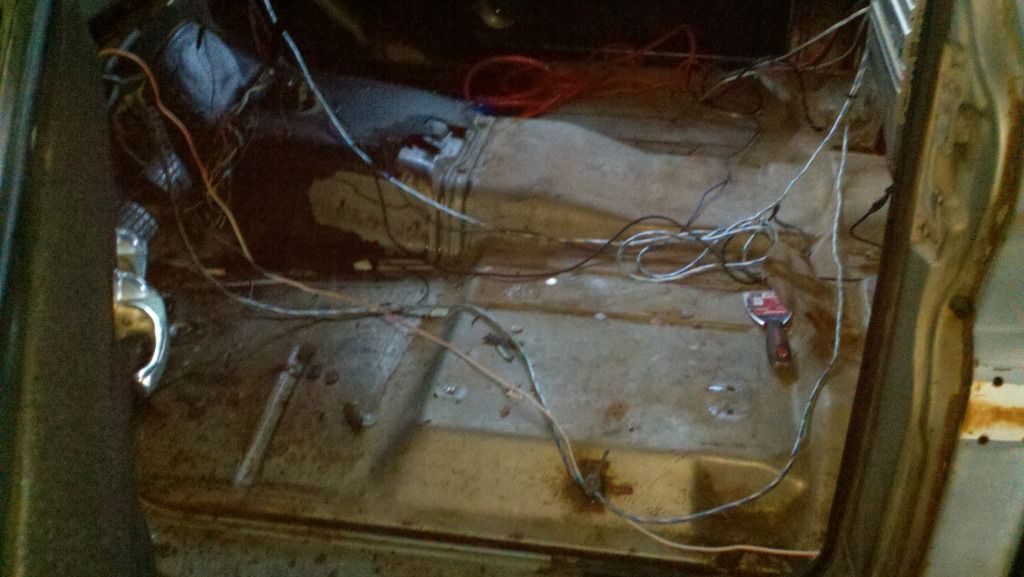 Sprayed all the rust down with Prep & Etch from Home Depot, Hoping it comes off easier tomorrow. Progress will be slow We have 4 kids ages 10,7,5 and 2 + one more on the way (9 weeks along). On top of all that I am Active Duty Air Force and with my upcoming deployment I'm thinking I will have a big list of stuff to get done before I leave my wonderful wife alone with all our kids! Thanks for looking! I leave you with my only boy, Levi, My soon to be handyman: http://s1223.photobucket.com/albums/...-06-39_994.mp4 |

|

|
|
04-25-2012, 07:54 PM
|
#2 |
|
Registered User
Join Date: Feb 2012
Location: Marysville, CA
Posts: 165
|
Re: Dad's 66 Custom Camper - Big Family/Small Budget
Well I am attempting to do rust repair with as little down time as possible so I will be attacking it one section at a time. My main concern right now is the area around the bottom drivers side rocker panel as well as the floor board. Also the fender has some cancer.
Left fender cancer, The fender support bracket that mounts to the cab was in good shape but the rear fender support (?) is rotted. 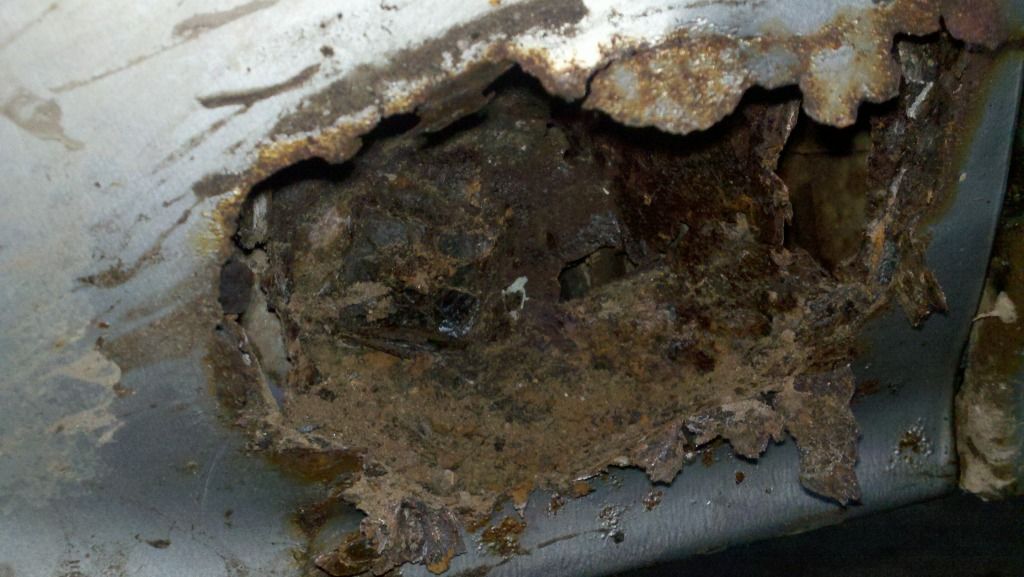 Area of concern from inside 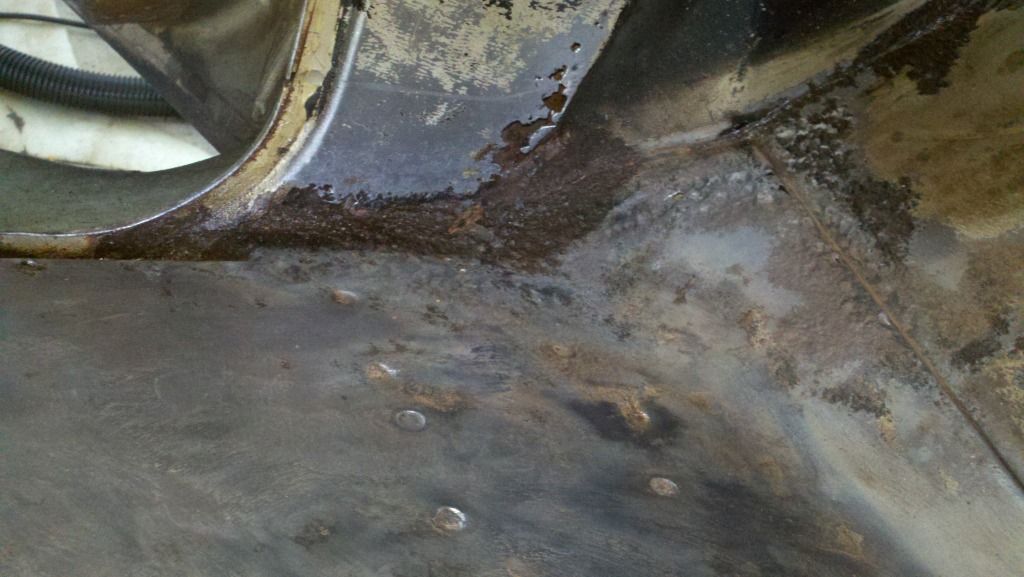 Outside of same area 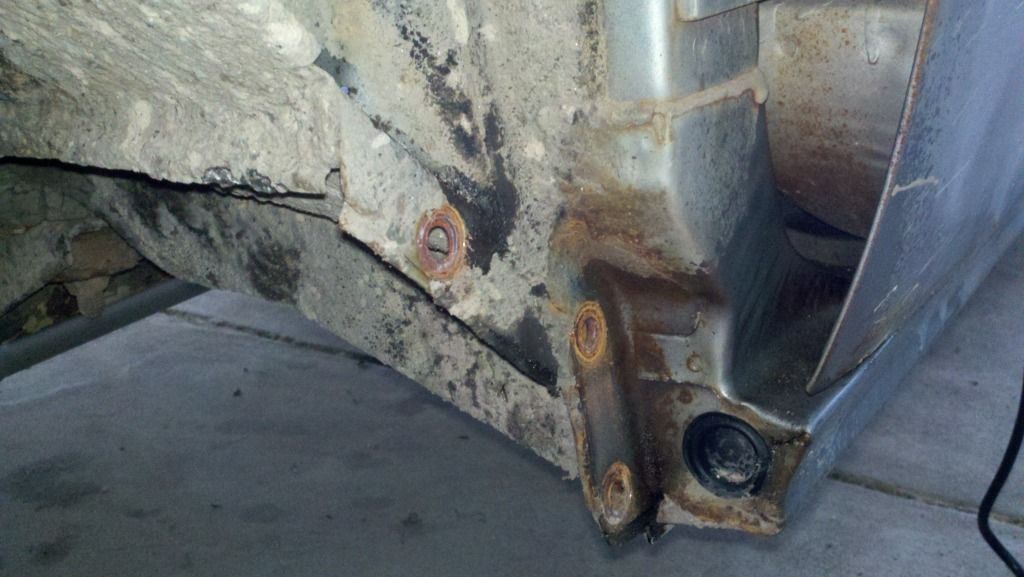 Straight on shot 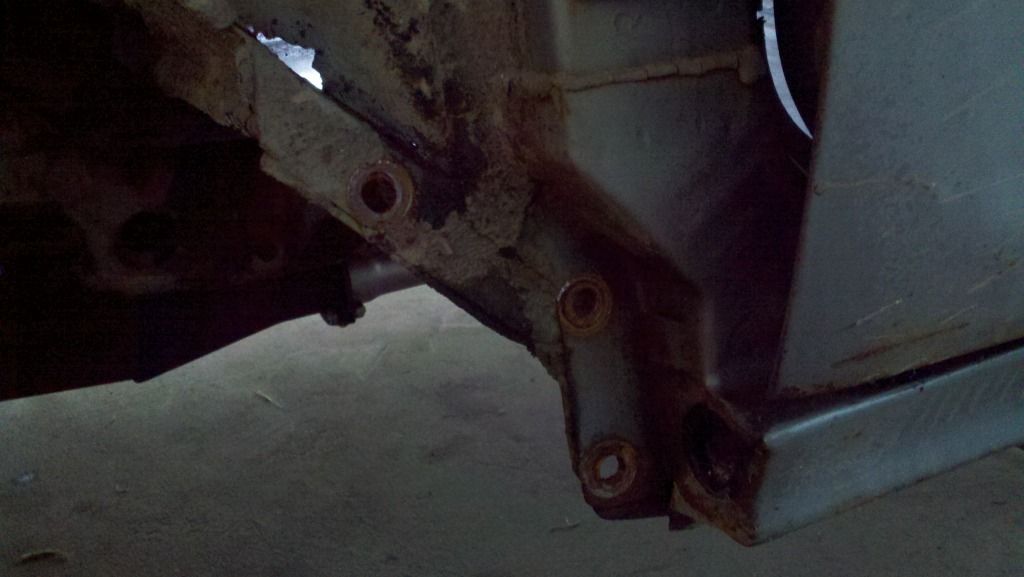 All I have is flap discs and wire wheels for my angle grinder but I'm going to do the best I can cleaning this up to get a good look at what needs replaced. So far I'm looking at lower kick panel, far left side of floor board and the fender parts. The cab support bracket under the floor looks great so far. |
|
|
|
|
04-29-2012, 10:47 PM
|
#3 |
|
Registered User
Join Date: Feb 2012
Location: Marysville, CA
Posts: 165
|
Re: Dad's 66 Custom Camper - Big Family/Small Budget
Got my little helpers out to scrape the floors clean and remove the door panels
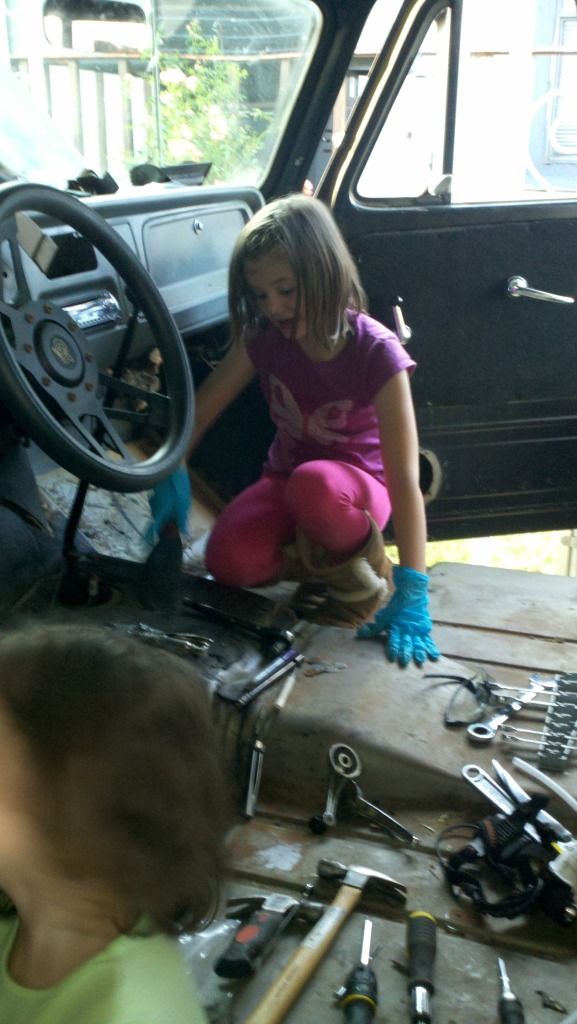 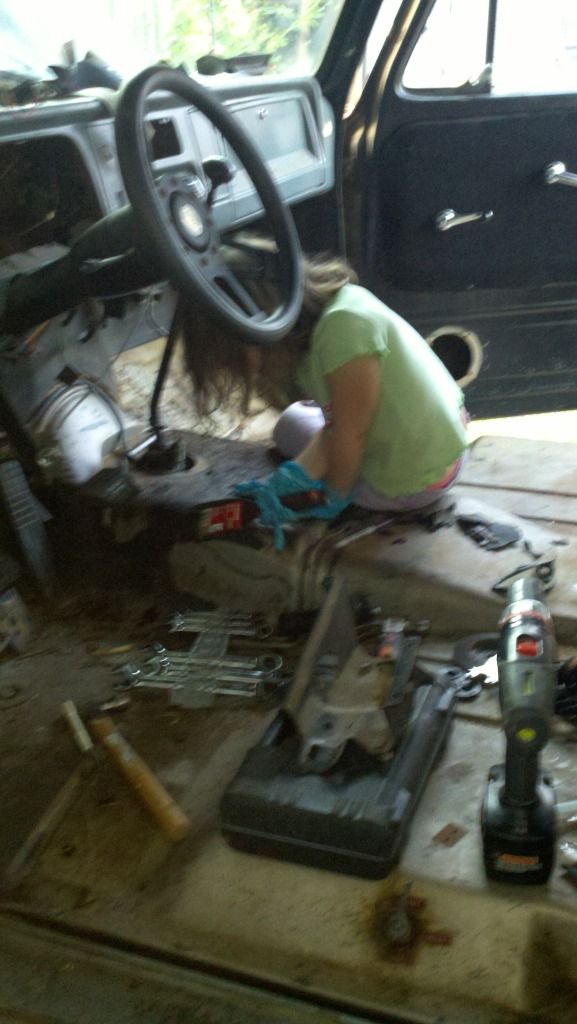 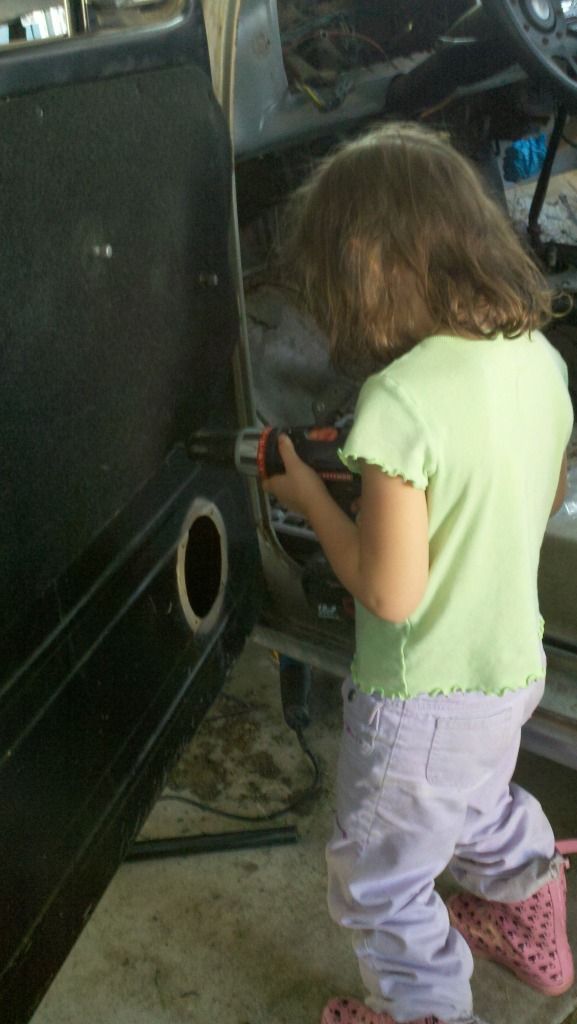 Still need to pull the steering colum and all the under dash heater stuff Floors look great! 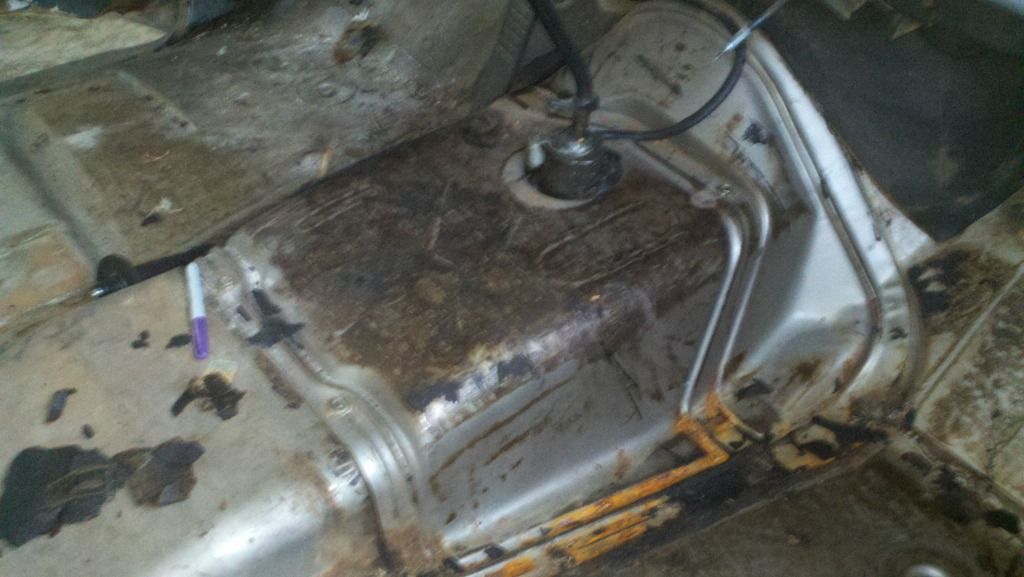 Though the drivers side rocker doesn't look promising, pulled the plug and snapped a shot 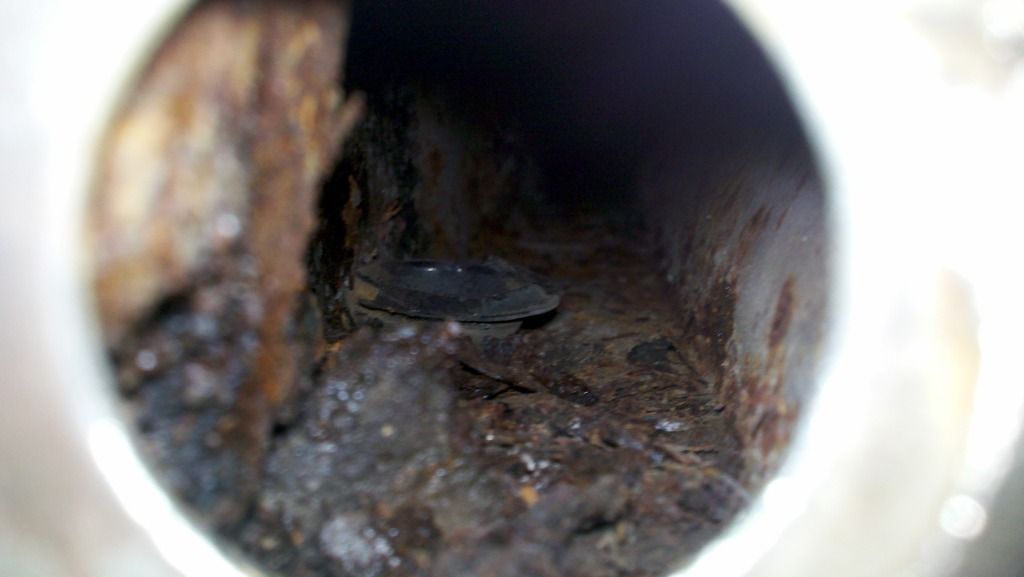 Thanks for looking! |
|
|
|
|
04-29-2012, 11:07 PM
|
#4 |
|
Registered User
Join Date: Dec 2010
Location: Venice, Ca.
Posts: 314
|
Re: Dad's 66 Custom Camper - Big Family/Small Budget
Kool get the kids involved, gimme this gimme that and don't forget to grab me a freshy from the frigde.
|
|
|
|
|
04-30-2012, 12:38 AM
|
#5 |
|
60-66 Nut
  Join Date: Mar 2007
Location: Coeur d'Alene, Idaho
Posts: 23,254
|
Re: Dad's 66 Custom Camper - Big Family/Small Budget
Welcome to the forum and thank you for your service
 I really enjoy seeing these trucks being built that have been in the family for so long. And even better yet is seeing your kids getting into the project. I did the same with my kids years ago and have some good memories and pictures. How long do you have until your deployment?
__________________
Power Steering Box Adapter Plates For Sale HERE Power Brake Booster Adapter Brackets For Sale '63-'66 HERE and '67-'72 HERE and '60-'62 HERE and "60-'62 with clutch HERE Rear Disc Brake Brackets For Sale. Impala SS calipers HERE Camaro Calipers HERE D52 Calipers HERE 6 Lug HERE Hydroboost Mounting Plates HERE |
|
|
|
|
04-30-2012, 02:47 PM
|
#6 | |
|
Registered User
Join Date: Feb 2012
Location: Marysville, CA
Posts: 165
|
Re: Dad's 66 Custom Camper - Big Family/Small Budget
Quote:
About two months, my goal is to get the cab in good shape before I leave. Currently it leaks, which is why it started rusting, I'm planning on pulling the front and rear glass, repairing the drivers side rust and the rust hole in the roof skin. Any tips on removing the stainless windshield trim without damaging it? Do I need a spcial tool? Currently I plan on cutting the windshield seal since it is almost as old as the truck but the stainless steel trim is in excellent shape and just needs a polish. Any lead on a good supplier for the windshield rubber for trim? I have heard good things about steele rubber. Also The current rust issue on the drivers side and luckily not the passeneger side was due to water leaking at the windshield rubber pooling up on the dash and seaping/dripping onto the floor, I'm assuming the installer never used any kind of putty or compound between the metal and the seal My dad's on a cruise but when he gets back he is going to scan me some old family photos with the truck I will post up |
|
|
|
|
|
05-01-2012, 01:48 AM
|
#7 |
|
60-66 Nut
Join Date: Mar 2007
Location: Coeur d'Alene, Idaho
Posts: 23,254
|
Re: Dad's 66 Custom Camper - Big Family/Small Budget
To remove the stainless windshield trim, you need to remove the windshield and all from the truck. Then remove the rubber and trim from the windshield, and then you can peel the rubber from the trim. From what I've heard, the rubber from Precision Restoration Products is the best fitting.
__________________
Power Steering Box Adapter Plates For Sale HERE Power Brake Booster Adapter Brackets For Sale '63-'66 HERE and '67-'72 HERE and '60-'62 HERE and "60-'62 with clutch HERE Rear Disc Brake Brackets For Sale. Impala SS calipers HERE Camaro Calipers HERE D52 Calipers HERE 6 Lug HERE Hydroboost Mounting Plates HERE |
|
|
|
|
05-01-2012, 09:15 AM
|
#8 |
|
Registered User
Join Date: Nov 2011
Location: fayetteville nc
Posts: 10,338
|
Re: Dad's 66 Custom Camper - Big Family/Small Budget
Welcome and thanks for your service. Great looking project you have there. Looks like the work is going along nicely and the extra hand s definitely help. Keep up the great progress.
__________________
1963 Short bed step side SBW 427 big block and borg warner T-16 HD 3 speed manual http://67-72chevytrucks.com/vboard/s...d.php?t=519869 1963 Short bed fleetside BBW 348 1st gen big block w/Powerglide http://67-72chevytrucks.com/vboard/s...d.php?t=619024 1964 Short bed trailer |
|
|
|
|
05-02-2012, 09:48 PM
|
#9 | |
|
Registered User
Join Date: Feb 2012
Location: Marysville, CA
Posts: 165
|
Re: Dad's 66 Custom Camper - Big Family/Small Budget
Quote:
The interior is virtually gutted except for the steering column now, Going to work on stripping to bare metal this week and hopefully laying down primer and new seam sealer this weekend (oh wait never mind working 12 hour shifts all weekend, hurray military). Not sure if I mentioned but the windshield seal was leaking causing water to pool on the dash which innevitably made it to the drivers side floor/kick panel causing all the rot. Well here is a back side view of the dash to cab seam: 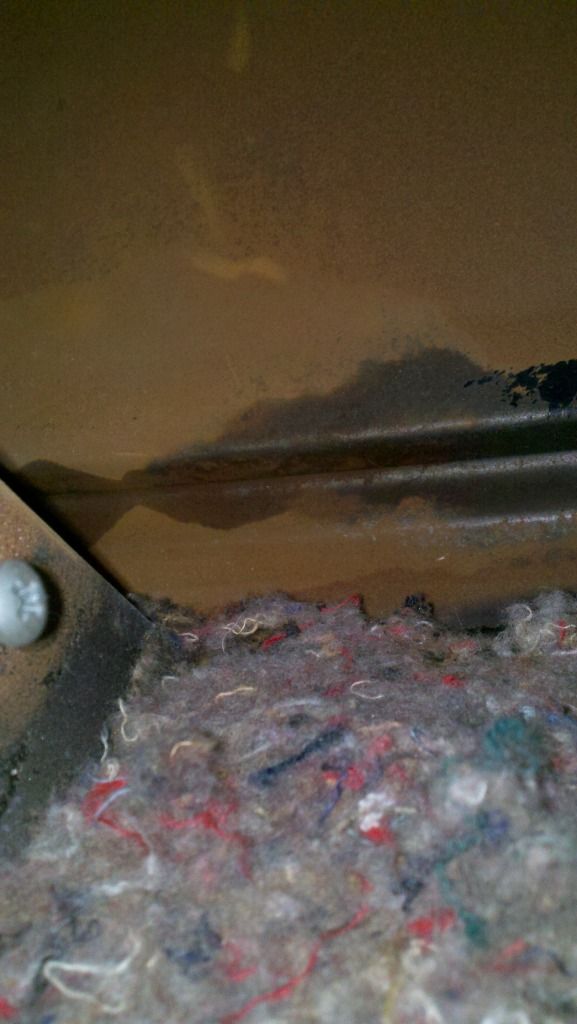 Appears to be in good shape but you can still see moisture present, will be drying this out VERY well after the windshield is removed and before priming/sealing Overall this is how I left it tonight: 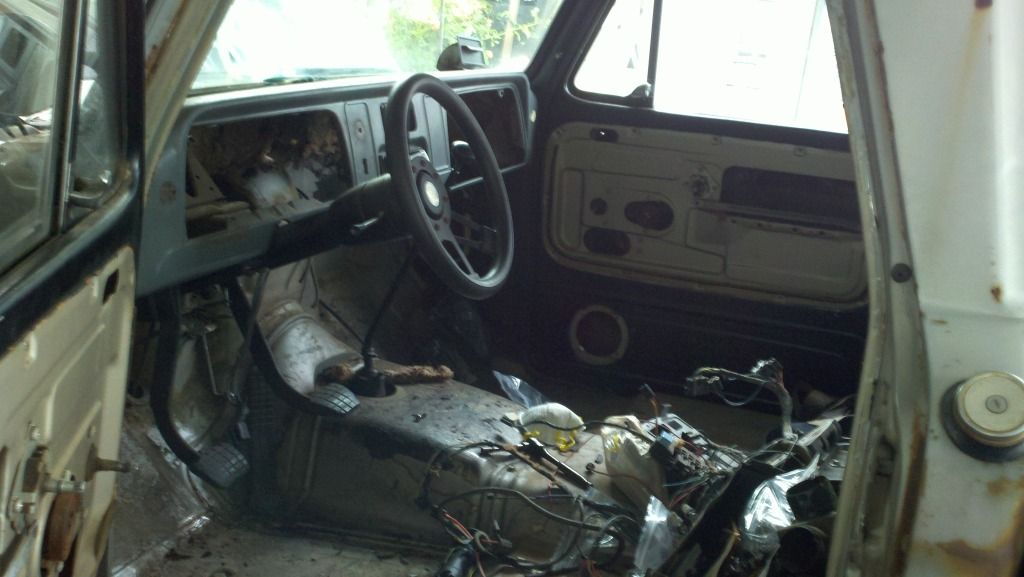 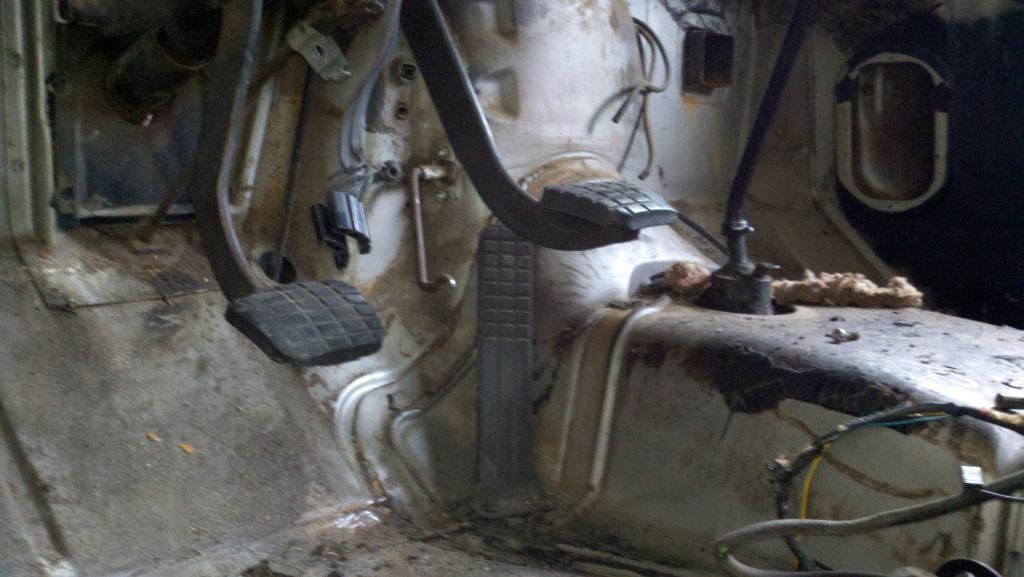 I have noticed that my rear cab mounts are shot (C20 Style), I am hoping to upgrade to the C10 style mounts and was curious how difficult it would be with the cab in place or possibly even raised off the frame slightly? Have a 220v MiG on hand Also noticing my Drivers side door has become slightly lower towards the rear of the cab and is becoming a bit more difficult to open, I'm guessing this is due to the broken cab mounts and drivers side rust weakening that side? Any ideas on correcting this as I patch the rust? Thanks for looking and by the way after 4 weeks of waiting for answers on a possible miscarriage of our 5th child, the Doc finally gave us a "Everything looks normal and healthy" with a low res pic to go along with it:  
|
|
|
|
|
|
05-02-2012, 09:52 PM
|
#10 |
|
Registered User
Join Date: Feb 2012
Location: Marysville, CA
Posts: 165
|
Re: Dad's 66 Custom Camper - Big Family/Small Budget
Oh yeah any suggestions on removing the black glue crap that all that insulation behind the dash is stuck to this stuff is horrible!
|
|
|
|
|
05-04-2012, 11:55 PM
|
#11 |
|
Registered User
Join Date: Feb 2012
Location: Marysville, CA
Posts: 165
|
Re: Dad's 66 Custom Camper - Big Family/Small Budget
Hmm anyone that can give me advice on removing the drivers side rocker panel?
So far I see spot welds running along the bottom lip where it meets the inner rocker (Maybe floor pan?) and a few at the front and rear door jamb, am I missing any? So Far I count approx 9 on each side, I have the Factory Assembly Manual but it appears to be completely random and very difficult to find what applies to my truck or not. Last edited by ozzyman; 05-05-2012 at 12:06 AM. |
|
|
|
|
05-06-2012, 12:15 AM
|
#12 |
|
Registered User
Join Date: Feb 2012
Location: Marysville, CA
Posts: 165
|
Re: Dad's 66 Custom Camper - Big Family/Small Budget
Removed The drivers rocker panel:
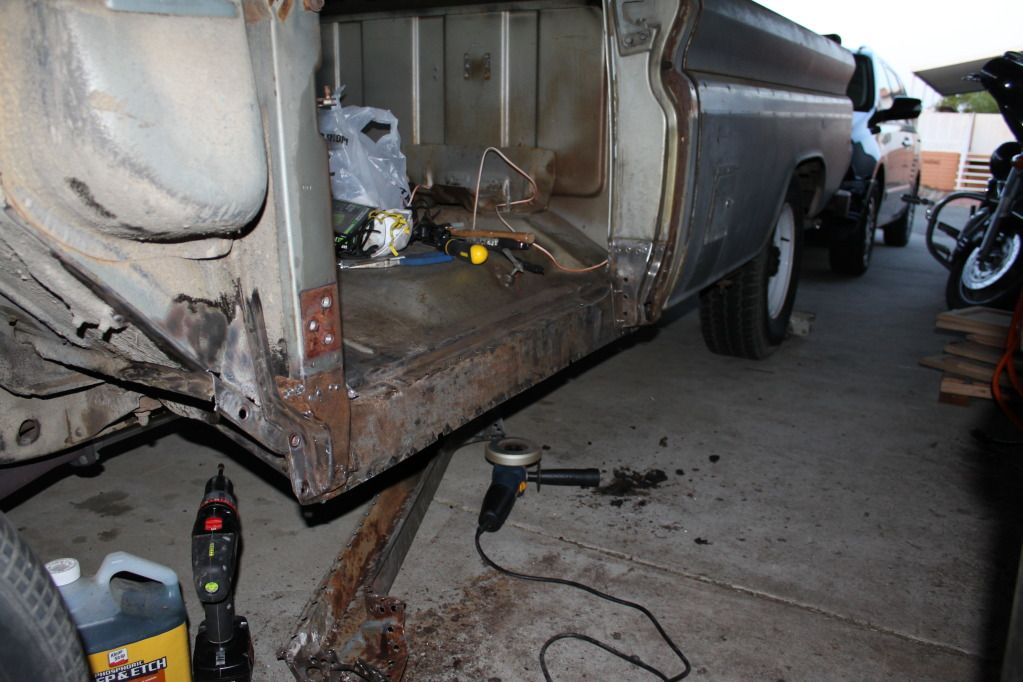 So far I'm replacing the Front lower Door Piller, the bottom of it is rotted and also has pin holes rusting from inside out 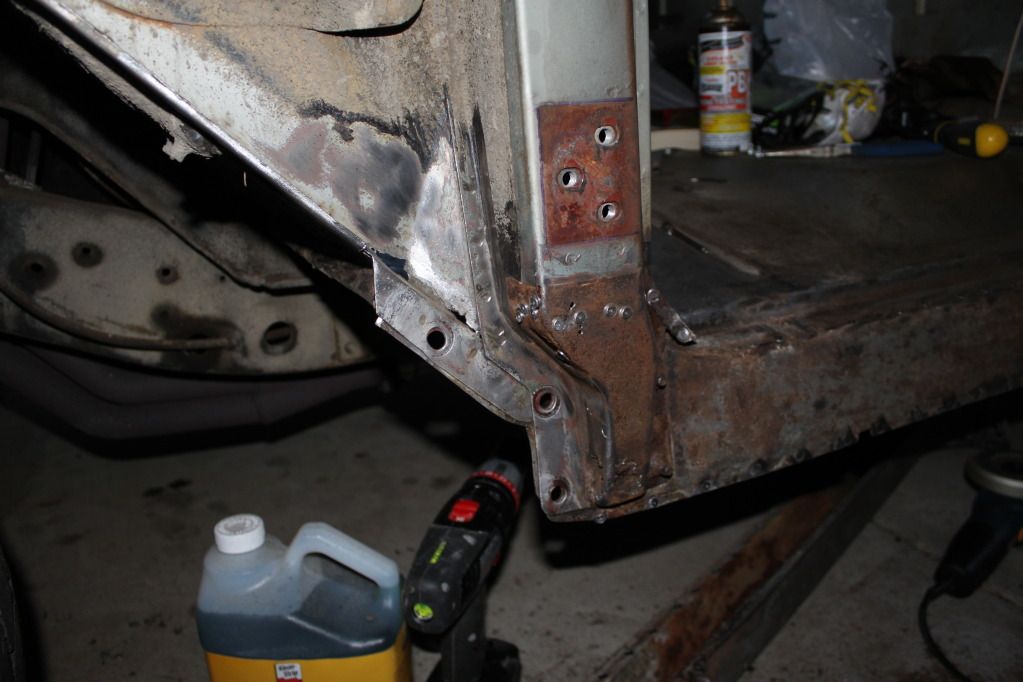 Inner kick panel/floor looks good but will be cutting out the forward 20% or so as part of the floor repair. 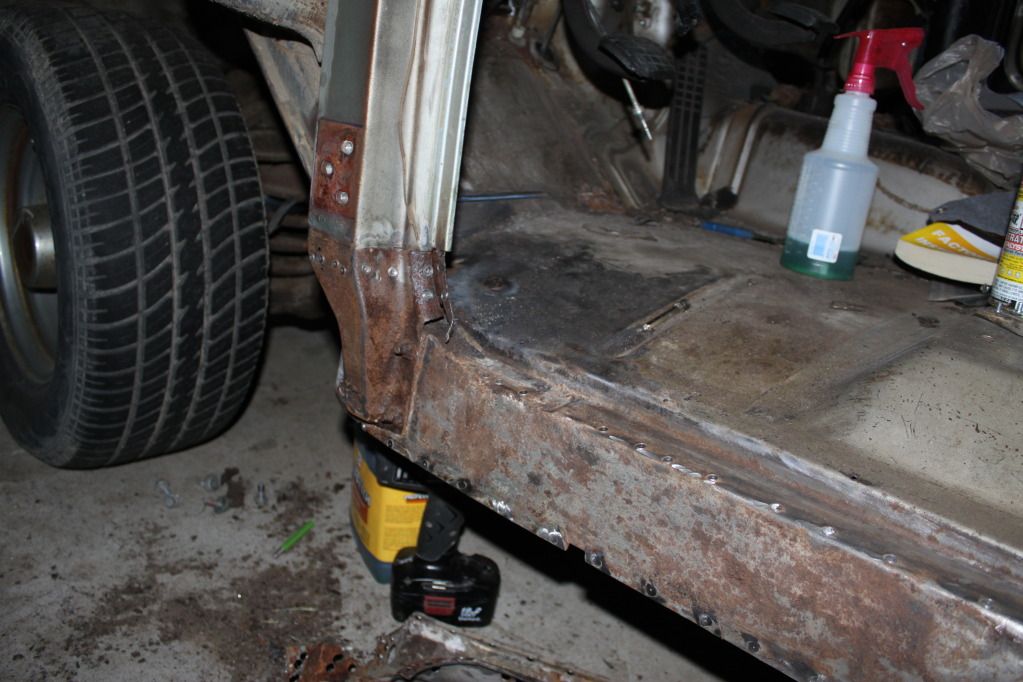 Will also be replacing the lower kick panel, outer floor board and fabricating a small peice of 90 degree to patch the small bit of rust at the lower/upper floor board seam: 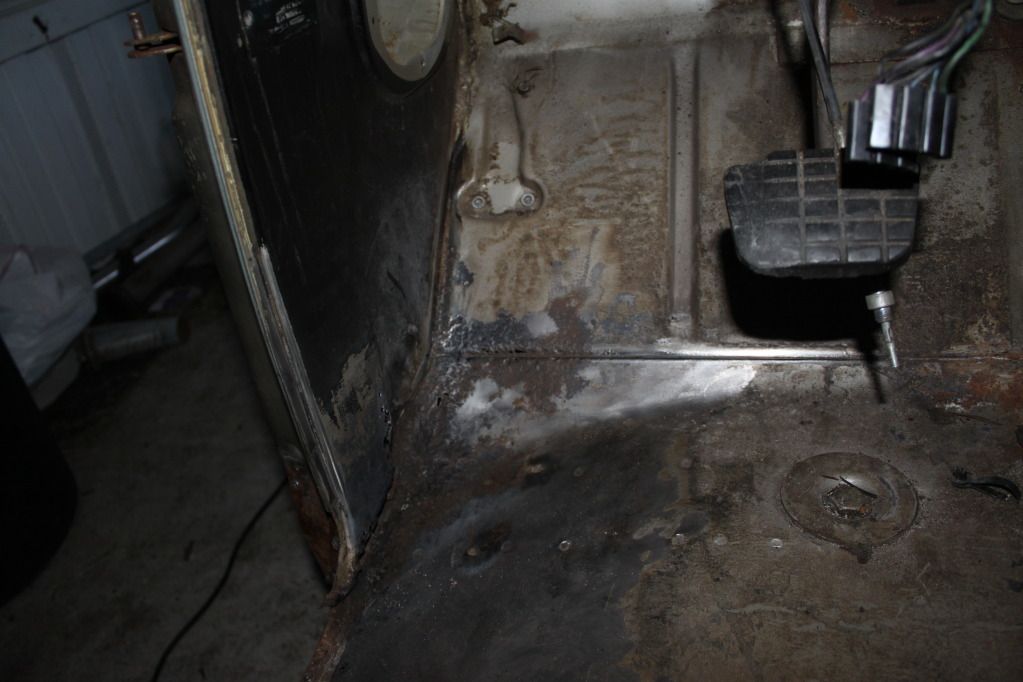 The good news for the night was the rear cab/corner looks great! 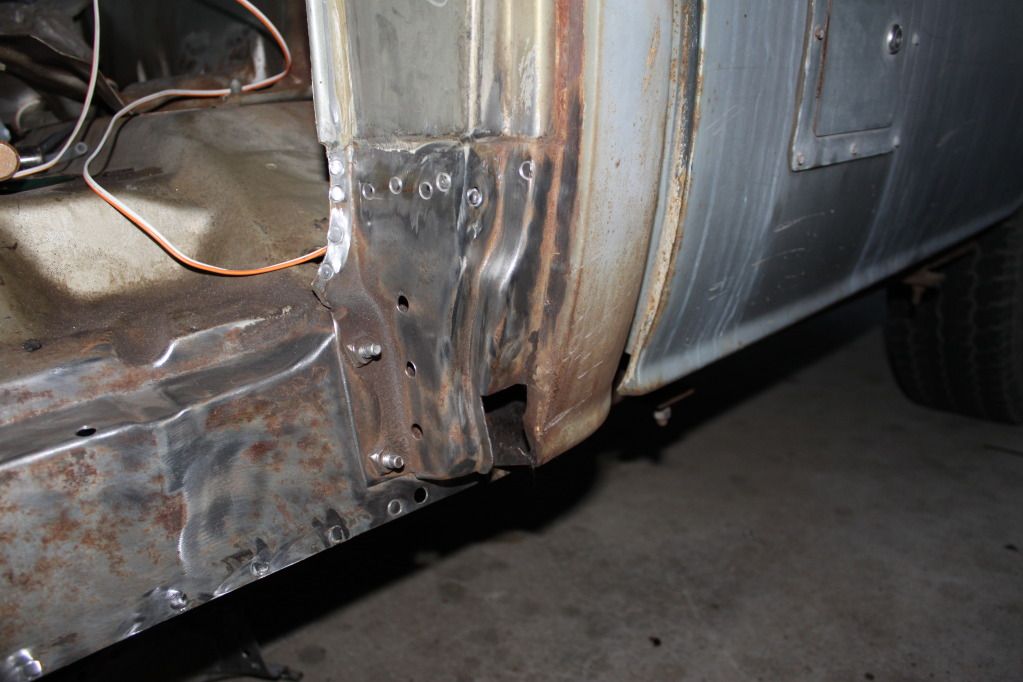 Couldn't get a good shot of the inside cab corner but it had about 4" of very Hard rubbery type gunk, was a PITA to get out but once out revealed perfectly clean sheet metal! woohoo! My plan of action is cut out piller, kick panel and floor and patch in reverse order, sound good? Any words of advice before diving in? The cab is mounted to the frame and since I wont be messing with the back half I'm hoping lining things up will be relatively easy. I bought butt clamps and magnets should I grab some spot weld pliers? Also I have been practicing alot on sheet metal because all I have is 30 flux wire for my MIG, I know I know bad, but I cant afford the gas setup and have gotten pretty decent at using the flux. Do you guys usually drill holes in one piece for spot welding? This is all new to me but I learn fast 
|
|
|
|
|
05-06-2012, 01:09 AM
|
#13 |
|
60-66 Nut
Join Date: Mar 2007
Location: Coeur d'Alene, Idaho
Posts: 23,254
|
Re: Dad's 66 Custom Camper - Big Family/Small Budget
Yes you do need to drill holes in the replacement piece you are welding in. A 1/4" hole is usually sufficient.
Congrats on #5 baby on the way 
__________________
Power Steering Box Adapter Plates For Sale HERE Power Brake Booster Adapter Brackets For Sale '63-'66 HERE and '67-'72 HERE and '60-'62 HERE and "60-'62 with clutch HERE Rear Disc Brake Brackets For Sale. Impala SS calipers HERE Camaro Calipers HERE D52 Calipers HERE 6 Lug HERE Hydroboost Mounting Plates HERE |
|
|
|
|
05-06-2012, 03:39 PM
|
#14 | |
|
Registered User
Join Date: Sep 2011
Location: Tacoma, WA
Posts: 2,425
|
Re: Dad's 66 Custom Camper - Big Family/Small Budget
Quote:
Otherwise  to the site and Hello !! to the site and Hello !!Glad to see more of us Active Duty folk getting into projects like this! We are a small fraternity around here. I am about 6 months ahead of you on this stuff, so if my trial and error can save you time, money, blood, sweat, or tears, please feel free to hit me up! Keep us posted, we are sorely addicted to photos and progress, though the two are not mutually related
__________________
Michael McMurphy My 66 Stepside My 64 Tow Truck My 66 Tempest Table Of Contents Added to Page1 |
|
|
|
|
|
05-07-2012, 12:09 AM
|
#15 | |
|
Registered User
Join Date: Feb 2012
Location: Marysville, CA
Posts: 165
|
Re: Dad's 66 Custom Camper - Big Family/Small Budget
Quote:
|
|
|
|
|
|
05-07-2012, 10:45 PM
|
#16 |
|
Registered User
Join Date: Feb 2012
Location: Marysville, CA
Posts: 165
|
Re: Dad's 66 Custom Camper - Big Family/Small Budget
UPS Email Confirmed my patch panels should arrive Thursday! Now to figure out a way to get some welding done on Mother's Day Weekend......... HMMMMMM
|
|
|
|
|
05-08-2012, 02:21 PM
|
#17 |
|
Registered User
Join Date: Jun 2011
Location: benld il
Posts: 43
|
Re: Dad's 66 Custom Camper - Big Family/Small Budget
great job on work so far. Keep up the post i need to take more pics. Oh yeah great shot of inside the old rocker.
|
|
|
|
|
05-08-2012, 03:32 PM
|
#18 |
|
Senior Member
Join Date: Mar 2011
Location: Tucson, Arizona
Posts: 2,087
|
Re: Dad's 66 Custom Camper - Big Family/Small Budget
First off, welcome to the site. I am in about the same place as you in replacing sheet metal on my 66 and I, too, am pretty new at mig welding. I really appreciate the great pictures you took of the rockers and floors. It helps me get a good perception of what's in store for me. I haven't removed the outer rocker yet but my rust area seems to be very similar to yours. Good luck on your progress and I'll be checking in.
|
|
|
|
|
05-08-2012, 11:42 PM
|
#19 |
|
Registered User
Join Date: Feb 2012
Location: Marysville, CA
Posts: 165
|
Re: Dad's 66 Custom Camper - Big Family/Small Budget
Oh yeah, So Far my Cheapo Harbor Freight spot weld cutter has been performing great, Requires a center punch first and start off slow or it tends to wander but otherwise works great! My 7 year old recorded this so don't mind the yelling.
http://youtu.be/6wSNUIux3t8 I did break one of the spring loaded pins in the center of the cutter after about 200 spot welds but it was one of those where it started wandering and probably led to the breakage who knows
__________________
Active Duty Air Force 02'-Current  Proud dad of 3 girls, 1 boy and 1 TBD in Dec of 2012 - Lucky Husband "Family owned and operated since 1969" Dad's 66' Custom Camper - Big Family Small Budget |
|
|
|
|
05-10-2012, 09:09 PM
|
#20 |
|
Registered User
Join Date: Feb 2012
Location: Marysville, CA
Posts: 165
|
Re: Dad's 66 Custom Camper - Big Family/Small Budget
Pulled the Glass today:
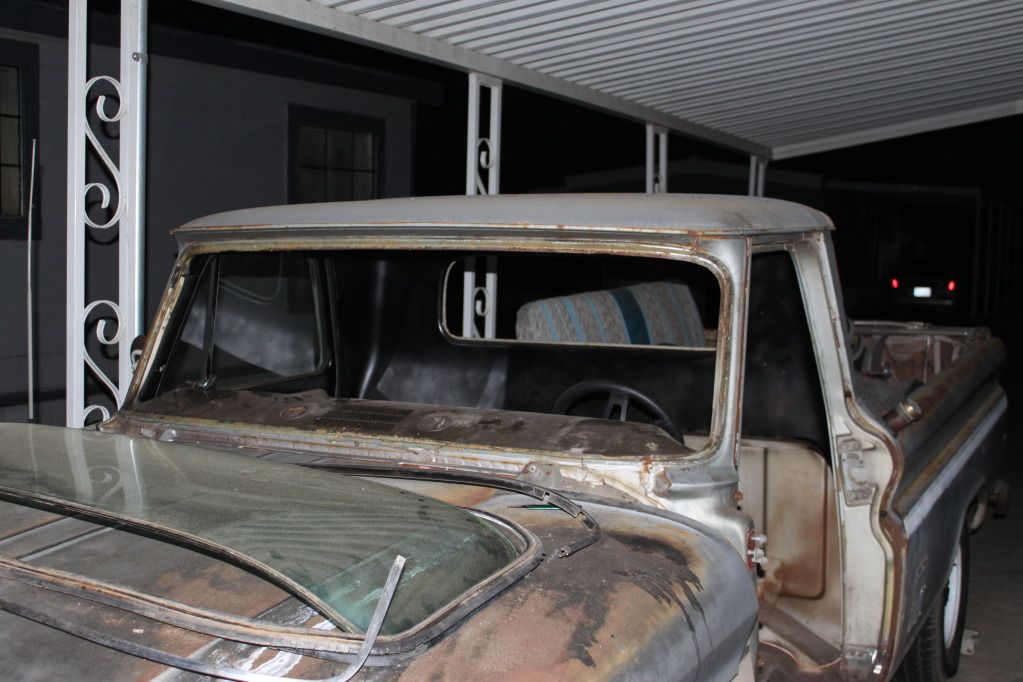 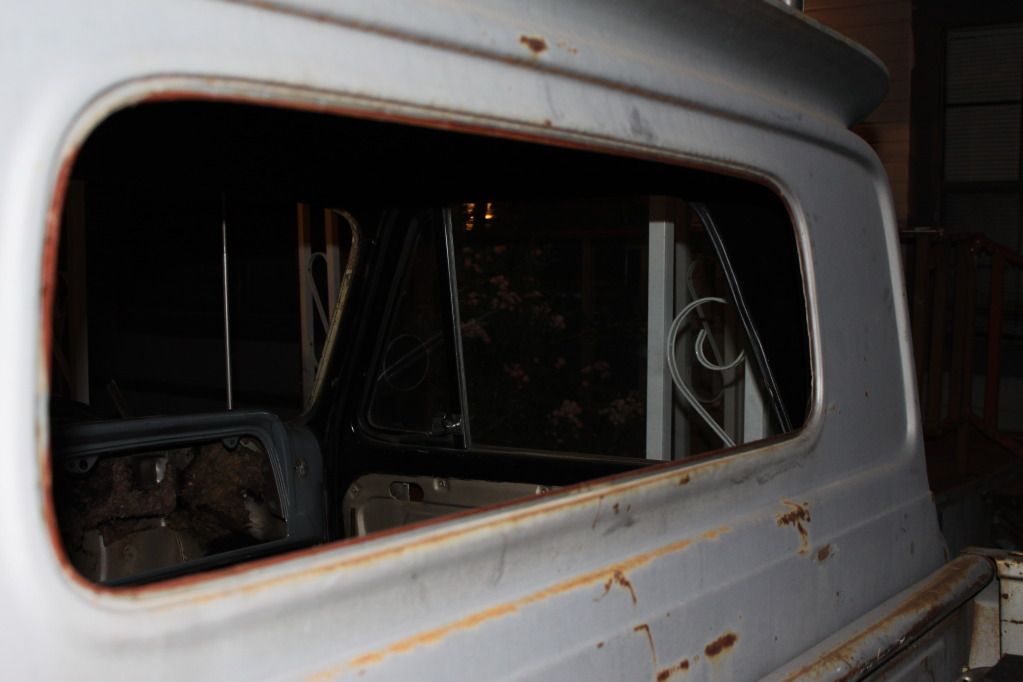 Already have green glass to replace this sliding unit that was installed for the camper: 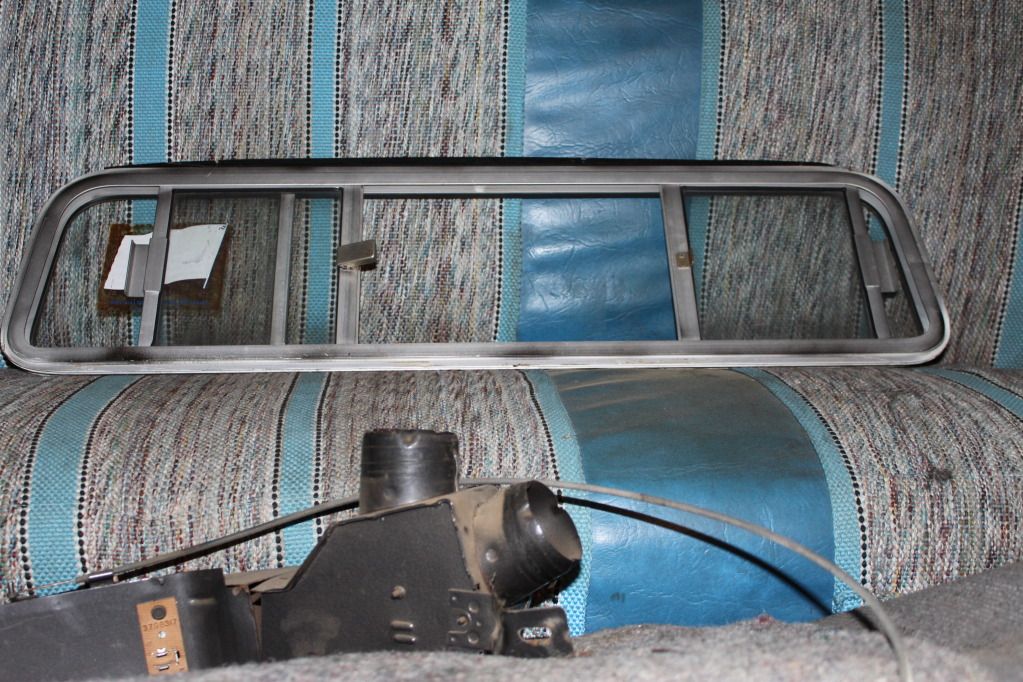 Virtually rust free top and bottom of windshield: 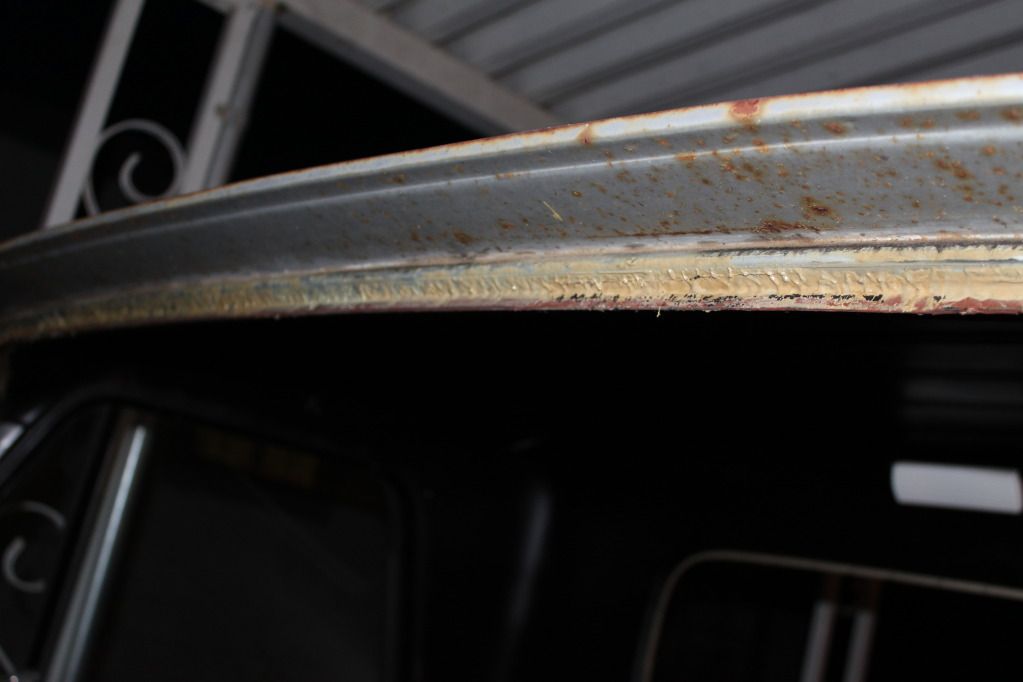 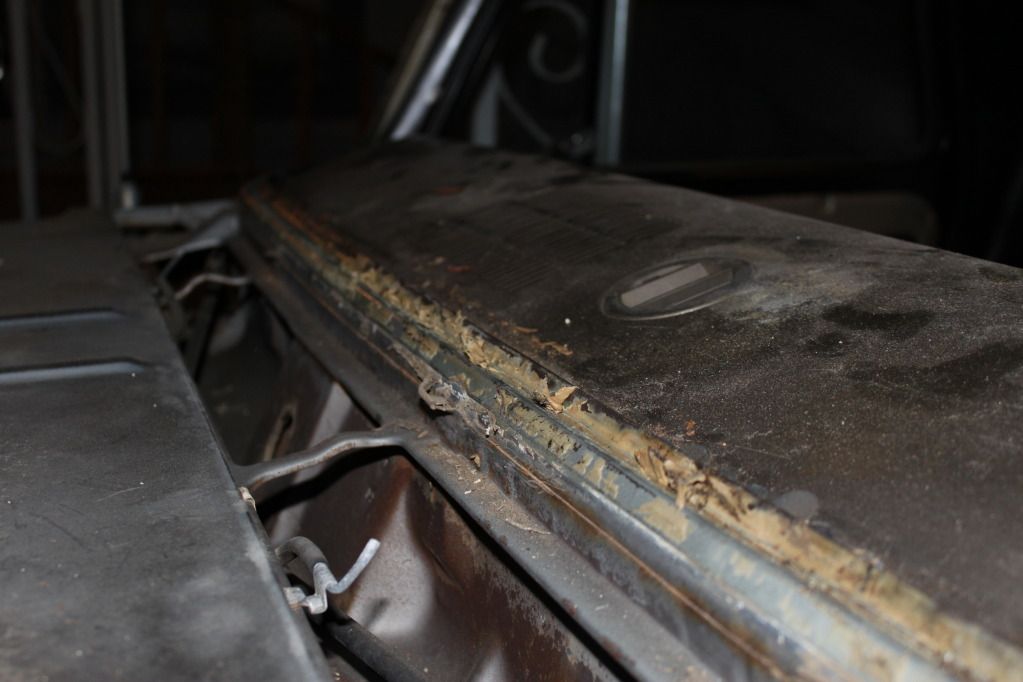
__________________
Active Duty Air Force 02'-Current Proud dad of 3 girls, 1 boy and 1 TBD in Dec of 2012 - Lucky Husband "Family owned and operated since 1969" Dad's 66' Custom Camper - Big Family Small Budget |
|
|
|
|
05-10-2012, 09:43 PM
|
#21 |
|
Registered User
Join Date: Apr 2012
Location: Cambridge, Ontario, Canada
Posts: 1,771
|
Re: Dad's 66 Custom Camper - Big Family/Small Budget
Welcome, looking forward to following your progress. Your service to your country is commendable, and appreciated by your little brother to the north as well.
__________________
Craigerrr My build thread, CRGRS 66 Winter Build: http://67-72chevytrucks.com/vboard/s...09#post5638709 |
|
|
|
|
05-11-2012, 03:07 PM
|
#22 | |
|
Registered User
Join Date: Sep 2011
Location: Tacoma, WA
Posts: 2,425
|
Re: Dad's 66 Custom Camper - Big Family/Small Budget
Quote:
Hope this helps you.
__________________
Michael McMurphy My 66 Stepside My 64 Tow Truck My 66 Tempest Table Of Contents Added to Page1 |
|
|
|
|
|
05-11-2012, 03:26 PM
|
#23 |
|
Registered User
Join Date: Jul 2010
Location: los angeles,ca
Posts: 3,617
|
Re: Dad's 66 Custom Camper - Big Family/Small Budget
looking forward to the pix from when your dad owned it. thanks for your service. keep up the good work
Posted via Mobile Device |
|
|
|
|
05-12-2012, 11:55 PM
|
#24 |
|
Registered User
Join Date: Feb 2012
Location: Marysville, CA
Posts: 165
|
Re: Dad's 66 Custom Camper - Big Family/Small Budget
FedEx Delivered a package today, At least that's what my tracking info shows.
My Paint and seam filler from Eastwood Technically delivered via FedEx today just not to my house, hoping I can figure this out next week. I'm guessing it accidentally got delivered to one of my neighbors but who knows. My order confirmation from Eastwood lists my full address including Lot # but FedEx is saying they are missing the lot # and only had the street address..... so I guess my question is since there are about 70 lots at my address didn't the driver think maybe not delivering it to a random mobile home would be a good idea? Maybe i'll start knocking on doors until I find the patio they left the package on.
__________________
Active Duty Air Force 02'-Current Proud dad of 3 girls, 1 boy and 1 TBD in Dec of 2012 - Lucky Husband "Family owned and operated since 1969" Dad's 66' Custom Camper - Big Family Small Budget |
|
|
|
|
05-13-2012, 12:54 AM
|
#25 |
|
Senior Enthusiast
Join Date: Feb 2007
Location: Spokane Valley, WA
Posts: 8,356
|
Re: Dad's 66 Custom Camper - Big Family/Small Budget
There are so many build threads on the forum it's hard to keep up with everything. Your progress is outstanding. This is the ugly part, getting started and coming up with new discoveries you'd rather not have found. Great news the windshield flange is rust free.
I've read virtually every thread available on currently available windshield gaskets, and it appears Precision brand is the highest quality most dependable brand. From what I've read Steele Rubber Products sells gaskets made by Precision. Steele charges $75.50 while other suppliers sell the same seal for around $35-$45. The tricky part is determining and confirming exactly who sells the Precision seals. I'm working on this now because Im planning on adding trim to mine in the near future. UPS should be able to contact the driver and find out where he left your package. Most of those folks are pretty sharp and should be able to solve the mystery. Keep up the good work!
__________________
My Build Thread: http://67-72chevytrucks.com/vboard/s...d.php?t=444502 |
|
|
|
|
| Bookmarks |
|
|


 Linear Mode

