
|
 12-23-2012, 07:28 PM
|
#1 |
|
Senior Member
 Join Date: Oct 2012
Location: mountain view arkansas
Posts: 1,317
|
73-87 idler arm on 65
I have looked in the faq section and can not find out about the idler arm I swapped the front end out of a 83 chevy truck to my 65 and everything worked great but the idler arm on the passenger side is different than the orginal. Do I drill new holes in the frame or is there a different idler arm I use?
__________________
http://67-72chevytrucks.com/vboard/s...d.php?t=548705 |

|

|
|
12-23-2012, 08:19 PM
|
#2 |
|
Registered User
Join Date: Nov 2012
Location: Escalon, Ca
Posts: 63
|
Re: 73-87 idler arm on 65
I used the newer idler arm on mine. Just drilled the holes in frame and was ready to rock.
Posted via Mobile Device |
|
|
|
|
12-23-2012, 08:41 PM
|
#3 |
|
Watch out for your cornhole !
Join Date: Jun 2003
Location: Azle, Texas
Posts: 14,162
|
Re: 73-87 idler arm on 65
Drill it.
Use a C clamp to get the center link level and straight then mark and drill the two holes. |
|
|
|
|
12-23-2012, 08:47 PM
|
#4 |
|
Registered User
Join Date: Dec 2007
Location: Billerica, MA
Posts: 329
|
Re: 73-87 idler arm on 65
I've always wanted to know why the idler arms are shorter than the pitman arms from center to center by about 1/4". Also, why are all the later model 73-87' pitman arms and idler arms another 1/4" longer than the earlier stuff? Its weird geometrically.
|
|
|
|
|
12-23-2012, 09:59 PM
|
#5 |
|
Senior Member
Join Date: Oct 2012
Location: mountain view arkansas
Posts: 1,317
|
Re: 73-87 idler arm on 65
The one from the 83 will fit up closer to the bumper that than the original one is this right? It is more of an angle and the original was straghter up and down.
__________________
http://67-72chevytrucks.com/vboard/s...d.php?t=548705 |
|
|
|
|
12-23-2012, 10:13 PM
|
#6 |
|
Senior Member
Join Date: Oct 2012
Location: mountain view arkansas
Posts: 1,317
|
Re: 73-87 idler arm on 65
Anyone have a picture of theres redrilled?
__________________
http://67-72chevytrucks.com/vboard/s...d.php?t=548705 |
|
|
|
|
12-23-2012, 11:15 PM
|
#7 | |
|
Registered User
Join Date: Apr 2012
Location: Searcy, AR
Posts: 4,203
|
Re: 73-87 idler arm on 65
Quote:
Hope it Helps, Merry CHRISTmas!
__________________
DON Proverbs 27:17  US Air Force Retarded errr Retired My '65 Stepper Build:http://67-72chevytrucks.com/vboard/s...d.php?t=533920 My '60 Rusty Patina Build:http://67-72chevytrucks.com/vboard/s...66#post7402266 My '72 http://67-72chevytrucks.com/vboard/s...59#post7204359 SOLD |
|
|
|
|
|
12-23-2012, 11:19 PM
|
#8 |
|
Senior Member
Join Date: Oct 2012
Location: mountain view arkansas
Posts: 1,317
|
Re: 73-87 idler arm on 65
Perfect shot. That is what I needed. I was trying to put it the other way which was backwards. Looks like you used the bottom hole of the original one and drilled the top one. Thanks.
__________________
http://67-72chevytrucks.com/vboard/s...d.php?t=548705 |
|
|
|
|
12-24-2012, 08:27 AM
|
#9 |
|
UCA63
Join Date: Aug 2005
Location: Lloydminster AB Can.
Posts: 1,637
|
Re: 73-87 idler arm on 65
mine
__________________
member#7816 "63 sb ss bbw 350\350 12 bolt rear Pwr Fr Disc PS tilt '61 GMC in progress '63 GMC to use for parts '90 Chevy Ext cab sbfs 5.7l (current d d) |
|
|
|
|
12-24-2012, 12:49 PM
|
#10 |
|
Senior Member
Join Date: Oct 2012
Location: mountain view arkansas
Posts: 1,317
|
Re: 73-87 idler arm on 65
If it is not to much trouble could you get a picture of the other side. I am having trouble getting it straight with the steering box. Thanks
__________________
http://67-72chevytrucks.com/vboard/s...d.php?t=548705 |
|
|
|
|
12-24-2012, 02:51 PM
|
#11 |
|
Registered User
Join Date: Apr 2012
Location: Searcy, AR
Posts: 4,203
|
Re: 73-87 idler arm on 65
Try again...
__________________
DON Proverbs 27:17 US Air Force Retarded errr Retired My '65 Stepper Build:http://67-72chevytrucks.com/vboard/s...d.php?t=533920 My '60 Rusty Patina Build:http://67-72chevytrucks.com/vboard/s...66#post7402266 My '72 http://67-72chevytrucks.com/vboard/s...59#post7204359 SOLD |
|
|
|
|
12-26-2012, 04:20 PM
|
#12 |
|
Scrapper 1
Join Date: Jan 2007
Location: Riverside Calif
Posts: 1,649
|
Re: 73-87 idler arm on 65
one thing i'm not seeing them tell you about is there are dimples in the frame that move it out by a 1/2 of inch should really look at the newer frames to see the lumps in the frame to push the idler arm away from the frame
|
|
|
|
|
12-26-2012, 06:32 PM
|
#13 |
|
Senior Member
Join Date: Oct 2012
Location: mountain view arkansas
Posts: 1,317
|
Re: 73-87 idler arm on 65
I now have it all bolted up and ready to go. Thanks for the pictures and comments. One thing I did notice was the power steering box is leaking from the bottom seal how hard is the seal to change?
__________________
http://67-72chevytrucks.com/vboard/s...d.php?t=548705 |
|
|
|
|
12-26-2012, 07:01 PM
|
#14 |
|
Watch out for your cornhole !
Join Date: Jun 2003
Location: Azle, Texas
Posts: 14,162
|
Re: 73-87 idler arm on 65
To replace the seal, you need to remove the pitman arm and the snap ring that retains the seal. From bottom to top, you'll have a snap ring, washer, seal, washer, and seal. All in that order. The new seal kit will come with both seals, both washers, and a snap ring. Here are pictures of the last one I rebuilt. Don't worry about the fact that I took my box completely apart. That's not important for this job and the seal can be changed without doing any of that.
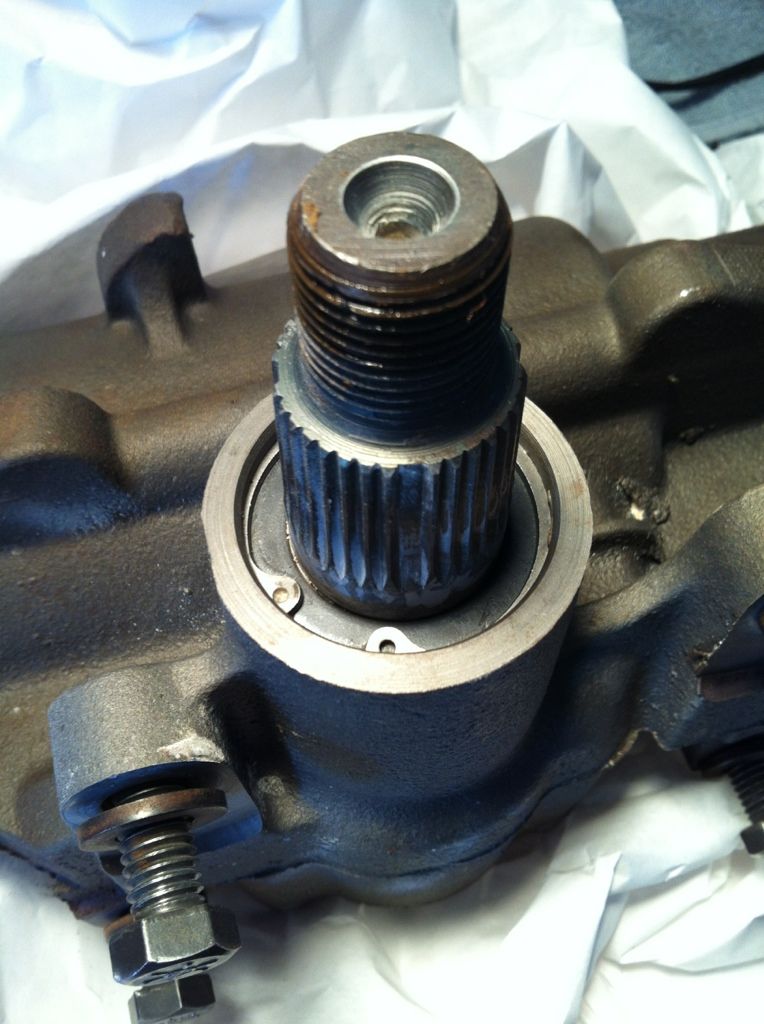 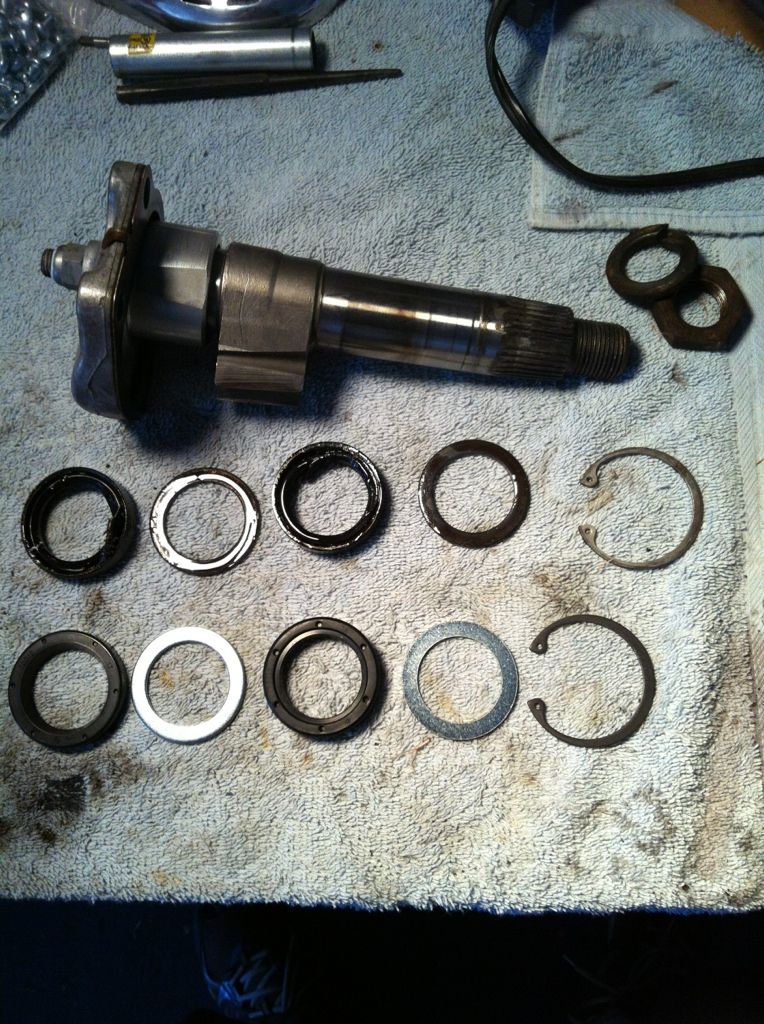 Honestly, the easiest method by far is to remove the snap ring and put a drain pan under the steering box. Then, start the engine and cycle the steering wheel lock to lock. That will blow the seals out and it they should land in the drain pan. Re-install the new parts in the proper order using a piece of pipe or PVC and a mallet to drive them up into place. |
|
|
|
 |
| Bookmarks |
|
|


 Linear Mode

