
|
 02-10-2013, 10:27 AM
|
#1 |
|
Registered User
Join Date: Sep 2010
Location: Lake Havasu City Arizona
Posts: 863
|
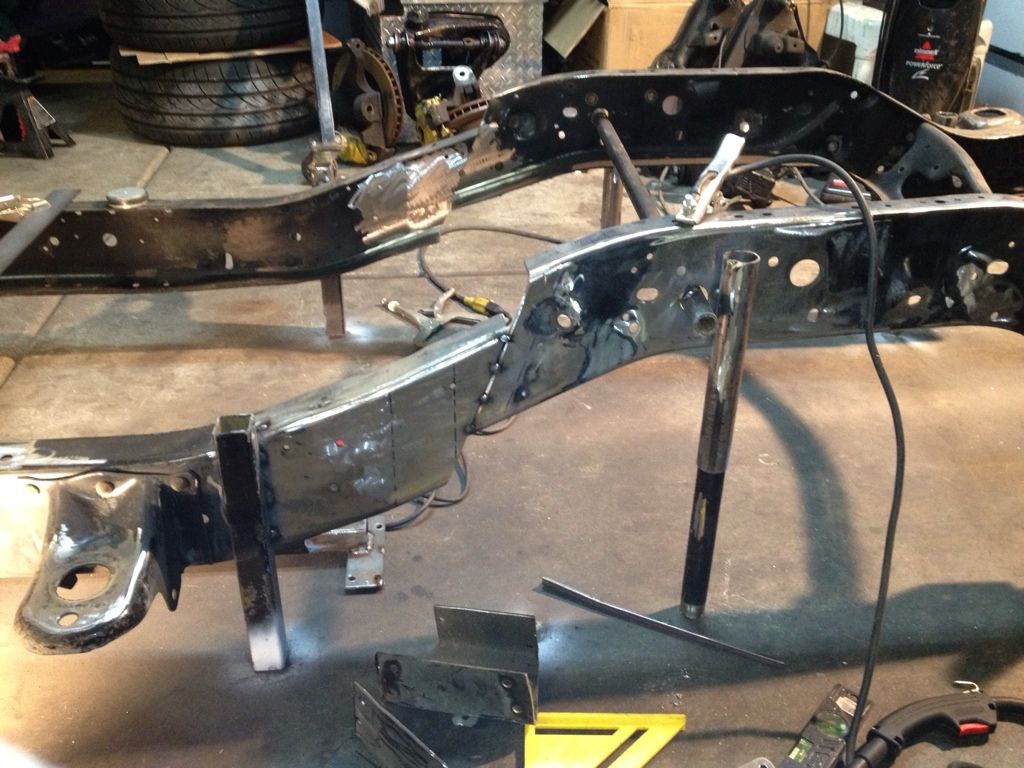
First time frame Z
Zed, Z'ed , Zing, whatever you call it. It all means the same thing to me and a giant leap into the unknown as my fab skills are not that great but I figured what the hell!
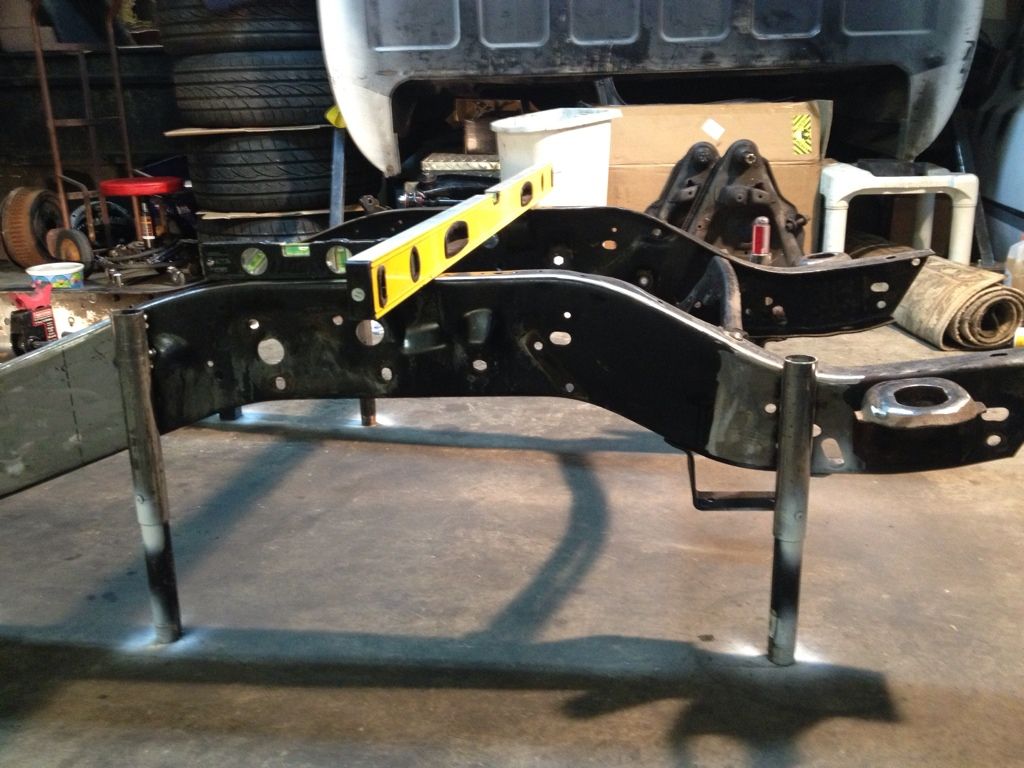
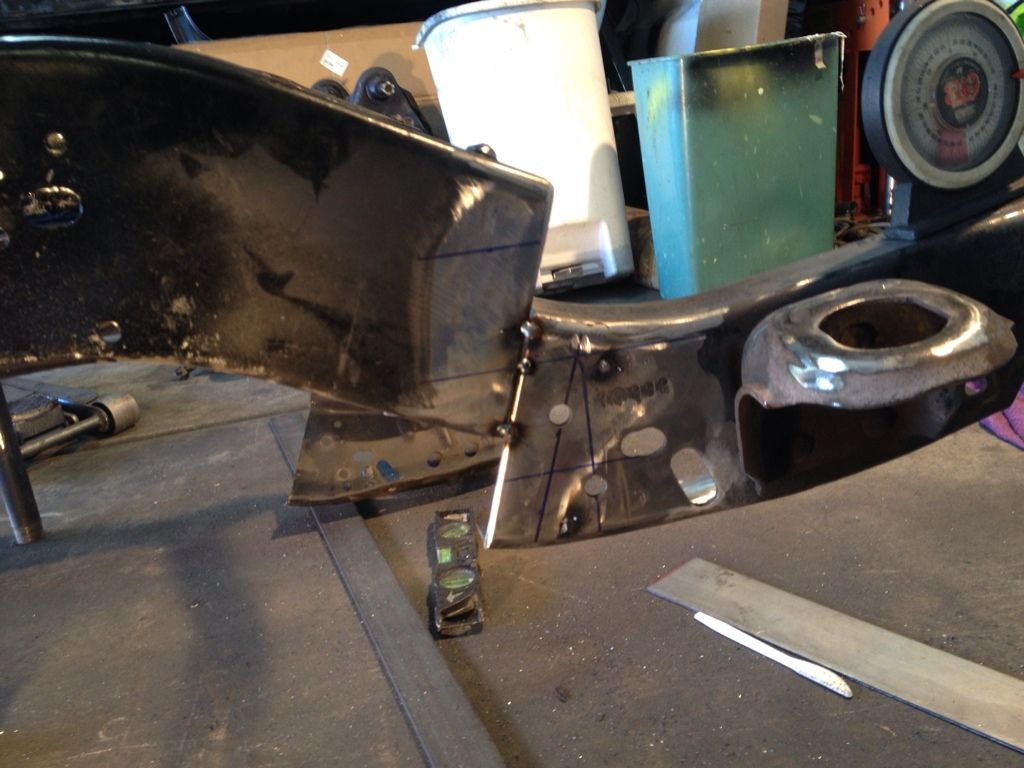
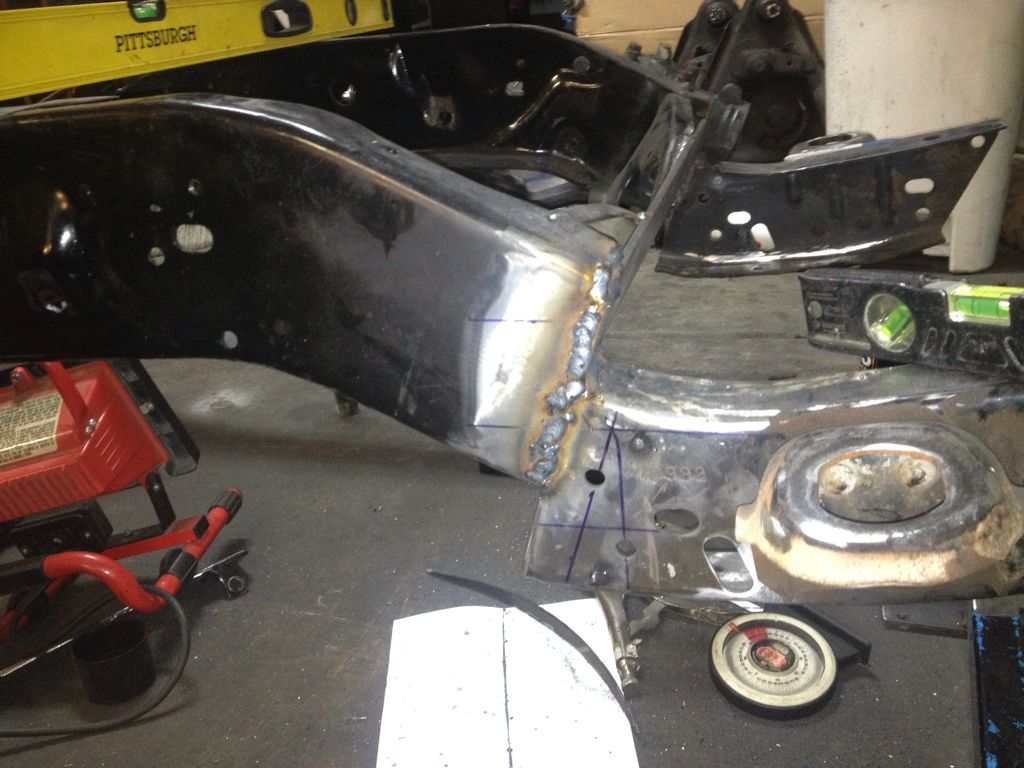
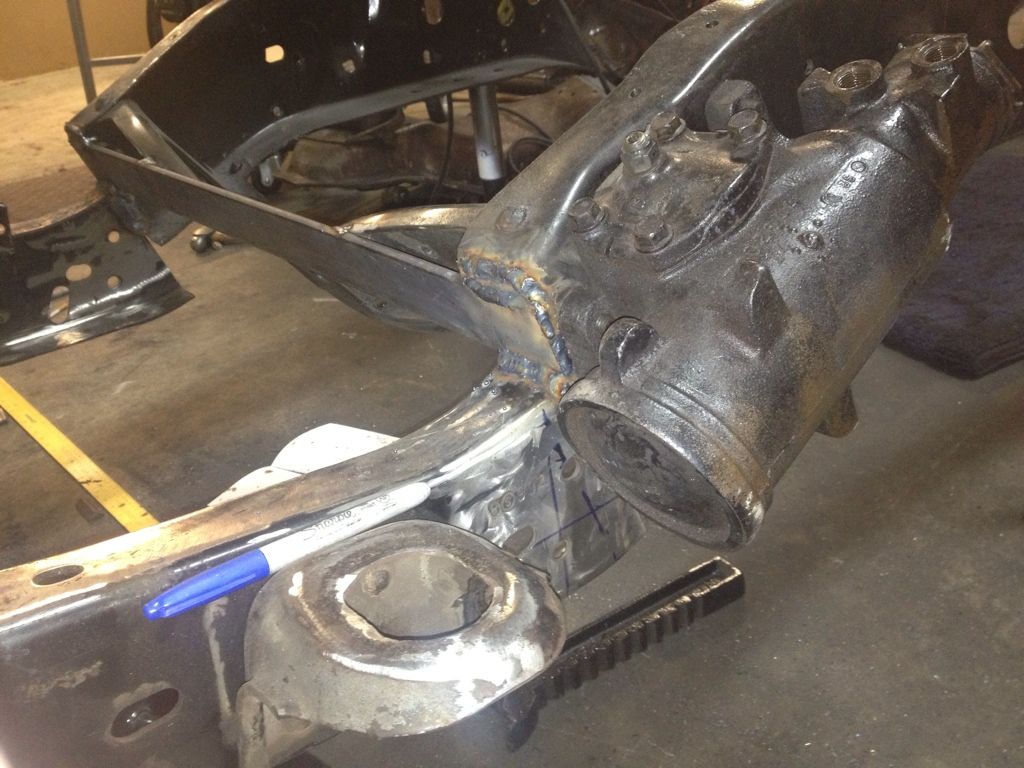
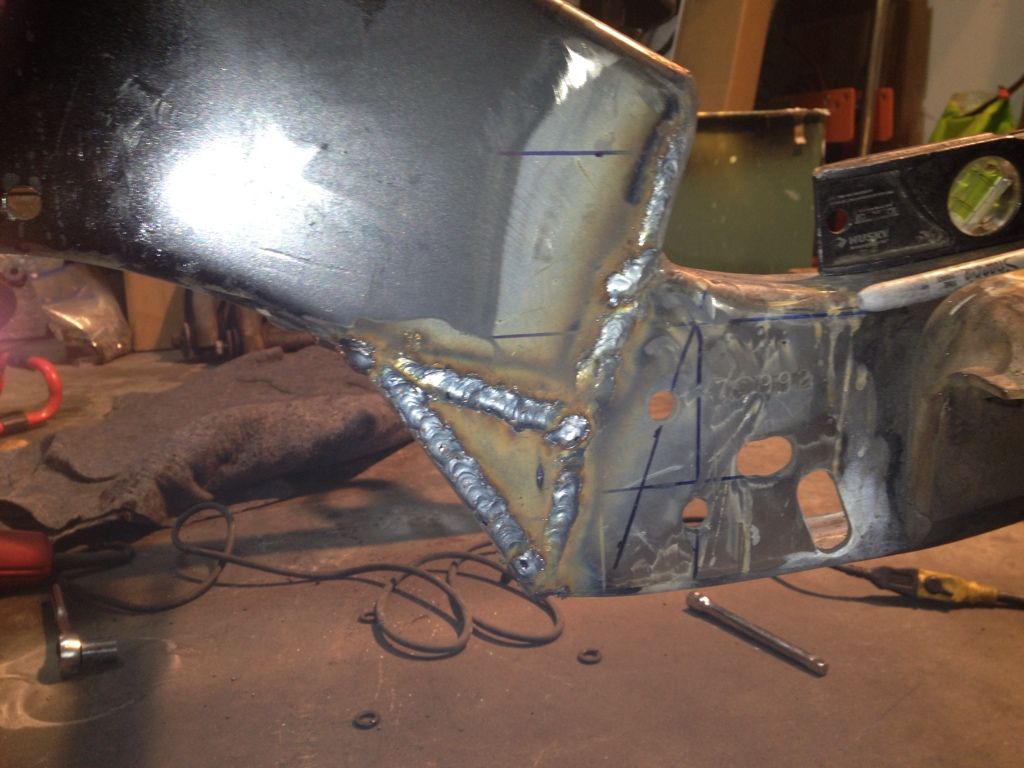
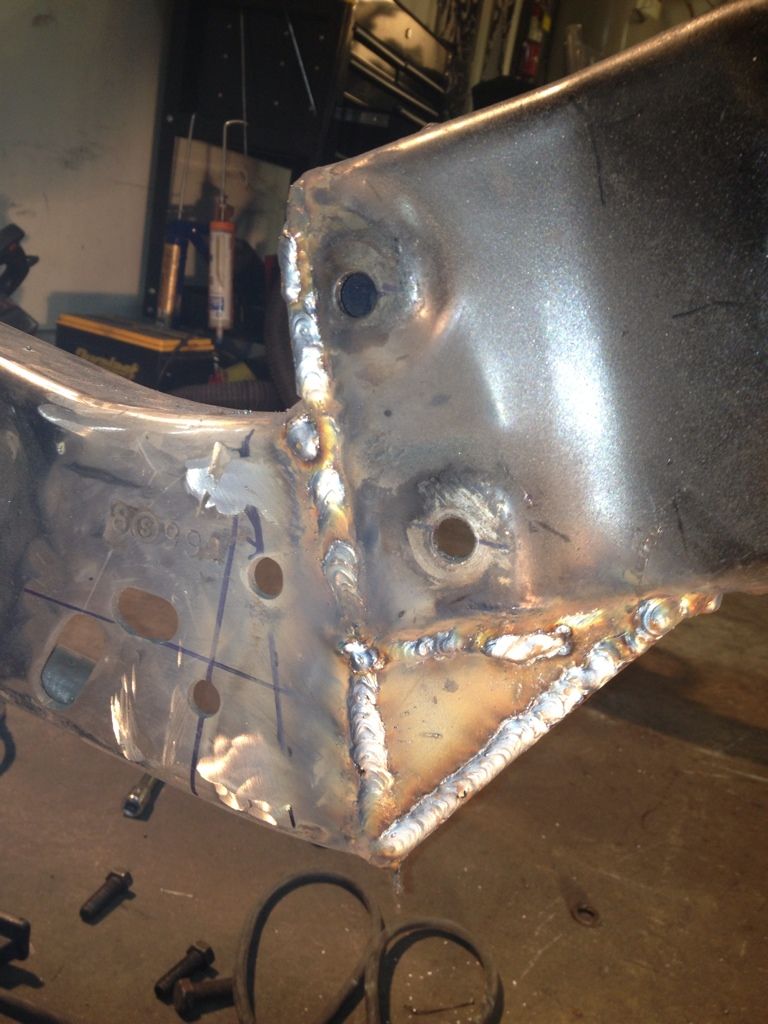
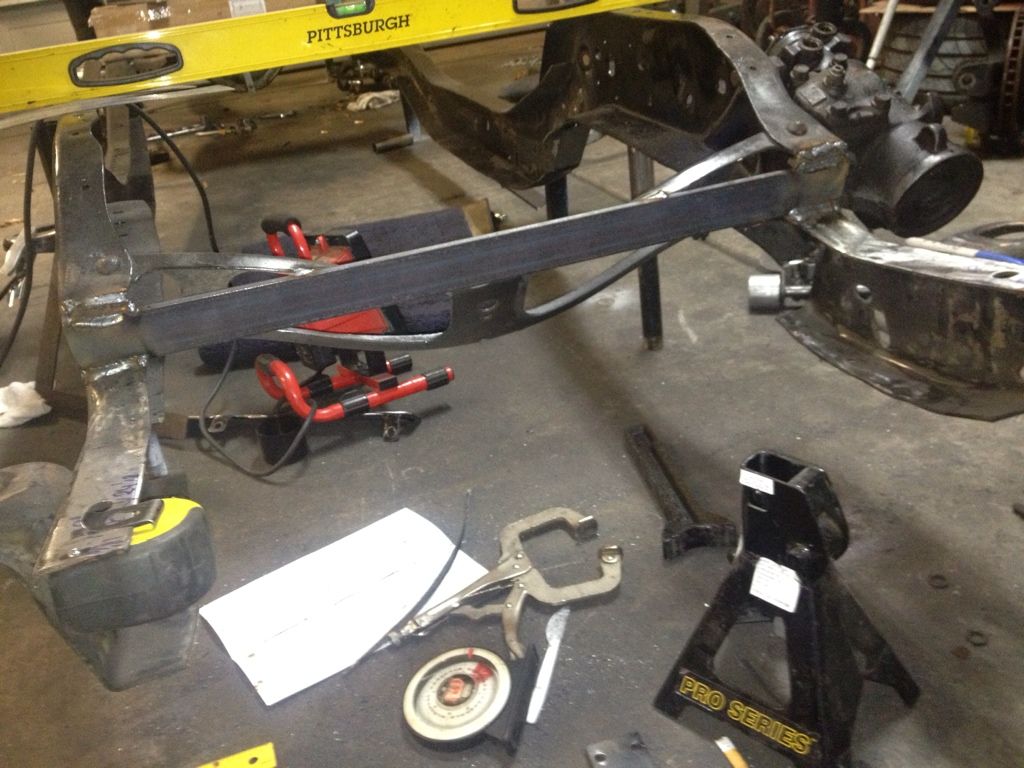
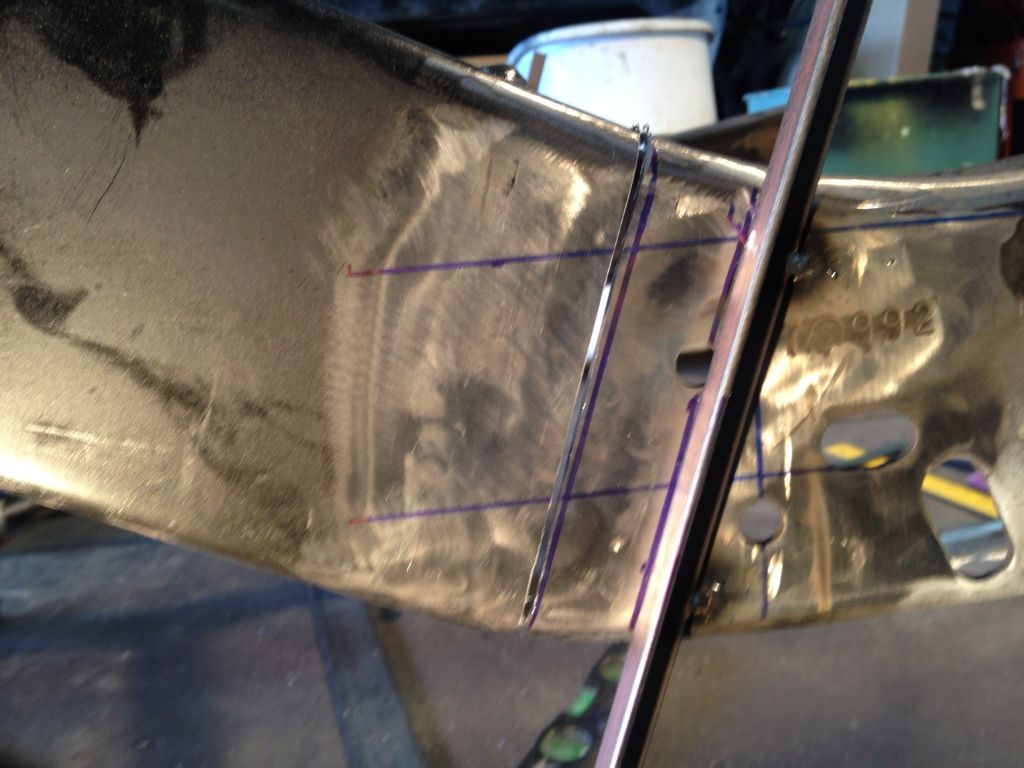
After reading countless threads and searching and reading I found a very limited amount of good usable info. Mostly vauge second hand no real facts and figures SO I just winged it on my own. The following are some pics, let me know what you guys think and if you see any issues I may not see coming. Its a 85 C10, was a longbed that I shortened several months ago. I stepped (Z'ed) it 2.5 inches, and made my cut at a 20 degree angle. This I figured would add almost 1 INCH to the wheelbase (centering the front wheel) and then cut the front at the same angle only reversed of course. Does that sound right? Comments please.......   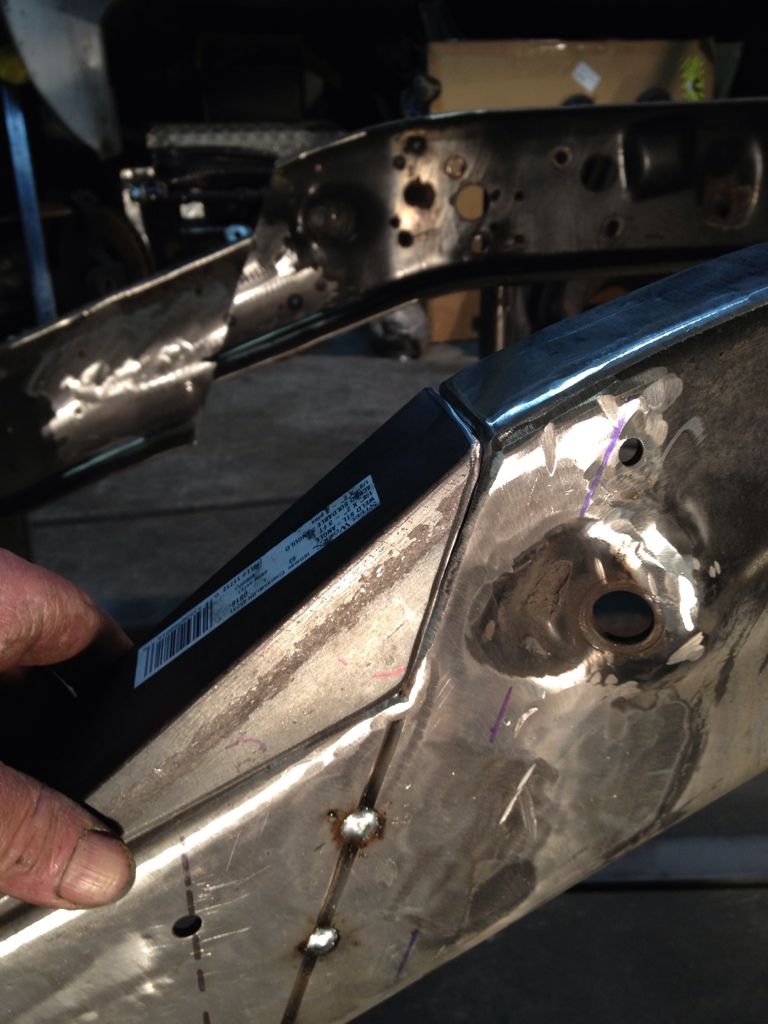 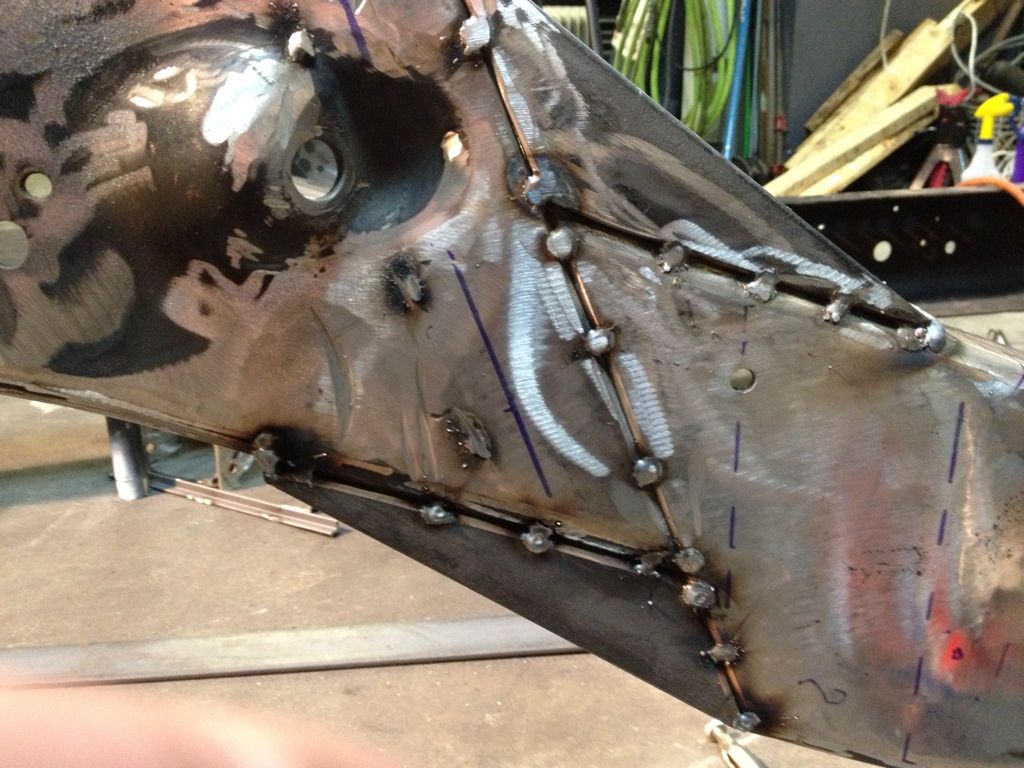 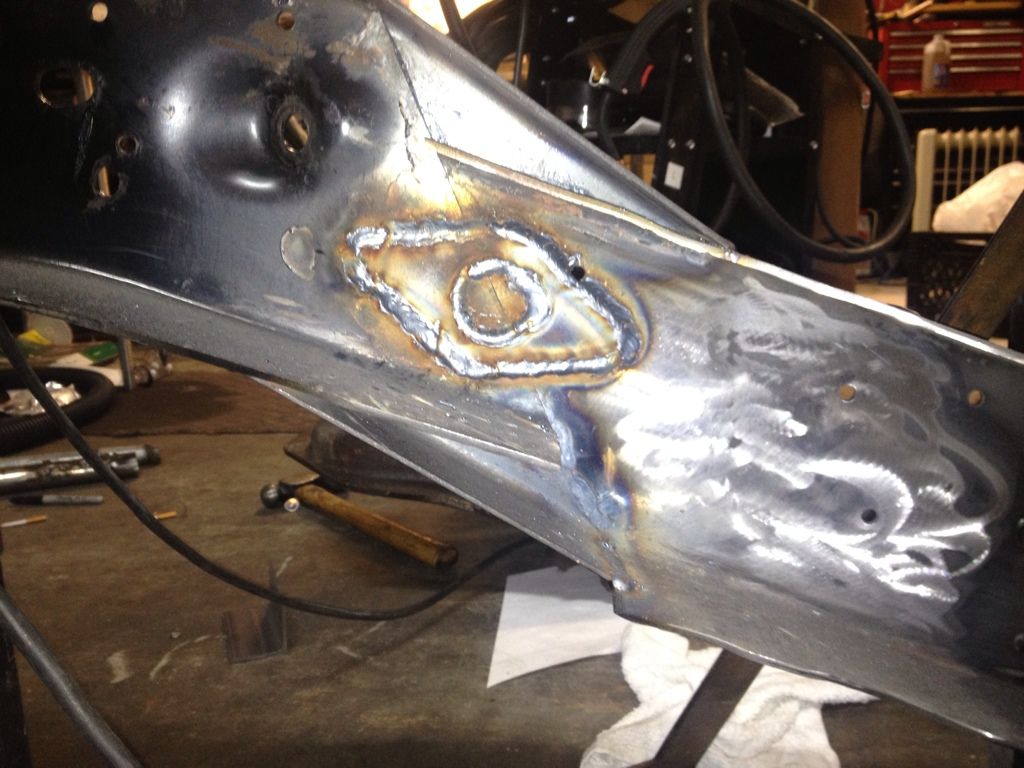 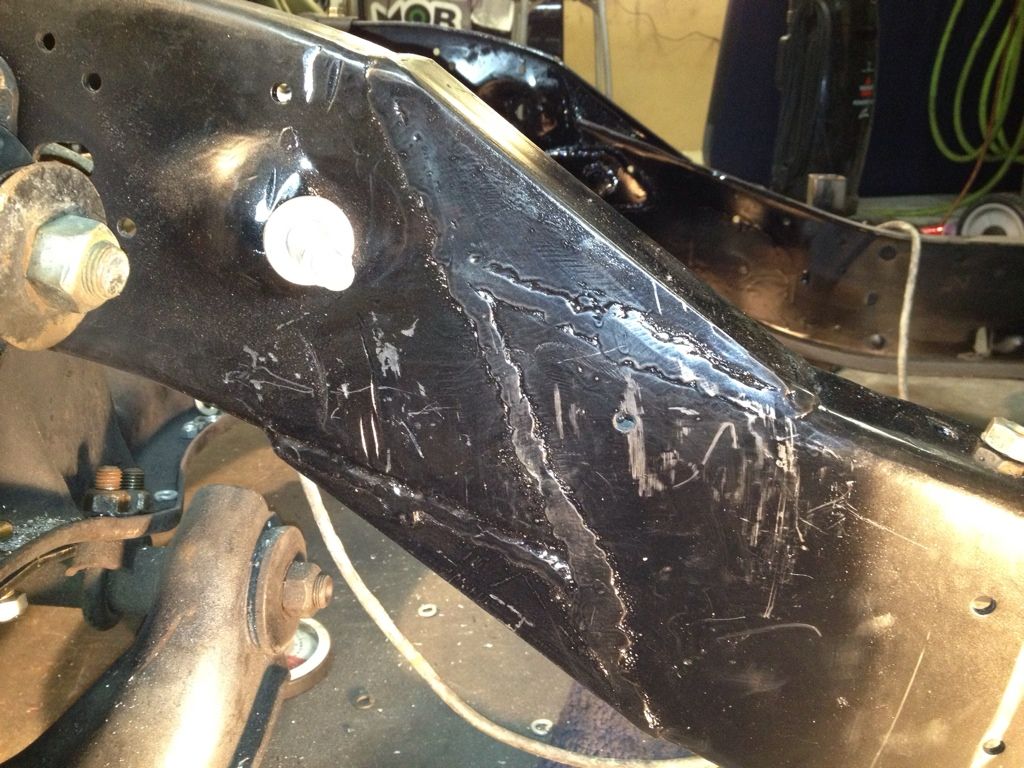
Last edited by wraprail; 02-10-2013 at 10:34 AM. |

|

|
|
02-10-2013, 10:45 AM
|
#2 |
|
Registered User
Join Date: Sep 2010
Location: Lake Havasu City Arizona
Posts: 863
|
Re: First time frame Z
        Posted via Mobile Device |
|
|
|
|
02-10-2013, 10:49 AM
|
#3 |
|
Registered User
Join Date: Sep 2010
Location: Lake Havasu City Arizona
Posts: 863
|
Re: First time frame Z
  Posted via Mobile Device |
|
|
|
|
02-10-2013, 03:32 PM
|
#4 |
|
Registered User
Join Date: Jul 2009
Location: San Jose Ca
Posts: 2,871
|
Re: First time frame Z
Your prep work is great. I think most people cut the front horns off with a straight cut and remove an inch (or whatever amount you moved forward). I'm not sure but you might run into clearance issues.
|
|
|
|
|
02-10-2013, 07:41 PM
|
#5 |
|
Registered User
Join Date: Sep 2010
Location: Lake Havasu City Arizona
Posts: 863
|
Re: First time frame Z
Thanks for the response,
I thought about that ( removing material ) but seemed easier to just cut the same angle and make one cut instead of two. I have not tried fitting the core support/rad yet. Hope it fits! Posted via Mobile Device |
|
|
|
|
02-10-2013, 07:45 PM
|
#6 |
|
67-72 parts collector,
 Join Date: Nov 2002
Location: Mid-MO
Posts: 22,686
|
Re: First time frame Z
I think you have done excellent.
I will be following your progress.
__________________
Keith Convert to disc brakes. http://67-72chevytrucks.com/vboard/s...d.php?t=444823 |
|
|
|
|
02-11-2013, 02:21 AM
|
#7 |
|
Registered User
Join Date: Jan 2009
Location: Louisville,Ky
Posts: 5,811
|
Re: First time frame Z
Looks real good for your first time.
|
|
|
|
|
02-11-2013, 10:44 AM
|
#8 |
|
Senior Member
Join Date: Mar 2011
Location: West Plains, Missouri
Posts: 7,555
|
Re: First time frame Z
I've never done a "Z", but yours looks great. I agree with tiny, check fitment before going any further, best of luck...Jim
__________________
my build thread: http://67-72chevytrucks.com/vboard/s...d.php?t=459839 Jimbo's long bed step build:http://67-72chevytrucks.com/vboard/s...t=464626<br /> |
|
|
|
|
02-11-2013, 06:58 PM
|
#9 |
|
Registered User
Join Date: Sep 2010
Location: Lake Havasu City Arizona
Posts: 863
|
Re: First time frame Z
Thanks guys, without some feedback sometimes I don't know if good or bad.
Posted via Mobile Device |
|
|
|
|
02-12-2013, 02:44 AM
|
#10 |
|
Registered User
Join Date: Jan 2009
Location: Louisville,Ky
Posts: 5,811
|
Re: First time frame Z
If you ever want a laugh or be scared search any mini truck forum for a hack post.But like said check that everything fits like you want before you get too far to turn back if needed.Once your happy with everything its time to finish all the welds and make it look nice.Or if you really wanna go nuts you can fill in all the extra holes in the frame you don't need.
|
|
|
|
|
02-12-2013, 11:23 PM
|
#11 |
|
Registered User
Join Date: Aug 2011
Location: Atlanta, GA
Posts: 1,523
|
Re: First time frame Z
that looks very good. I have pics of my Z in my build thread (might help)
__________________
Best Regards, Leon M. Instagram: @TheDirtyDianah
Bagged | 6.0L LS | T-56 (6-Speed Manual) | Turbo Burnout/Rolling Video: Chevy C10 Stepside 6.0L LSx & 6-Speed Manual |
|
|
|
|
02-14-2013, 06:33 PM
|
#12 |
|
Registered User
Join Date: Jul 2010
Location: Norman, Oklahoma
Posts: 557
|
Re: First time frame Z
From all the Z's i've seen, yours looks spot on. Worst case scenario if it causes fitment issues of the core support/radiator assembly, you just make a vertical cut on the top portion of each side and cap it.
Good work!
__________________
Max Max's bagged 81 81 rcsb bagged, 22s, build in progress 09 ext cab, 24" U2's, DD sub/amp |
|
|
|
|
02-15-2013, 06:31 PM
|
#13 |
|
Registered User
Join Date: Sep 2010
Location: Lake Havasu City Arizona
Posts: 863
|
Re: First time frame Z
Thanks. Thats what I was thinking. Lower rad hose has me a little worried. Maybe move the outlet in the rad up a few inches. We will see soon.....
Posted via Mobile Device |
|
|
|
|
02-17-2013, 10:39 PM
|
#14 |
|
its just $$$$$
Join Date: Jul 2003
Location: OK
Posts: 2,078
|
Re: First time frame Z
Looks good. I did mine the same except at the front I cut it straight and removed an inch
Posted via Mobile Device |
|
|
|
|
02-22-2013, 10:56 AM
|
#15 |
|
Registered User
Join Date: Jun 2006
Location: Tucson, Az
Posts: 705
|
Re: First time frame Z
looking good keep it up

|
|
|
|
|
04-02-2013, 05:09 AM
|
#16 |
|
Registered User
Join Date: Sep 2010
Location: Lake Havasu City Arizona
Posts: 863
|
Re: First time frame Z
Time I updated this thread as i'm driving the truck now.
If I was to do this Z again I would do it exactly the same. I planned this out, spent alot of time starring out in space thinking it through and I hit on the perfect frame Z. If there was a book on how to Z a squarebody frame it would be written about mine. The 20 degree cut moves the wheel center in fender, the 20 degree back cut on the front frame allows the factory (2 each side) bumper bracket holes to be retained and the brackets line up perfectly. Radiator core support drops in with only slight trimming around steering box and stock 19 inch radiator fits with stock mounts and lower hose. I could have moved the motor back that 1 inch but I left it in "stock" location. I did this to keep the shifter location as far forward on my T56 as possible. I use an electric fan anyways so no issue. I am using the extra tall stock truck air cleaner and it does just hit the hood. I used a 4X4 hi hump for my 6 speed clearance so I do not know if this is needed with an auto. Biggest surprise was the steering. Every frame Z I have seen has used 3 u joints and routed around the upper control arm for clearance. My Z is 2.5 inches and all I did was slightly raise the lower firewall column mount and lower the upper mount about 3/4 inch. I like the steering wheel low anyways. Lower the better. It may not be low enough for some of you guys ( only lays the saddle tanks on the ground with stock lower arms and 2600 bags) but with all the things going on with a frame Z and all the things that can go wrong I think I found A setup that is as close to perfect as you can get. Now for a ****pile of pictures. Posted via Mobile Device |
|
|
|
|
04-02-2013, 05:16 AM
|
#17 |
|
Registered User
Join Date: Sep 2010
Location: Lake Havasu City Arizona
Posts: 863
|
Re: First time frame Z
 Bumper bracket and lower rad. hose over frame 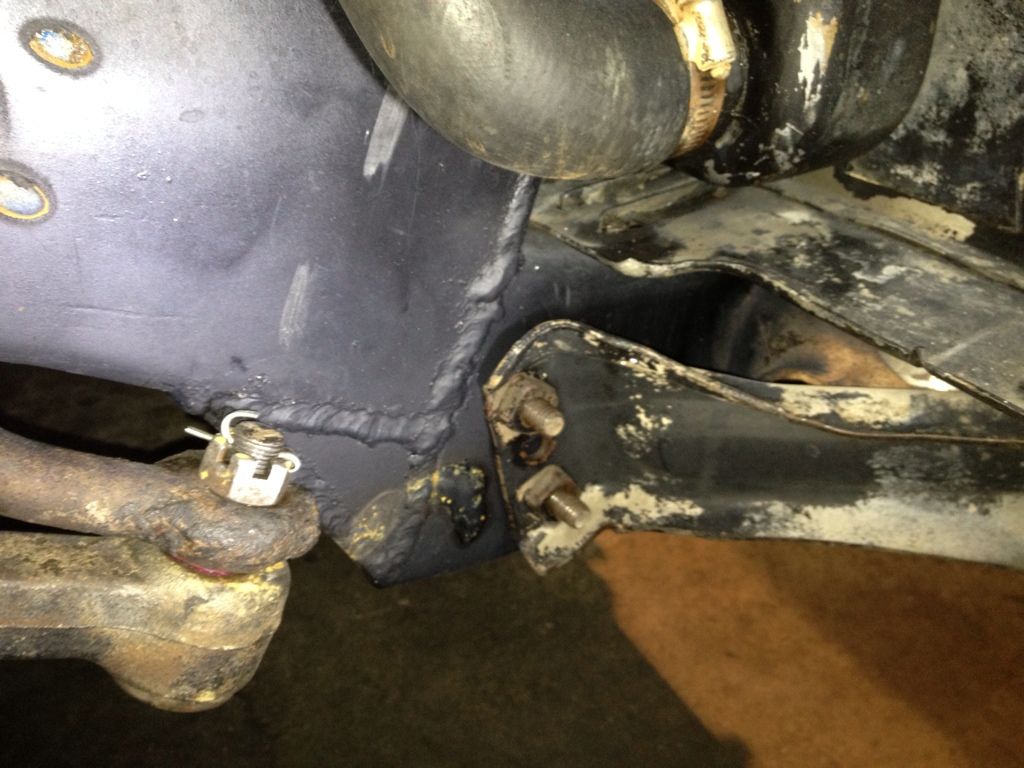 Clearance from frame cut/drop to radiator. Like 2 inches 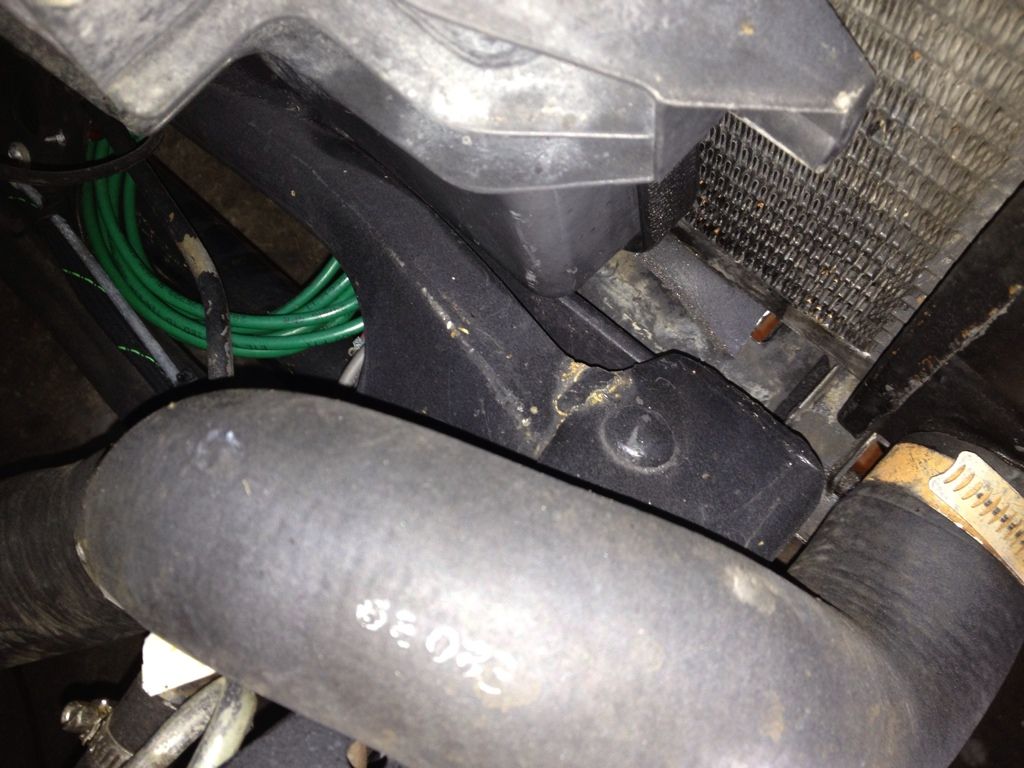 Steering box trimming on core support also radiator clearance 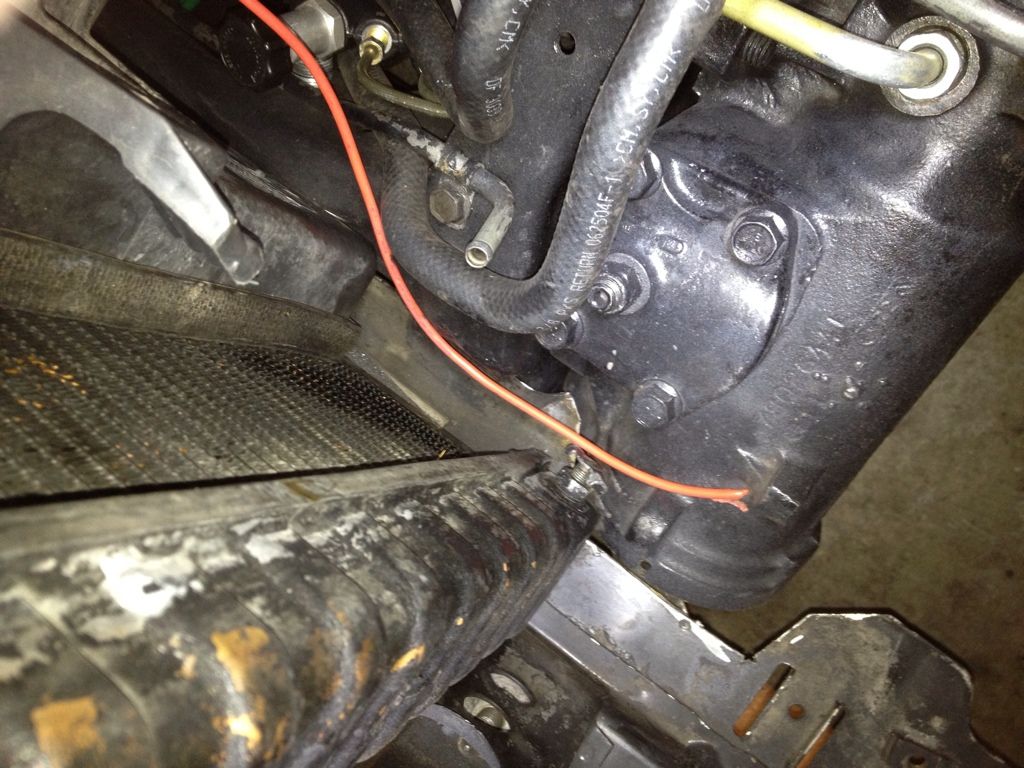 Posted via Mobile Device |
|
|
|
|
04-02-2013, 05:23 AM
|
#18 |
|
Registered User
Join Date: Sep 2010
Location: Lake Havasu City Arizona
Posts: 863
|
Re: First time frame Z
Steering shaft over upper control arm in factory (almost) location
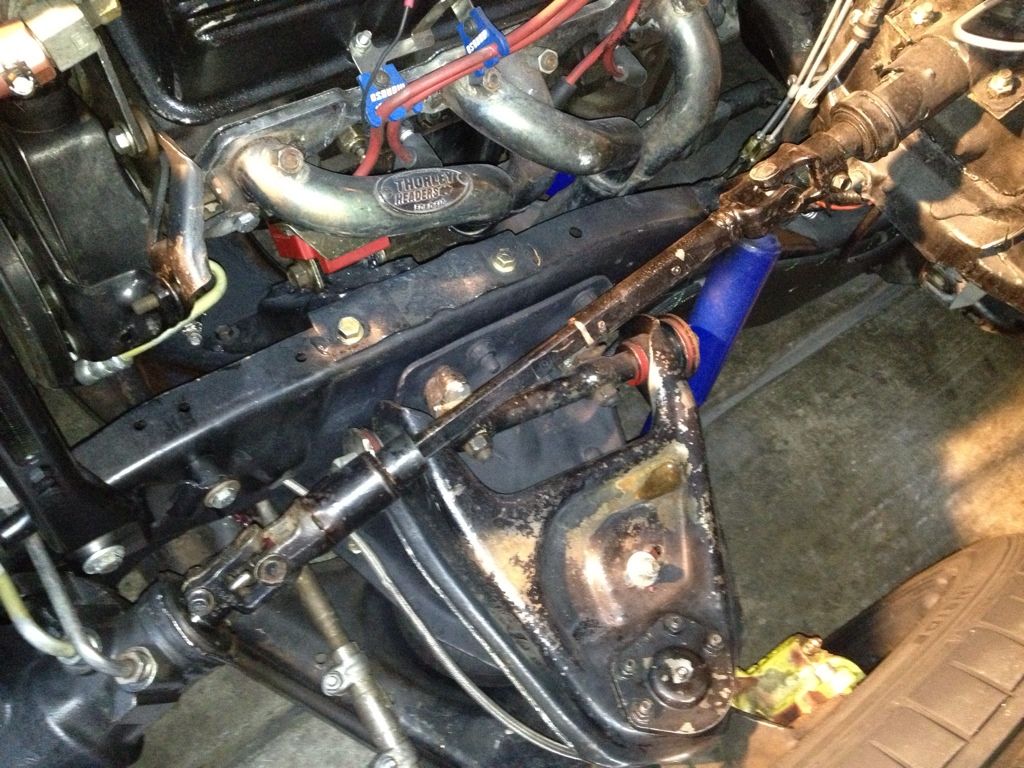 Driver side frame. Note relocated shocks 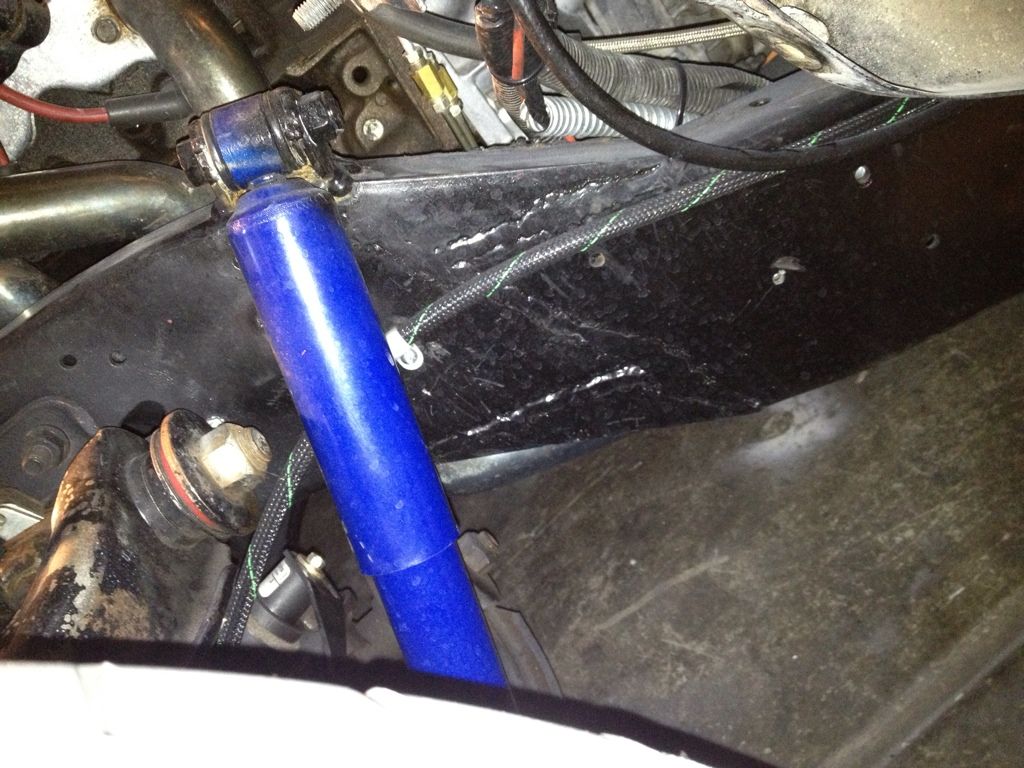 Pass side. 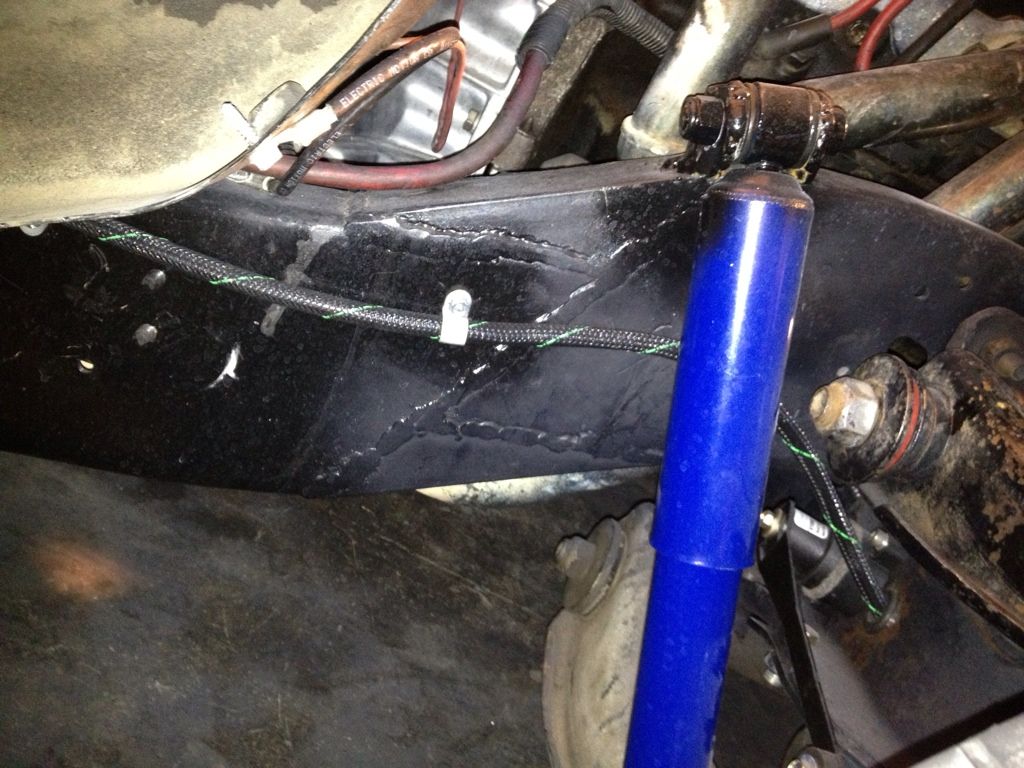 Firewall clearance. Had to lose the factory A/C (so far) 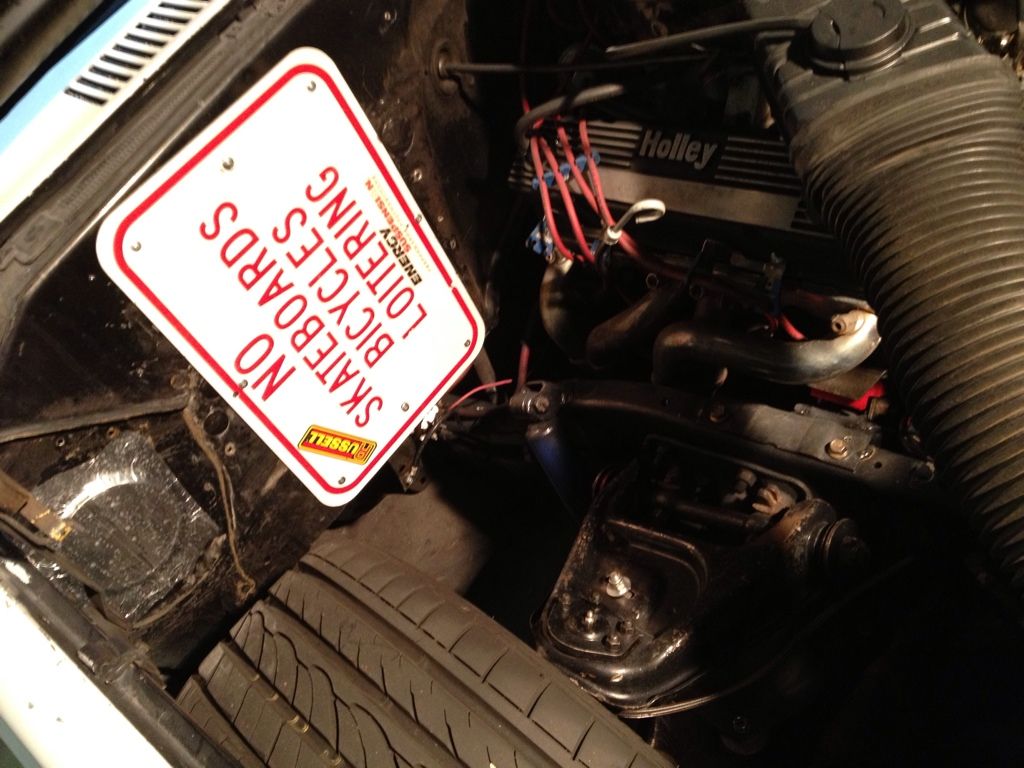 Water pump electric fan clearance. ( its a big dam fan) 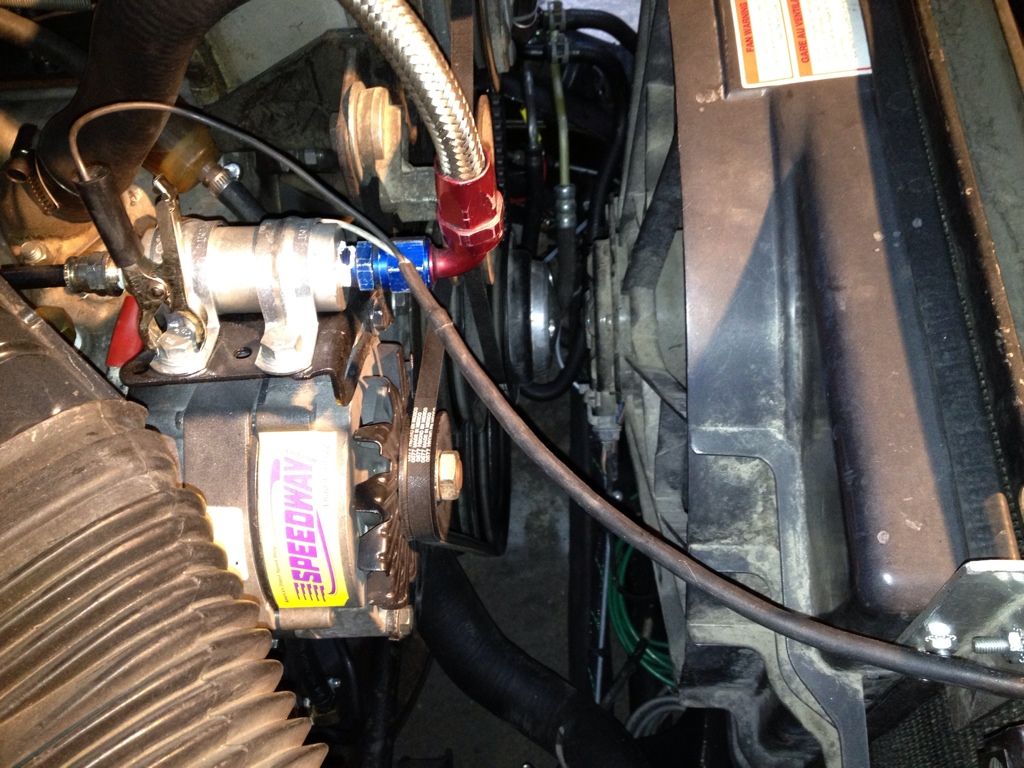 Posted via Mobile Device |
|
|
|
|
04-02-2013, 05:31 AM
|
#19 |
|
Registered User
Join Date: Sep 2010
Location: Lake Havasu City Arizona
Posts: 863
|
Re: First time frame Z
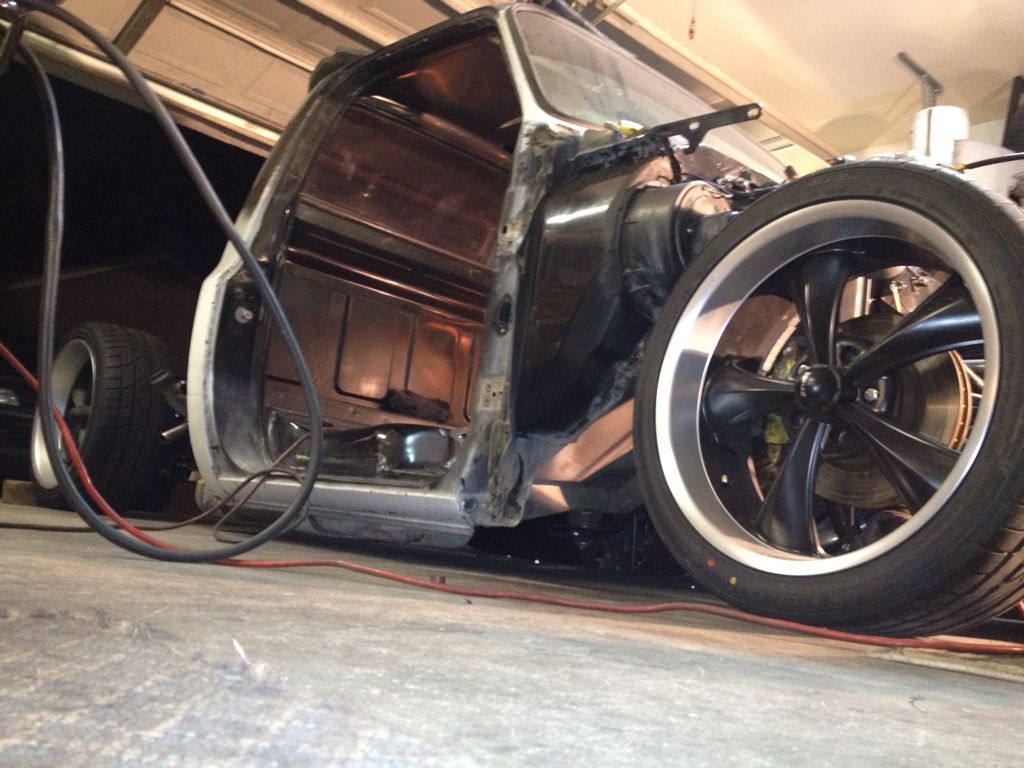
 Ok here is the pass front wheel after 20 degree 2.5 Z. As you can see, centered with loads of firewall clearance. Thats a 245/40zr20 in a 20x8.5 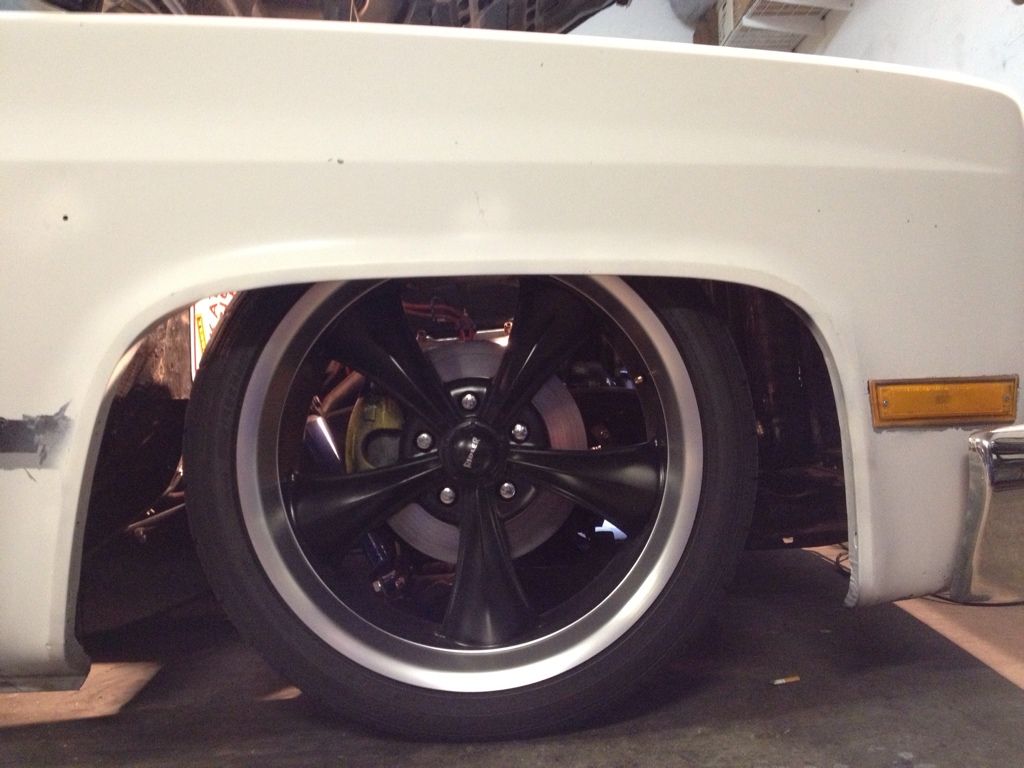 And here ya go. This is aired out i think. 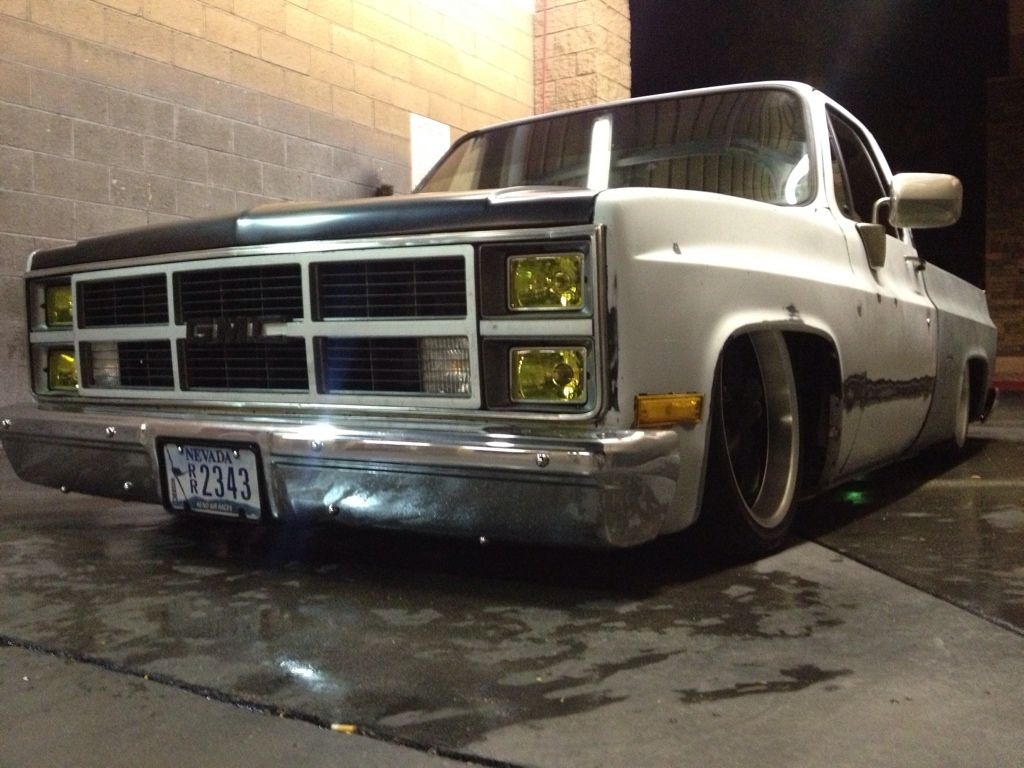 Posted via Mobile Device |
|
|
|
|
04-02-2013, 05:48 AM
|
#20 |
|
Registered User
Join Date: Sep 2010
Location: Lake Havasu City Arizona
Posts: 863
|
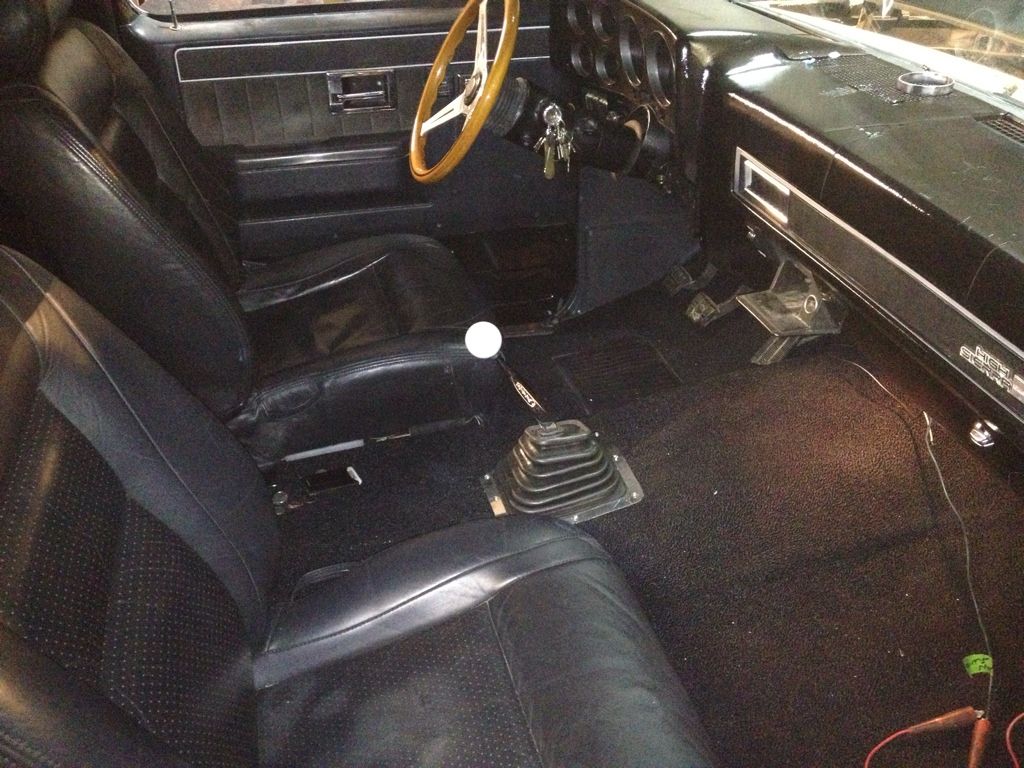
Re: First time frame Z
One last one showing my T56 shifter location. Won't work with a bench seat but with my buckets (97 cadillac eldorado) for me it's ideal. Not sure which I like more, the 6 speed or the Heated leather seats.
  Posted via Mobile Device |
|
|
|
|
04-02-2013, 06:34 AM
|
#21 |
|
Registered User
Join Date: Feb 2012
Location: Ruskin Florida
Posts: 4,549
|
Re: First time frame Z
Very nice. Might try this myself now. How many cores does your radiator have?
__________________
70 swb 4x4 406sbc 700r4 203/205 d60/14blt locker yadda yadda http://67-72chevytrucks.com/vboard/s...88#post6935688 Yeller 72 Blazer 2wd conversion project "No Daggum Money" http://67-72chevytrucks.com/vboard/s...d.php?t=550804 LS1-T56 3.73 LSD super budget build Blanco-2014 Sierra SWB https://67-72chevytrucks.com/vboard/...d.php?t=810350 |
|
|
|
|
04-02-2013, 10:19 AM
|
#22 |
|
Senior Member
Join Date: Mar 2011
Location: West Plains, Missouri
Posts: 7,555
|
Re: First time frame Z
Glad you are happy with it, I like that you posted back with how it worked out, nice job...Jim
__________________
my build thread: http://67-72chevytrucks.com/vboard/s...d.php?t=459839 Jimbo's long bed step build:http://67-72chevytrucks.com/vboard/s...t=464626<br /> |
|
|
|
|
04-03-2013, 12:33 AM
|
#23 |
|
Registered User
Join Date: Sep 2010
Location: Lake Havasu City Arizona
Posts: 863
|
Re: First time frame Z
Thanks guys. This is the first frame cutting and welding project I have done and while it was alot of work it was not really that hard. Since i'm really a one man band planning was key. Removing the cab and reinstalling it (and the bed as well) with one person was a challenge but doable. Also I am unemployed and have been for a few years which allowed me to work only on this one project 7 days a week otherwise it would have taken me over a year I bet to do what I did in 3 months.
Anyway, It's a three (3) row radiator/.. |
|
|
|
|
04-03-2013, 12:48 AM
|
#24 |
|
Registered User
Join Date: Jul 2010
Location: Norman, Oklahoma
Posts: 557
|
Re: First time frame Z
You did a great job, and it'll be an easy thread for first timers to follow along and get the just of the Zing process.
__________________
Max Max's bagged 81 81 rcsb bagged, 22s, build in progress 09 ext cab, 24" U2's, DD sub/amp |
|
|
|
|
04-03-2013, 12:52 AM
|
#25 |
|
Registered User
Join Date: Jul 2010
Location: Norman, Oklahoma
Posts: 557
|
Re: First time frame Z
question. In post #17 in the last picture, what are those rubber lines that run across the frame?
Are those power steering? Also do you happen to have any pictures prior to the Z?
__________________
Max Max's bagged 81 81 rcsb bagged, 22s, build in progress 09 ext cab, 24" U2's, DD sub/amp |
|
|
|
 |
| Bookmarks |
|
|


 Linear Mode

