
|
Register or Log In To remove these advertisements. |
|
|
|
|||||||
 |
|
|
Thread Tools | Display Modes |
 06-09-2013, 03:18 PM
|
#1 |
|
Registered User
Join Date: Aug 2005
Location: Manvel, Texas
Posts: 69
|
My 65 GMC / Chevy Build
WARNING! This build is NOT for the "numbers matching" guys! Basically, I always liked parts of both the GMCs and Chevs, so I put them together to reflect my tastes. This isn't a show truck or anything amazingly nice. Just a nice driver. So here goes...
Just over 2 years ago I found a 65 GMC for sale and decided to take it on. It already had an SBC / TH350 swap done. Little did I know, it would snowball into a full-on project riddled with plenty of fixing of the previous owners' shortcuts. 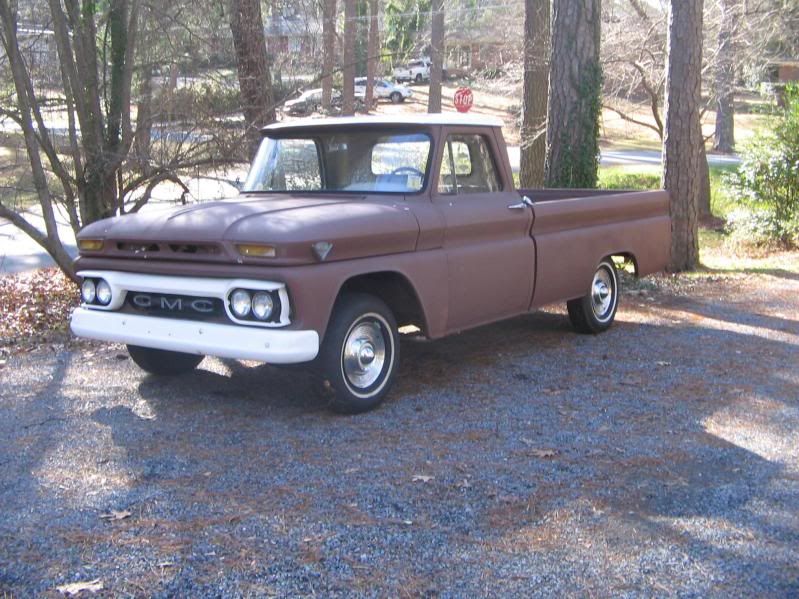 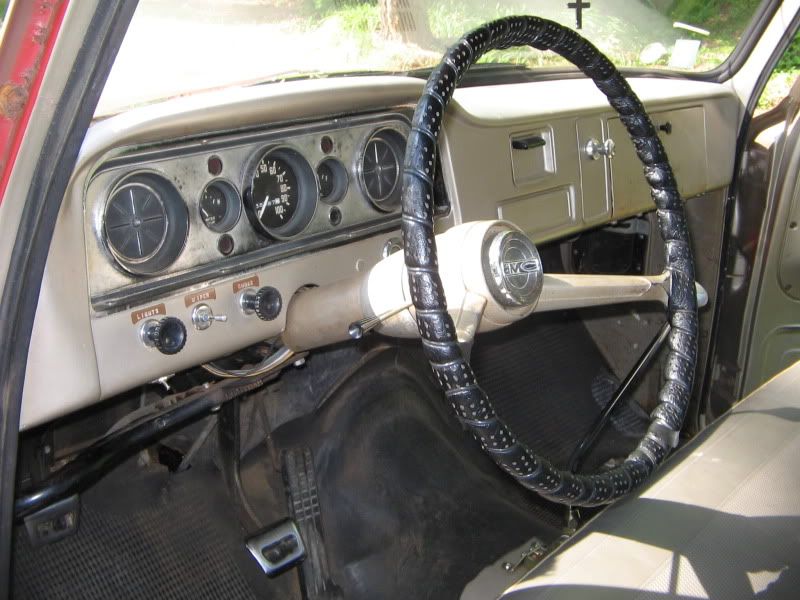 It looked relatively clean when I got it... more rust than originally revealed though. So... first thing is an altitude adjustment. I used 2" coils in front, but it wasn't low enough. So I ended up taking them back out and cutting a full coil off each one. For the rear, I got the replacement 5" leaf springs. 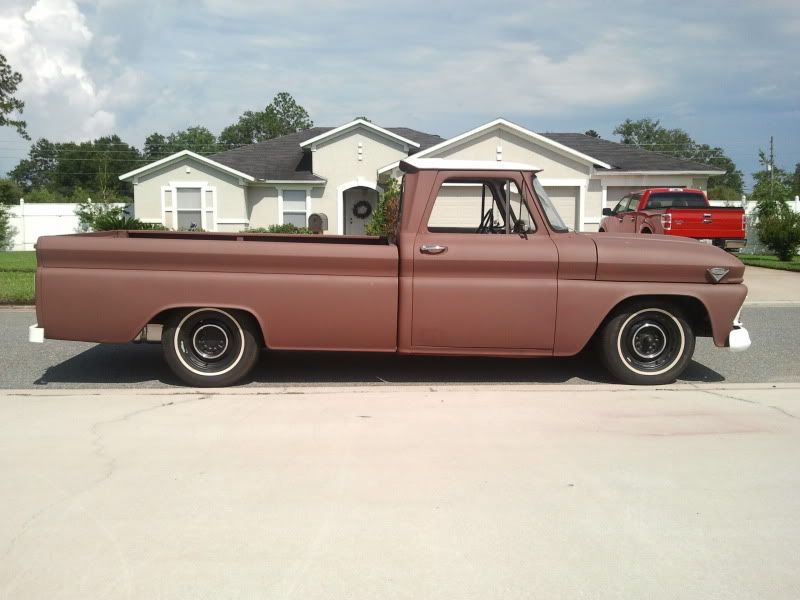 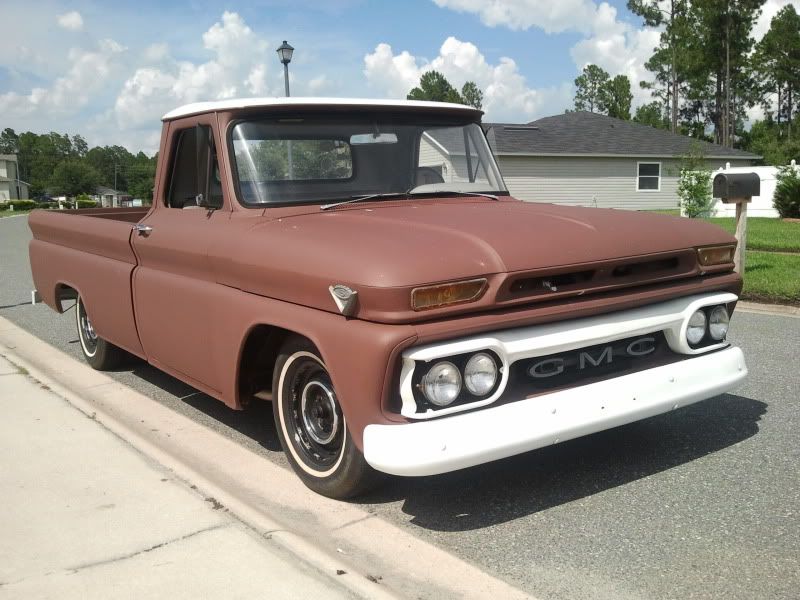
Last edited by forcedinduction; 06-09-2013 at 03:32 PM. |

|

|
|
06-09-2013, 03:25 PM
|
#2 |
|
Registered User
Join Date: Aug 2005
Location: Manvel, Texas
Posts: 69
|
Re: My 65 GMC / Chevy Build
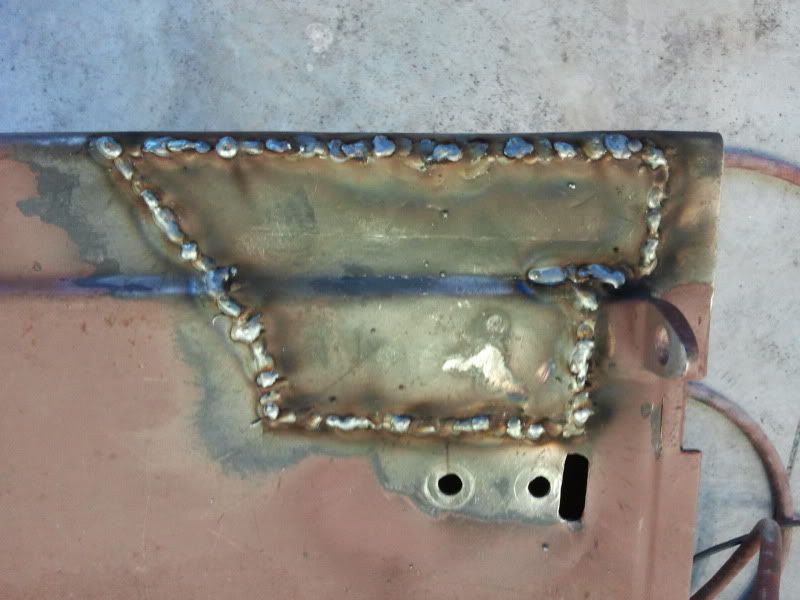
The fuel sender leaked and I wanted to relocate the tank, so I got the kit from LMC. Alot of work went into the tank mounts cuz I didnt want it hanging down too far like I have seen on this forum. Unfortunately, I don't have any pics of that. So let's move onto filling the original filler neck hole.
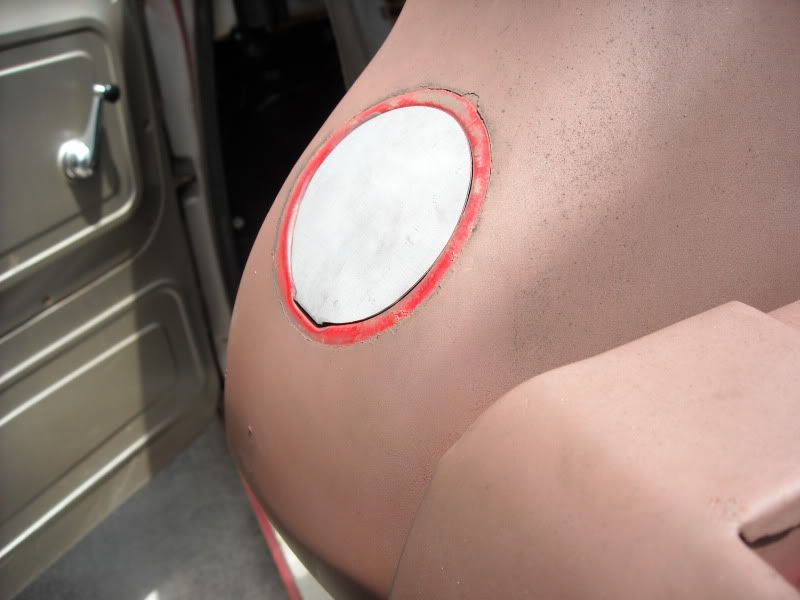 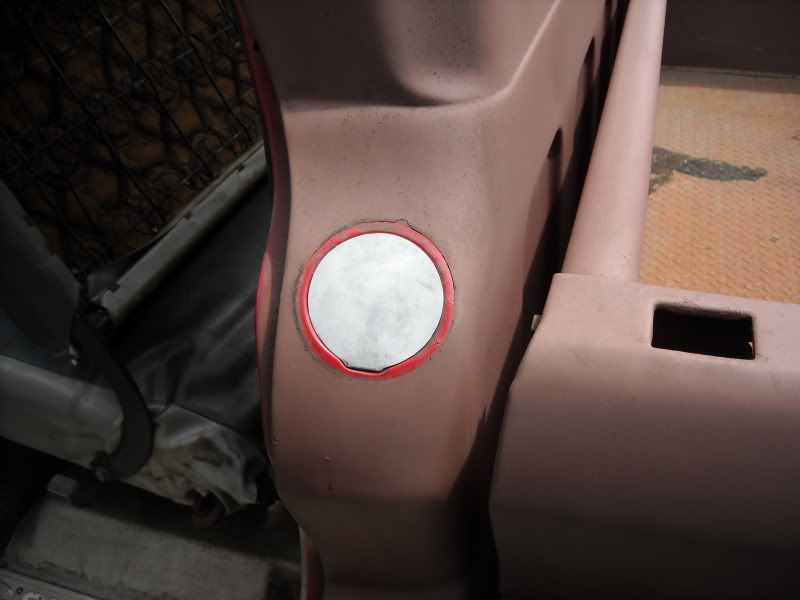 I found that a spray can lid is very close to the correct size. I traced around one onto 18 gauge and cut it a little big, then trimmed as needed. 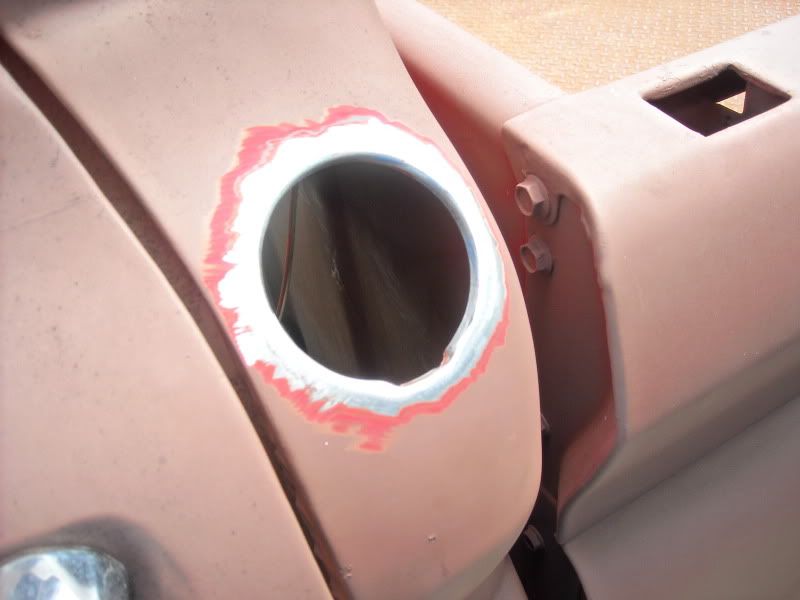 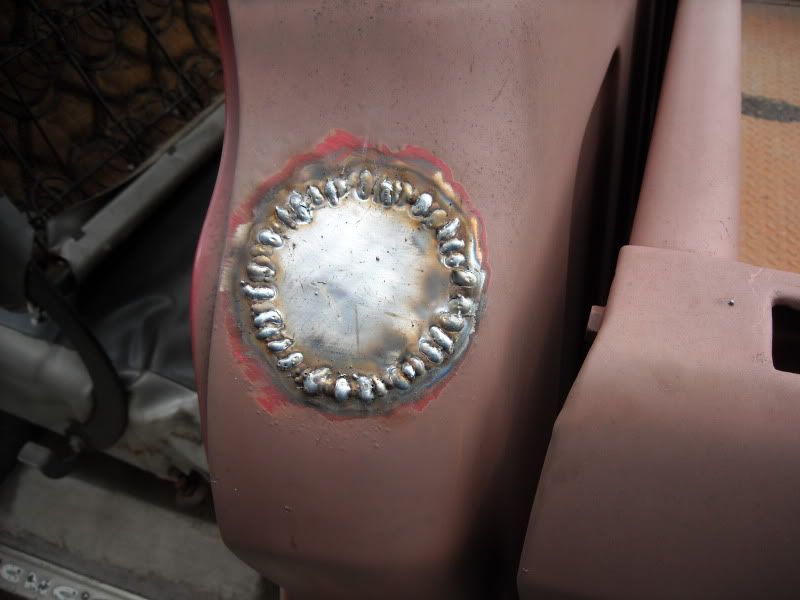 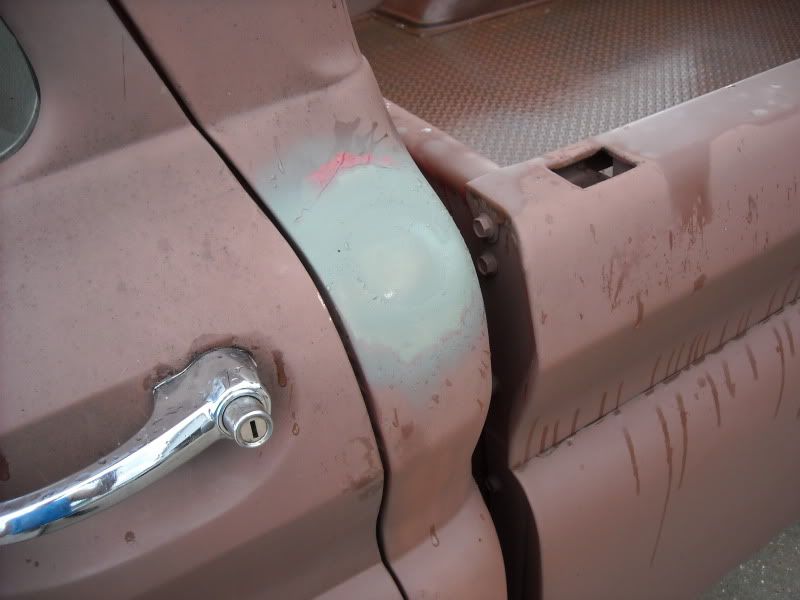
Last edited by forcedinduction; 06-09-2013 at 03:40 PM. |
|
|
|
|
06-09-2013, 03:48 PM
|
#3 |
|
Registered User
Join Date: Aug 2005
Location: Manvel, Texas
Posts: 69
|
Re: My 65 GMC / Chevy Build
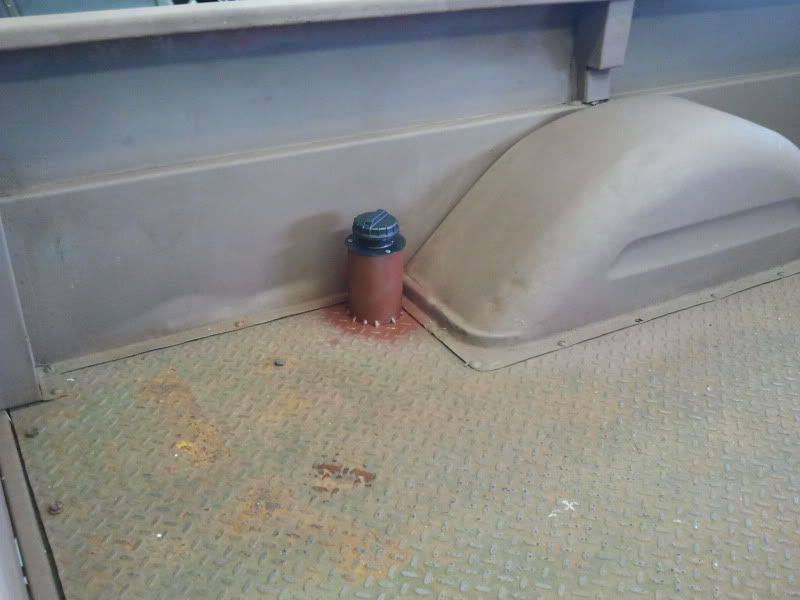
For the filler, I got a fill tube from a 96 Mustang and modified it to work. I used a 1/4" thick pipe to mount the filler tube in the bed. I figured a seriously sturdy mount would be a good idea... just in case. Here it is tacked in place.
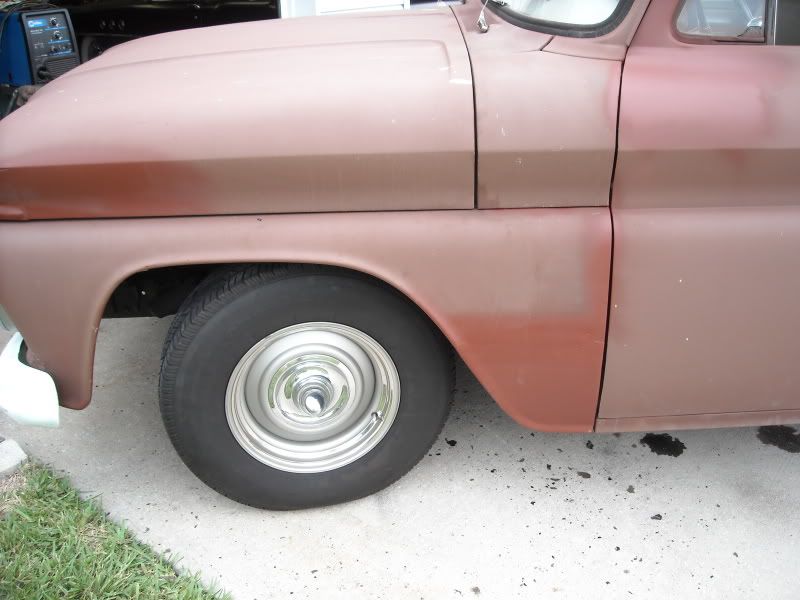
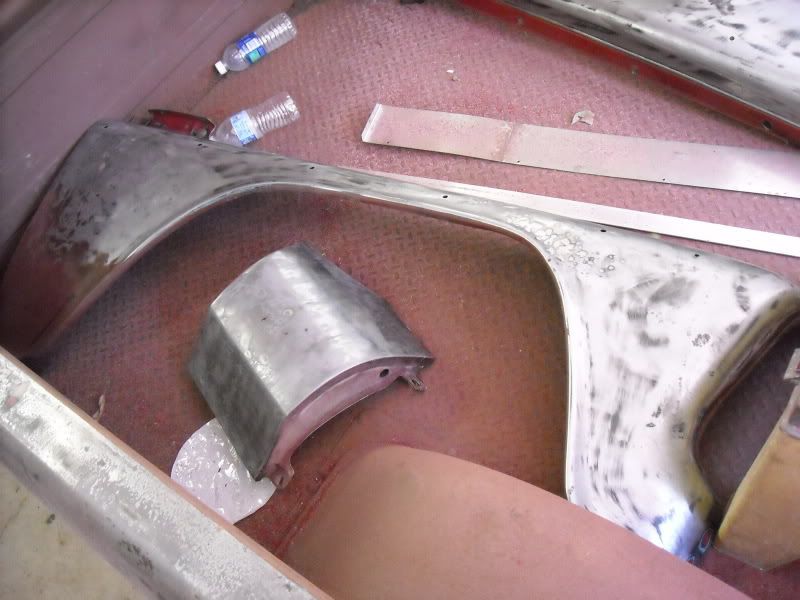
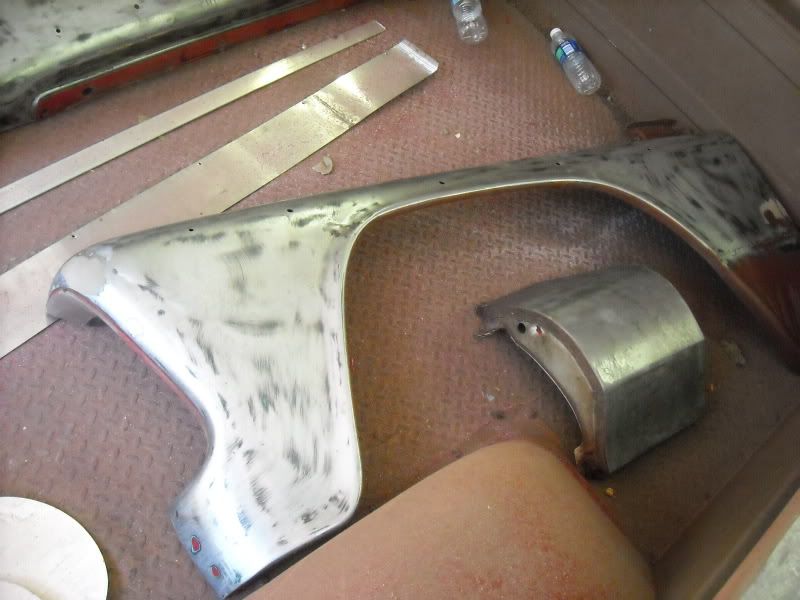
 After that I decided to find the source of those rust bubbles on the lower front drivers' fender. Oh what a surprise I found! 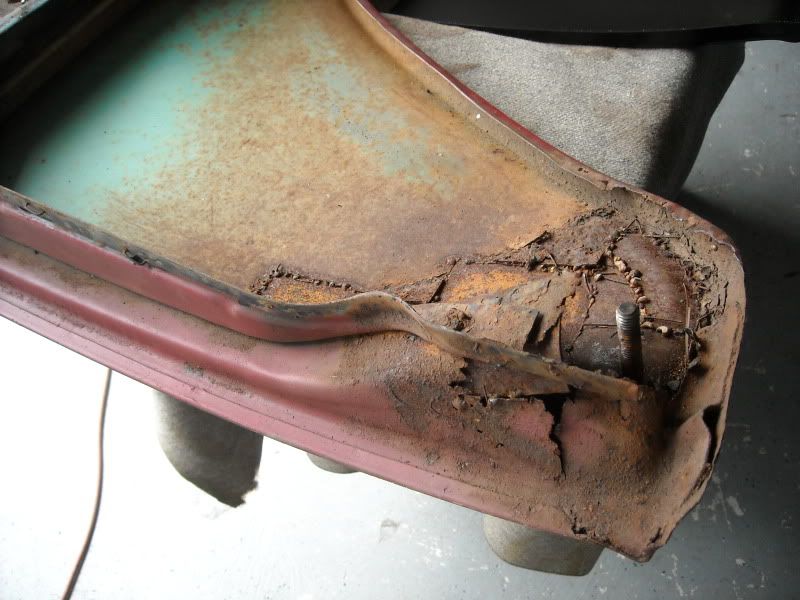 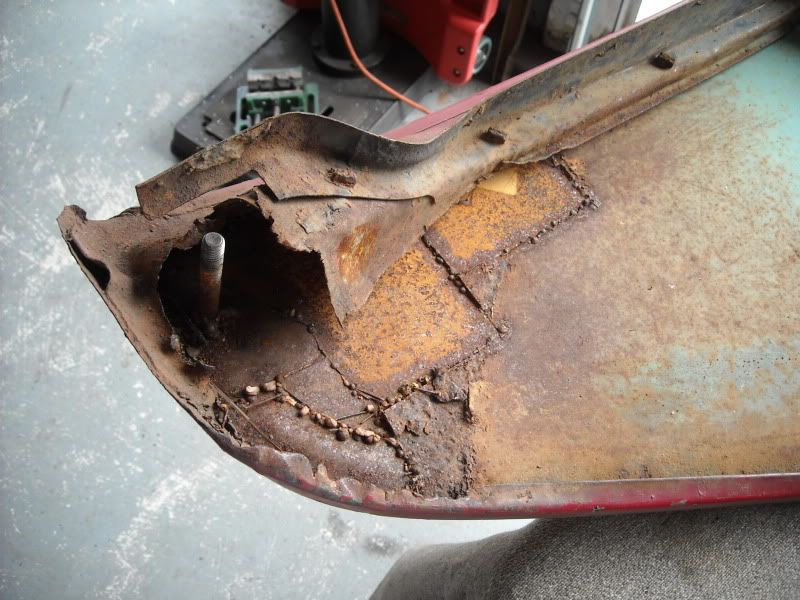 Not only was the fender mount gone and a bolt welded in place of it, but the fender had been patched together like a quilt! UGH!! Time to start cuttin. 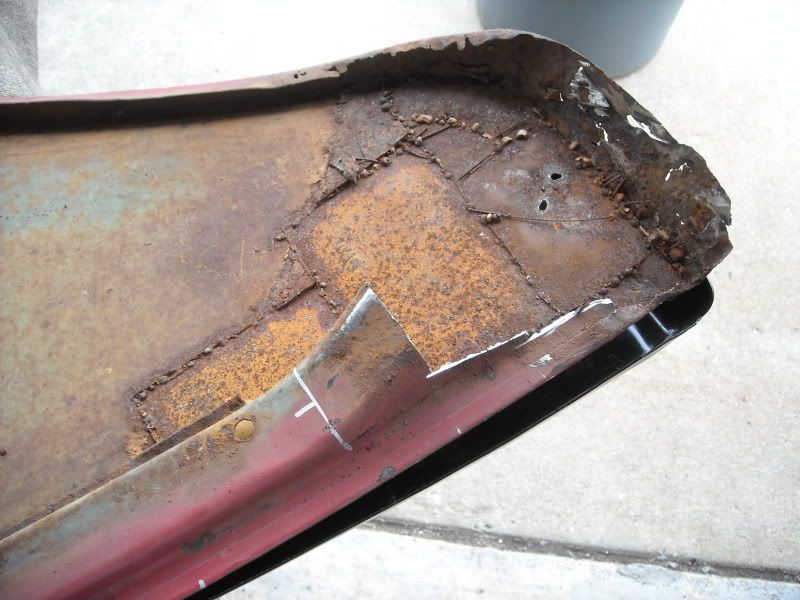
|
|
|
|
|
06-09-2013, 03:52 PM
|
#4 |
|
Registered User
Join Date: Aug 2005
Location: Manvel, Texas
Posts: 69
|
Re: My 65 GMC / Chevy Build
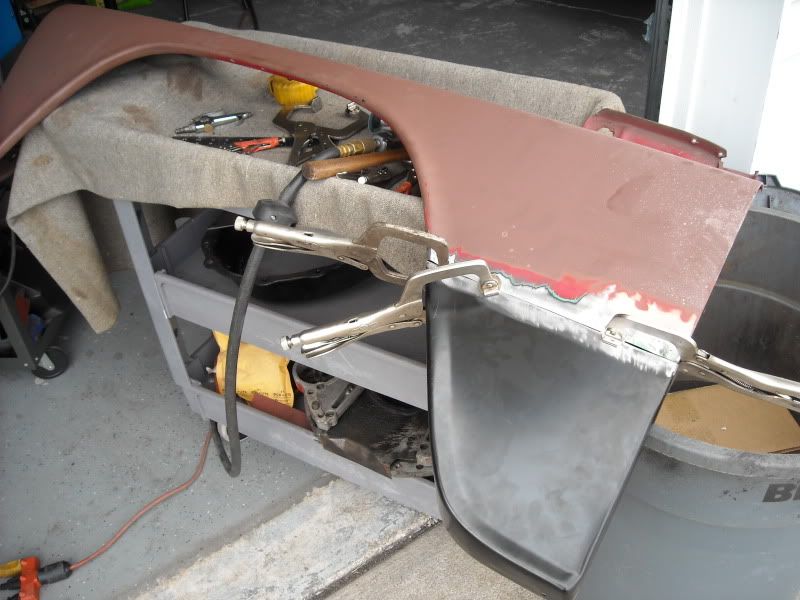
I had a piece of a patch panel left over from another job so I started hackin it up to make the mount.
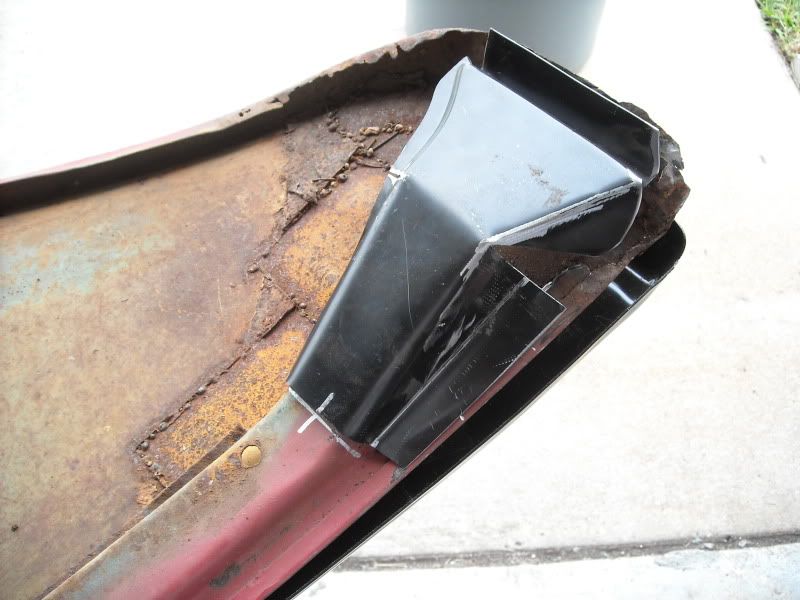  I had the patch panel for the fender, so I marked the line, took a deep breath and put the wheel of death to work. 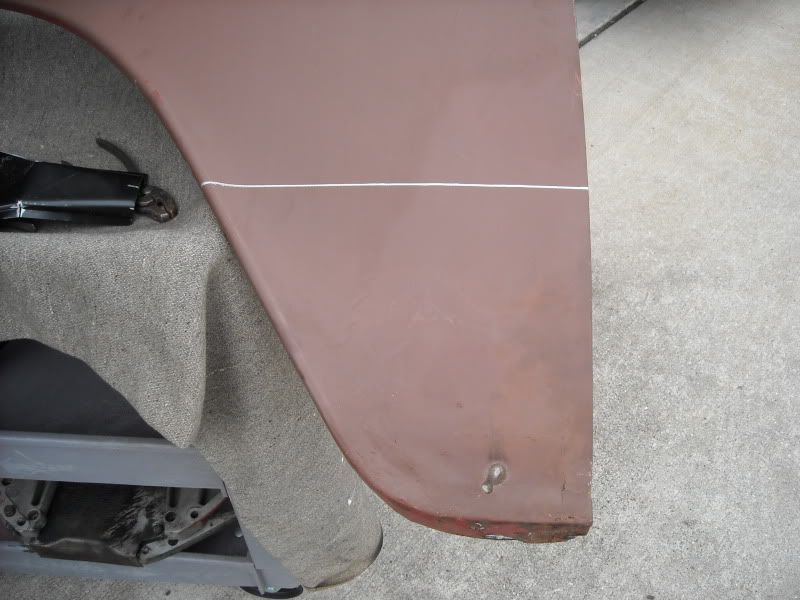 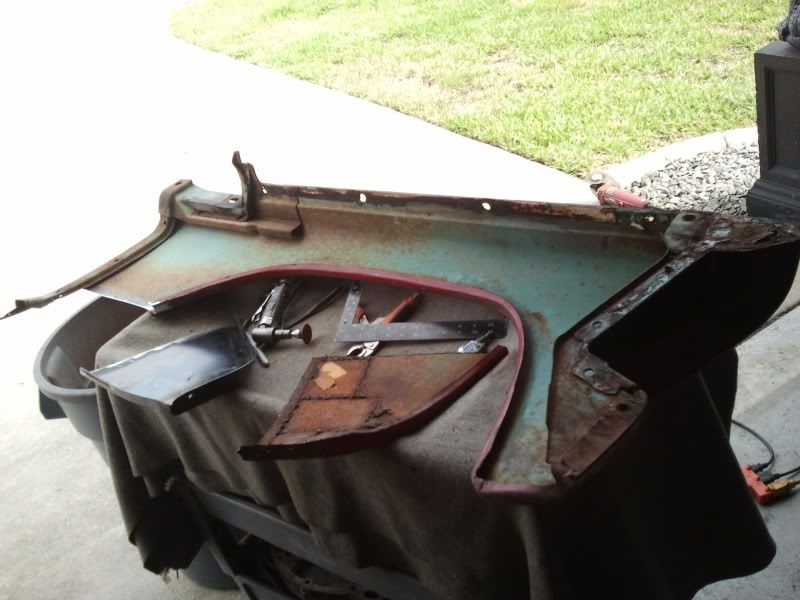
|
|
|
|
|
06-09-2013, 03:58 PM
|
#5 |
|
Registered User
Join Date: Aug 2005
Location: Manvel, Texas
Posts: 69
|
Re: My 65 GMC / Chevy Build
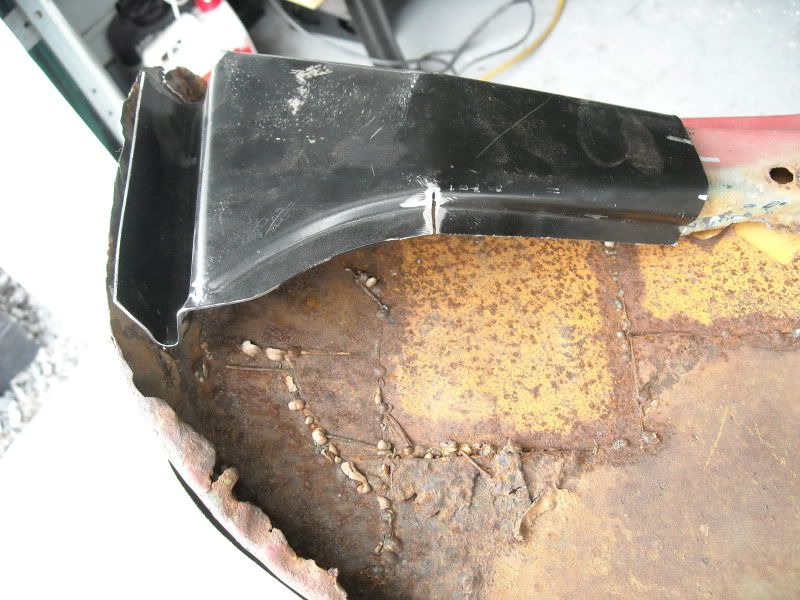
Before welding it on, I measured about 2 dozen times. Then started the long process of a gojillion tack welds to keep the heat from warping the panels.
 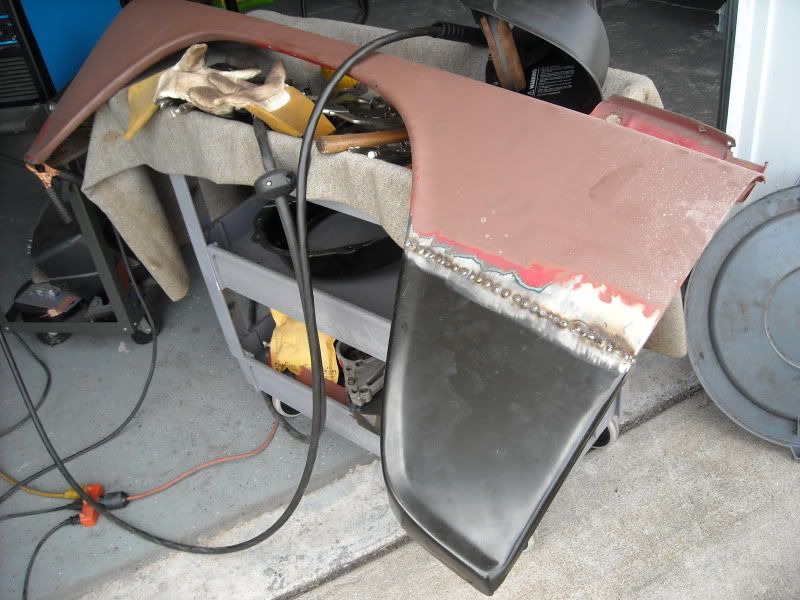  And it actually fit! I was stoked! 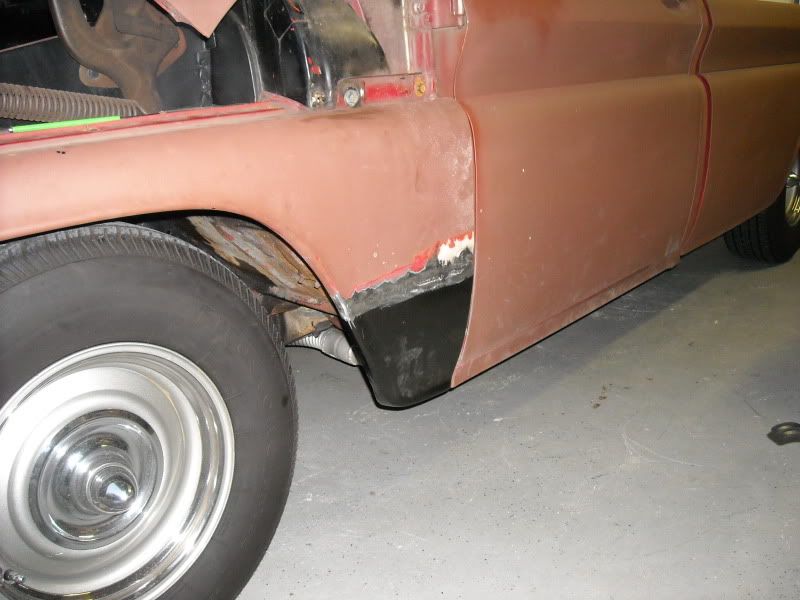
|
|
|
|
|
06-09-2013, 04:11 PM
|
#6 |
|
Registered User
Join Date: Aug 2005
Location: Manvel, Texas
Posts: 69
|
Re: My 65 GMC / Chevy Build
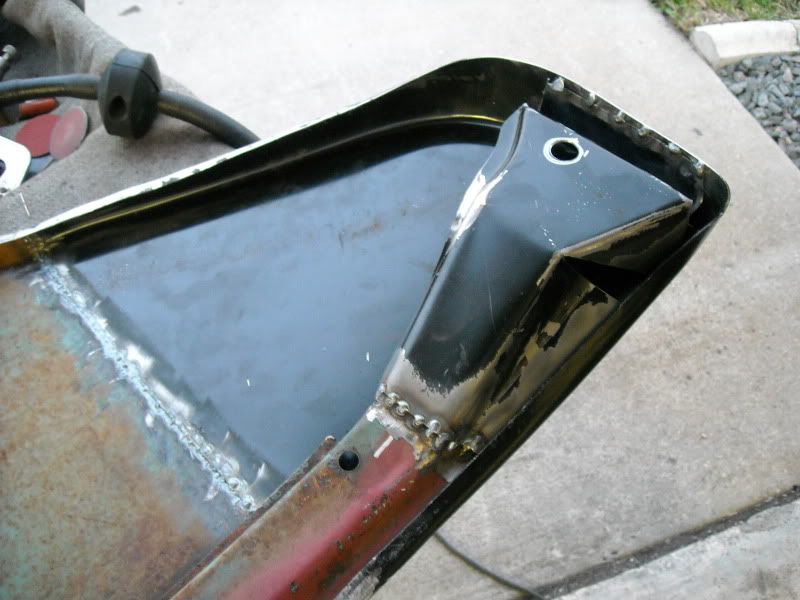
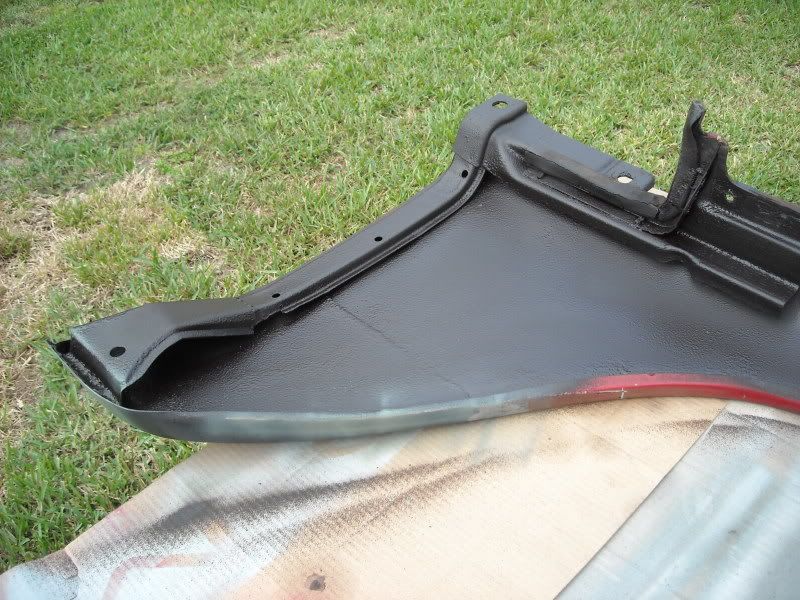
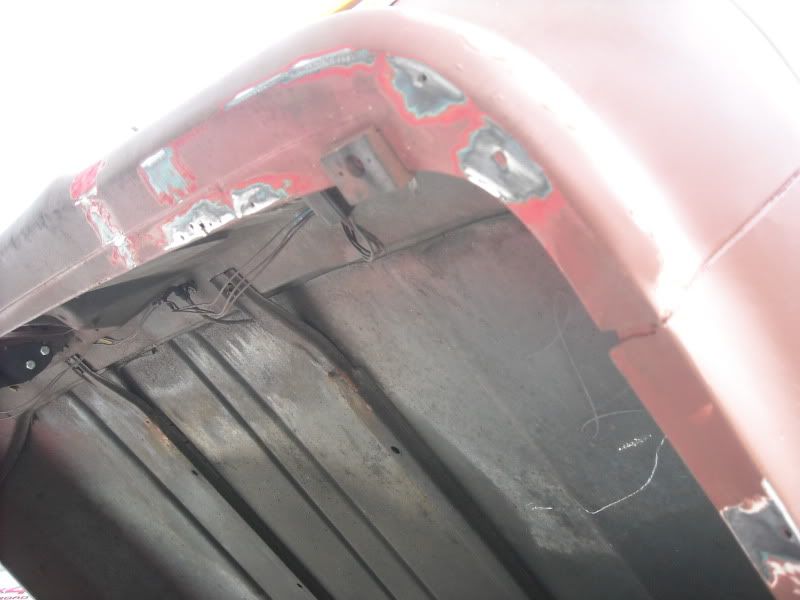
After the fab and welding was done, I used rust convertor and wire brushes to get all the bad, brown stuff to go away. Followed up with a nice undercoating finish.
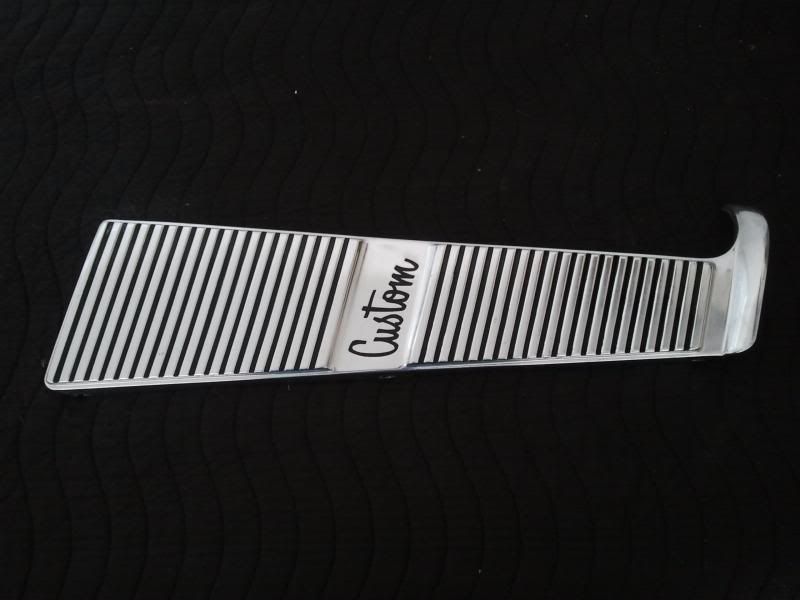
 I ordered up some steel wheels (15x7's and 15x10's) and decided to shoot them with a satin, nickle kinda color. Here is close up shot. 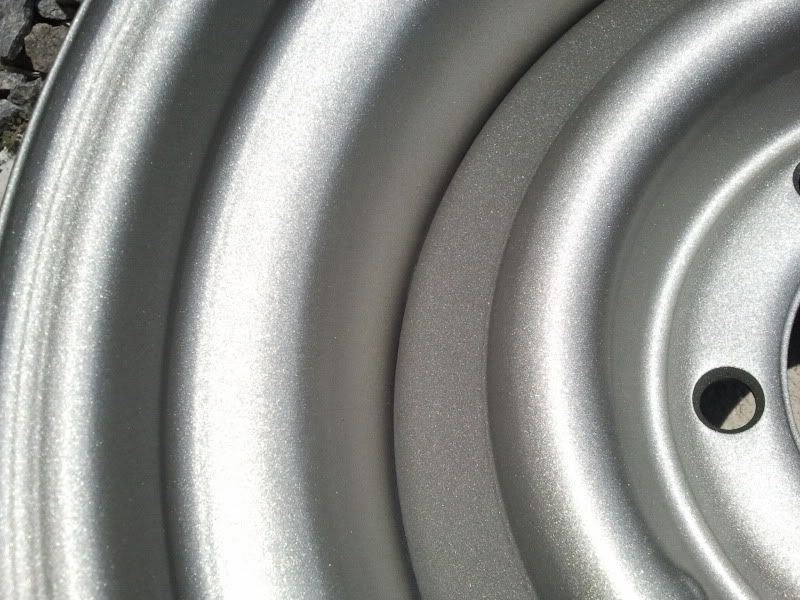 And new tires 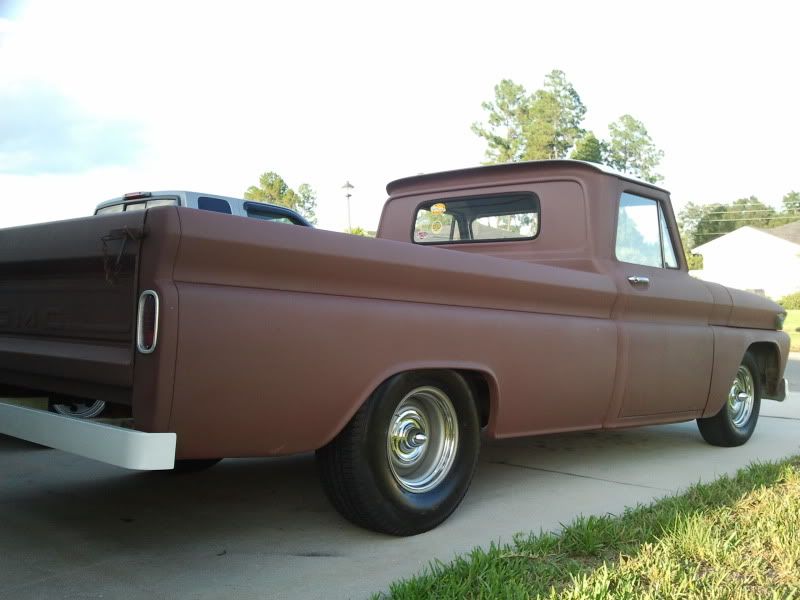 I got a grill off of a 65 Chevy schoolbus and liked the fact that it didn't have "Chevrolet" stamped in it and no waffle grill between the upper and lower bars. Also, I have always preferred the single headlight of the Chevs to the duals on the GMCs. So I removed the letters from the stock grill, modified the mounting bracket and after straightening the grill, painted it and the letters to match the new wheels. 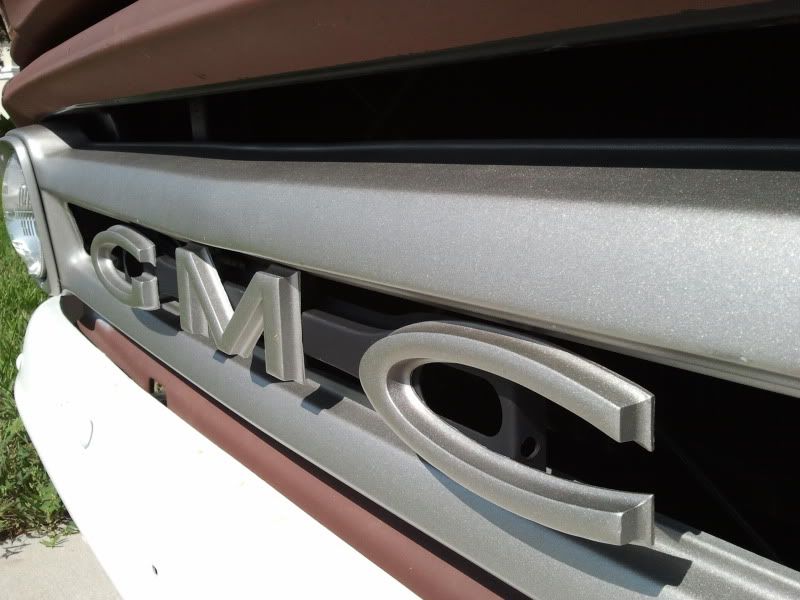 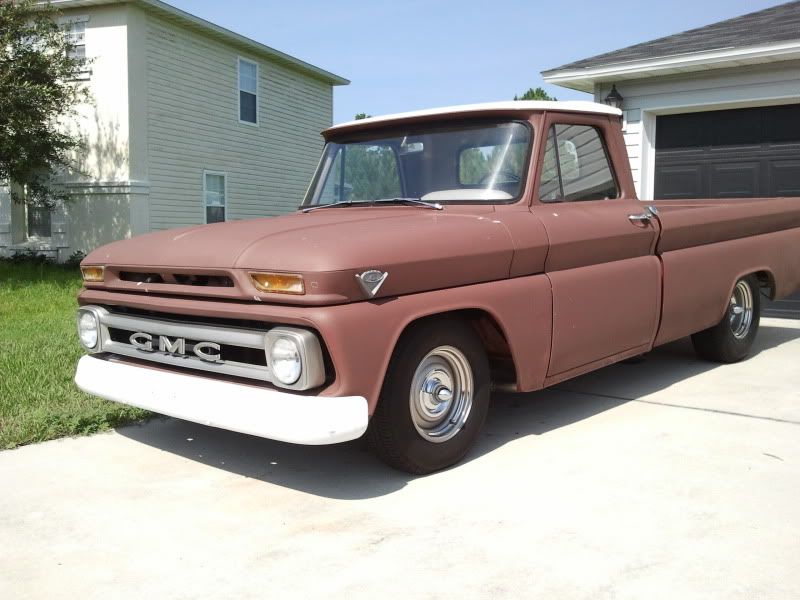
|
|
|
|
|
06-09-2013, 04:20 PM
|
#7 |
|
Registered User
Join Date: Aug 2005
Location: Manvel, Texas
Posts: 69
|
Re: My 65 GMC / Chevy Build
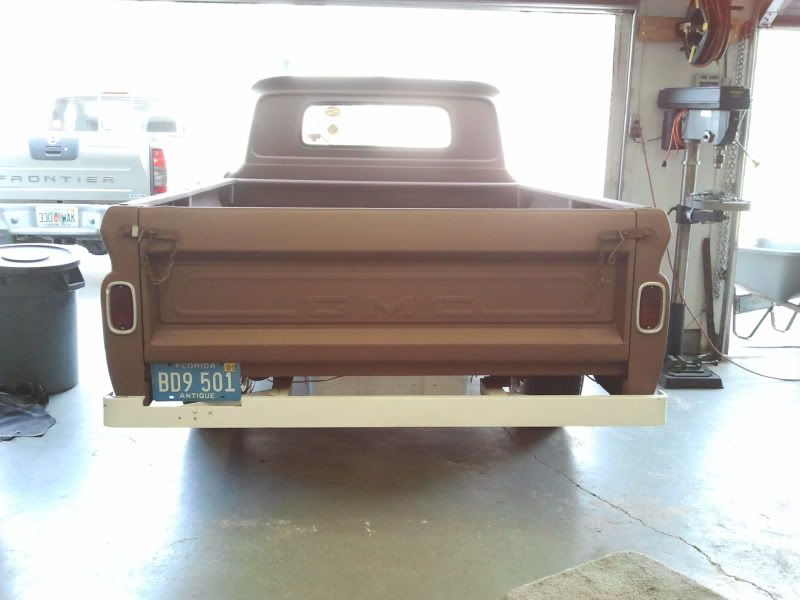
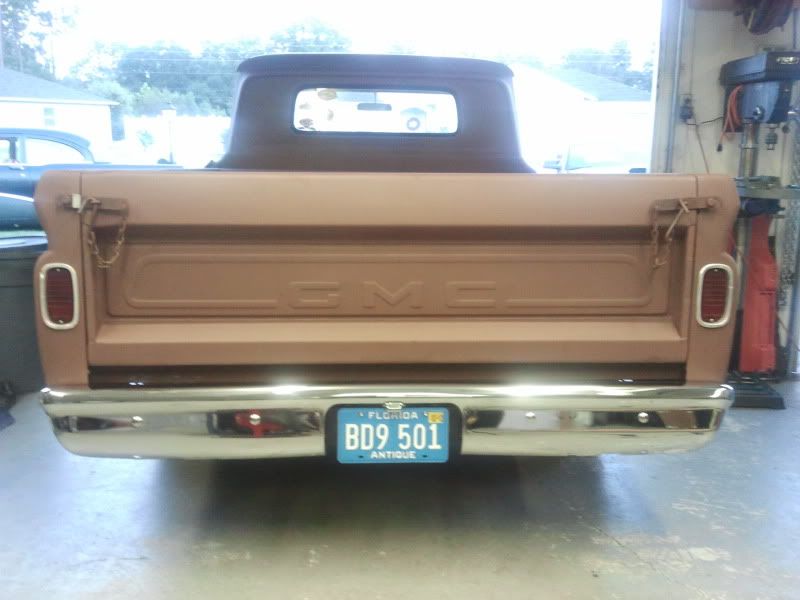
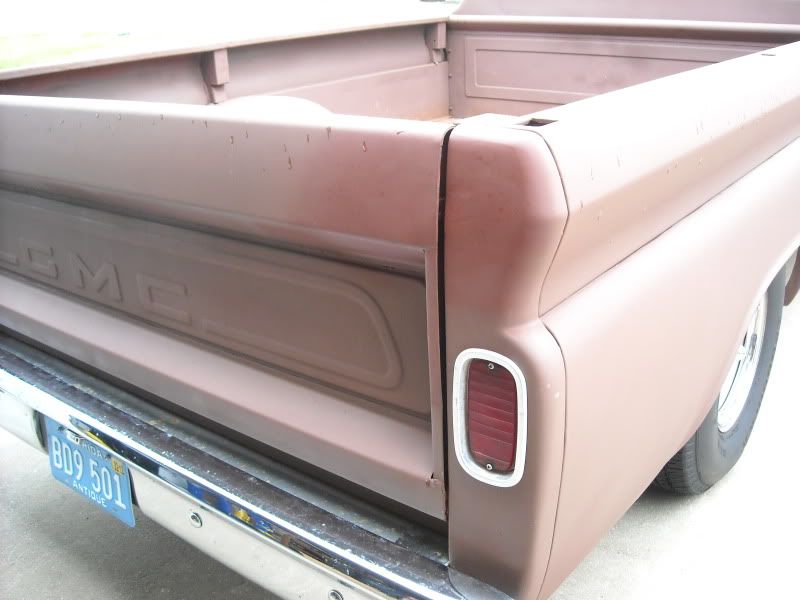
The rear bumper was made out of 3/8" C-channel and provided a great mounting point for the 67-72 bumper I got. I think the lines of the newer bumper lend well to the fleetsides, and it has the plate mount below versus above like a 60-66 bumper.
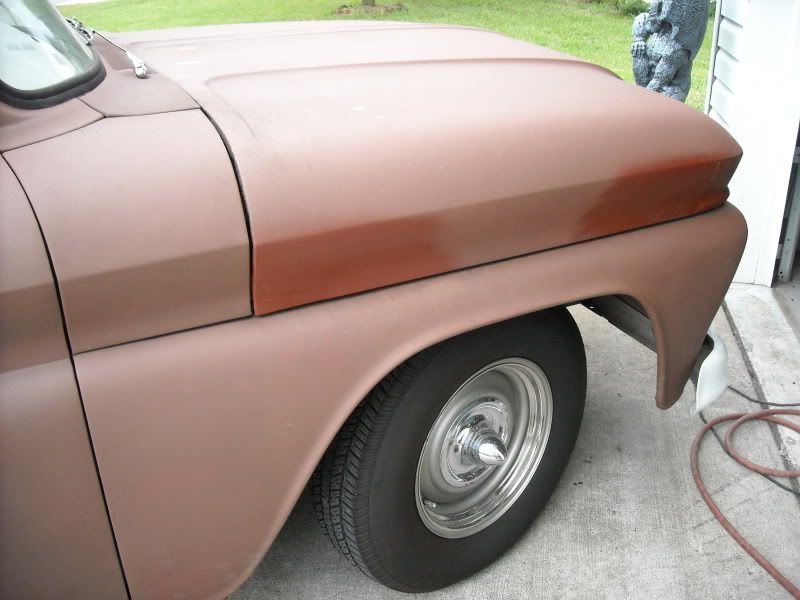
  The hood needed attention also and the emblems hadta go. 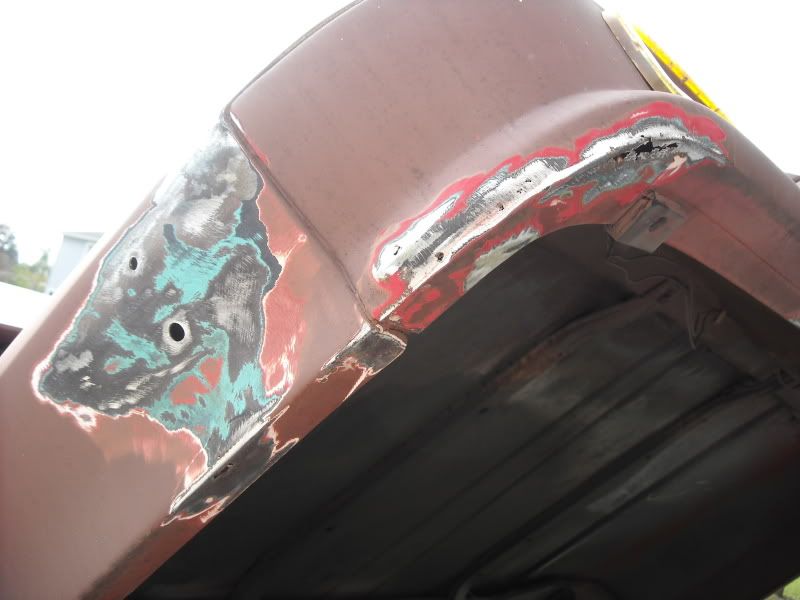 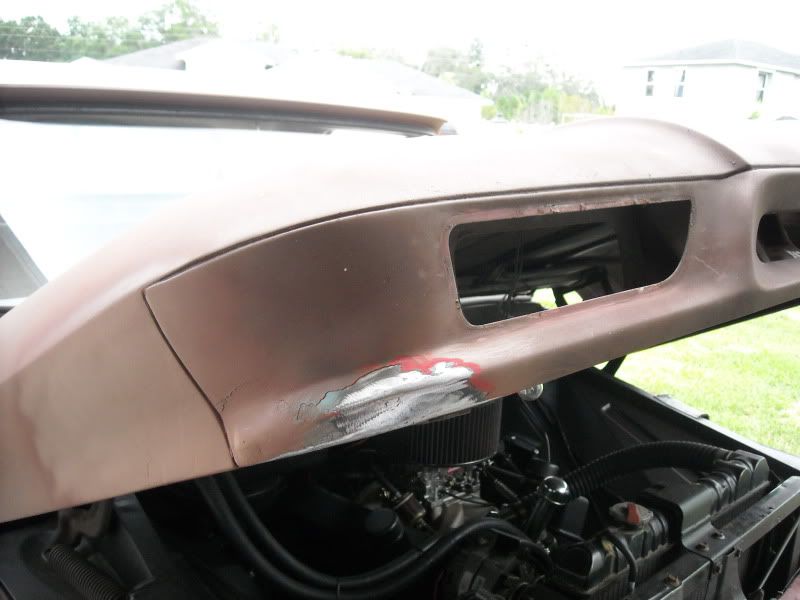 Takin my time and metal finishing everything paid off... huge! No filler needed to be used in any of the rust repairs I did. I really learned ALOT about keeping the metal cool while welding and blending the welds down afterwards. 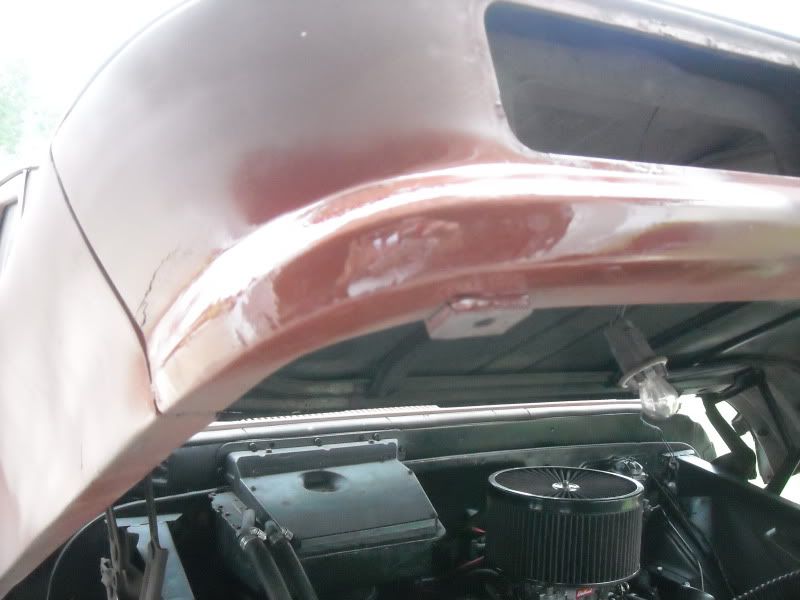
|
|
|
|
|
06-09-2013, 04:24 PM
|
#8 |
|
Registered User
Join Date: Aug 2005
Location: Manvel, Texas
Posts: 69
|
Re: My 65 GMC / Chevy Build
|
|
|
|
|
06-09-2013, 04:34 PM
|
#9 |
|
Registered User
Join Date: Aug 2005
Location: Manvel, Texas
Posts: 69
|
Re: My 65 GMC / Chevy Build
I shaved the tailgate chains by first removing all the brackets and wedling small patch panels in.
 I purchased Ford tailgate cables from Napa and located the upper pivot bolt directly in line with the hole on the bed corner structure. That way, I could access the nut to properly tighten the bolt. I then put the cable on it, made sure the tailgate was level to the ground and extended the cable down to the bed. Using the tailgate chain bracket, I drilled the holes on the inside of the tailgate to mount the bracket and made a slotted hole for the bracket to slid into... just like Chev and GMC did, except that it is on the inside of the tailgate instead of the outside. Note that I moved the tailgate cable brackets slightly in from the tailgate side. This ensures that the cable will never bind up or angle out when the tailgate is raised. The pin that holds it in has a spring loaded ball on the end of it so it can never slip out. The pin bracket is part of the old tailgate chain assembly that I bent and welded onto the tailgate. 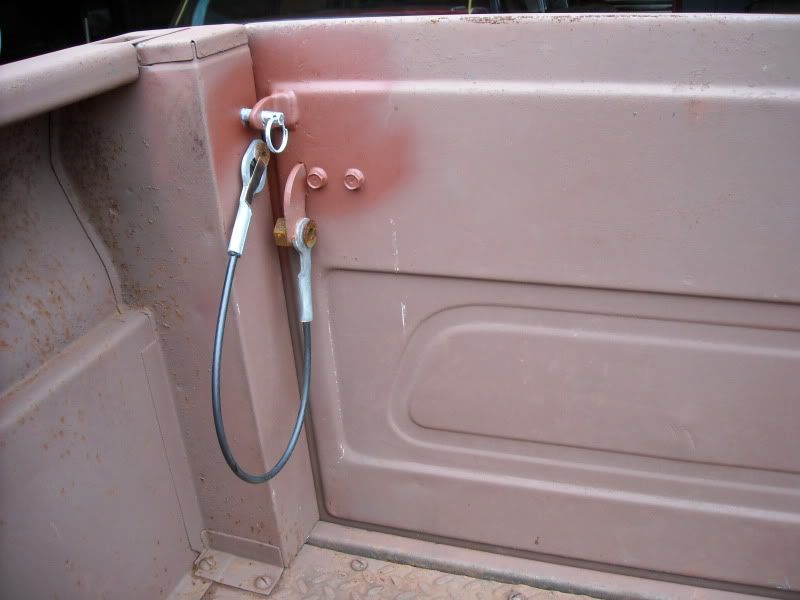 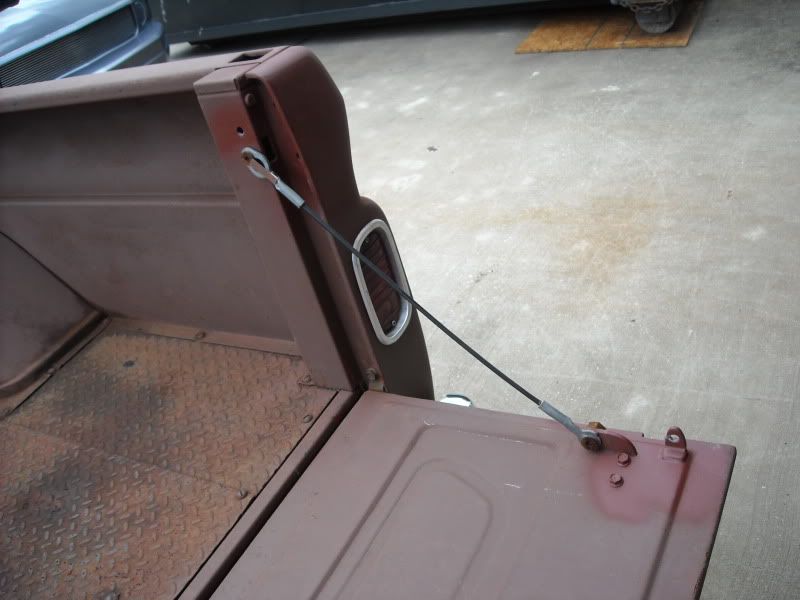
|
|
|
|
|
06-09-2013, 04:34 PM
|
#10 |
|
Registered User
Join Date: Apr 2013
Location: Louisiana
Posts: 553
|
Re: My 65 GMC / Chevy Build
Nice project.
|
|
|
|
|
06-09-2013, 04:41 PM
|
#11 |
|
Registered User
Join Date: Aug 2005
Location: Manvel, Texas
Posts: 69
|
Re: My 65 GMC / Chevy Build
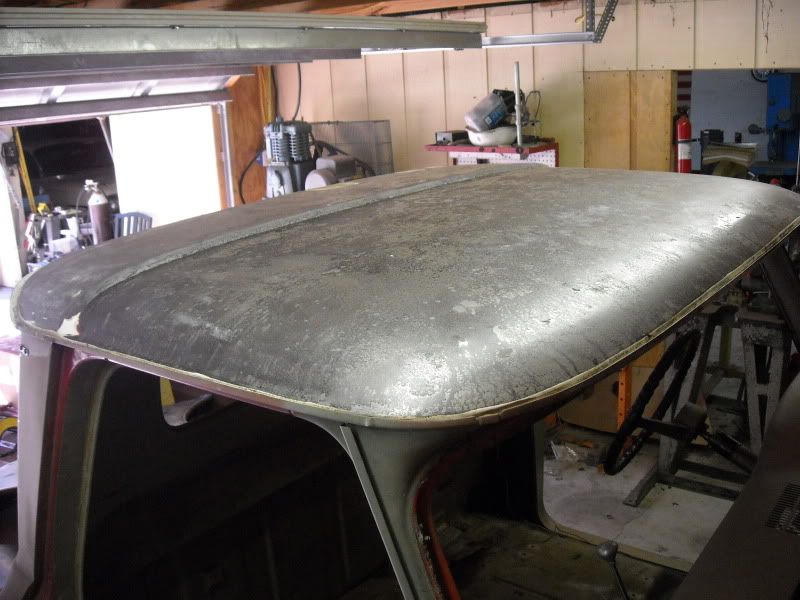
The rain gutters on both of the A-pillers had to go too.
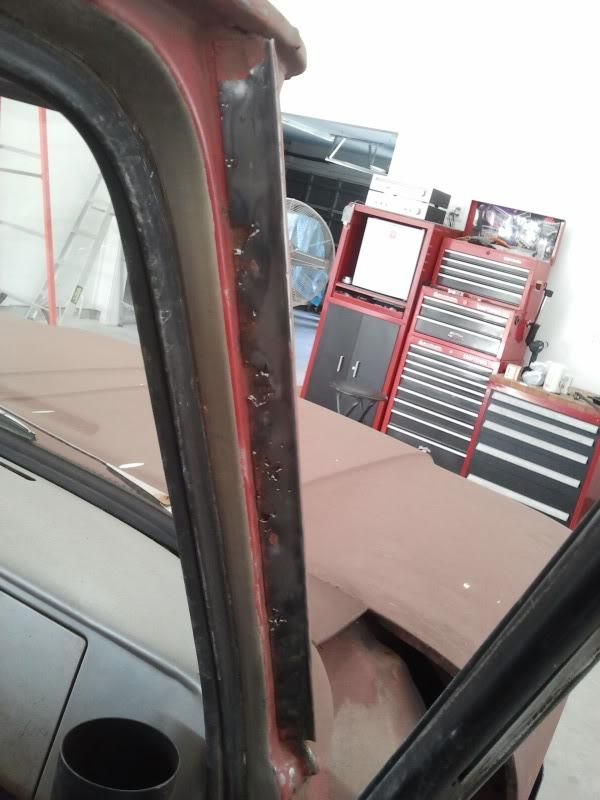 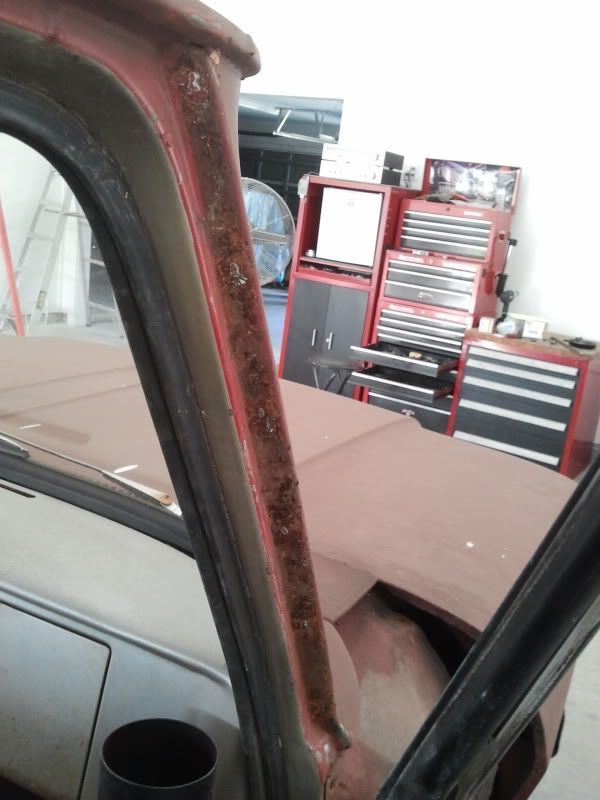 I bent up new ones and drilled holes for plug welds. A little self etching primer gives me peace of mind. 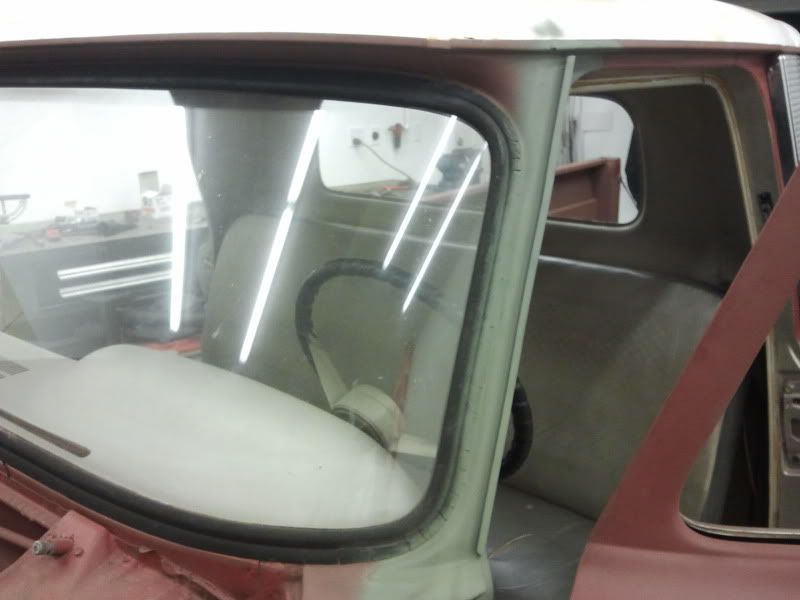 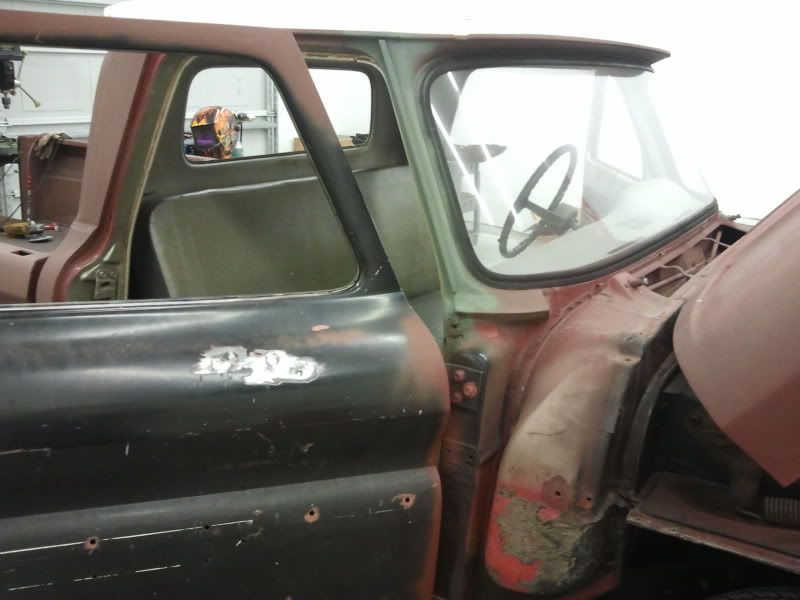
|
|
|
|
|
06-09-2013, 04:56 PM
|
#12 |
|
Registered User
Join Date: Aug 2005
Location: Manvel, Texas
Posts: 69
|
Re: My 65 GMC / Chevy Build
The tailgate had a HUGE dent in it also, so I cut it out and fabbed up a patch panel for that too. In this picture you can also see the holes I made for the cable bracket.
  Here is the cab being stripped out 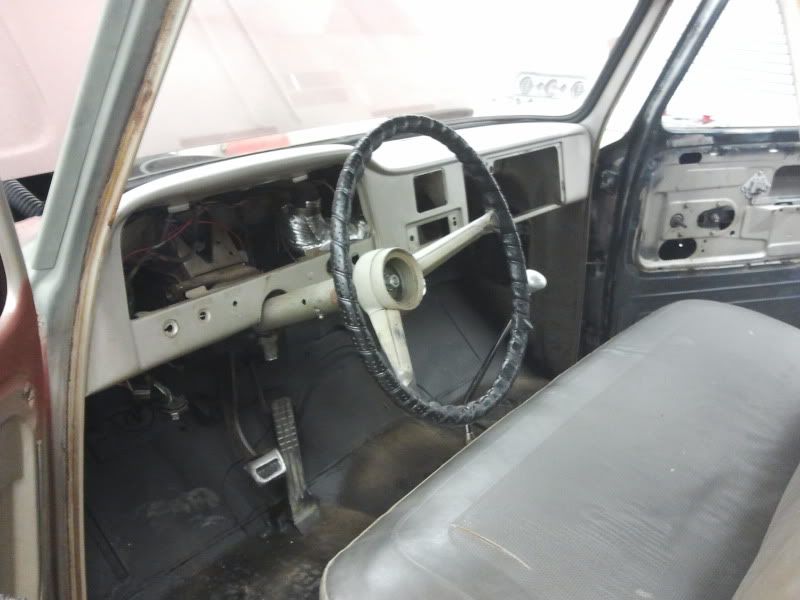 
|
|
|
|
|
06-09-2013, 04:56 PM
|
#13 |
|
Post Whore
 Join Date: Mar 2013
Location: Southern Oregon
Posts: 10,384
|
Re: My 65 GMC / Chevy Build
Is truly one of a kind and looks awsome! Keep us posted. Love the truck.

__________________
1966 Chevy C10 "Project Two Tone" http://67-72chevytrucks.com/vboard/s...d.php?t=596643 1964 GMC "Crustine" semi-build:http://67-72chevytrucks.com/vboard/s...d.php?t=665056 My youtube channel. Username "Military Chevy": https://www.youtube.com/channel/UC_h...fzpcUXyK_5-uiw |
|
|
|
|
06-09-2013, 05:01 PM
|
#14 |
|
Just here to tinker
Join Date: Jun 2008
Location: Holland, MI
Posts: 3,697
|
Re: My 65 GMC / Chevy Build
Man that grill turned out awesome! Well done!
Posted via Mobile Device
__________________
78 C10 SWB Diesel #1 (wrecked)http://67-72chevytrucks.com/vboard/s...1978+silverado 78 C10 SWB Diesel #2 (sold)http://67-72chevytrucks.com/vboard/s...d.php?t=650751 60 GMC Suburban (sold)http://67-72chevytrucks.com/vboard/s...d.php?t=445526 60 GMC 1000 (sold)http://67-72chevytrucks.com/vboard/showthread.php?t=298235 67 GMC 1500 (sold) http://67-72chevytrucks.com/vboard/s...d.php?t=803695 73 Chevy C20(Daily)http://67-72chevytrucks.com/vboard/s...d.php?t=852767 86 Suburban(summer unit) http://67-72chevytrucks.com/vboard/s...d.php?t=810697 88 Suburban 4x4(sold) |
|
|
|
|
06-09-2013, 05:05 PM
|
#15 |
|
Registered User
Join Date: Aug 2005
Location: Manvel, Texas
Posts: 69
|
Re: My 65 GMC / Chevy Build
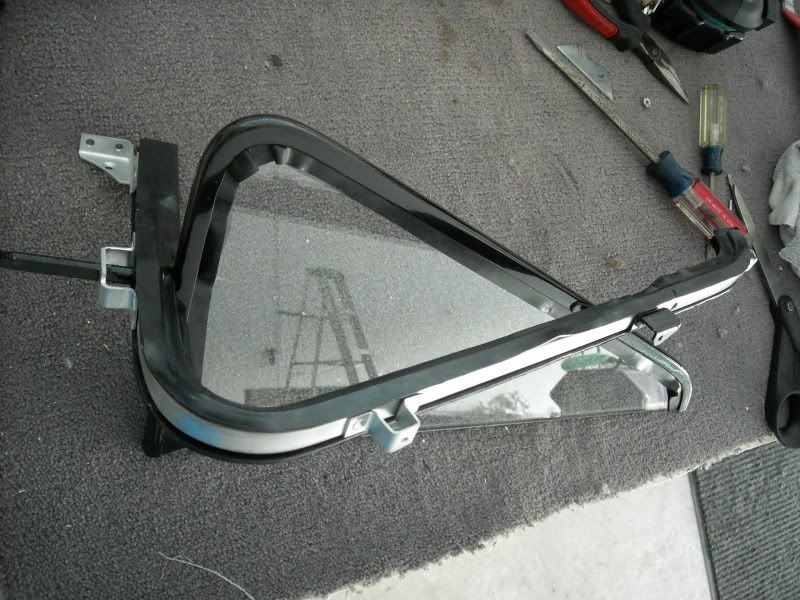
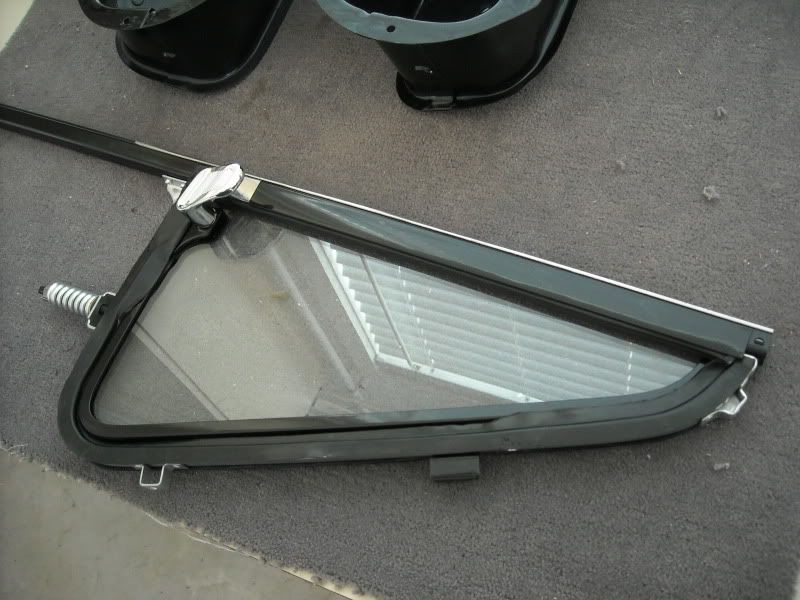
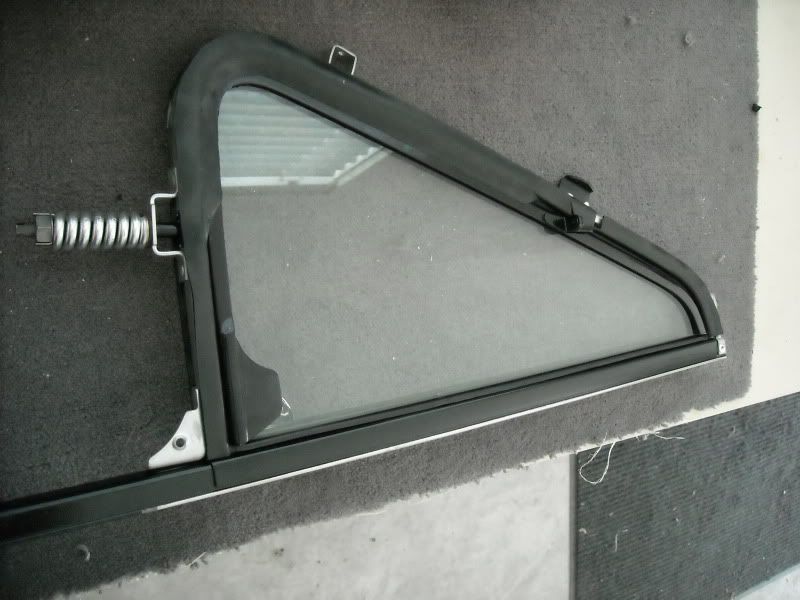
By this time, I had decided that all new weatherstripping was needed and the vent windows were next. The pic below shows the exact order that the washers go in for anyone that may not remember after they have taken them apart.
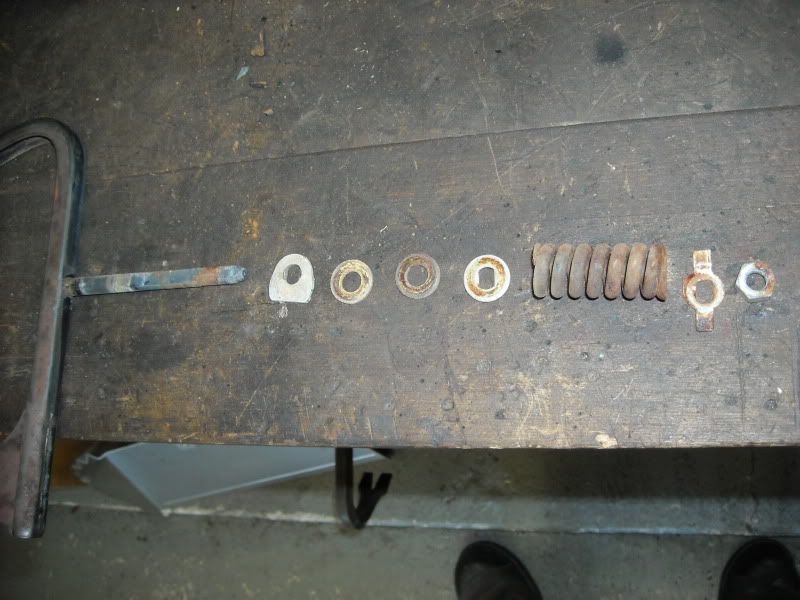 After all the parts were blasted and painted, reassembly was next. For anyone that is contemplating doing this... take your time! I laid the new rubber outside in the sun for several hours to make it as flexible as possible and I used silicone spray lube during assembly to help it slide into place. Even with that, it took patience and time. But, the finished vent windows close great and I don't have any wind leaks even on the highway. 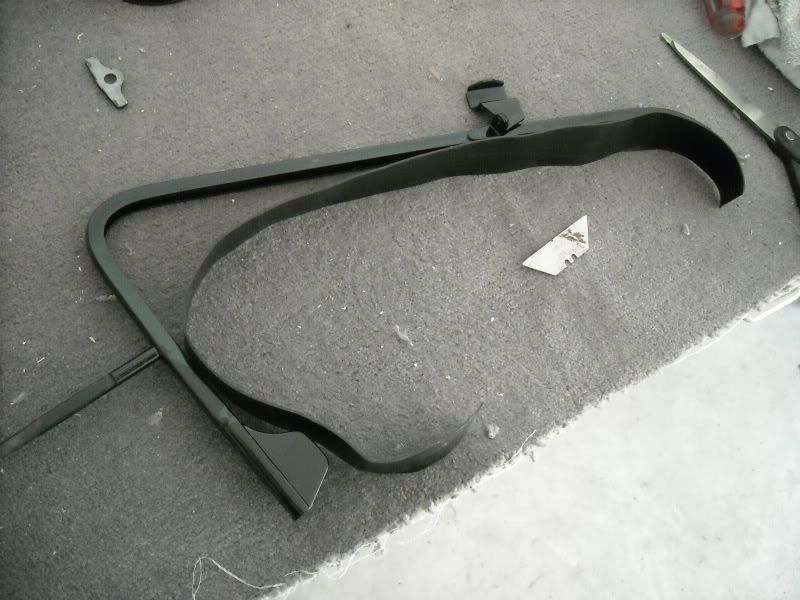 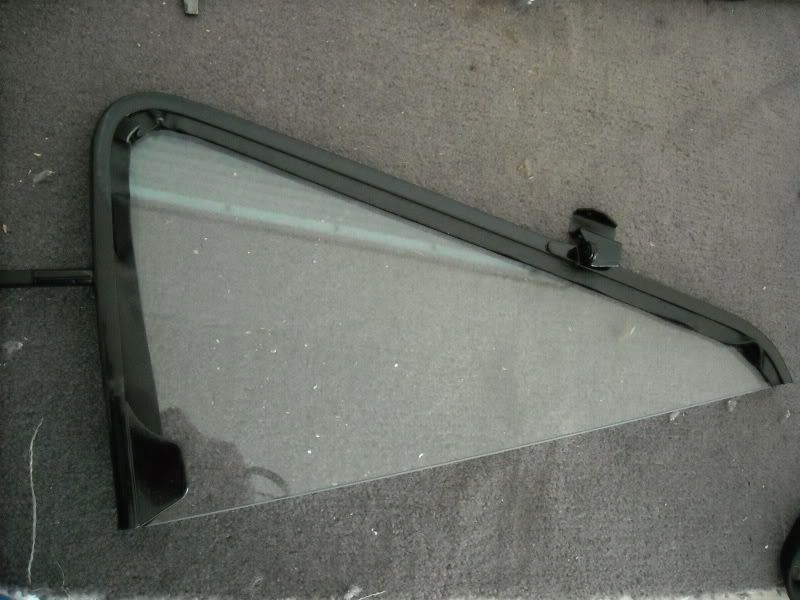 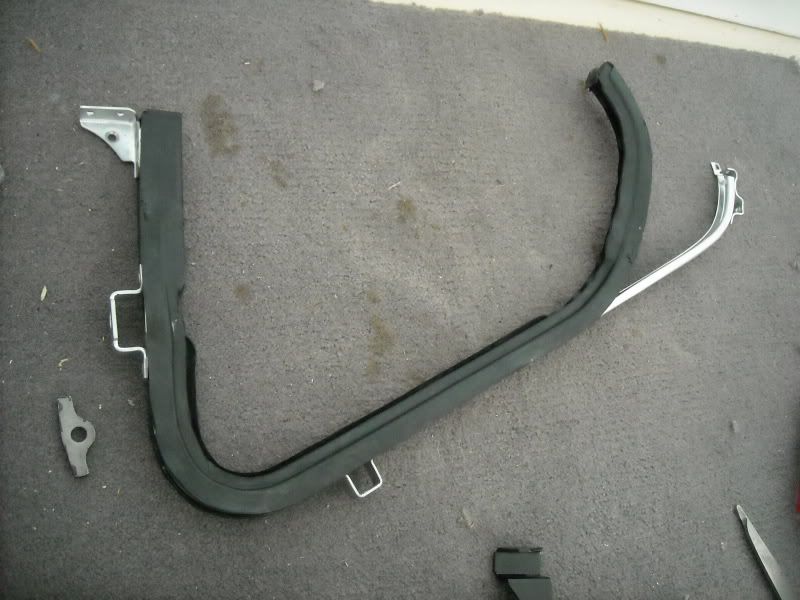
|
|
|
|
|
06-09-2013, 05:10 PM
|
#16 |
|
Registered User
Join Date: Aug 2005
Location: Manvel, Texas
Posts: 69
|
Re: My 65 GMC / Chevy Build
   The kick panel vents got the same treatment.  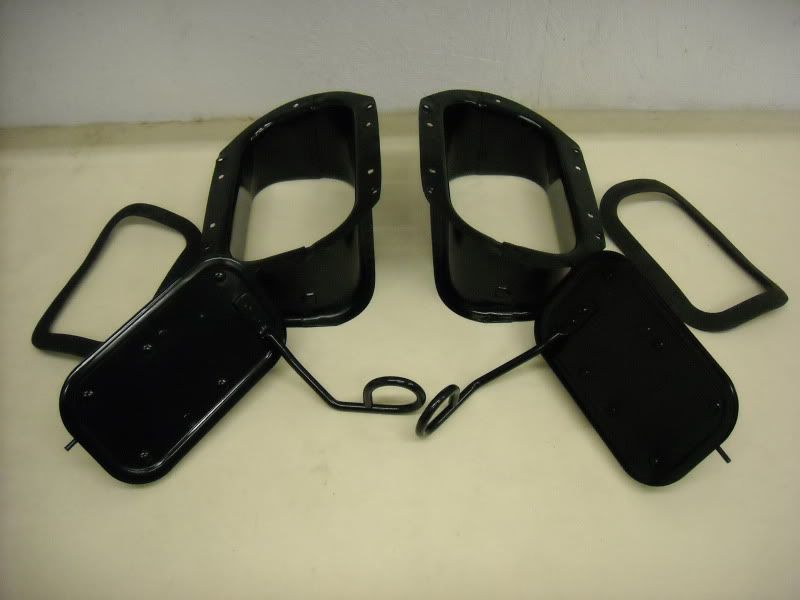
|
|
|
|
|
06-09-2013, 05:23 PM
|
#17 |
|
Registered User
Join Date: Aug 2005
Location: Manvel, Texas
Posts: 69
|
Re: My 65 GMC / Chevy Build
However... I found that the "seals" from LMC were not the best to promote sealing. After installing both of them, I ended up ripping them both out and using them for templates for new ones.
I made the new ones out of a tire inner tube I had. The thickness of the rubber inner tube was perfect and it seals MUCH better that the other ones. Also, because it's rubber, it conforms to the openings waaaay better. I strongly recommend that you learn from my mistake and do not buy them, make them. 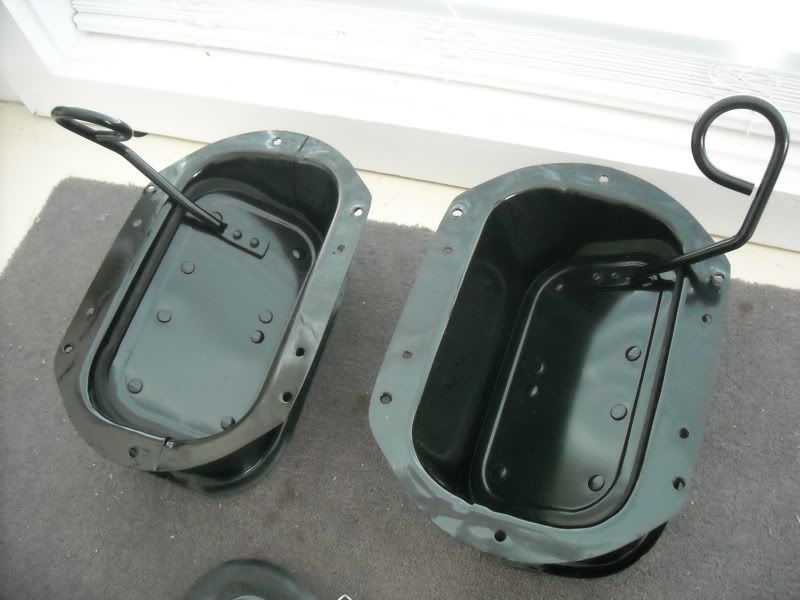 I wasn't exactly in love with the stock GMC gauge cluster, and because it was longer than the Chevy unit, a swap would not work... unless you wanted to make some ugly filler panels for each side of it. 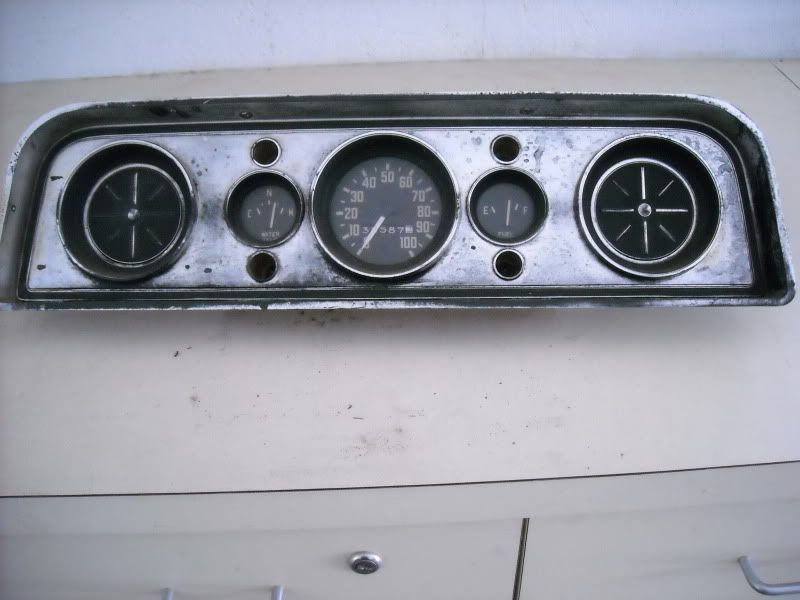 However, since it did fit the dash opening, I decided to modify the stock panel and use it as a trim piece for my new gauges. First step was to smooth the whole thing and make a template for the insert. 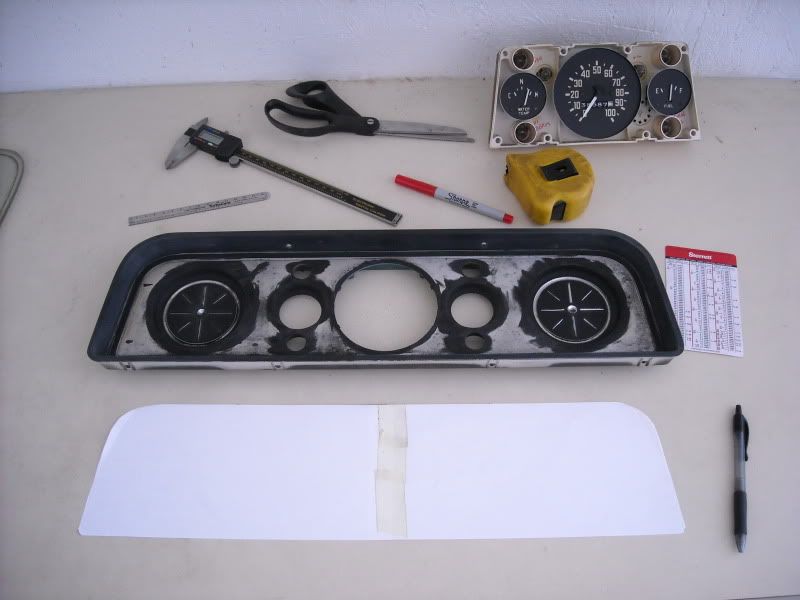 Next was to cut a new panel and figure out the gauge layout I wanted. After that, I welded four 10-24 machine screws to the backside (in the corners) of the insert so I could install it without any fasteners showing. 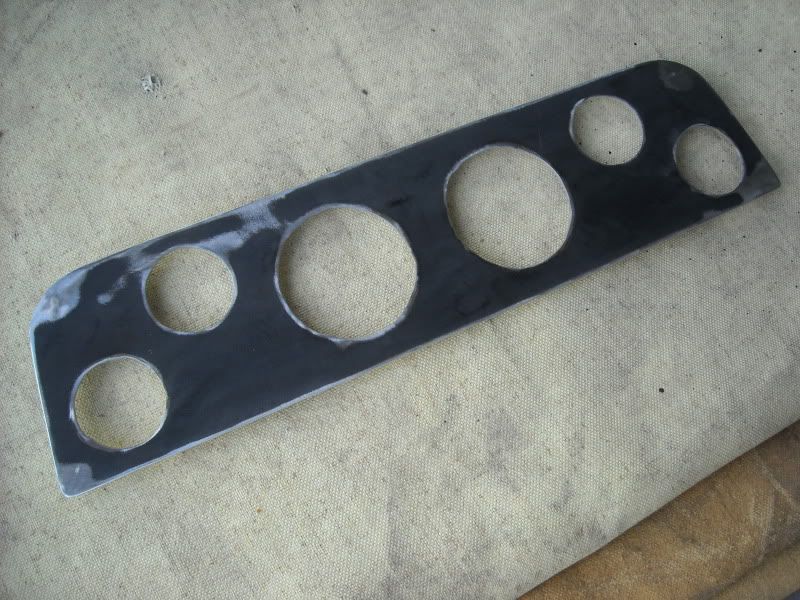 Then I sent the original gauge panel out to be chromed. |
|
|
|
|
06-09-2013, 05:33 PM
|
#18 |
|
Registered User
Join Date: Aug 2005
Location: Manvel, Texas
Posts: 69
|
Re: My 65 GMC / Chevy Build
After the part came back from the chromer, I then painted the new insert with black wrinkle paint and installed the gauges. TIP : Follow the directions on the can for wrinkle paint and put in the oven after you paint it. The wrinkling is very "even" after cooking.
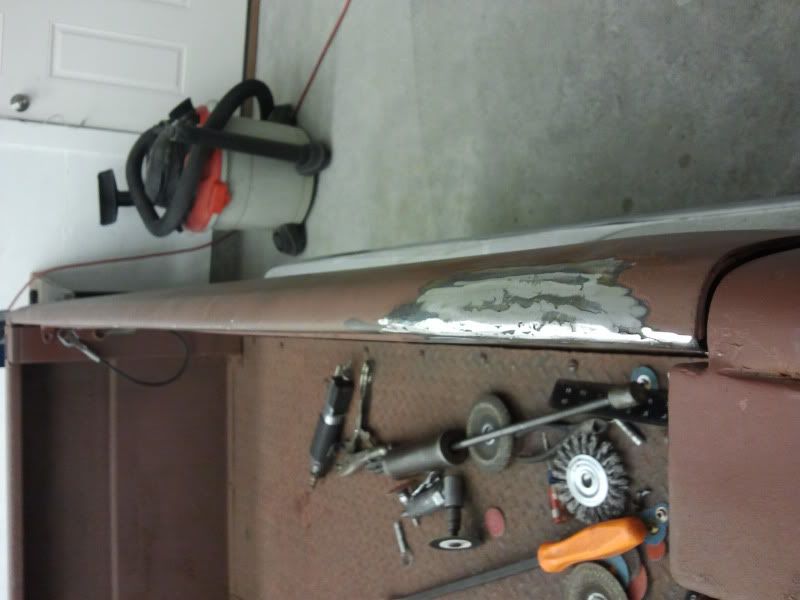
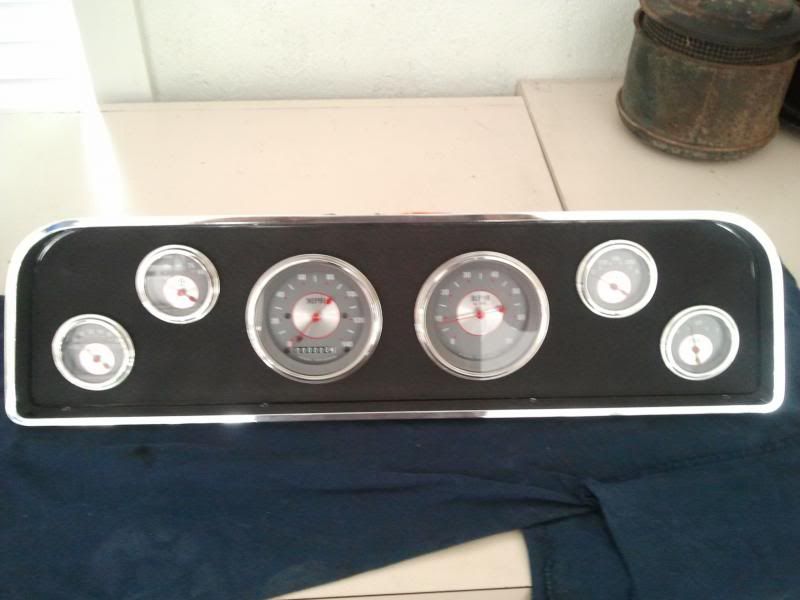 And wired it taking into account the factory wire colors and trying to keep everything as sanitary as possible. I purchased 12 pin male and female wiring connectors from Radio Shack so installation and removal of the cluster would be a snap. 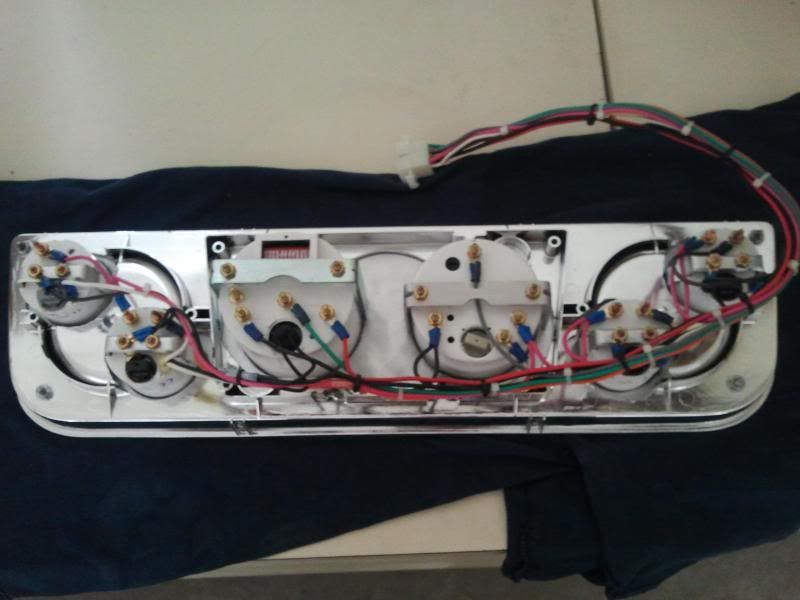 After that, the bodywork commenced. I did not do the body or paint work as I don't think I have the skill to accomplish it correctly. However, a friend stepped up and helped me out and I was able to at least lend a hand when possible. Luckily, all my hard work on the rust repair in the hood, fenders, rockers, tailgate, doors, etc, etc paid off as very little filler had to be used. 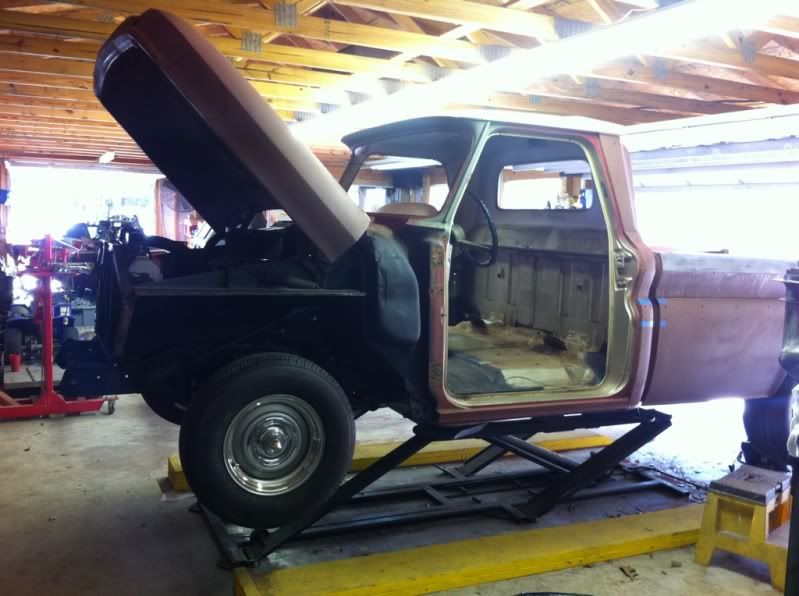 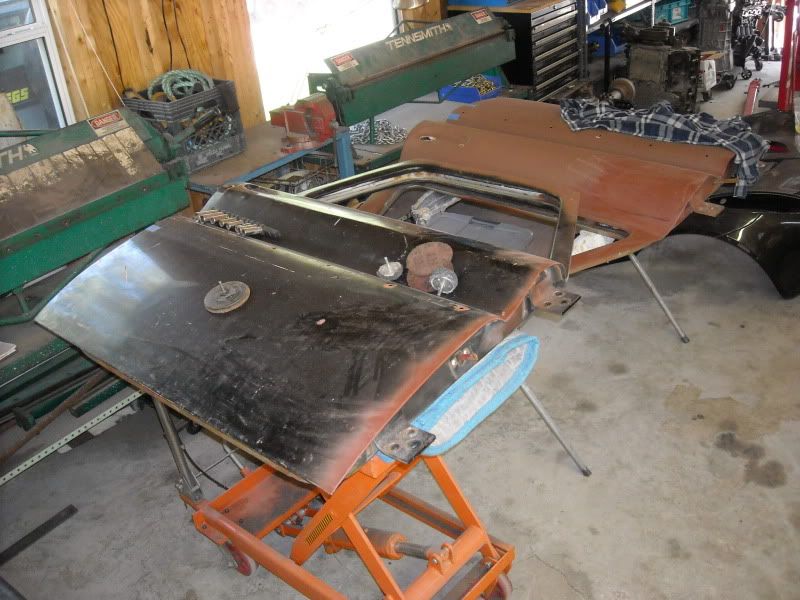 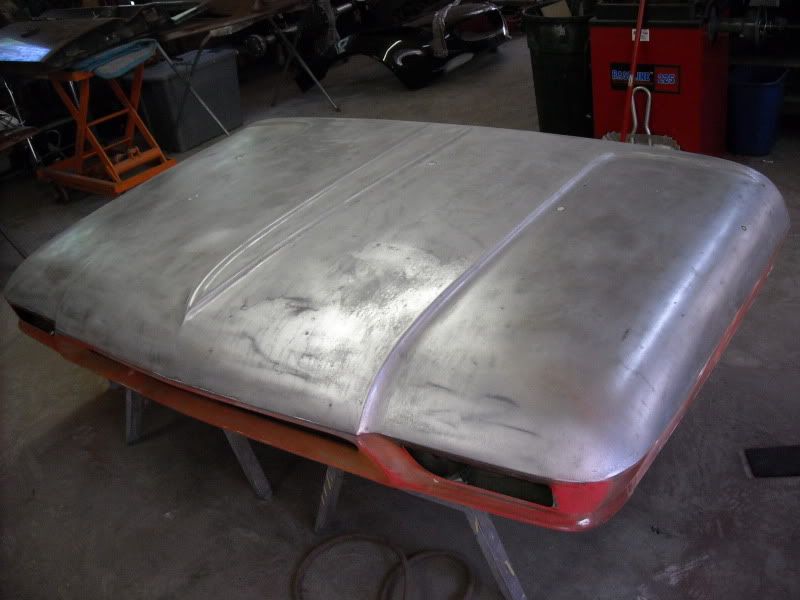 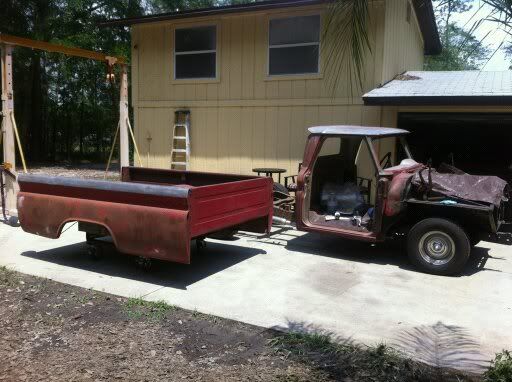
|
|
|
|
|
06-09-2013, 05:40 PM
|
#19 |
|
Registered User
Join Date: Aug 2005
Location: Manvel, Texas
Posts: 69
|
Re: My 65 GMC / Chevy Build
   These pics show the fitment of the tank. 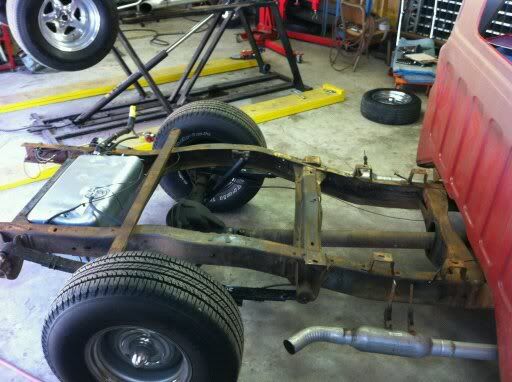 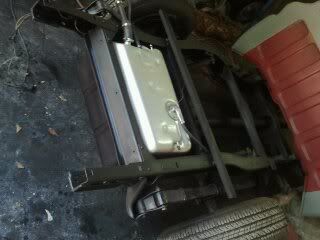 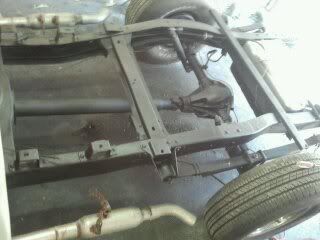
|
|
|
|
|
06-09-2013, 05:46 PM
|
#20 |
|
Registered User
Join Date: Aug 2005
Location: Manvel, Texas
Posts: 69
|
Re: My 65 GMC / Chevy Build
I won't bore you with all the body work, priming and paint pics but here is a little taste of the color.
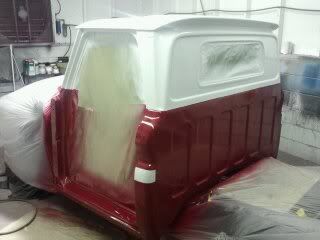    She's comin back together!! 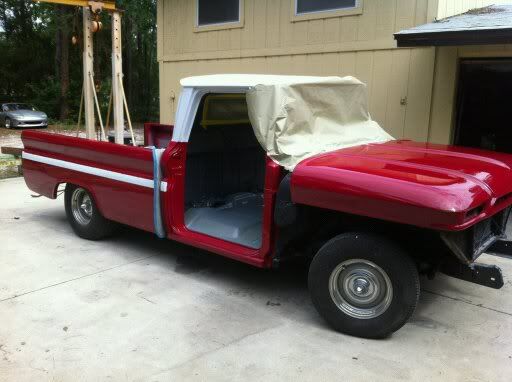
|
|
|
|
|
06-09-2013, 05:56 PM
|
#21 |
|
Registered User
Join Date: Aug 2005
Location: Manvel, Texas
Posts: 69
|
Re: My 65 GMC / Chevy Build
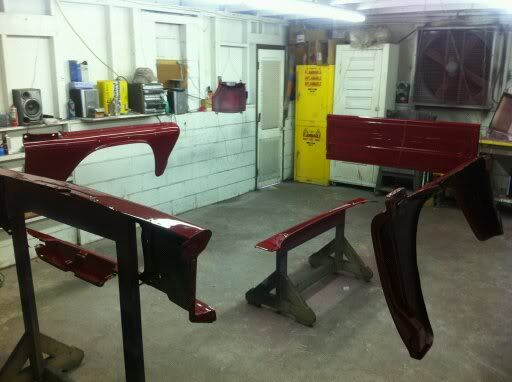
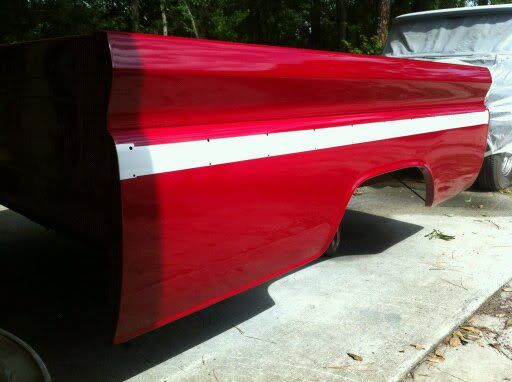
Now it's gettin excitin!!! She's back home and ready get all put back together.
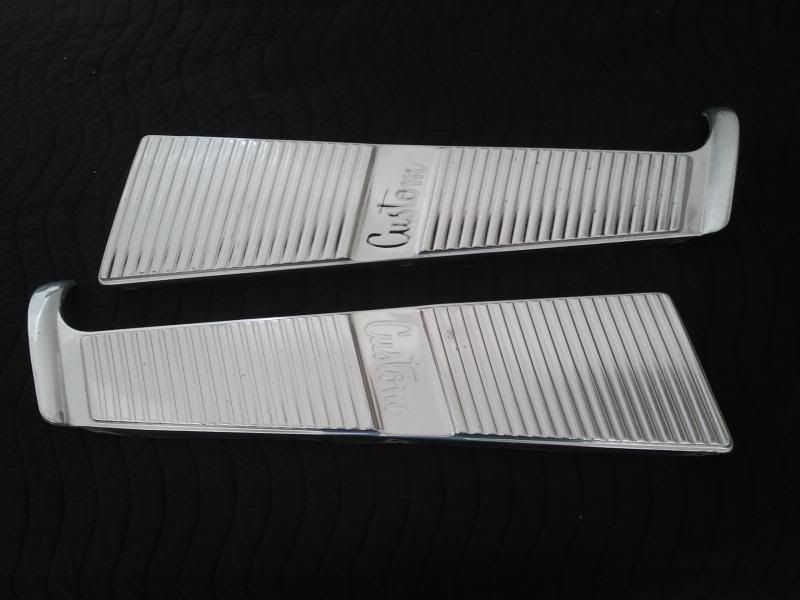
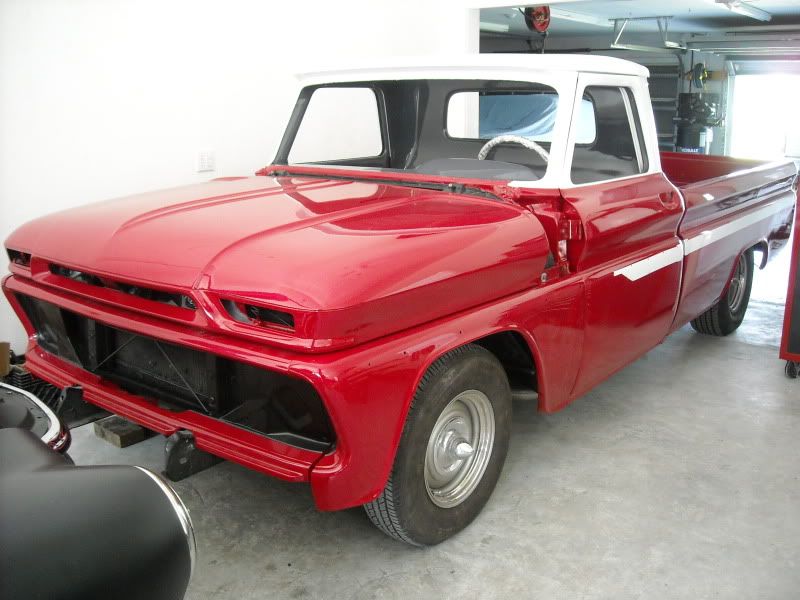    I'm sure you've all realized it now that you've seen the paint. And I'm pretty sure a bunch of you are scratchin your heads wondering why in the hell do I have a Chevy paint job on a GMC? Well, I've never been a fan of the two tone paint on the GMC's. Nothing against you guys out there that love it... It's just not my favorite. So... I put Chevy deluxe trim on it. Hope you guys don't banned me from the site for such blasphemy. |
|
|
|
|
06-09-2013, 05:58 PM
|
#22 | |
|
Registered User
Join Date: Apr 2013
Location: Louisiana
Posts: 553
|
Re: My 65 GMC / Chevy Build
Quote:
Blasphemy would be painting it Ford blue or something along those lines. Chevy/GMC.....all good in my book. |
|
|
|
|
|
06-09-2013, 06:04 PM
|
#23 | |
|
Post Whore
Join Date: Mar 2013
Location: Southern Oregon
Posts: 10,384
|
Re: My 65 GMC / Chevy Build
Quote:
 
__________________
1966 Chevy C10 "Project Two Tone" http://67-72chevytrucks.com/vboard/s...d.php?t=596643 1964 GMC "Crustine" semi-build:http://67-72chevytrucks.com/vboard/s...d.php?t=665056 My youtube channel. Username "Military Chevy": https://www.youtube.com/channel/UC_h...fzpcUXyK_5-uiw |
|
|
|
|
|
06-09-2013, 06:24 PM
|
#24 |
|
Registered User
Join Date: Aug 2005
Location: Manvel, Texas
Posts: 69
|
Re: My 65 GMC / Chevy Build
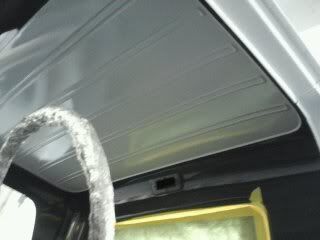
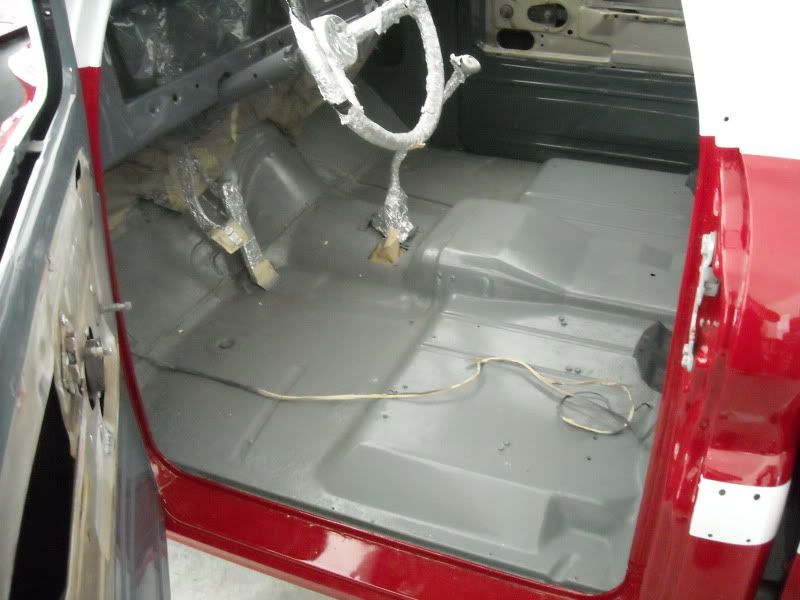
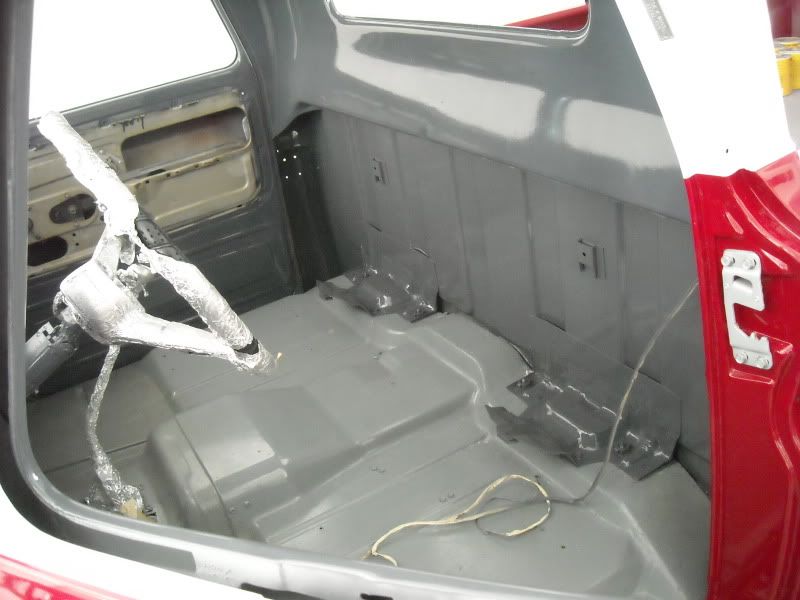
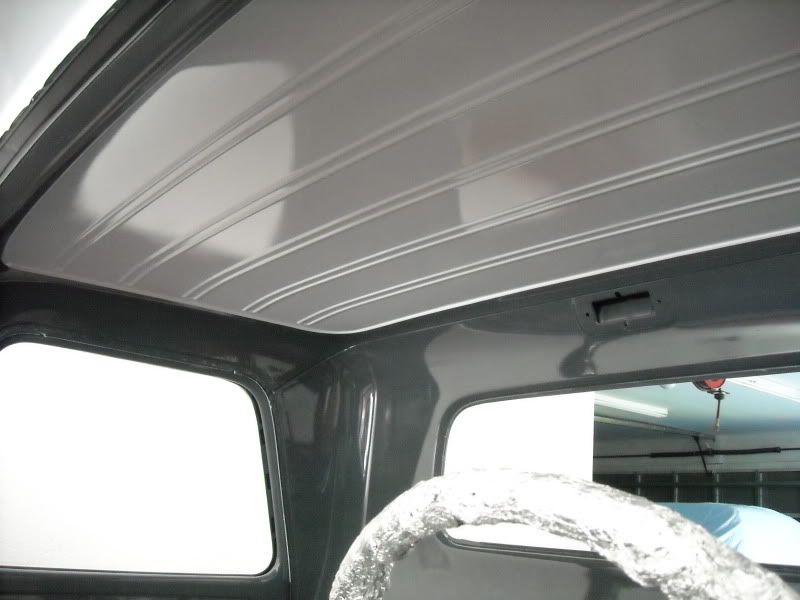
I have know about Dynamat forever, but could never bring myself to pay that much for it. Also, I have read online about the wonders of roofing repair foil backed material and how well it works so I decided to give it a shot.
I went to Home Depot and bought 3 rolls of this stuff. 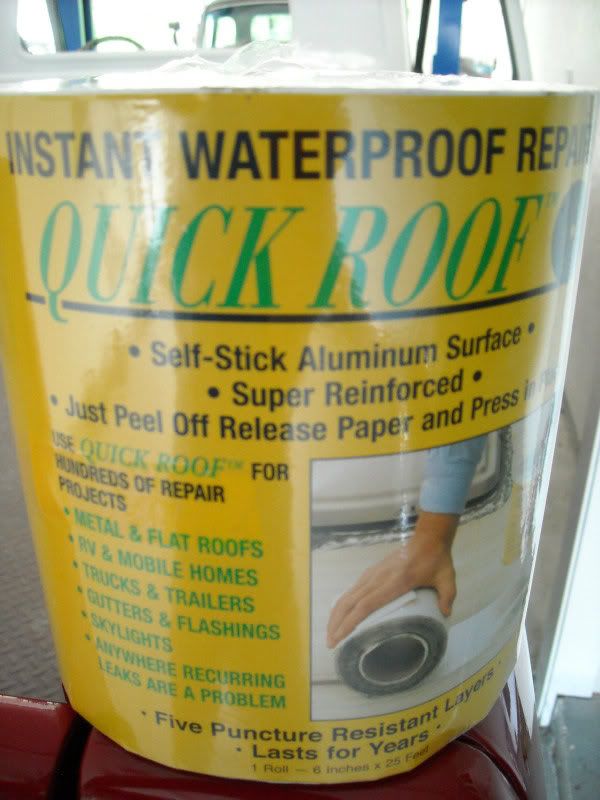 Using both ends of a ballpeen hammer, plenty of patience and a box cutter, I did the whole floor for about $36. And man am I impressed!!! I worked into all the ribs and ridges and I am here to tell ya... It makes a HUGE difference!!! Note : If you are over 35 and have not sat with your legs crossed in awhile, be prepared to really let your knees tell you what you did after the 6 hour install time. LOL  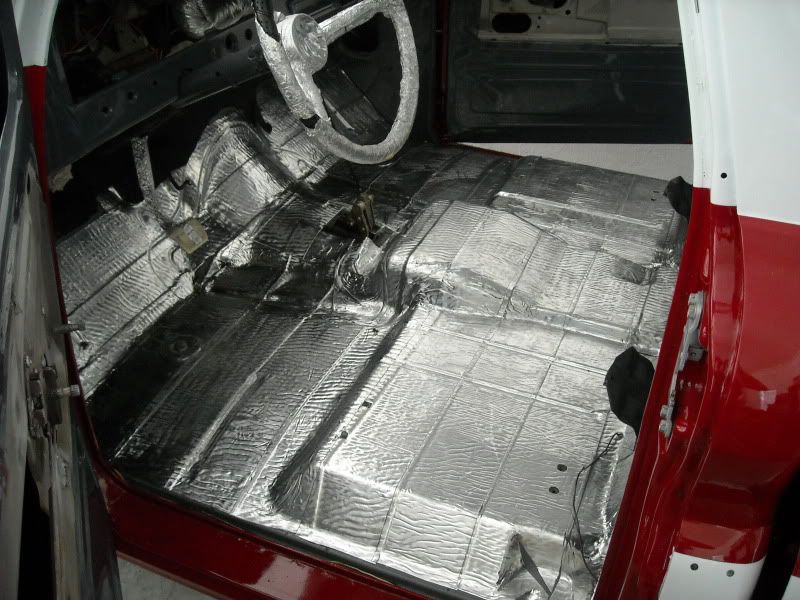 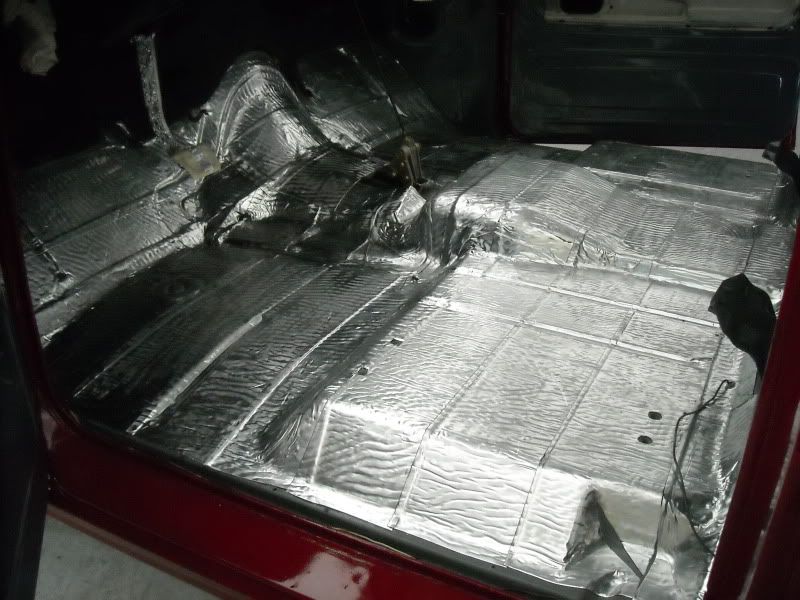 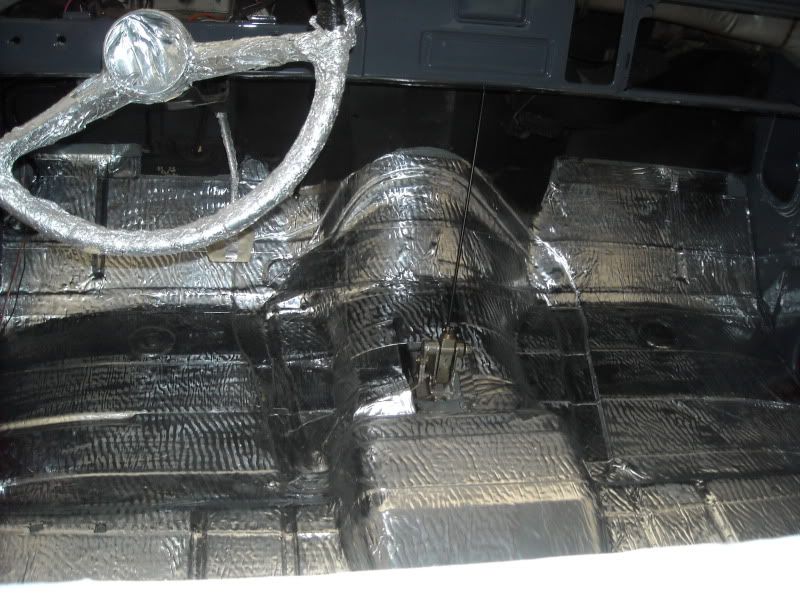 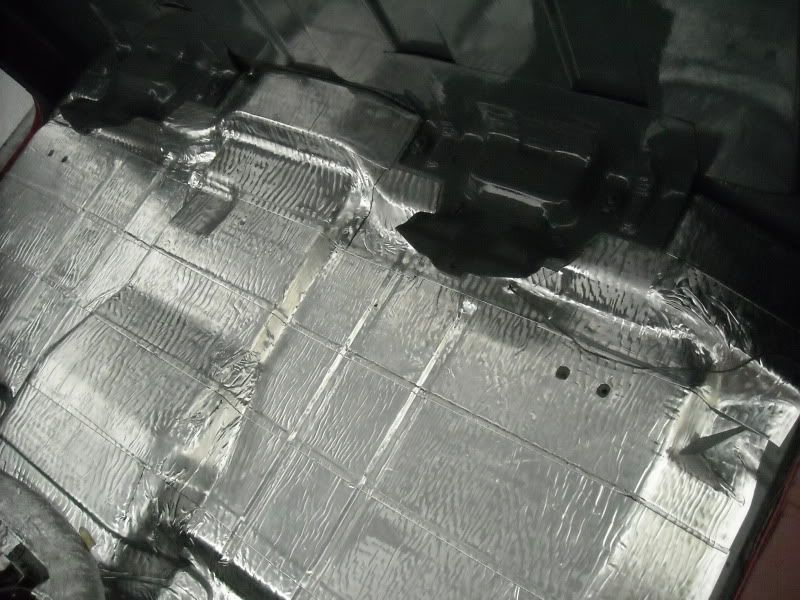
|
|
|
|
|
06-09-2013, 06:36 PM
|
#25 |
|
Registered User
Join Date: Aug 2005
Location: Manvel, Texas
Posts: 69
|
Re: My 65 GMC / Chevy Build
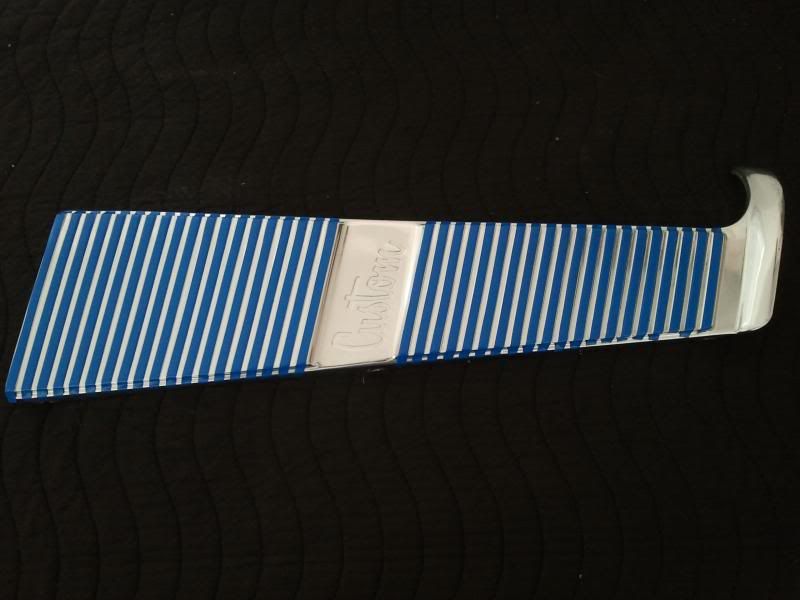
With some extended internet searching, I found a decent set of cab trim panels (because I'm cheap and couldn't bring myself to pay for new ones). So I cleaned them up, hammered out a few dings and masked them off to be sprayed.
   Time to take her outside to get a look at the progress after all the glass and new weatherstrip is installed. Also, completely restored the running / turn signal lights. I chose to go with white lenses to match the paint. Orange would've looked out of place. 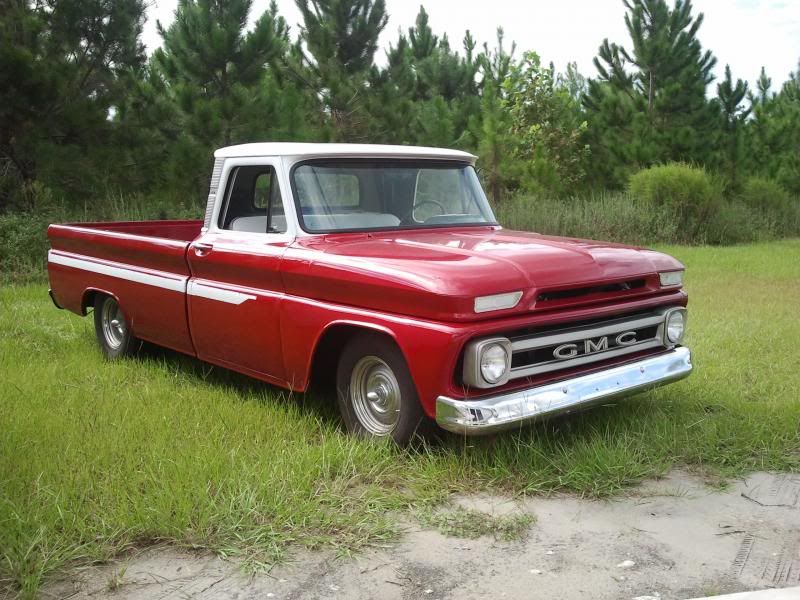 Also, please note that I painted the area behind the grill and the rib between the hood openings semigloss black to add a bit of depth. |
|
|
|
|
| Bookmarks |
|
|


 Linear Mode

