 |
Register or Log In To remove these advertisements. |
|
|
|
|||||||
 |
|
|
Thread Tools | Display Modes |
|
|
#1 |
|
Registered User
Join Date: Apr 2011
Location: greenville sc
Posts: 558
|
a tip to help finish off a detailed engine bay (pics)
Awhile back actually when I had my rad out i noticed the staples that hold the top and bottom of the fan shroud together was rusty.
I took the same gauge steel and replaced them clipped them looks just like it did new. If your bay is detailed just an idea to bring it up a bit be surprised how you notice them when you look from the side into the engine bay. With these truck being hard to find in good condition details like this if you ever do sell can help bring that premium of a nice piece IMO. Keep um original  Couple pics to describe. |
|
|

|
|
|
#2 |
|
Registered User
Join Date: May 2007
Location: New Hampshire
Posts: 349
|
Re: a tip to help finish off a detailed engine bay (pics)
Another option:
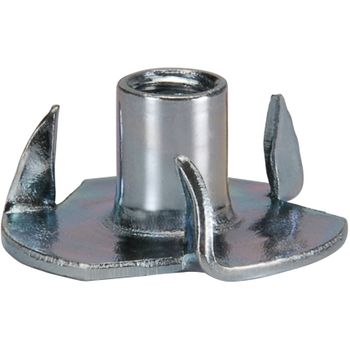
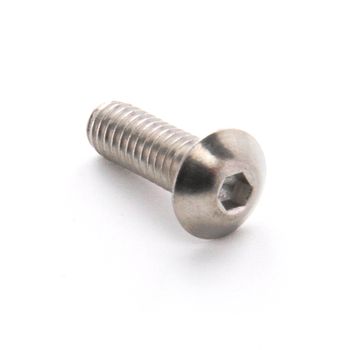
I use stainless tee-nuts and button head socket screws (5/16" x 1/4") to fasten the upper/lower shroud sections together. They look good, allow for quick separation of the shroud halves and are easily reassembled.   Remove the shroud halves from the truck and clamp them together - the guide pins with maintain the correct line up. Drill 3 appropriately sized holes (to accept the OD of the threaded body of the tee-nut) through both flanges. As far as locations - I use the same spots as where the factory staples are located. Un-clamp the shrouds halves and set the upper aside. Thread one of the screws into the tee-nut (provides a place to hold onto with some Channelocks). Apply heat to the tee-nut with a torch - until it is hot enough to melt into the plastic of the shroud. Line up the tee-nut with a hole and gently sink it into the upper surface of the lower shroud flange. The 4 claws will sink right through easily. The trick is to apply just enough pressure so that the round upper surface of the tee-nut will also become just partially embedded into the plastic. It takes some practice to learn how hot to make the tee-nut. If it's not hot enough, it won't melt/penetrate/embed in the flange. If it's too hot (and you push too hard) you can push the entire tee-nut right through the flange. When all the tee nuts have been inserted, use a pair of Channelocks to bend each of the claws over. Do this with the jaws of the pliers on the face of the tee-nut and the claw point. Squeeze the pliers until the claw bends over onto the lower surface of the flange. It isn't necessary to do all 4 claws - there will be one that is difficult to access. When you are done you will have 3 permanent threaded stainless inserts in the flanges of the lower shroud. These images are all I could find of the finished product:  
|
|
|

|
|
|
#3 |
|
Post Whore
 Join Date: Aug 2014
Location: Sacramento, CA
Posts: 10,870
|
Re: a tip to help finish off a detailed engine bay (pics)
Nice job, I would have probably used rivets and a rivet gun, than had second thoughts if when I would have to drill them out to separate them two pieces
|
|
|

|
|
|
#4 |
|
Registered User
Join Date: Apr 2015
Location: Shenandoah Valley, Virginia
Posts: 332
|
Re: a tip to help finish off a detailed engine bay (pics)
GET THAT OFF THAT BEAUTIFUL PAINT! Hahahaha jk
__________________
85' GMC Sierra Classic Built 350; Weiand intake, Holley 600, Thumpr Cam Built 350 turbo with shift kit & 2500 Stall Thumpin' away |
|
|

|
 |
| Bookmarks |
|
|