
 |
|
|
#1 |
|
Registered User
Join Date: Feb 2017
Location: Warren MI
Posts: 28
|
65 c10 SWB step side
Recently picked up my first project vehicle. 65 c10 step side. 305 v8/ TH400 column shift. Runs and drives great. PO updated to front disk and 3in lowering springs all corners. Most of interior is all new. Plan is to keep it a driver while it's nice, which in Michigan isn't always a lot of the year, and during winter dig deeper into long term fixes. Needs inner and outer rockers, fender bottoms, small portion of floor, and a few other areas.
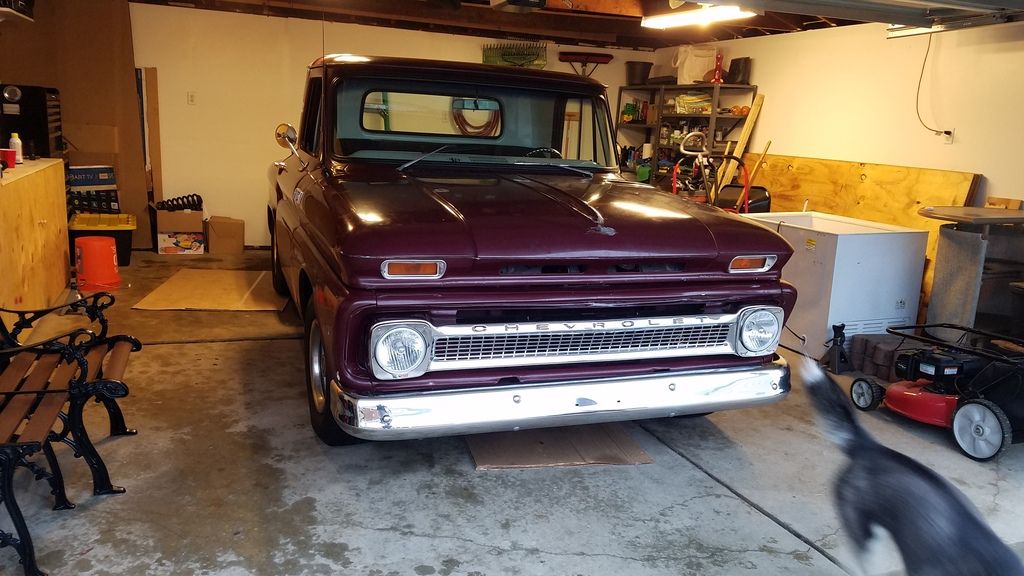 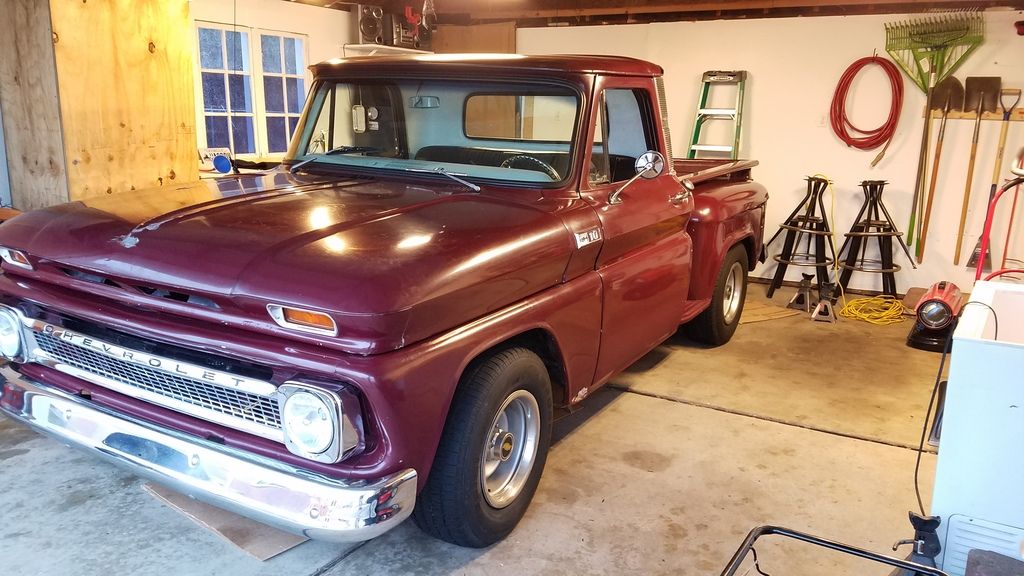 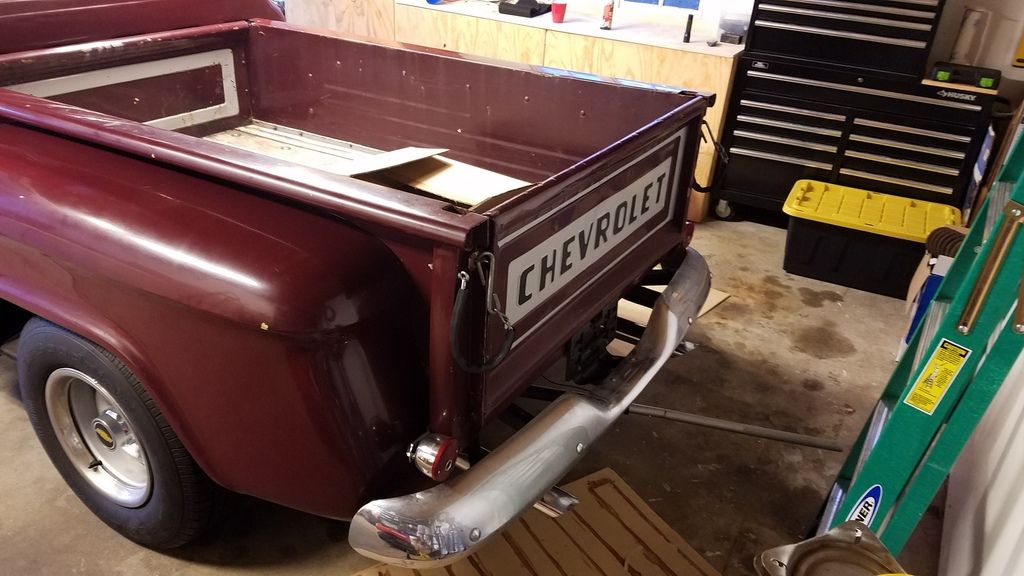 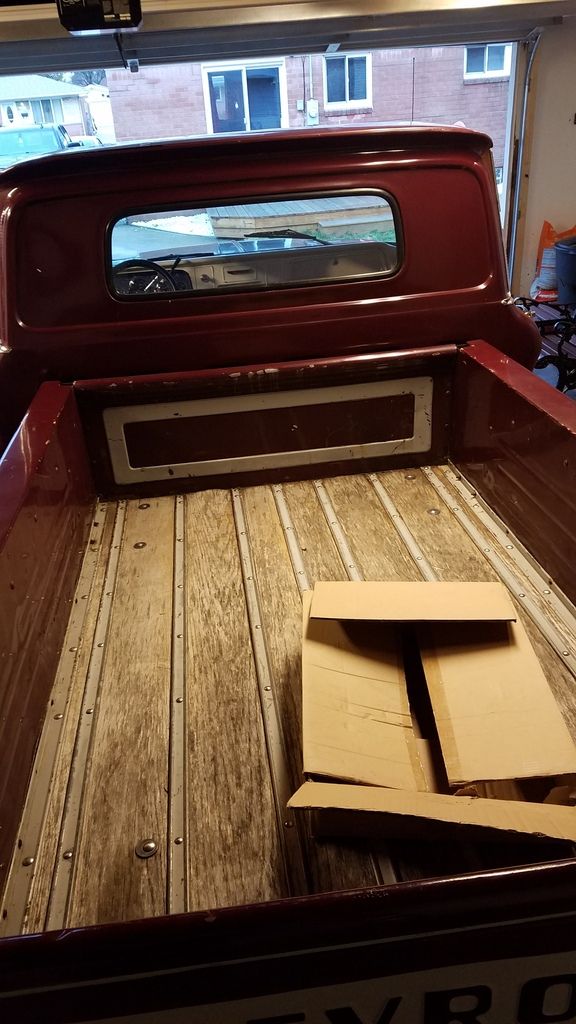 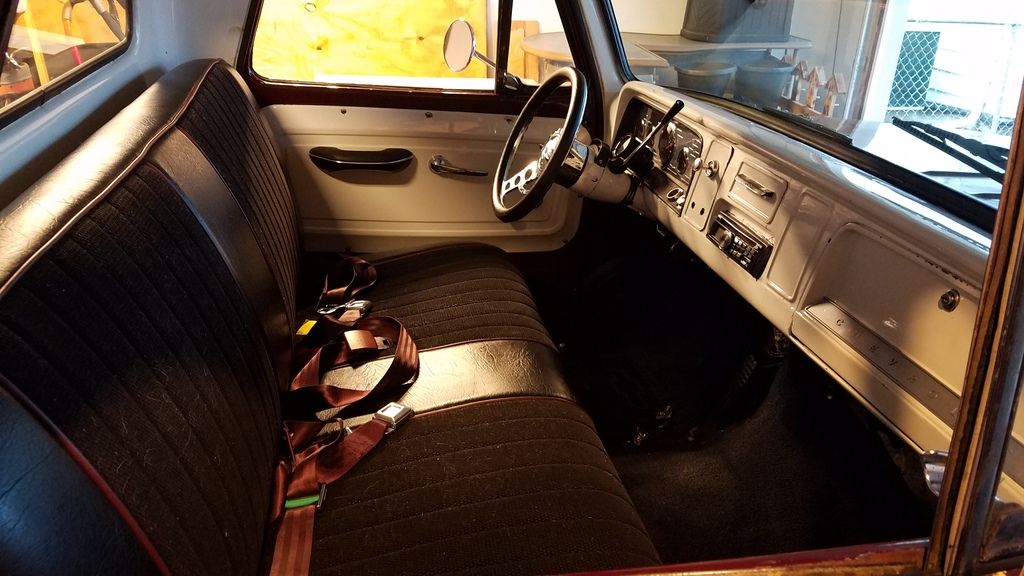 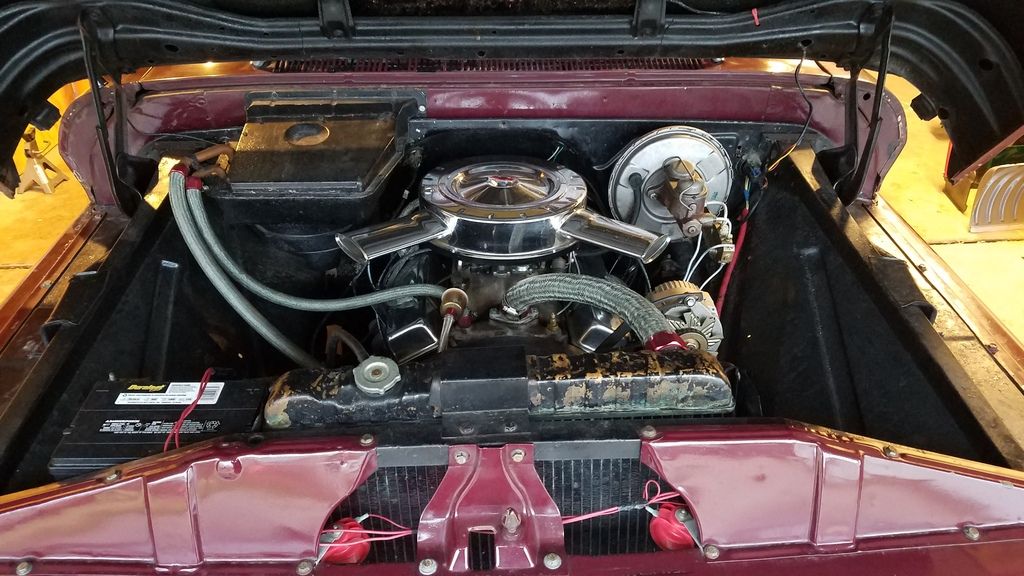 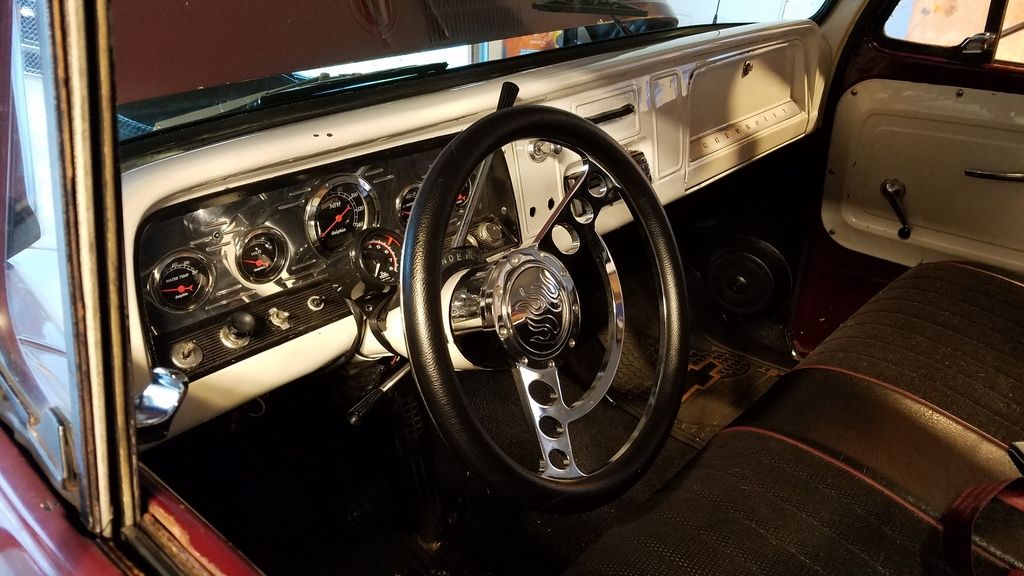 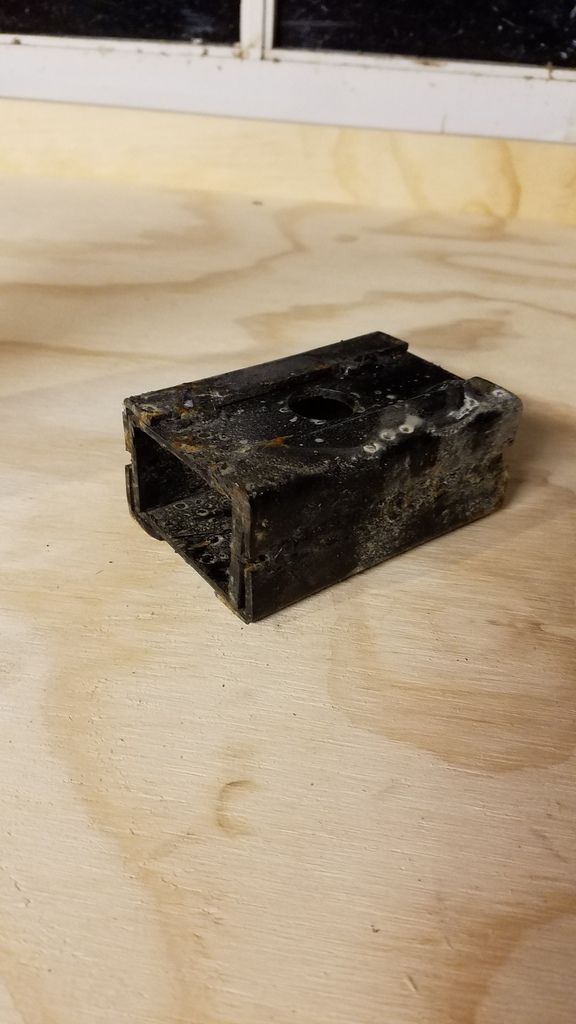 This block (aprox 1in thick) was above the passenger side lowering spring, only on the one side. Truck sat fairly level, took it out and still seems to sit level. Buddy who has a 64 wasn't sure why it would be there, any ideas? |
|
|

|
|
|
#2 |
|
60-66 Nut
  Join Date: Mar 2007
Location: Coeur d'Alene, Idaho
Posts: 23,252
|
Re: 65 c10 SWB step side
Welcome to the forum
 That looks like a decent truck to build. I have no idea about that 1" block.
__________________
Power Steering Box Adapter Plates For Sale HERE Power Brake Booster Adapter Brackets For Sale '63-'66 HERE and '67-'72 HERE and '60-'62 HERE and "60-'62 with clutch HERE Rear Disc Brake Brackets For Sale. Impala SS calipers HERE Camaro Calipers HERE D52 Calipers HERE 6 Lug HERE Hydroboost Mounting Plates HERE |
|
|

|
|
|
#3 |
|
State of Confusion!
  Join Date: Jul 2002
Location: Gulfport, MS USA
Posts: 47,249
|
Re: 65 c10 SWB step side
Welcome, beautiful looking truck!
__________________
Bill 1970 Chevy Custom/10 LWB Fleetside 2010 Toyota Tacoma PreRunner SR5 Double Cab - DD Member of Louisiana Classic Truck Club (LCTC) Bill's Gallery Life isn't tied with a bow, but it's still a gift. Live simply. Love generously. Care deeply. Speak kindly. Leave the rest to God! |
|
|

|
|
|
#4 |
|
Registered User
Join Date: Feb 2017
Location: Warren MI
Posts: 28
|
Re: 65 c10 SWB step side
Thank you gentlemen. Hoping to make some good progress today. Plan is to remove the bed, trailing arms, and axle and start preparing the frame for a bed mounted tank.
|
|
|

|
|
|
#5 |
|
Senior Member
  Join Date: Aug 2013
Location: Windsor, California
Posts: 1,042
|
Re: 65 c10 SWB step side
Nice...
|
|
|

|
|
|
#6 |
|
Registered User
Join Date: Feb 2017
Location: Warren MI
Posts: 28
|
Re: 65 c10 SWB step side
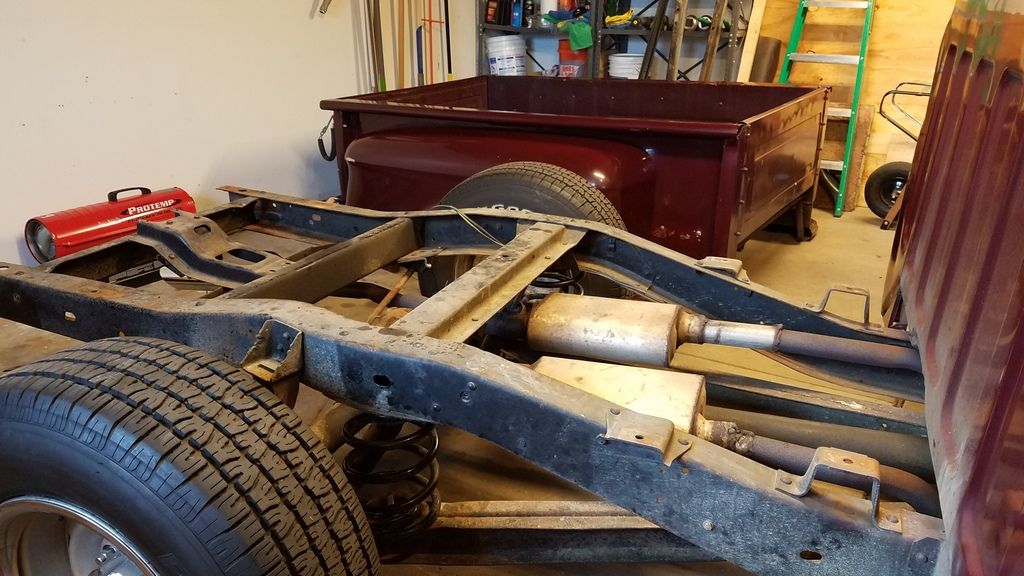
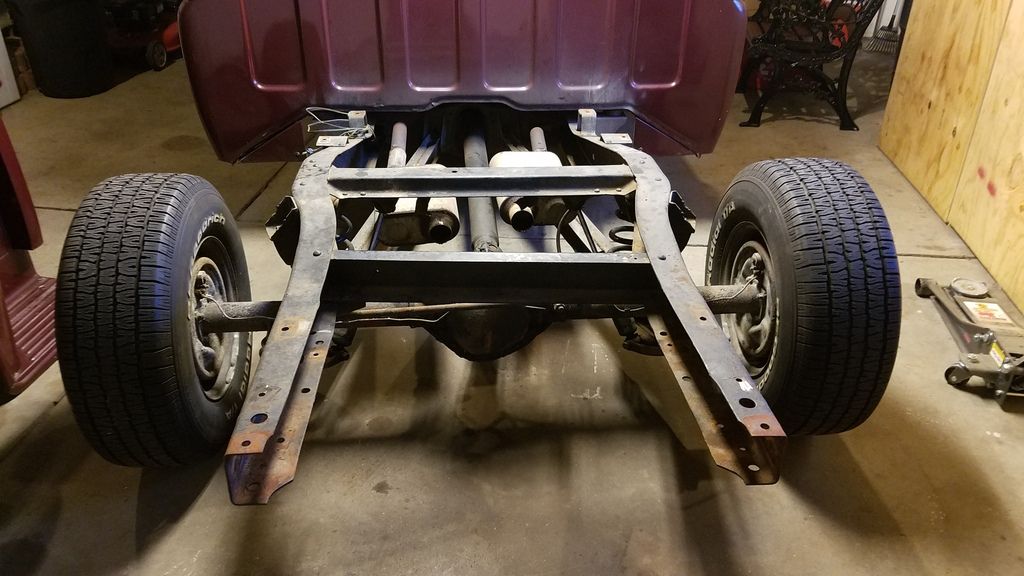
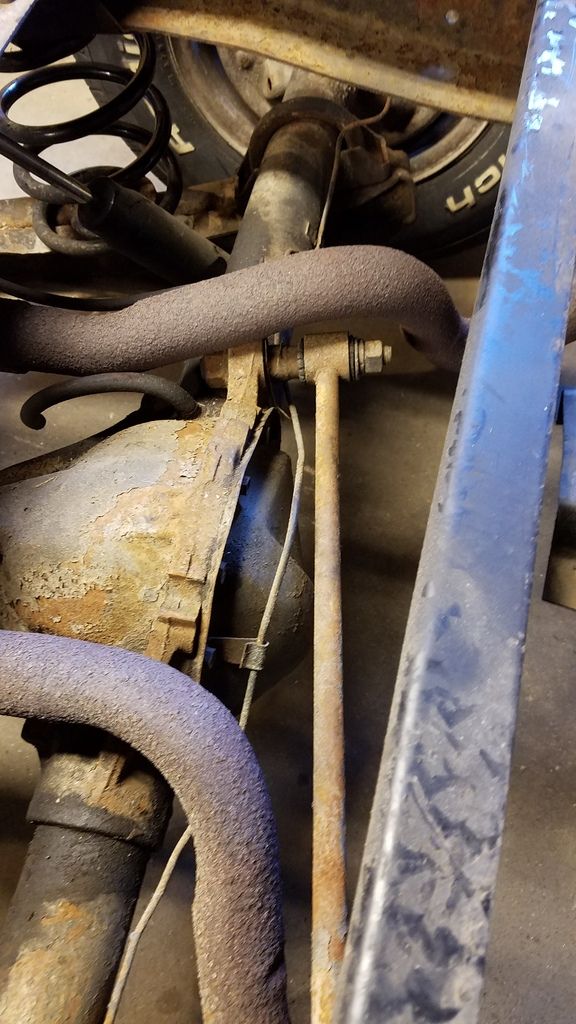
Got the bed off and the spare tire carrier and cross member cut out. Decided to cut the exhaust off at the muffler and will weld on a down turn. The exhaust was hitting the axle on the passenger side, which I think is why they stuck that block above the spring. Are the track bar mounts different between the 64's and 65's? My buddy mentioned his axle used a bracket welded on to the axle tube, as well as a different frame mount, while mine is built into the casting of the center section.
|
|
|

|
|
|
#7 |
|
Senior Member
  Join Date: Aug 2013
Location: Windsor, California
Posts: 1,042
|
Re: 65 c10 SWB step side
My 62 had the panhard bar on the passenger's tube...when I change out the rear end to a later 12 bolts I relocated that bracket on the new rear end and left the hole unused....
|
|
|

|
|
|
#8 |
|
Registered User
Join Date: Feb 2017
Location: Warren MI
Posts: 28
|
Re: 65 c10 SWB step side
I was looking to replace the origional with an adjustable bar that comes with a bracket to the trailing arm. So I guess i'll just leave the origional hole unused.
|
|
|

|
|
|
#9 |
|
Senior Member
  Join Date: Aug 2013
Location: Windsor, California
Posts: 1,042
|
Re: 65 c10 SWB step side
I believe the "kit" is available from CPP, my bar is an adjustable one from CPP but, you can't quite see it in the picture....
Joe |
|
|

|
|
|
#10 |
|
Registered User
Join Date: Feb 2017
Location: Warren MI
Posts: 28
|
Re: 65 c10 SWB step side
Started pulling everything cab rearward off of the truck, realized I have to pick up some bigger sockets/ wrenches. Anyone by chance know what size the nuts on the u bolts as well as the front trailing arm mounts are? Calipers are at work so I'm not able to measure them quick. And I haven't had much luck finding any information online.
|
|
|

|
|
|
#11 |
|
Registered User
Join Date: Feb 2017
Location: Warren MI
Posts: 28
|
Re: 65 c10 SWB step side
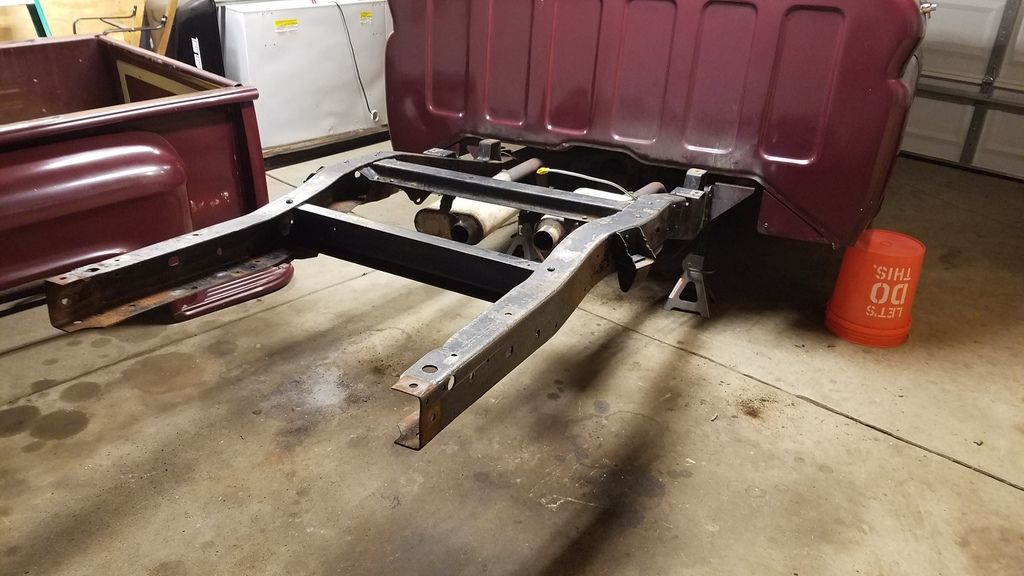
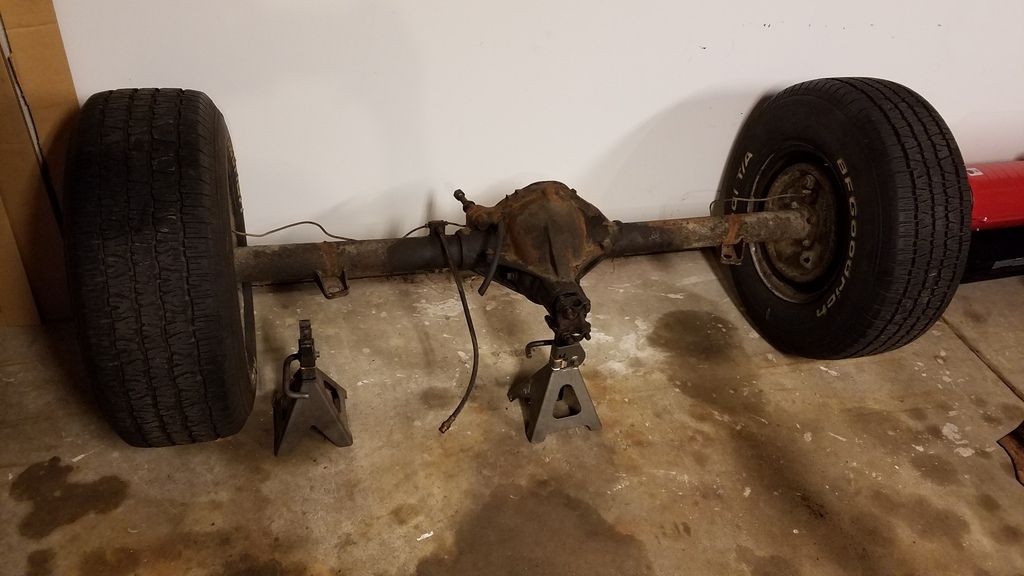
Finally got everything tore down. As much as I thought the u bolt nuts would be easier then the frame mounts for the trailing arms I was wrong. Spent about an hour and a half getting the u bolts off and about 5 minutes on the frame mount. The frame is pretty clean and a good portion of the paint scraped off the other day, so wire wheeling the rails is taking no time at all. Unfortunately it looks like my new gas tank is back ordered, as well as new trailing arm bushings. The tank isn't a huge deal as I could put all of the suspension back in, but without the bushings I will end up at a standstill. Contemplating canceling the bushings and using another supplier.
|
|
|

|
|
|
#12 |
|
I'm just glad to be here!
Join Date: Jan 2008
Location: Longview, TX
Posts: 4,788
|
Re: 65 c10 SWB step side
Truck looks good. Great starting point to make it better.
__________________
Karl  1965 Chevy Stepside(Grandpa's Old Blue) and (July 2015 Shop Build!)(2020, the Saga Continues) http://67-72chevytrucks.com/vboard/s...d.php?t=372424 The LST Challenge: http://67-72chevytrucks.com/vboard/s...=1#post7812257 Korbin's 1st Square: "Sunburn" http://67-72chevytrucks.com/vboard/s...d.php?t=418618 1985 GMC Sierra: "White Trash", Korbin's 2nd now... http://67-72chevytrucks.com/vboard/s...d.php?t=632305 Henry - 1984 Chevrolet, Owen's 1st Square |
|
|

|
|
|
#13 |
|
Registered User
Join Date: Feb 2017
Location: Warren MI
Posts: 28
|
Re: 65 c10 SWB step side
Well got the back half of the frame stripped and wiped down with acetone. Also slowly getting some parts in. Fuel cap and diff gasket came today, fuel line and fuel level sender should be here tomorrow. Found out my new track bar and gas tank are two weeks out, and my trailing arm bushings are three weeks out. At least the weather is less than desirable so I don't feel to bad about the truck being tore down for a couple more weeks. Frame will get wiped down again tomorrow and primed. Once the frame is dry Ill start on the axle and trailing arms.
I read in another post about putting a line of seam sealer on the top joint of the trailing arm to prevent water from getting between the two halves. Is it best to only do the top so water can run out if it happens to get in? or seal the top and bottom? Does anyone have any good tips/tricks on containing dust from grinding/wire wheeling? Makes me wish I had enough room to separate part as a designated dirty room. I thought about tarping off a section to try and keep the majority of the dust in one area. 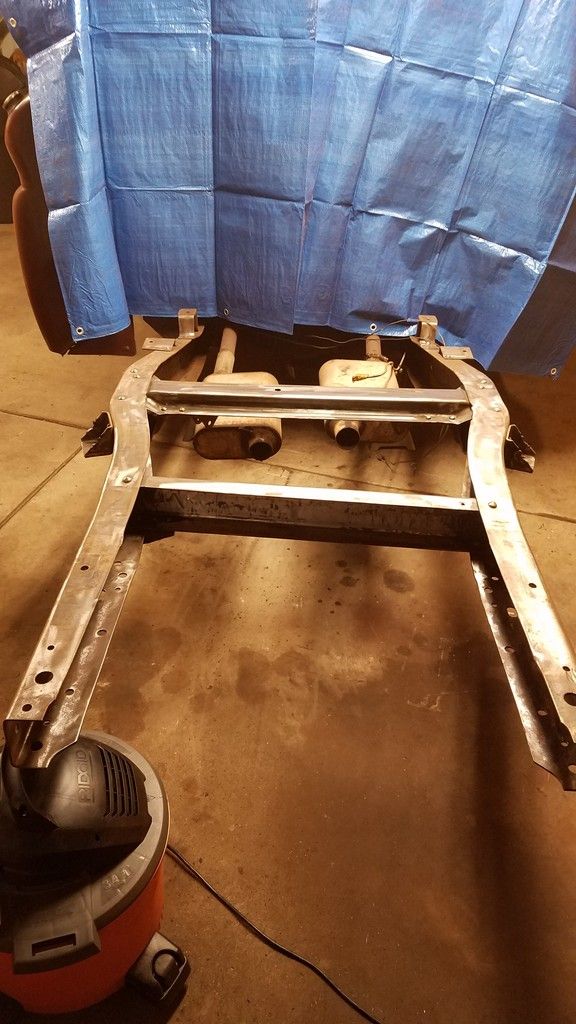 
|
|
|

|
|
|
#14 |
|
60-66 Nut
  Join Date: Mar 2007
Location: Coeur d'Alene, Idaho
Posts: 23,252
|
Re: 65 c10 SWB step side
I would seal only the top seam of the trailing arms.
__________________
Power Steering Box Adapter Plates For Sale HERE Power Brake Booster Adapter Brackets For Sale '63-'66 HERE and '67-'72 HERE and '60-'62 HERE and "60-'62 with clutch HERE Rear Disc Brake Brackets For Sale. Impala SS calipers HERE Camaro Calipers HERE D52 Calipers HERE 6 Lug HERE Hydroboost Mounting Plates HERE |
|
|

|
|
|
#15 |
|
Registered User
Join Date: Feb 2017
Location: Warren MI
Posts: 28
|
Re: 65 c10 SWB step side
Made a little more progress this weekend. Wiped the frame down one more time with acetone and sprayed it Friday night with a few coats of primer. The weather was a little better yesterday then expected so I decided to pull the rear axle and trailing arms into the drive way and scrape/ degrease them. I think I probably scraped about 5 pounds of crap off of the axle. Drug the axle back into the garage and fired up the heater while I prepped to spray the frame. A few coats of gloss black later and it looks great. Makes me glad I spent a little more time prepping the frame. Just kept telling myself an extra few hours makes all the difference later. Now to get the trailing arms and axle finished up while I wait on the rest of my parts.
Bench seat should be gone on Friday if this guy actually comes and picks it up, and may go Thursday to pick up some bucket seats. 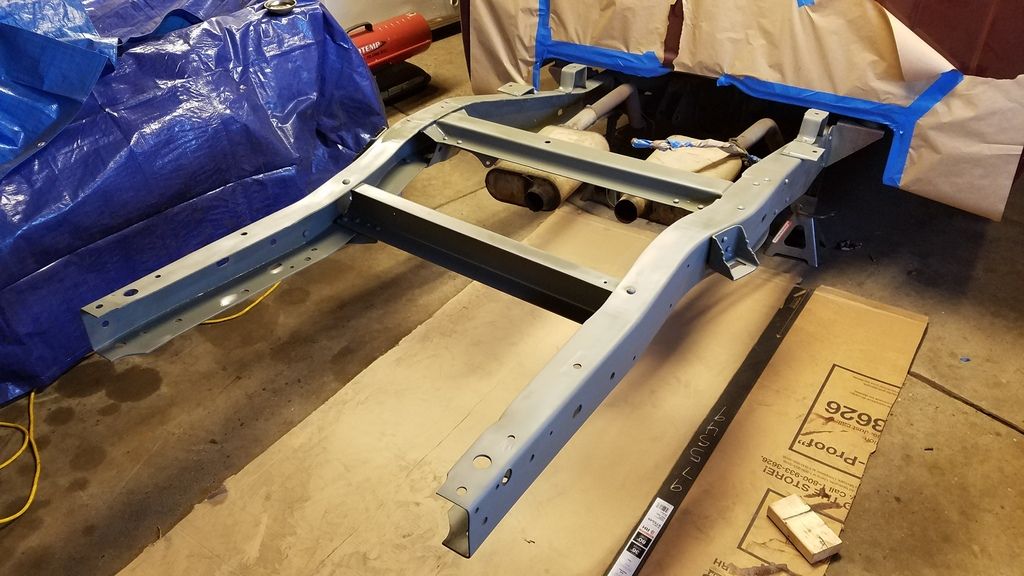 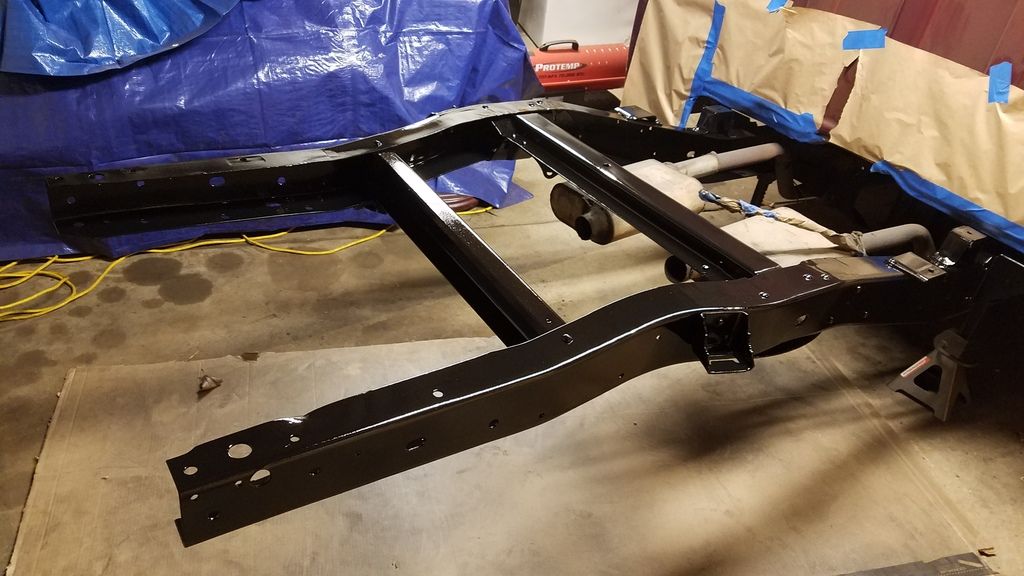 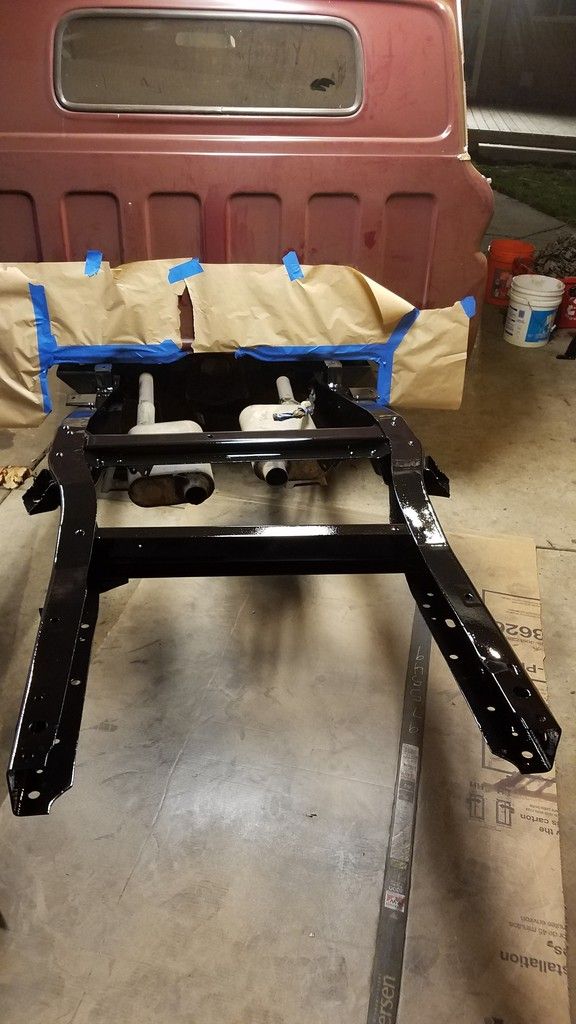
|
|
|

|
|
|
#16 |
|
Registered User
 Join Date: Feb 2016
Location: Richmond, VA
Posts: 176
|
Re: 65 c10 SWB step side
I have no good ideas, only wanted to say I know your pain. I swear I am still cleaning up from preping my frame months ago. I think next time I am just going to buy one of those tarp tents and do all my grinding outside.
|
|
|

|
|
|
#17 | |
|
Registered User
Join Date: Feb 2017
Location: Warren MI
Posts: 28
|
Re: 65 c10 SWB step side
Quote:
That's a great idea. Except most of my sanding/grinding will be happening during the cold Michigan months lol. |
|
|
|

|
|
|
#18 |
|
Registered User
 Join Date: Feb 2016
Location: Richmond, VA
Posts: 176
|
Re: 65 c10 SWB step side
Yep, that's what happened to me. It was 30 outside, so I was inside the garage with my small space heater on full blast.
|
|
|

|
|
|
#19 |
|
Registered User
Join Date: Jun 2012
Location: Portland
Posts: 1,330
|
Re: 65 c10 SWB step side
I bought a dust collector and sometimes tape the tube to my arm, near the wrist, when I grind to help suck up dust as I go. Really depends on what I'm doing as sometimes it's just easier to sweep and suck it up after.
|
|
|

|
|
|
#20 |
|
Registered User
Join Date: Feb 2017
Location: Warren MI
Posts: 28
|
Re: 65 c10 SWB step side
Well it's been a little while since I've last posted. Spent most the time waiting on parts while slowly working on miscellaneous things. Started off stripping the trailing arms, rear axle, and some of the cross supports for the bed. Got those all cleaned up and shot them with some primer as well as a couple coats of gloss black. Before painting the axle I removed the diff cover, drained all of the old oil and replaced the gasket. Also received some parts while I was out in the garage, new U-bolts, front trailing arm bolts, and a new track bar mount.
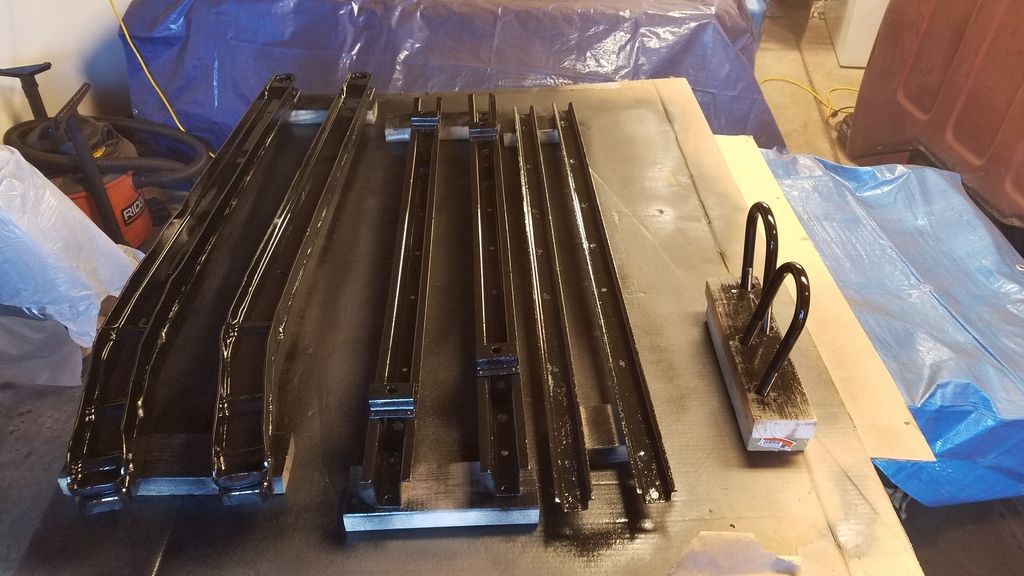 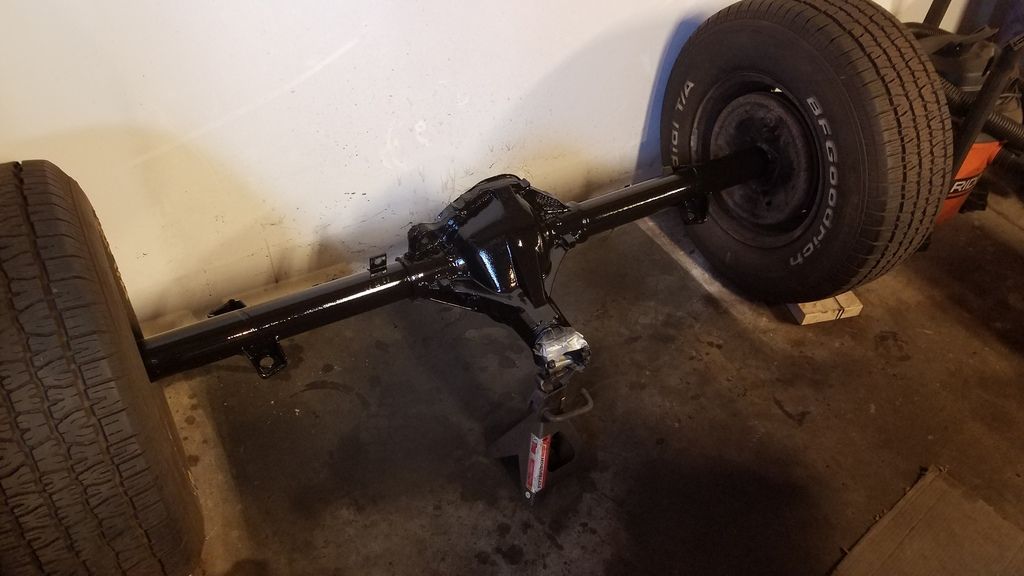 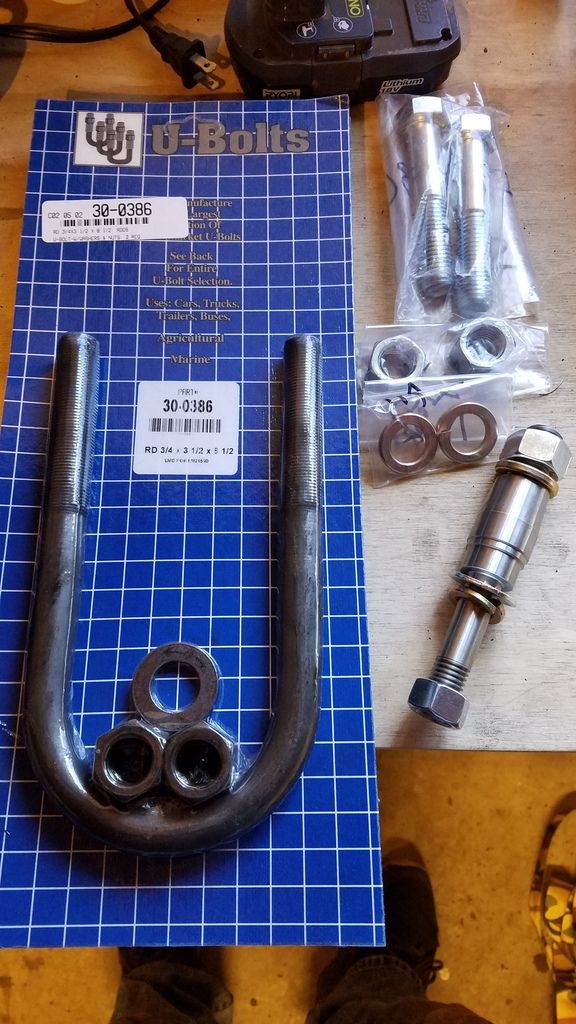 While waiting on paint to dry my new aluminum tank finally came. Went with 20 gallon tank from CPP. Also received an adjustable track bar. 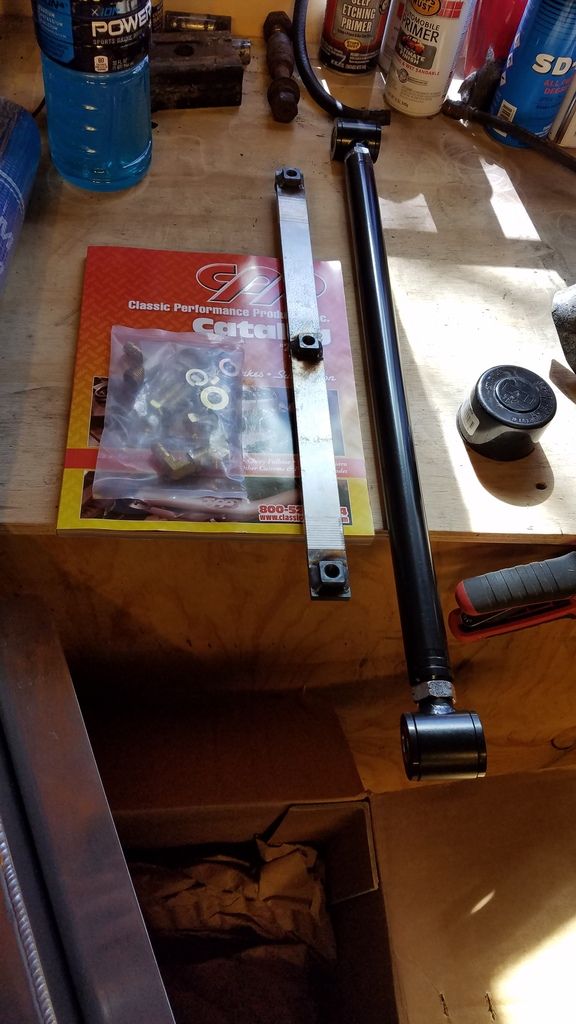 Let the paint dry over night and spent the next day getting the tank installed as well as removing the old fuel lines and running the new line. 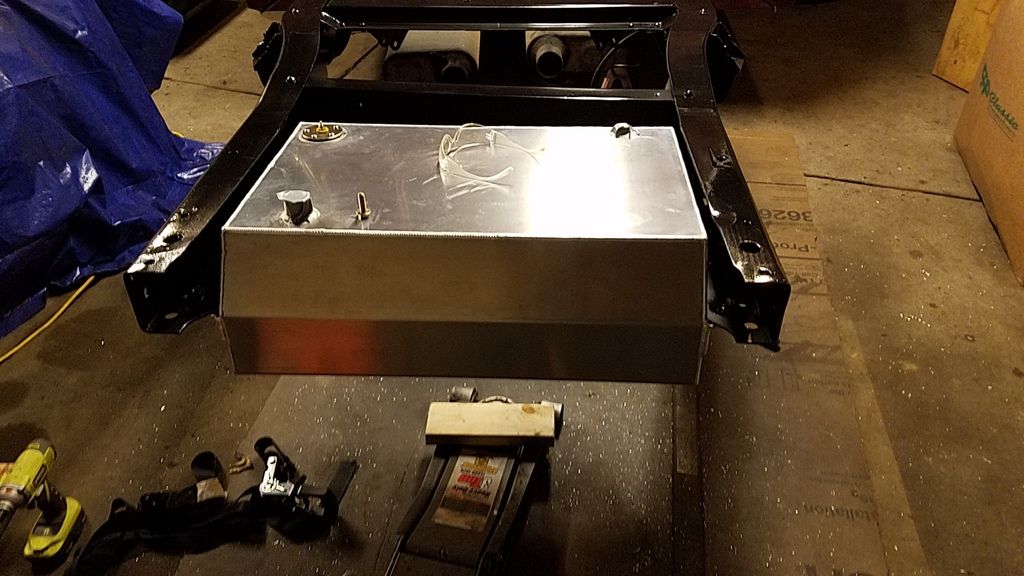 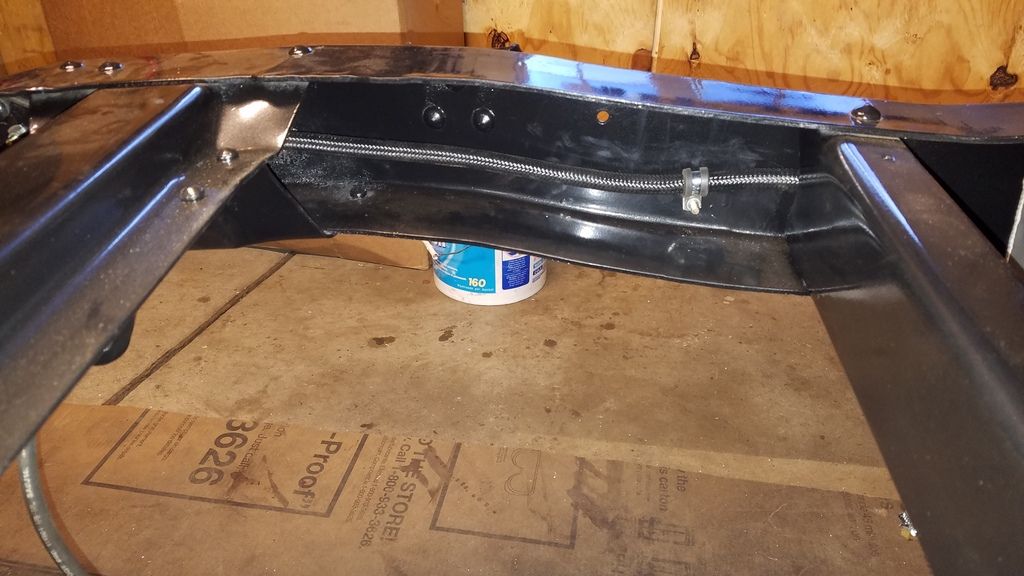 At a point now where I'm waiting for my trailing arm bushings to get here so I can start putting the rear back together. Been slowly finishing some small projects, replaced the brake lines on the axle, cleaned up and painted the lower shock mounts, and spring retainers. 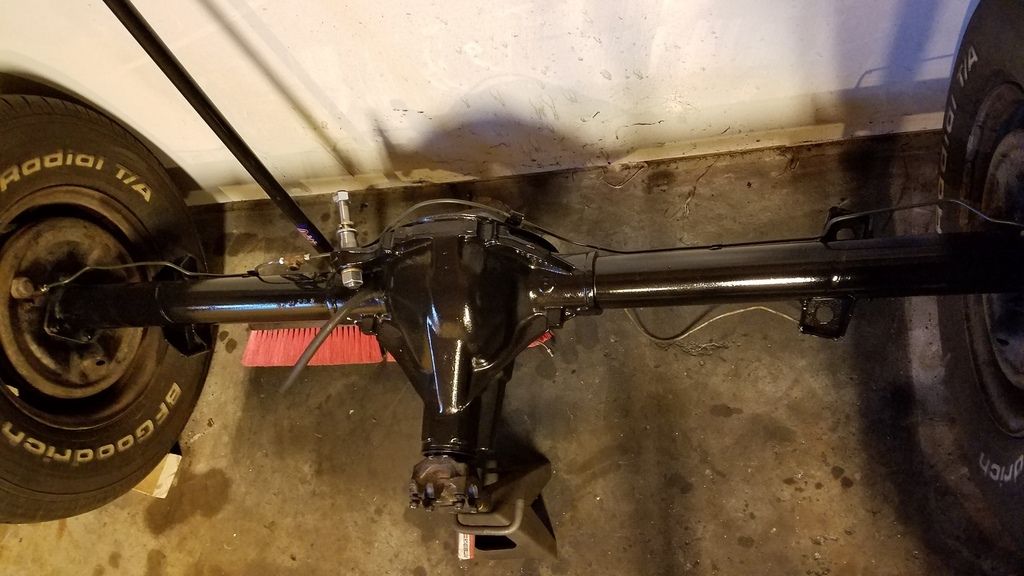 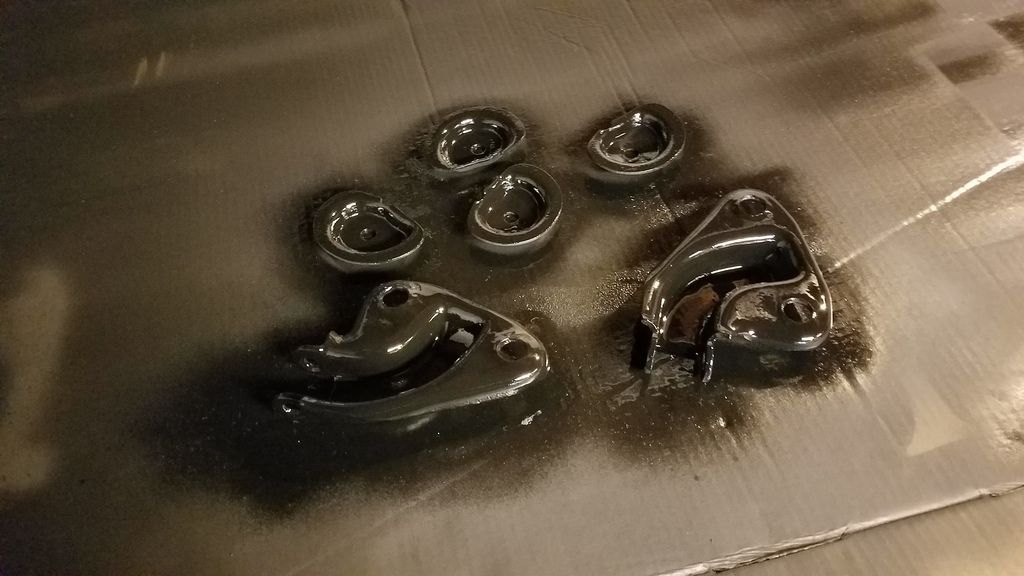 Finally received the invoice for the bushings so they should ship out today. hopefully will get them early next week and have to good progress and updates to show. |
|
|

|
|
|
#21 |
|
Registered User
Join Date: Feb 2017
Location: Warren MI
Posts: 28
|
Re: 65 c10 SWB step side
Trailing arm bushings came Friday just before I was about to call and see if they shipped. Had plans Friday night but got up early Saturday before the in laws came down to get some work in. Based on what I was told by my buddy I was planning on spending the weekend trying to get the bushings in, about five minutes later both bushings were in. Got the truck all bolted back together will all new hardware. Came back out to the garage after dinner and worked on wrapping up a few other small items, connecting the brake lines, removing the tank from the cab, and trying to clean the shop up a little. Plan today is to bleed the brakes, torque everything to spec, and maybe go pick up everything to do an oil change. Truck really needs a quick spray down with the hose, but that may be depending on the temp today.
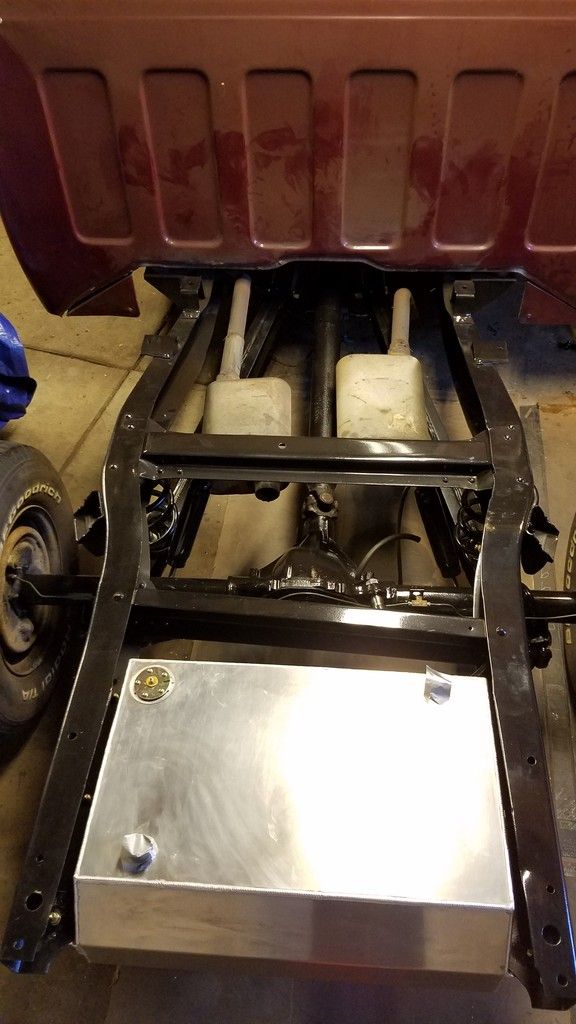 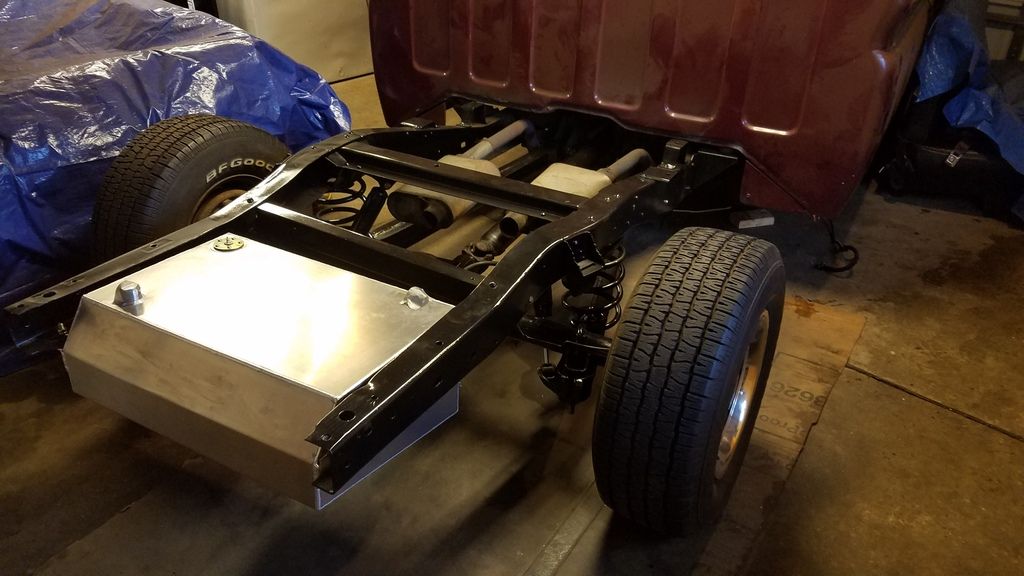 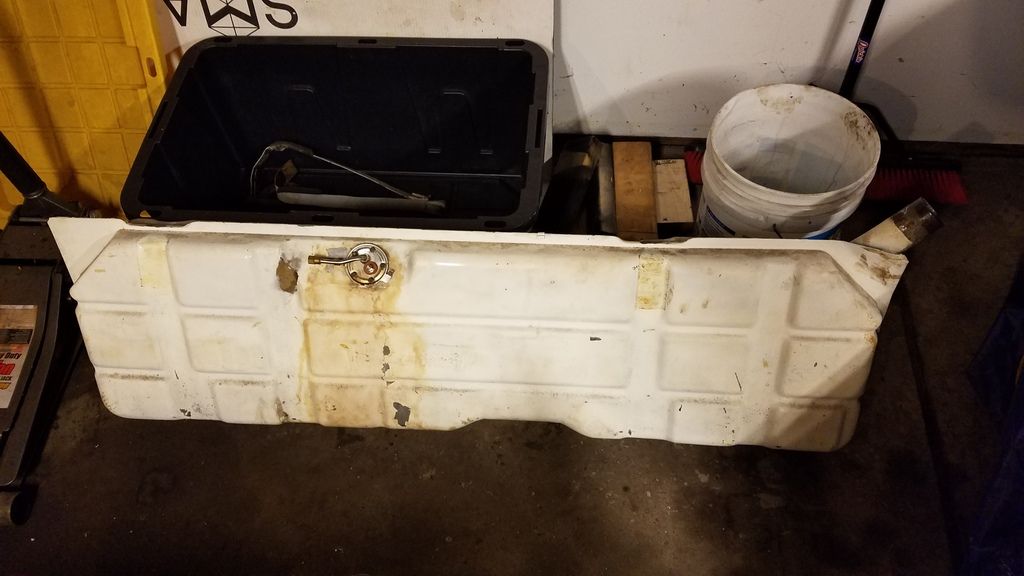 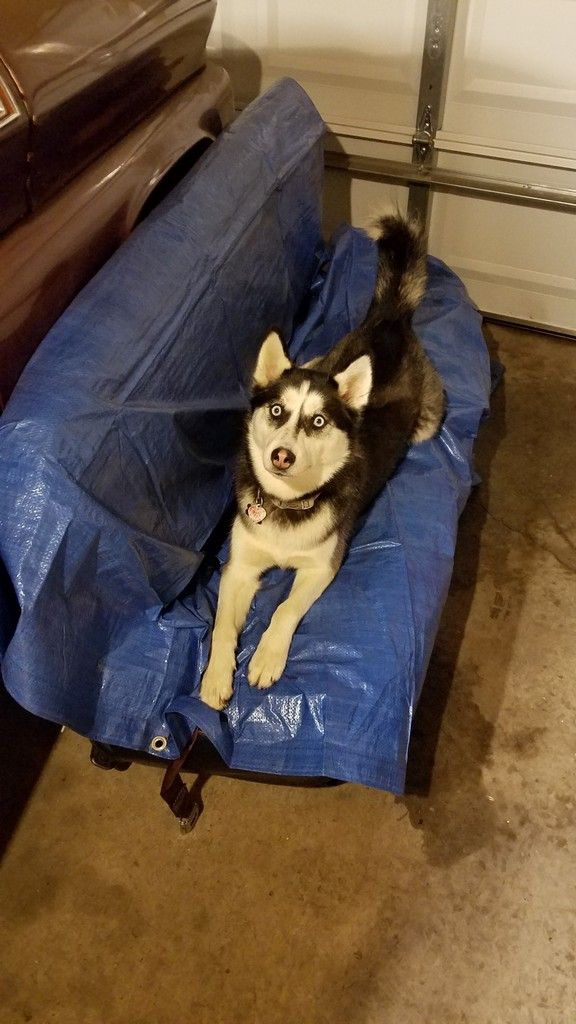 Had some supervision while getting some work done. |
|
|

|
|
|
#22 |
|
Registered User
Join Date: Feb 2017
Location: Warren MI
Posts: 28
|
Re: 65 c10 SWB step side
Put the bed back on and slapped everything back on the truck since it was 75 degrees this afternoon. Got insurance and just made it to the Secretary of state just as they were closing to pick up a plate. Checked all of the fluids and made sure everything was tight and took her for a cruise with the woman. Went for just over a 70 mile shakedown, had zero issues. Which is always a good thing. Waiting on parts to come. Picked up a new wiring harness as well as drop spindles, new control arms, tie rods, and new rear springs to increase my drop to 5/5. Picked up everything to do an oil change as well as a new trans gasket and filter.
|
|
|

|
|
|
#23 |
|
Registered User
Join Date: Feb 2017
Location: Warren MI
Posts: 28
|
Re: 65 c10 SWB step side
While chasing transmission leaks I noticed the electronic kick down wasn't hooked up. After lots of browsing on the internet I've got mixed answers on whether or not to hook it up. Lots of people say they never do, some say to hook it up. What's everyone's thoughts on it?
|
|
|

|
|
|
#24 |
|
Registered User
Join Date: Mar 2013
Location: Waco, Texas
Posts: 411
|
Re: 65 c10 SWB step side
Good progress, I know about Michigan winters, I lived in Grand Rapids 21 years.
Following this build. |
|
|

|
|
|
#25 |
|
60-66 Nut
  Join Date: Mar 2007
Location: Coeur d'Alene, Idaho
Posts: 23,252
|
Re: 65 c10 SWB step side
I don't think I have ever had a TH400 that had the kick down hooked up. If I needed to drop down a gear, I just do it with the shifter. If you want to hook it up, you will have to mount a electric switch either on the pedal or at the throttle linkage on the carb. I believe it was '72 and earlier had the switch on the carb and '73 and up had it on the pedal inside the cab.
__________________
Power Steering Box Adapter Plates For Sale HERE Power Brake Booster Adapter Brackets For Sale '63-'66 HERE and '67-'72 HERE and '60-'62 HERE and "60-'62 with clutch HERE Rear Disc Brake Brackets For Sale. Impala SS calipers HERE Camaro Calipers HERE D52 Calipers HERE 6 Lug HERE Hydroboost Mounting Plates HERE |
|
|

|
 |
| Bookmarks |
|
|