
|
Register or Log In To remove these advertisements. |
|
|
|
|||||||
 |
|
|
Thread Tools | Display Modes |
 09-29-2009, 09:46 PM
|
#26 |
|
Registered User
Join Date: Jun 2009
Location: Eugene, OR
Posts: 200
|
Re: Let the rebuild begin...
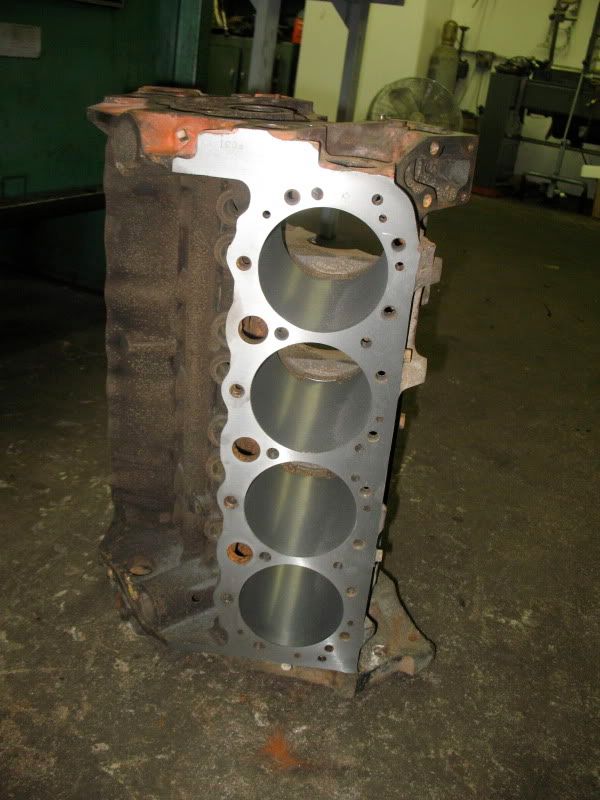
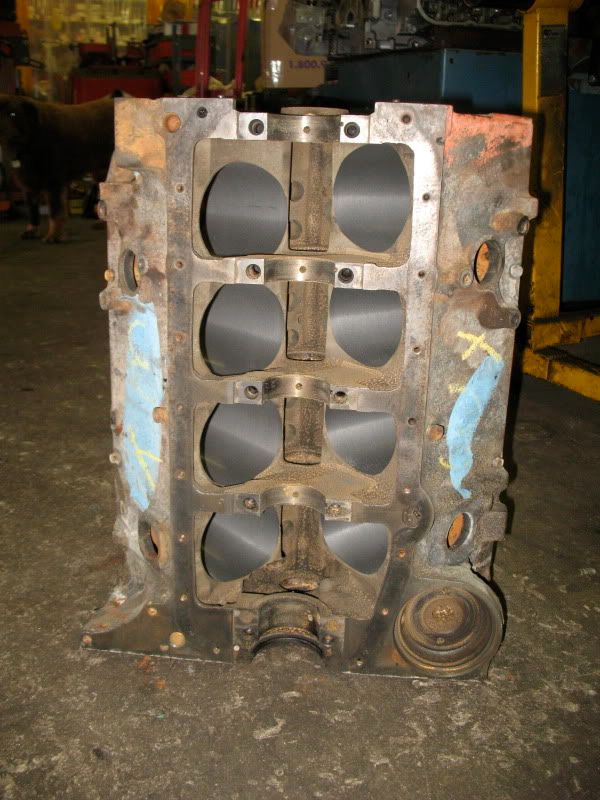
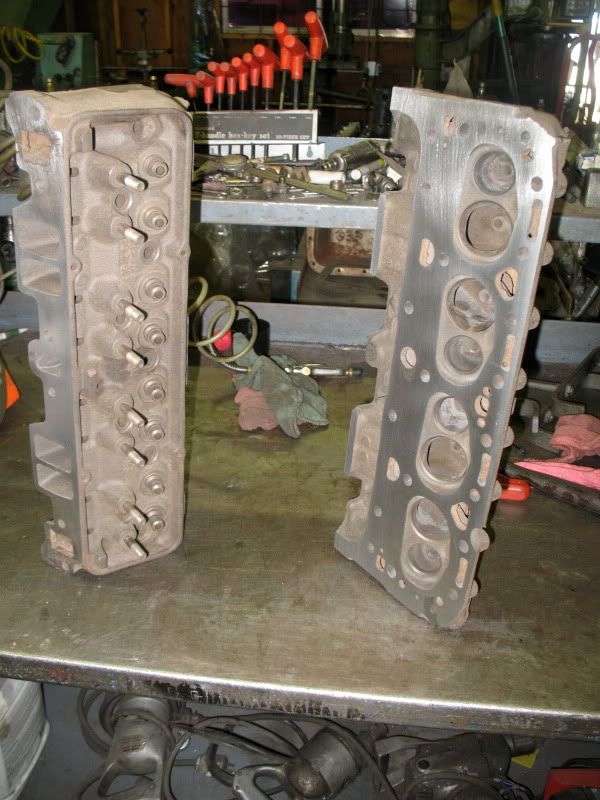
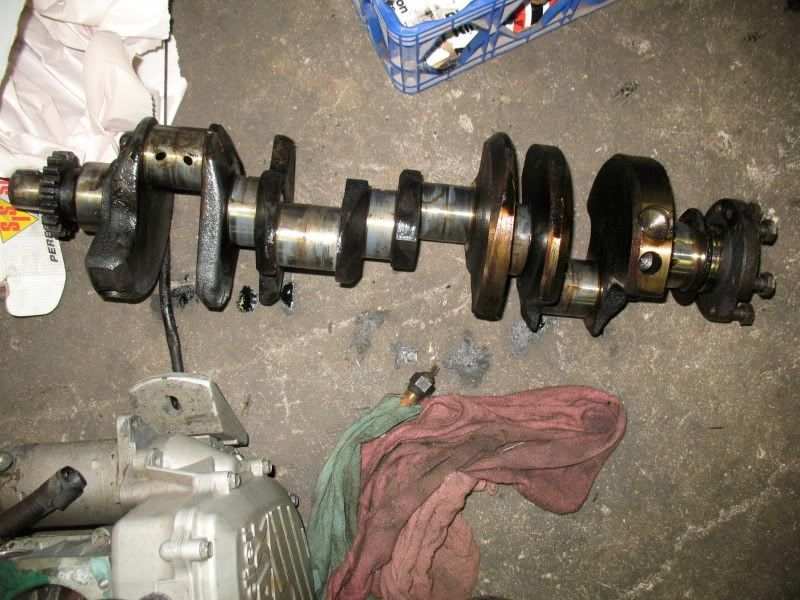
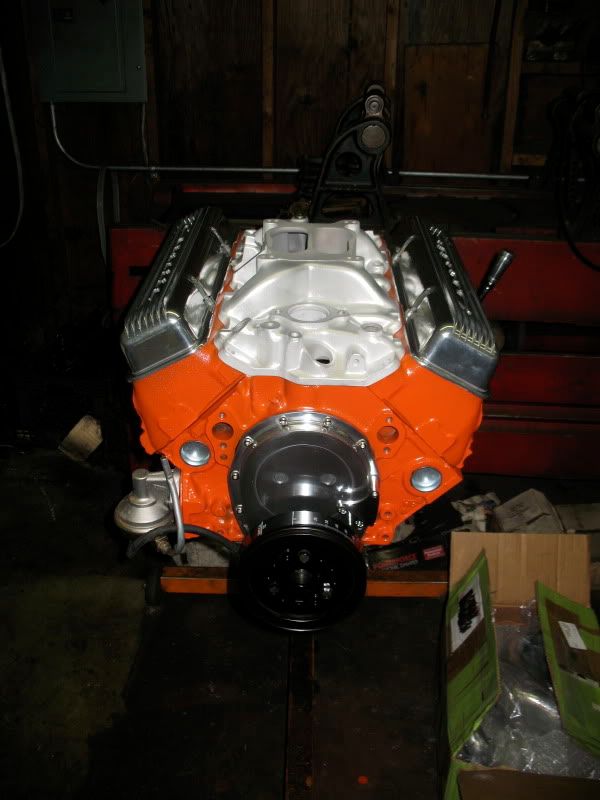
Just stopped by the rebuilders shop today. He just finished decking the block and boring it .030 over. The 462 camel humps are gettin a new life too. The crank is trashed, so it's being replaced. Should be done by next week. Just picked up the freshly rebuilt 4spd. Here's what the 327 is lookin like:
__________________
Project Build (1): http://67-72chevytrucks.com/vboard/s...d.php?t=362482 Project build (2): http://67-72chevytrucks.com/vboard/s...d.php?t=370985 Life should not be a journey to the grave with the intention of arriving safely in a pretty and well preserved body, but rather to skid in broadside in a cloud of smoke, thoroughly used up, totally worn out, and loudly proclaiming...Wow, What a Ride! - Hunter S. Thompson |

|

|
|
09-29-2009, 10:01 PM
|
#27 |
|
Hollister, CA.
 Join Date: Sep 2006
Location: Hollister, Ca.
Posts: 6,150
|
Re: Let the rebuild begin...
Sweet....Good job bro.
Really dig'n the bumper guards...gotta get some.
__________________
John What the Heck is that ?? CURRENT BUILDS: 62 BurbMaster  Other Builds: My '63 C-10,LWB,CC,BBW '06 HD StrAight Axle Swap Father/Son '67 C-20, LQ9,4L80,Bagged,8-Lugger !!Good Friend Richard's Build AMERICAN CUSTOMS & CLASSICS (831) 630-1965 www.ACCHOLLISTER.com ACC on FACEBOOK "Rest in Peace, Mom & Dad ... I will see you again someday!" |
|
|
|
|
09-29-2009, 11:56 PM
|
#28 | |
|
Registered User
Join Date: Jun 2009
Location: Eugene, OR
Posts: 200
|
Re: Let the rebuild begin...
Quote:

__________________
Project Build (1): http://67-72chevytrucks.com/vboard/s...d.php?t=362482 Project build (2): http://67-72chevytrucks.com/vboard/s...d.php?t=370985 Life should not be a journey to the grave with the intention of arriving safely in a pretty and well preserved body, but rather to skid in broadside in a cloud of smoke, thoroughly used up, totally worn out, and loudly proclaiming...Wow, What a Ride! - Hunter S. Thompson Last edited by Sicboy; 09-29-2009 at 11:58 PM. |
|
|
|
|
|
10-16-2009, 06:33 PM
|
#29 |
|
Registered User
Join Date: Jun 2009
Location: Eugene, OR
Posts: 200
|
Re: Let the rebuild begin...
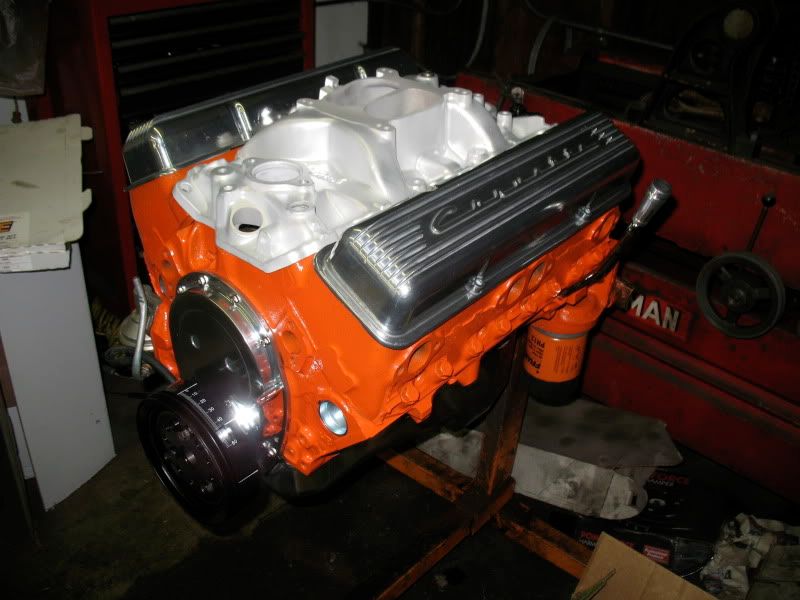
Stopped by the shop today to drop off some shiny parts and got to see the 327's makeover. Here's what she's lookin like...
__________________
Project Build (1): http://67-72chevytrucks.com/vboard/s...d.php?t=362482 Project build (2): http://67-72chevytrucks.com/vboard/s...d.php?t=370985 Life should not be a journey to the grave with the intention of arriving safely in a pretty and well preserved body, but rather to skid in broadside in a cloud of smoke, thoroughly used up, totally worn out, and loudly proclaiming...Wow, What a Ride! - Hunter S. Thompson |
|
|
|
|
10-16-2009, 06:44 PM
|
#30 |
|
283 Drama Queen
Join Date: Dec 2004
Location: Surf City, CA
Posts: 2,435
|
Re: Let the rebuild begin...
 Oh, be still my beating heart! Oh, be still my beating heart! 
__________________
For about 12 years of my adult life I had a severe speech impediment. My ex-wife never let me get a word in edgewise. |
|
|
|
|
10-24-2009, 02:28 AM
|
#31 |
|
Registered User
Join Date: Jun 2009
Location: Eugene, OR
Posts: 200
|
Re: Let the rebuild begin...
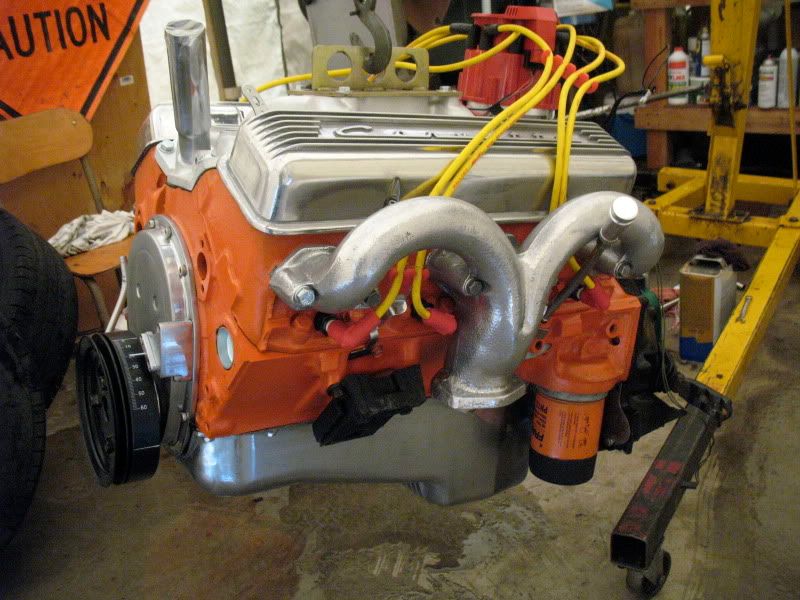
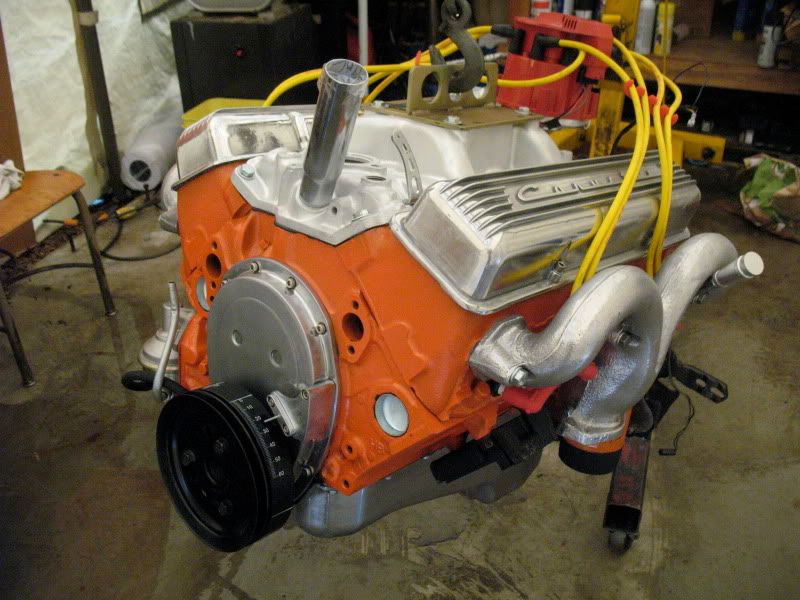
Got the engine today. Will be installing it tomorrow. Woohoo!!!! More pics to follow...
__________________
Project Build (1): http://67-72chevytrucks.com/vboard/s...d.php?t=362482 Project build (2): http://67-72chevytrucks.com/vboard/s...d.php?t=370985 Life should not be a journey to the grave with the intention of arriving safely in a pretty and well preserved body, but rather to skid in broadside in a cloud of smoke, thoroughly used up, totally worn out, and loudly proclaiming...Wow, What a Ride! - Hunter S. Thompson |
|
|
|
|
10-24-2009, 02:45 AM
|
#32 |
|
Senior Enthusiast
Join Date: Feb 2007
Location: Spokane Valley, WA
Posts: 8,356
|
Re: Let the rebuild begin...
Those exhaust manifolds are too cool.
|
|
|
|
|
10-24-2009, 02:46 AM
|
#33 |
|
Registered User
Join Date: Sep 2009
Location: California Delta
Posts: 2,163
|
Re: Let the rebuild begin...
My buddy had a saginaw 4 speed in his big block Chevelle. You could here the tranny before you heard the engine note. It sounded just like a UPS truck coming up the street. Brings back great memories.
__________________
Name: Rich Current Ride: 1964 C-10 Short Fleetside Daily Driver: 2005 GMC crew cab short fleetside /2001 Chevy Tahoe Past GM Trucks: 1959 GMC short stepside 1968 GMC short stepside-4x4 1973 Chevy short stepside 1989 Chevy short fleetside-reg cab 1993 Chevy short fleetside-Xcab 2002 Chevy short fleetside-Xcab Save the dinosaurs, use synthetic oil. |
|
|
|
|
10-25-2009, 09:38 PM
|
#34 |
|
Registered User
Join Date: Jun 2009
Location: Eugene, OR
Posts: 200
|
Re: Let the rebuild begin...
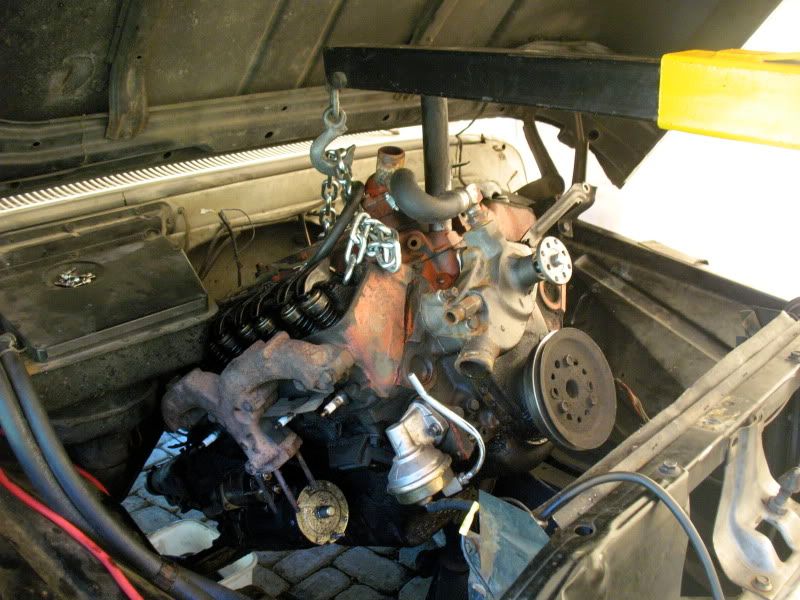
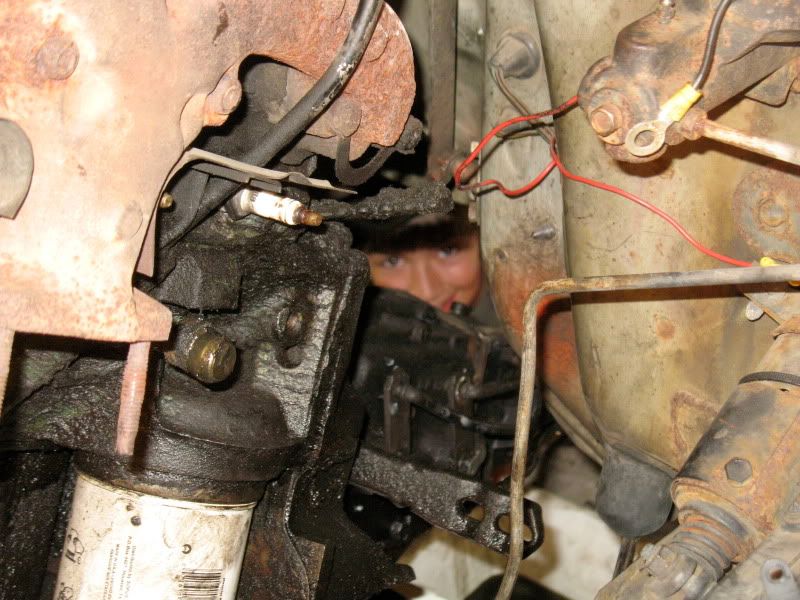
Installed the rebuilt 327 and rebuilt saginaw yesterday. Woohoo!!! The motor installation was a breeze. The tranny however, was an SOB. Took two hours and 20 SOB's, with three of us wiggling and pushing to get the input shaft guided into the needle bearing pilot bushing. Have a few things to button up, then trailer it down to the exhaust shop to install 2-1/2" pipes with Brockman Steel Packed Mellowtones. Then the cam break in. Here's a few pics...notice the custom sponsored air cleaner.
The left rear exhaust manifold is about a paper thickness away from the firewall...will be pounding it out. 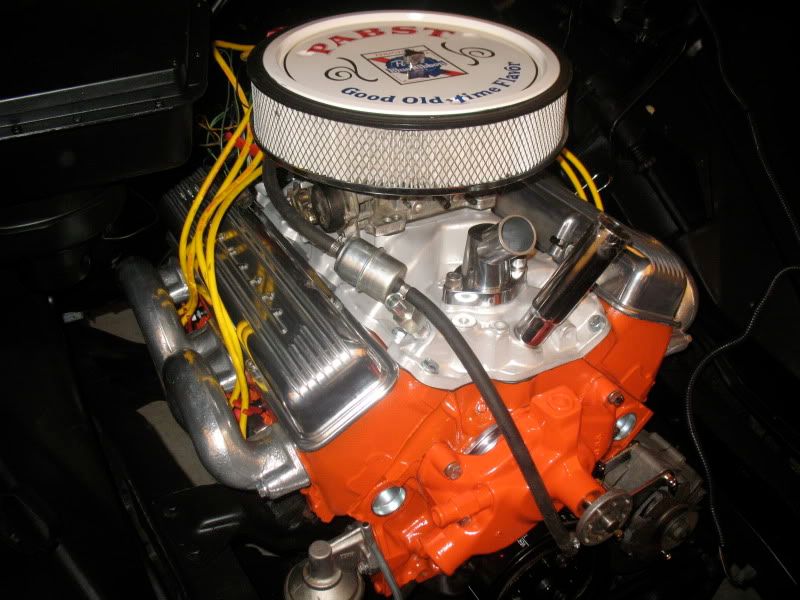 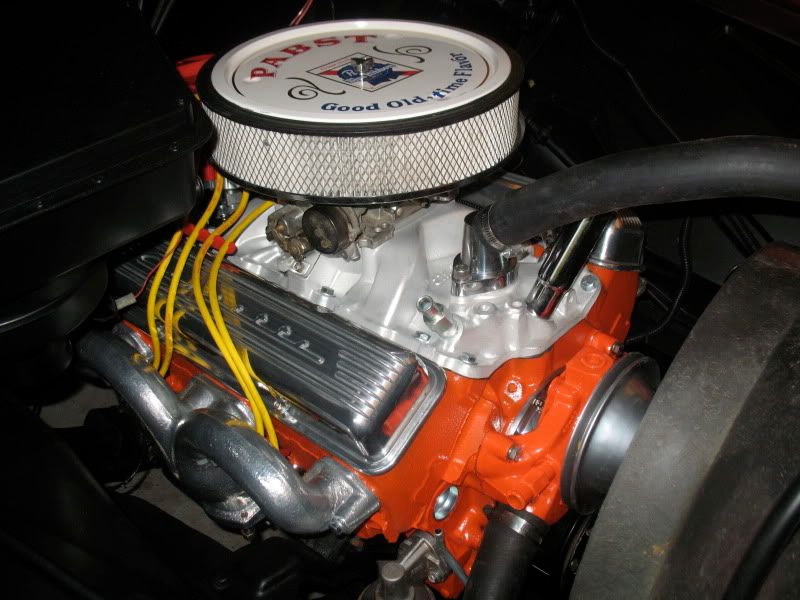 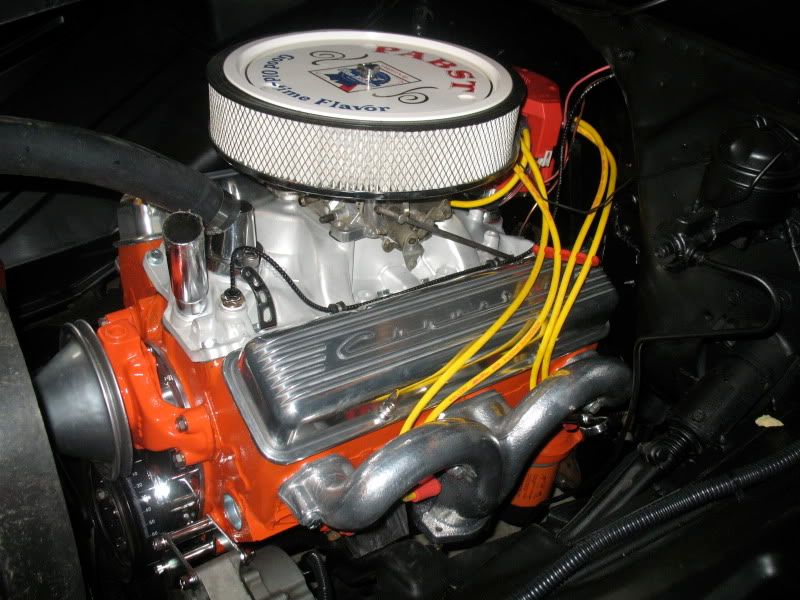 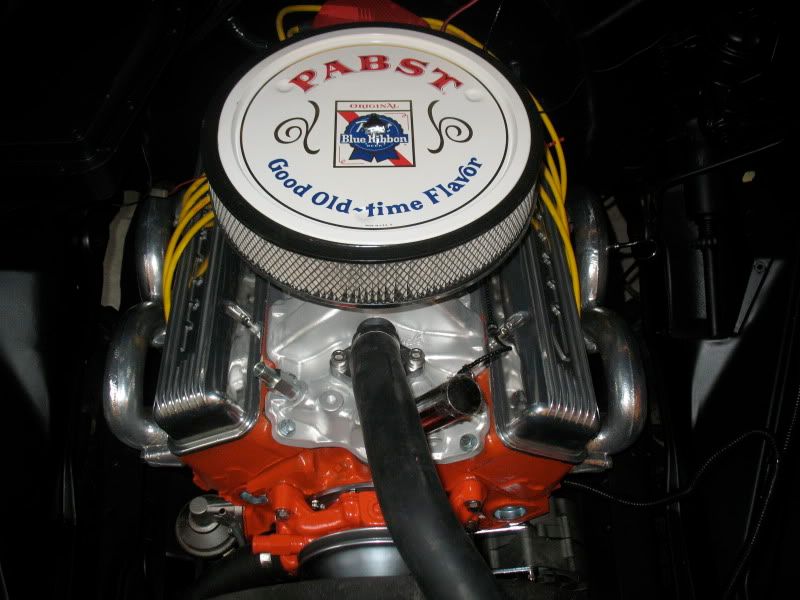
__________________
Project Build (1): http://67-72chevytrucks.com/vboard/s...d.php?t=362482 Project build (2): http://67-72chevytrucks.com/vboard/s...d.php?t=370985 Life should not be a journey to the grave with the intention of arriving safely in a pretty and well preserved body, but rather to skid in broadside in a cloud of smoke, thoroughly used up, totally worn out, and loudly proclaiming...Wow, What a Ride! - Hunter S. Thompson |
|
|
|
|
09-06-2011, 10:27 PM
|
#35 | |
|
But Found Her 25yrs Later!
Join Date: Oct 2010
Location: Oregon City, Oregon
Posts: 10,530
|
Re: Let the rebuild begin...
Quote:

__________________
I lost my 65 - Found it 25 years later: http://67-72chevytrucks.com/vboard/s...d.php?t=426650 66 C20 Service Truck: http://67-72chevytrucks.com/vboard/s...d.php?t=428035 |
|
|
|
|
|
09-07-2011, 12:20 AM
|
#36 |
|
Registered User
Join Date: Dec 2010
Location: Venice, Ca.
Posts: 314
|
Re: Let the rebuild begin...
Cool build, my brother in-law lives in Vida, Oregon across from the river. cool area
|
|
|
|
|
09-13-2011, 04:19 AM
|
#37 |
|
Registered User
Join Date: Oct 2010
Location: crestline ca
Posts: 15
|
Re: Let the rebuild begin...
that air cleaner is sick lol how did u make it?
|
|
|
|
|
11-16-2013, 06:54 PM
|
#38 |
|
Registered User
Join Date: Apr 2010
Location: Everett, WA
Posts: 504
|
Re: Let the rebuild begin...
Okay so I know i'm bridging up a fairly old thread but your intake I gotta ask what'd you do about the oil fill hole in the front? Drill it?
|
|
|
|
|
11-16-2013, 07:42 PM
|
#39 |
|
Registered User
Join Date: Jul 2013
Location: grande prairie alberta
Posts: 324
|
Re: Let the rebuild begin...
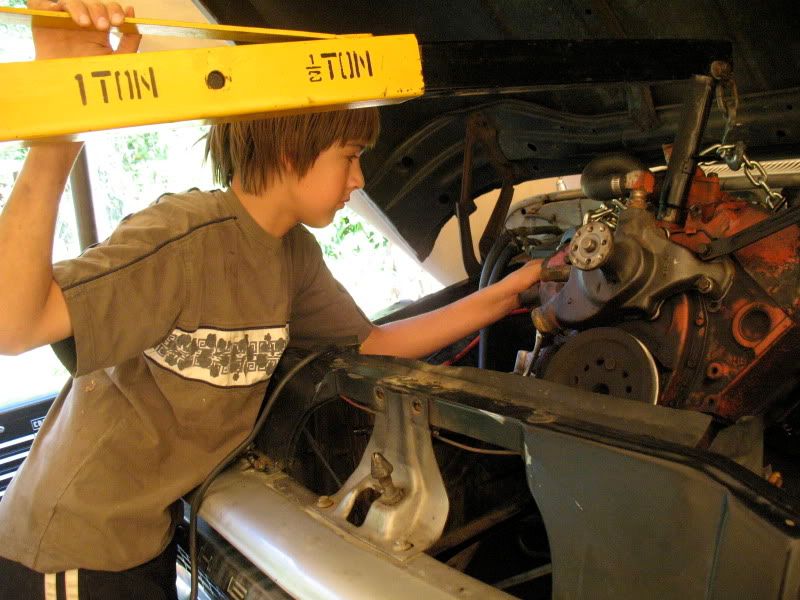
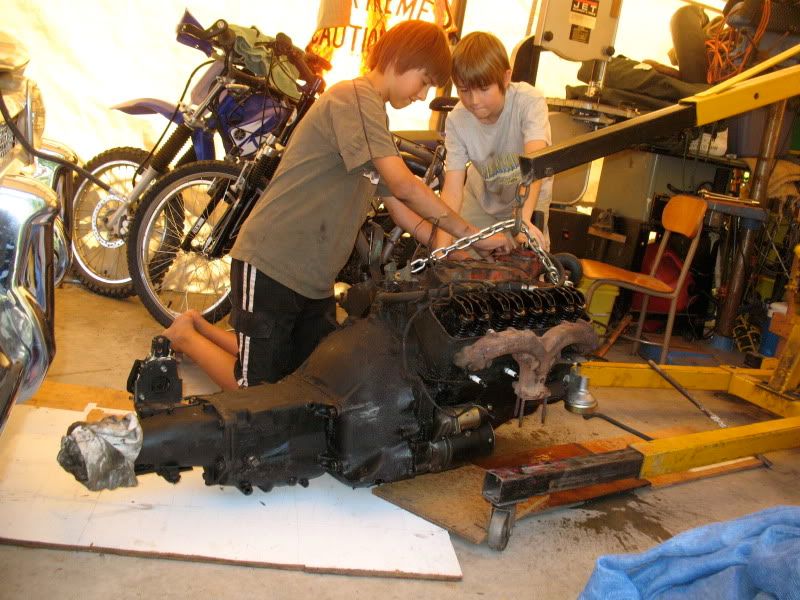
Man the engine bay is looking great. Can't believe ya pulled the motor over that nice interlock. Lol love the shot on the street with the wet newspaper. Those boys are smart also get your hands dirty. Then they for sure have to drive it.
|
|
|
|
|
11-17-2013, 02:15 AM
|
#40 | |
|
60-66 Nut
 Join Date: Mar 2007
Location: Coeur d'Alene, Idaho
Posts: 23,252
|
Re: Let the rebuild begin...
You could either take a regular intake to a machine shop and have it machined to accomodate the fill tube (the tube is a press fit, so it needs to be exact) or purchase this one already done.
http://www.summitracing.com/parts/edl-2703/overview/ Quote:
__________________
Power Steering Box Adapter Plates For Sale HERE Power Brake Booster Adapter Brackets For Sale '63-'66 HERE and '67-'72 HERE and '60-'62 HERE and "60-'62 with clutch HERE Rear Disc Brake Brackets For Sale. Impala SS calipers HERE Camaro Calipers HERE D52 Calipers HERE 6 Lug HERE Hydroboost Mounting Plates HERE |
|
|
|
|
|
11-17-2013, 11:20 AM
|
#41 |
|
Registered User
Join Date: Sep 2008
Location: Newport, North Carolina
Posts: 646
|
Re: Let the rebuild begin...
I have the same heads that you're running...the double humps with no accessory holes for the alternator bracket. I'm interested in what type of alternator bracket you use. It's been holding me up for a while now...trying to move past this hang up.
|
|
|
|
|
11-17-2013, 12:44 PM
|
#42 |
|
Registered User
Join Date: Mar 2013
Location: Southern Oregon
Posts: 10,384
|
Re: Let the rebuild begin...
The truck is sweet! Nice going on the engine bay! Love the 327!

__________________
1966 Chevy C10 "Project Two Tone" http://67-72chevytrucks.com/vboard/s...d.php?t=596643 1964 GMC "Crustine" semi-build:http://67-72chevytrucks.com/vboard/s...d.php?t=665056 My youtube channel. Username "Military Chevy": https://www.youtube.com/channel/UC_h...fzpcUXyK_5-uiw |
|
|
|
|
11-17-2013, 01:00 PM
|
#43 |
|
Registered User
Join Date: Aug 2012
Location: Fort Campbell, KY
Posts: 494
|
Re: Let the rebuild begin...
Very nice truck! Its an old thread so I have to ask how the rustoleum is holding up? Was it spray can or did you thin it and spray from a gun? What did you do for prep?
|
|
|
|
|
11-19-2013, 12:38 PM
|
#44 |
|
Registered User
Join Date: Aug 2012
Location: Tar Island, AB
Posts: 8
|
Re: Let the rebuild begin...
@ joesscamaro: Looks like a Mr Gasket chrome low mount.
http://www.summitracing.com/int/part...5179/overview/ Last edited by Muskwa; 11-19-2013 at 12:49 PM. Reason: link to part # |
|
|
|
|
11-19-2013, 12:41 PM
|
#45 |
|
Registered User
Join Date: Nov 2011
Location: fayetteville nc
Posts: 10,338
|
Re: Let the rebuild begin...
Engine looking great...lets see some paint on those fins and really make them pop
__________________
1963 Short bed step side SBW 427 big block and borg warner T-16 HD 3 speed manual http://67-72chevytrucks.com/vboard/s...d.php?t=519869 1963 Short bed fleetside BBW 348 1st gen big block w/Powerglide http://67-72chevytrucks.com/vboard/s...d.php?t=619024 1964 Short bed trailer |
|
|
|
|
| Bookmarks |
|
|


 Linear Mode

