
 |
|
|
#26 |
|
Registered User
Join Date: Sep 2014
Location: Oakdale, Ny
Posts: 70
|
Re: Blue 64 Short Bed
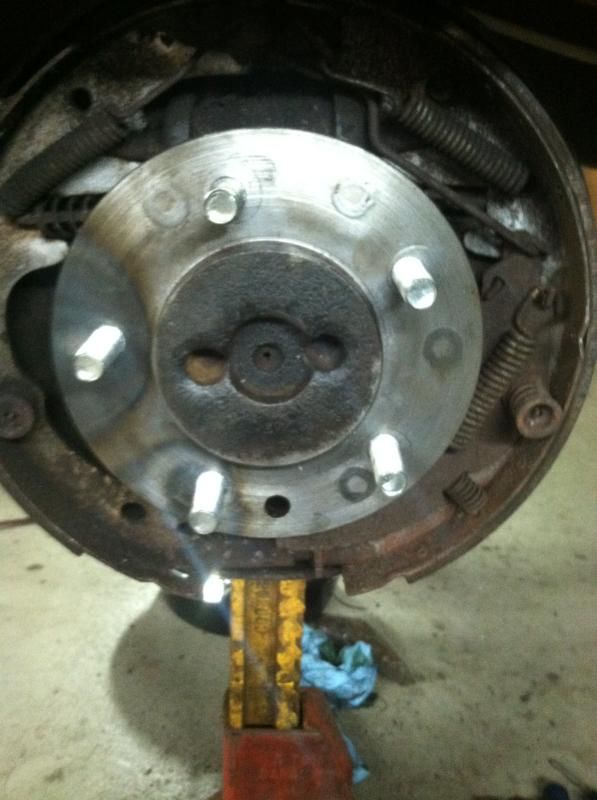
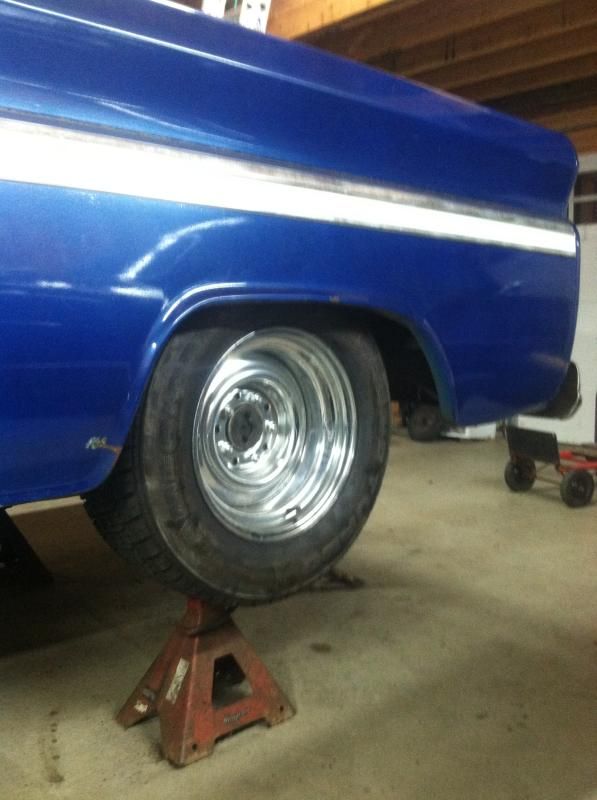
Last weekend my dad found a great deal on four 5 on 5 chrome steelies with tires at a garage sale. I had planned to run 5 on 5 up front with the disc brake swap but didn't have anything lined up to swap the rear to 5 on 5 (eventually a ford 9 inch ). I was going to run my old 6 lug wheels on the rear until the 9 inch swap but the tires are shot. So this week during free time at work
I took the old crusty 6 lug axles 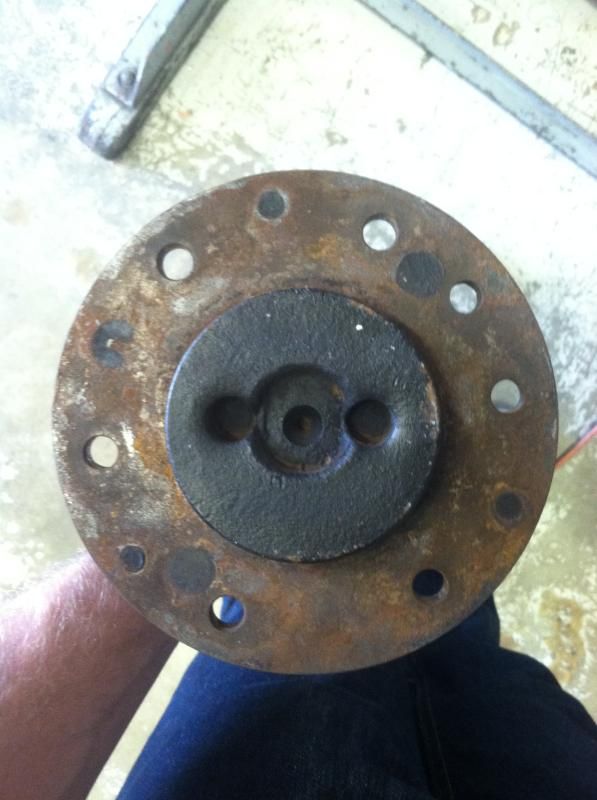 Made slugs 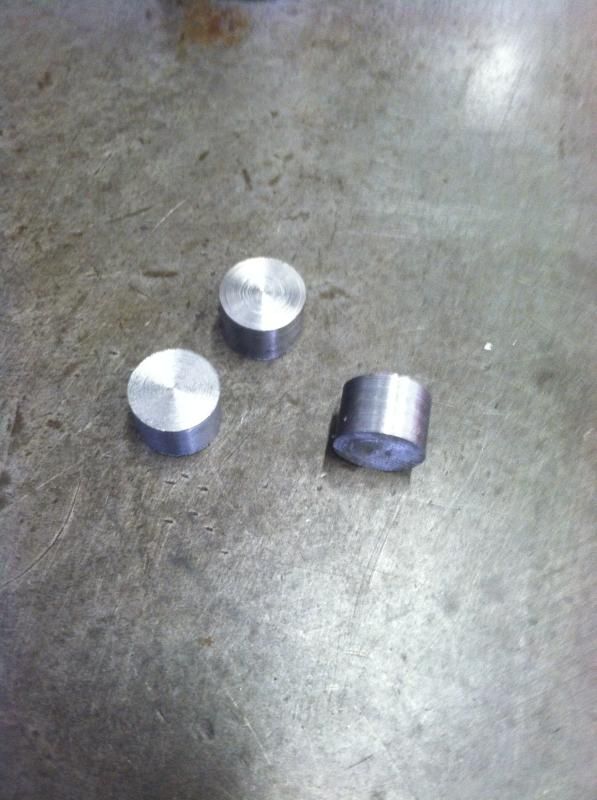 Cleaned the axle flanges and filled the 6 lug pattern 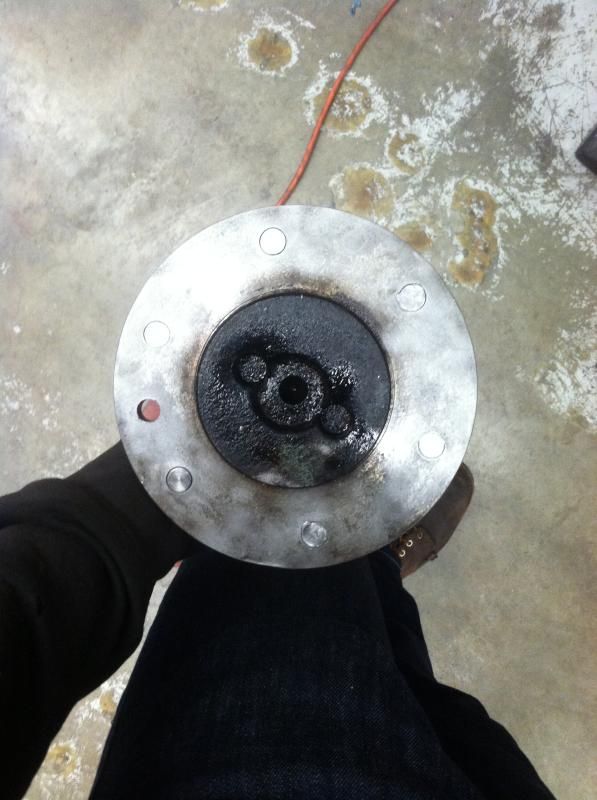 Fusion welded the plugs 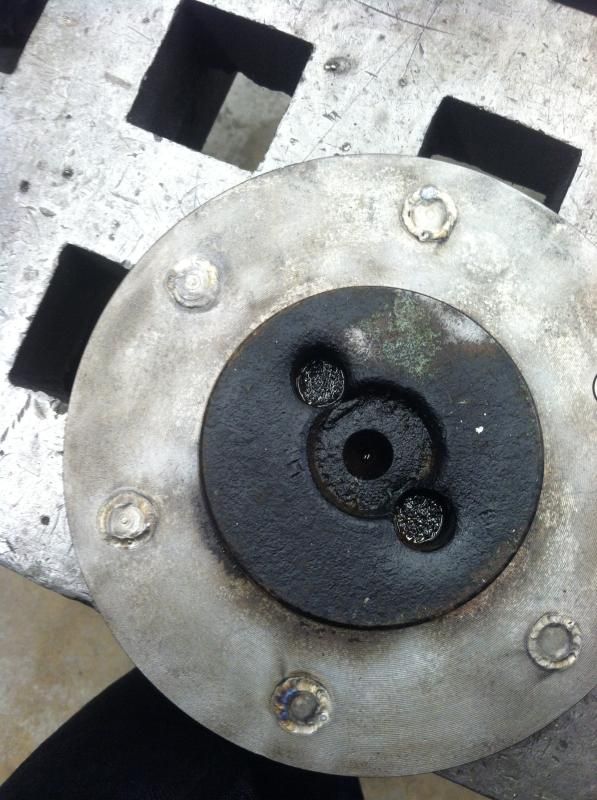 Turned the welds and slugs flush 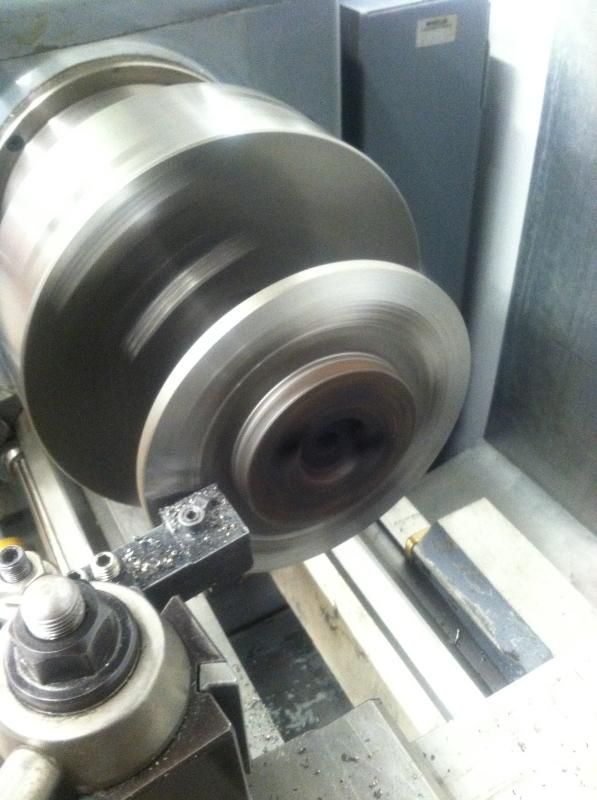 Next I took an aluminum slug 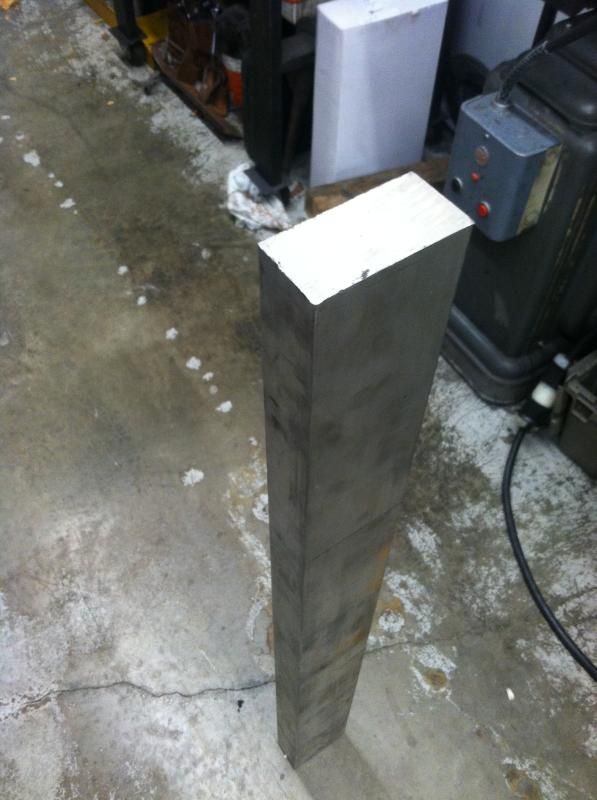 And made an offset fixture to hang the axles off of the milling machine table 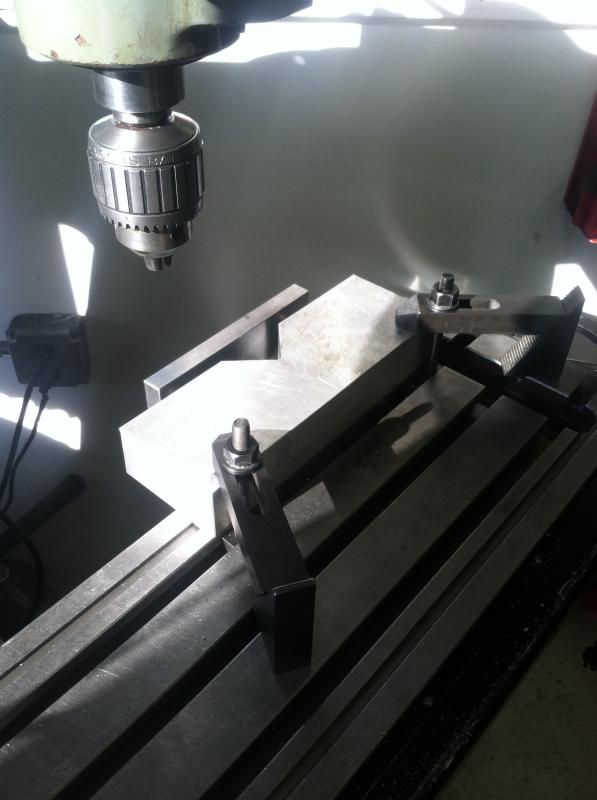 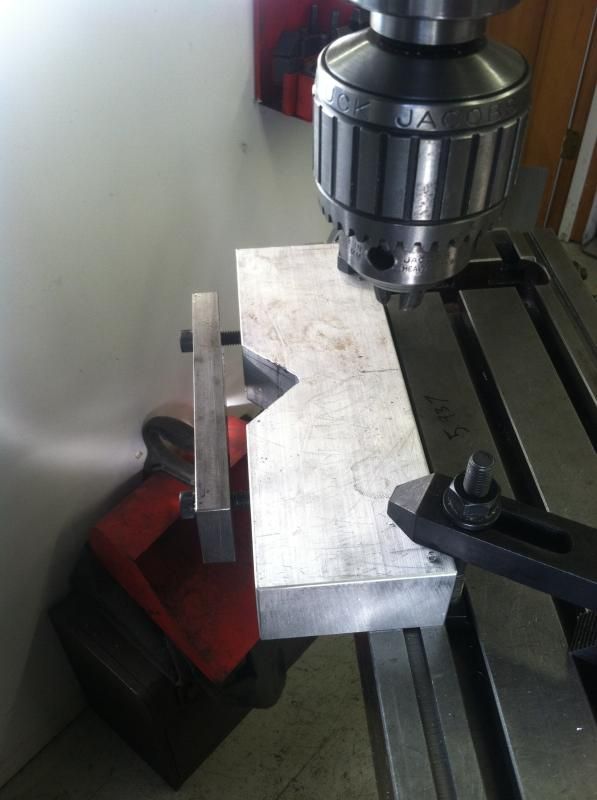 Bolted the axle up in the fixture 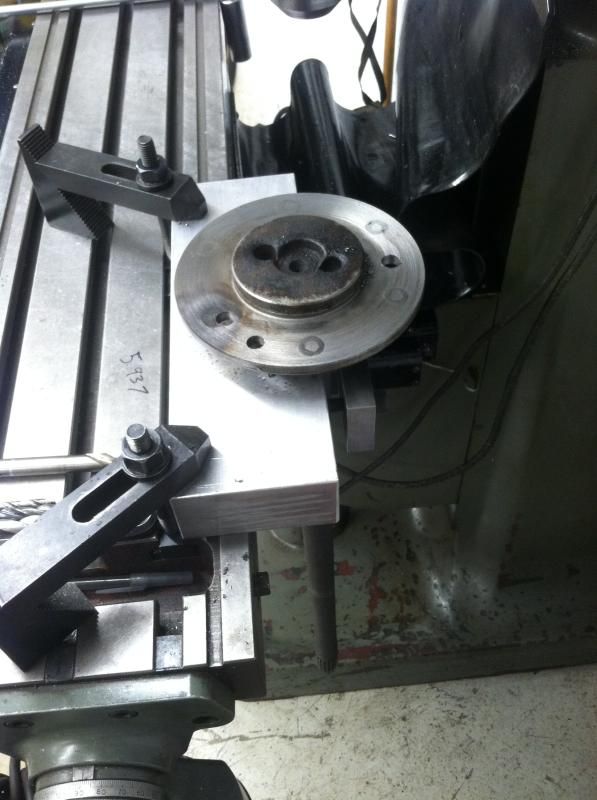 Located and drilled 5 on 5 bolt pattern, then reamed holes to . 015 interference for the wheel studs 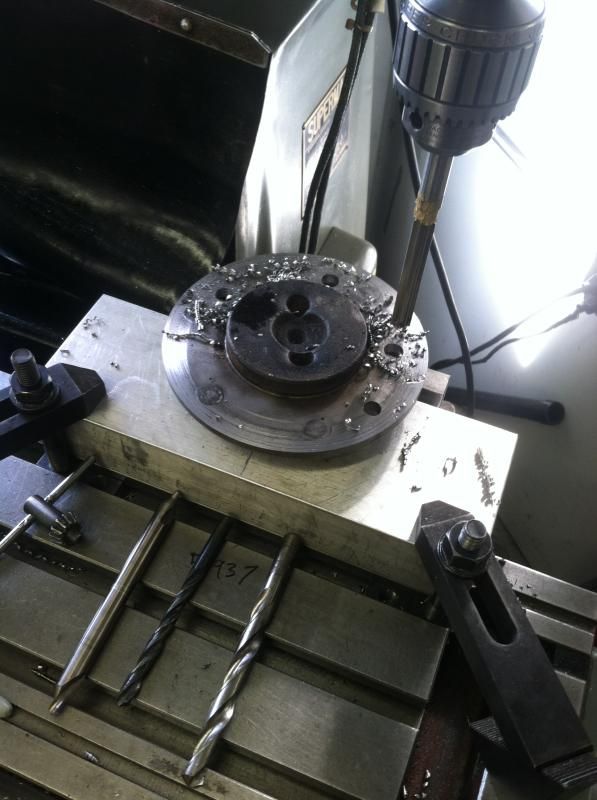 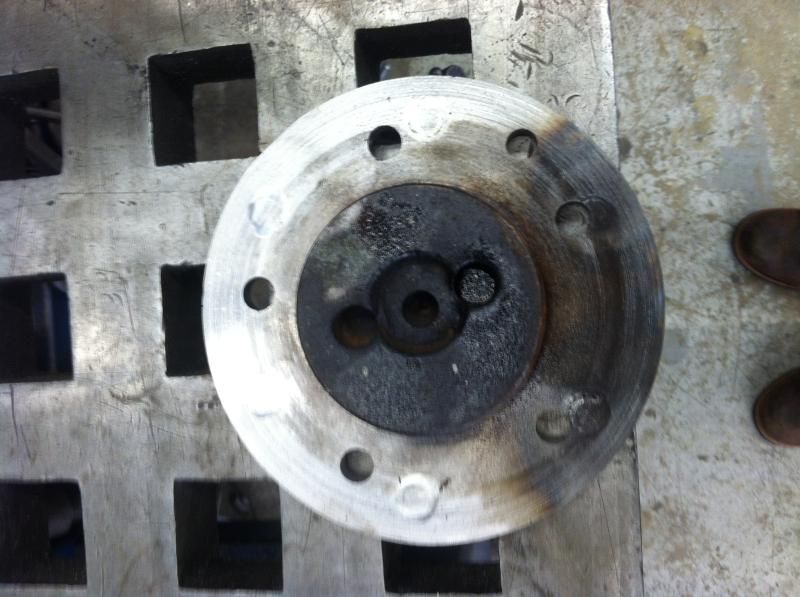 Finally pressed the 1/2" wheel studs into the new bolt pattern 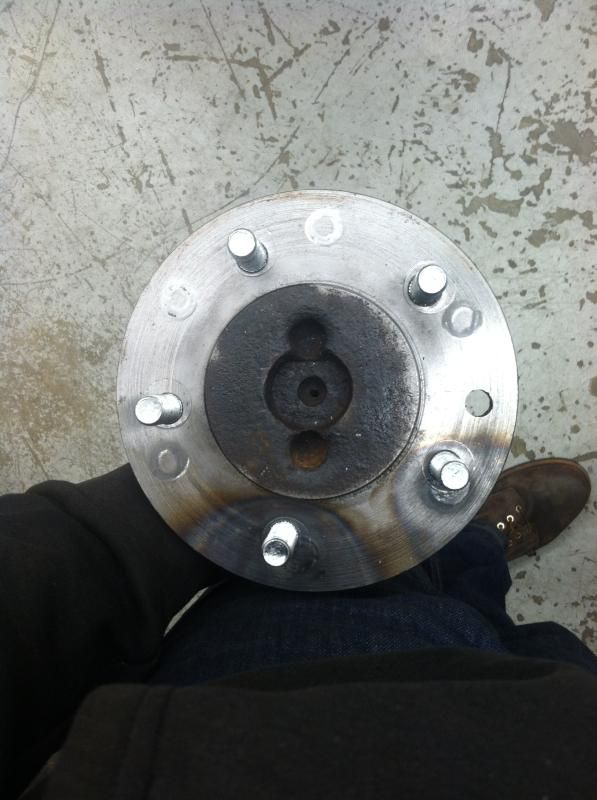
|
|
|

|
|
|
#27 |
|
State of Confusion!
  Join Date: Jul 2002
Location: Gulfport, MS USA
Posts: 47,216
|
Re: Blue 64 Short Bed
Very nice. I need some of your toys to play with!
__________________
Bill 1970 Chevy Custom/10 LWB Fleetside 2010 Toyota Tacoma PreRunner SR5 Double Cab - DD Member of Louisiana Classic Truck Club (LCTC) Bill's Gallery Life isn't tied with a bow, but it's still a gift. Live simply. Love generously. Care deeply. Speak kindly. Leave the rest to God! |
|
|

|
|
|
#28 |
|
Registered User
Join Date: Apr 2013
Location: Fort Worth, Texas
Posts: 166
|
Re: Blue 64 Short Bed
Nice truck! Off topic a bit but do you have any pictures of the layout of your shop? I'm about to build a detach garage. I'm in the design stage and I like some of your features
|
|
|

|
|
|
#29 |
|
Registered User
Join Date: Sep 2014
Location: Oakdale, Ny
Posts: 70
|
Re: Blue 64 Short Bed
Thank you, I'm lucky enough to work in a shop where I have excess to a lot of cool machinery and more importantly learn a ton.
Thanks, I don't currently have pictures but can get some for you. The garage is 26' wide by 36' deep and 14' tall. Would have liked to go taller but town code limits the detached garage to a max high of 14'. About 20' of one side of the roof is dormered out for the lift. The storage loft surrounding the lift is useful but difficult to maneuver in due to the roof hight and pitch. I plan to put a horrizontal compressor on one side of the loft. Let me know of any specific pictures you would like. |
|
|

|
|
|
#30 |
|
Registered User
Join Date: Apr 2013
Location: Fort Worth, Texas
Posts: 166
|
Re: Blue 64 Short Bed
Yeah I like your storage loft. I'm dealing with zoning codes as well. They sure do make it a pain in the ass for us to have nice garages ha ha.
|
|
|

|
|
|
#31 |
|
Registered User
Join Date: Sep 2014
Location: Oakdale, Ny
Posts: 70
|
Re: Blue 64 Short Bed
Got the rear end buttoned up this morning and tried the new wheels on
  Bought a slave cylinder for a 84 Nissan Z for the hydraulic clutch last week. The two bolt holes needed slight machining to fit but it looks like it will work. Just have to make up a push rod. 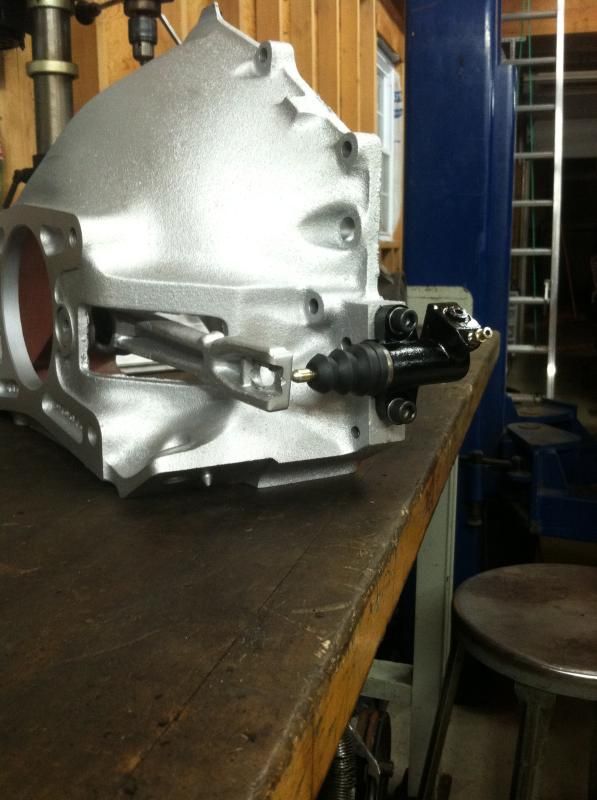 Started fitting a Wilwood master cylinder for the hydraulic clutch. Kept it in line with the brake master which keeps the clutch pedal at the correct 6:1 ratio. 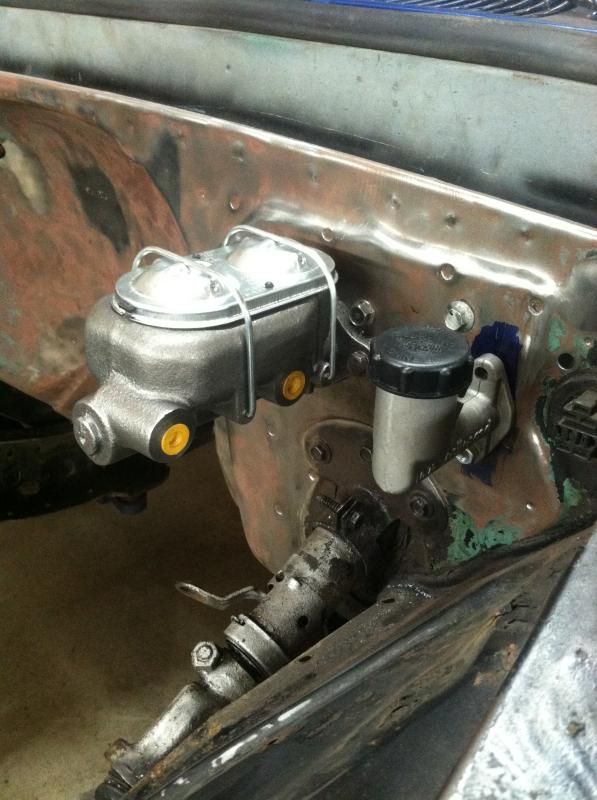 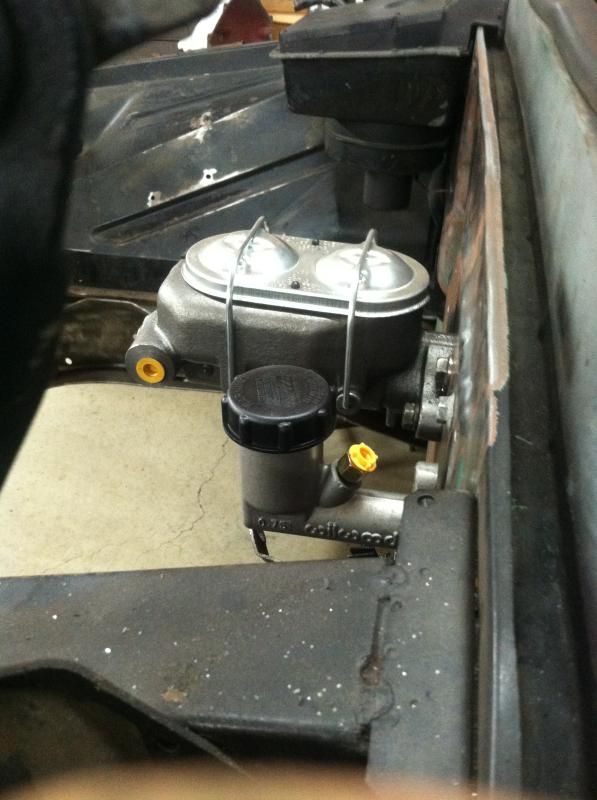 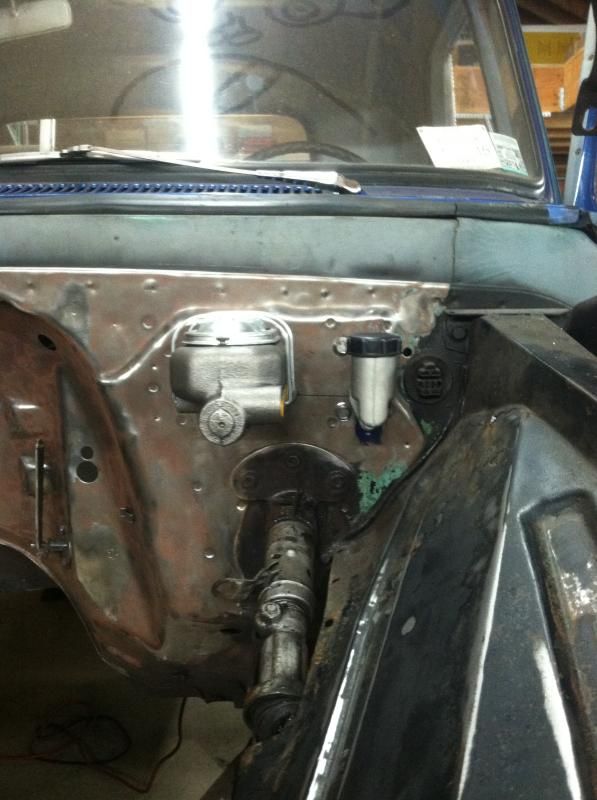
|
|
|

|
|
|
#32 |
|
Registered User
Join Date: Sep 2014
Location: Oakdale, Ny
Posts: 70
|
Re: Blue 64 Short Bed
Found some time to finish up the clutch master cylinder.
The master cylinder ended up dead in center of the rib running down the inside of the fire wall. I was happy with this location because it would be the strongest portion of the fire wire and prevent the fire wall from oil canning under hard clutch depressions. Because the two bolts holding the master cylinder also ended up in dead center of this rib I made two spacer for the bolts to seat flat on. 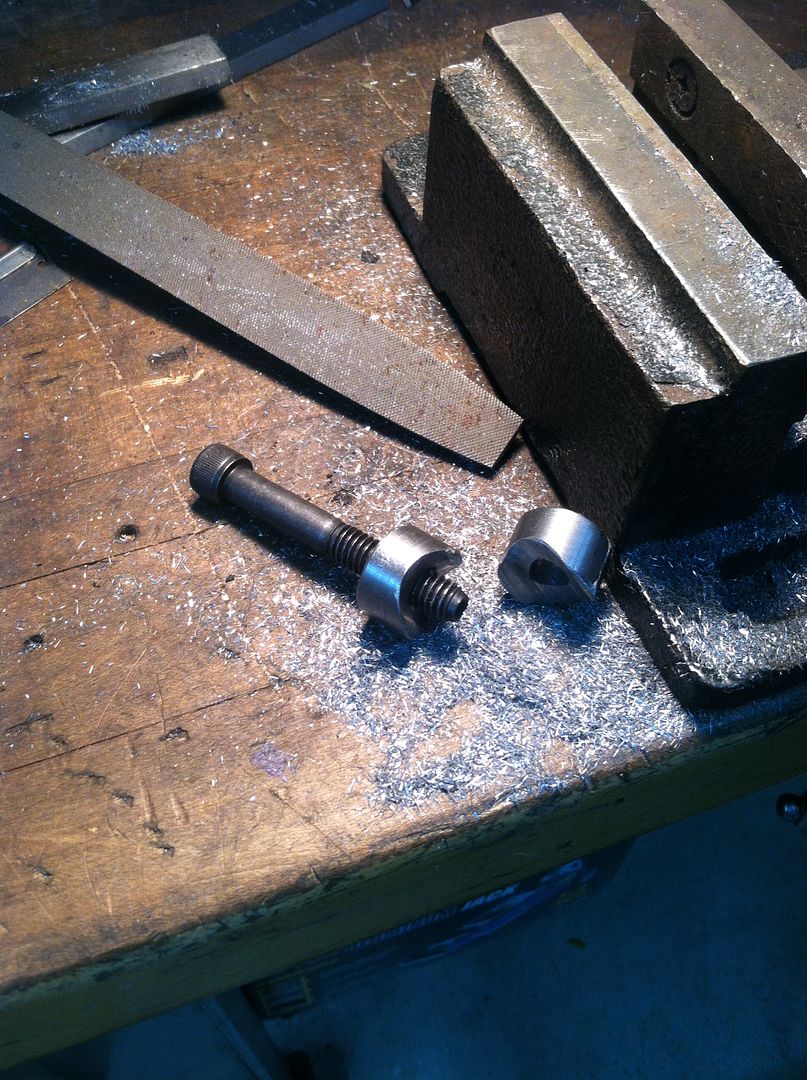 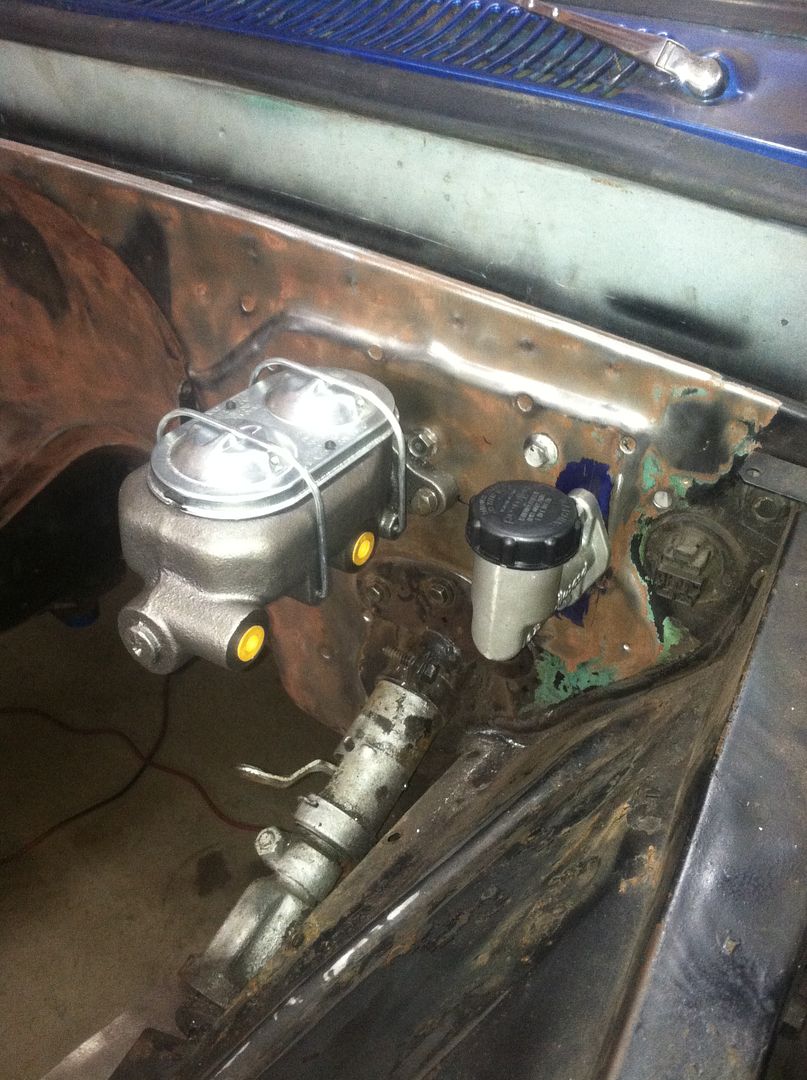 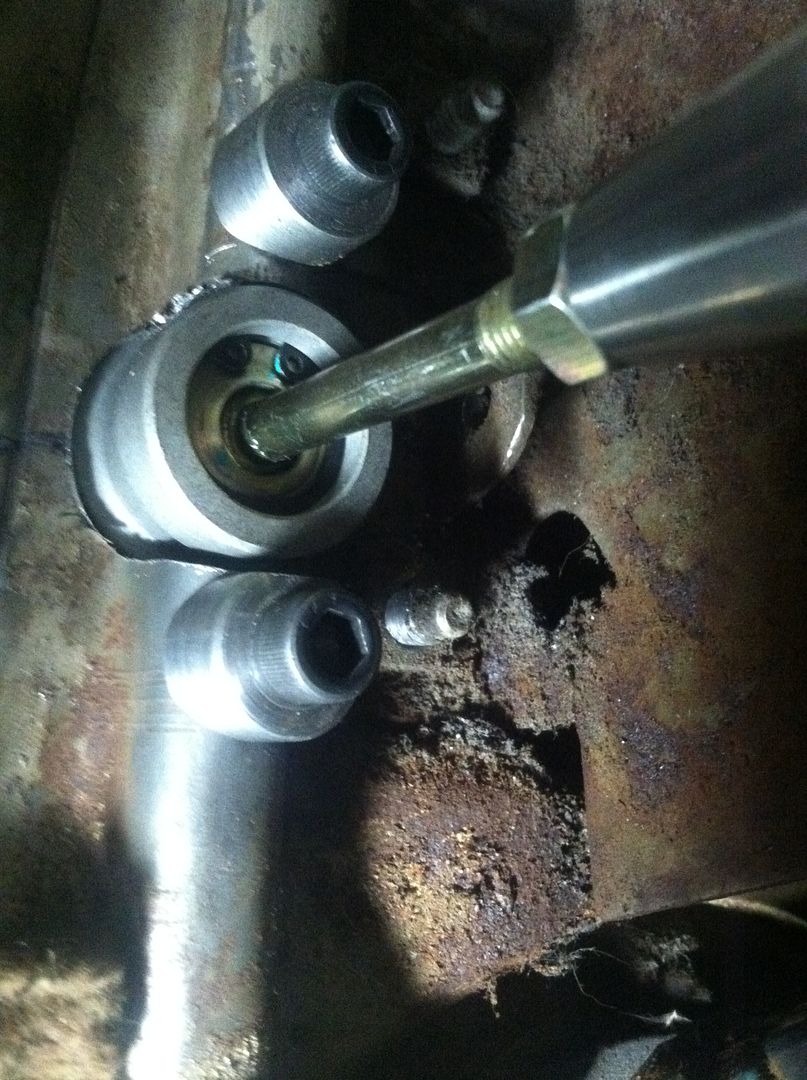 With the master bolted up it was time to move onto linking it to the pedal. Had a 5/16-24 female heim joint and the master had male 5/15-24 threads. Also had some mirror polished stainless steel left over from a job, so I turned a linkage and spacer from the stainless. 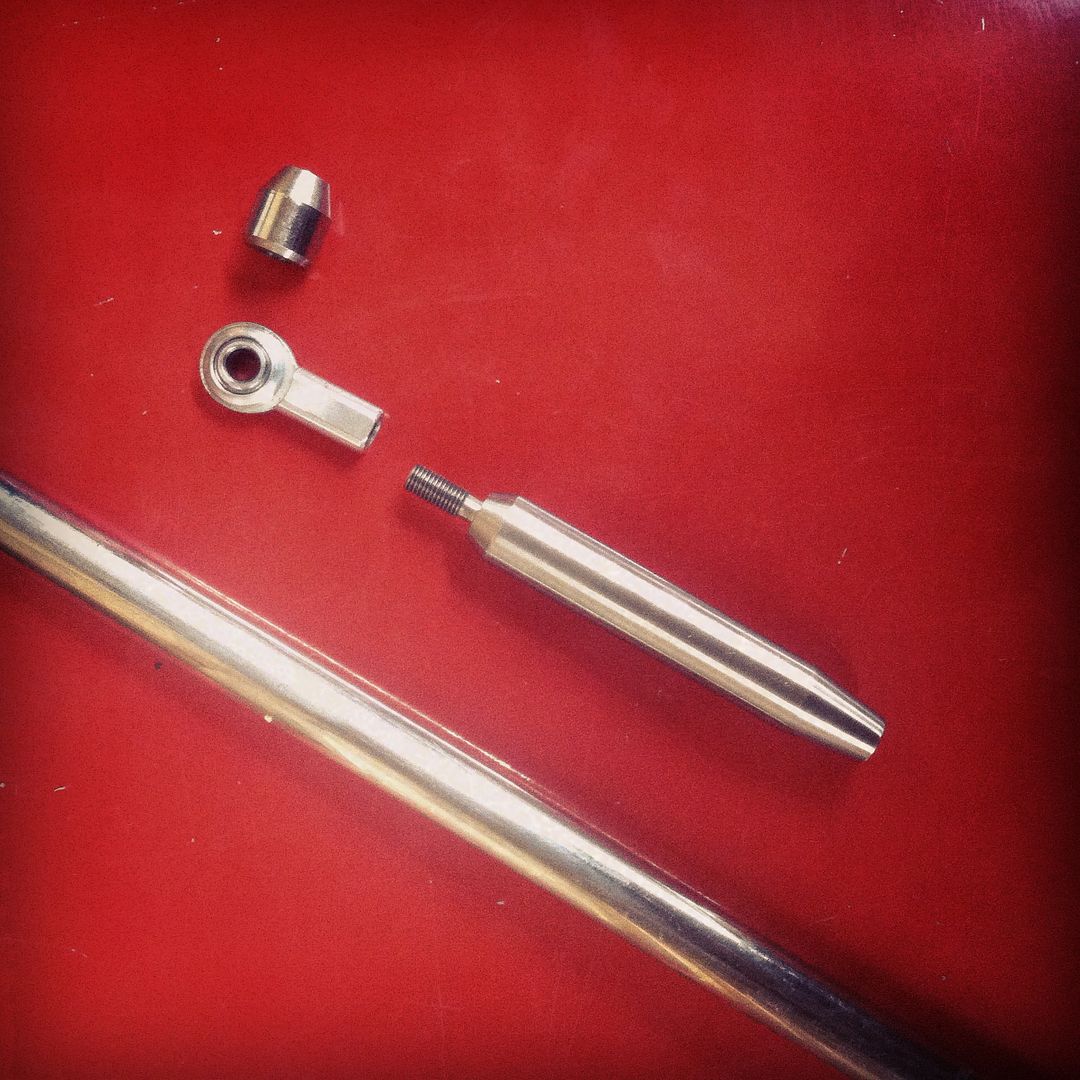 All bolted up 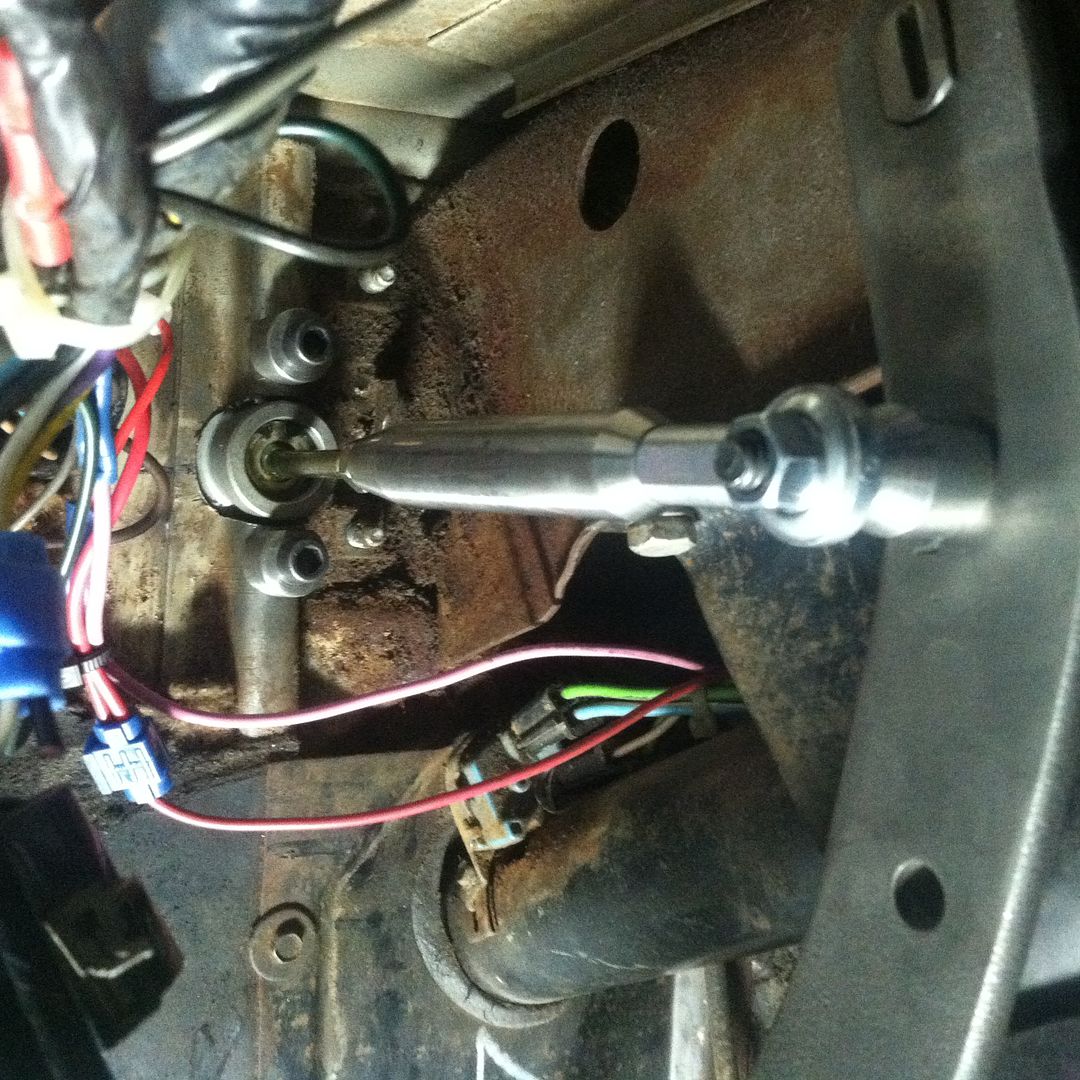 Propped my new wheels up to get a feel for them. 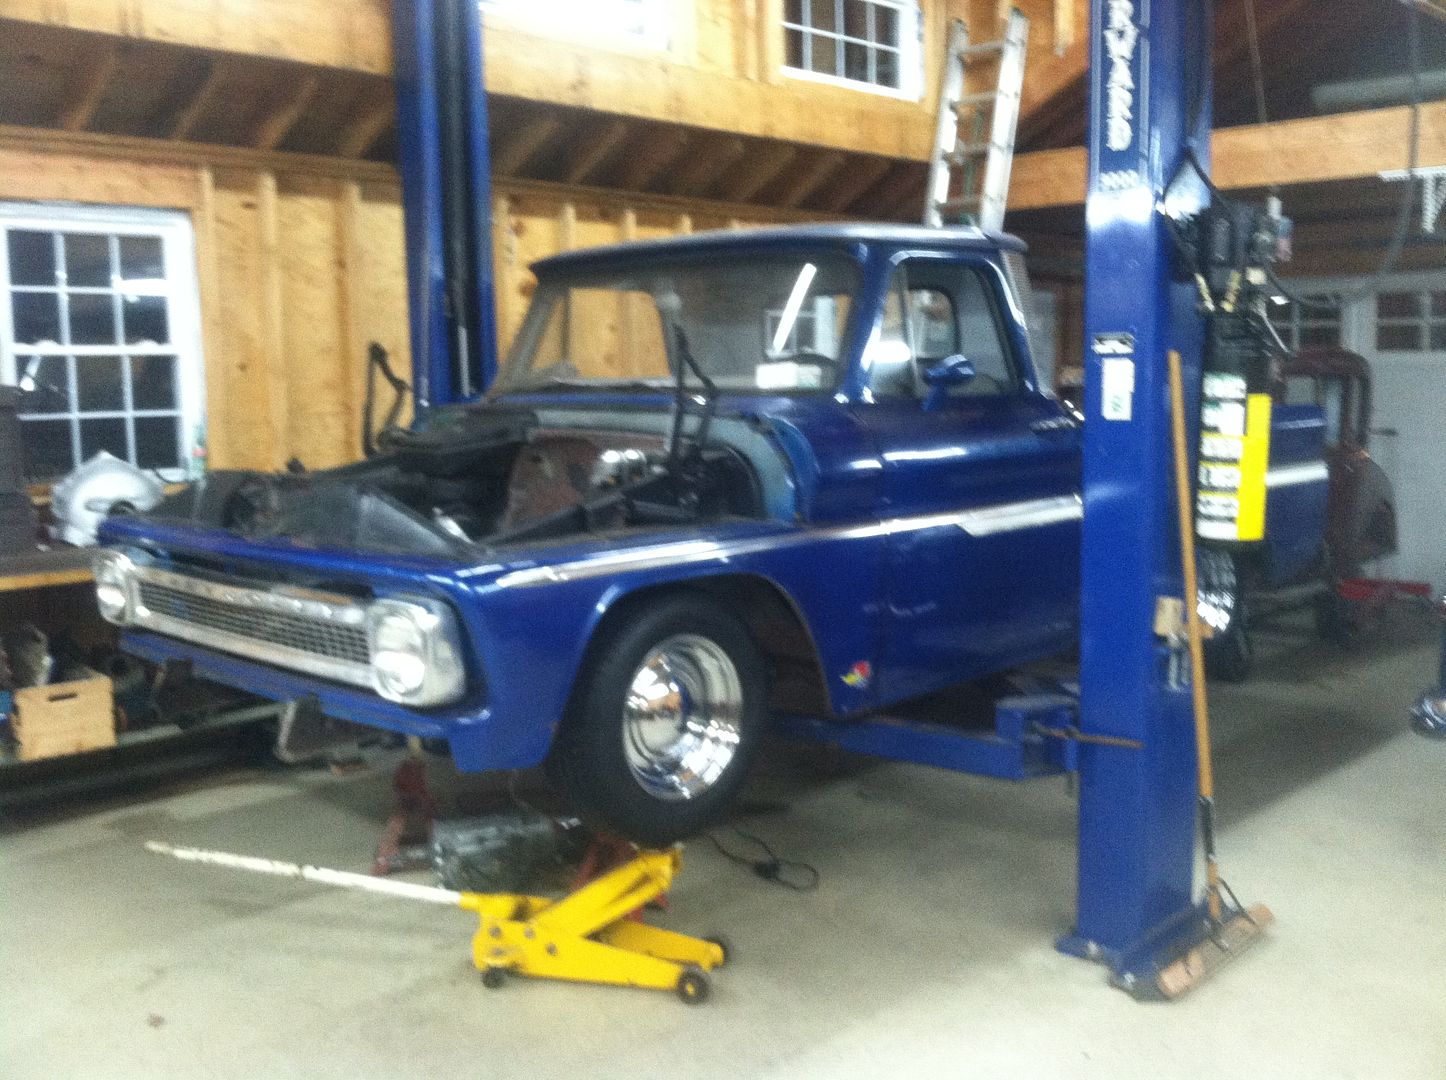 Also started machining my block. Squared up and zero decked. 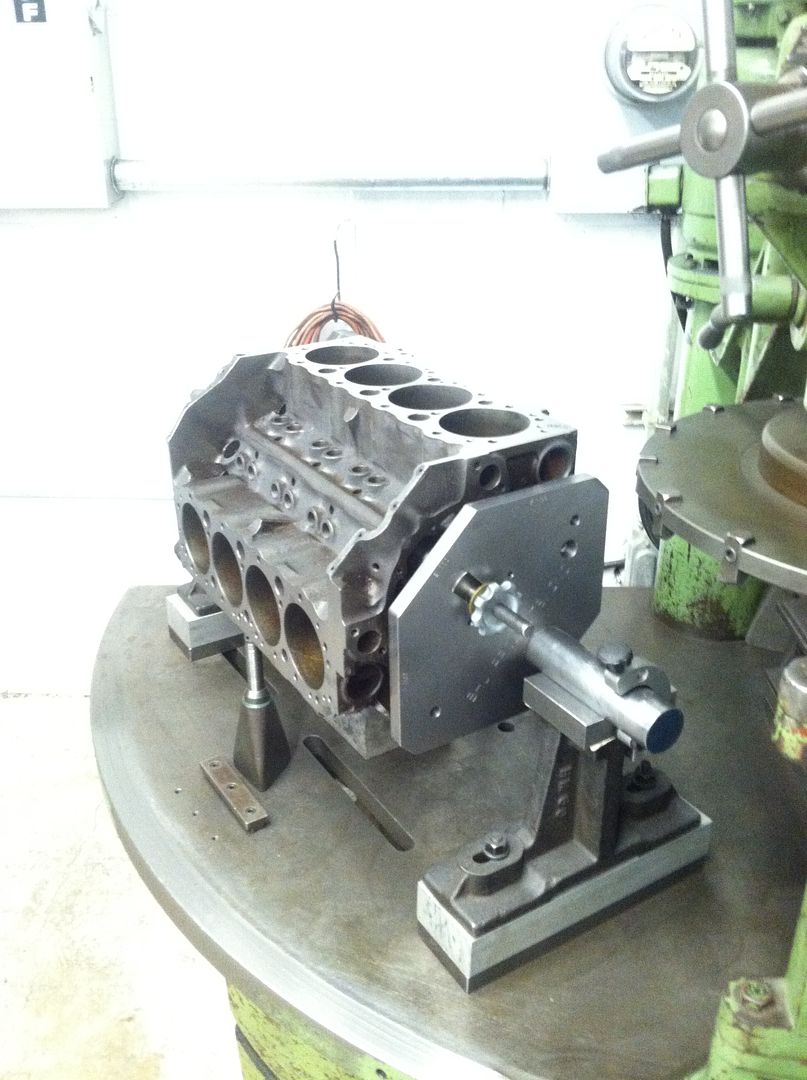 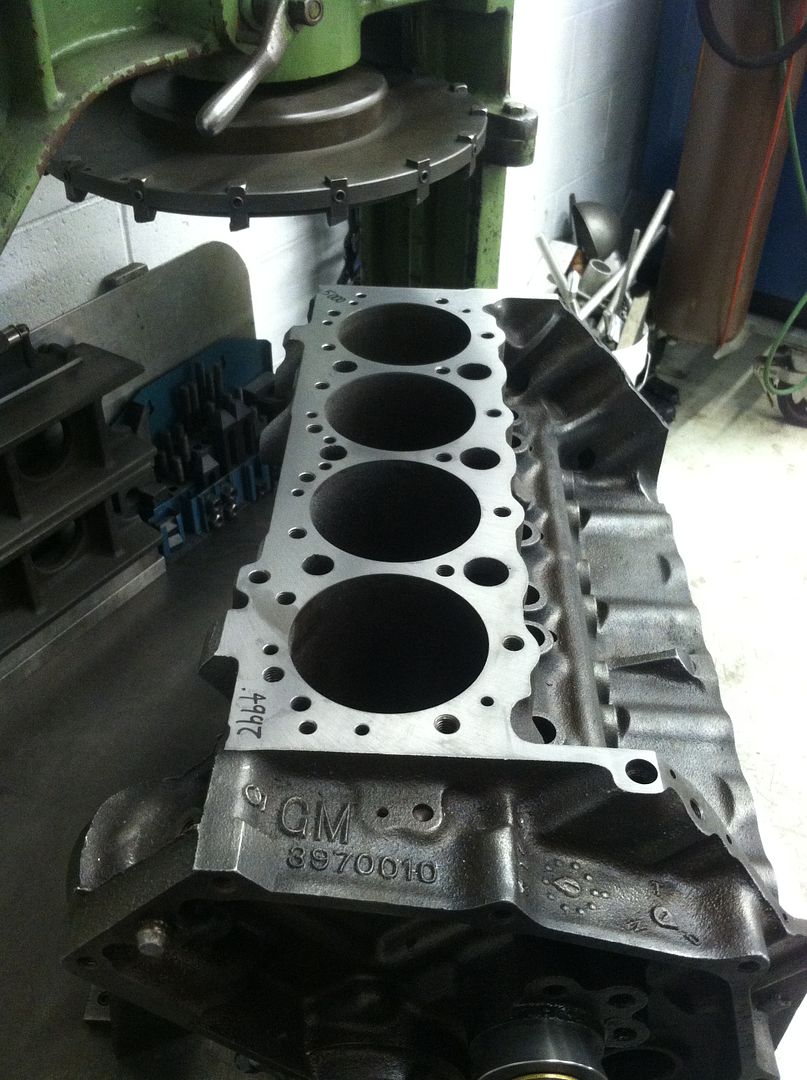 Suppose to have warmer temps here the next few days so I'm hoping to get some paint on my frame. Then I can start putting it back together to get it on four wheels. |
|
|

|
|
|
#33 |
|
Registered User
 Join Date: Aug 2002
Location: Texas
Posts: 198
|
Re: Blue 64 Short Bed
Looks great...
__________________
1964 C10 SWB original 1970 SS El Camino 1964 Impala SS http://67-72chevytrucks.com/vboard/s...d.php?t=649951 |
|
|

|
|
|
#34 |
|
Registered User
Join Date: May 2012
Location: Madison Alabama
Posts: 201
|
Re: Blue 64 Short Bed
IN on this build. Nice work....Looks great.
|
|
|

|
|
|
#35 |
|
Registered User
Join Date: Sep 2014
Location: Oakdale, Ny
Posts: 70
|
Re: Blue 64 Short Bed
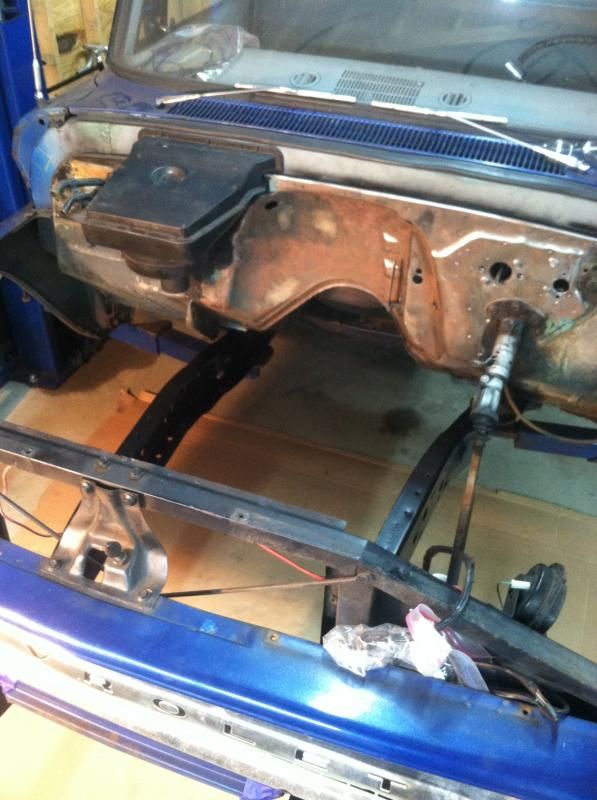
Got out in the garage early and popped the inner fenders out to make it easier to paint the frame. Glad I did rather than having to work around them. My inner fenders have some rough spots and I'm still undecided on wether I should take the time to fix what I have or purchase repop fenders. I like the idea of having original steel but not sure if they are worth the effort. Anyways got some paint laid on the frame.
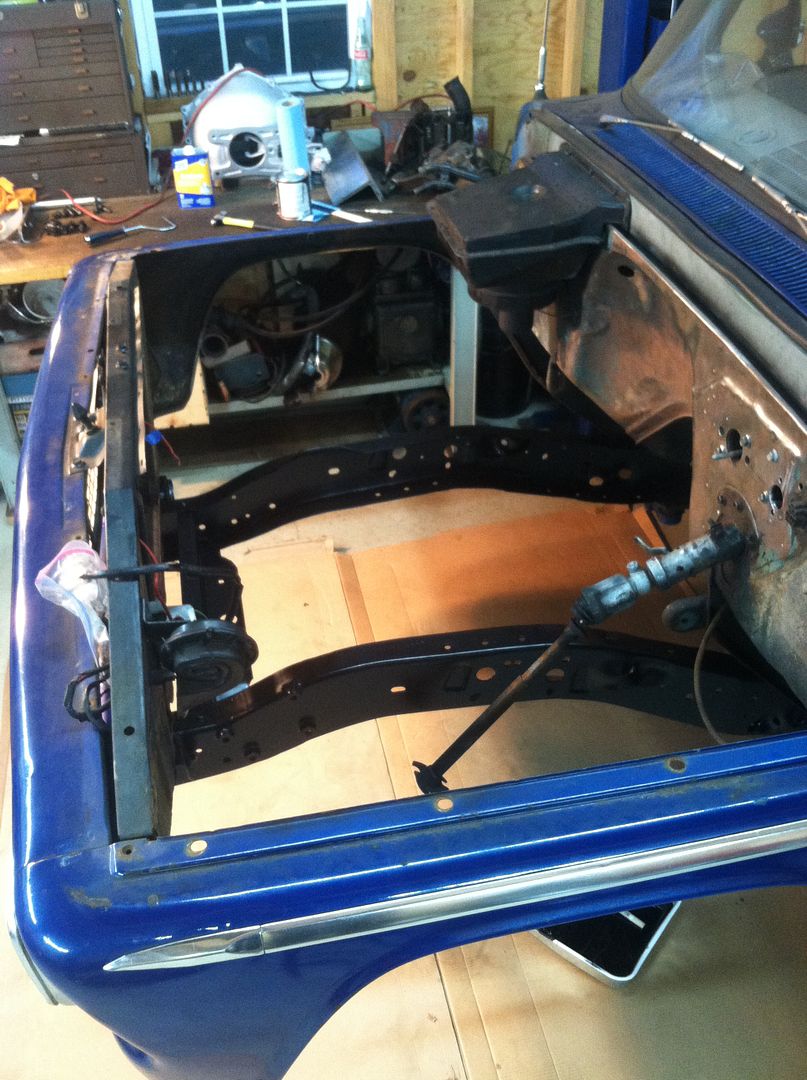 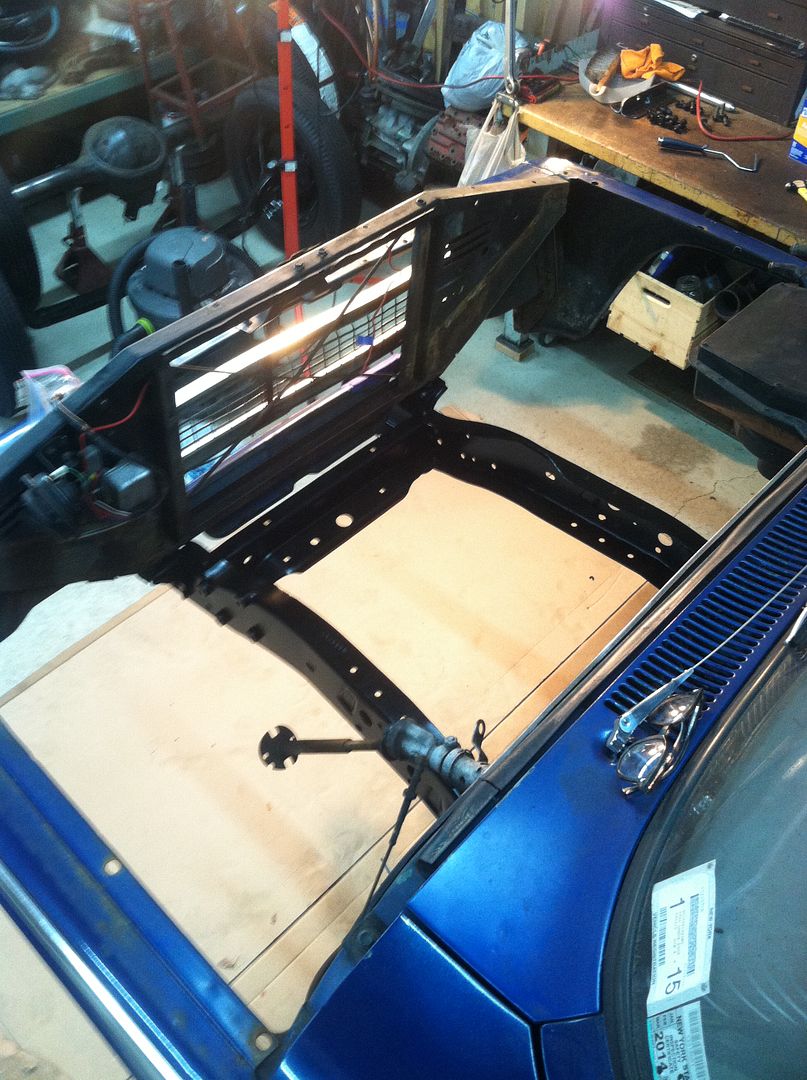 
|
|
|

|
|
|
#36 |
|
Registered User
Join Date: Nov 2014
Location: Corinth, Texas
Posts: 161
|
Re: Blue 64 Short Bed
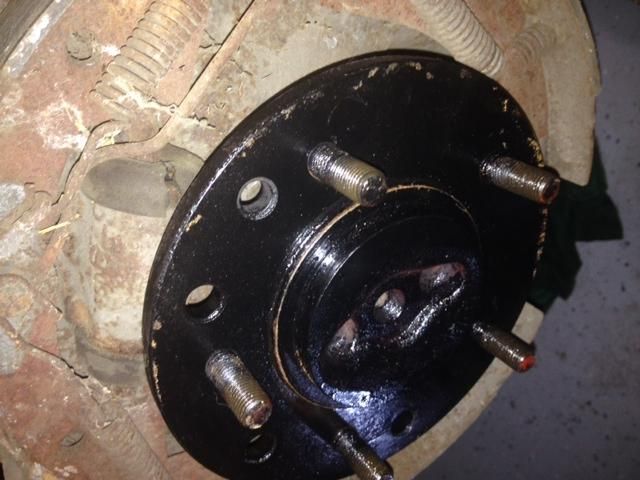
Great job. I did the same thing to my rear axles, I had to step the brume hubs because the new wheels I purchased would not fit over them.
__________________
http://67-72chevytrucks.com/vboard/s...d.php?t=649661 |
|
|

|
|
|
#37 |
|
Registered User
Join Date: Nov 2014
Location: Corinth, Texas
Posts: 161
|
Re: Blue 64 Short Bed
Great job. I did the same thing to my rear axles, I had to step the brume hubs because the new wheels I purchased would not fit over them.
 Don't know why it posted twice. Sorry
__________________
http://67-72chevytrucks.com/vboard/s...d.php?t=649661 |
|
|

|
|
|
#38 |
|
Registered User
Join Date: Mar 2005
Location: Fairfield Maine
Posts: 1,759
|
Re: Blue 64 Short Bed
Im in on this build, great work!
|
|
|

|
|
|
#39 |
|
Registered User
Join Date: Sep 2014
Location: Oakdale, Ny
Posts: 70
|
Re: Blue 64 Short Bed
|
|
|

|
|
|
#40 |
|
Registered User
Join Date: Sep 2014
Location: Oakdale, Ny
Posts: 70
|
Re: Blue 64 Short Bed
|
|
|

|
|
|
#41 |
|
Registered User
Join Date: Sep 2014
Location: Oakdale, Ny
Posts: 70
|
Re: Blue 64 Short Bed
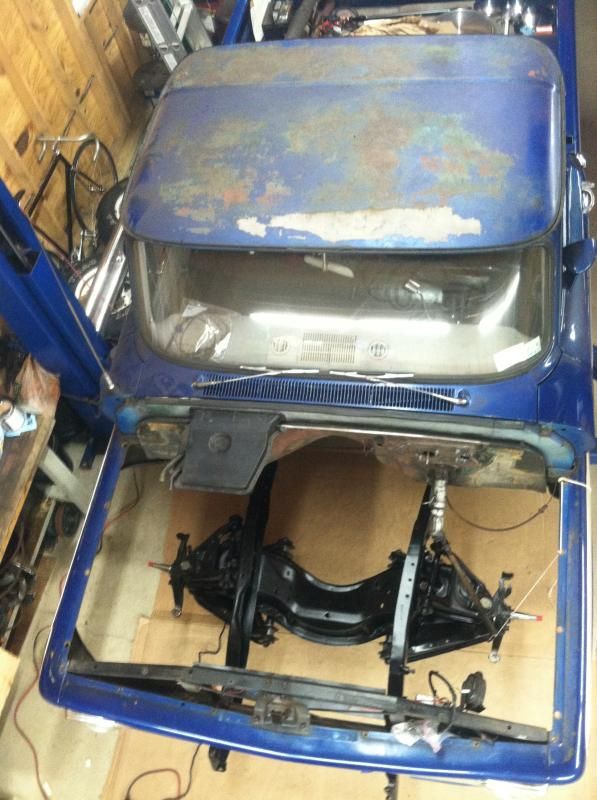
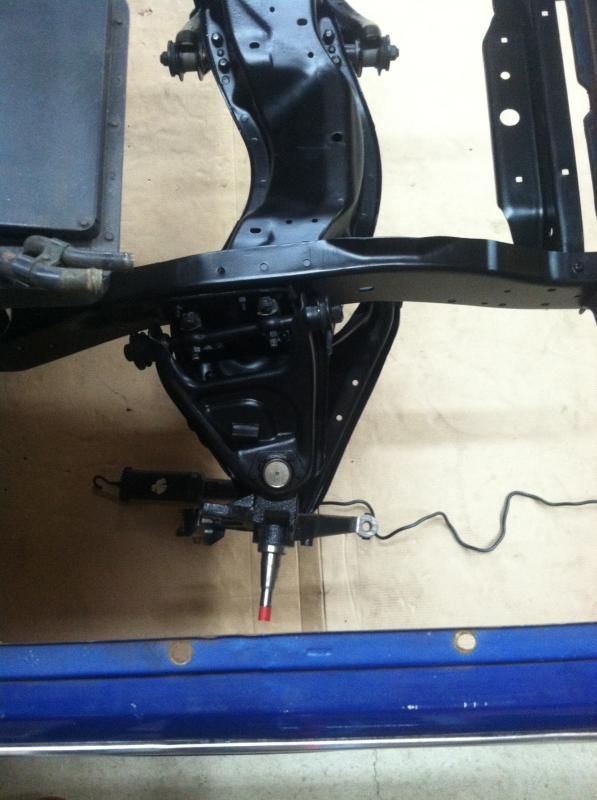
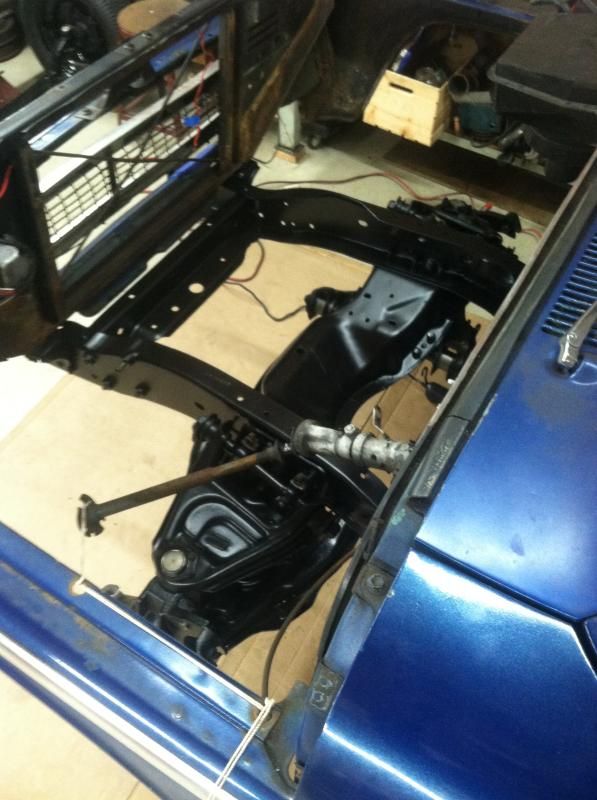
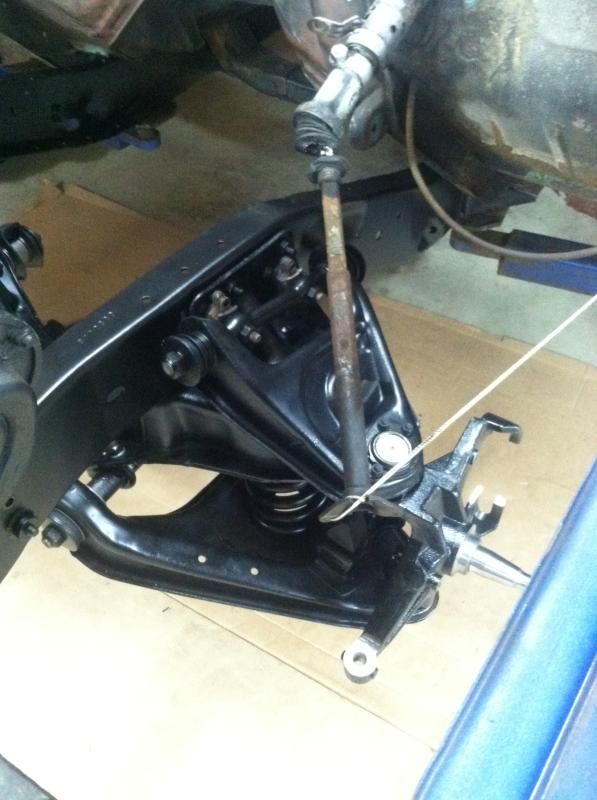
Not much of an update tonight but progress none the less. Finished up Sunday night by bolting the crossmember on and getting a final coat of paint on everything. Really happy with how the paint laid out and how durable it is. Monday night I got the A arms bolted up, installed springs, and drop spindles. Sometime this week or next week Ill pick up new disc and wheel bearings.
|
|
|

|
|
|
#42 |
|
Registered User
Join Date: Apr 2012
Location: Cambridge, Ontario, Canada
Posts: 1,771
|
Re: Blue 64 Short Bed
Subscribed, great looking project
__________________
Craigerrr My build thread, CRGRS 66 Winter Build: http://67-72chevytrucks.com/vboard/s...09#post5638709 |
|
|

|
|
|
#43 |
|
Registered User
Join Date: Dec 2012
Location: Rochester, KENT
Posts: 10,572
|
Re: Blue 64 Short Bed
You are really impressing me with your progress
__________________
MY BUILD LINK: http://67-72chevytrucks.com/vboard/s...585901]Redneck Express - 1966 C10 Short Fleetside MY USA ROADTRIPS http://forum.retro-rides.org/thread/...2018-humdinger IF YOU CAN'T FIX IT WITH A HAMMER, YOU'VE GOT AN ELECTRICAL PROBLEM MATE. |
|
|

|
|
|
#44 |
|
Registered User
Join Date: Sep 2014
Location: Oakdale, Ny
Posts: 70
|
Re: Blue 64 Short Bed
A small update as I'm working seasonally FedEx early ams and spare time is a little sparse. But I decided to rip into my inner fenders and see how they come out. Also my motor has come a little further along.
Cut a large dent out 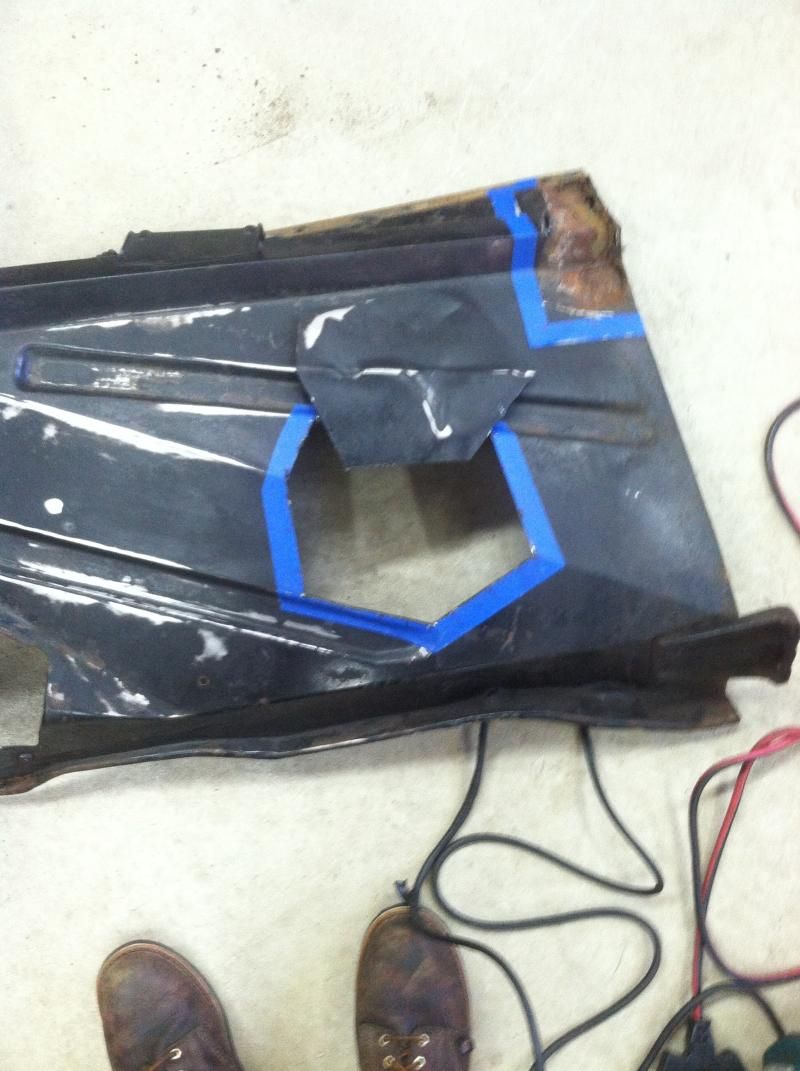 Cut and bent patch 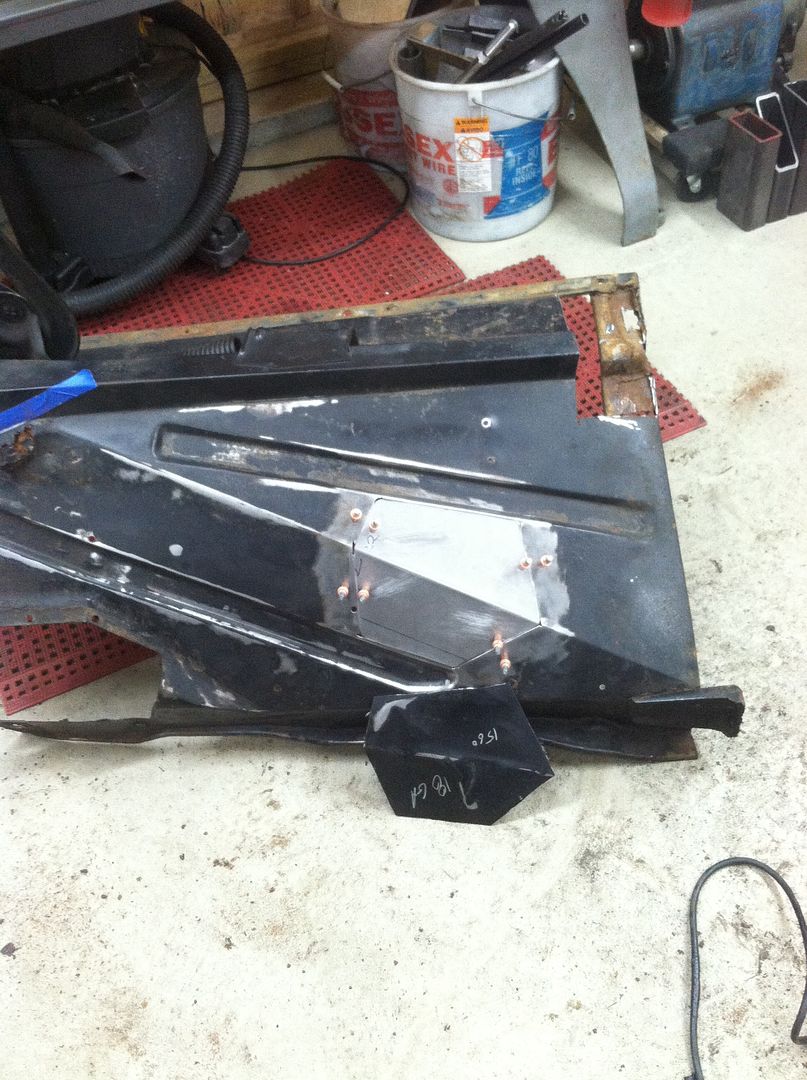 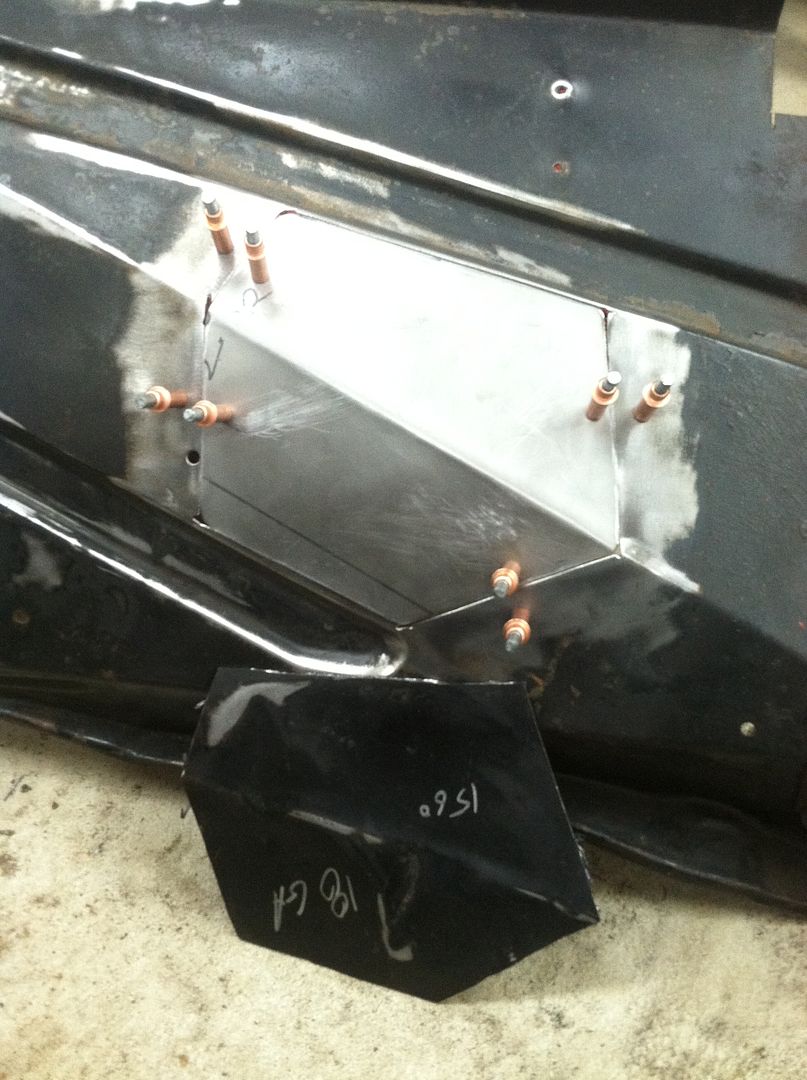 Cut out the fronts where a PO had welded steel on top of rusted out steel. 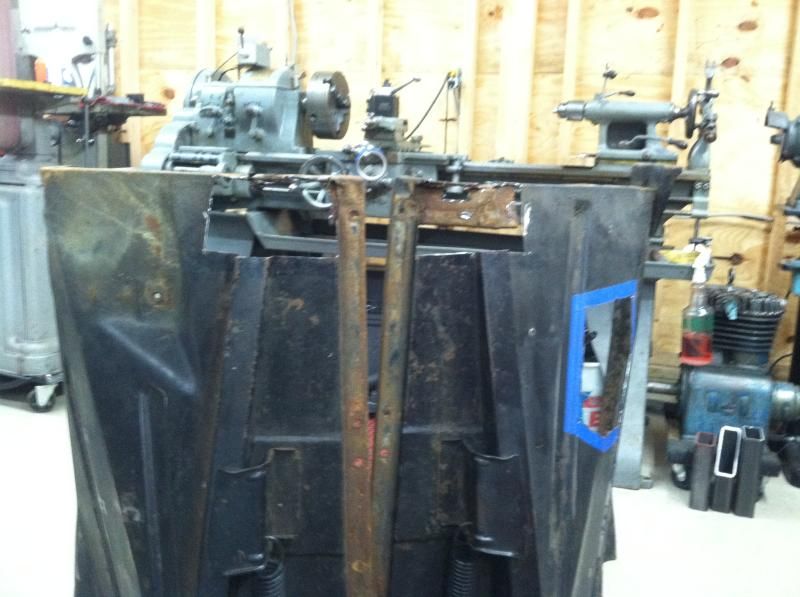 Made templet for front patches 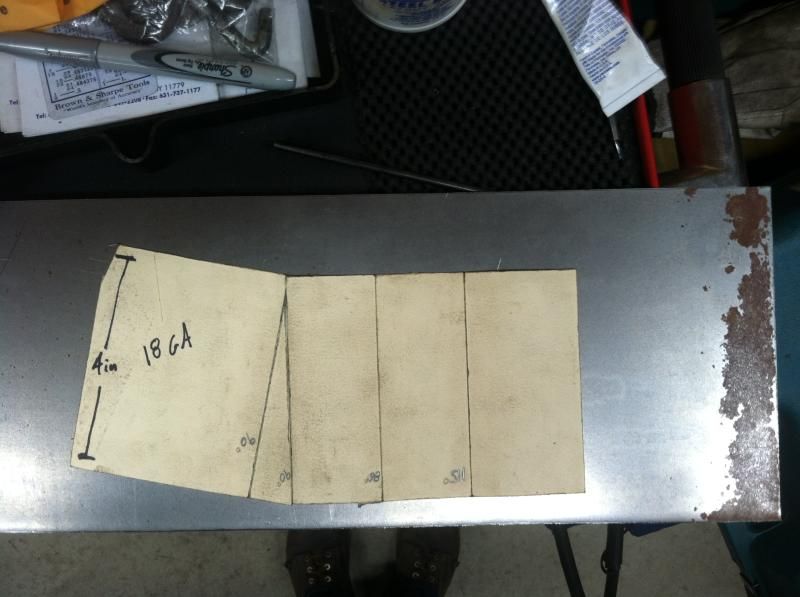 Transferred to steel 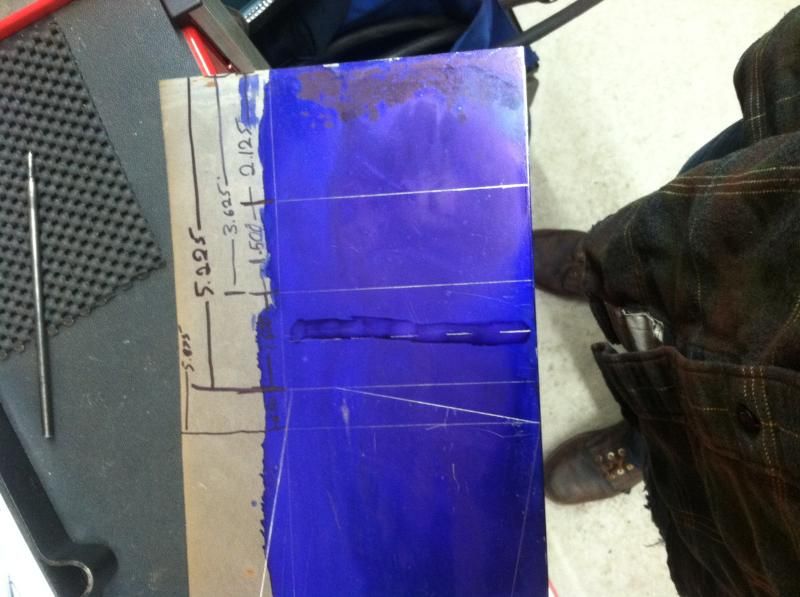 That's it for the sheet metal work so far. Got the bottom end of the motor assembled and the cam degreed. 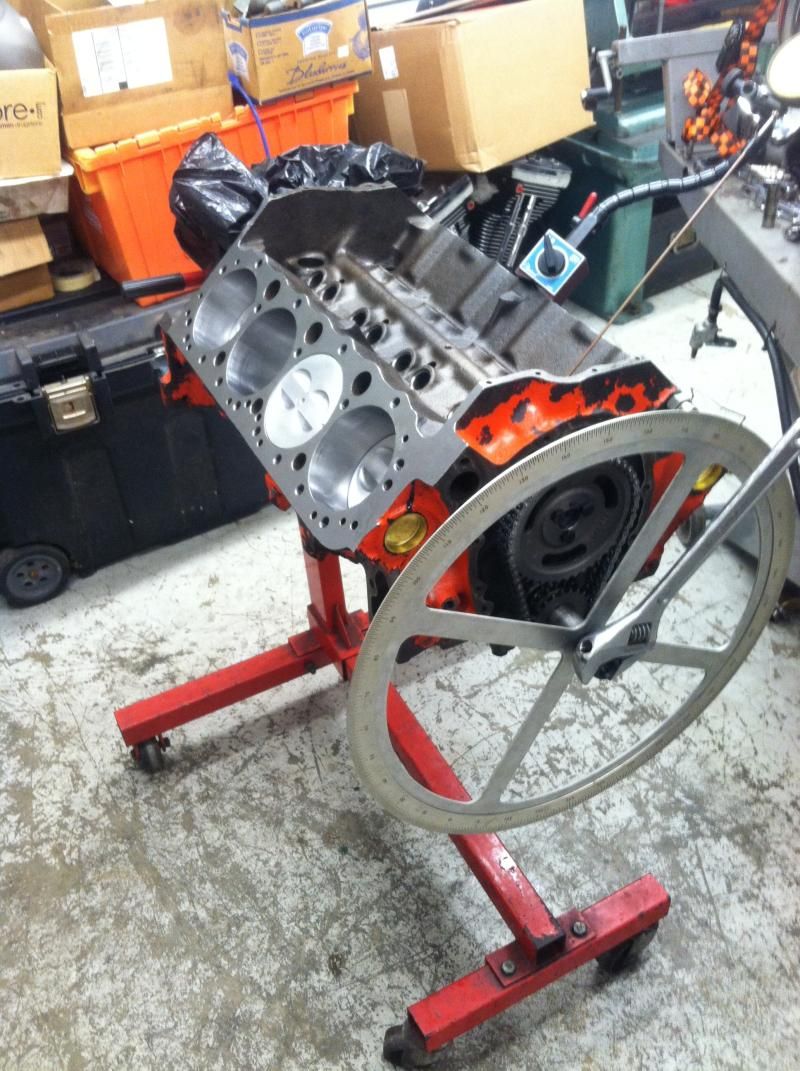
|
|
|

|
|
|
#45 |
|
Registered User
Join Date: Mar 2005
Location: Fairfield Maine
Posts: 1,759
|
Re: Blue 64 Short Bed
Very nice work keep the pics coming!
|
|
|

|
|
|
#46 |
|
Registered User
Join Date: Jan 2008
Location: oldfort tn
Posts: 1,183
|
Re: Blue 64 Short Bed
x2

__________________
my 65 fleetside build http://67-72chevytrucks.com/vboard/s...d.php?t=442370 big back glass conversion http://67-72chevytrucks.com/vboard/s...dow+conversion |
|
|

|
|
|
#47 |
|
Registered User
Join Date: Sep 2014
Location: Oakdale, Ny
Posts: 70
|
Re: Blue 64 Short Bed
Ok finally some updates. After a long winter with the weather finally starting to break (except for more snow today) I've been able to get out in the garage and start making progress. The motor was finished up at my buddies shop over the winter and brought home last week.
It's a pretty mild 355 but should run pretty well and be a much better improvement over what was in there. 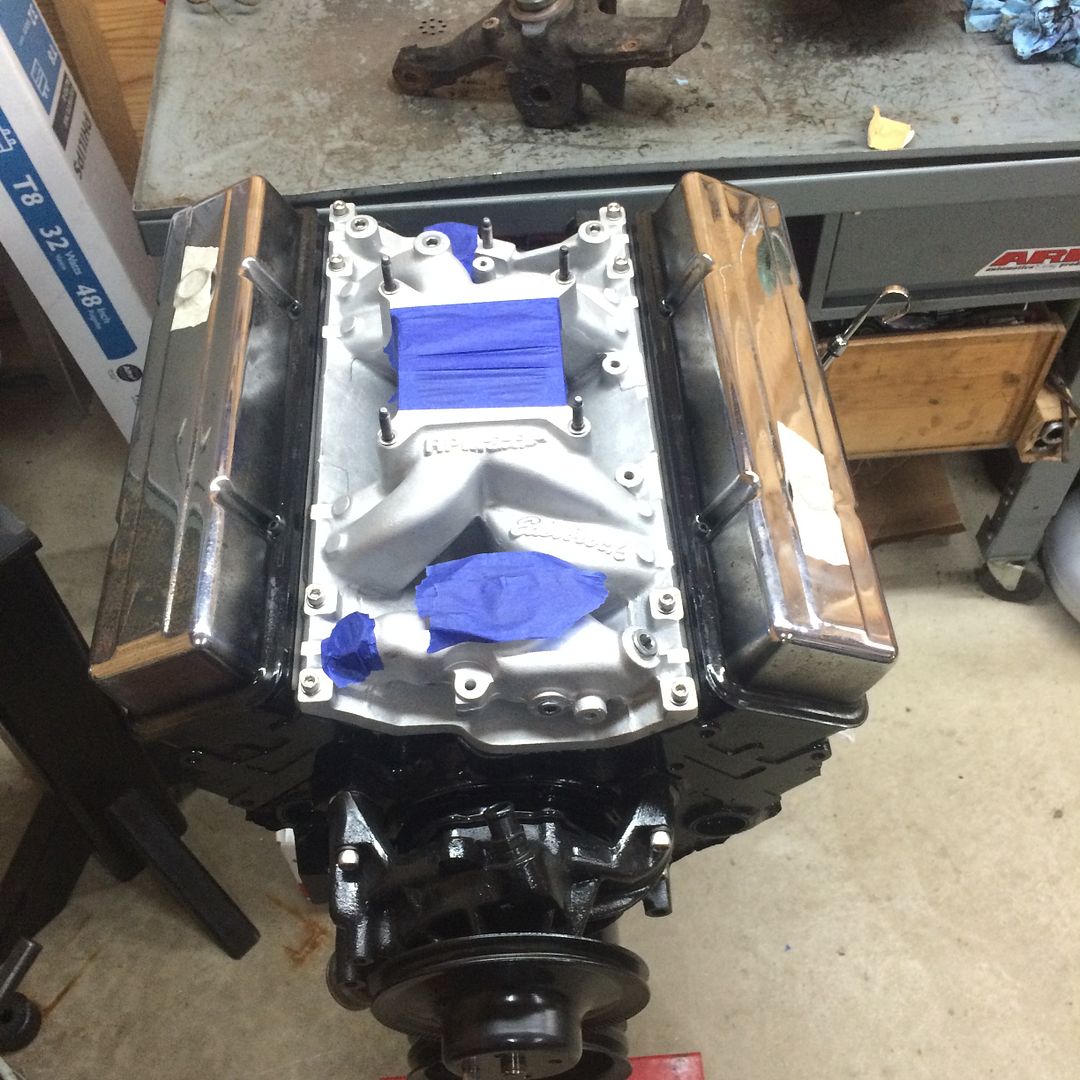 I placed a big order with rock auto last week and got timken wheel bearing, seals, front rotors, calipers, pads, inner and out tie rods, adjusting sleeves, pitman arm and idler arm. 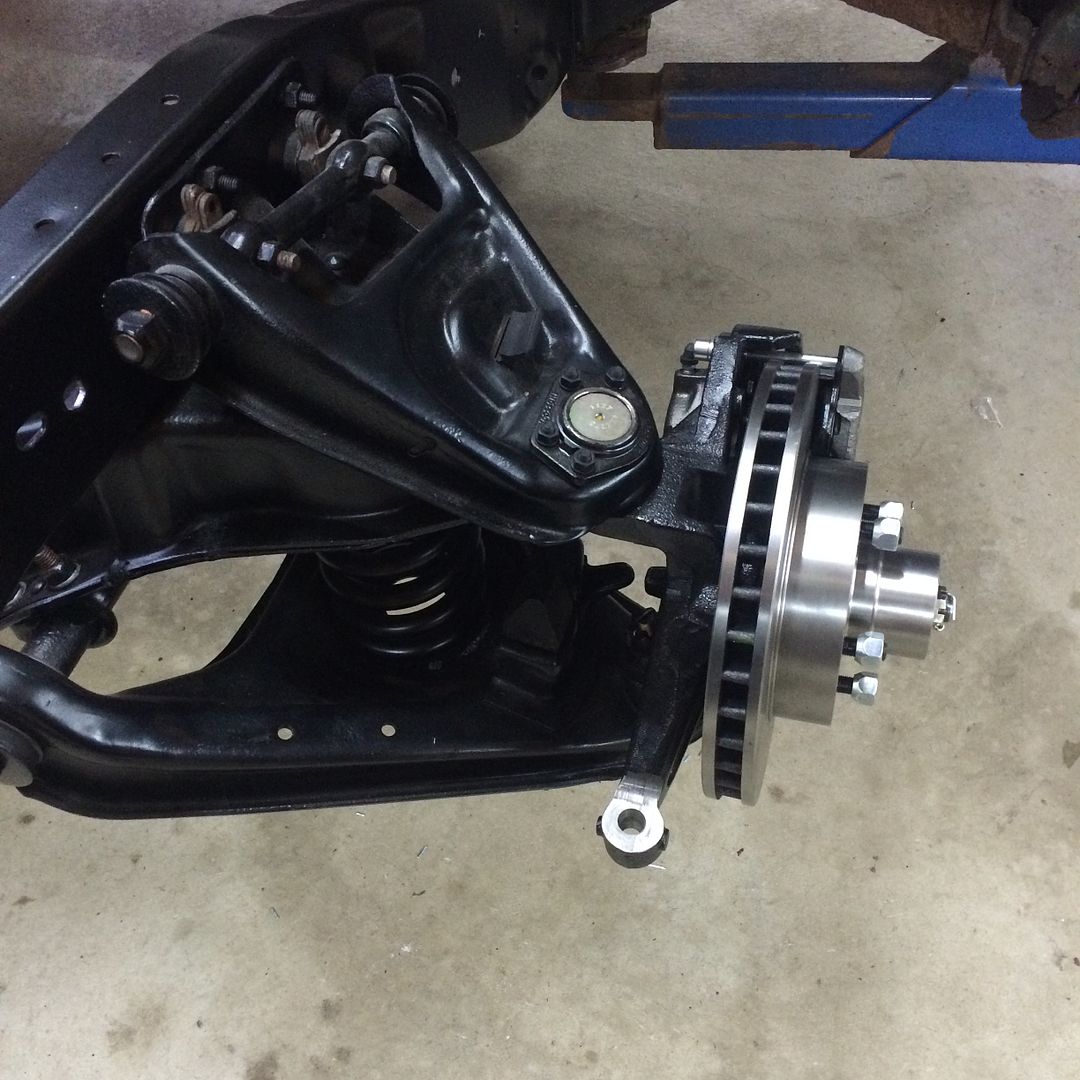 The drivers side caliper took a little work to fit properly. After swapping rotors and pads side to side, I bolted the drivers side rotor and caliper to the stock spindle and realized the drop spindle caliper mounting pad was causing the fitment issue. Some quick work with a file and everything fit as it should. 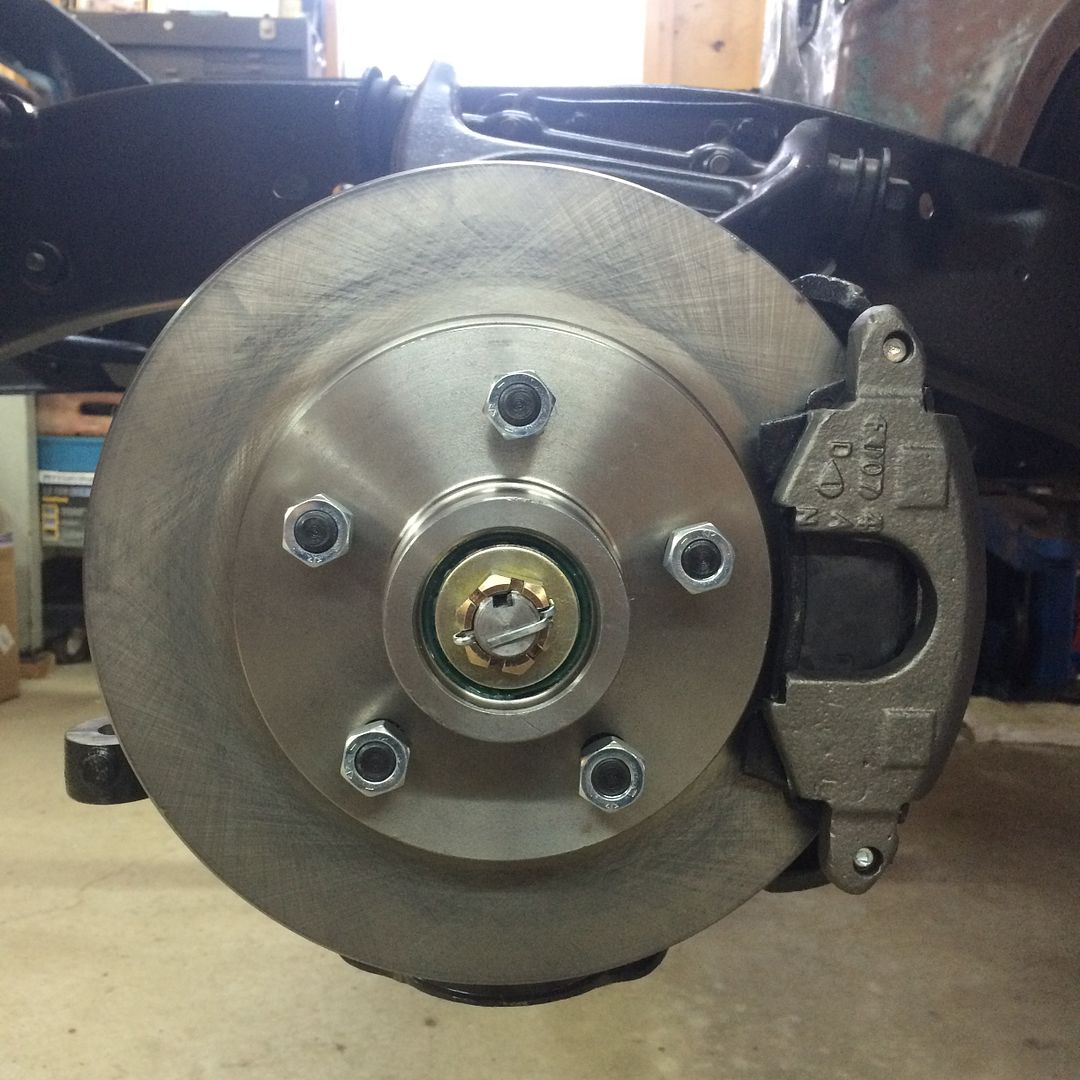 The most tedious work was filing the half hex half round hole for the late model brake hoses. 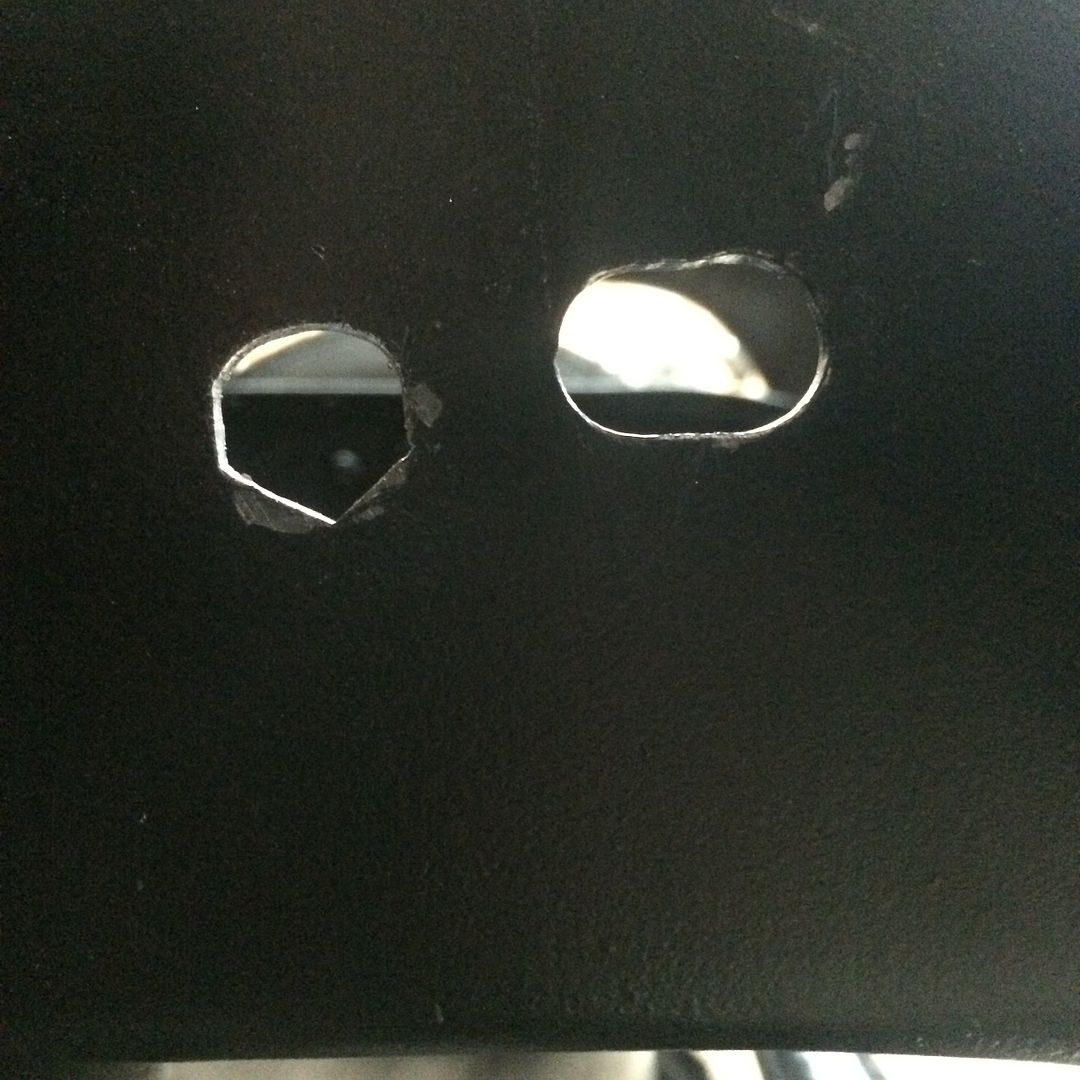 Yesterday I spent my time properly setting up the the drag link and late model idler arm. The new pitman arm was installed on the steering box then the drag link and new idler arm were installed as well as the idler arm bracket. The bracket was clamped to the frame and moved around until the drag link matched level with the crossmember and parallel to the crossmember. These measurements were taken with a magnetic level on the drag link and crossmember and a tape measure from the drag link to motor mount holes. Once level and square two 3/8 holes were drilled through the bracket into the frame rails and new hardware was installed. 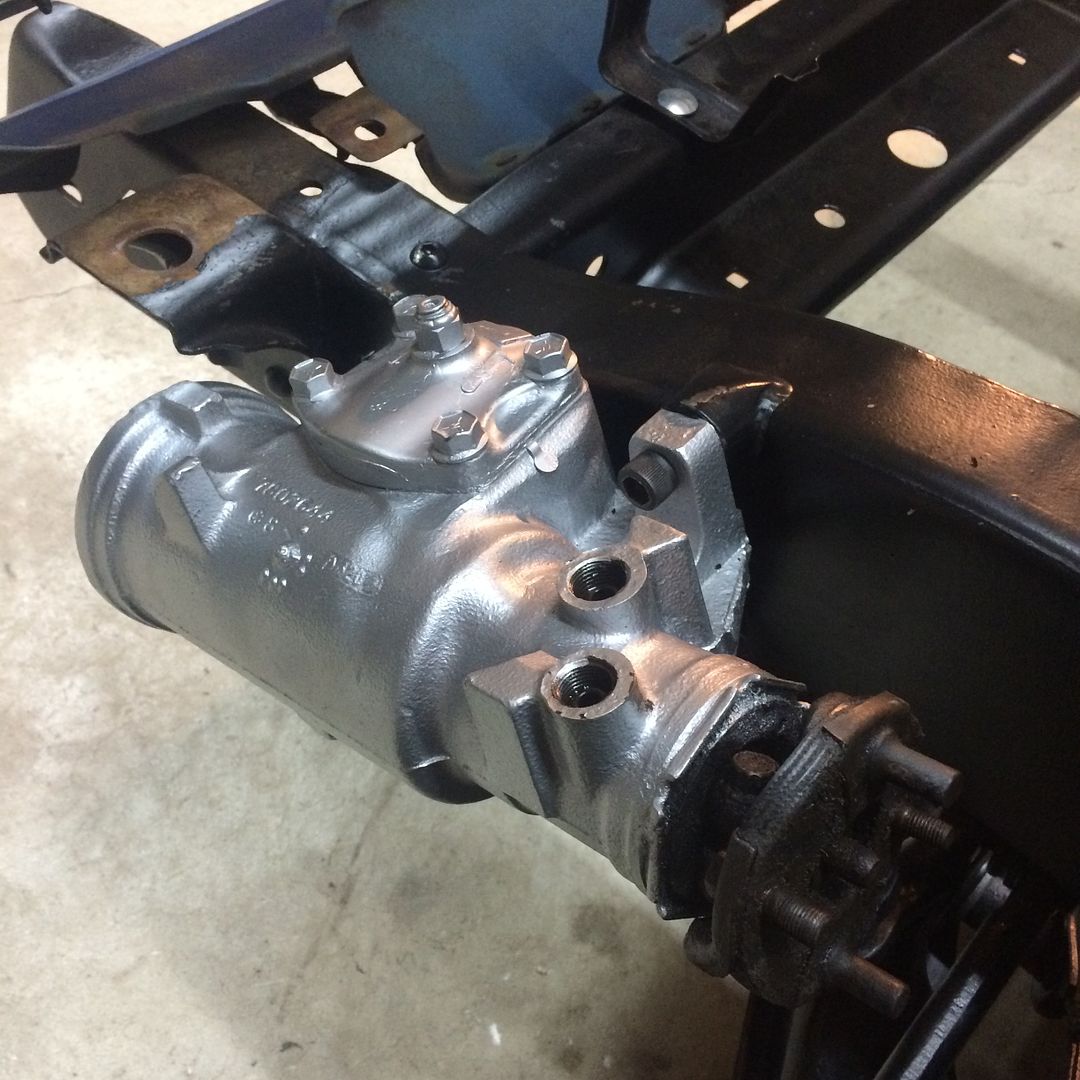 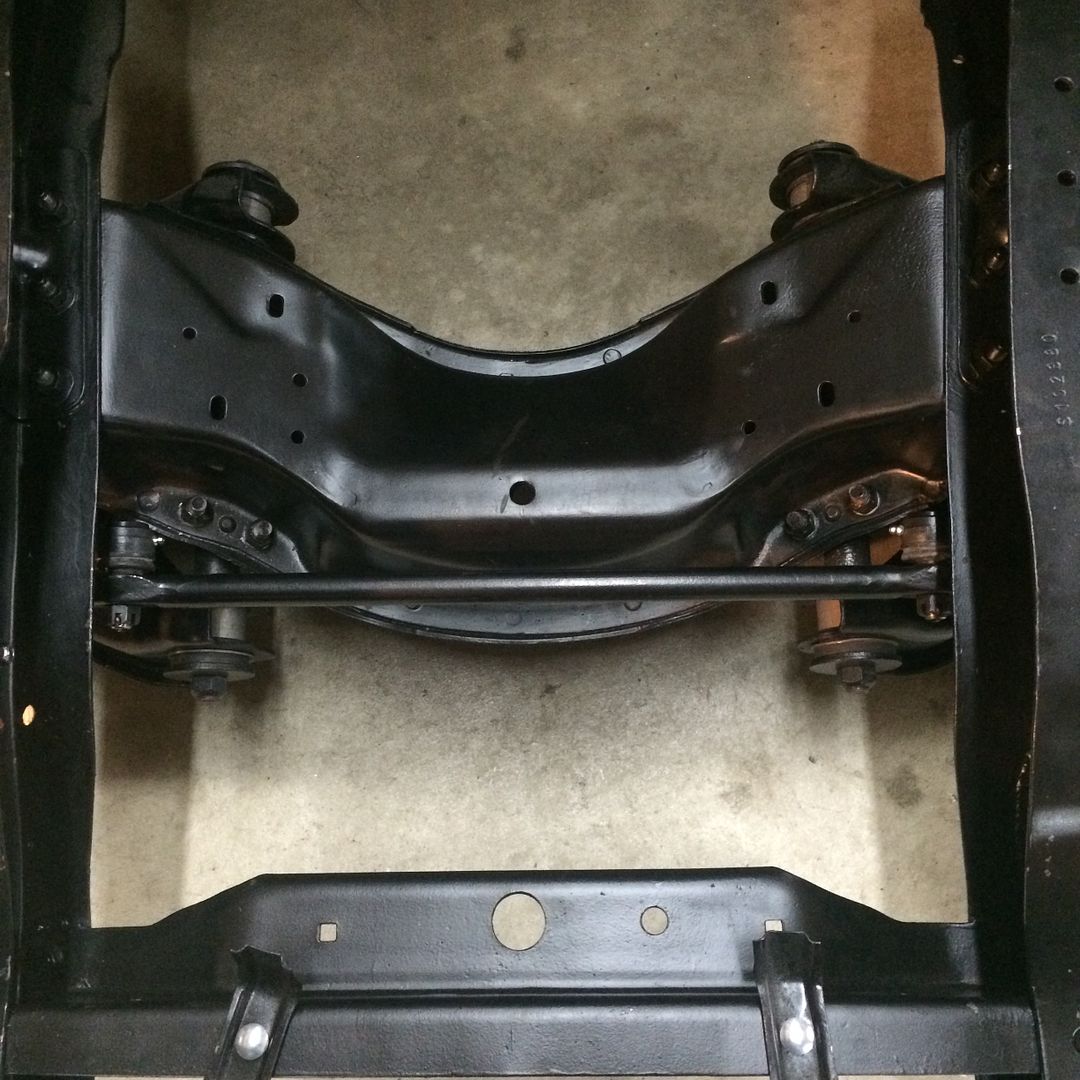 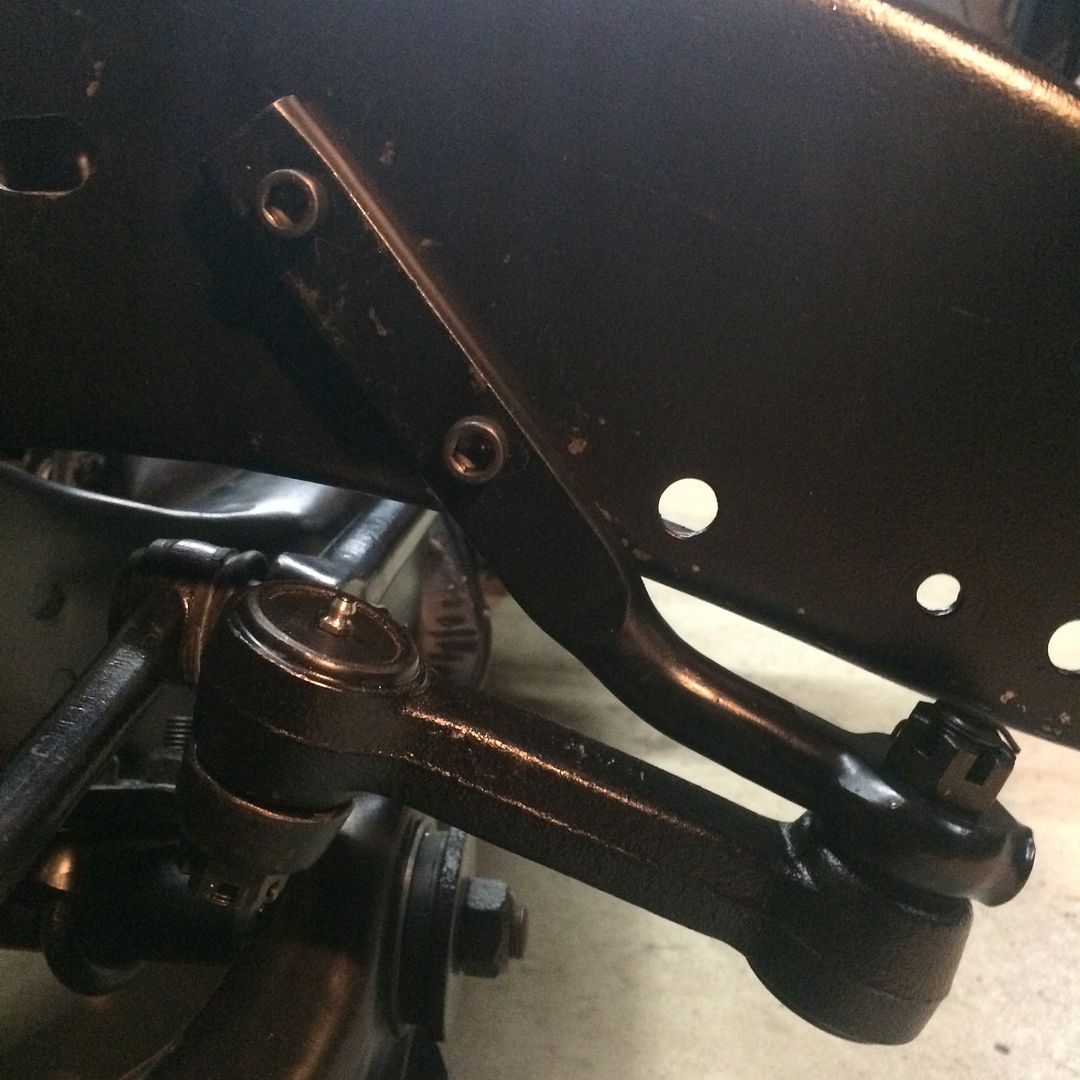 Once the drag link was in the correct location the tie rods were installed and round about adjusted. 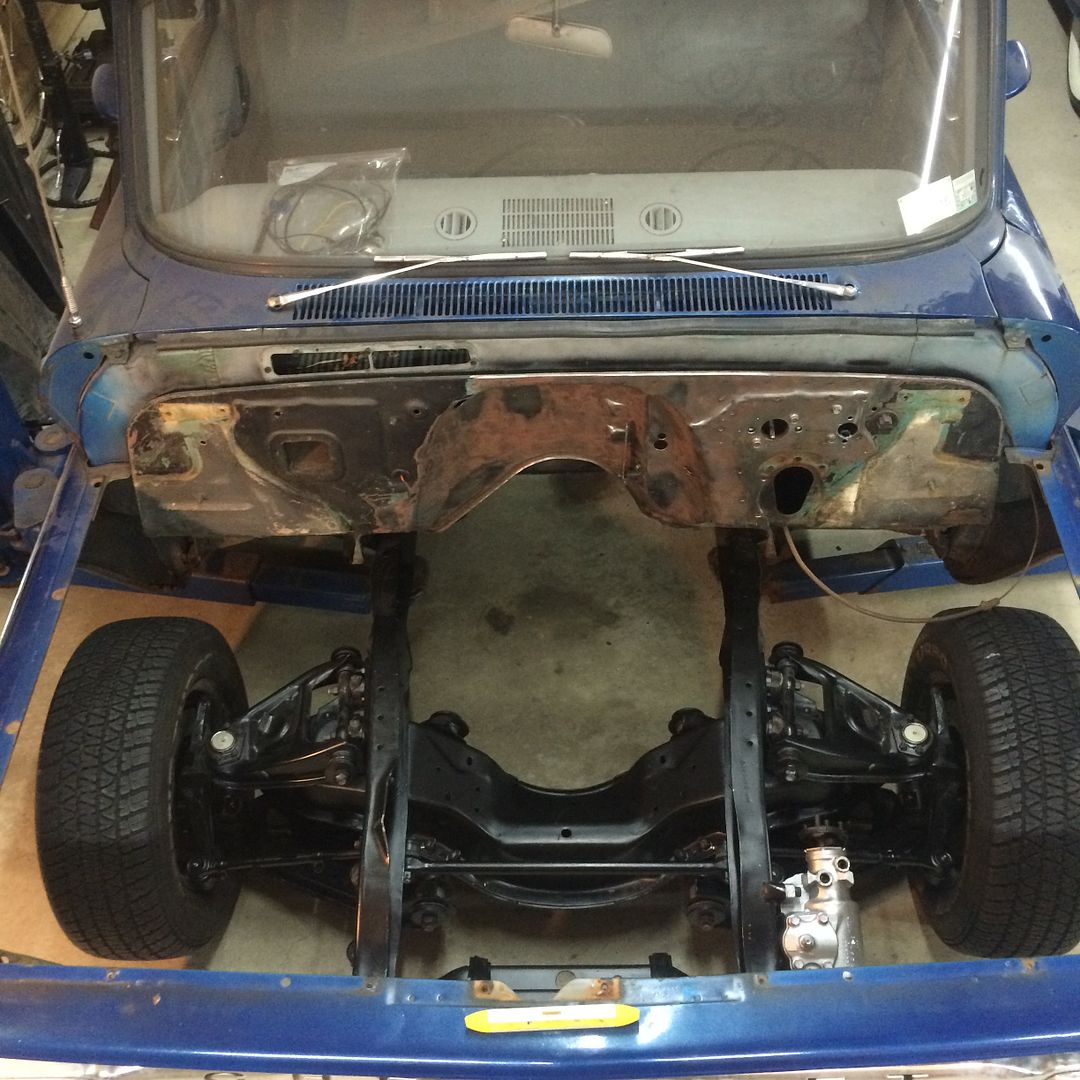 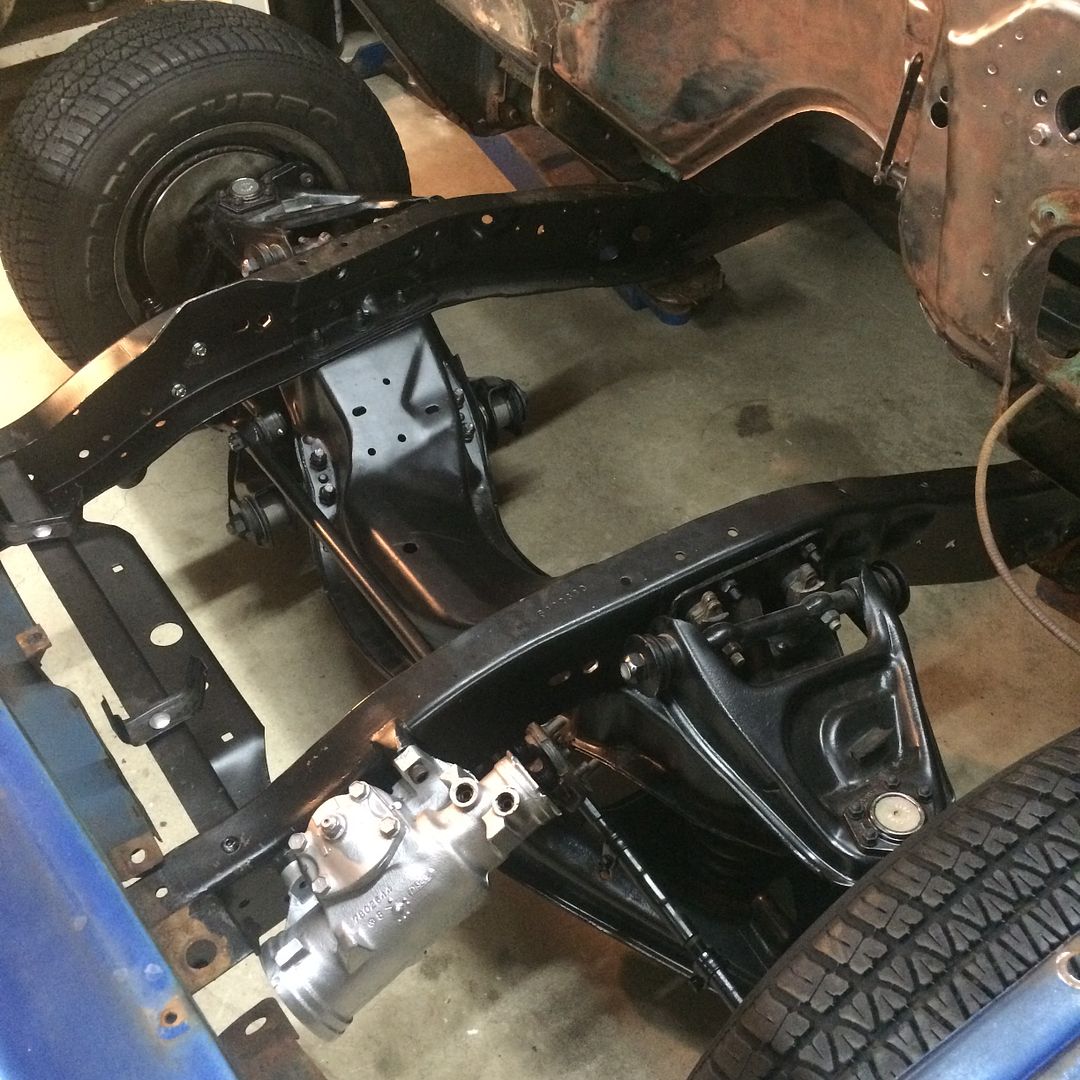 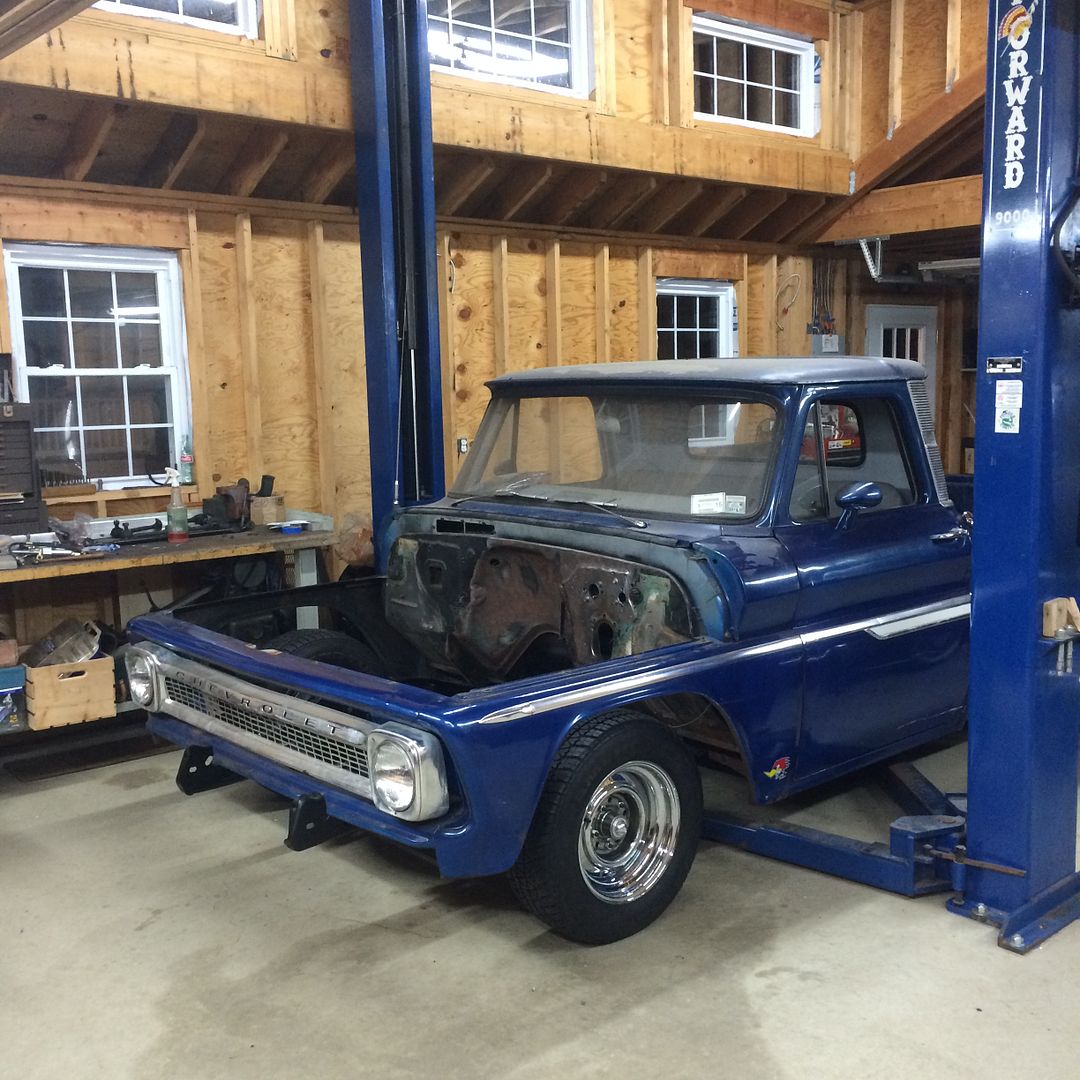
|
|
|

|
|
|
#48 |
|
Registered User
Join Date: Sep 2014
Location: Oakdale, Ny
Posts: 70
|
Re: Blue 64 Short Bed
Haven't been able to get on here and write so here's an update from the past couple of weeks, ill try to keep everything in order.
Everything in my front end is brand new, except for my rag joint. After doing some reach search on here I found that I could rebuild my existing rag joint for a fraction of the cost for a new one. My local parts store had the rebuild kit so with the help of txfirefighters post ( http://67-72chevytrucks.com/vboard/s...d.php?t=614332 ) I rebuilt my rag joint. Old crusty rag joint 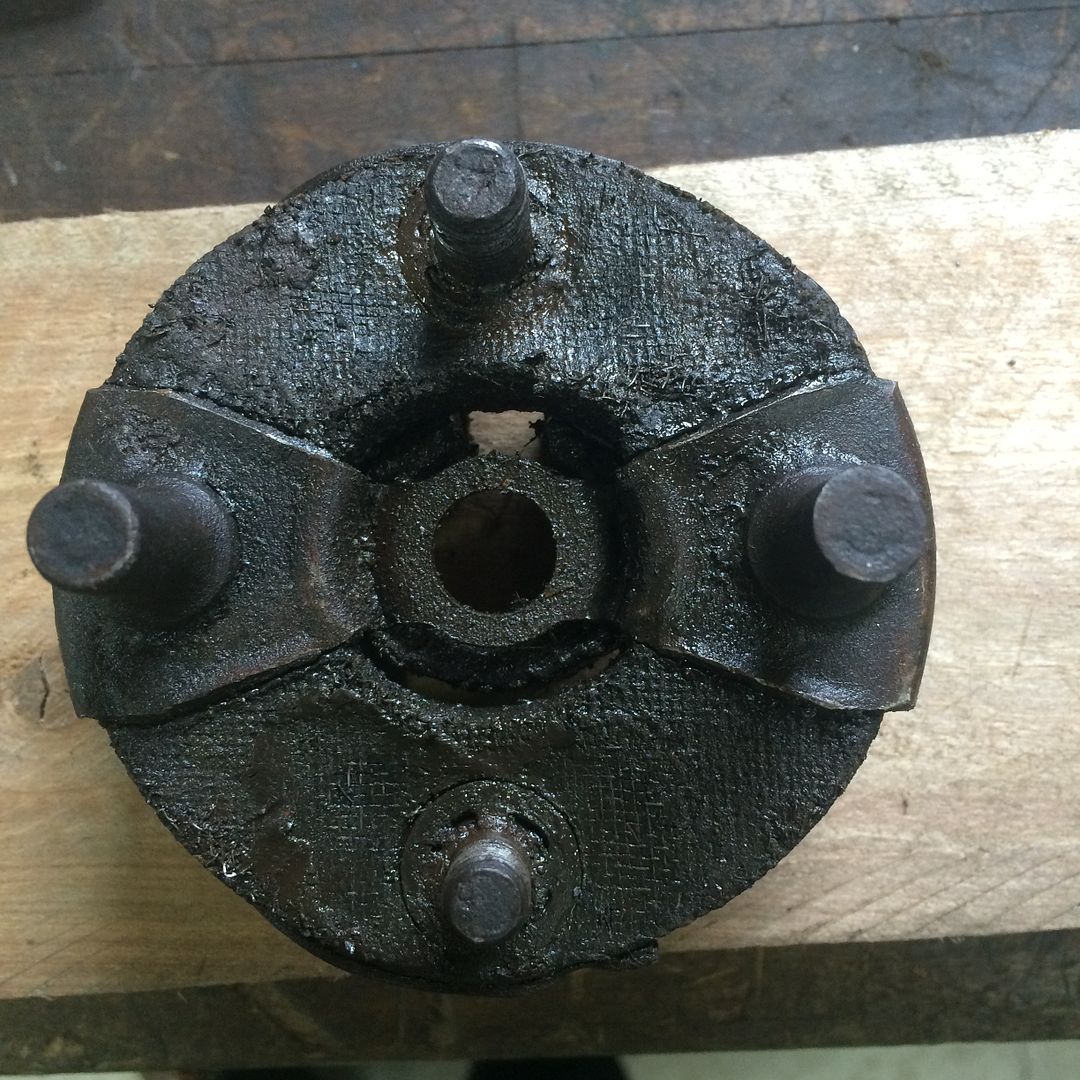 Cleaned parts and new parts 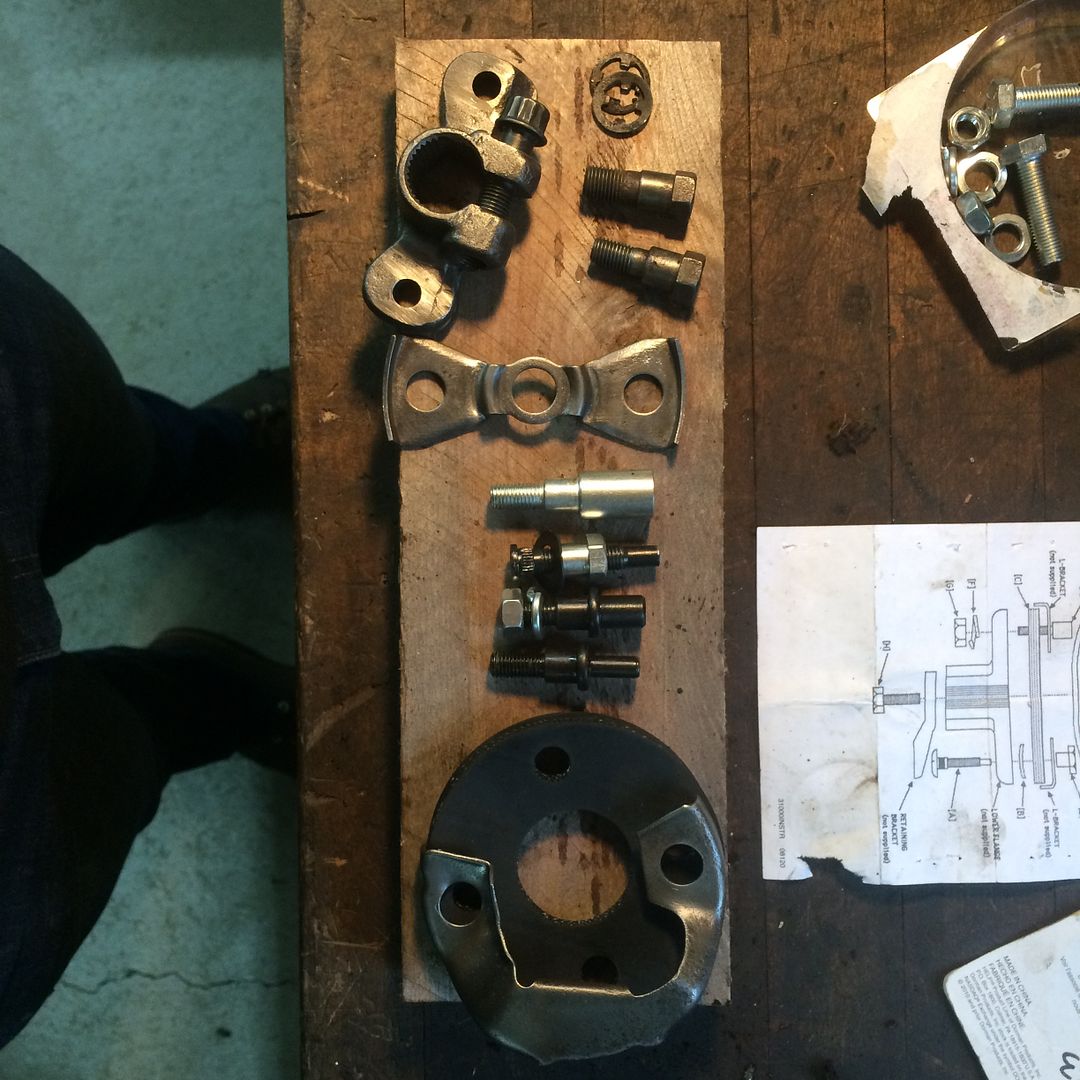 Rebuilt rag joint 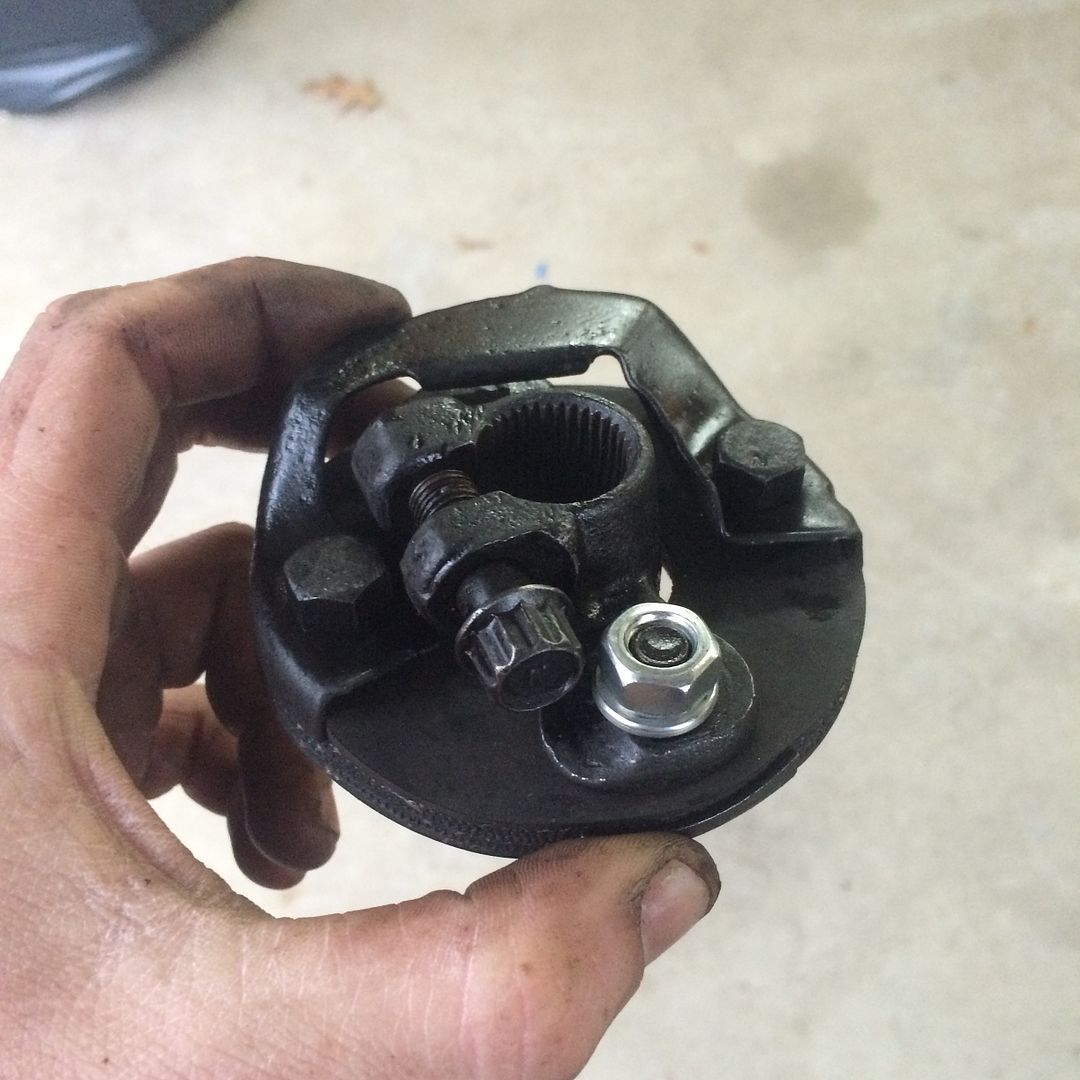 Next I received my brake hoses and shocks in the mail and installed these. The metal line portion of the brake hoses took slight bending to clear the ball joint of the drop spindles. Brake hose installed 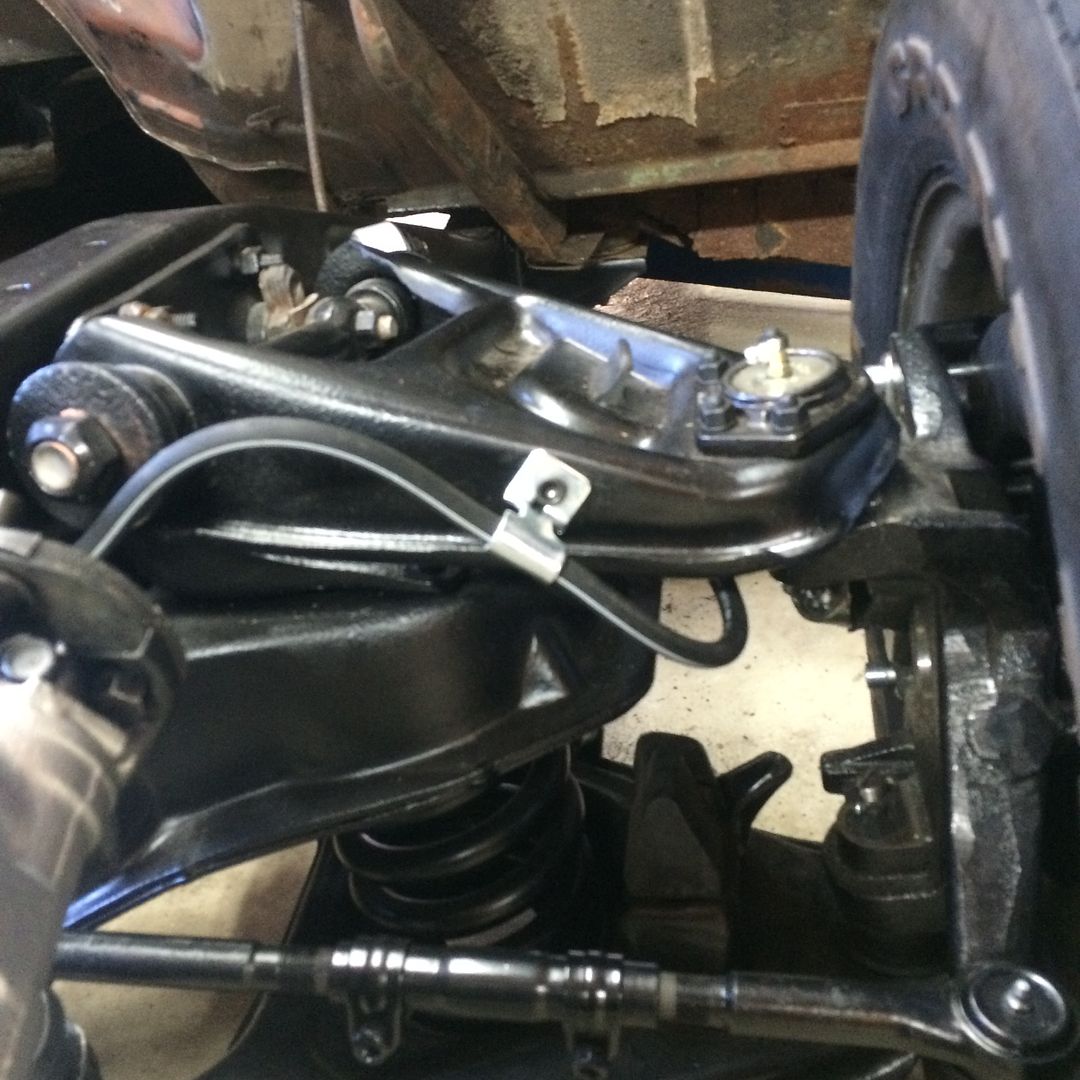 Brake hose after bend 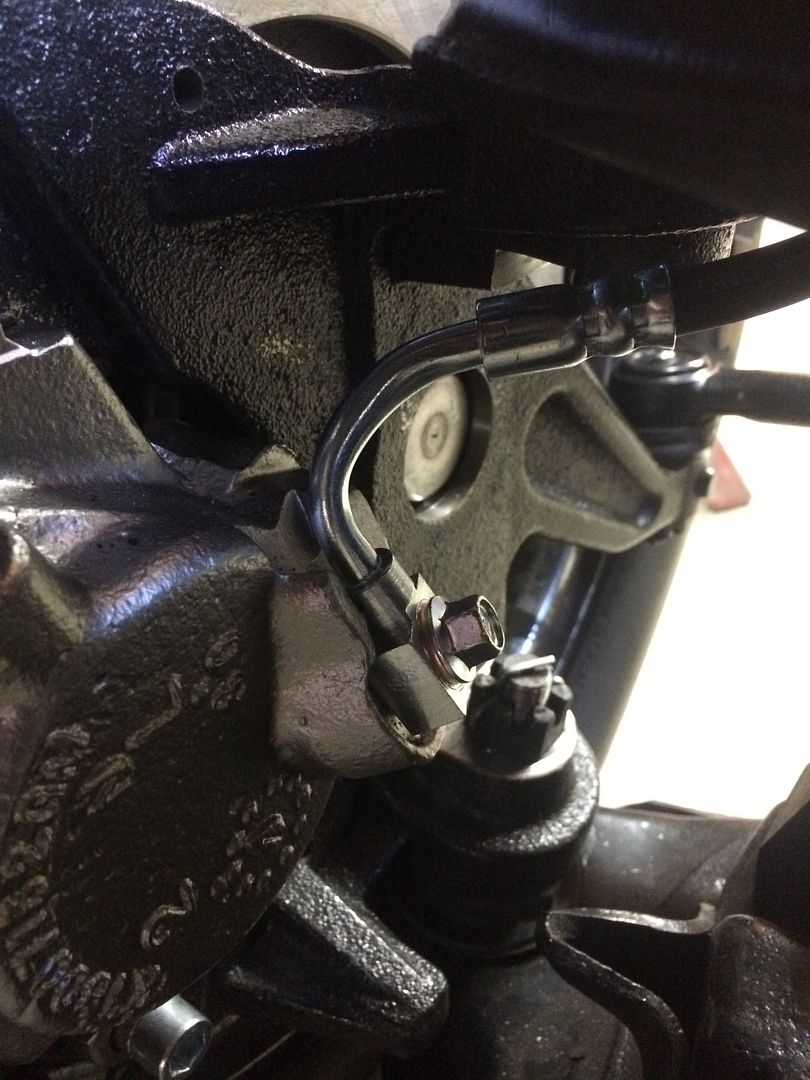 KYB Gas-a-just 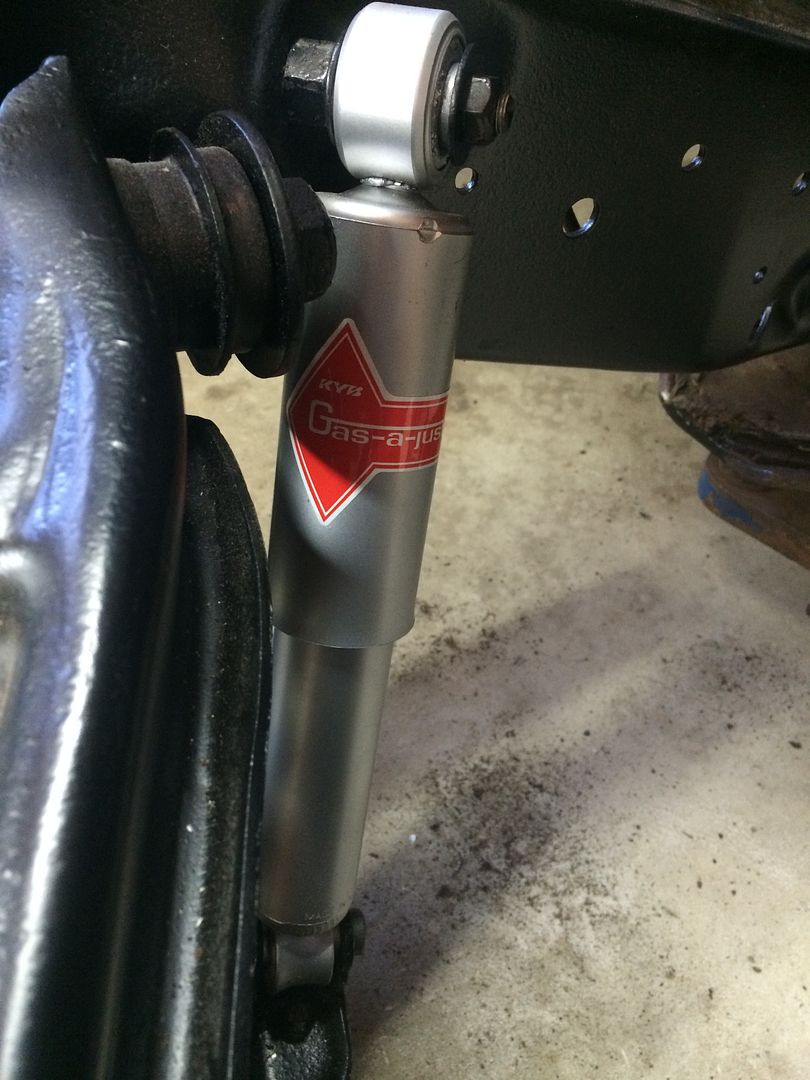 With almost all of the front suspension and brakes done it was time to get some sheet metal back in between the fenders. Back in the fall I started patching my inner fenders when I ran into a local guy who was getting rid of aftermarket inner fenders and radiator support. With all the work to patch what I had I figured these would save me some time and the price was right. I was wrong about the time part as it took almost a whole day to get the new stuff to fit right. Sheet metal sanded and fitted 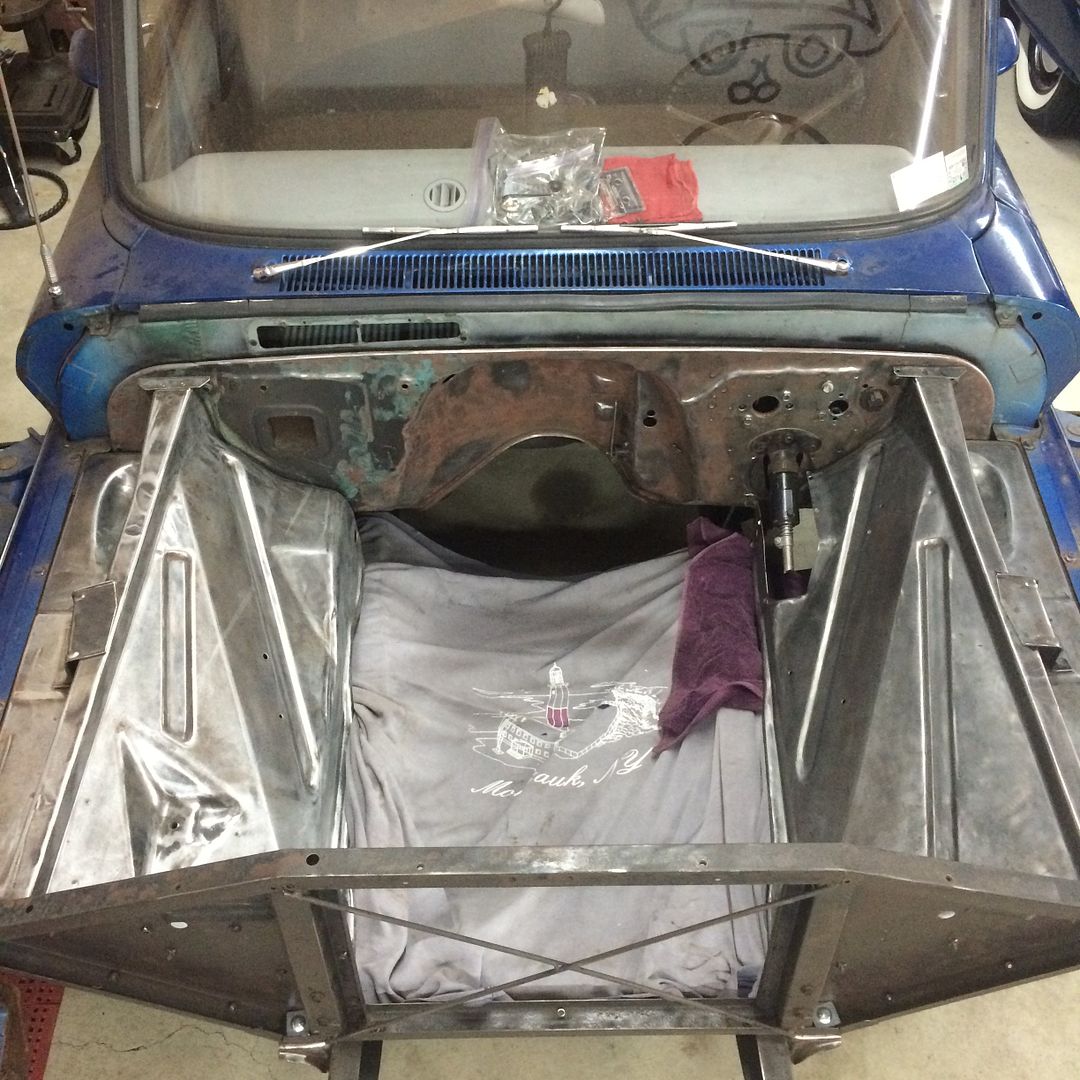 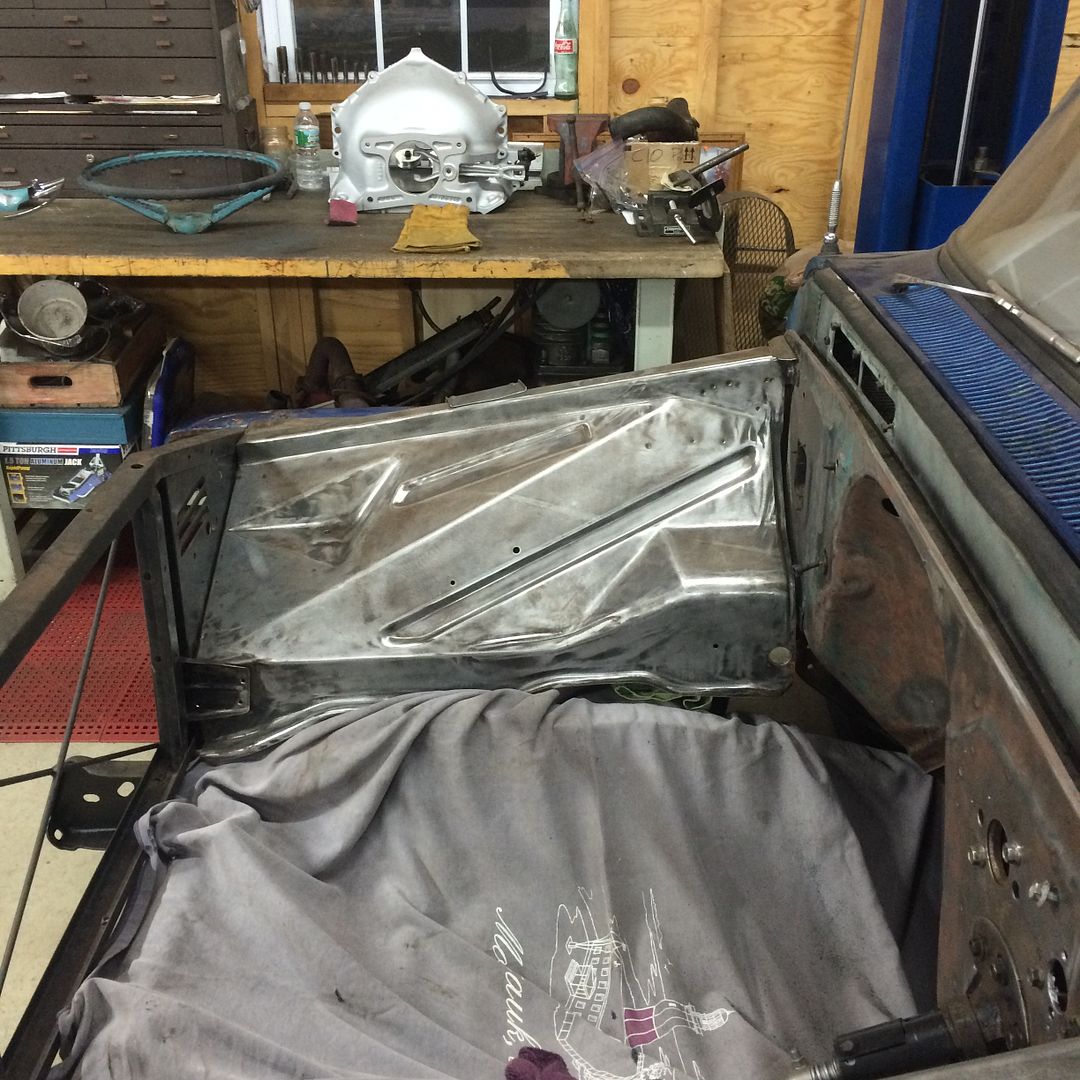 Then the truck was rolled outside for some paint. 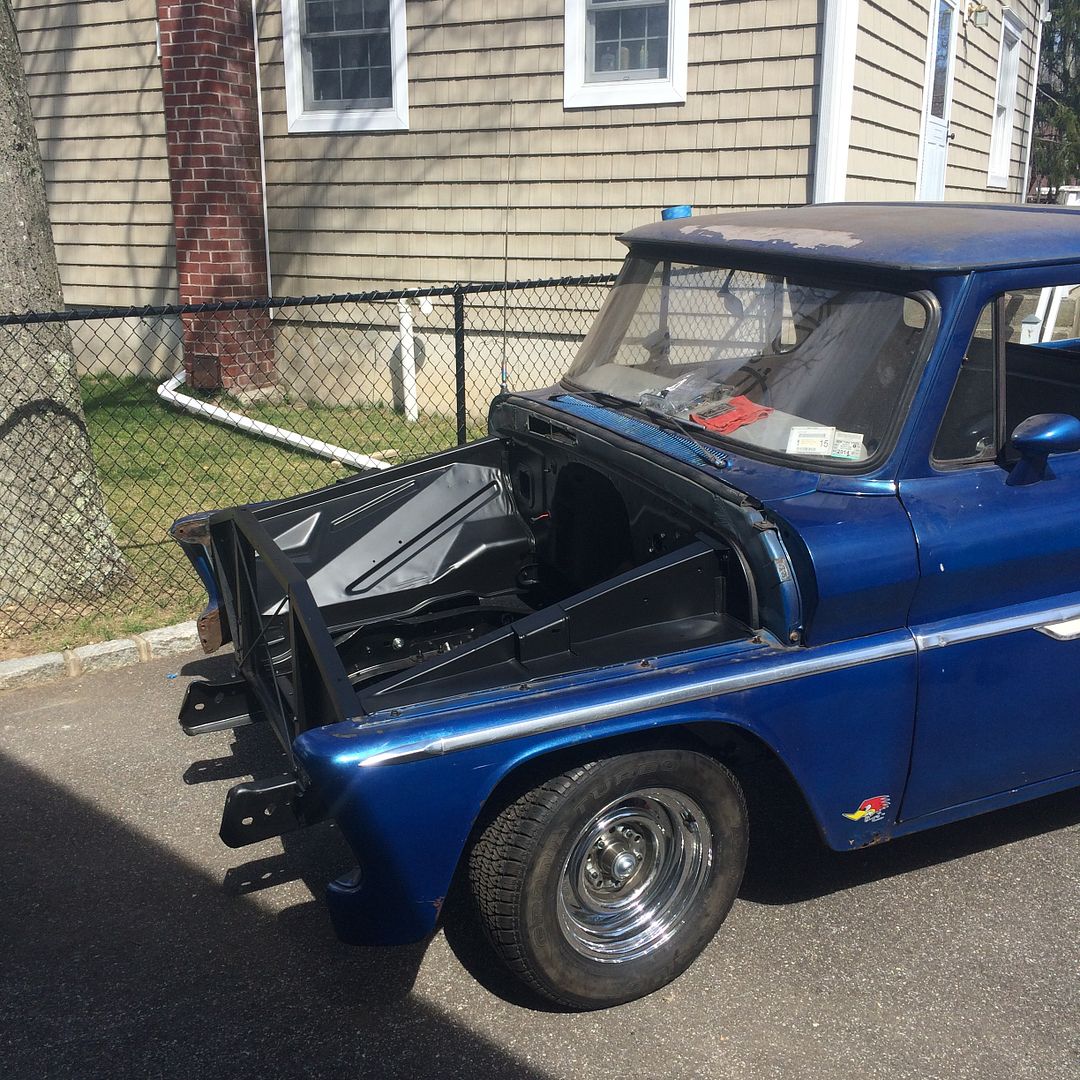 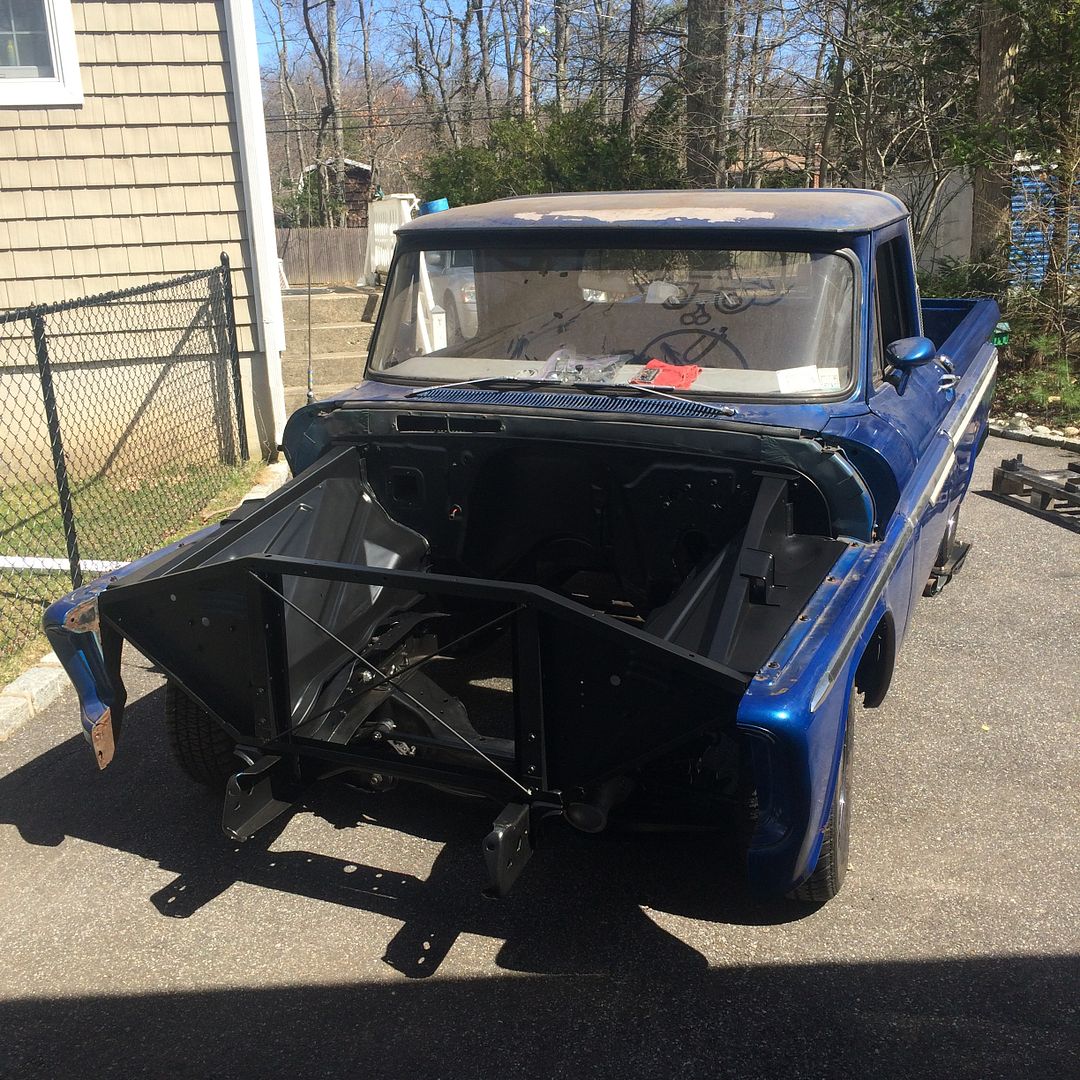 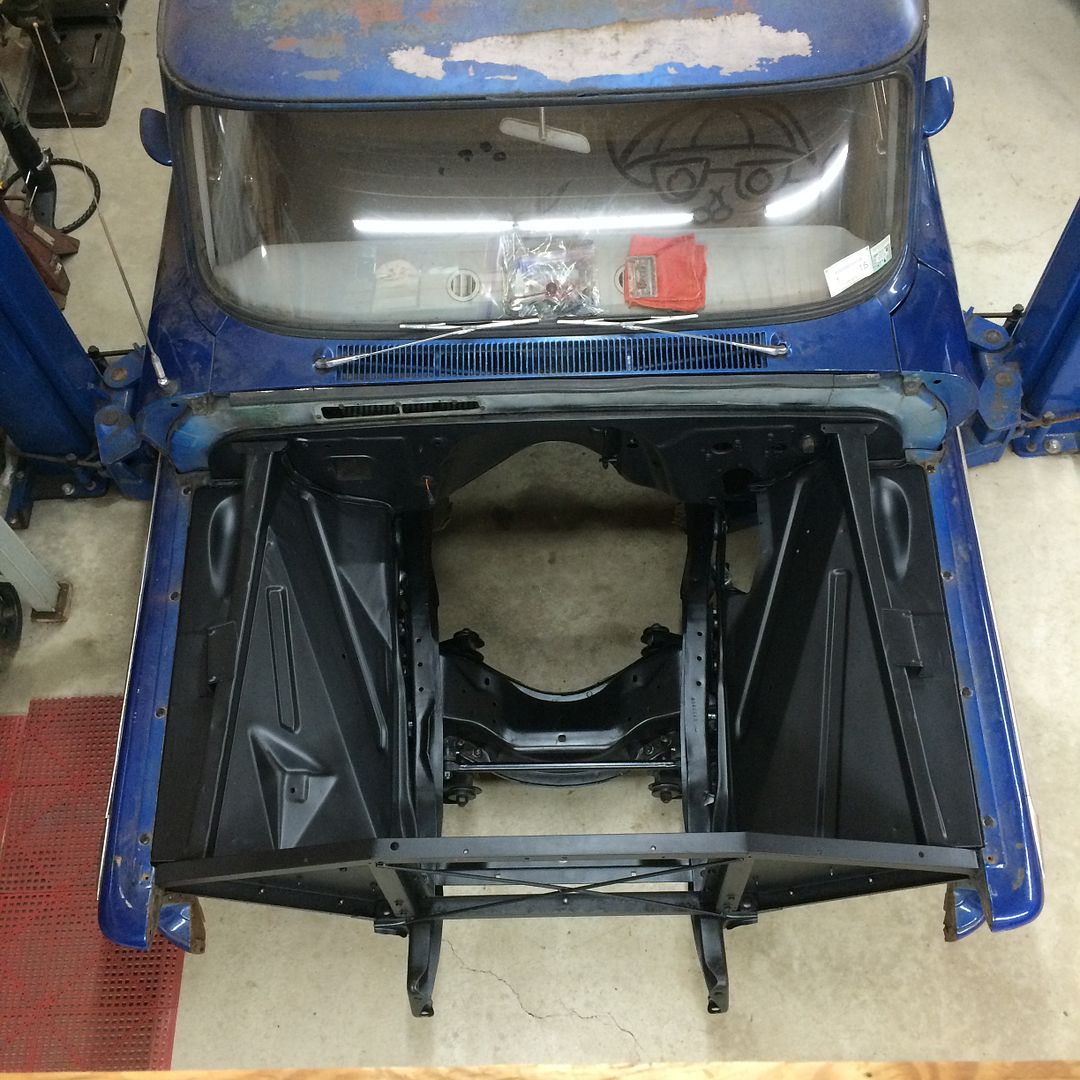 At this time I had just received in the mail pedals and a stock column to put back in the truck. Putting a 4 speed in the truck I wanted to get rid of the ugly late model column shift auto column. In order to link the steering column to the power steering box I choose to use a steering u joint one end 3/4 DD to match the steering box shaft and the other end 3/4 smooth weld on for the column shaft. Having a straight steering wheel when going down the road is something I always found important to me. This meant getting the steering wheel dead straight with the steering box dead center it's lock to lock. To find dead center of the steering box I set up a pointer at 12 o'clock on the rag joint and used a sharpie to mark each lock and then find the center. 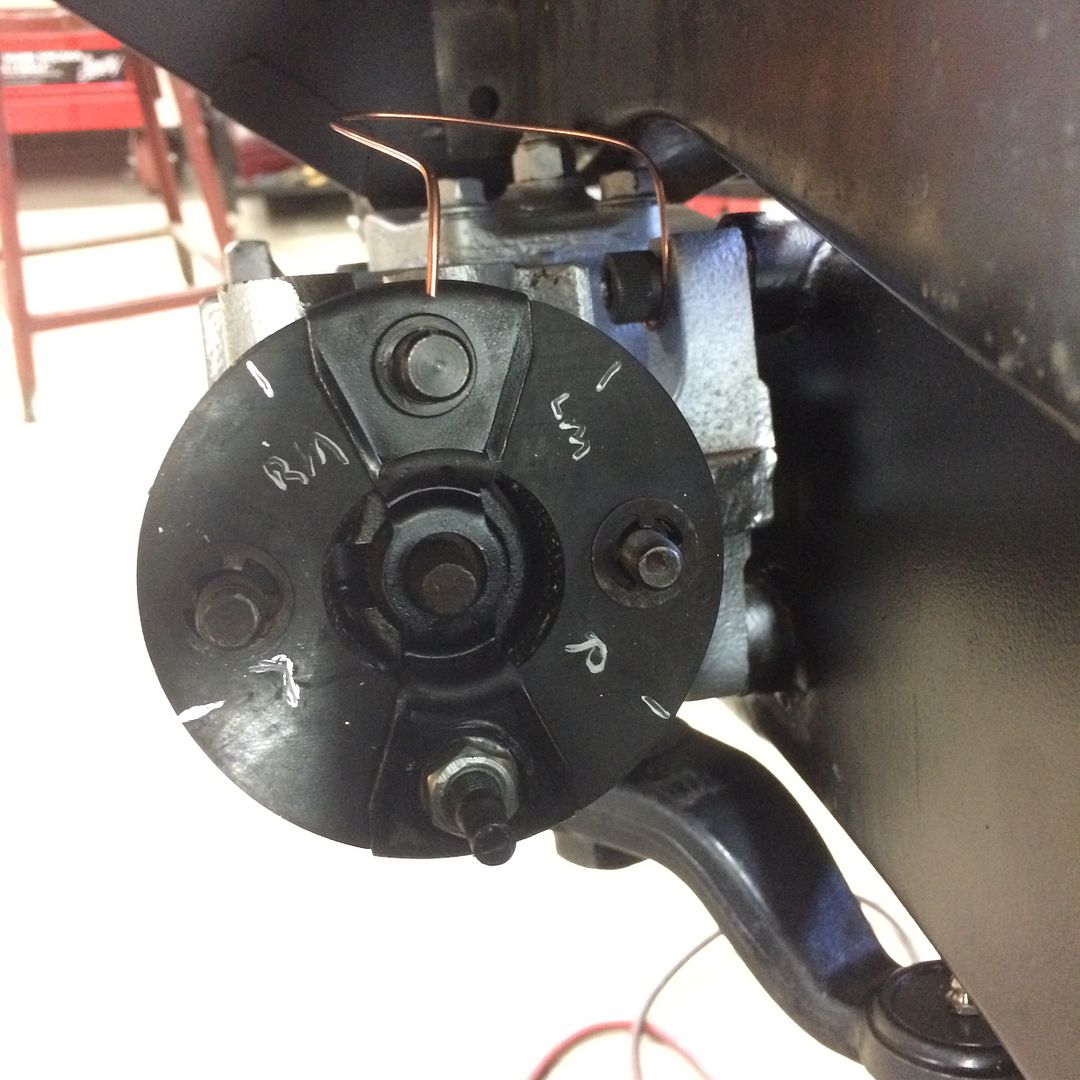 The 3/4 DD was cut right where it begins 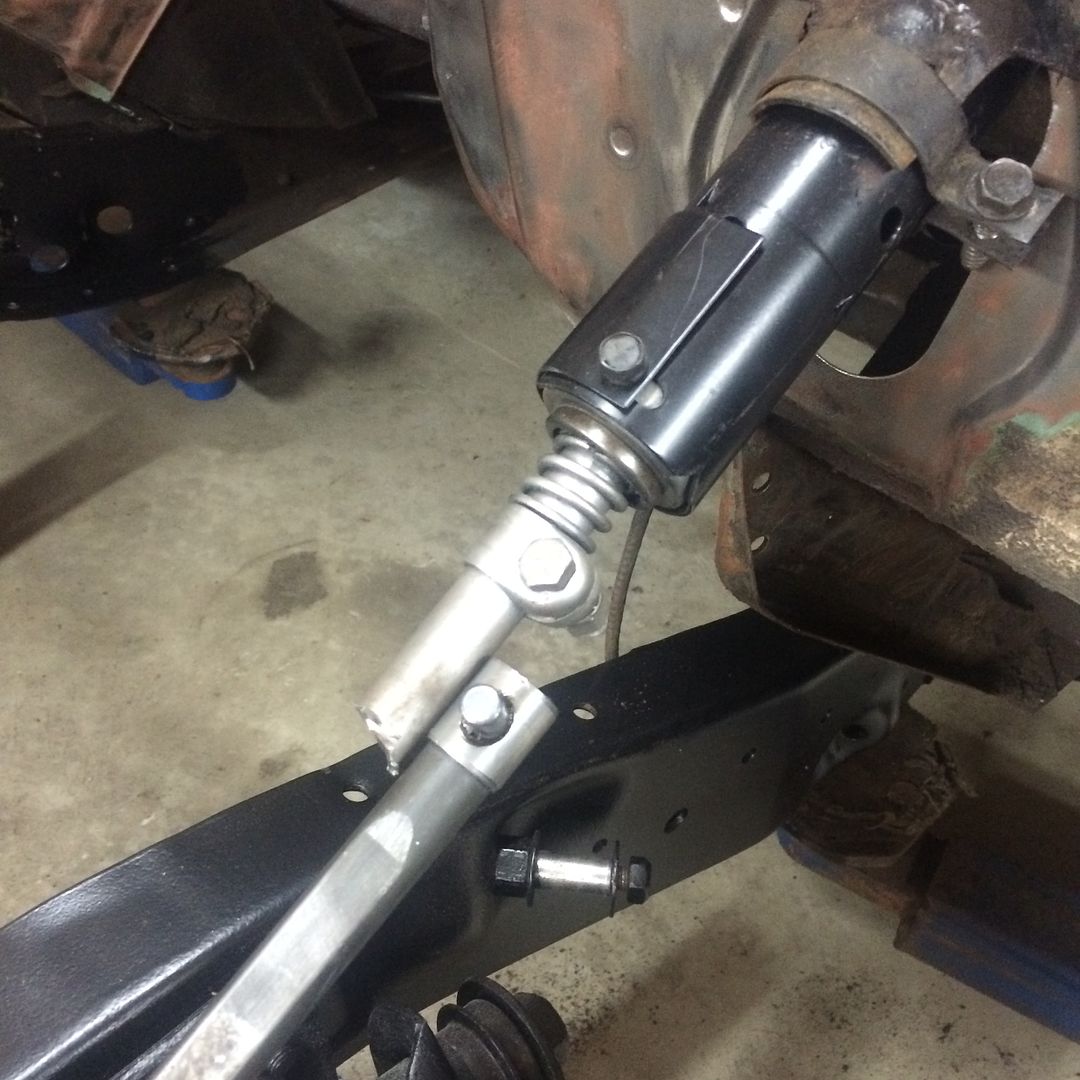 U joint installed 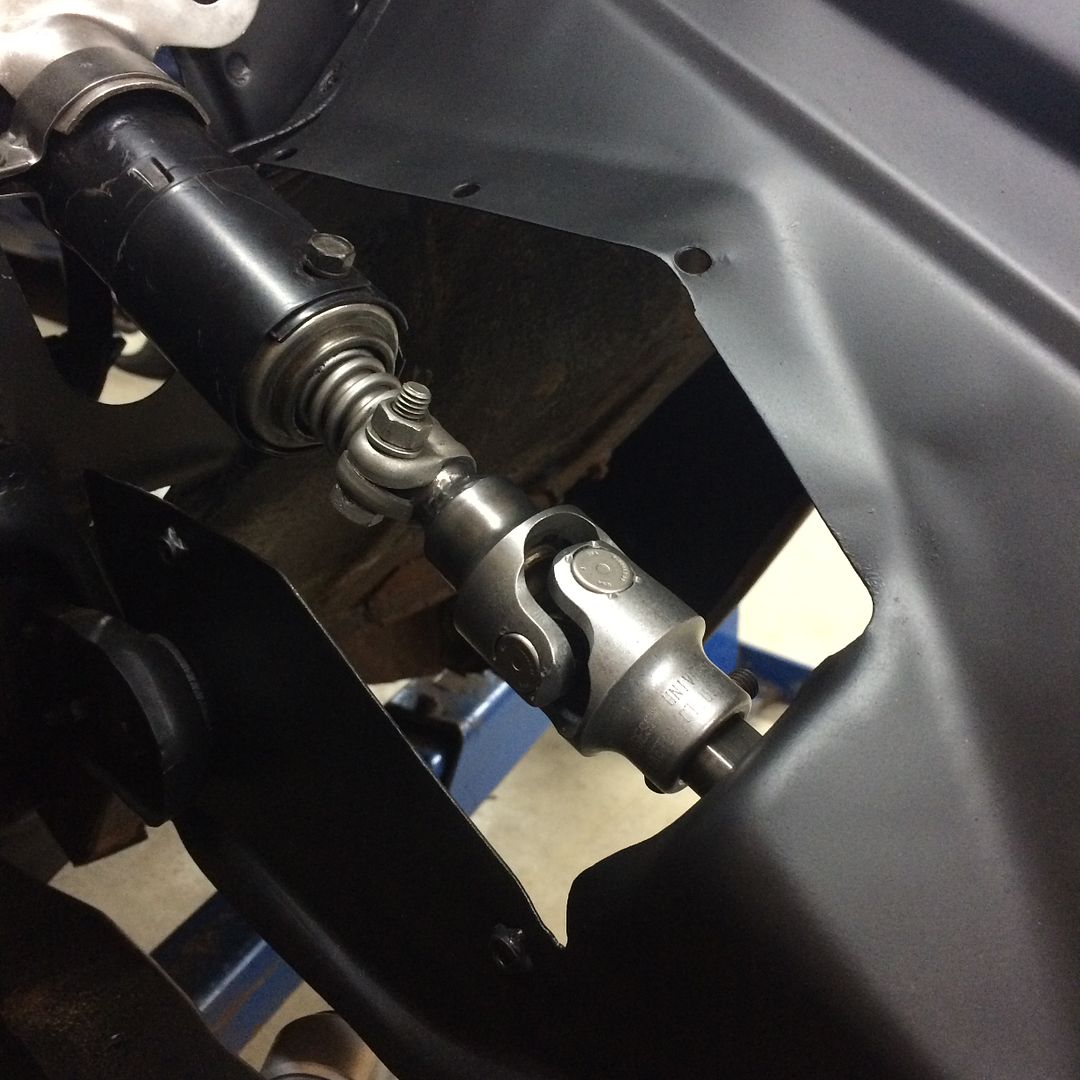 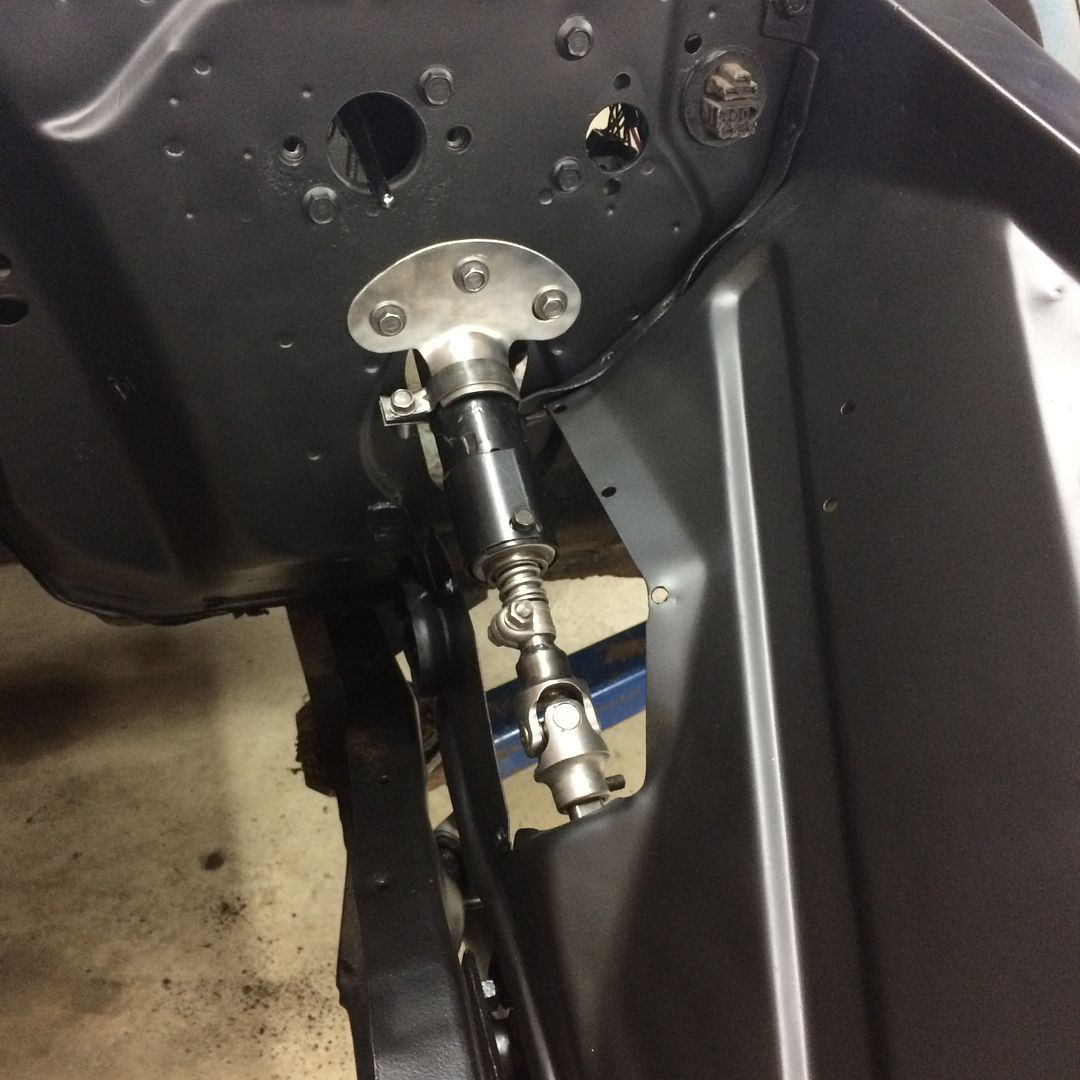 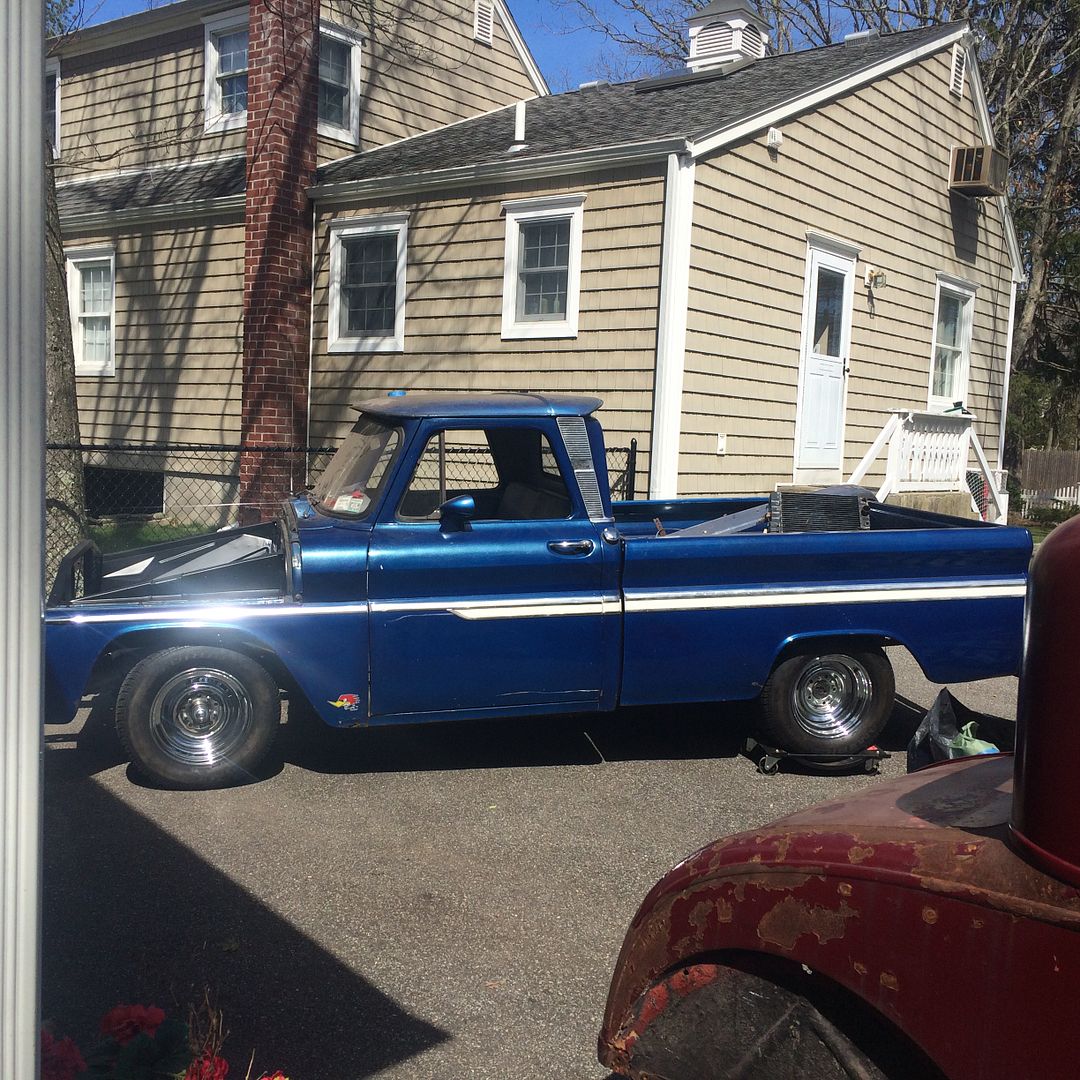
|
|
|

|
|
|
#49 |
|
Registered User
Join Date: Sep 2014
Location: Oakdale, Ny
Posts: 70
|
Re: Blue 64 Short Bed
|
|
|

|
|
|
#50 |
|
Registered User
Join Date: Sep 2014
Location: Oakdale, Ny
Posts: 70
|
Re: Blue 64 Short Bed
|
|
|

|
 |
| Bookmarks |
|
|