
|
Register or Log In To remove these advertisements. |
|
|
|
|||||||
 |
|
|
Thread Tools | Display Modes |
|
|
 02-07-2017, 01:29 PM
|
#1 |
|
I'm just glad to be here!
Join Date: Jan 2008
Location: Longview, TX
Posts: 4,788
|
Re: 1966 C10 Project Truck
Just checked out your thread. Cool truck. I dig the Army vibe. I kinda miss my old 6 banger from years ago. I bet the 5 speed was a great upgrade.
You are gonna love the power of the 5.3, it has great power for a stock engine.
__________________
Karl  1965 Chevy Stepside(Grandpa's Old Blue) and (July 2015 Shop Build!)(2020, the Saga Continues) http://67-72chevytrucks.com/vboard/s...d.php?t=372424 The LST Challenge: http://67-72chevytrucks.com/vboard/s...=1#post7812257 Korbin's 1st Square: "Sunburn" http://67-72chevytrucks.com/vboard/s...d.php?t=418618 1985 GMC Sierra: "White Trash", Korbin's 2nd now... http://67-72chevytrucks.com/vboard/s...d.php?t=632305 Henry - 1984 Chevrolet, Owen's 1st Square |

|

|
|
02-08-2017, 10:57 AM
|
#2 | |
|
Registered User
Join Date: Apr 2004
Location: Tigard, Or
Posts: 503
|
Re: 1966 C10 Project Truck
Quote:
 I don't think I ever posted this here, I got a GoPro for Christmas so I took a little video on the way to my buddy's place around New Years. It so fun to drive! https://www.youtube.com/watch?v=ryDZ2UCNh-o |
|
|
|
|
|
02-10-2017, 11:52 AM
|
#3 |
|
Registered User
Join Date: Apr 2004
Location: Tigard, Or
Posts: 503
|
Re: 1966 C10 Project Truck
Parts are starting to roll in for the 5.3. To say I'm excited is an understatement!
|
|
|
|
|
03-15-2017, 10:03 AM
|
#4 |
|
Registered User
Join Date: Apr 2004
Location: Tigard, Or
Posts: 503
|
Re: 1966 C10 Project Truck
Motivation has been on the low side the last couple of weeks but I'm still plugging away on the pickup. Last night, I bolted the intake back on after I had my buddy fix a mistake that I did, buttoned up the new under dash harness and just had to see what the gauges will look like. The gauges look awesome and I can't stop sitting in the truck and looking at them!
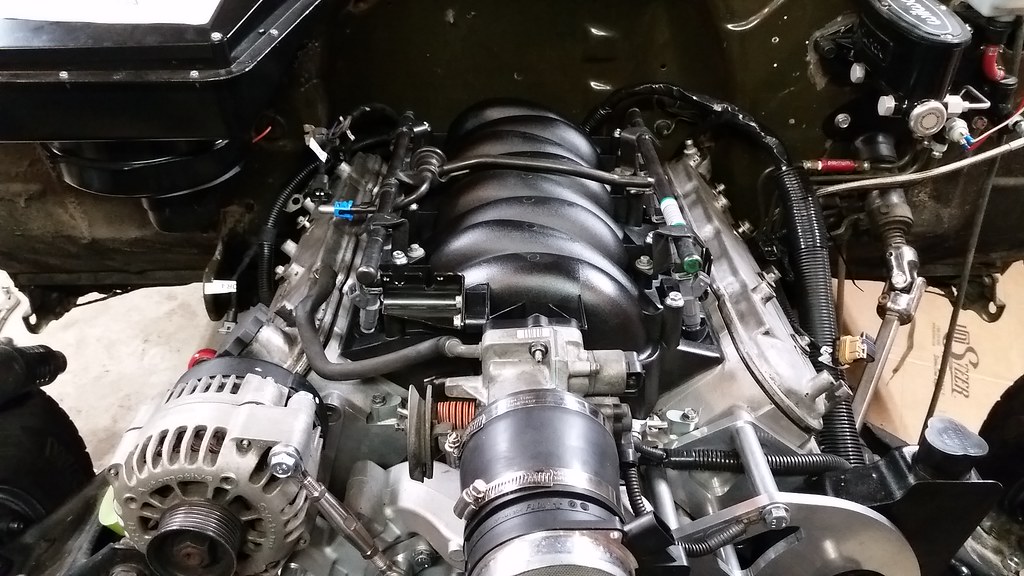 Since I was here, I tied the parking light wire in with the running lights. Super easy thing to do and should help the other people on the road see the truck at night. I hope. 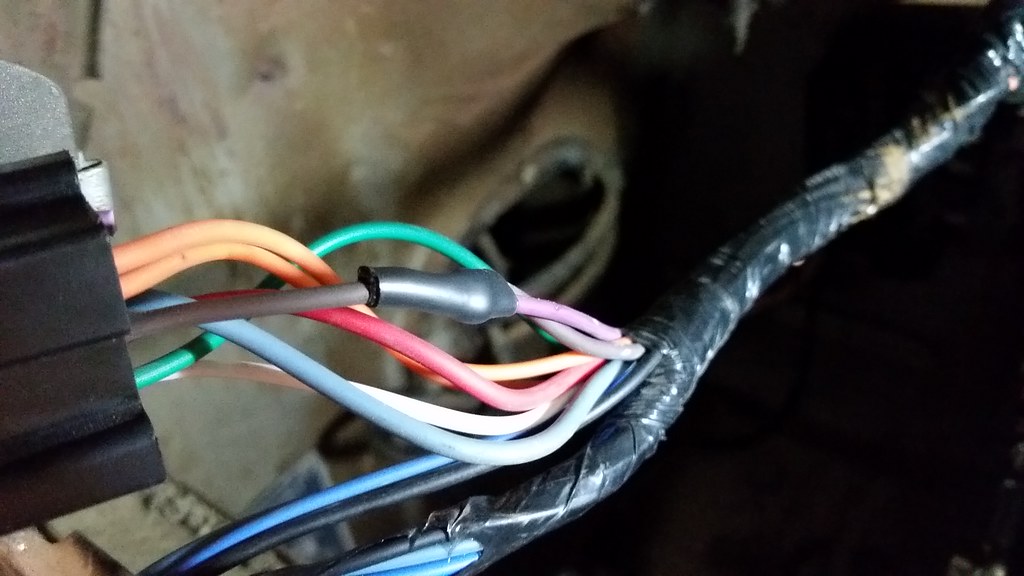 Here's what the gauges look like. They turned out nicer than I was expecting 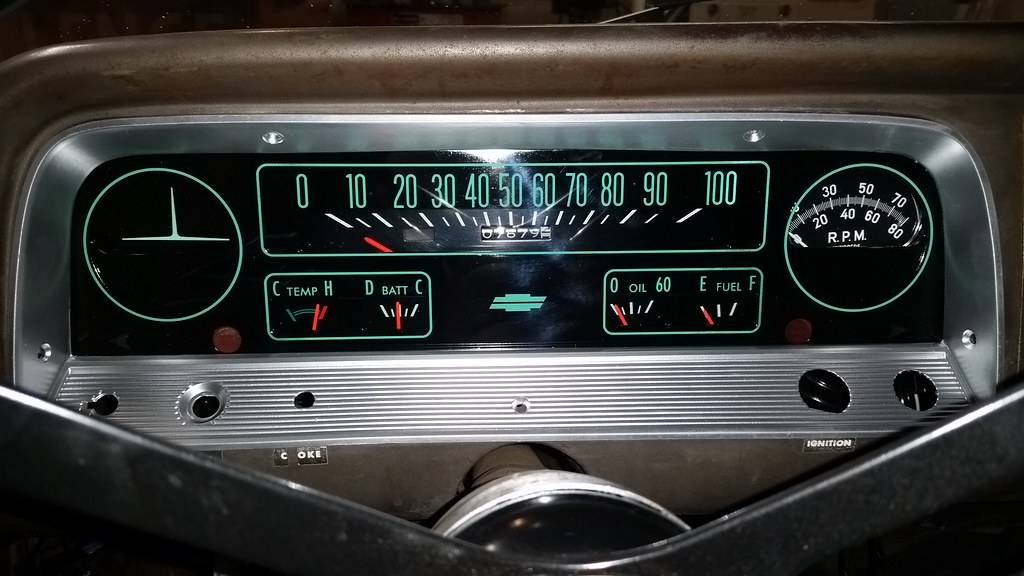 Later this week, my buddy is coming over to help me get the truck wire harness setup for the car intake. It'll look 110% better once we are done! |
|
|
|
|
03-16-2017, 12:21 PM
|
#5 |
|
Registered User
Join Date: Apr 2004
Location: Tigard, Or
Posts: 503
|
Re: 1966 C10 Project Truck
Last night was wiring night. I was less than thrilled how the truck harness didn't even try to fit the car intake even though my harness guy knew exactly what I was doing. My buddy came by and it doesn't even look like the same harness anymore. I honestly would have been better off buying a new harness rather than having mine reworked but this is a build where every dollar counts and this option was cheaper than going another route. Live, learn and move on
 Here's how the harness ran when I got it all plugged in. Totally hiding the beautiful car intake  After a couple hours of my buddy working his wiring magic. So much better is a definite understatement! We worked the stock harnesses over and integrated them with the LS harness, the end result is it not looking too much like a 1966 when the hood is popped. 
|
|
|
|
|
03-21-2017, 10:19 AM
|
#6 |
|
Registered User
Join Date: Apr 2004
Location: Tigard, Or
Posts: 503
|
Re: 1966 C10 Project Truck
Running the car intake and fuel rail, I had an interference with the fuel inlet and a coil. Tried flipping the rail around and it still ran right into a coil and I also had the #8 coil just touching the firewall so I came up with this bracket to move the coils around a bit. Couple quick things to check out tonight before I have them cut but I should have a winner

|
|
|
|
|
03-27-2017, 09:44 AM
|
#7 |
|
Registered User
Join Date: Apr 2004
Location: Tigard, Or
Posts: 503
|
Re: 1966 C10 Project Truck
I got some good shop time with the Army Truck on Saturday. Ended up torqueing the new crank bolt, installing the power steering pulley, pulling the in-cab tank and moving the shifter hole for the T5. I wanted to get a little more done over the weekend but had to spend some time on the 2 upcoming 4WD events I have coming up. Shooting to have it back together before the end of April
    
|
|
|
|
|
03-30-2017, 09:55 AM
|
#8 |
|
Registered User
Join Date: Apr 2004
Location: Tigard, Or
Posts: 503
|
Re: 1966 C10 Project Truck
Hit an unfortunate stopping point with the exhaust manifolds last night. I can't run the factory truck manifolds because they hit the frame so I picked up the Hooker block hugger manifolds and apparently the driver side manifold hits my slave cylinder. Oh well, I'll either get that swapped out for an internal slave or a pull style slave. No biggie. I was able to re-thread the temperature sending unit for 3/8NPT so that and getting the manifolds installed was a plus
 Rethreaded temp sender 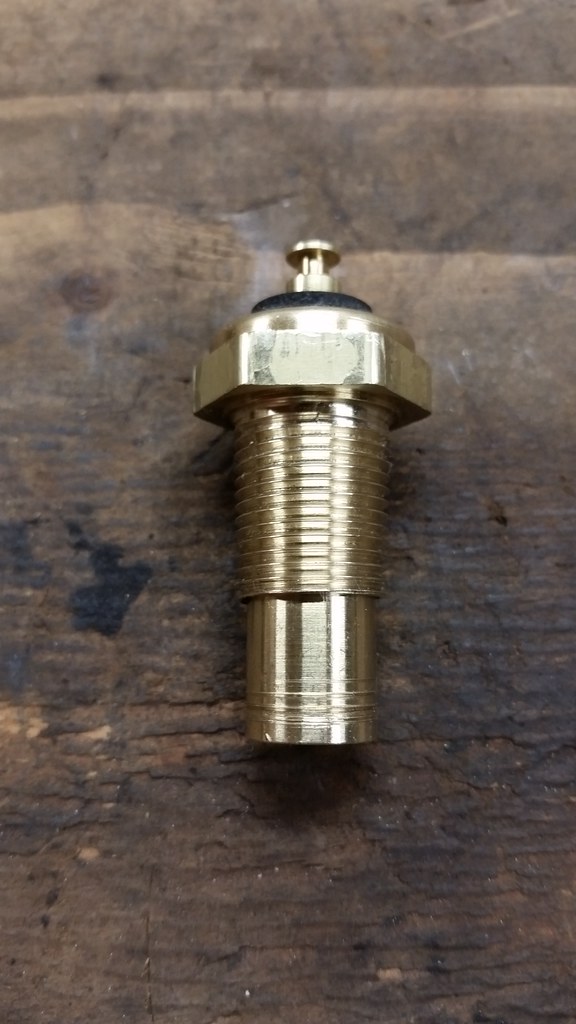 Tightening the driver exhaust manifold, I heard a little pop and the manifold seated all the way to the head. Crawled under the truck to find that it doesn't want to play nice with the slave cylinder I had.  The manifolds look amazing though! 
|
|
|
|
|
03-31-2017, 09:39 AM
|
#9 |
|
Registered User
Join Date: Jun 2007
Location: North Plains Oregon
Posts: 684
|
Re: 1966 C10 Project Truck
just read your thread great to see another stepper in the local area. keep up the great work.
|
|
|
|
|
04-24-2017, 10:05 AM
|
#10 |
|
Registered User
Join Date: Apr 2004
Location: Tigard, Or
Posts: 503
|
Re: 1966 C10 Project Truck
Time for a little update. I haven't had much time to work in the garage lately but I took the weekend off from my other projects and events to get some progress done on the old pickup. Thursday night, I finished plumbing the pressure side of the fuel system and started on the return side but ended up needing more fittings so the fuel system had to wait a little longer. I was happy with how everything was looking from underneath but when I got top side, I couldn't live with what I had.
This is how the feed line to the rail came out. It just didn't look right and I wasn't happy with that.  Friday night, I fixed that with a longer piece of AN that runs from the regulator up to the rail. Much much cleaner and looks like it was supposed to be like that.  Saturday, I had some running around to do in the morning but my AN fittings were in so I was able to get those on my way home and plumb finish the fuel lines. One thing I had to do was swing by my buddy's place and cut the final version of my coil pack brackets out on his plasma table. I wasn't sure how they would look after seeing them in CAD but I'm super happy with how they turned out.   New on the left, old on the right  Looks good on there!  While I was waiting for the paint to dry on the brackets, I took the time to clean the valve covers up and shoot them Chevy Orange. They turned out awesome.  Looking real good at this point and I was super stoked to see it all together!  Sunday morning, bright and early, my buddy Sean showed up and we got right to business. We started the morning off by taking the front clip apart and getting the inner fenders and core support bolted on the truck. From there, we were able to basically finish the motor install, all the wiring, radiator, air intake, etc. Here he is cutting a hole in the inner fender to mount my relay and fuse block for the 5.3. After that, we figured out where the ECU will sit, it'll be tucked down between the radiator and the motor so it will not draw any attention to it. Can't wait to get the mount done for it!  Gettin his cutting on!  This is where it ended up, looks super good here!  We had to go pick Sean's Coyote F100 up from being on display at the Performance Warehouse tradeshow and while we were out and about, we picked up some remaining wiring items, radiator hoses and some other miscellaneous items we needed. When we got back, I had a phone call to make and when I was done, I walked into the garage to see this. Holy crap, it's coming together! 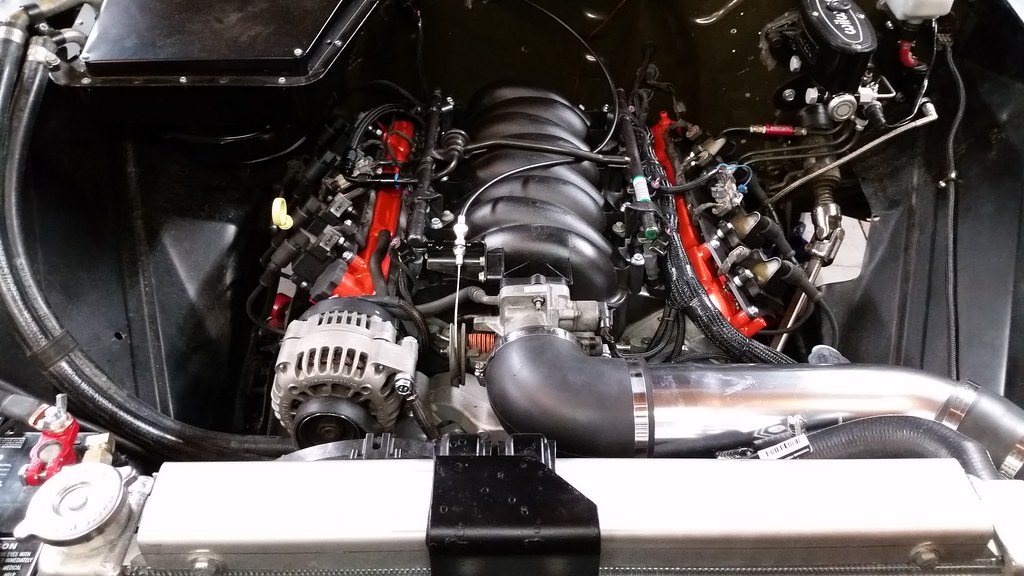 I finished wiring the fuel pump and then we started working on getting the bed wood back in place. Some HUGE progress was made on the old girl over the weekend and I can't be happier with where it is right now. I truly have great friends that are willing to jump in and kick my butt into high gear. Wouldn't change them for the world! The theory behind the install is that the motor needs to look at home, like it could've come this way from the factory and I gotta say, I nailed it.  My obligatory progress board shot. These items were all completed yesterday, it was a hell of a good day in the garage!  Check back soon for the first start
|
|
|
|
|
04-25-2017, 09:59 AM
|
#11 |
|
Registered User
Join Date: Apr 2004
Location: Tigard, Or
Posts: 503
|
Re: 1966 C10 Project Truck
Last night, my buddy Sean came back to button up the wiring under the hood and to finish the hole for the fuel filler in the bed wood. My dad also stopped by and helped out finishing the bed wood install and a few other odds and ends. It's pretty great how much you can get done with 3 people all keeping busy! The wiring is basically finished, I finally wired in my reverse lights while dad wired in the fuel sending unit. What an awesome and productive Monday night!
The rain and snow took a toll on the wood last year, it's still in great shape but ultimately I will be ditching it for a steel floor at some point.  The filler just didn't look right on the truck but after a coat of OD Green, she looks right at home. I'm not a fan of the fillers out there that go through the bed but I have yet to see a stepside filler that I like so I went through the floor.   Sean does some amazing wiring work, I'm super thankful that he's willing to take the time to wire this for me, I couldn't make it look half as nice!  Here, you can kinda see where the computer ended up. I'll make a mount off of the crossmember to hold it at an angle. I like where it's at, it doesn't draw attention to it and fits really good there.  And, of course, the obligatory to-do list picture 
|
|
|
|
|
| Bookmarks |
|
|


 Hybrid Mode
